Showing 62 items
matching enemy fire
-
 Australian Commando Association - Victoria
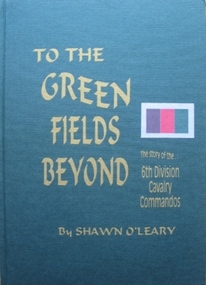
Book - 6th Div, Shawn OLeary, To The Green Fields Beyond:The story of the 6th Division Cavalry Commandos
The comprehensive history of the 6th Australian Division Cavalry Commandos – a (now out of print) reprint of one of the rarer Armoured unit history books. This is the story of one of Australia’s most famous fighting regiments during World War II. As an armoured cavalry unit it fought the Italians and Germans in the sands of the African desert and the Vichy French in the mountains of Syria. Later as a dismounted commando unit it fought the Japanese in the terrifying jungles of New Guinea. The heroism of the men in its ranks and the actions in which they engaged are portrayed in a way which makes battle deeds leap realistically from the pages. “To The Green Fields Beyond” is a documented and detailed book which is of value to everyone who is interested in Australia’s story. Seldom before has such a contribution been made to record of our national history. The book has been approved and sponsored by the Australian War Memorial. The 6th Division Cavalry Regiment was formed in November 1939 and, just two months later, was sent overseas to the Middle East in January 1940. Arriving in Egypt, the regiment immediately went to Palestine, where it joined the rest of the 6th Division and trained using machine-gun carriers and, from October, six old Vickers light tanks. At the end of the year the regiment moved into the Western Desert, where it joined British forces ready for the major offensive to commence on 9 December. Two days later the regiment became the first unit of the 2nd Australian Imperial Force (AIF) to go into action when one of its squadron fought a sharp action against the Italians holding Garn el Grein and Fort Maddalina on 11 and 12 December. By 21 December British forces had captured Sidi Barrrani and the desert was now open for the 6th Division’s advance along the Libyan coast. On 3 January 1941 the division attacked and captured the Italian fort of Bardia. The regiment’s A Squadron, under the command of Major Denzil Macarthur-Onslow, who went on to command the 4th Armoured Brigade, supported the attack. Tobruk was the next Italian fort to be captured, with the regiment again in support and covering the 19th Brigade’s advance. The regiment, though, was under-equipped and without its full compliment of vehicles, using only machine gun carriers. To compensate for this, A Squadron was parity re-equipped with captured Italian light tanks, which had large kangaroos painted on the hulls and turrets to distinguish them from enemy vehicles. After Tobruk, the regiment was used as part of the advance guard in the capture of Derna and then Benghazi. In April the unit moved to Helwan, where it was equipped with Vickers light tanks and machine-gun carriers, and operated with British troops in capturing Sollum. Towards the end of May the regiment moved to Palestine, where it came under the command of the 7th Division for the imminent invasion of Syria. The regiment experienced its heaviest fighting during the Syrian campaign, which began on 7 June. A Squadron was attached to the 21st Brigade and advanced along the coast, where the rugged hills made it difficult to manoeuvre the tanks and carriers. The squadron was relieved by one of the 9th Division Cavalry Regiment’s squadrons on 13 and 14 June. C Squadron, meanwhile, was with the 25th Brigade, and advanced along the Rosh Pinna road, engaging strong enemy defences at Fort Khirbe. C Squadron was relieved by B Squadron, which was later attacked by Vichy French tanks that were supported by heavy artillery and machine-gun fire, which forced the Australians to withdrawal. Always willing or needing to improvise during the campaign, A and B Squadrons both operated three captured French R35 Renault light tanks, while C Squadron provided personnel for a horse troop, quickly nicknamed the “Kelly Gang”, to patrol the high, rugged hills near the Mardjayoun–Banis Road. The regiment remained in Syria as part of the occupation force and returned to Australia in March 1942. It was sent to the Adelaide River, in the Northern Territory, and then later to Murgon, in Queensland. In 1943 and 1944 divisional cavalry regiments were reorganised into cavalry (commando) regiments. In January 1944 the 6th Division Cavalry Regiment became the 2/6th Cavalry (Commando) Regiment. The regiment lost its vehicles and became the administrative headquarters for the 2/7th, 2/9th, and 2/10th Commando Squadrons. The regiment remained with the 6th Division and participated in the Aitpae–Wewak campaign, in New Guinea, during 1945. Includes Nominal Rollnon-fictionThe comprehensive history of the 6th Australian Division Cavalry Commandos – a (now out of print) reprint of one of the rarer Armoured unit history books. This is the story of one of Australia’s most famous fighting regiments during World War II. As an armoured cavalry unit it fought the Italians and Germans in the sands of the African desert and the Vichy French in the mountains of Syria. Later as a dismounted commando unit it fought the Japanese in the terrifying jungles of New Guinea. The heroism of the men in its ranks and the actions in which they engaged are portrayed in a way which makes battle deeds leap realistically from the pages. “To The Green Fields Beyond” is a documented and detailed book which is of value to everyone who is interested in Australia’s story. Seldom before has such a contribution been made to record of our national history. The book has been approved and sponsored by the Australian War Memorial. The 6th Division Cavalry Regiment was formed in November 1939 and, just two months later, was sent overseas to the Middle East in January 1940. Arriving in Egypt, the regiment immediately went to Palestine, where it joined the rest of the 6th Division and trained using machine-gun carriers and, from October, six old Vickers light tanks. At the end of the year the regiment moved into the Western Desert, where it joined British forces ready for the major offensive to commence on 9 December. Two days later the regiment became the first unit of the 2nd Australian Imperial Force (AIF) to go into action when one of its squadron fought a sharp action against the Italians holding Garn el Grein and Fort Maddalina on 11 and 12 December. By 21 December British forces had captured Sidi Barrrani and the desert was now open for the 6th Division’s advance along the Libyan coast. On 3 January 1941 the division attacked and captured the Italian fort of Bardia. The regiment’s A Squadron, under the command of Major Denzil Macarthur-Onslow, who went on to command the 4th Armoured Brigade, supported the attack. Tobruk was the next Italian fort to be captured, with the regiment again in support and covering the 19th Brigade’s advance. The regiment, though, was under-equipped and without its full compliment of vehicles, using only machine gun carriers. To compensate for this, A Squadron was parity re-equipped with captured Italian light tanks, which had large kangaroos painted on the hulls and turrets to distinguish them from enemy vehicles. After Tobruk, the regiment was used as part of the advance guard in the capture of Derna and then Benghazi. In April the unit moved to Helwan, where it was equipped with Vickers light tanks and machine-gun carriers, and operated with British troops in capturing Sollum. Towards the end of May the regiment moved to Palestine, where it came under the command of the 7th Division for the imminent invasion of Syria. The regiment experienced its heaviest fighting during the Syrian campaign, which began on 7 June. A Squadron was attached to the 21st Brigade and advanced along the coast, where the rugged hills made it difficult to manoeuvre the tanks and carriers. The squadron was relieved by one of the 9th Division Cavalry Regiment’s squadrons on 13 and 14 June. C Squadron, meanwhile, was with the 25th Brigade, and advanced along the Rosh Pinna road, engaging strong enemy defences at Fort Khirbe. C Squadron was relieved by B Squadron, which was later attacked by Vichy French tanks that were supported by heavy artillery and machine-gun fire, which forced the Australians to withdrawal. Always willing or needing to improvise during the campaign, A and B Squadrons both operated three captured French R35 Renault light tanks, while C Squadron provided personnel for a horse troop, quickly nicknamed the “Kelly Gang”, to patrol the high, rugged hills near the Mardjayoun–Banis Road. The regiment remained in Syria as part of the occupation force and returned to Australia in March 1942. It was sent to the Adelaide River, in the Northern Territory, and then later to Murgon, in Queensland. In 1943 and 1944 divisional cavalry regiments were reorganised into cavalry (commando) regiments. In January 1944 the 6th Division Cavalry Regiment became the 2/6th Cavalry (Commando) Regiment. The regiment lost its vehicles and became the administrative headquarters for the 2/7th, 2/9th, and 2/10th Commando Squadrons. The regiment remained with the 6th Division and participated in the Aitpae–Wewak campaign, in New Guinea, during 1945. Includes Nominal Rollww2, australian commandos, australian special forces, world war 2 -
 National Vietnam Veterans Museum (NVVM)
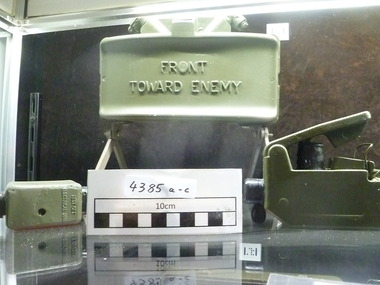
Weapon, M18 Claymore Mine
Three part exhibit featuring mine body, curved block of C4 explosive and firing device. Olive drab in colour and metal composition.Front towards enemy - on mine body. Test set electrical M18. Firing device electrical.m18 claymore mine, sas -
 Monbulk RSL Sub Branch
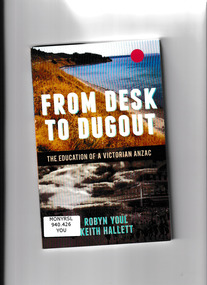
Book, Robin Youl et al, From desk to dugout : the education of a Victorian ANZAC, 2015
... enemy fire and in extreme hardship, the illustrations, stories ...Come see my little dugout - way up on the hill it stands, Where I can get a lovely view of Anzac's golden sands.' The Anzac Book was the finest 'trench publication' produced during the Great War and was an instant bestseller when first released in 1916. Created by soldiers under enemy fire and in extreme hardship, the illustrations, stories, cartoons, and poems were intended as a Christmas and New Year diversion for soldiers facing a harsh winter in the trenches on Gallipoli. The way these young men powerfully captured their felt experiences and struggles in the trenches had a huge emotional effect on readers back home in Australia. From Desk to Dugout explores this particular moment in Australian literary and educational history and its intersections with the war at Gallipoli and the history of ANZAC.Ill, maps, p.127.non-fictionCome see my little dugout - way up on the hill it stands, Where I can get a lovely view of Anzac's golden sands.' The Anzac Book was the finest 'trench publication' produced during the Great War and was an instant bestseller when first released in 1916. Created by soldiers under enemy fire and in extreme hardship, the illustrations, stories, cartoons, and poems were intended as a Christmas and New Year diversion for soldiers facing a harsh winter in the trenches on Gallipoli. The way these young men powerfully captured their felt experiences and struggles in the trenches had a huge emotional effect on readers back home in Australia. From Desk to Dugout explores this particular moment in Australian literary and educational history and its intersections with the war at Gallipoli and the history of ANZAC.world war 1914-1918 - campaigns - gallipoli, gallipoli campaign - personal narratives -
 Monbulk RSL Sub Branch
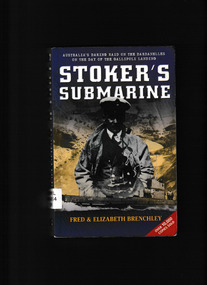
Book, Harper Collins et al, Stoker's submarine, 2003
... enemy fire, Stoker and his men succeeded where British ...On 25 April 1915 - the day the Anzacs landed at Gallipoli - Lieutenant Commander Dacre Stoker set out as captain of the Australian submarine AE2 on a mission to breach the treacherous Dardanelles Strait with the intention of disrupting Turkish supply lines to the isolated Gallipoli peninsula. Facing dangerous currents, mines and withering enemy fire, Stoker and his men succeeded where British and French submarines had come to grief." "Stoker's achievement meant much in military terms, and even more emotionally in boosting the morale of embattled Allied troops. But what was proclaimed at the time as 'the finest feat in submarine history' has since sunk into oblivion. Few Australians even know their country had a submarine at Gallipoli, much less that it achieved daring feats, sank an enemy craft, and possibly played a pivotal role in Anzac troops staying on the beachhead for eight months." "Now, finally, Stoker's Submarine tells the story of a remarkable naval hero and the men under his command. And the AE2 itself, still lying intact on the floor of the Sea of Marmara, is celebrated as the most tangible relic of Australia's role at Gallipoli, the crucible of nationhood.Index, bibliography, notes, ill. (some col.), maps, ports, p.318.non-fictionOn 25 April 1915 - the day the Anzacs landed at Gallipoli - Lieutenant Commander Dacre Stoker set out as captain of the Australian submarine AE2 on a mission to breach the treacherous Dardanelles Strait with the intention of disrupting Turkish supply lines to the isolated Gallipoli peninsula. Facing dangerous currents, mines and withering enemy fire, Stoker and his men succeeded where British and French submarines had come to grief." "Stoker's achievement meant much in military terms, and even more emotionally in boosting the morale of embattled Allied troops. But what was proclaimed at the time as 'the finest feat in submarine history' has since sunk into oblivion. Few Australians even know their country had a submarine at Gallipoli, much less that it achieved daring feats, sank an enemy craft, and possibly played a pivotal role in Anzac troops staying on the beachhead for eight months." "Now, finally, Stoker's Submarine tells the story of a remarkable naval hero and the men under his command. And the AE2 itself, still lying intact on the floor of the Sea of Marmara, is celebrated as the most tangible relic of Australia's role at Gallipoli, the crucible of nationhood.world war 1914-1918 - campaigns - gallipoli, gallipoli campaign - naval operations, submarine ae2 -
 Monbulk RSL Sub Branch
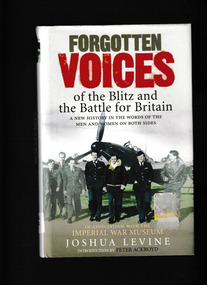
Book, Ebury Press, Forgotten voices of the Blitz and the Battle for Britain, 2006
Drawing material from the Imperial War Museum's extensive aural archive, Joshua Levine brings together voices from both sides of the Blitz and the Battle of Britain to give us a unique, complete and compelling picture of this turbulent time. We hear from the soldiers, airmen, fire-fighters, air-raid wardens and civilians, people in the air and on the ground, on both sides of the battle, giving us a thrilling account of Britain under siege. With first-hand testimonies from those involved in Dunkirk and the Battle of Britain, Black Saturday on 7th September 1940 when the Luftwaffe began the Blitz, to its climax on the 10th May 1941, this is the definitive oral history of a period when Britain came closer to being overwhelmed by the enemy than at any other time in modern history.Index, ill, p.486.non-fictionDrawing material from the Imperial War Museum's extensive aural archive, Joshua Levine brings together voices from both sides of the Blitz and the Battle of Britain to give us a unique, complete and compelling picture of this turbulent time. We hear from the soldiers, airmen, fire-fighters, air-raid wardens and civilians, people in the air and on the ground, on both sides of the battle, giving us a thrilling account of Britain under siege. With first-hand testimonies from those involved in Dunkirk and the Battle of Britain, Black Saturday on 7th September 1940 when the Luftwaffe began the Blitz, to its climax on the 10th May 1941, this is the definitive oral history of a period when Britain came closer to being overwhelmed by the enemy than at any other time in modern history.battle of britain 1940 - personal narratives, the blitz -
 Monbulk RSL Sub Branch
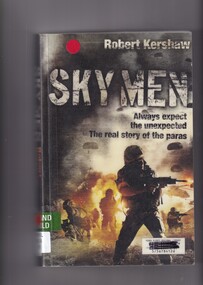
Book, Robert Kershaw, Sky men: The real story of the paras, 2010
From the 1930s through WWII to Afghanistan today, from total war to counterinsurgency, this history unravels and defines the intangible qualities that differentiate the "Sky Men" from other soldiers Seventy years ago the Parachute Regiment was formed - the army's elite air assault force was tough, well-trained, and designed to fight hazardous operations behind enemy lines with little or no backup. Dropping into the middle of enemy territory, these "Sky Men"- British, American, German, and Russian soldiers - engage in gruelling combat in the most dangerous conflict zones around the world. Ex-Parachute Regiment officer Robert Kershaw reveals the history of these airborne forces and their role during the most dramatic battles of the 20th century. He finds out what drives a "Sky Man" to take these extraordinary risks, and what marks these sky warriors out from ordinary soldiers. How do military paratroopers conquer the fear of jumping from aircraft at low level, by night, and frequently under fire? Has the helicopter replaced the need for parachutists in the 21st Century? Has the increasing lethality of anti-aircraft weapons made the airborne option redundant? These issues are examined alongside the personal experiences of the Soviet "Locust Warriors," German Fallschirmjäger, British Red Devils, American "devils in baggy-pants," and Les Paras. Based on letters, diaries, and exclusive interviews with soldiers from around the world, this book is full of vivid personalities and nail-biting action.Index, bibliography, notes, ill (b/w), p.348.From the 1930s through WWII to Afghanistan today, from total war to counterinsurgency, this history unravels and defines the intangible qualities that differentiate the "Sky Men" from other soldiers Seventy years ago the Parachute Regiment was formed - the army's elite air assault force was tough, well-trained, and designed to fight hazardous operations behind enemy lines with little or no backup. Dropping into the middle of enemy territory, these "Sky Men"- British, American, German, and Russian soldiers - engage in gruelling combat in the most dangerous conflict zones around the world. Ex-Parachute Regiment officer Robert Kershaw reveals the history of these airborne forces and their role during the most dramatic battles of the 20th century. He finds out what drives a "Sky Man" to take these extraordinary risks, and what marks these sky warriors out from ordinary soldiers. How do military paratroopers conquer the fear of jumping from aircraft at low level, by night, and frequently under fire? Has the helicopter replaced the need for parachutists in the 21st Century? Has the increasing lethality of anti-aircraft weapons made the airborne option redundant? These issues are examined alongside the personal experiences of the Soviet "Locust Warriors," German Fallschirmjäger, British Red Devils, American "devils in baggy-pants," and Les Paras. Based on letters, diaries, and exclusive interviews with soldiers from around the world, this book is full of vivid personalities and nail-biting action.great britain - history - military, great britain - parachute regiment -
 Monbulk RSL Sub Branch
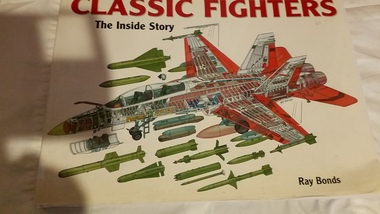
Book, Chartwell Books, Classic fighters : the inside story, 2005
'Packed with fascinating facts, this volume contains incredibly detailed cutaway drawings of arguably the greatest fighter aircraft ever flown. Each drawing examines what's 'under the skin', clearly showing 'the inside story' - airframe structure, cockpit components, engines, fuel tanks, avionics, machine guns and cannon, missiles and bombs - revealing how the fighters were built, and the weapons they have carried into combat. Each significant component is given a number and is identified in an accompanying key. Moreover, together with stunning photographs, as well as detailed specifications, the absorbing in-depth development histories provide avid aviation enthusiasts all the information they could wish for about the most exciting warplanes spanning almost a hundred years. The aircraft themselves vary tremendously, from simple, wooden-framed, fabric-covered machines with open cockpits, often firing machine guns through whirring, propellers, to super-fast, highly maneuverable, sophisticated and stealthy fighters armed to the teeth with multi-barrel cannons and missiles that can destroy enemy aircraft from beyond visual range. In between are featured a host of combat-proven fighters, many of which have recorded a plethora of 'firsts' - first jet warplane, first supersonic fighter to enter service, first Mach 2 and even Mach 3 interceptors, first tail-less delta machine, first sweeping-wing machine, first missile-armed fighter, and many more. It is certainly an extraordinarily wide-ranging subject presented in such a fantastically individual manner that it is difficult to imagine a more striking volume in aviation publishing.Ill, p,253.non-fiction'Packed with fascinating facts, this volume contains incredibly detailed cutaway drawings of arguably the greatest fighter aircraft ever flown. Each drawing examines what's 'under the skin', clearly showing 'the inside story' - airframe structure, cockpit components, engines, fuel tanks, avionics, machine guns and cannon, missiles and bombs - revealing how the fighters were built, and the weapons they have carried into combat. Each significant component is given a number and is identified in an accompanying key. Moreover, together with stunning photographs, as well as detailed specifications, the absorbing in-depth development histories provide avid aviation enthusiasts all the information they could wish for about the most exciting warplanes spanning almost a hundred years. The aircraft themselves vary tremendously, from simple, wooden-framed, fabric-covered machines with open cockpits, often firing machine guns through whirring, propellers, to super-fast, highly maneuverable, sophisticated and stealthy fighters armed to the teeth with multi-barrel cannons and missiles that can destroy enemy aircraft from beyond visual range. In between are featured a host of combat-proven fighters, many of which have recorded a plethora of 'firsts' - first jet warplane, first supersonic fighter to enter service, first Mach 2 and even Mach 3 interceptors, first tail-less delta machine, first sweeping-wing machine, first missile-armed fighter, and many more. It is certainly an extraordinarily wide-ranging subject presented in such a fantastically individual manner that it is difficult to imagine a more striking volume in aviation publishing.fighter planes - history, fighter planes -
 Monbulk RSL Sub Branch
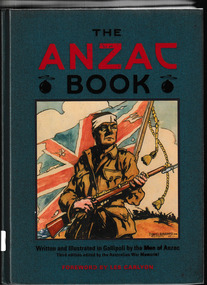
Book, UNSW Press, The Anzac book / written and illustrated in Gallipoli by the men of Anzac, 2010
... under enemy fire and in extreme hardship, the illustrations ...Created by soldiers under enemy fire and in extreme hardship, the illustrations, stories, cartoons, and poems were intended as a Christmas and New Year diversion for soldiers facing a harsh winter in the trenches on Gallipoli. This long-awaited third edition is a reproduction of the original book, with a new foreword by acclaimed author Les Carlyon, an introduction from Australian War Memorial historian Ashley Ekins, and added material originally rejected by the editor, official war correspondent C.E.W. Bean.Bibliography, ill, p.203.non-fictionCreated by soldiers under enemy fire and in extreme hardship, the illustrations, stories, cartoons, and poems were intended as a Christmas and New Year diversion for soldiers facing a harsh winter in the trenches on Gallipoli. This long-awaited third edition is a reproduction of the original book, with a new foreword by acclaimed author Les Carlyon, an introduction from Australian War Memorial historian Ashley Ekins, and added material originally rejected by the editor, official war correspondent C.E.W. Bean.world war 1914-1918 - campaigns - gallipoli, world war 1914-1918 - personal correspondence -
 Victorian Interpretive Projects Inc.
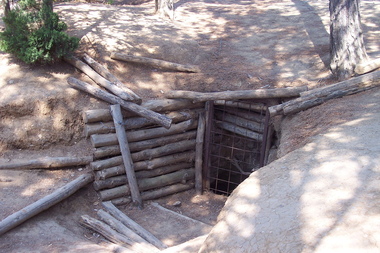
Photograph - Colour, Gaida Stevens, World War One Tunnel Entrance, Lone Pine, Gallipoli, 2015, 2015
Lone Pine was an action that featured one of the most famous assaults of the Gallipoli campaign. The attack was planned as a diversion for the Australian and New Zealand units that were to breakout from the Anzac perimeter by capturing the heights of Chunuk Bair and Hill 971. At 5.30 pm on 6 August 1915, the Australian artillery barrage lifted and from concealed trenches in no man’s land the 1st Australian Brigade charged towards the Turkish trenches. The troops paused on reaching the Turkish trenches, finding that many were covered by timber roofs. Some fired, bombed and bayoneted from above, some found their way inside and others ran on past to the open communications and support trenches behind. Others advanced as far as "the Cup" which was where Turkish support units were located and from where the Turks counter-attacked. By nightfall, most of the enemy front line was in Australian hands and outposts had been established in former Turkish communication trenches. The Australian Engineers dug a safe passage across no man’s land so that reinforcements could enter the captured positions without being exposed to Turkish fire. Having captured the Turkish trenches, the Australians now tried to hold what they had taken while the Turks desperately and determinedly tried to throw the Australians out. From nightfall on 6 August until the night of 9 August a fierce battle ensued underground in the complex maze of Turkish tunnels. The Australians succeeded in drawing the whole of the immediate Turkish reserve. Six Australian battalions suffered nearly 2,300 killed and wounded at Lone Pine. Seven Australians were awarded the Victoria Cross, the highest number ever awarded to an Australian division for one action.(http://www.awmlondon.gov.au/battles/lone-pine)Entrance to a tunnel at Lone Pine, Gallipoli. gallipoli, world war one, tunnel, mmm -
 National Vietnam Veterans Museum (NVVM)
Photograph, Seeking guidance from above, 1/09/1970 12:00:00 AM
Mounted Black and White Photgraph. Phuoc Tuy Vietnam September 1970. WO2 Dave Powell (AATTV) squints as he looks into the sun after signalling witha mirror to guide a spotter plane to an enemy target.AWM Jon/70/0705/VNphotograph, wo 2 powell, aattv, phuoc tuy, fire support base, o'reilly -
 El Dorado Museum Association Inc.
Photograph - Digital Image - 2nd Corporal Frederick A. McLaughlin, c1914 - 1918
McLaughlin, Frederick Arthur Service number: 10307 Australian Imperial Force Ranks held: Sapper, 2nd Corporal Service: Australian Imperial Force Unit: 10th Field Company, Australian Engineers Recommended for Military Medal, 13 September 1918 'Distinguished himself by gallantry and devotion to duty in bringing up material for a bridge urgently required East of Vaux. Lance Corporal McLaughlin was in charge of the wagons conveying material for this purpose and led the way over a road under heavy shell-fire in full view of the enemy. The determination and judgement shown by this N.C.O. in this, as in earlier operations, have shown him to be an excellent soldier'. first world war, world war one, wwi, australian imperial force, aif, el dorado, eldorado, soldiers, men -
 Wangaratta RSL Sub Branch
Award - Citation
... directions to his captain and coolly aimed return fire, drove off... fire, drove off the enemy aircraft in a badly damaged condition ...Citation of Distinguished Flying Cross awarded to JOHN HUDSON WILKINSON: Service Number - 400444 : Date of birth - 18 Feb 1914 : Place of birth - RUTHERGLEN Victoria - tragically killed in action over Germany on 30th August, 1944. Citation reads: - "Pilot Officer WILKINSON is an air gunner of great ability and determination. He has taken part in a large number of operational sorties, many of which have been against some of German's most heavily defended targets. On one occasion, in March 1944, when engaged in an attack on Stuttgart, a Junkers 88 attacked the aircraft five times, but Pilot Officer WILKINSON, by his accurate directions to his captain and coolly aimed return fire, drove off the enemy aircraft in a badly damaged condition. At all times his unwavering devotion to duty and constant alertness have inspired confidence in his crew." The Distinguished Flying Cross (DFC) is the third-level military decoration awarded to officers, and since 1993 to other ranks, of the United Kingdom's Royal Air Force and other services, and formerly to officers of other Commonwealth countries, for "an act or acts of valour, courage or devotion to duty whilst flying in active operations against the enemy"Original typed document on blue/grey parchment with blue letterhead containing crestGovernor General Commonwealth of Australiapilot, kia, killed in action, dfc, distinguished flying cross, wwii, world war two, air force, wilkinson -
 Chiltern Athenaeum Trust
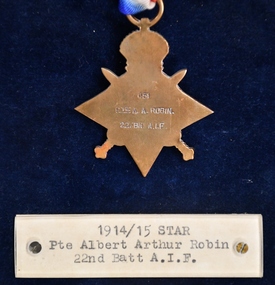
WW1 1914-1915 Star : Campaign Medal for Pte. Albert Arthur Robin
... ’ was issued to those who actually served under the fire of the enemy... under the fire of the enemy in France and Belgium between those... served under the fire of the enemy in France and Belgium between ...1914 Star for the Greatr War 1914-1918 The 1914 Star was authorised in April 1917 to be awarded to those who served in France or Belgium on the strength of a unit, or who served in either of those two countries between 5 August 1914 and midnight on 22/23 November 1914. A recipient of the 1914 Star could not also be awarded the 1914–15 Star. WW1 Medal - The 1914 Star Issued to Pte. Albert Arthur Robin. The Great War 1914-1918. Australian Infantry Force. 1914 Star The 1914 Star was authorised in April 1917 to be awarded to those who served in France or Belgium. Design The four pointed star is bright bronze, ensigned with a crown. The obverse has crossed gladius, overlaid with an oak wreath that is ensigned with the cypher of King George V. Interlaced in the crossed blades of the gladius is an ‘S’ shaped scroll bearing the words ‘AUG’, ‘1914’, and ‘NOV’. Ribbon The ribbon has the red white and blue colours of the Empire, in shaded and watered stripes. Clasp A bronze clasp inscribed ‘5th Aug – 22nd Nov 1914’ was issued to those who actually served under the fire of the enemy in France and Belgium between those dates.The four pointed star is bright bronze, ensigned with a crown. The obverse has crossed gladius, overlaid with an oak wreath that is ensigned with the cypher of King George V. Interlaced in the crossed blades of the gladius is an ‘S’ shaped scroll bearing the words ‘AUG’, ‘1914’, and ‘NOV’. Ribbon The ribbon has the red white and blue colours of the Empire, in shaded and watered stripes. Clasp A bronze clasp inscribed ‘5th Aug – 22nd Nov 1914’ was issued to those who actually served under the fire of the enemy in France and Belgium between those dates.the ww1 star, ww1 1914-1918, pte. albert arthur robin., ww1 pte a. robin 22 battalion aif -
 8th/13th Victorian Mounted Rifles Regimental Collection
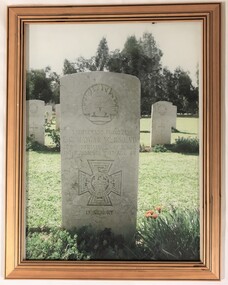
Photograph - Maygar grave
Lieutenant Colonel Leslie Cecil Maygar, VC, DSO, VD (27 May 1868 – 1 November 1917) was an Australian recipient of the Victoria Cross, the highest award for gallantry in the face of the enemy that can be awarded to British and Commonwealth forces. He was awarded the VC for facilitating the rescue of a dismounted man while under severe rifle fire in 1902 during the Second Boer War. He later served with the 4th Australian Light Horse at Gallipoli during the First World War, and died of wounds after being strafed during the Battle of Beersheba as part of the Sinai and Palestine campaign while commanding the 8th Australian Light Horse..Framed colour photograph of headstone at the grave of Lieutenant Colonel Leslie Maygar VC.maygar, grave, world war, wwi -
 8th/13th Victorian Mounted Rifles Regimental Collection
Photograph - Magyar portrait
Lieutenant Colonel Leslie Cecil Maygar, VC, DSO, VD (27 May 1868 – 1 November 1917) was an Australian recipient of the Victoria Cross, the highest award for gallantry in the face of the enemy that can be awarded to British and Commonwealth forces. He was awarded the VC for facilitating the rescue of a dismounted man while under severe rifle fire in 1902 during the Second Boer War. He later served at Gallipoli during the First World War, and died of wounds after being strafed during the Battle of Beersheba as part of the Sinai and Palestine campaign. The Maygar Club was the Other Ranks club at firstly Buna Barracks Albury, later at North Bandiana and currently at Latchford Barracks Bonegilla. The framed artwork was removed from the Club at Buna Barracks when the regiment relocated to Bandiana and placed in the Heritage Collection.Framed black and white reproduction of a photograph of Lieutenant Colonel Leslie Magyar together with a interpretive panel and a donor's plaque.Presented to Maygar Club by Sgt C Bruce Dec 97-Dec 99maygar, wwi, world war one, boer war, victoria cross -
 8th/13th Victorian Mounted Rifles Regimental Collection
Work on paper - VMR, Labour and Shipping Strike
Probably originally drawn for publication in Melbourne newspaper showing detachment of Victorian Mounted Rifles on way to establish order at a strike site during the Labour and Shipping Strike of August 1890. During the strike armed troops were deployed to support the police in Melbourne and in Newcastle and a number of other ports around the country. In Melbourne, the announcement that a public meeting was going to be held on 31 August 1890 to support the maritime strikers sent the Victorian government into precautionary mode. On the eve of the meeting, the Victorian Mounted Rifles were briefed by their commanding officer Lieutenant-Colonel Tom Price: 'Men of the Mounted Rifles, one of your obligations imposes on you the duty of resisting invasion by a foreign enemy, but you are also liable to be called upon to assist in preserving law and order in the colony. ... To do your work faintly would be a grave mistake. If it has to be done effectively you will each be supplied with 40 rounds of ammunition, leaden bullets, and if the order is given to fire, don't let me see any rifle pointed in the air; fire low and lay them out so that the duty will not have to be performed again.' Price was quite clear and quite unapologetic about his intentions. He only wanted ′'to hit the strikers in the legs ... not to kill them outright. He explained that the term 'lay them out' was used in his regiment to mean 'temporary disablement'. A force of 1,000 militia and mounted police and another 1,000 special constables were embodied by the time of the meeting. These forces, apart from a troop of mounted police were held in reserve out of the way and the 40,000 who attended the meeting, although enthusiastic, were orderly and the forces were not called in. Framed coloured artistic work with three works depicting soldiers on horseback in midst of angry crowds.military, strike, melbourne, maritime, vmr -
 Clayton RSL Sub Branch
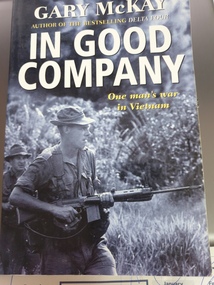
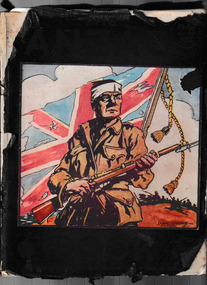
soft cover non-fiction book, In Good Company, 1987
Vietnam War veteran An enthralling account of an Australian infantryman and his companions in the Vietnam War. On Friday 8th March 1968, 20-year-old Gary McKay lost the lottery. He was conscripted. From a comfortable and carefree life of surfing and rugby football, he was drafted into the deadly serious preparation for war in the jungles of South Vietnam. In Good Company is his story told in his own words. It begins with induction and selection for the officer academy for national servicemen at Scheyville, a six-month 'pressure cooker' course which produced second lieutenants ready to lead troops into action against the Viet Cong. It ends three and a half years later with a burst of NVA machine-gun fire during a battle among enemy-held bunkers in the hills of Nui Le. Here is a grass-roots account of the blood, sweat and tears shared by a rifle platoon in jungle warfare, a straightforward story of the fears and the camaraderie which soldiers experience in combat. Gary McKay fashioned this account from his experience in action, leading his platoon. The detail is provided from the 80 letters he wrote to his wife while he served. He wrote his story for the reader who wants to know what the soldier on the ground went through - in the fetid jungle, in battle. Anyone who wants to understand what service in South Vietnam meant to those who were there should read this book. 'Reading In Good Company leaves a vivid and disconcerting impression of how the Vietnam War smelt, felt and sounded. One of the most honest and affecting war memoirs which Australians have so far published.' - Mark Thomas, Canberra Times 'An enthralling, accurate account of infantry soldiering in the Vietnam era. Very readable; a must for those who have never experienced combat and a vivid reminder for all veterans.' - Major General M. P. Blake, AM, MC, former CO 5th Battalion RARGary John McKay MC (born 1947) is a writer and former Australian Army officer. He was awarded the Military Cross while serving with the 4th Battalion, Royal Australian Regiment during the Vietnam War.[1] He later served as Commanding Officer of 8th/9th Battalion, Royal Australian Regiment between 1988 and 1990Soft cover non fiction book -
 Box Hill RSL Inc.
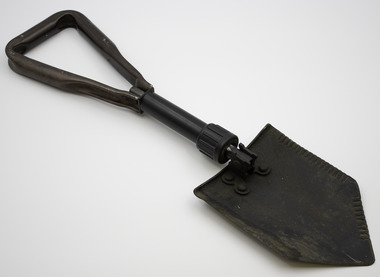
Functional object - Entrenching tool, Ames 68, c. 1938-1945
Entrenching tools were part of every soldier's equipment. They were used to dig shallow trenches which protected the soldier when under enemy bombardment from artillery or mortar fire. They could also be used to bury rubbish or human waste, and to fill sandbags.Folding spade for digging a trench. Folding spade with a short shaft and triangular handle that unfolds from the blade and is locked when opened with a screw.entrenching, tool, spade, folding -
 Melbourne Legacy
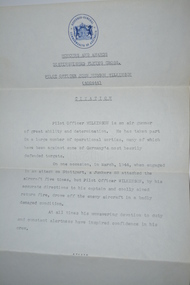
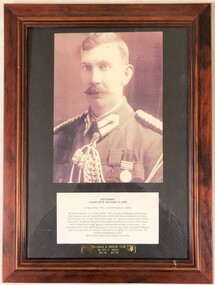
Document, Honours and Awards - DSO for Captain Stanley Savige 1919, 1919
A photocopy of the Honours and Awards published in 1919 that included Legatee Stan Savige receiving his DSO from General Sir W R Birdwood. It refers to his work protecting the Assyrian refugees in Persia from the Turks. Text includes: "In pursuance of the authority delegated to me by His Imperial Majesty, the King Emperor, I make the following awards for gallantry and distinguished service in the field:- To be Companion of the Distinguished Service Order. Captain Stanley George SAVIGE, MC, Australian Imperial Force. For conspicuous gallantry and devotion to duty. He was in command of a small party sent out to protect the rear of a column of refugees who were being hard pressed by the enemy. By his energy, resource and able dispositions the hostile troops, many of whom were mounted, were kept at a distance, although in greatly superior force. He hung on to position after position until nearly surrounded, but on each occasion extricated his command most skilfully. His cool determination and fine example under fire inspired his men and put heart into the almost panic-stricken refugees, thereby averting what might have been a very serious situation."A record of the war service of Legatee Stan Savige and the recognition he received.White foolscap photocopy of General Sir Birdwood awarding the DSO to Legatee Savigestan savige, service award -
 Wodonga & District Historical Society Inc
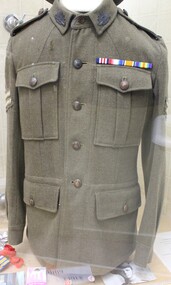
Uniform - Uniform of Bombardier Charles Frederick Clark
Charles Frederick Clark was 1 of 3 sons of Thomas and Elizabeth Clark of Bonegilla who served in WW1. Charles, Ernest and Thomas were the eldest children of a family of 12 children. At the age of 25, Charles enlisted in 13th Light Horse Brigade 1st Reinforcement on 25 January 1915. He was later transferred to the 2nd Division Artillery Column and the 4th Australian Medium Trench Mortar Battery. Charles served in Egypt, Gallipoli and France. As a result of his actions at the Third Battle of Morlancourt on the Western Front, Charles was awarded the Military Medal. The citation for the medal read:- Awarded: Military Medal 24th June 1918 Recommended by: Brigadier-General O. F. Phillips Commanding 2nd Division Artillery Column Action for which commended: 637 Bombardier Charles Frederick Clark 868 Bombardier (T/Corporal) George Traill McLennan "On the night 10/11th June 1918 during the attack South of MORLANCOURT near ALBERT, these NCOs showed great courage and determination under most trying conditions. They were each in charge of 6” Newton Mortars which had very important tasks. Just prior to the attack their gun positions were very heavily shelled and this continued throughout the barrage fire covering the advance. The work of these NCOs, who could not remain under cover all the time, was extremely dangerous, the enemy batteries having the range exactly. Their great gallantry set a splendid example of coolness to their men." (Signed) C. Rosenthal, Major General Commanding 2nd Australian Division He also received the 1914-15 Star, the British War medal and the Victory Medal.This uniform is significant as it was worn by a Wodonga District resident who received the Military Medal which was awarded for acts of gallantry and devotion to duty under fire during World War 1.Khaki Australia WW1 uniform for AIF. This uniform has 2 external patch chest pockets and 2 internal pockets with opening flap. It has 5 central buttons and 4 pocket buttons. There is a buttoned down epaulet on each shoulder and unit badges sewn onto each arm. An AIF Rising collar badge is on each peak of the collar. A strip of service ribbons is attached at the top of one chest pocket.australian military uniforms, ww1 bonella, military medal, 13th light horse, 4th australian medium trench mortar battery -
 Melbourne Legacy
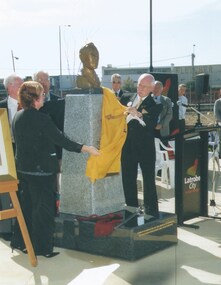
Photograph, Stan Savige Memorial, 2006
Photos of the unveiling of a memorial to Stan Savige in Morwell Victoria on 31st August 2006. It is a bronze bust mounted on a granite pedestal, it was installed in Legacy Place. The inscription on the front says: THIS MEMORIAL WAS ERECTED BY THE CITIZENS OF MORWELL TO HONOUR A GREAT HUMANITARIAN AND GREAT AUSTRALIAN Photos include the President of Legacy, Bill Rogers; Liza Price, Mayor of Morwell; Paul Buckley, La Trobe Valley CEO and a photo of Sir Stanley Savige KBE, CB, DSO, MC, ED. founder of Legacy who was born in Morwell 26.6.1890. He died 15.5.1954. The photos were sent to Legacy by Stan Wright. The inscription on the back (according to Monumentaustralia.org.au) says: A Distinguished Service Order (DSO) was awarded to Captain Stanley Savige, for conspicuous gallantry and devotion to duty during the retirement of Assyrian refugees from Sain Keleh to Tikkan Tappah between 26th and 28th July 1918; also at Chalkaman on the 5th and 6th August 1918. He was in command of a small party sent to protect the rear of the column of refugees who being hard pressed by the enemy. By his energy, resource and able dispositions the hostile troops, many of whom were mounted, were kept at a distance, although in greatly superior force. He hung on to position after position until nearly surrounded, but on each occasion extricated his command most skilfully. His cool determination and fine example under fire inspired his men and put heart into the almost panic stricken refugees, thereby averting what might have been a very serious situation.A record of a memorial to Stan Savige in his birthplace of Morwell.Colour photo x 8 of the Stan Savige memorial in Morwell.stan savige, memorial -
 Mrs Aeneas Gunn Memorial Library
Book, Cassell and Company, The Anzac book: written and illustrated in Gallipoli by the Men of Anzac, 1916
... - Campaigns - Gallipoli Created by soldiers under enemy fire ...Created by soldiers under enemy fire and in extreme hardship, the illustrations, stories, cartoons, and poems were intended as a Christmas and New Year diversion for soldiers facing a harsh winter in the trenches on Gallipoli.Ill, p.164.non-fictionCreated by soldiers under enemy fire and in extreme hardship, the illustrations, stories, cartoons, and poems were intended as a Christmas and New Year diversion for soldiers facing a harsh winter in the trenches on Gallipoli. world war 1914-1918 - personal recollections, world war 1914-1918 - campaigns - gallipoli -
 National Vietnam Veterans Museum (NVVM)
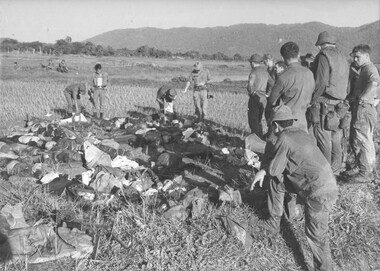
Photograph, Gibbons, Denis, Ambush Site
Denis Gibbons (1937 – 2011) Trained with the Australian Army, before travelling to Vietnam in January 1966, Denis stayed with the 1st Australian Task Force in Nui Dat working as a photographer. For almost five years Gibbons toured with nine Australian infantry battalions, posting compelling war images from within many combat zones before being flown out in late November 1970 after sustaining injuries. The images held within the National Vietnam Veterans Museum make up the Gibbons Collection. A black and white photograph of the ambush site at Hoa Long, by 8 Platoon, C Coy 8 RAR on the night of 12/07/1970 Sgt CJ Sherrin MM observed 50 to 60 NVA/VietCong pass into Hoa Long at 2100 hrs. At 0315 hrs the enemy returned and were engaged with claymores and machine gun fire, resulting in seventeen dead.photograph, 8 rar, c coy, sgt cj sherrin, nva/vc, hoa long, gibbons collection catalogue, military medal, 8 platoon, claymore mine, machine gun, killed in action, denis gibbons -
 National Vietnam Veterans Museum (NVVM)
Photograph, Gibbons, Denis, Under Heavy Fire
Denis Gibbons (1937 – 2011) Trained with the Australian Army, before travelling to Vietnam in January 1966, Denis stayed with the 1st Australian Task Force in Nui Dat working as a photographer. For almost five years Gibbons toured with nine Australian infantry battalions, posting compelling war images from within many combat zones before being flown out in late November 1970 after sustaining injuries. The images held within the National Vietnam Veterans Museum make up the Gibbons Collection. A black and white photograph of contact, Contact, Contact late afternoon, section strength TAOR patrol, Long Binh Operation Federal 14th March 1969, 7 platoon, C Coy 4 RAR/NZ (ANZAC), under heavy fire from both sides of the road the riflemen engage the enemy as the M60 moves forwardphotograph, long binh, c coy, 4rar nz, gibbons collection catalogue, m60 machine gun, 7 platoon, taor patrol, operation federal, m60, 4 rar/nz (anzac), riflemen, denis gibbons -
 National Vietnam Veterans Museum (NVVM)
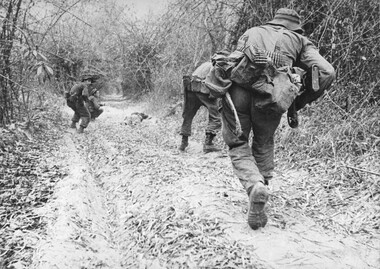
Book, Vetter, Lawrence C. Jr, Never Without Heroes: Marine Third Reconnaissance Battalion in Vietnam 1965-70
In four and a half years in Vietnam, the Marines of the Third Reconnaissance Battalion repeatedly penetrted North Vietnam and Vietcong sanctuaries by foor and by helipcopter to find enemy forces, learn the enemy's intentions, and, when possible, bring deadly fire down on his head.In four and a half years in Vietnam, the Marines of the Third Reconnaissance Battalion repeatedly penetrted North Vietnam and Vietcong sanctuaries by foor and by helipcopter to find enemy forces, learn the enemy's intentions, and, when possible, bring deadly fire down on his head.united states. marine corps. reconnaissance battalion, vietnam war, 1961-1975 - regimental histories - united states, us marines, 3rd reconnaissance battalion, north vietnamese, vietcong, nva base camps -
 National Vietnam Veterans Museum (NVVM)
Book, Sullivan, Michael P, The Vietnam War: A Study in the Making of American Policy, 1985
... into helicopters under heavy enemy fire, an era in American foreign policy ...On 30 April 1975, as American diplomats and Mrines were being hastily lifted off the roof of the American embassy in Saigon into helicopters under heavy enemy fire, an era in American foreign policy was ignominiously coming to an end.On 30 April 1975, as American diplomats and Mrines were being hastily lifted off the roof of the American embassy in Saigon into helicopters under heavy enemy fire, an era in American foreign policy was ignominiously coming to an end.vietnamese conflict, 1961-1975 - united states, united states - foreign relations - 1945 -, saigon, us marines, american diplomats -
 National Vietnam Veterans Museum (NVVM)
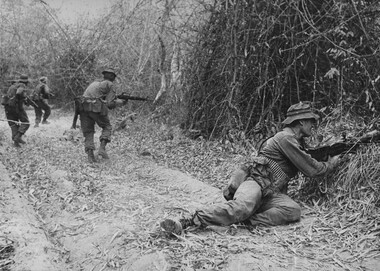
Photograph, Gibbons, Denis, Contact, Contact, Contact
Denis Gibbons (1937 – 2011) Trained with the Australian Army, before travelling to Vietnam in January 1966, Denis stayed with the 1st Australian Task Force in Nui Dat working as a photographer. For almost five years Gibbons toured with nine Australian infantry battalions, posting compelling war images from within many combat zones before being flown out in late November 1970 after sustaining injuries. The images held within the National Vietnam Veterans Museum make up the Gibbons Collection. A black and white photograph of Contat, Contact, Contact....late afternoon section strength TAOR Patrol, Long Binh, Operation Federal, 14th March 1969, 7 Platoon, C Company 4 RAR/NZ (ANZAC), under heavy fire from both sides of the road the riflemen engage the enemy to their immediate rightphotograph, operation federal, long binh, 7 platoon, c coy, 4rar nz, gibbons collection catalogue, taor patrol, 4 rar/nz (anzac), riflemen, denis gibbons -
 Flagstaff Hill Maritime Museum and Village
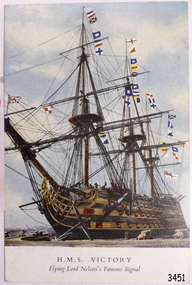
Postcard - Vessel, Sailing Ship, after October 1805
The British Royal Navy’s warship HMS Victory was once Lord Nelson’s flagship. The HMS Victory was built in 1765 and after serving active duty is now, in 2019, still a ship of the Royal Navy, in dry dock undergoing continuous restoration to preserve her for display as a museum ship, due to the vessel’s significant naval history. Battle of Trafalgar: On October 21, 1805, twenty-seven British ships of the line, led by Admiral Lord Nelson aboard HMS Victory, defeated thirty-three French and Spanish ships of the line under French Admiral Villeneuve. The battle took place in the Atlantic Ocean off the southwest coast of Spain, just west of Cape Trafalgar, near the town of Los Caños de Meca. The victory confirmed the naval supremacy Britain had established during the course of the eighteenth century and it was achieved in part through Nelson's departure from the prevailing naval tactical orthodoxy of the day. Conventional practice at the time was for opposing fleets to engage each other in single parallel lines, in order to facilitate signalling and disengagement and to maximise fields of fire and target areas. Nelson instead arranged his ships into two columns to sail perpendicularly into the enemy fleet's line. During the battle, Nelson was shot by a French musketeer and he died shortly before the battle ended. Villeneuve was captured, along with his ship Bucentaure. He later attended Nelson's funeral while a captive on parole in Britain. Admiral Federico Gravina, the senior Spanish flag officer, escaped with the remnant of the fleet. He died five months later from wounds sustained during the battle. It was prior to this battle that Nelson had issued his now-famous final orders to his ships in 12 separate flag-hoists “England expects that every man will do his duty”. This wood sample is historically significant for its association with Admiral Lord Nelson the Battle of Trafalgar. Through Nelson’s leadership and unorthodox battle tactics, he secured not only a victory against the French and Spanish but reaffirmed Britain's naval supremacy opening the way for Britain to continuing the policy of colonisation of many countries including Australia.A coloured postcard of a sailing ship, warship or battleship, deck cannons on the ship and in the foreground, many signal flags flying from the masts. Printed on the front "H.M.S. Victory Flying Lord Nelson Famous Signal". The signal was given by Lord Nelson in 1805.Printed on the front "H.M.S. Victory / Flying Lord Nelson Famous Signal"flagstaff hill, warrnambool, shipwrecked-coast, flagstaff-hill, flagstaff-hill-maritime-museum, maritime-museum, shipwreck-coast, flagstaff-hill-maritime-village, post card, postcard, sailing ship, vice-admiral lord nelson, horatio nelson, lord nelson, oak piece, piece of oak, nelson, battle of trafalgar, maritime technology, ship relics, 18th century warship, british royal navy, sir home popham’s telegraphic code, admiralty official day signal book, october 21, 1805, admiral lord nelson, french and spanish navies, nelson's famous signal, england expects that every man will do his duty, hms victory, nelson collection at lloyd's, lloyd’s of london, lloyd’s patriotic fund, napoleonic battles, british naval history, 18th century warship, 18th century battleship -
 Flagstaff Hill Maritime Museum and Village
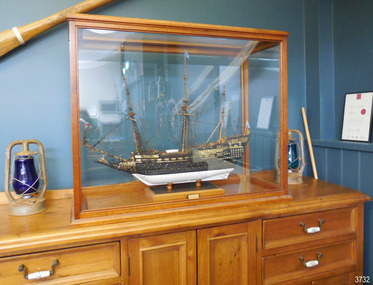
Craft - Ship Model, Sovereign of the Seas, Made between 1930-1955
This meticulously hand crafted ship model is one of the most intricate and challenging projects for a ship modeller to create. Jim Williams took up the challenge, choosing to make all of the components by hand, following a plan of the ship rather than purchasing a pre-made kit. He even made his own tools specifically for working with this model. The “Sovereign of the Seas” 1637-1697 - The magnificent ship “Sovereign of the Seas” was ordered by Charles I of England, who desired a giant Great Ship to be built. It was built by Peter Pett under the guidance of his father Phineas, the King's master shipwright, and launched with 102-guns at Woolwich Dockyard on 13th October 1637, as the Navy’s second three-decker first-rate ship. It was the most extravagantly decorated warship in the Royal Navy, bought with the help of a special 'Ship Money' tax imposed by the King. Soon afterwards the ship was remodelled and cut down to a safer and faster ship. Over the ship’s lifetime it was renamed “Commonwealth”, then in 1650 it became simply “Sovereign” then again after a rebuild in 1660 it was named “Royal Sovereign”. By 1642 the ship’s armament had been reduced to 90 guns. In 1651 Sovereign was made more manoeuvrable by reducing the upper works. It served throughout the wars of the Commonwealth and became the flagship of General Robert Blake. It was involved in all of the great English naval conflicts fought against the United Provinces and France and was referred to as 'The Golden Devil' by the Dutch. By 1660 the armament was changed attain to 100 guns. After the English Restoration, it was rebuilt as a first-rate ship of the line, with flatter gun decks and 100 guns, and most of the carvings were removed. During the First Anglo-Dutch War, in a secret session on 21 October 1652, the States-General of the Netherlands announced reward money for the crews of fire ships that succeeded in destroying enemy vessels; the Sovereign was singled out with an extra prize of 3000 guilders to sink or ruin it. Although repeatedly occupied by the Dutch, the Sovereign was retaken every time by the British and remained in service for nearly sixty years as the best ship in the English fleet. The Sovereign was in regular service during the three Anglo-Dutch Wars, surviving the Raid on the Medway in 1667. After a second rebuild in 1685 the Sovereign was relaunched as a first-rate ship of 100 guns, before taking part in the outset of the War of the Grand Alliance against Louis XIV of France, venturing into the Irish Sea, and later participating in the Battle of Beachy Head in 1690 and the Battle of La Hougue. At this time she was more than fifty years old. It was the first ship in history to fly ‘royals’ above the topgallant sails and a top gallant sail on the jigger-mast. The Sovereign eventually became leaky and defective with age and was laid up at Chatham when, on 27th January 1697, the famous ship caught fire, burning to the waterline. Jim Williams, the model’s maker - Jim (James Bernard) Williams was born in 1888 at The Forth in Scotland. He lived in Tasmania for some time and enlisted to fight in France in WW1. After the war he moved to Warrnambool, Victoria, where he worked at the Cramond & Dickson clothing store until the Great Depression in the 1930’s. He was later employed at Fletcher Jones Menswear, where he worked for 27 years until just before his death in 1959. Jim was a passionate ship model builder. He worked on his model ships between 1930 and 1955, including The Endeavour and The Sovereign of the Seas, which was one of the most intricate historic ship models to build. He had a table set up in a bay window and worked on them on and off using a jeweller's eye glass on the finer pieces. Jim’s long-time employer, Fletcher Jones, knew of Jim’s hobby and skill as a ship model builder and requested Jim to describe the model, Sovereign of the Seas, with the view of putting it on display. When the model was finished there was a full article and photo in The Standard newspaper. Jim described his work on the ship mode “Sovereign of the Seas” in correspondence to his then employer, Fletcher Jones. The document gives us an insight into his skill, patience, and regard for replicating the details of the original ship. Some of the details are: "In making the model the time taken to make certain items might be of interest. For instance "The Great Lantern" on the stern, four weeks, a similar time for the figurehead of St George & the Dragon. "The lower shrouds three to each side about six weeks & the rigging as whole several months. There are nearly 300 blocks and pulleys ranging from nearly 1 / 16 inch in diameter. Dead eyes were bored with 3 to 5 holes. To do this needles of different sizes, set in handles & ground to wedge ends were used. Glass cut and ground to shape were used windows. All gun-port covers (74) hinged. "All guns and anchors made of wood. Nothing for the model was purchased ready-made; everything hand made." Jim’s family donated the ship model along with many associated tools, accessories and papers. The model represents the Sovereign of the Seas. The Royal Navy ship of the line launched in 1637 has a significant British maritime heritage. These days the Sovereign of the Seas still remains one of the most intricate historic ship models to build, representing to the model enthusiast a true challenge to the art of model shipbuilding. The model of Sovereign of the Seas in Flagstaff Hill's collection is an exemplary example of a ship model built and hand crafted from a plan with the making of every item on the model, not a model kit with prefabricated parts. It was made by a local Warrnambool man Jim Williams as a leisure activity in the mid 20th century. The hobby and craft of ship model making has resulted in visual representations of the changes in maritime technology and advances in world-wide navigation. Ship model of HMS Sovereign of the Seas, a 17th century British warship. The handmade model is in wooden framed, airtight glass case. All components were hand crafted. Many of the tools used were made by the model maker, Jim Williams. An inscribed plaque is within the case. Inscribed on plaque "SOVEREIGN OF THE SEAS / 102 GUNS - 1634"flagstaff hill, warrnambool, shipwrecked coast, flagstaff hill maritime museum, maritime museum, shipwreck coast, flagstaff hill maritime village, great ocean road, model ship, vessel sovereign of the seas, jim williams, james bernard williams, the forth tasmania, freda williams, heather williams, phyllis bowditch, fletcher jones staff 1936, 17th century sailing ship, cramond and dickson, sovereign of the seas, royal sovereign, sovereign, charles 1, ship model -
 Wangaratta RSL Sub Branch
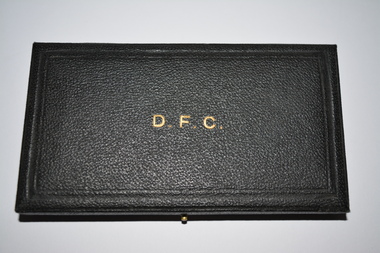
Award - Presentation Case with Medal, Distinguished Flying Cross
... and coolly aimed return fire drove ff the enemy aircraft in a badly... and coolly aimed return fire drove ff the enemy aircraft in a badly ...Distinguish Flying Cross medal awarded to John Hudson WILKINSON 400444 born 18/2/1914 at Rutherglen. He was a Pharmaceutical Chemist prior to enlisting in the RAAF on 2/9/1940 He was reporting missing during air operations over East Prussia and later presumed to have lost his life on 30/8/1944 Awarded the Distinguished Flying Cross - citation reads Pilot Officer Wilkinson is an air gunner of great ability and determination. He has taken part in a large number of operational sorties many of which have been against some of German's most heavily defended targets. On one occasion in March 1944 when engaged n an attack on Stuttgart a Junkers 88 attacked his aircraft five times but Pilot Officer Wilkinson by his accurate directions to his captain and coolly aimed return fire drove ff the enemy aircraft in a badly damaged condition. At all times his unwavering devotion to duty and constant alertness have inspired confidence in his crew. The Distinguished Flying Cross (DFC) is the third-level military decoration awarded to officers, and since 1993 to other ranks, of the United Kingdom's Royal Air Force and other services, and formerly to officers of other Commonwealth countries, for "an act or acts of valour, courage or devotion to duty whilst flying in active operations against the enemy"Black case which opens out from right side. The top affixed by two side hinges on the left and push in pin on the right side. Inside case the top is lined in satin fabric imprinted with a black crest and the base is lined in felt containing a silver metal medal in the shape of a cross attached to a purple and while diagonally striped ribbon.On Top - DFC impressed in gold colour paint. Inside Top - Royal Mint Medal inscriptions -400444 Flt Lt Wilkinson Stuttgart 1944 pilot officer john hudson wilkinson, dfc, ww2, raaf, kia