Showing 32 items matching reef wash
-
 Federation University Historical Collection
Plan, Underground Workings New Australasian Company Creswick, not dated
... reef wash... the locations of the Red streak or Australasian Gutter, Reef wash... of the Red streak or Australasian Gutter, Reef wash, Eastern Wash ...A plan of the underground working of the New Australasian Mine at Creswick, showing Wheeler's Bridge Road, a transverse section on the West Main Reef Drive and Line AB. It als shows the locations of the Red streak or Australasian Gutter, Reef wash, Eastern Wash, Australasian and Eaglehawk Shaft and prospecting drives.mining, plans, cgt, creswick, new australasian company, wheeler's bridge, red streak gutter, australasian gutter, reef wash, eastern wash, australiasian shaft, eaglehawk shaft -
 Flagstaff Hill Maritime Museum and Village
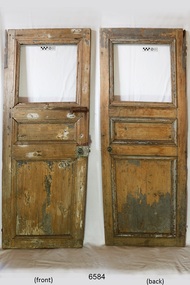
Furniture - Door, 1871 or earlier
The wooden door was salvaged from the wreck of the sailing ship Eric the Red, which was a wooden, three masted clipper ship. Eric the Red was the largest full-rigged ship built at Bath, Maine, USA in 1871, having had a 1,580 tons register. She was built and registered by Arthur Sewall, later to become the partnership E. & A. Sewall, the 51st ship built by this company. The annually-published List of Merchant Vessels of the U.S. shows Bath was still the home port of Eric the Red in 1880. The vessel was named after the Viking discoverer, Eric the Red, who was the first European to reach the shores of North America (in 980AD). The ship Eric the Red at first traded in coal between America and Britain, and later traded in guano nitrates from South America. In 1879 she was re-metalled and was in first class condition. On 10th June 1880 (some records say 12th June) Eric the Red departed New York for Melbourne and then Sydney. She had been commissioned by American trade representatives to carry a special cargo of 500 exhibits (1400 tons) – about a quarter to a third of America’s total exhibits - from America for the U.S.A. pavilion at Melbourne’s first International Exhibition. The exhibits included furniture, ironmongery, wines, chemicals, dental and surgical instruments, paper, cages, bronze lamp trimmings, axles, stamped ware, astronomical and time globes, samples of corn and the choicest of leaf tobacco. Other general cargo included merchandise such as cases of kerosene and turpentine, brooms, Bristol's Sarsaparilla, Wheeler and Wilson sewing machines, Wheeler’s thresher machine, axe handles and tools, cases of silver plate, toys, pianos and organs, carriages and Yankee notions. The Eric the Red left New York under the command of Captain Z. Allen (or some records say Captain Jacques Allen) and 24 other crew including the owner’s son third mate Ned Sewall. There were 2 saloon passengers also. The ship had been sailing for an uneventful 85 days and the voyage was almost at its end. On 4th September 1880 the Eric the Red approached Cape Otway with a moderate north-west wind and hazy and overcast atmosphere. Around 1:30am Captain Allen sighted the Cape Otway light and was keeping the ship 5-6 miles offshore to stay clear of the hazardous Otway Reef. However he had badly misjudged his position. The ship hit the Otway Reef about 2 miles out to sea, south west of the Cape Otway light station. He ordered the wheel to be put ‘hard up’ thinking that she might float off the reef. A heavy sea knocked the man away from the wheel, broke the wheel ropes and carried away the rudder. The sea swamped the lifeboats. The mizzenmast fell, with all of its rigging, then the mainmast also fell and the ship broke in two. Some said that the passenger Vaughan, who was travelling for his health and not very strong, was washed overboard and never seen again. The ship started breaking up. The forward house came adrift with three of the crew on it as well as a longboat, which the men succeeded in launching and keeping afloat by continually bailing with their sea boots. The captain, the third mate (the owner’s son) and others clung to the mizzenmast in the sea. Then the owner’s son was washed away off the mast. Within 10 minutes the rest of the ship was in pieces, completely wrecked, with cargo and wreckage floating in the sea. The captain encouraged the second mate to swim with him to the deckhouse where there were other crew but the second mate wouldn’t go with him. Eventually the Captain made it to the deckhouse and the men pulled him up. At about 4:30am the group of men on the deckhouse saw the lights of a steamer and called for help. At the same time they noticed the second mate and the other man had drifted nearby, still on the spur, and pulled them both onto the wreck. The coastal steamer Dawn was returning to Warrnambool from Melbourne, its sailing time different to its usual schedule. Captain Jones sent out two life boats, and fired off rockets and blue lights to illuminate the area. They picked up the three survivors who were in the long boat from Eric the Red. Two men were picked up out of the water, one being the owner’s son who was clinging to floating kerosene boxes. At daylight the Dawn then rescued the 18 men from the floating portion of the deckhouse, which had drifted about 4 miles from where they’d struck the reef. Shortly after the rescue the deckhouse drifted onto breakers and was thrown onto rocks at Point Franklin, about 2 miles east of Cape Otway. Captain Jones had signalled to Cape Otway lighthouse the number of the Eric the Red and later signalled that there was a wreck at Otway Reef but there was no response from the lighthouse. The captain and crew of the Dawn spent several more hours searching unsuccessfully for more survivors, even going back as far as Apollo Bay. On board the Dawn the exhausted men received care and attention to their needs and wants, including much needed clothing. Captain Allen was amongst the 23 battered and injured men who were rescued and later taken to Warrnambool for care. Warrnambool’s mayor and town clerk offered them all hospitality, the three badly injured men going to the hospital for care and others to the Olive Branch Hotel, then on to Melbourne. Captain Allen’s leg injury prevented him from going ashore so he and three other men travelled on the Dawn to Portland. They were met by the mayor who also treated them all with great kindness. Captain Allen took the train back to Melbourne then returned to America. Those saved were Captain Z. Allen (or Jacques Allen), J. Darcy chief mate, James F. Lawrence second mate, Ned Sewall third mate and owner’s son, John French the cook, C. Nelson sail maker, Clarence W. New passenger, and the able seamen Dickenson, J. Black, Denis White, C. Herbert, C. Thompson, A. Brooks, D. Wilson, J. Ellis, Q. Thompson, C. Newman, W. Paul, J. Davis, M. Horenleng, J. Ogduff, T. W. Drew, R. Richardson. Four men had lost their lives; three of them were crew (Gus Dahlgreen ship’s carpenter, H. Ackman steward, who drowned in his cabin, and George Silver seaman) and one a passenger (J. B. Vaughan). The body of one of them had been found washed up at Cape Otway and was later buried in the lighthouse cemetery; another body was seen on an inaccessible ledge. Twelve months later the second mate James F. Lawrence, from Nova Scotia, passed away in the Warrnambool district; an obituary was displayed in the local paper. The captain and crew of the Dawn were recognised by the United States Government in July 1881 for their humane efforts, being thanked and presented with substantial monetary rewards, medals and gifts. Neither the ship, nor its cargo, was insured. The ship was worth about £15,000 and the cargo was reportedly worth £40,000; only about £2,000 worth had been recovered. Cargo and wreckage washed up at Apollo Bay, Peterborough, Port Campbell, Western Port and according to some reports, even as far away as the beaches of New Zealand. The day after the wreck the government steam ship Pharos was sent from Queenscliff to clear the shipping lanes of debris that could be a danger to ships. The large midship deckhouse of the ship was found floating in a calm sea near Henty Reef. Items such as an American chair, a ladder and a nest of boxes were all on top of the deckhouse. As it was so large and could cause danger to passing ships, Captain Payne had the deckhouse towed towards the shore just beyond Apollo Bay. Between Apollo Bay and Blanket Bay the captain and crew of Pharos collected Wheeler and Wilson sewing machines, nests of boxes, bottles of Bristol’s sarsaparilla, pieces of common American chairs, axe handles, a Wheelers’ Patent thresher and a sailor’s trunk with the words “A. James” on the front. A ship’s flag-board bearing the words “Eric the Red” was found on the deckhouse; finally those on board the Pharos had the name of the wrecked vessel. During this operation Pharos came across the government steamer Victoria and also a steamer S.S. Otway, both of which were picking up flotsam and wreckage. A whole side of the hull and three large pieces of the other side of the hull, with some of the copper sheathing stripped off, had floated on to Point Franklin. Some of the vessels yards and portions of her masts were on shore. The pieces of canvas attached to the yards and masts confirmed that the vessel had been under sail. The beach there was piled with debris several feet high. There were many cases of Diamond Oil kerosene, labelled R. W. Cameron and Company, New York. There were also many large planks of red pine, portions of a small white boat and a large, well-used oar. Other items found ashore included sewing machines (some consigned to ‘Long and Co.”) and notions, axe and scythe handles, hay forks, wooden pegs, rolls of wire (some branded “T.S” and Co, Melbourne”), kegs of nails branded “A.T. and Co.” from the factory of A. Field and Son, Taunton, Massachusetts, croquet balls and mallets, buggy fittings, rat traps, perfumery, cutlery and Douay Bibles, clocks, bicycles, chairs, a fly wheel, a cooking stove, timber, boxes, pianos, organs and a ladder. (Wooden clothes pegs drifted in for many years). There seemed to be no personal luggage or clothing. The Pharos encountered a long line, about one and a half miles, of floating wreckage about 10 miles off land, south east of Cape Otway, and in some places about 40 feet wide. It seemed that more than half of it was from Eric the Red. The ship’s crew rescued 3 cases that were for the Melbourne Exhibition and other items from amongst the debris. There were also chairs, doors, musical instruments, washing boards, nests of trunks and fly catchers floating in the sea. Most of the goods were saturated and smelt of kerosene. A section of the hull lies buried in the sand at Parker River Beach. An anchor with chain is embedded in the rocks east of Point Franklin and a second anchor, thought to be from Eric the Red, is on display at the Cape Otway light station. (There is a photograph of a life belt on the verandah of Rivernook Guest House in Princetown with the words “ERIC THE RED / BOSTON”. This is rather a mystery as the ship was registered in Bath, Maine, USA.) Parts of the ship are on display at Bimbi Park Caravan Park and at Apollo Bay Museum. Flagstaff Hill Maritime Village also has part of the helm (steering wheel), a carved wooden sword (said to be the only remaining portion of the ship’s figurehead; further research is currently being carried out), a door, a metal rod and samples of wood. Much of the wreckage was recovered by the local residents before police and other authorities arrived at the scene. Looters went to great effort to salvage goods, being lowered down the high cliff faces to areas with little or no beach to collect items from the wreckage, their mates above watching out for dangerous waves. A Tasmanian newspaper reports on a court case in Stawell, Victoria, noting a man who was caught 2 months later selling tobacco from the wreckage of Eric the Red. Some of the silverware is still treasured by descendants of Mr Mackenzie who was given these items by officials for his help in securing the cargo. The gifts included silver coffee and tea pots, half a dozen silver serviette rings and two sewing machines. The wreck and cargo were sold to a Melbourne man who salvaged a quantity of high quality tobacco and dental and surgical instruments. Timbers from the ship were salvaged and used in the construction of houses and sheds around Apollo Bay, including a guest house, Milford House (since burnt down in bushfires), which had furniture, fittings and timber on the dining room floor from the ship. A 39.7 foot long trading ketch, the Apollo, was also built from its timbers by Mr Burgess in 1883 and subsequently used in Tasmanian waters. It was the first attempt at ship building in Apollo bay. In 1881 a red light was installed about 300 feet above sea level at the base of the Cape Otway lighthouse to warn ships when they were too close to shore; It would not be visible unless a ship came within 3 miles from it. This has proved to be an effective warning. The State Library of Victoria has a lithograph in its collection depicting the steamer Dawn and the shipwrecked men, titled. "Wreck of the ship Eric the Red, Cape Otway: rescue of the crew by the Dawn". “The Eric the Red is historically significant as one of Victoria's major 19th century shipwrecks. (Heritage Victoria Eric the Red; HV ID 239) The wreck led to the provision of an additional warning light placed below the Cape Otway lighthouse to alert mariners to the location of Otway Reef. The site is archaeologically significant for its remains of a large and varied cargo and ship's fittings being scattered over a wide area. The site is recreationally and aesthetically significant as it is one of the few sites along this coast where tourists can visit identifiable remains of a large wooden shipwreck, and for its location set against the background of Cape Otway, Bass Strait, and the Cape Otway lighthouse.“ (Victorian Heritage Database Registration Number S239, Official Number 8745 USA) Door from the wreck of the ship Eric the Red. The wooden singular rectangular door includes three insert panel sections. The top section is square shaped and is missing its panel or glass. The centre timber panel is about a third of the height of the top panel and the bottom timber panel is approximately equal in height to the total height of the two upper panels. The door fastenings include both a metal door latch and traditional door bolt. They are both attached to the front right hand side of the door. The bolt is just below the top panel, and the door latch is in approximately the centre of that side. The door latch has a round mark where a handle could have been attached. The wood of the door has scraping marks in a semi-circle around the door latch where the latch has swung around on its one remaining fastening and grazed the surface. There is a metal hinge at the top section of the door on the opposite side to the latch. The painted surface has been scraped back to expose the wood. The door is shorter than the average height of a person. On the reverse of the door there are lines on the panels, just inside their edges, is what appears to be pencil. The door is not aligned straight but is skew to centre.warrnambool, flagstaff hill, flagstaff hill maritime village, maritime museum, shipwreck coast, great ocean road, shipwreck artefact, eric the red, jaques allen, sewall, 1880, melbourne exhibition 1880, cape otway, otway reef, victorian shipwreck, bass strait, eric-the-red, door -
 Flagstaff Hill Maritime Museum and Village
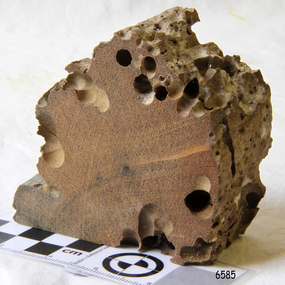
Wood Sample, about 1871
This piece of timber from the ship Eric the Red has been eaten through by the marine animals called Teredo Worms, sometimes called sea worms or ‘termites of the sea’. The worms bore holes into wood that is immersed in sea water and bacteria inside the worms digest the wood. Shipbuilders tried to prevent this problem by using coatings of tar, wax, lead or pitch. In the 18th and 19th centuries the outside of their ships were sheathed in copper or a combination of copper and zinc (called Muntz metal) and would be re-metalled periodically to ensure the sheathing would remain effective. In more recent times the ships are protected with a toxic coating. The American ship Eric the Red was a wooden, three masted clipper ship. She had 1,580 tons register and was the largest full-rigged ship built at Bath, Maine, USA in 1871. She was built and registered by Arthur Sewall, later to become the partnership E. & A. Sewall, the 51st ship built by this company. The annually-published List of Merchant Vessels of the U.S. shows Bath was still the home port of Eric the Red in 1880. The vessel was named after the Viking discoverer, Eric ‘the Red-haired’ Thorvaldsson , who was the first European to reach the shores of North America (in 980AD). The ship Eric the Red at first traded in coal between America and Britain, and later traded in guano nitrates from South America. In 1879 she was re-metalled and was in first class condition. On 10th June 1880 (some records say 12th June) Eric the Red departed New York for Melbourne and then Sydney. She had been commissioned by American trade representatives to carry a special cargo of 500 exhibits (1400 tons) – about a quarter to a third of America’s total exhibits - for the U.S.A. pavilion at Melbourne’s first International Exhibition. The exhibits included furniture, ironmongery, wines, chemicals, dental and surgical instruments, paper, cages, bronze lamp trimmings, axles, stamped ware, astronomical and time globes, samples of corn and the choicest of leaf tobacco. Other general cargo included merchandise such as cases of kerosene and turpentine, brooms, Bristol's Sarsaparilla, Wheeler and Wilson sewing machines, Wheeler’s thresher machine, axe handles and tools, cases of silver plate, toys, pianos and organs, carriages and Yankee notions. The Eric the Red left New York under the command of Captain Zaccheus Allen (or some records say Captain Jacques Allen) and 24 other crew including the owner’s son third mate Ned Sewall. There were also 2 saloon passengers on board. The ship had been sailing for an uneventful 85 days and the voyage was almost at its end. As Eric the Red approached Cape Otway there was a moderate north-west wind and hazy and overcast atmosphere. On 4th September 1880 at about 1:30am Captain Allen sighted the Cape Otway light and was keeping the ship 5-6 miles offshore to stay clear of the hazardous Otway Reef. However he had badly misjudged his position. The ship hit the Otway Reef about 2 miles out to sea, south west of the Cape Otway light station. Captain Allen ordered the wheel to be put ‘hard up’ thinking that she might float off the reef. The sea knocked the helmsman away from the wheel, broke the wheel ropes and carried away the rudder. The lifeboats were swamped, the mizzenmast fell, with all of its rigging, then the mainmast also fell and the ship broke in two. Some said that the passenger Vaughan, who was travelling for his health and not very strong, was washed overboard and never seen again. The ship started breaking up. The forward house came adrift with three of the crew on it as well as a longboat, which the men succeeded in launching and keeping afloat by continually bailing with their sea boots. The captain, the third mate (the owner’s son) and others clung to the mizzenmast in the sea. Then the owner’s son was washed away off the mast. Within 10 minutes the rest of the ship was in pieces, completely wrecked, with cargo and wreckage floating in the sea. The captain encouraged the second mate to swim with him to the deckhouse where there were other crew but the second mate wouldn’t go with him. Eventually the Captain made it to the deckhouse and the men pulled him up. At about 4:30am the group of men on the deckhouse saw the lights of a steamer and called for help. At the same time they noticed the second mate and the other man had drifted nearby, still on the spur, and pulled them both onto the wreck. The coastal steamer SS Dawn was returning to Warrnambool from Melbourne, its sailing time different to its usual schedule. She was built in 1876 and bought by the Portland and Belfast Steam Navigation Co. in 1877. At the time of this journey she was commanded by Captain Jones, and was sailing between Melbourne and Portland via Warrnambool. The provedore of the Dawn, Benjamin Lear, heard cries of distress coming through the portholes of the saloon. He gave the alarm and the engines were stopped. Cries could be heard clearly, coming from the land. Captain Jones sent out crew in two boats, and fired off rockets and blue lights to illuminate the area. They picked up the three survivors who were in the long boat from Eric the Red. Two men were picked up out of the water, one being the owner’s son who was clinging to floating kerosene boxes. At daylight the Dawn then rescued the 18 men from the floating portion of the deckhouse, which had drifted about 4 miles from where they’d struck the reef. Shortly after the rescue the deckhouse drifted onto breakers and was thrown onto rocks at Point Franklin, about 2 miles east of Cape Otway. Captain Jones had signalled to Cape Otway lighthouse the number of the Eric the Red and later signalled that there was a wreck at Otway Reef but there was no response from the lighthouse. The captain and crew of the Dawn spent several more hours searching unsuccessfully for more survivors, even going back as far as Apollo Bay. On board the Dawn the exhausted men received care and attention to their needs and wants, including much needed clothing. Captain Allen was amongst the 23 battered and injured men who were rescued and later taken to Warrnambool for care. Warrnambool’s mayor and town clerk offered them all hospitality, the three badly injured men going to the hospital for care and others to the Olive Branch Hotel, then on to Melbourne. Captain Allen’s leg injury prevented him from going ashore so he and three other men travelled on the Dawn to Portland. They were met by the mayor who also treated them all with great kindness. Captain Allen took the train back to Melbourne then returned to America. Those saved were Captain Zaccheus Allen (or Jacques Allen), J. Darcy chief mate, James F. Lawrence second mate, Ned Sewall third mate and owner’s son, John French the cook, C. Nelson sail maker, Clarence W. New passenger, and the able seamen Dickenson, J. Black, Denis White, C. Herbert, C. Thompson, A. Brooks, D. Wilson, J. Ellis, Q. Thompson, C. Newman, W. Paul, J. Davis, M. Horenleng, J. Ogduff, T. W. Drew, R. Richardson. Four men had lost their lives; three of them were crew (Gus Dahlgreen ship’s carpenter, H. Ackman steward, who drowned in his cabin, and George Silver seaman) and one a passenger (J. B. Vaughan). The body of one of them had been found washed up at Cape Otway and was later buried in the lighthouse cemetery; another body was seen on an inaccessible ledge. Twelve months later the second mate James F. Lawrence, from Nova Scotia, passed away in the Warrnambool district; an obituary was displayed in the local paper. Neither the ship, nor its cargo, was insured. The ship was worth about £15,000 and the cargo was reportedly worth £40,000; only about £2,000 worth had been recovered. Cargo and wreckage washed up at Apollo Bay, Peterborough, Port Campbell, Western Port and according to some reports, even as far away as the beaches of New Zealand. The day after the wreck the government steam ship Pharos was sent from Queenscliff to clear the shipping lanes of debris that could be a danger to ships. The large midship deckhouse of the ship was found floating in a calm sea near Henty Reef. Items such as an American chair, a ladder and a nest of boxes were all on top of the deckhouse. As it was so large and could cause danger to passing ships, Captain Payne had the deckhouse towed towards the shore just beyond Apollo Bay. Between Apollo Bay and Blanket Bay the captain and crew of Pharos collected Wheeler and Wilson sewing machines, nests of boxes, bottles of Bristol’s sarsaparilla, pieces of common American chairs, axe handles, a Wheelers’ Patent thresher and a sailor’s trunk with the words “A. James” on the front. A ship’s flag-board bearing the words “Eric the Red” was found on the deckhouse; finally those on board the Pharos had the name of the wrecked vessel. During this operation Pharos came across the government steamer Victoria and also a steamer S.S. Otway, both of which were picking up flotsam and wreckage. A whole side of the hull and three large pieces of the other side of the hull, with some of the copper sheathing stripped off, had floated on to Point Franklin. Some of the vessels yards and portions of her masts were on shore. The pieces of canvas attached to the yards and masts confirmed that the vessel had been under sail. The beach there was piled with debris several feet high. There were many cases of Diamond Oil kerosene, labelled R. W. Cameron and Company, New York. There were also many large planks of red pine, portions of a small white boat and a large, well-used oar. Other items found ashore included sewing machines (some consigned to ‘Long and Co.”) and notions, axe and scythe handles, hay forks, wooden pegs, rolls of wire (some branded “T.S” and Co, Melbourne”), kegs of nails branded “A.T. and Co.” from the factory of A. Field and Son, Taunton, Massachusetts, croquet balls and mallets, buggy fittings, rat traps, perfumery, cutlery and Douay Bibles, clocks, bicycles, chairs, a fly wheel, a cooking stove, timber, boxes, pianos, organs and a ladder. (Wooden clothes pegs drifted in for many years). There seemed to be no personal luggage or clothing. The Pharos encountered a long line, about one and a half miles, of floating wreckage about 10 miles off land, south east of Cape Otway, and in some places about 40 feet wide. It seemed that more than half of it was from Eric the Red. The ship’s crew rescued 3 cases that were for the Melbourne Exhibition and other items from amongst the debris. There were also chairs, doors, musical instruments, washing boards, nests of trunks and fly catchers floating in the sea. Most of the goods were saturated and smelt of kerosene. A section of the hull lies buried in the sand at Parker River Beach. An anchor with chain is embedded in the rocks east of Point Franklin and a second anchor, thought to be from Eric the Red, is on display at the Cape Otway light station. (There is a photograph of a life belt on the verandah of Rivernook Guest House in Princetown with the words “ERIC THE RED / BOSTON”. This is rather a mystery as the ship was registered in Bath, Maine, USA.) Parts of the ship are on display at Bimbi Park Caravan Park and at Apollo Bay Museum. Flagstaff Hill Maritime Village also has part of the helm (steering wheel), a carved wooden sword (said to be the only remaining portion of the ship’s figurehead; further research is currently being carried out), a door, a metal rod, several samples of wood and a medal for bravery, awarded to Nelson Johnson, a crew member of the S.S. Dawn by the U.S. President, for the rescue of the crew. Much of the wreckage was recovered by the local residents before police and other authorities arrived at the scene. Looters went to great effort to salvage goods, being lowered down the high cliff faces to areas with little or no beach to collect items from the wreckage, their mates above watching out for dangerous waves. A Tasmanian newspaper reports on a court case in Stawell, Victoria, noting a man who was caught 2 months later selling tobacco from the wreckage of Eric the Red. Some of the silverware is still treasured by descendants of Mr Mackenzie who was given these items by officials for his help in securing the cargo. The gifts included silver coffee and tea pots, half a dozen silver serviette rings and two sewing machines. A Mr G.W. Black has in his possession a medal and a purse that were awarded to his father, another Dawn crew member who was part of the rescue team. The medal is inscribed and named “To John Black ….” (from “Shipwrecks” by Margaret E. Mackenzie, 3rd edition, published 1964). The wreck and cargo were sold to a Melbourne man who salvaged a quantity of high quality tobacco and dental and surgical instruments. Timbers from the ship were salvaged and used in the construction of houses and sheds around Apollo Bay, including a guest house, Milford House (since burnt down in bushfires), which had furniture, fittings and timber on the dining room floor from the ship. A 39.7 foot long trading ketch, the Apollo, was also built from its timbers by Mr Burgess in 1883 and subsequently used in Tasmanian waters. It was the first attempt at ship building in Apollo bay. In 1881 a red light was installed about 300 feet above sea level at the base of the Cape Otway lighthouse to warn ships when they were too close to shore; It would not be visible unless a ship came within 3 miles from it. This has proved to be an effective warning. Nelson Johnson, recipient of the medal for bravery, married Elizabeth Howard in 1881 and they had 10 children. They lived in South Melbourne, Victoria. Nelson died in 1922 in Fitzroy Victoria, age 66. In 1895 the owners of the S.S. Dawn, the Portland and Belfast Steam Navigation Co., wound up and sold out to the Belfast Company who took over the Dawn for one year before selling her to Howard Smith. She was condemned and sunk in Suva in 1928. The State Library of Victoria has a lithograph in its collection depicting the steamer Dawn and the shipwrecked men, titled. "Wreck of the ship Eric the Red, Cape Otway: rescue of the crew by the Dawn".The wood (timber) sample is listed on the Collections Australia Database, Heritage Victoria, number 239 00010 A “The Eric the Red is historically significant as one of Victoria's major 19th century shipwrecks. (Heritage Victoria Eric the Red; HV ID 239) The wreck led to the provision of an additional warning light placed below the Cape Otway lighthouse to alert mariners to the location of Otway Reef. The site is archaeologically significant for its remains of a large and varied cargo and ship's fittings being scattered over a wide area. The site is recreationally and aesthetically significant as it is one of the few sites along this coast where tourists can visit identifiable remains of a large wooden shipwreck, and for its location set against the background of Cape Otway, Bass Strait, and the Cape Otway lighthouse.“ (Victorian Heritage Database Registration Number S239, Official Number 8745 USA) Wood sample from the wreck of the ship Eric the Red. Triangular shaped, full of sea worm (Teredo worm) holes. The wood is dark in colour and is very light in weight.flagstaff hill, warrnambool, shipwrecked-coast, flagstaff-hill, flagstaff-hill-maritime-museum, maritime-museum, shipwreck-coast, flagstaff-hill-maritime-village, shipwreck-artefact, eric-the-red, zaccheus-allen, sewall, 1880, melbourne-exhibition, cape-otway, otway-reef, wood-sample, s.s.-dawn -
 Flagstaff Hill Maritime Museum and Village
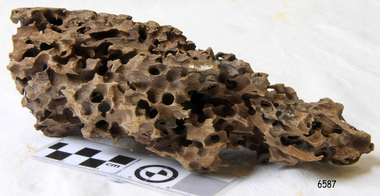
Wood Sample, About 1871
This piece of timber from the ship Eric the Red has been eaten through by the marine animals called Teredo Worms, sometimes called sea worms or ‘termites of the sea’. The worms bore holes into wood that is immersed in sea water and bacteria inside the worms digest the wood. Shipbuilders tried to prevent this problem by using coatings of tar, wax, lead or pitch. In the 18th and 19th centuries the outside of their ships were sheathed in copper or a combination of copper and zinc (called Muntz metal) and would be re-metalled periodically to ensure the sheathing would remain effective. In more recent times the ships are protected with a toxic coating. The American ship Eric the Red was a wooden, three masted clipper ship. She had 1,580 tons register and was the largest full-rigged ship built at Bath, Maine, USA in 1871. She was built and registered by Arthur Sewall, later to become the partnership E. & A. Sewall, the 51st ship built by this company. The annually-published List of Merchant Vessels of the U.S. shows Bath was still the home port of Eric the Red in 1880. The vessel was named after the Viking discoverer, Eric ‘the Red-haired’ Thorvaldsson , who was the first European to reach the shores of North America (in 980AD). The ship Eric the Red at first traded in coal between America and Britain, and later traded in guano nitrates from South America. In 1879 she was re-metalled and was in first class condition. On 10th June 1880 (some records say 12th June) Eric the Red departed New York for Melbourne and then Sydney. She had been commissioned by American trade representatives to carry a special cargo of 500 exhibits (1400 tons) – about a quarter to a third of America’s total exhibits - for the U.S.A. pavilion at Melbourne’s first International Exhibition. The exhibits included furniture, ironmongery, wines, chemicals, dental and surgical instruments, paper, cages, bronze lamp trimmings, axles, stamped ware, astronomical and time globes, samples of corn and the choicest of leaf tobacco. Other general cargo included merchandise such as cases of kerosene and turpentine, brooms, Bristol's Sarsaparilla, Wheeler and Wilson sewing machines, Wheeler’s thresher machine, axe handles and tools, cases of silver plate, toys, pianos and organs, carriages and Yankee notions. The Eric the Red left New York under the command of Captain Zaccheus Allen (or some records say Captain Jacques Allen) and 24 other crew including the owner’s son third mate Ned Sewall. There were also 2 saloon passengers on board. The ship had been sailing for an uneventful 85 days and the voyage was almost at its end. As Eric the Red approached Cape Otway there was a moderate north-west wind and hazy and overcast atmosphere. On 4th September 1880 at about 1:30am Captain Allen sighted the Cape Otway light and was keeping the ship 5-6 miles offshore to stay clear of the hazardous Otway Reef. However he had badly misjudged his position. The ship hit the Otway Reef about 2 miles out to sea, south west of the Cape Otway light station. Captain Allen ordered the wheel to be put ‘hard up’ thinking that she might float off the reef. The sea knocked the helmsman away from the wheel, broke the wheel ropes and carried away the rudder. The lifeboats were swamped, the mizzenmast fell, with all of its rigging, then the mainmast also fell and the ship broke in two. Some said that the passenger Vaughan, who was travelling for his health and not very strong, was washed overboard and never seen again. The ship started breaking up. The forward house came adrift with three of the crew on it as well as a longboat, which the men succeeded in launching and keeping afloat by continually bailing with their sea boots. The captain, the third mate (the owner’s son) and others clung to the mizzenmast in the sea. Then the owner’s son was washed away off the mast. Within 10 minutes the rest of the ship was in pieces, completely wrecked, with cargo and wreckage floating in the sea. The captain encouraged the second mate to swim with him to the deckhouse where there were other crew but the second mate wouldn’t go with him. Eventually the Captain made it to the deckhouse and the men pulled him up. At about 4:30am the group of men on the deckhouse saw the lights of a steamer and called for help. At the same time they noticed the second mate and the other man had drifted nearby, still on the spur, and pulled them both onto the wreck. The coastal steamer SS Dawn was returning to Warrnambool from Melbourne, its sailing time different to its usual schedule. She was built in 1876 and bought by the Portland and Belfast Steam Navigation Co. in 1877. At the time of this journey she was commanded by Captain Jones, and was sailing between Melbourne and Portland via Warrnambool. The provedore of the Dawn, Benjamin Lear, heard cries of distress coming through the portholes of the saloon. He gave the alarm and the engines were stopped. Cries could be heard clearly, coming from the land. Captain Jones sent out crew in two boats, and fired off rockets and blue lights to illuminate the area. They picked up the three survivors who were in the long boat from Eric the Red. Two men were picked up out of the water, one being the owner’s son who was clinging to floating kerosene boxes. At daylight the Dawn then rescued the 18 men from the floating portion of the deckhouse, which had drifted about 4 miles from where they’d struck the reef. Shortly after the rescue the deckhouse drifted onto breakers and was thrown onto rocks at Point Franklin, about 2 miles east of Cape Otway. Captain Jones had signalled to Cape Otway lighthouse the number of the Eric the Red and later signalled that there was a wreck at Otway Reef but there was no response from the lighthouse. The captain and crew of the Dawn spent several more hours searching unsuccessfully for more survivors, even going back as far as Apollo Bay. On board the Dawn the exhausted men received care and attention to their needs and wants, including much needed clothing. Captain Allen was amongst the 23 battered and injured men who were rescued and later taken to Warrnambool for care. Warrnambool’s mayor and town clerk offered them all hospitality, the three badly injured men going to the hospital for care and others to the Olive Branch Hotel, then on to Melbourne. Captain Allen’s leg injury prevented him from going ashore so he and three other men travelled on the Dawn to Portland. They were met by the mayor who also treated them all with great kindness. Captain Allen took the train back to Melbourne then returned to America. Those saved were Captain Zaccheus Allen (or Jacques Allen), J. Darcy chief mate, James F. Lawrence second mate, Ned Sewall third mate and owner’s son, John French the cook, C. Nelson sail maker, Clarence W. New passenger, and the able seamen Dickenson, J. Black, Denis White, C. Herbert, C. Thompson, A. Brooks, D. Wilson, J. Ellis, Q. Thompson, C. Newman, W. Paul, J. Davis, M. Horenleng, J. Ogduff, T. W. Drew, R. Richardson. Four men had lost their lives; three of them were crew (Gus Dahlgreen ship’s carpenter, H. Ackman steward, who drowned in his cabin, and George Silver seaman) and one a passenger (J. B. Vaughan). The body of one of them had been found washed up at Cape Otway and was later buried in the lighthouse cemetery; another body was seen on an inaccessible ledge. Twelve months later the second mate James F. Lawrence, from Nova Scotia, passed away in the Warrnambool district; an obituary was displayed in the local paper. Neither the ship, nor its cargo, was insured. The ship was worth about £15,000 and the cargo was reportedly worth £40,000; only about £2,000 worth had been recovered. Cargo and wreckage washed up at Apollo Bay, Peterborough, Port Campbell, Western Port and according to some reports, even as far away as the beaches of New Zealand. The day after the wreck the government steam ship Pharos was sent from Queenscliff to clear the shipping lanes of debris that could be a danger to ships. The large midship deckhouse of the ship was found floating in a calm sea near Henty Reef. Items such as an American chair, a ladder and a nest of boxes were all on top of the deckhouse. As it was so large and could cause danger to passing ships, Captain Payne had the deckhouse towed towards the shore just beyond Apollo Bay. Between Apollo Bay and Blanket Bay the captain and crew of Pharos collected Wheeler and Wilson sewing machines, nests of boxes, bottles of Bristol’s sarsaparilla, pieces of common American chairs, axe handles, a Wheelers’ Patent thresher and a sailor’s trunk with the words “A. James” on the front. A ship’s flag-board bearing the words “Eric the Red” was found on the deckhouse; finally those on board the Pharos had the name of the wrecked vessel. During this operation Pharos came across the government steamer Victoria and also a steamer S.S. Otway, both of which were picking up flotsam and wreckage. A whole side of the hull and three large pieces of the other side of the hull, with some of the copper sheathing stripped off, had floated on to Point Franklin. Some of the vessels yards and portions of her masts were on shore. The pieces of canvas attached to the yards and masts confirmed that the vessel had been under sail. The beach there was piled with debris several feet high. There were many cases of Diamond Oil kerosene, labelled R. W. Cameron and Company, New York. There were also many large planks of red pine, portions of a small white boat and a large, well-used oar. Other items found ashore included sewing machines (some consigned to ‘Long and Co.”) and notions, axe and scythe handles, hay forks, wooden pegs, rolls of wire (some branded “T.S” and Co, Melbourne”), kegs of nails branded “A.T. and Co.” from the factory of A. Field and Son, Taunton, Massachusetts, croquet balls and mallets, buggy fittings, rat traps, perfumery, cutlery and Douay Bibles, clocks, bicycles, chairs, a fly wheel, a cooking stove, timber, boxes, pianos, organs and a ladder. (Wooden clothes pegs drifted in for many years). There seemed to be no personal luggage or clothing. The Pharos encountered a long line, about one and a half miles, of floating wreckage about 10 miles off land, south east of Cape Otway, and in some places about 40 feet wide. It seemed that more than half of it was from Eric the Red. The ship’s crew rescued 3 cases that were for the Melbourne Exhibition and other items from amongst the debris. There were also chairs, doors, musical instruments, washing boards, nests of trunks and fly catchers floating in the sea. Most of the goods were saturated and smelt of kerosene. A section of the hull lies buried in the sand at Parker River Beach. An anchor with chain is embedded in the rocks east of Point Franklin and a second anchor, thought to be from Eric the Red, is on display at the Cape Otway light station. (There is a photograph of a life belt on the verandah of Rivernook Guest House in Princetown with the words “ERIC THE RED / BOSTON”. This is rather a mystery as the ship was registered in Bath, Maine, USA.) Parts of the ship are on display at Bimbi Park Caravan Park and at Apollo Bay Museum. Flagstaff Hill Maritime Village also has part of the helm (steering wheel), a carved wooden sword (said to be the only remaining portion of the ship’s figurehead; further research is currently being carried out), a door, a metal rod, several samples of wood and a medal for bravery, awarded to Nelson Johnson, a crew member of the S.S. Dawn by the U.S. President, for the rescue of the crew. Much of the wreckage was recovered by the local residents before police and other authorities arrived at the scene. Looters went to great effort to salvage goods, being lowered down the high cliff faces to areas with little or no beach to collect items from the wreckage, their mates above watching out for dangerous waves. A Tasmanian newspaper reports on a court case in Stawell, Victoria, noting a man who was caught 2 months later selling tobacco from the wreckage of Eric the Red. Some of the silverware is still treasured by descendants of Mr Mackenzie who was given these items by officials for his help in securing the cargo. The gifts included silver coffee and tea pots, half a dozen silver serviette rings and two sewing machines. A Mr G.W. Black has in his possession a medal and a purse that were awarded to his father, another Dawn crew member who was part of the rescue team. The medal is inscribed and named “To John Black ….” (from “Shipwrecks” by Margaret E. Mackenzie, 3rd edition, published 1964). The wreck and cargo were sold to a Melbourne man who salvaged a quantity of high quality tobacco and dental and surgical instruments. Timbers from the ship were salvaged and used in the construction of houses and sheds around Apollo Bay, including a guest house, Milford House (since burnt down in bushfires), which had furniture, fittings and timber on the dining room floor from the ship. A 39.7 foot long trading ketch, the Apollo, was also built from its timbers by Mr Burgess in 1883 and subsequently used in Tasmanian waters. It was the first attempt at ship building in Apollo bay. In 1881 a red light was installed about 300 feet above sea level at the base of the Cape Otway lighthouse to warn ships when they were too close to shore; It would not be visible unless a ship came within 3 miles from it. This has proved to be an effective warning. Nelson Johnson, recipient of the medal for bravery, married Elizabeth Howard in 1881 and they had 10 children. They lived in South Melbourne, Victoria. Nelson died in 1922 in Fitzroy Victoria, age 66. In 1895 the owners of the S.S. Dawn, the Portland and Belfast Steam Navigation Co., wound up and sold out to the Belfast Company who took over the Dawn for one year before selling her to Howard Smith. She was condemned and sunk in Suva in 1928. The State Library of Victoria has a lithograph in its collection depicting the steamer Dawn and the shipwrecked men, titled. "Wreck of the ship Eric the Red, Cape Otway: rescue of the crew by the Dawn".The wood (timber) sample is listed on the Collections Australia Database, Heritage Victoria, number 239 00010 A “The Eric the Red is historically significant as one of Victoria's major 19th century shipwrecks. (Heritage Victoria Eric the Red; HV ID 239) The wreck led to the provision of an additional warning light placed below the Cape Otway lighthouse to alert mariners to the location of Otway Reef. The site is archaeologically significant for its remains of a large and varied cargo and ship's fittings being scattered over a wide area. The site is recreationally and aesthetically significant as it is one of the few sites along this coast where tourists can visit identifiable remains of a large wooden shipwreck, and for its location set against the background of Cape Otway, Bass Strait, and the Cape Otway lighthouse.“ (Victorian Heritage Database Registration Number S239, Official Number 8745 USA) Wood sample from the wreck of the ship Eric the Red. Oblong shaped, full of sea worm (Teredo worm) holes. The wood is dark in colour and is very light in weight. flagstaff hill, warrnambool, shipwrecked-coast, flagstaff-hill, flagstaff-hill-maritime-museum, maritime-museum, shipwreck-coast, flagstaff-hill-maritime-village, shipwreck-artefact, eric-the-red, zaccheus-allen, sewall, 1880, melbourne-exhibition, cape-otway, otway-reef, wood-sample, s.s.-dawn -
 Flagstaff Hill Maritime Museum and Village
Functional object - Ship's Wheel, 1871 or earlier
The ship building company E. & A. Sewall, from Bath, Maine, USA, built many ships that had wheels with the same decorative, starburst pattern on them as this particular wheel segment, including the Eric the Red. The wheel was manufactured by their local Bath foundry, Geo. Moulton & Co. and sold to the Sewall yard for $100, according to the construction accounts of the vessel. Eric the Red was a wooden, three masted clipper ship. She had 1,580 tons register and was the largest full-rigged ship built at Bath, Maine, USA in 1871. She was built and registered by Arthur Sewall, later to become the partnership E. & A. Sewall, and was the 51st ship built by this company. The annually-published List of Merchant Vessels of the U.S. shows that Bath was still the home port of Eric the Red in 1880. The vessel was named after the Viking discoverer, Eric the Red, who was the first European to reach the shores of North America (in 980AD). The ship Eric the Red at first traded in coal between America and Britain, and later traded in guano nitrates from South America. In 1879 she was re-metalled and was in first class condition. On 10th June 1880 (some records say 12th June) Eric the Red departed New York for Melbourne and then Sydney. She had been commissioned by American trade representatives to carry a special cargo of 500 exhibits (1400 tons) - about a quarter to a third of America’s total exhibits - from America for the U.S.A. pavilion at Melbourne’s first International Exhibition. The exhibits included furniture, ironmongery, wines, chemicals, dental and surgical instruments, paper, cages, bronze lamp trimmings, axles, stamped ware, astronomical and time globes, samples of corn and the choicest of leaf tobacco. Other general cargo included merchandise such as cases of kerosene and turpentine, brooms, Bristol's Sarsaparilla, Wheeler and Wilson sewing machines, Wheeler’s thresher machine, axe handles and tools, cases of silver plate, toys, pianos and organs, carriages and Yankee notions. The Eric the Red left New York under the command of Captain Z. Allen (or some records say Captain Jacques Allen) and 24 other crew including the owner’s son third mate Ned Sewall. There were 2 saloon passengers also. On 4th September 1880 the ship had been sailing for an uneventful 85 days and the voyage was almost at its end. Eric the Red approached Cape Otway in a moderate north-west wind and hazy and overcast atmosphere. Around 1:30am Captain Allen sighted the Cape Otway light and was keeping the ship 5-6 miles offshore to stay clear of the hazardous Otway Reef. However he had badly misjudged his position. The ship hit the Otway Reef about 2 miles out to sea, south west of the Cape Otway light station. Captain Allen ordered the wheel to be put ‘hard up’ thinking that she might float off the reef. A heavy sea knocked the man away from the wheel, broke the wheel ropes and carried away the rudder. The sea swamped the lifeboats, the mizzenmast fell, with all of its rigging, then the mainmast fell and the ship broke in two. Some said that the passenger Vaughan, who was travelling for his health and not very strong, was washed overboard and never seen again. The ship started breaking up. The forward house came adrift with three of the crew on it as well as a longboat, which the men succeeded in launching and keeping afloat by continually bailing with their sea boots. The captain, the third mate (the owner’s son) and others clung to the mizzenmast in the sea. Then the owner’s son was washed away off the mast. Within 10 minutes the rest of the ship was in pieces, completely wrecked, with cargo and wreckage floating in the sea. The captain encouraged the second mate to swim with him to the deckhouse where there were other crew but the second mate wouldn’t go with him. Eventually the Captain made it to the deckhouse and the men pulled him up. At about 4:30am the group of men on the deckhouse saw the lights of a steamer and called for help. At the same time they noticed the second mate and the other man had drifted nearby, still on the spur, and pulled them both onto the wreck. The coastal steamer Dawn was returning to Warrnambool from Melbourne, its sailing time different to its usual schedule. Cries were heard coming from out of the darkness. Captain Jones sent out two life boats, and fired off rockets and blue lights to illuminate the area. They picked up the three survivors who were in the long boat from Eric the Red. Two men were picked up out of the water, one being the owner’s son who was clinging to floating kerosene boxes. At daylight the Dawn then rescued the 18 men from the floating portion of the deckhouse, which had drifted about 4 miles from where they’d struck the reef. Shortly after the rescue the deckhouse drifted onto breakers and was thrown onto rocks at Point Franklin, about 2 miles east of Cape Otway. Captain Jones had signalled to Cape Otway lighthouse the number of the Eric the Red and later signalled that there was a wreck at Otway Reef but there was no response from the lighthouse. The captain and crew of the Dawn spent several more hours searching unsuccessfully for more survivors, even going back as far as Apollo Bay. On board the Dawn the exhausted men received care and attention to their needs and wants, including much needed clothing. Captain Allen was amongst the 23 battered and injured men who were rescued and later taken to Warrnambool for care. Warrnambool’s mayor and town clerk offered them all hospitality, the three badly injured men going to the hospital and others to the Olive Branch Hotel, then on to Melbourne. Captain Allen’s leg injury prevented him from going ashore so he and three other men travelled on the Dawn to Portland. They were met by the mayor who also treated them all with great kindness. Captain Allen took the train back to Melbourne then returned to America. Those saved were Captain Z. Allen (or Jacques Allen), J. Darcy chief mate, James F. Lawrence second mate, Ned Sewall third mate and owner’s son, John French the cook, C. Nelson sail maker, Clarence W. New passenger, and the able seamen Dickenson, J. Black, Denis White, C. Herbert, C. Thompson, A. Brooks, D. Wilson, J. Ellis, Q. Thompson, C. Newman, W. Paul, J. Davis, M. Horenleng, J. Ogduff, T. W. Drew, R. Richardson. Four men had lost their lives; three of them were crew (Gus Dahlgreen ship’s carpenter, H. Ackman steward, who drowned in his cabin, and George Silver seaman) and one a passenger (J. B. Vaughan). The body of one of them had been found washed up at Cape Otway and was later buried in the lighthouse cemetery; another body was seen on an inaccessible ledge. Twelve months later the second mate James F. Lawrence, from Nova Scotia, passed away in the Warrnambool district; an obituary was displayed in the local paper. The captain and crew of the Dawn were recognised by the United States Government in July 1881 for their humane efforts and bravery, being thanked and presented with substantial monetary rewards, medals and gifts. Neither the ship, nor its cargo, was insured. The ship was worth about £15,000 and the cargo was reportedly worth £40,000; only about £2,000 worth had been recovered. Cargo and wreckage washed up at Apollo Bay, Peterborough, Port Campbell, Western Port and according to some reports, even as far away as the beaches of New Zealand. The day after the wreck the government steam ship Pharos was sent from Queenscliff to clear the shipping lanes of debris that could be a danger to ships. The large midship deckhouse of the ship was found floating in a calm sea near Henty Reef. Items such as an American chair, a ladder and a nest of boxes were all on top of the deckhouse. As it was so large and could cause danger to passing ships, Captain Payne had the deckhouse towed towards the shore just beyond Apollo Bay. Between Apollo Bay and Blanket Bay the captain and crew of Pharos collected Wheeler and Wilson sewing machines, nests of boxes, bottles of Bristol’s sarsaparilla, pieces of common American chairs, axe handles, a Wheelers’ Patent thresher and a sailor’s trunk with the words “A. James” on the front. A ship’s flag-board bearing the words “Eric the Red” was found on the deckhouse; finally those on board the Pharos had the name of the wrecked vessel. During this operation Pharos came across the government steamer Victoria and also a steamer S.S. Otway, both of which were picking up flotsam and wreckage. A whole side of the hull and three large pieces of the other side of the hull, with some of the copper sheathing stripped off, had floated on to Point Franklin. Some of the vessels yards and portions of her masts were on shore. The pieces of canvas attached to the yards and masts confirmed that the vessel had been under sail. The beach there was piled with debris several feet high. There were many cases of Diamond Oil kerosene, labelled R. W. Cameron and Company, New York. There were also many large planks of red pine, portions of a small white boat and a large, well-used oar. Other items found ashore included sewing machines (some consigned to ‘Long and Co.”) and notions, axe and scythe handles, hay forks, wooden pegs, rolls of wire (some branded “T.S” and Co, Melbourne”), kegs of nails branded “A.T. and Co.” from the factory of A. Field and Son, Taunton, Massachusetts, croquet balls and mallets, buggy fittings, rat traps, perfumery, cutlery and Douay Bibles, clocks, bicycles, chairs, a fly wheel, a cooking stove, timber, boxes, pianos, organs and a ladder. (Wooden clothes pegs drifted in for many years). There seemed to be no personal luggage or clothing. The Pharos encountered a long line, about one and a half miles, of floating wreckage about 10 miles off land, south east of Cape Otway, and in some places about 40 feet wide. It seemed that more than half of it was from Eric the Red. The ship’s crew rescued 3 cases that were for the Melbourne Exhibition and other items from amongst the debris. There were also chairs, doors, musical instruments, washing boards, nests of trunks and fly catchers floating in the sea. Most of the goods were saturated and smelt of kerosene. A section of the hull lies buried in the sand at Parker River Beach. An anchor with chain is embedded in the rocks east of Point Franklin and a second anchor, thought to be from Eric the Red, is on display at the Cape Otway light station. (There is a photograph of a life belt on the verandah of Rivernook Guest House in Princetown with the words “ERIC THE RED / BOSTON”. This is rather a mystery as the ship was registered in Bath, Maine, USA.) Parts of the ship are on display at Bimbi Park Caravan Park and at Apollo Bay Museum. Flagstaff Hill Maritime Village also has part of the helm (steering wheel), a carved wooden sword (said to be the only remaining portion of the ship’s figurehead; further research is currently being carried out), a door, a metal rod, samples of wood and a medal for bravery. Much of the wreckage was recovered by the local residents before police and other authorities arrived at the scene. Looters went to great effort to salvage goods, being lowered down the high cliff faces to areas with little or no beach to collect items from the wreckage, their mates above watching out for dangerous waves. A Tasmanian newspaper reports on a court case in Stawell, Victoria, noting a man who was caught 2 months later selling tobacco from the wreckage of Eric the Red. Some of the silverware is still treasured by descendants of Mr Mackenzie who was given these items by officials for his help in securing the cargo. The gifts included silver coffee and tea pots, half a dozen silver serviette rings and two sewing machines. The wreck and cargo were sold to a Melbourne man who salvaged a quantity of high quality tobacco and dental and surgical instruments. Timbers from the ship were salvaged and used in the construction of houses and sheds around Apollo Bay, including a guest house, Milford House (since burnt down in bushfires), which had furniture, fittings and timber on the dining room floor from the ship. A 39.7 foot long trading ketch, the Apollo, was also built from its timbers by Mr Burgess in 1883 and subsequently used in Tasmanian waters. It was the first attempt at ship building in Apollo bay. In 1881 a red light was installed about 300 feet above sea level at the base of the Cape Otway lighthouse to warn ships when they were too close to shore; It would not be visible unless a ship came within 3 miles from it. This has proved to be an effective warning. The State Library of Victoria has a lithograph in its collection depicting the steamer Dawn and the shipwrecked men, titled. "Wreck of the ship Eric the Red, Cape Otway: rescue of the crew by the Dawn". “The Eric the Red is historically significant as one of Victoria's major 19th century shipwrecks. (Heritage Victoria Eric the Red; HV ID 239) The wreck led to the provision of an additional warning light placed below the Cape Otway lighthouse to alert mariners to the location of Otway Reef. The site is archaeologically significant for its remains of a large and varied cargo and ship's fittings being scattered over a wide area. The site is recreationally and aesthetically significant as it is one of the few sites along this coast where tourists can visit identifiable remains of a large wooden shipwreck, and for its location set against the background of Cape Otway, Bass Strait, and the Cape Otway lighthouse.“ (Victorian Heritage Database Registration Number S239, Official Number 8745 USA) Segment of a ship's wheel, or helm, from the wreck of the sailing ship Eric the Red. The wheel part is an arc shape from the outer rim of the wheel and is made up of three layers of timber. The centre layer is a dark, dense timber and is wider than the two outer layers, which are less dense and lighter in colour. The wheel segment has a vertically symmetrical, decorative copper plate inlaid on the front. The plate has a starburst pattern; six stars decorate it, each at a point where there is a metal fitting going through the three layers of timber to the rear side of the wheel. On the rear each of the six fittings has an individual copper star around it. The edges of the helm are rounded and bevelled, polished to a shine in a dark stain. Around each of the stars, front and back, the wood is a lighter colour, as though the metal in that area being polished frequently. The length of the segment suggests that it has probably come from a wheel or helm that had ten spokes. (Ref: F.H.M.M. 16th March 1994, 239.6.610.3.7. Artefact Reg No ER/1.)flagstaff hill, warrnambool, shipwrecked-coast, flagstaff-hill, flagstaff-hill-maritime-museum, maritime-museum, shipwreck-coast, flagstaff-hill-maritime-village, ship's-wheel, eric-the-red, helm, shei's wheel, ship's steering wheel -
 Flagstaff Hill Maritime Museum and Village
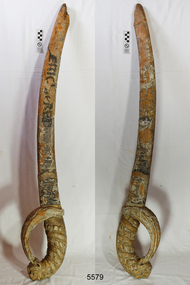
Decorative object - Sword, 1871 or earlier
This wooden sword is said to “possibly be the only remaining part of the figurehead from the sailing ship Eric the Red.” It was previously part of the collection of the old Warrnambool Museum and the entry in its inventory says “Wooden sword, portion of the figurehead, held by “Eric the Red” at the bow.” A large part of the ship’s hull was found on the rocks and a figurehead may have been attached or washed up on the shore. The shipping records for E. & A. Sewall, the builders, owners and managers of Eric the Red, are now preserved in the Maine Maritime Museum. There is no photograph on record of Eric the Red but photographs of other ships built around that time by the same company show that these did not have figureheads, and there is no record found of a figurehead for Eric the Red being ordered or paid for. Further research is being carried out. The ship building company E. & A. Sewall, from Bath, Maine, USA, built Eric the Red, a wooden, three masted clipper ship. She had 1,580 tons register and was the largest full-rigged ship built at Bath, Maine, USA in 1871. She was built and registered by Arthur Sewall, later to become the partnership E. & A. Sewall, and was the 51st ship built by this company. The annually-published List of Merchant Vessels of the U.S. shows that Bath was still the home port of Eric the Red in 1880. The vessel was named after the Viking discoverer, Eric the Red, who was the first European to reach the shores of North America (in 980AD). The ship Eric the Red at first traded in coal between America and Britain, and later traded in guano nitrates from South America. In 1879 she was re-metalled and was in first class condition. On 10th June 1880 (some records say 12th June) Eric the Red departed New York for Melbourne and then Sydney. She had been commissioned by American trade representatives to carry a special cargo of 500 exhibits (1400 tons) - about a quarter to a third of America’s total exhibits - from America for the U.S.A. pavilion at Melbourne’s first International Exhibition. The exhibits included furniture, ironmongery, wines, chemicals, dental and surgical instruments, paper, cages, bronze lamp trimmings, axles, stamped ware, astronomical and time globes, samples of corn and the choicest of leaf tobacco. Other general cargo included merchandise such as cases of kerosene and turpentine, brooms, Bristol's Sarsaparilla, Wheeler and Wilson sewing machines, Wheeler’s thresher machine, axe handles and tools, cases of silver plate, toys, pianos and organs, carriages and Yankee notions. The Eric the Red left New York under the command of Captain Z. Allen (or some records say Captain Jacques Allen) and 24 other crew including the owner’s son third mate Ned Sewall. There were 2 saloon passengers also. On 4th September 1880 the ship had been sailing for an uneventful 85 days and the voyage was almost at its end. Eric the Red approached Cape Otway in a moderate north-west wind and hazy and overcast atmosphere. Around 1:30am Captain Allen sighted the Cape Otway light and was keeping the ship 5-6 miles offshore to stay clear of the hazardous Otway Reef. However he had badly misjudged his position. The ship hit the Otway Reef about 2 miles out to sea, south west of the Cape Otway light station. Captain Allen ordered the wheel to be put ‘hard up’ thinking that she might float off the reef. A heavy sea knocked the man away from the wheel, broke the wheel ropes and carried away the rudder. The sea swamped the lifeboats, the mizzenmast fell, with all of its rigging, then the mainmast fell and the ship broke in two. Some said that the passenger Vaughan, who was travelling for his health and not very strong, was washed overboard and never seen again. The ship started breaking up. The forward house came adrift with three of the crew on it as well as a longboat, which the men succeeded in launching and keeping afloat by continually bailing with their sea boots. The captain, the third mate (the owner’s son) and others clung to the mizzenmast in the sea. Then the owner’s son was washed away off the mast. Within 10 minutes the rest of the ship was in pieces, completely wrecked, with cargo and wreckage floating in the sea. The captain encouraged the second mate to swim with him to the deckhouse where there were other crew but the second mate wouldn’t go with him. Eventually the Captain made it to the deckhouse and the men pulled him up. At about 4:30am the group of men on the deckhouse saw the lights of a steamer and called for help. At the same time they noticed the second mate and the other man had drifted nearby, still on the spur, and pulled them both onto the wreck. The coastal steamer Dawn was returning to Warrnambool from Melbourne, its sailing time different to its usual schedule. Cries were heard coming from out of the darkness. Captain Jones sent out two life boats, and fired off rockets and blue lights to illuminate the area. They picked up the three survivors who were in the long boat from Eric the Red. Two men were picked up out of the water, one being the owner’s son who was clinging to floating kerosene boxes. At daylight the Dawn then rescued the 18 men from the floating portion of the deckhouse, which had drifted about 4 miles from where they’d struck the reef. Shortly after the rescue the deckhouse drifted onto breakers and was thrown onto rocks at Point Franklin, about 2 miles east of Cape Otway. Captain Jones had signalled to Cape Otway lighthouse the number of the Eric the Red and later signalled that there was a wreck at Otway Reef but there was no response from the lighthouse. The captain and crew of the Dawn spent several more hours searching unsuccessfully for more survivors, even going back as far as Apollo Bay. On board the Dawn the exhausted men received care and attention to their needs and wants, including much needed clothing. Captain Allen was amongst the 23 battered and injured men who were rescued and later taken to Warrnambool for care. Warrnambool’s mayor and town clerk offered them all hospitality, the three badly injured men going to the hospital and others to the Olive Branch Hotel, then on to Melbourne. Captain Allen’s leg injury prevented him from going ashore so he and three other men travelled on the Dawn to Portland. They were met by the mayor who also treated them all with great kindness. Captain Allen took the train back to Melbourne then returned to America. Those saved were Captain Z. Allen (or Jacques Allen), J. Darcy chief mate, James F. Lawrence second mate, Ned Sewall third mate and owner’s son, John French the cook, C. Nelson sail maker, Clarence W. New passenger, and the able seamen Dickenson, J. Black, Denis White, C. Herbert, C. Thompson, A. Brooks, D. Wilson, J. Ellis, Q. Thompson, C. Newman, W. Paul, J. Davis, M. Horenleng, J. Ogduff, T. W. Drew, R. Richardson. Four men had lost their lives; three of them were crew (Gus Dahlgreen ship’s carpenter, H. Ackman steward, who drowned in his cabin, and George Silver seaman) and one a passenger (J. B. Vaughan). The body of one of them had been found washed up at Cape Otway and was later buried in the lighthouse cemetery; another body was seen on an inaccessible ledge. Twelve months later the second mate James F. Lawrence, from Nova Scotia, passed away in the Warrnambool district; an obituary was displayed in the local paper. The captain and crew of the Dawn were recognised by the United States Government in July 1881 for their humane efforts and bravery, being thanked and presented with substantial monetary rewards, medals and gifts. Neither the ship, nor its cargo, was insured. The ship was worth about £15,000 and the cargo was reportedly worth £40,000; only about £2,000 worth had been recovered. Cargo and wreckage washed up at Apollo Bay, Peterborough, Port Campbell, Western Port and according to some reports, even as far away as the beaches of New Zealand. The day after the wreck the government steam ship Pharos was sent from Queenscliff to clear the shipping lanes of debris that could be a danger to ships. The large midship deckhouse of the ship was found floating in a calm sea near Henty Reef. Items such as an American chair, a ladder and a nest of boxes were all on top of the deckhouse. As it was so large and could cause danger to passing ships, Captain Payne had the deckhouse towed towards the shore just beyond Apollo Bay. Between Apollo Bay and Blanket Bay the captain and crew of Pharos collected Wheeler and Wilson sewing machines, nests of boxes, bottles of Bristol’s sarsaparilla, pieces of common American chairs, axe handles, a Wheelers’ Patent thresher and a sailor’s trunk with the words “A. James” on the front. A ship’s flag-board bearing the words “Eric the Red” was found on the deckhouse; finally those on board the Pharos had the name of the wrecked vessel. During this operation Pharos came across the government steamer Victoria and also a steamer S.S. Otway, both of which were picking up flotsam and wreckage. A whole side of the hull and three large pieces of the other side of the hull, with some of the copper sheathing stripped off, had floated on to Point Franklin. Some of the vessels yards and portions of her masts were on shore. The pieces of canvas attached to the yards and masts confirmed that the vessel had been under sail. The beach there was piled with debris several feet high. There were many cases of Diamond Oil kerosene, labelled R. W. Cameron and Company, New York. There were also many large planks of red pine, portions of a small white boat and a large, well-used oar. Other items found ashore included sewing machines (some consigned to ‘Long and Co.”) and notions, axe and scythe handles, hay forks, wooden pegs, rolls of wire (some branded “T.S” and Co, Melbourne”), kegs of nails branded “A.T. and Co.” from the factory of A. Field and Son, Taunton, Massachusetts, croquet balls and mallets, buggy fittings, rat traps, perfumery, cutlery and Douay Bibles, clocks, bicycles, chairs, a fly wheel, a cooking stove, timber, boxes, pianos, organs and a ladder. (Wooden clothes pegs drifted in for many years). There seemed to be no personal luggage or clothing. The Pharos encountered a long line, about one and a half miles, of floating wreckage about 10 miles off land, south east of Cape Otway, and in some places about 40 feet wide. It seemed that more than half of it was from Eric the Red. The ship’s crew rescued 3 cases that were for the Melbourne Exhibition and other items from amongst the debris. There were also chairs, doors, musical instruments, washing boards, nests of trunks and fly catchers floating in the sea. Most of the goods were saturated and smelt of kerosene. A section of the hull lies buried in the sand at Parker River Beach. An anchor with chain is embedded in the rocks east of Point Franklin and a second anchor, thought to be from Eric the Red, is on display at the Cape Otway light station. (There is a photograph of a life belt on the verandah of Rivernook Guest House in Princetown with the words “ERIC THE RED / BOSTON”. This is rather a mystery as the ship was registered in Bath, Maine, USA.) Parts of the ship are on display at Bimbi Park Caravan Park and at Apollo Bay Museum. Flagstaff Hill Maritime Village also has part of the helm (steering wheel), a carved wooden sword (said to be the only remaining portion of the ship’s figurehead; further research is currently being carried out), a door, a metal rod, samples of wood and a medal for bravery. Much of the wreckage was recovered by the local residents before police and other authorities arrived at the scene. Looters went to great effort to salvage goods, being lowered down the high cliff faces to areas with little or no beach to collect items from the wreckage, their mates above watching out for dangerous waves. A Tasmanian newspaper reports on a court case in Stawell, Victoria, noting a man who was caught 2 months later selling tobacco from the wreckage of Eric the Red. Some of the silverware is still treasured by descendants of Mr Mackenzie who was given these items by officials for his help in securing the cargo. The gifts included silver coffee and tea pots, half a dozen silver serviette rings and two sewing machines. The wreck and cargo were sold to a Melbourne man who salvaged a quantity of high quality tobacco and dental and surgical instruments. Timbers from the ship were salvaged and used in the construction of houses and sheds around Apollo Bay, including a guest house, Milford House (since burnt down in bushfires), which had furniture, fittings and timber on the dining room floor from the ship. A 39.7 foot long trading ketch, the Apollo, was also built from its timbers by Mr Burgess in 1883 and subsequently used in Tasmanian waters. It was the first attempt at ship building in Apollo bay. In 1881 a red light was installed about 300 feet above sea level at the base of the Cape Otway lighthouse to warn ships when they were too close to shore; It would not be visible unless a ship came within 3 miles from it. This has proved to be an effective warning. The State Library of Victoria has a lithograph in its collection depicting the steamer Dawn and the shipwrecked men, titled. "Wreck of the ship Eric the Red, Cape Otway: rescue of the crew by the Dawn".The Eric the Red is historically significant as one of Victoria's major 19th century shipwrecks. (Heritage Victoria Eric the Red; HV ID 239) The wreck led to the provision of an additional warning light placed below the Cape Otway lighthouse to alert mariners to the location of Otway Reef. The site is archaeologically significant for its remains of a large and varied cargo and ship's fittings being scattered over a wide area. The site is recreationally and aesthetically significant as it is one of the few sites along this coast where tourists can visit identifiable remains of a large wooden shipwreck, and for its location set against the background of Cape Otway, Bass Strait, and the Cape Otway lighthouse. (Victorian Heritage Database Registration Number S239, Official Number 8745 USA)This carved wooden sword, recovered from the Eric the Red, is possibly the only portion of the figurehead recovered after the wreck. There are spirals carved from the base of the handle to the top of the sword. The hilt of the sword is a lion’s head holding its tail in its mouth, the tail forming the handle. The blade of the sword has engraved patterns on it. Tiny particles of gold leaf and dark blue paint fragments can be seen between the carving marks. There are remnants of yellowish-orange and crimson paint on the handle. At some time after the sword was salvaged the name of the ship was hand painted on the blade in black paint. The tip of the sword has broken or split and the remaining part is charcoal in appearance. On both the tip and the base of the handle are parts made where the sword could have been joined onto the figurehead There is a white coating over some areas of the sword, similar to white lead putty used in traditional shipbuilding. The words “ERIC the RED” have been hand painted on the blade of the sword in black paint sometime after it was salvaged.flagstaff hill, flagstaff hill maritime museum and village, warrnambool, maritime museum, maritime village, great ocean road, shipwreck coast, sword, wooden sword, eric the red, carved sword, figurehead, snake head on sword -
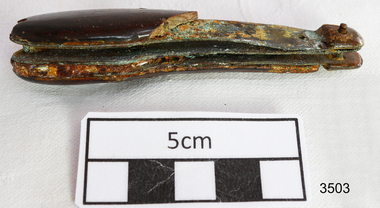 Flagstaff Hill Maritime Museum and Village
Pocket Knife, before 1878
Found on board the "Loch Ard" . 'Loch Ard" left Gravesend, England on 2nd March 1878, under the command of Captain Gibb, bound for Melbourne loaded with passengers and cargo. On June 1st 1878, almost at the end of her journey, she ran into a rocky reef at the base of Mutton Bird Island, near Port Campbell. Of the 54 crew members and passengers on board, only two survived: an apprentice, Tom Pearce and a young woman passenger, Eva Carmichael, who lost all of her family in the tragedy. The wreck of Loch Ard still lies at the base of Mutton Bird Island and much of the cargo has been salvaged. Some was washed up into what is now known as Loch Ard Gorge following the shipwreck. Amongst artefacts salvaged from the Loch Ard is the now famous Minton Peacock Statue which was destined for the Melbourne International Exhibition to be held in 1880 HISTORY OF THE LOCH ARD The LOCH ARD belonged to the famous Loch Line which sailed many ships from England to Australia. Built in Glasgow by Barclay, Curdle and Co. in 1873, the LOCH ARD was a three-masted square rigged iron sailing ship. The ship measured 262ft 7" (79.87m) in length, 38ft (11.58m) in width, 23ft (7m) in depth and had a gross tonnage of 1693 tons. The LOCH ARD's main mast measured a massive 150ft (45.7m) in height. LOCH ARD made three trips to Australia and one trip to Calcutta before its final voyage. LOCH ARD left England on March 2, 1878, under the command of Captain Gibbs, a newly married, 29 year old. She was bound for Melbourne with a crew of 37, plus 17 passengers and a load of cargo. The general cargo reflected the affluence of Melbourne at the time. On board were straw hats, umbrella, perfumes, clay pipes, pianos, clocks, confectionary, linen and candles, as well as a heavier load of railway irons, cement, lead and copper. There were items included that intended for display in the Melbourne International Exhibition in 1880. The voyage to Port Phillip was long but uneventful. At 3am on June 1, 1878, Captain Gibbs was expecting to see land and the passengers were becoming excited as they prepared to view their new homeland in the early morning. But LOCH ARD was running into a fog which greatly reduced visibility. Captain Gibbs was becoming anxious as there was no sign of land or the Cape Otway lighthouse. At 4am the fog lifted. A man aloft announced that he could see breakers. The sheer cliffs of Victoria's west coast came into view, and Captain Gibbs realised that the ship was much closer to them than expected. He ordered as much sail to be set as time would permit and then attempted to steer the vessel out to sea. On coming head on into the wind, the ship lost momentum, the sails fell limp and LOCH ARD's bow swung back. Gibbs then ordered the anchors to be released in an attempt to hold its position. The anchors sank some 50 fathoms - but did not hold. By this time LOCH ARD was among the breakers and the tall cliffs of Mutton Bird Island rose behind the ship. Just half a mile from the coast, the ship's bow was suddenly pulled around by the anchor. The captain tried to tack out to sea, but the ship struck a reef at the base of Mutton Bird Island, near Port Campbell. Waves broke over the ship and the top deck was loosened from the hull. The masts and rigging came crashing down knocking passengers and crew overboard. When a lifeboat was finally launched, it crashed into the side of LOCH ARD and capsized. Tom Pearce, who had launched the boat, managed to cling to its overturned hull and shelter beneath it. He drifted out to sea and then on the flood tide came into what is now known as LOCH ARD Gorge. He swam to shore, bruised and dazed, and found a cave in which to shelter. Some of the crew stayed below deck to shelter from the falling rigging but drowned when the ship slipped off the reef into deeper water. Eva Carmichael had raced onto deck to find out what was happening only to be confronted by towering cliffs looming above the stricken ship. In all the chaos, Captain Gibbs grabbed Eva and said, "If you are saved Eva, let my dear wife know that I died like a sailor". That was the last Eva Carmichael saw of the captain. She was swept off the ship by a huge wave. Eva saw Tom Pearce on a small rocky beach and yelled to attract his attention. He dived in and swam to the exhausted woman and dragged her to shore. He took her to the cave and broke open case of brandy which had washed up on the beach. He opened a bottle to revive the unconscious woman. A few hours later Tom scaled a cliff in search of help. He followed hoof prints and came by chance upon two men from nearby Glenample Station three and a half miles away. In a state of exhaustion, he told the men of the tragedy. Tom returned to the gorge while the two men rode back to the station to get help. By the time they reached LOCH ARD Gorge, it was cold and dark. The two shipwreck survivors were taken to Glenample Station to recover. Eva stayed at the station for six weeks before returning to Ireland, this time by steamship. In Melbourne, Tom Pearce received a hero's welcome. He was presented with the first gold medal of the Royal Humane Society of Victoria and a £1000 cheque from the Victorian Government. Concerts were performed to honour the young man's bravery and to raise money for those who lost family in the LOCH ARD disaster. Of the 54 crew members and passengers on board, only two survived: the apprentice, Tom Pearce and the young woman passenger, Eva Carmichael, who lost all of her family in the tragedy. Ten days after the LOCH ARD tragedy, salvage rights to the wreck were sold at auction for £2,120. Cargo valued at £3,000 was salvaged and placed on the beach, but most washed back into the sea when another storm developed. The wreck of LOCH ARD still lies at the base of Mutton Bird Island. Much of the cargo has now been salvaged and some was washed up into what is now known as LOCH ARD Gorge. Cargo and artefacts have also been illegally salvaged over many years before protective legislation was introduced. One of the most unlikely pieces of cargo to have survived the shipwreck was a Minton porcelain peacock - one of only nine in the world. The peacock was destined for the Melbourne International Exhibition in 1880. It had been well packed, which gave it adequate protection during the violent storm. Today, the Minton peacock can be seen at the Flagstaff Hill Maritime Museum in Warrnambool. From Australia's most dramatic shipwreck it has now become Australia's most valuable shipwreck artefact and is one of very few 'objects' on the Victorian State Heritage Register. The "Loch Ard" is registered on the National Shipwreck database and is protected as an Historic "Shipwreck. It is one of Australia's and Victoria's most tragic and most famous shipwrecks. The quantity of luxury and commercial items carried as cargo show the type and quality of goods passengers migrating to Australia at that time were bringing with them Flagstaff Hill’s collection of artefacts from LOCH ARD is significant for being one of the largest collections of artefacts from this shipwreck in Victoria. It is significant for its association with the shipwreck, which is on the Victorian Heritage Register (VHR S417). The collection is significant because of the relationship between the objects, as together they have a high potential to interpret the story of the LOCH ARD. The LOCH ARD collection is archaeologically significant as the remains of a large international passenger and cargo ship. The LOCH ARD collection is historically significant for representing aspects of Victoria’s shipping history and its potential to interpret sub-theme 1.5 of Victoria’s Framework of Historical Themes (living with natural processes). The collection is also historically significant for its association with the LOCH ARD, which was one of the worst and best known shipwrecks in Victoria’s history. Small pocket knife salvaged from the wreck of the Loch Ard. It has a dark brown cover on one side. Reverse side is only partly there. Both blades are missingflagstaff hill, warrnambool, shipwrecked coast, flagstaff hill maritime museum, maritime museum, shipwreck coast, flagstaff hill maritime village, great ocean road, loch line, loch ard, captain gibbs, eva carmichael, tom pearce, glenample station, mutton bird island, loch ard gorge, pocket knife, knife, tool -
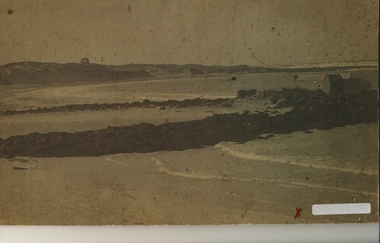 Port Fairy Historical Society Museum and Archives
Photograph
Bathing Boxes - South Beach. One of several versions as they were washed away during big stormsBlack and white photograph of Boarding School Bay looking south east showing bathing boxes on the right and in the background what maybe the boarding school on the far hillJ.L.Fox Hairdresser and Tobacconist Port fairy Hattams retunour?beach, boarding school bay, south beach, pea soup, bathing boxes, reefs, rocks, ocean, sea, boarding school -
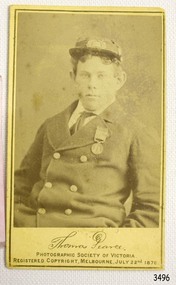 Flagstaff Hill Maritime Museum and Village
Photograph, late 19th century
Loch Ard was bound for Melbourne in 1878 loaded with passengers and cargo when it ran into a rocky reef at the base of Mutton Bird Island, near Port Campbell. Of the 54 crew members and passengers on board, only two survived: an apprentice, Tom Pearce and a young woman passenger, Eva Carmichael, who lost all of her family in the tragedy. The wreck of Loch Ard still lies at the base of Mutton Bird Island and much of the cargo has been salvaged. Some was washed up into what is now known as Loch Ard Gorge following the shipwreck. Cargo and artefacts have also been illegally salvaged over many years before protective legislation was introduced. The photograph is significant for its association with the wreck of the Loch Ard. This wreck has been protected as a Historic Shipwreck since 11 March 1982, under the Commonwealth Historic Shipwrecks Act (1976) Flagstaff Hill’s collection of artefacts from Loch Ard is significant for being one of the largest collections of artefacts from this shipwreck in Victoria. It is significant for its association with the shipwreck, which is on the Victorian Heritage Register. The collection is significant because of the relationship between the objects, as together they have a high potential to interpret the story of the Loch Ard. The Loch Ard collection is archaeologically significant as the remains of a large international passenger and cargo ship. The Loch Ard collection is historically significant for representing aspects of Victoria’s shipping history and its potential to interpret sub-theme 1.5 of Victoria’s Framework of Historical Themes (living with natural processes). The collection is also historically significant for its association with the Loch Ard, which was one of the worst and best known shipwrecks in Victoria’s history. The Loch Ard collection meets the following criteria for assessment: Criterion A: Importance to the course, or pattern, of Victoria’s cultural history. Criterion B: Possession of uncommon, rare or endangered aspects of Victoria’s cultural history. Criterion C: Potential to yield information that will contribute to an understanding of Victoria’s cultural history. Black and White photograph of Thomas Pearce. Taken on July 22nd 1878 by the Photographic Society of Victoria. Registered copyright July 24th 1878. Reverse has printed maker’s information.Printed green text “PHOTOGRAPHIC / SOCIETY OF VICTORIA / MELBOURNE / REGISTERED COPYRIGHT / JULY 24th 878” and “NONE ARE GENUINE UNLESS WITH / SIGNATURES THUS” and “PRESIDENT / VICE PRESIDENT / SECRETARY” flagstaff hill, warrnambool, shipwrecked-coast, flagstaff-hill, flagstaff-hill-maritime-museum, maritime-museum, shipwreck-coast, flagstaff-hill-maritime-village, photograph, thomas pearce, loch ard, photographic society of victoria -
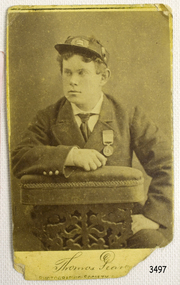 Flagstaff Hill Maritime Museum and Village
Photograph, late 19th century
Loch Ard was bound for Melbourne in 1878 loaded with passengers and cargo when it ran into a rocky reef at the base of Mutton Bird Island, near Port Campbell. Of the 54 crew members and passengers on board, only two survived: an apprentice, Tom Pearce and a young woman passenger, Eva Carmichael, who lost all of her family in the tragedy. The wreck of Loch Ard still lies at the base of Mutton Bird Island and much of the cargo has been salvaged. Some was washed up into what is now known as Loch Ard Gorge following the shipwreck. Cargo and artefacts have also been illegally salvaged over many years before protective legislation was introduced. The photograph is significant for its association with the wreck of the Loch Ard. This wreck has been protected as a Historic Shipwreck since 11 March 1982, under the Commonwealth Historic Shipwrecks Act (1976) Flagstaff Hill’s collection of artefacts from Loch Ard is significant for being one of the largest collections of artefacts from this shipwreck in Victoria. It is significant for its association with the shipwreck, which is on the Victorian Heritage Register. The collection is significant because of the relationship between the objects, as together they have a high potential to interpret the story of the Loch Ard. The Loch Ard collection is archaeologically significant as the remains of a large international passenger and cargo ship. The Loch Ard collection is historically significant for representing aspects of Victoria’s shipping history and its potential to interpret sub-theme 1.5 of Victoria’s Framework of Historical Themes (living with natural processes). The collection is also historically significant for its association with the Loch Ard, which was one of the worst and best known shipwrecks in Victoria’s history. The Loch Ard collection meets the following criteria for assessment: Criterion A: Importance to the course, or pattern, of Victoria’s cultural history. Criterion B: Possession of uncommon, rare or endangered aspects of Victoria’s cultural history. Criterion C: Potential to yield information that will contribute to an understanding of Victoria’s cultural history. Black and White photoghrap of Thomas Pearce. Taken by the Photographic Society of Victoria. Registered copyright July 24th 1878. Reverse has printed maker’s information and a white adhesive label with hand writing on it.Label has hand writing “F-Ph 55/2-74” Printed green text “PHOTOGRAPHIC / SOCIETY OF VICTORIA / MELBOURNE / REGISTERED COPYRIGHT / JULY 24th 878” and “NONE ARE GENUINE UNLESS WITH / SIGNATURES THUS” and “PRESIDENT / VICE PRESIDENT / SECRETARY” flagstaff hill, warrnambool, shipwrecked coast, flagstaff hill maritime museum, maritime museum, shipwreck coast, flagstaff hill maritime village, great ocean road, loch line, loch ard, captain gibbs, eva carmichael, tom pearce, glenample station, mutton bird island, loch ard gorge, photoghrap, thomas pearce, photographic society of victoria, loch ard shipwreck -
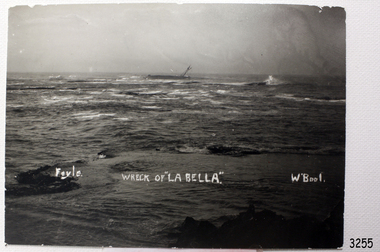 Flagstaff Hill Maritime Museum and Village
Photograph, Foyle Photographic Studio, Wreck of La Bella, about 11/11/1905
The photograph shows the wreck of La Bella in Lady Bay, Warrnambool, Australia. It was probably taken on 11th November 1905, the morning after she was wrecked. “Foyle” written on the photograph is the name of Foyle’s Photographic studio. At the time of the photograph the studio was owned by both Charles and Lilian Foyle (sometimes known as Lillian or Lily), either of whom could have taken this photograph. They also worked together at a later date on the photographs, sketches and paintings of the famous and historical Pioneers’ Honour Board, which is currently on view in the Warrnambool Library. Foyles Photography was the studio of James Charles Foyle. He owned “Foyle’s Photo Card Studios” in Liebig St , Warrnambool, which operated between 1889 – 1919 . A letter to the editor (by Mr Edward Vidler) in the Melbourne Argus, 3rd August, 1907, mentions that in that year Warrnambool would celebrate its 60th anniversary of its proclamation as a town, and that talented local artist Miss Lily Foyle would paint 200 portraits in watercolour of the pioneers who settled in the district prior to 1860. The Pioneer Honour Board can still be seen on display in the Warrnambool Library. In the Warrnambool Standard, Dec. 1917, “Mr Foyle’s studio was awarded contract to decorate rail cars on newly opened Trans-Continental railway, assisted by his sister, Miss Findlay.” The subject of the painting, La Bella, has its own tragic story. Read on for further details … On November 10th, 1905, the Norwegian-built barquentine La Bella approached Warrnambool at the end of her 37 day voyage. She was carrying a cargo of timber from Lyttleton, New Zealand, in heavy seas and evening mist. (On its only other visit to Warrnambool a year earlier the master had gone to shore to find a tow. He returned to the ship to find the crew drunk and unwilling to take up their posts, even though the ship was dragging its anchors and in a dangerous position.) As Captain Mylius steered La Bella to Lady Bay Channel the ship was tossed onto its side by heavy breakers and ran aground on what is now known as La Bella Reef. The sea was so rough that it wrenched a one-and-a- half ton anchor from the vessel. Several attempts were made by parties of volunteers in lifeboats to rescue the stricken sailors, but the rough conditions made this difficult for the boats to get close enough to the ship and the parties had to return to shore. The La Bella’s crew became exhausted and sailors were being washed overboard, one by one. By sunrise only five of the twelve crew still clung to the wreck. A local fisherman, 25 year old William Ferrier, rowed his small dingy through the heavy seas and managed to rescue the captain, whilst the volunteer lifeboat crew rescued a further three sailors, returning to shore. Ferrier made a final attempt at rescue and was able to reach its stern as the conditions eased slightly, saving the last remaining, terrified sailor just before the ship broke up and sank. William Ferrier became a national hero as news of the daring rescue spread. He was awarded the Silver Medal for bravery by the Royal Humane Society and was honoured by the Prime Minister and the Governor. He was presented with several other awards for his daring rescue. Ferrier’s rescue efforts are one of the most heroic in Victoria’s shipwreck history. The wreck now lies in 13m of water and is home to an abundance of marine life. Flagstaff Hill’s La Bella Collection includes a rail holder from La Bella, a photograph of William Ferrier with four of the five men rescued, a rail holder from the ship and the letter from the Prime Minister and other Members of Parliament that was sent to William Ferrier to commend him for his bravery. La Bella has been protected under the Commonwealth Historic Shipwrecks Act (1976) as a Historic Shipwreck since 23 April 1982 (VHR S401). It is archaeologically significant as the remains of an international and inter-colonial passenger and cargo ship. Flagstaff Hill’s collection of artefacts from the La Bella is of historical and archaeological significance because of its association with the La Bella, which is on the Victorian Heritage Register, and because of the relationship between the objects. The collection represents aspects of Victorian history, and the letter to William Ferrier demonstrates how important his rescue efforts were to Victoria and Australia. Black and white photograph of the wreck of the sailing ship La Bella in the bay at Warrnambool. The photograph shows the ship lying on its side in rough sea, with mast and rope rigging hanging loosely. Several large rocks are also visible. The photograph is a rectangle shape, mounted on heavy card, with slightly ragged edges. The photographer’s name, a title for the photograph and the location are hand written in white along the bottom third of the photograph. The back of the photograph is blank. Printed in white hand writing “Foyle”, “WRECK OF “LA BELLA”, “W’Bool”foyle, la bella, william ferrier, lady bay, lifeboats, lilian foyle, lillian foyle, charles foyle, james foyle, royal humane society medal, flagstaff hill, warrnambool, shipwrecked coast, flagstaff hill, flagstaff hill maritime museum, maritime museum, shipwreck coast, flagstaff hill maritime village -
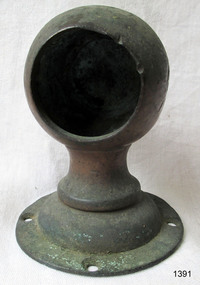 Flagstaff Hill Maritime Museum and Village
Functional object - Rail holder, About 1893, when the ship was made
This brass rail holder fixture would have been used to hold the end of a rail in place. There is no information as to where the fitting or rail would have been placed on the ship; sailing ships had many brass fittings. It was recovered from the wreck of the La Bella, which lies at the bottom of the Warrnambool Harbour. Some 15 ships are believed to have been wrecked in Lady Bay, but only two have been discovered on the sea floor; the La Bella and the Edinburgh Castle. Both wrecks are popular diving sites and are preserved as significant historical marine and marine archaeological sites. The story of the final voyage of the La Bella is summarised as follows … The ship from which the sailors were rescued was the three-masted, iron and steel barquentine the La Bella, built in Norway in 1893. She was one of two iron and steel ships by Johan Smith, the company being one of the leading shipping families in Tvedestrand, Norway. She was significant to Norwegian shipping, being one of only 27 iron and steel ships ever built in Norway. She was registered in New Zealand and engaged from 1902 in inter-colonial trading of timber in the pacific, between New Zealand and Australia and was often in Port Phillip Bay, Victoria. On 5th October, 1905, the twelve year old La Bella left Lyttleton, New Zealand carrying a cargo of timber bound for Warrnambool, Australia . She was manned by a crew of twelve: the Master, (Captain Mylius, previously 1st Mate of La Bella, appointed Captain to La Bella on 6th February 1903) 2 Mates, Cook, six able seamen, one ordinary seaman and a boy. . Bad weather en route caused her to shelter at Burnie on Tasmania's North West coast. On November 10th, the 37th day of her journey, La Bella approached Warrnambool. Captain Mylius steered her towards Lady Bay Channel in heavy south-west seas and evening mist. He ordered the helmsman to steer for the light. As the ship came round, a tremendous sea struck her on the port quarter, causing her to breach broadside in a north-westerly direction into breakers. The helm was brought round twice more, but each time heavy seas broke over her, the third time throwing the La Bella on to a submerged reef in Lady Bay now known as La Bella Reef (about 100 yards from the Warrnambool breakwater). The sea was so rough that it even wrenched a one-and-a-half ton anchor from its fastenings and into the sea. As Captain Mylius headed to the steel wheelhouse, intending to send up a rocket flare, a huge sea slammed the steel door into him (resulting in massive bruising front and back) Despite his injuries he still managed to set off a blue light, which he held up in his hands. La Bella’s lifeboats were filled with sea water and broke up on their chocks. The blue light was the first indication to people on shore that there was a ship in distress. The Harbour Master, Captain Roe (who lived in the Harbour Master’s House opposite Flagstaff Hill), organised a group of volunteers to crew the lifeboat because the trained crew was unavailable; the crewmen were working on a steamer in Port Fairy at the time. He then poured oil onto the water to try and smooth the sea. At around 11pm three of the crew took shelter in the steel forecastle but the sea crashed into it and broke it up. While the rest of the crew and onlookers watched helplessly in the moonlight the bodies were washed away into the sea, never to be seen again. Some of the crew lashed themselves to the weather rail to keep from being washed away. Watson, the ordinary seaman, became tangled in the rigging lines and was too weak to move, so the 2nd Mate, Robertson, put a line onto him so that he wouldn’t wash off. Around 11pm three of the crew were unconscious from exhaustion. The situation on La Bella was becoming dangerous. The 2nd Mate moved to the ‘house’ and soon afterwards the ship slipped in the heavy sea. The lashings of the 1st Mate and the ‘boy’ Denham had kept them safe until about 2am when they were washed overboard; no one was able to help. One by one, the exhausted crew were being washed overboard, too weak to hold on any longer. During the night the La Bella had broken into two and the deckhouse ran out towards the sea. Two more men drowned when trying to reach the lifeboat. By sunrise the only survivors of the twelve were the Master, 2nd Mate and three seamen. Early in the morning Captain Roe used the rocket apparatus on shore to try and shoot a line to the ship for a safer rescue but each attempt fell short of the target. Several attempts were made by the lifeboat to rescue the stricken sailors, but the rough conditions made this difficult for the boat to get close enough to the ship and the lifeboat had to return to shore. During a final attempt to reach the ship Captain Mylius ordered his men to jump into the sea. Leonard Robertson, 2nd mate, jumped and swam towards the lifeboat, taking hold of the boat hook offered to him. Oscar Rosenholme managed to reach the boat floating on a piece of timber from the ship’s load and a third survivor, Noake, also made the boat. Along with the lifeboat rescue crew, 25 year old William Ferrier rowed his small dingy through the heavy seas and managed to rescue the Captain, whom he landed on the breakwater. Ferrier then returned to the ship to attempt a final rescue, losing his oars and rowlocks into the high sea. Using just a spare paddle he skulled towards the La Bella, reaching her stern in time to cut loose the lone surviving sailor, Payne, from the lashing that held him to the ship; the terrified sailor dropped from the ship and into the dingy. Shortly after the last man was rescued, the La Bella was lifted by a huge wave and crashed back down on the reef; she broke up and sank. The ordeal had lasted ten hours. The survivors were taken to the nearby Bay View Hotel and gratefully received warm food and clothing, medical attention and a place to sleep. In the following days an unidentified body of a young person was washed ashore; it was either Watson or Denham. The body was buried in the Warrnambool cemetery with an appropriate gravestone and inscription. William Ferrier became a national hero as news of the daring rescue spread. In recognition of his bravery in the two daring rescues he was awarded the Silver Medal for Bravery by the Royal Humane Society and was honoured in the letter from the Prime Minister and the Parliament of the Commonwealth, telegrams and a cheque for £20 from the Governor General, over £150 subscribed by the public, including Warrnambool and district and readers of The Argus, and a gold medal from the Glenelg Dinghy Club of South Australia. Ferrier’s rescue efforts are one of the most heroic in Victoria’s shipwreck history. (William Ferrier’s son, Frank, received a similar award almost fifty years later, when he helped rescue four members of the crew on the yacht Merlan, after it ran on to a reef near the Point Lonsdale Lighthouse. ) The wreck of La Bella now lies on her port side in 13 metres of sheltered water inside the reef she struck. The bow section is relatively intact and part of the stern has drifted north-easterly towards the mouth of the Hopkins River. The reef the La Bella struck now bears its name. Those five rescued from the La Bella were Captain George Mylius, Leonard Robertson (2nd Mate, 21 years old), R. Payne, Oscar Rosenholme and Jack Noake. Those seven who lost their lives were Mr Coulson (1st mate), Charles Jackman (cook) Gustave Johnson, Pierre Johann and Robert Gent (all able seamen), Harry Watson (ordinary seaman) and Jack Denham (ship’s boy), Captain Mylius was found guilty of careless navigation; he had sailed into the bay without the services of a pilot. His Master Certificate was suspended for twelve months. Later he was also charged with manslaughter of one of the crew who had died when the La Bella was wrecked, but found not guilty. The event’s adverse publicity and damage to his career took a toll on his health and he died of a heart attack six months after the wreck; he was only thirty-seven. His body was buried in the Melbourne General Cemetery. The La Bella was “the best documented of all sailing ships owned in New Zealand”. Her record books, ship logs, correspondence and supporting papers are still available. At the time of the tragedy, she was owned by Messers David C.Turnbull and Co. of Timaru, New Zealand timber merchants and shipping agents, who had purchased her on 13th December 1901. A detailed account of the last journey of La Bella can be read in “Leonard Robertson, the Whangaroa & La Bella” written by Jack Churchouse, published in 1982 by Millwood Press Ltd, Wellington, NZ. Some 15 – 17 ships are believed to have sunk in Lady Bay, but only two have been discovered on the seafloor; the “La Bella” and the “Edinburgh Castle”. Both wrecks are popular diving sites and are preserved as significant historical marine and marine archaeological sites. As well as this letter, Flagstaff Hill’s La Bella Collection includes a photograph of the wrecked La Bella, a brass rail holder and a postcard of William Ferrier with four of the survivors. This original congratulatory letter sent to William Ferrier by the Prime Minister and Government of Australia demonstrates the importance attached to his efforts for Victoria and to Australia. The letter is part of the La Bella Collection and is significant at both a local and state level. Its connection to the La Bella shipwreck and the rescue of five survivors highlights the dangers of Victoria’s Shipwreck Coast. The letter to William Ferrier from the Australian Government acknowledges the bravery of ordinary Australians who risked their lives to save victims of shipwrecks along the coast. The letter is significant to the history of Warrnambool as it honours William Ferrier, a local fisherman whose descendants continue to live in the area. It highlights the way of life of people who lived in coastal towns in 19th century Victoria and the effects of shipwrecks upon them. The letter connects to the postcard of William Ferrier with four of the five rescued crew, the photograph of the wreck of the La Bella and the artefact from the wreck, the rail holder. This item is significant because of its association with the sailing ship “La Bella” . the “La Bella” is of local and state and national significance. It is one of the only two shipwrecks discovered in Lady Bay, Warrnambool, out of the 15-17 shipwrecks in the bay. Brass rail holder from the wreck "La Bella". This rail holder would have been used as a fitting for the end of a rail. It is made up of two parts and looks a little like a goblet in shape. The top is a hollow spherical shape with a circular hole cut out on one side, into which the end of a round rail would fit. There are two gouge marks close to each other on one side of the hole, about one centimetre apart, at 1 and 2 o’clock position. The sphere has a hollow pipe-like stem with a screw thread turned into the outside of the lower section and the bottom of the stem has been flared out after having the base fitted. The base is round and has a mound in the centre. The edge has four evenly spaced fixture holes around its edge. The metal shows signs of pitting and has mild encrustation. The fitting of the base is loose, allowing it to swivel in a complete circle. The top of the sphere is rough and has a dent in it. Underneath the base there is verdigris; some has flaked off and reveals a bright golden colour underneath. rail holder, brass rail holder, la bella, lady bay, norway, 1893, new zealand, captain mylius, william ferrier, flagstaff hill, warrnambool, shipwrecked coast, flagstaff hill maritime museum, maritime museum, shipwreck coast, flagstaff hill maritime village -
 Flagstaff Hill Maritime Museum and Village
Photograph, circa 1878
Loch Ard was bound for Melbourne in 1878 loaded with passengers and cargo when it ran into a rocky reef at the base of Mutton Bird Island, near Port Campbell. Of the 54 crew members and passengers on board, only two survived: an apprentice, Tom Pearce and a young woman passenger, Eva Carmichael, who lost all of her family in the tragedy. The wreck of Loch Ard still lies at the base of Mutton Bird Island and much of the cargo has been salvaged. Some was washed up into what is now known as Loch Ard Gorge following the shipwreck. Cargo and artefacts have also been illegally salvaged over many years before protective legislation was introduced. The photograph is significant for its association with the wreck of the Loch Ard. This wreck has been protected as a Historic Shipwreck since 11 March 1982, under the Commonwealth Historic Shipwrecks Act (1976) Flagstaff Hill’s collection of artefacts from Loch Ard is significant for being one of the largest collections of artefacts from this shipwreck in Victoria. It is significant for its association with the shipwreck, which is on the Victorian Heritage Register. The collection is significant because of the relationship between the objects, as together they have a high potential to interpret the story of the Loch Ard. The Loch Ard collection is archaeologically significant as the remains of a large international passenger and cargo ship. The Loch Ard collection is historically significant for representing aspects of Victoria’s shipping history and its potential to interpret sub-theme 1.5 of Victoria’s Framework of Historical Themes (living with natural processes). The collection is also historically significant for its association with the Loch Ard, which was one of the worst and best known shipwrecks in Victoria’s history. The Loch Ard collection meets the following criteria for assessment: Criterion A: Importance to the course, or pattern, of Victoria’s cultural history. Criterion B: Possession of uncommon, rare or endangered aspects of Victoria’s cultural history. Criterion C: Potential to yield information that will contribute to an understanding of Victoria’s cultural history. Photograph, portrait of Miss Eva Carmichael. Reverse has gold maker’s print and a white adhesive label with hand writing on it.Reverse of photograph shows 3 signatures in script on bottom right corner., Printed text “PHOTOGRAPHIC / SOCIETY OF VICTORIA / MELBOURNE / REGISTERED COPYRIGHT / JULY 24th 878” and “NONE ARE GENUINE UNLESS WITH / SIGNATURES THUS” and “PRESIDENT / VICE PRESIDENT / - - - - - TARY” plus white label, hand written “F- Ph 56/2 – 74” flagstaff hill, warrnambool, shipwrecked-coast, flagstaff-hill, flagstaff-hill-maritime-museum, maritime-museum, shipwreck-coast, flagstaff-hill-maritime-village, photograph miss eva carmichael, loch ard shipwreck, loch ard survivor -
 Flagstaff Hill Maritime Museum and Village
Photograph, March 1895
Loch Ard was bound for Melbourne in 1878 loaded with passengers and cargo when it ran into a rocky reef at the base of Mutton Bird Island, near Port Campbell. Of the 54 crew members and passengers on board, only two survived: an apprentice, Tom Pearce and a young woman passenger, Eva Carmichael, who lost all of her family in the tragedy. The wreck of Loch Ard still lies at the base of Mutton Bird Island and much of the cargo has been salvaged. Some was washed up into what is now known as Loch Ard Gorge following the shipwreck. Cargo and artefacts have also been illegally salvaged over many years before protective legislation was introduced. The photograph is significant for its association with the wreck of the Loch Ard. This wreck has been protected as a Historic Shipwreck since 11 March 1982, under the Commonwealth Historic Shipwrecks Act (1976) Flagstaff Hill’s collection of artefacts from Loch Ard is significant for being one of the largest collections of artefacts from this shipwreck in Victoria. It is significant for its association with the shipwreck, which is on the Victorian Heritage Register. The collection is significant because of the relationship between the objects, as together they have a high potential to interpret the story of the Loch Ard. The Loch Ard collection is archaeologically significant as the remains of a large international passenger and cargo ship. The Loch Ard collection is historically significant for representing aspects of Victoria’s shipping history and its potential to interpret sub-theme 1.5 of Victoria’s Framework of Historical Themes (living with natural processes). The collection is also historically significant for its association with the Loch Ard, which was one of the worst and best known shipwrecks in Victoria’s history. The Loch Ard collection meets the following criteria for assessment: Criterion A: Importance to the course, or pattern, of Victoria’s cultural history. Criterion B: Possession of uncommon, rare or endangered aspects of Victoria’s cultural history. Criterion C: Potential to yield information that will contribute to an understanding of Victoria’s cultural history. Photograph of Miss Eva Carmichaels Cave at Loch Ard Gorge where the survivors found shelter. Reverse has four areas of torn surface, perhaps were photo had been mounted. Hand written text in pencil and in ink.Reverse of photograph Hand written in pencil “ … refuge … which he … offer words … Miss Carmichael. He then … on the …“ Hand written in ink “Loch Ard Gorge / Miss Carmichael’s cave” and “ Mr J Swinton / Warrnambool / March 1895” flagstaff hill, warrnambool, shipwrecked coast, flagstaff hill maritime museum, maritime museum, shipwreck coast, flagstaff hill maritime village, great ocean road, loch line, loch ard, captain gibbs, eva carmichael, tom pearce, glenample station, mutton bird island, loch ard gorge, loch ard shipwreck, 1878 shipwreck, loch ard gorge, miss eva carmichael -
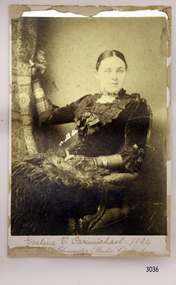 Flagstaff Hill Maritime Museum and Village
Photograph, late 1800's
Miss Eva Carmichael is one of two survivors of the Loch Ard shipwreck.. Loch Ard was bound for Melbourne in 1878 loaded with passengers and cargo when it ran into a rocky reef at the base of Mutton Bird Island, near Port Campbell. Of the 54 crew members and passengers on board, only two survived: an apprentice, Tom Pearce and a young woman passenger, Eva Carmichael, who lost all of her family in the tragedy. The wreck of Loch Ard still lies at the base of Mutton Bird Island and much of the cargo has been salvaged. Some was washed up into what is now known as Loch Ard Gorge following the shipwreck. Cargo and artefacts have also been illegally salvaged over many years before protective legislation was introduced. The photograph is significant for its association with the wreck of the Loch Ard. This wreck has been protected as a Historic Shipwreck since 11 March 1982, under the Commonwealth Historic Shipwrecks Act (1976) Flagstaff Hill’s collection of artefacts from Loch Ard is significant for being one of the largest collections of artefacts from this shipwreck in Victoria. It is significant for its association with the shipwreck, which is on the Victorian Heritage Register. The collection is significant because of the relationship between the objects, as together they have a high potential to interpret the story of the Loch Ard. The Loch Ard collection is archaeologically significant as the remains of a large international passenger and cargo ship. The Loch Ard collection is historically significant for representing aspects of Victoria’s shipping history and its potential to interpret sub-theme 1.5 of Victoria’s Framework of Historical Themes (living with natural processes). The collection is also historically significant for its association with the Loch Ard, which was one of the worst and best known shipwrecks in Victoria’s history. The Loch Ard collection meets the following criteria for assessment: Criterion A: Importance to the course, or pattern, of Victoria’s cultural history. Criterion B: Possession of uncommon, rare or endangered aspects of Victoria’s cultural history. Criterion C: Potential to yield information that will contribute to an understanding of Victoria’s cultural history. Photograph of Miss Eva Carmichael sitting on a chair holding a curtain. Text below photograph is partly unreadable but gives the name of the photographic studio. A printed on the back "County of Gloucester Studio Cheltenham" with the address and other informaion.Reverse has crest that includes “PRIZE MEDALIST PARIS EXHIBIT’N 1867” Printed text “No. …………” “COUNTY OF GLOUCESTER STUDIO / 20a / PROMENADE VILLAS / CHELTENHAM” and “Autotype Prints or Permanent Porcelain enlargements can be made from this plate” flagstaff hill, warrnambool, shipwrecked-coast, flagstaff-hill, flagstaff-hill-maritime-museum, maritime-museum, shipwreck-coast, flagstaff-hill-maritime-village, photograph of miss eva carmichael, eva carmichael, loch ard shipwreck, county of gloucester studio -
 Flagstaff Hill Maritime Museum and Village
Photograph, March, 1895
Loch Ard was bound for Melbourne in 1878 loaded with passengers and cargo when it ran into a rocky reef at the base of Mutton Bird Island, near Port Campbell. Of the 54 crew members and passengers on board, only two survived: an apprentice, Tom Pearce and a young woman passenger, Eva Carmichael, who lost all of her family in the tragedy. The wreck of Loch Ard still lies at the base of Mutton Bird Island and much of the cargo has been salvaged. Some was washed up into what is now known as Loch Ard Gorge following the shipwreck. Cargo and artefacts have also been illegally salvaged over many years before protective legislation was introduced. The photograph is significant for its association with the wreck of the Loch Ard. This wreck has been protected as a Historic Shipwreck since 11 March 1982, under the Commonwealth Historic Shipwrecks Act (1976) Flagstaff Hill’s collection of artefacts from Loch Ard is significant for being one of the largest collections of artefacts from this shipwreck in Victoria. It is significant for its association with the shipwreck, which is on the Victorian Heritage Register. The collection is significant because of the relationship between the objects, as together they have a high potential to interpret the story of the Loch Ard. The Loch Ard collection is archaeologically significant as the remains of a large international passenger and cargo ship. The Loch Ard collection is historically significant for representing aspects of Victoria’s shipping history and its potential to interpret sub-theme 1.5 of Victoria’s Framework of Historical Themes (living with natural processes). The collection is also historically significant for its association with the Loch Ard, which was one of the worst and best known shipwrecks in Victoria’s history. The Loch Ard collection meets the following criteria for assessment: Criterion A: Importance to the course, or pattern, of Victoria’s cultural history. Criterion B: Possession of uncommon, rare or endangered aspects of Victoria’s cultural history. Criterion C: Potential to yield information that will contribute to an understanding of Victoria’s cultural history. Photograph of Loch Ard Gorge graves on hillside, including the Carmichael family, Reginald Jones and Arthur Mitchell Reverse has hand writing in pen and ink, part of details are lost due to photo being trimmed. Also has four areas of torn surface, perhaps were photo had been mounted. Reverse has hand writing “ … Loch Ard Gorge / Graves of / the Carmichael family / Mr. Reginald Jones / Mr Arthur Mitchell “ and “Mr J Swinton / March 1895”flagstaff hill, warrnambool, shipwrecked coast, flagstaff hill maritime museum, maritime museum, shipwreck coast, flagstaff hill maritime village, great ocean road, loch line, loch ard, captain gibbs, eva carmichael, tom pearce, glenample station, mutton bird island, loch ard gorge, loch ard shipwreck, carmichael family, arthur mitchell, reginald jones, loch ard gorge graves -
 Flagstaff Hill Maritime Museum and Village
Photograph, circa 1895
Loch Ard was bound for Melbourne in 1878 loaded with passengers and cargo when it ran into a rocky reef at the base of Mutton Bird Island, near Port Campbell. Of the 54 crew members and passengers on board, only two survived: an apprentice, Tom Pearce and a young woman passenger, Eva Carmichael, who lost all of her family in the tragedy. The wreck of Loch Ard still lies at the base of Mutton Bird Island and much of the cargo has been salvaged. Some was washed up into what is now known as Loch Ard Gorge following the shipwreck. Cargo and artefacts have also been illegally salvaged over many years before protective legislation was introduced. The photograph is significant for its association with the wreck of the Loch Ard. This wreck has been protected as a Historic Shipwreck since 11 March 1982, under the Commonwealth Historic Shipwrecks Act (1976) Flagstaff Hill’s collection of artefacts from Loch Ard is significant for being one of the largest collections of artefacts from this shipwreck in Victoria. It is significant for its association with the shipwreck, which is on the Victorian Heritage Register. The collection is significant because of the relationship between the objects, as together they have a high potential to interpret the story of the Loch Ard. The Loch Ard collection is archaeologically significant as the remains of a large international passenger and cargo ship. The Loch Ard collection is historically significant for representing aspects of Victoria’s shipping history and its potential to interpret sub-theme 1.5 of Victoria’s Framework of Historical Themes (living with natural processes). The collection is also historically significant for its association with the Loch Ard, which was one of the worst and best known shipwrecks in Victoria’s history. The Loch Ard collection meets the following criteria for assessment: Criterion A: Importance to the course, or pattern, of Victoria’s cultural history. Criterion B: Possession of uncommon, rare or endangered aspects of Victoria’s cultural history. Criterion C: Potential to yield information that will contribute to an understanding of Victoria’s cultural history. Photograph of rocks of Loch Ard Gorge in background, a man is sitting on small rock in the foreground. Reverse has hand writing in pen and inkReverse hand writing “The Loch Ard Gorge / showing the rock / on which Miss Carmichael / was clinging when Pearce / first saw her” and “Mr J Swinton / Warrnambool / March 1895”flagstaff hill, warrnambool, shipwrecked coast, flagstaff hill maritime museum, maritime museum, shipwreck coast, flagstaff hill maritime village, great ocean road, loch line, loch ard, captain gibbs, eva carmichael, tom pearce, glenample station, mutton bird island, loch ard gorge, photograph -
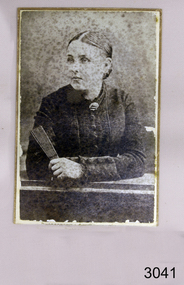 Flagstaff Hill Maritime Museum and Village
Photograph, late 19th century
Loch Ard was bound for Melbourne in 1878 loaded with passengers and cargo when it ran into a rocky reef at the base of Mutton Bird Island, near Port Campbell. Of the 54 crew members and passengers on board, only two survived: an apprentice, Tom Pearce and a young woman passenger, Eva Carmichael, who lost all of her family in the tragedy. The wreck of Loch Ard still lies at the base of Mutton Bird Island and much of the cargo has been salvaged. Some was washed up into what is now known as Loch Ard Gorge following the shipwreck. Cargo and artefacts have also been illegally salvaged over many years before protective legislation was introduced. The photograph is significant for its association with the wreck of the Loch Ard. This wreck has been protected as a Historic Shipwreck since 11 March 1982, under the Commonwealth Historic Shipwrecks Act (1976) Flagstaff Hill’s collection of artefacts from Loch Ard is significant for being one of the largest collections of artefacts from this shipwreck in Victoria. It is significant for its association with the shipwreck, which is on the Victorian Heritage Register. The collection is significant because of the relationship between the objects, as together they have a high potential to interpret the story of the Loch Ard. The Loch Ard collection is archaeologically significant as the remains of a large international passenger and cargo ship. The Loch Ard collection is historically significant for representing aspects of Victoria’s shipping history and its potential to interpret sub-theme 1.5 of Victoria’s Framework of Historical Themes (living with natural processes). The collection is also historically significant for its association with the Loch Ard, which was one of the worst and best known shipwrecks in Victoria’s history. The Loch Ard collection meets the following criteria for assessment: Criterion A: Importance to the course, or pattern, of Victoria’s cultural history. Criterion B: Possession of uncommon, rare or endangered aspects of Victoria’s cultural history. Criterion C: Potential to yield information that will contribute to an understanding of Victoria’s cultural history. Photograph of Miss Eva Carmichael holding a book seated at a desk. Oval gilt framed portrait in a green container edged with gilt. Reverse has piece of tape centre left and right. Also has printed maker’s information. Printed by the Photographic Society of Victoria, Melbourne.Printed brown text “PHOTOGRAPHIC / SOCIETY OF VICTORIA / MELBOURNE / REGISTERED COPYRIGHT / JULY 24th 878” and “NONE ARE GENUINE UNLESS WITH / SIGNATURES THUS” and “PRESIDENT / VICE PRESIDENT / SECRETARY” flagstaff hill, warrnambool, shipwrecked-coast, flagstaff-hill, flagstaff-hill-maritime-museum, maritime-museum, shipwreck-coast, flagstaff-hill-maritime-village, loch ard shipwreck, miss eva carmichael, loch ard survivor -
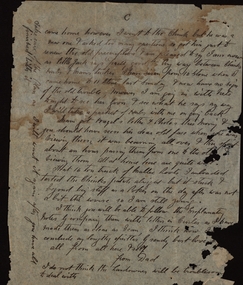 Federation University Historical Collection
Document - Correspondence, Richard Squire Mining Correspondence
Seems that Tom pays Ned's wages. Numerous bores were sunk , some were opened out and driven in the direction of the reef. Numerous Cross cuts were also made from the main tunnel.Unless otherwise stated the letters are from Dad (Richard Squire) to Tom, Hazel & Kiddies all. .1) Handwritten two page letter from Richard Squire to 'Tom & Hazel & little men' with information regarding the Leigh River Tunnel at Mount Mercer, dated 6/8/28. .2) Handwritten three page letter with information regarding mining operations dated 27.6.29. .3) Handwritten three page letter from Richard Squire to 'Tom & Hazel & Flock' with queries regarding the health of one of their children, other personal information and information regarding mining operations dated 18/7/29. .4) Handwritten one page letter from Richard Squire to 'Tom' dated 20/7/29, regarding the enclosed handwritten receipt with stamp for Call of two shares costing 8 pounds 7 shillings and 2 pence in Leigh River Tunnel Syndicate from Richard Squire dated 13th July 1927. .5) Handwritten two page letter from Richard Squire to 'Tom & Hazel & Pinchers' regarding his health, other personal information and information about the four page report of position of work at 'Leigh River Tunnel' enclosed. The letter is dated 29/11/29 and the report dated Nov 28th 29. .6) Handwritten two page letter with personal information and a suggestion that Tom learn to swim dated 13th Jan 30. .7) Handwritten two page report by Richard Squire regarding Leigh River Tunnel Syndicate plus a one page 'Rough Section' drawing of the tunnel dated 29th April 1930. .8) Typed one page report by Richard Squire regarding Leigh River Tunnel Syndicate and the findings of a new shaft dated 9th December 30. .9) Handwritten one page letter by Richard Squire to 'Tom' regarding mining operations and four handwritten receipts for payment of Calls from Richard Squire and Mr H McLeod and Mr E McLeod with stamps. .10) Handwritten two page letter regarding a meeting he had with the Secretary for Mines, Mr Whitehead dated 22 Feb 1931. .11) Handwritten two page letter regarding the difficulties in financing the mining operation occasioned by the interference of the government department dated 12th Mar 31. .12) Handwritten one page letter regarding the delay in the submission of his letter to the Gold Committee and with details of plans he had sent to Tom separately, dated 1st April 31. .13) Handwritten two page letter by Richard Squire to 'Tom' regarding personal matters including his health and also information regarding Tunnel work, dated May 11th 31. .14) Handwritten two page letter regarding the mine work, how his new employee, Ned, was going and also his health, dated Thur 21st May 31. .15) Handwritten two page letter regarding the Tunnel progress and financial matters dated Tue 26th May. .16) Handwritten three page letter regarding the Tunnel progress dated Thur June 11th. .17) Handwritten two page letter regarding the Tunnel progress, an issue relating to Ned's taxation assessment and his own health, dated 28th June 31. .18) Handwritten three page letter with detailed information on the Tunnel progress and information regarding his health, dated Thur July 23rd. .19) Handwritten two page letter regarding the Tunnel progress and some personal greetings, dated Thur July 30th 31. .20) Handwritten two page letter regarding the Tunnel progress, an agreement with Messrs Read & Peers? and a renaming of a Prospect as Lawaluk instead of Mount Mercer, dated Sun 2nd Aug 31. .21) Handwritten three page letter regarding the Tunnel progress, the lease agreement on Mr Read's property at Mount Mercer which he had been unable to pay and a parsley root remedy which a Ballarat Chinese herbalist had prescribed for his catarrh and had been effective, dated Thur 13th Aug 31. .22) Handwritten two page letter regarding the efficacy of the parsley (root) water in healing his catarrh and detailed progress report on the Tunnel which showed a little gold in the uncovered 'wash', dated Mon 24th Aug. .23) Handwritten three page letter regarding the progress of the Tunnel and one of the bores sunk also mentions his health, dated Mon Sept 7th. .24) Handwritten three page letter regarding the Tunnel progress in detail and an account of his illness, dated Thur 24th Sept. .25) Handwritten two page letter regarding the Tunnel progress in detail and his health which had been poor, dated Thur Oct 8th 31. .26) Handwritten four page letter regarding the Tunnel progress in detail, dated Thur Oct 22. .27) Handwritten four page letter regarding a detailed report of the Tunnel progress including the news of some show of gold and other personal matters including advising Tom not to drive there when he would have to drive home in the dark because of the accidents caused by 'Boosy Drivers', dated Thur Nov 19th 31. .28) Handwritten two page letter regarding the continued promising Tunnel progress, dated Thur Nov 26th. .29) Handwritten two page letter regarding Tunnel progress and personal matters relating to the coming Christmas visit, dated Thur Dec 3rd 1931. .30) Handwritten two page letter regarding Tunnel progress and personal matters regarding the impending visit by the family, dated Sun Dec 6th 31. .31) Handwritten two page letter regarding his health and the treatment proscribed by a Chinese herbalist and also some information about his expenses, dated Sunday 25/1/32. .32) Handwritten four page letter regarding Tunnel progress including a small diagram and further information on his health, dated Thur 25th Feb 32. .33) Handwritten three page letter regarding Tunnel progress and some personal and family information, dated Mon 21st 32. .34) Handwritten one page letter regarding some personal matters and information about the Tunnel progress, dated Thus 31st Mar. .35) Handwritten two page letter regarding detailed information about the Tunnel as well as a one page diagram of the Drives being excavated, dated Sun night 3rd April. .36). Handwritten three page letter from his home in Prahran regarding a mixture of personal matters and matters relating to the Tunnel, dated 18/4/32. .37) Handwritten one page letter regarding enclosed three shares which were to be placed as he was very short of funds, dated 19-4-32. .38) Handwritten two page letter from his home in Prahran regarding work carried out by Ned at the Tunnel and family matters, dated 6/5/32. .39) Handwritten one page letter from his home in Prahran regarding work carried out by Ned at the Tunnel, dated 10/5/32 plus an attached one page letter written by Ned (E. Woodlook) to 'Mr Squire' regarding regarding Tunnel progress, dated Saturday. .40) Handwritten two page letter from his home in Prahran regarding Tunnel progress and some personal matters, dated 27/5/32 plus an attached one page letter written by Ned to 'Mr Squire' regarding Tunnel progress and with the information that the rats were bad in Richard's hut, dated Friday. .41) Handwritten two page letter from his home in Prahran regarding Tunnel progress, dated 3/6/32 plus a two page letter written by E.Woodlock to 'Mr Squire' regarding Tunnel progress as well as person matters regarding his health, dated Friday (27th May 32 written in pencil by Richard). .42) Handwritten three page letter from his home in Prahran regarding tunnel progress and financial matters, also detailed information about the Madison's Tunnel, dated 8/6/32, plus a one page letter from E. Woodlock (Ned) to 'Mr Squire' regarding Tunnel progress dated Saturday (4 June, 32). .43) Handwritten three page letter from his home Prahran regarding a sketch he had made of Madison's Tunnel and the Mercer Shaft (not present) and the similarity of other mines with barely Payable gold, dated 13/6/32. plus a one page letter from E. Woodlock to 'Mr Squire' regarding Tunnel progress dated Saturday. .44) Handwritten one page letter by Richard Squire to 'Tom' from his home in Prahran with some personal information as well as the hope to return to Mt Mercer as he felt he was now well, not dated, plus a two page letter from E. Woodlock to 'Mr Squire' regarding duty stamps sent and Tunnel progress dated Saturday. .45) Handwritten two page letter from his home in Prahran regarding the progress of the Tunnel, dated 21/6/32, plus a one page letter from E. Woodlock regarding the progress of the Tunnel work, dated Monday (20/6/32). .46) Handwritten three page letter from his home in Prahran regarding the price of gold and the effect that mining Payable gold in the Madison Tunnel could have, dated 27/6/32. .47) Handwritten three page letter by Richard Squire to Tom, Hazel & Kiddies all' from his home in Prahran regarding his thoughts on the Madison Tunnel at Piggoreet, dated Mon 4th July 32, plus two one page letters by E Woodlock to 'Mr Squire' regarding the Tunnel work and more personal things, dated Wednesday (June 29th 32) and Saturday (July 2nd). .48) Handwritten two page letter from his home in Prahran regarding his intention to return to the diggings in a small car procured for his use and his intention to re-peg the Leigh River Lease in another name, dated Sun 17/7/32, plus a two page and a one page letter by E Woodlock to 'Mr Squire' regarding progress at the Tunnel dated Thursday (7th July) and Tuesday (12th July 32). .49) Handwritten one page letter by E Woodlock to Mr Squire detailing the tunnel work and other work related details dated Saturday (16th July 32), plus a one page letter by 'Dad' (Richard Squire) to 'Tom, Hazel & Kiddies all' regarding the letter sent by Ned (E Woodlock) and the ongoing work. He also talks about the health of Mam, his wife, dated 19th July 32. .50) Handwritten one page letter regarding the work at the tunnel and with the information that he was to finally return to the mine, dated 22/7/32, plus a one page letter by E Woodlock to Mr Squire about the ongoing work, dated Wednesday (20th July). .51) Handwritten two page letter written from Mt Mercer, regarding the works in the Mt Mercer Tunnel (mentioning South Cockloft). He also details that the drive from town (Melbourne) took 4 gallons of petrol, dated Thur 28th July 32. .52) Handwritten 3 page letter detailing the work carried on at the tunnels and with the information that underground gas had halted work temporarily. He was keen that Tom should visit one weekend soon, dated Sat 6th Aug 1932. .53) Handwritten four page letter detailing the work and new bore holes near Madisons Tunnel. The No 1 tunnel work had to be suspended due to continued gas filling the diggings every time the barometric pressure dropped. On the last page was a rough sketch of the area which was being worked, dated 19th Aug 32. .54) Handwritten two page letter regarding Tom's proposed visit to the site and some plans that he should bring with him. He also spoke of a pup that he was housing till Tom came, dated 21/8/32. .55) Handwritten one page letter encouraging Tom to bring skid chains for his vehicle as the road was muddy when he came on the weekend. He gave a brief account of the work and of the pup's progress, dated 25/8/32 .56) Handwritten three page letter regarding the weather and the relief he felt at knowing Tom and his companions had arrived safely home. He also thanked Tom for the cheques for Ned and detailed a little of the work at the tunnel and the need for more explosives as well as the fact that they had had to put a lock on the door of the hut to stop intruders, dated Sun Sept 4th 32. .57) Handwritten one page letter regarding the ongoing work at the tunnel, dated Thur Sept 8/32. .58) Handwritten two page letter written from Prahran, regarding his trip home, work at the tunnel and with information about the enclosed receipts, dated 16/9/32. Also included was a one page letter from E Woodlock to Mr Squire regarding the work at the tunnel, dated Wednesday. .59) Handwritten one page letter from Dad (Richard Squire) to 'Tom, Hazel & Kiddies all' written from Mt Mercer, regarding the work at the tunnel and the effect that 2 inches of rain had on the work, dated Wed Sept 20th 32. .60) Handwritten two page letter regarding the work at the tunnel and with the information that Mr Read who owned the property where the tunnel was located, had a serious accident in Melbourne, dated Thur 29th Sept 30 (this 1930 date is a mistake as the information contained in this letter follows on from his previous letter dated 20th Sept 32). .61) Handwritten one page letter regarding the work at the tunnel with the encouraging information that flecks of gold were found in about half a dish (mining pan), dated Thur Sept 22nd. .62) Handwritten two page letter regarding the progress at the tunnel and the difficulties of the work and thanks for Ned's cheque. Also mentioned was the information that Mr Read had a fractured pelvis and would be in hospital for two months, so Mrs Read with her father was looking after the shearing, dated Thur 6th Oct. .63) Handwritten two page letter with a third page of a diagram of a cross section of the Leigh River Tunnel, including the new tunnel and Madisons tunnel, with detailed description of the work in the tunnel, dated Sat 8th Oct. .64) Handwritten two page letter written from Prahran, giving detailed information of the tunnel and the expected outcome of the work. He also commented that he was to visit Mr Read in hospital, dated 14/10/32. .65) Handwritten two page letter written from Mt Mercer, giving information about the work in the tunnel and his visit to Mr Read, dated Wed 19th Oct. Enclosed also was a one page letter from E Woodlock to Mr Squire giving an account of his work in the tunnel, dated Thursday. .66) Handwritten one page letter regarding the work in the tunnel, dated Sun Oct 23/32. .67) Handwritten two page letter from Dad & Jim (Richard Squire) to 'Tom, Hazel & Kiddies all' regarding the receipt of Ned's wages cheque and the insurance of Ned's person as well as a detailed description of the tunnel and its relationship to Madisons Tunnel. He also gives some indication of his health, dated Tue Nov 1st 32. .68) Handwritten on page letter written from Prahran, giving a small amount of information about the tunnel work as well as his visit to see Mr Read and some personal information, undated. Enclosed also is a one page letter by E Woodlock to Mr Squire about the work in the tunnel, dated Thursday. .69) Handwritten one page letter with little information, dated 11/11/32. Also enclosed is a one page letter from E Woodlock to Mr Squire about the work in the tunnel, dated Thursday. .70) Handwritten three page letter with detailed information about the tunnel work and an aside about Jim's help and the he suffered from "Imaginitis imagines he sees a speck of gold in every bit of gravel met", dated 10/11/32. .71) Handwritten two page letter with detailed information on the work as their tunnel crossed with the old Madison Tunnel, dated Thur 17th Nov. .72) Handwritten three page letter detailing information on an application for a 500 acre lease which was posted at the Grenville Post Office and how it would impact on their lease. The upshot was that their leases would need to be re-pegged and the fee to publish a Notice of Application on their Leigh River claim was necessary to pay and he wondered if one of their investors would pay the 10 pounds necessary to secure the claim. He also spoke of perhaps forming a Company to put a plant on their Mt Mercer shaft as he felt that the gold would be of a payable quantity, dated Sunday 20th Nov, Also included was a note written by Ned (Edward Woodlock) who had copied the Notice of Application. .73) Handwritten two page letter detailing information found in Madison's Tunnel as it related to their own tunnels, particularly No 2 tunnel and how far he felt he would need to tunnel to reach an improvement in the 'wash', dated Thur 24th Nov. .74) Handwritten one page letter thanking him for the cheque the investor, Mr Wilkinson had provided for the Notice of Application for the Mt Mercer old Lease of 828 acres. He also gave some information about how it was originally farm labourers who only worked this lease and only when they had no other work. He also gave some personal information about Mam's birthday, dated Mon Nov 28th 32. .75) Handwritten two page letter by Dad (Richard Squire) to 'Tom, Hazel & Kiddies 3' written from Prahran, telling them that they had received Ned Cheque and that that Jim and He had come home. He also detailed an incident that Jim had had with a tyre blowout whilst on his way to get explosives and post the Notice of Application in the Warden's Office in Ballarat. The stub axle had bent and Jim had to ride a bike to get a new one and after changing the inner tube of the tyre they were able to drive back to Melbourne and were in the process on having the tyre re-treaded, dated 6/12/32. .76) Handwritten one page letter explaining how he and Mam had contracted colds and that his kidneys had some of their of trouble. He hoped to return to Mt Mercer on the weekend, dated 18th Jan 33. Also included was a handwritten two page letter by E Woodlock to Mr Squire giving information about the tunnel work, an injury to his hand and the fact that he had only 3 picks that were any good. He also asked for some vegetables, tomatoes and bacon when Richard returned, dated Saturday. .77) Handwritten one page letter written from Mt Mercer, giving information about the tunnel work, now 97'6" in and how he had expected to have already come upon the Madison's gold bearing gravel wash, dated Wed 25th Jan 33. .78) Handwritten two page letter with detailed information about how the tunnel had cut across a second Madison's tunnel and the prospects in this tunnel looked more promising. He also stated that he had not been well the last few days, dated Frid 27th 33 .79) Handwritten one page letter with information about the shotty gold found and the tunnel work and that he would test the value of the wash where the gold was found, dated Mon 30th Jan. .80) Handwritten short note of one page giving sketchy information about the tunnel work, dated Tue 31st Jan 33. .81) Handwritten two page letter giving information about his dealings with the Secretary for Mines relating to the fact that because the application for lease was identical to the old lease, they therefore should not need to pay for a full survey costing 7 pounds, just an inspection. He also detailed the workings and asks for more parsley roots to be sent to him, dated Thur Feb 9th 33. .82) Handwritten one page letter stating that he had received Ned's cheque and information about the workings, the coarse gold found and the fact they were going home for fresh food, dated Tue 14th 33. .83) Handwritten two page letter giving detailed information on the progress of the tunnelling as well as the information that Len and Max had come to visit the site and that Len had brought with him Keating, who he detested and pondered the reason for his bringing the man. As they were leaving Max "told Ned he thought they were going down to Ice Mam". Richard was worried about paying the 7 pounds ten shillings for the Department of Mines survey and was loath to put in another 20 pounds for another share of the mine to pay for it. He gave his thanks for a parcel of parsley he'd received , dated Tue 21st Feb 33. .84) Handwritten two page letter written saying that he had received Ned's cheque (for wages) and giving detailed information on the progress and for the need to timber the drive and have the bottom stoped up. He had no timber or laths left and was concerned about the cost necessary to satisfy the Mines Department. He mentions the possibility of insolvency. Fine gold had been found but not like the Madison's tunnel, dated Tue 28th Feb 33. .85) Handwritten two page letter written giving detailed information of the progress in the tunnel and with the expectation that they would soon meet the same wash which was in Madison's Tunnel. He also personal information about his health. the parsley roots received and the apples which Jim had "burgled", dated Sun 5th Mar 33. .86) Handwritten four page letter by with a very detailed account of the progress of the tunnelling and the reason why the expected intersection with the Madison wash did not occur, but with the hope that this intersection would soon occur, then they would be able to meet expenses. He also talked about not being able to pay for the lease but had the hope they they would not be too rigid in their case. He added some personal information about Jim not having the makings of a miner, catching rabbits "for the pot" and the fact that Mr Read was so much better that he was able to ride his horse, dated Sat 11th Mar 33. .87) Handwritten one page letter written from Prahran, acknowledging the receipt of Ned's cheque, a note about the work at the tunnel and some personal information, dated 21/3/33. .88) Handwritten one page letter written from Mt Mercer, saying that there was little change in the tunnel but that he was would open a cross cut north, dated Thur 23 March 33. .89) Handwritten note of a half page telling them that he had cross cut the tunnel, dated Sat 25th Mar. .90) Handwritten one page letter with progress of the tunnelling and where it is in relation to Madison's Tunnel, dated Thur 30th Mar 33. .91) Handwritten three page letter with the first part of the letter talking about the personal and financial worries he and his family had with travelling and mining expenses as well as Ned's wages which could not have been managed without Judy's little car, Jim's help and the payment of Ned's wages by Tom. He went on to give detailed information of the tunnelling and then talked about a letter received by the Department of Mines regarding the non payment of the lease and that a Notice of Abandonment would be published if not paid. Lastly he talked about the struggle he had had with this process and that it was only because of Tom's help that he had been able to continue this far, dated Sun 2/4/33. .92) A one page letter with information about the progress as well as the information that he had not heard from the Mines Department regarding the lease, and the the 1000 sq ft Miners Right Claim was secure, dated Thur 6th April. .93) A three page letter with detailed information about the work in the tunnel and also detailed explanation of the leases he has pegged and repegged. He also thanked Tom for paying the balance which was owed to the Department and informed Tom that he was going home, dated Tues 11th April 33. .94) A four page letter written from Prahran, thanking Tom for Ned's cheque and with information about the work still being carried on by Ned. He also talked about the pegging of the Mt Mercer claim and the cost of the advertisement and application and survey fees to secure the site as well as his opinion of the probable value of the gold from this site. He also stated that he really needed more investment from those who had initially invested with him or from new investors, dated 17/4/33. Included was a one page letter from Edward Woodlock (Ned) to Mr Squire regarding the work he was carrying out at the tunnel, dated Saturday. .95) A three page letterwritten from Mt Mercer, regarding the work in the tunnel and the quality of the gold found and the direction they will take. He also stated that he was posting letters to the original investors to see if they would contribute to the cost of the lease and also talked about another man who had a Notice of Application posted at Grenville for the water rights for a 25 miles long area and a dam. His Capital is 300 pounds and the supposition is that he wants to 'unwater' the leads, dated Frid 20th April. .96) A one page letter regarding the continued work in the tunnel and how his suppositions seemed to be correct, dated Thur 27th April 33. .97) A three page letter thanking Tom for Ned's cheque of 6 pounds 7 shillings and 6 pence. He also gave detailed information about the tunneling and the type of ground found and his next intentions. He also gave further information about the Notice of Application at Grenville which was posted by B Ryan, Agent for Western Deep Leads Coy Limited for 6000 acres, dated Sun 30th April 33. As well is a note detailing the information copied from the Notice. .98) A two page handwritten letter detailing the work being carried out as well as a complaint that he had not heard from the men he had written to, dated Thur 4th May 33. .99) A one page handwritten letter regarding the tunnel work and informing Tom that the gold found is shotty, dated Sat 6th May 33. .100) A four page handwritten letter written from Prahran, detailing the tunnel work and informing that the gold prospects were better in no.1 cross cut south and there was also payable fair gold where they were currently working, if worked in bulk. He also talked about the possibility of new investors as the old ones had not responded to his letter and the necessity of securing the leases, dated 11th May 1933. .101) A one page handwritten letter by E. Woodlock (Ned) to Mr Squire regarding the work going on, dated Thursday. .102) A six page handwritten letter written from Prahran historically detailing the acquisition of the two leases at Mt Mercer, 35 years earlier, with M C Donnely/Donney and Jas Clements, including Madisons. He goes on to clarify Tom's suggestion regarding the Leases and the Companies to be floated, then details the the shafts, bores, tunnels and Deep Leads held in the leases and then goes on to say what his next steps would be, dated 13th May 33. .103) A two page letter written from Mt Mercer detailing the continued work in the tunnel with the added information that because of the incline it was taking two men to push the truck up the tunnel. Richard also told of the need to take more parsley water for his condition, dated Thur 18th 33. .104) A three page letter with a very detailed description of the work in the tunnel. Richard also told that he had run out of metal rails and was having to use timber as a substitute. He was also to re-peg the North and South Leases in the morning, dated Sun 21st May 33. .105) A two page letter detailing the work in the tunnel and saying that there was a hundred feet of rail locked in by a fall in the No.2 Tunnel and he was hoping to get them out to replace the wooden rails as they made for heavy work on the inclines. He also said that he had a letter from the Department telling him to communicate with the Surveyor in Ballarat, dated Wed 24th May. .106) A three page letter acknowledging Ned's cheque as well as information about the work in the tunnel, including that he had been able to retrieve 45 feet of rail and would get more when needed. He said he was pleased that Tom and Mr Wilkinson were making a trip on Saturday to see him. He talked of the weather and the fact that the bread was a week old, so to bring enough to last till the Monday. Among other things he also spoke of Tom revising the Plans and also having a Share book printed and the name was to be the Ballarat Deep Leads Extension for which there could possibly be 3 Companies, dated Sun 28th May. .107) A one page letter with information about the work in the tunnel and also a weather update and the best way to come, dated Wed 31 May 33. .108) A two page letter written from Prahran, explaining a visit to the Leigh River Shaft to get whim rope, whip wheels and sundry items. He shifted some equipment and built a new forge and was to fix and mount a windlass and rope to enable Ned to get the truck up the incline of the tunnel. He also spoke of the work being undertake by Ned then when on to more personal correspondence about a birthday present for one of Tom's boys, dated 9/6/33. .109) A two page letter acknowledging receipt of the 'Prospectus of the Ballarat Deep Leads Extension Syndicate' and 'Share Certificate'. The No.1 Lease was in Ned's name and the No.2 Lease was in Jim's name to avoid inquisitive interest. Jim logged a Notice of Application and paid the fees. Richard acknowledged receipt of Ned's cheque and asked for 5 pounds as his finances were 'rather tight', dated 14/6/33. Included was a 1 page letter from Ned to Mr Squire regarding the work in the mine, dated Saturday. .110) A one page letter written from Mt Mercer giving information about what was happening in the new x cut N near the mouth of the tunnel, dated Friday 16/6/33. .111) A one page letter telling about the work and that he had fixed an old shed of Mr Reads for the forge. Mr Read and Mr Cameron visited and Richard was hopeful that Mr Cameron, the owner of the land in the North Lease would be easy as regards an agreement, dated June 22/33. .112) A two page letter which talked about his health, the mine, the local J.P. who had lost his eye in a shearing accident and the surveyors visit, He also spoke about contacting the Gold Mines Ltd and the Berry Leads Company, dated Tue 27th 33. Also included was a letter to the Mines Department and a receipt from the Mines Department for the sum of 7 pounds 10 shillings as well as the Lease Applications from the newspaper dated June 13th 1933. .113) A two page letter complaining of the charge made by the Mines Department for a Surveyors Inspection. He also wrote of trying to set up a float for the mine which he would do when he returned home.He also explained the current findings at the mine, dated Sun 2nd July 1933. .114) A one page note written from Prahran informing Tom that he had not yet heard from Gold Mines Ltd and also that there was a hitch with the lease on the house, but this was to hopefully be fixed the following day. He also spoke of Tom's trip home (completed in tow), dated 18/7/33. .115) A two page letter recounting some of the difficulties they were having with the new owners of the house they leased in Prahran. He also spoke of the fact that the Mines Department had requested another 10 pounds although they had not yet completed the survey on either mine, dated 21/7/1933. Also included was a one page letter from E. Woodlock (Ned) to Mr Squire about the workings, dated Tuesday and a letter from the Gold Mines of Australia Limited saying that the information he had supplied was now with their engineers, dated 20th July, 1933. .116) A three page letter written from Armidale saying that Mam (his wife) was fretting with the move to this house. He also told of the rejection by the Gold Mines of Australia Limited of his proposal to invest in his Mt Merser Mine, stating that he believed that Jim Clements who had been the manager when the mine had previously been opened, had most likely "thrown all the cold water he could" on the proposal. He spoke at length about how this man had run the mine into the ground and his own involvement with the winding up of the company. He went on to say that he would approach Ryall to see if he was interested in investing, dated 28/7/33. Included was the letter from Gold Mines of Australia Limited, dated 26th July, 1933. .117) A two page letter written from Prahran telling of the move to another house where Mam was quite settled. He also wrote of the work Ned was carrying out at the mine as well as personal and family news. He wrote that as he had not heard from Ryall, he would visit him the following day, dated 6/8/33. Also included was a two page letter from E Woodlock to Mr Squire giving detailed information of the progress at the tunnel, as well as asking for a new pair of boots as the ground was so wet his were letting in the water, dated Thursday. .118) A two page letter explaining about a letter he received from Mr Cameron who believed he had found gold as well as some personal information and his health, dated 8/8/33. Also included was a one page letter from Neil W Cameron to R B Squire telling about some specks of gold he'd found in a post hole, dated July 31st 33. Thirdly was a one page letter from Ned to Mr Squire explaining the work he was doing in the tunnel, dated Saturday. .119) A one page note saying that he did not like the enclosed 2 copies of the typed Agreement of the Leigh River Gold Mining Company with William Ryall, but asked Tom's advice. dated 9/8/33. .120) A two page letter dealing mainly about the work going on at the new house and the settling in process. He also wrote about the proposed Agreement with Ryall, dated 11/8/33. Also included was a one page letter from Mr Ryall to R B Squire from which part of the left hand side had been severed, dated 10th August 1933. .121) A one page note from R B Squire to W Ryall dated 14/8/33, with attached one page of information and figures. Also attached a one page letter from R B Squire to W Ryall asking if Ryall would be interested viewing the plans for an alluvial mining proposition, dated 27/7/33. .122) A three page letter mainly about the visit to Ryall and a Mr Cundy about the proposed agreement with his concerns about the language and terms of the agreement, dated Sun 21st 33. Also included was a letter from Ned to Mr Squire about the continued work in the tunnel and the fact that two of the pick heads had cracked and would have to be fixed, dated Thursday. .123) A two page letter dealing with a meeting had with Ryall and others in a private office regarding the interest in investing in the mining proposition, dated 23/8/33. .124) A four page letter dealing mainly with the work at the tunnel and exploratory diggings at the spot Mr Cameron had written about as well as the damage done to the car on the way to the workings, dated 29/8/33. .125) A one page letter telling of a proposed meeting with Mr Taylor and a Mr Bowler, who may turn out to be Alan Bowler who he knew, regarding the Mr Mercer Float scheduled for the following day, dated 30/8/33. .126) A five page letter explaining the content of the meeting held with Mr Bowler, who represented an English consortium which was interested in the Mt Mercer site. He explained the terms that the consortium would offer if they went ahead, This included 25 % shares in the mine but no money, which he bemoaned because of the shortness of their cash reserves. He went on to detail the 4 distinct deposits of wash in this field, which he believed were unique in the Ballarat district. He also stated that he had not heard from Mr Ryall. He closed by talking about the water levels in the mine, dated 1/9/33. .127) A two page letter saying that he had written an 11 page report on the Mt Mercer field for the English consortium as well as a private letter for the chairman.He also reported that he had been to see Ryall. Neither party knew that he was talking to the other. added was some personal information, dated 6/9/33. .128) A one page letter telling of a meeting with Mr Bowler and Mr Tayler who carefully went through his report. It was then being typed. He believed he had two strong supporters, dated 7/9/33. Also included was a 2 page note from A Bowler to R B Squire asking him to bring the report into the office the following day to be perused and typed, dated Sept 6th 33. .129) A two page letter with personal encouragement for one of the children. The letter then goes on with more information about the meeting with Mr Tayler and Bowler and his impressions of their interest. He also talked about the one of the experts who was to examine the site and also about the report which was now typed and a copy sent to Tom, dated 8/9/33. .130) A one page letter keeping him informed of progress. The expert was away but would be briefed on his return. He also thanked Tom for a cheque, which was used to get the car 'Liz' back in order for the trip to be made with the experts at a later date. He informed Tom of his intention to return to Mt Mercer, dated 13/9/33. .131) A one page letter written from Mt Mercer telling of the trip from Melbourne and the weather. He spoke of what was happening in the tunnel and that he had not yet heard from any of the interested parties, dated Tue 19th Sept. .132) A five page letter written from Prahran with detailed information about the tunnels, the washes and the shows. He also detailed his meeting with Bryant 38 years ago at the No 1 at Carisbrook and how he had given him assistance at that time and subsequently as well as giving his version of a potted history of Bryant, dated 29/9/33. .133) A two page letter with information about the arrival of the chairman of the English group and that Ned had shown Mr Kermode around the site, dated 6/10/33. Also included was a cutting from the Age about the arrival of Mr F W Baker, representing a large English financial group interested in Victorian deep lead propositions, dated Oct 6th. As well were two, one page letters from Ned (E Woodlock) to Tom, regarding the work in the tunnels, the bad air and the hopes of a successful float, dated Tuesday and Wednesday. .134) A one page letter thanking them for the gift of eggs and parsley. He also talked about a letter from Bowler regarding the business of the experts and that their leases would be seen in due course, dated 10/10/33. Included was a one page letter from A Bowler to P B Squires saying that Mt Mercer site was receiving attention but that no decision had as yet been made, dated Oct 9th 1933. .135) A three page letter written from Prahran giving information about Richards visit and conversation with Mr Ryall, who indicated that no decision had as yet been made regarding his proposal. He also included some personal information about members of the family, dated 18/10/33. Included was a one page letter from Ned (E Woodlock) to Tom with information about the tunnelling progress in no.2 tunnel and the bad air that drove them out for a time, dated Saturday. .136) A one page letter containing a brief update on the state of affairs , dated 20/10/33. Included was a one page letter from Ned to Mr Squire with an information on the progress at the tunnel and with the information that his hands were cracked so badly that he was wearing two socks on each hand, dated Saturday. .137) A one page letter which family news and a paragraph about the figures in his calculations, dated 21/10/33. On the back side was a letter from E Squire (his wife) to Tom, Hazel & boys again with family and personal information, dated 22nd 10/33. .138) A three page letter with the disappointing news that the English consortium would not take up the option on the Mt Mercer lease and gave his opinion that it was self interest that stopped it going ahead. He then gave two options as to the way forward, dated 24/10/33. Also included was a typed one page letter from W C Tayler to R B Squire informing him of a letter stating that the proposal had been turned down, dated 23rd October 1933. .139) A three page letter informing of further developments with Mr Tayler who asked for the plans to be left at the office till the following week as there was another company who may yet be interested to take up the option, dated 27/10/33. .140) A one page letter asking for 9 copies of the old agreement to be typed for the 3 Syndicate members, Rice, Cameron and McNaughton, dated 5/11/33. .141) A three page letter regarding the decision by the Syndicate to reopen the LRG shaft and the practical issues of timber acquisition and probable costs. He then went on to talk about Mam's indisposition and treatment by the herbalist, Goon, dated 8/11/33. Also included was a newspaper clipping from the Age entitled 'Inquiries for properties at Ballarat'. .142) A three page letter giving all the news regarding the agreements, the costs and the way forward. He also spoke of his wife's improvement and other personal information, dated 11/11/33. .143) A two page letter written from Mt Mercer regarding the difficulties in obtaining the timbers and tanks needed to reopen the shaft and the state of all the existing fittings and what would be needed to get the site operational again. His agreement with Mr Read had duly been signed, dated Thurs 16th 33. .144) A two page letter with further information about the progress with acquiring and repairing the shaft site, dated Mon Nov 20th 33. .145) A three page letter informing that the timber for the whim & shaft were being delivered and the area had been cleared out for the poppet heads. The top of the shaft had been cleared ready for re-framing and other work had been carried out. Liz, the car had broken down and Jim was in the process of fixing her. He concluded with information about his and his wife's health, dated Sun 26th Nov 33. .146) A four page letter with news of Mam's health, the problems associated with fixing the car and the floods which stopped Jim from going to Ballarat and washed away the Gary Bridge which affected the mail and had halted work at the shaft, as well as delaying the second delivery of timber, dated Sun Dec 3rd. .147) richard squire, william ryall, jim clements, gold mines of australia limited, e woodlock, ned woodlock, neil w cameron, alan bowler, mr cundy, don mcnaughton, mr rice -
 Flagstaff Hill Maritime Museum and Village
Container - Earthenware jar, Bailey & Co, circa 1878
The handmade earthenware jar was one of a group of artefacts in the McCulloch Collection that were recovered from the shipwreck Loch Ard. The jar could have been from the ship's cargo or personal effects. There are other jars in our collection that were recovered from the Loch Ard. The object is now one of the shipwreck artefacts in Flagstaff Hill’s Mc Culloch Collection, which includes items recovered from the wrecks of the Victoria Tower (wrecked in 1869) and Loch Ard (wrecked in 1878). They were salvaged by a diver in the early 1970s from the southwest coast of Victoria. Advanced marine technology had enabled divers to explore the depths of the ocean and gather its treasures before protective legislation was introduced by the Government. The artefacts were donated to Queensland’s Department of Environment and Heritage Protection (EHP) by a passionate shipwreck lover and their locations were verified by Bruce McCulloch. In 2017 the Department repatriated them to Flagstaff Hill where they joined our vast collection of artefacts from Victoria’s Shipwreck Coast. The Loch Ard: - The three-masted, square-rigged iron ship Loch Ard belonged to the famous Loch Line which sailed many ships from England to Australia. The ship was built in Glasgow in 1873. The Loch Ard made three trips to Australia and one trip to Calcutta before its final voyage. The Loch Ard left England on March 2, 1878, under the command of Captain Gibbs, bound for Melbourne with a crew of 37, plus 17 passengers and a load of cargo. The general cargo included straw hats, umbrellas, perfumes, clay pipes, pianos, clocks, confectionery, linen and candles, as well as a heavier load of railway irons, cement, lead and copper. There were items included that were intended for display in the 1880 Melbourne International Exhibition, including the famous Loch Ard Peacock. On June 1, 1878, Captain Gibbs was expecting to see land but visibility was reduced by fog. As it lifted, the sheer cliffs of Victoria's west coast came much closer than expected. The captain was unable to steer away and the ship struck a reef at the base of Mutton Bird Island, near Port Campbell. The top deck was loosened from the hull, the masts and rigging came down and knocked passengers and crew overboard, and even the lifeboat crashed into the side of the ship and capsized. Of the 54 people on board, only two survived: the apprentice, Tom Pearce and the young woman passenger, Eva Carmichael. The well-packed Minton porcelain peacock also survived, safe inside its crate. Much of the cargo was washed up, smashed and broken, and some was salvaged. Other cargo is still with the wreck at the base of Mutton Bird Island, now protected by Government law. The artefact is an example of cargo or personal items on board a ship in 1878. It provides a reference point for classifying and dating similar items. This artefact is significant for its association with the sailing ship Loch Ard, one of the best-known, and one of the worst, shipwrecks in Victoria’s history. Flagstaff Hill’s collection of artefacts from Loch Ard is significant for being one of the largest collections of artefacts from this shipwreck in Victoria. It is significant for its association with the shipwreck, which is on the Victorian Heritage Register (VHR S417). The collection is significant because of the relationship between the objects, as together they have a high potential to interpret the story of the Loch Ard. The Loch Ard collection is archaeologically significant as the remains of a large international passenger and cargo ship. It is historically significant for representing aspects of Victoria’s shipping history. Container, round brown earthenware jar with a wide mouth, thick lip, a wide neck that tapers slightly inwards towards the shoulder, and a body that tapers slightly inward towards the base. The glazed surface is rough. The variegated colours of the clay also has small dark speckles. There are several chips and dents on the jar. The inscription is stamped into the lower edge. Made by Bailey & Co., England. Recovered from the wreck of the Loch Ard.Inscription “Bailey [&] Co / ENGLAND” flagstaff hill, warrnambool, flagstaff hill maritime museum, maritime museum, shipwreck coast, flagstaff hill maritime village, great ocean road, white star line, victorian heritage register, sailing ship loch ard, loch line, loch ard, captain gibbs, eva carmichael, tom pearce, glenample station, mutton bird island, loch ard gorge, migrant ship 1878, cargo ship 1878, stoneware jar, domestic container, kitchenware, kitchen storage, bailey & co england, shipwreck artefact, wreck dive, mcculloch collection, bruce mcculloch, 1878, sailing ship, earthenware, stoneware, domestic jar -
 Flagstaff Hill Maritime Museum and Village
Leisure object - Doll's Leg, circa 1878
This doll's leg was one of a set of artefacts recovered from the shipwreck of the Loch Ard that were donated together. The doll's leg could have been from the ship's cargo or personal effects. Dolls from this era were often made from fabric, which would have quickly deteriorated in the ocean. Ceramic limbs were joined to the body by tightening the fabric around the grooves on the limbs. There are other doll's limbs in our collection that were recovered from the Loch Ard The object is now one of the shipwreck artefacts in Flagstaff Hill’s Mc Culloch Collection, which includes items recovered from the wrecks of the Victoria Tower (wrecked in 1869) and Loch Ard (wrecked in 1878). They were salvaged by a diver in the early 1970s from the southwest coast of Victoria. Advanced marine technology had enabled divers to explore the depths of the ocean and gather its treasures before protective legislation was introduced by the Government. The artefacts were donated to Queensland’s Department of Environment and Heritage Protection (EHP) by a passionate shipwreck lover and their locations were verified by Bruce McCulloch. In 2017 the Department repatriated them to Flagstaff Hill where they joined our vast collection of artefacts from Victoria’s Shipwreck Coast.The Loch Ard: - The three-masted, square-rigged iron ship Loch Ard belonged to the famous Loch Line which sailed many ships from England to Australia. The ship was built in Glasgow in 1873. The Loch Ard made three trips to Australia and one trip to Calcutta before its final voyage. The Loch Ard: - The Loch Ard left England on March 2, 1878, under the command of Captain Gibbs, bound for Melbourne with a crew of 37, plus 17 passengers and a load of cargo. The general cargo included straw hats, umbrellas, perfumes, clay pipes, pianos, clocks, confectionery, linen and candles, as well as a heavier load of railway irons, cement, lead and copper. There were items included that were intended for display in the 1880 Melbourne International Exhibition, including the famous Loch Ard Peacock. On June 1, 1878, Captain Gibbs was expecting to see land but visibility was reduced by fog. As it lifted, the sheer cliffs of Victoria's west coast came much closer than expected. The captain was unable to steer away and the ship struck a reef at the base of Mutton Bird Island, near Port Campbell. The top deck was loosened from the hull, the masts and rigging came down and knocked passengers and crew overboard, and even the lifeboat crashed into the side of the ship and capsized. Of the 54 people on board, only two survived: the apprentice, Tom Pearce and the young woman passenger, Eva Carmichael. The well-packed Minton porcelain peacock also survived, safe inside its crate. Much of the cargo was washed up, smashed and broken, and some was salvaged. Other cargo is still with the wreck at the base of Mutton Bird Island, now protected by Government law. The artefact is an example of cargo or personal items on board a ship in 1878. It provides a reference point for classifying and dating similar items. This artefact is significant for its association with the sailing ship Loch Ard, one of the best-known, and one of the worst, shipwrecks in Victoria’s history. Flagstaff Hill’s collection of artefacts from Loch Ard is significant for being one of the largest collections of artefacts from this shipwreck in Victoria. It is significant for its association with the shipwreck, which is on the Victorian Heritage Register (VHR S417). The collection is significant because of the relationship between the objects, as together they have a high potential to interpret the story of the Loch Ard. The Loch Ard collection is archaeologically significant as the remains of a large international passenger and cargo ship. It is historically significant for representing aspects of Victoria’s shipping history. Doll's leg, cream-coloured ceramic leg with two seams, a flat solid top and a glazed green ankle-length heeled boot. A shallow groove runs around the leg just below the top. An inscription is stamped into the leg below the groove. Recovered from the wreck of the Loch Ard. Inscribed "2"flagstaff hill, warrnambool, maritime village, maritime museum, flagstaff hill maritime museum and village, shipwreck coast, great ocean road, shipwreck artefact, wreck dive, mcculloch collection, bruce mcculloch, loch ard, 1878, loch line, victorian heritage register, sailing ship, captain gibbs, eva carmichael, tom pearce, mutton bird island, loch ard gorge, migrant ship 1878, cargo ship 1878, doll's leg, ceramic doll leg, porcelain doll leg, doll's limb, 1870s doll, 1870's toy, ceramic limb from doll, children's toy, children's recreation, doll's leg with green boot -
 Flagstaff Hill Maritime Museum and Village
Functional object - Lamp Fitting, circa 1878
This gas pipe fitting was one of a group of artefacts in the McCulloch Collection that were recovered from the shipwreck Loch Ard and were donated together. The fitting could have been from the ship's cargo or a ship’s fitting. Lamps from this era were fuelled by gas. There are other gas lamp fittings in our collection that were recovered from the Loch Ard The object is now one of the shipwreck artefacts in Flagstaff Hill’s Mc Culloch Collection, which includes items recovered from the wrecks of the Victoria Tower (wrecked in 1869) and Loch Ard (wrecked in 1878). They were salvaged by a diver in the early 1970s from the southwest coast of Victoria. Advanced marine technology had enabled divers to explore the depths of the ocean and gather its treasures before protective legislation was introduced by the Government. The artefacts were donated to Queensland’s Department of Environment and Heritage Protection (EHP) by a passionate shipwreck lover and their locations were verified by Bruce McCulloch. In 2017 the Department repatriated them to Flagstaff Hill where they joined our vast collection of artefacts from Victoria’s Shipwreck Coast. The Loch Ard: - The three-masted, square-rigged iron ship Loch Ard belonged to the famous Loch Line which sailed many ships from England to Australia. The ship was built in Glasgow in 1873. The Loch Ard made three trips to Australia and one trip to Calcutta before its final voyage. The Loch Ard left England on March 2, 1878, under the command of Captain Gibbs, bound for Melbourne with a crew of 37, plus 17 passengers and a load of cargo. The general cargo included straw hats, umbrellas, perfumes, clay pipes, pianos, clocks, confectionery, linen and candles, as well as a heavier load of railway irons, cement, lead and copper. There were items included that were intended for display in the 1880 Melbourne International Exhibition, including the famous Loch Ard Peacock. On June 1, 1878, Captain Gibbs was expecting to see land but visibility was reduced by fog. As it lifted, the sheer cliffs of Victoria's west coast came much closer than expected. The captain was unable to steer away and the ship struck a reef at the base of Mutton Bird Island, near Port Campbell. The top deck was loosened from the hull, the masts and rigging came down and knocked passengers and crew overboard, and even the lifeboat crashed into the side of the ship and capsized. Of the 54 people on board, only two survived: the apprentice, Tom Pearce and the young woman passenger, Eva Carmichael. The well-packed Minton porcelain peacock also survived, safe inside its crate. Much of the cargo was washed up, smashed and broken, and some was salvaged. Other cargo is still with the wreck at the base of Mutton Bird Island, now protected by Government law. The artefact is an example of cargo or personal items on board a ship in 1878. It provides a reference point for classifying and dating similar items. This artefact is significant for its association with the sailing ship Loch Ard, one of the best-known, and one of the worst, shipwrecks in Victoria’s history. Flagstaff Hill’s collection of artefacts from Loch Ard is significant for being one of the largest collections of artefacts from this shipwreck in Victoria. It is significant for its association with the shipwreck, which is on the Victorian Heritage Register (VHR S417). The collection is significant because of the relationship between the objects, as together they have a high potential to interpret the story of the Loch Ard. The Loch Ard collection is archaeologically significant as the remains of a large international passenger and cargo ship. It is historically significant for representing aspects of Victoria’s shipping history. Brass decorative gas lamp fitting. Two flat arms of different lengths are joined on either side of a fitting that has a fleur-de-lis-like design. The shorter arm has a J-shaped brass pipe fitted to it with a decorative threaded cube joint part way along, and ends with a triangular tap and knob. The longer arm is also J-shaped and ends with a feather design on it. There are remnants of green paint on the cube fittings and the knob. Recovered from the wreck of the Loch Ard.flagstaff hill, warrnambool, maritime village, maritime museum, flagstaff hill maritime museum and village, shipwreck coast, great ocean road, shipwreck artefact, wreck dive, mcculloch collection, bruce mcculloch, loch ard, 1878, loch line, victorian heritage register, sailing ship, captain gibbs, eva carmichael, tom pearce, mutton bird island, loch ard gorge, migrant ship 1878, cargo ship 1878, lamp fitting, gas lamp fitting, ship’s fitting, ship’s lamp, brass lamp fitting, lighting, domestic lighting, ship’s lighting -
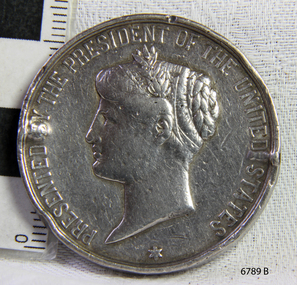 Flagstaff Hill Maritime Museum and Village
Award - Medal, Nelson Johnson, November 1880
This medal for bravery, for rescue of the crew from the shipwreck “Eric the Red” on 4th September 1880, was awarded to one of the crew of the steamer S.S. Dawn by the President of the United States in July 1881. The medal is engraved with the name “Nelson Johnson” (the anglicised version of his Swedish name Neils Frederick Yohnson). It was donated to Flagstaff Hill Maritime Village in 2013 by Nelson’s granddaughter. Nelson had migrated from Sweden to Sydney in 1879. The next year in 1880, aged 24, he was a seaman on the steamship Dawn and involved in the rescue of the survivors of the Eric the Red. Nelson Johnson was a crew member of the S.S. Dawn and was one of the rescue team in the dinghy in the early morning of September 4th 1880. Medals were awarded to the Captain and crew of the S.S. Dawn by the President of the United States, through the Consul-general (Mr Oliver M. Spencer), in July 1881 “ … in recognition of their humane efforts in rescuing the 23 survivors of the American built wooden sailing ship, the Eric the Red, on 4th September 1880.” The men were also presented with substantial monetary rewards and gifts. The city of Warrnambool’s care of the survivors was also mentioned by the President at the presentation, saying that “the city hosted and supported the crew ‘most graciously’. Previously, a week after the shipwreck, the Australian Government had also conveyed its thanks to the Captain and crew of the S.S. Dawn “Captain Griffith Jones, S.S. Dawn, The Hon. Mr Clark desires that the thanks of the Government should be conveyed to you for the prompt, persevering and seamanlike qualities displayed by you, your officers and crew in saving the number of lives you did on the occasion referred to. The hon. The Commissioner has also been pleased to award you a souvenir in commemoration of the occasion, and a sum of 65 pounds to be awarded to your officers and crew according to annexed scale. I am, &c, W Collins Rees, for and in the absence of the Chief Harbour Master.” The Awards are as follows: - Crew of DAWN'S lifeboat-Chief Officer, Mr G. Peat, 15 pounds; boat's crew-G. Sterge, A.B., 5 pounds; T. Hammond, A.B., 5 pounds; J. Black, A.B., 5 pounds; H. Edwards, A.B., 5 pounds. Dinghy's Crew-Second Officer, Mr Christie, 10 pounds; boat's crew -F. Lafer, A.B., 5 pounds; W. Johnstone, A.B., 5 pounds; Mr Lear, provedore, 5 pounds; Mr Dove, purser, 5 pounds. Captain Jones receives a piece of plate. (from “Wreck of the ship Eric the Red” by Jack Loney) The medal’s history, according to the Editor of ‘E-Sylum’ (the newsletter of The Numismatic Bibliomania Society “… appears to be an example of an 1880 State Department medal, catalogued as LS-3 (page 322 of R. W. Julian's book, Medals of the United States Mint: The First Century 1792-1892). The reverse is mostly blank for engraving, surrounded by a thin wreath. It was designed by George Morgan, chief engraver for the Philadelphia Mint, and struck in gold, silver and bronze. The one pictured here (in The Standard newspaper, 2nd July 2013) appears to be silver.” The following is an account of the events which led to the awarding of this medal. The American ship Eric the Red was a wooden, three-masted clipper ship. She had 1,580 tons register and was the largest full-rigged ship built at Bath, Maine, USA in 1871. She was built and registered by Arthur Sewall, later to become the partnership E. & A. Sewall, the 51st ship built by this company. The annually-published List of Merchant Vessels of the U.S. shows Bath was still the home port of Eric the Red in 1880. The vessel was named after the Viking discoverer, Eric ‘the Red-haired’ Thorvaldsson, who was the first European to reach the shores of North America (in 980AD). The ship Eric the Red at first traded in coal between America and Britain, and later traded in guano nitrates from South America. In 1879 she was re-metalled and was in first-class condition. On 10th June 1880 (some records say 12th June) Eric the Red departed New York for Melbourne and then Sydney. She had been commissioned by American trade representatives to carry a special cargo of 500 exhibits (1400 tons) – about a quarter to a third of America’s total exhibits - for the U.S.A. pavilion at Melbourne’s first International Exhibition. The exhibits included furniture, ironmongery, wines, chemicals, dental and surgical instruments, paper, cages, bronze lamp trimmings, axles, stamped ware, astronomical and time globes, samples of corn and the choicest of leaf tobacco. Other general cargo included merchandise such as cases of kerosene and turpentine, brooms, Bristol's Sarsaparilla, Wheeler and Wilson sewing machines, Wheeler’s thresher machine, axe handles and tools, cases of silver plate, toys, pianos and organs, carriages and Yankee notions. The Eric the Red left New York under the command of Captain Zaccheus Allen (or some records say Captain Jacques Allen) and 24 other crew including the owner’s son third mate Ned Sewall. There were also 2 saloon passengers on board. The ship had been sailing for an uneventful 85 days and the voyage was almost at its end. As Eric the Red approached Cape Otway there was a moderate north-west wind and a hazy and overcast atmosphere. On 4th September 1880 at about 1:30 am Captain Allen sighted the Cape Otway light and was keeping the ship 5-6 miles offshore to stay clear of the hazardous Otway Reef. However, he had badly misjudged his position. The ship hit the Otway Reef about 2 miles out to sea, southwest of the Cape Otway light station. Captain Allen ordered the wheel to be put ‘hard up’ thinking that she might float off the reef. The sea knocked the helmsman away from the wheel, broke the wheel ropes and carried away the rudder. The lifeboats were swamped, the mizzenmast fell, with all of its riggings, then the mainmast also fell and the ship broke in two. Some said that the passenger Vaughan, who was travelling for his health and not very strong, was washed overboard and never seen again. The ship started breaking up. The forward house came adrift with three of the crew on it as well as a longboat, which the men succeeded in launching and keeping afloat by continually bailing with their sea boots. The captain, the third mate (the owner’s son) and others clung to the mizzenmast in the sea. Then the owner’s son was washed away off the mast. Within 10 minutes the rest of the ship was in pieces, completely wrecked, with cargo and wreckage floating in the sea. The captain encouraged the second mate to swim with him to the deckhouse where there were other crew but the second mate wouldn’t go with him. Eventually, the Captain made it to the deckhouse and the men pulled him up. At about 4:30 am the group of men on the deckhouse saw the lights of a steamer and called for help. At the same time, they noticed the second mate and the other man had drifted nearby, still on the spur, and pulled them both onto the wreck. The coastal steamer SS Dawn was returning to Warrnambool from Melbourne, and its sailing time was different to its usual schedule. She was built in 1876 and bought by the Portland and Belfast Steam Navigation Co. in 1877. At the time of this journey, she was commanded by Captain Jones and was sailing between Melbourne and Portland via Warrnambool. The provedore the Dawn, Benjamin Lear, heard cries of distress coming through the portholes of the saloon. He gave the alarm and the engines were stopped. Cries could be heard clearly, coming from the land. Captain Jones sent out crew in two boats and fired off rockets and blue lights to illuminate the area. They picked up the three survivors who were in the long boat from Eric the Red. Two men were picked up out of the water, one being the owner’s son who was clinging to floating kerosene boxes. At daylight, the Dawn then rescued the 18 men from the floating portion of the deckhouse, which had drifted about 4 miles from where they’d struck the reef. Shortly after the rescue the deckhouse drifted onto breakers and was thrown onto rocks at Point Franklin, about 2 miles east of Cape Otway. Captain Jones had signalled to Cape Otway lighthouse the number of the Eric the Red and later signalled that there was a wreck at Otway Reef but there was no response from the lighthouse. The captain and crew of the Dawn spent several more hours searching unsuccessfully for more survivors, even going back as far as Apollo Bay. On board the Dawn the exhausted men received care and attention to their needs and wants, including much-needed clothing. Captain Allen was amongst the 23 battered and injured men who were rescued and later taken to Warrnambool for care. Warrnambool’s mayor and town clerk offered them all hospitality, the three badly injured men going to the hospital for care and others to the Olive Branch Hotel, then on to Melbourne. Captain Allen’s leg injury prevented him from going ashore so he and three other men travelled on the Dawn to Portland. They were met by the mayor who also treated them all with great kindness. Captain Allen took the train back to Melbourne then returned to America. Those saved were Captain Zaccheus Allen (or Jacques Allen), J. Darcy chief mate, James F. Lawrence second mate, Ned Sewall third mate and owner’s son, John French the cook, C. Nelson sail maker, Clarence W. New passenger, and able seamen Dickenson, J. Black, Denis White, C. Herbert, C. Thompson, A. Brooks, D. Wilson, J. Ellis, Q. Thompson, C. Newman, W. Paul, J. Davis, M. Horenleng, J. Ogduff, T. W. Drew, R. Richardson. Four men had lost their lives; three of them were crew (Gus Dahlgreen ship’s carpenter, H. Ackman steward, who drowned in his cabin, and George Silver seaman) and one a passenger (J. B. Vaughan). The body of one of them had been found washed up at Cape Otway and was later buried in the lighthouse cemetery; another body was seen on an inaccessible ledge. Twelve months later the second mate James F. Lawrence, from Nova Scotia passed away in the Warrnambool district; an obituary was displayed in the local paper. Neither the ship nor its cargo was insured. The ship was worth about £15,000 and the cargo was reportedly worth £40,000; only about £2,000 worth had been recovered. Cargo and wreckage washed up at Apollo Bay, Peterborough, Port Campbell, Western Port and according to some reports, even as far away as the beaches of New Zealand. The day after the wreck the government steamship Pharos was sent from Queenscliff to clear the shipping lanes of debris that could be a danger to ships. The large midship deckhouse of the ship was found floating in a calm sea near Henty Reef. Items such as an American chair, a ladder and a nest of boxes were all on top of the deckhouse. As it was so large and could cause danger to passing ships, Captain Payne had the deckhouse towed towards the shore just beyond Apollo Bay. Between Apollo Bay and Blanket Bay, the captain and crew of Pharos collected Wheeler and Wilson sewing machines, nests of boxes, bottles of Bristol’s sarsaparilla, pieces of common American chairs, axe handles, a Wheelers’ Patent thresher and a sailor’s trunk with the words “A. James” on the front. A ship’s flag-board bearing the words “Eric the Red” was found on the deckhouse; finally, those on board the Pharos had the name of the wrecked vessel. During this operation, Pharos came across the government steamer Victoria and also a steamer S.S. Otway, both of which were picking up flotsam and wreckage. A whole side of the hull and three large pieces of the other side of the hull, with some of the copper sheathing stripped off, had floated onto Point Franklin. Some of the vessels' yards and portions of her masts were on shore. The pieces of canvas attached to the yards and masts confirmed that the vessel had been under sail. The beach there was piled with debris several feet high. There were many cases of Diamond Oil kerosene, labelled R. W. Cameron and Company, New York. There were also many large planks of red pine, portions of a small white boat and a large, well-used oar. Other items found ashore included sewing machines (some consigned to ‘Long and Co.”) and notions, axe and scythe handles, hay forks, wooden pegs, rolls of wire (some branded “T.S” and Co, Melbourne”), kegs of nails branded “A.T. and Co.” from the factory of A. Field and Son, Taunton, Massachusetts, croquet balls and mallets, buggy fittings, rat traps, perfumery, cutlery and Douay Bibles, clocks, bicycles, chairs, a fly wheel, a cooking stove, timber, boxes, pianos, organs and a ladder. (Wooden clothes pegs drifted in for many years). There seemed to be no personal luggage or clothing. The Pharos encountered a long line, about one and a half miles, of f locating wreckage about 10 miles off land, southeast of Cape Otway, and in some places about 40 feet wide. It seemed that more than half of it was from Eric the Red. The ship’s crew rescued 3 cases that were for the Melbourne Exhibition and other items from amongst the debris. There were also chairs, doors, musical instruments, washing boards, nests of trunks and flycatchers floating in the sea. Most of the goods were saturated and smelt of kerosene. A section of the hull lies buried in the sand at Parker River Beach. An anchor with a chain is embedded in the rocks east of Point Franklin and a second anchor, thought to be from Eric the Red, is on display at the Cape Otway light station. (There is a photograph of a life belt on the verandah of Rivernook Guest House in Princetown with the words “ERIC THE RED / BOSTON”. This is rather a mystery as the ship was registered in Bath, Maine, USA.) Parts of the ship are on display at Bimbi Park Caravan Park and at Apollo Bay Museum. Flagstaff Hill Maritime Village also has part of the helm (steering wheel), a carved wooden sword (said to be the only remaining portion of the ship’s figurehead; further research is currently being carried out), a door, a metal rod, samples of wood and this medal awarded for the rescue of the crew. Much of the wreckage was recovered by the local residents before police and other authorities arrived at the scene. Looters went to great effort to salvage goods, being lowered down the high cliff faces to areas with little or no beach to collect items from the wreckage, their mates above watching out for dangerous waves. A Tasmanian newspaper reports on a court case in Stawell, Victoria, noting a man who was caught 2 months later selling tobacco from the wreckage of Eric the Red. Some of the silverware is still treasured by descendants of Mr Mackenzie who was given these items by officials for his help in securing the cargo. The gifts included silver coffee and teapots, half a dozen silver serviette rings and two sewing machines. A Mr G.W. Black has in his possession a medal and a purse that was awarded to his father, another Dawn crew member who was part of the rescue team. The medal is similarly inscribed and named “To John Black ….” (from “Shipwrecks” by Margaret E. Mackenzie, 3rd edition, published 1964). The wreck and cargo were sold to a Melbourne man who salvaged a quantity of high-quality tobacco and dental and surgical instruments. Timbers from the ship were salvaged and used in the construction of houses and shed around Apollo Bay, including a guest house, Milford House (since burnt down in bushfires), which had furniture, fittings and timber on the dining room floor from the ship. A 39.7-foot-long trading ketch, the Apollo, was also built from its timbers by Mr Burgess in 1883 and subsequently used in Tasmanian waters. It was the first attempt at shipbuilding in Apollo Bay. In 1881 a red light was installed about 300 feet above sea level at the base of the Cape Otway lighthouse to warn ships when they were too close to shore; It would not be visible unless a ship came within 3 miles from it. This has proved to be an effective warning. Nelson Johnson married Elizabeth Howard in 1881 and they had 10 children, the father of the medal’s donor being the youngest. They lived in 13 Tichbourne Place, South Melbourne, Victoria. Nelson died in 1922 in Fitzroy Victoria, age 66. In 1895 the owners of the S.S. Dawn, the Portland and Belfast Steam Navigation Co., wound up and sold out to the Belfast Company who took over the Dawn for one year before selling her to Howard Smith. She was condemned and sunk in Suva in 1928. The State Library of Victoria has a lithograph in its collection depicting the steamer Dawn and the shipwrecked men, titled. "Wreck of the ship Eric the Red, Cape Otway: rescue of the crew by the Dawn". The medal for bravery is associated with the ship the “The Eric the Red which is historically significant as one of Victoria's major 19th century shipwrecks. (Heritage Victoria Eric the Red; HV ID 239) The wreck led to the provision of an additional warning light placed below the Cape Otway lighthouse to alert mariners to the location of Otway Reef. The site is archaeologically significant for its remains of a large and varied cargo and ship's fittings being scattered over a wide area. The site is recreationally and aesthetically significant as it is one of the few sites along this coast where tourists can visit identifiable remains of a large wooden shipwreck, and for its location set against the background of Cape Otway, Bass Strait, and the Cape Otway lighthouse.“ (Victorian Heritage Database Registration Number S239, Official Number 8745 USA) This medal was awarded to Nelson Johnson by the U.S. President for bravery in the rescue of the Eric the Red crew. The obverse of the round, solid silver medal has an inscription around the rim. In the centre of the medal is the head of Liberty to the left, hair in a bun, with a sprig of leaves in the top left of a band around her head. There is a 6-pointed star below the portrait, between the start and end of the inscription. There are two raised areas on the rim, horizontally opposite each other, from the edge to just below the lettering and coinciding with the holes drilled in the edge. Slightly right of the top is a round indentation in the rim. The reverse has a wreath of leaves as a border, joined at the bottom by a ribbon bow. In the centre of the medal is an inscription, decorated with 3-pronged design and dots. The edge is plain with 2 small, rough and uneven holes horizontally opposite to each other, as though they had been used for mounting the medal at some stage. The medal has a matte finish on both sides and is slightly pitted and scratched.“PRESENTED BY THE PRESIDENT OF THE UNITED STATES” around the perimeter of the obverse of the medal. “TO / Nelson Johnson, / seaman of the British, / str “Dawn”, for bravery, / at risk of life, / in / rescuing the crew of / the American Ship / “Eric the Red.” “M” on obverse, truncation of the portraitwarrnambool, flagstaff hill, flagstaff hill maritime village, maritime museum, shipwreck coast, great ocean road, shipwreck artefact, eric the red, zaccheus allen, sewall, 1880, melbourne exhibition, cape otway, otway reef, victorian shipwreck, medal, nelson johnson, neils frederick yohnson, s.s. dawn, george morgan, hero -
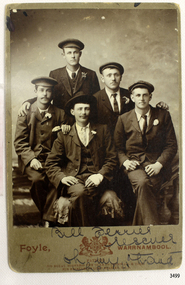 Flagstaff Hill Maritime Museum and Village
Postcard - People, Bill Ferrier - rescuer, 11th November, 1905
The postcard shows a photograph of William Ferrier, the 25-year-old Warrnambool fisherman from South Warrnambool whose rescue of two sailors from the wrecked La Bella made him an overnight National hero, quoted as “one of the most heroic rescues in Victoria’s shipwreck history”. The La Bella was wrecked on 10th November 1905 and the photograph was taken on the next day. In the photograph, William Ferrier is seated in the centre, with four of the five survivors beside him: (from left to right) Leonard Robertson, R. Payne, Oscar Rosenholme and Jack Noake. The photograph was taken by Foyle Photography Studio in Warrnambool, originally owned by James Charles Foyle. He previously had a photographic studio in Melbourne 1882 1887, then opened “Foyle’s Photo Card Studios” in Liebig St, Warrnambool. James Foyle died on 13th July 1905 and his son and daughter, Charles and Lilian Foyle continued on with the business until 1945. This photograph was most likely taken by either Charles or Lilian Foyle. The story of William Ferrier’s brave act follows on below … The ship from which the sailors were rescued was the three-masted, iron and steel barquentine the La Bella, built in Norway in 1893. She was one of two iron and steel ships by Johan Smith, the company was one of the leading shipping families in Tvedestrand, Norway. She was significant to Norwegian shipping, being one of only 27 iron and steel ships ever built in Norway. She was registered in New Zealand and engaged from 1902 in inter-colonial trading of timber in the Pacific, between New Zealand and Australia and was often in Port Phillip Bay, Victoria. On 5th October 1905, the twelve-year-old La Bella left Lyttleton, New Zealand carrying a cargo of timber bound for Warrnambool, Australia. She was manned by a crew of twelve: the Master, (Captain Mylius, previously 1st Mate of La Bella, appointed Captain to La Bella on 6th February 1903) 2 Mates, Cook, six able seamen, one ordinary seaman and a boy. Bad weather en route caused her to shelter at Burnie on Tasmania's North West coast. On November 10th, the 37th day of her journey, La Bella approached Warrnambool. Captain Mylius steered her towards Lady Bay Channel in heavy south-west seas and evening mist. He ordered the helmsman to steer for the light. As the ship came round, a tremendous sea struck her on the port quarter, causing her to breach broadside in a northwesterly direction into breakers. The helm was brought round twice more, but each time heavy seas broke over her, the third time throwing the La Bella on to a submerged reef in Lady Bay now known as La Bella Reef (about 100 yards from the Warrnambool breakwater). The sea was so rough that it even wrenched a one-and-a-half ton anchor from its fastenings and into the sea. As Captain Mylius headed to the steel wheelhouse, intending to send up a rocket flare, a huge sea slammed the steel door into him (resulting in massive bruising front and back) Despite his injuries he still managed to set off a blue light, which he held up in his hands. La Bella’s lifeboats were filled with seawater and broke up on their chocks. The blue light was the first indication to people on the shore that there was a ship in distress. The Harbour Master, Captain Roe (who lived in the Harbour Master’s House opposite Flagstaff Hill), organised a group of volunteers to crew the lifeboat because the trained crew was unavailable; the crewmen were working on a steamer in Port Fairy at the time. He then poured oil onto the water to try and smooth the sea. At around 11 pm three of the crew took shelter in the steel forecastle but the sea crashed into it and broke it up. While the rest of the crew and onlookers watched helplessly in the moonlight the bodies were washed away into the sea, never to be seen again. Some of the crew lashed themselves to the weather rail to keep from being washed away. Watson, the ordinary seaman, became tangled in the rigging lines and was too weak to move, so the 2nd Mate, Robertson, put a line onto him so that he wouldn’t wash off. Around 11 pm three of the crew were unconscious from exhaustion. The situation on La Bella was becoming dangerous. The 2nd Mate moved to the ‘house’ and soon afterwards the ship slipped in the heavy sea. The lashings of the 1st Mate and the ‘boy’ Denham had kept them safe until about 2 am when they were washed overboard; no one was able to help. One by one, the exhausted crew were being washed overboard, too weak to hold on any longer. During the night the La Bella had broken into two and the deckhouse ran out towards the sea. Two more men drowned when trying to reach the lifeboat. By sunrise, the only survivors of the twelve were the Master, 2nd Mate and three seamen. Early in the morning, Captain Roe used the rocket apparatus on shore to try and shoot a line to the ship for a safer rescue but each attempt fell short of the target. Several attempts were made by the lifeboat to rescue the stricken sailors, but the rough conditions made this difficult for the boat to get close enough to the ship and the lifeboat had to return to shore. During a final attempt to reach the ship Captain Mylius ordered his men to jump into the sea. Leonard Robertson, 2nd mate, jumped and swam towards the lifeboat, taking hold of the boat hook offered to him. Oscar Rosenholme managed to reach the boat floating on a piece of timber from the ship’s load and a third survivor, Noake, also made the boat. Along with the lifeboat rescue crew, 25-year-old William Ferrier rowed his small dingy through the heavy seas and managed to rescue the Captain, whom he landed on the breakwater. Ferrier then returned to the ship to attempt a final rescue, losing his oars and rowlocks into the high sea. Using just a spare paddle he skulled towards the La Bella, reaching her stern in time to cut loose the lone surviving sailor, Payne, from the lashing that held him to the ship; the terrified sailor dropped from the ship and into the dingy. Shortly after the last man was rescued, the La Bella was lifted by a huge wave and crashed back down on the reef; she broke up and sank. The ordeal had lasted ten hours. The survivors were taken to the nearby Bay View Hotel and gratefully received warm food and clothing, medical attention and a place to sleep. In the following days, an unidentified body of a young person had washed ashore; it was either Watson or Denham. The body was buried in the Warrnambool cemetery with an appropriate gravestone and inscription. William Ferrier became a national hero as news of the daring rescue spread. In recognition of his bravery in the two daring rescues, he was awarded the Silver Medal for Bravery by the Royal Humane Society and was honoured in the letter from the Prime Minister and the Parliament of the Commonwealth, telegrams and a cheque for £20 from the Governor-General, over £150 subscribed by the public, including Warrnambool and district and readers of The Argus, and a gold medal from the Glenelg Dinghy Club of South Australia. Ferrier’s rescue efforts are one of the most heroic in Victoria’s shipwreck history. (William Ferrier’s son, Frank, received a similar award almost fifty years later when he helped rescue four members of the crew on the yacht Merlan after it ran on to a reef near the Point Lonsdale Lighthouse. ) The wreck of La Bella now lies on her port side in 13 metres of sheltered water inside the reef she struck. The bow section is relatively intact and part of the stern has drifted north-easterly towards the mouth of the Hopkins River. The reef the La Bella struck now bears its name. Those five rescued from the La Bella were Captain George Mylius, Leonard Robertson (2nd Mate, 21 years old), R. Payne, Oscar Rosenholme and Jack Noake. Those seven who lost their lives were Mr Coulson (1st mate), Charles Jackman (cook) Gustave Johnson, Pierre Johann and Robert Gent (all able seamen), Harry Watson (ordinary seaman) and Jack Denham (ship’s boy), Captain Mylius was found guilty of careless navigation; he had sailed into the bay without the services of a pilot. His Master Certificate was suspended for twelve months. Later he was also charged with manslaughter of one of the crew who had died when the La Bella was wrecked but found not guilty. The event’s adverse publicity and damage to his career took a toll on his health and he died of a heart attack six months after the wreck; he was only thirty-seven. His body was buried in the Melbourne General Cemetery. The La Bella was “the best documented of all sailing ships owned in New Zealand”. Her record books, ship logs, correspondence and supporting papers are still available. At the time of the tragedy, she was owned by Messers David C.Turnbull and Co. of Timaru, New Zealand timber merchants and shipping agents, who had purchased her on 13th December 1901. A detailed account of the last journey of La Bella can be read in “Leonard Robertson, the Whangaroa & La Bella” written by Jack Churchouse, published in 1982 by Millwood Press Ltd, Wellington, NZ. As well as this postcard, Flagstaff Hill’s La Bella Collection includes a photograph of the wrecked La Bella, a brass rail holder and the letter from the Prime Minister and other Members of Parliament that was sent to William Ferrier to commend him for his bravery. Some 15 – 17 ships are believed to have sunk in Lady Bay, but only two have been discovered on the seafloor; the “La Bella” and the “Edinburgh Castle”. Both wrecks are popular diving sites and are preserved as significant historical marine and marine archaeological sites. This postcard is part of the La Bella Collection and is significant at both a local and state level. Its connection to the La Bella shipwreck and the rescue of five survivors highlights the dangers of Victoria’s Shipwreck Coast. The photograph of William Ferrier and four of the five survivors demonstrates the bravery of ordinary Australians who risked their lives to save victims of shipwrecks along the coast. The postcard is significant to the history of Warrnambool as it portrays William Ferrier, a local fisherman whose descendants continue to live in the area. It highlights the way of life of people who lived in coastal towns in 19th century Victoria and the effects of shipwrecks upon them. The postcard connects to the congratulatory letter which was sent to William Ferrier by the Prime Minister and Government of Australia and demonstrates the importance they attached to his efforts for Victoria and to Australia. The postcard is also an example of the photography of Foyle Photographers who were in the town of Warrnambool from the late 1800’s. Charles and Lillian Foyle took over the business when their father James died in 1905. Lillian Foyle is significant as the first woman photographer in Warrnambool. It is not known whether Charles of Lillian took this photograph. This postcard is significant because of its association with the sailing ship “La Bella”. The “La Bella” is of local and state and national significance. It is one of the only two shipwrecks discovered in Lady Bay, Warrnambool, out of the 15-17 shipwrecks in the bay. Sepia photograph of William (Bill) Ferrier (seated in the middle), heroic rescuer of two crew members of the La Bella, wrecked at Warrnambool. The photograph is a postcard and shows five men dressed formally in suits and hats. Printed below the photograph are the name and place of the photographer, a royal crest and the details of two patrons of the photographer. Also below the photograph are some handwritten words in black pen. On the back of the postcard is a handwritten message in the same writing as the front.Printed on the front of the card is “Foyle, WARRNAMBOOL” “PATRONS: / HIS ROYAL HIGHNESS THE DUKE OF CORNWALL & YORK. / HIS EXCELLENCY LORD BRAS_ EY, R.O.B.” Handwritten on the front of the card is “Bill Ferrier / rescuer / Oh my hero _ _ _ “ Handwritten on the back of the card is a message. “La Bella” Wrecked off W.Bool Breakwater Nov. 1906 (_ _ _ _ show night) Payne Noake Rosenholme Robertson and Capt Mylius (saved) (moonlight bright) Watson (_ _ _ _ boy) Richwoud [possibly Richmond] drowned” and signed “Desdewoua [possibly Desdemona] Slogos”la bella, foyle, william ferrier, bill ferrier, lady bay, 1905, 10th november 1905, 11th november 1905, parliament of the commonwealth, royal humane society medal, flagstaff hill, warrnambool, shipwrecked coast, flagstaff hill maritime museum, maritime museum, shipwreck coast, flagstaff hill maritime village -
 Flagstaff Hill Maritime Museum and Village
Letter - William Ferrier, 14th November 1905
The letter to William Ferrier of South Warrnambool from the Prime Minister and the Parliament of the Commonwealth recognised the significance of William’s brave and courageous lifesaving act to the people of Australia; “They all feel that your conduct was worthy of the best deeds done by British sailors in the past and they are proud to know that Australia can produce such as you.” The story of that brave rescue follows on below … The ship from which the sailors were rescued was the three-masted, iron and steel barquentine the La Bella, built in Norway in 1893. She was one of two iron and steel ships by Johan Smith, The company was one of the leading shipping families in Tvedestrand, Norway. She was significant to Norwegian shipping, being one of only 27 iron and steel ships ever built in Norway. She was registered in New Zealand and engaged from 1902 in inter-colonial trading of timber in the Pacific, between New Zealand and Australia and was often in Port Phillip Bay, Victoria. On 5th October 1905, the twelve-year-old La Bella left Lyttleton, New Zealand carrying a cargo of timber bound for Warrnambool, Australia. She was manned by a crew of twelve: the Master, (Captain Mylius, previously 1st Mate of La Bella, appointed Captain to La Bella on 6th February 1903) 2 Mates, Cook, six able seamen, one ordinary seaman and a boy. Bad weather en route caused her to shelter at Burnie on Tasmania's North West coast. On November 10th, the 37th day of her journey, La Bella approached Warrnambool. Captain Mylius steered her towards Lady Bay Channel in heavy south-west seas and evening mist. He ordered the helmsman to steer for the light. As the ship came round, a tremendous sea struck her on the port quarter, causing her to breach broadside in a north-westerly direction into breakers. The helm was brought round twice more, but each time heavy seas broke over her, the third time throwing the La Bella on to a submerged reef in Lady Bay now known as La Bella Reef (about 100 yards from the Warrnambool breakwater). The sea was so rough that it even wrenched a one-and-a-half ton anchor from its fastenings and into the sea. As Captain Mylius headed to the steel wheelhouse, intending to send up a rocket flare, a huge sea slammed the steel door into him (resulting in massive bruising front and back) Despite his injuries he still managed to set off a blue light, which he held up in his hands. La Bella’s lifeboats were filled with seawater and broke up on their chocks. The blue light was the first indication to people on the shore that there was a ship in distress. The Harbour Master, Captain Roe (who lived in the Harbour Master’s House opposite Flagstaff Hill), organised a group of volunteers to crew the lifeboat because the trained crew was unavailable; the crewmen were working on a steamer in Port Fairy at the time. He then poured oil onto the water to try and smooth the sea. At around 11 pm three of the crew took shelter in the steel forecastle but the sea crashed into it and broke it up. While the rest of the crew and onlookers watched helplessly in the moonlight the bodies were washed away into the sea, never to be seen again. Some of the crew lashed themselves to the weather rail to keep from being washed away. Watson, the ordinary seaman, became tangled in the rigging lines and was too weak to move, so the 2nd Mate, Robertson, put a line onto him so that he wouldn’t wash off. Around 11 pm three of the crew were unconscious from exhaustion. The situation on La Bella was becoming dangerous. The 2nd Mate moved to the ‘house’ and soon afterwards the ship slipped in the heavy sea. The lashings of the 1st Mate and the ‘boy’ Denham had kept them safe until about 2 am when they were washed overboard; no one was able to help. One by one, the exhausted crew were being washed overboard, too weak to hold on any longer. During the night the La Bella had broken into two and the deckhouse ran out towards the sea. Two more men drowned when trying to reach the lifeboat. By sunrise, the only survivors of the twelve were the Master, 2nd Mate and three seamen. Early in the morning, Captain Roe used the rocket apparatus on shore to try and shoot a line to the ship for a safer rescue but each attempt fell short of the target. Several attempts were made by the lifeboat to rescue the stricken sailors, but the rough conditions made this difficult for the boat to get close enough to the ship and the lifeboat had to return to shore. During a final attempt to reach the ship Captain Mylius ordered his men to jump into the sea. Leonard Robertson, 2nd mate, jumped and swam towards the lifeboat, taking hold of the boat hook offered to him. Oscar Rosenholme managed to reach the boat floating on a piece of timber from the ship’s load and a third survivor, Noake, also made the boat. Along with the lifeboat rescue crew, 25-year-old William Ferrier rowed his small dingy through the heavy seas and managed to rescue the Captain, whom he landed on the breakwater. Ferrier then returned to the ship to attempt a final rescue, losing his oars and rowlocks into the high sea. Using just a spare paddle he skulled towards the La Bella, reaching her stern in time to cut loose the lone surviving sailor, Payne, from the lashing that held him to the ship; the terrified sailor dropped from the ship and into the dingy. Shortly after the last man was rescued, the La Bella was lifted by a huge wave and crashed back down on the reef; she broke up and sank. The ordeal had lasted ten hours. The survivors were taken to the nearby Bay View Hotel and gratefully received warm food and clothing, medical attention and a place to sleep. In the following days, an unidentified body of a young person has washed ashore; it was either Watson or Denham. The body was buried in the Warrnambool cemetery with an appropriate gravestone and inscription. William Ferrier became a national hero as news of the daring rescue spread. In recognition of his bravery in the two daring rescues, he was awarded the Silver Medal for Bravery by the Royal Humane Society and was honoured in the letter from the Prime Minister and the Parliament of the Commonwealth, telegrams and a cheque for £20 from the Governor-General, over £150 subscribed by the public, including Warrnambool and district and readers of The Argus, and a gold medal from the Glenelg Dinghy Club of South Australia. Ferrier’s rescue efforts are one of the most heroic in Victoria’s shipwreck history. (William Ferrier’s son, Frank, received a similar award almost fifty years later when he helped rescue four members of the crew on the yacht Merlan after it ran on to a reef near the Point Lonsdale Lighthouse. ) The wreck of La Bella now lies on her port side in 13 metres of sheltered water inside the reef she struck. The bow section is relatively intact and part of the stern has drifted north-easterly towards the mouth of the Hopkins River. The reef the La Bella struck now bears its name. Those five rescued from the La Bella were Captain George Mylius, Leonard Robertson (2nd Mate, 21 years old), R. Payne, Oscar Rosenholme and Jack Noake. Those seven who lost their lives were Mr Coulson (1st mate), Charles Jackman (cook) Gustave Johnson, Pierre Johann and Robert Gent (all able seamen), Harry Watson (ordinary seaman) and Jack Denham (ship’s boy), Captain Mylius was found guilty of careless navigation; he had sailed into the bay without the services of a pilot. His Master Certificate was suspended for twelve months. Later he was also charged with the manslaughter of one of the crew who had died when the La Bella was wrecked but found not guilty. The event’s adverse publicity and damage to his career took a toll on his health and he died of a heart attack six months after the wreck; he was only thirty-seven. His body was buried in the Melbourne General Cemetery. The La Bella was “the best documented of all sailing ships owned in New Zealand”. Her record books, ship logs, correspondence and supporting papers are still available. At the time of the tragedy, she was owned by Messers David C.Turnbull and Co. of Timaru, New Zealand timber merchants and shipping agents, who had purchased her on 13th December 1901. A detailed account of the last journey of La Bella can be read in “Leonard Robertson, the Whangaroa & La Bella” written by Jack Churchouse, published in 1982 by Millwood Press Ltd, Wellington, NZ. As well as this letter, Flagstaff Hill’s La Bella Collection includes a photograph of the wrecked La Bella, a brass rail holder and a postcard of William Ferrier with four of the survivors. Some 15 – 17 ships are believed to have sunk in Lady Bay, but only two have been discovered on the seafloor; the “La Bella” and the “Edinburgh Castle”. Both wrecks are popular diving sites and are preserved as significant historical marine and marine archaeological sites. This original congratulatory letter sent to William Ferrier by the Prime Minister and Government of Australia demonstrates the importance attached to his efforts for Victoria and to Australia. The letter is part of the La Bella Collection and is significant at both a local and state level. Its connection to the La Bella shipwreck and the rescue of five survivors highlights the dangers of Victoria’s Shipwreck Coast. The letter to William Ferrier from the Australian Government acknowledges the bravery of ordinary Australians who risked their lives to save victims of shipwrecks along the coast. The letter is significant to the history of Warrnambool as it honours William Ferrier, a local fisherman whose descendants continue to live in the area. It highlights the way of life of people who lived in coastal towns in 19th century Victoria and the effects of shipwrecks upon them. The letter connects to the postcard of William Ferrier with four of the five rescued crew, the photograph of the wreck of the La Bella and the artefact from the wreck, the rail holder. This letter is significant because of its association with the sailing ship “La Bella”. The “La Bella” is of local and state and national significance. It is one of the only two shipwrecks discovered in Lady Bay, Warrnambool, out of the 15-17 shipwrecks in the bay. Letter to William Ferrier of South Warrnambool from the Prime Minister and Members of Parliament commending him on his bravery. The printed letterhead includes a coat of arms in the top centre and the official address. The letter is very neatly hand written in black pen and includes 4 signatures of Members of Parliament. The rectangular paper is cream coloured with some yellow/brown discolouring. It has the letterhead on the right hand side of it and the written letter begins below the letterhead. The paper has been folded so that the right side becomes the cover page of the letter. The writing is continued onto the inside right hand page of the folded paper and the writing ends here. There is more recent writing on the bottom right hand corner of the back page. The paper has been officially folded in half a total 3 times and there is heavy discolouration on the sections that form the front and back of the folded letter. There is a 4th fold line that is less pronounced that the other folds and would make the paper the size to fit into a pocket. At several fold creases the paper has worn through. The edges of the paper have minor tears. The printed coat of arms is that of the House of Representatives. Underneath is printed “The Parliament of the Commonwealth, / Parliament House / Melbourne”. The hand written, letter is dated “14th November, 1905” and addressed to “Mr. William Ferrier / South Warrnambool” The letter begins “The Speaker, the Prime Minister and Members of the Ministry and its supporters, the Leader and Members of the Opposition, the Leader and Members of the Labour Party, being all the Members of the House of Representatives of the Federal Parliament of Australia” … It continues “desire to express to you their appreciation of your bravery in skulling out to the wreck of the “La Bella” at Warrnambool on Saturday, 11th November, 1905, and recovering therefrom two of the crew who were in imminent danger of their lives. They all feel that your conduct was worthy of the best deeds done by British sailors in the past and they are proud to know that Australia can produce such as you.” The letter is “Signed on behalf of the Members – Speaker (Frederick Holder ), Deputy Leader of the Opposition (Joseph Cook ), Prime Minister (Alfred Deakin), Leader of the Labour Party ( J.C. Watson)” On the back of the letter is blue ink handwriting “OWNER / G. FERRIER / TO. BE. PHOTOGRAPHED / 27-4-76”la bella, william ferrier, bill ferrier, lady bay, 1905, 10th november 1905, 11th november 1905, parliament of the commonwealth, prime minister, australian government, new zealand, flagstaff hill, warrnambool, shipwrecked coast, flagstaff hill maritime museum, maritime museum, shipwreck coast, flagstaff hill maritime village -
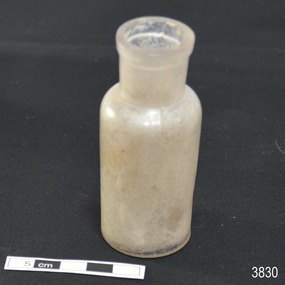 Flagstaff Hill Maritime Museum and Village
Container - Glass Bottle, mid-19th century to 1902
This handmade glass bottle was recovered from the wreck of the 1895-1902 ship Inverlochy and is part of the John Chance Collection. The bottle has side seams that extend from base to mouth, indicating that it would have been made in a mould. The parallel, diagonal lines are likely to have been made by the molten glass being mouth-blown into the mould. The mould would have also had the pattern for the embossed numbers in the base. The seamless applied mouth would have been added after the bottle was removed from the two-piece mould. The even neck of the bottle would have probably been sealed with a cork or glass stopper. Bottles similar to this one were used for medical (apothecary) and cosmetic purposes. Bottles with these features date from around the late 19th to early 20th century. Bottles began to have embossed numbers on the bases from the late 19th century and the practice continues into modern times. The numbers may represent the date of manufacture i.e. “463” may be April 1863. It may instead be the date of the patent or design pattern number. This bottle may have been made around 1863 and the latest it could have been made was 1902, the year of the wreck of the Inverlochy. THE INVERLOCHY (1895-1902) - The Inverlochy was a steel sailing barque built in Scotland in 1895 for international trade. In 1902 the Inverlochy left Liverpool under the command of Captain E.R. Kendrick. There were 21 officers and crew and the captain’s wife Mrs Kendrick, on board, bound for Australia with cargo that included tools, chemicals, liquor (beer, whisky, stout, rum, and brandy), steel, iron, wire netting, hoop iron, tinplate and pig iron), and steel wire for the Melbourne Tramway Company, tiles, soap, soft goods and earthenware. On December 18 almost at their destination, the Inverlochy ran aground on Ingoldsby Reef at Point Addis, near Anglesea. The crew and passengers left the ship via lifeboat and landed at Thompson’s Creek, then walked about 20 kilometres to Barwon Heads. Salvagers were interested in the 10 miles of cable in the hold. Mrs Kendrick’s ‘high grade’ bicycle was amongst the items salvaged but she lost her jewellery and two pianos. By February 1903 the ship had broken up and objects such as bottles and casks of liquor were washed ashore. Bad weather shook the wreck in June 1903, causing the ship’s spars and figurehead to be washed ashore. This glass bottle is historically significant as it represents methods of storage and manufacture that were used from the 19th century and into the early-20th century, before machine made bottles were becoming common. The shape and size of the bottle are similar to bottles used for medical and cosmetic purposes in that period. The glass bottle also has significant as it was recovered by John Chance, a diver from the wreck of the Inverlochy in the late 1960s to early 1970s. Items that come from several wrecks along Victoria's coast have since been donated to the Flagstaff Hill Maritime Village’s museum collection by his family, illustrating this item’s level of historical value. This glass bottle is significant because of its historical connection to the barque Inverlochy, which is an example of a commercial international steel sailing barque and is listed on the Victorian Heritage Database VHR S338. The Inverlochy is significant for its cargo, which is a snapshot of the kind of goods imported into Australia at the turn of the 19th century, including cable for the Melbourne Tramway Company. The wreck of the Inverlochy is important as an accessible dive site that shows the remains of a large international trading vessel and its contents. It is valuable for an insight into Victorian era of shipping and maritime history. Bottle; clear glass with opalescent shine in places, round, handmade. Narrow lip is flat across top and on side edge, neck is straight, about a third of the bottle’s height. The shoulder is rounded, and the body has straight sides with two pronounced side seams from below the lip to the base, which is shallow. Outer glass surface is smooth, inner surface has areas of dried, light coloured substance. Base has embossed inscription. Embossed "463" and logo symbol [trident]flagstaff hill, warrnambool, flagstaff hill maritime museum, maritime museum, shipwreck coast, flagstaff hill maritime village, great ocean road, john chance, inverlochy, scotland, captain e.r. kendrick, melbourne tramway company, ingoldsby reef, handmade, glass bottle, apothecary, cosmetic, mould blown, vintage, two-piece bould, point addis, medicine -
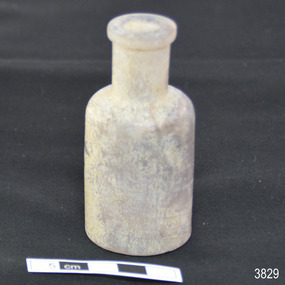 Flagstaff Hill Maritime Museum and Village
Container - Glass Bottle, mid-19th century to 1902
This handmade glass bottle was recovered from the wreck of the 1895-1902 ship Inverlochy and is part of the John Chance Collection. The bottle has side seams that extend from base to mouth, indicating that it would have been made in a mould. The parallel, diagonal lines are likely to have been made by the molten glass being mouth-blown into the mould. The mould would have also had the pattern for the embossed numbers in the base. The seamless applied mouth would have been added after the bottle was removed from the two-piece mould. The even neck of the bottle would have probably been sealed with a cork or glass stopper. Bottles similar to this one were used for medical (apothecary) and cosmetic purposes. Bottles with these features date from around the late 19th to early 20th century. Bottles began to have embossed numbers on the bases from the late 19th century and the practice continues into modern times. The numbers may represent the date of manufacture i.e. “4188” may be 4th January 1888. It may instead be the date of the patent or design pattern number. This bottle may have been made around 1888 and the latest it could have been made was 1902, the year of the wreck of the Inverlochy. THE INVERLOCHY (1895-1902) - The Inverlochy was a steel sailing barque built in Scotland in 1895 for international trade. In 1902 the Inverlochy left Liverpool under the command of Captain E.R. Kendrick. There were 21 officers and crew and the captain’s wife Mrs Kendrick, on board, bound for Australia with cargo that included tools, chemicals, liquor (beer, whisky, stout, rum, and brandy), steel, iron, wire netting, hoop iron, tinplate and pig iron), and steel wire for the Melbourne Tramway Company, tiles, soap, soft goods and earthenware. On December 18 almost at their destination, the Inverlochy ran aground on Ingoldsby Reef at Point Addis, near Anglesea. The crew and passengers left the ship via lifeboat and landed at Thompson’s Creek, then walked about 20 kilometres to Barwon Heads. Salvagers were interested in the 10 miles of cable in the hold. Mrs Kendrick’s ‘high grade’ bicycle was amongst the items salvaged but she lost her jewellery and two pianos. By February 1903 the ship had broken up and objects such as bottles and casks of liquor were washed ashore. Bad weather shook the wreck in June 1903, causing the ship’s spars and figurehead to be washed ashore. This glass bottle is historically significant as it represents methods of storage and manufacture that were used from the 19th century and into the early-20th century, before machine made bottles were becoming common. The shape and size of the bottle are similar to bottles used for medical and cosmetic purposes in that period. The glass bottle also has significant as it was recovered by John Chance, a diver from the wreck of the Inverlochy in the late 1960s to early 1970s. Items that come from several wrecks along Victoria's coast have since been donated to the Flagstaff Hill Maritime Village’s museum collection by his family, illustrating this item’s level of historical value. This glass bottle is significant because of its historical connection to the barque Inverlochy, which is an example of a commercial international steel sailing barque and is listed on the Victorian Heritage Database VHR S338. The Inverlochy is significant for its cargo, which is a snapshot of the kind of goods imported into Australia at the turn of the 19th century, including cable for the Melbourne Tramway Company. The wreck of the Inverlochy is important as an accessible dive site that shows the remains of a large international trading vessel and its contents. It is valuable for an insight into Victorian era of shipping and maritime history. Bottle; clear glass, round, handmade. Narrow lip is flat across top and on side edge, neck is straight, about a third of the bottle’s height. The shoulder is rounded, and the body has straight sides with two side seams from below the lip to the base, which is shallow. Outer glass surface is rough, inner surface has areas of dried, light coloured substance. The body has several diagonal parallel lines and areas with opalescent shine. Base has embossed inscription. Embossed inscription on base "4188".flagstaff hill, warrnambool, flagstaff hill maritime museum, maritime museum, shipwreck coast, flagstaff hill maritime village, great ocean road, john chance, inverlochy, scotland, captain e.r. kendrick, melbourne tramway company, ingoldsby reef, handmade, glass bottle, apothecary, cosmetic, mould blown, vintage, two-piece bould, point addis, medicine -
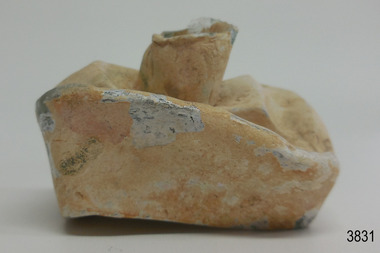 Flagstaff Hill Maritime Museum and Village
Container - Ink Bottle, from mid-19th century to 1902
This ink bottle is ‘boat’ shaped, which was a common design from the mid-1840s. It was crudely made; maybe it was rejected as a practice bottle or perhaps heat or pressure has distorted it. The bottle was recovered from the wreck of the Inverlochy and is part of the John Chance collection. Ink in the 1700s ink could be purchased in powdered or block form from apothecary shops, to be mixed with water as needed. Then in the mid-1800s chemists began selling ink in liquid form, in small, inexpensive and often attractive bottles. The small glass ink bottles were handmade, blown into a cup shaped mould, and sharply broken off from the blow-pipe at the neck, referred to as the English-made ‘burst-off’ finish. The neck was then filed, filled with liquid ink and sealed with a cork or wax. It was a quick, affordable container and made pen and ink writing available to the public. The name ‘penny ink’ bottles was a common title due to their low cost. INVERLOCHY 1895-1902 - The Inverlochy was a steel sailing barque built in Scotland in 1895 for international trade. In 1902 the Inverlochy left Liverpool under the command of Captain E.R. Kendrick. There were 21 officers and crew and the captain’s wife Mrs Kendrick, on board, bound for Australia with cargo that included tools, chemicals, liquor (beer, whisky, stout, rum, and brandy), steel, iron, wire netting, hoop iron, tinplate and pig iron), and steel wire for the Melbourne Tramway Company, tiles, soap, soft goods and earthenware. On December 18 almost at their destination, the Inverlochy ran aground on Ingoldsby Reef at Point Addis, near Anglesea. The crew and passengers left the ship via lifeboat and landed at Thompson’s Creek, then walked about 20 kilometres to Barwon Heads. Salvagers were interested in the 10 miles of cable in the hold. Mrs Kendrick’s ‘high grade’ bicycle was amongst the items salvaged but she lost her jewellery and two pianos. By February 1903 the ship had broken up and objects such as bottles and casks of liquor were washed ashore. Bad weather shook the wreck in June 1903, causing the ship’s spars and figurehead to be washed ashore. This boat shaped handmade ink bottle is historically significant for its association with communications and record keeping in the mid-to-late 19th century. The bottle is socially significant as an example of making a useful product affordable to every day people. This handmade glass ink bottle is significant for its connection with the John Chance Collection, which is historically significant as an example of artefacts from wrecks that had been lost in the coastal waters of Victoria from thirty to over one hundred years before John Chance and others discovered them. These artefacts are a sample of goods carried as cargo or personal possessions, and of ship hardware of that era. The ink bottle is significant through its connection with the barque, Inverlochy, The Inverlochy is significant for its cargo, which is a snapshot of the array of goods imported into Australia at the turn of the 19th century, including cable for the Melbourne Tramway Company. The Inverlochy is historically significant and is registered on the Victorian Heritage Database, VHR S338. The wreck of the Inverlochy is important as an accessible dive site that shows the remains of a large international trading vessel and its contents. It is valuable for an insight into Victorian era of shipping and maritime history.Ink bottle, thick clear glass, rectangular base with small round mouth, long sides have have a U shaped groove along the shoulders (used for resting pen handles). The outside surface has a white clay-type reside over it. Bottle is very bent and distorted. flagstaff hill, warrnambool, flagstaff hill maritime museum, maritime museum, shipwreck coast, flagstaff hill maritime village, great ocean road, john chance, inverlochy, scotland, captain e.r. kendrick, melbourne tramway company, tramway cable, ingoldsby reef, point addis, anglesea, thompson’s creek, barwon heads, boat ink bottle, cottage ink, penny ink, glass ink bottle, pen rest, writing accessory, victorian, antique, ink well, sheer lip, distorted body, handmade, mould blown, statoionery -
 Flagstaff Hill Maritime Museum and Village
Container - Ink Bottle, 1890s to 1902
This design of ink bottle or ink well was commonly referred to as a ‘penny ink well’ because it was very inexpensive to produce. It is also known as a dwarf bottle. It was recovered from the wreck of the 1895-1902 ship Inverlochy and is part of the John Chance Collection. Pen and ink has been in use for hand writing from about the seventh century up until the mid-20th century. Up until around the mid-19th century a quill pen made from a bird’s feather was used. In the 1850s the steel point pen was invented and could be manufactured on machines in large quantities. In the 1880s a successful portable fountain pen was designed, giving a smooth flowing ink and ease of use. Ink wells, used with steel nib dip pens, were commonly used up until the mid-20th century. The pens only held a small amount of ink so users had to frequently dip the nib of the pen into an ink well for more ink. Hand writing with pen and ink left wet writing on the paper, so blotting paper was carefully used to absorb the excess ink and prevent smudging. Ink could be purchased, ready to use, or in the powdered form, which needed to be mixed with water. After the invention of fountain pens, which had a reservoir of ink, and then ballpoint pens, which also had ink that flowed freely, the dip pen was slowly replaced. However, artisans continue to use nib pens to create beautiful calligraphy. INVERLOCHY 1895-1902 - The Inverlochy was a steel sailing barque built in Scotland in 1895 for international trade. In 1902 the Inverlochy left Liverpool under the command of Captain E.R. Kendrick. There were 21 officers and crew and the captain’s wife Mrs Kendrick, on board, bound for Australia with cargo that included tools, chemicals, liquor (beer, whisky, stout, rum, and brandy), steel, iron, wire netting, hoop iron, tinplate and pig iron), and steel wire for the Melbourne Tramway Company, tiles, soap, soft goods and earthenware. On December 18 almost at their destination, the Inverlochy ran aground on Ingoldsby Reef at Point Addis, near Anglesea. The crew and passengers left the ship via lifeboat and landed at Thompson’s Creek, then walked about 20 kilometres to Barwon Heads. Salvagers were interested in the 10 miles of cable in the hold. Mrs Kendrick’s ‘high grade’ bicycle was amongst the items salvaged but she lost her jewellery and two pianos. By February 1903 the ship had broken up and objects such as bottles and casks of liquor were washed ashore. Bad weather shook the wreck in June 1903, causing the ship’s spars and figurehead to be washed ashore. This ink bottle is historically significant as it represents methods of hand written communication that were still common up until the mid-20th century, when fountain pens and ballpoint pens took over in popularity and convenience. The Ink bottle also has significant as it was recovered by John Chance, a diver from the wreck of the Inverlochy in the late 1960s to early 1970s. Items that come from several wrecks along Victoria's coast have since been donated to the Flagstaff Hill Maritime Village’s museum collection by his family, illustrating this item’s level of historical value. This Ink bottle is significant because of its historical connection to the barque Inverlochy, which is an example of a commercial international steel sailing barque and is listed on the Victorian Heritage Database VHR S338. The Inverlochy is significant for its cargo, which is a snapshot of the kind of goods imported into Australia at the turn of the 19th century, including cable for the Melbourne Tramway Company. The wreck of the Inverlochy is important as an accessible dive site that shows the remains of a large international trading vessel and its contents. It is valuable for an insight into Victorian era of shipping and maritime history. Ink bottle, glazed, prange-brown ceramic cylinder, ring of clay on top for lip, narrow mouth, very short neck on wide shoulder that reaches out to edge of of straight-sided body, flat base. On the shoulder, close to the neck, are concentric lines in the clay. There are dark areas around the lip and mouth opening. The clay appears to have a fold line on its body. The material has flecks of darker material in it. Sediment around shoulder. Handmade. Also called a Penny Ink Well.flagstaff hill, warrnambool, flagstaff hill maritime museum, maritime museum, shipwreck coast, flagstaff hill maritime village, great ocean road, john chance, inverlochy, scotland, captain e.r. kendrick, melbourne tramway company, tramway cable, ingoldsby reef, point addis, anglesea, thompson’s creek, barwon heads, ink bottle, writing equipment, writing accessory, office equipment, stationery, domestic, stoneware, clay, ceramic, pottery, ink well, inkwell, penny ink well, nib pen, dip pen, ink, hand writing, record keeping, household, business, vintage, blotting paper, dwarf ink -
 Flagstaff Hill Maritime Museum and Village
Container - Ink Bottle, 1890s to 1902
This design of ink bottle or ink well was commonly referred to as a ‘penny ink well’ because it was very inexpensive to produce. It is also known as a dwarf ink bottle. It was recovered from the wreck of the 1895-1902 ship Inverlochy and is part of the John Chance Collection. Pen and ink has been in use for hand writing from about the seventh century up until the mid-20th century. Up until around the mid-19th century a quill pen made from a bird’s feather was used. In the 1850s the steel point pen was invented and could be manufactured on machines in large quantities. In the 1880s a successful portable fountain pen was designed, giving a smooth flowing ink and ease of use. Ink wells, used with steel nib dip pens, were commonly used up until the mid-20th century. The pens only held a small amount of ink so users had to frequently dip the nib of the pen into an ink well for more ink. Hand writing with pen and ink left wet writing on the paper, so blotting paper was carefully used to absorb the excess ink and prevent smudging. Ink could be purchased, ready to use, or in the powdered form, which needed to be mixed with water. After the invention of fountain pens, which had a reservoir of ink, and then ballpoint pens, which also had ink that flowed freely, the dip pen was slowly replaced. However, artisans continue to use nib pens to create beautiful calligraphy. INVERLOCHY 1895-1902 - The Inverlochy was a steel sailing barque built in Scotland in 1895 for international trade. In 1902 the Inverlochy left Liverpool under the command of Captain E.R. Kendrick. There were 21 officers and crew and the captain’s wife Mrs Kendrick, on board, bound for Australia with cargo that included tools, chemicals, liquor (beer, whisky, stout, rum, and brandy), steel, iron, wire netting, hoop iron, tinplate and pig iron), and steel wire for the Melbourne Tramway Company, tiles, soap, soft goods and earthenware. On December 18 almost at their destination, the Inverlochy ran aground on Ingoldsby Reef at Point Addis, near Anglesea. The crew and passengers left the ship via lifeboat and landed at Thompson’s Creek, then walked about 20 kilometres to Barwon Heads. Salvagers were interested in the 10 miles of cable in the hold. Mrs Kendrick’s ‘high grade’ bicycle was amongst the items salvaged but she lost her jewellery and two pianos. By February 1903 the ship had broken up and objects such as bottles and casks of liquor were washed ashore. Bad weather shook the wreck in June 1903, causing the ship’s spars and figurehead to be washed ashore. This ink bottle is historically significant as it represents methods of hand written communication that were still common up until the mid-20th century, when fountain pens and ballpoint pens took over in popularity and convenience. The Ink bottle also has significant as it was recovered by John Chance, a diver from the wreck of the Inverlochy in the late 1960s to early 1970s. Items that come from several wrecks along Victoria's coast have since been donated to the Flagstaff Hill Maritime Village’s museum collection by his family, illustrating this item’s level of historical value. This Ink bottle is significant because of its historical connection to the barque Inverlochy, which is an example of a commercial international steel sailing barque and is listed on the Victorian Heritage Database VHR S338. The Inverlochy is significant for its cargo, which is a snapshot of the kind of goods imported into Australia at the turn of the 19th century, including cable for the Melbourne Tramway Company. The wreck of the Inverlochy is important as an accessible dive site that shows the remains of a large international trading vessel and its contents. It is valuable for an insight into Victorian era of shipping and maritime history.Ink bottle or ink well; cylindrical shaped, salt-glazed, mid-brown ceramic bottle. It has a small round mouth, rounded lip that extend past the short neck, wide shoulders, straight sides, flat bottom. Handmade. Also called a Penny Ink Well.flagstaff hill, warrnambool, flagstaff hill maritime museum, maritime museum, shipwreck coast, flagstaff hill maritime village, great ocean road, john chance, inverlochy, scotland, captain e.r. kendrick, melbourne tramway company, tramway cable, ingoldsby reef, point addis, anglesea, thompson’s creek, barwon heads, ink bottle, writing equipment, writing accessory, office equipment, stationery, domestic, stoneware, clay, ceramic, pottery, ink well, inkwell, penny ink well, nib pen, dip pen, ink, hand writing, record keeping, household, business, vintage, blotting paper, dwarf ink