Showing 166 items matching " route 30"
-
 Eltham District Historical Society Inc
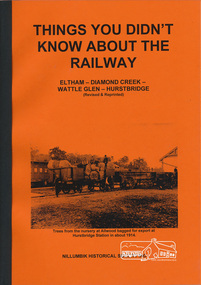
Book, Things You Didn't Know about the Railway: Eltham, Diamond Creek, Wattle Glen, Hurstbridge, 2017
Update of 1st editon by Jock Ryan published in March 2003. 2nd edition (Revised) Nillumbik Historical Society December 2017 Brief history of the agitation and eventual extension and opening of the Hurstbridge Railway line from Eltham to Diamond Creek, Wattle Glen to Hurstbridge, which was opened in June 1912. Includes details of events thereafter including Wattle Day and Railway accidents. Profusely illustrated with black and white photographs from the collection of the Nillumbik Historical Society (Diamond Creek). Agitation for a railway extension began in 1888 when a meeting was held at Arthurs Creek to press for the construction of a railway line from Heidelberg to Kinglake. The Chairman Mr Charles Draper said this was necessary because this was the best fruit growing district in Victoria. Mr Cameron M.P. pointed out that whatever route the line took it would have to follow the Diamond Valley from Eltham. At the same time another meeting was pressing for the line to be extended to Queenstown (St Andrews). However when detailed surveys were made it was discovered that the only possible route was to Hurstbridge because of the hills. In 1912 the railway was opened terminating at Hurstbridge. Bound with orange covers. Text with black and white illustrations. 30 pages.hurstbridge railway line,diamond creek,wattle glen,hurstbridge, nillumbik historical society -
 Waverley RSL Sub Branch
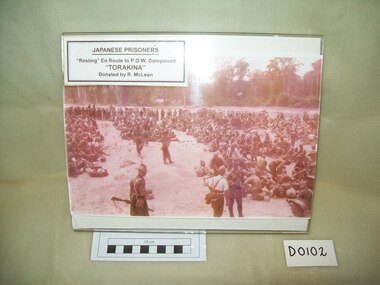
Print Torakina, Torakina
August 1945 saw Major Hugh St Clair Brockway accepting the surrender of a Marine Brigade of Japanese, at Bonis Northern Bougainville, from Naval Commander Takahashi the representative of the Japanese High Command. For a month Major Brockway concentrated on transporting the Japanese out and returning the area, as far as possible, to a pre-war condition. "The Japanese were in a bad way, saying no ship had resupplied them since 1942. They had lived off fish from the sea and what they could grow. Many were sick and they had few medicines. "Our job was basically to evacuate the Japanese and ship the troops out to a POW compound at Torakina, on the mid-eastern coast of Bougainville." Major Brockway had a small group of about 30 to execute the operation, which included destroying all Japanese arms and ammunition of the 3000 strong naval brigade. "They had been cut off since about 1942 and we had to clean the place up for civilian occupation again." Source "the Wargin Argus" BY VEANA SCOTT 27 Apr, 2005 09:36 AM Wagin Argus cnr Tavistock and Ranford Streets Wagin WA 6315 [email protected] Phone: 08 9861 1200Photograph in very faded colour (mainly pale pink with a square of colour visible under label) of Japanese P.O.W's resting en-route to compound at Torakina Digitally rescanned in greyscale -
 Flagstaff Hill Maritime Museum and Village
Tool - Moulding wood Plane, Late 19th to Early 20th century
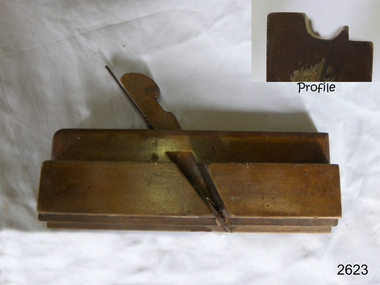
A moulding plane is a specialised plane used for making the complex shapes found in wooden mouldings that are used to decorate furniture or other wooden objects. Traditionally, moulding planes were blocks of wear-resistant hardwood, often beech or maple, which were worked to the shape of the intended moulding. The blade or iron was likewise formed to the intended moulding profile and secured in the body of the plane with a wooden wedge. A traditional cabinetmakers shop might have many, perhaps hundreds, of moulding planes for the full range of work to be performed. Large crown mouldings required planes of six or more inches in width, which demanded great strength to push and often had additional peg handles on the sides, allowing the craftsman's apprentice or other workers to pull the plane ahead of the master who guided it. Company History: The firm of Alexander Mathieson & Sons was one of the leading makers of hand tools in Scotland. Its success went hand in hand with the growth of the shipbuilding industries on the Firth of Clyde in the nineteenth century and the emergence of Glasgow regarded as the "second city of the Empire". It also reflected the firm's skill in responding to an unprecedented demand for quality tools by shipyards, cooperage's and other industries, both locally and far and wide. The year 1792 was deemed by the firm to be that of its foundation it was in all likelihood the year in which John Manners had set up his plane-making workshop on Saracen Lane off the Gallowgate in the heart of Glasgow, not far from the Saracen's Head Inn, where Dr Johnson and James Boswell had stayed on their tour of Scotland in 1773. Alexander Mathieson (1797–1851) is recorded in 1822 as a plane-maker at 25 Gallowgate, but in the following year at 14 Saracen's Lane, presumably having taken over the premises of John Manners. The 1841 national census described Alexander Mathieson as a master plane-maker at 38 Saracen Lane with his son Thomas Adam working as a journeyman plane-maker. In 1849 the firm of James & William Stewart at 65 Nicolson Street, Edinburgh was taken over and Thomas was put in charge of the business, trading under the name Thomas A. Mathieson & Co. as plane and edge-tool makers. Thomas's company acquired the Edinburgh edge-tool makers Charles & Hugh McPherson and took over their premises in Gilmore Street. The Edinburgh directory of 1856/7 the business is recorded as being Alexander Mathieson & Son, plane and edge-tool makers at 48 Nicolson Street and Paul's Work, Gilmore Street. The 1851 census records indicate that Alexander was working as a tool and plane-maker employing eight men. Later that year Alexander died and his son Thomas took over the business. Under the heading of an edge-tool maker in the 1852/3 (Post-Office Glasgow Annual Directory) the firm is now listed as Alexander Mathieson & Son. By the early 1850s, the business had moved to 24 Saracen Lane. The directory for 1857/8 records that the firm had moved again only a few years later to East Campbell Street, also off the Gallowgate, and that through further diversification was also manufacturing coopers' and tinmen's tools. The ten-yearly censuses log the firm's growth and in 1861 Thomas was a tool manufacturer employing 95 men and 30 boys; in 1871 he had 200 men working for him and in 1881 300 men. By 1899 the firm had been incorporated as Alexander Mathieson & Sons Ltd, even though only Alexander's son Thomas appears ever to have joined the firm. A vintage tool made by a well-known firm made for other firms and individuals that worked in wood. The tool was used before routers and spindle moulders came into use after World War ll, a time when to produce a decorative moulding for a piece of furniture or other items this had to be accomplished by hand using one of these types of planes. A significant item from the mid to late 19th century that today is quite rare and sought after by collectors. It gives us a snapshot of how furniture was made predominately by hand and with tools that were themselves hand made shows the craftsmanship used to make such a unique item. Side bead Moulding Plane Alex Mathieson & Son. flagstaff hill, warrnambool, shipwrecked-coast, flagstaff-hill, flagstaff-hill-maritime-museum, maritime-museum, shipwreck-coast, flagstaff-hill-maritime-village -
 Flagstaff Hill Maritime Museum and Village
Tool - Moulding wood Plane, Late 19th to Early 20th century
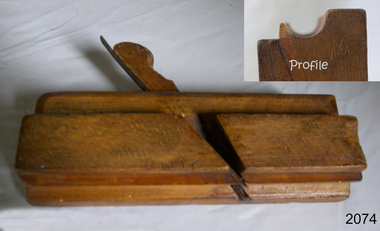
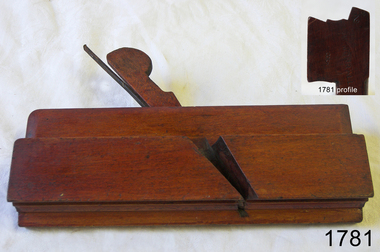
A moulding plane is a specialised plane used for making the complex shapes found in wooden mouldings that are used to decorate furniture or other wooden objects. Traditionally, moulding planes were blocks of wear-resistant hardwood, often beech or maple, which were worked to the shape of the intended moulding. The blade or iron was likewise formed to the intended moulding profile and secured in the body of the plane with a wooden wedge. A traditional cabinetmakers shop might have many, perhaps hundreds, of moulding planes for the full range of work to be performed. Large crown mouldings required planes of six or more inches in width, which demanded great strength to push and often had additional peg handles on the sides, allowing the craftsman's apprentice or other workers to pull the plane ahead of the master who guided it. Company History: The firm of Alexander Mathieson & Sons was one of the leading makers of hand tools in Scotland. Its success went hand in hand with the growth of the shipbuilding industries on the Firth of Clyde in the nineteenth century and the emergence of Glasgow regarded as the "second city of the Empire". It also reflected the firm's skill in responding to an unprecedented demand for quality tools by shipyards, cooperage's and other industries, both locally and far and wide. The year 1792 was deemed by the firm to be that of its foundation it was in all likelihood the year in which John Manners had set up his plane-making workshop on Saracen Lane off the Gallowgate in the heart of Glasgow, not far from the Saracen's Head Inn, where Dr Johnson and James Boswell had stayed on their tour of Scotland in 1773. Alexander Mathieson (1797–1851) is recorded in 1822 as a plane-maker at 25 Gallowgate, but in the following year at 14 Saracen's Lane, presumably having taken over the premises of John Manners. The 1841 national census described Alexander Mathieson as a master plane-maker at 38 Saracen Lane with his son Thomas Adam working as a journeyman plane-maker. In 1849 the firm of James & William Stewart at 65 Nicolson Street, Edinburgh was taken over and Thomas was put in charge of the business, trading under the name Thomas A. Mathieson & Co. as plane and edge-tool makers. Thomas's company acquired the Edinburgh edge-tool makers Charles & Hugh McPherson and took over their premises in Gilmore Street. The Edinburgh directory of 1856/7 the business is recorded as being Alexander Mathieson & Son, plane and edge-tool makers at 48 Nicolson Street and Paul's Work, Gilmore Street. The 1851 census records indicate that Alexander was working as a tool and plane-maker employing eight men. Later that year Alexander died and his son Thomas took over the business. Under the heading of an edge-tool maker in the 1852/3 (Post-Office Glasgow Annual Directory) the firm is now listed as Alexander Mathieson & Son. By the early 1850s, the business had moved to 24 Saracen Lane. The directory for 1857/8 records that the firm had moved again only a few years later to East Campbell Street, also off the Gallowgate, and that through further diversification was also manufacturing coopers' and tinmen's tools. The ten-yearly censuses log the firm's growth and in 1861 Thomas was a tool manufacturer employing 95 men and 30 boys; in 1871 he had 200 men working for him and in 1881 300 men. By 1899 the firm had been incorporated as Alexander Mathieson & Sons Ltd, even though only Alexander's son Thomas appears ever to have joined the firm. A vintage tool made by a well-known firm made for other firms and individuals that worked in wood. The tool was used before routers and spindle moulders came into use after World War ll, a time when to produce a decorative moulding for a piece of furniture or other items this had to be accomplished by hand using one of these types of planes. A significant item from the mid to late 19th century that today is quite rare and sought after by collectors. It gives us a snapshot of how furniture was made predominately by hand and with tools that were themselves hand made shows the craftsmanship used to make such a unique item. Moulding Plane side beadStamped Mathieson and Son also ( size "W" & ¾" )also GN (previous owner)flagstaff hill, warrnambool, shipwrecked-coast, flagstaff-hill, flagstaff-hill-maritime-museum, maritime-museum, shipwreck-coast, flagstaff-hill-maritime-village -
 Flagstaff Hill Maritime Museum and Village
Tool - Moulding wood Plane, Late 19th to Early 20th century
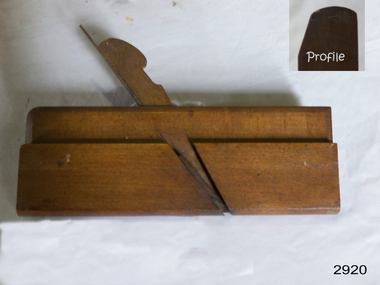
A moulding plane is a specialised plane used for making the complex shapes found in wooden mouldings that are used to decorate furniture or other wooden objects. Traditionally, moulding planes were blocks of wear-resistant hardwood, often beech or maple, which were worked to the shape of the intended moulding. The blade or iron was likewise formed to the intended moulding profile and secured in the body of the plane with a wooden wedge. A traditional cabinetmakers shop might have many, perhaps hundreds, of moulding planes for the full range of work to be performed. Large crown mouldings required planes of six or more inches in width, which demanded great strength to push and often had additional peg handles on the sides, allowing the craftsman's apprentice or other workers to pull the plane ahead of the master who guided it. Company History: The firm of Alexander Mathieson & Sons was one of the leading makers of hand tools in Scotland. Its success went hand in hand with the growth of the shipbuilding industries on the Firth of Clyde in the nineteenth century and the emergence of Glasgow regarded as the "second city of the Empire". It also reflected the firm's skill in responding to an unprecedented demand for quality tools by shipyards, cooperage's and other industries, both locally and far and wide. The year 1792 was deemed by the firm to be that of its foundation it was in all likelihood the year in which John Manners had set up his plane-making workshop on Saracen Lane off the Gallowgate in the heart of Glasgow, not far from the Saracen's Head Inn, where Dr Johnson and James Boswell had stayed on their tour of Scotland in 1773. Alexander Mathieson (1797–1851) is recorded in 1822 as a plane-maker at 25 Gallowgate, but in the following year at 14 Saracen's Lane, presumably having taken over the premises of John Manners. The 1841 national census described Alexander Mathieson as a master plane-maker at 38 Saracen Lane with his son Thomas Adam working as a journeyman plane-maker. In 1849 the firm of James & William Stewart at 65 Nicolson Street, Edinburgh was taken over and Thomas was put in charge of the business, trading under the name Thomas A. Mathieson & Co. as plane and edge-tool makers. Thomas's company acquired the Edinburgh edge-tool makers Charles & Hugh McPherson and took over their premises in Gilmore Street. The Edinburgh directory of 1856/7 the business is recorded as being Alexander Mathieson & Son, plane and edge-tool makers at 48 Nicolson Street and Paul's Work, Gilmore Street. The 1851 census records indicate that Alexander was working as a tool and plane-maker employing eight men. Later that year Alexander died and his son Thomas took over the business. Under the heading of an edge-tool maker in the 1852/3 (Post-Office Glasgow Annual Directory) the firm is now listed as Alexander Mathieson & Son. By the early 1850s, the business had moved to 24 Saracen Lane. The directory for 1857/8 records that the firm had moved again only a few years later to East Campbell Street, also off the Gallowgate, and that through further diversification was also manufacturing coopers' and tinmen's tools. The ten-yearly censuses log the firm's growth and in 1861 Thomas was a tool manufacturer employing 95 men and 30 boys; in 1871 he had 200 men working for him and in 1881 300 men. By 1899 the firm had been incorporated as Alexander Mathieson & Sons Ltd, even though only Alexander's son Thomas appears ever to have joined the firm. A vintage tool made by a well-known firm made for other firms and individuals that worked in wood. The tool was used before routers and spindle moulders came into use after World War ll, a time when to produce a decorative moulding for a piece of furniture or other items this had to be accomplished by hand using one of these types of planes. A significant item from the mid to late 19th century that today is quite rare and sought after by collectors. It gives us a snapshot of how furniture was made predominately by hand and with tools that were themselves hand made shows the craftsmanship used to make such a unique item. Round Moulding plane size 12 Alex Mathieson & Son Glasgow makerflagstaff hill, warrnambool, shipwrecked-coast, flagstaff-hill, flagstaff-hill-maritime-museum, maritime-museum, shipwreck-coast, flagstaff-hill-maritime-village -
 Glen Eira Historical Society
Document - PRAHRAN AND MALVERN TRAMWAYS TRUST
This file has 3 items. 1/Photocopy of Caulfield Conservation Study Report by Andrew Ward dated January 1995 of 6-8 Rusden Street, Elsternwick being former Prahran and Malvern Tramways Trust substation. Report includes image, existing registrations, description of substation building and condition. 2/Original photograph (black and white) of tram shelter at corner of Balaclava Road and Orrong Road, Caulfield North, outside Grimwade House (school), description written on back of photo. 3/Original copy of magazine of the Tramway Museum Society of Victoria Ltd. ‘Running Journal’ Vol 7 No. 3 dated June 1970. Article (pages 3-7) entitled ‘Feeding & Filling, The Story of the Prahran & Malvern Tramways Trust’ written by Graeme Breydon. Article written for the 60th anniversary of the trust which opened for business on 30/05/1910 and describes the establishment and development of Tramways between suburbs of Malvern & Prahran including Elsternwick, Caulfield & Glen Huntly. Article includes 4 images plus map and diagram. Included: Photograph 3: Opening ceremony of tramway extension from Balaclava junction to Elsternwick railway station on Glen Huntly Road dated 13/11/1913. Diagram of various tramway routes including Prahran & Malvern Tramways Trust routes.prahran and malvern tramways trust, p+mtt, tram companies, land transport, public transport, substation, tram shelter, powerhouse, parapet, brick, stuccoed, roof lanterns, historic buildings register, national estate register, national trust register, rusden street, balaclava road, orrong road, hawthorn road, dandenong road, glen huntly road, grange road, elsternwick, elsternwick railway station, caulfield, caulfield north, caulfield railway station, point ormond, grimwade house, breydon graeme, tramcar, edwardian, transport, trams, tram depot -
 Flagstaff Hill Maritime Museum and Village
Tool - Complex Wood Plane, Late 19th to Early 20th century
A moulding plane is a specialised plane used for making the complex shapes found in wooden mouldings that are used to decorate furniture or other wooden objects. Traditionally, moulding planes were blocks of wear-resistant hardwood, often beech or maple, which were worked to the shape of the intended moulding. The blade or iron was likewise formed to the intended moulding profile and secured in the body of the plane with a wooden wedge. A traditional cabinetmakers shop might have many, perhaps hundreds, of moulding planes for the full range of work to be performed. Large crown mouldings required planes of six or more inches in width, which demanded great strength to push and often had additional peg handles on the sides, allowing the craftsman's apprentice or other workers to pull the plane ahead of the master who guided it. Company History: The firm of Alexander Mathieson & Sons was one of the leading makers of hand tools in Scotland. Its success went hand in hand with the growth of the shipbuilding industries on the Firth of Clyde in the nineteenth century and the emergence of Glasgow regarded as the "second city of the Empire". It also reflected the firm's skill in responding to an unprecedented demand for quality tools by shipyards, cooperage's and other industries, both locally and far and wide. The year 1792 was deemed by the firm to be that of its foundation it was in all likelihood the year in which John Manners had set up his plane-making workshop on Saracen Lane off the Gallowgate in the heart of Glasgow, not far from the Saracen's Head Inn, where Dr Johnson and James Boswell had stayed on their tour of Scotland in 1773. Alexander Mathieson (1797–1851) is recorded in 1822 as a plane-maker at 25 Gallowgate, but in the following year at 14 Saracen's Lane, presumably having taken over the premises of John Manners. The 1841 national census described Alexander Mathieson as a master plane-maker at 38 Saracen Lane with his son Thomas Adam working as a journeyman plane-maker. In 1849 the firm of James & William Stewart at 65 Nicolson Street, Edinburgh was taken over and Thomas was put in charge of the business, trading under the name Thomas A. Mathieson & Co. as plane and edge-tool makers. Thomas's company acquired the Edinburgh edge-tool makers Charles & Hugh McPherson and took over their premises in Gilmore Street. The Edinburgh directory of 1856/7 the business is recorded as being Alexander Mathieson & Son, plane and edge-tool makers at 48 Nicolson Street and Paul's Work, Gilmore Street. The 1851 census records indicate that Alexander was working as a tool and plane-maker employing eight men. Later that year Alexander died and his son Thomas took over the business. Under the heading of an edge-tool maker in the 1852/3 (Post-Office Glasgow Annual Directory) the firm is now listed as Alexander Mathieson & Son. By the early 1850s, the business had moved to 24 Saracen Lane. The directory for 1857/8 records that the firm had moved again only a few years later to East Campbell Street, also off the Gallowgate, and that through further diversification was also manufacturing coopers' and tinmen's tools. The ten-yearly censuses log the firm's growth and in 1861 Thomas was a tool manufacturer employing 95 men and 30 boys; in 1871 he had 200 men working for him and in 1881 300 men. By 1899 the firm had been incorporated as Alexander Mathieson & Sons Ltd, even though only Alexander's son Thomas appears ever to have joined the firm. A vintage tool made by a well-known firm made for other firms and individuals that worked in wood. The tool was used before routers and spindle moulders came into use after World War ll, a time when to produce a decorative moulding for a piece of furniture or other items this had to be accomplished by hand using one of these types of planes. A significant item from the mid to late 19th century that today is quite rare and sought after by collectors. It gives us a snapshot of how furniture was made predominately by hand and with tools that were themselves hand made shows the craftsmanship used to make such a unique item. Ogee Complex Moulding Plane Alex Mathieson & Son. Stamped W Worrel, (owner) & No 2.flagstaff hill, warrnambool, flagstaff-hill, flagstaff-hill-maritime-museum, maritime-museum, shipwreck-coast, flagstaff-hill-maritime-village, alexander mathieson & sons, complex moulding plane, carpenders tools, cabinet makers tools, wood working tools, wood planes -
 Bendigo Historical Society Inc.
Newspaper - BENDIGO ADVERTISER NOVEMBER 6, 1971 BENDIGO TRUST SAVING THE TRAMS, 1971
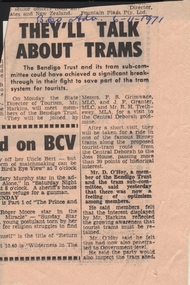
Bendigo Advertiser November 6, 1971 Article: They'll Talk About Trams. On Monday the State Director of Tourism, Mr Harkins, will meet with members of the Bendigo Trust. Joining them will be Messrs. F.S. Grimwade, MLC, J.F. Granter, MLC, & Mr R.H. Trethewey MLA, for a visit to the Central Deborah Goldmine and a ride in one of the famous Birney trams along the proposed tourist tram route from Central Deborah to the Joss House, passing more than 30 points of historical interest. Mr D.. O'Hoy member of the Bendigo Trust announced there was a feeling of optimism among members that the trams could be saved.bendigo, tourism, bendigo trams -
 Bendigo Historical Society Inc.
Document - BASIL MILLER COLLECTION: TRAMS - 'RUNNING JOURNAL', Feb - March 1969
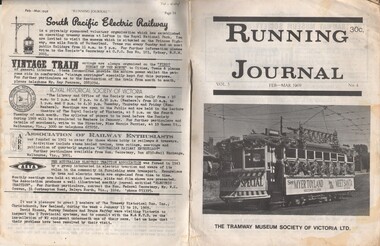
Journal of the Tramway Museum Society of Victoria. Ltd. Volume 5, No. 4. Feb - March 1969. 30 cents, sixteen pages. Front cover photo took by Malcolm Rowe. Bendigo Birney no. 28 seen in its guise as "Myer's santa special" turning out of Caledonia Street on the North Bendigo route on Saturday, 21st December 1968. The conductor's red uniform is rather non-standard, but it matched the color on the roof of the car. History of document: Part of 'Basil Miller Tramways Collection'.document -
 Moorabbin Air Museum
Document (collection) - Simon Warrender Collection See items under Description
-
 8th/13th Victorian Mounted Rifles Regimental Collection
Badge - Identity disc Schleibs
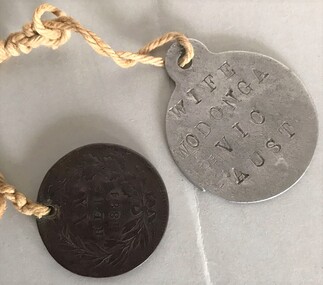
Frederick August Schleibs a 44 year old farmer of Wodonga enlisted in AIF 30 March 1916 and was allocated to 2nd Pioneer Battalion with regimental number 2972. En route to England he was hospitalised at Cape Town with injured knee. He was returned to Australia and discharged 27 October 1916. He reenlisted 21 February 1917 and sailed with 28th Reinforcements 8th Light Horse to Egypt. He returned to Australia following the war. Unusual to see a foreign coin used as an identity disc.Soldiers identify disc set connected by string; one aluminium and one a Portuguese 20 Reis coin. Both are stamped with information relating to 3383 Frederick Augustus Schleibs who served with 8th Australian Light Horse in World War One.On aluminium disc "A F Schleibs / 3383 / 8LH / CE", and on reverse "Wife / Wadonga / Vic / Aust". On coin "FAS / 3383 / CE"schleibs, light horse, 8th, world war one, wwi, aif, pioneer, wodonga -
 Ballarat Tramway Museum
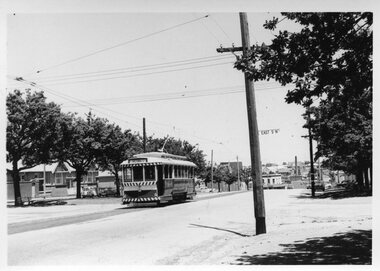
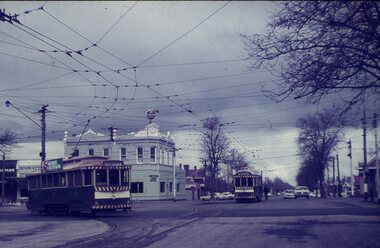
Photograph - Black and White - tram 17 Victoria St and East St, A T Miles, 30/1/1968
Black and White - tram 17 (Victoria St) at the intersection with East St, looking west. Shows the curve in Victoria St, just before the descent to Bridge St, Taken by A T Miles 30/1/1968.Yields information about the Victoria St route.Photograph - black and white print with notes on rear. Printed on Ilford paper.A T Miles stamp and location and date notes.tramways, trams, tram 17, victoria st, east st -
 Ballarat Tramway Museum
Slide - 27 mm sq slide/s set of 6, Lilian Butler, Tram No. 38 at the Victoria St terminus, Aug. 1971
Yields information about the streetscapes of Ballarat on the Gardens to Victoria St route and in particular buildings and people that crewed the trams.Set of six Colour 27 x 27 mm slide in a Kodachrome cardboard mount. .1 - Tram No. 38 at the Victoria St terminus, with the destination of Gardens via Sturt St West. Note the red traffic cone in the overhead by the trolley wheel positioning location device. .2 - crew of No. 30 by the tram - R. Knight (57) and Conductor W. Nancarrow (8) .3 - No. 30 at Gardens Loop .4 - as for .2 - see Also Reg item 6455. .5 - view from tram at intersection of Wendouree Parade and MacArthur St, View Point. .6 - view of trackwork at intersection of Drummond and Sturt Streets with the Southern Cross Hotel in the background. Slide mount date August 1971. Photo from the collection of Lilian Butler.ballarat, tramways, trams, victoria st, crews, gardens loop, view point, hospital corner, tram 30 -
 Ballarat Tramway Museum
Slide - 27 mm sq slide/s - set of 9 - Victoria St and crews, Lilian Butler, Aug. 1971
Yields information about the streetscapes of Ballarat on the Gardens to Victoria St route and in particular buildings and people that crewed the trams.Set of nine Colour 27 x 27 mm slide in a Kodachrome cardboard mount. .1 - R. Williams (Motorman) and Danny Powell (badge 30) standing in front of a tram at Victoria St. The tram has the destination of Gardens via Sturt St West. .2 - view of No. 113 Victoria St - now Ardenlee B&B. .3 - Sunshine Biscuit Factory .4 - Mack's Hotel .5 - Stones Corner - intersection of Victoria and Mt Pleasant routes .6 - Crossing Grenville St .7 - No. 30 at the City terminus, Lydiard St with Racey's and the SEC office in the background. .8 - as for .5, but looking east with the Caltex service station in the background. .9 - No. 30 at the Victoria St terminus. Slide mount date August 1971. Photo from the collection of Lilian Butler.ballarat, tramways, trams, victoria st, bridge st, stones corner, tram 30 -
 Ballarat Tramway Museum
Slide - 35mm slide/s - set of 9, Noel Simons, Sept. 1971
Set of 9 Kodak Ready-mount with slides made from the Association of Railway Enthusiast Provincial Tramways film strip. Reference Item 2560 details the ARE Film Strip, and provide references to other slides. See also Reg. item 1164. 1174.9 on plain white mount. 1174.1 - Tram 40 North bound for Lydiard St. North at the Railway Gates, with the gates closed. Tram carrying a heavy load of passengers. Railway station building and car park in background. Taken from the signal box. 1174.2 - Tram 12 bound for Gardens, photographed across the median strip plantation near Dawson St. Image i2a - adjusted 9/2021 to remove colour cast. 1174.3 - Tram 43 in bound along Wendouree Parade near Barrett Ave, passing a former tram stop and with "Warning Oncoming Trams" sign mounted on an adjacent pole. See also Reg. item 1172.1 for a photo taken in May 1971. This photo taken after the closure of the Victoria St. line, as the tram stop has been painted out. 1174.4 - Looking along the track to Sebastopol terminus on the west side of Albert St. - telephoto shot showing bogie tram in the far distance. Shows the nature of the track, poles, tram stop frequency and in the fare distance the terminus. Also show the trees that used to be along this section of the track. 1174.5 - No. 42 showing "Special" in Macarthur St. approaching Drummond St. north. Photo taken from under the verandah of a shop on the south side of the street that were many years later to become the Tramcar Restaurant. Note metal fence to cemetery. 1174.6 - Nos. 21 (Sebastopol) crossing 14 (Lydiard St. Nth) at the loop between Sayle and Grey St. Photo taken looking south. 1174.7 - No. 12 bound for Mt Pleasant, in Bridge St. about to stop at the junction for the two routes. Telephoto photo looking west along Bridge St. with many cars in the photo. Very few people on the street itself. 1174.8 - No. 30 and 17 at the City Terminus, on the north side of Sturt St. Taken from the Post Office corner with the Town Hall in the background. 1174.9 - No. 39 inbound along Sturt St. West. with many cars on the road. Bus stop on a pole on the other side of the road.1174.1 - "No. 40 on Lydiard St. North service waits at the level crossing at Ballarat Railway Station." 1174.2 - "No. 12 bound for 'Gardens' seen across the centre plantation in Sturt St." 1174.3 - "Barrett Ave." 1174.4 - "The Sebastopol route near the terminus" 1174.6 - "Nos. 21 and 14 crossing at Sayle St. Loop on Sebastopol route" 1174.7 - "No. 12 at Eastern end of Bridge St." 1174.8 - "Nos. 30 and 17 in Sturt St. at Cnr of Lydiard St." 1174.9 - "No. 39 City bound from 'Gardens" in Sturt St. West" All have date stamp of "Sep 1971" in black ink. Writing in blue ink.tramways, trams, lydiard st. nth, railway crossing, sturt st, wendouree parade, sebastopol, macarthur st., bridge st., sturt st. west, tram 12, tram 14, tram 17, tram 21, tram 30, tram 39, tram 40, tram 42, tram 43 -
 Ballarat Tramway Museum
Slide - 35mm slide/s - set of 24, Noel Simons, 20/05/1971 12:00:00 AM
Set of 24 transparencies taken on 20/5/1971 on Kodak mounts. 1195.1 - Bendigo 19 arriving at Charing Cross en route to North Bendigo with Fountain Plaza and the City Family Hotel in the background. No. 19 has two roof ads for the SEC. -'Electricity better for cooking' and 'Everything's under control in my all electric kitchen' 1195.2 - as above, but standing at the Charing cross stop, with the Beehive Stores and other buildings along the east side of Pall Mall in the background. 1195.3 - No 21 ex Golden Square crossing View St. trackwork in front of No. 25 waiting to depart for Quarry Hill. No.21 has two roof ads (as for No.19 in 1195.1) and No.25 has one SEC roof ad and another. Ezywalkin sign in the background, and Fountain Plaza. 1195.4 - as for 1195.3, but after 21 has arrived and 25 left for Quarry Hill. Has Ezywalkin store and the Beehive store in the background. 1195.5 - No. 5 at the Eaglehawk terminus. Photo taken with a cannon in foreground looking along High St. Eaglehawk. Has shops on the west side of High St. in the background. 1195.6 - No. 5 at the Eaglehawk terminus, close up of the rear of the tram - note tow bar arrangement. Has destination of Quarry Hill. 1195.7-Nos.25 and 5 crossing at the Thorpe St. Loop, California Gully. No. 25 bound for Eaglehawk (has SEC Briquette and electric cooking roof ads) and 5 en route for Quarry Hill with a SEC and Cinzano roof ad. 1195.8 - as for 1195.7, but after trams have passed each other. Has Borough Auto Service building in the background. 1195.9 - No. 5 in Mt Korong Road, towards Bamard Street, photo taken after tram has passed photographer. 1195.10 - No. 30 at the Golden Square terminus with the Milk Bar on the right hand side of the photograph. 1195.11 - No. 30 inbound at Fire Station Loop, High St. Golden Square. Has old fire station in the background. Passengers are boarding the tramcar. 1195.12 - No. 30 in High St, bound for North Bendigo between Vine and Wattle Streets. 1195.13 - No. 5 bound for Eaglehawk waits at Iron Bark Gully Loop, at Hayes St. 1195.14 - No. 5 and No. 2 crossing at Iron Bark Gully Loop. 1195.15 - No. 5 bound for Eaglehawk leaving the Manchester Loop, Long gully. 1195.16 - No. 5 passing William Street, Long Gully en route to Eaglehawk. 1195.17 - No. 5 just before the California Gully Crossing Loop. 1195.18 - Nos. 5 and 26 crossing at California Gully crossing Loop. No. 5 heading to Eaglehawk, 26, Quarry Hill. 1195.19 - No. 5 in High St. Eaglehawk with Bob Moyle's Victoria Hotel and the TAB in the background. 1195.20 - No. 5 in High St. Eaglehawk approaching the terminus. Photo taken after the tram has passed the photographer. Has Foodland store and J. Best Fruit supply in the background, along with Eaglehawk Town Hall. 1195.21 - No. 5 at the Eaglehawk terminus, photo taken along seldom used track along High St. 1195.22 - as for 1195.22 - but at the very end of the track. 1195.23 - No. 5 en route for Quarry Hill climbs High St. Eaglehawk with the Victoria Hotel and Eaglehawk Town Hall in the background. 1195.24 - No. 5 and 25 crossing at Jobs Gully Loop. Note 25 has a black on white destination roll, while No. 5 has a white on black destination roll. Information written on in black ink and date stamped on purple ink. 1195.1 - "No. 19 arrives at Charing Cross Bendigo from Golden Square" 1195.2 - "No. 19 about to leave Charing Cross for North Bendigo" 1195.3 - "No. 25 awaiting departure for Quarry Hill, watches No. 21 arrive at Charring Cross from Golden Square" 1195.4 - "No. 21 on North Bendigo service and No. 25 on Quarry Hill run await departure at Charing Cross" 1195.5 - "No. 5 at Eaglehawk terminus" 1195.6 - "No. 5 at Eaglehawk terminus" 1195.7 - "Nos. 5 and 25 crossing at Thorpe St. Loop, California". 1195.8 - "Nos. 25 and 5 crossing Thorpe St. Loop, California Gully". 1195.9 - "No. 5 descending Mt Korong Rd. towards Bamard St." 1195.10 - "Birney car No. 30 at Golden Square terminus" 1195.11 - "Birney car No. 30 in High Street near Thistle Street (Fire Station Loop)" 1195.12 - "No. 30 in High St. between vine and Wattle Streets" 1195.13 - "No. 25 at Hayes Street Loop Iron Bark". 1195.14 - "Nos. 2 and 5 crossing at Hayes Street Loop Iron Bark" 1195.15 - "No. 5 at Manchester Loop opposite Havilah Road, Long Gully" 1195.16 - "No. 5 passing William Street, Long Gully". 1195.17 - "No. 5 at California Gully" 1195,18 - "Nos. 26 and 5 at Thorpe St. Loop, California Gully". 1195.19 - "No. 5 in High St. Eaglehawk". 1195.20 - "No. 5 approaching Eaglehawk terminus" 1195.21 - "No. 5 at Eaglehawk terminus" 1195.22 - "No. 5 at Eaglehawk terminus" 1195.23 - "No. 5 in High St. Eaglehawk" tramways, trams, bendigo, charing cross, eaglehawk, california gully, golden square, iron bark gully, jobs gully, tram 2, tram 5, tram 19, tram 21, tram 25, tram 26, tram 30 -
Ballarat Tramway Museum
Document - Report, Melbourne and Metropolitan Tramways Board (MMTB), "Report and Statement of Accounts" for year ended 30 June 1958, 1959, 1960, 1958-1960
1215.1 - Annual report of the MMTB for the year end 30/6/1958 - No. 39 - buff heavy paper cover with 56 pages on inside giving details of the MMTB Board, Officers, Balance Sheet, Statement of funds, operation, schedule of debenture, investments, Auditors reports, record of Annual traffic receipts, passengers, miles etc, tram and bus routes operated, statistical information, graphs and photographs. Photos include 2 of Influenza inoculations, traffic congestion in Collins St., new tram track in Malvern area, and new depot entrance at Camberwell. Has an insert inside front cover "With the Compliments of the Melbourne and Metropolitan Tramways Board." 1215.2 - 2 copies - Annual report of the MMTB for the year end 30/6/1959 - No. 40 - light green heavy paper cover with 60 pages on inside giving details of the MMTB Board, Officers, Balance Sheet, Statement of funds, operation, schedule of debenture, investments, Auditors reports, record of Annual traffic receipts, passengers, miles etc, tram and bus routes operated, statistical information, graphs and photographs. Photos include reconstruction of Batman Ave., laying special work at Kew Junction, pouring concrete in Johnston St., cable tramway abandonment, new thermit welding process, new dressing sheds at Wattle Park, illuminated tramcar for the City of Fitzroy centenary. Has an insert inside front cover "With the Compliments of the Melbourne and Metropolitan Tramways Board." 1215.3 - Annual report of the MMTB for the year end 30/6/1960 - No. 41 - light grey heavy paper cover with 60 pages on inside giving details of the MMTB Board, Officers, Balance Sheet, Statement of funds, operation, schedule of debenture, investments, Auditors reports, record of Annual traffic receipts, passengers, miles etc, tram and bus routes operated, statistical information, graphs and photographs. Photos include new St Kilda junction trackwork being assembled in Sth Melbourne yard, Flinders St. overpass under construction, - temporary trackwork, wheel welding machine at Preston, bus drivers school, new golf club house at Wattle Park, Q class tram decorated for Myers Christmas 1959. Has an insert inside front cover "With the Compliments of the Melbourne and Metropolitan Tramways Board." Printer not given on 1215.31215.1 - in ink on the front cover "Mr Major". On page 34 in pencil some notations re figures. 1215.2 - copy 2 - in ink on the front cover "Mr Major". 1215.3 - in light colour ink on front cover "Mr. B.F.Becher"trams, tramways, mmtb, melbourne, annual reports, operations, trackwork -
 Ballarat Tramway Museum
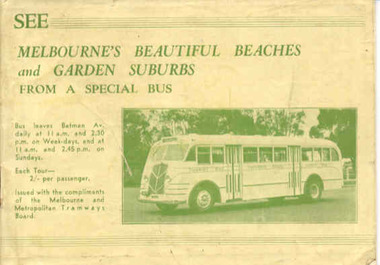
Book, Melbourne and Metropolitan Tramways Board (MMTB), "See Melbourne's Beautiful Beaches and Garden Suburbs from a Special Bus", 1939
Thirty two page landscape booklet on semi gloss white paper with off white cover and single supplementary white sheet tipped onto the inside of the front cover titled "See Melbourne's Beautiful Beaches and Garden Suburbs from a Special Bus". Saddle stapled, printed letterpress. Text printed in black and green ink. Cover green ink only. The book advertising MMTB's Special tourist bus, giving overall tour details on page 1, including fares, time of departures and reservations. Each tour has a map showing the route, details of the tour route with notes and photographs. Page 14 shows a maximum traction tram on the reserved track in Dandenong road and page 30, W2 488 outbound in Victoria Parade. Page 32 has an advertisement for the Round Trip by Tram 1/-. Front cover has details of the departure times and fares and a photo of the Tourist Bus. The supplementary sheet has been prepared for the tours that operated daily from Sun Sept. 17 to Friday May 31, except Anzac Day. Melbourne Tram Museum has a similar book - different bus - Reg Item 99 - 1938-39 version..trams, tramways, mmtb, bus tours, melbourne, sightseeing -
 Ballarat Tramway Museum
Slide - 35mm slide/s - set of 11, May 1979c
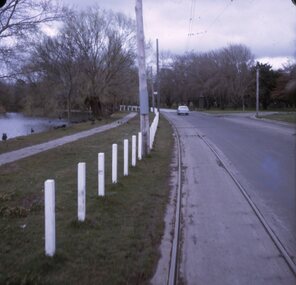
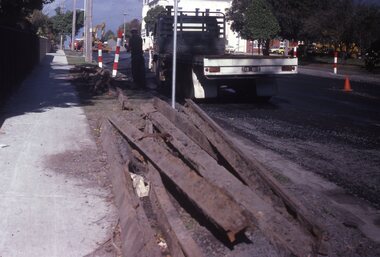
Set of eleven colour slides (Kodak) showing the removal of tram track in Geelong, c May 1979. All in Pakington St., Newtown, ex Newtown route. 2268.1 - slide 29 - look south from the north of Retreat Road. .2 - 30 - No. 276 in background, looking south .3 - 31 - City of Newtown Town Hall in background. .4 - 32 - opposite to that of No. 29. .5 - 33 - Looking south .6 - 34 - looking south with Aphrasia St. in the background. .7 - 35 - as for .2 .8 - 36 - Opposite No. 278, looking south .9 - 1 - opposite No. 276/278. .10 - 2 - ditto .11 - 3 - Outside No. 278, looking south. Bus stop still in position. See Letter to Dave O'Neil and responses.tramways, trams, geelong, track removal, pakington st, newtown -
 Ballarat Tramway Museum
Slide - 35mm slide/s - set of 4, Peter Moses, Jan. 1966
Set of four photographs on slides of the timetable boards in the waiting shelter at the City terminus at the intersection of Sturt and Lydiard St. Jan. 1966. 2031.1 - Timetable board for the Gardens, Victoria St and Mt Pleasant routes. .2 - ditto, not as well exposed. .3 - Timetable board for the Sebastopol and Lydiard St. North routes - over exposed, especially the left hand side. .4 - ditto, but better exposed on sides, but not perfect. Kodak cardboard mount slide, taken by Peter Moses January 1966.On back of slide in blue ink descriptions as below and on the bottom "P. Moses". 2031.1 - Ballarat City Terminus Jan. 1966 / 30-f5.6 .2 - Ballarat Jan. 1966 / 30 f4.0 .3 - Ballarat Jan 1966 / 30 f4.0 .4 - Jan. 1966 Ballarat / 30 f2.8tramways, trams, timetables, city terminus, shelters, timetable boards -
 Ballarat Tramway Museum
Photograph - Black & White Photograph/s, The Courier Ballarat, 30/09/1969 12:00:00 AM
Yields information about Ballarat's tramway system at the point where it crossed Albert St on the Sebastopol route.Black and White copy photograph of a newspaper photograph taken by The Courier, photo published 30/9/1969 of No. 42, Albert St (Sebastopol) crossover, looking south, after City Council asked Government to close Ballarat system. Tram has the destination of Lydiard St Nth, a Briquettes roof advertisement with the Anglican Trinity church in the background. Collected by Alan Bradley from the Ballarat Courier early 1980's. See Excel file "Record of Ballarat Courier Photos SEC era" (Archive Documents) for source of details.On rear stamped "Copyright, The Ballarat Courier Proprietary Limited."tramways, trams, albert st, sebastopol, tram 42 -
 Ballarat Tramway Museum
Photograph - Black & White Photograph/s, The Courier Ballarat, 30/09/1969 12:00:00 AM
Yields information about Ballarat's tramway system at the point where it crossed Albert St on the Sebastopol route. On of many similar photographs.Black and White copy photograph taken by The Courier, photo not published of No. 42, Albert St (Sebastopol) crossover, looking south. Tram has the destination of Lydiard St Nth, a Briquettes roof advertisement. Presumably photographed 30/9/1969, at the same time as Reg. Item 3753. Shows the Albert St road looking south. Collected by Alan Bradley from the Ballarat Courier early 1980's. See Excel file "Record of Ballarat Courier Photos SEC era" (Archive Documents) for source of details.On rear stamped "Copyright, The Ballarat Courier Proprietary Limited."tramways, trams, albert st, sebastopol, tram 42 -
 Ballarat Tramway Museum
Slide - 35mm slide/s, Eldon Hogan, 8 or 9/1971
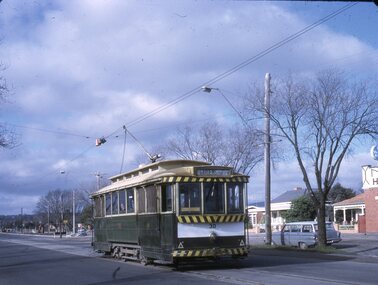
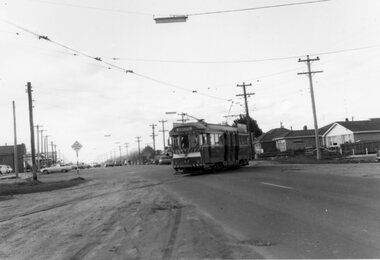
35mm Agfa colour blue and white plastic mount slide - photo of a Ballarat trams No. 30 turning from Drummond St North into Sturt St (has the destination of Sebastopol) with No. 41 (has the destination of Depot) crossing from the Sebastopol route in the background. Location known as Hospital Corner. Possibly a tram type change. Has the Southern Cross Hotel in the background. Taken 8 or 9/1971. Photos Eldon Hogan. tramways, trams, sturt st, hospital corner, drummond st, tram 41, tram 30 -
 Ballarat Tramway Museum
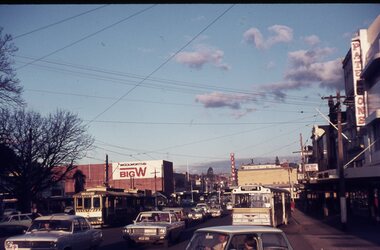
Slide - 35mm slide/s, Eldon Hogan, Sep. 1971
35mm Agfa colour blue and white plastic mount slide - photo of a Ballarat bogie tram 30 and another single trucker parked in the City Loop, Sturt St. with a busy street scene around, including a Davis Bus Lines on route 1, Wendouree West. Has the Dickins Foodstore, Woolworths Big W, Paterson store in the photograph. Taken 9/1971. Photos Eldon Hogan. All files transferred from disc to high res files 2/9/2009.tramways, trams, city loop, davis bus lines, sturt st, tram 30 -
 Ballarat Tramway Museum
Document - Form/s, State Electricity Commission of Victoria (SECV), "Trip Way-Bill", 1969
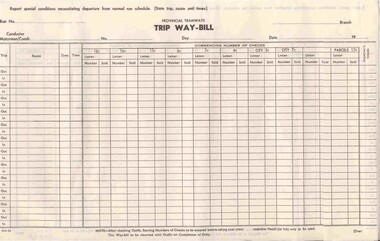
Demonstrates aspects of the SEC governance and monitoring system, gives information on actual tram running, tickets sold against a date. Could be used by Inspectors to check tickets on a tram. Has City and Parcel tickets.Printed form titled "Trip Way-Bill" of the Provincial Tramways, on off white paper. Gives value of tickets up to 18c and parcel stamps of 13c. Has space for the Run No, Branch, Motorman/Conductor, Day, Date , route time and tram no and space for Inspectors Initials. Able to be used on both sides of the sheet. Has sheet or print number of 554-30. Two copies held. Five copies added 11/1/2007. trams, tramways, tickets, accounting, trip waybills, conductors -
 Ballarat Tramway Museum
Photograph - Black & White Photograph/s, Leon Marshall Wood, Mar. 1947
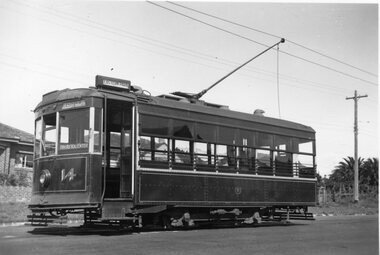
Black and white photograph of Geelong No. 14, Birney, with apparent destination of Eastern Park. Photographer - Leon Marshall-Wood, March 1947. Dave O'Neil confirmed June 30/2009, photo at the Western Park terminus. Up to 1951, Eastern Park was only operated by City to Eastern Park services, after 1951 through routed to Newtown. No. 14 was in Bendigo by then. See related documents. .1 - Copy small format print from Lloyd Rogers collection via Robert Green 2/2014. Added 4-4-2019On rear in pencil "3?, S/S, L M-W" and in light green pencil, "PWD" and "Owned JR". On rear of copy print 4194.1 - "Geelong" in top left hand corner.tramways, trams, geelong, eastern park, birney, tram 14 -
 Ballarat Tramway Museum
Document - Report, Melbourne and Metropolitan Tramways Board (MMTB), "Report and Statement of Accounts" for year ended 30 June 1964, 1964
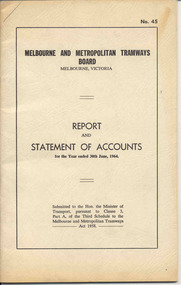
Annual report of the MMTB for the year end 30/6/1964 - No. 45 - buff heavy paper cover with 48 pages on inside giving details of the MMTB Board, Officers, Balance Sheet, Statement of funds, operation, schedule of debenture, investments, Auditors reports, record of Annual traffic receipts, passengers, miles etc, tram and bus routes operated, statistical information, graphs and photographs. Photos include trams operating in Stuttgart, Dusseldorf, Frankfurt-on-Main, window display Victoria House London, overseas recruiting, test equipment in a W class tram, building construction, Doncaster.trams, tramways, mmtb, melbourne, annual reports, operations, trackwork -
 Ballarat Tramway Museum
Document - Report, Melbourne and Metropolitan Tramways Board (MMTB), "Report and Statement of Accounts" for year ended 30 June 1963, 1963
Annual report of the MMTB for the year end 30/6/1963 - No. 44 - buff heavy paper cover with 52 pages on inside giving details of the MMTB Board, Officers, Balance Sheet, Statement of funds, operation, schedule of debenture, investments, Auditors reports, record of Annual traffic receipts, passengers, miles etc, tram and bus routes operated, statistical information, graphs and photographs. Photos include site preparation for new Doncaster depot, decorated tramcar for Melbourne cup carnival Nov. 1962, MMTB float - Melbourne Moomba festival Feb. 1963 and Demonstration model of Underground Tramway Intersection.4950 - has Graeme Breydon's address stamp on front cover.trams, tramways, mmtb, melbourne, annual reports, operations, trackwork -
 Ballarat Tramway Museum
Document - Report, Melbourne and Metropolitan Tramways Board (MMTB), MMTB Reports 1970 to 1976, 1970 to 1976
Seven copies of the Annual report of the MMTB for the years end 1970 to 1976. 3951.1 - "Report and Statement of Accounts for year ended 30 June 1970", No. 51, gloss fawn heavy paper cover with 44 pages, gloss, on inside giving details of the MMTB Board, Officers, Balance Sheet, Statement of operations, schedule of debenture, investments, Auditors reports, record of Annual traffic receipts, passengers, miles etc, tram and bus routes operated, statistical information, graphs and photographs. Photos include Doncaster depot, track reconstruction - concrete spreading equipment, Wattle Park and tram wheel grinding equipment. No printer name given. 3951.2 - "Report and Statement of Accounts for year ended 30 June 1971", No. 52, white embossed heavy paper cover with 44 pages, gloss, on inside giving details of the MMTB Board, Officers, Balance Sheet, Statement of operations, schedule of debenture, investments, Auditors reports, record of Annual traffic receipts, passengers, miles etc, tram and bus routes operated, statistical information, graphs and photographs. Photos include; prototype tram in St Kilda Rd, the New computer installation, decorated tram - Christmas 1970, Tram Advertising 1971 (briquettes), No printer name given. 3951.3 - "Annual Report 1972" - white gloss heavy paper cover with 44 pages, gloss, on inside giving details of the MMTB Board, Officers, Operations report, schedule of debenture, investments, Auditors reports, record of Annual traffic receipts, passengers, miles etc, tram and bus routes operated, statistical information, graphs and photographs. Photos include; school children boarding bus, passengers boarding bus at Shoppingtown, Concreting tracks in Keilor Road, Rail Inspection Unit and Wattle Park. No printer name given. 3951.4 - "Annual Report 1973" - light grey gloss heavy paper cover with 40 pages, gloss, on inside giving details of the MMTB Board, Officers, Operations report, schedule of debenture, investments, Auditors reports, record of Annual traffic receipts, passengers, miles etc, tram and bus routes operated, statistical information, graphs and photographs. Photos include; tram 1041, interior and driving cabin of 1041 and fire fighting demonstration at Preston Workshops. No printer name given. 3951.5 - "Annual Report 1974" - light blue gloss heavy paper cover with 40 pages, gloss, on inside giving details of the MMTB Board, Officers, Operations report, schedule of debenture, investments, Auditors reports, record of Annual traffic receipts, passengers, miles etc, tram and bus routes operated, statistical information, graphs and photographs. Photos include; Pedestrian Mall, Bourke St, New truck assembly area at Preston Workshops, electronic control equipment for new trams, English language lessons for migrant employees and 1041 turning from Bourke into Spring St. Printed by Sands & McDougall. 3951.6 - "Annual Report 1975" - fawn coloured gloss heavy paper cover with 44 pages, gloss, on inside giving details of the MMTB Board, Officers, Operations report, schedule of debenture, investments, Auditors reports, record of Annual traffic receipts, passengers, miles etc, tram and bus routes operated, statistical information, graphs and photographs. Photos include; Z class tram in Nicholson St, National Bus in Doncaster, New passenger shelter in St Kilda Road, new trams at Preston, drivers position of Z class tram, Interior of National Bus, Drivers position in National bus and first cable car in Melbourne after restoration. Printed by Magnum Press. 3951.7 - "Annual Report 1976" - light blue coloured gloss heavy paper cover with 44 pages, gloss, on inside giving details of the MMTB Board, Officers, Operations report, schedule of debenture, investments, Auditors reports, record of Annual traffic receipts, passengers, miles etc, tram and bus routes operated, statistical information, graphs and photographs. Photos include; Z2 in Bourke St, Z24 Victoria Parade, Z17 Nicholson St, overhead trucks, W2 in Mount Alexander Road Nth Essendon, Z28 Nicholson St, W2 226 loading passengers St Georges Rd and Wattle Park. Printed by Magnum Press.3951.1 - has Graeme Breydon's address stamp on front cover., 3951.2 - ditto, 3951.3 - ditto and on inside of front cover., 3951.6 - "G. Breydon" in pencil on front cover and pencil comments on balance sheet., 3951.7 - dittotrams, tramways, mmtb, melbourne, annual reports, operations, trackwork -
 Ballarat Tramway Museum
Document - Table Cards (Sheets), State Electricity Commission of Victoria (SECV), Rosters, Mar. 1970
3293.1 - Grey folder, with a two prong clip, marked ""Rosters both sides, containing a set of 29 sheets, typed on foolscap paper, giving the Weekdays, Saturday and Sunday tables or runs for the SEC Ballarat trams on the SEC Ballarat Tramway system until the period before closure. Gives details of 38 tables or runs, numbered from 1 Run to 38 Run. Each sheet headed "Weekday", three runs per sheet. Saturdays - 1 to 34, Sunday - 1 to 10. Each sheet has in the top right hand corner LJD/3/70. Time table operated until the commencement of closure of the system. All sheets imaged and are: Monday to Friday Runs 1- 3 4-6 7-9 10-12 13-15 16-18 19-21 22-24 25-28 29-30 31-33 34-36 37 and 38 Saturday Runs 1- 3 4-6 7-9 10-12 13-15 16-18 19-21 22-24 25-28 29-30 31-33 34 Sunday Runs 1- 3 4-6 7-9 10 Each run details where the driver/conductor would sign on, time, the trips, meal breaks, finish time and the total time of the shift. See also Reg Items 2984 - 2993 for table cards at the time of closure. 3293.2 - separate sheet in front of folder, was taped to folder, giving distance of the various routes within Ballarat - miles. Now loose within folder. Second copy of this sheet added 3-8-2006, BTPS Cat No. 611. - See image btm3293i31 for image file. Images of all sheets added 31/8/2012.On front of folder in black ink " BTPS 811" and on top of 3293.2 - "BTPS 611"trams, tramways, timetables, sec, ballarat, crews, routes