Showing 71 items
matching glenferrie station
-
 Kew Historical Society Inc
Photograph - Kew Railway Station, May 1950
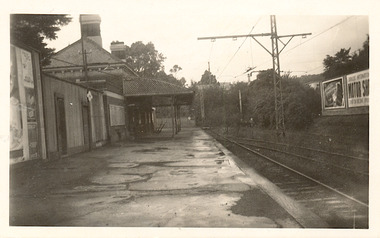
The Kew railway was opened in 1887, and diverged from the main (Box Hill–Lilydale) line about half-way between Hawthorn and Glenferrie. From the point of divergence the line was slightly less than one mile long, and it had only one intermediate station — Barker. There were four road over-bridges and two level crossings, including one over the busy Barkers Road. The line supported a passenger and goods service, and was electrified in December 1922, at the same time as the main line to Box Hill. There were a number of peak hour services which ran from Flinders Street station (Melbourne) to Kew, but in 1938 all but one of these were diverted to the Ashburton line, where traffic was growing. This had an adverse effect on Kew traffic, as passengers from Kew needed to cross over a footbridge at Hawthorn to change trains, and the main line trains were usually already crowded by the time they reached Hawthorn. At about the same time the off-peak trains were replaced by road buses. In 1952 all passenger trains were withdrawn, but the road bus service continued for many years. Goods trains were finally withdrawn in 1957, and the railway was dismantled in 1958-59. (Source: Frank Stamford, 'The Hawthorn - Kew Railway')Small black and white snapshot of Kew Railway Station inMay 1950. The photograph, one of 12, is part of a larger album of newspaper clippings, timetables, tickets and photos relating to the Kew Railway Line, taken and compiled by Lachlan Richardson, while a resident of Kew. The album dates from the 1950s. The album is part of a larger subject file on the Kew Line, compiled over time by members of the Kew Historical Society."Kew Railway Station, May 1950"kew railway line, transport -- railways -- kew (vic.), kew branch line, kew railway station -
 Kew Historical Society Inc
Photograph - Kew Railway Station, 1951
The Kew railway was opened in 1887, and diverged from the main (Box Hill–Lilydale) line about half-way between Hawthorn and Glenferrie. From the point of divergence the line was slightly less than one mile long, and it had only one intermediate station — Barker. There were four road over-bridges and two level crossings, including one over the busy Barkers Road. The line supported a passenger and goods service, and was electrified in December 1922, at the same time as the main line to Box Hill. There were a number of peak hour services which ran from Flinders Street station (Melbourne) to Kew, but in 1938 all but one of these were diverted to the Ashburton line, where traffic was growing. This had an adverse effect on Kew traffic, as passengers from Kew needed to cross over a footbridge at Hawthorn to change trains, and the main line trains were usually already crowded by the time they reached Hawthorn. At about the same time the off-peak trains were replaced by road buses. In 1952 all passenger trains were withdrawn, but the road bus service continued for many years. Goods trains were finally withdrawn in 1957, and the railway was dismantled in 1958-59. (Source: Frank Stamford, 'The Hawthorn - Kew Railway')Small black and white snapshot of Kew Railway Station in 1950. The photograph, one of 12, is part of a larger album of newspaper clippings, timetables, tickets and photos relating to the Kew Railway Line, taken and compiled by Lachlan Richardson, while a resident of Kew. The album dates from the 1950s. The album is part of a larger subject file on the Kew Line, compiled over time by members of the Kew Historical Society."Kew Station / 14/51 / 22/4/51 F5"kew railway line, transport -- railways -- kew (vic.), kew branch line, kew railway station -
 Kew Historical Society Inc
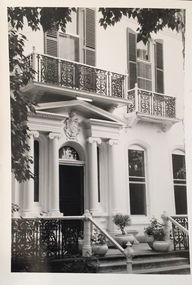
Photograph - 'Butleigh Wooton', 867 Glenferrie Road, John T Collins, 1979
in 1882 Thomas Maidment paid the Society of Jesus £5,750 for nine allotments along Barkly Road (now Glenferrie Road). Maidment, who had arrived in Australia from the Glastonbury district in England in 1858, owned and managed a number of sheep stations in Victoria and subsequently became an '... eminently respectable ...' member of District society. In 1883 the Rate Books list Maidment's land in Barkly Road as the 'Buxton Hill Estate' and it was given an N.A.V. of £90, while in the following year his property attracted an N.A.V. of £160, suggesting that substantial improvements were taking place. Maidment's two-storey mansion, named 'Butleigh Wooton' after his birth-place in England, was completed in 1885 and was given an initial N.A.V. of £420. While Maidrnent is recorded as the owner of the building until at least 1896, Jane Maidment, his wife, continued the family ownership of the twenty-six roomed house with its extensive grounds until at least 1910. (Sanderson P. City of Kew Urban Conservation Study Vol 2)Butleigh Wooton is a substantial two storeyed house built in the Italianate style common in the 1880s. Its walls are rendered and it has limited applied decoration that includes brackets to the eaves line and engaged ionic columns under a broken pediment over the front entrance. The bowed window unit is of particular distinction and is not at all typical of this type of building. This interior by John T Collins is a view of the staircase from the first floor landing. (Sanderson P. City of Kew Urban Conservation Study Vol 2)Reverse: "JOHN COLLINS / 11 Anderson Road / Hawthorn East, 3123 / Film 395 Exposure 27A / Kew / Butleigh Wooton / Looking down on stairs / 8-4-79thomas maidment, butleigh wooton, 867 glenferrie road -- kew (vic.) -
 Kew Historical Society Inc
Photograph - 'Butleigh Wooton', 867 Glenferrie Road, John T Collins, 1979
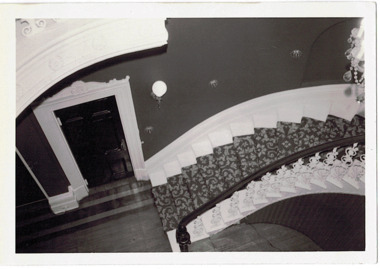
in 1882 Thomas Maidment paid the Society of Jesus £5,750 for nine allotments along Barkly Road (now Glenferrie Road). Maidment, who had arrived in Australia from the Glastonbury district in England in 1858, owned and managed a number of sheep stations in Victoria and subsequently became an '... eminently respectable ...' member of District society. In 1883 the Rate Books list Maidment's land in Barkly Road as the 'Buxton Hill Estate' and it was given an N.A.V. of £90, while in the following year his property attracted an N.A.V. of £160, suggesting that substantial improvements were taking place. Maidment's two-storey mansion, named 'Butleigh Wooton' after his birth-place in England, was completed in 1885 and was given an initial N.A.V. of £420. While Maidrnent is recorded as the owner of the building until at least 1896, Jane Maidment, his wife, continued the family ownership of the twenty-six roomed house with its extensive grounds until at least 1910. (Sanderson P. City of Kew Urban Conservation Study Vol 2)Butleigh Wooton is a substantial two storeyed house built in the Italianate style common in the 1880s. Its walls are rendered and it has limited applied decoration that includes brackets to the eaves line and engaged ionic columns under a broken pediment over the front entrance. The bowed window unit is of particular distinction and is not at all typical of this type of building. This interior by John T Collins is a view of the staircase from the first floor landing. (Sanderson P. City of Kew Urban Conservation Study Vol 2)Reverse: "JOHN COLLINS / 11 Anderson Road / Hawthorn East, 3123 / Film 395 Exposure 21A / Kew / Butleigh Wooton / Staircase / 8-4-79thomas maidment, butleigh wooton, 867 glenferrie road -- kew (vic.), john t collins -
 Kew Historical Society Inc
Photograph - 'Butleigh Wooton', 867 Glenferrie Road, John T Collins, 1979
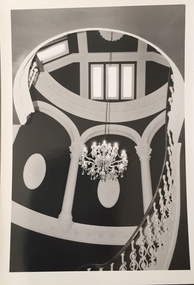
in 1882 Thomas Maidment paid the Society of Jesus £5,750 for nine allotments along Barkly Road (now Glenferrie Road). Maidment, who had arrived in Australia from the Glastonbury district in England in 1858, owned and managed a number of sheep stations in Victoria and subsequently became an '... eminently respectable ...' member of District society. In 1883 the Rate Books list Maidment's land in Barkly Road as the 'Buxton Hill Estate' and it was given an N.A.V. of £90, while in the following year his property attracted an N.A.V. of £160, suggesting that substantial improvements were taking place. Maidment's two-storey mansion, named 'Butleigh Wooton' after his birth-place in England, was completed in 1885 and was given an initial N.A.V. of £420. While Maidrnent is recorded as the owner of the building until at least 1896, Jane Maidment, his wife, continued the family ownership of the twenty-six roomed house with its extensive grounds until at least 1910. (Sanderson P. City of Kew Urban Conservation Study Vol 2)Butleigh Wooton is a substantial two storeyed house built in the Italianate style common in the 1880s. Its walls are rendered and it has limited applied decoration that includes brackets to the eaves line and engaged ionic columns under a broken pediment over the front entrance. The bowed window unit is of particular distinction and is not at all typical of this type of building. This interior by John T Collins is a view of the staircase from the first floor landing. (Sanderson P. City of Kew Urban Conservation Study Vol 2)Reverse: "JOHN COLLINS / 11 Anderson Road / Hawthorn East, 3123 / Film 395 Exposure 21A / Kew / Butleigh Wooton / Staircase looking up to dome / 8-4-79thomas maidment, butleigh wooton, 867 glenferrie road -- kew (vic.), john t collins -
 Kew Historical Society Inc
Photograph - 'Butleigh Wooton', 867 Glenferrie Road, John T Collins, 1979
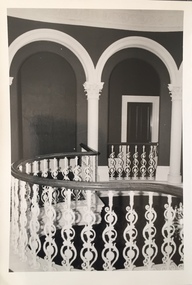
in 1882 Thomas Maidment paid the Society of Jesus £5,750 for nine allotments along Barkly Road (now Glenferrie Road). Maidment, who had arrived in Australia from the Glastonbury district in England in 1858, owned and managed a number of sheep stations in Victoria and subsequently became an '... eminently respectable ...' member of District society. In 1883 the Rate Books list Maidment's land in Barkly Road as the 'Buxton Hill Estate' and it was given an N.A.V. of £90, while in the following year his property attracted an N.A.V. of £160, suggesting that substantial improvements were taking place. Maidment's two-storey mansion, named 'Butleigh Wooton' after his birth-place in England, was completed in 1885 and was given an initial N.A.V. of £420. While Maidrnent is recorded as the owner of the building until at least 1896, Jane Maidment, his wife, continued the family ownership of the twenty-six roomed house with its extensive grounds until at least 1910. (Sanderson P. City of Kew Urban Conservation Study Vol 2)Butleigh Wooton is a substantial two storeyed house built in the Italianate style common in the 1880s. Its walls are rendered and it has limited applied decoration that includes brackets to the eaves line and engaged ionic columns under a broken pediment over the front entrance. The bowed window unit is of particular distinction and is not at all typical of this type of building. This interior by John T Collins is a view of the staircase from the first floor landing. (Sanderson P. City of Kew Urban Conservation Study Vol 2)Reverse: "JOHN COLLINS / 11 Anderson Road / Hawthorn East, 3123 / Film 395 Exposure 21A / Kew / Butleigh Wooton / Railing at head of stairs / 8-4-79thomas maidment, butleigh wooton, 867 glenferrie road -- kew (vic.), john t collins -
 Kew Historical Society Inc
Photograph - 'Butleigh Wooton', 867 Glenferrie Road, John T Collins, 1979
in 1882 Thomas Maidment paid the Society of Jesus £5,750 for nine allotments along Barkly Road (now Glenferrie Road). Maidment, who had arrived in Australia from the Glastonbury district in England in 1858, owned and managed a number of sheep stations in Victoria and subsequently became an '... eminently respectable ...' member of District society. In 1883 the Rate Books list Maidment's land in Barkly Road as the 'Buxton Hill Estate' and it was given an N.A.V. of £90, while in the following year his property attracted an N.A.V. of £160, suggesting that substantial improvements were taking place. Maidment's two-storey mansion, named 'Butleigh Wooton' after his birth-place in England, was completed in 1885 and was given an initial N.A.V. of £420. While Maidrnent is recorded as the owner of the building until at least 1896, Jane Maidment, his wife, continued the family ownership of the twenty-six roomed house with its extensive grounds until at least 1910. (Sanderson P. City of Kew Urban Conservation Study Vol 2)Butleigh Wooton is a substantial two storeyed house built in the Italianate style common in the 1880s. Its walls are rendered and it has limited applied decoration that includes brackets to the eaves line and engaged ionic columns under a broken pediment over the front entrance. The bowed window unit is of particular distinction and is not at all typical of this type of building. This interior by John T Collins is a view of the staircase from the first floor landing. (Sanderson P. City of Kew Urban Conservation Study Vol 2)Reverse: "JOHN COLLINS / 11 Anderson Road / Hawthorn East, 3123 / Film 395 Exposure 21A / Kew / Butleigh Wooton / Entrance / 8-4-79thomas maidment, butleigh wooton, 867 glenferrie road -- kew (vic.), john t collins -
 Vision Australia
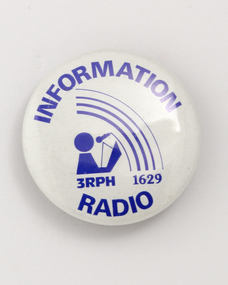
Badge - Object, 3RPH radio badge, 1980s
Circular metal badge. Convex in transverse section. Front of badge has a white background with blue graphics and writing. Marked: On front of badge: "INFORMATION / 3RPH 1629 / RADIO" A blue figure speaks into a microphone beneath a curved arc of lines representing sound waves.Small blue and white badgeINFORMATION / 3RPH 1629 / RADIO badges, 3rph radio station -
 Vision Australia
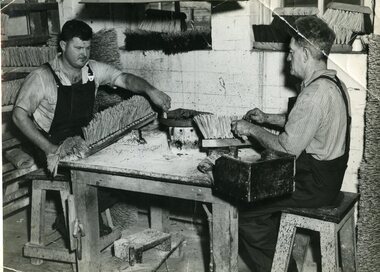
Photograph - Image, Queensland Institute for the Blind matting, cane and mattress workshop, August 1952
Fives images of the workshop machinery used by the Queensland Industrial Institute for the Blind in the manufacture of various products. 1 - Pitched brooms being made by Stewart Jewell (left) and Jack Dollier (right). 2 - Unknown worker at a basket station making a cane basket, surrounded by finished examples. 3 - Snowy Willis oversees the operation of the machine that bores holes into brush heads. 4 - Unknown worker operating a coir matting machine. There were apparently 10 such machines in use at the time this image was taken. 5 - Snowy Willis checking the bobbins being filled from a giant spool. In the background are empty bobbins stacked against walls and filled bobbins on spool holders. 6 - Roy Anderson checks the wadding on a recently filled mattress, whilst in the background Ellen McDevitt uses a portable sewing table to sew the ends of a filled mattress.6 x B/W photographs of the workshop machinery used by the Queensland Industrial Institute for the BlindC2-657: 2, Brush shop - pitch set brooms being made by blind workers C2-664: Basket shop - some of the various types of baskets made C2-654: Snowy Willis. Brush shop - a semi automatic brush stock boring machine in operation. C2-666: Matting shop - one of the ten coir matting looms in use. 1960. C2-659: Matting shop - bobbin winder and bobbin bank. C2-655: 15. 2 col wide. Bed shop wadding a fibre mattress. Also showing special sewing machine and movable table used in sewing the mouths of filled mattresses.queensland industrial institute for the blind, stuart jewell, jack dollier, snowy willis, roy anderson, ellen mcdevitt -
 Vision Australia
Administrative record - Text, RPH minute book, 1979-1983
Minutes relating to the formation and running of the Radio for the Print Handicapped Co-operative Limited directors meetings. The agenda included attendees, reports, financial statements and correspondence, and covered areas of establishing a structure, programming, technical needs, resourcing and the running of the station. 2 volumes of typed minutes glued to pagesassociation for the blind, 3rph -
 Vision Australia
Text, AFB Loddon Mallee Regional Committee minutes: 8/7/1996 - 11/3/1997, 1996-1997
Held at the 'Mirridong' Home for the Blind, McIvor Rd, Bendigo, these minutes contain information on attendees, meeting chair, apologies, confirmation of minutes, reports including from Auxiliaries and the Building, house and grounds, matters arising from reports, recommendations, Life Governors awards, general business and the date of the next meeting. It was noted that a fundraising campaign had been established to raise $100,000 from the Mildura District community for a Radio station for the Print Handicapped at Mildura. The "Paving the Way" program which was designed to help build the National Information Centre at Kooyong had been launched. For a gift of $100, individuals, businesses and organisations may have their names permanently inscribed on the brick pavers used to create the area. The Centenary Appeal was in action to raise $750,000 to enable commencement of the re-development of the Mirridong Home for the Blind - Amy Bayne Wing. 1 volumemirridong home (bendigo), association for the blind -
 Vision Australia
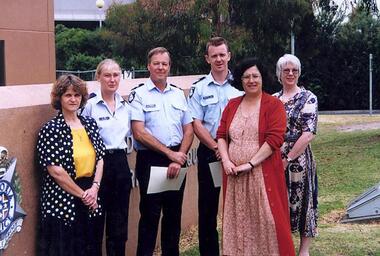
Image, 1998?
Images of staff with Victoria Police outside a station, as part of Interlink 1998 awards. Other photos in this collection are of staff in the office and a Christmas party for day centre patients. Possibly taken with staff from Essendon office.1 photograph and 25 negativesassociation for the blind -
 Vision Australia
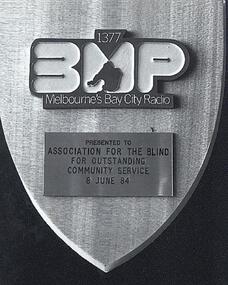
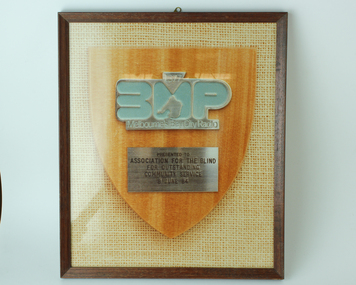
Photograph - Image, 3MP award
The Association for the Blind was honoured with many awards for its achievements. This one from radio station 3MP, was gained because of the services the organisation provided to the community.Wooden shield with two metal nameplates attached1377 3MP Melbourne's Bay City Radio Presented to Association for the Blind For Outstanding Community Service 8 June 84association for the blind, 3mp radio station, nameplates -
 Vision Australia
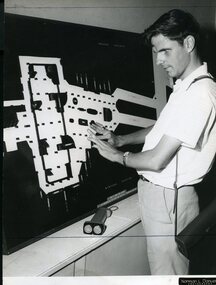
Photograph - Image, Ron Goodwin reading a map of Wynyard train station, 1969?
Ron Goodwin reads a tactile map of Wynyard Railway Station in Sydney's CBD. The map was made at the Sydney Tesol College with wood working machinery and painting/decorating sections. In front of Ron sits a ultrasonic torch.B/W photograph of man looking at relief map of Wynyard Station14/69051 Ann. Report Orientation - historicalroyal blind society of nsw, ron goodwin, maps -
 Vision Australia
Photograph - Image, 3MP award
The Association for the Blind was honoured with many awards for its achievements. This one from radio station 3MP, was gained because of the services the organisation provided to the community.Wooden shield with two metal nameplates attached1377 3MP Melbourne's Bay City Radio Presented to Association for the Blind For Outstanding Community Service 8 June 84association for the blind, 3mp radio station, nameplates -
Vision Australia
Audio - Sound recording, Gold 104 advertisement for sand sculpture exhibition at Rye, 2003, 2003
Advertisement for sand sculpturing exhibition at Rye beach, supported by radio station Gold 104. Each weekend until March 10, 2003 to see the life size sculptures at Rye, with proceeds supporting Vision Australia Foundation.1 sound file of radio advertisementvision australia foundation, gold 104, fundraising -
 Vision Australia
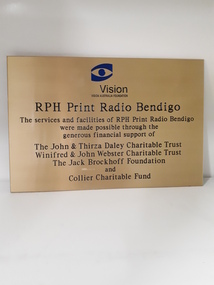
Photograph - Image, RPH Print Radio Bendigo
Vision Australia Foundation RPH Print Radio Bendigo The services and facilities of RPH Print Radio Bendigo were made possible through the generous support of The John & Thirza Daly Charitable Trust Winifred & John Webster Charitable Trust The Jack Brockhoff Foundation and Collier Charitable FundDigital image of golden coloured plaquevision australia foundation, 3rph radio station -
 Vision Australia
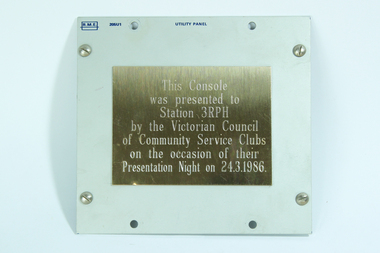
Photograph, 3RPH Console plaque
Running a radio station required update and maintenance of equipment. In this example, a console was presented by the Victorian Council of Community Service Clubs to 3RPH, and acknowledged as such by this plaque.Gold coloured metal plate with inscription3rph, nameplates -
 Vision Australia
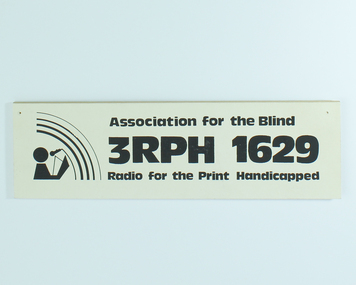
Sign - Object, 3RPH radio sign, 1980s
Small signboard advertising 3RPH. To th left of the sign a figure speaks into a microphone beneath a curved arc of lines representing sound waves.Black and White 3RPH sign with two holes in top cornersAssociation for the Blind 3RPH 1629 Radio for the Print Handicapped 3rph radio station, signs and signboards -
 Vision Australia
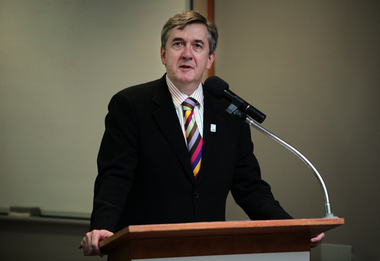
Photograph - Image, Foto Group, 25th Anniversary of Vision Australia Radio, 15 May 2007
On June 15, 2007 Vision Australia Radio (formerly 3RPH) celebrated its 25th anniversary of broadcasting. Despite earlier broadcasts on community radio stations, a dedicated radio service for people who wanted to listen to in depth information on news and current events as well as serialisation of books had not eventuated. With the support of Commonwealth funding in 1982, stations were permitted to transmit on marine band frequencies in Melbourne, Sydney and Hobart. With the eventual movement of major stations to FM in the 1980s, provision was finally granted for RPH stations to allow them to move to the AM band in metropolitan areas. In the 1990's regional stations were established, later linking to provide the Vision Australia Radio network. Throughout all of these changes, volunteers have supported the radio station in a range of ways, including collating and reading the newspaper articles for broadcast, helping source interviews and program ideas, operating studio equipment as well as presenting programs themselves.38 digital images of the 25th anniversary of VARvision australia, 3rph radio station, vision australia radio, gerard menses, stephen jolley, pam adams, lynne kells, tim evans, roberta ashby, marj west, norm richards, vince september, norm rees, graeme dawson -
 Vision Australia
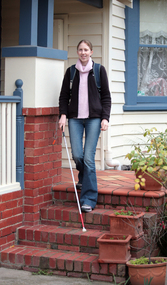
Photograph - Image, Anna Briggs, 5/7/2007
Images of Anna Briggs as she makes her way from a house to the train station, showing the different terrains and challenges she handles using her cane to guide her.16 digital images of Anna Briggsvision australia, orientation and mobility, anna briggs -
 Vision Australia
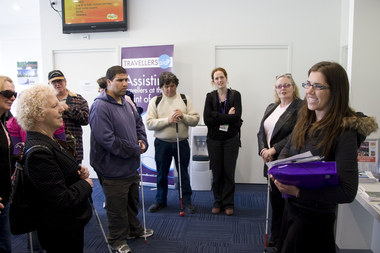
Photograph - Image, Thomas Kane, 2008 International White Cane Day at Flinders St Station and Southbank, 15/10/2008
To celebrate White Cane Day in 2008, a group of cane users met at the Travellers Aid office at Flinders Street station, before walking down the escalators, along the platform and along the Yarra River and St Kilda Road at Southbank.98 digital images of people participating in the 2008 White Cane Day eventvision australia, white cane day, cath caddis, tracy wright, kylie gerson, nicola misso, di seybold, flinders street station -
Vision Australia
Audio - Sound recording, Vision Australia, Around Vision Australia: Episode 48
Covering issues and news about Vision Australia and the opportunities it provides for clients, volunteers and staff. Host: Stephen Jolley with guest interviews by Valerie Thomas. Robyn McKenzie speaks with Stephen Jolly about his role as manager of VA Radio and the 8 stations involved in the RPH network. Siobhan Dennis will give the library update and Valerie Thomas interviews David Brandt, Chairman of the Client Representative Council. Finally, Megan Denyer talks about a Making a Difference Award to Sister Helen Merrin, Sister Margaret Keely and Mary Cameron have been working on a Braille music guide for a sighted teacher to teach Braille music to a Braille user – A Survivors Guide to Braille Music Notation.1 digital sound file in WAV formatradio shows, vision australia, robyn mckenzie, valerie thomas, stephen jolley, siobhan dennis, david brandt, megan denyer, sister helen merrin, sister margaret keely, mary cameron -
 Vision Australia
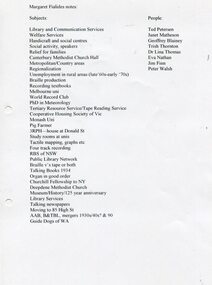
Audio - Sound recording, Interview with Margaret Fialides, 20/2/1991
Oral history recording and transcript of interview of Margaret Fialides by Alan Nuske. Recorded as part of 'The Years Between: an oral history of the RVIB 1866-1991'. Staff recall how they came to be involved with the organisation and changes made during their tenure.1 oral history interview with Margaret Fialidesroyal victorian institute for the blind, allan nuske, margaret fialides, 3rph radio station, library, burwood school, oral history -
 Vision Australia
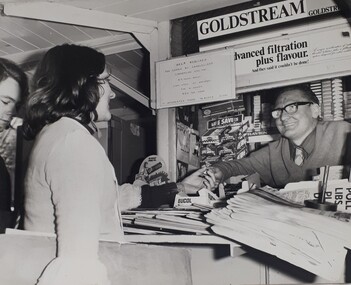
Photograph (item) - Image, Help required for Carols by Candlelight
Carols by Candlelight required the assistance of the general public around Melbourne to sell programs and other items, assist ticket sales and other activities. Various avenues were used to call for this assistance, including the circulation of Help Wanted signs at newsagent kiosks at metropolitan railway stations. In this image, a woman buys something from a newsagent kiosk, whilst another person waits behind her. The newsagent smiles from behind his stack of papers, beside a Life Savers rack and in front of cigarette towers behind him. Above him is an advertisement for Goldstream tobacco. The sign attached slightly over the tobacco advertisement reads: Help Required for Carols by Candlelight commencing 27th Nov. 5 1/4 hours daily. 6 day week inc. Saturday. For 4 weeks. 80 cents per hour. If interested phone Mr Burke 511381.carols by candlelight, royal victorian institute for the blind -
 Hawthorn Historical Society
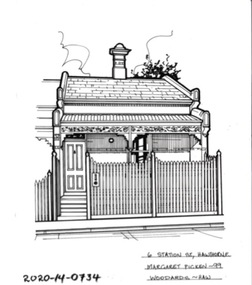
Drawing - Property Illustration, 6 Station Street Hawthorn East
'After training as a Cartographic Draftsman within the mining industry, I worked as a property illustrator for real estate firms in the eastern suburbs of Melbourne for 23 years from 1983. I initially photographed houses with a Polaroid camera and made a 'thumbnail' sketch while there. The photos were used to scale off a sketch in pencil and then that sketch was overlaid with drafting film and the 'pen and ink' completed. The pens I used were the Rotring ‘Rapidigraph’ drafting pens. The ink was also made by Rotring (German).The film was ‘Rapidraw’, polyester drafting film, double matte. It takes a very fine line and doesn’t bleed. As well as house sketches, there were often floor plans and site plans ordered. Aerial sketches were ordered when the property needed an overall view.' (Margaret Picken, 2020)This property illustration is one of a series created by Margaret Picken for a range of real estate agents in Melbourne between c. 1983 and c. 2006. Each work is signed and dated by the artist.Gift of Margaret Picken, 2020pen and ink architectural drawing on drafting film.6 STATION ST, HAWTHORN E Margaret Picken ~99 WOODARDS - HAWartist - margaret picken 1950- -
 Hawthorn Historical Society
Drawing - Property Illustration, 36 Station Street, Hawthorn East
'After training as a Cartographic Draftsman within the mining industry, I worked as a property illustrator for real estate firms in the eastern suburbs of Melbourne for 23 years from 1983. I initially photographed houses with a Polaroid camera and made a 'thumbnail' sketch while there. The photos were used to scale off a sketch in pencil and then that sketch was overlaid with drafting film and the 'pen and ink' completed. The pens I used were the Rotring ‘Rapidigraph’ drafting pens. The ink was also made by Rotring (German).The film was ‘Rapidraw’, polyester drafting film, double matte. It takes a very fine line and doesn’t bleed. As well as house sketches, there were often floor plans and site plans ordered. Aerial sketches were ordered when the property needed an overall view.' (Margaret Picken, 2020)This property illustration is one of a series created by Margaret Picken for a range of real estate agents in Melbourne between c. 1983 and c. 2006. Each work is signed and dated by the artist.Gift of Margaret Picken, 2020pen and ink architectural drawing on drafting film.36 STATION ST, HAWTHORN Margaret Picken ~89 WOODARDS - HAWTHORNartist - margaret picken 1950- -
 Melbourne Tram Museum
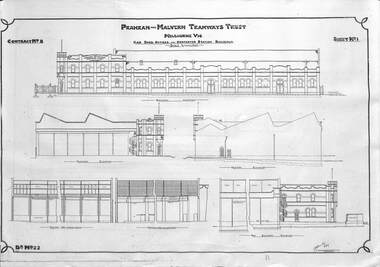
Drawing - Set of 3, Prahran & Malvern Tramway Trust (PMTT), "PMTT Malvern Depot", 1909 to 1920
Set of the three drawings of the Prahran and Malvern Tramways Trust (PMTT) Depot in Glenferrie Road, Malvern. 1 - Drawing No. 22 - Sheet No. 1 - Contract No. 8 - "Car shed offices and converter station buildings" - by Noyes Bros, dated 10/10/1909 2 - Drawing No. 23 - Sheet No. 2 - Contract No. 8 - Plan view of above - shows the first three roads or tracks within a larger building. Shows the room layout of the first depot building. 3 - Drawing No. 156 - Layout of Offices, car depot, and substation - c1920 - showing additional buildings, floor plans, extensions and the small four road workshop on the northside of Coldblo Road.Yields information about Malvern tram depot by the PMTT.Set of three prints on paper from a larger drawing reduced to A3 size.trams, tramways, depots, pmtt, malvern depot, drawings, noyes bros -
 Melbourne Tram Museum
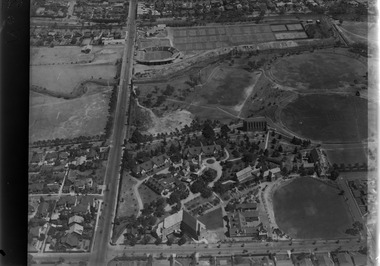
Photograph - Digital Image, Kevin O'Reilly, looking south over the Scotch College complex, Late 1930's to mid 1940's
Image from CD (Compact Diskette for use in computers) - see Reg Item 135. Image titled "Scotch" on CD, of looking south over the eastern part of Scotch College complex with Glenferrie Road, Hawthorn on the left hand side of the photograph. The Kooyong Stadium (Tennis) constructed in 1927 now shows the new extended Northern stand added in 1934. In the top left of the photograph is the Kooyong Railway Station. A tram can be seen southbound in Glenferrie Road, adjacent to the college. late 1930's to mid 1940's trams, tramways, kooyong, hawthorn, glenferrie rd, kooyong tennis courts, scotch college -
 Melbourne Tram Museum
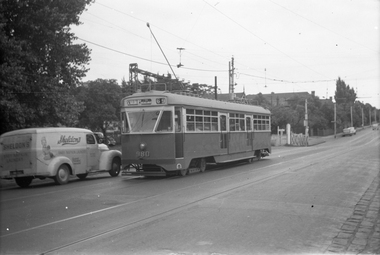
Negative, Wal Jack, c1950
Black and white negative, by Wal Jack, of PCC 980, south bound in Glenferrie Road, about to cross over the Kooyong Station Level crossing while running a route 69, St Kilda Beach. c1950. Alongside is a Sheldon's Baby Napkin Laundry van of Roche Street Hawthorn. trams, tramways, pcc class, glenferrie road, route 69, railway squares, level crossings, kooyong, tram 980