Showing 244 items matching "how it looked"
-
 Ringwood and District Historical Society
Magazine, Nature Notes magazines 1975 (Vol 12) Issues 1-10
... information and taught children how to look after their environment... information and taught children how to look after their environment ...Printed magazinesFrom “The History of Ringwood East Primary School 1924-1990” 'Nature Notes' was a children's nature magazine, produced at Ringwood East Primary School for approximately 10 years. It came to us from Blackburn Lake Primary School and before that Blackburn South Primary School. It was originally developed by Harry Hopkins in 1964. He was a District Inspector of schools and also President of the Gould League at the time. Fred Rodgers and Len Delacca were original contributors, Fred writing on native flora and Len writing on native flora [fauna]. It came to Ringwood East in 1975 with Keith Dyer, a teacher on the staff, as editor. The magazine had a large circulation, supplying to schools, private subscribers and societies as well as sending many complimentary copies to libraries, and museums; distribution was throughout Australia. The Magazine continued to grow under consequent editors, Anne Gibson (who also developed 'Probe' a junior version of 'Nature Notes' designed for grades 2 and 4), Barry Archibald, Colin Bull, Russell Hall, Deborah Brydon and Mandy Charmichael. The editors would research, compile, edit and print the magazine which was a monthly issue. The parents would then come in on a Monday to collate, fold and staple. This usually was a morning’s work but this depended on how many helping hands there were. The Wednesday was packing and posting day and in the early days the parents used to deliver the local orders to save costs. Subscribers were sought through advertisements in various school literature and material. The Parents Club received an annual remuneration for their hard work and in turn were able to help purchase many items needed throughout the school. These magazines were packed with really good nature information and taught children how to look after their environment using articles, puzzles, riddles, questions and quizzes. There were special characters as well like 'Wally the Wombat' and 'Ernie the Echidna' for the children to follow on various adventures every month. Children would enjoy watching them crop up in each edition. The magazine stayed with us at Ringwood East until 1986, when due to restructuring and various other things was moved to Healesville Sanctuary where it adopted a new format and name. From here it has since folded and so the end of 'Nature Notes'. 'Nature Notes' was a very successful magazine. Many people through the years devoted a lot of time and energy to its production and readers throughout Australia, as well as its many creators and producers during its 20-year existence, mourn its passing. Written from material supplied by Barry Archibald (editor 'Nature Notes' 1977-78) Margaret Preece & Lois Aders (parents in charge of collating and packaging during its last years of existence. -
 Ringwood and District Historical Society
Magazine, Nature Notes magazines 1977 (Vol 14) Issues 1-10
... information and taught children how to look after their environment... information and taught children how to look after their environment ...Printed magazinesFrom “The History of Ringwood East Primary School 1924-1990” 'Nature Notes' was a children's nature magazine, produced at Ringwood East Primary School for approximately 10 years. It came to us from Blackburn Lake Primary School and before that Blackburn South Primary School. It was originally developed by Harry Hopkins in 1964. He was a District Inspector of schools and also President of the Gould League at the time. Fred Rodgers and Len Delacca were original contributors, Fred writing on native flora and Len writing on native flora [fauna]. It came to Ringwood East in 1975 with Keith Dyer, a teacher on the staff, as editor. The magazine had a large circulation, supplying to schools, private subscribers and societies as well as sending many complimentary copies to libraries, and museums; distribution was throughout Australia. The Magazine continued to grow under consequent editors, Anne Gibson (who also developed 'Probe' a junior version of 'Nature Notes' designed for grades 2 and 4), Barry Archibald, Colin Bull, Russell Hall, Deborah Brydon and Mandy Charmichael. The editors would research, compile, edit and print the magazine which was a monthly issue. The parents would then come in on a Monday to collate, fold and staple. This usually was a morning’s work but this depended on how many helping hands there were. The Wednesday was packing and posting day and in the early days the parents used to deliver the local orders to save costs. Subscribers were sought through advertisements in various school literature and material. The Parents Club received an annual remuneration for their hard work and in turn were able to help purchase many items needed throughout the school. These magazines were packed with really good nature information and taught children how to look after their environment using articles, puzzles, riddles, questions and quizzes. There were special characters as well like 'Wally the Wombat' and 'Ernie the Echidna' for the children to follow on various adventures every month. Children would enjoy watching them crop up in each edition. The magazine stayed with us at Ringwood East until 1986, when due to restructuring and various other things was moved to Healesville Sanctuary where it adopted a new format and name. From here it has since folded and so the end of 'Nature Notes'. 'Nature Notes' was a very successful magazine. Many people through the years devoted a lot of time and energy to its production and readers throughout Australia, as well as its many creators and producers during its 20-year existence, mourn its passing. Written from material supplied by Barry Archibald (editor 'Nature Notes' 1977-78) Margaret Preece & Lois Aders (parents in charge of collating and packaging during its last years of existence. -
 Ringwood and District Historical Society
Magazine, Nature Notes magazines 1979 (Vol 16) Issues 1-5, 7-8, 10
... information and taught children how to look after their environment... information and taught children how to look after their environment ...Printed magazinesFrom “The History of Ringwood East Primary School 1924-1990” 'Nature Notes' was a children's nature magazine, produced at Ringwood East Primary School for approximately 10 years. It came to us from Blackburn Lake Primary School and before that Blackburn South Primary School. It was originally developed by Harry Hopkins in 1964. He was a District Inspector of schools and also President of the Gould League at the time. Fred Rodgers and Len Delacca were original contributors, Fred writing on native flora and Len writing on native flora [fauna]. It came to Ringwood East in 1975 with Keith Dyer, a teacher on the staff, as editor. The magazine had a large circulation, supplying to schools, private subscribers and societies as well as sending many complimentary copies to libraries, and museums; distribution was throughout Australia. The Magazine continued to grow under consequent editors, Anne Gibson (who also developed 'Probe' a junior version of 'Nature Notes' designed for grades 2 and 4), Barry Archibald, Colin Bull, Russell Hall, Deborah Brydon and Mandy Charmichael. The editors would research, compile, edit and print the magazine which was a monthly issue. The parents would then come in on a Monday to collate, fold and staple. This usually was a morning’s work but this depended on how many helping hands there were. The Wednesday was packing and posting day and in the early days the parents used to deliver the local orders to save costs. Subscribers were sought through advertisements in various school literature and material. The Parents Club received an annual remuneration for their hard work and in turn were able to help purchase many items needed throughout the school. These magazines were packed with really good nature information and taught children how to look after their environment using articles, puzzles, riddles, questions and quizzes. There were special characters as well like 'Wally the Wombat' and 'Ernie the Echidna' for the children to follow on various adventures every month. Children would enjoy watching them crop up in each edition. The magazine stayed with us at Ringwood East until 1986, when due to restructuring and various other things was moved to Healesville Sanctuary where it adopted a new format and name. From here it has since folded and so the end of 'Nature Notes'. 'Nature Notes' was a very successful magazine. Many people through the years devoted a lot of time and energy to its production and readers throughout Australia, as well as its many creators and producers during its 20-year existence, mourn its passing. Written from material supplied by Barry Archibald (editor 'Nature Notes' 1977-78) Margaret Preece & Lois Aders (parents in charge of collating and packaging during its last years of existence. -
 Ringwood and District Historical Society
Magazine, Probe magazines 1978 (Vol 4) Issues 1-5, 7-10
... information and taught children how to look after their environment... information and taught children how to look after their environment ...Printed magazinesFrom “The History of Ringwood East Primary School 1924-1990” 'Nature Notes' was a children's nature magazine, produced at Ringwood East Primary School for approximately 10 years. It came to us from Blackburn Lake Primary School and before that Blackburn South Primary School. It was originally developed by Harry Hopkins in 1964. He was a District Inspector of schools and also President of the Gould League at the time. Fred Rodgers and Len Delacca were original contributors, Fred writing on native flora and Len writing on native flora [fauna]. It came to Ringwood East in 1975 with Keith Dyer, a teacher on the staff, as editor. The magazine had a large circulation, supplying to schools, private subscribers and societies as well as sending many complimentary copies to libraries, and museums; distribution was throughout Australia. The Magazine continued to grow under consequent editors, Anne Gibson (who also developed 'Probe' a junior version of 'Nature Notes' designed for grades 2 and 4), Barry Archibald, Colin Bull, Russell Hall, Deborah Brydon and Mandy Charmichael. The editors would research, compile, edit and print the magazine which was a monthly issue. The parents would then come in on a Monday to collate, fold and staple. This usually was a morning’s work but this depended on how many helping hands there were. The Wednesday was packing and posting day and in the early days the parents used to deliver the local orders to save costs. Subscribers were sought through advertisements in various school literature and material. The Parents Club received an annual remuneration for their hard work and in turn were able to help purchase many items needed throughout the school. These magazines were packed with really good nature information and taught children how to look after their environment using articles, puzzles, riddles, questions and quizzes. There were special characters as well like 'Wally the Wombat' and 'Ernie the Echidna' for the children to follow on various adventures every month. Children would enjoy watching them crop up in each edition. The magazine stayed with us at Ringwood East until 1986, when due to restructuring and various other things was moved to Healesville Sanctuary where it adopted a new format and name. From here it has since folded and so the end of 'Nature Notes'. 'Nature Notes' was a very successful magazine. Many people through the years devoted a lot of time and energy to its production and readers throughout Australia, as well as its many creators and producers during its 20-year existence, mourn its passing. Written from material supplied by Barry Archibald (editor 'Nature Notes' 1977-78) Margaret Preece & Lois Aders (parents in charge of collating and packaging during its last years of existence. -
 Ringwood and District Historical Society
Magazine, Probe magazines 1979 (Vol 5) Issues 8-10
... information and taught children how to look after their environment... information and taught children how to look after their environment ...Printed magazinesFrom “The History of Ringwood East Primary School 1924-1990” 'Nature Notes' was a children's nature magazine, produced at Ringwood East Primary School for approximately 10 years. It came to us from Blackburn Lake Primary School and before that Blackburn South Primary School. It was originally developed by Harry Hopkins in 1964. He was a District Inspector of schools and also President of the Gould League at the time. Fred Rodgers and Len Delacca were original contributors, Fred writing on native flora and Len writing on native flora [fauna]. It came to Ringwood East in 1975 with Keith Dyer, a teacher on the staff, as editor. The magazine had a large circulation, supplying to schools, private subscribers and societies as well as sending many complimentary copies to libraries, and museums; distribution was throughout Australia. The Magazine continued to grow under consequent editors, Anne Gibson (who also developed 'Probe' a junior version of 'Nature Notes' designed for grades 2 and 4), Barry Archibald, Colin Bull, Russell Hall, Deborah Brydon and Mandy Charmichael. The editors would research, compile, edit and print the magazine which was a monthly issue. The parents would then come in on a Monday to collate, fold and staple. This usually was a morning’s work but this depended on how many helping hands there were. The Wednesday was packing and posting day and in the early days the parents used to deliver the local orders to save costs. Subscribers were sought through advertisements in various school literature and material. The Parents Club received an annual remuneration for their hard work and in turn were able to help purchase many items needed throughout the school. These magazines were packed with really good nature information and taught children how to look after their environment using articles, puzzles, riddles, questions and quizzes. There were special characters as well like 'Wally the Wombat' and 'Ernie the Echidna' for the children to follow on various adventures every month. Children would enjoy watching them crop up in each edition. The magazine stayed with us at Ringwood East until 1986, when due to restructuring and various other things was moved to Healesville Sanctuary where it adopted a new format and name. From here it has since folded and so the end of 'Nature Notes'. 'Nature Notes' was a very successful magazine. Many people through the years devoted a lot of time and energy to its production and readers throughout Australia, as well as its many creators and producers during its 20-year existence, mourn its passing. Written from material supplied by Barry Archibald (editor 'Nature Notes' 1977-78) Margaret Preece & Lois Aders (parents in charge of collating and packaging during its last years of existence. -
 Ringwood and District Historical Society
Archive, Parent Record for Nature Notes & Probe magazines Collection
... information and taught children how to look after their environment... information and taught children how to look after their environment ...Parent Record for Archive collection of photographs, documents, minutes etc relating to the Nature Notes and Probe magazines published by the Ringwood Electorate State/Primary SchoolsFrom “The History of Ringwood East Primary School 1924-1990” 'Nature Notes' was a children's nature magazine, produced at Ringwood East Primary School for approximately 10 years. It came to us from Blackburn Lake Primary School and before that Blackburn South Primary School. It was originally developed by Harry Hopkins in 1964. He was a District Inspector of schools and also President of the Gould League at the time. Fred Rodgers and Len Delacca were original contributors, Fred writing on native flora and Len writing on native flora [fauna]. It came to Ringwood East in 1975 with Keith Dyer, a teacher on the staff, as editor. The magazine had a large circulation, supplying to schools, private subscribers and societies as well as sending many complimentary copies to libraries, and museums; distribution was throughout Australia. The Magazine continued to grow under consequent editors, Anne Gibson (who also developed 'Probe' a junior version of 'Nature Notes' designed for grades 2 and 4), Barry Archibald, Colin Bull, Russell Hall, Deborah Brydon and Mandy Charmichael. The editors would research, compile, edit and print the magazine which was a monthly issue. The parents would then come in on a Monday to collate, fold and staple. This usually was a morning’s work but this depended on how many helping hands there were. The Wednesday was packing and posting day and in the early days the parents used to deliver the local orders to save costs. Subscribers were sought through advertisements in various school literature and material. The Parents Club received an annual remuneration for their hard work and in turn were able to help purchase many items needed throughout the school. These magazines were packed with really good nature information and taught children how to look after their environment using articles, puzzles, riddles, questions and quizzes. There were special characters as well like 'Wally the Wombat' and 'Ernie the Echidna' for the children to follow on various adventures every month. Children would enjoy watching them crop up in each edition. The magazine stayed with us at Ringwood East until 1986, when due to restructuring and various other things was moved to Healesville Sanctuary where it adopted a new format and name. From here it has since folded and so the end of 'Nature Notes'. 'Nature Notes' was a very successful magazine. Many people through the years devoted a lot of time and energy to its production and readers throughout Australia, as well as its many creators and producers during its 20-year existence, mourn its passing. Written from material supplied by Barry Archibald (editor 'Nature Notes' 1977-78) Margaret Preece & Lois Aders (parents in charge of collating and packaging during its last years of existence. -
 Ringwood and District Historical Society
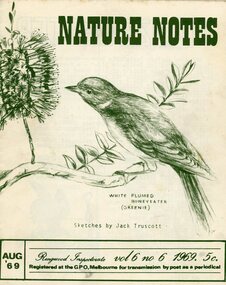
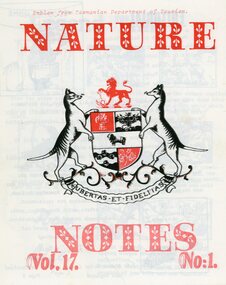
Magazine, Nature Notes magazines 1980 (Vol 17) Issues 1-10
... information and taught children how to look after their environment... information and taught children how to look after their environment ...Printed magazinesFrom “The History of Ringwood East Primary School 1924-1990” 'Nature Notes' was a children's nature magazine, produced at Ringwood East Primary School for approximately 10 years. It came to us from Blackburn Lake Primary School and before that Blackburn South Primary School. It was originally developed by Harry Hopkins in 1964. He was a District Inspector of schools and also President of the Gould League at the time. Fred Rodgers and Len Delacca were original contributors, Fred writing on native flora and Len writing on native flora [fauna]. It came to Ringwood East in 1975 with Keith Dyer, a teacher on the staff, as editor. The magazine had a large circulation, supplying to schools, private subscribers and societies as well as sending many complimentary copies to libraries, and museums; distribution was throughout Australia. The Magazine continued to grow under consequent editors, Anne Gibson (who also developed 'Probe' a junior version of 'Nature Notes' designed for grades 2 and 4), Barry Archibald, Colin Bull, Russell Hall, Deborah Brydon and Mandy Charmichael. The editors would research, compile, edit and print the magazine which was a monthly issue. The parents would then come in on a Monday to collate, fold and staple. This usually was a morning’s work but this depended on how many helping hands there were. The Wednesday was packing and posting day and in the early days the parents used to deliver the local orders to save costs. Subscribers were sought through advertisements in various school literature and material. The Parents Club received an annual remuneration for their hard work and in turn were able to help purchase many items needed throughout the school. These magazines were packed with really good nature information and taught children how to look after their environment using articles, puzzles, riddles, questions and quizzes. There were special characters as well like 'Wally the Wombat' and 'Ernie the Echidna' for the children to follow on various adventures every month. Children would enjoy watching them crop up in each edition. The magazine stayed with us at Ringwood East until 1986, when due to restructuring and various other things was moved to Healesville Sanctuary where it adopted a new format and name. From here it has since folded and so the end of 'Nature Notes'. 'Nature Notes' was a very successful magazine. Many people through the years devoted a lot of time and energy to its production and readers throughout Australia, as well as its many creators and producers during its 20-year existence, mourn its passing. Written from material supplied by Barry Archibald (editor 'Nature Notes' 1977-78) Margaret Preece & Lois Aders (parents in charge of collating and packaging during its last years of existence. -
 Ringwood and District Historical Society
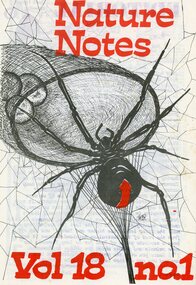
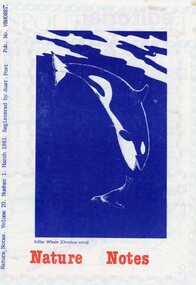
Magazine, Nature Notes magazines 1981 (Vol 18) Issues 1-10
... information and taught children how to look after their environment... information and taught children how to look after their environment ...Printed magazinesFrom “The History of Ringwood East Primary School 1924-1990” 'Nature Notes' was a children's nature magazine, produced at Ringwood East Primary School for approximately 10 years. It came to us from Blackburn Lake Primary School and before that Blackburn South Primary School. It was originally developed by Harry Hopkins in 1964. He was a District Inspector of schools and also President of the Gould League at the time. Fred Rodgers and Len Delacca were original contributors, Fred writing on native flora and Len writing on native flora [fauna]. It came to Ringwood East in 1975 with Keith Dyer, a teacher on the staff, as editor. The magazine had a large circulation, supplying to schools, private subscribers and societies as well as sending many complimentary copies to libraries, and museums; distribution was throughout Australia. The Magazine continued to grow under consequent editors, Anne Gibson (who also developed 'Probe' a junior version of 'Nature Notes' designed for grades 2 and 4), Barry Archibald, Colin Bull, Russell Hall, Deborah Brydon and Mandy Charmichael. The editors would research, compile, edit and print the magazine which was a monthly issue. The parents would then come in on a Monday to collate, fold and staple. This usually was a morning’s work but this depended on how many helping hands there were. The Wednesday was packing and posting day and in the early days the parents used to deliver the local orders to save costs. Subscribers were sought through advertisements in various school literature and material. The Parents Club received an annual remuneration for their hard work and in turn were able to help purchase many items needed throughout the school. These magazines were packed with really good nature information and taught children how to look after their environment using articles, puzzles, riddles, questions and quizzes. There were special characters as well like 'Wally the Wombat' and 'Ernie the Echidna' for the children to follow on various adventures every month. Children would enjoy watching them crop up in each edition. The magazine stayed with us at Ringwood East until 1986, when due to restructuring and various other things was moved to Healesville Sanctuary where it adopted a new format and name. From here it has since folded and so the end of 'Nature Notes'. 'Nature Notes' was a very successful magazine. Many people through the years devoted a lot of time and energy to its production and readers throughout Australia, as well as its many creators and producers during its 20-year existence, mourn its passing. Written from material supplied by Barry Archibald (editor 'Nature Notes' 1977-78) Margaret Preece & Lois Aders (parents in charge of collating and packaging during its last years of existence. -
 Ringwood and District Historical Society
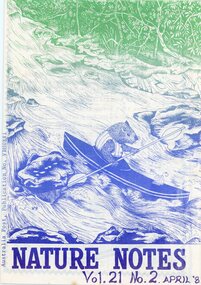
Magazine, Nature Notes magazines 1984 (Vol 21) Issues 1-5, 7-10
... information and taught children how to look after their environment... information and taught children how to look after their environment ...Printed magazinesFrom “The History of Ringwood East Primary School 1924-1990” 'Nature Notes' was a children's nature magazine, produced at Ringwood East Primary School for approximately 10 years. It came to us from Blackburn Lake Primary School and before that Blackburn South Primary School. It was originally developed by Harry Hopkins in 1964. He was a District Inspector of schools and also President of the Gould League at the time. Fred Rodgers and Len Delacca were original contributors, Fred writing on native flora and Len writing on native flora [fauna]. It came to Ringwood East in 1975 with Keith Dyer, a teacher on the staff, as editor. The magazine had a large circulation, supplying to schools, private subscribers and societies as well as sending many complimentary copies to libraries, and museums; distribution was throughout Australia. The Magazine continued to grow under consequent editors, Anne Gibson (who also developed 'Probe' a junior version of 'Nature Notes' designed for grades 2 and 4), Barry Archibald, Colin Bull, Russell Hall, Deborah Brydon and Mandy Charmichael. The editors would research, compile, edit and print the magazine which was a monthly issue. The parents would then come in on a Monday to collate, fold and staple. This usually was a morning’s work but this depended on how many helping hands there were. The Wednesday was packing and posting day and in the early days the parents used to deliver the local orders to save costs. Subscribers were sought through advertisements in various school literature and material. The Parents Club received an annual remuneration for their hard work and in turn were able to help purchase many items needed throughout the school. These magazines were packed with really good nature information and taught children how to look after their environment using articles, puzzles, riddles, questions and quizzes. There were special characters as well like 'Wally the Wombat' and 'Ernie the Echidna' for the children to follow on various adventures every month. Children would enjoy watching them crop up in each edition. The magazine stayed with us at Ringwood East until 1986, when due to restructuring and various other things was moved to Healesville Sanctuary where it adopted a new format and name. From here it has since folded and so the end of 'Nature Notes'. 'Nature Notes' was a very successful magazine. Many people through the years devoted a lot of time and energy to its production and readers throughout Australia, as well as its many creators and producers during its 20-year existence, mourn its passing. Written from material supplied by Barry Archibald (editor 'Nature Notes' 1977-78) Margaret Preece & Lois Aders (parents in charge of collating and packaging during its last years of existence. -
 Ringwood and District Historical Society
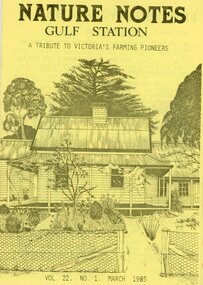
Magazine, Nature Notes magazines 1985 (Vol 22) Issues 1-9
... information and taught children how to look after their environment... information and taught children how to look after their environment ...Printed magazinesFrom “The History of Ringwood East Primary School 1924-1990” 'Nature Notes' was a children's nature magazine, produced at Ringwood East Primary School for approximately 10 years. It came to us from Blackburn Lake Primary School and before that Blackburn South Primary School. It was originally developed by Harry Hopkins in 1964. He was a District Inspector of schools and also President of the Gould League at the time. Fred Rodgers and Len Delacca were original contributors, Fred writing on native flora and Len writing on native flora [fauna]. It came to Ringwood East in 1975 with Keith Dyer, a teacher on the staff, as editor. The magazine had a large circulation, supplying to schools, private subscribers and societies as well as sending many complimentary copies to libraries, and museums; distribution was throughout Australia. The Magazine continued to grow under consequent editors, Anne Gibson (who also developed 'Probe' a junior version of 'Nature Notes' designed for grades 2 and 4), Barry Archibald, Colin Bull, Russell Hall, Deborah Brydon and Mandy Charmichael. The editors would research, compile, edit and print the magazine which was a monthly issue. The parents would then come in on a Monday to collate, fold and staple. This usually was a morning’s work but this depended on how many helping hands there were. The Wednesday was packing and posting day and in the early days the parents used to deliver the local orders to save costs. Subscribers were sought through advertisements in various school literature and material. The Parents Club received an annual remuneration for their hard work and in turn were able to help purchase many items needed throughout the school. These magazines were packed with really good nature information and taught children how to look after their environment using articles, puzzles, riddles, questions and quizzes. There were special characters as well like 'Wally the Wombat' and 'Ernie the Echidna' for the children to follow on various adventures every month. Children would enjoy watching them crop up in each edition. The magazine stayed with us at Ringwood East until 1986, when due to restructuring and various other things was moved to Healesville Sanctuary where it adopted a new format and name. From here it has since folded and so the end of 'Nature Notes'. 'Nature Notes' was a very successful magazine. Many people through the years devoted a lot of time and energy to its production and readers throughout Australia, as well as its many creators and producers during its 20-year existence, mourn its passing. Written from material supplied by Barry Archibald (editor 'Nature Notes' 1977-78) Margaret Preece & Lois Aders (parents in charge of collating and packaging during its last years of existence. -
 Ringwood and District Historical Society
Magazine, Nature Notes magazines 1983 (Vol 20) Issues 1-5, 7-10
... information and taught children how to look after their environment... information and taught children how to look after their environment ...Printed magazinesFrom “The History of Ringwood East Primary School 1924-1990” 'Nature Notes' was a children's nature magazine, produced at Ringwood East Primary School for approximately 10 years. It came to us from Blackburn Lake Primary School and before that Blackburn South Primary School. It was originally developed by Harry Hopkins in 1964. He was a District Inspector of schools and also President of the Gould League at the time. Fred Rodgers and Len Delacca were original contributors, Fred writing on native flora and Len writing on native flora [fauna]. It came to Ringwood East in 1975 with Keith Dyer, a teacher on the staff, as editor. The magazine had a large circulation, supplying to schools, private subscribers and societies as well as sending many complimentary copies to libraries, and museums; distribution was throughout Australia. The Magazine continued to grow under consequent editors, Anne Gibson (who also developed 'Probe' a junior version of 'Nature Notes' designed for grades 2 and 4), Barry Archibald, Colin Bull, Russell Hall, Deborah Brydon and Mandy Charmichael. The editors would research, compile, edit and print the magazine which was a monthly issue. The parents would then come in on a Monday to collate, fold and staple. This usually was a morning’s work but this depended on how many helping hands there were. The Wednesday was packing and posting day and in the early days the parents used to deliver the local orders to save costs. Subscribers were sought through advertisements in various school literature and material. The Parents Club received an annual remuneration for their hard work and in turn were able to help purchase many items needed throughout the school. These magazines were packed with really good nature information and taught children how to look after their environment using articles, puzzles, riddles, questions and quizzes. There were special characters as well like 'Wally the Wombat' and 'Ernie the Echidna' for the children to follow on various adventures every month. Children would enjoy watching them crop up in each edition. The magazine stayed with us at Ringwood East until 1986, when due to restructuring and various other things was moved to Healesville Sanctuary where it adopted a new format and name. From here it has since folded and so the end of 'Nature Notes'. 'Nature Notes' was a very successful magazine. Many people through the years devoted a lot of time and energy to its production and readers throughout Australia, as well as its many creators and producers during its 20-year existence, mourn its passing. Written from material supplied by Barry Archibald (editor 'Nature Notes' 1977-78) Margaret Preece & Lois Aders (parents in charge of collating and packaging during its last years of existence. -
 Ringwood and District Historical Society
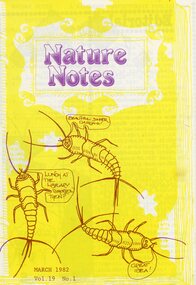
Magazine, Nature Notes magazines 1982 (Vol 19) Issues 1-10
... information and taught children how to look after their environment... information and taught children how to look after their environment ...Printed magazinesFrom “The History of Ringwood East Primary School 1924-1990” 'Nature Notes' was a children's nature magazine, produced at Ringwood East Primary School for approximately 10 years. It came to us from Blackburn Lake Primary School and before that Blackburn South Primary School. It was originally developed by Harry Hopkins in 1964. He was a District Inspector of schools and also President of the Gould League at the time. Fred Rodgers and Len Delacca were original contributors, Fred writing on native flora and Len writing on native flora [fauna]. It came to Ringwood East in 1975 with Keith Dyer, a teacher on the staff, as editor. The magazine had a large circulation, supplying to schools, private subscribers and societies as well as sending many complimentary copies to libraries, and museums; distribution was throughout Australia. The Magazine continued to grow under consequent editors, Anne Gibson (who also developed 'Probe' a junior version of 'Nature Notes' designed for grades 2 and 4), Barry Archibald, Colin Bull, Russell Hall, Deborah Brydon and Mandy Charmichael. The editors would research, compile, edit and print the magazine which was a monthly issue. The parents would then come in on a Monday to collate, fold and staple. This usually was a morning’s work but this depended on how many helping hands there were. The Wednesday was packing and posting day and in the early days the parents used to deliver the local orders to save costs. Subscribers were sought through advertisements in various school literature and material. The Parents Club received an annual remuneration for their hard work and in turn were able to help purchase many items needed throughout the school. These magazines were packed with really good nature information and taught children how to look after their environment using articles, puzzles, riddles, questions and quizzes. There were special characters as well like 'Wally the Wombat' and 'Ernie the Echidna' for the children to follow on various adventures every month. Children would enjoy watching them crop up in each edition. The magazine stayed with us at Ringwood East until 1986, when due to restructuring and various other things was moved to Healesville Sanctuary where it adopted a new format and name. From here it has since folded and so the end of 'Nature Notes'. 'Nature Notes' was a very successful magazine. Many people through the years devoted a lot of time and energy to its production and readers throughout Australia, as well as its many creators and producers during its 20-year existence, mourn its passing. Written from material supplied by Barry Archibald (editor 'Nature Notes' 1977-78) Margaret Preece & Lois Aders (parents in charge of collating and packaging during its last years of existence. -
 Orbost & District Historical Society
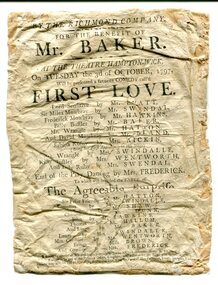
program, 1797
... to how it would have looked in 1797. One of the regular patrons... to how it would have looked in 1797. One of the regular patrons ..."The theatre itself was located in a barn close to the village pond. Its location is indicated on the attached 1827 map of Hampton Wick and the Swan arrowed where tickets were to be had. The picture of Ye Swan around 1900 is probably not too dissimilar to how it would have looked in 1797. One of the regular patrons at the theatre is believed to have been William, Duke of Clarence (later King William IV, uncle of Queen Victoria). The Duke lived in Bushy House about a mile away from the village and was a known devotee of theatrical entertainments. The theatre had disappeared by 1865. It would have been a touring company who were playing on the night of 3 October 1797." ( information from Ray Elmitt, historian of Hampton Wick ) The doors were to be opened at 6 to begin precisely at 7 o'clock,. Boxes were 3 shillings, Pit seats were 2 shillings and seats in the gallery were 1 shilling. Tickets could be bought at the printing office in Kingston or from Mr Ansel of Adam and Eve in Kingston or from Mr Pattenden of the Swan in Hampton Wick. "First Love" is a 1795 sentimental comedy play by the British playwright Richard Cumberland. It was first performed at the Drury Lane Theatre in May 1795. Frederick Mowbray becomes the protector of Sabrina Rosny after her abandoment by Lord Sensitive. The Agreeable Surprise is a 1781 comic opera to music by Samuel Arnold and a libretto by John O'Keeffe. The work in two acts was first performed at the Theatre Royal, Haymarket (London), on 3 September 1781. It was one of the most performed works of its kind in London in the last quarter of the 18th century. In England the 18th century saw the flourishing of theatre as a popular pastime. Many theatres were enlarged and new playhouses built in London and the provinces. This item was kept as a souvenir / memento and brought to Australia by an early settler.A very old program from the Richmond Company at the Theatre Hampton-Wick. It is white with black print. There are two performances - First Love and The Agreeable Surprise. There is a cast list for each. theatre hampton-wick-richmond-company -
 Flagstaff Hill Maritime Museum and Village
Domestic object - Bowl, Late 19th or early 20th Century
... are stable colourants that turn out pretty much how they look... do things, how you could achieve the look you are seeking ...The Process of Making Pottery Decorating, Firing, Glazing, Making, Technical There is a rhythm and flow to clay. It can’t be done all at once! Even the making process! It can take weeks to get everything done, especially if you can only work on your pottery once a week! Even though we have three hour classes, it’s often just not enough time! Here is an overview of some of the processes so you have a bit more grasp on some of the technical stuff! Step One – Design There are SO many ideas out there for making stuff in clay! From delicate porcelain jewellery, through to heavy sculptural work and everything in between. Deciding your direction is sometimes not that easy – when you first start, try everything, you will naturally gravitate to the style that you enjoy! The options and variations are endless and can get a wee bit overwhelming too! Check in with me before you start to ensure your ideas will work, what order you might do things, how you could achieve the look you are seeking and any other technical data required! Step Two – Making Clay is thixotropic. This means that as you work with it, the clay first gets sloppier and wetter, before is begins to dry in the atmosphere. For most things, you simply can’t do all parts of the project at once. An example of work order might look like: Get last weeks work out from the shelves Prepare clay for today’s work – roll your clay, prepare balls for throwing, make the first stage of a pinch pot) Clean up last week’s work and put it on the shelf for bisque firing Check that you have any glazing to do – and do enough of it that you will have time to finish your main project Do the next step of your next project – there might be a further step that can’t be complete immediately, in that case, wrap your work well and put onto the shelves. Letting your work rest for a while can really help keep your work clean and professional looking. Many things require bagging under plastic to keep it ready for work the next week – put your name on the outside of the bag so you can find your work easily. We have stickers and markers. Consider how you want to decorate your work – coloured slip can be applied at a fairly wet stage (remembering that it will make your work even wetter!). Trying to apply slip to dry clay won’t work! If you want to do sgraffito – you will need to keep the work leather hard (a state of dryness where you can still work the clay with a little effort and a little water and care). Step Three – Drying Most of the time your work can go into the rack uncovered to let it dry out for the following week. If you want to continue forming or shaping you will need to double bag your work – put your work on a suitable sized bat and put the bat in a bag so the base of the bag is under the bat, then put another bag over the top of the work and tuck the top of the bag under the bat. If you want to trim (or turn) your thrown work the following week, it should also be double bagged. If your work is large, delicate, or of uneven thicknesses, you should lightly cover your work for drying. When considering the drying process, bare in mind the weather, humidity and wind! The hotter and dryer, the faster things dry and work can dry unevenly in the shelves – this can lead to cracking – another time to lightly cover your work for drying. Step Four – Trimming and Cleaning Up Your work is dry! It is called greenware now and it is at it’s most fragile! Handle everything with two hands. I often refer to soft hands – keep everything gentle and with your fingers spread as much as possible. Try to not pick up things like plates too much, and always with both hands! Before your work can be bisque fired it should be “cleaned up”. You work won’t go into the kiln if it has sharp edges – when glazed, sharp edges turn into razor blades! Use a piece of fly wire to rub the work all over – this will scratch a little so be light handed. Use a knife or metal kidney to scrape any areas that require a bit more dynamic treatment than the fly wire offers! Finally, a very light wipe over with a slightly damp sponge can help soften and soothe all of your edges and dags! Trimming thrown work: If you are planning to trim (or turn) your thrown work (and you should be), make sure you bag it well – your work should be leather hard to almost dry for easiest trimming. Use this step to finish the work completely – use a metal kidney to polish the surface, or a slightly damp sponge to give a freshly thrown look. Wipe the sponge around the rim after trimming, and check the inside of the pot for dags! Trimming slip cast work: Usually I will trim the rims of your work on the wheel the following day to make that stage easier, however you will still need to check your work for lumps and bumps. Last but not least – check that your name is still clearly on the bottom of your work. Step Five – Bisque Firing When the work is completely dry it can go into the bisque kiln. The bisque kiln is fired to 1000°C. This process burns off the water in the clay as well as some of the chemically bound water. The structure of the clay is not altered that much at this temperature. Inside the bisque kiln, the work is stacked a little, small bowl inside a larger bowl and onto a heavy plate. Smaller items like decorations or drink coasters might get stacked several high. Consideration is paid to the weight of the stack and shape of the work. A bisque kiln can fire about one and a half times the amount of work that the glaze kiln can fire. The firing takes about 10 hours to complete the cycle and about two days to cool down. Once it has been emptied the work is placed in the glaze room ready for you to decorate! Step Six – Glazing Decorating your work with colour can be a lot of fun – and time consuming! There are three main options for surface treatment at this stage: Oxide Washes Underglazes Glazes Washes and underglazes do not “glaze” the work – It will still need a layer of glaze to fully seal the clay (washes don’t need glaze on surfaces not designed for food or liquid as they can gloss up a little on their own). Underglazes are stable colourants that turn out pretty much how they look in the jar. They can be mixed with each other to form other colours and can be used like water colours to paint onto your work. Mostly they should have a clear glaze on top to seal them. Oxides are a different species – the pink oxide (cobalt) wash turns out bright blue for instance. They don’t always need a glaze on top, and some glazes can change the colour of the wash! The glazes need no other “glaze” on top! Be careful of unknown glaze interactions – you can put any combination of glaze in a bowl or on a plate, but only a single glaze on the outside of any vertical surface! Glazes are a chemical reaction under heat. We don’t know the exact chemicals in the Mayco glazes we use. I can guess by the way they interact with each other, however, on the whole, you need to test every idea you have, and not run the test on a vertical surface! Simply put, glaze is a layer of glass like substance that bonds with the clay underneath. Clay is made of silica, alumina and water. Glaze is made of mostly silica. Silica has a melting point of 1700°C and we fire to 1240°C. The silica requires a “flux” to help it melt at the lower temperature. Fluxes can be all sorts of chemicals – a common one is calcium – calcium has a melting point of 2500°C, however, together they both melt at a much lower temperature! Colourants are metal oxides like cobalt (blue), chrome (green through black), copper (green, blue, even red!), manganese (black, purple and pink) iron (red brown), etc. Different chemicals in the glaze can have dramatic effects. for example, barium carbonate (which we don’t use) turns manganese bright pink! Other elements can turn manganese dioxide brown, blue, purple and reddish brown. Manganese dioxide is a flux in and of itself as well. So, glazes that get their black and purple colours, often interact with other glazes and RUN! Our mirror black is a good example – it mixes really well with many glazes because it fluxes them – causes them to melt faster. It will also bring out many beautiful colours in the glazes because it’s black colouring most definitely comes from manganese dioxide! Glaze chemistry is a whole subject on it’s own! We use commercial Mayco glazes on purpose – for their huge range of colour possibilities, stability, cool interactions, artistic freedom with the ability to easily brush the glazes on and ease of use. We currently have almost 50 glazes on hand! A major project is to test the interactions of all glazes with each other. That is 2,500 test tiles!!!! I’m going to make the wall behind the wheels the feature wall of pretty colours! Step Seven – Glaze (Gloss or sometimes called “Glost”) Firing Most of the time this is the final stage of making your creation (but not always!) The glaze kiln goes to 1240°C. This is called cone 6, or midrange. It is the low end of stoneware temperatures. Stoneware clays and glazes are typically fired at cone 8 – 10, that is 1260 – 1290°C. The energy requirement to go from 1240°C to 1280°C is almost a 30% more! Our clay is formulated to vitrify (mature, turn “glass-like”) at 1240°, as are our glazes. A glaze kiln take around 12 hours to reach temperature and two to three days to cool down. Sometimes a third firing process is required – this is for decoration that is added to work after the glaze firing. For example – adding precious metals and lustres. this firing temperature is usually around 600 – 800°C depending upon the techniques being used. There are many students interested in gold and silver trims – we will be doing this third type of firing soon! After firing your work will be in the student finished work shelves. Remember to pay for it before you head out the door! There is a small extra charge for using porcelain clay (it’s more than twice the price of regular clay), and for any third firing process! Once your work has been fired it can not turn back into clay for millennia – so don’t fire it if you don’t like it! Put it in the bucket for recycling. https://firebirdstudios.com.au/the-process-of-making-pottery/ The bowl is an example of kitchenware used in the 19th century and still in use today.Bowl white ceramic. Crack on side. Badly stained.Backstamp very faint and unable to be read.flagstaff hill, warrnambool, shipwrecked-coast, flagstaff-hill, flagstaff-hill-maritime-museum, maritime-museum, shipwreck-coast, flagstaff-hill-maritime-village, mixing bowl, food preparation, kitchen equipment, ceramic -
 Flagstaff Hill Maritime Museum and Village
Domestic object - Bowl
... are stable colourants that turn out pretty much how they look... do things, how you could achieve the look you are seeking ...The Process of Making Pottery Decorating, Firing, Glazing, Making, Technical There is a rhythm and flow to clay. It can’t be done all at once! Even the making process! It can take weeks to get everything done, especially if you can only work on your pottery once a week! Even though we have three hour classes, it’s often just not enough time! Here is an overview of some of the processes so you have a bit more grasp on some of the technical stuff! Step One – Design There are SO many ideas out there for making stuff in clay! From delicate porcelain jewellery, through to heavy sculptural work and everything in between. Deciding your direction is sometimes not that easy – when you first start, try everything, you will naturally gravitate to the style that you enjoy! The options and variations are endless and can get a wee bit overwhelming too! Check in with me before you start to ensure your ideas will work, what order you might do things, how you could achieve the look you are seeking and any other technical data required! Step Two – Making Clay is thixotropic. This means that as you work with it, the clay first gets sloppier and wetter, before is begins to dry in the atmosphere. For most things, you simply can’t do all parts of the project at once. An example of work order might look like: Get last weeks work out from the shelves Prepare clay for today’s work – roll your clay, prepare balls for throwing, make the first stage of a pinch pot) Clean up last week’s work and put it on the shelf for bisque firing Check that you have any glazing to do – and do enough of it that you will have time to finish your main project Do the next step of your next project – there might be a further step that can’t be complete immediately, in that case, wrap your work well and put onto the shelves. Letting your work rest for a while can really help keep your work clean and professional looking. Many things require bagging under plastic to keep it ready for work the next week – put your name on the outside of the bag so you can find your work easily. We have stickers and markers. Consider how you want to decorate your work – coloured slip can be applied at a fairly wet stage (remembering that it will make your work even wetter!). Trying to apply slip to dry clay won’t work! If you want to do sgraffito – you will need to keep the work leather hard (a state of dryness where you can still work the clay with a little effort and a little water and care). Step Three – Drying Most of the time your work can go into the rack uncovered to let it dry out for the following week. If you want to continue forming or shaping you will need to double bag your work – put your work on a suitable sized bat and put the bat in a bag so the base of the bag is under the bat, then put another bag over the top of the work and tuck the top of the bag under the bat. If you want to trim (or turn) your thrown work the following week, it should also be double bagged. If your work is large, delicate, or of uneven thicknesses, you should lightly cover your work for drying. When considering the drying process, bare in mind the weather, humidity and wind! The hotter and dryer, the faster things dry and work can dry unevenly in the shelves – this can lead to cracking – another time to lightly cover your work for drying. Step Four – Trimming and Cleaning Up Your work is dry! It is called greenware now and it is at it’s most fragile! Handle everything with two hands. I often refer to soft hands – keep everything gentle and with your fingers spread as much as possible. Try to not pick up things like plates too much, and always with both hands! Before your work can be bisque fired it should be “cleaned up”. You work won’t go into the kiln if it has sharp edges – when glazed, sharp edges turn into razor blades! Use a piece of fly wire to rub the work all over – this will scratch a little so be light handed. Use a knife or metal kidney to scrape any areas that require a bit more dynamic treatment than the fly wire offers! Finally, a very light wipe over with a slightly damp sponge can help soften and soothe all of your edges and dags! Trimming thrown work: If you are planning to trim (or turn) your thrown work (and you should be), make sure you bag it well – your work should be leather hard to almost dry for easiest trimming. Use this step to finish the work completely – use a metal kidney to polish the surface, or a slightly damp sponge to give a freshly thrown look. Wipe the sponge around the rim after trimming, and check the inside of the pot for dags! Trimming slip cast work: Usually I will trim the rims of your work on the wheel the following day to make that stage easier, however you will still need to check your work for lumps and bumps. Last but not least – check that your name is still clearly on the bottom of your work. Step Five – Bisque Firing When the work is completely dry it can go into the bisque kiln. The bisque kiln is fired to 1000°C. This process burns off the water in the clay as well as some of the chemically bound water. The structure of the clay is not altered that much at this temperature. Inside the bisque kiln, the work is stacked a little, small bowl inside a larger bowl and onto a heavy plate. Smaller items like decorations or drink coasters might get stacked several high. Consideration is paid to the weight of the stack and shape of the work. A bisque kiln can fire about one and a half times the amount of work that the glaze kiln can fire. The firing takes about 10 hours to complete the cycle and about two days to cool down. Once it has been emptied the work is placed in the glaze room ready for you to decorate! Step Six – Glazing Decorating your work with colour can be a lot of fun – and time consuming! There are three main options for surface treatment at this stage: Oxide Washes Underglazes Glazes Washes and underglazes do not “glaze” the work – It will still need a layer of glaze to fully seal the clay (washes don’t need glaze on surfaces not designed for food or liquid as they can gloss up a little on their own). Underglazes are stable colourants that turn out pretty much how they look in the jar. They can be mixed with each other to form other colours and can be used like water colours to paint onto your work. Mostly they should have a clear glaze on top to seal them. Oxides are a different species – the pink oxide (cobalt) wash turns out bright blue for instance. They don’t always need a glaze on top, and some glazes can change the colour of the wash! The glazes need no other “glaze” on top! Be careful of unknown glaze interactions – you can put any combination of glaze in a bowl or on a plate, but only a single glaze on the outside of any vertical surface! Glazes are a chemical reaction under heat. We don’t know the exact chemicals in the Mayco glazes we use. I can guess by the way they interact with each other, however, on the whole, you need to test every idea you have, and not run the test on a vertical surface! Simply put, glaze is a layer of glass like substance that bonds with the clay underneath. Clay is made of silica, alumina and water. Glaze is made of mostly silica. Silica has a melting point of 1700°C and we fire to 1240°C. The silica requires a “flux” to help it melt at the lower temperature. Fluxes can be all sorts of chemicals – a common one is calcium – calcium has a melting point of 2500°C, however, together they both melt at a much lower temperature! Colourants are metal oxides like cobalt (blue), chrome (green through black), copper (green, blue, even red!), manganese (black, purple and pink) iron (red brown), etc. Different chemicals in the glaze can have dramatic effects. for example, barium carbonate (which we don’t use) turns manganese bright pink! Other elements can turn manganese dioxide brown, blue, purple and reddish brown. Manganese dioxide is a flux in and of itself as well. So, glazes that get their black and purple colours, often interact with other glazes and RUN! Our mirror black is a good example – it mixes really well with many glazes because it fluxes them – causes them to melt faster. It will also bring out many beautiful colours in the glazes because it’s black colouring most definitely comes from manganese dioxide! Glaze chemistry is a whole subject on it’s own! We use commercial Mayco glazes on purpose – for their huge range of colour possibilities, stability, cool interactions, artistic freedom with the ability to easily brush the glazes on and ease of use. We currently have almost 50 glazes on hand! A major project is to test the interactions of all glazes with each other. That is 2,500 test tiles!!!! I’m going to make the wall behind the wheels the feature wall of pretty colours! Step Seven – Glaze (Gloss or sometimes called “Glost”) Firing Most of the time this is the final stage of making your creation (but not always!) The glaze kiln goes to 1240°C. This is called cone 6, or midrange. It is the low end of stoneware temperatures. Stoneware clays and glazes are typically fired at cone 8 – 10, that is 1260 – 1290°C. The energy requirement to go from 1240°C to 1280°C is almost a 30% more! Our clay is formulated to vitrify (mature, turn “glass-like”) at 1240°, as are our glazes. A glaze kiln take around 12 hours to reach temperature and two to three days to cool down. Sometimes a third firing process is required – this is for decoration that is added to work after the glaze firing. For example – adding precious metals and lustres. this firing temperature is usually around 600 – 800°C depending upon the techniques being used. There are many students interested in gold and silver trims – we will be doing this third type of firing soon! After firing your work will be in the student finished work shelves. Remember to pay for it before you head out the door! There is a small extra charge for using porcelain clay (it’s more than twice the price of regular clay), and for any third firing process! Once your work has been fired it can not turn back into clay for millennia – so don’t fire it if you don’t like it! Put it in the bucket for recycling. https://firebirdstudios.com.au/the-process-of-making-pottery/ This bowl is an example of kitchenware used in the 19th century and still in use today.Bowl white ceramic plain that has two sets of edging around lip. Inside bowl has plaster designed to look like cooking mixture.flagstaff hill, warrnambool, shipwrecked-coast, flagstaff-hill, flagstaff-hill-maritime-museum, maritime-museum, shipwreck-coast, flagstaff-hill-maritime-village, kitchen equipment, ceramic -
 Flagstaff Hill Maritime Museum and Village
Domestic object - Bowl, J & G Meakin, Late 19th or early 20th Century
... are stable colourants that turn out pretty much how they look... do things, how you could achieve the look you are seeking ...The Process of Making Pottery Decorating, Firing, Glazing, Making, Technical There is a rhythm and flow to clay. It can’t be done all at once! Even the making process! It can take weeks to get everything done, especially if you can only work on your pottery once a week! Even though we have three hour classes, it’s often just not enough time! Here is an overview of some of the processes so you have a bit more grasp on some of the technical stuff! Step One – Design There are SO many ideas out there for making stuff in clay! From delicate porcelain jewellery, through to heavy sculptural work and everything in between. Deciding your direction is sometimes not that easy – when you first start, try everything, you will naturally gravitate to the style that you enjoy! The options and variations are endless and can get a wee bit overwhelming too! Check in with me before you start to ensure your ideas will work, what order you might do things, how you could achieve the look you are seeking and any other technical data required! Step Two – Making Clay is thixotropic. This means that as you work with it, the clay first gets sloppier and wetter, before is begins to dry in the atmosphere. For most things, you simply can’t do all parts of the project at once. An example of work order might look like: Get last weeks work out from the shelves Prepare clay for today’s work – roll your clay, prepare balls for throwing, make the first stage of a pinch pot) Clean up last week’s work and put it on the shelf for bisque firing Check that you have any glazing to do – and do enough of it that you will have time to finish your main project Do the next step of your next project – there might be a further step that can’t be complete immediately, in that case, wrap your work well and put onto the shelves. Letting your work rest for a while can really help keep your work clean and professional looking. Many things require bagging under plastic to keep it ready for work the next week – put your name on the outside of the bag so you can find your work easily. We have stickers and markers. Consider how you want to decorate your work – coloured slip can be applied at a fairly wet stage (remembering that it will make your work even wetter!). Trying to apply slip to dry clay won’t work! If you want to do sgraffito – you will need to keep the work leather hard (a state of dryness where you can still work the clay with a little effort and a little water and care). Step Three – Drying Most of the time your work can go into the rack uncovered to let it dry out for the following week. If you want to continue forming or shaping you will need to double bag your work – put your work on a suitable sized bat and put the bat in a bag so the base of the bag is under the bat, then put another bag over the top of the work and tuck the top of the bag under the bat. If you want to trim (or turn) your thrown work the following week, it should also be double bagged. If your work is large, delicate, or of uneven thicknesses, you should lightly cover your work for drying. When considering the drying process, bare in mind the weather, humidity and wind! The hotter and dryer, the faster things dry and work can dry unevenly in the shelves – this can lead to cracking – another time to lightly cover your work for drying. Step Four – Trimming and Cleaning Up Your work is dry! It is called greenware now and it is at it’s most fragile! Handle everything with two hands. I often refer to soft hands – keep everything gentle and with your fingers spread as much as possible. Try to not pick up things like plates too much, and always with both hands! Before your work can be bisque fired it should be “cleaned up”. You work won’t go into the kiln if it has sharp edges – when glazed, sharp edges turn into razor blades! Use a piece of fly wire to rub the work all over – this will scratch a little so be light handed. Use a knife or metal kidney to scrape any areas that require a bit more dynamic treatment than the fly wire offers! Finally, a very light wipe over with a slightly damp sponge can help soften and soothe all of your edges and dags! Trimming thrown work: If you are planning to trim (or turn) your thrown work (and you should be), make sure you bag it well – your work should be leather hard to almost dry for easiest trimming. Use this step to finish the work completely – use a metal kidney to polish the surface, or a slightly damp sponge to give a freshly thrown look. Wipe the sponge around the rim after trimming, and check the inside of the pot for dags! Trimming slip cast work: Usually I will trim the rims of your work on the wheel the following day to make that stage easier, however you will still need to check your work for lumps and bumps. Last but not least – check that your name is still clearly on the bottom of your work. Step Five – Bisque Firing When the work is completely dry it can go into the bisque kiln. The bisque kiln is fired to 1000°C. This process burns off the water in the clay as well as some of the chemically bound water. The structure of the clay is not altered that much at this temperature. Inside the bisque kiln, the work is stacked a little, small bowl inside a larger bowl and onto a heavy plate. Smaller items like decorations or drink coasters might get stacked several high. Consideration is paid to the weight of the stack and shape of the work. A bisque kiln can fire about one and a half times the amount of work that the glaze kiln can fire. The firing takes about 10 hours to complete the cycle and about two days to cool down. Once it has been emptied the work is placed in the glaze room ready for you to decorate! Step Six – Glazing Decorating your work with colour can be a lot of fun – and time consuming! There are three main options for surface treatment at this stage: Oxide Washes Underglazes Glazes Washes and underglazes do not “glaze” the work – It will still need a layer of glaze to fully seal the clay (washes don’t need glaze on surfaces not designed for food or liquid as they can gloss up a little on their own). Underglazes are stable colourants that turn out pretty much how they look in the jar. They can be mixed with each other to form other colours and can be used like water colours to paint onto your work. Mostly they should have a clear glaze on top to seal them. Oxides are a different species – the pink oxide (cobalt) wash turns out bright blue for instance. They don’t always need a glaze on top, and some glazes can change the colour of the wash! The glazes need no other “glaze” on top! Be careful of unknown glaze interactions – you can put any combination of glaze in a bowl or on a plate, but only a single glaze on the outside of any vertical surface! Glazes are a chemical reaction under heat. We don’t know the exact chemicals in the Mayco glazes we use. I can guess by the way they interact with each other, however, on the whole, you need to test every idea you have, and not run the test on a vertical surface! Simply put, glaze is a layer of glass like substance that bonds with the clay underneath. Clay is made of silica, alumina and water. Glaze is made of mostly silica. Silica has a melting point of 1700°C and we fire to 1240°C. The silica requires a “flux” to help it melt at the lower temperature. Fluxes can be all sorts of chemicals – a common one is calcium – calcium has a melting point of 2500°C, however, together they both melt at a much lower temperature! Colourants are metal oxides like cobalt (blue), chrome (green through black), copper (green, blue, even red!), manganese (black, purple and pink) iron (red brown), etc. Different chemicals in the glaze can have dramatic effects. for example, barium carbonate (which we don’t use) turns manganese bright pink! Other elements can turn manganese dioxide brown, blue, purple and reddish brown. Manganese dioxide is a flux in and of itself as well. So, glazes that get their black and purple colours, often interact with other glazes and RUN! Our mirror black is a good example – it mixes really well with many glazes because it fluxes them – causes them to melt faster. It will also bring out many beautiful colours in the glazes because it’s black colouring most definitely comes from manganese dioxide! Glaze chemistry is a whole subject on it’s own! We use commercial Mayco glazes on purpose – for their huge range of colour possibilities, stability, cool interactions, artistic freedom with the ability to easily brush the glazes on and ease of use. We currently have almost 50 glazes on hand! A major project is to test the interactions of all glazes with each other. That is 2,500 test tiles!!!! I’m going to make the wall behind the wheels the feature wall of pretty colours! Step Seven – Glaze (Gloss or sometimes called “Glost”) Firing Most of the time this is the final stage of making your creation (but not always!) The glaze kiln goes to 1240°C. This is called cone 6, or midrange. It is the low end of stoneware temperatures. Stoneware clays and glazes are typically fired at cone 8 – 10, that is 1260 – 1290°C. The energy requirement to go from 1240°C to 1280°C is almost a 30% more! Our clay is formulated to vitrify (mature, turn “glass-like”) at 1240°, as are our glazes. A glaze kiln take around 12 hours to reach temperature and two to three days to cool down. Sometimes a third firing process is required – this is for decoration that is added to work after the glaze firing. For example – adding precious metals and lustres. this firing temperature is usually around 600 – 800°C depending upon the techniques being used. There are many students interested in gold and silver trims – we will be doing this third type of firing soon! After firing your work will be in the student finished work shelves. Remember to pay for it before you head out the door! There is a small extra charge for using porcelain clay (it’s more than twice the price of regular clay), and for any third firing process! Once your work has been fired it can not turn back into clay for millennia – so don’t fire it if you don’t like it! Put it in the bucket for recycling. https://firebirdstudios.com.au/the-process-of-making-pottery/This bowl was made by renowned pottery company J & G Meakin of England. The firm was established in the mid-1800's. The bowl is an example of kitchenware used in the 19th century and still in use today.Bowl; white ceramic, round and tapering inwards towards base. Made by J and G Meakin England.On base, 'Ironstone China Reg SOL 391413' with symbolflagstaff hill, flagstaff hill maritime museum and village, warrnambool, maritime museum, maritime village, great ocean road, shipwreck coast, mixing bowl, food preparation, j & g meakin, pottery, stoke-on-trent, kitchen equipment, ceramic -
 Flagstaff Hill Maritime Museum and Village
Domestic object - Plate
... are stable colourants that turn out pretty much how they look... do things, how you could achieve the look you are seeking ...The Process of Making Pottery Decorating, Firing, Glazing, Making, Technical There is a rhythm and flow to clay. It can’t be done all at once! Even the making process! It can take weeks to get everything done, especially if you can only work on your pottery once a week! Even though we have three hour classes, it’s often just not enough time! Here is an overview of some of the processes so you have a bit more grasp on some of the technical stuff! Step One – Design There are SO many ideas out there for making stuff in clay! From delicate porcelain jewellery, through to heavy sculptural work and everything in between. Deciding your direction is sometimes not that easy – when you first start, try everything, you will naturally gravitate to the style that you enjoy! The options and variations are endless and can get a wee bit overwhelming too! Check in with me before you start to ensure your ideas will work, what order you might do things, how you could achieve the look you are seeking and any other technical data required! Step Two – Making Clay is thixotropic. This means that as you work with it, the clay first gets sloppier and wetter, before is begins to dry in the atmosphere. For most things, you simply can’t do all parts of the project at once. An example of work order might look like: Get last weeks work out from the shelves Prepare clay for today’s work – roll your clay, prepare balls for throwing, make the first stage of a pinch pot) Clean up last week’s work and put it on the shelf for bisque firing Check that you have any glazing to do – and do enough of it that you will have time to finish your main project Do the next step of your next project – there might be a further step that can’t be complete immediately, in that case, wrap your work well and put onto the shelves. Letting your work rest for a while can really help keep your work clean and professional looking. Many things require bagging under plastic to keep it ready for work the next week – put your name on the outside of the bag so you can find your work easily. We have stickers and markers. Consider how you want to decorate your work – coloured slip can be applied at a fairly wet stage (remembering that it will make your work even wetter!). Trying to apply slip to dry clay won’t work! If you want to do sgraffito – you will need to keep the work leather hard (a state of dryness where you can still work the clay with a little effort and a little water and care). Step Three – Drying Most of the time your work can go into the rack uncovered to let it dry out for the following week. If you want to continue forming or shaping you will need to double bag your work – put your work on a suitable sized bat and put the bat in a bag so the base of the bag is under the bat, then put another bag over the top of the work and tuck the top of the bag under the bat. If you want to trim (or turn) your thrown work the following week, it should also be double bagged. If your work is large, delicate, or of uneven thicknesses, you should lightly cover your work for drying. When considering the drying process, bare in mind the weather, humidity and wind! The hotter and dryer, the faster things dry and work can dry unevenly in the shelves – this can lead to cracking – another time to lightly cover your work for drying. Step Four – Trimming and Cleaning Up Your work is dry! It is called greenware now and it is at it’s most fragile! Handle everything with two hands. I often refer to soft hands – keep everything gentle and with your fingers spread as much as possible. Try to not pick up things like plates too much, and always with both hands! Before your work can be bisque fired it should be “cleaned up”. You work won’t go into the kiln if it has sharp edges – when glazed, sharp edges turn into razor blades! Use a piece of fly wire to rub the work all over – this will scratch a little so be light handed. Use a knife or metal kidney to scrape any areas that require a bit more dynamic treatment than the fly wire offers! Finally, a very light wipe over with a slightly damp sponge can help soften and soothe all of your edges and dags! Trimming thrown work: If you are planning to trim (or turn) your thrown work (and you should be), make sure you bag it well – your work should be leather hard to almost dry for easiest trimming. Use this step to finish the work completely – use a metal kidney to polish the surface, or a slightly damp sponge to give a freshly thrown look. Wipe the sponge around the rim after trimming, and check the inside of the pot for dags! Trimming slip cast work: Usually I will trim the rims of your work on the wheel the following day to make that stage easier, however you will still need to check your work for lumps and bumps. Last but not least – check that your name is still clearly on the bottom of your work. Step Five – Bisque Firing When the work is completely dry it can go into the bisque kiln. The bisque kiln is fired to 1000°C. This process burns off the water in the clay as well as some of the chemically bound water. The structure of the clay is not altered that much at this temperature. Inside the bisque kiln, the work is stacked a little, small bowl inside a larger bowl and onto a heavy plate. Smaller items like decorations or drink coasters might get stacked several high. Consideration is paid to the weight of the stack and shape of the work. A bisque kiln can fire about one and a half times the amount of work that the glaze kiln can fire. The firing takes about 10 hours to complete the cycle and about two days to cool down. Once it has been emptied the work is placed in the glaze room ready for you to decorate! Step Six – Glazing Decorating your work with colour can be a lot of fun – and time consuming! There are three main options for surface treatment at this stage: Oxide Washes Underglazes Glazes Washes and underglazes do not “glaze” the work – It will still need a layer of glaze to fully seal the clay (washes don’t need glaze on surfaces not designed for food or liquid as they can gloss up a little on their own). Underglazes are stable colourants that turn out pretty much how they look in the jar. They can be mixed with each other to form other colours and can be used like water colours to paint onto your work. Mostly they should have a clear glaze on top to seal them. Oxides are a different species – the pink oxide (cobalt) wash turns out bright blue for instance. They don’t always need a glaze on top, and some glazes can change the colour of the wash! The glazes need no other “glaze” on top! Be careful of unknown glaze interactions – you can put any combination of glaze in a bowl or on a plate, but only a single glaze on the outside of any vertical surface! Glazes are a chemical reaction under heat. We don’t know the exact chemicals in the Mayco glazes we use. I can guess by the way they interact with each other, however, on the whole, you need to test every idea you have, and not run the test on a vertical surface! Simply put, glaze is a layer of glass like substance that bonds with the clay underneath. Clay is made of silica, alumina and water. Glaze is made of mostly silica. Silica has a melting point of 1700°C and we fire to 1240°C. The silica requires a “flux” to help it melt at the lower temperature. Fluxes can be all sorts of chemicals – a common one is calcium – calcium has a melting point of 2500°C, however, together they both melt at a much lower temperature! Colourants are metal oxides like cobalt (blue), chrome (green through black), copper (green, blue, even red!), manganese (black, purple and pink) iron (red brown), etc. Different chemicals in the glaze can have dramatic effects. for example, barium carbonate (which we don’t use) turns manganese bright pink! Other elements can turn manganese dioxide brown, blue, purple and reddish brown. Manganese dioxide is a flux in and of itself as well. So, glazes that get their black and purple colours, often interact with other glazes and RUN! Our mirror black is a good example – it mixes really well with many glazes because it fluxes them – causes them to melt faster. It will also bring out many beautiful colours in the glazes because it’s black colouring most definitely comes from manganese dioxide! Glaze chemistry is a whole subject on it’s own! We use commercial Mayco glazes on purpose – for their huge range of colour possibilities, stability, cool interactions, artistic freedom with the ability to easily brush the glazes on and ease of use. We currently have almost 50 glazes on hand! A major project is to test the interactions of all glazes with each other. That is 2,500 test tiles!!!! I’m going to make the wall behind the wheels the feature wall of pretty colours! Step Seven – Glaze (Gloss or sometimes called “Glost”) Firing Most of the time this is the final stage of making your creation (but not always!) The glaze kiln goes to 1240°C. This is called cone 6, or midrange. It is the low end of stoneware temperatures. Stoneware clays and glazes are typically fired at cone 8 – 10, that is 1260 – 1290°C. The energy requirement to go from 1240°C to 1280°C is almost a 30% more! Our clay is formulated to vitrify (mature, turn “glass-like”) at 1240°, as are our glazes. A glaze kiln take around 12 hours to reach temperature and two to three days to cool down. Sometimes a third firing process is required – this is for decoration that is added to work after the glaze firing. For example – adding precious metals and lustres. this firing temperature is usually around 600 – 800°C depending upon the techniques being used. There are many students interested in gold and silver trims – we will be doing this third type of firing soon! After firing your work will be in the student finished work shelves. Remember to pay for it before you head out the door! There is a small extra charge for using porcelain clay (it’s more than twice the price of regular clay), and for any third firing process! Once your work has been fired it can not turn back into clay for millennia – so don’t fire it if you don’t like it! Put it in the bucket for recycling. https://firebirdstudios.com.au/the-process-of-making-pottery/Ceramics have evolved over thousands of years.White earthenware dinner plate. Crazing evident all over.Backstamped ‘Made in England S LTD’flagstaff hill, warrnambool, shipwrecked-coast, flagstaff-hill, flagstaff-hill-maritime-museum, maritime-museum, shipwreck-coast, flagstaff-hill-maritime-village, ceramics, tableware -
 Flagstaff Hill Maritime Museum and Village
Domestic object - Plate, Johnson Bros
... are stable colourants that turn out pretty much how they look... do things, how you could achieve the look you are seeking ...The Process of Making Pottery Decorating, Firing, Glazing, Making, Technical There is a rhythm and flow to clay. It can’t be done all at once! Even the making process! It can take weeks to get everything done, especially if you can only work on your pottery once a week! Even though we have three hour classes, it’s often just not enough time! Here is an overview of some of the processes so you have a bit more grasp on some of the technical stuff! Step One – Design There are SO many ideas out there for making stuff in clay! From delicate porcelain jewellery, through to heavy sculptural work and everything in between. Deciding your direction is sometimes not that easy – when you first start, try everything, you will naturally gravitate to the style that you enjoy! The options and variations are endless and can get a wee bit overwhelming too! Check in with me before you start to ensure your ideas will work, what order you might do things, how you could achieve the look you are seeking and any other technical data required! Step Two – Making Clay is thixotropic. This means that as you work with it, the clay first gets sloppier and wetter, before is begins to dry in the atmosphere. For most things, you simply can’t do all parts of the project at once. An example of work order might look like: Get last weeks work out from the shelves Prepare clay for today’s work – roll your clay, prepare balls for throwing, make the first stage of a pinch pot) Clean up last week’s work and put it on the shelf for bisque firing Check that you have any glazing to do – and do enough of it that you will have time to finish your main project Do the next step of your next project – there might be a further step that can’t be complete immediately, in that case, wrap your work well and put onto the shelves. Letting your work rest for a while can really help keep your work clean and professional looking. Many things require bagging under plastic to keep it ready for work the next week – put your name on the outside of the bag so you can find your work easily. We have stickers and markers. Consider how you want to decorate your work – coloured slip can be applied at a fairly wet stage (remembering that it will make your work even wetter!). Trying to apply slip to dry clay won’t work! If you want to do sgraffito – you will need to keep the work leather hard (a state of dryness where you can still work the clay with a little effort and a little water and care). Step Three – Drying Most of the time your work can go into the rack uncovered to let it dry out for the following week. If you want to continue forming or shaping you will need to double bag your work – put your work on a suitable sized bat and put the bat in a bag so the base of the bag is under the bat, then put another bag over the top of the work and tuck the top of the bag under the bat. If you want to trim (or turn) your thrown work the following week, it should also be double bagged. If your work is large, delicate, or of uneven thicknesses, you should lightly cover your work for drying. When considering the drying process, bare in mind the weather, humidity and wind! The hotter and dryer, the faster things dry and work can dry unevenly in the shelves – this can lead to cracking – another time to lightly cover your work for drying. Step Four – Trimming and Cleaning Up Your work is dry! It is called greenware now and it is at it’s most fragile! Handle everything with two hands. I often refer to soft hands – keep everything gentle and with your fingers spread as much as possible. Try to not pick up things like plates too much, and always with both hands! Before your work can be bisque fired it should be “cleaned up”. You work won’t go into the kiln if it has sharp edges – when glazed, sharp edges turn into razor blades! Use a piece of fly wire to rub the work all over – this will scratch a little so be light handed. Use a knife or metal kidney to scrape any areas that require a bit more dynamic treatment than the fly wire offers! Finally, a very light wipe over with a slightly damp sponge can help soften and soothe all of your edges and dags! Trimming thrown work: If you are planning to trim (or turn) your thrown work (and you should be), make sure you bag it well – your work should be leather hard to almost dry for easiest trimming. Use this step to finish the work completely – use a metal kidney to polish the surface, or a slightly damp sponge to give a freshly thrown look. Wipe the sponge around the rim after trimming, and check the inside of the pot for dags! Trimming slip cast work: Usually I will trim the rims of your work on the wheel the following day to make that stage easier, however you will still need to check your work for lumps and bumps. Last but not least – check that your name is still clearly on the bottom of your work. Step Five – Bisque Firing When the work is completely dry it can go into the bisque kiln. The bisque kiln is fired to 1000°C. This process burns off the water in the clay as well as some of the chemically bound water. The structure of the clay is not altered that much at this temperature. Inside the bisque kiln, the work is stacked a little, small bowl inside a larger bowl and onto a heavy plate. Smaller items like decorations or drink coasters might get stacked several high. Consideration is paid to the weight of the stack and shape of the work. A bisque kiln can fire about one and a half times the amount of work that the glaze kiln can fire. The firing takes about 10 hours to complete the cycle and about two days to cool down. Once it has been emptied the work is placed in the glaze room ready for you to decorate! Step Six – Glazing Decorating your work with colour can be a lot of fun – and time consuming! There are three main options for surface treatment at this stage: Oxide Washes Underglazes Glazes Washes and underglazes do not “glaze” the work – It will still need a layer of glaze to fully seal the clay (washes don’t need glaze on surfaces not designed for food or liquid as they can gloss up a little on their own). Underglazes are stable colourants that turn out pretty much how they look in the jar. They can be mixed with each other to form other colours and can be used like water colours to paint onto your work. Mostly they should have a clear glaze on top to seal them. Oxides are a different species – the pink oxide (cobalt) wash turns out bright blue for instance. They don’t always need a glaze on top, and some glazes can change the colour of the wash! The glazes need no other “glaze” on top! Be careful of unknown glaze interactions – you can put any combination of glaze in a bowl or on a plate, but only a single glaze on the outside of any vertical surface! Glazes are a chemical reaction under heat. We don’t know the exact chemicals in the Mayco glazes we use. I can guess by the way they interact with each other, however, on the whole, you need to test every idea you have, and not run the test on a vertical surface! Simply put, glaze is a layer of glass like substance that bonds with the clay underneath. Clay is made of silica, alumina and water. Glaze is made of mostly silica. Silica has a melting point of 1700°C and we fire to 1240°C. The silica requires a “flux” to help it melt at the lower temperature. Fluxes can be all sorts of chemicals – a common one is calcium – calcium has a melting point of 2500°C, however, together they both melt at a much lower temperature! Colourants are metal oxides like cobalt (blue), chrome (green through black), copper (green, blue, even red!), manganese (black, purple and pink) iron (red brown), etc. Different chemicals in the glaze can have dramatic effects. for example, barium carbonate (which we don’t use) turns manganese bright pink! Other elements can turn manganese dioxide brown, blue, purple and reddish brown. Manganese dioxide is a flux in and of itself as well. So, glazes that get their black and purple colours, often interact with other glazes and RUN! Our mirror black is a good example – it mixes really well with many glazes because it fluxes them – causes them to melt faster. It will also bring out many beautiful colours in the glazes because it’s black colouring most definitely comes from manganese dioxide! Glaze chemistry is a whole subject on it’s own! We use commercial Mayco glazes on purpose – for their huge range of colour possibilities, stability, cool interactions, artistic freedom with the ability to easily brush the glazes on and ease of use. We currently have almost 50 glazes on hand! A major project is to test the interactions of all glazes with each other. That is 2,500 test tiles!!!! I’m going to make the wall behind the wheels the feature wall of pretty colours! Step Seven – Glaze (Gloss or sometimes called “Glost”) Firing Most of the time this is the final stage of making your creation (but not always!) The glaze kiln goes to 1240°C. This is called cone 6, or midrange. It is the low end of stoneware temperatures. Stoneware clays and glazes are typically fired at cone 8 – 10, that is 1260 – 1290°C. The energy requirement to go from 1240°C to 1280°C is almost a 30% more! Our clay is formulated to vitrify (mature, turn “glass-like”) at 1240°, as are our glazes. A glaze kiln take around 12 hours to reach temperature and two to three days to cool down. Sometimes a third firing process is required – this is for decoration that is added to work after the glaze firing. For example – adding precious metals and lustres. this firing temperature is usually around 600 – 800°C depending upon the techniques being used. There are many students interested in gold and silver trims – we will be doing this third type of firing soon! After firing your work will be in the student finished work shelves. Remember to pay for it before you head out the door! There is a small extra charge for using porcelain clay (it’s more than twice the price of regular clay), and for any third firing process! Once your work has been fired it can not turn back into clay for millennia – so don’t fire it if you don’t like it! Put it in the bucket for recycling. https://firebirdstudios.com.au/the-process-of-making-pottery/Ceramics have evolved over thousands of years.A white earthenware side plate with a gadroon edge. Has water marks and chips on front.‘Johnson Bros England Reg No 15587’flagstaff hill, warrnambool, shipwrecked-coast, flagstaff-hill, flagstaff-hill-maritime-museum, maritime-museum, shipwreck-coast, flagstaff-hill-maritime-village, johnson bros, ceramics, tableware -
 Flagstaff Hill Maritime Museum and Village
Domestic object - Plate, Alfred Meakin
... are stable colourants that turn out pretty much how they look... do things, how you could achieve the look you are seeking ...The Process of Making Pottery Decorating, Firing, Glazing, Making, Technical There is a rhythm and flow to clay. It can’t be done all at once! Even the making process! It can take weeks to get everything done, especially if you can only work on your pottery once a week! Even though we have three hour classes, it’s often just not enough time! Here is an overview of some of the processes so you have a bit more grasp on some of the technical stuff! Step One – Design There are SO many ideas out there for making stuff in clay! From delicate porcelain jewellery, through to heavy sculptural work and everything in between. Deciding your direction is sometimes not that easy – when you first start, try everything, you will naturally gravitate to the style that you enjoy! The options and variations are endless and can get a wee bit overwhelming too! Check in with me before you start to ensure your ideas will work, what order you might do things, how you could achieve the look you are seeking and any other technical data required! Step Two – Making Clay is thixotropic. This means that as you work with it, the clay first gets sloppier and wetter, before is begins to dry in the atmosphere. For most things, you simply can’t do all parts of the project at once. An example of work order might look like: Get last weeks work out from the shelves Prepare clay for today’s work – roll your clay, prepare balls for throwing, make the first stage of a pinch pot) Clean up last week’s work and put it on the shelf for bisque firing Check that you have any glazing to do – and do enough of it that you will have time to finish your main project Do the next step of your next project – there might be a further step that can’t be complete immediately, in that case, wrap your work well and put onto the shelves. Letting your work rest for a while can really help keep your work clean and professional looking. Many things require bagging under plastic to keep it ready for work the next week – put your name on the outside of the bag so you can find your work easily. We have stickers and markers. Consider how you want to decorate your work – coloured slip can be applied at a fairly wet stage (remembering that it will make your work even wetter!). Trying to apply slip to dry clay won’t work! If you want to do sgraffito – you will need to keep the work leather hard (a state of dryness where you can still work the clay with a little effort and a little water and care). Step Three – Drying Most of the time your work can go into the rack uncovered to let it dry out for the following week. If you want to continue forming or shaping you will need to double bag your work – put your work on a suitable sized bat and put the bat in a bag so the base of the bag is under the bat, then put another bag over the top of the work and tuck the top of the bag under the bat. If you want to trim (or turn) your thrown work the following week, it should also be double bagged. If your work is large, delicate, or of uneven thicknesses, you should lightly cover your work for drying. When considering the drying process, bare in mind the weather, humidity and wind! The hotter and dryer, the faster things dry and work can dry unevenly in the shelves – this can lead to cracking – another time to lightly cover your work for drying. Step Four – Trimming and Cleaning Up Your work is dry! It is called greenware now and it is at it’s most fragile! Handle everything with two hands. I often refer to soft hands – keep everything gentle and with your fingers spread as much as possible. Try to not pick up things like plates too much, and always with both hands! Before your work can be bisque fired it should be “cleaned up”. You work won’t go into the kiln if it has sharp edges – when glazed, sharp edges turn into razor blades! Use a piece of fly wire to rub the work all over – this will scratch a little so be light handed. Use a knife or metal kidney to scrape any areas that require a bit more dynamic treatment than the fly wire offers! Finally, a very light wipe over with a slightly damp sponge can help soften and soothe all of your edges and dags! Trimming thrown work: If you are planning to trim (or turn) your thrown work (and you should be), make sure you bag it well – your work should be leather hard to almost dry for easiest trimming. Use this step to finish the work completely – use a metal kidney to polish the surface, or a slightly damp sponge to give a freshly thrown look. Wipe the sponge around the rim after trimming, and check the inside of the pot for dags! Trimming slip cast work: Usually I will trim the rims of your work on the wheel the following day to make that stage easier, however you will still need to check your work for lumps and bumps. Last but not least – check that your name is still clearly on the bottom of your work. Step Five – Bisque Firing When the work is completely dry it can go into the bisque kiln. The bisque kiln is fired to 1000°C. This process burns off the water in the clay as well as some of the chemically bound water. The structure of the clay is not altered that much at this temperature. Inside the bisque kiln, the work is stacked a little, small bowl inside a larger bowl and onto a heavy plate. Smaller items like decorations or drink coasters might get stacked several high. Consideration is paid to the weight of the stack and shape of the work. A bisque kiln can fire about one and a half times the amount of work that the glaze kiln can fire. The firing takes about 10 hours to complete the cycle and about two days to cool down. Once it has been emptied the work is placed in the glaze room ready for you to decorate! Step Six – Glazing Decorating your work with colour can be a lot of fun – and time consuming! There are three main options for surface treatment at this stage: Oxide Washes Underglazes Glazes Washes and underglazes do not “glaze” the work – It will still need a layer of glaze to fully seal the clay (washes don’t need glaze on surfaces not designed for food or liquid as they can gloss up a little on their own). Underglazes are stable colourants that turn out pretty much how they look in the jar. They can be mixed with each other to form other colours and can be used like water colours to paint onto your work. Mostly they should have a clear glaze on top to seal them. Oxides are a different species – the pink oxide (cobalt) wash turns out bright blue for instance. They don’t always need a glaze on top, and some glazes can change the colour of the wash! The glazes need no other “glaze” on top! Be careful of unknown glaze interactions – you can put any combination of glaze in a bowl or on a plate, but only a single glaze on the outside of any vertical surface! Glazes are a chemical reaction under heat. We don’t know the exact chemicals in the Mayco glazes we use. I can guess by the way they interact with each other, however, on the whole, you need to test every idea you have, and not run the test on a vertical surface! Simply put, glaze is a layer of glass like substance that bonds with the clay underneath. Clay is made of silica, alumina and water. Glaze is made of mostly silica. Silica has a melting point of 1700°C and we fire to 1240°C. The silica requires a “flux” to help it melt at the lower temperature. Fluxes can be all sorts of chemicals – a common one is calcium – calcium has a melting point of 2500°C, however, together they both melt at a much lower temperature! Colourants are metal oxides like cobalt (blue), chrome (green through black), copper (green, blue, even red!), manganese (black, purple and pink) iron (red brown), etc. Different chemicals in the glaze can have dramatic effects. for example, barium carbonate (which we don’t use) turns manganese bright pink! Other elements can turn manganese dioxide brown, blue, purple and reddish brown. Manganese dioxide is a flux in and of itself as well. So, glazes that get their black and purple colours, often interact with other glazes and RUN! Our mirror black is a good example – it mixes really well with many glazes because it fluxes them – causes them to melt faster. It will also bring out many beautiful colours in the glazes because it’s black colouring most definitely comes from manganese dioxide! Glaze chemistry is a whole subject on it’s own! We use commercial Mayco glazes on purpose – for their huge range of colour possibilities, stability, cool interactions, artistic freedom with the ability to easily brush the glazes on and ease of use. We currently have almost 50 glazes on hand! A major project is to test the interactions of all glazes with each other. That is 2,500 test tiles!!!! I’m going to make the wall behind the wheels the feature wall of pretty colours! Step Seven – Glaze (Gloss or sometimes called “Glost”) Firing Most of the time this is the final stage of making your creation (but not always!) The glaze kiln goes to 1240°C. This is called cone 6, or midrange. It is the low end of stoneware temperatures. Stoneware clays and glazes are typically fired at cone 8 – 10, that is 1260 – 1290°C. The energy requirement to go from 1240°C to 1280°C is almost a 30% more! Our clay is formulated to vitrify (mature, turn “glass-like”) at 1240°, as are our glazes. A glaze kiln take around 12 hours to reach temperature and two to three days to cool down. Sometimes a third firing process is required – this is for decoration that is added to work after the glaze firing. For example – adding precious metals and lustres. this firing temperature is usually around 600 – 800°C depending upon the techniques being used. There are many students interested in gold and silver trims – we will be doing this third type of firing soon! After firing your work will be in the student finished work shelves. Remember to pay for it before you head out the door! There is a small extra charge for using porcelain clay (it’s more than twice the price of regular clay), and for any third firing process! Once your work has been fired it can not turn back into clay for millennia – so don’t fire it if you don’t like it! Put it in the bucket for recycling. https://firebirdstudios.com.au/the-process-of-making-pottery/Ceramics have evolved over thousands of years.Earthenware dessert plate, cream colour. Made by Alfred Meakin, England. Backstamped ‘Alfred Meakin England’. flagstaff hill, warrnambool, shipwrecked-coast, flagstaff-hill, flagstaff-hill-maritime-museum, maritime-museum, shipwreck-coast, flagstaff-hill-maritime-village, alfred meakin, ceramics, earthenware, kitchenware -
 Flagstaff Hill Maritime Museum and Village
Domestic object - Jug
... are stable colourants that turn out pretty much how they look... do things, how you could achieve the look you are seeking ...The Process of Making Pottery Decorating, Firing, Glazing, Making, Technical There is a rhythm and flow to clay. It can’t be done all at once! Even the making process! It can take weeks to get everything done, especially if you can only work on your pottery once a week! Even though we have three hour classes, it’s often just not enough time! Here is an overview of some of the processes so you have a bit more grasp on some of the technical stuff! Step One – Design There are SO many ideas out there for making stuff in clay! From delicate porcelain jewellery, through to heavy sculptural work and everything in between. Deciding your direction is sometimes not that easy – when you first start, try everything, you will naturally gravitate to the style that you enjoy! The options and variations are endless and can get a wee bit overwhelming too! Check in with me before you start to ensure your ideas will work, what order you might do things, how you could achieve the look you are seeking and any other technical data required! Step Two – Making Clay is thixotropic. This means that as you work with it, the clay first gets sloppier and wetter, before is begins to dry in the atmosphere. For most things, you simply can’t do all parts of the project at once. An example of work order might look like: Get last weeks work out from the shelves Prepare clay for today’s work – roll your clay, prepare balls for throwing, make the first stage of a pinch pot) Clean up last week’s work and put it on the shelf for bisque firing Check that you have any glazing to do – and do enough of it that you will have time to finish your main project Do the next step of your next project – there might be a further step that can’t be complete immediately, in that case, wrap your work well and put onto the shelves. Letting your work rest for a while can really help keep your work clean and professional looking. Many things require bagging under plastic to keep it ready for work the next week – put your name on the outside of the bag so you can find your work easily. We have stickers and markers. Consider how you want to decorate your work – coloured slip can be applied at a fairly wet stage (remembering that it will make your work even wetter!). Trying to apply slip to dry clay won’t work! If you want to do sgraffito – you will need to keep the work leather hard (a state of dryness where you can still work the clay with a little effort and a little water and care). Step Three – Drying Most of the time your work can go into the rack uncovered to let it dry out for the following week. If you want to continue forming or shaping you will need to double bag your work – put your work on a suitable sized bat and put the bat in a bag so the base of the bag is under the bat, then put another bag over the top of the work and tuck the top of the bag under the bat. If you want to trim (or turn) your thrown work the following week, it should also be double bagged. If your work is large, delicate, or of uneven thicknesses, you should lightly cover your work for drying. When considering the drying process, bare in mind the weather, humidity and wind! The hotter and dryer, the faster things dry and work can dry unevenly in the shelves – this can lead to cracking – another time to lightly cover your work for drying. Step Four – Trimming and Cleaning Up Your work is dry! It is called greenware now and it is at it’s most fragile! Handle everything with two hands. I often refer to soft hands – keep everything gentle and with your fingers spread as much as possible. Try to not pick up things like plates too much, and always with both hands! Before your work can be bisque fired it should be “cleaned up”. You work won’t go into the kiln if it has sharp edges – when glazed, sharp edges turn into razor blades! Use a piece of fly wire to rub the work all over – this will scratch a little so be light handed. Use a knife or metal kidney to scrape any areas that require a bit more dynamic treatment than the fly wire offers! Finally, a very light wipe over with a slightly damp sponge can help soften and soothe all of your edges and dags! Trimming thrown work: If you are planning to trim (or turn) your thrown work (and you should be), make sure you bag it well – your work should be leather hard to almost dry for easiest trimming. Use this step to finish the work completely – use a metal kidney to polish the surface, or a slightly damp sponge to give a freshly thrown look. Wipe the sponge around the rim after trimming, and check the inside of the pot for dags! Trimming slip cast work: Usually I will trim the rims of your work on the wheel the following day to make that stage easier, however you will still need to check your work for lumps and bumps. Last but not least – check that your name is still clearly on the bottom of your work. Step Five – Bisque Firing When the work is completely dry it can go into the bisque kiln. The bisque kiln is fired to 1000°C. This process burns off the water in the clay as well as some of the chemically bound water. The structure of the clay is not altered that much at this temperature. Inside the bisque kiln, the work is stacked a little, small bowl inside a larger bowl and onto a heavy plate. Smaller items like decorations or drink coasters might get stacked several high. Consideration is paid to the weight of the stack and shape of the work. A bisque kiln can fire about one and a half times the amount of work that the glaze kiln can fire. The firing takes about 10 hours to complete the cycle and about two days to cool down. Once it has been emptied the work is placed in the glaze room ready for you to decorate! Step Six – Glazing Decorating your work with colour can be a lot of fun – and time consuming! There are three main options for surface treatment at this stage: Oxide Washes Underglazes Glazes Washes and underglazes do not “glaze” the work – It will still need a layer of glaze to fully seal the clay (washes don’t need glaze on surfaces not designed for food or liquid as they can gloss up a little on their own). Underglazes are stable colourants that turn out pretty much how they look in the jar. They can be mixed with each other to form other colours and can be used like water colours to paint onto your work. Mostly they should have a clear glaze on top to seal them. Oxides are a different species – the pink oxide (cobalt) wash turns out bright blue for instance. They don’t always need a glaze on top, and some glazes can change the colour of the wash! The glazes need no other “glaze” on top! Be careful of unknown glaze interactions – you can put any combination of glaze in a bowl or on a plate, but only a single glaze on the outside of any vertical surface! Glazes are a chemical reaction under heat. We don’t know the exact chemicals in the Mayco glazes we use. I can guess by the way they interact with each other, however, on the whole, you need to test every idea you have, and not run the test on a vertical surface! Simply put, glaze is a layer of glass like substance that bonds with the clay underneath. Clay is made of silica, alumina and water. Glaze is made of mostly silica. Silica has a melting point of 1700°C and we fire to 1240°C. The silica requires a “flux” to help it melt at the lower temperature. Fluxes can be all sorts of chemicals – a common one is calcium – calcium has a melting point of 2500°C, however, together they both melt at a much lower temperature! Colourants are metal oxides like cobalt (blue), chrome (green through black), copper (green, blue, even red!), manganese (black, purple and pink) iron (red brown), etc. Different chemicals in the glaze can have dramatic effects. for example, barium carbonate (which we don’t use) turns manganese bright pink! Other elements can turn manganese dioxide brown, blue, purple and reddish brown. Manganese dioxide is a flux in and of itself as well. So, glazes that get their black and purple colours, often interact with other glazes and RUN! Our mirror black is a good example – it mixes really well with many glazes because it fluxes them – causes them to melt faster. It will also bring out many beautiful colours in the glazes because it’s black colouring most definitely comes from manganese dioxide! Glaze chemistry is a whole subject on it’s own! We use commercial Mayco glazes on purpose – for their huge range of colour possibilities, stability, cool interactions, artistic freedom with the ability to easily brush the glazes on and ease of use. We currently have almost 50 glazes on hand! A major project is to test the interactions of all glazes with each other. That is 2,500 test tiles!!!! I’m going to make the wall behind the wheels the feature wall of pretty colours! Step Seven – Glaze (Gloss or sometimes called “Glost”) Firing Most of the time this is the final stage of making your creation (but not always!) The glaze kiln goes to 1240°C. This is called cone 6, or midrange. It is the low end of stoneware temperatures. Stoneware clays and glazes are typically fired at cone 8 – 10, that is 1260 – 1290°C. The energy requirement to go from 1240°C to 1280°C is almost a 30% more! Our clay is formulated to vitrify (mature, turn “glass-like”) at 1240°, as are our glazes. A glaze kiln take around 12 hours to reach temperature and two to three days to cool down. Sometimes a third firing process is required – this is for decoration that is added to work after the glaze firing. For example – adding precious metals and lustres. this firing temperature is usually around 600 – 800°C depending upon the techniques being used. There are many students interested in gold and silver trims – we will be doing this third type of firing soon! After firing your work will be in the student finished work shelves. Remember to pay for it before you head out the door! There is a small extra charge for using porcelain clay (it’s more than twice the price of regular clay), and for any third firing process! Once your work has been fired it can not turn back into clay for millennia – so don’t fire it if you don’t like it! Put it in the bucket for recycling. https://firebirdstudios.com.au/the-process-of-making-pottery/The form of the jug has been in use for many centuries.Stoneware jug. Two tone brown glaze with pierced lip behind spout. Spout chipped.None.flagstaff hill, warrnambool, shipwrecked-coast, flagstaff-hill, flagstaff-hill-maritime-museum, maritime-museum, shipwreck-coast, flagstaff-hill-maritime-village, jug, ceramic jug -
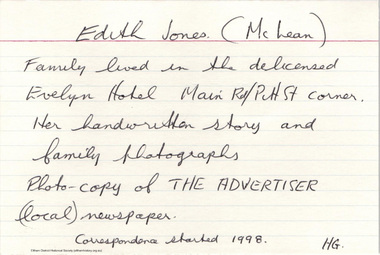 Eltham District Historical Society Inc
Document - Folder, McLean, 1984-1999
... .” Describes how they all look tired in the photos as they had to walk....” Describes how they all look tired in the photos as they had to walk ...References to McLean family, Hector John McLean and Louisa Frances (nee Green) and six daughters who lived in Eltham during the period 1930 to 1934 inclusive. Lived in the former Evelyn Hotel at the time it was destroyed by fire and being part of the Centenary Parade in 1934 where the family won the Group Section for their entry “Pioneers of Eltham” Reminiscences provided by Edith Jones (nee M1934 flood, ballroom, baptism, barber shop, bittern, boy scouts, bremner's flat, burgoyne's shop, cable tram, cemetery road, centenary celebrations, centenary parade, christening, coach house, collis grocery, dalton street, depression, dole, dorothy jean mclean, edith jones (nee mclean), eltham fire brigade, eltham high school, eltham higher elementary school, eltham lower park, eltham railway station, eltham state school no. 209, evelyn hotel, fire damage - buildings, flinders naval depot, fordham, gladys evelyn mclean, gold mining, gwenneth mae mclean, gwladys evelyn mclean, headmistress, hector john mclean, isherwood house and shop, louisa frances mclean (nee green), metery road, methodist church, miss finnin, miss grant cottage, motor bike races, mrs barrett, mrs bremner, mrs hurley, olive isabel mclean, parade, phoebe lillian mclean, picnic, pioneers of eltham, pitt street, research fire brigade, rev. r.g. arthur, shed, shops, st margarets church hall, st margaret's church, stables, state savings bank of victoria, susso books, todaro, vinnie willet, warrandyte bridge, warrandyte, wingrove park, yarra river -
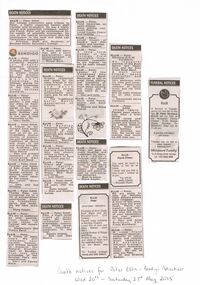 Bendigo Historical Society Inc.
Newspaper - PETER ELLIS COLLECTION: NEWSPAPER CLIPPINGS
... never told you that or how much I looked up to you. You... never told you that or how much I looked up to you. You ...A4 sheet white printer paper with 8 newspaper clippings glued on. Handwritten note reads: Death notices for Peter Ellis - Bendigo Advertiser Wed 20th - Saturday 23rd May 2015. Death Notices. Ellis - Peter OAM. Our college community pays tribute to Peter, a highly respected former staff member and ex-student. He was a highly valued and supportive colleague, mentor and friend. Peter will be remembered for his wealth of scientific knowledge, his love of the natural environment and his contribution to the local and state Lab Technicians Associations. - Principal, staff and Students of Bendigo Senior Secondary College. City of Greater Bendigo. Ellis- Peter. A gentle man with a wonderful passion for Greater Bendigo's natural, built and musical heritage, Peter will be greatly missed by the Greater Bendigo Heritage Advisory Committee. He willingly shared his love and knowledge of the rich and unique heritage around us. Ellis - Peter Nicolaus OAM. You went so quickly. I will miss our trips to Festivals doing crosswords on the way. My sympathy to both families and Brian a great mate to the last. A void impossible to fill. - Mary Smith. Ellis- Peter OAM. A tribute to our intrepid band leader of 34 years who took us on an unforgettable musical journey of preserving and teaching the traditions of dance and music to old and young throughout Australia. You are irreplaceable ' Dirty Pierre' - Past and present members of the celebrated Emu Creek Bush Band. Ellis - Peter OAM. Founder and leader of Emu Creek Bush Band. Australia's largest collector of dancing history. A great friend taken far too young. Au revoir 'Dirty Pierre' - John and Sue Williams. Ellis - Peter OAM. Thanks Pete, you introduced me to a life of extraordinary experiences, amazing friendships, dance and music. We did have some fun. - Marg Hogan. Ellis - Peter. We are so saddened by your passing. Your music and great sense of humour will remain with us. - Wedderburn Old Timers Band. Ellis - Peter. A friend of many years. We will remember your warmth, humour and tireless pursuit to preserve the Natural Environment of Bendigo. Your love and knowledge of the Bendigo Flora was inspirational. - Mary and Patrick Ward. Ellis- Peter. A music and dance man with a warm appreciation and encouragement of diverse talent. - Winzar boys. Death Notices. Ellis - Peter. Greatly respected and loved by his many friends in the traditional music and dance movement across Australia. His achievements were many and he will be missed. - The Traditional Social Dance Association of Victoria. Ellis - Peter. The Bendigo Historical Society is saddened at the passing of fine musician and friend Peter Ellis. - Committee and members, Bendigo Historical Society. Ellis- Peter. A talented musician and long time friend who was always willing to help us. - Members of Euro fest Choir and Inc. Ellis - Peter. Friend and neighbour, nature's gentleman at rest. Sincere sympathy to Robyn, Rick, Ryan and Doug. - Judy Monti. Ellis- Peter OAM Fond memories of 28 years with the band. Sadly Missed. - Stan and Heather Symes. Death Notices. Ellis - Peter OAM Pete, a much loved friend of many years. We fondly remember your knowledge, humour and those great times together, especially in the bush. Deeply missed. - Rob and Glen Moors. Death Notices. Ellis- Peter. Fond memories, so sadly missed. Keep playing your music Peter. Loved cousin Cheryl and families. Ellis -Peter. Loved cousin of Sandra and Phil Jubber and families. Deeply Missed. Ellis - Peter. A long term member of the Bendigo Field Naturalist Club. Deepest sympathy to his friends, he will be sadly missed by all. Ellis - Peter. Leader of the 'Celebrated Emu Creek Bush Band' Memories of lots of great times playing and travelling all over. We learned so much about dancing and music and it just won't be the same. - Don and Julie. Ellis - Peter. Much loved friend, dancer and band leader. - Dianne and Doug Pearse. Death Notices. Ellis - Peter. Peter, you gave so much laughter and happiness to many, many people through your lovely nature and your brilliant music to listen to and dance to. You have left a legacy of music, books and dance as well as unforgettable memories. Rest in peace. - Diana Austin. Death Notices Ellis Peter 27/3/1946 - 18/5/2015 Formerly of Emu Creek Bush Band and the Wedderburn Old Timers). Passed away suddenly at Bendigo Hospice. Loved son of Joan and Allan Nielsen (both Dec). Loving brother of Robyn and Doug. Brother-in-law of Rick and Uncle of Ryan and the extended family. Let the music play on… For Funeral arrangements see later edition. Death Notices. Ellis - Peter Nicolaus O.A.M. Suddenly. An inaugural member of the Bush Dance and Music Club and the Emu Creek Bush Band. A much loved friend, dance instructor and musician. Very generous with his time and knowledge. Passionate collector of dance music and old time dances. Will be sadly missed by all who knew him. - Devastated dance members. Ellis- Peter. OAM 27/3/46 - 18/5/15 Passed away peacefully after a brief illness. Much loved and irreplaceable brother, cousin and uncle to the Lilford, Datson, Burns, Shaw and Kitch families. You enriched our lives. No words can express how much we will miss you. Ellis Pierre (Peter) You were as much a father to me as an uncle. I never told you that or how much I looked up to you. You will be sadly missed - Boswald ( Ryan). Ellis - Peter. We are going to miss our Monday night dinners before rehearsal. A lover of fine wine, good food and great music. Pierre, our Maestro and fearless band leader, we will miss the sound of your squeeze box and your passion for the music. - Paul and Alida Robinson, Emu Creek Bush Band. Ellis - Peter. A close friend colleague, musician, authority on native plants and colonial music researcher. An enormous influence in preserving early Australian dance and dance music. We will all miss you Pete. - Jill and Graeme Balaam. Funeral Notices Ellis. A service of thanksgiving for the life of the late Mr Peter Nicolaus Ellis will be held at the Mulqueen Family Chapel, 15-25 Bridge street, Bendigo on MONDAY (May 25) at 11.00am. A private cremation will follow. Tributes can be left at www.heavenaddress.com Mulqueen Family 15-25 Bridge street, Bendigo Est. 1853 5443 4455.person, individual, peter ellis oam -
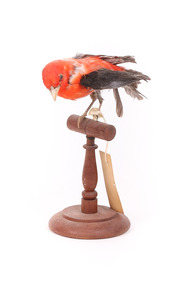 The Beechworth Burke Museum
Animal specimen - Scarlet Tanager (male), Trustees of the Australian Museum, 1860-1880
The Scarlet Tanager is an American songbird of medium size with bright coloured plumage. They are commonly located in eastern North America and in northwestern South America. They can often be found within woodlands that have oaks. On occasion, the Tanager can be seen in suburban areas including parks and gardens. These birds are sociable and often join with other foraging flocks. They are carnivores (insectivores) and feed on insects including wasps, ants, moths, beetles, butterflies and grasshoppers. The numbers of these birds in America are declining due to exposure and starvation during the colder months. These birds can also die from collisions with man made objects which includes the TV and radio towers, buildings and cars. They also have high rates of predation and brood parasitism. However, at current the IUCN classifies this species as Least Concern and note that their numbers are stable. This specimen is part of a collection of almost 200 animal specimens that were originally acquired as skins from various institutions across Australia, including the Australian Museum in Sydney and the National Museum of Victoria (known as Museums Victoria since 1983), as well as individuals such as amateur anthropologist Reynell Eveleigh Johns between 1860-1880. These skins were then mounted by members of the Burke Museum Committee and put-on display in the formal space of the Museum’s original exhibition hall where they continue to be on display. This display of taxidermy mounts initially served to instruct visitors to the Burke Museum of the natural world around them, today it serves as an insight into the collecting habits of the 19th century.This specimen is part of a significant and rare taxidermy mount collection in the Burke Museum. This collection is scientifically and culturally important for reminding us of how science continues to shape our understanding of the modern world. They demonstrate a capacity to hold evidence of how Australia’s fauna history existed in the past and are potentially important for future environmental research. This collection continues to be on display in the Museum and has become a key part to interpreting the collecting habits of the 19th century.The Scarlet Tanager specimen stands perched on a wooden platform looking towards the ground. It has bright red/orange feathers on the main body and head with dark black feathers on the tail and wings. Overall, whilst retaining a bright appearance the bird has faded in contrast to it's original colouring This particular specimen has disheveled feathers and is missing one leg. The bill is short and pale and the specimen has been provided with glass eyes made in a dark colour. The specimen has two paper identification tags attached to the damaged leg.Swing tag: 114a / unnamed / catalogue, page 59 Cotton tag: A.4440 /taxidermy mount, taxidermy, animalia, burke museum, beechworth, australian museum, skin, reynell eveleigh johns, bird, australian birds, american, american birds, scarlet tanager, tanager, medium bird, small bird -
 The Beechworth Burke Museum
Animal specimen - Scarlet Tanager (male), Trustees of the Australian Museum, 1860-1880
The Scarlet Tanager is an American songbird of medium size with bright coloured plumage. They are commonly located in eastern North America and in northwestern South America. They can often be found within woodlands that have oaks. On occasion, the Tanager can be seen in suburban areas including parks and gardens. These birds are sociable and often join with other foraging flocks. They are carnivores (insectivores) and feed on insects including wasps, ants, moths, beetles, butterflies and grasshoppers. The numbers of these birds in America are declining due to exposure and starvation during the colder months. These birds can also die from collisions with man made objects which includes the TV and radio towers, buildings and cars. They also have high rates of predation and brood parasitism. However, at current the IUCN classifies this species as Least Concern and note that their numbers are stable. This specimen is part of a collection of almost 200 animal specimens that were originally acquired as skins from various institutions across Australia, including the Australian Museum in Sydney and the National Museum of Victoria (known as Museums Victoria since 1983), as well as individuals such as amateur anthropologist Reynell Eveleigh Johns between 1860-1880. These skins were then mounted by members of the Burke Museum Committee and put-on display in the formal space of the Museum’s original exhibition hall where they continue to be on display. This display of taxidermy mounts initially served to instruct visitors to the Burke Museum of the natural world around them, today it serves as an insight into the collecting habits of the 19th century.This specimen is part of a significant and rare taxidermy mount collection in the Burke Museum. This collection is scientifically and culturally important for reminding us of how science continues to shape our understanding of the modern world. They demonstrate a capacity to hold evidence of how Australia’s fauna history existed in the past and are potentially important for future environmental research. This collection continues to be on display in the Museum and has become a key part to interpreting the collecting habits of the 19th century.The Scarlet Tanager specimen stands perched on a wooden platform looking forwards in a raised position. It has bright red/orange feathers on the main body and head with dark black feathers on the tail and wings. Overall, whilst retaining a bright appearance the bird has faded in contrast to it's original colouring. The bill is short and pale and the specimen has been provided with glass eyes made in a dark colour. The specimen has two paper identification tags attached to the right leg.Swing tag: 143a / unnamed / catalogue page 59 Metal tag: A4439 /taxidermy mount, taxidermy, animalia, burke museum, beechworth, australian museum, skin, reynell eveleigh johns, bird, australian birds, american, american birds, scarlet tanager, tanager, medium bird, small bird -
 The Beechworth Burke Museum
Audio - Oral History, Jennifer Williams, Mr Ken Howe, 23rd September 2000
Ken Howe was born on the 9th February 1941 in Beechworth. His parents came from Everton. His mothers parents were from Northern Island and his fathers parents from Everton. They were farmers and did not come to Beechworth for gold. Ken left school when he was 13 and a half and worked at the Zwar brothers Tannery for four years. He then went on to work at with the Forest Commission. Ken discusses his job's, family, the arrival of Baltic immigrants after world war 2, The impact of the story of Kelly's in his life and just life in general at Beechworth. This oral history recording was part of a project conducted by Jennifer Williams in the year 2000 to capture the everyday life and struggles in Beechworth during the twentieth century. This project involved recording seventy oral histories on cassette tapes of local Beechworth residents which were then published in a book titled: Listen to what they say: voices of twentieth century Beechworth. These cassette tapes were digitised in July 2021 with funds made available by the Friends of the Burke.Ken Howe's story offers an insight into life in Beechworth from the 1940's onwards, he details the various jobs that occurred in the Zwar brothers tannery factory, the tasks that occurred for the forest commission. He also provides insight into the role the Kelly story played in their lives and the significant places were incidents occurred. His story also offers a look into everyday Beechworth life and how the baltic immigrants after World War 2 integrated into the Australian lifestyle by working at the Zwar brothers tannery. This oral history account is socially and historically significant as it is a part of a broader collection of interviews conducted by Jennifer Williams which were published in the book 'Listen to what they say: voices of twentieth-century Beechworth.' While the township of Beechworth is known for its history as a gold rush town, these accounts provide a unique insight into the day-to-day life of the town's residents during the 20th century, many of which will have now been lost if they had not been preserved.This is a digital copy of a recording that was originally captured on a cassette tape. The cassette tape is black with a horizontal white strip and is currently stored in a clear flat plastic rectangular container. It holds up 40 minutes of recordings on each side.Mr Ken Howe /listen to what they say, beechworth, oral history, burke museum, ken howe, howe, everton, northern island, farmers, zwar brothers tannery, glue, forest commission, family -
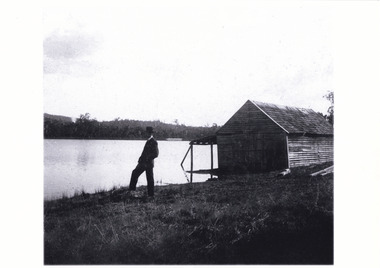 The Beechworth Burke Museum
Photograph - Photographs, c1900
Both of these stereoscopic images depict a man standing by Lake Kerferd in Beechworth. The boathouse is located behind him. Lake Kerferd is significant because it was created in 1862 and Beechworth's main water supply. These images depict how Lake Kerferd was once used for boats because of the boathouse shown in the background of the image. However this boathouse appears to be in poor condition. This could give an indication that either boating was not a popular activity or that this boathouse in particular was not well looked after. Black and white photograph mounted on cardA03074.2 obverse: Lake Kerferd/ Beechworth/boathouse, lake, lake kerferd, man, stereoscopic, beechworth lake, beechworth, victoria, trees, boat, wooden house -
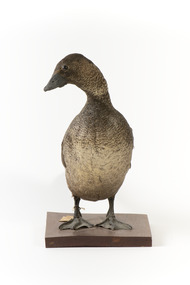 The Beechworth Burke Museum
Animal specimen - Musk Duck, Trustees of the Australian Museum, 1860-1880
This particular Musk Duck is a female specimen. This is ascertained through the lack of a large bulbous lobe of skin hanging under the bill. This particular duck has a much smaller lobe on the underside of its bill which is only visible when close. The name Musk Duck comes from the strong musk odour produced from a gland on the rump of the bird. These ducks are found only in Australia, in south-western and south-eastern mainland and in Tasmania. They prefer to reside in locations which have deep water and plenty of aquatic vegetation. This specimen is part of a collection of almost 200 animal specimens that were originally acquired as skins from various institutions across Australia, including the Australian Museum and the National Museum of Victoria, as well as individuals such amateur anthropologist Reynell Eveleigh Johns between 1860-1880. These skins were then mounted by members of the Burke Museum Committee and put-on display in the formal space of the Museum’s original exhibition hall where they continue to be on display. This display of taxidermy mounts initially served to instruct visitors to the Burke Museum of the natural world around them, today it serves as an insight into the collecting habits of the 19th century. This specimen is part of a significant and rare taxidermy mount collection in the Burke Museum. This collection is scientifically and culturally important for reminding us of how science continues to shape our understanding of the modern world. They demonstrate a capacity to hold evidence of how Australia’s fauna history existed in the past and are potentially important for future environmental research. This collection continues to be on display in the Museum and has become a key part to interpreting the collecting habits of the 19th century.A large duck with a sooty-brown plumage and paler brown colouring on the stomach and areas of the neck. This bird stands with its head turned to look over its right shoulder. The eyes are made of brown coloured glass. The legs on the Musk Duck are positioned towards the far back of the stocky body and the feet are webbed. This enables the duck to swim but provides a clumsy gait. The bill of this Musk Duck is dark grey and the tail feathers are positioned in a fan-shape.Paper tag reading "9a Musk Duck. See Catalogue, page, 39."taxidermy mount, taxidermy, animalia, burke museum, beechworth, australian museum, skin, reynell eveleigh johns, duck, musk duck, aquatic, biziura lobata -
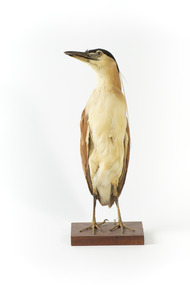 The Beechworth Burke Museum
Animal specimen - Nankeen Night Heron, Trustees of the Australian Museum, 1860-1880
Nankeen Night Herons reside in Australia wherever there is permanent water. They can often be found in wetlands, shallow river margins, floodplains and parks and gardens. These birds spend the day time roosting in groups among dense foliage and emerge during the night. An adult Nankeen Night Heron is identified by the black cap on its head and a pale breast. This particular specimen has these signs which enable it to be identified as adult. The large eyes of the Nankeen Night Heron are a bright yellow colour which are adapted to night vision. This specimen is part of a collection of almost 200 animal specimens that were originally acquired as skins from various institutions across Australia, including the Australian Museum and the National Museum of Victoria, as well as individuals such amateur anthropologist Reynell Eveleigh Johns between 1860-1880. These skins were then mounted by members of the Burke Museum Committee and put-on display in the formal space of the Museum’s original exhibition hall where they continue to be on display. This display of taxidermy mounts initially served to instruct visitors to the Burke Museum of the natural world around them, today it serves as an insight into the collecting habits of the 19th century. This specimen is part of a significant and rare taxidermy mount collection in the Burke Museum. This collection is scientifically and culturally important for reminding us of how science continues to shape our understanding of the modern world. They demonstrate a capacity to hold evidence of how Australia’s fauna history existed in the past and are potentially important for future environmental research. This collection continues to be on display in the Museum and has become a key part to interpreting the collecting habits of the 19th century.The Nankeen Night Heron has a stocky body and is standing tall on a wooden pedestal and looking towards the upper right. This adult specimen has yellow and black glass eyes and a long pale grey bill. Plumage on the head is black which turns a pale cinnamon on the nape of the neck. The wings are placed along the back of the body and are a light brown. The torso is a pale buff colour. This specimen has nuptial plums which look like they come out of the back of the birds head. These plums are long white feathers which appear during the breeding season.taxidermy mount, taxidermy, animalia, burke museum, beechworth, australian museum, skin, reynell eveleigh johns, bird, nankeen night heron, heron, nocturnal -
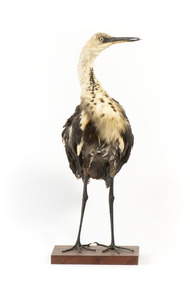 The Beechworth Burke Museum
Animal specimen - White-Neck Heron, Trustees of the Australian Museum, 1860-1880
The White-necked Heron (also known as the Pacific Heron) is commonly found throughout mainland Australia. It resides mainly in locations with freshwater and in tidal areas. These birds are carnivores and mainly eat fish, crustaceans, amphibians and insects. They are also known to feed on young freshwater rats, young ducklings and lizards. This specimen is part of a collection of almost 200 animal specimens that were originally acquired as skins from various institutions across Australia, including the Australian Museum in Sydney and the National Museum of Victoria (known as Museums Victoria since 1983), as well as individuals such as amateur anthropologist Reynell Eveleigh Johns between 1860-1880. These skins were then mounted by members of the Burke Museum Committee and put-on display in the formal space of the Museum’s original exhibition hall where they continue to be on display. This display of taxidermy mounts initially served to instruct visitors to the Burke Museum of the natural world around them, today it serves as an insight into the collecting habits of the 19th century.This specimen is part of a significant and rare taxidermy mount collection in the Burke Museum. This collection is scientifically and culturally important for reminding us of how science continues to shape our understanding of the modern world. They demonstrate a capacity to hold evidence of how Australia’s fauna history existed in the past and are potentially important for future environmental research. This collection continues to be on display in the Museum and has become a key part to interpreting the collecting habits of the 19th century.The White-Necked Heron has been stylised in a standing position on a wooden platform. It is facing forwards but looking over its left shoulder. The eyes of this specimen are made from yellow glass. The bird has long black legs and a long white neck with black spots decorating the front of the neck. The head is also white and the bill black. The front torso of the bird is cream mixed with brown plumage and the back. The rear and wings are a dark brown.taxidermy mount, taxidermy, animalia, burke museum, beechworth, australian museum, skin, reynell eveleigh johns, bird, australian birds, white-necked heron, heron, pacific heron -
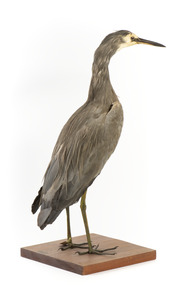 The Beechworth Burke Museum
Animal specimen - White Faced Heron, Trustees of the Australian Museum, 1860-1880
The White-faced Heron is a common bird located throughout Australasia, including New Guinea, Torres Strait, Indonesia and New Zealand. It can be found in all parts of Australia with the exception of areas which are too dry. The White-faced heron typically resides in wetland habitats including reefs, rock pools, swamps and rivers. They feed on small aquatic animals. These birds get their name from their characteristic white face which contrasts to the ashen grey plumage of their bodies. This specimen is part of a collection of almost 200 animal specimens that were originally acquired as skins from various institutions across Australia, including the Australian Museum in Sydney and the National Museum of Victoria (known as Museums Victoria since 1983), as well as individuals such as amateur anthropologist Reynell Eveleigh Johns between 1860-1880. These skins were then mounted by members of the Burke Museum Committee and put-on display in the formal space of the Museum’s original exhibition hall where they continue to be on display. This display of taxidermy mounts initially served to instruct visitors to the Burke Museum of the natural world around them, today it serves as an insight into the collecting habits of the 19th century.This specimen is part of a significant and rare taxidermy mount collection in the Burke Museum. This collection is scientifically and culturally important for reminding us of how science continues to shape our understanding of the modern world. They demonstrate a capacity to hold evidence of how Australia’s fauna history existed in the past and are potentially important for future environmental research. This collection continues to be on display in the Museum and has become a key part to interpreting the collecting habits of the 19th century.The White Faced Heron is stylised in a standing position on a wooden platform, looking forward. The bird has small brown glass eyes in place of the original. The Heron has long dark legs and is mostly covered in grey-brown plumage. Around the face, the plumage is a cream colour. The bill is black. This particular specimen has a paper identification tag tied around its left leg.....[missing] Heron / ....[missing] page 34. /taxidermy mount, taxidermy, animalia, burke museum, beechworth, australian museum, skin, reynell eveleigh johns, bird, australian birds, heron, white faced heron