Showing 881 items
matching bendigo town hall.
-
 Federation University Historical Collection
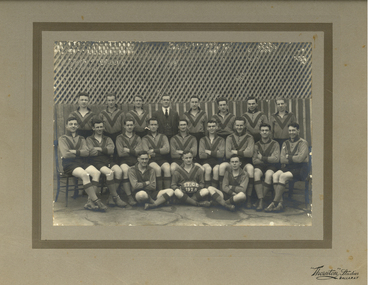
Photograph - Photograph - black and white, Ballarat Teachers' College Football Team, 1928, 1928
This photo was taken at the Ballarat East Town Hall. The Ballarat Teachers' College was established after the Victorian State Government and the State Education Department decided to establish two provincial teachers' colleges, at Ballarat and Bendigo. On 04 May 1926 W.H. Ellwood (Principal), Miss A. Bouchier, and Mr A.B. Jones, welcomed the first enrolment of 61 students to undertake the one year course. In 1927 the College moved to the former Ballarat East Town Hall in Barkly Street, which was remodelled for their use. It closed in December 1931 due to the Great Depression. In 1946 Ballarat Teachers' College reopened and relocated to the Dana Street State School. The building used by the Teachers' College was the original bluestone building facing Doveton Street South. It was originally planned to open as a women's college, for whom the residence at 130 Victoria Street was purchased, but the decision was made to admit resident men from Ballarat. Mr T.W. Turner was appointed as Principal in 1951 and directed the introduction of a two year course for the Trained Primary Teachers' Certificate. The former one year course was terminated at the end of 1951. In 1958 the College was relocated to a custom built facility at Gillies Street, in close proximity to the Ballarat Botanical Gardens. Numbers increased with the introduction of the Trained Infant Teachers' Certificate course under the guidance of Mary Egan. With the introduction of a three year Diploma Course in 1968 accommodation became cramped. The introduction of the Diploma of Teaching (Primary) led to the Trained Infant Teachers' Certificate being discontinued in 1969, and the end of the Trained Primary Teachers' Certificate in 1969. Secondary Art and Craft students began studies at Ballarat Teachers' College in 1969 under Mr Ted Doney. In 1971 Mr D. Watson was appointed Principal. The State College of Victoria was proclaimed by Order in Council on 24 July 1973, and Ballarat Teachers' College became a constituent college of the State College of Victoria, and was known as State College of Victoria, Ballarat. By 1975 the College moved to Mount Helen as part of the Ballarat College of Advanced Education. Pre service teachers currently undertake their studies on the Mount Helen Campus of Federation University. ("Ruffians Attempted to Carry of the School Tent: A History of State Education in Ballarat", 1974, p73-4.)Mounted photograph of the football team of the Teacher Training College Ballarat. Ron Robson is 3rd from the right in the centre row. He later lived at Merbein, Victoriaballarat teachers' college, teacher training college ballarat, football, ballarat teachers' college football team, thornton studios, ballarat east town hall -
 Federation University Historical Collection
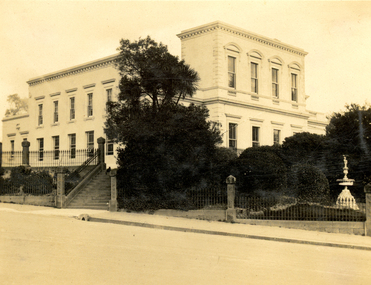
Programme - Card, Ballarat Teachers' Reunion Souvenir, 1933, 1933
This card was used by John McNaughton, student of the Ballarat Teachers' College in 1929. The Ballarat Teachers' College was established after the Victorian State Government and the State Education Department decided to establish two provincial teachers' colleges, at Ballarat and Bendigo. On 04 May 1926 W.H. Ellwood (Principal), Miss A. Bouchier, and Mr A.B. Jones, welcomed the first enrolment of 61 students to undertake the one year course. In 1927 the College moved to the former Ballarat East Town Hall in Barkly Street, which was remodelled for their use. It closed in December 1931 due to the Great Depression. In 1946 Ballarat Teachers' College reopened and relocated to the Dana Street State School. The building used by the Teachers' College was the original bluestone building facing Doveton Street South. It was originally planned to open as a women's college, for whom the residence at 130 Victoria Street was purchased, but the decision was made to admit resident men from Ballarat. Mr T.W. Turner was appointed as Principal in 1951 and directed the introduction of a two year course for the Trained Primary Teachers' Certificate. The former one year course was terminated at the end of 1951. In 1958 the College was relocated to a custom built facility at Gillies Street, in close proximity to the Ballarat Botanical Gardens. Numbers increased with the introduction of the Trained Infant Teachers' Certificate course under the guidance of Mary Egan. With the introduction of a three year Diploma Course in 1968 accommodation became cramped. The introduction of the Diploma of Teaching (Primary) led to the Trained Infant Teachers' Certificate being discontinued in 1969, and the end of the Trained Primary Teachers' Certificate in 1969. Secondary Art and Craft students began studies at Ballarat Teachers' College in 1969 under Mr Ted Doney. In 1971 Mr D. Watson was appointed Principal. The State College of Victoria was proclaimed by Order in Council on 24 July 1973, and Ballarat Teachers' College became a constituent college of the State College of Victoria, and was known as State College of Victoria, Ballarat. By 1975 the College moved to Mount Helen as part of the Ballarat College of Advanced Education. Pre service teachers currently undertake their studies on the Mount Helen Campus of Federation University. ("Ruffians Attempted to Carry of the School Tent: A History of State Education in Ballarat", 1974, p73-4.)Printed card with a black and white photo of the Ballarat Teachers' College (former Ballarat East Town Hall).ballarat teachers' college, mcnaughton, john mcnaughton, former ballarat east town hall, ballarat east gardens -
 Federation University Historical Collection
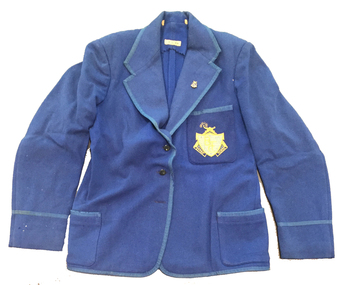
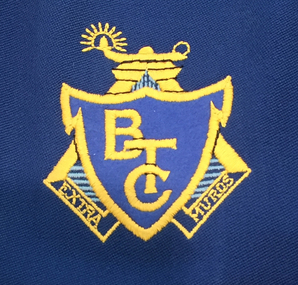
Costume, Ballarat Teachers' College Blazer, 1940s
This blazer was worn by Elaine Cooke when she attended the Ballarat Teachers College. The Ballarat Teachers' College was established after the Victorian State Government and the State Education Department decided to establish two provincial teachers' colleges, at Ballarat and Bendigo. On 04 May 1926 W.H. Ellwood (Principal), Miss A. Bouchier, and Mr A.B. Jones, welcomed the first enrolment of 61 students to undertake the one year course. In 1927 the College moved to the former Ballarat East Town Hall in Barkly Street, which was remodelled for their use. It closed in December 1931 due to the Great Depression. In 1946 Ballarat Teachers' College reopened and relocated to the Dana Street State School. It was originally planned to open as a women's college, for whom the residence at 130 Victoria Street was purchased, but the decision was made to admit resident men from Ballarat. Mr T.W. Turner was appointed as Principal in 1951 and directed the introduction of a two year course for the Trained Primary Teachers' Certificate. The former one year course was terminated at the end of 1951. In 1958 the College was relocated to a custom built facility at Gillies Street, in close proximity to the Ballarat Botanical Gardens. Numbers increased with the introduction of the Trained Infant Teachers' Certificate course under the guidance of Mary Egan. With the introduction of a three year Diploma Course in 1968 accommodation became cramped. The introduction of the Diploma of Teaching (Primary) led to the Trained Infant Teachers' Certificate being discontinued in 1969, and the end of the Trained Primary Teachers' Certificate in 1969. Secondary Art and Craft students began studies at Ballarat Teachers' College in 1969 under Mr Ted Doney. In 1971 Mr D. Watson was appointed Principal. The State College of Victoria was proclaimed by Order in Council on 24 July 1973, and Ballarat Teachers' College became a constituent college of the State College of Victoria, and was known as State College of Victoria, Ballarat. By 1975 the College moved to Mount Helen as part of the Ballarat College of Advanced Education. Pre service teachers currently undertake their studies on the Mount Helen Campus of Federation University. ("Ruffians Attempted to Carry of the School Tent: A History of State Education in Ballarat", 1974, p73-4.)Blue woollen blazer with Ballarat Teachers College lapel pin and embroidered pocket. The edges are bound, including the two side pockets and the breast pocket and the sleeve cuffs have the binding 10.5 cm from the edge. The blazer has three front buttons. The body is unlined but the sleeves are lined with a cotton fabric. The hem edge is bound and hand stitched in place, whilst the back neck facing is cut with pinking shears.Hand written with pen on white tape - E. Cookballarat teachers' college, blazer, elaine cook, costume, textiles, uniform, embroidery -
 Federation University Historical Collection
Costume, Ballarat Teachers' College Blazer, c1947
This blazer was worn by Tom Hill in 1947. He was educated at Digby Primary School and Hammilton High and was appointed principle of Paschendale P.S. and Kannagulk P.S. at the age of 17 before he entered the College at Dana Street. He graduated in 1948 and was appointed to the Myrtle Creek school. At the time of his retirement in 1986 he was principle of Bacchus Marsh P.S. The Ballarat Teachers' College was established after the Victorian State Government and the State Education Department decided to establish two provincial teachers' colleges, at Ballarat and Bendigo. On 04 May 1926 W.H. Ellwood (Principal), Miss A. Bouchier, and Mr A.B. Jones, welcomed the first enrolment of 61 students to undertake the one year course. In 1927 the College moved to the former Ballarat East Town Hall in Barkly Street, which was remodelled for their use. It closed in December 1931 due to the Great Depression. In 1946 Ballarat Teachers' College reopened and relocated to the Dana Street State School. It was originally planned to open as a women's college, for whom the residence at 130 Victoria Street was purchased, but the decision was made to admit resident men from Ballarat. Mr T.W. Turner was appointed as Principal in 1951 and directed the introduction of a two year course for the Trained Primary Teachers' Certificate. The former one year course was terminated at the end of 1951. In 1958 the College was relocated to a custom built facility at Gillies Street, in close proximity to the Ballarat Botanical Gardens. Numbers increased with the introduction of the Trained Infant Teachers' Certificate course under the guidance of Mary Egan. With the introduction of a three year Diploma Course in 1968 accommodation became cramped. The introduction of the Diploma of Teaching (Primary) led to the Trained Infant Teachers' Certificate being discontinued in 1969, and the end of the Trained Primary Teachers' Certificate in 1969. Secondary Art and Craft students began studies at Ballarat Teachers' College in 1969 under Mr Ted Doney. In 1971 Mr D. Watson was appointed Principal. The State College of Victoria was proclaimed by Order in Council on 24 July 1973, and Ballarat Teachers' College became a constituent college of the State College of Victoria, and was known as State College of Victoria, Ballarat. By 1975 the College moved to Mount Helen as part of the Ballarat College of Advanced Education. Pre service teachers currently undertake their studies on the Mount Helen Campus of Federation University. ("Ruffians Attempted to Carry of the School Tent: A History of State Education in Ballarat", 1974, p73-4.)Blue satin lined, wool gabardine Ballarat Teachers' College blazer with embroidered pocket. The jacket has two plain silver coloured buttons at the frontEmbroidered emblem of the Ballarat Teachers College.ballarat teachers' college, blazer, tom hill, thomas hill, costume, uniform, embroidery, textiles -
 Federation University Historical Collection
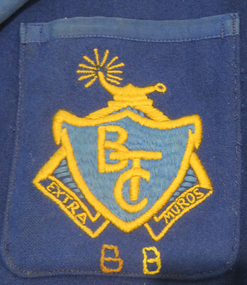
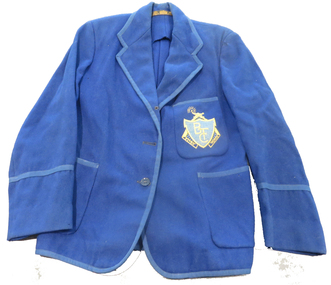
Costume, Paterson Powell Pty Ltd, Ballarat Teachers' College Blazer, 1948
This blazer was worn by John Freckleton at the Ballarat Teachers College in 1949. The Ballarat Teachers' College was established after the Victorian State Government and the State Education Department decided to establish two provincial teachers' colleges, at Ballarat and Bendigo. On 04 May 1926 W.H. Ellwood (Principal), Miss A. Bouchier, and Mr A.B. Jones, welcomed the first enrolment of 61 students to undertake the one year course. In 1927 the College moved to the former Ballarat East Town Hall in Barkly Street, which was remodelled for their use. It closed in December 1931 due to the Great Depression. In 1946 Ballarat Teachers' College reopened and relocated to the Dana Street State School. It was originally planned to open as a women's college, for whom the residence at 130 Victoria Street was purchased, but the decision was made to admit resident men from Ballarat. Mr T.W. Turner was appointed as Principal in 1951 and directed the introduction of a two year course for the Trained Primary Teachers' Certificate. The former one year course was terminated at the end of 1951. In 1958 the College was relocated to a custom built facility at Gillies Street, in close proximity to the Ballarat Botanical Gardens. Numbers increased with the introduction of the Trained Infant Teachers' Certificate course under the guidance of Mary Egan. With the introduction of a three year Diploma Course in 1968 accommodation became cramped. The introduction of the Diploma of Teaching (Primary) led to the Trained Infant Teachers' Certificate being discontinued in 1969, and the end of the Trained Primary Teachers' Certificate in 1969. Secondary Art and Craft students began studies at Ballarat Teachers' College in 1969 under Mr Ted Doney. In 1971 Mr D. Watson was appointed Principal. The State College of Victoria was proclaimed by Order in Council on 24 July 1973, and Ballarat Teachers' College became a constituent college of the State College of Victoria, and was known as State College of Victoria, Ballarat. By 1975 the College moved to Mount Helen as part of the Ballarat College of Advanced Education. Pre service teachers currently undertake their studies on the Mount Helen Campus of Federation University. ("Ruffians Attempted to Carry of the School Tent: A History of State Education in Ballarat", 1974, p73-4.)This unlined, 3 buttoned, royal blue woolen blazer is bound with twill tape in a matching colour. It has a patch pocket on either side near the bottom hem line and a breast patch pocket with an embroidered emblem of the Ballarat Teachers College. Under this emblem is embroidered in stem stitch 'B B' in brown and yellow. The pockets are all bound at the top and the sleeves have a trim binding about 8.5 cm from the cuff. The inside seams are all bound.The fabric label says - Paterson, Powell Pty Ltd Ballarat Attached to the shoulder seam is a tape with a handwritten - Georgeballarat teachers' college, blazer, costume, textiles, uniform, embroidery -
 Federation University Historical Collection
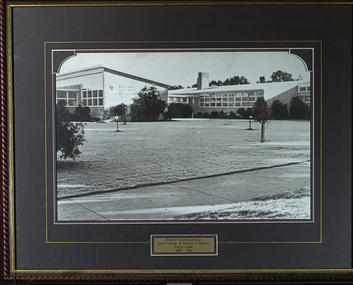
Photograph - Photographs - Black and White, Ballarat Teachers' College
These images were hung in the corridor of the University of Ballarat School of Education (Mount Helen). It most probably dates from around the time of the transfer of the College. The Ballarat Teachers' College was established after the Victorian State Government and the State Education Department decided to establish two provincial teachers' colleges, at Ballarat and Bendigo. On 04 May 1926 W.H. Ellwood (Principal), Miss A. Bouchier, and Mr A.B. Jones, welcomed the first enrolment of 61 students to undertake the one year course. In 1927 the College moved to the former Ballarat East Town Hall in Barkly Street, which was remodelled for their use. It closed in December 1931 due to the Great Depression. In 1946 Ballarat Teachers' College reopened and relocated to the Dana Street State School. The building used by the Teachers' College was the original bluestone building facing Doveton Street South. It was originally planned to open as a women's college, for whom the residence at 130 Victoria Street was purchased, but the decision was made to admit resident men from Ballarat. Mr T.W. Turner was appointed as Principal in 1951 and directed the introduction of a two year course for the Trained Primary Teachers' Certificate. The former one year course was terminated at the end of 1951. In 1958 the College was relocated to a custom built facility at Gillies Street, in close proximity to the Ballarat Botanical Gardens. Numbers increased with the introduction of the Trained Infant Teachers' Certificate course under the guidance of Mary Egan. With the introduction of a three year Diploma Course in 1968 accommodation became cramped. The introduction of the Diploma of Teaching (Primary) led to the Trained Infant Teachers' Certificate being discontinued in 1969, and the end of the Trained Primary Teachers' Certificate in 1969. Secondary Art and Craft students began studies at Ballarat Teachers' College in 1969 under Mr Ted Doney. In 1971 Mr D. Watson was appointed Principal. The State College of Victoria was proclaimed by Order in Council on 24 July 1973, and Ballarat Teachers' College became a constituent college of the State College of Victoria, and was known as State College of Victoria, Ballarat. By 1975 the College moved to Mount Helen as part of the Ballarat College of Advanced Education. Pre service teachers currently undertake their studies on the Mount Helen Campus of Federation University. ("Ruffians Attempted to Carry of the School Tent: A History of State Education in Ballarat", 1974, p73-4.)Three photographs of the Ballarat Teachers' College, all at different locaitons. .1) Dana Street Primary School (State School) .2) Barkly Street - former Ballarat East Town Hall .3) Gillies StreetBrass plaque on each framed photograph .1) Ballarat Teachers' College Doveton Street 1926, 1946-1957 (Part of Dana Street Primary School No. 33) .2) Ballarat Teachers' College Barkly Street 1927-1931 (Formerly Ballarat East Town Hall) .3) Ballarat Teachers' College State College of Victoria at Ballarat Gillies Street 1958-1976ballarat teachers' college, dana street primary school, ballarat east library, gillies street, state college of victoria, state college of victoria at ballarat -
 Federation University Historical Collection
Costume - Blazer, Ballarat Teachers' College Blazer, c1954
Wilma Hall (later Hobbs) wore this blazer while studying at the Ballarat Teachers' College in 1954-55. The college was established after the Victorian State Government and the State Education Department decided to establish two provincial teachers' colleges, at Ballarat and Bendigo. On 04 May 1926 W.H. Ellwood (Principal), Miss A. Bouchier, and Mr A.B. Jones, welcomed the first enrolment of 61 students to undertake the one year course. In 1927 the College moved to the former Ballarat East Town Hall in Barkly Street, which was remodelled for their use. It closed in December 1931 due to the Great Depression. In 1946 Ballarat Teachers' College reopened and relocated to the Dana Street State School. It was originally planned to open as a women's college, for whom the residence at 130 Victoria Street was purchased, but the decision was made to admit resident men from Ballarat. Mr T.W. Turner was appointed as Principal in 1951 and directed the introduction of a two year course for the Trained Primary Teachers' Certificate. The former one year course was terminated at the end of 1951. In 1958 the College was relocated to a custom built facility at Gillies Street, in close proximity to the Ballarat Botanical Gardens. Numbers increased with the introduction of the Trained Infant Teachers' Certificate course under the guidance of Mary Egan. With the introduction of a three year Diploma Course in 1968 accommodation became cramped. The introduction of the Diploma of Teaching (Primary) led to the Trained Infant Teachers' Certificate being discontinued in 1969, and the end of the Trained Primary Teachers' Certificate in 1969. Secondary Art and Craft students began studies at Ballarat Teachers' College in 1969 under Mr Ted Doney. In 1971 Mr D. Watson was appointed Principal. The State College of Victoria was proclaimed by Order in Council on 24 July 1973, and Ballarat Teachers' College became a constituent college of the State College of Victoria, and was known as State College of Victoria, Ballarat. By 1975 the College moved to Mount Helen as part of the Ballarat College of Advanced Education. Pre service teachers currently undertake their studies on the Mount Helen Campus of Federation University. ("Ruffians Attempted to Carry off the School Tent: A History of State Education in Ballarat", 1974, p73-4.)Blue unlined, woollen Ballarat Teachers' College blazer with embroidered pocket. The jacket had three buttons at the front although two are missing. The edges are all bound with tape including the pocket and the sleeve binding is 12cm from the cuff edge. The seam edges are either turned back and stitched or cut with pinking shears. There is a small panel on either side of the inside between the side seam and the facing which reinforces the pockets.Embroidered emblem of the Ballarat Teachers College and woven makers patch - The Myer Store for Menballarat teachers' college, blazer, wilma hall, wilma hobbs, textiles, costume, embroidery, uniform -
 Federation University Historical Collection
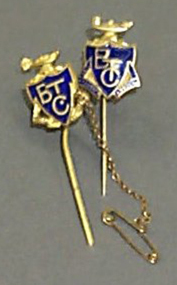
Stick Pin, Swann, Ballarat Teachers' College Stick Pins, c1948/50
Both this students stick pin and Ex Students' Association stick pin were owned and worn by Helen Veitch who was a student at the Ballarat Teachers' College in 1948. The Ballarat Teachers' College was established after the Victorian State Government and the State Education Department decided to establish two provincial teachers' colleges, at Ballarat and Bendigo. On 04 May 1926 W.H. Ellwood (Principal), Miss A. Bouchier, and Mr A.B. Jones, welcomed the first enrolment of 61 students to undertake the one year course. In 1927 the College moved to the former Ballarat East Town Hall in Barkly Street, which was remodelled for their use. It closed in December 1931 due to the Great Depression. In 1946 Ballarat Teachers' College reopened and relocated to the Dana Street State School. It was originally planned to open as a women's college, for whom the residence at 130 Victoria Street was purchased, but the decision was made to admit resident men from Ballarat. Mr T.W. Turner was appointed as Principal in 1951 and directed the introduction of a two year course for the Trained Primary Teachers' Certificate. The former one year course was terminated at the end of 1951. In 1958 the College was relocated to a custom built facility at Gillies Street, in close proximity to the Ballarat Botanical Gardens. Numbers increased with the introduction of the Trained Infant Teachers' Certificate course under the guidance of Mary Egan. With the introduction of a three year Diploma Course in 1968 accommodation became cramped. The introduction of the Diploma of Teaching (Primary) led to the Trained Infant Teachers' Certificate being discontinued in 1969, and the end of the Trained Primary Teachers' Certificate in 1969. Secondary Art and Craft students began studies at Ballarat Teachers' College in 1969 under Mr Ted Doney. In 1971 Mr D. Watson was appointed Principal. The State College of Victoria was proclaimed by Order in Council on 24 July 1973, and Ballarat Teachers' College became a constituent college of the State College of Victoria, and was known as State College of Victoria, Ballarat. By 1975 the College moved to Mount Helen as part of the Ballarat College of Advanced Education. Pre service teachers currently undertake their studies on the Mount Helen Campus of Federation University. ("Ruffians Attempted to Carry of the School Tent: A History of State Education in Ballarat", 1974, p73-4.)Two gold coloured stick pins with the Ballarat Teachers' College Shield, featuring a blue enamelled background with the letters in gold. 1). has Ex Students Assoc'n in gold with blue enamelled background at the bottom of the shield. 2). has Extra Muros in gold coloured relief at the bottom of the shield and a safety chain and pin attached.BTC shield ballarat teachers' college, stick pin, student stick pin, ex student association stick pin, helen veitch -
 Federation University Historical Collection
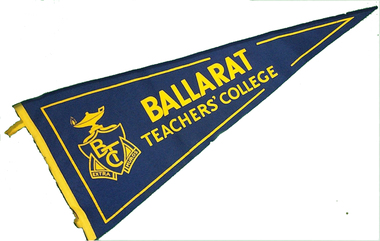
Pennant, Ballarat Teachers' College, c1948
The pennant was part of the collection owned by Helen Veitch when she was a student at the Ballarat Teachers' College in 1948. The Ballarat Teachers' College was established after the Victorian State Government and the State Education Department decided to establish two provincial teachers' colleges, at Ballarat and Bendigo. On 04 May 1926 W.H. Ellwood (Principal), Miss A. Bouchier, and Mr A.B. Jones, welcomed the first enrolment of 61 students to undertake the one year course. In 1927 the College moved to the former Ballarat East Town Hall in Barkly Street, which was remodelled for their use. It closed in December 1931 due to the Great Depression. In 1946 Ballarat Teachers' College reopened and relocated to the Dana Street State School. It was originally planned to open as a women's college, for whom the residence at 130 Victoria Street was purchased, but the decision was made to admit resident men from Ballarat. Mr T.W. Turner was appointed as Principal in 1951 and directed the introduction of a two year course for the Trained Primary Teachers' Certificate. The former one year course was terminated at the end of 1951. In 1958 the College was relocated to a custom built facility at Gillies Street, in close proximity to the Ballarat Botanical Gardens. Numbers increased with the introduction of the Trained Infant Teachers' Certificate course under the guidance of Mary Egan. With the introduction of a three year Diploma Course in 1968 accommodation became cramped. The introduction of the Diploma of Teaching (Primary) led to the Trained Infant Teachers' Certificate being discontinued in 1969, and the end of the Trained Primary Teachers' Certificate in 1969. Secondary Art and Craft students began studies at Ballarat Teachers' College in 1969 under Mr Ted Doney. In 1971 Mr D. Watson was appointed Principal. The State College of Victoria was proclaimed by Order in Council on 24 July 1973, and Ballarat Teachers' College became a constituent college of the State College of Victoria, and was known as State College of Victoria, Ballarat. By 1975 the College moved to Mount Helen as part of the Ballarat College of Advanced Education. Pre service teachers currently undertake their studies on the Mount Helen Campus of Federation University. ("Ruffians Attempted to Carry of the School Tent: A History of State Education in Ballarat", 1974, p73-4.)lBlue wool felt pennant with a yellow felt edge with 2 loops stitched to the side edge. The pennant is printed in yellow with the words 'Ballarat Teachers' College' and Coat of Arms.Printed - Ballarat Teachers' College & Coat of Armsballarat teachers' college, pennant, helen veitch -
 Federation University Historical Collection
Booklet, Ballarat Teachers' College Song Book, c1947
Students at the Ballarat Teachers' College would sing the songs in the songbook regularly. The Ballarat Teachers' College was established after the Victorian State Government and the State Education Department decided to establish two provincial teachers' colleges, at Ballarat and Bendigo. On 04 May 1926 W.H. Ellwood (Principal), Miss A. Bouchier, and Mr A.B. Jones, welcomed the first enrolment of 61 students to undertake the one year course. In 1927 the College moved to the former Ballarat East Town Hall in Barkly Street, which was remodelled for their use. It closed in December 1931 due to the Great Depression. In 1946 Ballarat Teachers' College reopened and relocated to the Dana Street State School. The building used by the Teachers' College was the original bluestone building facing Doveton Street South. It was originally planned to open as a women's college, for whom the residence at 130 Victoria Street was purchased, but the decision was made to admit resident men from Ballarat. Mr T.W. Turner was appointed as Principal in 1951 and directed the introduction of a two year course for the Trained Primary Teachers' Certificate. The former one year course was terminated at the end of 1951. In 1958 the College was relocated to a custom built facility at Gillies Street, in close proximity to the Ballarat Botanical Gardens. Numbers increased with the introduction of the Trained Infant Teachers' Certificate course under the guidance of Mary Egan. With the introduction of a three year Diploma Course in 1968 accommodation became cramped. The introduction of the Diploma of Teaching (Primary) led to the Trained Infant Teachers' Certificate being discontinued in 1969, and the end of the Trained Primary Teachers' Certificate in 1969. Secondary Art and Craft students began studies at Ballarat Teachers' College in 1969 under Mr Ted Doney. In 1971 Mr D. Watson was appointed Principal. The State College of Victoria was proclaimed by Order in Council on 24 July 1973, and Ballarat Teachers' College became a constituent college of the State College of Victoria, and was known as State College of Victoria, Ballarat. By 1975 the College moved to Mount Helen as part of the Ballarat College of Advanced Education. Pre service teachers currently undertake their studies on the Mount Helen Campus of Federation University. ("Ruffians Attempted to Carry of the School Tent: A History of State Education in Ballarat", 1974, p73-4.) 1 blue covered Ballarat Teachers' College Books. Includes a photograph of Monica Millar in the front inside cover. Inside front cover 'Monica Miller' autographs in inside book pages from the reunion on 1. 9. 1960 of BTC 1930ballarat teachers college, monica miller, extra muros, w h ellwood, entertainment, ellwood, w.h. ellwood, ballarat teachers' college -
 Federation University Historical Collection
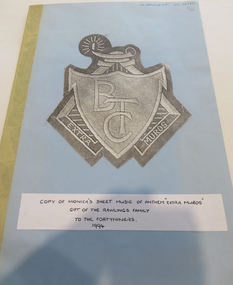
Music Book, Music for the Ballarat Teachers' College Anthem 'Extra Muros', 1994, 1994
Monica Miller was a greatly loved music lecturer at the Ballarat Teachers' College lecturer Monica Miller. The Ballarat Teachers' College was established after the Victorian State Government and the State Education Department decided to establish two provincial teachers' colleges, at Ballarat and Bendigo. On 04 May 1926 W.H. Ellwood (Principal), Miss A. Bouchier, and Mr A.B. Jones, welcomed the first enrolment of 61 students to undertake the one year course. In 1927 the College moved to the former Ballarat East Town Hall in Barkly Street, which was remodelled for their use. It closed in December 1931 due to the Great Depression. In 1946 Ballarat Teachers' College reopened and relocated to the Dana Street State School. It was originally planned to open as a women's college, for whom the residence at 130 Victoria Street was purchased, but the decision was made to admit resident men from Ballarat. Mr T.W. Turner was appointed as Principal in 1951 and directed the introduction of a two year course for the Trained Primary Teachers' Certificate. The former one year course was terminated at the end of 1951. In 1958 the College was relocated to a custom built facility at Gillies Street, in close proximity to the Ballarat Botanical Gardens. Numbers increased with the introduction of the Trained Infant Teachers' Certificate course under the guidance of Mary Egan. With the introduction of a three year Diploma Course in 1968 accommodation became cramped. The introduction of the Diploma of Teaching (Primary) led to the Trained Infant Teachers' Certificate being discontinued in 1969, and the end of the Trained Primary Teachers' Certificate in 1969. Secondary Art and Craft students began studies at Ballarat Teachers' College in 1969 under Mr Ted Doney. In 1971 Mr D. Watson was appointed Principal. The State College of Victoria was proclaimed by Order in Council on 24 July 1973, and Ballarat Teachers' College became a constituent college of the State College of Victoria, and was known as State College of Victoria, Ballarat. By 1975 the College moved to Mount Helen as part of the Ballarat College of Advanced Education. Pre service teachers currently undertake their studies on the Mount Helen Campus of Federation University. ("Ruffians Attempted to Carry of the School Tent: A History of State Education in Ballarat", 1974, p73-4.) A copy of hand written sheet music for the song 'Extra Muros' by Ballarat Teachers' College lecturer Monica Miller. Copy of Monica's sheet music of anthem 'Extra Muros'. Gift of teh Rawlings Family to the Fortyniners. 1994. ballarat, ballarat teachers college, monica miller, extra muros, music, sheet music, ballarat teachers' college -
 Federation University Historical Collection
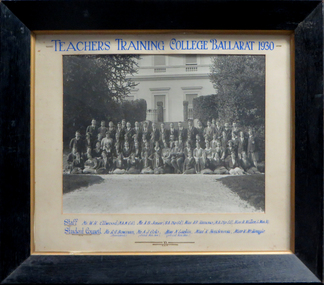
Photograph, Teachers' Training College Ballarat, 1930
The Ballarat Teachers' College was established after the Victorian State Government and the State Education Department decided to establish two provincial teachers' colleges, at Ballarat and Bendigo. On 04 May 1926 W.H. Ellwood (Principal), Miss A. Bouchier, and Mr A.B. Jones, welcomed the first enrolment of 61 students to undertake the one year course. In 1927 the College moved to the former Ballarat East Town Hall in Barkly Street, which was remodelled for their use. It closed in December 1931 due to the Great Depression. In 1946 Ballarat Teachers' College reopened and relocated to the Dana Street State School. The building used by the Teachers' College was the original bluestone building facing Doveton Street South. It was originally planned to open as a women's college, for whom the residence at 130 Victoria Street was purchased, but the decision was made to admit resident men from Ballarat. Mr T.W. Turner was appointed as Principal in 1951 and directed the introduction of a two year course for the Trained Primary Teachers' Certificate. The former one year course was terminated at the end of 1951. In 1958 the College was relocated to a custom built facility at Gillies Street, in close proximity to the Ballarat Botanical Gardens. Numbers increased with the introduction of the Trained Infant Teachers' Certificate course under the guidance of Mary Egan. With the introduction of a three year Diploma Course in 1968 accommodation became cramped. The introduction of the Diploma of Teaching (Primary) led to the Trained Infant Teachers' Certificate being discontinued in 1969, and the end of the Trained Primary Teachers' Certificate in 1969. Secondary Art and Craft students began studies at Ballarat Teachers' College in 1969 under Mr Ted Doney. In 1971 Mr D. Watson was appointed Principal. The State College of Victoria was proclaimed by Order in Council on 24 July 1973, and Ballarat Teachers' College became a constituent college of the State College of Victoria, and was known as State College of Victoria, Ballarat. By 1975 the College moved to Mount Helen as part of the Ballarat College of Advanced Education. Pre service teachers currently undertake their studies on the Mount Helen Campus of Federation University. ("Ruffians Attempted to Carry of the School Tent: A History of State Education in Ballarat", 1974, p73-4.)Framed photograph of the staff and students of the Ballarat Teachers' College taken outside the outside of the Ballarat East Town Hall. teachers training college ballarat, ballarat teachers' college, w.h. ellwood, a.b. jones, a.r. hamono, monica miller, a.j. colo, n. larkin, k. henderson, v. mckenzie, prudence hamono, ballarat east library, ballarat east town hall, r.g. bowman, univesity women -
 Bendigo Historical Society Inc.
Newspaper - LONG GULLY HISTORY GROUP COLLECTION: BENDIGO SAYS GOOD-BYE TO THE TRAMS
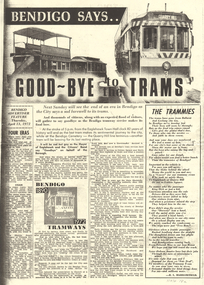
Copy (2 pages) of a Bendigo Advertiser Feature dated Thursday, April 13, 1972 titled Bendigo Says. Good-bye to the Trams. Article contains photos of trams, a photo of a conductor assisting an elderly lady with a shopping jeep and a photo of trams and people at the Alexander Fountain. The article mentions Four Eras of Trams, a poem titled 'The Trammies' by R L Harrowfield, some men who worked on the trams and tasks they did, some accidents, local identities, and some of Tom Griffiths memories.bendigo, history, long gully history group, the long gully history group - bendigo says good-bye to the trams, the electric supply company of victoria, state electricity commission of victoria, cr d e elliott, the city council, bendigo trust, sandhurst and eaglehawk tramway company, bendigo tramway company, battery trams, steam trams, electric trams, r l harrowfield, tom griffiths, baby health centre, miss tavenor's sweet shop, needle mine, the robbie burns hotel, eaglehawk wine saloon, town hall hotel, hooley's dress fabrics, kevin anstee, bert knight, bendigo curtain service, graham o'donahoo, john henderson, the english electric traction company, princess theatre, upper reserve, five lions, hercules mine, needle loop (needle mine), jim collins, arch robinson's seat, st liborius church, virginia mine, upper reserve (qeo), bendigo tram history, gibson's, blum's, powney's, view point newsagency, city offices, hopetoun hotel, ?ob & dorothy mills' concern, gillies bros pty ltd -
 Bendigo Historical Society Inc.
Newspaper - JENNY FOLEY COLLECTION: MINIATURES
Bendigo Advertiser '' The way we were'' from Monday, October 28, 2002. Miniatures: in 1960, 15 mini-debutantes, dressed in white frocks and wearing wristlet posies of pink and blue, were presented to the Bishop of Sandhurst, the Most Rev. B. D. Stewart, at St Liborius' annual children's ball in Eaglehawk Town Hall. The debs and their partners were: Patricia Hill (John Leahy), Pauline Hughes (Bradley Penno), Ann Stewart (Philip Munro), Margaret Benbow (Garry Kallismae), Marie Girvan (Norman Hall), Mary Anderson (Colin Hill), Valerie Andrew (Bernard Crameri), Dianne Crawford (Danny Dullard), Jennifer Newman (Michael Cluff), Carmel McQuillan (Robert Hall), Dorothy Wilson (Shane Metcalf), Rhonda Metcalf (Wayne Fitzgerald), Patricia Fitzpatrick (Mark Gladman), Mary Stack (John Keogh), Elizabeth McCann (Joseph Singe). The clip is in a folder.newspaper, bendigo advertiser, the way we were -
 Bendigo Historical Society Inc.
Newspaper - JENNY FOLEY COLLECTION: STARS OF THE SHOW
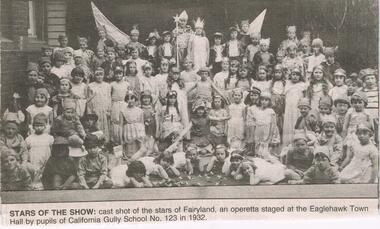
Bendigo Advertiser '' The way we were'' from 2002. Stars of the show: cast shot of the stars of Fairyland, an operetta staged at the Eaglehawk Town Hall by the pupils of California Gully School No. 123 in 1932. The clip is in a folder.newspaper, bendigo advertiser, the way we were -
 Bendigo Historical Society Inc.
Newspaper - JENNY FOLEY COLLECTION: GRAND
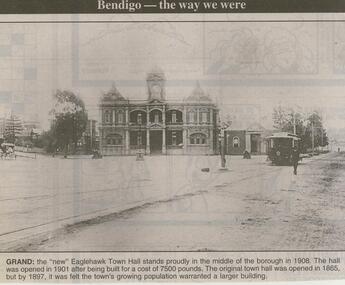
Bendigo Advertiser ''The way we were'' from 2000. Grand: the ''new'' Eaglehawk Town Hall stands proudly in the middle of the borough in 1908. The hall was opened in 1901 after being built for a cost of 7500 pounds. The original town hall was opened in 1865, but by 1897, it was felt the town's growing population warranted a larger building. The clip is in a folder.newspaper, bendigo advertiser, the way we were -
 Bendigo Historical Society Inc.
Newspaper - JENNY FOLEY COLLECTION: PALL MALL
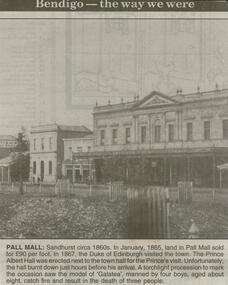
Bendigo Advertiser ''The way we were'' from 2000. Pall Mall: Sandhurst circa 1860s. In January, 1865, land in Pall Mall sold for 90 pounds per foot. In 1867, the Duke of Edinburgh visited the town. The Prince Albert Hall was erected next to the town hall for the Prince's visit. Unfortunately, the hall burnt down just hours before his arrival. A torchlight procession to mark the occasion saw the model of 'Galatea', manned by four boys, aged about eight, catch fire and result in the death of three people. The clip is in a folder.newspaper, bendigo advertiser, the way we were -
 Bendigo Historical Society Inc.
Newspaper - JENNY FOLEY COLLECTION: TOWN HALL
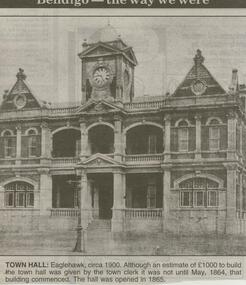
Bendigo Advertiser ''The way we were'' from 2000. Town Hall: Eaglehawk, circa 1900. Although an estimate of 1000 pounds to build the town hall was given by the town clerk it was not until May, 1864, that building commenced. The hall was opened in 1865. The clip is in a folder.newspaper, bendigo advertiser, the way we were -
 Bendigo Historical Society Inc.
Document - BENDIGO SALEYARDS COLLECTION: THE BENDIGO SALEYARDS ECONOMIC VIABILITY STUDY
140 Loose pages titled The Bendigo Saleyards Economic Viability Study. Report written by Kate Millard on behalf of the Bendigo Development Committee Inc. Contents include: Chapter 1 - Background Information, Chapter 1 - Present Operations at the Saleyards, Chapter 3 - Economic Factors, Chapter 4 - Environmental Factors, Chapter 5 - Selling Techniques, Chapter 6 - Employment Study, Management and Sundry Issues, Chapter 7 - Survey of Farmers and Saleyard Users in the 'Catchment Area', and Chapter 8 - Recommendations of the Report. Includes diagrams and maps. Recommendations printed on dark yellow paper.bendigo, council, cattle markets, bendigo saleyards collection - the bendigo saleyards economic viability study, bendigo development committee inc., kate millard, loddon campaspe planning authority, street, ryan and associates, bendigo city council, strathfieldsaye shire council, department of industry technology & resources, national library of australia, meldrum burows & partners, core wilson sayer, town planning appeals panel, ces, victorian farmers and graziers association, stock agents association, department of agriculture, department of industry technology & resources, department of conservation forests and land, cr jock comini, rca depot, wellsford rifle range, bendigo airport, bendigo field naturalists club, mr david kennedy, mr john brumby, mr john radford, neil o'keefe, bendigo east progress association, bendigo east traders, trades hall council, mr tom uren, mr frank wilkes, mr bruce reid, mr k i m wright, mr e t ebery, bendigo pastoral council of the vfga, victorian meatworks association, bendigo stock & station agents association, rutlands transport, mr don pickles, country abattoirs & wholesalers association association of victoria, meat and allied trade federation of australia, bendigo saleyards advisory committee, bendigo residents & ratepayers association, a h & n graham, mrs p unmack australian bureau of statistics, mr lloyd houlden, cr c rodda, mr jolly, mr tony milanese, dr robert carter, university of melbourne, bendigo college of tafe, t matthews, a s & r d rutland, john kerr, j talbot, g l o'sullivan, penney & lang pty ltd, graeme pickering, pickhall j w & sons, r a plant, w k schmidt, t j vick, k & j wignall, a e wright, g chapman, a j gillies, p g & m m harris, ian r hollingsworth, b kennedy, s letcher, s & d k letcher, p m llewellyn, l g mason, boyer r t, connally m f, kennedy & mortlock, nevins j p, r w johnstone, w j keith, b d kelly, notman r, pitts a j & c a, pitts mervyn l & co, rowe w o, warren k m, associated stock & station agents, dalgety farmers ltd, elders dsm estates, ellis nuttall & co, gallagher g d, hamilton real estate, mcgregor ralph h & co, mckean w & co, miller turner livestock co, vains e m & co, victorian producers, hill m j & co, bennetts meats, comell bros, davis b & d, hardwick g f & v c, penney & lang p/l, tendercut meats, northern seed supply co, bendigo fertilizers, agri business pty ltd, agrilink consulting group pty ltd, acil aust pty ltd, mcgowan & associates, chapman w c, talbot e j, mcculloch w & sons pty ltd, k v equipment, commercial egg producers assoc co-op, monsanto aust ltd, balmer bryan r, barry i j, bath l, clarke b j, treacy k m, turner j m, bendigo mower serv pty ltd, everlast concrete tank tyltd, wicks bros, canvas goods, don mcarthur, bendigo communications, transcom, emdell pty ltd, epsom pharmaceutical supplies, sandhurst fencing pty ltd, arnolds gates & fencing, r furniss, carne neville, awa & unicla, ajm refrigeration, bendigo concrete sawing service, hamilton r j, hearpes t w, j e brown, campey dr a r, fyffe j j, kangaroo flat vet clinic, ottrey k e, bendigo sprinkler installations, milnes irrigation, onga pumpshop, barastoc products, bush's produce stores, epsom produce, k m m pty ltd, bendigo grain co, eaglehawk chaff mills, grain elevators board dept, bonneys pest control, knights pest control, brown wk & l d, bendigo sewerage authority, bendigo water board, aci computer services, leham donald, a e hueffer & associates, wolmoke planners, p langley, mr ken strachan, mr evan jones, mr peter byrnes, mr wayne street, street ryan & associates -
 Bendigo Historical Society Inc.
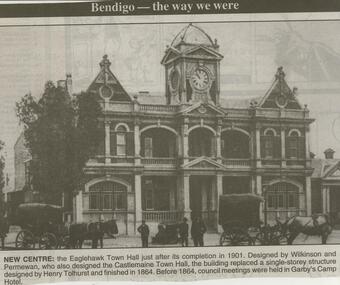
Newspaper - JENNY FOLEY COLLECTION: NEW CENTRE
Bendigo Advertiser ''The way we were'' from 2000. New centre: the Eaglehawk Town Hall just after its completion in 1901. Designed by Wilkinson and Permewan, who also designed the Castlemaine Town Hall, the building replaced a single-storey structure designed by Henry Tolhurst and finished in 1864. Before 1864, council meetings were held in Garby's Camp Hotel. The clip is in a folder.newspaper, bendigo advertiser, the way we were -
 Bendigo Historical Society Inc.
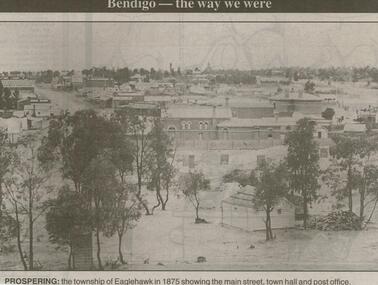
Newspaper - JENNY FOLEY COLLECTION: PROSPERING
Bendigo Advertiser ''The way we were'' from 2000. Prospering: The township of Eaglehawk in 1875 showing the main street, town hall and post office. The clip is in a folder.newspaper, bendigo advertiser, the way we were -
 Bendigo Historical Society Inc.
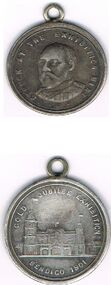
Medal - GOLD JUBILEE EXHIBITION MEDAL, 1901
Gold Jubilee Exhibition Medal: Medal struck at Exhibition Mint to commemorate the Gold Jubilee Exhibition Bendigo 1901. A small round medal has a picture of the Town Hall decorated for the event. On the back is a picture of King Edward V11 with the words inscribed 'Struck at the Exhibition Mint. Box 625numismatics, medals - commemorative, gold jubilee exhibition medal. 1901 edward v11 -
 Bendigo Historical Society Inc.
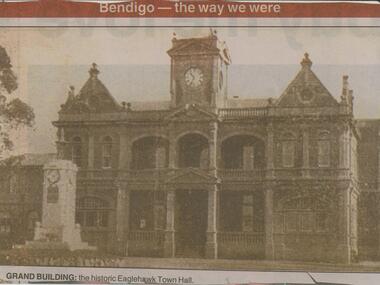
Newspaper - JENNY FOLEY COLLECTION: GRAND BUILDING
Bendigo Advertiser ''The way we were'' from 2001. Grand building: the historic Eaglehawk Town Hall. The clip is in a folder.newspaper, bendigo advertiser, the way we were -
 Bendigo Historical Society Inc.
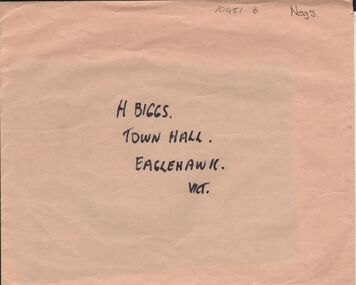
Negative - ALBERT RICHARDSON COLLECTION: EAGLEHAWK TOWNSHIP NEGATIVES
Envelope containing two negatives: on outside of envelope 'H. Biggs, Town Hall, Eaglehawk, Vict' on back 2 negatives, 1 township of Eaglehawk, 2. View from behind Eaglehawk Town Hall. Negatives not scanned.bendigo, streetscape, eaglehawk -
 Bendigo Historical Society Inc.
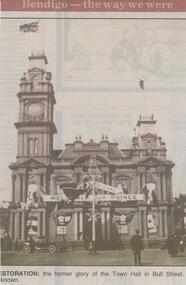
Newspaper - JENNY FOLEY COLLECTION: RESORATION
Bendigo Advertiser ''The way we were'' from 2001. Restoration: the former glory of the Town Hall in Bull Street. Date unknown. The clip is in a folder.newspaper, bendigo advertiser, the way we were -
 Bendigo Historical Society Inc.
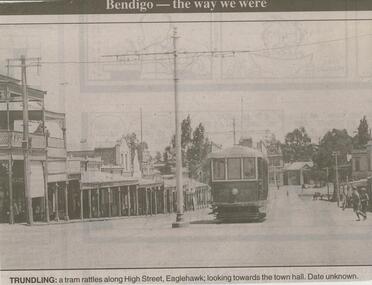
Newspaper - JENNY FOLEY COLLECTION: TRUDLING
Bendigo Advertiser ''The way we were'' from 2001. Trudling: a tram rattles along High street, Eaglehawk, looking towards the town hall. Date unknown. The clip is in a folder.newspaper, bendigo advertiser, the way we were -
 Bendigo Historical Society Inc.
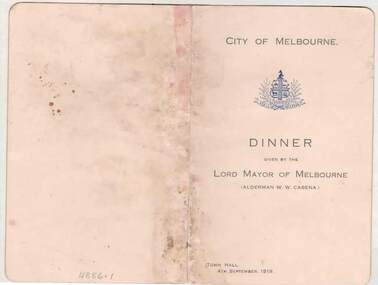
Document - MENU AND TOAST LIST - CITY OF MELBOURNE DINNER, 04/09/1919
White menu and toast list with gold edge, black printing and blue City Coat of Arms. Dinner given by the Lord Mayor of Melbourne, Alderman W. W. Cabena at the Town Hall, 4th September, 1919. Top and bottom right corners are rounded.document, menu and toast list, city of melbourne dinner, alderman w w cabena, the right hon sir ronald munro-ferguson, sir william irvine, the right hon w m hughes, the right hon sir joseph cook -
 Bendigo Historical Society Inc.
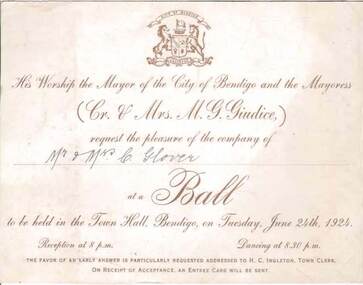
Document - GLOVER COLLECTION: INVITATION CITY OF BENDIGO BALL, MR AND MRS C. GLOVER, 25/06/1924
White invitation with gold printing. Card has City of Bendigo Coat of Arms at the top and the name of the Mayor, Cr and Mrs M. Giudice. The invitation is in the name of Mr & Mrs C Glover. The Ball was held in the Town Hall on Tuesday, June 24th, 1924. H. C. Ingleton Town Clerk. Gold printing with handwritten name. On the back is written C J Glover.document, invitations, mayoral ball, invitation, city of bendigo ball, cr & mrs m g giudice, mr & mrs c glover, h c ingleton -
 Bendigo Historical Society Inc.
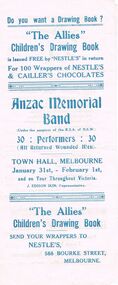
Document - LYDIA CHANCELLOR COLLECTION; ANZAC MEMORIAL BAND PROGRAMME
A white programme with blue print. On the front are the words ' Do you want a Drawing Book? 'The Allies' Children's Drawing Book is issued Free by 'Nestles' in return for 100 wrappers of Nestles & Cailler's Chocolates. ANZAC MEMORIAL BAND (under the auspices of the R.S.A. 0f N.S.W.) 30 Performers : 30 ( All returned wounded men). TOWN HALL, MELBOURNE January 31st, - February 1st., and on Tour throughout Victoria. J. Edison Ikin. Representative. 'The Allies' Children's Drawing Book. Send your wrappers to NESTLE'S 588 Bourke Street, Melbourne.' On the inside is the poem 'How Anzac was Named,' an advertisement for Bellmaine Bros. printers Melbourne and the programme itself. On the back are the words for ' The Toast! For ANZAC Day by C.H. Souter. C. 1940s -50s.program, music, anzac day, lydia chancellor, collection, event, music, entertainment, concert, australian army, anzac memorial band, bands -
 Bendigo Historical Society Inc.
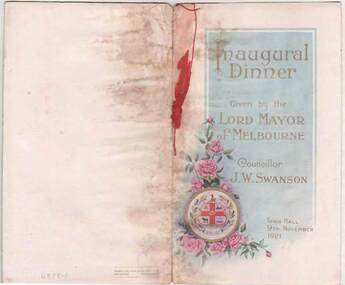
Document - PROGRAM/MENU FOR INAUGURAL DINNER LORD MAYOR OF MELBOURNE
White card with insert held with red ribbon. Gold printing on the front with blue background. In the bottom left corner is the City Coat of Arms and pink roses. On the inside is a picture of the Town Hall and the Music list, the player W. G. Price, the Menu, and Wine List. Also the Toast list and the facing page, a picture of the gardens and a bridge. The Music, Menu, Wines and Toasts lists have a pink border. On the back cover is the printer - Osboldstone & Co. Pty. Ltd. Printers. Melbourne.document, program/menu for inaugural dinner lord mayor of melbourne, cr j w swanson, w g price, sir william h irvine, cr herbert h smith, alderman sir david hennessy, commodore c t hardy, lieut.-gen sir harry chauvel