Showing 486 items
matching s. bridges
-
 Ballarat Tramway Museum
Photograph - Digital image Set of 2, Peter Bruce, "No.30 Bridge and Main", 1970s
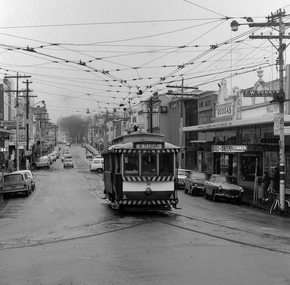
Yields information about Bridge St Ballarat and its associated shopping strip.Digital image, black and white, two images, of No. 30 in Bridge St. 4605.1 - at Stones Corner, enroute to Mt Pleasant with Rodda's, Gill & O'Keffe, C.W. Pennan, ANZ Bank and other shops in the background. Note the signal lamps on the right hand side of the photo above the tram stop sign and how the overhead was arranged at this junction. 4605.2 - at Grenville St end, with Faulls Shoes, Suttons HMV and other shops in the background. Photo taken by Peter Bruce 1970's and 1971, prior to the closure of the Ballarat tramway system. Peter's Title of image: "No.30 Bridge and Main" and "No. 30 Bridge St up end".trams, tramways, bridge st, mt pleasant, tram 30 -
 Ballarat Tramway Museum
Photograph - Digital image, 1970s
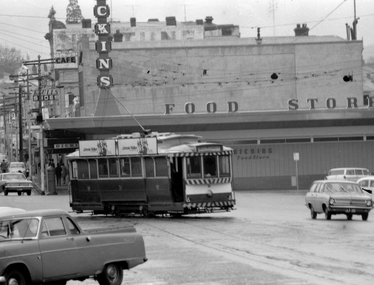
... St from Bridge St, with S E Dickins Food store... entering Sturt St from Bridge St, with S E Dickins Food store ...Yields information about the Sturt St and Grenville St intersection.Digital image, black and white, of No. 31 entering Sturt St from Bridge St, with S E Dickins Food store in the background. Tram has two Johnnie Walker Whiskey roof advertisements. Photo taken by Peter Bruce 1970's and 1971, prior to the closure of the Ballarat tramway system. Peter's Title of image: "No. 31 Dickins"trams, tramways, sturt st, bridge st, tram 31 -
 Ballarat Tramway Museum
Photograph - Digital image, Peter Bruce, "No. 41 Loading for Sebas", 1970s
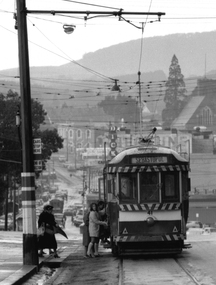
Yields information about the stop in the City on the south side of Sturt St and loading passengers.Digital image, black and white, of No. 41 loading passengers for Sebastopol at the city terminus. A number of passengers, including one carrying an umbrella are boarding. Shows the signage at the city stop. In the background is Bridge St, looking along to Victoria St and Mt Warrenheip. Another tram is in Bridge St. Photo taken by Peter Bruce 1970's and 1971, prior to the closure of the Ballarat tramway system. Peter's Title of image: "No. 41 Loading for Sebas"trams, tramways, city, sturt st, bridge st, sebastopol, tram 41 -
 Ballarat Tramway Museum
Photograph - Digital image, 1970s
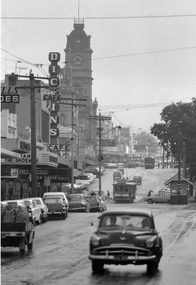
Yields information about the Sturt St. and Bridge St and some of the cars that used the street - a Plymouth.Digital image, black and white, of a scene in Bridge St looking back towards the Town Hall and Sturt St, showing a Plymouth motor vehicle, a single trucker and a bogie car in Sturt St. Shows the Dickins store, Williams the Shoeman, Roger David Store. Photo taken by Peter Bruce 1970's and 1971, prior to the closure of the Ballarat tramway system. Peter's Title of image: "Plymouth Bridge St"trams, tramways, bridge st, sturt st, town hall -
 Ballarat Tramway Museum
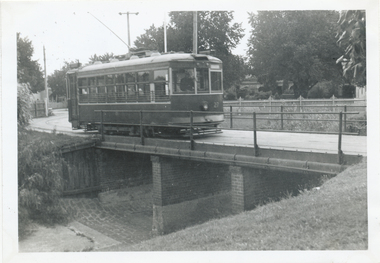
Photograph - Black & White Photograph/s, Wal Jack, 10/04/1950 12:00:00 AM
Black and White print contained within the Wal Jack Bendigo and Geelong Album, see Reg Item 5003 for more details. Photo of Bendigo Birney No. 27 crossing the bridge entering the depot 10-4-1950, Photo by Wal Jack. Printed on Ilford paper. i1 - scan of print in the album i2 - rear of image i3 - scan of negative at 3200dpi added 6/6/2020. On the rear in blue ink "SEC Bendigo Birney #27 crossing over creek near depot 10-4-50" with Wal Jack copyright stamp in the top right hand corner and the number "T210" written in.trams, tramways, bendigo, depot, birney, tram 27 -
 Ballarat Tramway Museum
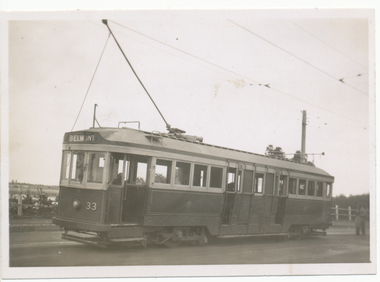
Photograph - Black & White Photograph/s, 29/03/1948 12:00:00 AM
Black and White print contained within the Wal Jack Bendigo and Geelong Album, see Reg Item 5003 for more details. Photo of Geelong No. 33 on the Barwon Bridge, with the destination of Belmont. Photo by Leon Marshall Wood, 29-3-1948. Printed on Kodak Velox paper. On rear in ink "Geelong 29.3.48, Barwon Bridge". Has the L. M Wood copyright stamp on rear.trams, tramways, geelong, belmont, tram 33 -
 Bendigo Historical Society Inc.
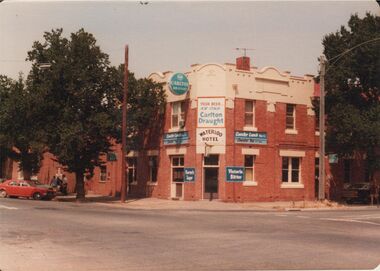
Photograph - BENDIGO HOTEL COLLECTION: WATERLOO HOTEL
Colour image: Waterloo Hotel, 170 Bridge Street, Bendigo. two storey red brick building, deep cream pediment. On front in brown print on cream background (over entry) 'Waterloo Hotel' Appears to be late 1970's?bendigo, hotel, waterloo hotel -
 Bendigo Historical Society Inc.
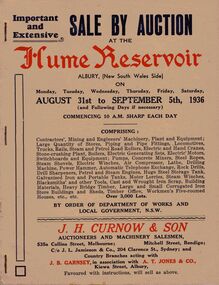
Document - IAN DYETT COLLECTION: AUCTION CATALOGUE - HUME RESERVOIR
Pale beige auction catalogue with red and dark blue printing for a sale held from the 31st August to 5th September 1936 at the Hume Reservoir, Albury, (New South Wales Side) By Order of Department of Works and Local Government, N. S. W. For sale was Contractors', Mining and Engineers' Machinery, Plant and Equipment, Stores, Locomotives, Tools, Petrol and Steam Engines, Tanks, Scrap, Building Materials, Heavy Bridge Timber, Buildings, and Workmen's Five-roomed Houses, etc. J. H. Curnow & Son were the auctioneers. Black and white photos include Lots 2065 and 2622 Kelly & Lewis Engine and Condensing Plant with G.E.C. Dynamo, Generating 300 K.W.; Lot 2018 Locomotive; Lots 2617 and 2618 Steam Road Rollers; Lot 2069 Administrative Offices; and Lot 93 Locomotives (Victorian Side).business, auctioneers, j h curnow & son pty ltd, ian dyett collection - auction catalogue - hume reservoir, department of works and local government nsw, j h curnow & son, j l jamieson & co, j b garnsey, a t jones, bolton bros pty ltd -
 Bendigo Historical Society Inc.
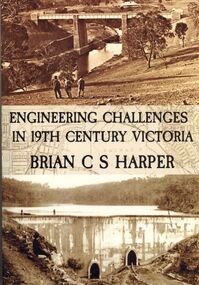
Book - ENGINEERING CHALLENGES IN 19TH CENTURY VICTORIA
Engineering Challenges in 19th Century Victoria by Brian C S Harper, or Brian Harper, soft cover 256 pages with black and white photographs. Book includes information on the construction of the Bendigo Railway Line, Coliban Water Scheme, Lower Stony Creek Dam, the Saltwater Railway Bridge, and the Taradale Railway Viaduct. Transferred to Specimen Cottage for use June 2016 Missing from Specimen Cottage. Check sale items 8.12.22Brian C. S. Harperbooks, technical, engineering -
 Ballarat Tramway Museum
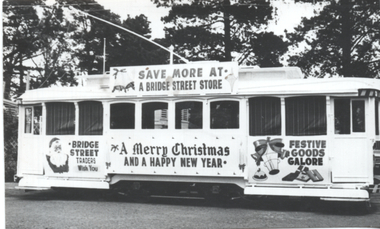
Photograph - Bridge St Traders Xmas tram 17, Dec. 1967
Black and white photograph of tram 17 decorated for Bridge St traders Christmas Tram Dec. 1967. Photographed at the SECV depot and has been trimmed for use in TMSV Running Journal Jan. 1968, photographer not named. See item 2353 for a colour photo of the tram.Yields information about the 1967 Bridge St traders Christmas tram.Black and white photograph on plain paper.has "P16A" and " S/S" in ink on the rear.trams, tramways, depot, secv, bridge st traders, christmas trams, decorated trams, tram 17 -
 Ballarat Tramway Museum
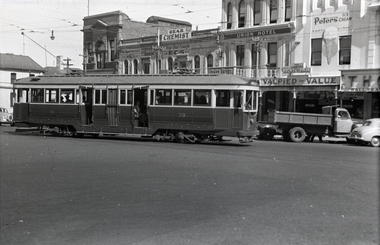
Negative, Wal Jack, mid 1950's
... the early to mid 1950's. Trams tramways Bridge St Sturt St Grenville ...Yields information about the tram services running out of Bridge St into Sturt St. during the early to mid 1950's.Negative and Digital images of the Wal Jack Ballarat Negative file of No 39 running from Bridge St into Sturt St across Grenville St. Has the Bucks Head Hotel, Sunny McK's south Delicatessen, The Spot Cafe, Gear Chemist, Union Hotel and Valpied for Value store.trams, tramways, bridge st, sturt st, grenville st, tram 39 -
 Ballarat Tramway Museum
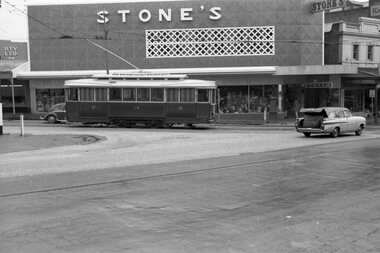
Negative, Wal Jack, 1950's
Yields information about Ballarat tram No. 18 at Stones Corner.Negative and Digital images of the Wal Jack Ballarat Negative file of No 18 at Stones Corner, in bound from Mt Pleasant. Side on view. Has the Stones clothing store in the background. Note the motor car travelling westbound, with large object in the boot. Has the boot lid open. Photo 1950's. trams, tramways, main road, stones corner, bridge st, tram 30 -
 Bendigo Historical Society Inc.
Photograph - Bendigo Business
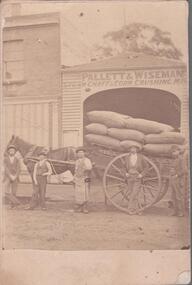
Pallett and Wiseman operated out of "Coopers Timber Yard", Bridge St., Bendigo. They operated a steam chaff and corn crushing mill. They also supplied firewood, coal and coke.Sepia coloured photograph. Five men standing in front of a horse and cart. The cart is full of sacks of some produce. A building in the background with a sign on the top "Pallett & Wiseman steam chaff & corn crushing ma... Date and location unknown. Part of the Barker"s family collection.bendigo businesses, pallett & wiseman -
 Bendigo Historical Society Inc.
Photograph - MULQUEEN FAMILY COLLECTION: FIZELLE AND MULQUEEN HEARSE CIRCA 1920'S
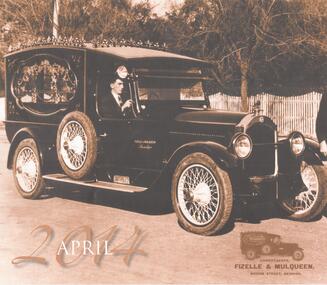
... 2014, Fizelle & Mulqueen Bendigo, Bridge Street circa 1920's.... from undertakers Fizelle & Mulqueen circa 1920's. The photo ...Sepia coloured photograph of a hearse from undertakers Fizelle & Mulqueen circa 1920's. The photo is from a calendar and is marked April 2014. On the back: from David Mulqueen calendar 2014, Fizelle & Mulqueen Bendigo, Bridge Street circa 1920's.bendigo, business, mulqueen -
 Ballarat Tramway Museum
Photograph - Black & White copy photograph, Rose Stereograph Co, "Ballarat looking east along Bridge St from Grenville St c1920s"
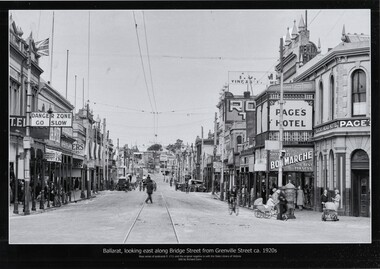
Original photograph by Rose Series Postcard P1711 with the original image held by the State Library of Victoria. Edited by Richard Conn. Purchased by the Museum.Provides information about the appearance of Bridge St during the 1920's, shows the tram tracks and overhead. Has in the view a number of road signs, shops, Super Spirit, Shell, Junction Service Station, motor vehicles, cyclists, Bon Marche, ladies with prams, a post box and Page's Bucks Head Hotel.Black & White copy photograph view A4 size, titled "Ballarat looking east along Bridge St from Grenville St c1920s", from a Rose Series Postcard, P1711. Original image held by the State Library of Victoria.ballarat, grenville st, bucks head hotel, bridge st, road signs, bon marche, tramways -
 Ballarat Tramway Museum
Photograph - Black & White Photograph/s
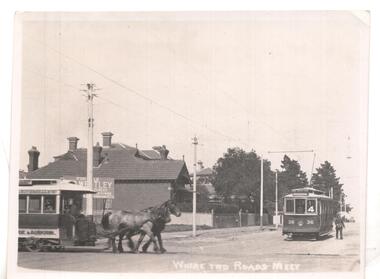
Black & white photo ex Postcard? titled 'Where two roads meet', showing a horse tram ( Hawthorn Bridge to Auburn Road (Riversdale Road) and Prahran and Malvern No. 36 on Glenferrie Road with Deepdene destination, at the intersection of Riversdale & Glenferrie Roads, Hawthorn. Corner block (SE) behind photo has a 'For Sale' sign on it, with houses in background. Now a block of shops. Tram No. 36 is an F class car, later renumbered - see p14 of Destination City, 4th edition. See also inscriptions. Questions: How horse tram number determined and date of photograph??`` Reimaged 17/7/2017 both front and back.'T101, No. 26 horse tram of Hawthorn Tramway Trust in Riversdale Road. No. 36 toastrack (enclosed cross seat) of the Prahran & Malvern Trams in Glenferrie Road, Hawthorn 1917. Horse trams ran from Auburn Road to Hawthorn Bridge and connected with the Richmond cable trams. W.Jack.'trams, tramways, pmtt, horse trams, riversdale road, glenferrie rd , tram f 36 -
 Ballarat Tramway Museum
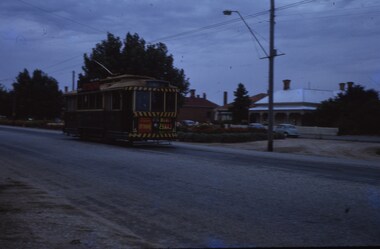
Slide - 35mm slide/s, Feb. 1963
Single truck SEC tram outward bound in Victoria St., could be 26, slide underexposed, taken just before Eureka line railway bridge, looking to southwest.'Tram Victoria St. Ballarat Feb 1963' in blue inktramways, trams, victoria st, eureka, twin lakes, tram 26 -
 Ballarat Tramway Museum
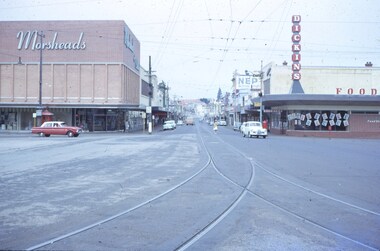
Slide - 35mm slide/s, Feb. 1963
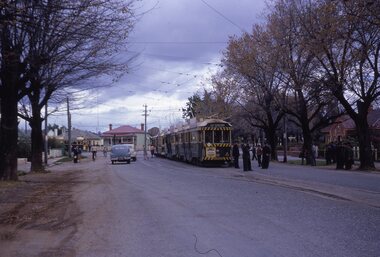
View looking down Bridge St. from east end of Sturt St. Photographer standing before junction of tracks, looking east. No trams in photo, two or three cars on the roads. With Morseheads and Dickins stores on the corner.'Ballarat Feb. 1963, Bridge St in blue inktramways, trams, bridge st., grenville st -
 Ballarat Tramway Museum
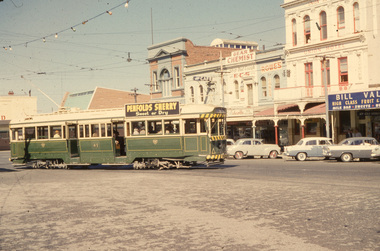
Slide - 35mm slide/s, Wal Jack, 24/03/1962 12:00:00 AM
Ballarat tram 41, turning into Sturt St from Bridge St, 24-3-1962. Tram has dash canopy lighting, Penfolds Sherry Roof ad. Many Holdens parked. South side Sturt Street buildings in background. Barrier rails have been changed over for off side running in Sturt St.'SEC Ballart, No. 41, Sturt St, 24--62' in blue inktramways, trams, ballarat, sturt st, grenville st, tram 41 -
 Ballarat Tramway Museum
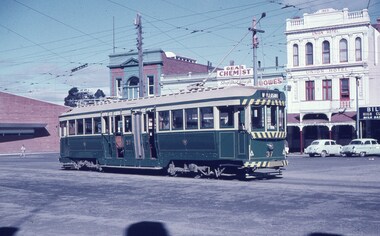
Slide - 35mm slide/s, Wal Jack, 26/08/1961 12:00:00 AM
Ballarat Tram No. 37, about to enter Bridge St, at bottom of Sturt St. hill, with Mt. Pleasant destination, 26-8-1961. Has been fitted with dash canopy lights. Has small white triangles on front dashes. In background is Union Hotel and other shops on South side of Sturt St.'SEC Ballarat No. 37, Sturt St., 26-8-61'tramways, trams, ballarat, sturt st, tram 37 -
 Ballarat Tramway Museum
Slide - 35mm slide/s, Keith Kings, 20/10/1962 12:00:00 AM
Bendigo trams, 18, 26, 29, 11 in Bridge St. Loop, with 5 in Nolan St waiting for a Bendigo tram? on 20-10-1962 as part of an ARHS tour to Bendigo. Note white convoy marker on front tram, Tram 18 showing 'RLY Station' destination. Tram 18 has 'Kohn Drinks' ad on front panel. Photo by Keith Kings.Stamped 'K.S.KIngs etc', and in blue ink 'K(k)(384), 1/250, f5.6, 20/10/62, ARHS, Convoy 'A' 5,11,29,26,18 on Bridge St.. Loop, Bendigo'tramways, trams, bendigo, north bendigo, bridge st loop, arhs, tram 18, tram 26, tram 29, tram 11, tram 5 -
 Kew Historical Society Inc
Postcard, Valentine Publishing Co Pty Ltd, New Yarra Bridge, Between Kew and Heidelberg, 1926-1930
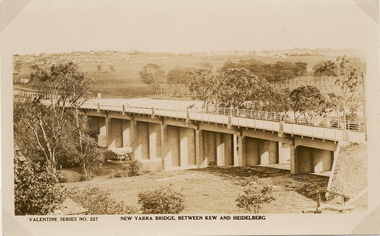
Without bridges, Kew remained cut off from the City of Melbourne, only being accessible by Punt. Private and public bridges were constructed from the 1850s, beginning with the Hawthorn Bridge linking Bridge and Burwood Roads. A bridge across the Yarra at Burke Road was created as early as 1873. Since that first wooden bridge, a number of later bridges, typically on concrete pylons have been built, in 1926 and again during the 1970s.Angle view of the new Yarra bridge [ie. The Burke Road bridge] taken from the Kew side, showing the bridge’s structure. Trees line the river’s edge. In the distance can be seen a distant line of houses stretching to the horizon. The river appears to have an S-shaped bend beyond the bridge. The postcard, No. 227, was produced by the Valentine Publishing Co. Pty Ltd., of Queen Street, Melbourne.burke road bridge - kew (vic), bridges - kew (vic) -
 Tennis Australia
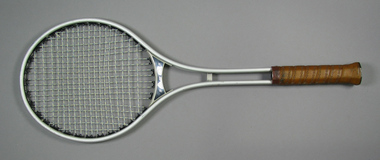
Racquet, Circa 1972
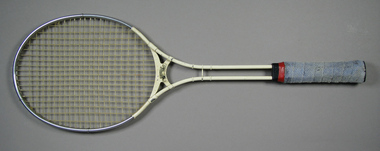
A Santor 'S Pro' model metal tennis racquet with double shaft, and metal bridge. Handle wrapped with synthetic grip tape. Black plastic butt cap and nylon strings. Manufacturer name and model name in decal stuck onto bridge. Materials: Metal, Nylon, Paint, Adhesive tape, Plastic, Cloth tape, Adhesive labeltennis -
 Tennis Australia
Racquet, Circa 1975
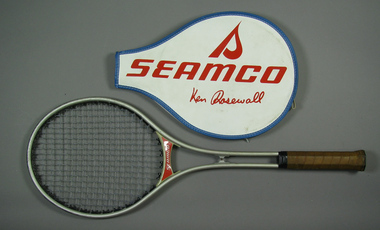
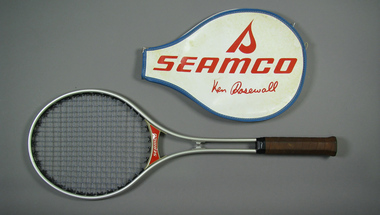
Two part object. (1) A Seamco Ken Rosewall-endorsed metal tennis racquet, with double shaft, metal shaft bridge, plastic throat bridge; black plastic shaft casing embossed with 'ACRO'; and a handle wrapped in brown leather. Black plastic butt cap with adhesive label featuring manufacturer's 'S' logo and name. Manufacturer name on label on throat bridge (reverse). Endorser name on troat bridge (obverse). (2) A white & blue vinyl racquet head cover. Printed in red on cover is maunfacturer name and endorser signature (both sides). Materials: Metal, Plastic, Adhesive label, Leather, Adhesive tape, Nylon, Vinyltennis -
 Tennis Australia
Racquet, Circa 1975
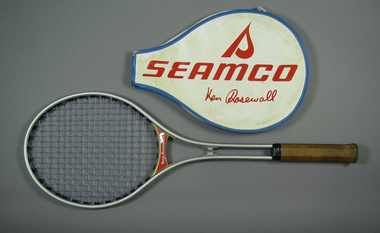
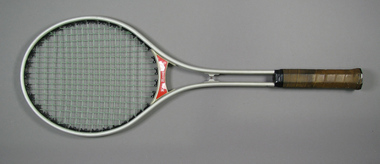
A Seamco Ken Rosewall-endorsed metal tennis racquet, with double shaft, metal shaft bridge, plastic throat bridge; black plastic shaft casing embossed with 'ACRO'; and a handle wrapped in brown leather. Black plastic butt cap with adhesive label featuring manufacturer's 'S' logo and name. Manufacturer name on label on throat bridge (reverse). Endorser name on troat bridge (obverse). Materials: Metal, Plastic, Adhesive label, Leather, Adhesive tape, Nylontennis -
 Tennis Australia
Racquet, Circa 1975
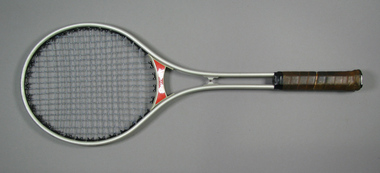
A Seamco Ken Rosewall-endorsed metal tennis racquet, with double shaft, metal shaft bridge, plastic throat bridge; black plastic shaft casing embossed with 'ACRO'; and a handle wrapped in brown leather. Black plastic butt cap with adhesive label featuring manufacturer's 'S' logo and name. Manufacturer name on label on throat bridge (reverse). Endorser name on troat bridge (obverse). Marker pen ink on butt states: '-4'. Materials: Metal, Plastic, Adhesive label, Leather, Adhesive tape, Nylontennis -
 Tennis Australia
Racquet, Circa 1971
A Seamless (Seamco) Ken Rosewall-endorsed metal tennis racquet, with double shaft, metal shaft bridge, grey plastic throat bridge; black plastic shaft casing embossed with 'ACRO'; and a handle wrapped in brown leather. Black plastic butt cap with adhesive label featuring black 'S' logo. Manufacturer name on label on throat bridge (both sides). Endorser name on sides of shaft. Materials: Metal, Plastic, Adhesive label, Leather, Adhesive tape, Nylontennis -
 Tennis Australia
Racquet, Circa 1971
A Seamless (Seamco) Ken Rosewall-endorsed metal tennis racquet, with double shaft, metal shaft bridge, grey plastic throat bridge; black plastic shaft casing embossed with 'ACRO'; and a handle wrapped in tan perforated leather. Black plastic butt cap with adhesive label featuring black 'S' logo. Manufacturer name on label on throat bridge (both sides). Endorser name on sides of shaft. Materials: Metal, Plastic, Adhesive label, Leather, Adhesive tape, Nylontennis