Showing 930 items
matching head set
-
 Kiewa Valley Historical Society
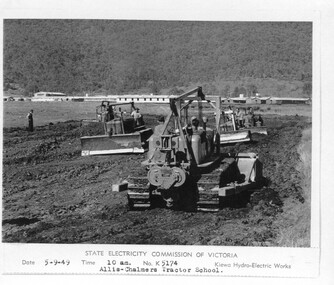
Photograph - Folder of Photographs – Photocopied set of 10 black and white photographs (pages 19 - 28) from the display folder put together by KVHS to document life on the Kiewa Valley Hydro-electric Scheme
Although the Kiewa Hydro-Electric Scheme was first proposed in 1911, construction did not commence until 1938. As part of the push to cut electricity costs and diversify supply, the Victorian Government (circa 1930) initiated the conversion from primarily brown coal supply to hydro – electricity. Field investigations during the 1940’s resulted in a new proposal for a scheme that had more than double the capacity of the 1938 scheme. The Kiewa Hydroelectric Scheme became the largest scheme of its kind in the State Of Victoria and the second largest scheme in Australia. The number of personnel involved in the planning and construction of the scheme increased dramatically. During the late 1940’s, most activity centred around the construction of the West Kiewa Power Station, Rocky Valley Reservoir, McKay Creek Power Station and the Bogong Creek Aqueduct.A common thread across all the larger hydro scheme constructions was the need for workers, both qualified and unqualified who came from around the world seeking a new life for themselves and their families. New accommodation and facilities were required for the army of workers engaged in construction in often remote and wild areas. The SEC had a high demand for timber, and set up the first of a number of sawmills at Bogong Creek in 1939 and set up the first hardwood logging in the headwaters of the Kiewa River. These new ‘towns’ such as Mt Beauty and Bogong, survived, serving the needs of operational personnel and their families, and expanding with growth of new industries. Mount Beauty, and to a lesser extent Bogong, are among these places. Large A3 size spiral bound display folder containing 21 pages of photocopied black and white photographs of various aspects of the early days of the Kiewa Valley Hydro-electric scheme including equipment, various work sites and photographs of workers and their families. 1-Allis Chalmers Tractor School 2- Gardens outside Administrative Office – Mt Beauty 3- Mt Beauty house – 1950 4-Bridge over Pretty Valley River, Bogong 5-Rocky Valley Spillway Tunnel break through 6-Ni 1 Headrace Tunnel drilling face 7-No 4 Power Station Drilling 8-Clover Dam Flood Waters 9-No1 Head Race Tunnel Portal Building 10-Clover Dam 1-STATE ELECTRICITY COMMISSION OF VICTORIA Date: 5.9.49 Time: 10amm No K5174 Kiewa Hydro Electric Works Allis Chalmers Tractor School Page number 19 2-STATE ELECTRICITY COMMISSION OF VICTORIA Date: 22.2.50 Time: 3.30pm No K5601 Kiewa Hydro Electric Works Gardens outside Administrative Office – Mt Beauty Page number 20 3-Mt Beauty house – 1950 Page number 21 4-STATE ELECTRICITY COMMISSION OF VICTORIA Date: 23.10.50 Time: 11.15am No K6331 Kiewa Hydro Electric Works Bogong-Bridge over Pretty Valley River Page number 22 5-STATE ELECTRICITY COMMISSION OF VICTORIA Date: 23.6.50 Time: 2.30pm No K5844 Kiewa Hydro Electric Works ROCKY VALLEY SPILLWAY TUNNEL BREAK THROUGH Page number 23 6-20/3/52 – No. 1 Headrace Tunnel Drilling face (E.E.E. contract) Page number 24 7-6/6/52 – No 4 Power Station – Drilling Page number 25 8-STATE ELECTRICITY COMMISSION OF VICTORIA Date: 6/6/52 Time: No K7113 Kiewa Hydro Electric Works Clover Dam Flood Waters Page number 26 9-STATE ELECTRICITY COMMISSION OF VICTORIA Date: Oct 1952 Time: No K7239 Kiewa Hydro Electric Works No. 1 HEAD RACE TUNNEL PORTAL BUILDING. Handwritten underneath – This information from Ron White-the later Principal Hydro Engineer of the SEC. Oct 1952 Location incorrect? All work on No 1 had ceased after financial crash of 1951. This photo would refer to No 4 Headrace Tunnel? Page number 27 10-STATE ELECTRICITY COMMISSION OF VICTORIA Date: Jan 1953 Time: No K7307 Kiewa Hydro Electric Works CLOVER DAM Page number 28 secv; kiewa hydro electric scheme; bogong; mt beauty; construction area -
 Kiewa Valley Historical Society
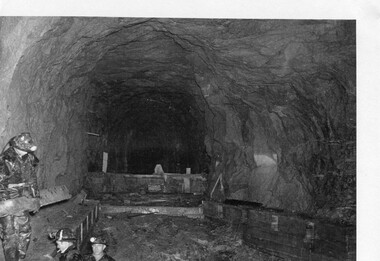
Photograph - Folder of Photographs – Photocopied set of black and white photographs (pages 49 -58) from the display folder put together by KVHS to document life on the Kiewa Valley Hydro-electric Scheme
Although the Kiewa Hydro-Electric Scheme was first proposed in 1911, construction did not commence until 1938. As part of the push to cut electricity costs and diversify supply, the Victorian Government (circa 1930) initiated the conversion from primarily brown coal supply to hydro – electricity. Field investigations during the 1940’s resulted in a new proposal for a scheme that had more than double the capacity of the 1938 scheme. The Kiewa Hydroelectric Scheme became the largest scheme of its kind in the State Of Victoria and the second largest scheme in Australia. The number of personnel involved in the planning and construction of the scheme increased dramatically. During the late 1940’s, most activity centred around the construction of the West Kiewa Power Station, Rocky Valley Reservoir, McKay Creek Power Station and the Bogong Creek Aqueduct.A common thread across all the larger hydro scheme constructions was the need for workers, both qualified and unqualified who came from around the world seeking a new life for themselves and their families. New accommodation and facilities were required for the army of workers engaged in construction in often remote and wild areas. The SEC had a high demand for timber, and set up the first of a number of sawmills at Bogong Creek in 1939 and set up the first hardwood logging in the headwaters of the Kiewa River. These new ‘towns’ such as Mt Beauty and Bogong, survived, serving the needs of operational personnel and their families, and expanding with growth of new industries. Mount Beauty, and to a lesser extent Bogong, are among these places. Large A3 size spiral bound display folder containing photocopied black and white photographs of various aspects of the early days of the Kiewa Valley Hydro-electric scheme including equipment, various work sites and photographs of workers and their families. 1-Workmen working inside one of the tunnels. 2-Workman drilling in West Kiewa Tunnel 3-Junction Dam wall construction 4&5-2B&W photographs Kiewa House residents ready to go to a ball in Mt Beauty 6-Workmen warming up in front of a fire at No 1 bench 7-Workmen being hauled in at No 4 P.S Shaft 8-No 4 Power Station – Drilling 9-Workmen eating a hot meal in the tunnel. 10-2 photographs (a)Pretty Valley camp showing workman’s huts and construction materials & (b)Worker in Langford Gap Basalt Hill Tunnel face 11-Tunnel entrance (unlabelled) with rail tracks in foreground 12- Workmen drilling at No 1 Head race tunnel-Drilling face 13- No 1 Power Station 14-Workmen at the entrance to one of the SECV tunnels under construction 1-SECV number at bottom of picture Half obscured possibly K8461 Page number 53 2-In West Kiewa Tunnel Page number 54 3- Construction of Junction Dam wall – approximately 1941 Page number 55 4&5- Residents of Kiewa House at Bogong ready to go to the ball at Mt Beauty-1946. Handwritten on a copy of the photo on opposite page Mrs Lorna Crosset filled out the names *Dad was Des Crossett – his daughter is Gael Petcopoulis Greta engaged to John broke it off. Charlie, Rosalind, Bill, Priscilla, Max Lawrence-Dad’s Boss, Mary & Max married, Mary, Kay, Gwen McPherson Mum’s boss, John McCluskey (c) At No. 5 Bench Page number 56 6- STATE ELECTRICITY COMMISSION OF VICTORIA Date: 27.2.51 Time:2.15pm No K6373 Kiewa Hydro Electric Works No. 4 P.S. Shaft – Haulage of men in buckets (b) As above Handwritten at top of photo Appendix 4 page number 57 7- STATE ELECTRICITY COMMISSION OF VICTORIA Date: 6.6.52 Time:… No K7122 Kiewa Hydro Electric Works No. 4 POWER STATION – DRILLING page number 58 8-No markings page number 59 9-(a)Handwritten under photograph Approx. 1948/49 (b) STATE ELECTRICITY COMMISSION OF VICTORIA Date: 28.10.54 Time:.. No K7860 Kiewa Hydro Electric Works LANGFORD GAP BASALT HILL TUNNEL FACE Page number 49 10-(a) No markings 11- STATE ELECTRICITY COMMISSION OF VICTORIA Date: 20.3.52 Time: No K6979 Kiewa Hydro Electric Works No. 1 HEAD RACE TUNNEL – DRILLING FACE (E.E.E. CONTRACT) ‘The Frenchies’ (E.E.E) as they were affectionately known Page number 50 12-31.5.56 No. 1 Power Station Aggregate Stock Piles. Page number 51 13&14-No markings Page number 52 secv; kiewa hydro electric scheme; bogong; mt beauty; construction area -
 Warrnambool and District Historical Society Inc.
Accessory - Matches in a Holder, Early to mid 20th Century
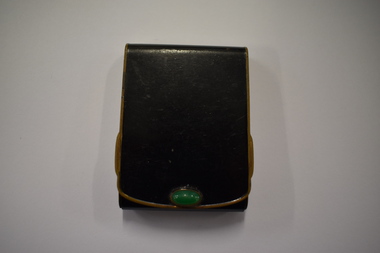
A container to hold matches was a common item to have on the person or in the home in the first half of the 20th century. The original owner of this item is unknown.This item is of minor significance and is kept for display purposes only.Rectangular shaped metal container with gold edging and an oval green stone set in the lower part of the front cover. The back cover is damaged. Inside is gold coloured lining with an insert containing a packet of matches. The matches have a black paper body and white flammable heads. There is an inserted striking mechanism vintage accessories, warrnambool history -
 Eltham District Historical Society Inc
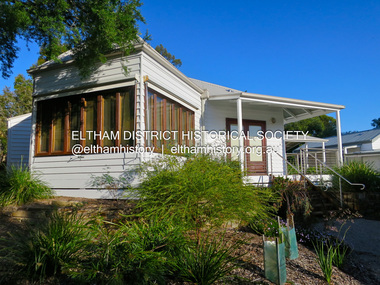
Photograph - Digital Photograph, Jim Connor, The Pavillion, Eltham Living and Learning Centre, 739 Main Road, Eltham, 29 November 2016
The Pavillion was an extension to the Eltham Living and Learning Centre which was opened 8 October, 1994 In 1857, tanner John Pearson purchased three and a half acres of land in Little Eltham, at the western end of Pitt Street, with a 70-foot frontage to Maria Street (Main Road) and stretching down to the Diamond Creek for £100. He contracted Benjamin Oliver Wallis to build house for him. Wallis, a mason by trade who originated from the Cornish village of Newlyn, migrated to Melbourne in 1853 and was shortly engaged by Richard Warren to build the Eltham Hotel, which opened in 1854. When Warren fell into financial difficulty in 1858, Wallis purchased the hotel. That same year, Pearson constructed a tannery below the house with access to the water in the Diamond Creek. When Pearson became bankrupt in 1867, Wallis similarly acquired the house from Pearson’s creditors in 1868 and lived there until his death in 1896. For some of this time the house was in the name of Wallis’s son Richard but following his death in 1888, ownership reverted to his father. It was purchased by retired teacher Richard Gilsenen in 1899. Gilsenen was made acting head teacher at the Eltham State School in 1906 following the sudden death of head teacher John Brown. In the 1950s the house was bought by retired engineer Dr Alfred Fitzpatrick and his wife Claire who made various modifications to house goats and poultry as well as structural modifications to the house. In the early 1970s, Eltham Shire Councillors Frank Maas and Don Maling proposed an extended communities’ activities program be set up and the Commonwealth Grants Commission was approached for financial assistance. In 1974 a $50,000 Commonwealth Grant was received by the Shire Council to acquire the Fitzpatrick property as part of the planning to establish an extended communities’ activities program. The Fitzpatricks moved next door and Claire taught at the new Living and Learning Centre, which began in 1975, one of the first community education centres in Victoria.jim connor collection, eltham, eltham living and learning centre, living and learning centre, pavilion -
 Eltham District Historical Society Inc
Document - Property Binder, 895 Main Road, Eltham
Folder: 895 Main Road, Eltham Contents Listing 1. Certificate of Title; Vol. 8424, Fol. 334, 5 February 1963 2. Certificate of Title; Lot 2, Plan of Subdivision No. 63242, Parish of Nillumbik, Vol. 8479, Fol. 283, 18 May 1964 (Eltham War Memorial Trust) 3. Newspaper article: Extensions to shire offices will benefit all, by Fab Calafuri, Diamond Valley News, Tuesday, July 8, 1986, p6 [Reverse side, p5, Residents rally to save dam by Helen Gillman about Peck’s Dam in Napier Street, Montmorency] 4. Office memo: Temporary Shutdown of Water Supply Shire Offices – Tuesday 9 March 1993; Anthony Guzzo, 5 March 1993 – Melbourne Water advice due to works on new library 5. Plan of Old Municipal Offices, date and creator unknown 6. Newspaper clipping: Move to convert shire office for police use, by Jodie Haythorne, Diamond Valley News, May 1995 7. Newspaper clipping: Sale of Eltham office / Removal of Question time; Nillumbik Happenings, Mountain Views, 15 May 1995 8. Newspaper clipping: Bid for TAFE campus, Mountain Views, 25 September 1995, p8 9. Newspaper clipping: Will the former Shire of Eltham offices become a TAFE college?, The Advertiser, circa September 1995 [Reverse side; Jezza! Photo of football legend Alex Jesaulenko at Watsonia RSL also Advertisement: Maternal and Child Health Centre Timetable] 10. Newspaper clipping: Eltham may get TAFE campus in shire offices, by Fiona Kaegi and Natalie Town, and Nillumbik set for rate cuts, Diamond Valley News, circa September 1995 [Reverse side; Art for hope – article about artist Damien Curtain at Hurstbridge Primary School] 11. Newspaper clipping: More talks on TAFE, The Advertiser, Tuesday, October 17, 1995, p3 – includes photos of Nillumbik Chief Commissioner Don Cordell, Box Hill College of TAFE Executive Director Andrew Jackson and Niillumbik CEO Barry Rochford; Eltham MP Wayne Phillips with Eltham Chamber of Commerce President Norm Williams and Rotary Club of Eltham President Peter Bishop; Eltham College principal John Brennan with St Helena Secondary College head Ken Cunningham and Eltham High School principal Ron Edwards. [On reverse, p4, Sorry sag of botched relations, Jock Kyme] 12. Newspaper clipping: Eltham hails TAFE take-over, by Fiona Kaegi and Council to hold regular briefings, Diamond Valley News, 18 October 1995 13. Newspaper clipping (photocopy): Why no council office at Eltham?, Mark Burns, Letters, Diamond Valley News, 18 October 1995 14. Newspaper clipping: Future of Eltham office?, Mountain Views, Monday, October 23, 1995, p8 15. Newspaper clipping: Council seeks opinions on former shire offices, by Fiona Kaegi, Diamond Valley News, 25 October 1995 16. Newspaper clipping: Shire office move, The Advertiser, December 1995 17. Newspaper clipping: Former shire offices up for sale; possibly Diamond Valley News, December 1995 18. Newspaper clipping: Agents to sell shire office, Mountain Views, Monday, December 18, 1995, p8 19. Newspaper clipping: Advertisement; Nillumbik Shire Council Proposed Sale or Lease of Eltham Municipal Offices, Diamond Valley News, 10 January 1996 20. Newspaper clipping: No Submissions on Eltham Shire Offices, Diamond Valley-Whittlesea Advertiser, 30 January 1996, p1 21. Photocopy: Minutes of Ordinary Council Meeting, 31 January 1996, 7.4 Sale or Lease of Former Eltham Municipal Offices 22. Photocopy: Letter HTW Valuers to Nillumbik Shire Council, Valuation of former Eltham Municipal Offices at $1.45 million, 31 January 1996 23. Newspaper clipping: New G’boro, Eltham places, Diamond Valley-Whittlesea Advertiser, Tuesday, March 26, 1996, p4 [on reverse, p3, ALP Faithful at Montsalvat] 24. Newspaper clipping: Legal costs a hurdle for action group, by Laeta Antonysen, Diamond Valley News, 16 April 1996 25. Photocopy (91 pages): Tender Documents for purchase of Former Eltham Shire Offices 895 Main Road, Eltham, Prepared for Nillumbik Shire Council, Maddock Lonie & Chisholm, Melbourne. Tenders close at 3.00pm on 24 April 1996 26. Newspaper clipping (Photocopy): Building’s asbestos riddle. By Fiona Kaegi, Diamond Valley News, 26 June 1996 27. Photocopy: Minutes of Ordinary Council Meeting, 26 June 1996, 11.43/96 Sale of Eltham Offices, Main Road, Eltham 28. Media Release (Photocopy of facsimile from Barry Rochford, CEO): Community Facilities in New Gateway to Eltham, 28 June 1996 29. Photocopy (A3): TPA1 – Site Plan 1:200 Proposed Convenience Centre At Main Road Eltham, Baldasso Cortese Pty Ltd Architects, Collingwood, July 1996 30. Newspaper clipping: ‘Whopper’ For Eltham?, Letters, Sigmund Jorgensen, The Advertiser, Tuesday, July 2, 1996, p3 31. Newspaper clipping: Ex-shire offices to go, by Fiona Kaegi, Diamond Valley News, 3 July 1996, p1 32. Photocopy Newspaper clipping: Unsuccessful bidders criticise sale of offices, by Fiona Kaegi, Diamond Valley News, 10 July 1996 33. Newspaper clipping: Insensitive proposal, Sue Dyet, Letters, Diamond Valley Newsm 17 July 1996 34. Photocopy: Minutes of Ordinary Council Meeting, 17 July 1996, 7.116/96 Sale of Eltham Offices, Main Road, Eltham 35. Newspaper clipping: Former shire office sale angers residents, Diamond Valley News, 30 July 1996, p3 36. Newspaper clipping: Eltham Offices Demolition, ‘You can’t demolish city hall’, The Advertiser, Tuesday, July 30, 1996, pp14-15 features photos of Eltham protestors, Thelma Barkway, Harry Gilham, Jenni Mitchell, Jock Kyme and David Essex 37. Photocopy (A3): TPA1 – Site Plan Proposed Convenience Centre, Main Road, Eltham, Graeme Bentley Landscape Architects, August 1996 38. Newspaper clipping (Photocopy): Letters; Disbelief at plans, Margaret Jennings; Lack of respect, Mike Jansz; Community opinion, Sigmund Jorgensen, Diamond Valley News, circa August 1996 39. Newspaper clipping (Photocopy): ‘There was no conflict of interest’, The Advertiser, Tuesday, August 4, 1996 40. Newspaper clipping: Chamber supports plans, by Jodie Guest, Diamond Valley News, 7 August 1996 41. Newspaper clipping (Photocopy): Letters; Adding to the price, Kelly Fitzpatrick; Area being torn apart, Jenni Bundy, Diamond Valley News, 7 August 1996 42. Newspaper clipping: Labor joins battle to save offices, by Fiona Kaegi, Diamond Valley News, (7?) August 1996 43. Newspaper clipping: Letters to the Editor; ‘Atrocious assault of commercialism’, Lois Loftus-Hills, The Advertiser, Tuesday, August 13, 1996, p9 44. Newspaper clipping: Letters; Roll up for the show, Kahn Franke; Thanks for turn-out, Margaret Jennings; Way past time, Jenni Bundy; Angry at the vandalism (continued p13 missing), Diamond Valley News, August 14, 1996, p12 45. Newspaper clipping: ‘Enough is enough’ states John Cohen; Letters to the Editor, Diamond Valley-Whittlesea Advertisers, Tuesday, August 20, 1996, p2 [Reverse, p1, Trade boost at Diamond Creek] 46. Newspaper clipping: Public viewing, Diamond Valley News, 4 September 1996, p 47. Newspaper clipping: Letters; Chiefs must resign, Gayle Blackwood; Time to have your say, Margaret Jennings; Sensible balance, Gwen Jakins; Recycling: a fine example, Grace Mitchell; Limits on site use, Stephen Clendinnen; Diamond Valley News, 4 September 1996, p4 48. Newspaper clipping: Letters; A lasting memorial, Ken and Laurel Eckersell; Stripping assets, Jack Lawson; Diamond Valley News, 4 September 1996, p29 49. Newspaper clipping: Letters; Nillumbik: in the eye of the beholder, Sigmund Jorgensen; ‘Crying inside’ over Eltham Shire office, Grace Mitchell; The Advertiser, Tuesday, September 10, 1996, 2 50. Newspaper clipping: Public Notice; Notice of an Application for Planning Permit, Dallas price Homes Pty Ltd, Diamond Valley News, 11 September 1996 51. Newspaper clipping (Photocopy): Timing was the problem: chief, by Laeta Antonysen, Diamond Valley News, 11 September 1996 52. Newspaper clipping: Letters; Architectural monstrosity, Jenni Bundy; Bargain price, Gavin Gray; Paying for road works, Sue Dyet; Diamond Valley News, 11 September 1996 [ on reverse, articles on Queen’s Guide Nicola Blay (photo) and Plenty River and Diamond Creek waterways] 53. Newspaper clipping: Eltham Hub Plans on Show, The Advertiser, Tuesday, September 17, 1996, p1 54. Newspaper clipping: Bleeding halted: Commish and Letters; Sigmund’s credibility gap, David Nolte; ‘Double standards’, Ros Harris, The Advertiser, Tuesday, September 17, 1996, p3 55. Newspaper clipping: Gateway to the future; Plans on display, public comments sought, by Laeta Antonysen, Diamond Valley News, September 18, 1996, p8 [Reverse, p7, Policy limits event signs, and, Council ‘arrogant’ on ward option: MP] 56. Newspaper clipping (Photocopy): 19 on council inquiry list, by Jodie Guest, Diamond Valley News, 18 September 1996 – about council listing 19 people who are only to be dealt with directly by CEO, Barry Rochford 57. Newspaper clipping (Photocopy): Eltham is wonderful, Sigmund Jorgensen, Letters, The Advertiser, Tuesday, September 24, 1996, p4 58. Objection to Grant of Planning Permit (Photocopy): Russell Yeoman per Eltham District Historical Society Inc. re application 960376 for petrol station, convenience shop, retail shop, etc to be issued to Dallas price Homes Pty Ltd, 25 September 1996 59. Newspaper clipping (Photocopy): Public meeting, Eltham Gateway Action Group – to discuss latest plans to develop former shire office site on Sunday 4 September 1996; publication unknown, possibly Diamond Valley News 60. Newspaper clipping: Minister orders sale probe, by Jodie Guest, Diamond Valley News, Wednesday, October 12, 1996, p1 61. Newspaper clipping: Letters; Headline could mislead, Wayne Phillips, Member for Eltham, The Advertiser, Tuesday, October 8, 1996, p3 62. Newspaper clipping: Letters; Few jobs for young, Margaret Jennings; The whole truth, Alan Ramsay, Diamond Valley News, October 9, 1996, p12 63. Newspaper clipping: Public outcry at Abbott veto with ‘reserve power’; 200 residents yell abuse as commissioners give ok to Eltham service station, The Advertiser, Tuesday, October 15, 1996, p1 64. Newspaper clipping: Letters; Eltham Hub briochure has ‘trees that are a fiction’, Lois Lofus-Hills, The Advertiser, Tuesday, October 15, 1996, p2 65. Newspaper clipping: Shrewd tactics row, by Jodie Guest, Diamond Valley News, Wednesday, October 16, 1996, p1 66. Newspaper clipping: Residents have their say on former shire offices, by Jodie Guest, and, Anger over reserve power, by Laeta Antonysen, Diamond Valley News, Wednesday, October 16, 1996, p9 67. Newspaper clipping: Office sale report will not be made public, Diamond Valley News, October 23, 1996 [Reverse, article featuring Youth development officer, Ian Patching] 68. Newspaper clipping: Letters; Happening in a hurry, Peter Dodds; Development unsuitable, Mark Burns; Vale those dreamers, Sigmund Jorgensen, Diamond Valley News, October 23, 1996, two pages unidentified 69. Newspaper clipping: Group to fight council decision on office site, by Laeta Antonysen, Diamond Valley News, October 26, 1996 – re Eltham Gateway Action Group taking Council to the Administrative Appeal Tribunal over approval of controversial development [Reverse, article on Bend of Islands place name] 70. Newspaper clipping: Three days allowed to hear objection, by John Dubois, Diamond Valley New, December 4, 1996 71. Newspaper clipping: Letters; Site traffic dangers, Frank Burgoyne; Thanks for support, Margaret Jennings, Diamond Valley News, noted in pen as 8 December 1996 though probably 11 December 1996 [Reverse, What about that link, asks council, by Natalie Town – about ring road between Greensborough and Ringwood] 72. Newspaper clipping: Minister to rule on proposal, by Fiona Kaegi, Diamond Valley News, December 18, 1996 73. Report (Photocopy, 31 pages): Convenience Centre Development Proposal: Italian Cypress at Former Eltham Shire Offices Site, Main Rd. Eltham, Graeme Butler & Associates, 1997 74. Newspaper clipping: People unite to battle project, by Fiona Kaegi, Diamond Valley News, February 19, 1997 75. Letter (Photocopy): Ms B Martin to Fiona Kaegi to be submitted for Letters to the Editor, Diamond Valley News 26 March 1996 edition 76. Letter (Photocopy): Thelma Barkway to Fiona Kaegi to be submitted for Letters to the Editor, Diamond Valley News 26 March 1996 edition 77. Newspaper clipping: Legal Battle, by Fiona Kaegi, Diamond Valley News, Wednesday, April 2, 1997 78. Newspaper clipping: Site Row Saga, by Laeta Antonysen, Diamond Valley News, Wednesday, April 9, 1997 79. Newspaper clipping: Community fears loss of heritage, by Laeta Antonysen, Diamond Valley News, April 9, 1997 80. Newspaper clipping: Debate erupts over service station plan, by Laeta Antonysen, Diamond Valley News, April 9, 1997 [Reverse, ‘No’ to rates hike proposal] 81. Newspaper clipping: Letter to the Editor; “Your front-page last week is considerable inaccurate … a surplus of $14,000 is expected at 30 June 1977.”, Robert Marshall, The Advertiser, April 28, 1997, p1 82. Newspaper clipping: $1.1m Debt Plan, by Fiona Keagi, Diamond Valley News, Wednesday, April 23, 1997, p1 and continued on p24, Shire to defer works programs 83. Newspaper clipping: Blast for Council, by Laeta Antonysen, Diamond Valley News, Wednesday, April 30, 1997, p1 and continued on p7, ‘Experts’ oppose plans for shire site. 84. Newspaper clipping: Photo – Uncertainty: the future of the former Eltham Shire office site is still to be decided by Planning Minister Rob Maclellan., Diamond Valley News, April 30, 1997 [ Reverse; Not your average convenience store, by Laeta Antonysen] 85. Newspaper clipping: Shire site decision soon, Diamond Valley News, May 28, 1997 86. Newspaper clipping: Letters to the Editor; Features to protect, Ken Eckersell, Diamond Valley News, June 4, 1997 87. Newspaper clipping: Costly bun fight over shire offices, by Laeta Antonysen, Diamond Valley News, July 2, 1997 [reverse, Montsalvat plans season of festivals, by Fiona Kaegi] 88. Newspaper clipping: Shire office shemozzle, Diamond Valley News, July 2, 1997 – provides a brief timeline of events June 1996 to April 22, 1997 89. Newspaper clipping: Law Suit Threat, by Fiona Kaegi and Laeta Antonysen, Diamond Valley News, Wednesday, July 9, 1997, p1 90. Newspaper clipping: Report rejects store plan, and, Residents with panel, Diamond Valley News, Wednesday, July 9, 1997 91. Newspaper clipping: Councillors meet Shell developer, by Laeta Antonysen, Diamond Valley News, July 30, 1997 92. Newspaper clipping: Deadline extended to allow more talks, by Fiona Kaegi, Diamond Valley News, August 8, 1997. Also Curves to stay in link road about Nillumbik’s realignment plans for Diamond Creek’s ‘windy mile’ [Reverse, Shire tightens grants scheme] 93. Newspaper clipping: $10m option for shire office site, by Laeta Antonysen, Diamond Valley News, September 10, 1997 94. Newspaper clipping: New plan for shire office site, by Laeta Antonysen, and , Council refuses to do trade with developer, Diamond Valley News, September 17, 1997, p12 [ Reverse, p11, Mixed reaction to kangaroo culling] 95. Newspaper clipping: Gateway plan review, by Laeta Antonysen, Diamond Valley News, October 22, 1997, p3 96. Newspaper clipping: Top planner calls for rethink on office site, by Jodie Guest, Diamond Valley News (includes photo of John Pizzey) 97. Newspaper clipping: Opposition offers help on planning, by Jamie Duncan, Diamond Valley News, November 5, 1997, p3 (includes photo of Opposition Leader John Brumby and Nillumbik Shire President Robert Marshall at the Eltham Gateway site) 98. Letter (Photocopy): Russell Yeoman, Secretary, Eltham District Historical SAociety to Mr B. Rochford, CEO, Nillumbik Shire Council, 15 November 1997 with specific reference to the health of the three “Shillinglaw” trees 99. Newspaper clipping: Puzzlement over delay on office site, by Laeta Antonysen, Diamond Valley News, November 19, 1997 100. Newspaper clipping: Developer pulls out, by Laeta Antonysen, Diamond Valley News, December 10, 1997, p3, and, Council uproar over officers [Reverse, p4, Final victory – announcing resignation of Jenni Mitchell as president of Etham Gateway Action Group] 101. Newspaper clipping: Letters; Asset of pride, Sigmund Jorgensen, Diamond Valley News, January 14, 1998 102. Newspaper clipping: Minister ‘no’ to plan, by Laeta Antonysen, Diamond Valley News, February 11, 1998, p3 103. Newspaper clipping: Shell shocked as Eltham planning protest is upheld, by Gabrielle Costa, date and publication unknown; possibly The Age, February 1998 104. Newspaper clipping: Land review, by Laeta Antonysen, Diamond Valley News, April 1, 1998 105. Newspaper clipping: Bid to move shire offices to new site, by Laeta Antonysen, Diamond Valley News not specifically about 895 Main Road but former Diamond Valley Shire Offices at Civic Drive, Greensborough, circa June 1998 106. Newspaper clipping: Letters; What about us?, Gayle Blackwood, Diamond Valley News, circa June 10, 1998 107. Letter (Photocopy): Sigmund Jorgensen to Kahn Franke, 1 July 1998 re advertisement and list of contributors 108. Advertisement (Photocopy): Show that democracy is not dead in Nillumbik !!!, Saturday 17 Oct. 1998 109. Newspaper clipping: Arts dream shattered, by Natalie Birch, Diamond Valley Leader, July 17, 2002, p3 – Council about to dump plans for an arts centre on former office site 110. Newspaper clipping: Letters; This site belongs to the people, John Cohen; Pro-development, Jenni Bundy, Diamond Valley Leader, May 21, 2003 111. Discussion Paper: Community Use of Site, 895 Main Road Eltham, 8 pages, Gayle Blackwood, Sue Dyet, Ken Eckersell, 25 August 2003 with supporting drafts dated August 5 and 6. 112. Newspaper clipping: Shire plan ‘sacrilegious’; Residents fight war memorial sale, by Dave Cropssthwaite, Diamond Valley Leader, Nillumbik Edition, Wednesday, August 18, 2004, p1 – about council plans to sell Eltham War memorial and former Shire Office sites 113. Newspaper clipping: Land sales to come under more debate, by Dave Crossthwaite, Diamond Valley Leader, September 15, 2004, p5 114. Newspaper clipping: Council saves ex-office site, axes club plan, Diamond Valley Leader, March 30, 2005 115. Newspaper clipping: Letters; Ask the people, John Cohen, Diamond Valley Leader, April 6, 2005, p20 116. Newspaper clipping: Shire moving for public use zoning on Eltham landmark sites, Diamond Valley Leader, October 25, 2006 117. Newspaper clipping: Letters; Consultation a sham, Carol Doherty; Civic centre excellent, Marguerite Marshall; Only Eltham counts, Carmel Jacobsen, Diamond Valley Leader, May 22, 2007 [Reverse, Disability a test for councillor (Bo Bendtsen)] 118. Newspaper clipping: Advertisement; Nillumbik Planning Scheme, Approval of Amendment C49 – rezoning of 895 and 903-907 Main Road, Diamond Valley Leader, September 5, 2007, p7 119. Newspaper clipping: Illustration; An artist’s impression of the proposed Nillumbik civic centre in Main Rd., Diamond Valley Leader, June 25, 2008 [Reverse, City link with learning – about Eltham College setting up a city campus for Year 9 students, with photo featuring principal Dr David Warner and students] 120. Newspaper clipping: Civic centre forecast withdrawn, Diamond Valley Leader, July 2, 2008 121. Letter: Nillumbik Shire Council, 5 September 2008, re Civic Future Project 122. Letter: Nillumbik Shire Council to EDHS, 5 October 2008, re Civic Future Project 123. Letter (Copy): Mrs D. Bassett-Smith to Mayor and Councillors, 17 April 2009 re former shire office site and future community use 124. Letter (Copy): Eltham District Historical Society to Bill Forrest, CEO, Nillumbik Shire Council, 1 August 2009, in support of D. Bassett-Smith letter of 17 April 2009 and response from Council, 12 August 2009 125. Newspaper clipping: Hotel mooted for site, by Brittany Shanahan, Diamond Valley Leader, July 5, 2017 126. Newspaper clipping: Letters; Fury, surprise and support for Eltham development; Re: Grand plan for Eltham’s jewel (February 7), Cath McLardy, Diamond Valley Leader, February 14, 2008, p14 [Reverse, p13, Learning from the fateful day; the devastation on that day in 2009 will always stay in Steve Warrington’s mind. He recalls the tragedy] 127. Newspaper clipping: Letters; Plan to fight council on land sell-off, Jennifer Ambrudge and others, Diamond Valley Leader, February 14, 2018, p15 – about council plan to sell off reserves and shire office site and Eltham War Memorial 128. Newspaper clipping: Plans for site urged, by Brittany Shanahan, Diamond Valley Leader, September 5, 2018 129. Newspaper clipping: Approach under fire; Council plans for historic shire site raises eyebrows, by Brittany Shanahan, Diamond Valley Leader, September 19, 2018 130. Newspaper clipping: Advertisement; Our plan for a revitalised Eltham, Nillumbik Shire Council, Diamond Valley Leader, Wednesday, October 3, 2018, p7 131. Notice: Eltham Community Town Meeting, Saturday 134th October 2018 – about council plans to sell off community reserves and assets – along with flyer for Eltham Community Action Group 132. Essay A4 18 pages: An essay addressed to the Councillors of Nillumbik Shire, October 2018 (with addendum 7 November), Andrew Lemon 133. Photocopy Marked Up Flyer: The story behind 895 and 903-907 Main Road, Eltham – the heart of Eltham’s Town Centre, with marked up comments by Eltham Community Action Group, collected 9 December 2018 134. Newspaper clipping: Calls to fix ‘outdated’ site; negotiations cease with developers amid renewed push to improve civic space at Main St. Eltham, by Anthony Plovesan, Diamond Valley Leader, May 29, 2019, p5 135. Newspaper clipping: Ex-council site flagged for hospital; Councillor suggests former Eltham headquarters would be ideal spot, by Anthony Plovesan, Diamond Valley Leader, October 30, 2019, p3 136. Concept plan: Proposal; Nillumbik Cultural Gallery with Art Cinema, Restaurant, Tourism, Preliminary Sketch Design G, Barry Pearce Architect and Designer, 8 April 2022, 8 pagesmain road, eltham, property, houses, shops, businesses, shillinglaw trees, eltham shire offices site -
 Eltham District Historical Society Inc
Photograph (item), J.H. Clark, View of Eltham from Main Road, c.1907
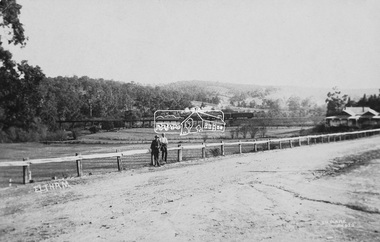
An F-class 2-4-0 steam locomotive and tender hauls a train of two open wagons, a guards van and a single Tait passenger car over the Eltham Railway Trestle Bridge, heading for Melbourne. This type of steam locomotive was replaced by the F-Class 2-4-2. The house on the right, originally known as 'Derril' was purchased in the early 1920s by Walter Ernest and Alice Miriam Gahan. On the western side of Main Road near the present-day site of Shillinglaw Cottage, they remained till about 1960 when Walter died. The house was demolished in 1968 during the widening of Main Road. In the distance beyond the trestle bridge on what would become Central Park appears to be an orchard of fruit trees. A young man with waist coat, jacket and hat stands beside an older man wearing suspenders without jacket and bare headed, sitting on the post fence. Photographer: J.H. Clark John Henry Clark was the youngest of three boys born to William Henry Clark (1823-1877) and Maria White (1843-1914). He and his brothers, William Charles Clark (1872-1945), Clement Kent Clark (1874-1912) operated a photography business (Clark Bros.) from 25 Thomas Street, Windsor near Prahran during the period c.1894 to 1914. Following death of Clement in September 1912 and their mother in 1914, the Clark Bros business appears to have dissolved, the premises demolished, and a new house was under construction in 1915. John set up business independently in 1914 operating out of 29 Moor Street, Fitzroy where he is registered in the 1914 and 1915 Electoral Rolls. By 1916 John had relocated to Eltham where he continued his practice as a photographer and took many of the early images around the district of Little Eltham. Around 1930 John changed professions and opened a small cobbler's shop in 1931 near the pond opposite Dalton Street adjacent to the Jarrold family cottage. He never married and continued his profession as a bootmaker from this little shop, maintaining a close relationship with Mrs Jarrold for the rest of their lives. His bootmaker shop remains today beside the Whitecloud cottage and is one of only three remaining shops in the area from the early 20th century. There are a couple of images of Eltham taken by Clark Bros. in the Eltham District Historical Society collection, one such example being Hunniford’s Post Office with Miss Anne Hunniford out front (EDHS_00140 - marked on the back of the print, Clark Bros., 25 Thomas St. Windsor), which would date this image between c.1894 and 1914. Other early images of Eltham taken by John Henry Clark are marked on the face “J. H. Clark Photo” and it is assumed these are dated between 1914 and 1930. It is noted that the Grant of Probate for John H Clark of Eltham South dated 5 April !957 (513/387) records his occupation as "X Photographer".derril, eltham railway trestle bridge, f-class 2-4-0 steam locomotive, gahan house, j.h. clark photo, main road, orchards, postcards, steam train, tait train, victorian railways -
 Eltham District Historical Society Inc
Photograph, Peter Pidgeon, Birch Cottage, Eltham-Yarra Glen Road, Christmas Hills, 27 September 2018, 2018
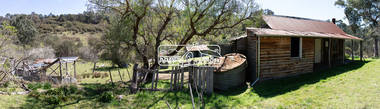
Originally built by John Hill, a shoemaker at Kangaroo Ground around 1878. In the late 1970s when our Society was the Shire of Eltham Historical Society, an offer was made to the Society regarding use of an old cottage at Christmas Hills. The cottage sat beside Watsons Creek just outside the then Shire of Eltham but following municipal restructuring it now lies within the Shire of Nillumbik. For various reasons the offer ultimately lapsed. At that time some research on the cottage was carried out for the Society by Keith Chappel as part of a larger research project that he was doing. Keith’s notes were taken from Lands Department records and showed that the property was the subject of a permissive occupancy of Crown land comprising the creek reserve. In 1903 a Miner’s Right of one acre in area was granted to Edwin Samuel Birch. In 1907 Birch applied to purchase this land but was unable to because it was part of the creek reserve. The documents show that the cottage existed at that time. Upon Birch’s death in 1932, his daughter, Honor Mary Birch was granted a permit to occupy the residence. Honor Mary Birch, known as Nora, was born 1900, the daughter of Edwin Samuel Birch and Honor (nee Young). In 1939 she married George Henry Williams (aka Henry). Honor died 8 July 1976. Her siblings were Margaret Martin (dec), Bert Birch and Brigidene Brinkkotter. In her will she gave and bequeathed “all the improvements on the land held by me at Christmas Hills under Permissive Occupancy from the Department of Land and Survey consisting of the house property thereon and all the contents of the said house to my nephew Brian Joseph Martin of Christmas Hills aforesaid farmer”. The will described the property as a four room, five square house, about 100 years old with enclosed verandah, including kitchen, combined lounge dining room, bedroom and store room; built of ‘bush slabs’ with a corrugated iron roof. A dairy had been erected in 1935. After her death, the property was acquired by the Melbourne Metropolitan Board of Works in 1978. The property is listed on the Victorian Heritage Database HO200-Hill, later Birch farm complex, 945 Eltham-Yarra Glen Road, Watsons Creek and described as: The house has a steep but simply gabled roof form clad with corrugated iron, vertical adzed hardwood slab front wall construction, split palings to the gable ends; rubble freestone chimney at one end (with added gsi flue), pole-framed Graeme Butler & Associates, 2006: 101 Shire of Nillurnbik Planning Scheme Amendment C13 Heritage Assessments verandah (rebuilt?); six-pane double-hung sash windows; T&G bead-edge boarded ledged & braced door; and paling clad rooms added at verandah ends. A slab-clad large fireplace is at the north corner of the house, with a gsi upper cladding added and an internal lining of rubble stone. The rear facade is different construction, being drop-slab, and sits beneath a rear skillion addition to the main gabled form: this may be more recent construction. The house appears to have been once set up for public display and may have been recreated in part for that purpose. Outbuildings are reached by a track along the east side of the house, including what may have been a creamery (typical standard inter-war design clad with corrugated iron and lined with 1938 Lysaght Queens Head Australia galvanised sheet iron) and a paling clad gabled out-house. Timber outbuildings of differing eras are to the north-west of the house, with pole framing and paling infill construction and Redcliffe brand corrugated iron. Post and rail (front) and split paling (rear) fence remnants line the front boundary. Pepper trees part of house yard landscape49 born digital images (includes one panoramic stitch and nine frames from drone video)birch cottage, christmas hills, early settlers, edwin samuel birch, honor mary birch, john hill, watsons creek -
 Federation University Historical Collection
Book - Book - Scrapbook, Ballarat Institute of Advanced Education: Scrapbook of newspaper cutting, Book 3, July 1970 to December 1970
Newspaper cuttings relating to Ballarat Institute of Advanced Education. These are from various newspapers and include The Age, Ballarat Courier, The Australian, The Herald. The cuttings cover the period from 7 July 1970 to 12 December 1970. Book with yellow cover, front. Spiral bound.ballarat institute of advanced education, biae, employment advertisements, early school records found, council records from 1870 - 1893, john lynch wins stock exchange award, b r hames to deliver lecture at smb, death of a w steane, biae motor cycle club visit factory, mount helen campus of the future, visit from mt isa officer, centenary celebrations, peter hensley outstanding academic record 1969, rosslynne guymer, hill climb, repco gives $5000 to smb fund, ray woolard artist, mineral discoveries in australia, centenary prediction, centenary medallion, betty archdale to deliver fourth lecture, looking back on school history, e j tippett, threshold of the second century, e j barker, stanley white awarded csiro doctoral scholarship, tertiary colleges should be community centre, post-diploma course in malting and brewing, young geologists from broken hill, technical conference for ballarat, banks' gift, exhibition by students, rare rocks for biae, teachers' college at mt helen?, technical principals' association, miss n findley of emily mcpherson college, visiting heads admire facilities at biae, advisory council sets guidelines, smb plaque unveiled, $25000 to centenary appeal, national service exemption granted, technical schools disrupted by teachers' strike, bid for fourth university, librarian course advocated, smb appeal at $221000, centenary of technical education in australia, mt helen campus opening, centenary of great achievement, governments give $100000 to institute, student from last century, mrs o ratray, biae asked to train librarians, buninyong seek talks, problems of "background" in education, exhibition by jon crawley - potter, mr thompson's comment, art sake at school, 90 engineers at biae, ray woollard -
Federation University Historical Collection
Book - Book - Scrapbook, Ballarat College of Advanced Education: Scrapbook of newspaper cutting, Book 17; February 1986 to June 1986
Newspaper cuttings relating to Ballarat College of Advanced Education. These are from various newspapers and include The Age, Ballarat Courier, The Australian, The Herald. The cuttings cover the period from 15 February 1986 to 28 June 1986. Mention of the Solutions Data Bank developed within the VIOSH program conducted at Ballarat College of Advanced Education. . Book with beige cover, front. Spiral bound.employment advertisements, application for enrolment, outline of courses, ballarat college of advanced education, bcae, dr ray watson psychologist, moneghetti for world events, musical cultural exchange, annie begonia queen, "cool burn" may save animals, wombat state forest, trainees at queen elizabeth centre, course will benefit sport, council president to national organisation, dr don watts, engineering study awards, ricky calvert, barry walker, indian brewer returns, n c mohan ram, metallurgy medal to ian mckee, political desert images, geoff bonney, jack coman, garry kinnane lecturer, biography of george johnston, mayor crebbins graduates, education for the nation, degrees for dad and daughter, paul hotchin a busy man, robert morrow mining engineer, the flab kids, speech problems rife, brett sinclair wins $1000, roderick ramsay top geology student, pro david klein revisits, merit for geologist, filipino academic at bcae, method to assess skills, student nurses meet patients, schools compete for environment awards, students set to join vsu, victorian student union, first for local sculpture students, adrian thomas, head of perfoming arts, key role in inventions, head questions government plans, saga of survival on the ice, dick richards, dr jim thyer physics lecturer, old u s defence 'secret', safety solutions data bank, dennis else -
 Bendigo Military Museum
photograph - Fortuna - 1st Year of Army Occupation in Bendigo, 1942
This is a set of 17 photographs taken during the first year of Army occupation at Fortuna, Bendigo in 1942. The photos provide an insight into the preparatory work performed on the Fortuna Villa and surrounding buildings, by the Working Party 5th Army Troop and Ordnance Training Depot, before its occupation by personnel from LHQ Cartographic Company, Royal Australian Survey Corps. The annotation on the back of Photos .9P and .10P is misspelt. The correct spelling is ‘Nell Gwynne’. The poppet head of the Central Nell Gwynne mine is still an iconic landmark in Bendigo, lying just down the road from the poppet head lookout at Victoria Hill. The Central Nell Gwynne was the premier mine of Bendigo's 1930s mining revival and is of high historical value, due to the extensive and relatively intact features which remain at the site. The annotation on the back of Photo .17P is incorrect. The location of HQ 5th Army Troop was ‘Reynard St, Coburg.’ By late 1941 as Japan extended its control throughout Indo-China, resolving the accommodation problem of AHQ Cartographic Company located in Melbourne became more urgent. The steady Japanese advance made the bombing of Melbourne no longer a remote possibility, and in accordance with a general policy of dispersion, the Deputy Chief of the General Staff, Major General Sidney Rowell instructed Major William Sarll, in the interests of security of plant and to provide against possible damage of air attack, to investigate suitable safer inland accommodation for AHQ Cartographic Company. Major Sarll inspected many properties before finding one that would meet the requirements of the Cartographic Company. In late 1941, he came to inspect Fortuna, a rambling old mansion with about fifteen acres of ground in central Bendigo. Initially there was no intention to occupy the site beyond the end of the war, although Major Sarll's report to the Director of Survey noted many advantages in moving the Company to Bendigo. Major General Rowell quickly approved the selection of Fortuna before other authorities, which were investigating the evacuation of school children, could get in ahead of the Cartographic Company. On 23 March 1942, the Commonwealth of Australia, under the provisions of the National Security Act of 1939, took possession of the house, the old battery buildings and the fifteen acres of grounds. Under Warrant Officer J. Trist’s direction, over fifty Parks and Works tradesmen completed building works necessary to accommodate the Survey Corps’ military, map making and printing requirements. The building program was still under way when the first officer, Lieutenant Ralph Westgarth, arrived in May 1942 with the advance party which received and positioned all equipment as it came up from Melbourne in semi-trailers. Once the equipment was installed the rest of the Cartographic Company completed its shift to Bendigo by 11th June 1942. The first year of the Survey Corps’ occupation of Fortuna is covered in more detail with additional historic photographs, in pages 17-22 of Valerie Lovejoy’s book 'Mapmakers of Fortuna – A history of the Army Survey Regiment’ ISBN: 0-646-42120-4.This is a set of 17 photographs taken during the first year of Army Occupation at Fortuna, Bendigo in 1942. The black and white photographs were printed on photographic paper and are part of the Army Survey Regiment’s Collection. The photographs were scanned at 300 dpi. .1) - Photo, black & white, 1942. Bendigo Parks and Works tradesmen at Fortuna. L to R: Cliff Day, Ernie Arnold, Norm? .2) - Photo, black & white, 1942. “Don” - possibly SGT Don Sutcliffe. Fortuna, Bendigo. .3) - Photo, black & white, 1942. Parks and Works tradesmen in garden at Fortuna, Bendigo. L to R: Fred & Ernie. .4) - Photo, black & white, 1942. Benny Jack Williams at Fortuna, Bendigo. Accommodation tents were erected above the lake, which later became the parade ground. .5) - Photo, black & white, 1942. Working dress - Giggle suits. Parks and Works tradesmen at Fortuna, Bendigo. L to R: Cliff and Harry on big roof. .6) - Photo, black & white, 1942. Parks and Works tradesmen at Fortuna, Bendigo. Ted on big roof. .7) - Photo, black & white, 1942. Gold crusher battery just behind Fortuna. .8) - Photo, black & white, 1942. Scene of Bendigo from Fortuna. .9) - Photo, black & white, 1942. Nell Gwynne Mine from mullock heap at Victoria Hill near Fortuna, Bendigo. .10) - Photo, black & white, 1942. Nell Gwynne Mine and crusher near Fortuna, Bendigo. .11) - Photo, black & white, 1942. Sluicing for gold at Eaglehawk. .12) - Photo, black & white, 1942. Fortuna, Bendigo taken from the far side of tennis courts. .13) - Photo, black & white, 1942. Fortuna, Bendigo & its reflection from across the lake. .14) - Photo, black & white, 1942. Fortuna, Bendigo from the fishpond. .15) - Photo, black & white, 1942. Fortuna, Bendigo. .16) - Photo, black & white, 1942. First Fortuna Football Team at unknown location. L to R: 5th Bob Wright, 11th SGT Don Sutcliffe. .17) - Photo, black & white, 1942. Working Party from 5th Army Troop and Ordnance Training Depot at Fortuna, Bendigo.Some personnel are identified. Annotated with date within photos. .1) – Annotated on back ‘Cliff, Ernie, Norm, Dec ‘42. Cliff Day - dairy farmer, plasterers’ labourer. Ernie Arnold – hard plasterer. Norm? - QM Store for tools etc. QM Store was the Stables.’ .2) - Annotated on back ‘Don. Fortuna 1942’ .3) - Annotated on back ‘Fred & Ernie. Dec 1942. Carpenters. Note the state of the gardens.’ .4) - Annotated on back ‘Benny Jack Williams Fortuna Bendigo. Tents were erected where present day parade ground is above the lake.’ .5) - Annotated on back ‘Working dress - Giggle suits. June 42. Cliff and Harry on big roof. This photo was taken as the ventilating ridge was being installed on the building housing the printing machines. The machines were installed later by civilian labour when building was complete.’ .6) - Annotated on back ‘Ted on big roof Fortuna Bendigo.’ .7) - Annotated on back ‘Gold crusher battery – Bendigo for slay heap – 1942. 12 stamp battery. Just behind Fortuna. Was working at night when the “Army” came to Bendigo. Later removed to “Coolgardie - WA. Present site of Southern Cross TV.’ .8) - Annotated on back ‘Scene of Bendigo from Fortuna. June 1942.’ .9) - Annotated on back ‘Nell Gwyne Mine from mullock heap (Victoria Hill) Sept 1942.’ .10) - Annotated on back ‘Nell Gwyne Mine and crusher September 1942.’ .11) - Annotated on back ‘Sluicing for gold at Eaglehawk. August 1942.’ .12) - Annotated on back ‘Fortuna Bendigo 1942. Taken from far side of tennis courts.’ .13) - Annotated on back ‘ “Fortuna” across the lake & reflection.’ .14) - Annotated on back ‘Fortuna from fishpond June 1942.’ .15) - Annotated on back ‘Fortuna Dec 1942.’ .16) - Annotated on front ‘X’ x2. Annotated on back First Fortuna Football Team 1942‘Bob Wright’, ‘SGT Don Sutcliffe’. .17) - Annotated ‘Working Party at Fortuna before one of the drafts’, Working Party 5th Army Troop and Ordnance Training Depot Showgrounds, now the Sportsground Bendigo’, ‘HQ of 5th Army Troop was Reynards Rd, Coburg.’royal australian survey corps, rasvy, army survey regiment, army svy regt, fortuna, asr -
 Bendigo Military Museum
Equipment - EYESHIELDS & CASE
Issued to soldiers for protection from gas attacks during World War 2. Plastic Eye Protection for use and instructions on how to react.1. Hard cardboard case, brown in colour, with green writing instructions. 2. 3 sets of tinted eye shields with purple elastic strap that goes around head in between paper.1. Cardboard case has detailed instructions on treatment of person and equipmentin relation to gas contamination and instructions on a gas attack.passchendaele barracks trust, eye protection, anti gas -
 Lara RSL Sub Branch
Booklet, Souvenir of The Camp, Australian Y.M.C.A. Series, circ 1900's
Historical photos of camp areaWW1, Camp set-outBooklet, cardboard cover, pages containing Photographs of the camp etc. Booklet containing Photographs of the camp etc. Details are 1. Y.M.C.A. The Camp. 2. The Cross & village Barford. 3. Stonehenge. 4.Main Road, through camp. 5. Main road to Camp. 6. The Camp Headquarters 4 Command. 7. Head Quarters The Camp. 8. H.Q.-Pay office. 8. H.Q, Gardening, The camp. 9. The camp, 9 Command. 10. Garden - Australia map and title. 11. The Smithy Figheldean. "The spreading chestnut tree" -
 Shepparton RSL Sub Branch
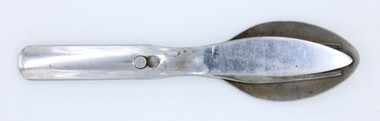
Cutlery Set, Grosvenor, c. 2000s
This cutlery set mirrors older examples held in the collection (K04) and may have been manufactured as recently as the 2000s. The manufacturer's name "GROSVENOR" and the defence symbol of the broad arrow indicates that the equipment was produced by an external company.This set is representative of a typical set issued to contemporary servicemen and women and as such, has social significance as a ubiquitous relic of service. The set has strong interpretive capacity, being able to draw on issues of equipment, food, technological shifts over time. The set also represents a shift in defence equipment production from government-run manufacturing, with the Australian Government Clothing Factory and Australian Defence Apparel etc., to outsourced contracted production with existing manufacturers such as Grosvenor, an established cutlery manufacturing company.Three piece fork, knife and spoon set held together by a flat headed pin on the knife handle which clips into corresponding holes on fork and knife handles. Handles are curved (concave) in centre. Spoon has engraving "[broad arrow] GROSVENOR 381"; Fork has engraving "[broad arrow] GROSVENOR 381"; Knife has engraving "[broad arrow] GROSVENOR 3".cutlery, knife, fork, spoon, food, equipment, ration -
 Bendigo Military Museum
Award - MEDAL SET, Post WW1
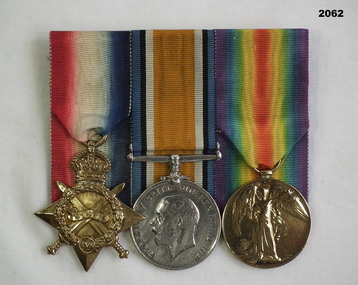
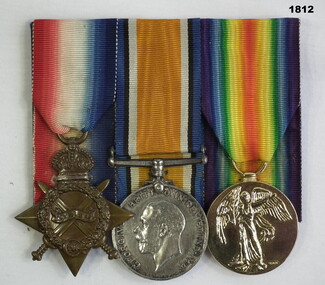
Harold Hall enlisted in G Coy 10th Batt AIF on 24.8.14. Hospital on Gallipoli with Diarrhoea 9.5.15. WIA 7.8.15 GSW to the head. Transferred to 7th Field Ambulance 25.5.16. Hospital with Diarrhoea 26.12.16. Hospital with Scabies 10.4.17. Promoted to L/Cpl 25.1.18. Returned to Australia 21.4.18 for Staff duties. Discharged from the AIF 27.8.18. Medal set, court mounted, set of (3) re H. Hall. 1. 1914-15 Star. 2. War medal 1914-19. 3. Victory medal."270 L/Cpl H Hall 10 Bn A.I.F."medals, military -
 Bendigo Military Museum
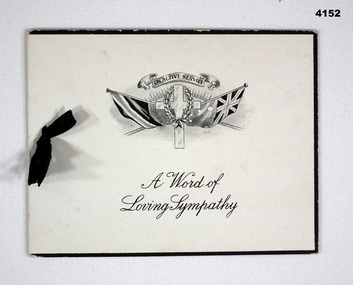
Card - SYMPATHY CARD, Atlas Press, Marlborough series, 1917
The card relates to the death of George Frederick Pierce DCM. Refer Cat No 1891P for his service, award and death WW1.Four page folding card, front cover has a set of flags with a cross and wreath, inside a short poem headed “he fought the good fight”, next page is a brief sympathy note and under a hand written note in ink, a small black ribbon holds the pages together.Front cover, “A world of sympathy”, in ink “To Mrs and Mr Pierce from Agnes.E.Staples”.sympathy, military, cards -
 Bendigo Military Museum
Award - MEDAL SET, post WWI
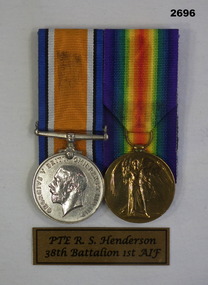
ROBERT STANLEY HENDERSON No 1961 enlisted in 2nd reinforcements 38th Batt AIF on 7.7.1916 age 20 years 1 month. Embarked for England 16.8.1916, embarked for France 22.11.1916, hospitalised 6.12.1916 with Pyrexia followed by Influenza, WIA 8.6.1917 Gassed, WIA 12.10.1917 Contusions to the Head, hospitalised 13.6.1918 with Pyrexia, hospitalised 2.3.1919 (unclear), discharged from the AIF 20.7.1919.Medals, court mounted, set of 2, re R S HENDERSON 1. War Medal 1914-19 2. Victory Medal1961 PTE R S HENDERSON 38 BN AIFmedals, military, history, passchendaele barracks trust -
 Bendigo Military Museum
Award - MEDAL SET & BADGE, 1.) post WWII; .2) 1966
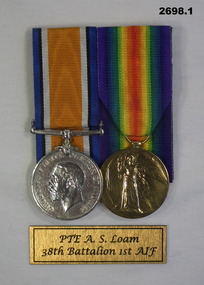
ARTHUR STEDMAN LOAM No 929 enlisted in C Coy 38th Batt AIF on 7.2.1916 age 23 years 7 months. Embarked for England 20.6.1916, hospitalised with Chill 6.10.1916 then classed Influenza, embarked for France 22.11.1916, WIA 25.5.1917 Abrasions to Head and Neck, hospitalised 28.6.1917 with Scabies, discharged from the AIF 21.9.1919. Arthur was also a “Bandsman” in the 38th Battalion and played the Cornet, as a Bandsman he would also have been a “Stretcher Bearer”.1) Medals, court mounted, set of 2, re A S LOAM 1. War Medal 1914-19 2. Victory Medal .2) Badge, circular, metal, centre has 38 BATT colour patch surrounded by laurel leaf, engraved front & rear..1) 929 PTE A S LOAM 38 BN AIF .2) Front: 38th INF BN SOCIAL CLUB LIFE MEMBER Rear: A S LOAM 30.11.66medals, military, life membership, passchendaele barracks trust -
Federation University Historical Collection
Document - Document - Letter, Ballarat Junior Technical School: Request from L Garner for application form for Alexander Rushall Memorial Scholarship, 1952
Request from Ballarat Junior Technical School for an application form for the Alexander Rushall Memorial Scholarship. Alexander Rushall established a fund to encourage boys to study for higher education. He set up a scholarship which is still available today. Males doing VCE can apply for this scholarship provided they intend going to university. It is worth $1 500 and has been available since Captain Rushall’s death in 1926.Cream page' typed ballarat junior technical school, head master, l garner, alexander rushall memorial scholarship, application form -
 Bendigo Military Museum
Award - MEDAL SET, Post WWI
A. SGT (Acting Sergeant) William John Hannan enlisted in the 16th reinforcements 6th Batt AIF on 31.1.16. Transferred to the 57th Batt 19.5.16 then to the 57th Batt 14.10.16. To hospital with Trench Feet on 28.11.16, WIA on 6.4.18 with GSW's to head and ankle. Transferred to 5th MG Batt on 17.9.18. Discharged from the AIF on 12.10.19.Medals, court mounted, set of (2) Re W.J.Hannan 1. War Medal 1914-19. 2. Victory Medal."5102 A- SGT W.J Hannan 58 BN A.I.F"numastics - medals - military, metalcraft -
 Bendigo Military Museum
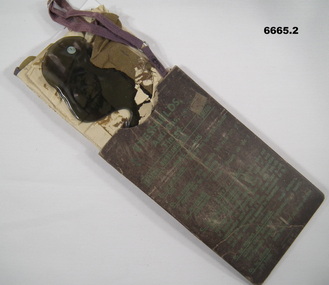
Accessory - SHAVING KIT, Possibly C.WW2
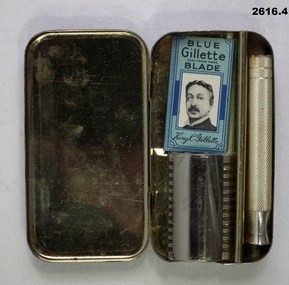
.1) Blue tin container, hinged lid with gold lettering inside. .2) Razor head. .3) Screw on handle. .4) x 1 razor blade.Gillette logo, diamond shape, black background, gold lettering. Gillette Service Set in gold lettering.toilet requisites - shaving, military history, passchendaele barracks trust -
 Bendigo Military Museum
Photograph - PHOTOGRAPH WW1, FRAMED, Post WW1
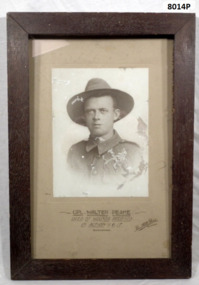
Walter Peake No 6/1688 N.Z.E.F. He was from Bendigo and enlisted in New Zealand. He was " Mentioned in Despatches". This framed photo was one of a number that originally hung in the foyer "Gallery of Honour" at the Soldiers Memorial institute Pall Mall Bendigo which is now the Bendigo Military Museum. Refer Cat No 8003. Refer also 1794, 1793.2, 1791.3, 1792P. These items came into the Museum since it opened in 1998.Portrait photo, B & W set on a cream background re W Peake. Photo is in a dark stained wood frame. Brown wooden frame - glass front - cardboard backing. Head and shoulder, sepia photo in uniform. Mounted on fawn cardboard. By Bartlett Bros, Bendigo"Cpl Walter Peake Died of Wounds received in action 1.6.1917"brsl, smirsl, n.z.e.f -
 Bendigo Military Museum
Award - MEDAL SET, Post WW1
Vincent Joseph Lannen No 482 enlisted on the 17.8.14 in D Coy 1st Batt AIF. Embarked 18.10.14 for Eygpt then Gallipoli at the landing. WIA 30.4.15 GSW to right ear, later changed to head. Returned to Australia on 8.10.15. Discharged from the AIF 23.12.15.Medals, court mounted, set of (3) re V.J.Lannen. 1. 1914-15 Star. 2. War medal 1914-19. 3. Victory Medal, replica not engraved."482 Pte V.J. Lannen 1/BN A.I.F"medals, military -
 Bendigo Military Museum
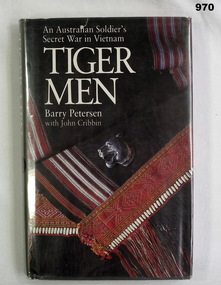
Book, Tiger Men. An Australian Soldier's Secret War in Vietnam, 1988
Hard cover, dark grey background, white print on spine. Dust cover with plastic covering, dark grey colour background, front illustrated tiger head badge, coloured cloth, back illustrated medal set in colour. 245 pages cut plain, illustrated with black and white photographs, maps Front fly leaf - handwritten blue ink - "Francis W Dean BEM:. First title page - owners stamps in black ink "Frances W Dean/"Coval"/ 20 Strickland Road, Bendigo, 3550.books-military-history, vietnam -
 Bendigo Military Museum
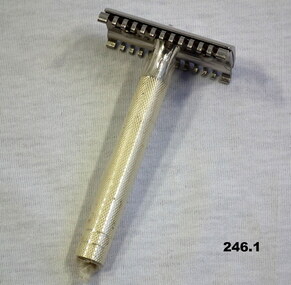
Accessory - RAZOR SET
New razor & storage tin. .1)Knurled (textured) handle encased in plastic. Chrome head for blade. .2)Navy blue painted tin with "GILLETTE" in gold. On lid: "GILLETTE/Service Set."accessories, shaving, gillette -
 Frankston RSL Sub Branch
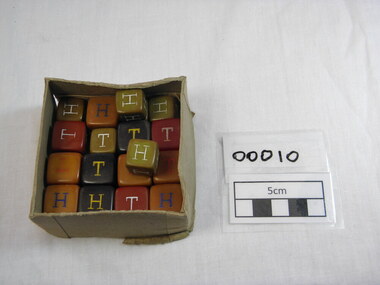
Set, Heads 'n Tails
... is marked with the three letters H and three letters T. Set, Heads ...These heads and tails dice were used by the troops to gamble in World War 1 and World War 11 and were the pre-cursur to the two-up game which was a popular form of gambling in Australia post World War 11. Later versions of two-up were played with two pennies on a board. A hand made cardboard box containing 18 cubed shaped dice of various colours and sizes. Three red with white lettering, three dark grey with yellow lettering, six orange/brown with blue and red lettering, and six brown with white lettering. Each dice is marked with the three letters H and three letters T.Each dice has H and Tworld war 1, world war 2, dice, game, two up, gambling, heads tails, heads and tails -
Frankston RSL Sub Branch
Plaque, Memorial, 1914-1918 Memorial Plaque, 1920 (estimated); Issued from 1920
This round, bronze memorial plaque was presented to the family of Private Richard Evans Harkness, service number 3426, of the 37th Battalion, (8th Reinforcements) who was killed in action at Villers-Bretonneux on 12th August, 1918. Colloquially known as 'Dead Man's Penny' or 'King's Penny', this plaque was given to the next of kin of service personnel who died on active service in WW1. 1914-1918 Memorial Plaque In early 1920 it was announced that the next-of-kin of all Australian servicemen and women whose deaths were attributable to the First World War would receive a memorial plaque and scroll "as a solace for bereavement and as a memento". The memorial plaques were not uniquely Australian. In fact they were designed and produced in Britain and issued to commemorate all those who died as a result of war service from within the British Commonwealth. The idea for the plaques was originally conceived mid-way through the war. In 1917 a competition was announced to obtain a suitable design and 800 entries were eventually received. The winner, Mr. E. Carter Preston of Liverpool, England, was chosen in 1918. He was awarded a prize of 250 pounds. Mr Manning Pike directed the manufacture of the memorial plaques at the Memorial Plaque Factory set up at Acton, London. Some later plaques were also made at the Woolwich Arsenal. The cost of manufacturing so many plaques must have been considerable. Each plaque had the name of the soldier commemorated individually embossed (some were engraved) as part of the design. The full name was given without any indication of rank or honours to show the equality of sacrifice of all those who had lost their lives. The scroll designed to accompany the plaques was of thick paper, headed by the royal coat-of-arms, and bore the following message: "He whom this scroll commemorates was numbered among those who, at the call of King and Country, left all that was dear to them, endured hardness, faced danger, and finally passed out of the sight of men by the path of duty and self-sacrifice, giving up their own lives that others might live in freedom. Let those that come after see that his name is not forgotten". Underneath the message the serviceman or woman’s name, rank, honours and unit were written by hand in red ink. Because of the late arrival in Australia of the plaques many scrolls were sent out separately. A message from the King, "I join with my grateful people in sending you this memorial of a brave life given for others in the Great War", was included with the scroll. The first plaques were distributed in Australia in 1922. Each plaque was sent out from Base Records Office at Victoria Barracks in Melbourne by second-class mail. Approximately 60,000 plaques were issued in Australia. Families of deceased members of the Royal Australian Navy and the Australian Army Nursing Service also received plaques and scrolls This plaque is significant because it commemorates the death of an Australian soldier on active service in World War 1. It is representative of some 60,000 issued to next of kin of soldiers killed in World War 1. Although Richard Harness was living at 52 Victoria Street, Abbotsford when enlisted, together with a scroll from the King, it was donated by a Frankston Family.This round, bronze memorial plaque was presented to the family of Australian Army private Richard Evans Harkness, service number 03426, of the 37th battalion, 8th re-inforcement. Harkness was killed in action on 12th August, 1918, near the French village of Proyart, during the 3rd Division's advance along the Somme Valley. further details can be found here: https://www.awm.gov.au/collection/U51477 Colloquially known as 'Dead Man's Penny' or 'King's Penny', these plaques were awarded to the next of kin of service personnel who died on active service during WW1. refer to link for further information : http://www.awm.gov.au/encyclopedia/memorial_scroll/plaque.aspAround the edge are the words 'HE DIED FOR FREEDOM AND HONOUR' On the righthand side of the plaque is the name of the soldier, in this case Richard Evans Harkness.commemorative, memorial, plaque, dead, man s, penny, king s, richard, evans, harkness -
 Frankston RSL Sub Branch
Plaque, Memorial, c. 1919
Originally would have been issued with a scroll & letter from the King but neither with plaque. 1914-1918 Memorial Plaque In early 1920 it was announced that the next-of-kin of all Australian servicemen and women whose deaths were attributable to the First World War would receive a memorial plaque and scroll "as a solace for bereavement and as a memento". The memorial plaques were not uniquely Australian. In fact they were designed and produced in Britain and issued to commemorate all those who died as a result of war service from within the British Commonwealth. The idea for the plaques was originally conceived mid-way through the war. In 1917 a competition was announced to obtain a suitable design and 800 entries were eventually received. The winner, Mr. E. Carter Preston of Liverpool, England, was chosen in 1918. He was awarded a prize of 250 pounds. Mr Manning Pike directed the manufacture of the memorial plaques at the Memorial Plaque Factory set up at Acton, London. Some later plaques were also made at the Woolwich Arsenal. The cost of manufacturing so many plaques must have been considerable. Each plaque had the name of the soldier commemorated individually embossed (some were engraved) as part of the design. The full name was given without any indication of rank or honours to show the equality of sacrifice of all those who had lost their lives. The scroll designed to accompany the plaques was of thick paper, headed by the royal coat-of-arms, and bore the following message: "He whom this scroll commemorates was numbered among those who, at the call of King and Country, left all that was dear to them, endured hardness, faced danger, and finally passed out of the sight of men by the path of duty and self-sacrifice, giving up their own lives that others might live in freedom. Let those that come after see that his name is not forgotten". Underneath the message the serviceman or woman’s name, rank, honours and unit were written by hand in red ink. Because of the late arrival in Australia of the plaques many scrolls were sent out separately. A message from the King, "I join with my grateful people in sending you this memorial of a brave life given for others in the Great War", was included with the scroll. The first plaques were distributed in Australia in 1922. Each plaque was sent out from Base Records Office at Victoria Barracks in Melbourne by second-class mail. Approximately 60,000 plaques were issued in Australia. Families of deceased members of the Royal Australian Navy and the Australian Army Nursing Service also received plaques and scrolls Bronze Memorial Plaque 1914-1918 for 4876 Pte. Harry Milne , 46 Battalion KIA 10/5/1918, In a cardboard square envelope. http://www.awm.gov.au/research/people/roll_of_honour/person.asp?p=493414Embossed around edge of plaque "HE DIED FOR FREEDOM AND HONOVR" Name of serviceman embossed on plaque right of centre "HARRY MILNE"ww1, dead mans penny, kings penny, memorial plaque -
Frankston RSL Sub Branch
Medal Set (set of 3)
Thomas Richard Cook Service number: 1732 Rank: Private Roll title: 1 Infantry Battalion - 1 to 8 Reinforcements (December 1914 - August 1915) Conflict: First World War, 1914-1918 Date of embarkation: 10 April 1915 Place of embarkation: Sydney Ship embarked on: HMAT Argyllshire Ship number: A8 Set of WW1 medals issued to T. R. Cook, note DCM + MM not included. 1) The 1914-1915 Star. Awarded for service on the establishment of a ship or unit in a theatre of war. A member awarded the 1914 Star could not be awarded the 1914-15 Star (this award). 2) British War Medal. Awarded for service as follows: • Navy - for 28 days mobilised service or to those who lost their lives in active operations before completing that period, between 5 August 1914 and 11 November 1918. • Army and Air Force - entry into a theatre of war on duty, or who left places of residence and rendered approved overseas service between 5 August 1914 and 11 November 1918. • Mercantile Marine - at least six months service between 5 August 1914 and 11 November 1918. 3) The Victory medal. Awarded for service as follows: • Navy - those who were mobilised and rendered approved service either at sea between 5 August 1914 and 11 November 1918 or on the establishment of a unit within a theatre of military operations. • Army - those who served on the establishment of a unit in a theatre of war. • Air Force - those who served on the establishment of a unit in a theatre of war outside the UK, served with an operational unit in the UK or overseas and had been actively engaged against the enemy, been employed in flying new aircraft to France or served on the complement of aircraft-carrying ships. A member Mentioned in Dispatches for service during World War 1 wears a bronze oak leaf on the ribbon. Only one emblem is worn no matter how many times a member may have been 'mentioned' 1) 1914-15 Star: Star with crown on top, with crossed swords, embossed with "1914-15" on obverse side, "1768/ Gnr T R Cook/ 1/Bn. A.I.F." 2)King George head and mounted warrioir on obverse. 3)Winged Brittania and obverse "The Great/war for/civilisation/1914-1919"medals, 1914 15 star, british war medal, victory medal, ww1 medals -
Frankston RSL Sub Branch
Plaque, Memorial
1914-1918 Memorial Plaque In early 1920 it was announced that the next-of-kin of all Australian servicemen and women whose deaths were attributable to the First World War would receive a memorial plaque and scroll "as a solace for bereavement and as a memento". The memorial plaques were not uniquely Australian. In fact they were designed and produced in Britain and issued to commemorate all those who died as a result of war service from within the British Commonwealth. The idea for the plaques was originally conceived mid-way through the war. In 1917 a competition was announced to obtain a suitable design and 800 entries were eventually received. The winner, Mr. E. Carter Preston of Liverpool, England, was chosen in 1918. He was awarded a prize of 250 pounds. Mr Manning Pike directed the manufacture of the memorial plaques at the Memorial Plaque Factory set up at Acton, London. Some later plaques were also made at the Woolwich Arsenal. The cost of manufacturing so many plaques must have been considerable. Each plaque had the name of the soldier commemorated individually embossed (some were engraved) as part of the design. The full name was given without any indication of rank or honours to show the equality of sacrifice of all those who had lost their lives. The scroll designed to accompany the plaques was of thick paper, headed by the royal coat-of-arms, and bore the following message: "He whom this scroll commemorates was numbered among those who, at the call of King and Country, left all that was dear to them, endured hardness, faced danger, and finally passed out of the sight of men by the path of duty and self-sacrifice, giving up their own lives that others might live in freedom. Let those that come after see that his name is not forgotten". Underneath the message the serviceman or woman’s name, rank, honours and unit were written by hand in red ink. Because of the late arrival in Australia of the plaques many scrolls were sent out separately. A message from the King, "I join with my grateful people in sending you this memorial of a brave life given for others in the Great War", was included with the scroll. The first plaques were distributed in Australia in 1922. Each plaque was sent out from Base Records Office at Victoria Barracks in Melbourne by second-class mail. Approximately 60,000 plaques were issued in Australia. Families of deceased members of the Royal Australian Navy and the Australian Army Nursing Service also received plaques and scrolls First World War Memorial Plaque, bronze, in recognition of Private Sydney Frederick TURNER, from C Company, 9 Battalion who was KIA at Pozieres on 25 July, 1916. it is housed in a wooden surround with pattern embossed in the margins with a liking of the rising sun at the top. He is recorded on the Villers-Bretonneux Memorial and is listed with an Australian Red Cross Society Wounded and Missing Enquiry Bureau File, a copy of which is attached.Embossed around the edge of the plaque "HE DIED FOR FREEDOM AND HONOVR". The name of the serviceman is embossed on the plaque, right of centre, SYDNEY FREDERICK TURNER -
Frankston RSL Sub Branch
Collection, A. E. Bolger
1914-1918 Memorial Plaque In early 1920 it was announced that the next-of-kin of all Australian servicemen and women whose deaths were attributable to the First World War would receive a memorial plaque and scroll "as a solace for bereavement and as a memento". The memorial plaques were not uniquely Australian. In fact they were designed and produced in Britain and issued to commemorate all those who died as a result of war service from within the British Commonwealth. The idea for the plaques was originally conceived mid-way through the war. In 1917 a competition was announced to obtain a suitable design and 800 entries were eventually received. The winner, Mr. E. Carter Preston of Liverpool, England, was chosen in 1918. He was awarded a prize of 250 pounds. Mr Manning Pike directed the manufacture of the memorial plaques at the Memorial Plaque Factory set up at Acton, London. Some later plaques were also made at the Woolwich Arsenal. The cost of manufacturing so many plaques must have been considerable. Each plaque had the name of the soldier commemorated individually embossed (some were engraved) as part of the design. The full name was given without any indication of rank or honours to show the equality of sacrifice of all those who had lost their lives. The scroll designed to accompany the plaques was of thick paper, headed by the royal coat-of-arms, and bore the following message: "He whom this scroll commemorates was numbered among those who, at the call of King and Country, left all that was dear to them, endured hardness, faced danger, and finally passed out of the sight of men by the path of duty and self-sacrifice, giving up their own lives that others might live in freedom. Let those that come after see that his name is not forgotten". Underneath the message the serviceman or woman’s name, rank, honours and unit were written by hand in red ink. Because of the late arrival in Australia of the plaques many scrolls were sent out separately. A message from the King, "I join with my grateful people in sending you this memorial of a brave life given for others in the Great War", was included with the scroll. The first plaques were distributed in Australia in 1922. Each plaque was sent out from Base Records Office at Victoria Barracks in Melbourne by second-class mail. Approximately 60,000 plaques were issued in Australia. Families of deceased members of the Royal Australian Navy and the Australian Army Nursing Service also received plaques and scrolls Collection of items relating to the death of Private Arthur Ernest Bolger, service number 01338, 14th Battalion, Australian Imperial Forces, who was killed in action at Gallipoli on 27th April, 1915. Private Bolger was from Victoria and was recorded as being the first Frankston serviceman to be killed in the ANZAC landing at Gallipoli. For more information refer: < > see items 00014.1 and 00014.2