Showing 13466 items
matching on-off
-
 Federation University Historical Collection
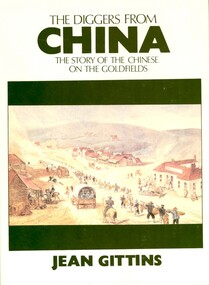
Book, Jean Gittins, The Diggers from China: the story of the Chinese on the goldfields, 1981, 1981
... The Diggers from China: the story of the Chinese on the ...Soft covered book called 'the Diggers from Chine: the Story of the Chinese on the goldfields'. The book is 148 pages and contents include the Celestial empire, the journey, Mountains of gold, Off to the Diggings, Toil and Strife, the way they lived. Appendix A is the report submitted to the Victorian Parliament by the Select committee on the Subject of Chinese Immigration in 1857.chinese, goldfield, lambing flat, immigration, mining, gold, geoffrey blainey -
 Melbourne Tram Museum
Pamphlet, Yarra Trams, "Getting around safely on trams", May. 2012
... "Getting around safely on trams" ...Full colour pamphlet, DL folded, titled "Getting around safely on trams", has a person sitting on a rhino, and holding onto a "strap hanger" or safety handles. Gives advice for used the tram from hailing, travelling and getting off, notes re tram driver and being part of the tram community.trams, tramways, yarra trams, rhinos, passengers, safety -
 Tatura Irrigation & Wartime Camps Museum
Book, Soldiering On, 1942
... Soldiering On ...The stories were contributed by members of the Australian Army. They had been prepared in the field in brief hours off duty, often by the flickering light of a hurricane lamp in a black-out camp and sometimes within hearing of the front-line guns.Red hard cover with beige printing on front cover and spine. Text, black and white and coloured sketches, pictures and mapsww1, books, history, local -
![Plan, Improvements on the Camp Reserve Ballarat, 1870, 26/4/1870 (exact); Traced by Henry [Mornes?], district surveyor, on the above date](/media/collectors/4f729f6797f83e0308601707/items/4f72a4fa97f83e0308602508/item-media/59b79d3921ea680200c6b8a7/item-fit-380x285.jpg) Federation University Historical Collection
Federation University Historical CollectionPlan, Improvements on the Camp Reserve Ballarat, 1870, 26/4/1870 (exact); Traced by Henry [Mornes?], district surveyor, on the above date
... Improvements on the Camp Reserve Ballarat, 1870... surveyor, on the above date ...The Ballarat Camp housed the Goldfields administrators. It was from this site that the troopers left on the morning of 3 December 1854 to attack the Eureka Stockade. Much of the area shown in on the west side of Camp Street is now used by the Federation University Arts Academy.Hand-drawn plan on white linen showing the camp reserve in what is now known Ballarat's Camp Street. The plan shows allotments in an area bounded by Mair, Sturt and Lydiard Streets. The plan has colours indicating wooden buildings, stone buildings, brick buildings, Wood & zinc buildings, and wood & brick buildings.ballarat, camp street, horace walker, henry mornes, goldfields architecture, reserve for public, buildings, goldfields administration, eureka stockade -
 Queenscliffe Maritime Museum
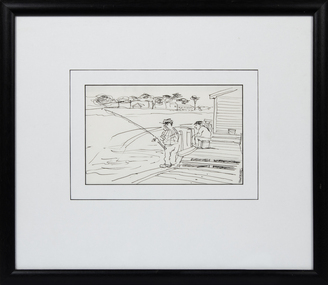
Artwork, other - Illustrations, Ron Tandberg, Queenscliff Pier, 30 November 1995
Hand drawn pen and ink sketches of fishermen fishing off Queenscliff pierRon Tandberg, Queenscliff resident artist and long time cartoonist for The Age newspaper presented these framed sketches as a gift to the QMM. Three framed sketches of fishermen fishing off a pier in QueenscliffTandberg, Queenscliff pier, 30/11/1995fishermen, queensclff, queenscliff pier, tandberg, sketch -
Whitehorse Historical Society Inc.
Functional object - Ephemera, Train tickets, 1989
Train tickets issued by the Met March and April 1989Train tickets issued by the Met March and April 1989: Box Hill Neighbourhood; Box Hill Plus Inner Travel Card; Box Hill - City Off-peak Saver; Box Hill Off-peak Saver ConcessionTrain tickets issued by the Met March and April 1989train tickets, the met -
 Melbourne Tram Museum
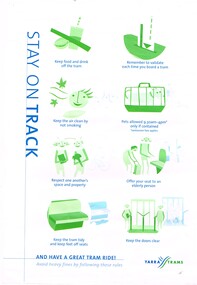
Poster, Yarra Trams, "Stay on Track", early 2000?
... "Stay on Track" ...Poster - A3 - two colours printed on white paper titled "Stay on Track" with pictograms for behaviour on trams - eg no food, keeping feet off seats, validating tickets, keeping door closed. Has the good behaviour in green and the poor or not allowed behaviour in light blue - not easy to read. Published by Yarra Trams - actual use?trams, tramways, posters, yarra trams, behaviour, by laws -
Melbourne Tram Museum
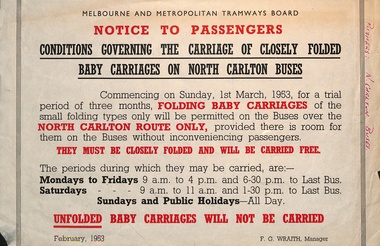
Document - Notice to Passengers, Melbourne & Metropolitan Tramways Board (MMTB), "Baby carriages on North Carlton buses", Feb 1963
... "Baby carriages on North Carlton buses" ...Notice to passengers about the conditions of carriage of closely folded baby carriages on North Carlton buses, commencing 1/3/1953 - on trial for 3 months, carried free during off-peak hours. Signed F G Wraith as Manager.Yields information about the carriage of baby carriages on buses.Notice - printed on special size paper.Has in red ink on right hand edge "pushers N Carlton buses"tramways, buses, baby carriages, north carlton -
 Melbourne Tram Museum
Document - Notice to Passengers, Melbourne & Metropolitan Tramways Board (MMTB), "Baby carriages on North Carlton buses", Feb 1953
... "Baby carriages on North Carlton buses" ...Notice to passengers about the conditions of carriage of closely folded baby carriages on North Carlton buses, commencing 1/3/1953 - on trial for 3 months, carried free during off-peak hours. Signed F G Wraith as Manager.Yields information about the carriage of baby carriages on buses.Notice - printed on special size paper.Has in red ink on right hand edge "pushers N Carlton buses"tramways, buses, baby carriages, north carlton -
 Flagstaff Hill Maritime Museum and Village
Domestic object - Bowl, J & G Meakin, Late 19th or early 20th Century
... Hanley, Stoke-on-Trent, Staffordshire, England ...The Process of Making Pottery Decorating, Firing, Glazing, Making, Technical There is a rhythm and flow to clay. It can’t be done all at once! Even the making process! It can take weeks to get everything done, especially if you can only work on your pottery once a week! Even though we have three hour classes, it’s often just not enough time! Here is an overview of some of the processes so you have a bit more grasp on some of the technical stuff! Step One – Design There are SO many ideas out there for making stuff in clay! From delicate porcelain jewellery, through to heavy sculptural work and everything in between. Deciding your direction is sometimes not that easy – when you first start, try everything, you will naturally gravitate to the style that you enjoy! The options and variations are endless and can get a wee bit overwhelming too! Check in with me before you start to ensure your ideas will work, what order you might do things, how you could achieve the look you are seeking and any other technical data required! Step Two – Making Clay is thixotropic. This means that as you work with it, the clay first gets sloppier and wetter, before is begins to dry in the atmosphere. For most things, you simply can’t do all parts of the project at once. An example of work order might look like: Get last weeks work out from the shelves Prepare clay for today’s work – roll your clay, prepare balls for throwing, make the first stage of a pinch pot) Clean up last week’s work and put it on the shelf for bisque firing Check that you have any glazing to do – and do enough of it that you will have time to finish your main project Do the next step of your next project – there might be a further step that can’t be complete immediately, in that case, wrap your work well and put onto the shelves. Letting your work rest for a while can really help keep your work clean and professional looking. Many things require bagging under plastic to keep it ready for work the next week – put your name on the outside of the bag so you can find your work easily. We have stickers and markers. Consider how you want to decorate your work – coloured slip can be applied at a fairly wet stage (remembering that it will make your work even wetter!). Trying to apply slip to dry clay won’t work! If you want to do sgraffito – you will need to keep the work leather hard (a state of dryness where you can still work the clay with a little effort and a little water and care). Step Three – Drying Most of the time your work can go into the rack uncovered to let it dry out for the following week. If you want to continue forming or shaping you will need to double bag your work – put your work on a suitable sized bat and put the bat in a bag so the base of the bag is under the bat, then put another bag over the top of the work and tuck the top of the bag under the bat. If you want to trim (or turn) your thrown work the following week, it should also be double bagged. If your work is large, delicate, or of uneven thicknesses, you should lightly cover your work for drying. When considering the drying process, bare in mind the weather, humidity and wind! The hotter and dryer, the faster things dry and work can dry unevenly in the shelves – this can lead to cracking – another time to lightly cover your work for drying. Step Four – Trimming and Cleaning Up Your work is dry! It is called greenware now and it is at it’s most fragile! Handle everything with two hands. I often refer to soft hands – keep everything gentle and with your fingers spread as much as possible. Try to not pick up things like plates too much, and always with both hands! Before your work can be bisque fired it should be “cleaned up”. You work won’t go into the kiln if it has sharp edges – when glazed, sharp edges turn into razor blades! Use a piece of fly wire to rub the work all over – this will scratch a little so be light handed. Use a knife or metal kidney to scrape any areas that require a bit more dynamic treatment than the fly wire offers! Finally, a very light wipe over with a slightly damp sponge can help soften and soothe all of your edges and dags! Trimming thrown work: If you are planning to trim (or turn) your thrown work (and you should be), make sure you bag it well – your work should be leather hard to almost dry for easiest trimming. Use this step to finish the work completely – use a metal kidney to polish the surface, or a slightly damp sponge to give a freshly thrown look. Wipe the sponge around the rim after trimming, and check the inside of the pot for dags! Trimming slip cast work: Usually I will trim the rims of your work on the wheel the following day to make that stage easier, however you will still need to check your work for lumps and bumps. Last but not least – check that your name is still clearly on the bottom of your work. Step Five – Bisque Firing When the work is completely dry it can go into the bisque kiln. The bisque kiln is fired to 1000°C. This process burns off the water in the clay as well as some of the chemically bound water. The structure of the clay is not altered that much at this temperature. Inside the bisque kiln, the work is stacked a little, small bowl inside a larger bowl and onto a heavy plate. Smaller items like decorations or drink coasters might get stacked several high. Consideration is paid to the weight of the stack and shape of the work. A bisque kiln can fire about one and a half times the amount of work that the glaze kiln can fire. The firing takes about 10 hours to complete the cycle and about two days to cool down. Once it has been emptied the work is placed in the glaze room ready for you to decorate! Step Six – Glazing Decorating your work with colour can be a lot of fun – and time consuming! There are three main options for surface treatment at this stage: Oxide Washes Underglazes Glazes Washes and underglazes do not “glaze” the work – It will still need a layer of glaze to fully seal the clay (washes don’t need glaze on surfaces not designed for food or liquid as they can gloss up a little on their own). Underglazes are stable colourants that turn out pretty much how they look in the jar. They can be mixed with each other to form other colours and can be used like water colours to paint onto your work. Mostly they should have a clear glaze on top to seal them. Oxides are a different species – the pink oxide (cobalt) wash turns out bright blue for instance. They don’t always need a glaze on top, and some glazes can change the colour of the wash! The glazes need no other “glaze” on top! Be careful of unknown glaze interactions – you can put any combination of glaze in a bowl or on a plate, but only a single glaze on the outside of any vertical surface! Glazes are a chemical reaction under heat. We don’t know the exact chemicals in the Mayco glazes we use. I can guess by the way they interact with each other, however, on the whole, you need to test every idea you have, and not run the test on a vertical surface! Simply put, glaze is a layer of glass like substance that bonds with the clay underneath. Clay is made of silica, alumina and water. Glaze is made of mostly silica. Silica has a melting point of 1700°C and we fire to 1240°C. The silica requires a “flux” to help it melt at the lower temperature. Fluxes can be all sorts of chemicals – a common one is calcium – calcium has a melting point of 2500°C, however, together they both melt at a much lower temperature! Colourants are metal oxides like cobalt (blue), chrome (green through black), copper (green, blue, even red!), manganese (black, purple and pink) iron (red brown), etc. Different chemicals in the glaze can have dramatic effects. for example, barium carbonate (which we don’t use) turns manganese bright pink! Other elements can turn manganese dioxide brown, blue, purple and reddish brown. Manganese dioxide is a flux in and of itself as well. So, glazes that get their black and purple colours, often interact with other glazes and RUN! Our mirror black is a good example – it mixes really well with many glazes because it fluxes them – causes them to melt faster. It will also bring out many beautiful colours in the glazes because it’s black colouring most definitely comes from manganese dioxide! Glaze chemistry is a whole subject on it’s own! We use commercial Mayco glazes on purpose – for their huge range of colour possibilities, stability, cool interactions, artistic freedom with the ability to easily brush the glazes on and ease of use. We currently have almost 50 glazes on hand! A major project is to test the interactions of all glazes with each other. That is 2,500 test tiles!!!! I’m going to make the wall behind the wheels the feature wall of pretty colours! Step Seven – Glaze (Gloss or sometimes called “Glost”) Firing Most of the time this is the final stage of making your creation (but not always!) The glaze kiln goes to 1240°C. This is called cone 6, or midrange. It is the low end of stoneware temperatures. Stoneware clays and glazes are typically fired at cone 8 – 10, that is 1260 – 1290°C. The energy requirement to go from 1240°C to 1280°C is almost a 30% more! Our clay is formulated to vitrify (mature, turn “glass-like”) at 1240°, as are our glazes. A glaze kiln take around 12 hours to reach temperature and two to three days to cool down. Sometimes a third firing process is required – this is for decoration that is added to work after the glaze firing. For example – adding precious metals and lustres. this firing temperature is usually around 600 – 800°C depending upon the techniques being used. There are many students interested in gold and silver trims – we will be doing this third type of firing soon! After firing your work will be in the student finished work shelves. Remember to pay for it before you head out the door! There is a small extra charge for using porcelain clay (it’s more than twice the price of regular clay), and for any third firing process! Once your work has been fired it can not turn back into clay for millennia – so don’t fire it if you don’t like it! Put it in the bucket for recycling. https://firebirdstudios.com.au/the-process-of-making-pottery/This bowl was made by renowned pottery company J & G Meakin of England. The firm was established in the mid-1800's. The bowl is an example of kitchenware used in the 19th century and still in use today.Bowl; white ceramic, round and tapering inwards towards base. Made by J and G Meakin England.On base, 'Ironstone China Reg SOL 391413' with symbolflagstaff hill, flagstaff hill maritime museum and village, warrnambool, maritime museum, maritime village, great ocean road, shipwreck coast, mixing bowl, food preparation, j & g meakin, pottery, stoke-on-trent, kitchen equipment, ceramic -
 Flagstaff Hill Maritime Museum and Village
Domestic object - Plate
... Stoke-on-Trent, Staffordshire, UK ...The Process of Making Pottery Decorating, Firing, Glazing, Making, Technical There is a rhythm and flow to clay. It can’t be done all at once! Even the making process! It can take weeks to get everything done, especially if you can only work on your pottery once a week! Even though we have three hour classes, it’s often just not enough time! Here is an overview of some of the processes so you have a bit more grasp on some of the technical stuff! Step One – Design There are SO many ideas out there for making stuff in clay! From delicate porcelain jewellery, through to heavy sculptural work and everything in between. Deciding your direction is sometimes not that easy – when you first start, try everything, you will naturally gravitate to the style that you enjoy! The options and variations are endless and can get a wee bit overwhelming too! Check in with me before you start to ensure your ideas will work, what order you might do things, how you could achieve the look you are seeking and any other technical data required! Step Two – Making Clay is thixotropic. This means that as you work with it, the clay first gets sloppier and wetter, before is begins to dry in the atmosphere. For most things, you simply can’t do all parts of the project at once. An example of work order might look like: Get last weeks work out from the shelves Prepare clay for today’s work – roll your clay, prepare balls for throwing, make the first stage of a pinch pot) Clean up last week’s work and put it on the shelf for bisque firing Check that you have any glazing to do – and do enough of it that you will have time to finish your main project Do the next step of your next project – there might be a further step that can’t be complete immediately, in that case, wrap your work well and put onto the shelves. Letting your work rest for a while can really help keep your work clean and professional looking. Many things require bagging under plastic to keep it ready for work the next week – put your name on the outside of the bag so you can find your work easily. We have stickers and markers. Consider how you want to decorate your work – coloured slip can be applied at a fairly wet stage (remembering that it will make your work even wetter!). Trying to apply slip to dry clay won’t work! If you want to do sgraffito – you will need to keep the work leather hard (a state of dryness where you can still work the clay with a little effort and a little water and care). Step Three – Drying Most of the time your work can go into the rack uncovered to let it dry out for the following week. If you want to continue forming or shaping you will need to double bag your work – put your work on a suitable sized bat and put the bat in a bag so the base of the bag is under the bat, then put another bag over the top of the work and tuck the top of the bag under the bat. If you want to trim (or turn) your thrown work the following week, it should also be double bagged. If your work is large, delicate, or of uneven thicknesses, you should lightly cover your work for drying. When considering the drying process, bare in mind the weather, humidity and wind! The hotter and dryer, the faster things dry and work can dry unevenly in the shelves – this can lead to cracking – another time to lightly cover your work for drying. Step Four – Trimming and Cleaning Up Your work is dry! It is called greenware now and it is at it’s most fragile! Handle everything with two hands. I often refer to soft hands – keep everything gentle and with your fingers spread as much as possible. Try to not pick up things like plates too much, and always with both hands! Before your work can be bisque fired it should be “cleaned up”. You work won’t go into the kiln if it has sharp edges – when glazed, sharp edges turn into razor blades! Use a piece of fly wire to rub the work all over – this will scratch a little so be light handed. Use a knife or metal kidney to scrape any areas that require a bit more dynamic treatment than the fly wire offers! Finally, a very light wipe over with a slightly damp sponge can help soften and soothe all of your edges and dags! Trimming thrown work: If you are planning to trim (or turn) your thrown work (and you should be), make sure you bag it well – your work should be leather hard to almost dry for easiest trimming. Use this step to finish the work completely – use a metal kidney to polish the surface, or a slightly damp sponge to give a freshly thrown look. Wipe the sponge around the rim after trimming, and check the inside of the pot for dags! Trimming slip cast work: Usually I will trim the rims of your work on the wheel the following day to make that stage easier, however you will still need to check your work for lumps and bumps. Last but not least – check that your name is still clearly on the bottom of your work. Step Five – Bisque Firing When the work is completely dry it can go into the bisque kiln. The bisque kiln is fired to 1000°C. This process burns off the water in the clay as well as some of the chemically bound water. The structure of the clay is not altered that much at this temperature. Inside the bisque kiln, the work is stacked a little, small bowl inside a larger bowl and onto a heavy plate. Smaller items like decorations or drink coasters might get stacked several high. Consideration is paid to the weight of the stack and shape of the work. A bisque kiln can fire about one and a half times the amount of work that the glaze kiln can fire. The firing takes about 10 hours to complete the cycle and about two days to cool down. Once it has been emptied the work is placed in the glaze room ready for you to decorate! Step Six – Glazing Decorating your work with colour can be a lot of fun – and time consuming! There are three main options for surface treatment at this stage: Oxide Washes Underglazes Glazes Washes and underglazes do not “glaze” the work – It will still need a layer of glaze to fully seal the clay (washes don’t need glaze on surfaces not designed for food or liquid as they can gloss up a little on their own). Underglazes are stable colourants that turn out pretty much how they look in the jar. They can be mixed with each other to form other colours and can be used like water colours to paint onto your work. Mostly they should have a clear glaze on top to seal them. Oxides are a different species – the pink oxide (cobalt) wash turns out bright blue for instance. They don’t always need a glaze on top, and some glazes can change the colour of the wash! The glazes need no other “glaze” on top! Be careful of unknown glaze interactions – you can put any combination of glaze in a bowl or on a plate, but only a single glaze on the outside of any vertical surface! Glazes are a chemical reaction under heat. We don’t know the exact chemicals in the Mayco glazes we use. I can guess by the way they interact with each other, however, on the whole, you need to test every idea you have, and not run the test on a vertical surface! Simply put, glaze is a layer of glass like substance that bonds with the clay underneath. Clay is made of silica, alumina and water. Glaze is made of mostly silica. Silica has a melting point of 1700°C and we fire to 1240°C. The silica requires a “flux” to help it melt at the lower temperature. Fluxes can be all sorts of chemicals – a common one is calcium – calcium has a melting point of 2500°C, however, together they both melt at a much lower temperature! Colourants are metal oxides like cobalt (blue), chrome (green through black), copper (green, blue, even red!), manganese (black, purple and pink) iron (red brown), etc. Different chemicals in the glaze can have dramatic effects. for example, barium carbonate (which we don’t use) turns manganese bright pink! Other elements can turn manganese dioxide brown, blue, purple and reddish brown. Manganese dioxide is a flux in and of itself as well. So, glazes that get their black and purple colours, often interact with other glazes and RUN! Our mirror black is a good example – it mixes really well with many glazes because it fluxes them – causes them to melt faster. It will also bring out many beautiful colours in the glazes because it’s black colouring most definitely comes from manganese dioxide! Glaze chemistry is a whole subject on it’s own! We use commercial Mayco glazes on purpose – for their huge range of colour possibilities, stability, cool interactions, artistic freedom with the ability to easily brush the glazes on and ease of use. We currently have almost 50 glazes on hand! A major project is to test the interactions of all glazes with each other. That is 2,500 test tiles!!!! I’m going to make the wall behind the wheels the feature wall of pretty colours! Step Seven – Glaze (Gloss or sometimes called “Glost”) Firing Most of the time this is the final stage of making your creation (but not always!) The glaze kiln goes to 1240°C. This is called cone 6, or midrange. It is the low end of stoneware temperatures. Stoneware clays and glazes are typically fired at cone 8 – 10, that is 1260 – 1290°C. The energy requirement to go from 1240°C to 1280°C is almost a 30% more! Our clay is formulated to vitrify (mature, turn “glass-like”) at 1240°, as are our glazes. A glaze kiln take around 12 hours to reach temperature and two to three days to cool down. Sometimes a third firing process is required – this is for decoration that is added to work after the glaze firing. For example – adding precious metals and lustres. this firing temperature is usually around 600 – 800°C depending upon the techniques being used. There are many students interested in gold and silver trims – we will be doing this third type of firing soon! After firing your work will be in the student finished work shelves. Remember to pay for it before you head out the door! There is a small extra charge for using porcelain clay (it’s more than twice the price of regular clay), and for any third firing process! Once your work has been fired it can not turn back into clay for millennia – so don’t fire it if you don’t like it! Put it in the bucket for recycling. https://firebirdstudios.com.au/the-process-of-making-pottery/Ceramics have evolved over thousands of years.White earthenware dinner plate. Crazing evident all over.Backstamped ‘Made in England S LTD’flagstaff hill, warrnambool, shipwrecked-coast, flagstaff-hill, flagstaff-hill-maritime-museum, maritime-museum, shipwreck-coast, flagstaff-hill-maritime-village, ceramics, tableware -
 Flagstaff Hill Maritime Museum and Village
Domestic object - Plate, Johnson Bros
... Stoke-on-Trent, Staffordshire, UK ...The Process of Making Pottery Decorating, Firing, Glazing, Making, Technical There is a rhythm and flow to clay. It can’t be done all at once! Even the making process! It can take weeks to get everything done, especially if you can only work on your pottery once a week! Even though we have three hour classes, it’s often just not enough time! Here is an overview of some of the processes so you have a bit more grasp on some of the technical stuff! Step One – Design There are SO many ideas out there for making stuff in clay! From delicate porcelain jewellery, through to heavy sculptural work and everything in between. Deciding your direction is sometimes not that easy – when you first start, try everything, you will naturally gravitate to the style that you enjoy! The options and variations are endless and can get a wee bit overwhelming too! Check in with me before you start to ensure your ideas will work, what order you might do things, how you could achieve the look you are seeking and any other technical data required! Step Two – Making Clay is thixotropic. This means that as you work with it, the clay first gets sloppier and wetter, before is begins to dry in the atmosphere. For most things, you simply can’t do all parts of the project at once. An example of work order might look like: Get last weeks work out from the shelves Prepare clay for today’s work – roll your clay, prepare balls for throwing, make the first stage of a pinch pot) Clean up last week’s work and put it on the shelf for bisque firing Check that you have any glazing to do – and do enough of it that you will have time to finish your main project Do the next step of your next project – there might be a further step that can’t be complete immediately, in that case, wrap your work well and put onto the shelves. Letting your work rest for a while can really help keep your work clean and professional looking. Many things require bagging under plastic to keep it ready for work the next week – put your name on the outside of the bag so you can find your work easily. We have stickers and markers. Consider how you want to decorate your work – coloured slip can be applied at a fairly wet stage (remembering that it will make your work even wetter!). Trying to apply slip to dry clay won’t work! If you want to do sgraffito – you will need to keep the work leather hard (a state of dryness where you can still work the clay with a little effort and a little water and care). Step Three – Drying Most of the time your work can go into the rack uncovered to let it dry out for the following week. If you want to continue forming or shaping you will need to double bag your work – put your work on a suitable sized bat and put the bat in a bag so the base of the bag is under the bat, then put another bag over the top of the work and tuck the top of the bag under the bat. If you want to trim (or turn) your thrown work the following week, it should also be double bagged. If your work is large, delicate, or of uneven thicknesses, you should lightly cover your work for drying. When considering the drying process, bare in mind the weather, humidity and wind! The hotter and dryer, the faster things dry and work can dry unevenly in the shelves – this can lead to cracking – another time to lightly cover your work for drying. Step Four – Trimming and Cleaning Up Your work is dry! It is called greenware now and it is at it’s most fragile! Handle everything with two hands. I often refer to soft hands – keep everything gentle and with your fingers spread as much as possible. Try to not pick up things like plates too much, and always with both hands! Before your work can be bisque fired it should be “cleaned up”. You work won’t go into the kiln if it has sharp edges – when glazed, sharp edges turn into razor blades! Use a piece of fly wire to rub the work all over – this will scratch a little so be light handed. Use a knife or metal kidney to scrape any areas that require a bit more dynamic treatment than the fly wire offers! Finally, a very light wipe over with a slightly damp sponge can help soften and soothe all of your edges and dags! Trimming thrown work: If you are planning to trim (or turn) your thrown work (and you should be), make sure you bag it well – your work should be leather hard to almost dry for easiest trimming. Use this step to finish the work completely – use a metal kidney to polish the surface, or a slightly damp sponge to give a freshly thrown look. Wipe the sponge around the rim after trimming, and check the inside of the pot for dags! Trimming slip cast work: Usually I will trim the rims of your work on the wheel the following day to make that stage easier, however you will still need to check your work for lumps and bumps. Last but not least – check that your name is still clearly on the bottom of your work. Step Five – Bisque Firing When the work is completely dry it can go into the bisque kiln. The bisque kiln is fired to 1000°C. This process burns off the water in the clay as well as some of the chemically bound water. The structure of the clay is not altered that much at this temperature. Inside the bisque kiln, the work is stacked a little, small bowl inside a larger bowl and onto a heavy plate. Smaller items like decorations or drink coasters might get stacked several high. Consideration is paid to the weight of the stack and shape of the work. A bisque kiln can fire about one and a half times the amount of work that the glaze kiln can fire. The firing takes about 10 hours to complete the cycle and about two days to cool down. Once it has been emptied the work is placed in the glaze room ready for you to decorate! Step Six – Glazing Decorating your work with colour can be a lot of fun – and time consuming! There are three main options for surface treatment at this stage: Oxide Washes Underglazes Glazes Washes and underglazes do not “glaze” the work – It will still need a layer of glaze to fully seal the clay (washes don’t need glaze on surfaces not designed for food or liquid as they can gloss up a little on their own). Underglazes are stable colourants that turn out pretty much how they look in the jar. They can be mixed with each other to form other colours and can be used like water colours to paint onto your work. Mostly they should have a clear glaze on top to seal them. Oxides are a different species – the pink oxide (cobalt) wash turns out bright blue for instance. They don’t always need a glaze on top, and some glazes can change the colour of the wash! The glazes need no other “glaze” on top! Be careful of unknown glaze interactions – you can put any combination of glaze in a bowl or on a plate, but only a single glaze on the outside of any vertical surface! Glazes are a chemical reaction under heat. We don’t know the exact chemicals in the Mayco glazes we use. I can guess by the way they interact with each other, however, on the whole, you need to test every idea you have, and not run the test on a vertical surface! Simply put, glaze is a layer of glass like substance that bonds with the clay underneath. Clay is made of silica, alumina and water. Glaze is made of mostly silica. Silica has a melting point of 1700°C and we fire to 1240°C. The silica requires a “flux” to help it melt at the lower temperature. Fluxes can be all sorts of chemicals – a common one is calcium – calcium has a melting point of 2500°C, however, together they both melt at a much lower temperature! Colourants are metal oxides like cobalt (blue), chrome (green through black), copper (green, blue, even red!), manganese (black, purple and pink) iron (red brown), etc. Different chemicals in the glaze can have dramatic effects. for example, barium carbonate (which we don’t use) turns manganese bright pink! Other elements can turn manganese dioxide brown, blue, purple and reddish brown. Manganese dioxide is a flux in and of itself as well. So, glazes that get their black and purple colours, often interact with other glazes and RUN! Our mirror black is a good example – it mixes really well with many glazes because it fluxes them – causes them to melt faster. It will also bring out many beautiful colours in the glazes because it’s black colouring most definitely comes from manganese dioxide! Glaze chemistry is a whole subject on it’s own! We use commercial Mayco glazes on purpose – for their huge range of colour possibilities, stability, cool interactions, artistic freedom with the ability to easily brush the glazes on and ease of use. We currently have almost 50 glazes on hand! A major project is to test the interactions of all glazes with each other. That is 2,500 test tiles!!!! I’m going to make the wall behind the wheels the feature wall of pretty colours! Step Seven – Glaze (Gloss or sometimes called “Glost”) Firing Most of the time this is the final stage of making your creation (but not always!) The glaze kiln goes to 1240°C. This is called cone 6, or midrange. It is the low end of stoneware temperatures. Stoneware clays and glazes are typically fired at cone 8 – 10, that is 1260 – 1290°C. The energy requirement to go from 1240°C to 1280°C is almost a 30% more! Our clay is formulated to vitrify (mature, turn “glass-like”) at 1240°, as are our glazes. A glaze kiln take around 12 hours to reach temperature and two to three days to cool down. Sometimes a third firing process is required – this is for decoration that is added to work after the glaze firing. For example – adding precious metals and lustres. this firing temperature is usually around 600 – 800°C depending upon the techniques being used. There are many students interested in gold and silver trims – we will be doing this third type of firing soon! After firing your work will be in the student finished work shelves. Remember to pay for it before you head out the door! There is a small extra charge for using porcelain clay (it’s more than twice the price of regular clay), and for any third firing process! Once your work has been fired it can not turn back into clay for millennia – so don’t fire it if you don’t like it! Put it in the bucket for recycling. https://firebirdstudios.com.au/the-process-of-making-pottery/Ceramics have evolved over thousands of years.A white earthenware side plate with a gadroon edge. Has water marks and chips on front.‘Johnson Bros England Reg No 15587’flagstaff hill, warrnambool, shipwrecked-coast, flagstaff-hill, flagstaff-hill-maritime-museum, maritime-museum, shipwreck-coast, flagstaff-hill-maritime-village, johnson bros, ceramics, tableware -
 Flagstaff Hill Maritime Museum and Village
Domestic object - Plate, Alfred Meakin
... Stoke-on-Trent, Staffordshire, UK ...The Process of Making Pottery Decorating, Firing, Glazing, Making, Technical There is a rhythm and flow to clay. It can’t be done all at once! Even the making process! It can take weeks to get everything done, especially if you can only work on your pottery once a week! Even though we have three hour classes, it’s often just not enough time! Here is an overview of some of the processes so you have a bit more grasp on some of the technical stuff! Step One – Design There are SO many ideas out there for making stuff in clay! From delicate porcelain jewellery, through to heavy sculptural work and everything in between. Deciding your direction is sometimes not that easy – when you first start, try everything, you will naturally gravitate to the style that you enjoy! The options and variations are endless and can get a wee bit overwhelming too! Check in with me before you start to ensure your ideas will work, what order you might do things, how you could achieve the look you are seeking and any other technical data required! Step Two – Making Clay is thixotropic. This means that as you work with it, the clay first gets sloppier and wetter, before is begins to dry in the atmosphere. For most things, you simply can’t do all parts of the project at once. An example of work order might look like: Get last weeks work out from the shelves Prepare clay for today’s work – roll your clay, prepare balls for throwing, make the first stage of a pinch pot) Clean up last week’s work and put it on the shelf for bisque firing Check that you have any glazing to do – and do enough of it that you will have time to finish your main project Do the next step of your next project – there might be a further step that can’t be complete immediately, in that case, wrap your work well and put onto the shelves. Letting your work rest for a while can really help keep your work clean and professional looking. Many things require bagging under plastic to keep it ready for work the next week – put your name on the outside of the bag so you can find your work easily. We have stickers and markers. Consider how you want to decorate your work – coloured slip can be applied at a fairly wet stage (remembering that it will make your work even wetter!). Trying to apply slip to dry clay won’t work! If you want to do sgraffito – you will need to keep the work leather hard (a state of dryness where you can still work the clay with a little effort and a little water and care). Step Three – Drying Most of the time your work can go into the rack uncovered to let it dry out for the following week. If you want to continue forming or shaping you will need to double bag your work – put your work on a suitable sized bat and put the bat in a bag so the base of the bag is under the bat, then put another bag over the top of the work and tuck the top of the bag under the bat. If you want to trim (or turn) your thrown work the following week, it should also be double bagged. If your work is large, delicate, or of uneven thicknesses, you should lightly cover your work for drying. When considering the drying process, bare in mind the weather, humidity and wind! The hotter and dryer, the faster things dry and work can dry unevenly in the shelves – this can lead to cracking – another time to lightly cover your work for drying. Step Four – Trimming and Cleaning Up Your work is dry! It is called greenware now and it is at it’s most fragile! Handle everything with two hands. I often refer to soft hands – keep everything gentle and with your fingers spread as much as possible. Try to not pick up things like plates too much, and always with both hands! Before your work can be bisque fired it should be “cleaned up”. You work won’t go into the kiln if it has sharp edges – when glazed, sharp edges turn into razor blades! Use a piece of fly wire to rub the work all over – this will scratch a little so be light handed. Use a knife or metal kidney to scrape any areas that require a bit more dynamic treatment than the fly wire offers! Finally, a very light wipe over with a slightly damp sponge can help soften and soothe all of your edges and dags! Trimming thrown work: If you are planning to trim (or turn) your thrown work (and you should be), make sure you bag it well – your work should be leather hard to almost dry for easiest trimming. Use this step to finish the work completely – use a metal kidney to polish the surface, or a slightly damp sponge to give a freshly thrown look. Wipe the sponge around the rim after trimming, and check the inside of the pot for dags! Trimming slip cast work: Usually I will trim the rims of your work on the wheel the following day to make that stage easier, however you will still need to check your work for lumps and bumps. Last but not least – check that your name is still clearly on the bottom of your work. Step Five – Bisque Firing When the work is completely dry it can go into the bisque kiln. The bisque kiln is fired to 1000°C. This process burns off the water in the clay as well as some of the chemically bound water. The structure of the clay is not altered that much at this temperature. Inside the bisque kiln, the work is stacked a little, small bowl inside a larger bowl and onto a heavy plate. Smaller items like decorations or drink coasters might get stacked several high. Consideration is paid to the weight of the stack and shape of the work. A bisque kiln can fire about one and a half times the amount of work that the glaze kiln can fire. The firing takes about 10 hours to complete the cycle and about two days to cool down. Once it has been emptied the work is placed in the glaze room ready for you to decorate! Step Six – Glazing Decorating your work with colour can be a lot of fun – and time consuming! There are three main options for surface treatment at this stage: Oxide Washes Underglazes Glazes Washes and underglazes do not “glaze” the work – It will still need a layer of glaze to fully seal the clay (washes don’t need glaze on surfaces not designed for food or liquid as they can gloss up a little on their own). Underglazes are stable colourants that turn out pretty much how they look in the jar. They can be mixed with each other to form other colours and can be used like water colours to paint onto your work. Mostly they should have a clear glaze on top to seal them. Oxides are a different species – the pink oxide (cobalt) wash turns out bright blue for instance. They don’t always need a glaze on top, and some glazes can change the colour of the wash! The glazes need no other “glaze” on top! Be careful of unknown glaze interactions – you can put any combination of glaze in a bowl or on a plate, but only a single glaze on the outside of any vertical surface! Glazes are a chemical reaction under heat. We don’t know the exact chemicals in the Mayco glazes we use. I can guess by the way they interact with each other, however, on the whole, you need to test every idea you have, and not run the test on a vertical surface! Simply put, glaze is a layer of glass like substance that bonds with the clay underneath. Clay is made of silica, alumina and water. Glaze is made of mostly silica. Silica has a melting point of 1700°C and we fire to 1240°C. The silica requires a “flux” to help it melt at the lower temperature. Fluxes can be all sorts of chemicals – a common one is calcium – calcium has a melting point of 2500°C, however, together they both melt at a much lower temperature! Colourants are metal oxides like cobalt (blue), chrome (green through black), copper (green, blue, even red!), manganese (black, purple and pink) iron (red brown), etc. Different chemicals in the glaze can have dramatic effects. for example, barium carbonate (which we don’t use) turns manganese bright pink! Other elements can turn manganese dioxide brown, blue, purple and reddish brown. Manganese dioxide is a flux in and of itself as well. So, glazes that get their black and purple colours, often interact with other glazes and RUN! Our mirror black is a good example – it mixes really well with many glazes because it fluxes them – causes them to melt faster. It will also bring out many beautiful colours in the glazes because it’s black colouring most definitely comes from manganese dioxide! Glaze chemistry is a whole subject on it’s own! We use commercial Mayco glazes on purpose – for their huge range of colour possibilities, stability, cool interactions, artistic freedom with the ability to easily brush the glazes on and ease of use. We currently have almost 50 glazes on hand! A major project is to test the interactions of all glazes with each other. That is 2,500 test tiles!!!! I’m going to make the wall behind the wheels the feature wall of pretty colours! Step Seven – Glaze (Gloss or sometimes called “Glost”) Firing Most of the time this is the final stage of making your creation (but not always!) The glaze kiln goes to 1240°C. This is called cone 6, or midrange. It is the low end of stoneware temperatures. Stoneware clays and glazes are typically fired at cone 8 – 10, that is 1260 – 1290°C. The energy requirement to go from 1240°C to 1280°C is almost a 30% more! Our clay is formulated to vitrify (mature, turn “glass-like”) at 1240°, as are our glazes. A glaze kiln take around 12 hours to reach temperature and two to three days to cool down. Sometimes a third firing process is required – this is for decoration that is added to work after the glaze firing. For example – adding precious metals and lustres. this firing temperature is usually around 600 – 800°C depending upon the techniques being used. There are many students interested in gold and silver trims – we will be doing this third type of firing soon! After firing your work will be in the student finished work shelves. Remember to pay for it before you head out the door! There is a small extra charge for using porcelain clay (it’s more than twice the price of regular clay), and for any third firing process! Once your work has been fired it can not turn back into clay for millennia – so don’t fire it if you don’t like it! Put it in the bucket for recycling. https://firebirdstudios.com.au/the-process-of-making-pottery/Ceramics have evolved over thousands of years.Earthenware dessert plate, cream colour. Made by Alfred Meakin, England. Backstamped ‘Alfred Meakin England’. flagstaff hill, warrnambool, shipwrecked-coast, flagstaff-hill, flagstaff-hill-maritime-museum, maritime-museum, shipwreck-coast, flagstaff-hill-maritime-village, alfred meakin, ceramics, earthenware, kitchenware -
 Bendigo Military Museum
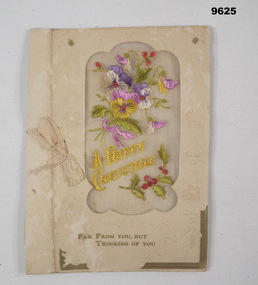
Card - CHRISTMAS CARD, Unknown
Part of the collection of "Thomas Edward Silk". Refer 9615.4 for details.One page cream Christmas card with flowers and a message embroidered in the middle. A separate piece of white paper tied to the back with an address half cut off.Message: "A Happy Christmas", "Far from you and thinking of you". Cut off address: "FRA ..., To M..., With .., Mother". france, ww1, christmas card, thomas edward silk -
 Ballarat Tramway Museum
Newspaper, The Courier Ballarat, "On the wrong track", 13/06/2012 12:00:00 AM
... "On the wrong track" ...Yields information about newspaper articles about the problem of cyclists and the tramway rails at depot junction.Pages 5 and 6 sheets from The Ballarat Courier, regarding issues with the tram tracks at Depot junction and cyclists, dated Wednesday 13 June 2012. Page 5 with headline "On the wrong track" of The Courier, Ballarat, 13/6/2012 written by Fiona Henderson, photo Lachlan Bence about Stephen Stewart who was injured after falling off his bicycle. depot junction, cyclists -
 Greensborough Historical Society
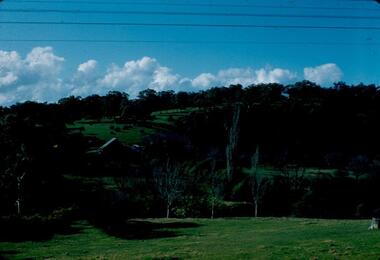
Photograph - Digital Image, Blackjack: Greensborough flats and house on the Plenty River, 1953_
... Blackjack: Greensborough flats and house on the Plenty ...Greensborough flats and house on the Plenty River at Blackjack, the home of the Robinson family to late 1956. The Blackjack property, house and acres of fruit orchards ran down to the Plenty River off Hume Street Greensborough. The photographs were taken as slides by Frank Robinson and digitised by his son James in 2015.Digital copy of colour photograph.blackjack, robinson family, plenty river -
Linton and District Historical Society Inc
Clay pipe bowl, Part of clay smoking pipe
Found at old diggings off Dreamer's Hill Road near Linton.Bowl of clay smoking pipe, with metal band. Stem of pipe broken off.smoking pipes -
 Eltham District Historical Society Inc
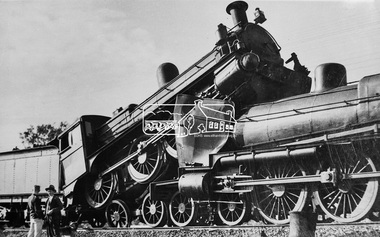
Photograph, Head on collision, Victorian Railways photo, 1962
... Head on collision, Victorian Railways photo ...c.1962 photo of original Victorian Railways photo Believed to be 'Overland' crash at Serviceton on 7 Sept 1951. Four locomotives were involved. The Melbourne-bound 'Overland' ran head-on into the stationary Adelaide-bound 'Overland'. Three of the locomotives were written off. One person died - one of the firemen.Digital TIFF file Scan of 35mm Ilford FP3 black and white transparencysteam engine, train crash, victorian railways -
 Melbourne Tram Museum
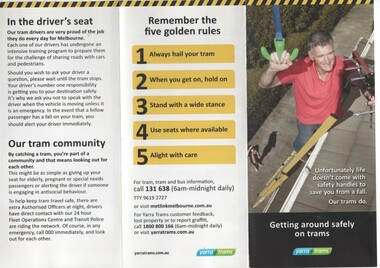
Pamphlet, Yarra Trams, "Getting around safely on trams", mid 2011
... "Getting around safely on trams" ...Full colour pamphlet, 3 fold DL size, titled "Getting around safely on trams", has on a long ladder adjusting a TV aerial and holding onto a "strap hanger" or safety handles. Gives five "golden" rules for using trams - hailing, travelling, standing and getting off, notes re tram driver and being part of the tram community. 2 copies held.trams, tramways, yarra trams, passengers, safety -
 Lakes Entrance Historical Society
Photograph - Debbie Rozynski, 20/06/1978 12:00:00 AM
Colour photograph off Debbie Rozynski Secondary College student Gippsland VictoriaColour photograph off Debbie Rozynski Secondary College student Gippsland Victoriaschools, social history, people -
 Mission to Seafarers Victoria
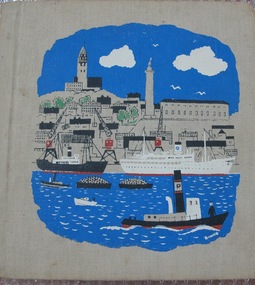
Album - Photograph album, Allan Charles Quinn, Ports of call with M/S 'Mongabarra' on African trip 16th June - Dec 1950 ( Voyage starts and ends in Sweden), 1950
... Ports of call with M/S 'Mongabarra' on African trip 16th ...The item tells the story of Allan Quinn's voyage to Africa on a round trip departing returning to Gothenburg aboard the Merchant Ship Mongabarra.. The album preserves a 1950s perspective of a Merchant Seaman and his experience of the respective Ports at that time. The Collection is especially useful when viewed along with contemporary Quinn family correspondence.Album with metal spiral spine and beige fabric cover with gouache printed colour design featuring Gothenburg landmarks. Photograph album contains 25 pages of b/w photos . In Aqua coloured ink on the inside front cover is a handwritten itinerary / index of the 25 ports visited on the voyage on adhered sheet of paper. Inscription: Title (see above)/ follows with Header line: " Port Country Arrived Departed / 1. Gothenberg.../ 16. Bel Congo.../25. Gothenburg / Signed off in Gothenburg 12 December 1950" album, photos, mongabarra, 1950, ms mongbarra, gothenburg, sweden, seafaring life -
 Orbost & District Historical Society
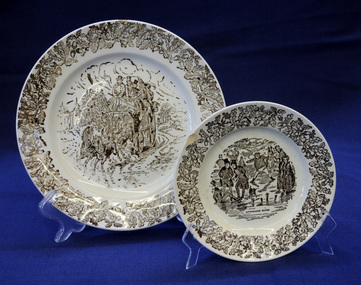
plates
... Stoke-on-Trent, Staffordsshire, England ...One small Broadhurst Dickens Series side plate Mr Pickwick Glides One large dinner plate. Both have white background and oak tree branches as border. Small plate illustration in centre is of people sliding on ice. Large plate centre illustration is David Copperfield + friends on a horse buggy riding bthrough town.Front of smaller plate - Mr Pickwick Glides Front of larger plate - My first fall in life - David Copperfield Back of both "Ironstone Broadhurst Staffordshire England. Dickens series underglaze... plates pottery broadhurst domestic-items china -
 Warrnambool and District Historical Society Inc.
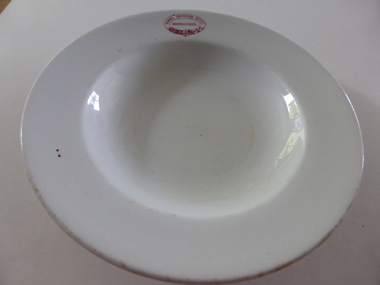
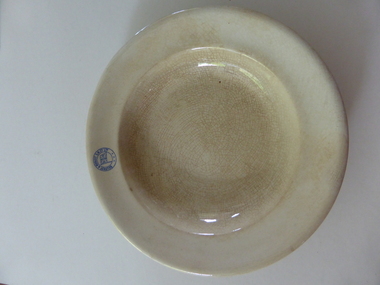
Plate, Humms Criterion Hotel Warrnambool, Early 20th century
... Tunstall, Stoke-On-Trent, England ...This plate has been produced by the English firm of W.H.Grindley for use at the Criterion Hotel in Warrnambool. The Criterion Hotel was on the western side of Kepler street near Lava Street and was established in 1872 with the first licensee being John Tate. The hotel closed in 2008, was partially destroyed by fire in 2010 and was demolished in 2013. The Humm family had a long association with the Criterion Hotel, with George Humm of Woodford taking over as the licensee in 1882 and buying the hotel in 1887 and remaining there until his death in 1894. George Humm’s widow, Elizabeth, was the licensee from 1894 to 1907, her son, John was the licensee from 1907 to 1916 and his widow, Bridget, was the licensee from 1916 to 1919. The plate could have been in use for all or part of these years but is most likely to have been bought early in the 20th century. This plate is of considerable interest because it came from the Criterion Hotel, a prominent hotel in Warrnambool for over 130 years.This is a white china plate which has a red embedded stamp in the shape of a belt (the maker’s trademark) on the front and on the back it has the blue markings of the maker with an image of a crown. The bowl has a shallow base and was perhaps a soup plate. The edges of the plate are somewhat worn and scuffed. ‘Humms Criterion Hotel Warrnambool’ ‘Grindley Hotel Ware England Vitrified’ criterion hotel, humm family of woodford, history of warrnambool -
 Warrnambool and District Historical Society Inc.
Plate, Criterion Hotel Warrnambool, Early 20th century
... Cobridge, Stoke-on-Trent, England ...This plate has been made by the Globe Pottery Company in England and supplied by the china merchant firm of John Dynon and Sons of Lonsdale Street, Melbourne. As it has the mark ‘Cobridge’ on the back of the plate, it was made before 1934. It was used at the Warrnambool Criterion Hotel which was on the western side of Kepler Street near Lava Street. This hotel was established in 1872 with the first licensee being John Tate. It closed in 2008, was partially destroyed by fire in 2010 and was demolished in 2013. During the first 30 years of the 20th century licensees at the Criterion Hotel included members of the Humm family, Theresa Lynch and Henry and Margaret McGennan. The plate could have been used for all or part of these times and even at a later date. This plate is of considerable interest because it came from the Cruterion Hotel, a prominent hotel in Warrnambool for over 130 years.This is a circular white china plate with a shallow base probably used as a soup plate. It has a red embedded stamp in the shape of a belt on the front edge and on the back it has the grey markings of the maker.‘Criterion Hotel Warrnambool’ ‘Globe Pottery Co. Ltd. Cobridge, England, Vitrified, John Dynon &Sons, Melbourne’ criterion hotel, history of warrnambool, humm family, woodford, theresa lynch, mcgennan family -
 Warrnambool and District Historical Society Inc.
Plate, Criterion Hotel Warrnambool, Early 20th Century
... Cobridge, Stoke-on-Trent, England ...This plate has been made by the Globe Pottery Company of England and supplied by the china merchant firm of John Dynon and Sons of Lonsdale Street, Melbourne. It was used at the Criterion Hotel in Warrnambool. The Criterion Hotel, situated on the western side of Kepler Street near Lava Street, was established in 1872 with the first licensee being John Tate. The hotel closed in 2008, was partially destroyed by fire in 2010 and was demolished in 2010. This plate, being marked with the name ‘Cobridge’, was made before 1934. In the first three decades of the 20th century the licensees at the Criterion Hotel were members of the Humm family, Theresa Lynch, Henry McGennan and Margaret McGennan. The dinner plate could have been used for all or part of these years and could have been used later as well. This plate is of considerable interest as it was used at the Criterion Hotel, a prominent hotel in Warrnambool for over 130 years. This is a circular white china plate with a rim and a slight indentation at the base. There is a red embedded stamp in the shape of a belt on the top edge and the grey stamp of the maker on the bottom of the plate. This plate was probably used as a small dinner plate. There are a few small imperfections and stains on this plate.‘Criterion Hotel Warrnambool’ ‘Globe Pottery Co. Ltd. Cobridge England Vitrified, John Dynon & Sons, Melbourne’ humm family, mcgennan family, theresa lynch, criterion hotel, history of warrnambool -
 Warrnambool and District Historical Society Inc.
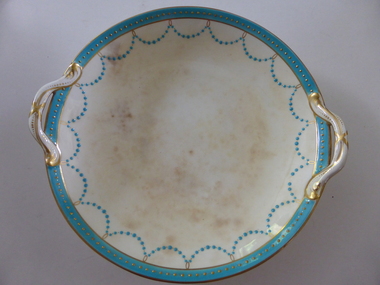
Plate, Rolfe dinner plates x 4, 1864
... Stoke-on-Trent, England ...These dishes were part of a crockery set used in the George Rolfe household at Lyndoch, Warrnambool. George Rolfe (1836-1919) was a Melbourne tea merchant who acquired land at the mouth of the Hopkins River in Warrnambool from the 1880s on as a holiday home. He developed the property over the years, adding a windmill and reservoir, bone and chaff sheds, a stable, jetty and boathouse and an extensive garden. In 1891 he married Mrs Annie Lake and it was his stepdaughter, Florence Lake who built the house, Lyndoch in the 1920s. This building today forms part of an Aged Care Facility. This item is part of the larger Rolfe dinner set as described on Victorian Collections at VC001421 and VC001422These dishes are of importance as they belonged to the George Rolfe family of Lyndoch, Warrnambool. They demonstrate the quality of the household goods used by more affluent families in the second half of the 19th century. These are four china serving dishes or plates which are part of a set of crockery used in the Rolfe Lyndoch household in Warrnambool. The dishes have a circular base with a circular dish resting on the base. The dishes have or had two handles with these handles and the edges of the dishes being gold trimmed. Around the rim of the dishes is a pattern of loops and dots etc of teal and gold. One dish (.1) has no handles, one dish (.4) has one handle only and two dishes are cracked (.3 & .4) . Two dishes are stained, one severely (.2 & .4) ‘Minton’ george rolfe, florence lake -
 Warrnambool and District Historical Society Inc.
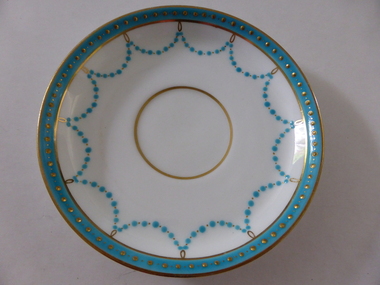
Plates, Rolfe Saucers x 6, 1864
... Cobridge, Stoke-on-Trent, England ...These saucers are part of a crockery set that belonged to George Rolfe and his family. George Rolfe (1836-1919) was a tea merchant in Melbourne who bought land at the mouth of the Hopkins River in Warrnambool in the 1880s. He had adjoining land and the properties of ‘Shipley’ and ‘Fairy Hill’ and developed ‘Lyndoch’, adding stables, jetty, boat house, windmill and reservoir, chaff and bone sheds and an extensive garden. In 1891 he married Annie Lake and it was his stepdaughter, Florence Lake who built the ‘Lyndoch’ house still standing today. ‘Lyndoch’ today is now the site of an Aged Care Facility. This item is part of the Rolfe Dinnerset as described on Victorian Collections at VC001420 and VC001422.These saucers, part of a crockery set, are kept because they belonged to George Rolfe, a prominent property owner and farmer in Warrnambool in the late 19th century and early 20th century. The items, dating from 1864, have social significance showing the type of crockery used by a more affluent family in the 19th century. These are six circular china saucers with a gold rim and ornamentation in a scallop design in gold and teal around the rim and the outer edges. The base of the saucers has a gold rim. One of the saucers has a chip on the edge and four show significant wearing of the inner gold circle. Some of the outside gold edging also shows wear. The maker’s marks and name are indented on the bottom of the saucers ‘Minton’ lyndoch, warrnambool, rolfe and co., george rolfe, history of warrnambool, florence lake -
 Warrnambool and District Historical Society Inc.
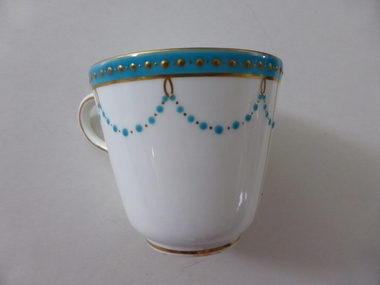
China, Cups x 4, 1864
... Stoke - on -Trent, England ...These dishes were part of a crockery set used in the George Rolfe household at Lyndoch, Warrnambool. George Rolfe (1836-1919) was a Melbourne tea merchant who acquired land at the mouth of the Hopkins River in Warrnambool from the 1880s on as a holiday home. He developed the property over the years, adding a windmill and reservoir, bone and chaff sheds, a stable, jetty and boathouse and an extensive garden. In 1891 he married Mrs Annie Lake and it was his stepdaughter, Florence Lake who built the house, Lyndoch in the 1920s. This building today forms part of an Aged Care Facility. This item is part of the larger Rolfe dinner set as described on Victorian Collections at VC001421 and VC001422These cups are part of a crockery set, and are kept because they belonged to George Rolfe, a prominent property owner and farmer in Warrnambool in the late 19th century and early 20th century. The items, dating from 1864, have social significance showing the type of crockery used by a more affluent family in the 19th century.Four small white cups decorated with aqua band around the top of each cup . A scalloped pattern of dots are suspended from the solid band which is decorated with a row of gold dots. There is a gold rim at the base of the cup.Mintonrolfe, lyndoch, warrnambool, minton cups, mrs annie lake -
 Warrnambool and District Historical Society Inc.
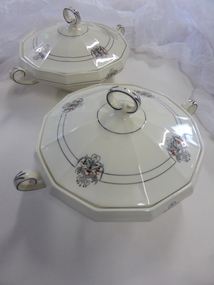
Crockery, Serving dish x 2, Between 1900 and 1920
... Stoke-on-Trent, England ...These two serving dishes or tureens have been made by the English firm of Myott, Son & Co. early in the 20th century (Art Nouveau design). Ashley Myott established the business in 1898 and later his brother joined the business. In 1976 the firm merged with the Alfred Meakin Company but today it is owned by the Churchill Pottery Group. The dishes have no known local provenance. These dishes are kept because they are attractive items in good order and examples of the type of dishes bought for use in the more affluent households early in the 20th century They will be useful for display purposes These are two identical china serving dishes with lids. The bases of the dishes are circular with the bowl section having twelve-sided edges and two handles with black patterns. The tops of the bowl have two black lines around the edges with two ornamental patterns in red, grey and black on the top edges. The lids also have twelve sided edges and have the same black lines, four of the coloured designs and handles with black patterning. On the bases are a gold-coloured crown with the maker’s details. ‘Myott, Son & Co. Ltd.’ myott & co, art nouveau, warrnambool, art nouveau serving dishes -
 Warrnambool and District Historical Society Inc.
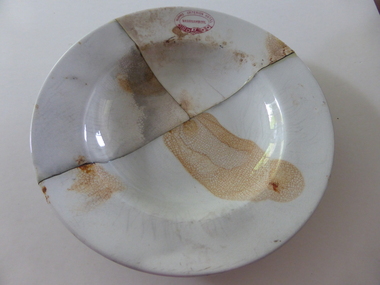
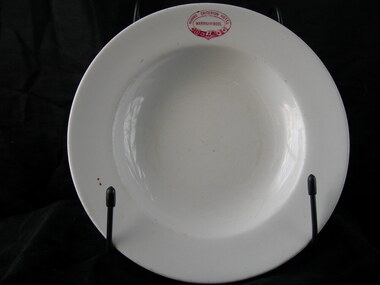
Plate, Humms Criterion Hotel, Early 20th century
... Tunstall, Stoke-On-Trent, England ...This plate has been produced by the English firm of W.H.Grindley for use at the Criterion Hotel in Warrnambool. The Criterion Hotel was on the western side of Kepler Street near Lava Street and was established in 1872 with the first licensee being John Tate. The hotel closed in 2008, was partially destroyed by fire in 2010 and was demolished in 2013. The Humm family had a long association with the Criterion Hotel with George Humm of Woodford taking over as licensee in 1882, buying the hotel in 1887 and remaining there until his death in 1894. George Humm’s widow, Elizabeth, was the licensee from 1894 to 1907, her son, John, was the licensee from 1907 to 1916 and his widow, Bridget, was the licensee from 1916 to 1919. The plate could have been in use for all or part of these years but is most likely to have been bought early in the 20th century. This plate is of considerable interest because it came from the Criterion Hotel, a prominent hotel in Warrnambool for over 130 years. This is a white china plate which has been broken into three pieces and inexpertly mended. The plate is much stained. It has a red embedded stamp in the shape of a belt (the maker’s trademark) on the front and on the back it has the blue markings of the maker with an image of a crown. The bowl has a shallow curved base and was perhaps used for soup. ‘Humms Criterion Hotel Warrnambool’ ‘Grindley Hotel Ware England Vitrified’ criterion hotel, humm family of woodford, history of warrnambool