Showing 878 items
matching route 2
-
 Otway Districts Historical Society
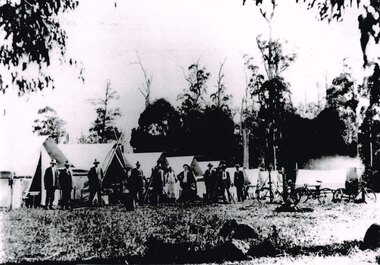
Photograph, Knox Collection, Survey camp for Colac-Beech Forest railway, 1901, 1901
Plans for a rail connection between Colac and Beech Forest had been drawn up in 1884 and 1889 but proofed inconclusive because of the enormous cost involved in building a railway in such difficult terrain. Because of the financial depression in the early 1890s such expenditure went of hold. Towards the end of the decade planners recognised that a narrow gauge could be a viable alternative and it was taken up by the community, Parliamentary representatives and the government, although Victorian Railways administration was against the idea. This was overridden. The 1898 Parliament approved a 2 foot 6 inch gauge from Colac to Beech Forest although strict financial limits were set. The route was to be the most direct and the infrastructure the most basic. Construction began in 1900 entailing very steep grades and myriad curves until it finished in 1902. Surveyors and their assistants came before and during the track laying for the whole distance.B/W. Survey camp for the Colac-Beech Forest railway in 1901, showing nine tents, ten men including a cook, survey instruments, and three bicycles. Note the cooking fire on the right.colac: beech forest; railways; survey; -
 Otway Districts Historical Society
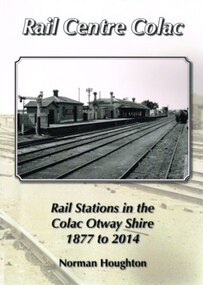
Book, Norman Houghton, Rail Centre Colac, 2014
Colac was the centre of a spidery rail network over which were carted anything and everything by Victorian Railways, the common carrier throughout the area. The main line through the region was the 35 km rail route from Birregurra (and thence to Geelong) though Colac to Pirron Yallock (and thence to Warrnambool and Port Fairy) from March, 1877, to July, 1883. The first branch line ran from Irrewarra to Beeac in 1889, which then extended in stages to Cressy and on the Ballarat. The second branch line was the 31 km long Birregurra to Forrest in 1891. The cost of building railways into mountainous terrain meant the third branch line was a narrow-gauge 2 foot 6 inch line, first of all to Beech Forest in 1902, and then to Crowes in 1911, for a total of 71 km. The final rail connection was the 16 km branch from Colac to Alvie to facilitate the transport of onions, opening in 1923. Each line had its own character and peculiarities derived from its foundation, geography and economic base. As a general rule, the loadings on the branch lines had greater output tonnage than inwards, the reverse of the main line. The lines traversed agricultural and timber areas where inputs like seed, grass, fertiliser and labour were minor, compared with the output, timber, wool, cream, butter, cheese fruit, potatoes, onion, grain and livestock.Rail Centre Colac. Rail stations in the Colac Otway Shire, 1877 to 2014. Norman Houghton. 1st ed. Norman Houghton; Geelong (Vic); 2014. vi, 262 p.; illus., maps, index. Soft cover.colac; cressy; forrest; beech forest; crowes -
 Queenscliffe Maritime Museum
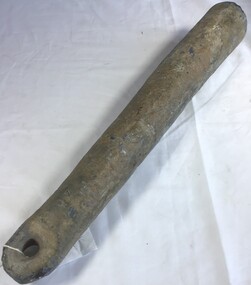
Functional object - Sounding Lead and bottle
Collected by person in the 1960s before amnesty. Recovered from the wreck of the William SalthouseWilliam Salthouse was the first merchant vessel to sail with a cargo of merchandise from the British Dominion of Canada to British Colonies of Australia. The ship was lost on 28 November 1841 while attempting to enter Port Phillip Heads en-route to Melbourne Harbour. The wreck of William Salthouse has been the site of several maritime archaeological investigations as well as experimental in situ conservation efforts.Large sounding lead and handmade bottle recovered from the wreck of the William Salthouse [lost on 28 November 1841]'No.2' on bottleshipwrecks, salvaged items, william salthouse, sounding lead, hand made bottle -
 Ballarat Tramway Museum
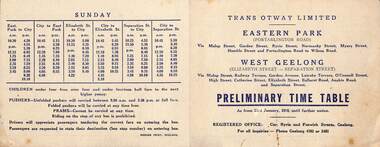
Ephemera - Set of 4 - Timetables - Geelong bus, Trans Otway, 1956
Set of 4 - Timetables - Geelong buses that were introduced following the closure of the Geelong tram system. 1 - Trans Otway - Eastern Park and West Geelong dated 23/1/1956 - gives route and times. Printed - 111x142mm 2 - Benders Busways - Chillwell - gives times, fares, bus stop locations and route details - tri fold foolscap - 210 x 111 3 - ditto - for Newtown 4 - Corio bus lines - Belmon - City from 26/3/1956 - gives sections, fares, routes, times and route details - folded quarto - 205 x 164 All note that folded pushers carried at any times, unfolded between 9.30 and 3.30, no prams. See item 6812 for the Transport Regulation Board poster of 1956 and two other bus operators.Yields information about the bus timetables following the closure of the Geelong tram system.Set of four printed or duplicated documentstramways, geelong, closure, bus, buses, bus replacement, timeables, trans otway, corio bus lines, benders busways -
 Queenscliffe Maritime Museum
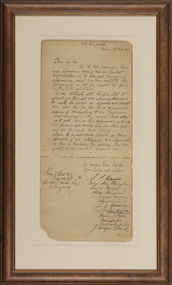
Document - Framed letter, SS Elingamite, Captain P.W. Bull
This vessel was owned by Huddart Parker & co a shipping line started in Geelong and later transferred to Melbourne. The SS Elingamite operated between 1876 and 1961. It was one of the seven major coastal shippers in Australia at a time when shipping was the principal means of interstate and trans-Tasman transport. Congratulatory letter from the cabin passengers of the SS Elingamite dated the 19th November 1887 addressed to Captain P.W. Bull. The letter is behind glass in a timber frame.captain pw bull, ss elingamite, huddart parker & co, immigration, travel, england - australia route -
 Queenscliffe Maritime Museum
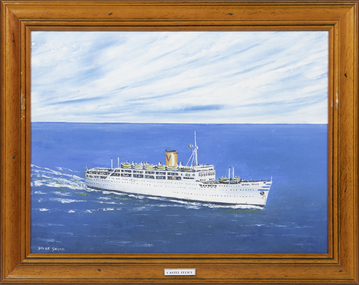
Painting - MV Castel Felice, Dacre Smyth, Castel Felice
Owned by the Sitmar Line, the 'Castel Felice' operated on the Australia migrgant route from the 60s to the 70s prioir to air travel in the mid 70s. Mrs B SmythA framed oil painting of the migrant ship 'MV Castel Felice'Castel Felicemv castel felice, migrant ships -
 Queenscliffe Maritime Museum
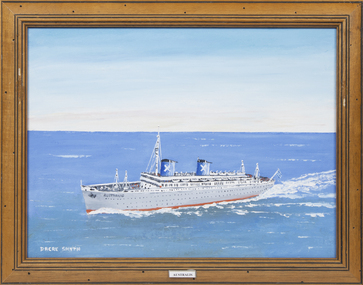
Painting - SS Australis, Dacre Smyth, Australis
The Australis retains a significant place in Australian immigration history as the last ship to carry government assisted immigrants to Australian shores in 1977. She had the largest passenger capacity of any post World War II immigrant ship to regularly visit Australia and many passengers fondly remember her grandeur and remnants of Art Deco style.Mrs B SmythA framed oil painting of the migrant ship SS AustralisAustralisss australis, migrant ships -
 Queenscliffe Maritime Museum
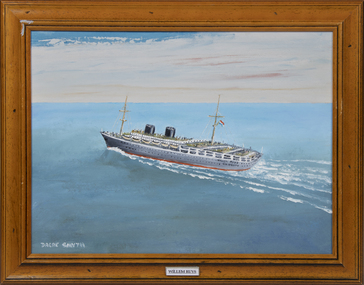
Painting - Willem Ruys, Dacre Smyth
Ordered in 1938 to replace the aging ships on the Dutch East Indies route, her keel was laid in 1939 at De Schelde shipyard in Vlissingen, Netherlands, for Rotterdamsche Lloyd (now Nedlloyd). Interrupted by World War II and two bombing raids, the ship was finally launched in July 1946, as Willem Ruys. The ship was named after the grandson of the founder of the Rotterdamsche Lloyd who was taken hostage and shot during the war.B SmythA framed oil painting of the Dutch vessel Willem Ruys which was later refitted to become the Lloyd Triestino 'Achille Lauro'.Willen Ruysmv willem ruys, ms achille lauro, migrant ships -
 Ballarat Tramway Museum
Sign - Tram Stop Information, State Electricity Commission of Victoria (SECV), Stop Information
Sheet metal signs mounted onto 2 metal brackets top and bottom by rivets. Mounted on wood pole so it faced outwards at right angles. On both faces in black paint on white background is "Trams Leave here for Gardens, View Point, Sebastopol." Believed to be located at the intersection of Sturt St and Drummond St. on the south side before junction.trams, tramways, ballarat, secv, street furniture, tram stops, route signs -
 Ballarat Tramway Museum
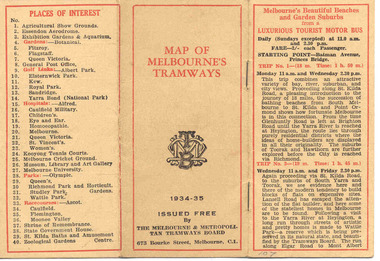
Map, Melbourne and Metropolitan Tramways Board (MMTB), "MMTB Map of Melbourne Tramways 1934-5", 1934
Demonstrates methods of giving information to visitors to Melbourne and yields information about tram services at the time in Melbourne.Very small pocket sized timetable and map book, consisting of 2 octavo cards stapled and folded into 12 pages consisting of three pages of bus and tram round trips, 3 center pages for map of electric and cable trams, route numbers and interest points. Map printed in 4 colours. 4 pages index to routes and first and last trams to City and from City. Also gives points where suburban routes are intersected by City routes. One page devoted to places of interest. All printing in black with red headings and highlights.trams, tramways, mmtb map, mmtb, timetables, tourist trips, map -
 Ballarat Tramway Museum
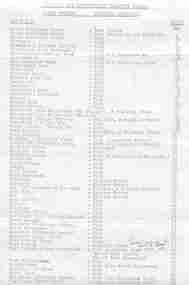
Document - List, Melbourne and Metropolitan Tramways Board (MMTB), MMTB Route Numbers listing - Electric Tramways, Nov. 1957
... route 67 on page 2..... Additional route 67 on page 2. Foolscap size paper consisting of two ...Foolscap size paper consisting of two pages giving a listing of Melbourne Electric Trams route numbers, held together with staple at top left hand corner. Dated November 1957 Originally printed, then duplicated.Written inscription of route 67 on page 1. Additional route 67 on page 2.mmtb, melbourne, route numbers, melbourne trams -
 Ballarat Tramway Museum
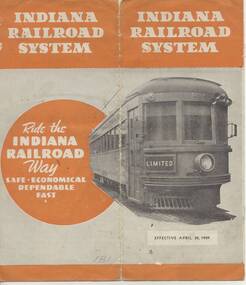
Ephemera - Timetable, Indiana Railroad, "Indiana Railroad system, Timetable, April 30, 1939" - Wal Jack Collection, Apr. 1932
Eight page (folded) timetable for the Indiana Railroad (Interurban Traction Co.) in receivership at time (see page 2), map of page 1, showing routes and connecting lines, bus services, services, days run etc. Record images added 20/8/2013.On each timetable in pencil, whether traction operated or bus (coach), where coach, crossed out in pencil.indiana railroad (electric cars), indianapolis, terre haute, timetables -
 Ballarat Tramway Museum
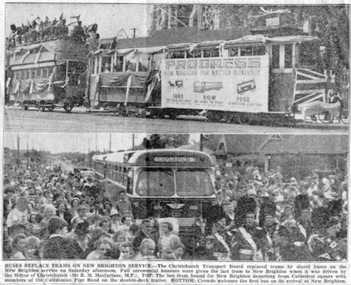
Newspaper, The Press, "Buses replace trams on New Brighton Service", Oct. 1952
Newspaper cutting with 2 photos and caption of closure of Christchurch NZ's New Brighton tram route, titled "Buses replace trams on New Brighton Service" and replacement with buses - 20/10/1952. Page 8 of the "The Press", Mon. Oct 20, 1952. Record revised 20/9/2013.trams, tramways, christchurch, brighton trams closure, closure -
 Ballarat Tramway Museum
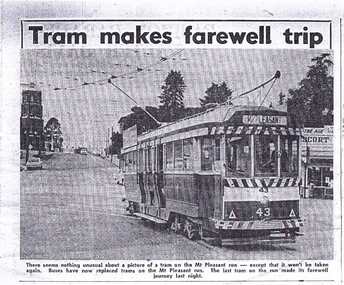
Document - Photocopies, Ballarat Tramway Museum (BTM), newspaper items - Ballarat closure, Mar. 1996
Photocopies of original newspaper clippings from the Ballarat Courier. Originals of cuttings held - see notes below. 278.1 - "Tram makes farewell trip" - photo of No. 43, near dusk on Mt. Pleasant route, fire station in background. - Sunday Sept. 5, 1971. - Courier Monday 6/9/1971 - A4 sheet. - (See Reg. Item 2907 for actual copy of cutting) 278.2. - "Last Journey for 39" - report on tram 39 last trip to Mt. Pleasant by Judy Graham - page 1 of Courier, 6/9/1971 - A4 sheet. - See Reg. Item 2908.1 for actual copy of cutting and 2908.2 for 2nd part on page 2. 278.3 - "Tram Change Uneventful" - report in the Courier of 24/8/1971, day after buses started on Victoria Street and photo of overhead dismantling (A4 sheet). - See Reg Item 1065 for actual copy of the cutting. 278.4. - "Many will miss tram" - report in Courier, Monday 23/8/1971 - following closure of Victoria St. route on 232/8/1971. Photo of No. 31 at Victoria St. (A3 sheet). (See Reg Item 1068 for actual copy of cutting). 278.5 - "Pieces of Tram History" - item in Courier of Wed. 22/9/1971 of tramway Supt. Mr. Denmead, handing over tokens and sample tickets to City of Ballarat - 2 photos - A3 sheet. - (See Reg Item 1846 for actual copy of cutting). Record updated 11/9/2013 for actual cuttings held. See Page 57 of KS Kings, "Ballarat Tramways"trams, tramways, ballarat, secv, closure -
 Ballarat Tramway Museum
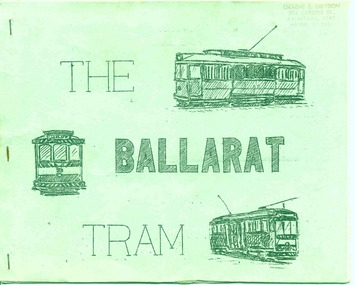
Book, A. Weston & Geoff Clark of North Sydney Boys High School, "The Ballarat Tram", Jul. 1971
Produced by the North Sydney Boys High School Railway club, prior to the closure of the Ballarat system - little else written and published at the time about the history and details of the system. A very good booklet for the time - produced entirely by the wax cut stencil process. Has a strong association with the people who prepared the document.Twenty page booklet on the history, operation and tramcars of Ballarat, produced by the Nth Sydney Boys High School Railway Club in July 1971. Printed on a wax cut stencil process, with green covers, drawings, maps, track layout, fleet list, gives tentative closure dates, route descriptions, sketches, stapled on edge. Title "The Ballarat Tram". Stapled on the left hand side. Three copies held - 3rd copy added 22/10/05. 4th copy added 11/10/2007 and image of cover added as well. pdf image of copy added 2/11/13 - to produce the scan, copy 2 was unstapled and filed loose - may not open properly in dbtext. find file and open directly. See Reg Item 6388 for the Bendigo version.3rd copy - page 3 - in black ink "Ballarat Tramway Preservation Society Catalogue No. 118", On top right hand corner "Graeme Breydon address stamp"trams, tramways, ballarat trams, secv, tramcars -
 Tennis Australia
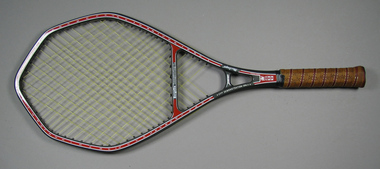
Racquet, Circa 1986
Three-part object. (1) A MacGregor 'Bergelin Long String' model tennis racquet with polygonal head shape, open throat and handle wrapped with leather. Plastic butt cap embossed with words: 'LONGSTRING/TENSION'. Net strung in diamond pattern, and net extends beyond head into open throat area. On edges of racquet, strings are routed along edge of head and shaft and anchored into handle. Manufacturer name printed along both sides of open shaft. Model name printed across base of head. Series of guide numbers printed around head and open throat area. (2) Black faux-suede three-quarter racquet cover with zipper, printed with manufacturer name and racquet model name in blue, red & white. (3) Player manual booklet, housed in pocket inside cover. Materials: Graphite, Leather, Vinyl, Paint, Ink, Paper, Metaltennis -
 Tennis Australia
Racquet, Circa 1988
A MacGregor 'Bergelin Long String 2' model tennis racquet with polygonal head shape, open throat and handle wrapped with perforated leather. Plastic butt cap embossed with words: 'LONGSTRING/TENSION'. Net strung in diamond pattern, and net extends beyond head into open throat area. On edges of racquet, strings are routed along edge of head and shaft and anchored into handle. Manufacturer name printed along right pillar of open shaft. On left pillar is printed: 'FOR DEMONSTRATION ONLY'. Model name printed across base of head. Series of guide numbers printed around head and open throat area. Materials: Graphite, Leather, Vinyl, Ink, Adhesive tapetennis -
Kew Historical Society Inc
Journal, The Kewriosity Sheet Vol.2 No.2 : July 1980
What's doing in Kew for July / p1. The origins of Kew / Elizabeth Mackie p1. Yooralla Seminars / p1. Lyrebirds / p1. Printers err / p1. East Kew Baptist Church news / p2. Kew Elder Citizens Club fete / p2. National Boys' Choir [Foster Parents Care Centre] / p2. Portrait of Kew [Exhibition - Donald Cameron; Gwen Walker] / p2. "Teenagers" - a seminar for professional staff who work with teenagers / p2. Kew Garden Club / p2. Fashion Parade [Wellington Clothes; St David’s Uniting Church] / p2. Poets Corner / p2. Council News [Urgently required school crossing supervisors; Search for outstanding young Australians; After School Programme; C.R.B. - Route E6 Environmental effects [Eastern Freeway] / p2.The Kewriosity Sheet (1979-83) was first published in the City of Kew (Victoria) in June 1979 as a two-sided 'community newssheet'. It aimed to: 'share news about Kew happenings and Kew people, and to exchange ideas about living in Kew'. Later issues gradually evolved into a 4-page, quarto sized publication. The Kewriosity Sheet was superseded by the Kew Council publication 'Kewriosity' (1983-1994).non-fictionWhat's doing in Kew for July / p1. The origins of Kew / Elizabeth Mackie p1. Yooralla Seminars / p1. Lyrebirds / p1. Printers err / p1. East Kew Baptist Church news / p2. Kew Elder Citizens Club fete / p2. National Boys' Choir [Foster Parents Care Centre] / p2. Portrait of Kew [Exhibition - Donald Cameron; Gwen Walker] / p2. "Teenagers" - a seminar for professional staff who work with teenagers / p2. Kew Garden Club / p2. Fashion Parade [Wellington Clothes; St David’s Uniting Church] / p2. Poets Corner / p2. Council News [Urgently required school crossing supervisors; Search for outstanding young Australians; After School Programme; C.R.B. - Route E6 Environmental effects [Eastern Freeway] / p2.community publications --- kew (vic.), the kewriosity sheet, newsletters - kew (vic.) -
 Kew Historical Society Inc
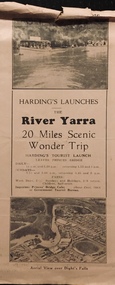
Flyer, Melbourne Ferries Pty Ltd, River Yarra: 20 Miles Scenic Wonder Trip
Bifold brochure including route map of the full 44 mile 'Wonder Trip' on pages 2 & 3. Photos used include an 'Aerial view over Dight's Falls', two ferries, and a 'Scene near Dight's Falls'.Flyer for Harding’s Launches on the River Yarra: 20 miles scenic wonder trip. Aerial view over Dight’s Falls on front. non-fictionBifold brochure including route map of the full 44 mile 'Wonder Trip' on pages 2 & 3. Photos used include an 'Aerial view over Dight's Falls', two ferries, and a 'Scene near Dight's Falls'.river yarra, melbourne ferries pty ltd, yarra river -- tourism, harding's cruises, christian-washfold collection -
 8th/13th Victorian Mounted Rifles Regimental Collection
Photograph - 8th Cav NT
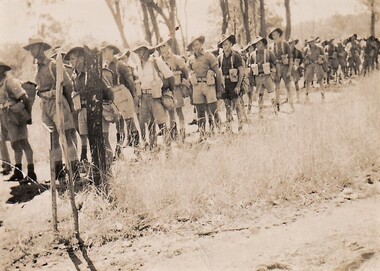
8th Cavalry Regiment took over airfield defence from 2/7 Cavalry Regiment 1942Shows 8th Light Horse in Northern Territory 1942.Black and white photograph of line of soldiers of 8th Cavalry in Northern Territory 1942, Dress is hats, shirts & shorts, boots and anklets and basic webbing" Start of an 60 mile route march "northern territory, cavalry, 8th -
 Surrey Hills Historical Society Collection
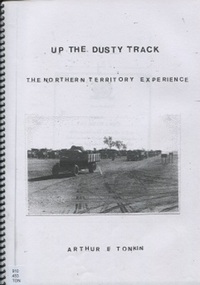
Personal memoir, Arthur Tonkin, Up the Dusty Track: The Northern Territory Experience
This is a personal account of Arthur Ernest Tonkin's experiences during World War 2. Arthur was a member of the 147 Australian General Transport Company. He enlisted in Alice Springs and spent the war as a driver along the route between Alice Springs and Darwin. There was no railway between Alice Springs and Darwin, and the road was more like a dirt track, but was essential for transportation of troops and supplies. Arthur was born in 1921 and spent most of his life in Surrey Hills.This is a compelling memoir written by a gentleman with a profound interest in history and an outstanding memory for detail, so although compiled when he was an advanced age, it is a significant memoir.illus.; 22p.; photos, A4 photocopied booklet spiral boundworld war, 1939-1945, darwin overland maintenance force, (mr) (lt col) noel medway loutit, central australian motor transport group, arthur ernest tonkin, memoir -
 Port Fairy Historical Society Museum and Archives
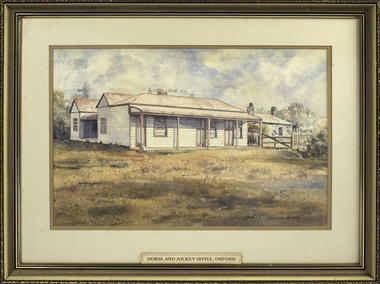
Painting - painting, watercolour, Horse and Jockey Hotel Orford, 01.02.1984
Painted for Mrs Ruby Young whose family owned the hotel at one time - (since burnt down) The hotel was built around 1857 near "Shaw Crossing" when Cowton and Bland selected the site because the bullockies watered and rested their stock on route Belfast and Portland. The name of the hotel came about because the winning post for the horse races was in front of the inn and the jockeys weighed in there.Illustration of a hotel that became the hub of social life in Orford that no longer exists.Watercolour painting of "Horse and Jockey" Hotel Orford. Frame composite wooden gilt embossingChristopher Mathews Ruby Young 1989 50 Whalers Road Victor Harbor S.A. 5211 1/2/84local history, illustrations, watercolours, horse and jockey hotel, ruby young, horseracing -
 Port Fairy Historical Society Museum and Archives
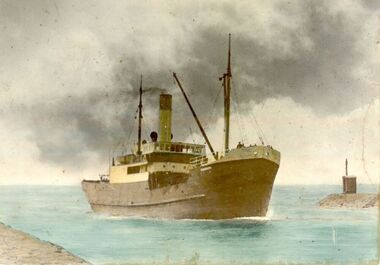
Photograph, Early 20th Century
WANNON 567 gross tons. Lbd: 167'4" x 26'6" x 11'. Steel hulled, single screw steam coaster, coal burner (burnt briquettes when on Melbourne-Tassie run); 3cyl triple expansion steam engine, 61 nhp; built 1919 at Enkhuisen, Holland, as Boschpolder; 1920 as British flag Rawlinson; 1922 to Canterbury Steamship Co. Ltd. Lyttleton, N.Z, as Gale; 1935 to Belfast & Koroit Steam navigation Co. Ltd., Melbourne, renamed Wannon to ply the Portland, Port Fairy, Warrnambool, Apollo Bay, Melbourne trade route after the loss of S.S.Coramba off Phillip Island. World War 2 as (S-153) carried general equipment, stores to U.S. Army camps at islands such as Woodlark, Kiriwina, Goodenough. Also served at Lae, Finschhafen and Wewak. Returned to owners and in 1957 went to Hong Kong shipbreakers hand tinted photograph of shipship, boat, sea, river, s.s.wannon -
 University of Melbourne, Burnley Campus Archives
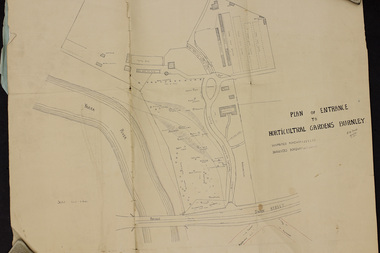
Plan, Plan of Entrance to Horticultural Gardens Burnley, 1932
Copy of plan photographed at the Public Records Office Victoria. (1) Hand drawn plan signed by A.W. Jessep 8/12/32 with 'Suspected Roadway' and ' Suggested Roadway'. Scale 1 inch - 1 chain. Trees on East side named. (2) Memorandum to The Agricultural Superintendent dated 08.12.1932 'Re Proposed Boulevard Along the River Yarra' from the Principal A.W. Jessep. Plan had been to put road through the Lagoon Paddock and he suggested the route outside the Burnley College grounds.prov, burnley gardens, a.w. jessep -
 Surrey Hills Historical Society Collection
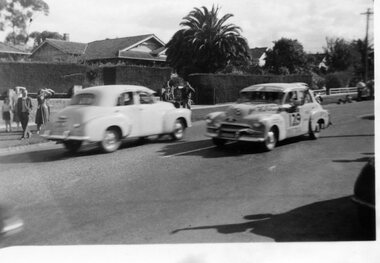
Digital photo, George L Coop, Redex trial on Whitehorse Road, Mont Albert, 1953, 1953
The FJ Holden is iconic in Australian motoring history. It was made in Australia by Holden from 1953 to 1956. During the 1950s, Holden dominated the Australian car market and by 1958 sales accounted for over 40 per cent of total car sales in Australia. The Redex Reliability Trial 1953 -The first Redex round-Australia reliability trial covered of 6,500 miles (10,500 km), and had a first prize of £1,000. It attracted both amateur and professional drivers in a variety of cars. The route passed through Brisbane, Rockhampton, Townsville, Darwin, Alice Springs, Adelaide and Melbourne before returning to Sydney and attracted much public interest. At the time the idea of driving huge distances around the country in ordinary cars was novel and the logistics were challenging. In many parts of the country there simply wasn’t adequate accommodation or suitably located refuelling stops. The Shell Company facilitated the race by placing petrol dumps along the 5000 km route between Townsville and Adelaide. The race began at the Sydney Showground on 30 August when 192 cars left at three-minute intervals. Of the twenty top finalists, two thirds were sponsored. Ken Tubman and John Marshall won the trial in a Peugeot 203. A black & white photo taken from near 688 Whitehorse Road. It includes 2 FJ Holdens - one is probably a passing car; the other is covered with labels and can assume to be competing in the trial. On the far side of the road are onlookers of men, women and one child standing on a wide nature strip. One man is taking photos. The houses behind are obscured by high hedges, but appear to be Californian bungalows, one with a large palm tree in its front garden.redex reliability trial, 1953, fj holden, whitehorse road, mont albert -
 Mont De Lancey
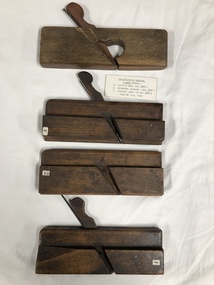
Planes, 1. Mid 1800's, 2. Late 1800's. 3. Early to mid 1800's. 4. Circa 1900
3 wooden Router Planes, and 1 wooden Rebate Plane. 3 Router planes:- 1. Atkin & Sons 2. Matheson, Glasgow 3. Highton.planes, router planes, rabbet planes -
 Phillip Island Conservation Society Inc.
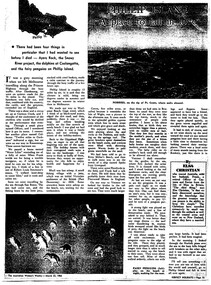
Work on paper - Photocopy of newspaper cutting, "PHILLIP ISLAND/A place to fall in love"
This article was written by an English visitor named Elsa Christian who was touring Australia and New Zealand with her husband Frank in their own small van. The article was published in the Australian Women’s Weekly, magazine, March 1966. Elsa writes she wanted to visit four Australian locations before she died: Ayers Rock (actually Uluru), the Snowy River project, dolphins at Coolangatta and the Penguin Parade at Phillip Island. These destinations were all very popular in the 1960s for both Australian residents and overseas visitors. Because the roads were becoming better too many locations, self guided tours in small vans for cars towing bond would caravans were becoming more popular means of seeing AustraliaThe article is significant in many ways. 1. Indicates the places English visitors commonly wish to see in Australia. 2. Describes the growing trend to self- drive van/camping holidays. 3. Gives the route taken from Melbourne to Phillip Island during the 1960s. 4. Describes the appearance of the roadsides and locations visited. 5. It is written in a descriptive and lyrical style designed to appeal to Women’s Weekly magazine readers, who were probably wondering how they could visit Phillip Island with their husbands or families themselves, and what there was to see there. 6. Gives the visitors’ view of how the Penguin Parade operated at the time. 7. Includes a description of potter and artist Eric Juckert’s renowned garden at Grossard Point, Ventnor. 8. Indicates how introduced plants such as Hawthorn pushes and Kate weed were common in the area. 9. Describes Phillip Island as “a place to fall in love” because of its natural beauty, fauna and coastal seascapes. 10. As a visitor Elsa describes the housing estates as a blot on the landscape, but also sees the value as a way of their owners escaping from the hustle and bustle of Melbourne. 11. Gives the visitors’ interpretation of the behaviour of wildlife the RC in the wild, as well as Elsa’s knowledge about some of the species she encounters.Photocopy of full page article with 5 columns of text, a map and 2 photographs. Black ink on white paper. Photographs blackened in photocopying processphillip island, cape woolamai, penguin parade, seal rocks, nobbies, township of rhyll phillip island, princes highway, dandenong, pakenham, kooweerup, carinya creek, officer, san remo, gippsland highway, holiday homes, fort dumaresq, kitty miller's beach, wreck of the speke, hereford cattle, fleetwood manor, koalas, ventnor, eric juckert, little penguin behaviour -
 Wodonga & District Historical Society Inc
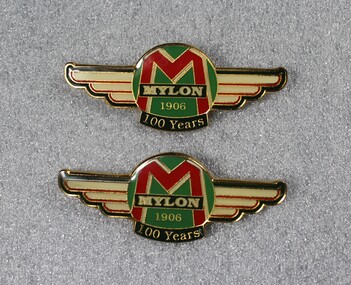
Memorabilia - Mylon's Wodonga, Victoria Centenary Badge, C. 1906
In 1906 Patrick Mylon started a passenger transport service in the Albury-Wodonga border area with horses and cabs. His son Jack went into business in the late 1920s, and his grandson Bernie joined the firm early in 1970. When Patrick started with the horses and cabs, each cab carried eight passengers and he always had two horses per cab. As the business expanded, Mylons used a range of buses and coaches including Reo, Chev and Bedford vehicles. During more than 100 years of service to the Wodonga region and beyond, Mylon Motorways received many awards for Excellence and tourism. On July 2, 2008 the company, including its 31 buses and 45 staff members were transferred to the Dyson Group. Mylon were formed in 1906 providing transport service between Wodonga and Albury via horse-drawn cabs. This expanded to a modern fleet of more than 31 buses offering a range of regular bus routes and tours throughout the area and beyond. They were recognised for outstanding service and awards of excellence in the transport industry and tourism.Badges produced to celebrate 100 years of Mylon's operation in Wodonga. Logo includes the Mylon company logo featuring a red M on a green background and 3 gold bars. The word 100 years and 1906 have been added in gold lettering.In centre of logo " 1906/ 100 years"mylon, buslines, wodonga, wodonga businesses, transport -
 Wodonga & District Historical Society Inc
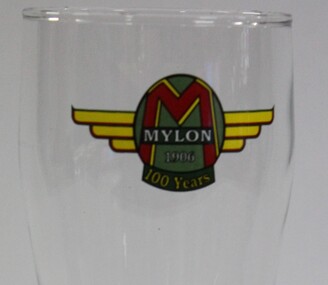
Memorabilia - Souvenir Schooner Glass Mylon Centenary, C. 1906
In 1906 Patrick Mylon started a passenger transport service in the Albury-Wodonga border area with horses and cabs. His son Jack went into business in the late 1920s, and his grandson Bernie joined the firm early in 1970. When Patrick started with the horses and cabs, each cab carried eight passengers and he always had two horses per cab. As the business expanded, Mylons used a range of buses and coaches including Reo, Chev and Bedford vehicles. During more than 100 years of service to the Wodonga region and beyond, Mylon Motorways received many awards for Excellence and tourism. On July 2, 2008 the company, including its 31 buses and 45 staff members were transferred to the Dyson Group. Mylon were formed in 1906 providing transport service between Wodonga and Albury via horse-drawn cabs. This expanded to a modern fleet of more than 31 buses offering a range of regular bus routes and tours throughout the area and beyond. They were recognised for outstanding service and awards of excellence in the transport industry and tourism.Two schooner glasses produced to celebrate 100 years of operation in Wodonga. Logo includes the Mylon company logo featuring a red M and 3 gold bars. The word 100 years and 1906 have been added in gold lettering.In centre of logo " 1906/ 100 years"mylon, transport, wodonga, buslines -
 Wodonga & District Historical Society Inc
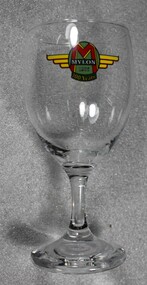
Memorabilia - Souvenir Wine Glass Mylon Centenary, C. 1906
In 1906 Patrick Mylon started a passenger transport service in the Albury-Wodonga border area with horses and cabs. His son Jack went into business in the late 1920s, and his grandson Bernie joined the firm early in 1970. When Patrick started with the horses and cabs, each cab carried eight passengers and he always had two horses per cab. As the business expanded, Mylons used a range of buses and coaches including Reo, Chev and Bedford vehicles. During more than 100 years of service to the Wodonga region and beyond, Mylon Motorways received many awards for Excellence and tourism. On July 2, 2008 the company, including its 31 buses and 45 staff members were transferred to the Dyson Group.Mylon were formed in 1906 providing transport service between Wodonga and Albury via horse-drawn cabs. This expanded to a modern fleet of more than 31 buses offering a range of regular bus routes and tours throughout the area and beyond. They were recognised for outstanding service and awards of excellence in the transport industry and tourism.A wine glass produced to celebrate 100 years of operation in Wodonga. Logo includes the Mylon company logo featuring a red M and 3 gold bars. The word 100 years and 1906 have been added in gold lettering.In centre of logo " 1906/ 100 years"mylon, transport, wodonga, buslines