Showing 52819 items
matching crossing-the-line
-
 Flagstaff Hill Maritime Museum and Village
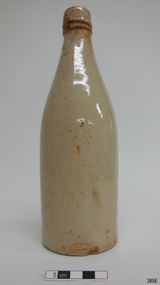
Ceramic - Stoneware Bottle, Dundas Pottery, Late 1800s to early 1900s
This bottle was made in Scotland and recovered decades later from a shipwreck along the coast of Victoria. It may have been amongst the ship's cargo, its provisions or amongst a passenger's personal luggage. It is now part of the John Chance collection. Stoneware bottles similar to this one were in common use during the mid-to-late 19th century. They were used to store and transport. The bottles were handmade using either a potter's wheel or in moulds such as a plaster mould, which gave the bottles uniformity in size and shape. The bottle would then be fired and glazed in a hot kiln. Makers often identified their bottles with the impression of a small symbol or adding a colour to the mouth. The manufacturer usually stamped their bottles with their name and logo, and sometimes a message that the bottle remained their property and should be returned to them. The bottles could then be cleaned and refilled. DUNDAS POTTERY WORKS - The Dundas Pottery works were established in 1828 by William Johnstone in partnership with John Forsyth and John Mc Coll. Located where the Forth and Clyde Canal joined the Monkland Canal, North of Glasgow. Johnstone sold the pottery in 1835 to Robert Cochran and James Couper. Mc Coll was retained as manager until 1837when in 1839 Cochran & Couper sold the pottery and purchased the St Rollex Glass Works. George Duncan took over briefly but died in 1841, with the pottery possibly being run by his widow Helen and a potter named Alexander Paul. James Miller was the manager at the time and he bought the pottery in 1856, in partnership with John Moody. Miller's long and careful stewardship of the pottery saw success from the export market which allowed him to purchase the North British pottery in 1867 until 1874 when it was sold. In 1875, Miller, in partnership with John Young, leased part of Caledonian Pottery, naming it Crown Pottery, however, it burned down in 1879. In the early 1880s, Young extended the pottery and named it Milton Pottery. Miller’s son, James W., became a partner in Milton pottery in 1905. James Miller Snr died in 1905 and the company continued as a limited liability company, being sold to the Borax Consolidation Ltd in 1929, but it was unsuccessful and Possil pottery purchased some of the company's equipment before it finally closed in 1932. From 1828 until the James Miller period of circa 1856, the pottery produced salt-glazed stoneware for the local industrial trade; mainly bottles and drain pipes. James Miller produced various bottles, whisky and acid jars, casks, butter crocks, jam jars and domestic wares in Bristol glaze. He streamlined the water filter manufacturing, which had become a specialty of the pottery, and a dedicated section of the pottery was created solely for their production, which was exported worldwide.This stoneware bottle is historically significant for its manufacture and use in the late 19th to the early 20th century. This bottle is historically significant for its connection with the well-known stoneware manufacturers, Dundas Pottery of Glasgow, Scotland. The bottle is also significant as it was recovered by John Chance, a diver, from a wreck on the coast of Victoria in the 1960s-70s. Items that come from several wrecks along Victoria's coast have since been donated to the Flagstaff Hill Maritime Village’s museum collection by his family, illustrating this item’s level of historical value.Bottle, salt glazed stoneware, beige, sealed with cork, no discolouration . Inscriptions stamped near base.Stamp: [symbol of concentric ovals], text within the symbol "PORT DUNDAS POTTERY COY." and "GLASGOW". Stamp:[Symbol - square with short vertical line in centre of base line]flagstaff hill, warrnambool, flagstaff hill maritime museum, maritime museum, shipwreck coast, flagstaff hill maritime village, great ocean road, john chance, shipwreck artefact, stoneware, ironstone, pottery, bottle, port dundas pottery, glasgow, antique bottle, william johnstone -
 Flagstaff Hill Maritime Museum and Village
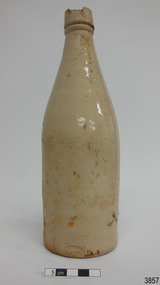
Ceramic - Stoneware Bottle, Dundas Pottery, Late 1800s to early 1900s
This bottle was made in Scotland and recovered decades later from a shipwreck along the coast of Victoria. It may have been amongst the ship's cargo, its provisions or amongst a passenger's personal luggage. It is now part of the John Chance collection. Stoneware bottles similar to this one were in common use during the mid-to-late 19th century. They were used to store and transport. The bottles were handmade using either a potter's wheel or in moulds such as a plaster mould, which gave the bottles uniformity in size and shape. The bottle would then be fired and glazed in a hot kiln. Makers often identified their bottles with the impression of a small symbol or adding a colour to the mouth. The manufacturer usually stamped their bottles with their name and logo, and sometimes a message that the bottle remained their property and should be returned to them. The bottles could then be cleaned and refilled. DUNDAS POTTERY WORKS - The Dundas Pottery works were established in 1828 by William Johnstone in partnership with John Forsyth and John Mc Coll. Located where the Forth and Clyde Canal joined the Monkland Canal, North of Glasgow. Johnstone sold the pottery in 1835 to Robert Cochran and James Couper. Mc Coll was retained as manager until 1837when in 1839 Cochran & Couper sold the pottery and purchased the St Rollex Glass Works. George Duncan took over briefly but died in 1841, with the pottery possibly being run by his widow Helen and a potter named Alexander Paul. James Miller was the manager at the time and he bought the pottery in 1856, in partnership with John Moody. Miller's long and careful stewardship of the pottery saw success from the export market which allowed him to purchase the North British pottery in 1867 until 1874 when it was sold. In 1875, Miller, in partnership with John Young, leased part of Caledonian Pottery, naming it Crown Pottery, however, it burned down in 1879. In the early 1880s, Young extended the pottery and named it Milton Pottery. Miller’s son, James W., became a partner in Milton pottery in 1905. James Miller Snr died in 1905 and the company continued as a limited liability company, being sold to the Borax Consolidation Ltd in 1929, but it was unsuccessful and Possil pottery purchased some of the company's equipment before it finally closed in 1932. From 1828 until the James Miller period of circa 1856, the pottery produced salt-glazed stoneware for the local industrial trade; mainly bottles and drain pipes. James Miller produced various bottles, whisky and acid jars, casks, butter crocks, jam jars and domestic wares in Bristol glaze. He streamlined the water filter manufacturing, which had become a specialty of the pottery, and a dedicated section of the pottery was created solely for their production, which was exported worldwide.This stoneware bottle is historically significant for its manufacture and use in the late 19th to the early 20th century. This bottle is historically significant for its connection with the well-known stoneware manufacturers, Dundas Pottery of Glasgow, Scotland. The bottle is also significant as it was recovered by John Chance, a diver, from a wreck on the coast of Victoria in the 1960s-70s. Items that come from several wrecks along Victoria's coast have since been donated to the Flagstaff Hill Maritime Village’s museum collection by his family, illustrating this item’s level of historical value.Bottle, salt glazed stoneware, beige, large chip on lip of bottle. Inscription stamped near base.Stamp: [symbol of concentric ovals], text within the symbol "PORT DUNDAS POTTERY COY." and "GLASGOW". Stamp:[Symbol - square with short vertical line in centre of base line]flagstaff hill, warrnambool, flagstaff hill maritime museum, maritime museum, shipwreck coast, flagstaff hill maritime village, great ocean road, john chance, shipwreck artefact, stoneware, ironstone, pottery, bottle, port dundas pottery, glasgow, antique bottle, william johnstone -
 Flagstaff Hill Maritime Museum and Village
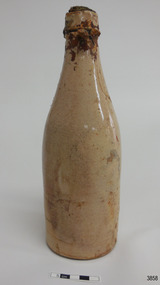
Ceramic - Stoneware Bottle, Dundas Pottery, Late 1800s to early 1900s
This bottle was made in Scotland and recovered decades later from a shipwreck along the coast of Victoria. It may have been amongst the ship's cargo, its provisions or amongst a passenger's personal luggage. It is now part of the John Chance collection. Stoneware bottles similar to this one were in common use during the mid-to-late 19th century. They were used to store and transport. The bottles were handmade using either a potter's wheel or in moulds such as a plaster mould, which gave the bottles uniformity in size and shape. The bottle would then be fired and glazed in a hot kiln. Makers often identified their bottles with the impression of a small symbol or adding a colour to the mouth. The manufacturer usually stamped their bottles with their name and logo, and sometimes a message that the bottle remained their property and should be returned to them. The bottles could then be cleaned and refilled. DUNDAS POTTERY WORKS - The Dundas Pottery works were established in 1828 by William Johnstone in partnership with John Forsyth and John Mc Coll. Located where the Forth and Clyde Canal joined the Monkland Canal, North of Glasgow. Johnstone sold the pottery in 1835 to Robert Cochran and James Couper. Mc Coll was retained as manager until 1837 when in 1839 Cochran & Couper sold the pottery and purchased the St Rollex Glass Works. George Duncan took over briefly but died in 1841, with the pottery possibly being run by his widow Helen and a potter named Alexander Paul. James Miller was the manager at the time and he bought the pottery in 1856, in partnership with John Moody. Miller's long and careful stewardship of the pottery saw success from the export market which allowed him to purchase the North British pottery in 1867 until 1874 when it was sold. In 1875, Miller, in partnership with John Young, leased part of Caledonian Pottery, naming it Crown Pottery, however, it burned down in 1879. In the early 1880s, Young extended the pottery and named it Milton Pottery. Miller’s son, James W., became a partner in Milton pottery in 1905. James Miller Snr died in 1905 and the company continued as a limited liability company, being sold to the Borax Consolidation Ltd in 1929, but it was unsuccessful and Possil pottery purchased some of the company's equipment before it finally closed in 1932. From 1828 until the James Miller period of circa 1856, the pottery produced salt-glazed stoneware for the local industrial trade; mainly bottles and drain pipes. James Miller produced various bottles, whisky and acid jars, casks, butter crocks, jam jars and domestic wares in Bristol glaze. He streamlined the water filter manufacturing, which had become a speciality of the pottery, and a dedicated section of the pottery was created solely for their production, which was exported worldwide.This stoneware bottle is historically significant for its manufacture and use in the late 19th to the early 20th century. This bottle is historically significant for its connection with the well-known stoneware manufacturers, Dundas Pottery of Glasgow, Scotland. The bottle is also significant as it was recovered by John Chance, a diver, from a wreck on the coast of Victoria in the 1960s-70s. Items that come from several wrecks along Victoria's coast have since been donated to the Flagstaff Hill Maritime Village’s museum collection by his family, illustrating this item’s level of historical value.Bottle, salt glazed stoneware, beige, sealed with cork and wax, discolouration on upper part. Inscription stamped near base.Stamp: [symbol of concentric ovals], text within the symbol "PORT DUNDAS POTTERY COY." and "GLASGOW". Stamp:[Symbol - square with short vertical line in centre of base line]flagstaff hill, warrnambool, flagstaff hill maritime museum, maritime museum, shipwreck coast, flagstaff hill maritime village, great ocean road, john chance, shipwreck artefact, stoneware, ironstone pottery, bottle, port dundas pottery, glasgow, antique bottle, william johnstone -
 Stawell Historical Society Inc
Book, Jessica Dalkin et al, The Best Old Town of All - Sheet Music
... The Best Old Town of All - Sheet Music ...Written for the Back To Stawell Celebrations in 1931?White Paper with black textPrinted Text Key of D (d to d) Underlined with one thin and one thick line. The best old Town Of All Song Words by To Robert Croll Music By Jessica A. Dalkin' Price 2/- Allan & Co Stawell 1931 Melbourne - Sydney - Adelaide - Bendigo Hand Written - Signature of Robert H. Croll Yours very sincerely Jessica .A. Dalkinstawell, music -
Stawell Historical Society Inc
Book, Jessica Dalkin et al, The Best Old Town of All - Sheet Music
... The Best Old Town of All - Sheet Music ...Written for the Back To Stawell Celebrations in 1931?White Paper with black textPrinted Text Key of D (d to d) Underlined with one thin and one thick line. The best old Town Of All Song Words by To Robert Croll Music By Jessica A. Dalkin' Price 2/- Allan & Co Stawell 1931 Melbourne - Sydney - Adelaide - Bendigo Hand Written - Signature of Robert H. Croll Yours very sincerely Jessica .A. Dalkinstawell, music -
 Eltham District Historical Society Inc
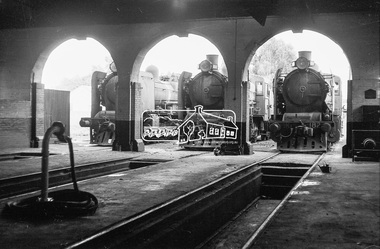
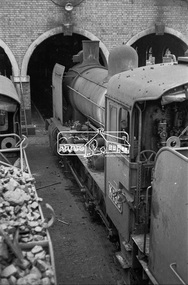
Photograph, Steam locomotives K-175, K-155 and K-182 outside the locomotive workshop, Echuca Railway Station, c.1962, 1962c
... Steam locomotives K-175, K-155 and K-182 outside the ...The K class was a branch line steam locomotive that ran on Victorian Railways in Australia from 1922 to 1979. Although its design was entirely conventional and its specifications unremarkable, the K class was in practice a remarkably versatile and dependable locomotive. It went on to outlast every other class of steam locomotive in regular service on the VR, and no fewer than 21 examples of the 53 originally built have survived into preservation. https://en.wikipedia.org/wiki/Victorian_Railways_K_classDigital TIFF file Scan of 35mm Ilford FP3 black and white negative transparencyechuca railway station, george coop collection, k-155, k-175, k-182, k-class steam locomotive (vr newport workshops), railway workshop -
 Eltham District Historical Society Inc
Photograph, Steam locomotive K-155 outside the locomotive workshop, Echuca Railway Station, c.1962, 1962c
... Steam locomotive K-155 outside the locomotive workshop ...The K class was a branch line steam locomotive that ran on Victorian Railways in Australia from 1922 to 1979. Although its design was entirely conventional and its specifications unremarkable, the K class was in practice a remarkably versatile and dependable locomotive. It went on to outlast every other class of steam locomotive in regular service on the VR, and no fewer than 21 examples of the 53 originally built have survived into preservation. https://en.wikipedia.org/wiki/Victorian_Railways_K_classDigital TIFF file Scan of 35mm Ilford FP3 black and white negative transparencyechuca railway station, george coop collection, k-155, k-class steam locomotive (vr newport workshops), railway workshop -
 Ballarat Tramway Museum
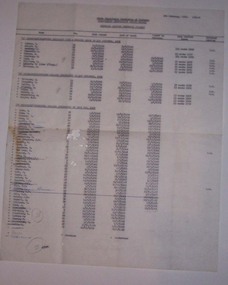
Document - List, State Electricity Commission of Victoria (SECV), "Tramways Traffic Personnel (Wages), Feb. 1970
Gives a list of names of people who worked on the Ballarat trams in the final 19 months of operations, some personal information and grade.Carbon copy of a typed list of SEC Ballarat Tramway traffic list dated 5 Feb. 1970, with hand alterations. Titled "SECV - Mid Western Electricity Supply Branch - Tramways Traffic Personnel (Wages)", gives a list of names, traffic number, position, date joined, date of birth, date passed as motorman, long service leave (taken or entitlement?) and whether a returned soldier - using letter "R.S." Three shown as "D.S." - disabled solider? List broken up into three components - "A" Motormen/Conductor Seniority List - Engaged prior to 1 Nov. 1952, - 9 Number, "B" engaged subsequent to 1 Nov. 1852 - 8 Number and "C" engaged since 30 May 1962 - 38 depending on the time. List A L Walker H Knight J Smerdon - crossed out A Turnbull - crossed out A Mercer R. Courtney W. Ward R. Williams D. Kellett - (also T/Insp.) A. Jeffreys List B D. McGregor D. Thomson I Willis D O'Leary - underlined J. Maher A. Morris D. Domaschenz R. G. Knight List C E Lake W. Maes I. Tierney B Munn N Cahill N Reynolds - crossed out W. Davies N. Hamilton L. McMahon - crossed out and (W/C) after name. J. Billman W. Nancarrow H. M. Van Oorschot W. Newell L. Bird D. Chambers H. Van Rooy H. Mannion N. Robe C. Harding - crossed out and (S/L) after name E. Van Rooy F. Edmonds - crossed out M. Blackman N. K. Alan - crossed out H. Hall J. Mason S. Davies W. F. Segrave J. F. Bolton - crossed out N. D. Hunt K. Butler - crossed out J. F. O'Brien - ruled out V. L. Gill R. K, Morris D. Everett T. Williams A. Reed R. Herauville - crossed out B. Melville I. Trenfield R. Walker - crossed out V. Thorne - crossed out B. Biddington - crossed out K. Jeffs - crossed out Hynos - in pen and crossed out Power - in pen W. Tuddenham - in pen See also list given in Reg Item 3462.1 and 3462.2 - difference in spelling for Willis = Wallis, and Power = Powell. No additional names, but not all this list names appears in the list in 3462.1Numerous crossings out of names as people left, and three additional names and numbers within circles giving sub totals and totals.personnel, sec, ballarat, crews -
 Melbourne Tram Museum
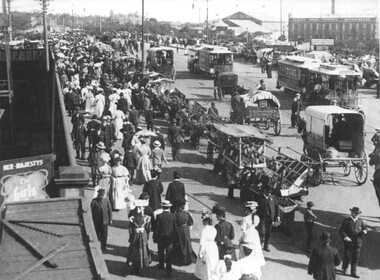
Photograph - Cable trams and stall vendors Princes Bridge, 1908
Black and white photograph of Princes Bridge looking south with produce vendor's carts and many people on both sides of the bridge, generally walking south. In the view are several horse-drawn vehicles, cable trams, one of which is bound for Queensberry St from Toorak. In the view is a poster for Le Girls at Her Majestys Theatre, Worth's Olympic Theatre, and Varley Bros Printer and Bookbinders building. Not known how the photo was dated to 1908. Photo possibly from a postcard.Yields information about Princes Bridge 1908.Black and white print with notes on the rear.In ink "Princes bridge area, crossing over railway lines 1908, City Bound tram - Toorak - Queensberry St route"tramways, tramcars, collins st, victoria bridge, cable trams -
 Stawell Historical Society Inc
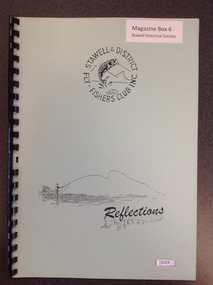
Book, Ian Holwell, Reflections, 1995
A Brief history of the Stawell & District Fly Fishers' Club Inc.Medium Blue/Geen Card cover with Black Plastic binding Black line drawing of a hooked jumping fish surrounded by print Line drawing of a man standing in water casting a fishing line with title belowIn Circle Curving up left to right: Stawell & District In Circle curving down left to right: Fly Fishers Club Inc. Below drawing: Reflectionsstawell sport -
 Ballarat Tramway Museum
Slide - 35mm slide/s - set of 23, Noel Simons, 26/02/1972 12:00:00 AM
Set of 23 transparencies taken on 26/2/1972 on Kodak mounts. 1205.1 - Bendigo No. 25 on a special tour at Fire Station Loop, en route to Golden Square. 1205.2 - No. 21 and 25 crossing at Fire Station Loop, note photographers on the ground. No. 21 bound for North Bendigo. 1205.3 - as for 1205.3, but with trams departing loop and fire station in the background. 1205.4 - No. 25 at Golden Square Hotel with 'Rodda's Golden Square Hotel' in the background. Tram on a special tour, but showing destination of North Bendigo. 1205.5 - as for 1205.4 - but showing special. Has the end of the track in the photograph. 1205.6 - Nos. 7 and 25 (on a special tour) crossing at Myrtle St. Loop. 1205.7 - No. 7 leaving Myrtle St. loop with the mine poppet head in the background. Photo taken after tram has passed photographer. (Print made of this slide 10/2001 for use in the Gold Gold Gold exhibition of 10/2001 - See Reg. item 1979. 1205.8 - No. 25 entering depot. Tram showing 'special'. Tennis court on right has players. Photo taken after tram has passed photographer. 1205.9 - No. 24 (showing 'special') and No. 20 (showing 'Long Gully') at Bendigo Depot. 1205.10 - No. 24 on a special charter, leaving Bendigo depot. Tram has two 'Johnnie Walker' roof ads. 1205.11 - Bendigo depot with 29, 25 and a bogie car inside the depot doors. 1205.12 - As for 1205.11, but with 28 and 29. 1205.13 - No. 24 standing at front entrance of Bendigo depot with No. 20 in the background. 1205.14 - No. 24 running out into McCrae St showing special, with conductor on front step. 1205.15 - No. 24 in Caledonia St. at corner of Thunder St with the Gasworks in the background. 1205.16 - No. 5 en route for Quarry Hill at Charing cross with No. 26 (en route for Eaglehawk) about to arrive. Has former crossover at this location in the foreground. Has the Ezywalkin building in the background. 1205.17 - No. 5 and 26 at Charing Cross, with the Alexandra Fountain in the foreground and the Beehive and Ezywalkin buildings in the background. No.26 has two SEC roof ads. 1205.18 - Charing Cross looking along Pall Mall with trams 7 and 21 and 26 in the picture. 1205.19 - Charing Cross, with 21 departing for Golden Square and No. 5 heading for Quarry Hill. Has the Ezywalkin and the Beehive buildings in the background. 1205.20 - as for 1205.19, but a few moments later. Adjacent pole has a "NO ROAD" letter in reflectors vertically. 1205.21 - Charing Cross with Nos. 25, 21, 26 and 7, looking south from Pall Mall end. 1205.22 - No. 24 crossing Mitchell St. en route for Golden Square, showing 'special' with the Beehive and Ezywalkin buildings in the background. 1205.23 - Charing Cross with Nos. 24, 21 and 7 in the photo and Fountain Plaza in the background. Print of 1205.7 - stored in box D1.Information written on in blue ink and date stamped on purple ink. 1205.1 - "No. 25 at Fire Station Loop High Street, Golden Square." 1205.2 - "Nos. 25 and 21 crossing at Fire Station Loop, near Golden Square." 1205.3 - "Nos. 25 and 21 crossing at Fire Station Loop, near Golden Square." 1205.4 - "No. 25 at Golden Square terminus." 1205.5 - "No. 25 at Golden Square terminus." 1205.6 - "Nos. 7 and 25 crossing at Myrtle St. Loop." 1205.7 - "No. 7 leaving Myrtle St. Loop." 1205.8 - "No 25, entering Bendigo Depot." 1205.9 - "Nos. 20 and 24 at Bendigo Depot." 1205.10 - "No. 24 at Bendigo Depot." 1205.11 - "Nos. 25 and 29 at Bendigo Depot." 1205.12 - "Birney cars 29 and 28 at Bendigo Depot." 1205.13 - "No. 24 (with 20 beyond) at Bendigo Depot." 1205.14 - "No. 24 entering McCrae St. from Arnold St." 1204.15 - "No. 24 in Caledonia St. at cnr of Thunder St." 1204.16 - "No. 5 waits at Charing Cross as No. 26 arrives from Quarry Hill. Note remains of crossover abandoned on relocation in 1965." 1204.17 - "Nos. 5 and 26 at Charing Cross." 1204.18 - "Nos. 26, 7 and 21 at Charing Cross (No. 5 just visible behind No. 26)." 1204.19 - "No. 21 leaves Charing Cross for Golden Square as No. 5 starts off for Quarry Hill." 1204.20 - "No. 21 swings onto the single track Golden Square line as No. 5 heads into Mitchell St. towards Quarry Hill." 1204.21 - "Nos. 25, 21 and 26 watch No. 7 arrive at Charing Cross from Golden Square." 1204.22 - "No. 24 at Charing Cross crossing Mitchell St." 1204.23 - "Nos. 24, 21 and 7 at Charing Cross."tramways, trams, bendigo, golden square, myrtle st., fire station, depot, charing cross, tram 5, tram 7, tram 20, tram 21, tram 24, tram 25, tram 28, tram 29 -
 Flagstaff Hill Maritime Museum and Village
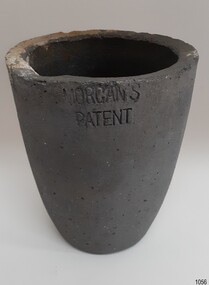
Functional object - Crucible, The Patent Plumbago Crucible Company, circa 1878
... The Patent Plumbago Crucible Company ...This crucible was raised from the wreck of the LOCH ARD. It is one of six similar relics, in a range of sizes, now in the Flagstaff Hill collection. All bear markings to indicate their manufacture by the Morgan brothers of Battersea, trading as the Patent Plumbago Crucible Co. A crucible is a container used for purifying and melting metals so that they can be cast in a mould to a predetermined shape and use. They must withstand extremely high temperatures, and abrupt cooling, and shed their contents with minimal adherence. The addition of graphite to the traditional firing clays greatly enhanced the durability of industrial crucibles in mid-Victorian Britain, a significant technological advance at a time of great activity in foundries and expansion of demand for refined metals. The Morgans first noticed the advantages of graphite crucibles at the Great Exhibition held in London in 1851. Initially, they contracted to be sole selling agents for the American-made products of Joseph Dixon and Co. from New Jersey, but in 1856 they obtained that firm’s manufacturing rights and began producing their own graphite crucibles from the South London site. The Morgans imported crystalline graphite in 4-5 cwt casks from the British colony of Ceylon (now Sri Lanka) and mixed it with conventional English (Stourbridge) clays to be fired in kilns. Their products were purchased by the Royal Mints in London and India, and exported to official mints in France and Germany. They were successful exhibitors of their crucibles and furnaces at the London Exhibition held in 1861 (Class 1, Mining, quarrying, metallurgy and mineral products, Exhibit 265, Patent Plumbago Crucible Co). The range of sizes represented by the six crucibles retrieved from the LOCH ARD, suggests they may have been part of a sample shipment intended for similar promotion in the Australian colonies ― at Melbourne’s International Exhibition to be held in 1880. The summary of the LOCH ARD cargo manifest, by Don Charlwood in ‘Wrecks and Reputations’, does not mention any crucibles, implying that they were not a large consignment of uniform items. A newspaper account of an 1864 tour of the Morgan brothers’ ‘Black Potteries’ at Battersea indicates: “All the pots were numbered according to their contents, each number standing for one kilogram, or a little over two pounds; a No. 2 crucible contains two kilogrammes; a No. 3, three kilogrammes, and so on.” These numbers are obscured by marine sediment on three of the crucibles in the Flagstaff Hill collection, but those legible on the remaining three are 5, 6, and 8. None of the six is of the same size from a visual appraisal. A brief history of the Loch Ard (1873-1878): - The sailing ship Loch Ard was one of the famous Loch Line of ships that sailed the long voyage from England to Australia. Barclay, Curdle and Co. built the three-masted iron vessel in Glasgow in 1873. It had sailed three trips to Australia and one trip to Calcutta before its fateful voyage. Loch Ard left England on March 2, 1878, under the command of recently married, 29-year-old Captain Gibbs. It was bound for Melbourne with a crew of 37, plus 17 passengers. The general cargo reflected the affluence of Melbourne at the time. Onboard were straw hats, umbrellas, perfumes, clay pipes, pianos, clocks, confectionery, linen and candles, and a heavier load of railway irons, cement, lead and copper. Other cargo included items intended for display in the Melbourne International Exhibition of 1880. The Loch Ard had been sailing for three months and was close to its destination on June 1, 1878. Captain Gibbs had expected to see land at about 3 am but the Loch Ard ran into a fog that greatly reduced visibility and there was no sign of land or the Cape Otway lighthouse. The fog lifted at 4 am and the sheer cliffs of Victoria's west coast were much closer to them than Captain Gibbs expected. He tried to manage the vessel but failed and the ship struck a reef at the base of Mutton Bird Island, near Port Campbell. The top deck loosened from the hull, and the masts and rigging crashed down, knocking passengers and crew overboard. The lifeboat was launched by Tom Pearce but crashed into the side of Loch Ard and capsized. He clung onto its overturned hull and sheltered under it. He drifted out to sea and the tide brought him back to what is now called Loch Ard Gorge. He swam to shore and found a cave for shelter. A passenger, Eva Carmichael, had raced onto the deck to find out what was happening and was confronted by towering cliffs above the ship. She was soon swept off the ship by a huge wave. Eva saw Tom Pearce on a small rocky beach and yelled to attract his attention. He swam out and dragged her to the shelter of the cave. He revived her with a bottle of brandy from a case that had washed up on the beach. Tom scaled a cliff in search of help and followed some horse hoof prints. He came from two men from Glenample Station, three and a half miles away. He told the men of the tragedy and then returned to the gorge while the two men rode back to the station to get help. They reached Loch Ard Gorge and took the two shipwreck survivors to Glenample Station to recover. Eva stayed at the station for six weeks before returning to Ireland by steamship. In Melbourne, Tom Pearce received a hero's welcome and was presented with a medal and some money. Of the 54 crew members and passengers on board, only two survived: the apprentice, Tom Pearce and the young woman passenger, Eva Carmichael, who lost her family in the tragedy. The shipwreck of the LOCH ARD is of State significance ― Victorian Heritage Register S417. Flagstaff Hill’s collection of artefacts from LOCH ARD is significant for being one of the largest collections of artefacts from this shipwreck in Victoria. It is significant for its association with the shipwreck, which is on the Victorian Heritage Register (VHR S417). The collection is significant because of the relationship between the objects, as together they have a high potential to interpret the story of the LOCH ARD. The LOCH ARD collection is archaeologically significant as the remains of a large international passenger and cargo ship. The LOCH ARD collection is historically significant for representing aspects of Victoria’s shipping history and its potential to interpret sub-theme 1.5 of Victoria’s Framework of Historical Themes (living with natural processes). The collection is also historically significant for its association with the LOCH ARD, which was one of the worst and best-known shipwrecks in Victoria’s history.A Morgan’s Patent graphite crucible No.8 (i.e. 8kgs capacity), one of a set. It was recovered from the wreck of the LOCH ARD. It is in its original grey colouring with minimal sediment accretion on the top rim. It rises in a slight curve from a flat circular base to a wider rim with a pouring lip. Maker’s marks on the side of the container clearly identify the manufacturer. The maker's details are stamped into the base around and within a circle. A white sticker is attached. Made by the Patent Plumbago Crucible Company at the Battersea Works in London. Number “8”. Letters “MORGAN’S PATENT”. Details on the base "MORGAN'S PATENT" "THE PATENT PLUMBAGO CRUCIBLE COMPANY" Symbol [8] above "BATTERSEA WORKS LONDON" Handwritten on a white sticker in black pen "LA/89"flagstaff hill, warrnambool, maritime museum, shipwreck coast, great ocean road, loch line, loch ard, captain gibbs, eva carmichael, tom pearce, glenample station, mutton bird island, loch ard gorge, graphite crucible, plumbago crucible, morgans crucible company, flagstaff hill maritime museum and village, fluxing pots, crucible, morgan’s patent, morgan brothers, patent plumbago crucible co, battersea works, london, port campbell -
 Flagstaff Hill Maritime Museum and Village
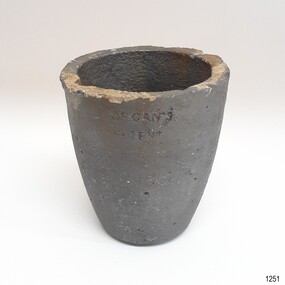
Functional object - Crucible, The Patent Plumbago Crucible Company, circa 1878
... The Patent Plumbago Crucible Company ...This crucible was raised from the wreck of the LOCH ARD. It is one of six similar relics, in a range of sizes, now in the Flagstaff Hill collection. All bear markings to indicate their manufacture by the Morgan brothers of Battersea, trading as the Patent Plumbago Crucible Co. A crucible is a container used for purifying and melting metals so that they can be cast in a mould to a predetermined shape and use. They must withstand extremely high temperatures, and abrupt cooling, and shed their contents with minimal adherence. The addition of graphite to the traditional firing clays greatly enhanced the durability of industrial crucibles in mid-Victorian Britain, a significant technological advance at a time of great activity in foundries and expansion of demand for refined metals. The Morgans first noticed the advantages of graphite crucibles at the Great Exhibition held in London in 1851. Initially, they contracted to be sole selling agents for the American-made products of Joseph Dixon and Co. from New Jersey, but in 1856 they obtained that firm’s manufacturing rights and began producing their own graphite crucibles from the South London site. The Morgans imported crystalline graphite in 4-5 cwt casks from the British colony of Ceylon (now Sri Lanka) and mixed it with conventional English (Stourbridge) clays to be fired in kilns. Their products were purchased by the Royal Mints in London and India, and exported to official mints in France and Germany. They were successful exhibitors of their crucibles and furnaces at the London Exhibition held in 1861 (Class 1, Mining, quarrying, metallurgy and mineral products, Exhibit 265, Patent Plumbago Crucible Co). The range of sizes represented by the six crucibles retrieved from the LOCH ARD, suggests they may have been part of a sample shipment intended for similar promotion in the Australian colonies ― at Melbourne’s International Exhibition to be held in 1880. The summary of the LOCH ARD cargo manifest, by Don Charlwood in ‘Wrecks and Reputations’, does not mention any crucibles, implying that they were not a large consignment of uniform items. A newspaper account of an 1864 tour of the Morgan brothers’ ‘Black Potteries’ at Battersea indicates: “All the pots were numbered according to their contents, each number standing for one kilogram, or a little over two pounds; a No. 2 crucible contains two kilogrammes; a No. 3, three kilogrammes, and so on.” These numbers are obscured by marine sediment on three of the crucibles in the Flagstaff Hill collection, but those legible on the remaining three are 5, 6, and 8. None of the six is of the same size from a visual appraisal. A brief history of the Loch Ard (1873-1878): - The sailing ship Loch Ard was one of the famous Loch Line of ships that sailed the long voyage from England to Australia. Barclay, Curdle and Co. built the three-masted iron vessel in Glasgow in 1873. It had sailed three trips to Australia and one trip to Calcutta before its fateful voyage. Loch Ard left England on March 2, 1878, under the command of recently married, 29-year-old Captain Gibbs. It was bound for Melbourne with a crew of 37, plus 17 passengers. The general cargo reflected the affluence of Melbourne at the time. Onboard were straw hats, umbrellas, perfumes, clay pipes, pianos, clocks, confectionery, linen and candles, and a heavier load of railway irons, cement, lead and copper. Other cargo included items intended for display in the Melbourne International Exhibition of 1880. The Loch Ard had been sailing for three months and was close to its destination on June 1, 1878. Captain Gibbs had expected to see land at about 3 am but the Loch Ard ran into a fog that greatly reduced visibility and there was no sign of land or the Cape Otway lighthouse. The fog lifted at 4 am and the sheer cliffs of Victoria's west coast were much closer to them than Captain Gibbs expected. He tried to manage the vessel but failed and the ship struck a reef at the base of Mutton Bird Island, near Port Campbell. The top deck loosened from the hull, and the masts and rigging crashed down, knocking passengers and crew overboard. The lifeboat was launched by Tom Pearce but crashed into the side of Loch Ard and capsized. He clung onto its overturned hull and sheltered under it. He drifted out to sea and the tide brought him back to what is now called Loch Ard Gorge. He swam to shore and found a cave for shelter. A passenger, Eva Carmichael, had raced onto the deck to find out what was happening and was confronted by towering cliffs above the ship. She was soon swept off the ship by a huge wave. Eva saw Tom Pearce on a small rocky beach and yelled to attract his attention. He swam out and dragged her to the shelter of the cave. He revived her with a bottle of brandy from a case that had washed up on the beach. Tom scaled a cliff in search of help and followed some horse hoof prints. He came from two men from Glenample Station, three and a half miles away. He told the men of the tragedy and then returned to the gorge while the two men rode back to the station to get help. They reached Loch Ard Gorge and took the two shipwreck survivors to Glenample Station to recover. Eva stayed at the station for six weeks before returning to Ireland by steamship. In Melbourne, Tom Pearce received a hero's welcome and was presented with a medal and some money. Of the 54 crew members and passengers on board, only two survived: the apprentice, Tom Pearce and the young woman passenger, Eva Carmichael, who lost her family in the tragedy. The shipwreck of the LOCH ARD is of State significance ― Victorian Heritage Register S417 Flagstaff Hill’s collection of artefacts from LOCH ARD is significant for being one of the largest collections of artefacts from this shipwreck in Victoria. It is significant for its association with the shipwreck, which is on the Victorian Heritage Register (VHR S417). The collection is significant because of the relationship between the objects, as together they have a high potential to interpret the story of the LOCH ARD. The LOCH ARD collection is archaeologically significant as the remains of a large international passenger and cargo ship. The LOCH ARD collection is historically significant for representing aspects of Victoria’s shipping history and its potential to interpret sub-theme 1.5 of Victoria’s Framework of Historical Themes (living with natural processes). The collection is also historically significant for its association with the LOCH ARD, which was one of the worst and best-known ahipwrecks in Victoria’s history.A Morgan’s Patent graphite crucible No.4 (i.e. 4kgs capacity), one of a set of three. It was recovered from the wreck of the LOCH ARD. It is in its original grey colouring with minimal sediment accretion on the top rim. It rises in a slight curve from a flat circular base to a wider rim with a pouring lip. Maker’s marks on the side of the container clearly identify the manufacturer. The maker's details are stamped into the base around and within a circle. A white sticker is attached. Made by the Patent Plumbago Crucible Company at the Battersea Works in London.Number or. Letters “MORGAN’S PATENT”. Details on the base "MORGAN'S PATENT" "THE PATENT PLUMBAGO CRUCIBLE COMPANY" Symbol [4] above "BATTERSEA WORKS LONDON" Handwritten on a white sticker in black pen "L89"flagstaff hill, warrnambool, flagstaff hill maritime museum, maritime museum, shipwreck coast, flagstaff hill maritime village, great ocean road, loch line, loch ard, captain gibbs, eva carmichael, tom pearce, glenample station, mutton bird island, loch ard gorge, graphite crucible, plumbago crucible, morgan's crucible company, flagstaff hill maritime museum and village, fluxing pots, crucible, morgan’s patent, morgan brothers, patent plumbago crucible co, battersea works, london, port campbell -
 Flagstaff Hill Maritime Museum and Village
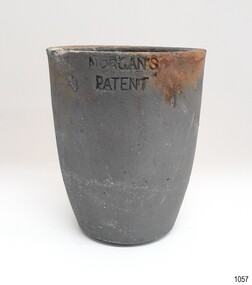
Functional object - Crucible, The Patent Plumbago Crucible Company, circa 1873
... The Patent Plumbago Crucible Company ...Crucibles are used for heating and pouring molten metal. The set of six crucibles was raised from the wreck of the Loch Ard and includes a range of sizes, now in the Flagstaff Hill collection. All were manufactured by the Morgan brothers who founded the Patent Plumbago Crucible Company in 1856, making crucibles in a small factory in Battersea London. A crucible is a container used for purifying and melting metals so that they can be cast in a mould to a predetermined shape and use. They must withstand extremely high temperatures, and abrupt cooling, and shed their contents with minimal adherence. The addition of graphite to the traditional firing clays greatly enhanced the durability of industrial crucibles this technique was pioneered by the Morgan Bros thereby making a significant technological advance in foundry technology and metallurgy. The Morgans first noticed the advantages of graphite crucibles at the Great Exhibition held in London in 1851. Initially, they contracted to be sole selling agents for the American-made products of Joseph Dixon and Co. from New Jersey, but in 1856 they obtained that firm's manufacturing rights and began producing their graphite crucibles from the South London site. The Morgans imported crystalline graphite in 4-5 cwt casks from the British colony of Ceylon (now Sri Lanka) and mixed it with conventional English (Stourbridge) clays to be fired in kilns. Their products were purchased by the Royal Mints in London and India and exported to official mints in France and Germany. They were successful exhibitors of their crucibles and furnaces at the London Exhibition held in 1861 (Class 1, Mining, quarrying, metallurgy and mineral products, Exhibit 265, Patent Plumbago Crucible Co). The range of sizes represented by the six crucibles retrieved from the Loch Ard suggests they may have been part of a sample shipment intended for similar promotion in the Australian colonies or at Melbourne's International Exhibition to be held in 1880. A newspaper account of an 1864 tour of the Morgan brothers' 'Black Potteries' at Battersea indicates: "All the pots were numbered according to their contents, each number standing for one kilogram or a little over two pounds; a No. 2 crucible contains two kilograms; a No. 3, three kilograms, and so on." These numbers are obscured by marine sediment on three of the crucibles in the Flagstaff Hill collection, but those legible on the remaining three are 5, 6, and 8. None of the six is of the same size. A brief history of the Loch Ard (1873-1878): - The sailing ship Loch Ard was one of the famous Loch Line of ships that sailed the long voyage from England to Australia. Barclay, Curdle and Co. built the three-masted iron vessel in Glasgow in 1873. It had sailed three trips to Australia and one trip to Calcutta before its fateful voyage. Loch Ard left England on March 2, 1878, under the command of recently married, 29-year-old Captain Gibbs. It was bound for Melbourne with a crew of 37, plus 17 passengers. The general cargo reflected the affluence of Melbourne at the time. Onboard were straw hats, umbrellas, perfumes, clay pipes, pianos, clocks, confectionery, linen and candles, and a heavier load of railway irons, cement, lead and copper. Other cargo included items intended for display in the Melbourne International Exhibition of 1880. The Loch Ard had been sailing for three months and was close to its destination on June 1, 1878. Captain Gibbs had expected to see land at about 3 am but the Loch Ard ran into a fog that greatly reduced visibility and there was no sign of land or the Cape Otway lighthouse. The fog lifted at 4 am and the sheer cliffs of Victoria's west coast were much closer to them than Captain Gibbs expected. He tried to manage the vessel but failed and the ship struck a reef at the base of Mutton Bird Island, near Port Campbell. The top deck loosened from the hull, and the masts and rigging crashed down, knocking passengers and crew overboard. The lifeboat was launched by Tom Pearce but crashed into the side of Loch Ard and capsized. He clung onto its overturned hull and sheltered under it. He drifted out to sea and the tide brought him back to what is now called Loch Ard Gorge. He swam to shore and found a cave for shelter. A passenger, Eva Carmichael, had raced onto the deck to find out what was happening and was confronted by towering cliffs above the ship. She was soon swept off the ship by a huge wave. Eva saw Tom Pearce on a small rocky beach and yelled to attract his attention. He swam out and dragged her to the shelter of the cave. He revived her with a bottle of brandy from a case that had washed up on the beach. Tom scaled a cliff in search of help and followed some horse hoof prints. He came from two men from Glenample Station, three and a half miles away. He told the men of the tragedy and then returned to the gorge while the two men rode back to the station to get help. They reached Loch Ard Gorge and took the two shipwreck survivors to Glenample Station to recover. Eva stayed at the station for six weeks before returning to Ireland by steamship. In Melbourne, Tom Pearce received a hero's welcome and was presented with a medal and some money. Of the 54 crew members and passengers on board, only two survived: the apprentice, Tom Pearce and the young woman passenger, Eva Carmichael, who lost her family in the tragedy. The shipwreck of the Loch Ard is of significance for Victoria and is registered on the Victorian Heritage Register ( S 417). Flagstaff Hill has a varied collection of artefacts from Loch Ard and its collection is significant for being one of the largest accumulation of artefacts from this notable Victorian shipwreck of which the subject items are a small part. The collection's objects give us a snapshot of how we can interpret the story of this tragic event. The collection is also archaeologically significant as it represents aspects of Victoria's shipping history that allows us to interpret Victoria's social and historical themes of the time. Through is associated with the worst and best-known shipwreck in Victoria's history.This crucible is the smallest of three nested crucibles, or fluxing pots, numbered according to their size. These containers rise slightly from a smaller flat base to a wider open top with a lip for pouring. They were recovered from the wreck of the Loch Ard. The crucibles have a coating of sediment that obscures some of their numerical specifications of size and capacity. Made by the Patent Plumbago Crucible Company at the Battersea Works in London. The number on this crucible is obscured by the sticker.Stamped into side "MORGAN'S PATENT" Stemped into base "MORGAN'S PATENT" "THE PATENT PLUMBAGO CRUCIBLE COMPANY" Sticker "L 96"flagstaff hill, warrnambool, graphite crucible, plumbago crucible, morgan's crucible company, loch ard, morgan potteries, crucible, fluxing pot, nested crucibles, heat proof container, metal worker, maritime museum, shipwreck coast, flagstaff hill maritime village, great ocean road, loch line, morgans crucible company, flagstaff hill maritime museum and village, fluxing pots, morgan’s patent, morgan brothers, patent plumbago crucible co, battersea works, london, loch ard gorge, port campbell -
 Melbourne Tram Museum
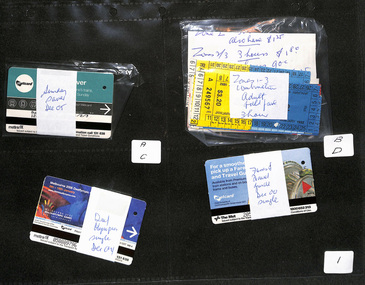
Ephemera - Ticket/s, Metlink, Set of 70 different types or blocks of Melbourne Metcards, 1980's to 2010s
... The Met ...Set of 70 different types or blocks of Melbourne Metcards, passes and associated tickets contained within their own envelope and placed in a heavy duty black folder within photographic sleeves or sheets by the Museum. All collected by Maxwell Hayes, These comprise: Folder Sheet Description 1A Sunday Saver Dec 05 1B Zones 1 to 3 combination Adult - 3 hour 1C Deaffympic games Dec. 04 1D Fares and Travel guide Dec 00 single 2A Safety and Security - Set 4 - Oct. 03 2A Federation May 01 2B Arts Festival 05 2C Melbourne Landmarks July 2000 2D Zones 1 to 3 combination concession - 3 hour 3A Herald Sun - free ticket 3B Art Set 4 Sept 03 3C Arts Festival 05, single Oct 05 3D Worlds Masters games, July 02 4A First issue March 98 4B First issue March 98 with arrows printed on top 4C Celebrity set 10 complete - Set 2 4D Early Bird tickets - wrapped with a Metlink newspaper advert. 5A MMTB / MTA Single Journey 5B Pre Decimal tickets MMTB 5C MMTB Machine tickets 5D Decimal MMTB/ MTA check tickets 6A MetroCard 1981 6B City Savers 6C MMTB Day tripper 6D MTMB/MTA paper tickets 7A Prepurchased Section tickets 7B MMTB Machine generated tickets 7C Monthly travel permits 7D MMTB Railway checks 8A Seniors travel passes 8B Victorian Railways Motor coach 8C Prepaid Travel voucher 8D City Section - concession 9A Misc. - Bus Proprietors Association tickets 9B Night Rider 9C Skybus 9D Neighbourhood Monthly 10A Neighbourhood student passes 10B Zone 1 concession 3 hour 10D Neighbourhood family travelcard 11A Neighbourhood concession 11B Set of 6 Melbourne 2000 Millennium Metcards 11C Melbourne Art Festival 2000 - set of 6 11D Federation Sq Metcard - two sets 12A Melbourne International Comedy festival Metcards 12B Free Internet trial Metcard Oct 1999 - 1 off 12C Two packets of Soccer tickets Metcards 12D Myer Metcard 13A Painted tram launch ticket 13B VR Spirit of Progress Metcard 13C Give blood Metcard May 03 13D Commonwealth Games Metcards Feb 06 14A Private bus lines 14B Melbourne food 2003 15A Neighbourhood full fare and off peak 15B Zone 1 full fare 3 hour 16A Zone full fare 2 hours 16B Neighbourhood travel cards - first issues? 17A Zone 1 to 3 and combinations full fare daily 17B TheatreWorks Travel card - Storming Mont Albert 18A National Bus Company 18B Zone concession - 2 hour 18B Machine issued MMTB - alpha zones 19A Sex (Party line) advertising on reverse 19B Machine issued MMTB Alpha zones 20A Veterans travel passes 20B Special Passes 21 Sample tickets - introduction of photo cards 22 Sample of MTA Gold pins Detail scans of Veterans passes and single journey tickets made - see images i2 to i5trams, tramways, tickets, metcard, metlink, buses, passes, nightrider -
 Ballarat Tramway Museum
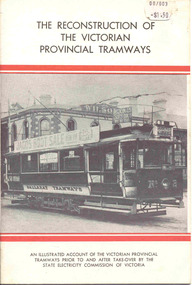
Book, B. Prentice, "The Reconstruction of The Victorian Provincial Tramways", 1976
... "The Reconstruction of The Victorian Provincial Tramways" ...Yields information on all three SEC systems through the publication of a book, especially with many Ballarat photos contained in the book. Has photos not previously published or since published. Sixteen page book plus card covers titled "The Reconstruction of The Victorian Provincial Tramways", an illustrated account of the Victorian provincial tramways prior to and after take-over by the State Electricity Commission of Victoria and the work done to rehabilitate them for further service. Compiled by Bob Prentice, published by the Haddon Tramway Workshops 1976. Outlines the creation of the SEC, the takeover of the private companies by the SEC and the question who would run their tramways, the condition of the tramways at the time of the SEC takeover, reconstruction work and maps of Geelong, Ballarat and Bendigo. Has a line drawing of Geelong No. 4 on title page. pdf scan of book added 19-3-2017 - image i5.trams, tramways, ballarat, bendigo, geelong, sec, reconstruction, map -
 Lara RSL Sub Branch
Framed collection of the Kokoda Trail, The Kodoka Trail, Circa 2018
... The Kodoka Trail. ...The Kokoda Track (or Trail) is a single-file thoroughfare that runs 96 kilometres (60ml) overland) - 60 kilometres (37ml) in a straight line - through the Owen Stanley Range in Papua New Guinea (PNG).The trail was First used by Europeans in the 1890s by miners struggling northwards to the Yodda Kokoda goldfields. During the Pacific War of World War 2 a series of battles were fought from July 1942 to January 1943 between Japanese and Australian forces.One of the bloodiest campaigns of World War 2,which has forever sealed the relation ship between Australia and Papua New Guinea began 61 years ago. This Photographic Memorial is dedicated to those Australian and Papua New Guinea forces who fought against the Japanese with courage and fortitude on the Kokoda Trail.Rectangular shaped glass covered picture frame showing a collection of photos,two flags and a Rising sun badge. The Kododa Trail.kokoda track, world war 2, papua new guinea, australian forces, lara r.s.l. -
 Robin Boyd Foundation
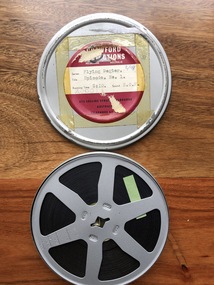
Film, Robin Boyd, The Flying Dogtor, Episode 1, 1962
... The Flying Dogtor, Episode 1 ...The Flying Dogtor is a black and white cartoon series, consisting of line drawings, devised and written by Robin Boyd. He also created the initial drawings for all the characters. The Flying Dogtor series, consisting of 52 episodes, was devised and written by Robin Boyd between 1962-1964 (items D194-D241). They were produced by Crawford Productions and broadcast on Australian Television Network, which later became the Seven Network. Hector Crawford and Robin Boyd were friends.16mm black and white film with sound. Inside a circular metal canister with lid. Duration-5:31 Minutes the flying dogtor, hector crawford, crawfords, robin boyd -
 Robin Boyd Foundation
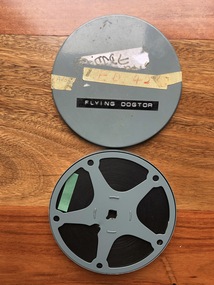
Film, Robin Boyd, The Flying Dogtor, Episode 2, 1962
... The Flying Dogtor, Episode 2 ...The Flying Dogtor is a black and white cartoon series, consisting of line drawings, devised and written by Robin Boyd. He also created the initial drawings for all the characters. The Flying Dogtor series, consisting of 52 episodes, was devised and written by Robin Boyd between 1962-1964 (items D194-D241). They were produced by Crawford Productions and broadcast on Australian Television Network, which later became the Seven Network. Hector Crawford and Robin Boyd were friends.16mm black and white film with sound. Inside a circular metal canister with lid. Duration-5:12 Minutes the flying dogtor, hector crawford, crawfords, robin boyd, ohm2022, ohm2022_5 -
 Robin Boyd Foundation
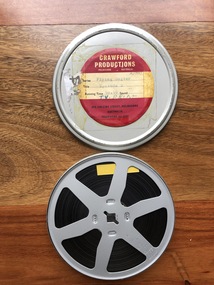
Film, Robin Boyd, The Flying Dogtor, Episode 1, 1963
... The Flying Dogtor, Episode 1 ...The Flying Dogtor is a black and white cartoon series, consisting of line drawings, devised and written by Robin Boyd. He also created the initial drawings for all the characters. The Flying Dogtor series, consisting of 52 episodes, was devised and written by Robin Boyd between 1962-1964 (items D194-D241). They were produced by Crawford Productions and broadcast on Australian Television Network, which later became the Seven Network. Hector Crawford and Robin Boyd were friends. 16mm black and white film with sound. Inside a circular metal canister with lid. Duration-5:31 Minutes the flying dogtor, hector crawford, crawfords, robin boyd -
 Stawell Historical Society Inc
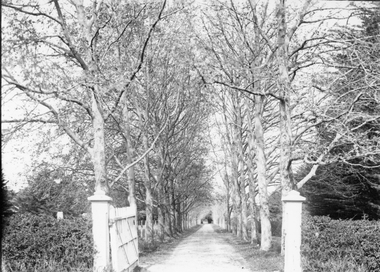
Photograph, “The Sycamores” Driveway entrance Gates
... “The Sycamores” Driveway entrance Gates ...Entrance gates to “The Sycamores” Driveway. A show place on Concongella from mid 1860's. "The Sychmores" where William Osmand lived. Osmand's "Sycamores" was in a secluded block of the eastern side of the creek along which was planted pine and cypress trees. He built a comfortable house and line the carriage way with Sycamores. Osmand was on the of the men who made money in the Stawell reefs mines. "The Sycamores" has been owned by the West family since c 1920. Black & white photograph (2 copies) of an entrance gateway with an avenue of deciduous trees.concongella -
 Federation University Historical Collection
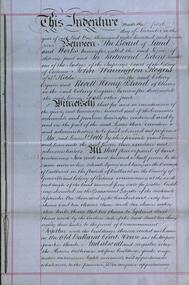
Document, Lease for the Former Ballarat Circuit Court House, Lydiard Street, Ballarat, 1870 and 1877, 05/1870; 1877
... Lease for the Former Ballarat Circuit Court House, Lydiard ...The Ballarat School of Mines opened in the former Ballarat Circuit Court House in 1870. The court house was demolished in 1915 to make way for the Ballarat Technical Art School. The Ballarat School of Mines is a predeccessor of Federation University Australia..1) Handwritten agreement on blue paper with green thread. The agreement is between the Board of Land and Works and Redmond Barry and others concerning a seven year lease of the former Ballarat Circuit Court House for use as a mining school (the Ballarat School of Mines). .2) Four lined fooscap pages relating to specifications of several works required to the Old Court House. .3) Rough notes on proposed lease of the Court House.lease, former ballerat circuit court house, redmond barry, legal, crown solicitor, gurner, robert davidson, warrington rogers, john warrington rogers, william warrington rogers, rivett henry bland, p. saunders, james williams, ballarat school of mines, ballarat school of mines establishment -
 Ballarat Tramway Museum
Book, Branford Electric Railway, "The Branford Electric Railway Timetable No. 9", 1977
... "The Branford Electric Railway Timetable No. 9" ...Forty page booklet individual pages pinned within grey covers titled "The Branford Electric Railway Timetable No. 9", dated 1/3/1977, authorised by D. K. Bowers Superintendent of Transportation. Gives Emergency Information, contact numbers, definitions, rules, timetables, special instructions and a map of the rail line. .Published by the Branford Electric Railway (Pennsylvania USA) for information and training their crews, mid 1970'strams, tramways, instructions, training, street cars, rules -
 Mont De Lancey
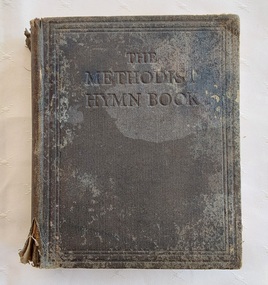
Book, Methodist Conference Office, The Methodist_ Hymn Book, Copyright, December 1933
... The Methodist_ Hymn Book ...Methodism was born in song. This Methodist Hymn_ Book is a collection of hymns that is not too large or expensive. It has the words for all the hymns included. It is an Australasia and New Zealand Edition specially prepared for and copyrighted in the Australian Commonwealth and New Zealand.A faded and damaged black fabric covered Methodist Hymn Book for Use in Australasia and New Zealand. The title is stamped into the top of the front cover and spine. The front endpapers are stained. At the back of the book there is the Australasian and New Zealand Supplement an Index of First Lines alphabetically arranged, an Index to the First Line of Every Verse, Except the First, in Each Hymn and an Index of Authors. At the front there are two Prefaces, Acknowledgements and Contents pages. Pp. 472.non-fictionMethodism was born in song. This Methodist Hymn_ Book is a collection of hymns that is not too large or expensive. It has the words for all the hymns included. It is an Australasia and New Zealand Edition specially prepared for and copyrighted in the Australian Commonwealth and New Zealand.religious books, hymns, churches -
![Map - World Map, Mappe Monde [Medieval Map of the World], 1910](/media/collectors/4f729f6597f83e03086016ea/items/5216086d19403a17c4ba1a38/item-media/66fe0677155b0b5a0d773326/item-fit-380x285.jpg) Flagstaff Hill Maritime Museum and Village
Flagstaff Hill Maritime Museum and VillageMap - World Map, Mappe Monde [Medieval Map of the World], 1910
... Mappe Monde [Medieval Map of the World] ...This map from the mid-18th century doesn't include the finer details of land and sea masses that we know today. The map was produced by German cartographer and publisher, Johann Baptist Homann (1663-1724) and published in 1746, after his death. Earlier versions were published, such as 1707 and 1716. The date can be calculated from the Roman numerals on the top left text area. This print of a map is significant for its connection with early world explorers. A comparison of maps over the centuries shows the progression of navigational technology, the countries who claimed the land they explored. The naming of even some Australian locations shows who had already made their mark on Australia in the early 18th century. The print shows the fine details included by the cartographer and the beauty included that makes it attractive and interesting even today. The map is also significant for its connection with German cartographer, Johann Baptist Homann, whose Homann publishing company was renewed in Germany for producing high quality maps and atlases. Map behind glass, in dark brown wooden frame on brown paper. The hand drawn line drawings show different hemispheres of the known world in the mid-18th century. There are beautifully drawn figures, decorative embellishments and soft watercolours. There are views of the world and of the known world. The text on the top right has an explanation of the Figures I, II, III, and IV. This print of the 1746 map was produced in England by Leisure Arts Ltd. "PLANIGLOBIL TERRESTRIS" "MDCCXXXXVI" [1746] "MAPPE_MONDE" [Medieval Map of the World] "LEISURE ARTS LTD" "Printed in England"flagstaff hill, warrnambool, flagstaff hill maritime museum, flagstaff hill maritime village, flagstaff hill maritime museum and village, shipwreck coast, world map, french map, 18th century map, leisure arts ltd, cartography, early exploration, cartographer, johann homann (1663-1724), exploration, naviagtion, 1746 planiglobil terrestris -
 Ballarat Tramway Museum
Photograph - Black & White Photograph/s - set of 2, Geoff Grant, 8/01/1956 12:00:00 AM
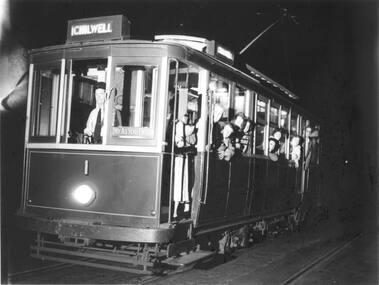
Black & White Photograph of Geelong No. 1 with destination "Chilwell", taken at night, on last day of operation of the Chilwell and East - West line of Geelong Trams, 8/1/1956. Tram has "PAY AS YOU ENTER" board on front entry of tram. See also Reg Item 5898i6 - photo by Keith Kings for a similar or same photograph. .1 - Copy large format print from Lloyd Rogers collection via Robert Green 2/2014. Added 4-4-2019Stamped on rear, btm rh corner "Geoff Grant 8 Jan. 1956 Victoria" .1 - in ink in bottom left hand corner "Last day of operation of Chilwell line 8th Jan 1956"trams, tramways, geelong, chilwell, closure , tram 1 -
 Eltham District Historical Society Inc
Photograph - Digital Photograph, Alan King, The Diamond Creek Bridge, 30 March 2008
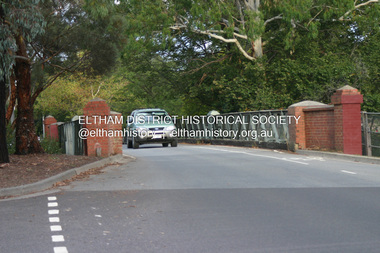
... The Diamond Creek Bridge ...Old Bridge on Main Hurstbridge road in Diamond Creek township crossing the Diamond Creek. The bridge opened in April 1898. Evelyn Observer, and South and East Bourke Record (Vic. : 1882 - 1902), Friday 22 April 1898, page 2 "Diamond Creek Bridge. The official opening of this bridge took place yesterday (Thursday) in the presence of a large gathering of people. The bridge-a substantial iron structure, costing .~r 2oo-was profusely decorated with "flags of all nations" for the occasion. In the absence of the Minister' of Public Works-who was unavoidably prevented from attending-the opening ceremony was neatly performed by President Lugton, of the Heidelberg Shire, in a few wellchosen words, after which an adjournment was made to the Literary Institute, where some sixty gentlemen were entertained at luncheon, followed by speeches, songs, and recitations. It was a red letter day for the Creek, and everything passed off with becoming eclat." Published: Nillumbik Now and Then / Marguerite Marshall 2008; photographs Alan King with Marguerite Marshall.; p7This collection of almost 130 photos about places and people within the Shire of Nillumbik, an urban and rural municipality in Melbourne's north, contributes to an understanding of the history of the Shire. Published in 2008 immediately prior to the Black Saturday bushfires of February 7, 2009, it documents sites that were impacted, and in some cases destroyed by the fires. It includes photographs taken especially for the publication, creating a unique time capsule representing the Shire in the early 21st century. It remains the most recent comprehenesive publication devoted to the Shire's history connecting local residents to the past. nillumbik now and then (marshall-king) collection, diamond creek, diamond creek bridge, main hurstbridge road -
 Eltham District Historical Society Inc
Photograph, Looking north along Main Road from intersection with Luck Street, Eltham, February 1968, Feb 1968
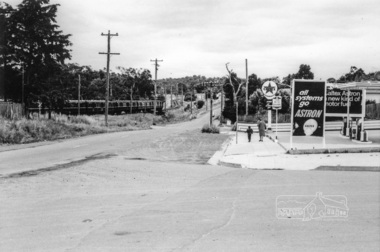
Shows the "Harris Blue" train at Diamond Street railway crossing.In February 1968 an unknown person took a series of photos from the Eltham Hotel at Pitt Street heading north along Main Road through the shopping centre to just north of Elsa Court covering the length of the section of Main Road which was duplicated shortly thereafter. Shows the condition and environment of the streesscape of Main Road, Eltham immediately prior to the duplication between Pitt Street and Elsa Court through the shopping centre. Also shows a number of shops and businesses that operated at that time.Black and white photographduplication, eltham, main road, caltex service station, luck street, railway line, train -
 Eltham District Historical Society Inc
Photograph, Looking southeast across Main Road to intersection with Cecil Street, Eltham, February 1968, Feb 1968
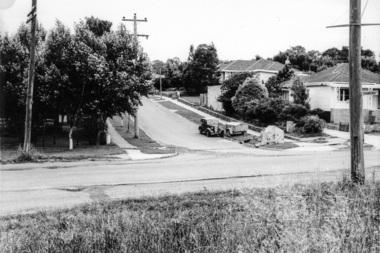
Shows street sign for Diamond Street on right with the railway crossing.In February 1968 an unknown person took a series of photos from the Eltham Hotel at Pitt Street heading north along Main Road through the shopping centre to just north of Elsa Court covering the length of the section of Main Road which was duplicated shortly thereafter. Shows the condition and environment of the streesscape of Main Road, Eltham immediately prior to the duplication between Pitt Street and Elsa Court through the shopping centre. Also shows a number of shops and businesses that operated at that time.Black and white photographduplication, eltham, main road, cecil street, diamond street