Showing 2067 items matching " bendigo show"
-
 Bendigo Military Museum
Administrative record - FORMS, GAS WW1, 1918
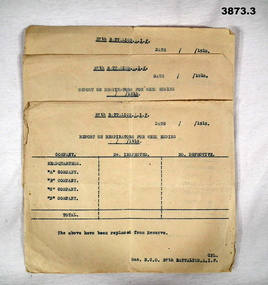
Items in the collection relating to F.A.W.Hutson No 3539 57th Bn AIF, Gas NCO. Refer Cat No 922 for his service details.Three forms on paper, printed in blue relating to the “Reporting of Gas Respirators 1918. Forms filled out to show Company by Company.All have “57th Battalion AIF, Cpl Gas NCO 57th Battalion AIF”forms, gas, 57th -
 Bendigo Military Museum
Souvenir - RECORD & COVER WW1, C.WW1
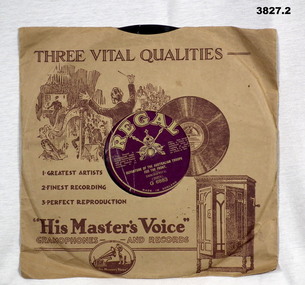
.1) Black gramophone disk by Regal made in England. Recording is of Departure of the Australian Troops for the Front. Descriptive (28378) G.6883. Disk is adhered to chipboard backing. .2) Brown paper record cover by His Masters Voice. Gramaphones & Records one side advertising Weber's Invitation to the Waltz record. Other side Three Vital Qualities. Cover has hole in centre to show record description.record, gramophone, troops, departing -
 Bendigo Military Museum
Photograph - PHOTOGRAPH WW1, 1915 - 1919
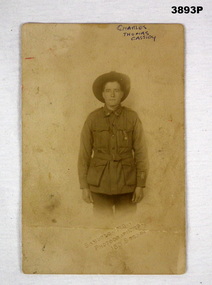
... Bendigo Military Museum 37 - 39 Pall Mall Bendigo ...Research shows the person in photo is Chas Thomas CASSIDY No 3800 9th Reinforcements 22nd BN AIF. Enlisted 22.7.1915 aged 20. Embarked 8.2.1916. Returned to Australia 29.5.1919.Post card photo, sepia, showing a soldier in uniform. The uniform shows 2 x Empire Wounded Stripes.On rear original writing in blue pen: “FROM CHARLIE TO HIS LOVER GIRL MARY” On front written later: “CHARLES THOMAS CASSIDY”photograph, postcard, 22nd -
 Bendigo Military Museum
Photograph - PHOTOGRAPH, WW1 SOLDIER, C. WW1
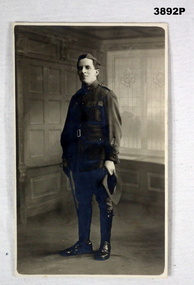
Frank Thomas DUNPHY. Refer Cat No 1093 for his service details.Post card photo, B & W showing a soldier with hat in one hand and crop in the other. Uniform shows he is wearing two x Empire wounded stripes.On the rear in pencil: “Pte F T (Tom) Dunphy Reg No 4485 6th Battalion (enlisted 12.7.1915)photograph, post card -
 Bendigo Military Museum
Document - DOCUMENT, EVACUATION, Possibly WW2
Coloured document, red / white / blue. Document folds out 4 times. Front shows a group of children with hand luggage. Details the evacuation procedure for all school children from aged between 6 - 15 years & mother or guardian. The document is for householders who may be implicated in this procedure during the war.“GOVERNMENT OF VICTORIA STATE EVACUATION COMMITTEE” “An Appeal and An Explanation”document, evacuation, families -
 Bendigo Military Museum
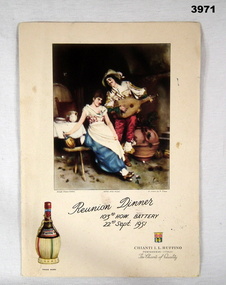
Card - CARD REUNION, 1951
Menu in the collection of "Frederick Campbell MOLLER" No 2233 AIF. Photo of Reunion refer Reg No 3970. Refer Reg No 1661.3 for his service details.Reunion Dinner folding menu card. Front has colour painting of a couple with an instrument & wine, a table in the background. Picture of a wine cask in bottom LH corner. Inside shows the menu typed and pasted in.Below picture on front: “Reunion Dinner 103RD HOW BATTERY 22nd Sept 1951” “Inside are 18 signatures of personnel attending”card, reunion, 103rd, frederick campbell moller -
 Bendigo Military Museum
Postcard - POSTCARDS, PHOTOGRAPHIC WW1, (.1) Dec 7.12.15, (.2) 31.10.16
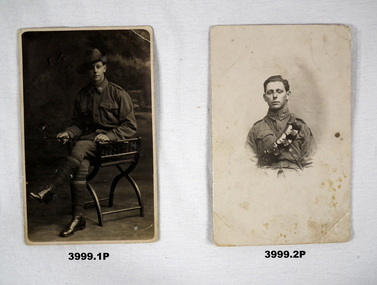
Both letters to “Lena” are from Tom WATT. As well as his signature someone has written his name as in blue pen. One letter is just signed “Tom” the other “Gunner T H Watt”. It is believed this is "Thomas Henry WATT", born Bendigo. He had pre war service in the 67th Bn Senior Cadets, no dates given. Regt No 3670 shows he enlisted on 20th or 28th Dec 1915 in the 8th reinforcements 21st Bn age 20 years. It shows he embarked just 9 days or 1 day later on 29.12.1915. He transfers to the 60th then 57th Bn and then on 17.3.1916 5th Div Artillery. he is mustered as “Gunner” and transfers to 5th DIV DAC (Ammunition Column) on 25.5.1916. (.1) The letter is dated Dec 7.12.1915 two weeks or so prior to enlistment dates. The end of the letter talks about being sick and possibly missing going with the next draft. There are 3 other sketchy records showing enlisted 12.7.1915, 5th DAC 15.7.1915, AWL Bendigo 4.11.1915. This would fit in better than enlisting and embarking in not much more than a week. Tom married Margaret McCALL in Scotland 25.4.1919 prior to coming home. Refer Cat No 3996P re “Lena” and other cards, 4000.2 from “Tom”.(.1) Postcard photo, B & W showing a soldier seated on a chair with a crop, studio background. On rear extensive letter in black pen to “Dear Lena”. (.2) Postcard photo, B & W, portrait of a soldier, no hat, bandolier over shoulder, clear background. On rear brief letter in black pen addressed to “Dear Lena”. postcard, lena, 21st, thomas henry watt -
 Bendigo Military Museum
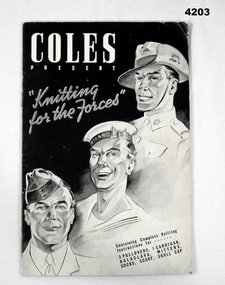
Booklet - BOOKLET, WW2, Johnson, Fear and Kingham PTY LTD, Coles Present "Knitting for the Forces", Post 1939
The booklet was published for “Coles Stores” Australia wide.The front cover shows in B & W drawings of the 3 Forces, inside is 15 pages in black print on white paper of instructions for knitting garments deemed most suitable for the Armed Forces as per the front cover.On the back of page 15 is a 7 inch ruler marking for measurement.coles, knitting -
 Bendigo Military Museum
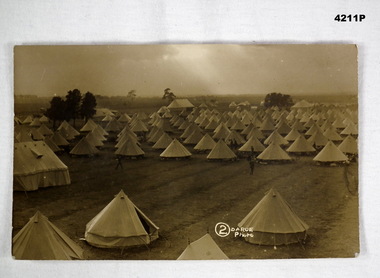
Postcard - POSTCARDWW1, PHOTOGRAPHIC, Poss 1914 - 15
Sepia tone photo postcard of Broadmeadows Military camp. Photo shows lines of tents with several larger tents dispersed amongst. On the rear is hand written text.On the rear, “A Coy 5th Bttn Broadmeadows Camp, To Dear Master John from Charles ........ Taylor”broadmeadows camp, 5th bttn -
 Bendigo Military Museum
Award - MEDALS WW2, Post 1945
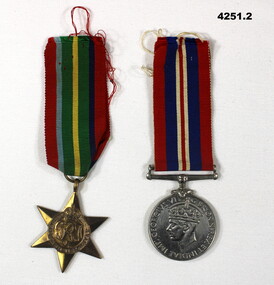
The medals are two off four entitled to Stanley Ernest Scoles. Enlisted in the RAAF as No 11717 on 5.8.1940 age 31 years, promoted to Cpl 1.10.1941, Sgt 1.8.1942. His overseas service shows he was in Port Moresby from 15.3.1943 then Goodenough, Kiriwina then Goodenough until arriving in Nadzab on 4.12.1943, Nadzab from then until arriving back in Townsville on 25.6.1944. Discharged from the RAAF on 11.12.1944 with the rank of Sgt in Airforce HQ..1) Pacific Star and ribbon unmounted. .2) British War medal and ribbon 1939 - 45 unmounted..1) on rear, “11717 S.E.Scoles. .2) around edge, “11717 S.E.Scoles”medals, militory, history -
 Bendigo Military Museum
Photograph - SUNDERLAND PHOTO, The Associated Press, Post 1943
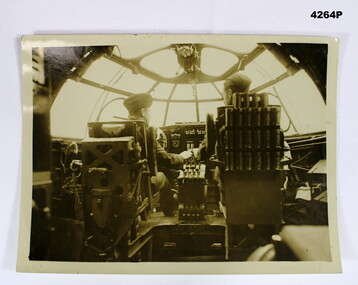
Item in the collection of Reginald Charles Allardice No 418557 RAAF. Refer Cat No 3627.5 for his service details.Sepia tone photo showing two pilots in the cock[pit of a Sunderland Flying Boat. On the rear is pasted a note typed in purple describing the photo.On the rear in Brief, “ Photo shows Australian Airman on the cockpit get acquainted with the control of a Sunderland Flying Boat”. “RID%220815 (M1653)”photography, sunderlands -
 Bendigo Military Museum
Book - RELIGIOUS BOOKS, 1) 1940
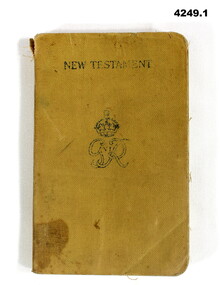
Items in the collection of Lawrence Vernon Andrews VX114736 2nd AIF. Refer Cat No 4228 for his service details..1) Yellow cloth covered “NEW TESTAMENT” with 384 pages, centre of front cover has a crown over G.R. .2) Red cardboard covered “The Gospel of John the Apostle”, 80 pages.1) Inside, “ With best wishes from C.R Brown YMCA Representative Show grounds Military Camp Sydney 1942”new testament, gospel, bible, st john -
 Bendigo Military Museum
Photograph - PHOTOGRAPH, WAR GRAVE, Post 1915
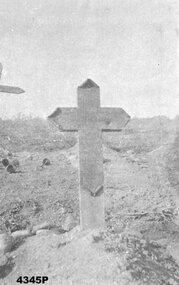
Item is re Pte W. Williams No 1442 2nd Bn AIF. Refer Cat No 4342P for his service details also Cat No 1859P for medals and photo.Black and white photo on photographic paper of a cross on a grave in foreground, background shows a partial cross and bushes.On back of photograph hand written in black ink, “Walter, grave killed 29th/15”photographs, graves, ww1 -
 Bendigo Military Museum
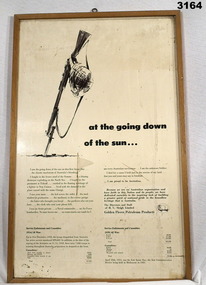
Poster - POSTER, FRAMED, Post WW2
Printed cardboard with wooden frame. Commemorating the Unknown Soldier of WWI & WWII. Item shows poetry and statistics.Top section in print: “at the going down of the sun.....” documents-posters, military history-army -
 Bendigo Military Museum
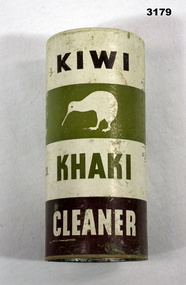
Accessory - KHAKI CLEANER, Kiwi Polish Co Pty Ltd
Cardboard container that holds khaki powered dye. Small dispensing holes at top, a tin recessed base, & the label is brown & white. Item shows a Kiwi bird and label Khaki cleaner.Kiwi khaki cleaner & image of a Kiwi bird. “Complies with colour standard of Dept of Army's Instructions for use”containers - commercial, military equipment, kiwi, cleaner -
 Bendigo Military Museum
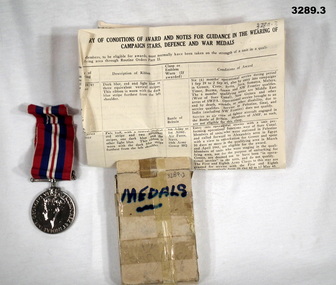
Award - MEDAL & BOX, Post 1945
Item relates to S W Ross VX78589, refer 3147 for his service details..1) War Medal 1939 - 1945. One side has head of George VI, the reverse shows a triumphant lion holding a bird headed monster to the ground. .2) Plain cardboard box to suit. .3) Sheet of paper summarising conditions of award & guidance for wearing..1) Inscription on Medal: VX78589 S W ROSS. .2) Written in blue ink on box: Medals. .3) Handwritten in ink on sheet of paper: Returned from Active Service badge. Total Awards = One VX78589 S W ROSS. Note: 2 numbers shown. Original 12277, then later with a different pen 12274. 12274 is the correct No on the RAS badge.medals, military, containers -
 Bendigo Military Museum
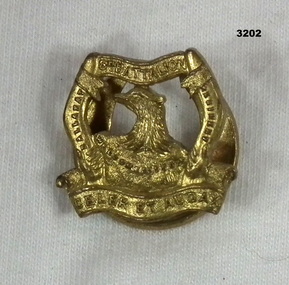
Badge - BADGE, 8TH BN
Small gold badge. Possibly a cuff link. The centre shows an eagle bust. There are banners with wording on sides, top & bottom.Banners: Top: "8TH BATTALION" Bottom: "CELER ET AUDAX" (Latin) Left: "BALLARAT", Right: "REGIMENT"numismatics-badges-military, 8th, passchendaele barracks trust -
 Bendigo Military Museum
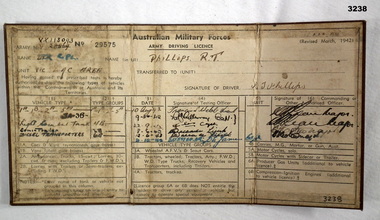
Administrative record - DRIVERS LICENCE WW2, Australian Military Forces, c.1942
Item re R T PHILLIPS VX113093, refer Cat No 3239P for his service details.Australian Army Driving Licence for Cpl R T PHILLIPS VX113093. Folds three ways. Left column shows vehicle types that PHILLIPS was authorised to drive. Column three shows authorised dates 10 Aug 1942 - 14 Oct 1943. Column six shows signature of CO. Brown buckram exterior."Licence No 29575"documents - licences/military, drivers -
 Bendigo Military Museum
Book - BOOK NAVAL, David L Mears, The Search for the Sydney, 2009
The Search for the Sydney, How Australia's Greatest Maritime Mystery was Solved. David L Mears, leader of the expedition which found Sydney and Kormoran. From back cover: The Full and Official Story of the Six Year Hunt for HMAS Sydney.Hard cardboard cover, buckram, silver colour print on front & spine, aquamarine colour background. Dust cover is silver, yellow, white & pale blue print. Photos on front are model of naval shipwreck, on back is a naval ship. The dust cover unfolds to show detailed diagrams of HMAS Sydney for the Wallsend Shipyard. Beige & brown colours. 264 pages, cut, glossy white. Illustrated black & white & colour photos & maps. Name plate on front flyleaf.Handwritten in black ink on front flyleaf name plate: "Noel R"hmas sydney, the search, maritime -
 Bendigo Military Museum
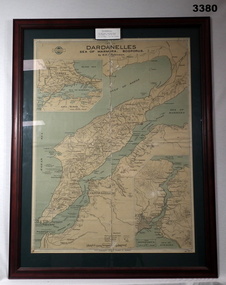
Map - MAP GALLIPOLI, FRAMED, H E C Robinson, Post WW1
Brown wooden frame with glass front. Coloured map of Dardanelles featuring the Sea of Marmara & The Bosporus. Mounted on green background with fawn cardboard backing. Map in scale of miles & kilometers. Map shows landings, ships sunk & events during 1915.Back of frame: “Bethany Gallery 116 Bridge Street Bendigo”map, framed, dardenelles, gallipoli, 1915 -
 Bendigo Military Museum
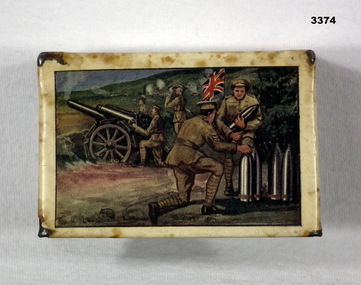
Accessory - PROTECTOR, MATCHBOX, c.1914 - 1918
Folded like a square that wraps around a match box preventing crushing. WWI patriotic. One side shows British soldiers loading & firing a heavy howitzer with a Union Jack behind them. Colour painted. Rear side has a photo of Old Elizabeth Street Melbourne. The spine bears an advertisement.Advertisement on spine: “Craig Williamson Pty Ltd, Melbourne Drapers & Complete House Furnishers, Utmost Value Always”accessory, matches, protector -
 Bendigo Military Museum
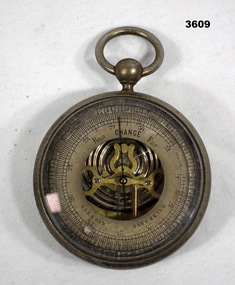
Accessory - BAROMETER, Pre WW2
Belonged to Keith Purves CLARKE NX34844. Refer Cat No 3607 for his service details.Barometer, metal, tarnished silver, round with adjustable dial, glass face, shows inner workings of the system. Top has a swivel handle.On face: “Rain CHANGE Fair. Aneroid Barometer”accessory, barometer -
 Bendigo Military Museum
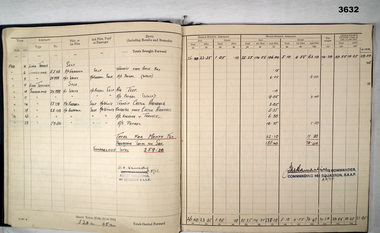
Administrative record - LOGBOOK, 1942 - 45
Item relates to Reginald Charles ALLARDICE No 418577 RAAF. Refer Cat No 3627.5 for his service history.Flight log book re R.C.Allardice. Book contains details re training, courses, aeroplane types flown, Training bases, flight hours. Entries are all in ink. A list at the rear shows postings that amounted to some 20 Stations.flight records, units -
 Bendigo Military Museum
Photograph - PHOTOGRAPH, POST WW2, Post 1945
.1) Panorama photo, Black and White, shows a group of men in suits and medals, in background is a banner which appears to say "12th" Aust Infantry Brigade". .2) Cardboard cylinder for the above item.Readable on Banner, "Middle East, New Guinea, Balikpapan"photographs, 12th, panorama -
 Bendigo Military Museum
Memorabilia - BADGE, ANZCA DAY, C. 2006
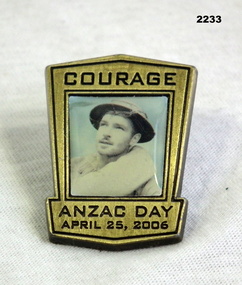
The Soldier on the badge is apparently VX103098 James Aloysious Canty, enlisted 19/7/1942 in Port Moresby age 29 just prior to Kokoda. He had initially enlisted No V42281. One record has him in E Coy 39th Infantry Batt which was the Machine Gun Coy of the Batt when formed. One record shows him being Taken on the Strength of 7th Machine Gun Batt on 2.11.1942. At discharge on 5.12.1945 he is listed as serving in the 39th Infantry Battalion with the rank of Cpl. The 39th was disbanded in July 1943.Badge, metal, Anzac commemorative. badge is rectangular in shape. Front is gold coloured with "Courage" at the top. Centre is a coloured photo under plastic of a soldier in tin helmet looking up. At base is "Anzac Day April 25 2006. On rear is a pin and clip.badges, anzac day -
 Bendigo Military Museum
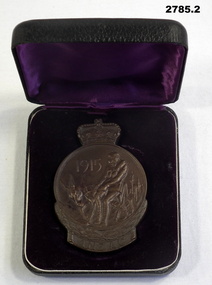
Memorabilia - MEDALLION WW1, Australian Government, c.1965
Heavy copper medallion commemorating 50th Year Gallipoli landing. Circular pattern with a crown on top. Centre motif is an image of Simpson & his donkey. The bottom has a wreath & a banner with the word ANZAC. The reverse shows a map of Australia & New Zealand & the Southern Cross. On the bottom banner is engraved the name "T H POCOCK" The metal case is covered in black vinyl. Inside lid has purple silk. A pop up floor, covered in velvet, has an indentation the shape of the medallion."T H POCOCK"government - federal government - mementoes, anzac, passchendaele barracks trust. -
 Bendigo Military Museum
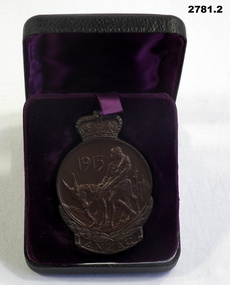
Memorabilia - MEDALLION WW1, BOXED, Australian Government, c.1965
Heavy copper medallion commemorating 50th Year Gallipoli landing. Circular pattern with a crown on top. Centre motif is an image of Simpson & his donkey. The bottom has a wreath & a banner with the word ANZAC. The reverse shows a map of Australia & New Zealand & the Southern Cross. On the bottom banner is engraved the name J G BOND. The metal case is covered in black vinyl. Inside lid has purple silk. A pop up floor, covered in velvet, has an indentation the shape of the medallion.“J G BOND”government - federal government - mementoes, military history, anzac, passchendaele barracks trust -
 Bendigo Military Museum
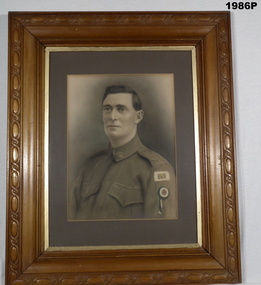
Photograph - PHOTOGRAPH WW1, FRAMED, c.1915 - 1918
James Joseph Kirkham Regt No 685. The “A” on the Colour patch denotes he was an “Anzac”. The Rosette was called the “Anzac leave Rosette” Issued in September 1918 for 1914 enlistee’s who were sent home for 6 months leave. Worn on the arm it was to show they were not “Shirking” their duty. The War ended so after. Refer 1281 for his service history also 1283P.Coloured portrait, enhanced painted portrait of WW1 Soldier displaying on left arm a coloured A Patch above a red, white & blue rosette. Large, light timber frame with moulded decorations, brown boarded, with glass front.Rear of frame: "Family Tree, Wife & Children. James Joseph Kirkham. 8th Battalion. 1st Pioneers. 1st AIF ANZAC" "Married Elizabeth Cornelia Blackley, Wonthaggi Elsie Edith Kirlkham - Connell Olive Winifred Kirkham - Rothberger - Jenner Francis James Kirkham" Myrtle Florence Kirkham - McGillvray Alma Gwenth Kirkham - Baker George Thomas Philip Kirkhamphotography, framed, portrait, ww1 -
 Bendigo Military Museum
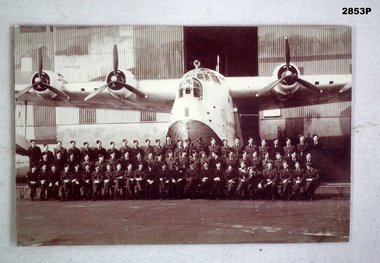
Photograph - PHOTOGRAPH, AIRFORCE, c. 1939 - 45
The photo shows three of the four engines of the Sunderland. There are about 70 airmen in front of the aircraft.photography-photographs, military history - air force, passchendaele barracks trust -
 Bendigo Military Museum
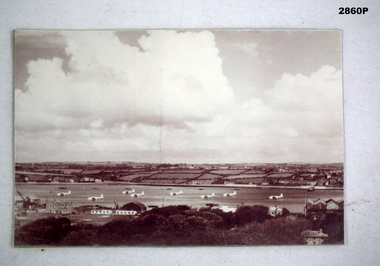
Photograph - PHOTOGRAPH, AIR FORCE, C. WW2 onwards
Photo, black & white, this is a distant shot showing patchy/cloudy sky. There is a waterway in the centre with 8 Sunderland Aircraft moored in it. The Tactical Air Command are facing left. The foreground shows buildings, a crane & trees.photography-photographs, military history - air force, sunderland, passchendaele barracks trust