Showing 3224 items matching "destination"
-
 Melbourne Tram Museum
Photograph - PCC 1041 at cnr Miller St and Plenty Rd
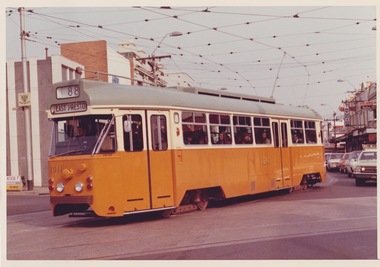
The photograph shows PCC 1041 at corner of Miller Street and Plenty Road, Northcote displaying destination 'East Preston" Route 88.Yields information about this prototype's limited period in service.Colour photograph, no notestrams, pcc 1041, route 88, miller st, tramways, pcc class, plenty rd, high st, northcote -
 Melbourne Tram Museum
Photograph - Body damage around destination box in driver's cab of W class
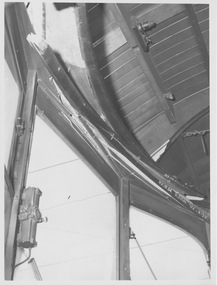
Body damage around destination box in driver's cab of W class. Service dates of 1959,1961 and 1964 evident above windowYields information about timber frame of driver's cbBlack and white photograph with stamp & biro marking on rearM&MTB Ref No. P251/1953trams, w class, collision, tram frame -
 Ballarat Tramway Museum
Negative - SECV tram 30 Gardens Loop, c1970
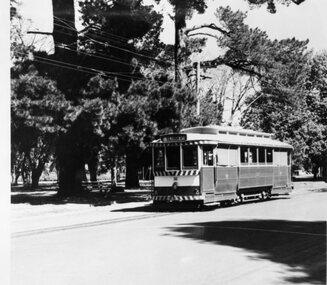
Photograph of SECV tram 30 at Gardens Loop in Wendouree Parade. Tram has the destination of Victoria St. Photographer and date unknown.Yields information about Ballarat tram 30 at Gardens Loop.Copy negative on a heavy substrate.tramcars, tramways, tram 30, gardens loop, wendouree parade -
 Ballarat Tramway Museum
Negative - Ballarat tram 12 Gardens, 1950s
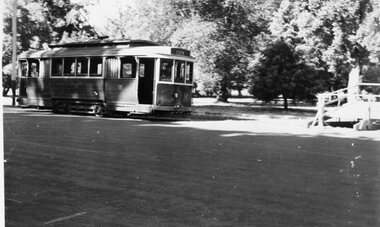
Photograph of SECV tram 12 in Wendouree Parade in the Gardens area. The tram has the destination of City. Photographer and date unknown - 1950s.Yields information about Ballarat tram 12 during the 1950sCopy negative on a heavy substrate.tramcars, tramways, wendouree parade, tram 12 -
 Melbourne Tram Museum
Photograph - X 217 Hawthorn Depot, c1925
Shows X class tram No. 217 at Hawthorn Depot with a bow collector. Tram has the destination of "Bridge Rd" (Bridge Road). Yields information about X 217 when it was fitted with a bow collector and Hawthorn Depot.Black and white photograph notes on rearIn ink by Keith Kings: - X217 Hawthorn depot about 1925, courtesy of Mr Stephenson Preston Workshops", has Rev L Marshall Wood stamp and K S Kings stamp - with number S-A 111.tramways, tramcars, tram 217, hawthorn depot, bow collector, x class, mmtb -
 Melbourne Tram Museum
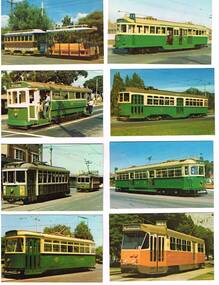
Photograph - Illustration/s, Melbourne & Metropolitan Tramways Board (MMTB), 1978
Set of eight of printed illustrations - postcard size of Melbourne and Metropolitan Tramways Board Tramcars produced in 1978. Separate card for each class of tramcar featured, with notes, statistics, MMTB name. Each card also has printers name and date on back. Not a formal postcard, no place for a stamp. 446.1 - Cable car set (No. 1) - photographed at Preston Workshops 446.2 - T 180 - showing "Special", while on a charter. 446.3 - X1 - 465 with 466 in background. Photographed at Footscray terminus, c1962. 465 has destination of "Ballarat Rd." 446.4 - Y 469 - showing destination of "Wattle Park - Elgar Road", possibly with Wattle Park in background. 446.5 - W2 511, showing destination of "City" and route 11. 446.6 - X2 676, showing "Special". 446.7 - W7 1022 - showing destination "West Preston", route 11, freshly painted. 446.8 - Z1 7 in Victoria Parade, c1975 - has destination of "West Preston - Regent St." and route number "13". 446.9 - L 104 on a route 67 Carnegie. 446.9 added 7/4/15, otherwise two copies of each held. 2nd copy of 446.9 added 28/5/2015. See Reg Item 994 for a packaged set of these photographs..trams, tramways, melbourne, mmtb, tramcars, tram 1, tram 180, tram 465, tram 466, tram 469, tram 511, tram 1022, tram 7, tram 104, z1 class, t class, x1 class, y class, w2 class, w7 class, l class, route 67, route 13, route 11 -
 Ballarat Tramway Museum
Photograph - Digital image Set of 5, George Coop, 1968 - 1970
Yields information about the tram operations at or near the Titanic Bandstand in Sturt St.Five (5) Digital images taken by George Coop during the period 1968 - 1970, of SEC trams in Sturt St, between Lydiard and Grenville Streets on the north side of Sturt St. .1 - Tram 11, descending the hill by the Titanic bandstand with the Post Office in the background. Trams has a Twin Lakes advert, Bliss Bombs and the destination of Mt Pleasant. .2 - Tram 31 ditto, except destination of Victoria St. .3 - Tram 13 with bandstand in the view - for Mt Pleasant. .4 - Tram 33, with a lady and man carrying a box descending the footpath. Tram has the destination of Victoria St and a Twin Lakes sign. .5 - Tram 26, at corner of Sturt and Camp Streets, with the Owen Williams store in the background. trams, tramways, sturt st, tram 11, tram 31, tram 13, tram 33, tram 26 -
 Ballarat Tramway Museum
Negative - Copy, Peter Duckett
Yields information about the use of a maximum traction tram when no longer required for regular passenger use as a "dog car" for transporting owners and their dogs to the Showgrounds for races.Copy negative of a black and white photograph from Ray Pearson Collection, taken by Dave Macartney in 1975c of Melbourne service tram No. 30 - the Dog Car, or Dog tram Camberwell depot, early 1940's. Copy print from Peter Duckett? Used to transport owners and their dogs to the Showgrounds for races, late 1930's and early 1940's. Refer to page 69 of Destination City 5th Edition for the information on this tram and a similar photograph taken by Peter Duckett. Note: Ray Person notes the tram as "No. 20" Image revised from the scan in the Ray Pearson album 30/5/2020. See Page 69 of Destination City 5th Edition and Page 69 of Destination City 5th Edition. trams, tramways, mmtb, bogie trams, dog car, race traffic -
 Ballarat Tramway Museum
Photograph - Digital image Set of 2, Doug Colquhoun, c1955
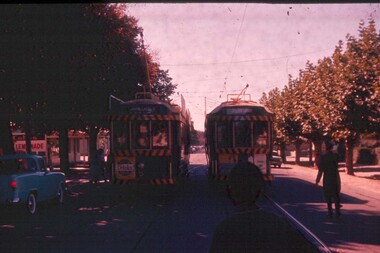
Set of two colour digital images of Geelong trams photographed by Doug Colquhoun? .1 - Geelong No 8 at the Chilwell terminus, c1955. Note the tram stop furniture on the pole behind. Tram has the destination of Beach. .2 - Trams 31 and 34 photographed in Moorabool St at a Safety Zone stop. Safety Zone stop sign in photograph. Trams have the destination of Belmont and North. Kays pastries and Austral Art Furnishers stores building in the background.trams, tramways, geelong, north, belmont, moorabool st, safety zone, tram 8, tram 31, tram 34 -
 Ballarat Tramway Museum
Photograph - Black & White Photograph/s set of 2, Charles Craig, early 1970's
Yields information about the use of the use of the City tram stop on the South side of Sturt St, during the last days of the SEC operated system.Set of two Black and White photographs of trams at the City terminus in Sturt St, south side, evening peak with many passengers boarding or leaving the tramcars. Shows the tram stop signage. .1 - tram 26 along with three other cars at the stop. No. 26 has the destination of City. .2 - tram 43 with the destination of Gardens via Sturt St west and the Commonwealth Bank in the background. Photo by Charles Craig possibly early 1970's. trams, tramways, sturt st, city, passengers, tram 17, tram 43 -
 Ballarat Tramway Museum
Photograph - Black & White Photograph/s, Travis Jeffrey, late 1950's early 1960's
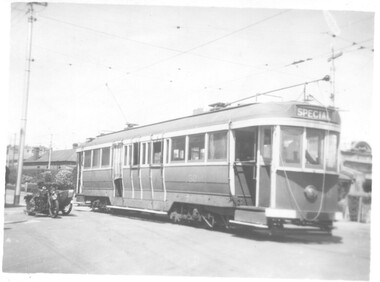
Black and white photograph of MMTB X2 675 at the Point Ormond terminus, late 1950's or early 1960's. Tram has destination of "Elsternwick Rly Stn". Driver/Conductor standing in doorway with cash bag. Pan in the trolley wire to assist drivers to locate the wire at night can be seen in the photograph. On Ilford paper. See Page 30 of Destination City, 5th Edition, advises that X2 675 withdrawn and stored in July 1961.Stamped on rear "Photo by C. Jeffrey Quote ....." in purple ink - words in triangular form.trams, tramways, point ormond, x2 class, mmtb, elsternwick, tram 675 -
 Ballarat Tramway Museum
Photograph - Colour Photograph/s, 23/11/1962 12:00:00 AM
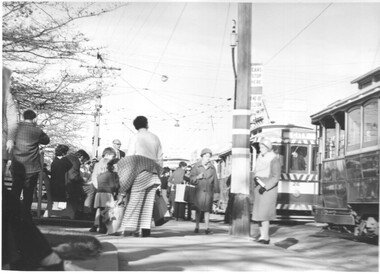
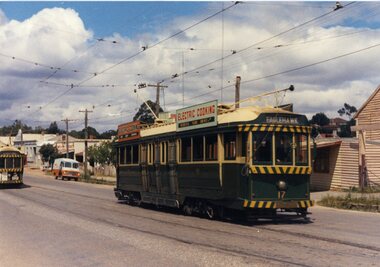
Colour postcard size print of SEC Bendigo trams 2 and 17 at the California or Thorne St. Loop on the Eaglehawk line. Photo dated 21.11.1962. Printed on AGFA paper. Both trams fitted with dash canopy lighting, but no large white strip under the driver's windows. 17 showing destination of "Eaglehawk", has two SEC ads on the side re Electric Cooking . Tram 2 showing destination of "Quarry Hill", has various ads. On rear top left hand corner "21.11.62" in very wavy handwriting typical of an aged person.bendigo, eaglehawk, tram 2, tram 17 -
 Ballarat Tramway Museum
Photograph - Black & White Photograph/s, pre 1920
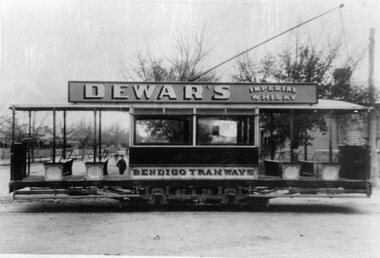
Black and white photograph of a Bendigo Single Truck straight sill tramcar (were numbers 1 to 12) prior to fitting windscreens (Destination Eaglehawk page 30 - says this occurred in 1920). Side on view of the same tram in Reg. Item No. 1711 Tram has "Dewar's imperial whisky" roof advertisement, and "Bendigo Tramways" on the letterboard. Photograph appears to be a photo of another print. Two copies held on file. See page 30 of Destination Eaglehawktrams, tramways, bendigo, esco -
 Ballarat Tramway Museum
Photograph - Black & White Photograph/s - set of 2, State Electricity Commission of Victoria (SECV), c1950
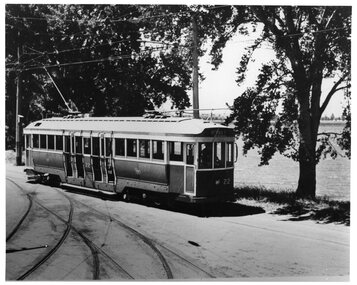
Yields information about one of the first two maximum traction bogie trams in Ballarat in October 1945 after it had been repainted for use in Ballarat by the SEC and the Lake / depot area at the time.Black and white photograph of SEC (bogie No. 22), in Wendouree Parade passing depot junction, has destination of Victoria St. Tram later renumbered to 37 in 1951. (See Destination Eaglehawk, p7) Original of photograph, SEC held by Alan Bradley has been cropped. Had a canoe on the right hand side, which is referred to in the interpretation panel at the Gardens Loop 474.1 - shows the canoe. Additional copy of .1 added 21/3/20201,trams, tramways, ballarat, secv, bogie trams, depot junction. , tram 22, 37 -
 Ballarat Tramway Museum
Photograph - Black & White Photograph/s, 1955 or 1956
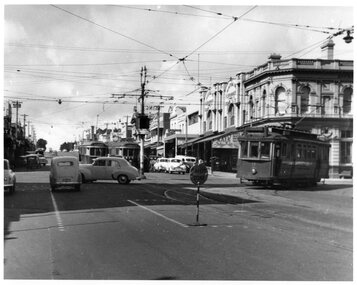
Black and white photograph of two Geelong bogie trams at the intersection of Moorabool and Ryrie Streets and Pengelly tram No. 17 turning into Moorabool St. See Reg. Item 2798 for a photograph just taken prior to this one. Tram No. 33 in Moorabool St. has the destination of Belmont, while the adjacent tram has the destination of North. The third tram is eastbound in Ryrie St. Note Safety zone signs, the bar traffic lights. In the background is Kays bakery. tramways, trams, geelong, moorabool st, ryrie st, traffic lights, safety zone, tram 33, tram 17 -
 Ballarat Tramway Museum
Slide - 35mm slide/s, Travis Jeffrey, c1962
Agfa plastic mount (blue base, white cover) with a photo of Bendigo No. 5 and No. 24 crossing at Myrtle St. loop. No. 5 has destination of Charing Cross and a Cohns Drinks Advertisement on front panel. No. 24 has destination of Golden Square. On the front dash panel is advertisement for Huttons Hams and a Streets Ice-cream advertisement. Note the empty roof advertisement panel on No. 24 - refer to Reg. Item 2632, which shows the tram at Golden Square."BES 21" in penciltramways, trams, bendigo, golden square, myrtle st, tram 5, tram 24 -
 Ballarat Tramway Museum
Photograph - Black & White Photograph/s, 1905
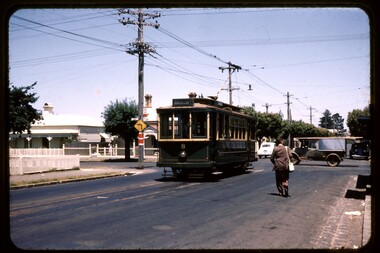
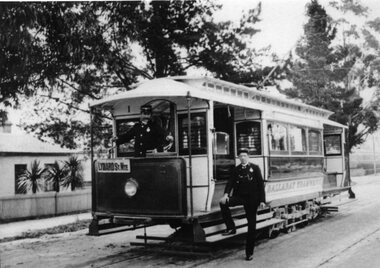
Yields information about Blackpool electric tramways in the 1880's, a system that was offered to the City of Ballarat by tender.Black and White photograph of ESCo Ballarat No. 1 in Ballarat, soon after opening in 1905, destination sign placed over front dash canopy. Has the driver (Rupert Bowd) at the controls. Has the destination of "Lydiard St Nth". (Rupert should be Robert - see page 138 of Alan Bradley's book, The Golden City and its Tramways) - at the Gregory St terminus. Two copies See Reg Item 6974 for another copy and details of the driver/motorman.Copy 1 - in ink "220) and Ballarat Tramways (Company) along the top edge and a "William F Scott" address label and "WFS Collection" in the bottom right hand corner. Copy 2 - in ink "220) and Ballarat Tramways (Company) along the top edge and "Driver Rupert Bowd B1872, Skipton St. Ballarat".trams, tramways, esco, opening, gregory st, tram 1 -
 Ballarat Tramway Museum
Photograph - Black & White Photograph/s, Charles Craig, 1971
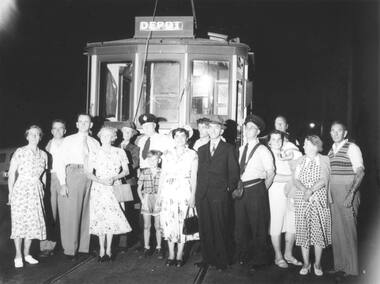
Yields information about the appearance and use of the bogie trams at night.Black and white photograph of No. 43 at the city terminus at night. In the view is the short tram stop and End of Section pole. Tram has the destination of Mt Pleasant. Photo by Charles Craig - during 1971. trams, tramways, city, sturt st, night photo, tram 43 -
 Ballarat Tramway Museum
Photograph - Black & White Photograph/s, Geoff Grant, 8/01/1956 12:00:00 AM
Yields information about Geelong trams at the time of the closure of the Chilwell and East-West routes.Black and White photograph of Geelong No. 1 at the Chilwell terminus on the last day of operation of this route. Tram showing destination of Depot. This is a large format print of Reg Item 476.7, photograph by Geoff Grant.On Rear ink "Last day of operation Chilwell & East - West Line 8th Jan. 1956"trams, tramways, geelong, chilwell, closure, tram 1 -
 Ballarat Tramway Museum
Slide - 35mm slide/s, Keith Caldwell, 12/03/1962 12:00:00 AM
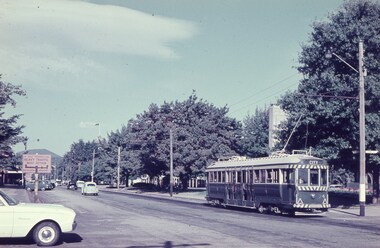
Yields information about the appearance of Sturt St north side and the appearance of tram 34.Agfa colour slide, white cardboard mount, photo by Keith Caldwell on 12/3/1962 of: Tram 34 inbound in Sturt St just past the intersection with Lyons St with the destination of City.In ink "Sturt St 12.3.62"tramways, trams, sturt st, lyons st, tram 34 -
 Ballarat Tramway Museum
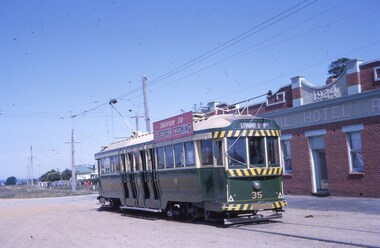
Slide - 35mm slide/s, Robert Thomson, 2/04/1964 12:00:00 AM
Yields information about Ballarat's trams during 1963 and the Sebastopol terminus.Kodak Kodachrome cardboard mount, colour slide of tram 35 at the Sebastopol terminus with the Royal Mail Hotel in the background. Tram has the destination of Lydiard St North and an electric cooking roof advert."35 bogie Sebastopol 2-4-64" in ink.tramways, trams, sebastopol, albert st, royal mail hotel, tram 35 -
 Ballarat Tramway Museum
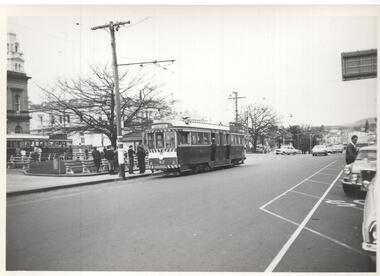
Photograph - Black & White Photograph/s, Andrew Howlett?, c1971
Yields information about the appearance and operation of the main tram stop in the City in Sturt St prior to closure.Black and White photograph print of tram 42 and another bogie car at the City terminus, south side of Sturt St, c1971. Tram has the destination of Sebastopol. The Ballarat Post Office is in the view.trams, tramways, sturt st, tram 42 -
 Ballarat Tramway Museum
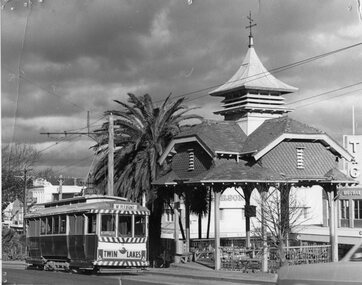
Photograph - Black & White Photograph/s, c1970
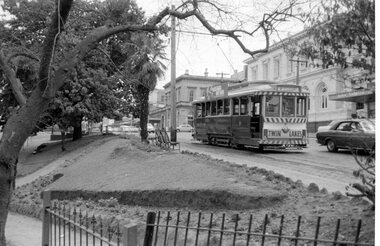
Black and white photograph of SEC No. 12 passing the Titanic Bandstand after leaving Lydiard St. Photo taken after the tram has passed the photographer. Tram has Mt Pleasant destination.trams, tramways, ballarat, sturt st., titanic bandstand , tram 12 -
 Ballarat Tramway Museum
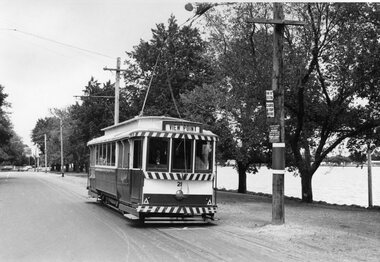
Photograph - Black & White Photograph/s, Graeme Turnbull, 13/03/1970 12:00:00 AM
Yields information about the Ballarat's tramcars in the early 1970's and the View Point Terminus.Black and white photograph of Ballarat No. 21 at the View Point terminus, with the stop signs visible on the adjacent pole. Tram has the destination of "View Point". Graeme Turnbull photograph, 13/3/1970.On the rear in pencil, "Ballarat Single truck car 21 at View Point terminus 13/3/70. Graeme Turnbull photograph. In ink in the top left hand corner, "13/3/70 and AA-27"tramways, trams, view point, wendouree parade, tram 21 -
 Ballarat Tramway Museum
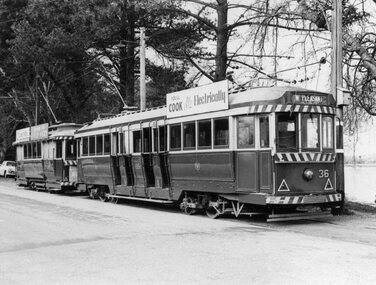
Photograph - Black & White Photograph/s, Leon Marshall-Wood, Aug. 1964
Yields information about the Ballarat's tramcars in the mid 1960's before the white strip was extended under the dash canopy lighting.Black and white photograph of Ballarat No. 36 and a single truck car at the SEC's Depot Junction. No. 36 has the destination of Mt Pleasant, and a "Cook with Electricity" roof advertisement. A single truck stands behind.On the Rear in ink "Wendouree Pde, Ballarat 8/64" and a "L. Marshall-Wood Photograph" stamp on the rear.tramways, trams, wendouree parade, secv, depot junction, tram 36 -
 Ballarat Tramway Museum
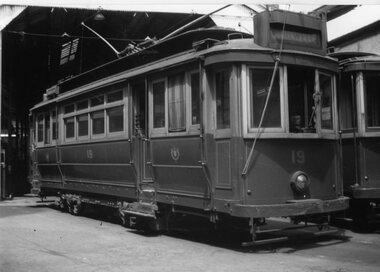
Photograph - Black & White Photograph/s, John Radcliffe, 11/01/1956 12:00:00 AM
Yields information about Geelong 1in Ryrie St during the mid 1930's.Black and White Photograph of Geelong No.19 at the depot, with the destination of Chilwell. Shows the tramcar in detail, such as the trolley rope. Photo by John Radcliffe, 11/1/1956, three days after the first closures.In hand writing on the rear "Geelong Pengelly car 19 on depot forecourt 3 days after the fist closures." In the bottom left hand corner "11-1-56" and in the bottom right hand corner "WFS Collection / J. C. Radcliffe (Adelaide)" trams, tramways, geelong, depot, pengelly, tram 19 -
 Ballarat Tramway Museum
Slide - 35mm slide/s, Jim Rush, early 1970's
Colour 35mm slide in white cardboard mount of Bendigo 6, with the destination of Golden Square inbound in Nolan St with the White Hills Bendigo works in the background. Photo from the collection of Lilian Butler.in ink on rear "No. 6 Bendigo fleet was No. 25 Ballarat" and "Jim Rush took this slide in Nolan Street, Bendigo North"tramways, trams, bendigo, north bendigo, nolan st, tram 6 -
 Ballarat Tramway Museum
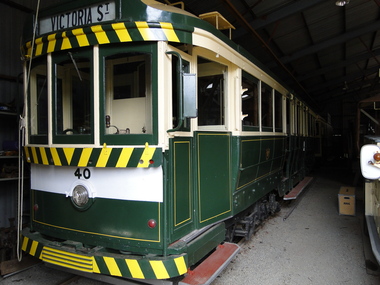
Photograph - Digital image, Peter Waugh, 8/12/2012 12:00:00 AM
Digital image of Tram 40 in the depot, road 7. Closeup view of the cabin and side view. Destination sign is "Victoria Street". Tram 661 is just visible behind. Taken in December 2012trams, tramways, tramcars, tram 40, tram 661 -
 Ballarat Tramway Museum
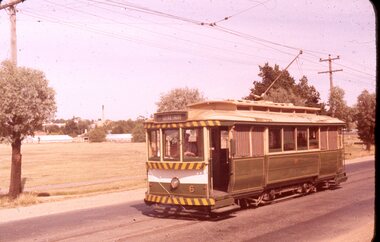
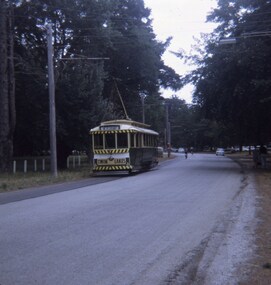
Slide - 27 mm sq slide/s, Andrew Howlett, Tram No. 11 northbound in Wendouree Parade in the North Gardens, Feb. 1969
Yields information about Wendouree Parade North Gardens area.Colour slide, Kodak white cardboard mount, developed Fb. 1969 of No. 11 northbound in Wendouree Parade in the North Gardens. Tram has the destination of Mt Pleasant and has a Twin Lake sign.ballarat, tramways, trams, wendouree parade, tram 11 -
 Ballarat Tramway Museum
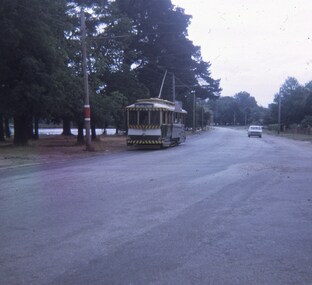
Slide - 27 mm sq slide/s, Andrew Howlett, No. 26 eastbound in Wendouree Parade nearing Forest St, Feb 1969?
Yields information about Wendouree Parade near Forest St.Colour slide, Kodak white cardboard mount, developed Feb 1969 of No. 26 eastbound in Wendouree Parade nearing Forest St. Has destination of Victoria St. Is approaching a request tram stop.ballarat, tramways, trams, wendouree parade, st aidans drive, forest st, tram 26