Showing 659 items
matching step
-
 Melbourne Legacy
Document, Origin of Last Post, 2007
Two articles about the origin of the Last Post collected by Bill Rogers. One's source is possibly Sydney Legacy. It says the last post is derived from the old custom of beating Tattoo. This word comes from the Dutch phrase - doe den tap toe, meaning turn the taps of the taverns off. Then when bugle calls were introduced two posts were written. "First Post symbolises the inspection of the last inn in the town. It was then a simple step for the Last Post to become associated with Military Funerals. Played at funerals the Last Post is followed by the call Rouser, a later version of Reveille, which symbolises the awakening of a new life." The other has the words to the Last Post and a similar story but not as detailed. Document was from a folder of documents donated to the archive by Legatee Bill Rogers that related to his time as President (March 2006 - March 2008) or as a legatee.A record that the traditions of the military was significant to the Legatees.Two A4 pages of the origin of the Last Post, one from Sydney Legacy.tradition, last post -
 Melbourne Legacy
Document - Article, Legatee E K (Karl) Robertson, President 1980
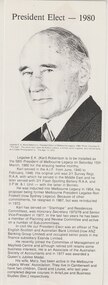
A cutting from from a Melbourne Legacy President's report showing a photo of Legatee Karl Robertson (President of Melbourne Legacy in 1980). It was collected to be a record of a photo of past presidents. Legatee Karl Robertson served in the AIF in World War 2, his original unit was 2/1 Survey Regt. RAA with which he served in the Middle East and he later served with 2/1 Flash Spotting Battery R A A and 3 P W and I Unit in Borneo. He was inducted into Melbourne Legacy in 1954 on the nomination of Legatee Ron Foskett. He stepped down between 1967 and 1972 when he was re-inducted. The article was part of an album of past presidents from 1965 to 1989. The folder included biographical details and obituaries, eulogies and death notices of prominent Legatees. The items have been catalogued separately.A record of Legatee Karl Robertson a past president of Legacy. The information was collected to record the lives of prominent legatees in a folder.Article with a black and white photo of Legatee Karl Robertson - President 1980.past presidents, karl robertson -
 Flagstaff Hill Maritime Museum and Village
Instrument - Fob Watch, 1920-30s
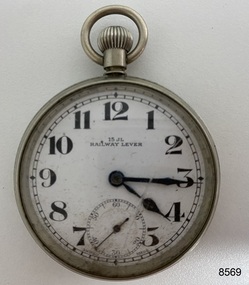
Fob (or pocket) watches were developed in Europe in the 16th century and gained wide usage during the mid 18th century until World War 1 when the wristwatch was invented. These watches were designed to be carried in a small pocket and attached through the means of a 'fob' which could be a chain or made from a variety of materials such as leather. Their popularity peaked in the nineteenth century where they were an important part of middle and lower class society as well. The inclusion of the word RAILWAY on the face of the watch suggests a possible use by an employee of the railways. This item is of social significance as fob / pocket watches were valued as an essential object in all levels of society. For some occupations, such as the railroads, it was a necessary tool of the job. Steel Railway Lever open face pocket / fob watch dated 1920s-1930s. The white dial has large black arabic numerals and outer minute divisions around the edge. A circular insert and small hand to show the seconds is at the bottom of the watch face. The hour hand is a rounded leaf shape, and the minute hand a thin diamond shape. Both hands and the small rounded end of the second hand reflect a metallic blue sheen in the right lighting. The words RAILWAY LEVER, 15 JL and SWISS MADE are on the dial. The lever set on watches was a requirement for railroad watches. It required a two step process for the hands to be adjusted. 15 JL refers to the movement being a 15 jewel one.The front dial of the watch has the words 15 JL, RAILWAY LEVER, and SWISS MADE. flagstaff hill maritime museum and village, warrnambool, great ocean road, shipwreck coast, fob watch, pocket watch, watch, horology, time keeper, swiss made, railway lever, 15 jl, 15 jewel -
 Bendigo Historical Society Inc.
Document - FOR HISTORICAL SOCIETY BENDIGO BRANCH NEWSLETTER
Handwritten copy of items for the Newsletter. Included is Machinery Contractor Called to Task. He took a lot longer to do the work than he should have. Boys Will Be Boys tells of a boy who was supposed to driving the whim horse, but in the absence of the braceman, he amused himself by taking a truck out of the cage and putting it back again. Then he started stepping backwards and forwards by holding onto a rope across the shaft, then fell down the shaft. He got a severe shaking. Cheers and Groans are about the long hours the miners worked and the introduction of the 8 hour day. Primitive Shafts is about the Victoria Reef Shafts. It tells of the underground working and raising the ore, crushing and yield.document, for historical society bendigo branch newsletter, federal australian, st mungo crushing battery, a richardson, royal hotel, bendigo advertiser, angus mackay, regulation of mines 1874, victoria reef quartz co, victoria quartz, grant and co, dicker's mining record 23/11/1861 pages 9 and 10 -
 Ballarat Tramway Museum
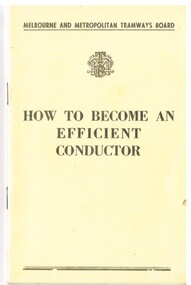
Document - Instruction Book, Melbourne and Metropolitan Tramways Board (MMTB), "How to become an efficient conductor", 1960's
Instruction Book - 20 pages, within manila card covers, titled ""How to become an efficient conductor", published by the Melbourne and Metropolitan Tramways Board. Gives details on how to be a conductor safely, collect fares, disputes, school concessions, ticket cancellation, accidents, and conduct. A list of dos and dents' employee benefits summary and two drawings showing the consequences of not securing the trolley pole under the hook and step accidents. Inside front cover is a list of Melbourne tram depots, giving stop number, and street. Handwritten addition regarding South Melbourne depot - short cut from St Kilda Road - folded printed sheet. No date on the documents - assumed 1960's.trams, tramways, mmtb, conductors, instructions, melbourne, depot -
 Melbourne Tram Museum
Document - Instruction Book, Melbourne & Metropolitan Tramways Board (MMTB), "How to become an efficient conductor", 1950's
Instruction Book - 20 pages, within manila card covers, titled ""How to become an efficient conductor", published by the Melbourne and Metropolitan Tramways Board. Gives details on how to be a conductor safely, collect fares, disputes, school concessions, ticket cancellation, accidents, and conduct. A list of dos and donts' employee benefits summary and two drawings showing the consequences of not securing the trolley pole under the hook and step accidents. No date on the documents - assumed 1950's. Second copy added 15/1/2015 from donation of Lindsay Rickard. 739.1 - Second copy added 3/12/15 from donation of Gary Butler - has a green ink printed cover and printed on gloss paper.trams, tramways, mmtb, conductors, instructions, melbourne, depot -
 Flagstaff Hill Maritime Museum and Village
Domestic object - Bowl, Late 19th or early 20th Century
The Process of Making Pottery Decorating, Firing, Glazing, Making, Technical There is a rhythm and flow to clay. It can’t be done all at once! Even the making process! It can take weeks to get everything done, especially if you can only work on your pottery once a week! Even though we have three hour classes, it’s often just not enough time! Here is an overview of some of the processes so you have a bit more grasp on some of the technical stuff! Step One – Design There are SO many ideas out there for making stuff in clay! From delicate porcelain jewellery, through to heavy sculptural work and everything in between. Deciding your direction is sometimes not that easy – when you first start, try everything, you will naturally gravitate to the style that you enjoy! The options and variations are endless and can get a wee bit overwhelming too! Check in with me before you start to ensure your ideas will work, what order you might do things, how you could achieve the look you are seeking and any other technical data required! Step Two – Making Clay is thixotropic. This means that as you work with it, the clay first gets sloppier and wetter, before is begins to dry in the atmosphere. For most things, you simply can’t do all parts of the project at once. An example of work order might look like: Get last weeks work out from the shelves Prepare clay for today’s work – roll your clay, prepare balls for throwing, make the first stage of a pinch pot) Clean up last week’s work and put it on the shelf for bisque firing Check that you have any glazing to do – and do enough of it that you will have time to finish your main project Do the next step of your next project – there might be a further step that can’t be complete immediately, in that case, wrap your work well and put onto the shelves. Letting your work rest for a while can really help keep your work clean and professional looking. Many things require bagging under plastic to keep it ready for work the next week – put your name on the outside of the bag so you can find your work easily. We have stickers and markers. Consider how you want to decorate your work – coloured slip can be applied at a fairly wet stage (remembering that it will make your work even wetter!). Trying to apply slip to dry clay won’t work! If you want to do sgraffito – you will need to keep the work leather hard (a state of dryness where you can still work the clay with a little effort and a little water and care). Step Three – Drying Most of the time your work can go into the rack uncovered to let it dry out for the following week. If you want to continue forming or shaping you will need to double bag your work – put your work on a suitable sized bat and put the bat in a bag so the base of the bag is under the bat, then put another bag over the top of the work and tuck the top of the bag under the bat. If you want to trim (or turn) your thrown work the following week, it should also be double bagged. If your work is large, delicate, or of uneven thicknesses, you should lightly cover your work for drying. When considering the drying process, bare in mind the weather, humidity and wind! The hotter and dryer, the faster things dry and work can dry unevenly in the shelves – this can lead to cracking – another time to lightly cover your work for drying. Step Four – Trimming and Cleaning Up Your work is dry! It is called greenware now and it is at it’s most fragile! Handle everything with two hands. I often refer to soft hands – keep everything gentle and with your fingers spread as much as possible. Try to not pick up things like plates too much, and always with both hands! Before your work can be bisque fired it should be “cleaned up”. You work won’t go into the kiln if it has sharp edges – when glazed, sharp edges turn into razor blades! Use a piece of fly wire to rub the work all over – this will scratch a little so be light handed. Use a knife or metal kidney to scrape any areas that require a bit more dynamic treatment than the fly wire offers! Finally, a very light wipe over with a slightly damp sponge can help soften and soothe all of your edges and dags! Trimming thrown work: If you are planning to trim (or turn) your thrown work (and you should be), make sure you bag it well – your work should be leather hard to almost dry for easiest trimming. Use this step to finish the work completely – use a metal kidney to polish the surface, or a slightly damp sponge to give a freshly thrown look. Wipe the sponge around the rim after trimming, and check the inside of the pot for dags! Trimming slip cast work: Usually I will trim the rims of your work on the wheel the following day to make that stage easier, however you will still need to check your work for lumps and bumps. Last but not least – check that your name is still clearly on the bottom of your work. Step Five – Bisque Firing When the work is completely dry it can go into the bisque kiln. The bisque kiln is fired to 1000°C. This process burns off the water in the clay as well as some of the chemically bound water. The structure of the clay is not altered that much at this temperature. Inside the bisque kiln, the work is stacked a little, small bowl inside a larger bowl and onto a heavy plate. Smaller items like decorations or drink coasters might get stacked several high. Consideration is paid to the weight of the stack and shape of the work. A bisque kiln can fire about one and a half times the amount of work that the glaze kiln can fire. The firing takes about 10 hours to complete the cycle and about two days to cool down. Once it has been emptied the work is placed in the glaze room ready for you to decorate! Step Six – Glazing Decorating your work with colour can be a lot of fun – and time consuming! There are three main options for surface treatment at this stage: Oxide Washes Underglazes Glazes Washes and underglazes do not “glaze” the work – It will still need a layer of glaze to fully seal the clay (washes don’t need glaze on surfaces not designed for food or liquid as they can gloss up a little on their own). Underglazes are stable colourants that turn out pretty much how they look in the jar. They can be mixed with each other to form other colours and can be used like water colours to paint onto your work. Mostly they should have a clear glaze on top to seal them. Oxides are a different species – the pink oxide (cobalt) wash turns out bright blue for instance. They don’t always need a glaze on top, and some glazes can change the colour of the wash! The glazes need no other “glaze” on top! Be careful of unknown glaze interactions – you can put any combination of glaze in a bowl or on a plate, but only a single glaze on the outside of any vertical surface! Glazes are a chemical reaction under heat. We don’t know the exact chemicals in the Mayco glazes we use. I can guess by the way they interact with each other, however, on the whole, you need to test every idea you have, and not run the test on a vertical surface! Simply put, glaze is a layer of glass like substance that bonds with the clay underneath. Clay is made of silica, alumina and water. Glaze is made of mostly silica. Silica has a melting point of 1700°C and we fire to 1240°C. The silica requires a “flux” to help it melt at the lower temperature. Fluxes can be all sorts of chemicals – a common one is calcium – calcium has a melting point of 2500°C, however, together they both melt at a much lower temperature! Colourants are metal oxides like cobalt (blue), chrome (green through black), copper (green, blue, even red!), manganese (black, purple and pink) iron (red brown), etc. Different chemicals in the glaze can have dramatic effects. for example, barium carbonate (which we don’t use) turns manganese bright pink! Other elements can turn manganese dioxide brown, blue, purple and reddish brown. Manganese dioxide is a flux in and of itself as well. So, glazes that get their black and purple colours, often interact with other glazes and RUN! Our mirror black is a good example – it mixes really well with many glazes because it fluxes them – causes them to melt faster. It will also bring out many beautiful colours in the glazes because it’s black colouring most definitely comes from manganese dioxide! Glaze chemistry is a whole subject on it’s own! We use commercial Mayco glazes on purpose – for their huge range of colour possibilities, stability, cool interactions, artistic freedom with the ability to easily brush the glazes on and ease of use. We currently have almost 50 glazes on hand! A major project is to test the interactions of all glazes with each other. That is 2,500 test tiles!!!! I’m going to make the wall behind the wheels the feature wall of pretty colours! Step Seven – Glaze (Gloss or sometimes called “Glost”) Firing Most of the time this is the final stage of making your creation (but not always!) The glaze kiln goes to 1240°C. This is called cone 6, or midrange. It is the low end of stoneware temperatures. Stoneware clays and glazes are typically fired at cone 8 – 10, that is 1260 – 1290°C. The energy requirement to go from 1240°C to 1280°C is almost a 30% more! Our clay is formulated to vitrify (mature, turn “glass-like”) at 1240°, as are our glazes. A glaze kiln take around 12 hours to reach temperature and two to three days to cool down. Sometimes a third firing process is required – this is for decoration that is added to work after the glaze firing. For example – adding precious metals and lustres. this firing temperature is usually around 600 – 800°C depending upon the techniques being used. There are many students interested in gold and silver trims – we will be doing this third type of firing soon! After firing your work will be in the student finished work shelves. Remember to pay for it before you head out the door! There is a small extra charge for using porcelain clay (it’s more than twice the price of regular clay), and for any third firing process! Once your work has been fired it can not turn back into clay for millennia – so don’t fire it if you don’t like it! Put it in the bucket for recycling. https://firebirdstudios.com.au/the-process-of-making-pottery/ The bowl is an example of kitchenware used in the 19th century and still in use today.Bowl white ceramic. Crack on side. Badly stained.Backstamp very faint and unable to be read.flagstaff hill, warrnambool, shipwrecked-coast, flagstaff-hill, flagstaff-hill-maritime-museum, maritime-museum, shipwreck-coast, flagstaff-hill-maritime-village, mixing bowl, food preparation, kitchen equipment, ceramic -
 Flagstaff Hill Maritime Museum and Village
Domestic object - Bowl
The Process of Making Pottery Decorating, Firing, Glazing, Making, Technical There is a rhythm and flow to clay. It can’t be done all at once! Even the making process! It can take weeks to get everything done, especially if you can only work on your pottery once a week! Even though we have three hour classes, it’s often just not enough time! Here is an overview of some of the processes so you have a bit more grasp on some of the technical stuff! Step One – Design There are SO many ideas out there for making stuff in clay! From delicate porcelain jewellery, through to heavy sculptural work and everything in between. Deciding your direction is sometimes not that easy – when you first start, try everything, you will naturally gravitate to the style that you enjoy! The options and variations are endless and can get a wee bit overwhelming too! Check in with me before you start to ensure your ideas will work, what order you might do things, how you could achieve the look you are seeking and any other technical data required! Step Two – Making Clay is thixotropic. This means that as you work with it, the clay first gets sloppier and wetter, before is begins to dry in the atmosphere. For most things, you simply can’t do all parts of the project at once. An example of work order might look like: Get last weeks work out from the shelves Prepare clay for today’s work – roll your clay, prepare balls for throwing, make the first stage of a pinch pot) Clean up last week’s work and put it on the shelf for bisque firing Check that you have any glazing to do – and do enough of it that you will have time to finish your main project Do the next step of your next project – there might be a further step that can’t be complete immediately, in that case, wrap your work well and put onto the shelves. Letting your work rest for a while can really help keep your work clean and professional looking. Many things require bagging under plastic to keep it ready for work the next week – put your name on the outside of the bag so you can find your work easily. We have stickers and markers. Consider how you want to decorate your work – coloured slip can be applied at a fairly wet stage (remembering that it will make your work even wetter!). Trying to apply slip to dry clay won’t work! If you want to do sgraffito – you will need to keep the work leather hard (a state of dryness where you can still work the clay with a little effort and a little water and care). Step Three – Drying Most of the time your work can go into the rack uncovered to let it dry out for the following week. If you want to continue forming or shaping you will need to double bag your work – put your work on a suitable sized bat and put the bat in a bag so the base of the bag is under the bat, then put another bag over the top of the work and tuck the top of the bag under the bat. If you want to trim (or turn) your thrown work the following week, it should also be double bagged. If your work is large, delicate, or of uneven thicknesses, you should lightly cover your work for drying. When considering the drying process, bare in mind the weather, humidity and wind! The hotter and dryer, the faster things dry and work can dry unevenly in the shelves – this can lead to cracking – another time to lightly cover your work for drying. Step Four – Trimming and Cleaning Up Your work is dry! It is called greenware now and it is at it’s most fragile! Handle everything with two hands. I often refer to soft hands – keep everything gentle and with your fingers spread as much as possible. Try to not pick up things like plates too much, and always with both hands! Before your work can be bisque fired it should be “cleaned up”. You work won’t go into the kiln if it has sharp edges – when glazed, sharp edges turn into razor blades! Use a piece of fly wire to rub the work all over – this will scratch a little so be light handed. Use a knife or metal kidney to scrape any areas that require a bit more dynamic treatment than the fly wire offers! Finally, a very light wipe over with a slightly damp sponge can help soften and soothe all of your edges and dags! Trimming thrown work: If you are planning to trim (or turn) your thrown work (and you should be), make sure you bag it well – your work should be leather hard to almost dry for easiest trimming. Use this step to finish the work completely – use a metal kidney to polish the surface, or a slightly damp sponge to give a freshly thrown look. Wipe the sponge around the rim after trimming, and check the inside of the pot for dags! Trimming slip cast work: Usually I will trim the rims of your work on the wheel the following day to make that stage easier, however you will still need to check your work for lumps and bumps. Last but not least – check that your name is still clearly on the bottom of your work. Step Five – Bisque Firing When the work is completely dry it can go into the bisque kiln. The bisque kiln is fired to 1000°C. This process burns off the water in the clay as well as some of the chemically bound water. The structure of the clay is not altered that much at this temperature. Inside the bisque kiln, the work is stacked a little, small bowl inside a larger bowl and onto a heavy plate. Smaller items like decorations or drink coasters might get stacked several high. Consideration is paid to the weight of the stack and shape of the work. A bisque kiln can fire about one and a half times the amount of work that the glaze kiln can fire. The firing takes about 10 hours to complete the cycle and about two days to cool down. Once it has been emptied the work is placed in the glaze room ready for you to decorate! Step Six – Glazing Decorating your work with colour can be a lot of fun – and time consuming! There are three main options for surface treatment at this stage: Oxide Washes Underglazes Glazes Washes and underglazes do not “glaze” the work – It will still need a layer of glaze to fully seal the clay (washes don’t need glaze on surfaces not designed for food or liquid as they can gloss up a little on their own). Underglazes are stable colourants that turn out pretty much how they look in the jar. They can be mixed with each other to form other colours and can be used like water colours to paint onto your work. Mostly they should have a clear glaze on top to seal them. Oxides are a different species – the pink oxide (cobalt) wash turns out bright blue for instance. They don’t always need a glaze on top, and some glazes can change the colour of the wash! The glazes need no other “glaze” on top! Be careful of unknown glaze interactions – you can put any combination of glaze in a bowl or on a plate, but only a single glaze on the outside of any vertical surface! Glazes are a chemical reaction under heat. We don’t know the exact chemicals in the Mayco glazes we use. I can guess by the way they interact with each other, however, on the whole, you need to test every idea you have, and not run the test on a vertical surface! Simply put, glaze is a layer of glass like substance that bonds with the clay underneath. Clay is made of silica, alumina and water. Glaze is made of mostly silica. Silica has a melting point of 1700°C and we fire to 1240°C. The silica requires a “flux” to help it melt at the lower temperature. Fluxes can be all sorts of chemicals – a common one is calcium – calcium has a melting point of 2500°C, however, together they both melt at a much lower temperature! Colourants are metal oxides like cobalt (blue), chrome (green through black), copper (green, blue, even red!), manganese (black, purple and pink) iron (red brown), etc. Different chemicals in the glaze can have dramatic effects. for example, barium carbonate (which we don’t use) turns manganese bright pink! Other elements can turn manganese dioxide brown, blue, purple and reddish brown. Manganese dioxide is a flux in and of itself as well. So, glazes that get their black and purple colours, often interact with other glazes and RUN! Our mirror black is a good example – it mixes really well with many glazes because it fluxes them – causes them to melt faster. It will also bring out many beautiful colours in the glazes because it’s black colouring most definitely comes from manganese dioxide! Glaze chemistry is a whole subject on it’s own! We use commercial Mayco glazes on purpose – for their huge range of colour possibilities, stability, cool interactions, artistic freedom with the ability to easily brush the glazes on and ease of use. We currently have almost 50 glazes on hand! A major project is to test the interactions of all glazes with each other. That is 2,500 test tiles!!!! I’m going to make the wall behind the wheels the feature wall of pretty colours! Step Seven – Glaze (Gloss or sometimes called “Glost”) Firing Most of the time this is the final stage of making your creation (but not always!) The glaze kiln goes to 1240°C. This is called cone 6, or midrange. It is the low end of stoneware temperatures. Stoneware clays and glazes are typically fired at cone 8 – 10, that is 1260 – 1290°C. The energy requirement to go from 1240°C to 1280°C is almost a 30% more! Our clay is formulated to vitrify (mature, turn “glass-like”) at 1240°, as are our glazes. A glaze kiln take around 12 hours to reach temperature and two to three days to cool down. Sometimes a third firing process is required – this is for decoration that is added to work after the glaze firing. For example – adding precious metals and lustres. this firing temperature is usually around 600 – 800°C depending upon the techniques being used. There are many students interested in gold and silver trims – we will be doing this third type of firing soon! After firing your work will be in the student finished work shelves. Remember to pay for it before you head out the door! There is a small extra charge for using porcelain clay (it’s more than twice the price of regular clay), and for any third firing process! Once your work has been fired it can not turn back into clay for millennia – so don’t fire it if you don’t like it! Put it in the bucket for recycling. https://firebirdstudios.com.au/the-process-of-making-pottery/ This bowl is an example of kitchenware used in the 19th century and still in use today.Bowl white ceramic plain that has two sets of edging around lip. Inside bowl has plaster designed to look like cooking mixture.flagstaff hill, warrnambool, shipwrecked-coast, flagstaff-hill, flagstaff-hill-maritime-museum, maritime-museum, shipwreck-coast, flagstaff-hill-maritime-village, kitchen equipment, ceramic -
 Flagstaff Hill Maritime Museum and Village
Domestic object - Bowl, J & G Meakin, Late 19th or early 20th Century
The Process of Making Pottery Decorating, Firing, Glazing, Making, Technical There is a rhythm and flow to clay. It can’t be done all at once! Even the making process! It can take weeks to get everything done, especially if you can only work on your pottery once a week! Even though we have three hour classes, it’s often just not enough time! Here is an overview of some of the processes so you have a bit more grasp on some of the technical stuff! Step One – Design There are SO many ideas out there for making stuff in clay! From delicate porcelain jewellery, through to heavy sculptural work and everything in between. Deciding your direction is sometimes not that easy – when you first start, try everything, you will naturally gravitate to the style that you enjoy! The options and variations are endless and can get a wee bit overwhelming too! Check in with me before you start to ensure your ideas will work, what order you might do things, how you could achieve the look you are seeking and any other technical data required! Step Two – Making Clay is thixotropic. This means that as you work with it, the clay first gets sloppier and wetter, before is begins to dry in the atmosphere. For most things, you simply can’t do all parts of the project at once. An example of work order might look like: Get last weeks work out from the shelves Prepare clay for today’s work – roll your clay, prepare balls for throwing, make the first stage of a pinch pot) Clean up last week’s work and put it on the shelf for bisque firing Check that you have any glazing to do – and do enough of it that you will have time to finish your main project Do the next step of your next project – there might be a further step that can’t be complete immediately, in that case, wrap your work well and put onto the shelves. Letting your work rest for a while can really help keep your work clean and professional looking. Many things require bagging under plastic to keep it ready for work the next week – put your name on the outside of the bag so you can find your work easily. We have stickers and markers. Consider how you want to decorate your work – coloured slip can be applied at a fairly wet stage (remembering that it will make your work even wetter!). Trying to apply slip to dry clay won’t work! If you want to do sgraffito – you will need to keep the work leather hard (a state of dryness where you can still work the clay with a little effort and a little water and care). Step Three – Drying Most of the time your work can go into the rack uncovered to let it dry out for the following week. If you want to continue forming or shaping you will need to double bag your work – put your work on a suitable sized bat and put the bat in a bag so the base of the bag is under the bat, then put another bag over the top of the work and tuck the top of the bag under the bat. If you want to trim (or turn) your thrown work the following week, it should also be double bagged. If your work is large, delicate, or of uneven thicknesses, you should lightly cover your work for drying. When considering the drying process, bare in mind the weather, humidity and wind! The hotter and dryer, the faster things dry and work can dry unevenly in the shelves – this can lead to cracking – another time to lightly cover your work for drying. Step Four – Trimming and Cleaning Up Your work is dry! It is called greenware now and it is at it’s most fragile! Handle everything with two hands. I often refer to soft hands – keep everything gentle and with your fingers spread as much as possible. Try to not pick up things like plates too much, and always with both hands! Before your work can be bisque fired it should be “cleaned up”. You work won’t go into the kiln if it has sharp edges – when glazed, sharp edges turn into razor blades! Use a piece of fly wire to rub the work all over – this will scratch a little so be light handed. Use a knife or metal kidney to scrape any areas that require a bit more dynamic treatment than the fly wire offers! Finally, a very light wipe over with a slightly damp sponge can help soften and soothe all of your edges and dags! Trimming thrown work: If you are planning to trim (or turn) your thrown work (and you should be), make sure you bag it well – your work should be leather hard to almost dry for easiest trimming. Use this step to finish the work completely – use a metal kidney to polish the surface, or a slightly damp sponge to give a freshly thrown look. Wipe the sponge around the rim after trimming, and check the inside of the pot for dags! Trimming slip cast work: Usually I will trim the rims of your work on the wheel the following day to make that stage easier, however you will still need to check your work for lumps and bumps. Last but not least – check that your name is still clearly on the bottom of your work. Step Five – Bisque Firing When the work is completely dry it can go into the bisque kiln. The bisque kiln is fired to 1000°C. This process burns off the water in the clay as well as some of the chemically bound water. The structure of the clay is not altered that much at this temperature. Inside the bisque kiln, the work is stacked a little, small bowl inside a larger bowl and onto a heavy plate. Smaller items like decorations or drink coasters might get stacked several high. Consideration is paid to the weight of the stack and shape of the work. A bisque kiln can fire about one and a half times the amount of work that the glaze kiln can fire. The firing takes about 10 hours to complete the cycle and about two days to cool down. Once it has been emptied the work is placed in the glaze room ready for you to decorate! Step Six – Glazing Decorating your work with colour can be a lot of fun – and time consuming! There are three main options for surface treatment at this stage: Oxide Washes Underglazes Glazes Washes and underglazes do not “glaze” the work – It will still need a layer of glaze to fully seal the clay (washes don’t need glaze on surfaces not designed for food or liquid as they can gloss up a little on their own). Underglazes are stable colourants that turn out pretty much how they look in the jar. They can be mixed with each other to form other colours and can be used like water colours to paint onto your work. Mostly they should have a clear glaze on top to seal them. Oxides are a different species – the pink oxide (cobalt) wash turns out bright blue for instance. They don’t always need a glaze on top, and some glazes can change the colour of the wash! The glazes need no other “glaze” on top! Be careful of unknown glaze interactions – you can put any combination of glaze in a bowl or on a plate, but only a single glaze on the outside of any vertical surface! Glazes are a chemical reaction under heat. We don’t know the exact chemicals in the Mayco glazes we use. I can guess by the way they interact with each other, however, on the whole, you need to test every idea you have, and not run the test on a vertical surface! Simply put, glaze is a layer of glass like substance that bonds with the clay underneath. Clay is made of silica, alumina and water. Glaze is made of mostly silica. Silica has a melting point of 1700°C and we fire to 1240°C. The silica requires a “flux” to help it melt at the lower temperature. Fluxes can be all sorts of chemicals – a common one is calcium – calcium has a melting point of 2500°C, however, together they both melt at a much lower temperature! Colourants are metal oxides like cobalt (blue), chrome (green through black), copper (green, blue, even red!), manganese (black, purple and pink) iron (red brown), etc. Different chemicals in the glaze can have dramatic effects. for example, barium carbonate (which we don’t use) turns manganese bright pink! Other elements can turn manganese dioxide brown, blue, purple and reddish brown. Manganese dioxide is a flux in and of itself as well. So, glazes that get their black and purple colours, often interact with other glazes and RUN! Our mirror black is a good example – it mixes really well with many glazes because it fluxes them – causes them to melt faster. It will also bring out many beautiful colours in the glazes because it’s black colouring most definitely comes from manganese dioxide! Glaze chemistry is a whole subject on it’s own! We use commercial Mayco glazes on purpose – for their huge range of colour possibilities, stability, cool interactions, artistic freedom with the ability to easily brush the glazes on and ease of use. We currently have almost 50 glazes on hand! A major project is to test the interactions of all glazes with each other. That is 2,500 test tiles!!!! I’m going to make the wall behind the wheels the feature wall of pretty colours! Step Seven – Glaze (Gloss or sometimes called “Glost”) Firing Most of the time this is the final stage of making your creation (but not always!) The glaze kiln goes to 1240°C. This is called cone 6, or midrange. It is the low end of stoneware temperatures. Stoneware clays and glazes are typically fired at cone 8 – 10, that is 1260 – 1290°C. The energy requirement to go from 1240°C to 1280°C is almost a 30% more! Our clay is formulated to vitrify (mature, turn “glass-like”) at 1240°, as are our glazes. A glaze kiln take around 12 hours to reach temperature and two to three days to cool down. Sometimes a third firing process is required – this is for decoration that is added to work after the glaze firing. For example – adding precious metals and lustres. this firing temperature is usually around 600 – 800°C depending upon the techniques being used. There are many students interested in gold and silver trims – we will be doing this third type of firing soon! After firing your work will be in the student finished work shelves. Remember to pay for it before you head out the door! There is a small extra charge for using porcelain clay (it’s more than twice the price of regular clay), and for any third firing process! Once your work has been fired it can not turn back into clay for millennia – so don’t fire it if you don’t like it! Put it in the bucket for recycling. https://firebirdstudios.com.au/the-process-of-making-pottery/This bowl was made by renowned pottery company J & G Meakin of England. The firm was established in the mid-1800's. The bowl is an example of kitchenware used in the 19th century and still in use today.Bowl; white ceramic, round and tapering inwards towards base. Made by J and G Meakin England.On base, 'Ironstone China Reg SOL 391413' with symbolflagstaff hill, flagstaff hill maritime museum and village, warrnambool, maritime museum, maritime village, great ocean road, shipwreck coast, mixing bowl, food preparation, j & g meakin, pottery, stoke-on-trent, kitchen equipment, ceramic -
 Flagstaff Hill Maritime Museum and Village
Domestic object - Plate
The Process of Making Pottery Decorating, Firing, Glazing, Making, Technical There is a rhythm and flow to clay. It can’t be done all at once! Even the making process! It can take weeks to get everything done, especially if you can only work on your pottery once a week! Even though we have three hour classes, it’s often just not enough time! Here is an overview of some of the processes so you have a bit more grasp on some of the technical stuff! Step One – Design There are SO many ideas out there for making stuff in clay! From delicate porcelain jewellery, through to heavy sculptural work and everything in between. Deciding your direction is sometimes not that easy – when you first start, try everything, you will naturally gravitate to the style that you enjoy! The options and variations are endless and can get a wee bit overwhelming too! Check in with me before you start to ensure your ideas will work, what order you might do things, how you could achieve the look you are seeking and any other technical data required! Step Two – Making Clay is thixotropic. This means that as you work with it, the clay first gets sloppier and wetter, before is begins to dry in the atmosphere. For most things, you simply can’t do all parts of the project at once. An example of work order might look like: Get last weeks work out from the shelves Prepare clay for today’s work – roll your clay, prepare balls for throwing, make the first stage of a pinch pot) Clean up last week’s work and put it on the shelf for bisque firing Check that you have any glazing to do – and do enough of it that you will have time to finish your main project Do the next step of your next project – there might be a further step that can’t be complete immediately, in that case, wrap your work well and put onto the shelves. Letting your work rest for a while can really help keep your work clean and professional looking. Many things require bagging under plastic to keep it ready for work the next week – put your name on the outside of the bag so you can find your work easily. We have stickers and markers. Consider how you want to decorate your work – coloured slip can be applied at a fairly wet stage (remembering that it will make your work even wetter!). Trying to apply slip to dry clay won’t work! If you want to do sgraffito – you will need to keep the work leather hard (a state of dryness where you can still work the clay with a little effort and a little water and care). Step Three – Drying Most of the time your work can go into the rack uncovered to let it dry out for the following week. If you want to continue forming or shaping you will need to double bag your work – put your work on a suitable sized bat and put the bat in a bag so the base of the bag is under the bat, then put another bag over the top of the work and tuck the top of the bag under the bat. If you want to trim (or turn) your thrown work the following week, it should also be double bagged. If your work is large, delicate, or of uneven thicknesses, you should lightly cover your work for drying. When considering the drying process, bare in mind the weather, humidity and wind! The hotter and dryer, the faster things dry and work can dry unevenly in the shelves – this can lead to cracking – another time to lightly cover your work for drying. Step Four – Trimming and Cleaning Up Your work is dry! It is called greenware now and it is at it’s most fragile! Handle everything with two hands. I often refer to soft hands – keep everything gentle and with your fingers spread as much as possible. Try to not pick up things like plates too much, and always with both hands! Before your work can be bisque fired it should be “cleaned up”. You work won’t go into the kiln if it has sharp edges – when glazed, sharp edges turn into razor blades! Use a piece of fly wire to rub the work all over – this will scratch a little so be light handed. Use a knife or metal kidney to scrape any areas that require a bit more dynamic treatment than the fly wire offers! Finally, a very light wipe over with a slightly damp sponge can help soften and soothe all of your edges and dags! Trimming thrown work: If you are planning to trim (or turn) your thrown work (and you should be), make sure you bag it well – your work should be leather hard to almost dry for easiest trimming. Use this step to finish the work completely – use a metal kidney to polish the surface, or a slightly damp sponge to give a freshly thrown look. Wipe the sponge around the rim after trimming, and check the inside of the pot for dags! Trimming slip cast work: Usually I will trim the rims of your work on the wheel the following day to make that stage easier, however you will still need to check your work for lumps and bumps. Last but not least – check that your name is still clearly on the bottom of your work. Step Five – Bisque Firing When the work is completely dry it can go into the bisque kiln. The bisque kiln is fired to 1000°C. This process burns off the water in the clay as well as some of the chemically bound water. The structure of the clay is not altered that much at this temperature. Inside the bisque kiln, the work is stacked a little, small bowl inside a larger bowl and onto a heavy plate. Smaller items like decorations or drink coasters might get stacked several high. Consideration is paid to the weight of the stack and shape of the work. A bisque kiln can fire about one and a half times the amount of work that the glaze kiln can fire. The firing takes about 10 hours to complete the cycle and about two days to cool down. Once it has been emptied the work is placed in the glaze room ready for you to decorate! Step Six – Glazing Decorating your work with colour can be a lot of fun – and time consuming! There are three main options for surface treatment at this stage: Oxide Washes Underglazes Glazes Washes and underglazes do not “glaze” the work – It will still need a layer of glaze to fully seal the clay (washes don’t need glaze on surfaces not designed for food or liquid as they can gloss up a little on their own). Underglazes are stable colourants that turn out pretty much how they look in the jar. They can be mixed with each other to form other colours and can be used like water colours to paint onto your work. Mostly they should have a clear glaze on top to seal them. Oxides are a different species – the pink oxide (cobalt) wash turns out bright blue for instance. They don’t always need a glaze on top, and some glazes can change the colour of the wash! The glazes need no other “glaze” on top! Be careful of unknown glaze interactions – you can put any combination of glaze in a bowl or on a plate, but only a single glaze on the outside of any vertical surface! Glazes are a chemical reaction under heat. We don’t know the exact chemicals in the Mayco glazes we use. I can guess by the way they interact with each other, however, on the whole, you need to test every idea you have, and not run the test on a vertical surface! Simply put, glaze is a layer of glass like substance that bonds with the clay underneath. Clay is made of silica, alumina and water. Glaze is made of mostly silica. Silica has a melting point of 1700°C and we fire to 1240°C. The silica requires a “flux” to help it melt at the lower temperature. Fluxes can be all sorts of chemicals – a common one is calcium – calcium has a melting point of 2500°C, however, together they both melt at a much lower temperature! Colourants are metal oxides like cobalt (blue), chrome (green through black), copper (green, blue, even red!), manganese (black, purple and pink) iron (red brown), etc. Different chemicals in the glaze can have dramatic effects. for example, barium carbonate (which we don’t use) turns manganese bright pink! Other elements can turn manganese dioxide brown, blue, purple and reddish brown. Manganese dioxide is a flux in and of itself as well. So, glazes that get their black and purple colours, often interact with other glazes and RUN! Our mirror black is a good example – it mixes really well with many glazes because it fluxes them – causes them to melt faster. It will also bring out many beautiful colours in the glazes because it’s black colouring most definitely comes from manganese dioxide! Glaze chemistry is a whole subject on it’s own! We use commercial Mayco glazes on purpose – for their huge range of colour possibilities, stability, cool interactions, artistic freedom with the ability to easily brush the glazes on and ease of use. We currently have almost 50 glazes on hand! A major project is to test the interactions of all glazes with each other. That is 2,500 test tiles!!!! I’m going to make the wall behind the wheels the feature wall of pretty colours! Step Seven – Glaze (Gloss or sometimes called “Glost”) Firing Most of the time this is the final stage of making your creation (but not always!) The glaze kiln goes to 1240°C. This is called cone 6, or midrange. It is the low end of stoneware temperatures. Stoneware clays and glazes are typically fired at cone 8 – 10, that is 1260 – 1290°C. The energy requirement to go from 1240°C to 1280°C is almost a 30% more! Our clay is formulated to vitrify (mature, turn “glass-like”) at 1240°, as are our glazes. A glaze kiln take around 12 hours to reach temperature and two to three days to cool down. Sometimes a third firing process is required – this is for decoration that is added to work after the glaze firing. For example – adding precious metals and lustres. this firing temperature is usually around 600 – 800°C depending upon the techniques being used. There are many students interested in gold and silver trims – we will be doing this third type of firing soon! After firing your work will be in the student finished work shelves. Remember to pay for it before you head out the door! There is a small extra charge for using porcelain clay (it’s more than twice the price of regular clay), and for any third firing process! Once your work has been fired it can not turn back into clay for millennia – so don’t fire it if you don’t like it! Put it in the bucket for recycling. https://firebirdstudios.com.au/the-process-of-making-pottery/Ceramics have evolved over thousands of years.White earthenware dinner plate. Crazing evident all over.Backstamped ‘Made in England S LTD’flagstaff hill, warrnambool, shipwrecked-coast, flagstaff-hill, flagstaff-hill-maritime-museum, maritime-museum, shipwreck-coast, flagstaff-hill-maritime-village, ceramics, tableware -
 Flagstaff Hill Maritime Museum and Village
Domestic object - Plate, Johnson Bros
The Process of Making Pottery Decorating, Firing, Glazing, Making, Technical There is a rhythm and flow to clay. It can’t be done all at once! Even the making process! It can take weeks to get everything done, especially if you can only work on your pottery once a week! Even though we have three hour classes, it’s often just not enough time! Here is an overview of some of the processes so you have a bit more grasp on some of the technical stuff! Step One – Design There are SO many ideas out there for making stuff in clay! From delicate porcelain jewellery, through to heavy sculptural work and everything in between. Deciding your direction is sometimes not that easy – when you first start, try everything, you will naturally gravitate to the style that you enjoy! The options and variations are endless and can get a wee bit overwhelming too! Check in with me before you start to ensure your ideas will work, what order you might do things, how you could achieve the look you are seeking and any other technical data required! Step Two – Making Clay is thixotropic. This means that as you work with it, the clay first gets sloppier and wetter, before is begins to dry in the atmosphere. For most things, you simply can’t do all parts of the project at once. An example of work order might look like: Get last weeks work out from the shelves Prepare clay for today’s work – roll your clay, prepare balls for throwing, make the first stage of a pinch pot) Clean up last week’s work and put it on the shelf for bisque firing Check that you have any glazing to do – and do enough of it that you will have time to finish your main project Do the next step of your next project – there might be a further step that can’t be complete immediately, in that case, wrap your work well and put onto the shelves. Letting your work rest for a while can really help keep your work clean and professional looking. Many things require bagging under plastic to keep it ready for work the next week – put your name on the outside of the bag so you can find your work easily. We have stickers and markers. Consider how you want to decorate your work – coloured slip can be applied at a fairly wet stage (remembering that it will make your work even wetter!). Trying to apply slip to dry clay won’t work! If you want to do sgraffito – you will need to keep the work leather hard (a state of dryness where you can still work the clay with a little effort and a little water and care). Step Three – Drying Most of the time your work can go into the rack uncovered to let it dry out for the following week. If you want to continue forming or shaping you will need to double bag your work – put your work on a suitable sized bat and put the bat in a bag so the base of the bag is under the bat, then put another bag over the top of the work and tuck the top of the bag under the bat. If you want to trim (or turn) your thrown work the following week, it should also be double bagged. If your work is large, delicate, or of uneven thicknesses, you should lightly cover your work for drying. When considering the drying process, bare in mind the weather, humidity and wind! The hotter and dryer, the faster things dry and work can dry unevenly in the shelves – this can lead to cracking – another time to lightly cover your work for drying. Step Four – Trimming and Cleaning Up Your work is dry! It is called greenware now and it is at it’s most fragile! Handle everything with two hands. I often refer to soft hands – keep everything gentle and with your fingers spread as much as possible. Try to not pick up things like plates too much, and always with both hands! Before your work can be bisque fired it should be “cleaned up”. You work won’t go into the kiln if it has sharp edges – when glazed, sharp edges turn into razor blades! Use a piece of fly wire to rub the work all over – this will scratch a little so be light handed. Use a knife or metal kidney to scrape any areas that require a bit more dynamic treatment than the fly wire offers! Finally, a very light wipe over with a slightly damp sponge can help soften and soothe all of your edges and dags! Trimming thrown work: If you are planning to trim (or turn) your thrown work (and you should be), make sure you bag it well – your work should be leather hard to almost dry for easiest trimming. Use this step to finish the work completely – use a metal kidney to polish the surface, or a slightly damp sponge to give a freshly thrown look. Wipe the sponge around the rim after trimming, and check the inside of the pot for dags! Trimming slip cast work: Usually I will trim the rims of your work on the wheel the following day to make that stage easier, however you will still need to check your work for lumps and bumps. Last but not least – check that your name is still clearly on the bottom of your work. Step Five – Bisque Firing When the work is completely dry it can go into the bisque kiln. The bisque kiln is fired to 1000°C. This process burns off the water in the clay as well as some of the chemically bound water. The structure of the clay is not altered that much at this temperature. Inside the bisque kiln, the work is stacked a little, small bowl inside a larger bowl and onto a heavy plate. Smaller items like decorations or drink coasters might get stacked several high. Consideration is paid to the weight of the stack and shape of the work. A bisque kiln can fire about one and a half times the amount of work that the glaze kiln can fire. The firing takes about 10 hours to complete the cycle and about two days to cool down. Once it has been emptied the work is placed in the glaze room ready for you to decorate! Step Six – Glazing Decorating your work with colour can be a lot of fun – and time consuming! There are three main options for surface treatment at this stage: Oxide Washes Underglazes Glazes Washes and underglazes do not “glaze” the work – It will still need a layer of glaze to fully seal the clay (washes don’t need glaze on surfaces not designed for food or liquid as they can gloss up a little on their own). Underglazes are stable colourants that turn out pretty much how they look in the jar. They can be mixed with each other to form other colours and can be used like water colours to paint onto your work. Mostly they should have a clear glaze on top to seal them. Oxides are a different species – the pink oxide (cobalt) wash turns out bright blue for instance. They don’t always need a glaze on top, and some glazes can change the colour of the wash! The glazes need no other “glaze” on top! Be careful of unknown glaze interactions – you can put any combination of glaze in a bowl or on a plate, but only a single glaze on the outside of any vertical surface! Glazes are a chemical reaction under heat. We don’t know the exact chemicals in the Mayco glazes we use. I can guess by the way they interact with each other, however, on the whole, you need to test every idea you have, and not run the test on a vertical surface! Simply put, glaze is a layer of glass like substance that bonds with the clay underneath. Clay is made of silica, alumina and water. Glaze is made of mostly silica. Silica has a melting point of 1700°C and we fire to 1240°C. The silica requires a “flux” to help it melt at the lower temperature. Fluxes can be all sorts of chemicals – a common one is calcium – calcium has a melting point of 2500°C, however, together they both melt at a much lower temperature! Colourants are metal oxides like cobalt (blue), chrome (green through black), copper (green, blue, even red!), manganese (black, purple and pink) iron (red brown), etc. Different chemicals in the glaze can have dramatic effects. for example, barium carbonate (which we don’t use) turns manganese bright pink! Other elements can turn manganese dioxide brown, blue, purple and reddish brown. Manganese dioxide is a flux in and of itself as well. So, glazes that get their black and purple colours, often interact with other glazes and RUN! Our mirror black is a good example – it mixes really well with many glazes because it fluxes them – causes them to melt faster. It will also bring out many beautiful colours in the glazes because it’s black colouring most definitely comes from manganese dioxide! Glaze chemistry is a whole subject on it’s own! We use commercial Mayco glazes on purpose – for their huge range of colour possibilities, stability, cool interactions, artistic freedom with the ability to easily brush the glazes on and ease of use. We currently have almost 50 glazes on hand! A major project is to test the interactions of all glazes with each other. That is 2,500 test tiles!!!! I’m going to make the wall behind the wheels the feature wall of pretty colours! Step Seven – Glaze (Gloss or sometimes called “Glost”) Firing Most of the time this is the final stage of making your creation (but not always!) The glaze kiln goes to 1240°C. This is called cone 6, or midrange. It is the low end of stoneware temperatures. Stoneware clays and glazes are typically fired at cone 8 – 10, that is 1260 – 1290°C. The energy requirement to go from 1240°C to 1280°C is almost a 30% more! Our clay is formulated to vitrify (mature, turn “glass-like”) at 1240°, as are our glazes. A glaze kiln take around 12 hours to reach temperature and two to three days to cool down. Sometimes a third firing process is required – this is for decoration that is added to work after the glaze firing. For example – adding precious metals and lustres. this firing temperature is usually around 600 – 800°C depending upon the techniques being used. There are many students interested in gold and silver trims – we will be doing this third type of firing soon! After firing your work will be in the student finished work shelves. Remember to pay for it before you head out the door! There is a small extra charge for using porcelain clay (it’s more than twice the price of regular clay), and for any third firing process! Once your work has been fired it can not turn back into clay for millennia – so don’t fire it if you don’t like it! Put it in the bucket for recycling. https://firebirdstudios.com.au/the-process-of-making-pottery/Ceramics have evolved over thousands of years.A white earthenware side plate with a gadroon edge. Has water marks and chips on front.‘Johnson Bros England Reg No 15587’flagstaff hill, warrnambool, shipwrecked-coast, flagstaff-hill, flagstaff-hill-maritime-museum, maritime-museum, shipwreck-coast, flagstaff-hill-maritime-village, johnson bros, ceramics, tableware -
 Flagstaff Hill Maritime Museum and Village
Domestic object - Plate, Alfred Meakin
The Process of Making Pottery Decorating, Firing, Glazing, Making, Technical There is a rhythm and flow to clay. It can’t be done all at once! Even the making process! It can take weeks to get everything done, especially if you can only work on your pottery once a week! Even though we have three hour classes, it’s often just not enough time! Here is an overview of some of the processes so you have a bit more grasp on some of the technical stuff! Step One – Design There are SO many ideas out there for making stuff in clay! From delicate porcelain jewellery, through to heavy sculptural work and everything in between. Deciding your direction is sometimes not that easy – when you first start, try everything, you will naturally gravitate to the style that you enjoy! The options and variations are endless and can get a wee bit overwhelming too! Check in with me before you start to ensure your ideas will work, what order you might do things, how you could achieve the look you are seeking and any other technical data required! Step Two – Making Clay is thixotropic. This means that as you work with it, the clay first gets sloppier and wetter, before is begins to dry in the atmosphere. For most things, you simply can’t do all parts of the project at once. An example of work order might look like: Get last weeks work out from the shelves Prepare clay for today’s work – roll your clay, prepare balls for throwing, make the first stage of a pinch pot) Clean up last week’s work and put it on the shelf for bisque firing Check that you have any glazing to do – and do enough of it that you will have time to finish your main project Do the next step of your next project – there might be a further step that can’t be complete immediately, in that case, wrap your work well and put onto the shelves. Letting your work rest for a while can really help keep your work clean and professional looking. Many things require bagging under plastic to keep it ready for work the next week – put your name on the outside of the bag so you can find your work easily. We have stickers and markers. Consider how you want to decorate your work – coloured slip can be applied at a fairly wet stage (remembering that it will make your work even wetter!). Trying to apply slip to dry clay won’t work! If you want to do sgraffito – you will need to keep the work leather hard (a state of dryness where you can still work the clay with a little effort and a little water and care). Step Three – Drying Most of the time your work can go into the rack uncovered to let it dry out for the following week. If you want to continue forming or shaping you will need to double bag your work – put your work on a suitable sized bat and put the bat in a bag so the base of the bag is under the bat, then put another bag over the top of the work and tuck the top of the bag under the bat. If you want to trim (or turn) your thrown work the following week, it should also be double bagged. If your work is large, delicate, or of uneven thicknesses, you should lightly cover your work for drying. When considering the drying process, bare in mind the weather, humidity and wind! The hotter and dryer, the faster things dry and work can dry unevenly in the shelves – this can lead to cracking – another time to lightly cover your work for drying. Step Four – Trimming and Cleaning Up Your work is dry! It is called greenware now and it is at it’s most fragile! Handle everything with two hands. I often refer to soft hands – keep everything gentle and with your fingers spread as much as possible. Try to not pick up things like plates too much, and always with both hands! Before your work can be bisque fired it should be “cleaned up”. You work won’t go into the kiln if it has sharp edges – when glazed, sharp edges turn into razor blades! Use a piece of fly wire to rub the work all over – this will scratch a little so be light handed. Use a knife or metal kidney to scrape any areas that require a bit more dynamic treatment than the fly wire offers! Finally, a very light wipe over with a slightly damp sponge can help soften and soothe all of your edges and dags! Trimming thrown work: If you are planning to trim (or turn) your thrown work (and you should be), make sure you bag it well – your work should be leather hard to almost dry for easiest trimming. Use this step to finish the work completely – use a metal kidney to polish the surface, or a slightly damp sponge to give a freshly thrown look. Wipe the sponge around the rim after trimming, and check the inside of the pot for dags! Trimming slip cast work: Usually I will trim the rims of your work on the wheel the following day to make that stage easier, however you will still need to check your work for lumps and bumps. Last but not least – check that your name is still clearly on the bottom of your work. Step Five – Bisque Firing When the work is completely dry it can go into the bisque kiln. The bisque kiln is fired to 1000°C. This process burns off the water in the clay as well as some of the chemically bound water. The structure of the clay is not altered that much at this temperature. Inside the bisque kiln, the work is stacked a little, small bowl inside a larger bowl and onto a heavy plate. Smaller items like decorations or drink coasters might get stacked several high. Consideration is paid to the weight of the stack and shape of the work. A bisque kiln can fire about one and a half times the amount of work that the glaze kiln can fire. The firing takes about 10 hours to complete the cycle and about two days to cool down. Once it has been emptied the work is placed in the glaze room ready for you to decorate! Step Six – Glazing Decorating your work with colour can be a lot of fun – and time consuming! There are three main options for surface treatment at this stage: Oxide Washes Underglazes Glazes Washes and underglazes do not “glaze” the work – It will still need a layer of glaze to fully seal the clay (washes don’t need glaze on surfaces not designed for food or liquid as they can gloss up a little on their own). Underglazes are stable colourants that turn out pretty much how they look in the jar. They can be mixed with each other to form other colours and can be used like water colours to paint onto your work. Mostly they should have a clear glaze on top to seal them. Oxides are a different species – the pink oxide (cobalt) wash turns out bright blue for instance. They don’t always need a glaze on top, and some glazes can change the colour of the wash! The glazes need no other “glaze” on top! Be careful of unknown glaze interactions – you can put any combination of glaze in a bowl or on a plate, but only a single glaze on the outside of any vertical surface! Glazes are a chemical reaction under heat. We don’t know the exact chemicals in the Mayco glazes we use. I can guess by the way they interact with each other, however, on the whole, you need to test every idea you have, and not run the test on a vertical surface! Simply put, glaze is a layer of glass like substance that bonds with the clay underneath. Clay is made of silica, alumina and water. Glaze is made of mostly silica. Silica has a melting point of 1700°C and we fire to 1240°C. The silica requires a “flux” to help it melt at the lower temperature. Fluxes can be all sorts of chemicals – a common one is calcium – calcium has a melting point of 2500°C, however, together they both melt at a much lower temperature! Colourants are metal oxides like cobalt (blue), chrome (green through black), copper (green, blue, even red!), manganese (black, purple and pink) iron (red brown), etc. Different chemicals in the glaze can have dramatic effects. for example, barium carbonate (which we don’t use) turns manganese bright pink! Other elements can turn manganese dioxide brown, blue, purple and reddish brown. Manganese dioxide is a flux in and of itself as well. So, glazes that get their black and purple colours, often interact with other glazes and RUN! Our mirror black is a good example – it mixes really well with many glazes because it fluxes them – causes them to melt faster. It will also bring out many beautiful colours in the glazes because it’s black colouring most definitely comes from manganese dioxide! Glaze chemistry is a whole subject on it’s own! We use commercial Mayco glazes on purpose – for their huge range of colour possibilities, stability, cool interactions, artistic freedom with the ability to easily brush the glazes on and ease of use. We currently have almost 50 glazes on hand! A major project is to test the interactions of all glazes with each other. That is 2,500 test tiles!!!! I’m going to make the wall behind the wheels the feature wall of pretty colours! Step Seven – Glaze (Gloss or sometimes called “Glost”) Firing Most of the time this is the final stage of making your creation (but not always!) The glaze kiln goes to 1240°C. This is called cone 6, or midrange. It is the low end of stoneware temperatures. Stoneware clays and glazes are typically fired at cone 8 – 10, that is 1260 – 1290°C. The energy requirement to go from 1240°C to 1280°C is almost a 30% more! Our clay is formulated to vitrify (mature, turn “glass-like”) at 1240°, as are our glazes. A glaze kiln take around 12 hours to reach temperature and two to three days to cool down. Sometimes a third firing process is required – this is for decoration that is added to work after the glaze firing. For example – adding precious metals and lustres. this firing temperature is usually around 600 – 800°C depending upon the techniques being used. There are many students interested in gold and silver trims – we will be doing this third type of firing soon! After firing your work will be in the student finished work shelves. Remember to pay for it before you head out the door! There is a small extra charge for using porcelain clay (it’s more than twice the price of regular clay), and for any third firing process! Once your work has been fired it can not turn back into clay for millennia – so don’t fire it if you don’t like it! Put it in the bucket for recycling. https://firebirdstudios.com.au/the-process-of-making-pottery/Ceramics have evolved over thousands of years.Earthenware dessert plate, cream colour. Made by Alfred Meakin, England. Backstamped ‘Alfred Meakin England’. flagstaff hill, warrnambool, shipwrecked-coast, flagstaff-hill, flagstaff-hill-maritime-museum, maritime-museum, shipwreck-coast, flagstaff-hill-maritime-village, alfred meakin, ceramics, earthenware, kitchenware -
 Flagstaff Hill Maritime Museum and Village
Domestic object - Jug
The Process of Making Pottery Decorating, Firing, Glazing, Making, Technical There is a rhythm and flow to clay. It can’t be done all at once! Even the making process! It can take weeks to get everything done, especially if you can only work on your pottery once a week! Even though we have three hour classes, it’s often just not enough time! Here is an overview of some of the processes so you have a bit more grasp on some of the technical stuff! Step One – Design There are SO many ideas out there for making stuff in clay! From delicate porcelain jewellery, through to heavy sculptural work and everything in between. Deciding your direction is sometimes not that easy – when you first start, try everything, you will naturally gravitate to the style that you enjoy! The options and variations are endless and can get a wee bit overwhelming too! Check in with me before you start to ensure your ideas will work, what order you might do things, how you could achieve the look you are seeking and any other technical data required! Step Two – Making Clay is thixotropic. This means that as you work with it, the clay first gets sloppier and wetter, before is begins to dry in the atmosphere. For most things, you simply can’t do all parts of the project at once. An example of work order might look like: Get last weeks work out from the shelves Prepare clay for today’s work – roll your clay, prepare balls for throwing, make the first stage of a pinch pot) Clean up last week’s work and put it on the shelf for bisque firing Check that you have any glazing to do – and do enough of it that you will have time to finish your main project Do the next step of your next project – there might be a further step that can’t be complete immediately, in that case, wrap your work well and put onto the shelves. Letting your work rest for a while can really help keep your work clean and professional looking. Many things require bagging under plastic to keep it ready for work the next week – put your name on the outside of the bag so you can find your work easily. We have stickers and markers. Consider how you want to decorate your work – coloured slip can be applied at a fairly wet stage (remembering that it will make your work even wetter!). Trying to apply slip to dry clay won’t work! If you want to do sgraffito – you will need to keep the work leather hard (a state of dryness where you can still work the clay with a little effort and a little water and care). Step Three – Drying Most of the time your work can go into the rack uncovered to let it dry out for the following week. If you want to continue forming or shaping you will need to double bag your work – put your work on a suitable sized bat and put the bat in a bag so the base of the bag is under the bat, then put another bag over the top of the work and tuck the top of the bag under the bat. If you want to trim (or turn) your thrown work the following week, it should also be double bagged. If your work is large, delicate, or of uneven thicknesses, you should lightly cover your work for drying. When considering the drying process, bare in mind the weather, humidity and wind! The hotter and dryer, the faster things dry and work can dry unevenly in the shelves – this can lead to cracking – another time to lightly cover your work for drying. Step Four – Trimming and Cleaning Up Your work is dry! It is called greenware now and it is at it’s most fragile! Handle everything with two hands. I often refer to soft hands – keep everything gentle and with your fingers spread as much as possible. Try to not pick up things like plates too much, and always with both hands! Before your work can be bisque fired it should be “cleaned up”. You work won’t go into the kiln if it has sharp edges – when glazed, sharp edges turn into razor blades! Use a piece of fly wire to rub the work all over – this will scratch a little so be light handed. Use a knife or metal kidney to scrape any areas that require a bit more dynamic treatment than the fly wire offers! Finally, a very light wipe over with a slightly damp sponge can help soften and soothe all of your edges and dags! Trimming thrown work: If you are planning to trim (or turn) your thrown work (and you should be), make sure you bag it well – your work should be leather hard to almost dry for easiest trimming. Use this step to finish the work completely – use a metal kidney to polish the surface, or a slightly damp sponge to give a freshly thrown look. Wipe the sponge around the rim after trimming, and check the inside of the pot for dags! Trimming slip cast work: Usually I will trim the rims of your work on the wheel the following day to make that stage easier, however you will still need to check your work for lumps and bumps. Last but not least – check that your name is still clearly on the bottom of your work. Step Five – Bisque Firing When the work is completely dry it can go into the bisque kiln. The bisque kiln is fired to 1000°C. This process burns off the water in the clay as well as some of the chemically bound water. The structure of the clay is not altered that much at this temperature. Inside the bisque kiln, the work is stacked a little, small bowl inside a larger bowl and onto a heavy plate. Smaller items like decorations or drink coasters might get stacked several high. Consideration is paid to the weight of the stack and shape of the work. A bisque kiln can fire about one and a half times the amount of work that the glaze kiln can fire. The firing takes about 10 hours to complete the cycle and about two days to cool down. Once it has been emptied the work is placed in the glaze room ready for you to decorate! Step Six – Glazing Decorating your work with colour can be a lot of fun – and time consuming! There are three main options for surface treatment at this stage: Oxide Washes Underglazes Glazes Washes and underglazes do not “glaze” the work – It will still need a layer of glaze to fully seal the clay (washes don’t need glaze on surfaces not designed for food or liquid as they can gloss up a little on their own). Underglazes are stable colourants that turn out pretty much how they look in the jar. They can be mixed with each other to form other colours and can be used like water colours to paint onto your work. Mostly they should have a clear glaze on top to seal them. Oxides are a different species – the pink oxide (cobalt) wash turns out bright blue for instance. They don’t always need a glaze on top, and some glazes can change the colour of the wash! The glazes need no other “glaze” on top! Be careful of unknown glaze interactions – you can put any combination of glaze in a bowl or on a plate, but only a single glaze on the outside of any vertical surface! Glazes are a chemical reaction under heat. We don’t know the exact chemicals in the Mayco glazes we use. I can guess by the way they interact with each other, however, on the whole, you need to test every idea you have, and not run the test on a vertical surface! Simply put, glaze is a layer of glass like substance that bonds with the clay underneath. Clay is made of silica, alumina and water. Glaze is made of mostly silica. Silica has a melting point of 1700°C and we fire to 1240°C. The silica requires a “flux” to help it melt at the lower temperature. Fluxes can be all sorts of chemicals – a common one is calcium – calcium has a melting point of 2500°C, however, together they both melt at a much lower temperature! Colourants are metal oxides like cobalt (blue), chrome (green through black), copper (green, blue, even red!), manganese (black, purple and pink) iron (red brown), etc. Different chemicals in the glaze can have dramatic effects. for example, barium carbonate (which we don’t use) turns manganese bright pink! Other elements can turn manganese dioxide brown, blue, purple and reddish brown. Manganese dioxide is a flux in and of itself as well. So, glazes that get their black and purple colours, often interact with other glazes and RUN! Our mirror black is a good example – it mixes really well with many glazes because it fluxes them – causes them to melt faster. It will also bring out many beautiful colours in the glazes because it’s black colouring most definitely comes from manganese dioxide! Glaze chemistry is a whole subject on it’s own! We use commercial Mayco glazes on purpose – for their huge range of colour possibilities, stability, cool interactions, artistic freedom with the ability to easily brush the glazes on and ease of use. We currently have almost 50 glazes on hand! A major project is to test the interactions of all glazes with each other. That is 2,500 test tiles!!!! I’m going to make the wall behind the wheels the feature wall of pretty colours! Step Seven – Glaze (Gloss or sometimes called “Glost”) Firing Most of the time this is the final stage of making your creation (but not always!) The glaze kiln goes to 1240°C. This is called cone 6, or midrange. It is the low end of stoneware temperatures. Stoneware clays and glazes are typically fired at cone 8 – 10, that is 1260 – 1290°C. The energy requirement to go from 1240°C to 1280°C is almost a 30% more! Our clay is formulated to vitrify (mature, turn “glass-like”) at 1240°, as are our glazes. A glaze kiln take around 12 hours to reach temperature and two to three days to cool down. Sometimes a third firing process is required – this is for decoration that is added to work after the glaze firing. For example – adding precious metals and lustres. this firing temperature is usually around 600 – 800°C depending upon the techniques being used. There are many students interested in gold and silver trims – we will be doing this third type of firing soon! After firing your work will be in the student finished work shelves. Remember to pay for it before you head out the door! There is a small extra charge for using porcelain clay (it’s more than twice the price of regular clay), and for any third firing process! Once your work has been fired it can not turn back into clay for millennia – so don’t fire it if you don’t like it! Put it in the bucket for recycling. https://firebirdstudios.com.au/the-process-of-making-pottery/The form of the jug has been in use for many centuries.Stoneware jug. Two tone brown glaze with pierced lip behind spout. Spout chipped.None.flagstaff hill, warrnambool, shipwrecked-coast, flagstaff-hill, flagstaff-hill-maritime-museum, maritime-museum, shipwreck-coast, flagstaff-hill-maritime-village, jug, ceramic jug -
 Vision Australia
Administrative record - Text, 77th Annual Report 1972 Association for the Blind of Victoria, 1973
Articles in annual report include: branch committees, President's report, finance report, balance sheet, welfare, hospital homes, day centres, auxiliaries, volunteer service group, senior staff, life governors, formal establishment of the Low Vision Clinic which had been begun with discussions with Professor Gerard Crook in 1970 and supported for a year by the Hecht Trust, John Wilson accompanied Hugh Jeffrey, Australia's delegate on the Executive Committee for the Welfare of the Blind and IFB, businessman John Wicking joined the committee, plans for the future development of the George Vowell Centre are being formulated, Derek Nimmo entertained at multiple Auxiliary functions, the Toorak Auxiliary closed but two new ones at Kyneton and Narcoonah (Hampton), were formed, introduction of training course for volunteer workers and Mrs H.M. Lightfoot, who organised drivers for home visitor Elsie Henderson, has stepped down after fourteen years of service.1 volume of text and photographsassociation for the blind, h.m. lightfoot, john wilson, hugh jeffrey, derek nimmo, iris barnier, annual reports -
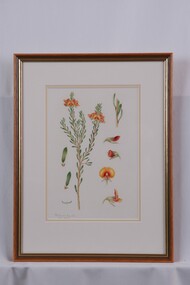 Glenelg Shire Council Cultural Collection
Drawing, Collin Elwyn Woolcock, Pultenaea humilis (Dwarf Bush-pea), 1977
Par of "Woolcock Gallery Collection". Exhibited CEMA 1989.Flower stem view on left, with flower details on right, leaf and stepal details on left. On far left are two leaf views of front and back in dark green - back view shows smalls hairs on leaf. On lower left is a side view of the leaf. The stem study depicts leaves up both sides of the central stem and side stems. Two stems have flowers near the top end. The flowers are dark yellow with an orange tinge, with red and purple centres. On right is a detail of stem and leaves, two side views of flower buds, a top view of full flower and a side view of full flower. Mounted in a double matt (off-white on pale tan) in a gold paint and wood glazed frame.Front: Pultenaea humilis (lower left) (pencil) CEW 29/1/77 (signature, lower left) (pencil) Back: 3 (upper left) (pen)cema, botanical, collin woolcock -
 Ballarat Tramway Museum
Photograph - Black & White Photograph/s, c1913
Black and white (slightly sepia toned) photo of ESCo No. 8 - side on view of tram. Has Driver standing by front of tram, a person, possibly conductor standing by rear, though tram set up for one man operation. Good detailed side view of tram, showing arrangements of blinds, seats etc. Has "Suttons Pianos" advertisement on side and "Pictures Coliseum tonight" ad on the inside middle window. Tram has been converted to have windscreens. Three ladies on the front seat section of the tramcar. Date unknown. Post 1912. Tram still has magnetic brakes. The step section by the seats has not been covered over with sheet metal to prevent people standing on the steps, as shown in later photographs.trams, tramways, esco, 8, suttons pianos, ballarat, tram 8 -
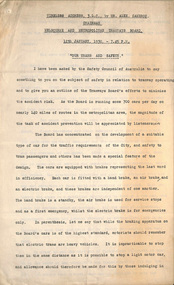 Melbourne Tram Museum
Document - Radio Transcript, Melbourne & Metropolitan Tramways Board (MMTB), "Wireless address 3LO by Mr Alex Cameron, Chairman MMTB 12 Jan 1930 - 745pm - Our Trams and Safety", 12/01/1930 12:00:00 AM
Radio transcript - 10 foolscap sheets, typed, titled "Wireless address 3LO by Mr Alex Cameron, Chairman MMTB 12 Jan 1930 - 745pm - Our Trams and Safety". Introduction refers to a request from the Safety Council of Australia, about safety around trams. Notes braking systems, tramcar maintenance, Preston Workshops, training, medical examinations, accident statistics, cable trams, more accidents with cable cars, knock downs mainly in the city, step accidents, crowding on trams, passengers knocked down by motor cars, tram stops, safety zones, traffic regulation, motor traffic, motor vehicle licencing, parking, and lane markings. Has a lists of don't for motorists, pedestrians and passengers.trams, tramways, radio stations, accidents, behaviour, driver training, brakes, safety, medical, cable trams, statistics, motor vehicles, traffic control -
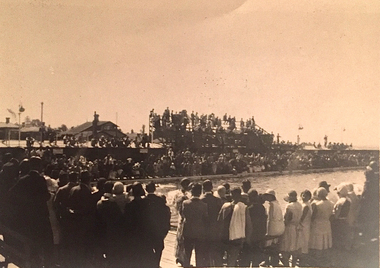 Kew Historical Society Inc
Photograph, Kew Municipal Baths, 1929-1933
W.D. Vaughan in 'Kew's Civic Century' (1960) has a chapter (XXII, pp.103-105) on the Kew Swimming Pool (aka Kew Baths). In the chapter he recounts debate in Council from 1912 about the need for a swimming pool. The first concrete step toward achieving this occurred in 1914 when Council purchased the Tramways Sheds on the corner of High and Disraeli Streets in 1914. Further adjoining land in High Street was compulsorily acquired in 1923. The final plans were accepted in 1925 and following public tender, Messrs. Weavill and Keast were appointed to construct the pool at a cost of 5,418/9/-. The baths were formally opened on 18 November 1925 by George Ramsay, Mayor of Kew. (The Kew Swimming Club was founded in the same year.) Vaughan notes that "mixed bathing was not permitted at the Kew Baths until January, 1928, when it was allowed every evening (except Sundays) and Friday afternoons. A few years later these restrictions were removed altogether".Small B&W photograph of a crowd of onlookers watching swimming events in the old Kew Swimming Pool in High Street. The photograph can be dated to the years 1929-33, as the wooden grandstand was not erected until 1929 and it was before a new high swimming platform was erected in 1933."Old Swimming Pool. D1. 92"kew swimming pool - kew (vic), sport and recreation - kew (vic), kew baths - kew (vic), mayors of kew - cr. george ramsay - kew (vic), kew swimming club -
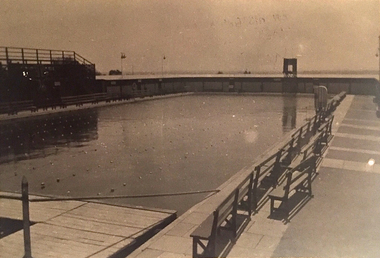 Kew Historical Society Inc
Photograph, Kew Municipal Baths, 1929-1933
W.D. Vaughan in 'Kew's Civic Century' (1960) has a chapter (XXII, pp.103-105) on the Kew Swimming Pool (aka Kew Baths). In the chapter he recounts debate in Council from 1912 about the need for a swimming pool. The first concrete step toward achieving this occurred in 1914 when Council purchased the Tramways Sheds on the corner of High and Disraeli Streets in 1914. Further adjoining land in High Street was compulsorily acquired in 1923. The final plans were accepted in 1925 and following public tender, Messrs. Weavill and Keast were appointed to construct the pool at a cost of 5,418/9/-. The baths were formally opened on 18 November 1925 by George Ramsay, Mayor of Kew. (The Kew Swimming Club was founded in the same year.) Vaughan notes that "mixed bathing was not permitted at the Kew Baths until January, 1928, when it was allowed every evening (except Sundays) and Friday afternoons. A few years later these restrictions were removed altogether".Small B&W photograph of the old Kew Swimming Pool showing seating at right. The photograph can be dated to the years 1929-33, as the wooden grandstand was not erected until 1929 and it was before a new high swimming platform was erected in 1933."D3. 92"kew swimming pool - kew (vic), sport and recreation - kew (vic), kew baths - kew (vic), mayors of kew - cr. george ramsay - kew (vic), kew swimming club -
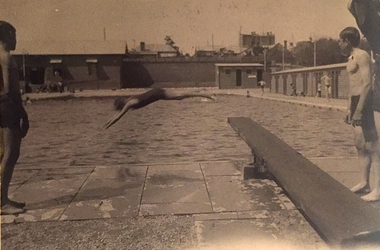 Kew Historical Society Inc
Photograph, Kew Municipal Baths, 1930s
W.D. Vaughan in 'Kew's Civic Century' (1960) has a chapter (XXII, pp.103-105) on the Kew Swimming Pool (aka Kew Baths). In the chapter he recounts debate in Council from 1912 about the need for a swimming pool. The first concrete step toward achieving this occurred in 1914 when Council purchased the Tramways Sheds on the corner of High and Disraeli Streets in 1914. Further adjoining land in High Street was compulsorily acquired in 1923. The final plans were accepted in 1925 and following public tender, Messrs. Weavill and Keast were appointed to construct the pool at a cost of 5,418/9/-. The baths were formally opened on 18 November 1925 by George Ramsay, Mayor of Kew. (The Kew Swimming Club was founded in the same year.) Vaughan notes that "mixed bathing was not permitted at the Kew Baths until January, 1928, when it was allowed every evening (except Sundays) and Friday afternoons. A few years later these restrictions were removed altogether".Small B&W photograph of two boys standing beside a diving board at the old Kew Swimming Pool while in the distance a woman dives into the pool. The photograph can be dated to the years 1929-33, as the wooden grandstand was not erected until 1929 and it was before a new high swimming platform was erected in 1933."Old Swimming Pool Kew. D4. 92"kew swimming pool - kew (vic), sport and recreation - kew (vic), kew baths - kew (vic), mayors of kew - cr. george ramsay - kew (vic), kew swimming club -
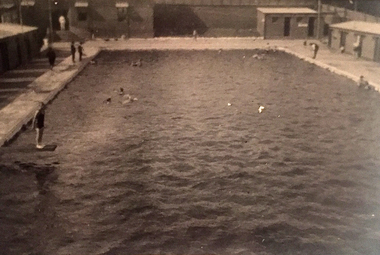 Kew Historical Society Inc
Photograph, Kew Municipal Baths, 1929-1933
W.D. Vaughan in 'Kew's Civic Century' (1960) has a chapter (XXII, pp.103-105) on the Kew Swimming Pool (aka Kew Baths). In the chapter he recounts debate in Council from 1912 about the need for a swimming pool. The first concrete step toward achieving this occurred in 1914 when Council purchased the Tramways Sheds on the corner of High and Disraeli Streets in 1914. Further adjoining land in High Street was compulsorily acquired in 1923. The final plans were accepted in 1925 and following public tender, Messrs. Weavill and Keast were appointed to construct the pool at a cost of 5,418/9/-. The baths were formally opened on 18 November 1925 by George Ramsay, Mayor of Kew. (The Kew Swimming Club was founded in the same year.) Vaughan notes that "mixed bathing was not permitted at the Kew Baths until January, 1928, when it was allowed every evening (except Sundays) and Friday afternoons. A few years later these restrictions were removed altogether".Small B&W photograph of the old Kew Swimming Pool. Girl on diving board at left. The photograph can be dated to the years 1929-33, as the wooden grandstand was not erected until 1929 and it was before a new high swimming platform was erected in 1933."Old Swimming Pool Kew. D2. 92"kew swimming pool - kew (vic), sport and recreation - kew (vic), kew baths - kew (vic), mayors of kew - cr. george ramsay - kew (vic), kew swimming club -
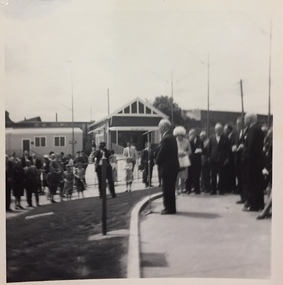 Kew Historical Society Inc
Photograph, Series - Kew Baths & Carmelite Monastery, 1960s
W.D. Vaughan in 'Kew's Civic Century' (1960) has a chapter (XXII, pp.103-105) on the Kew Swimming Pool (aka Kew Baths). In the chapter he recounts debate in Council from 1912 about the need for a swimming pool. The first concrete step toward achieving this occurred in 1914 when Council purchased the Tramways Sheds on the corner of High and Disraeli Streets in 1914. Further adjoining land in High Street was compulsorily acquired in 1923. The final plans were accepted in 1925 and following public tender, Messrs. Weavill and Keast were appointed to construct the pool at a cost of 5,418/9/-. The baths were formally opened on 18 November 1925 by George Ramsay, Mayor of Kew. (The Kew Swimming Club was founded in the same year.) Vaughan notes that "mixed bathing was not permitted at the Kew Baths until January, 1928, when it was allowed every evening (except Sundays) and Friday afternoons. A few years later these restrictions were removed altogether".Five black and white photographs of Kew in the 1960s donated by Kerstin Fraser. The photographs include 3 pictures of the Mayor of Kew, Gordon Greer at the Kew Baths and two photographs of the Carmelite Monastery in Stevenson Street, Kew.kew baths - kew (vic), carmelite monastery - stevenson street - kew (vic), cr leo hawkins, swimming -
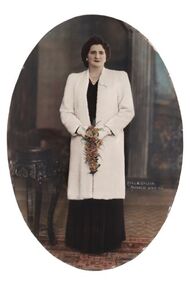 City of Greater Bendigo - Civic Collection
Photograph - Portrait, Vincent Kelly, Mrs L.W. Galvin Mayoress 1944 - 45
Prior to the election of female Councillors and Mayors, the Mayoress role was one of the few ways women could officially undertake civic duties and Mayoress's played an important role in civic life through charity work, even stepping in on occasions to undertake Mayoral duties. Anne Galvin O.B.E. was born Anne Edith Ruby in 1903 and was one of Bendigo's best known charity workers. She used her first speech as Mayoress to indicate her intentions to do something for mothers and children and it was mainly through her efforts as president of the National Council of Women that Bendigo received the appointment of the two first women police officers in 1956 (1). Anne Galvin was the second woman in Bendigo to be elected to the Bendigo City Council in the 1960's, retiring after six years on Council in 1973. Anne was awarded an O.B.E in 1967 for community service and the Anne Galvin Early Learning Centre is named after her. (1) p 193 Jackman, Mayors of Bendigo 1856 - 2001. Framed, oval photographic portraits with convex glass and print, created using a collodion wet plate process. Hand coloured detail.cr: Mrs L W Galvin / Mayoress 1944 - 45annie ruby, mayoress galvin, mayor galvin, councillor annie galvin, city of greater bendigo portraits -
 Melbourne Legacy
Photograph, Annual Demonstration 1958, 1959
A photo of the Annual demonstration from October 1958. This photo shows the boys and girls lined up either side of the Vice president Don Simonson and the band in the background under a large Legacy sign. The photo was featured in the December 1958 newsletter and it mentioned the president, Rob Allison, was attending the Annual Federal Conference in Toowoomba so Don Simonson stepped in for him. Acts included combined boys' vaulting item, the Dances of Spain (Fiesta Flamenco), the Western Symphony by the senior girls. The touching finale was "We'll not break faith", a massed item presented by Junior Legatees from all classes. Throughout the year Melbourne Legacy provided classes for Junior Legatees such as dancing, gymnastics and Eurythmics. The Demonstration was an annual event to showcase their skills. Melbourne Legacy conducted Annual Demonstrations / Parades from 1928 through to 1979, usually held at Melbourne Town Hall. The beautiful costumes were made by members of the Junior Legacy Mothers' Club and the Melbourne Legacy Wives' Association.A record of the displays at the Annual Demonstrations. Also that Legacy provided classes for junior legatees and the skills learned were displayed in the Annual Demonstration.Black and white photo of the assembly of children in the demonstration from 1958. junior legatees, demonstration, annual demonstration, girls classes -
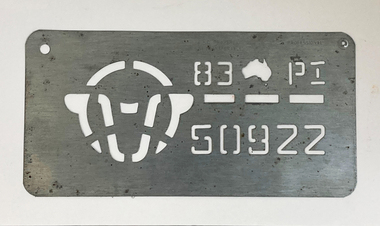 National Wool Museum
Tool - Stencil, 1983
The story of 90 years of wool classing between father & son begins in 1936, when a young boy by the name of Stanley James Hucker walked through the doors of the Gordon Technical School in Geelong. Born in 1921, Stanley was 15 years of age when he began his 3-year course in Wool Classing. 30 years later, Stanley’s second son Denis completed the same 3-year wool classing course. Beginning in 1966, Denis attended the same Gordon Technical School and walked the same halls as his father before him. Stanley finished his course in 1938. He went back to the family farm in Lake Bolac for a brief period before enrolling in the Second World War. At the completion of the war, Stanley returned home and married before gaining a soldier settler allotment, north of Willaura. This enabled Stan to use his wool classing knowledge. He ran between 1,500 and 2,000 sheep for many years, while his wool classer stencil also allowed him to go out and class at various sheds around the area. He held his stencil from 1938 until he retired at the age of 60 in 1981. On retirement, his second son Denis was working in the district, managing a local property while also leasing land himself. Upon his father’s retirement, Denis had the opportunity to lease his father’s farm, an opportunity he could not refuse. Denis had finished his wool classing course at the Gordon Technical School in 1968, graduating dux of his class. He began working with a local contractor and started classing wool in his team. Denis gained a great deal of experience working as part of this team in big sheds of up to 8 stands servicing between 10 & 20,000 sheep. It was not all smooth sailing for Denis however, and he soon learnt an important lesson. Class wool the way you’re taught, don’t listen to the owner standing over your shoulder. At a clip of Corriedales near Casterton, Denis was pushing too many fleeces into the line of fine wool. This resulted in a notice from the Australian Wool Exchange (AWEX) “mixing counts too much, submit three clips for inspection”. Denis was able to submit 3 clips with no further complaints, however, this proved a valuable lesson he would never forget over his long career classing wool. In the early 1980s, when Denis was leasing two properties including his father’s, things were going well until drought struck. February 1983 was the date of the Ash Wednesday bushfires, and saw Melbourne have three days over 40 °C for only the second time on record. This period saw Denis give away farming, turning towards contracting work instead. After the difficult times of the early 1980s, the next two decades were a good time for the sheep industry. 15 micron wool was selling for prices between 4 to 5,000 cents per kilo, double what you’d expect for the same wool in 2022. In 1995 a single bale of wool sold for a million dollars. This was a good time for Denis too. His contracting work saw him employing local shearers and shed staff. His team was involved with the shearing and classing of more than 130,000 sheep. After 20 years of contracting, it was time for Denis to transition into the next phase of his life. He gave up independent contracting, preferring instead to return to being a member of someone else’s team. In 2018, having completed 50 years of wool classing, it was time to call it a day and retire completely. At the annual Gordon Wool School Old Students Association dinner held in 2018, Denis was presented with his 50 years as a registered wool classer stencil awarded by the Australian Wool Exchange (AWEX). This is a rare honour achieved by few. As of February 2020, a total of 430 wool classers had achieved this 50-year milestone. For Denis however, his proudest achievement is achieving 90 years of wool classing with his father. The National Wool Museum is proud to share the collection of objects gained from 90 years in the wool classing industry by Stanley and Denis. This ranges from Stanley’s first stencil and Wool Sample book, started when he first attended the Gordon in 1936. The collection concludes 90 years later with Denis’ 50 years of wool classing Stencil. The collection contains many more objects, all telling the story of these 90 years, and the hard work invested by this dedicated father and son duo. Thin sheet of metal with letters and numbers cut to produce a consistent pattern for the surface below through the application of ink. In small text on the top edge of the stencil two separate phrases are engraved.” A.W.C. PROPERTY NOT TRANSFERABLE” and “PROFESSIONAL“. This wool classing stencil belonged to Stanley Hucker. It was his last Wool Classing Stencil. Dated to 1983, it is 45 years older than his first stencil. The role of a Wool Classer is to sort, classify, and grade wool into various ‘lines’ so that it can be sold for best market price. Wool Classers are typically also tasked with the managing and supervising of wool-handling teams. The stencil is used in the final step of preparing a bale of wool for sale. It is branded across the front of a wool bale to indicate the quality of the wool, with the classers number used as a seal of guarantee.Engraved letters. “A.W.C. PROPERTY / NOT TRANSFERABLE” Engraved letters. “PROFESSIONAL“. Cut imagery. Sheep’s head Cut letters, numbers, and imagery. “83 (Image Australia) P I / 50922”wool classing, stencil, 90 years wool classing between father & son -
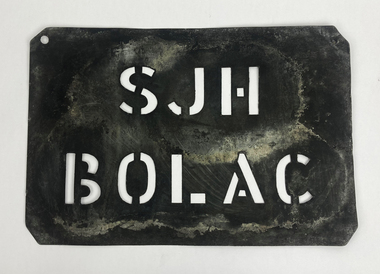 National Wool Museum
Tool - Stencil, 1938
The story of 90 years of wool classing between father & son begins in 1936, when a young boy by the name of Stanley James Hucker walked through the doors of the Gordon Technical School in Geelong. Born in 1921, Stanley was 15 years of age when he began his 3-year course in Wool Classing. 30 years later, Stanley’s second son Denis completed the same 3-year wool classing course. Beginning in 1966, Denis attended the same Gordon Technical School and walked the same halls as his father before him. Stanley finished his course in 1938. He went back to the family farm in Lake Bolac for a brief period before enrolling in the Second World War. At the completion of the war, Stanley returned home and married before gaining a soldier settler allotment, north of Willaura. This enabled Stan to use his wool classing knowledge. He ran between 1,500 and 2,000 sheep for many years, while his wool classer stencil also allowed him to go out and class at various sheds around the area. He held his stencil from 1938 until he retired at the age of 60 in 1981. On retirement, his second son Denis was working in the district, managing a local property while also leasing land himself. Upon his father’s retirement, Denis had the opportunity to lease his father’s farm, an opportunity he could not refuse. Denis had finished his wool classing course at the Gordon Technical School in 1968, graduating dux of his class. He began working with a local contractor and started classing wool in his team. Denis gained a great deal of experience working as part of this team in big sheds of up to 8 stands servicing between 10 & 20,000 sheep. It was not all smooth sailing for Denis however, and he soon learnt an important lesson. Class wool the way you’re taught, don’t listen to the owner standing over your shoulder. At a clip of Corriedales near Casterton, Denis was pushing too many fleeces into the line of fine wool. This resulted in a notice from the Australian Wool Exchange (AWEX) “mixing counts too much, submit three clips for inspection”. Denis was able to submit 3 clips with no further complaints, however, this proved a valuable lesson he would never forget over his long career classing wool. In the early 1980s, when Denis was leasing two properties including his father’s, things were going well until drought struck. February 1983 was the date of the Ash Wednesday bushfires, and saw Melbourne have three days over 40 °C for only the second time on record. This period saw Denis give away farming, turning towards contracting work instead. After the difficult times of the early 1980s, the next two decades were a good time for the sheep industry. 15 micron wool was selling for prices between 4 to 5,000 cents per kilo, double what you’d expect for the same wool in 2022. In 1995 a single bale of wool sold for a million dollars. This was a good time for Denis too. His contracting work saw him employing local shearers and shed staff. His team was involved with the shearing and classing of more than 130,000 sheep. After 20 years of contracting, it was time for Denis to transition into the next phase of his life. He gave up independent contracting, preferring instead to return to being a member of someone else’s team. In 2018, having completed 50 years of wool classing, it was time to call it a day and retire completely. At the annual Gordon Wool School Old Students Association dinner held in 2018, Denis was presented with his 50 years as a registered wool classer stencil awarded by the Australian Wool Exchange (AWEX). This is a rare honour achieved by few. As of February 2020, a total of 430 wool classers had achieved this 50-year milestone. For Denis however, his proudest achievement is achieving 90 years of wool classing with his father. The National Wool Museum is proud to share the collection of objects gained from 90 years in the wool classing industry by Stanley and Denis. This ranges from Stanley’s first stencil and Wool Sample book, started when he first attended the Gordon in 1936. The collection concludes 90 years later with Denis’ 50 years of wool classing Stencil. The collection contains many more objects, all telling the story of these 90 years, and the hard work invested by this dedicated father and son duo. Thin sheet of metal with letters cut to produce a consistent pattern for the surface below through the application of ink. This wool classing stencil belonged to Stanley Hucker. It was his first Wool Classing Stencil. It was used on Stanley’s property named “Yohhatnbu” in Willaura. Stanley gained the property as part of the Returned Soldiers Settlement Scheme for his service in World War 2. The role of a Wool Classer is to sort, classify, and grade wool into various ‘lines’ so that it can be sold for best market price. Wool Classers are typically also tasked with the managing and supervising of wool-handling teams. The stencil is used in the final step of preparing a bale of wool for sale. It is branded across the front of a wool bale to indicate the quality of the wool, with the classers number used as a seal of guarantee.Cut letters. “SJH / BOLAC ”wool classing, stencil, 90 years wool classing between father & son -
 Ballarat Tramway Museum
Slide - 27 mm sq slide/s, Lilian Butler, Sep. 1971
Yields information about the SEC Wendouree Parade depot and the activities at the depot after closure.Set of six Colour 27 x 27 mm slide in Agfachrome blue and white plastic mounts. .1 - view of a single trucker with a Twin Lakes sign inside the depot on No. 2 road, number obscured. .2 - view from inside the tram depot with No. 12 outside with the lake in the background. .3 - No. 34 entering the depot being driven by a depot worker in white overalls. .4 - B. Peart standing on the foot step of the Ballarat Scrubber tram at the Ballarat depot - see Reg Item 6447 for a colour print. .5 - Front of the depot from the Lake side - with all gates closed and the long grass alongside the lake. .6 - Bogie tram entering the depot with the depot gates in the foreground - could be 34 - see .3 Photo from the collection of Lilian Butler.ballarat, tramways, trams, depot, sec depot, scrubber tram, tram 12, scrubber, tram 34 -
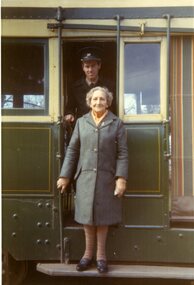 Ballarat Tramway Museum
Photograph - Colour Print/s - set of 4, Sep. 1972
Has a strong association with Elvie Phillips - at the time of the closure of the SEC system in Ballarat.Set of four colour prints - were contain within a folder (see below) of Elvie Phillips and crews at the time of the closure of the Ballarat SEC system - September 1971. .1 - standing on the step of a bogie tram with crew member number 58 behind. .2 - City loop with two crew members on either side - and three bogie trams .3 - standing in front of a single trucker, City Loop - with the Union Hotel behind. .4 - sitting on the bumper of a single trucker, Wendouree Parade, Gardens area with a crew member alongside. Printed on Kodak paper. Note - these type of photographs were common at the end of the SEC system - many people had these taken. Always in the way of the tram enthusiasts! Were held in a Wizard - Kodak Express folder - in the worksheet file along with letter and donor form.closure, sturt st, city loop -
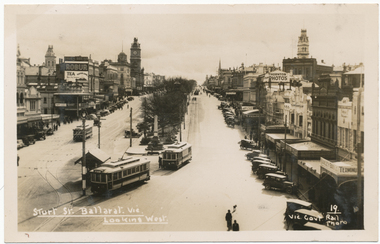 Ballarat Tramway Museum
Photograph - Digital image, Kodak, c1932
Yields information the appearance of Sturt St at Grenville St and three SEC trams about 1938.Digital image from the Wal Jack Ballarat Album of a postcard - actual printed photograph - looking east from Sturt and Grenville Sts, c1938. Has SEC tram 16 on the south side, No. 26 for Mt Pleasant and No. 20 showing Sturt St West with a crew member stepping off the tram. Printed and Published by Kodak - see rear of postcard. Has the caption "Sturt St Ballarat Vic Looking west" along the bottom left hand edge and "19 Vic Govt Rail Photo" in the bottom right hand corner. In the photograph are advertisings for Robur Tea, Davies Bread, Thornton for Photos, Malvern Star cycles, Singer and Bailey Bros." Wal's album notes dates the photo as "1938" See image i2 for rear of postcard.On rear of photo in pencil "1937".trams, tramways, sturt st, grenville st, tram 16, tram 26, tram 20 -
 Bendigo Historical Society Inc.
Document - PETER ELLIS COLLECTION: BENDIGO GOLD PANNERS' OLD TIME BALL, 22nd April, 1977
Small off white coloured glossy card. Blue writing. Bendigo Gold Panners' Old Time Ball Programme Bendigo Town Hall Friday, April 22 Special Guest Orchestra: Wedderburn Old-Timers. Hand written in blue pen on top of inside: BENDIGO GOLD-PANNERS FRID. APRIL 22 1977. Dance 1 Circular Waltz, 2 Plain Schottische, 3 Pride of Erin, 4 Maxina, 5 Progressive Barn Dance, 6 Alberts, 7 Polka Mazurka, 8 Evening Three Step, 9 Waltz Vienna, 10 Parma Waltz, 11 Lancers, 12 Swing Waltz. Master of Ceremonies: Mr Ted Stephenson. Your Partner: Wedderburn & Inglewood 'Express' Print, Wedderburn, 3518Wedderburn & Inglewood 'Express' Print, Wedderburn. 3518person, individual, peter ellis oam