Showing 4228 items matching "reg"
-
 Bendigo Military Museum
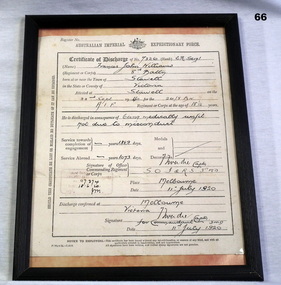
Document - DISCHARGE CERTIFICATE WW1, 11.7.1920
Francis John Williams No 7326. Refer 69.2 medals for his Service Details also Reg No 69P. Discharge Certificate in wooden frame for Francis John WILLIAMS, No. 7326 8 Battn.. In purple stamp in ink, “117374, 18.6.20, JM”documents - certificates, military history - army -
 Bendigo Military Museum
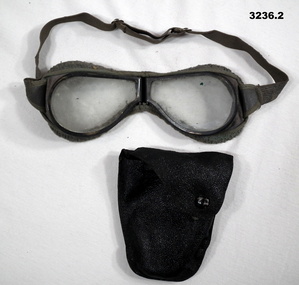
Equipment - FLYING GOGGLES
Item in the collection re R T PHILLIPS VX113093, refer Reg No 3239P for his service details..1) Pilot's flying goggles. Pear shaped lens, pivoted in centre made probably of multi layer glass. Painted black metal frame. The surrounds are of a stretch fabric material. The air seal is an open weave material with lambswool stitched into it. An elastic strap with two buckles hold it on the user's head. .2) Small black leather case to hold goggles. Press stud closure.military equipment - air force, flying -
 Bendigo Military Museum
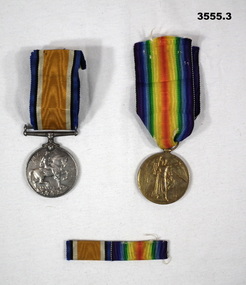
Award - MEDALS & RIBBONS WW1, Post WW1
James Clarence WATT No’s 900 and 533 AIF. Refer Reg No 3554.2 for his service details..1) British Service Medal 1914 - 1918 & ribbon. .2) Victory Medal 1914 - 1919 & ribbon. .3) British Service Medal & Victory Medal service ribbon bar.Name, Regt No and unit stamped around edge of medals.medals, award, ribbon -
 Bendigo Military Museum
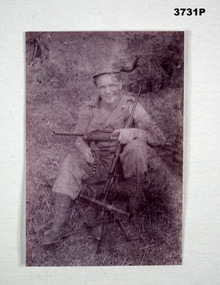
Photograph, c.1950's
Photo relates to B G COOPER No 3/410591 in Malaya. Refer Reg No's 1722P & 1723.Photo, black / white, showing a soldier seated with 4 weapons.photograph, soldier, malaya -
 Bendigo Military Museum
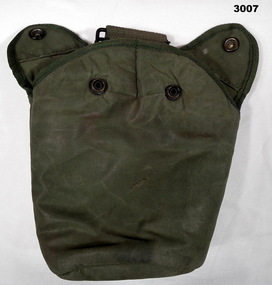
Equipment - CARRIER, WATER BOTTLE, post 1960
Refer Reg No's 3006 & 3008. Item issued to Peter Ball 3796117, refer Cat No 4704Water bottle carrier, green colour, webbing & water proof material, felt lined, has 2 press stud flaps to close around the bottle, rear has 2 sorts of metal keepers for attachment to webbing belt.P BALLcontainers, water bottle, military -
 Bendigo Military Museum
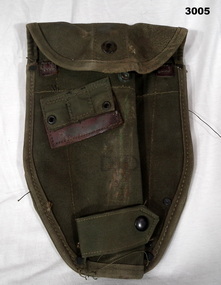
Equipment - POUCH, post 1960
Entrenching tool - refer Reg No 3004. Item issued to Peter Ball 3796117, refer Cat No 4704Webbing pouch, green colour, shaped to fit a entrenching tool. Has press stud closing cover, rear is fitted with 2 x steel keepers for fitting to basic webbing.PETER BALL D [up arrow] Dmilitary, webbing, entrenching tool -
 Bendigo Military Museum
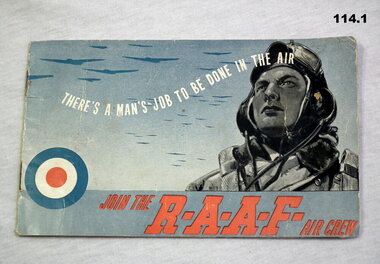
Flyer - BOOKLETS RAAF, 1) Boylan & Co. Pty Ltd, 2) 21.6.1940; .1) c.WWII
Items belonging to M J TAYLOR 418772 RAAF. Refer Reg No's 112P, 113, 115.2..1) & .2) Information booklets for entry into the RAAF WWII. .1) Printed on front cover: There's a man's job to be done in the air. Join the R-A-A-F Air Crew. .2) Printed front cover: RAAF publication No 78 Air Crew Entry under the Empire Air Scheme.booklets, raaf enlistment -
 Phillip Island and District Historical Society Inc.
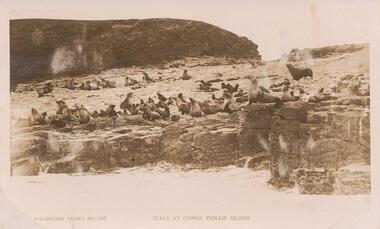
Photographs, 1930's
13 photographs collected in the 1930's by Reg & Nell Price who lived at Sale, Gippsland at the time.Photograph 224-01. Sepia photograph of seals on Seal Rocks, Phillip Island Photograph 224-02. Black & White photograph of the dirt road to the Back Beach, Phillip Island. Photograph 224-03. Black & White photograph of the Cowes Pier/Jetty with the Cenotaph in the foreground. Photograph 224-04. Black & White photograph of Forrest Caves, Phillip Island. Photograph 224-05. Black & White photograph of Cape Woolamai Quarry. People and a small boat working. Photograph 224-06. Black & White photograph of the Cowes Pier taken through the trees on the foreshore. Photograph 224-07. Black & White photograph of Lover's Walk, Cowes with foot bridge in foreground. Photograph 224-08. Black & White photograph of rocky seascape at The Nobbies, Phillip Island. Photograph 224-09. Black & White photograph of Forrest Caves, Phillip Island. Photograph 224-10. Black & White photograph of Cowes Pier with the Ferries "Alvina" and "Genista". Many people also on the pier. Photograph 224-11. Black & White photograph of The Pinnacles, Cape Woolamai. Photograph 224-12. Black & White photograph of The Sentinel, Cape Woolamai. Photograph 224-13. Black & White photograph of the beach and pier at Cowes, Phillip Island.On the back of each photograph description of the photo.seal rocks phillip island, seals on seal rocks phillip island, phillip island early roads, cowes pier phillip island, cowes jetty, cowes cenotaph, phillip island, forrest caves, phillip island, cape woolamai quarries phillip island, lover's walk cowes, the nobbies phillip island, seascape, ferries, "alvina", ferry "genista" - cowes jetty, the pinnacles, the sentinel cape woolamai, reg & nell price, david price -
 Greensborough Historical Society
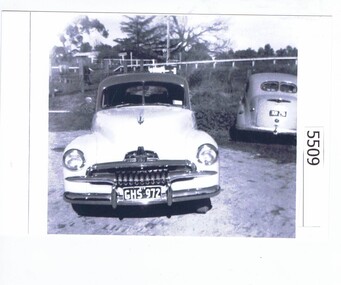
Photograph, Gary Partington, Gary Partington's F J Holden Car, 1956c
Photograph of Gary Partington's 1956 FJ Holden, Reg. No. GHS 972; in background, his Dodge sedan.Black and white photograph.motor cars, gary partington -
 Chiltern Athenaeum Trust
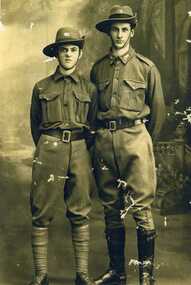
Photograph of the Moore Brothers in Cadet Militia (school cadets) Uniform
Photo of Reg A Moore (1900-1983) and William Leonard Moore (1986-1958). Used in WWI project. -
 Clunes Museum
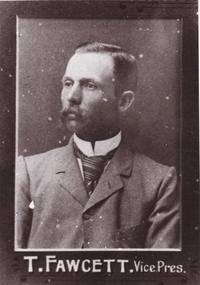
Photograph, PURCELL, ROGER, COPY 1997
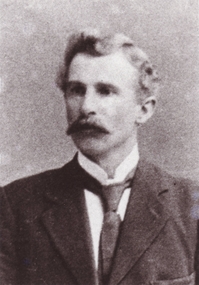
THIS COPY OF PHOTOGRAPH WAS TAKEN FROM COLLAGE OF CLUNES GUN CLUB. JANUARY 1903. REG. NO. OF COLLAGE 1001.1.2.3COPY OF PHOTOGRAPH OF MR.T. FAWCETT. VICE PRES. MEMBER OF CLUNES GUN CLUBlocal history, photography, photographs, gun club -
 Clunes Museum
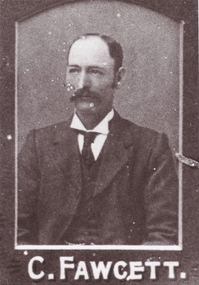
Photograph, PURCELL, ROGER, COPY 1997
THIS COPY OF PHOTOGRAPH WAS TAKEN FROM COLLAGE OF CLUNES GUN CLUB. JANUARY 1903. REG. NO. OF COLLAGE 1001.1.2.3COPY OF PHOTOGRAPH OF MR.C. FAWCETT. MEMBER OF CLUNES GUN CLUBlocal history, photography, photographs, gun club -
 Clunes Museum
Photograph, PURCELL, ROGER, COPY 1997
THIS COPY OF PHOTOGRAPH WAS TAKEN FROM COLLAGE OF CLUNES GUN CLUB. JANUARY 1903. REG. NO. OF COLLAGE 1001.1.2.3COPY OF PHOTOGRAPH OF MR. J. NICHOLS. MEMBER OF CLUNES GUN CLUBlocal history, photography, photographs, gun club -
 Clunes Museum
Photograph, PURCELL, ROGER, COPY 1997
COPY OF THIS PHOTOGRAPH TAKEN FROM COLLAGE OF CLUNES GUN CLUB. JANUARY 1903. REG. NO. OF COLLAGE 1001.1.2.3COPY OF PHOTOGRAPH OF MR. W.H. HOFSTEEDE. MEMBER OF CLUNES GUN CLUBlocal history, photographs, clunes gun club -
 Clunes Museum
Photograph, PURCELL, ROGER, COPY 1997
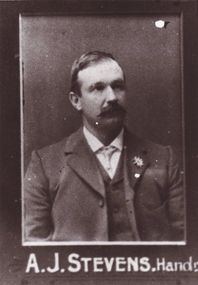
THIS COPY OF PHOTOGRAPH WAS TAKEN FROM COLLAGE OF CLUNES GUN CLUB. JANUARY 1903. REG. NO. OF COLLAGE 1001.1.2.3COPY OF PHOTOGRAPH OF MR. A.J. STEVENS. MEMBER OF CLUNES GUN CLUB COPY IS TAKEN FROM A COLLAGE OF CLUNES GUN CLUB JAN 1903local history, photography, photographs, gun club -
 Clunes Museum
Photograph, PURCELL, ROGER, COPY 1997
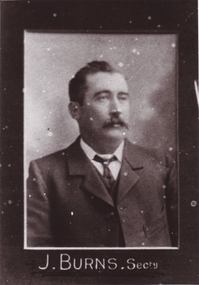
THIS COPY OF PHOTOGRAPH WAS TAKEN FROM COLLAGE OF CLUNES GUN CLUB. JANUARY 1903. REG. NO. OF COLLAGE 1001.1.2.3COPY OF PHOTOGRAPH OF MR. J. BURNS. SEC MEMBER OF CLUNES GUN CLUBlocal history, photography, photographs, gun club -
 Clunes Museum
Photograph, PURCELL, ROGER, COPY 1997
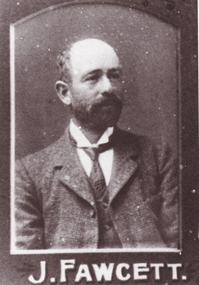
THIS COPY OF PHOTOGRAPH WAS TAKEN FROM COLLAGE OF CLUNES GUN CLUB. JANUARY 1903. REG. NO. OF COLLAGE 1001.1.2.3COPY OF PHOTOGRAPH OF MR. J. FAWCETT. MEMBER OF CLUNES GUN CLUBlocal history, photography, photographs, gun club -
 Clunes Museum
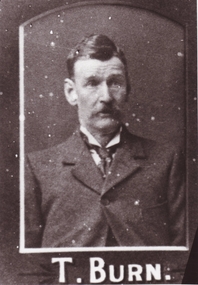
Photograph, PURCELL, ROGER, COPY 1997
THIS COPY OF PHOTOGRAPH WAS TAKEN FROM COLLAGE OF CLUNES GUN CLUB. JANUARY 1903. REG. NO. OF COLLAGE 1001.1.2.3COPY OF PHOTOGRAPH OF MR. T. BURN. MEMBER OF CLUNES GUN CLUBlocal history, photography, photographs, gun club -
 Clunes Museum
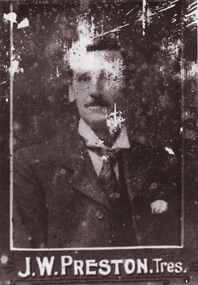
Photograph, PURCELL, ROGER, COPY 1997
THIS COPY OF PHOTOGRAPH WAS TAKEN FROM COLLAGE OF CLUNES GUN CLUB. JANUARY 1903. REG. NO. OF COLLAGE 1001.1.2.3COPY OF PHOTOGRAPH OF MR. J.W. PRESTON. TRES (sic) MEMBER OF CLUNES GUN CLUBlocal history, photography, photographs, gun club -
 Clunes Museum
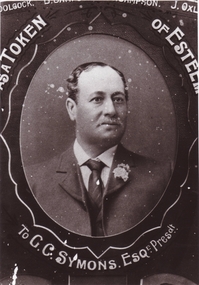
Photograph, PURCELL, ROGER, COPY 1997
THIS COPY OF PHOTOGRAPH WAS TAKEN FROM COLLAGE OF CLUNES GUN CLUB. JANUARY 1903. REG. NO. OF COLLAGE 1001.1.2.3COPY OF PHOTOGRAPH OF MR. G.C. SYMONDS ESQ. MEMBER OF CLUNES GUN CLUBlocal history, photography, photographs, gun club -
 Clunes Museum
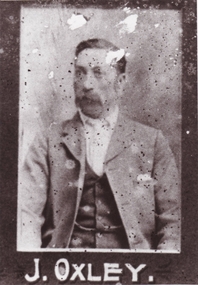
Photograph, PURCELL, ROGER, COPY 1997
THIS COPY OF PHOTOGRAPH WAS TAKEN FROM COLLAGE OF CLUNES GUN CLUB. JANUARY 1903. REG. NO. OF COLLAGE 1001.1.2.3COPY OF PHOTOGRAPH OF MR. J. OXLEY. MEMBER OF CLUNES GUN CLUBlocal history, photography, photographs, gun club -
 Clunes Museum
Photograph, PURCELL, ROGER, COPY 1997
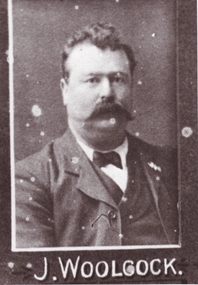
THIS COPY OF PHOTOGRAPH WAS TAKEN FROM COLLAGE OF CLUNES GUN CLUB. JANUARY 1903. REG. NO. OF COLLAGE 1001.1.2.3COPY OF PHOTOGRAPH OF MR. J. WOOLCOCK. MEMBER OF CLUNES GUN CLUBlocal history, photography, photographs, gun club -
 Clunes Museum
Photograph, PURCELL, ROGER, COPY 1997
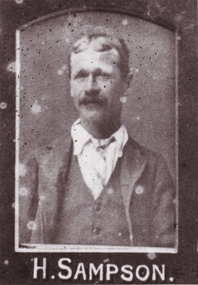
THIS COPY OF PHOTOGRAPH WAS TAKEN FROM COLLAGE OF CLUNES GUN CLUB. JANUARY 1903. REG. NO. OF COLLAGE 1001.1.2.3COPY OF PHOTOGRAPH OF MR. H. SAMPSON. MEMBER OF CLUNES GUN CLUBlocal history, photography, photographs, gun club -
 Clunes Museum
Photograph, PURCELL, ROGER, COPY 1997
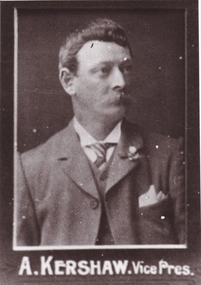
THIS COPY OF PHOTOGRAPH WAS TAKEN FROM COLLAGE OF CLUNES GUN CLUB. JANUARY 1903. REG. NO. OF COLLAGE 1001.1.2.3COPY OF PHOTOGRAPH OF MR. A. KERSHAW. VICE PRES. MEMBER OF CLUNES GUN CLUBlocal history, photography, photographs, gun club -
 Clunes Museum
Photograph, PURCELL, ROGER, COPY 1997
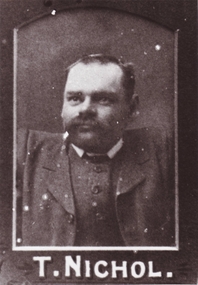
THIS COPY OF PHOTOGRAPH WAS TAKEN FROM COLLAGE OF CLUNES GUN CLUB. JANUARY 1903. REG. NO. OF COLLAGE 1001.1.2.3COPY OF PHOTOGRAPH OF MR. T. NICHOL. MEMBER OF CLUNES GUN CLUBlocal history, photography, photographs, gun club -
 Clunes Museum
Photograph, PURCELL, ROGER, COPY 1997
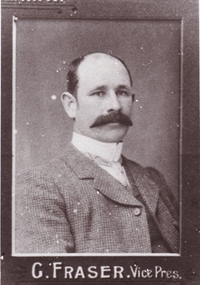
THIS COPY OF PHOTOGRAPH WAS TAKEN FROM COLLAGE OF CLUNES GUN CLUB. JANUARY 1903. REG. NO. OF COLLAGE 1001.1.2.3COPY OF PHOTOGRAPH OF MR. G. FRASER. VICE PRES. MEMBER OF CLUNES GUN CLUBlocal history, photography, photographs, gun club -
 Clunes Museum
Photograph, PURCELL, ROGER, COPY 1997
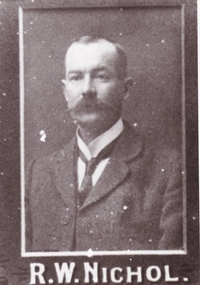
THIS COPY OF PHOTOGRAPH WAS TAKEN FROM COLLAGE OF CLUNES GUN CLUB. JANUARY 1903. REG. NO. OF COLLAGE 1001.1.2.3COPY OF PHOTOGRAPH OF MR. R.W.NICHOL. MEMBER OF CLUNES GUN CLUBlocal history, photography, photographs, gun club -
 Clunes Museum
Photograph, PURCELL, ROGER, COPY 1997
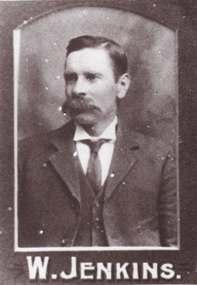
THIS COPY OF PHOTOGRAPH WAS TAKEN FROM COLLAGE OF CLUNES GUN CLUB. JANUARY 1903. REG. NO. OF COLLAGE 1001.1.2.3COPY OF PHOTOGRAPH OF MR.W. JENKINS. MEMBER OF CLUNES GUN CLUBlocal history, photography, photographs, gun club -
 Clunes Museum
Photograph, PURCELL, ROGER, COPY 1997
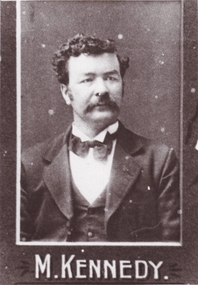
THIS COPY OF PHOTOGRAPH WAS TAKEN FROM COLLAGE OF CLUNES GUN CLUB. JANUARY 1903. REG. NO. OF COLLAGE 1001.1.2.3COPY OF PHOTOGRAPH OF MR.M. KENNEDY. MEMBER OF CLUNES GUN CLUBlocal history, photography, photographs, gun club -
 Clunes Museum
Photograph, PURCELL, ROGER, COPY 1997
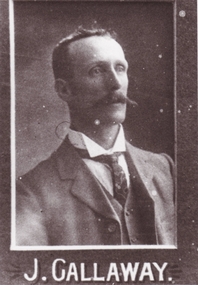
THIS COPY OF PHOTOGRAPH WAS TAKEN FROM COLLAGE OF CLUNES GUN CLUB. JANUARY 1903. REG. NO. OF COLLAGE 1001.1.2.3COPY OF PHOTOGRAPH OF MR. J. GALLAWAY. MEMBER OF CLUNES GUN CLUBlocal history, photography, photographs, gun club