Showing 668 items matching "cooling"
-
 Flagstaff Hill Maritime Museum and Village
Freezer, circa 1930's
This ice cream freezer, manufactured in South Australia in the 1930's, was advertised to "keep the contents of the cream compartment frozen for many hours". It was promoted for use at picnics to keep salads cool. Its design is very similar to other freezers of The Frigid name which were made in 1939; those freezers were all one colour whereas this one is blue around the top and bottom of the barrel and cream in the centre with blue/green lettering. The process of making ice cream was to pack the outer chamber full with a combination of 3 parts ice cubes of about 1 inch (2.cm) to one part coarse salt, then pour into the chamber about 1 cup of cold water. After this, the ingredients for ice cream or sorbet were poured into the inner chamber, then attach the lid and turn The Frigid freezer upside down for about 40 minutes or until the right consistency is reached. Advice as given to open the freezer every 20 minutes and stir around the contents that were frozen against the sides of the inner chamber. The ingredients for the ice cream could include cream, sugar, vanilla and eggs. The label on the box of The Frigid shows the address of A Simpson and Son to be at Pirie Street, Adelaide. This address was used as early as 1876 and later catalogues, 1931 - 1960 still show this address. Alfred Simpson and his family emigrated from England, arriving in South Australia in 1849. He had already completed his apprenticeship as a tinplate worker but he tried various other occupations, including trying out the gold mines in Victoria, before he established himself as a tinsmith in 1853. His products included many agricultural items. His son, Alfred Muller Simpson, joined the business when he turned 21. In the 1860 Simpson's products included 'explosion proof' safes. In the late 1880's A Simpson and Son manufactured munitions and mines for the war. At the time of Alfred's death in 1891, A Simpson and Son had the largest metal manufacturing plant in Australia. From 1898 the company's reputation grew from the process of enamel plating with porcelain. During the First World War, Simpsons returned to the manufacture of munitions. Alfred M. Simpson's sons (Alfred Allen, known as Allen, and Fredrick Neighbour) joined the company when they finished their schooling. Allen was also associated with the Royal Geological Society over many years and when the CT Madigan surveyed Central Australia in 1929, the Simpson Desert was named in his honour. Cape Simpson in Antarctica is also named after him due to his assistance to Douglas Mawson. A new factory was opened at Dudley Park in the 1940s and the company began the manufacture of whitegoods. In 1963 A. Simpson and Son merged with Pope Industries to form Simpson Pope Holdings. Alfred Simpson became chairman of the board of Simpson Pope Holdings. The Simpson brand, now owned by Electrolux, continues to produce a variety of household appliances. (Reference: State Library of South Australia) A Simpson and Son was an early colonial business that has lasted well into the 20th century and the name Simpson is still associated with whitegoods. Freezer, 2 quart (1.8 litre) capacity, made by A Simpson and Son Ltd, marked "The Frigid". Cylinder shaped, constructed from enamelled sheet metal, has two catches one on the base and one on top. Inner cylinder for holding contents for freezing. Slightly rusted. Freezer is inside original cardboard box with yellow label showing manufacturer details. Circa 1930'sOutside of freezer is printed in blue"The Frigid". Box includes "THE "FRIGID" FREEZER" and branded "S & S" inside a circle.flagstaff hill, warrnambool, shipwrecked-coast, flagstaff-hill, flagstaff-hill-maritime-museum, maritime-museum, shipwreck-coast, flagstaff-hill-maritime-village, a. simpson & son limited, manufacturer, foundry, freezer, 2 quart freezer, portable freezer, kitchen appliance, the frigid, ice cream freezer, ice cream maker 1930's -
 Flagstaff Hill Maritime Museum and Village
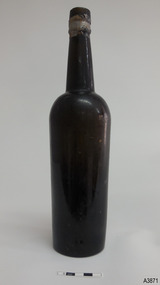
Container - Bottle, 1840s to 1910
This handmade ‘gallon’ style of bottle was generally used for storing and transporting wine and ale. Many bottles similar to this one have their bases embossed with “6 TO THE GALLON”. However, this bottle is rare, in that the base has been embossed then over-embossed with the same text, letters overlapping. It is one of many artefacts recovered from unidentified shipwrecks along Victoria’s coast between the late 1960s and the early 1970s. It is now part of the John Chance Collection. The capacity of this is one-sixth of a gallon (imperial measure), which is equal to 758 ml. (American bottles were often inscribed “5 TO THE GALLON”, which is one-fifth of an American gallon, equal to 757 ml.) Contemporary home brewers can purchase new ‘6 to gallon’ bottles that hold 750 ml. and are sold in cases of 36 bottles, which is equal to 6 gallons of wine. Glass was made thousands of years ago by heating together quartz-sand (Silica), lime and potash. Potash was obtained from burnt wood, but these days potash is mined. The natural sand had imperfections such as different forms of iron, resulting in ‘black’ glass, which was really dark green or dark amber colour. The ‘black’ glass was enhanced by residual carbon in the potash. Black glass is rarely used nowadays but most beer, wine, and liquors are still sold in dark coloured glass. Glass vessels were core-formed from around 1500 BC. An inner core with the vessel’s shape was formed around a rod using a porous material such as clay or dung. Molten glass was then modelled around the core and decorated. When the glass had cooled the vessel was immersed in water and the inner core became liquid and was washed out. Much more recently, bottlers were crafted by a glassblower using molten glass and a blow pipe together with other hand tools. Another method was using simple moulds, called dip moulds, that allowed the glass to be blown into the mould to form the base, then the glassblower would continue blowing free-form to shape the shoulders and neck. The bottle was then finished by applying a lip. These moulded bottles were more uniform in shape compared to the free-form bottles originally produced. English glassblowers in the mid-1800s were making some bottles with 2-piece and 3-piece moulds, some with a push-up style base, sometimes with embossing in the base as well. Improvements allowed the moulds to also have embossed and patterned sides, and straight sided shapes such as hexagons. Bottles made in full moulds usually displayed seam seams or lines. These process took skill and time, making the bottles valuable, so they were often recycled. By the early 20th century bottles were increasingly machine made, which greatly reduced the production time and cost. This bottle is a rare find, in that the base has been over-embossed with the same lettering, letters overlapping one another. This bottle is historically significant as an example of a handmade, blown inscribed glass bottle manufactured in the mid-to-late 1800s for specific use as a liquor bottle with a set measurement of one-sixth of gallon. It is also historically significant as an example of liquor bottles imported into Colonial Victoria in the mid-to-late 1800s, giving a snapshot into history and social life that occurred during the early days of Victoria’s development, and the sea trade that visited the ports in those days. The bottle is also significant as one of a group of bottles recovered by John Chance, a diver in Victoria’s coastal waters in the late 1960s to early 1970s. Items that come from several wrecks have since been donated to the Flagstaff Hill Maritime Village’s museum collection of shipwreck artefacts by his family, illustrating this item’s level of historical value. Bottle, over embossed, brown glass, handmade, rare. Tall slim Gallon style liquor bottle. Applied double collar lip; square upper and flared lower. Mouth has sealing tape remnants around top. Mould seam around shoulder. Body tapers inwards to push-up base. Top edge of lip has application faults. There is also a rectangular indent in the upper edge of lip. Base is embossed and over embossed, with the letters overlapping each other. Embossed on base "6 TO THE GALLON", then over-embossed with the same "6 TO THE GALLON"flagstaff hill, warrnambool, flagstaff hill maritime museum, maritime museum, shipwreck coast, flagstaff hill maritime village, great ocean road, shipwreck artefact, john chance, glass bottle, antique bottle, gallon bottle, 6 to the gallon bottle, handmade, dip mould, mouth blown, pontil mark, blown bottle, liquor bottle, ale bottle, double collar, 19th century bottle, collectable, over embossed, rare -
 Puffing Billy Railway
Equipment - Victorian Railways Carriage Foot Warmer
During prestige, long distance train journeys some carriages had air-conditioning, and the majority of passengers had to brave unheated carriages. To offer some comfort during the winter months, the non-air-conditioned carriages were provided with footwarmers. These were metal containers roughly 100 mm thick and 300 mm wide, and about 750 mm long, which were filled with salt crystals (concentrated crystalline hydrated sodium acetate). The footwarmers were covered by sleeves of thick canvas, and two footwarmers were usually placed in each compartment of non-air-conditioned carriages. To activate the chemicals, the footwarmers were heated almost to boiling point. This was done by removing the canvas sleeves and placing the footwarmers in a large bath of very hot water. After they had been heated, they were removed from the bath and the sleeves refitted. They were then ready to be placed in the carriages. The McLaren patent foot warmer was used on railways in New South Wales, Queensland, Victoria and South Australia as well as South Africa and New Zealand. It was during the 1901 royal visit by the Duke and Duchess of Cornwall that these foot warmers were first used in New Zealand in the royal carriage. Before railway carriage heating was introduced, McLaren patent foot warmers were placed on the floor of New South Wales government railway carriages from 1891 to provide a little passenger comfort. The rectangular steel container worked a bit like a hot water bottle but instead of water contained six and a half kilograms of loosely-packed salt crystals, (concentrated crystalline hydrated sodium acetate). This was permanently sealed inside the container with a soldered cap. After the foot warmer was heated in vat of boiling water for about one and a quarter hours the crystals became a hot liquid. (The melting point for sodium acetate is 58 degrees). There was a whole infrastructure of special furnaces set up at stations for the daily heating of foot warmers. By 1914 the Victorian railways had 4,000 foot warmers in service and by 1935 there were 33 furnaces at principal stations to heat them. After about 10 hours the container was picked up by the handle and given a good vertical shake which helped the cooled liquid reform into a solid mass of hot crystals. Staff or sometimes passengers shook them en route when the foot warmers began to get cold. However, as they were heavy this was only possible by fit and agile passengers. At the end of the journey the containers were boiled again for reuse on the next trip. Sodium acetate railway foot warmers were introduced in Victoria in 1889, Adelaide to Melbourne express in 1899. "Shaking up" on this service took place at Murray Bridge and Stawell on the tip to Melbourne and at Ballarat and Serviceton on the trip to Adelaide. The use of foot warmers began to decline in New South Wales from the 1930s with the first trial of carriage air-conditioning in 1936, steam heating from 1948 ad LP gas heating from 1961. By the early 1960s the main services using foot warmers were the overnight mail trains. info from : http://www.powerhousemuseum.com/collection/database/?irn=67564#ixzz4UBNzVf6t Under Creative Commons License: Attribution Non-Commercial There was a whole infrastructure set up at stations for the daily heating of foot warmers in special furnaces. In Victoria alone in 1935 there were 33 heating works.Historic - Victorian Railways - Carriage Heater - Foot warmerA rectangular-shaped stainless steel casing with a welded seam down the back and welded ends. There is a handle at one end for carrying and shaking. Inside the foot warmer are two baffle plates and three trays to contain the sodium acetate. There was a cast-iron ball in each internal compartment. puffing billy, victorian railways, carriage haeter, foot warmer, passenger comfort, station furnace, railway ephemera, early heating methods -
 Red Cliffs Military Museum
Document, Life history of Sgt. William Carroll, (estimated); early -mid 1990
This short history is in a display of photos and a copy of a letter written home by Sgt Carroll to his Aunt.A brief written life history from birth to death of William Carroll service Number 815. As written by a member of Red Cliffs R.S.L. in consultation with the family.Born in Wangaratta in 1891, was a drover and boundary rider in Queensland when enlisted.Sgt. Carroll was one of the original members of the 21st Battalion, 6th Brigade, 1st AIF, which was formed at Broadmeadows early 1915. The battalion embarked from Melbourne on the Uylsses on the 8th May 1915 enroute to the Middle East. Saw action Middle East> Gallipoli>Middle East to reform and reorganise > Western Front> Somme> Bullecourt> Ypres> Somme> Mont St. Quentin> Villiers Bretonneux> Hamel Mutiny./ Sgt. Carroll was twice wounded in action (at Fluers and Broondseinde)and was recommended for the Distinguished Conduct Medal, with a Sgt Cozens (No 825 also original member, on the 15th September 1916, for exceptional zeal in the performance of their duties and coolness in action, which had a great affect on the moral of their mem. He was discharged medically unfit with gun wounds to his left knee and back. Of the full Battalion strength of the original Officers and men, there were 16 Officers and 24 Or's left. 21st Battalion left buried on foreign soil 47 Officers and 827 Or's. It was the highest decorated Battalion of the 6th Brigade. Listed are some of the Battles and Misfortunes that Sgt. Carrol survived to return to Australia. Torpedoed on the troop ship Southland enroute to Gallipoli 1915;/ First Australian troops to Garrison Cairo; First Australian Infantry Unit into line in France; Last out of the line; Staging a successful mutiny; 21st Battalion was disbanded in 1918. Sgt. Carroll was given block 276 Red Cliffs, he sold his block in 1982. He was interested in Community affairs and was involved in ADFA, RSL, Mildura Club, and Mildura Show Society and was the third last Red Cliffs Soldier Settler to die. He was in his 100th year.medal, distinguished, battalion, aif, 21st, 6th, brigade, 1st, mutiny, gallipoli, wangaratta, 1891, boundary, rider, ulysses, middle, east, western, front, conduct -
 Flagstaff Hill Maritime Museum and Village
Domestic object - Bowl, Late 19th or early 20th Century
The Process of Making Pottery Decorating, Firing, Glazing, Making, Technical There is a rhythm and flow to clay. It can’t be done all at once! Even the making process! It can take weeks to get everything done, especially if you can only work on your pottery once a week! Even though we have three hour classes, it’s often just not enough time! Here is an overview of some of the processes so you have a bit more grasp on some of the technical stuff! Step One – Design There are SO many ideas out there for making stuff in clay! From delicate porcelain jewellery, through to heavy sculptural work and everything in between. Deciding your direction is sometimes not that easy – when you first start, try everything, you will naturally gravitate to the style that you enjoy! The options and variations are endless and can get a wee bit overwhelming too! Check in with me before you start to ensure your ideas will work, what order you might do things, how you could achieve the look you are seeking and any other technical data required! Step Two – Making Clay is thixotropic. This means that as you work with it, the clay first gets sloppier and wetter, before is begins to dry in the atmosphere. For most things, you simply can’t do all parts of the project at once. An example of work order might look like: Get last weeks work out from the shelves Prepare clay for today’s work – roll your clay, prepare balls for throwing, make the first stage of a pinch pot) Clean up last week’s work and put it on the shelf for bisque firing Check that you have any glazing to do – and do enough of it that you will have time to finish your main project Do the next step of your next project – there might be a further step that can’t be complete immediately, in that case, wrap your work well and put onto the shelves. Letting your work rest for a while can really help keep your work clean and professional looking. Many things require bagging under plastic to keep it ready for work the next week – put your name on the outside of the bag so you can find your work easily. We have stickers and markers. Consider how you want to decorate your work – coloured slip can be applied at a fairly wet stage (remembering that it will make your work even wetter!). Trying to apply slip to dry clay won’t work! If you want to do sgraffito – you will need to keep the work leather hard (a state of dryness where you can still work the clay with a little effort and a little water and care). Step Three – Drying Most of the time your work can go into the rack uncovered to let it dry out for the following week. If you want to continue forming or shaping you will need to double bag your work – put your work on a suitable sized bat and put the bat in a bag so the base of the bag is under the bat, then put another bag over the top of the work and tuck the top of the bag under the bat. If you want to trim (or turn) your thrown work the following week, it should also be double bagged. If your work is large, delicate, or of uneven thicknesses, you should lightly cover your work for drying. When considering the drying process, bare in mind the weather, humidity and wind! The hotter and dryer, the faster things dry and work can dry unevenly in the shelves – this can lead to cracking – another time to lightly cover your work for drying. Step Four – Trimming and Cleaning Up Your work is dry! It is called greenware now and it is at it’s most fragile! Handle everything with two hands. I often refer to soft hands – keep everything gentle and with your fingers spread as much as possible. Try to not pick up things like plates too much, and always with both hands! Before your work can be bisque fired it should be “cleaned up”. You work won’t go into the kiln if it has sharp edges – when glazed, sharp edges turn into razor blades! Use a piece of fly wire to rub the work all over – this will scratch a little so be light handed. Use a knife or metal kidney to scrape any areas that require a bit more dynamic treatment than the fly wire offers! Finally, a very light wipe over with a slightly damp sponge can help soften and soothe all of your edges and dags! Trimming thrown work: If you are planning to trim (or turn) your thrown work (and you should be), make sure you bag it well – your work should be leather hard to almost dry for easiest trimming. Use this step to finish the work completely – use a metal kidney to polish the surface, or a slightly damp sponge to give a freshly thrown look. Wipe the sponge around the rim after trimming, and check the inside of the pot for dags! Trimming slip cast work: Usually I will trim the rims of your work on the wheel the following day to make that stage easier, however you will still need to check your work for lumps and bumps. Last but not least – check that your name is still clearly on the bottom of your work. Step Five – Bisque Firing When the work is completely dry it can go into the bisque kiln. The bisque kiln is fired to 1000°C. This process burns off the water in the clay as well as some of the chemically bound water. The structure of the clay is not altered that much at this temperature. Inside the bisque kiln, the work is stacked a little, small bowl inside a larger bowl and onto a heavy plate. Smaller items like decorations or drink coasters might get stacked several high. Consideration is paid to the weight of the stack and shape of the work. A bisque kiln can fire about one and a half times the amount of work that the glaze kiln can fire. The firing takes about 10 hours to complete the cycle and about two days to cool down. Once it has been emptied the work is placed in the glaze room ready for you to decorate! Step Six – Glazing Decorating your work with colour can be a lot of fun – and time consuming! There are three main options for surface treatment at this stage: Oxide Washes Underglazes Glazes Washes and underglazes do not “glaze” the work – It will still need a layer of glaze to fully seal the clay (washes don’t need glaze on surfaces not designed for food or liquid as they can gloss up a little on their own). Underglazes are stable colourants that turn out pretty much how they look in the jar. They can be mixed with each other to form other colours and can be used like water colours to paint onto your work. Mostly they should have a clear glaze on top to seal them. Oxides are a different species – the pink oxide (cobalt) wash turns out bright blue for instance. They don’t always need a glaze on top, and some glazes can change the colour of the wash! The glazes need no other “glaze” on top! Be careful of unknown glaze interactions – you can put any combination of glaze in a bowl or on a plate, but only a single glaze on the outside of any vertical surface! Glazes are a chemical reaction under heat. We don’t know the exact chemicals in the Mayco glazes we use. I can guess by the way they interact with each other, however, on the whole, you need to test every idea you have, and not run the test on a vertical surface! Simply put, glaze is a layer of glass like substance that bonds with the clay underneath. Clay is made of silica, alumina and water. Glaze is made of mostly silica. Silica has a melting point of 1700°C and we fire to 1240°C. The silica requires a “flux” to help it melt at the lower temperature. Fluxes can be all sorts of chemicals – a common one is calcium – calcium has a melting point of 2500°C, however, together they both melt at a much lower temperature! Colourants are metal oxides like cobalt (blue), chrome (green through black), copper (green, blue, even red!), manganese (black, purple and pink) iron (red brown), etc. Different chemicals in the glaze can have dramatic effects. for example, barium carbonate (which we don’t use) turns manganese bright pink! Other elements can turn manganese dioxide brown, blue, purple and reddish brown. Manganese dioxide is a flux in and of itself as well. So, glazes that get their black and purple colours, often interact with other glazes and RUN! Our mirror black is a good example – it mixes really well with many glazes because it fluxes them – causes them to melt faster. It will also bring out many beautiful colours in the glazes because it’s black colouring most definitely comes from manganese dioxide! Glaze chemistry is a whole subject on it’s own! We use commercial Mayco glazes on purpose – for their huge range of colour possibilities, stability, cool interactions, artistic freedom with the ability to easily brush the glazes on and ease of use. We currently have almost 50 glazes on hand! A major project is to test the interactions of all glazes with each other. That is 2,500 test tiles!!!! I’m going to make the wall behind the wheels the feature wall of pretty colours! Step Seven – Glaze (Gloss or sometimes called “Glost”) Firing Most of the time this is the final stage of making your creation (but not always!) The glaze kiln goes to 1240°C. This is called cone 6, or midrange. It is the low end of stoneware temperatures. Stoneware clays and glazes are typically fired at cone 8 – 10, that is 1260 – 1290°C. The energy requirement to go from 1240°C to 1280°C is almost a 30% more! Our clay is formulated to vitrify (mature, turn “glass-like”) at 1240°, as are our glazes. A glaze kiln take around 12 hours to reach temperature and two to three days to cool down. Sometimes a third firing process is required – this is for decoration that is added to work after the glaze firing. For example – adding precious metals and lustres. this firing temperature is usually around 600 – 800°C depending upon the techniques being used. There are many students interested in gold and silver trims – we will be doing this third type of firing soon! After firing your work will be in the student finished work shelves. Remember to pay for it before you head out the door! There is a small extra charge for using porcelain clay (it’s more than twice the price of regular clay), and for any third firing process! Once your work has been fired it can not turn back into clay for millennia – so don’t fire it if you don’t like it! Put it in the bucket for recycling. https://firebirdstudios.com.au/the-process-of-making-pottery/ The bowl is an example of kitchenware used in the 19th century and still in use today.Bowl white ceramic. Crack on side. Badly stained.Backstamp very faint and unable to be read.flagstaff hill, warrnambool, shipwrecked-coast, flagstaff-hill, flagstaff-hill-maritime-museum, maritime-museum, shipwreck-coast, flagstaff-hill-maritime-village, mixing bowl, food preparation, kitchen equipment, ceramic -
 Flagstaff Hill Maritime Museum and Village
Domestic object - Bowl
The Process of Making Pottery Decorating, Firing, Glazing, Making, Technical There is a rhythm and flow to clay. It can’t be done all at once! Even the making process! It can take weeks to get everything done, especially if you can only work on your pottery once a week! Even though we have three hour classes, it’s often just not enough time! Here is an overview of some of the processes so you have a bit more grasp on some of the technical stuff! Step One – Design There are SO many ideas out there for making stuff in clay! From delicate porcelain jewellery, through to heavy sculptural work and everything in between. Deciding your direction is sometimes not that easy – when you first start, try everything, you will naturally gravitate to the style that you enjoy! The options and variations are endless and can get a wee bit overwhelming too! Check in with me before you start to ensure your ideas will work, what order you might do things, how you could achieve the look you are seeking and any other technical data required! Step Two – Making Clay is thixotropic. This means that as you work with it, the clay first gets sloppier and wetter, before is begins to dry in the atmosphere. For most things, you simply can’t do all parts of the project at once. An example of work order might look like: Get last weeks work out from the shelves Prepare clay for today’s work – roll your clay, prepare balls for throwing, make the first stage of a pinch pot) Clean up last week’s work and put it on the shelf for bisque firing Check that you have any glazing to do – and do enough of it that you will have time to finish your main project Do the next step of your next project – there might be a further step that can’t be complete immediately, in that case, wrap your work well and put onto the shelves. Letting your work rest for a while can really help keep your work clean and professional looking. Many things require bagging under plastic to keep it ready for work the next week – put your name on the outside of the bag so you can find your work easily. We have stickers and markers. Consider how you want to decorate your work – coloured slip can be applied at a fairly wet stage (remembering that it will make your work even wetter!). Trying to apply slip to dry clay won’t work! If you want to do sgraffito – you will need to keep the work leather hard (a state of dryness where you can still work the clay with a little effort and a little water and care). Step Three – Drying Most of the time your work can go into the rack uncovered to let it dry out for the following week. If you want to continue forming or shaping you will need to double bag your work – put your work on a suitable sized bat and put the bat in a bag so the base of the bag is under the bat, then put another bag over the top of the work and tuck the top of the bag under the bat. If you want to trim (or turn) your thrown work the following week, it should also be double bagged. If your work is large, delicate, or of uneven thicknesses, you should lightly cover your work for drying. When considering the drying process, bare in mind the weather, humidity and wind! The hotter and dryer, the faster things dry and work can dry unevenly in the shelves – this can lead to cracking – another time to lightly cover your work for drying. Step Four – Trimming and Cleaning Up Your work is dry! It is called greenware now and it is at it’s most fragile! Handle everything with two hands. I often refer to soft hands – keep everything gentle and with your fingers spread as much as possible. Try to not pick up things like plates too much, and always with both hands! Before your work can be bisque fired it should be “cleaned up”. You work won’t go into the kiln if it has sharp edges – when glazed, sharp edges turn into razor blades! Use a piece of fly wire to rub the work all over – this will scratch a little so be light handed. Use a knife or metal kidney to scrape any areas that require a bit more dynamic treatment than the fly wire offers! Finally, a very light wipe over with a slightly damp sponge can help soften and soothe all of your edges and dags! Trimming thrown work: If you are planning to trim (or turn) your thrown work (and you should be), make sure you bag it well – your work should be leather hard to almost dry for easiest trimming. Use this step to finish the work completely – use a metal kidney to polish the surface, or a slightly damp sponge to give a freshly thrown look. Wipe the sponge around the rim after trimming, and check the inside of the pot for dags! Trimming slip cast work: Usually I will trim the rims of your work on the wheel the following day to make that stage easier, however you will still need to check your work for lumps and bumps. Last but not least – check that your name is still clearly on the bottom of your work. Step Five – Bisque Firing When the work is completely dry it can go into the bisque kiln. The bisque kiln is fired to 1000°C. This process burns off the water in the clay as well as some of the chemically bound water. The structure of the clay is not altered that much at this temperature. Inside the bisque kiln, the work is stacked a little, small bowl inside a larger bowl and onto a heavy plate. Smaller items like decorations or drink coasters might get stacked several high. Consideration is paid to the weight of the stack and shape of the work. A bisque kiln can fire about one and a half times the amount of work that the glaze kiln can fire. The firing takes about 10 hours to complete the cycle and about two days to cool down. Once it has been emptied the work is placed in the glaze room ready for you to decorate! Step Six – Glazing Decorating your work with colour can be a lot of fun – and time consuming! There are three main options for surface treatment at this stage: Oxide Washes Underglazes Glazes Washes and underglazes do not “glaze” the work – It will still need a layer of glaze to fully seal the clay (washes don’t need glaze on surfaces not designed for food or liquid as they can gloss up a little on their own). Underglazes are stable colourants that turn out pretty much how they look in the jar. They can be mixed with each other to form other colours and can be used like water colours to paint onto your work. Mostly they should have a clear glaze on top to seal them. Oxides are a different species – the pink oxide (cobalt) wash turns out bright blue for instance. They don’t always need a glaze on top, and some glazes can change the colour of the wash! The glazes need no other “glaze” on top! Be careful of unknown glaze interactions – you can put any combination of glaze in a bowl or on a plate, but only a single glaze on the outside of any vertical surface! Glazes are a chemical reaction under heat. We don’t know the exact chemicals in the Mayco glazes we use. I can guess by the way they interact with each other, however, on the whole, you need to test every idea you have, and not run the test on a vertical surface! Simply put, glaze is a layer of glass like substance that bonds with the clay underneath. Clay is made of silica, alumina and water. Glaze is made of mostly silica. Silica has a melting point of 1700°C and we fire to 1240°C. The silica requires a “flux” to help it melt at the lower temperature. Fluxes can be all sorts of chemicals – a common one is calcium – calcium has a melting point of 2500°C, however, together they both melt at a much lower temperature! Colourants are metal oxides like cobalt (blue), chrome (green through black), copper (green, blue, even red!), manganese (black, purple and pink) iron (red brown), etc. Different chemicals in the glaze can have dramatic effects. for example, barium carbonate (which we don’t use) turns manganese bright pink! Other elements can turn manganese dioxide brown, blue, purple and reddish brown. Manganese dioxide is a flux in and of itself as well. So, glazes that get their black and purple colours, often interact with other glazes and RUN! Our mirror black is a good example – it mixes really well with many glazes because it fluxes them – causes them to melt faster. It will also bring out many beautiful colours in the glazes because it’s black colouring most definitely comes from manganese dioxide! Glaze chemistry is a whole subject on it’s own! We use commercial Mayco glazes on purpose – for their huge range of colour possibilities, stability, cool interactions, artistic freedom with the ability to easily brush the glazes on and ease of use. We currently have almost 50 glazes on hand! A major project is to test the interactions of all glazes with each other. That is 2,500 test tiles!!!! I’m going to make the wall behind the wheels the feature wall of pretty colours! Step Seven – Glaze (Gloss or sometimes called “Glost”) Firing Most of the time this is the final stage of making your creation (but not always!) The glaze kiln goes to 1240°C. This is called cone 6, or midrange. It is the low end of stoneware temperatures. Stoneware clays and glazes are typically fired at cone 8 – 10, that is 1260 – 1290°C. The energy requirement to go from 1240°C to 1280°C is almost a 30% more! Our clay is formulated to vitrify (mature, turn “glass-like”) at 1240°, as are our glazes. A glaze kiln take around 12 hours to reach temperature and two to three days to cool down. Sometimes a third firing process is required – this is for decoration that is added to work after the glaze firing. For example – adding precious metals and lustres. this firing temperature is usually around 600 – 800°C depending upon the techniques being used. There are many students interested in gold and silver trims – we will be doing this third type of firing soon! After firing your work will be in the student finished work shelves. Remember to pay for it before you head out the door! There is a small extra charge for using porcelain clay (it’s more than twice the price of regular clay), and for any third firing process! Once your work has been fired it can not turn back into clay for millennia – so don’t fire it if you don’t like it! Put it in the bucket for recycling. https://firebirdstudios.com.au/the-process-of-making-pottery/ This bowl is an example of kitchenware used in the 19th century and still in use today.Bowl white ceramic plain that has two sets of edging around lip. Inside bowl has plaster designed to look like cooking mixture.flagstaff hill, warrnambool, shipwrecked-coast, flagstaff-hill, flagstaff-hill-maritime-museum, maritime-museum, shipwreck-coast, flagstaff-hill-maritime-village, kitchen equipment, ceramic -
 Flagstaff Hill Maritime Museum and Village
Domestic object - Bowl, J & G Meakin, Late 19th or early 20th Century
The Process of Making Pottery Decorating, Firing, Glazing, Making, Technical There is a rhythm and flow to clay. It can’t be done all at once! Even the making process! It can take weeks to get everything done, especially if you can only work on your pottery once a week! Even though we have three hour classes, it’s often just not enough time! Here is an overview of some of the processes so you have a bit more grasp on some of the technical stuff! Step One – Design There are SO many ideas out there for making stuff in clay! From delicate porcelain jewellery, through to heavy sculptural work and everything in between. Deciding your direction is sometimes not that easy – when you first start, try everything, you will naturally gravitate to the style that you enjoy! The options and variations are endless and can get a wee bit overwhelming too! Check in with me before you start to ensure your ideas will work, what order you might do things, how you could achieve the look you are seeking and any other technical data required! Step Two – Making Clay is thixotropic. This means that as you work with it, the clay first gets sloppier and wetter, before is begins to dry in the atmosphere. For most things, you simply can’t do all parts of the project at once. An example of work order might look like: Get last weeks work out from the shelves Prepare clay for today’s work – roll your clay, prepare balls for throwing, make the first stage of a pinch pot) Clean up last week’s work and put it on the shelf for bisque firing Check that you have any glazing to do – and do enough of it that you will have time to finish your main project Do the next step of your next project – there might be a further step that can’t be complete immediately, in that case, wrap your work well and put onto the shelves. Letting your work rest for a while can really help keep your work clean and professional looking. Many things require bagging under plastic to keep it ready for work the next week – put your name on the outside of the bag so you can find your work easily. We have stickers and markers. Consider how you want to decorate your work – coloured slip can be applied at a fairly wet stage (remembering that it will make your work even wetter!). Trying to apply slip to dry clay won’t work! If you want to do sgraffito – you will need to keep the work leather hard (a state of dryness where you can still work the clay with a little effort and a little water and care). Step Three – Drying Most of the time your work can go into the rack uncovered to let it dry out for the following week. If you want to continue forming or shaping you will need to double bag your work – put your work on a suitable sized bat and put the bat in a bag so the base of the bag is under the bat, then put another bag over the top of the work and tuck the top of the bag under the bat. If you want to trim (or turn) your thrown work the following week, it should also be double bagged. If your work is large, delicate, or of uneven thicknesses, you should lightly cover your work for drying. When considering the drying process, bare in mind the weather, humidity and wind! The hotter and dryer, the faster things dry and work can dry unevenly in the shelves – this can lead to cracking – another time to lightly cover your work for drying. Step Four – Trimming and Cleaning Up Your work is dry! It is called greenware now and it is at it’s most fragile! Handle everything with two hands. I often refer to soft hands – keep everything gentle and with your fingers spread as much as possible. Try to not pick up things like plates too much, and always with both hands! Before your work can be bisque fired it should be “cleaned up”. You work won’t go into the kiln if it has sharp edges – when glazed, sharp edges turn into razor blades! Use a piece of fly wire to rub the work all over – this will scratch a little so be light handed. Use a knife or metal kidney to scrape any areas that require a bit more dynamic treatment than the fly wire offers! Finally, a very light wipe over with a slightly damp sponge can help soften and soothe all of your edges and dags! Trimming thrown work: If you are planning to trim (or turn) your thrown work (and you should be), make sure you bag it well – your work should be leather hard to almost dry for easiest trimming. Use this step to finish the work completely – use a metal kidney to polish the surface, or a slightly damp sponge to give a freshly thrown look. Wipe the sponge around the rim after trimming, and check the inside of the pot for dags! Trimming slip cast work: Usually I will trim the rims of your work on the wheel the following day to make that stage easier, however you will still need to check your work for lumps and bumps. Last but not least – check that your name is still clearly on the bottom of your work. Step Five – Bisque Firing When the work is completely dry it can go into the bisque kiln. The bisque kiln is fired to 1000°C. This process burns off the water in the clay as well as some of the chemically bound water. The structure of the clay is not altered that much at this temperature. Inside the bisque kiln, the work is stacked a little, small bowl inside a larger bowl and onto a heavy plate. Smaller items like decorations or drink coasters might get stacked several high. Consideration is paid to the weight of the stack and shape of the work. A bisque kiln can fire about one and a half times the amount of work that the glaze kiln can fire. The firing takes about 10 hours to complete the cycle and about two days to cool down. Once it has been emptied the work is placed in the glaze room ready for you to decorate! Step Six – Glazing Decorating your work with colour can be a lot of fun – and time consuming! There are three main options for surface treatment at this stage: Oxide Washes Underglazes Glazes Washes and underglazes do not “glaze” the work – It will still need a layer of glaze to fully seal the clay (washes don’t need glaze on surfaces not designed for food or liquid as they can gloss up a little on their own). Underglazes are stable colourants that turn out pretty much how they look in the jar. They can be mixed with each other to form other colours and can be used like water colours to paint onto your work. Mostly they should have a clear glaze on top to seal them. Oxides are a different species – the pink oxide (cobalt) wash turns out bright blue for instance. They don’t always need a glaze on top, and some glazes can change the colour of the wash! The glazes need no other “glaze” on top! Be careful of unknown glaze interactions – you can put any combination of glaze in a bowl or on a plate, but only a single glaze on the outside of any vertical surface! Glazes are a chemical reaction under heat. We don’t know the exact chemicals in the Mayco glazes we use. I can guess by the way they interact with each other, however, on the whole, you need to test every idea you have, and not run the test on a vertical surface! Simply put, glaze is a layer of glass like substance that bonds with the clay underneath. Clay is made of silica, alumina and water. Glaze is made of mostly silica. Silica has a melting point of 1700°C and we fire to 1240°C. The silica requires a “flux” to help it melt at the lower temperature. Fluxes can be all sorts of chemicals – a common one is calcium – calcium has a melting point of 2500°C, however, together they both melt at a much lower temperature! Colourants are metal oxides like cobalt (blue), chrome (green through black), copper (green, blue, even red!), manganese (black, purple and pink) iron (red brown), etc. Different chemicals in the glaze can have dramatic effects. for example, barium carbonate (which we don’t use) turns manganese bright pink! Other elements can turn manganese dioxide brown, blue, purple and reddish brown. Manganese dioxide is a flux in and of itself as well. So, glazes that get their black and purple colours, often interact with other glazes and RUN! Our mirror black is a good example – it mixes really well with many glazes because it fluxes them – causes them to melt faster. It will also bring out many beautiful colours in the glazes because it’s black colouring most definitely comes from manganese dioxide! Glaze chemistry is a whole subject on it’s own! We use commercial Mayco glazes on purpose – for their huge range of colour possibilities, stability, cool interactions, artistic freedom with the ability to easily brush the glazes on and ease of use. We currently have almost 50 glazes on hand! A major project is to test the interactions of all glazes with each other. That is 2,500 test tiles!!!! I’m going to make the wall behind the wheels the feature wall of pretty colours! Step Seven – Glaze (Gloss or sometimes called “Glost”) Firing Most of the time this is the final stage of making your creation (but not always!) The glaze kiln goes to 1240°C. This is called cone 6, or midrange. It is the low end of stoneware temperatures. Stoneware clays and glazes are typically fired at cone 8 – 10, that is 1260 – 1290°C. The energy requirement to go from 1240°C to 1280°C is almost a 30% more! Our clay is formulated to vitrify (mature, turn “glass-like”) at 1240°, as are our glazes. A glaze kiln take around 12 hours to reach temperature and two to three days to cool down. Sometimes a third firing process is required – this is for decoration that is added to work after the glaze firing. For example – adding precious metals and lustres. this firing temperature is usually around 600 – 800°C depending upon the techniques being used. There are many students interested in gold and silver trims – we will be doing this third type of firing soon! After firing your work will be in the student finished work shelves. Remember to pay for it before you head out the door! There is a small extra charge for using porcelain clay (it’s more than twice the price of regular clay), and for any third firing process! Once your work has been fired it can not turn back into clay for millennia – so don’t fire it if you don’t like it! Put it in the bucket for recycling. https://firebirdstudios.com.au/the-process-of-making-pottery/This bowl was made by renowned pottery company J & G Meakin of England. The firm was established in the mid-1800's. The bowl is an example of kitchenware used in the 19th century and still in use today.Bowl; white ceramic, round and tapering inwards towards base. Made by J and G Meakin England.On base, 'Ironstone China Reg SOL 391413' with symbolflagstaff hill, flagstaff hill maritime museum and village, warrnambool, maritime museum, maritime village, great ocean road, shipwreck coast, mixing bowl, food preparation, j & g meakin, pottery, stoke-on-trent, kitchen equipment, ceramic -
 Flagstaff Hill Maritime Museum and Village
Domestic object - Plate
The Process of Making Pottery Decorating, Firing, Glazing, Making, Technical There is a rhythm and flow to clay. It can’t be done all at once! Even the making process! It can take weeks to get everything done, especially if you can only work on your pottery once a week! Even though we have three hour classes, it’s often just not enough time! Here is an overview of some of the processes so you have a bit more grasp on some of the technical stuff! Step One – Design There are SO many ideas out there for making stuff in clay! From delicate porcelain jewellery, through to heavy sculptural work and everything in between. Deciding your direction is sometimes not that easy – when you first start, try everything, you will naturally gravitate to the style that you enjoy! The options and variations are endless and can get a wee bit overwhelming too! Check in with me before you start to ensure your ideas will work, what order you might do things, how you could achieve the look you are seeking and any other technical data required! Step Two – Making Clay is thixotropic. This means that as you work with it, the clay first gets sloppier and wetter, before is begins to dry in the atmosphere. For most things, you simply can’t do all parts of the project at once. An example of work order might look like: Get last weeks work out from the shelves Prepare clay for today’s work – roll your clay, prepare balls for throwing, make the first stage of a pinch pot) Clean up last week’s work and put it on the shelf for bisque firing Check that you have any glazing to do – and do enough of it that you will have time to finish your main project Do the next step of your next project – there might be a further step that can’t be complete immediately, in that case, wrap your work well and put onto the shelves. Letting your work rest for a while can really help keep your work clean and professional looking. Many things require bagging under plastic to keep it ready for work the next week – put your name on the outside of the bag so you can find your work easily. We have stickers and markers. Consider how you want to decorate your work – coloured slip can be applied at a fairly wet stage (remembering that it will make your work even wetter!). Trying to apply slip to dry clay won’t work! If you want to do sgraffito – you will need to keep the work leather hard (a state of dryness where you can still work the clay with a little effort and a little water and care). Step Three – Drying Most of the time your work can go into the rack uncovered to let it dry out for the following week. If you want to continue forming or shaping you will need to double bag your work – put your work on a suitable sized bat and put the bat in a bag so the base of the bag is under the bat, then put another bag over the top of the work and tuck the top of the bag under the bat. If you want to trim (or turn) your thrown work the following week, it should also be double bagged. If your work is large, delicate, or of uneven thicknesses, you should lightly cover your work for drying. When considering the drying process, bare in mind the weather, humidity and wind! The hotter and dryer, the faster things dry and work can dry unevenly in the shelves – this can lead to cracking – another time to lightly cover your work for drying. Step Four – Trimming and Cleaning Up Your work is dry! It is called greenware now and it is at it’s most fragile! Handle everything with two hands. I often refer to soft hands – keep everything gentle and with your fingers spread as much as possible. Try to not pick up things like plates too much, and always with both hands! Before your work can be bisque fired it should be “cleaned up”. You work won’t go into the kiln if it has sharp edges – when glazed, sharp edges turn into razor blades! Use a piece of fly wire to rub the work all over – this will scratch a little so be light handed. Use a knife or metal kidney to scrape any areas that require a bit more dynamic treatment than the fly wire offers! Finally, a very light wipe over with a slightly damp sponge can help soften and soothe all of your edges and dags! Trimming thrown work: If you are planning to trim (or turn) your thrown work (and you should be), make sure you bag it well – your work should be leather hard to almost dry for easiest trimming. Use this step to finish the work completely – use a metal kidney to polish the surface, or a slightly damp sponge to give a freshly thrown look. Wipe the sponge around the rim after trimming, and check the inside of the pot for dags! Trimming slip cast work: Usually I will trim the rims of your work on the wheel the following day to make that stage easier, however you will still need to check your work for lumps and bumps. Last but not least – check that your name is still clearly on the bottom of your work. Step Five – Bisque Firing When the work is completely dry it can go into the bisque kiln. The bisque kiln is fired to 1000°C. This process burns off the water in the clay as well as some of the chemically bound water. The structure of the clay is not altered that much at this temperature. Inside the bisque kiln, the work is stacked a little, small bowl inside a larger bowl and onto a heavy plate. Smaller items like decorations or drink coasters might get stacked several high. Consideration is paid to the weight of the stack and shape of the work. A bisque kiln can fire about one and a half times the amount of work that the glaze kiln can fire. The firing takes about 10 hours to complete the cycle and about two days to cool down. Once it has been emptied the work is placed in the glaze room ready for you to decorate! Step Six – Glazing Decorating your work with colour can be a lot of fun – and time consuming! There are three main options for surface treatment at this stage: Oxide Washes Underglazes Glazes Washes and underglazes do not “glaze” the work – It will still need a layer of glaze to fully seal the clay (washes don’t need glaze on surfaces not designed for food or liquid as they can gloss up a little on their own). Underglazes are stable colourants that turn out pretty much how they look in the jar. They can be mixed with each other to form other colours and can be used like water colours to paint onto your work. Mostly they should have a clear glaze on top to seal them. Oxides are a different species – the pink oxide (cobalt) wash turns out bright blue for instance. They don’t always need a glaze on top, and some glazes can change the colour of the wash! The glazes need no other “glaze” on top! Be careful of unknown glaze interactions – you can put any combination of glaze in a bowl or on a plate, but only a single glaze on the outside of any vertical surface! Glazes are a chemical reaction under heat. We don’t know the exact chemicals in the Mayco glazes we use. I can guess by the way they interact with each other, however, on the whole, you need to test every idea you have, and not run the test on a vertical surface! Simply put, glaze is a layer of glass like substance that bonds with the clay underneath. Clay is made of silica, alumina and water. Glaze is made of mostly silica. Silica has a melting point of 1700°C and we fire to 1240°C. The silica requires a “flux” to help it melt at the lower temperature. Fluxes can be all sorts of chemicals – a common one is calcium – calcium has a melting point of 2500°C, however, together they both melt at a much lower temperature! Colourants are metal oxides like cobalt (blue), chrome (green through black), copper (green, blue, even red!), manganese (black, purple and pink) iron (red brown), etc. Different chemicals in the glaze can have dramatic effects. for example, barium carbonate (which we don’t use) turns manganese bright pink! Other elements can turn manganese dioxide brown, blue, purple and reddish brown. Manganese dioxide is a flux in and of itself as well. So, glazes that get their black and purple colours, often interact with other glazes and RUN! Our mirror black is a good example – it mixes really well with many glazes because it fluxes them – causes them to melt faster. It will also bring out many beautiful colours in the glazes because it’s black colouring most definitely comes from manganese dioxide! Glaze chemistry is a whole subject on it’s own! We use commercial Mayco glazes on purpose – for their huge range of colour possibilities, stability, cool interactions, artistic freedom with the ability to easily brush the glazes on and ease of use. We currently have almost 50 glazes on hand! A major project is to test the interactions of all glazes with each other. That is 2,500 test tiles!!!! I’m going to make the wall behind the wheels the feature wall of pretty colours! Step Seven – Glaze (Gloss or sometimes called “Glost”) Firing Most of the time this is the final stage of making your creation (but not always!) The glaze kiln goes to 1240°C. This is called cone 6, or midrange. It is the low end of stoneware temperatures. Stoneware clays and glazes are typically fired at cone 8 – 10, that is 1260 – 1290°C. The energy requirement to go from 1240°C to 1280°C is almost a 30% more! Our clay is formulated to vitrify (mature, turn “glass-like”) at 1240°, as are our glazes. A glaze kiln take around 12 hours to reach temperature and two to three days to cool down. Sometimes a third firing process is required – this is for decoration that is added to work after the glaze firing. For example – adding precious metals and lustres. this firing temperature is usually around 600 – 800°C depending upon the techniques being used. There are many students interested in gold and silver trims – we will be doing this third type of firing soon! After firing your work will be in the student finished work shelves. Remember to pay for it before you head out the door! There is a small extra charge for using porcelain clay (it’s more than twice the price of regular clay), and for any third firing process! Once your work has been fired it can not turn back into clay for millennia – so don’t fire it if you don’t like it! Put it in the bucket for recycling. https://firebirdstudios.com.au/the-process-of-making-pottery/Ceramics have evolved over thousands of years.White earthenware dinner plate. Crazing evident all over.Backstamped ‘Made in England S LTD’flagstaff hill, warrnambool, shipwrecked-coast, flagstaff-hill, flagstaff-hill-maritime-museum, maritime-museum, shipwreck-coast, flagstaff-hill-maritime-village, ceramics, tableware -
 Flagstaff Hill Maritime Museum and Village
Domestic object - Plate, Johnson Bros
The Process of Making Pottery Decorating, Firing, Glazing, Making, Technical There is a rhythm and flow to clay. It can’t be done all at once! Even the making process! It can take weeks to get everything done, especially if you can only work on your pottery once a week! Even though we have three hour classes, it’s often just not enough time! Here is an overview of some of the processes so you have a bit more grasp on some of the technical stuff! Step One – Design There are SO many ideas out there for making stuff in clay! From delicate porcelain jewellery, through to heavy sculptural work and everything in between. Deciding your direction is sometimes not that easy – when you first start, try everything, you will naturally gravitate to the style that you enjoy! The options and variations are endless and can get a wee bit overwhelming too! Check in with me before you start to ensure your ideas will work, what order you might do things, how you could achieve the look you are seeking and any other technical data required! Step Two – Making Clay is thixotropic. This means that as you work with it, the clay first gets sloppier and wetter, before is begins to dry in the atmosphere. For most things, you simply can’t do all parts of the project at once. An example of work order might look like: Get last weeks work out from the shelves Prepare clay for today’s work – roll your clay, prepare balls for throwing, make the first stage of a pinch pot) Clean up last week’s work and put it on the shelf for bisque firing Check that you have any glazing to do – and do enough of it that you will have time to finish your main project Do the next step of your next project – there might be a further step that can’t be complete immediately, in that case, wrap your work well and put onto the shelves. Letting your work rest for a while can really help keep your work clean and professional looking. Many things require bagging under plastic to keep it ready for work the next week – put your name on the outside of the bag so you can find your work easily. We have stickers and markers. Consider how you want to decorate your work – coloured slip can be applied at a fairly wet stage (remembering that it will make your work even wetter!). Trying to apply slip to dry clay won’t work! If you want to do sgraffito – you will need to keep the work leather hard (a state of dryness where you can still work the clay with a little effort and a little water and care). Step Three – Drying Most of the time your work can go into the rack uncovered to let it dry out for the following week. If you want to continue forming or shaping you will need to double bag your work – put your work on a suitable sized bat and put the bat in a bag so the base of the bag is under the bat, then put another bag over the top of the work and tuck the top of the bag under the bat. If you want to trim (or turn) your thrown work the following week, it should also be double bagged. If your work is large, delicate, or of uneven thicknesses, you should lightly cover your work for drying. When considering the drying process, bare in mind the weather, humidity and wind! The hotter and dryer, the faster things dry and work can dry unevenly in the shelves – this can lead to cracking – another time to lightly cover your work for drying. Step Four – Trimming and Cleaning Up Your work is dry! It is called greenware now and it is at it’s most fragile! Handle everything with two hands. I often refer to soft hands – keep everything gentle and with your fingers spread as much as possible. Try to not pick up things like plates too much, and always with both hands! Before your work can be bisque fired it should be “cleaned up”. You work won’t go into the kiln if it has sharp edges – when glazed, sharp edges turn into razor blades! Use a piece of fly wire to rub the work all over – this will scratch a little so be light handed. Use a knife or metal kidney to scrape any areas that require a bit more dynamic treatment than the fly wire offers! Finally, a very light wipe over with a slightly damp sponge can help soften and soothe all of your edges and dags! Trimming thrown work: If you are planning to trim (or turn) your thrown work (and you should be), make sure you bag it well – your work should be leather hard to almost dry for easiest trimming. Use this step to finish the work completely – use a metal kidney to polish the surface, or a slightly damp sponge to give a freshly thrown look. Wipe the sponge around the rim after trimming, and check the inside of the pot for dags! Trimming slip cast work: Usually I will trim the rims of your work on the wheel the following day to make that stage easier, however you will still need to check your work for lumps and bumps. Last but not least – check that your name is still clearly on the bottom of your work. Step Five – Bisque Firing When the work is completely dry it can go into the bisque kiln. The bisque kiln is fired to 1000°C. This process burns off the water in the clay as well as some of the chemically bound water. The structure of the clay is not altered that much at this temperature. Inside the bisque kiln, the work is stacked a little, small bowl inside a larger bowl and onto a heavy plate. Smaller items like decorations or drink coasters might get stacked several high. Consideration is paid to the weight of the stack and shape of the work. A bisque kiln can fire about one and a half times the amount of work that the glaze kiln can fire. The firing takes about 10 hours to complete the cycle and about two days to cool down. Once it has been emptied the work is placed in the glaze room ready for you to decorate! Step Six – Glazing Decorating your work with colour can be a lot of fun – and time consuming! There are three main options for surface treatment at this stage: Oxide Washes Underglazes Glazes Washes and underglazes do not “glaze” the work – It will still need a layer of glaze to fully seal the clay (washes don’t need glaze on surfaces not designed for food or liquid as they can gloss up a little on their own). Underglazes are stable colourants that turn out pretty much how they look in the jar. They can be mixed with each other to form other colours and can be used like water colours to paint onto your work. Mostly they should have a clear glaze on top to seal them. Oxides are a different species – the pink oxide (cobalt) wash turns out bright blue for instance. They don’t always need a glaze on top, and some glazes can change the colour of the wash! The glazes need no other “glaze” on top! Be careful of unknown glaze interactions – you can put any combination of glaze in a bowl or on a plate, but only a single glaze on the outside of any vertical surface! Glazes are a chemical reaction under heat. We don’t know the exact chemicals in the Mayco glazes we use. I can guess by the way they interact with each other, however, on the whole, you need to test every idea you have, and not run the test on a vertical surface! Simply put, glaze is a layer of glass like substance that bonds with the clay underneath. Clay is made of silica, alumina and water. Glaze is made of mostly silica. Silica has a melting point of 1700°C and we fire to 1240°C. The silica requires a “flux” to help it melt at the lower temperature. Fluxes can be all sorts of chemicals – a common one is calcium – calcium has a melting point of 2500°C, however, together they both melt at a much lower temperature! Colourants are metal oxides like cobalt (blue), chrome (green through black), copper (green, blue, even red!), manganese (black, purple and pink) iron (red brown), etc. Different chemicals in the glaze can have dramatic effects. for example, barium carbonate (which we don’t use) turns manganese bright pink! Other elements can turn manganese dioxide brown, blue, purple and reddish brown. Manganese dioxide is a flux in and of itself as well. So, glazes that get their black and purple colours, often interact with other glazes and RUN! Our mirror black is a good example – it mixes really well with many glazes because it fluxes them – causes them to melt faster. It will also bring out many beautiful colours in the glazes because it’s black colouring most definitely comes from manganese dioxide! Glaze chemistry is a whole subject on it’s own! We use commercial Mayco glazes on purpose – for their huge range of colour possibilities, stability, cool interactions, artistic freedom with the ability to easily brush the glazes on and ease of use. We currently have almost 50 glazes on hand! A major project is to test the interactions of all glazes with each other. That is 2,500 test tiles!!!! I’m going to make the wall behind the wheels the feature wall of pretty colours! Step Seven – Glaze (Gloss or sometimes called “Glost”) Firing Most of the time this is the final stage of making your creation (but not always!) The glaze kiln goes to 1240°C. This is called cone 6, or midrange. It is the low end of stoneware temperatures. Stoneware clays and glazes are typically fired at cone 8 – 10, that is 1260 – 1290°C. The energy requirement to go from 1240°C to 1280°C is almost a 30% more! Our clay is formulated to vitrify (mature, turn “glass-like”) at 1240°, as are our glazes. A glaze kiln take around 12 hours to reach temperature and two to three days to cool down. Sometimes a third firing process is required – this is for decoration that is added to work after the glaze firing. For example – adding precious metals and lustres. this firing temperature is usually around 600 – 800°C depending upon the techniques being used. There are many students interested in gold and silver trims – we will be doing this third type of firing soon! After firing your work will be in the student finished work shelves. Remember to pay for it before you head out the door! There is a small extra charge for using porcelain clay (it’s more than twice the price of regular clay), and for any third firing process! Once your work has been fired it can not turn back into clay for millennia – so don’t fire it if you don’t like it! Put it in the bucket for recycling. https://firebirdstudios.com.au/the-process-of-making-pottery/Ceramics have evolved over thousands of years.A white earthenware side plate with a gadroon edge. Has water marks and chips on front.‘Johnson Bros England Reg No 15587’flagstaff hill, warrnambool, shipwrecked-coast, flagstaff-hill, flagstaff-hill-maritime-museum, maritime-museum, shipwreck-coast, flagstaff-hill-maritime-village, johnson bros, ceramics, tableware -
 Flagstaff Hill Maritime Museum and Village
Domestic object - Plate, Alfred Meakin
The Process of Making Pottery Decorating, Firing, Glazing, Making, Technical There is a rhythm and flow to clay. It can’t be done all at once! Even the making process! It can take weeks to get everything done, especially if you can only work on your pottery once a week! Even though we have three hour classes, it’s often just not enough time! Here is an overview of some of the processes so you have a bit more grasp on some of the technical stuff! Step One – Design There are SO many ideas out there for making stuff in clay! From delicate porcelain jewellery, through to heavy sculptural work and everything in between. Deciding your direction is sometimes not that easy – when you first start, try everything, you will naturally gravitate to the style that you enjoy! The options and variations are endless and can get a wee bit overwhelming too! Check in with me before you start to ensure your ideas will work, what order you might do things, how you could achieve the look you are seeking and any other technical data required! Step Two – Making Clay is thixotropic. This means that as you work with it, the clay first gets sloppier and wetter, before is begins to dry in the atmosphere. For most things, you simply can’t do all parts of the project at once. An example of work order might look like: Get last weeks work out from the shelves Prepare clay for today’s work – roll your clay, prepare balls for throwing, make the first stage of a pinch pot) Clean up last week’s work and put it on the shelf for bisque firing Check that you have any glazing to do – and do enough of it that you will have time to finish your main project Do the next step of your next project – there might be a further step that can’t be complete immediately, in that case, wrap your work well and put onto the shelves. Letting your work rest for a while can really help keep your work clean and professional looking. Many things require bagging under plastic to keep it ready for work the next week – put your name on the outside of the bag so you can find your work easily. We have stickers and markers. Consider how you want to decorate your work – coloured slip can be applied at a fairly wet stage (remembering that it will make your work even wetter!). Trying to apply slip to dry clay won’t work! If you want to do sgraffito – you will need to keep the work leather hard (a state of dryness where you can still work the clay with a little effort and a little water and care). Step Three – Drying Most of the time your work can go into the rack uncovered to let it dry out for the following week. If you want to continue forming or shaping you will need to double bag your work – put your work on a suitable sized bat and put the bat in a bag so the base of the bag is under the bat, then put another bag over the top of the work and tuck the top of the bag under the bat. If you want to trim (or turn) your thrown work the following week, it should also be double bagged. If your work is large, delicate, or of uneven thicknesses, you should lightly cover your work for drying. When considering the drying process, bare in mind the weather, humidity and wind! The hotter and dryer, the faster things dry and work can dry unevenly in the shelves – this can lead to cracking – another time to lightly cover your work for drying. Step Four – Trimming and Cleaning Up Your work is dry! It is called greenware now and it is at it’s most fragile! Handle everything with two hands. I often refer to soft hands – keep everything gentle and with your fingers spread as much as possible. Try to not pick up things like plates too much, and always with both hands! Before your work can be bisque fired it should be “cleaned up”. You work won’t go into the kiln if it has sharp edges – when glazed, sharp edges turn into razor blades! Use a piece of fly wire to rub the work all over – this will scratch a little so be light handed. Use a knife or metal kidney to scrape any areas that require a bit more dynamic treatment than the fly wire offers! Finally, a very light wipe over with a slightly damp sponge can help soften and soothe all of your edges and dags! Trimming thrown work: If you are planning to trim (or turn) your thrown work (and you should be), make sure you bag it well – your work should be leather hard to almost dry for easiest trimming. Use this step to finish the work completely – use a metal kidney to polish the surface, or a slightly damp sponge to give a freshly thrown look. Wipe the sponge around the rim after trimming, and check the inside of the pot for dags! Trimming slip cast work: Usually I will trim the rims of your work on the wheel the following day to make that stage easier, however you will still need to check your work for lumps and bumps. Last but not least – check that your name is still clearly on the bottom of your work. Step Five – Bisque Firing When the work is completely dry it can go into the bisque kiln. The bisque kiln is fired to 1000°C. This process burns off the water in the clay as well as some of the chemically bound water. The structure of the clay is not altered that much at this temperature. Inside the bisque kiln, the work is stacked a little, small bowl inside a larger bowl and onto a heavy plate. Smaller items like decorations or drink coasters might get stacked several high. Consideration is paid to the weight of the stack and shape of the work. A bisque kiln can fire about one and a half times the amount of work that the glaze kiln can fire. The firing takes about 10 hours to complete the cycle and about two days to cool down. Once it has been emptied the work is placed in the glaze room ready for you to decorate! Step Six – Glazing Decorating your work with colour can be a lot of fun – and time consuming! There are three main options for surface treatment at this stage: Oxide Washes Underglazes Glazes Washes and underglazes do not “glaze” the work – It will still need a layer of glaze to fully seal the clay (washes don’t need glaze on surfaces not designed for food or liquid as they can gloss up a little on their own). Underglazes are stable colourants that turn out pretty much how they look in the jar. They can be mixed with each other to form other colours and can be used like water colours to paint onto your work. Mostly they should have a clear glaze on top to seal them. Oxides are a different species – the pink oxide (cobalt) wash turns out bright blue for instance. They don’t always need a glaze on top, and some glazes can change the colour of the wash! The glazes need no other “glaze” on top! Be careful of unknown glaze interactions – you can put any combination of glaze in a bowl or on a plate, but only a single glaze on the outside of any vertical surface! Glazes are a chemical reaction under heat. We don’t know the exact chemicals in the Mayco glazes we use. I can guess by the way they interact with each other, however, on the whole, you need to test every idea you have, and not run the test on a vertical surface! Simply put, glaze is a layer of glass like substance that bonds with the clay underneath. Clay is made of silica, alumina and water. Glaze is made of mostly silica. Silica has a melting point of 1700°C and we fire to 1240°C. The silica requires a “flux” to help it melt at the lower temperature. Fluxes can be all sorts of chemicals – a common one is calcium – calcium has a melting point of 2500°C, however, together they both melt at a much lower temperature! Colourants are metal oxides like cobalt (blue), chrome (green through black), copper (green, blue, even red!), manganese (black, purple and pink) iron (red brown), etc. Different chemicals in the glaze can have dramatic effects. for example, barium carbonate (which we don’t use) turns manganese bright pink! Other elements can turn manganese dioxide brown, blue, purple and reddish brown. Manganese dioxide is a flux in and of itself as well. So, glazes that get their black and purple colours, often interact with other glazes and RUN! Our mirror black is a good example – it mixes really well with many glazes because it fluxes them – causes them to melt faster. It will also bring out many beautiful colours in the glazes because it’s black colouring most definitely comes from manganese dioxide! Glaze chemistry is a whole subject on it’s own! We use commercial Mayco glazes on purpose – for their huge range of colour possibilities, stability, cool interactions, artistic freedom with the ability to easily brush the glazes on and ease of use. We currently have almost 50 glazes on hand! A major project is to test the interactions of all glazes with each other. That is 2,500 test tiles!!!! I’m going to make the wall behind the wheels the feature wall of pretty colours! Step Seven – Glaze (Gloss or sometimes called “Glost”) Firing Most of the time this is the final stage of making your creation (but not always!) The glaze kiln goes to 1240°C. This is called cone 6, or midrange. It is the low end of stoneware temperatures. Stoneware clays and glazes are typically fired at cone 8 – 10, that is 1260 – 1290°C. The energy requirement to go from 1240°C to 1280°C is almost a 30% more! Our clay is formulated to vitrify (mature, turn “glass-like”) at 1240°, as are our glazes. A glaze kiln take around 12 hours to reach temperature and two to three days to cool down. Sometimes a third firing process is required – this is for decoration that is added to work after the glaze firing. For example – adding precious metals and lustres. this firing temperature is usually around 600 – 800°C depending upon the techniques being used. There are many students interested in gold and silver trims – we will be doing this third type of firing soon! After firing your work will be in the student finished work shelves. Remember to pay for it before you head out the door! There is a small extra charge for using porcelain clay (it’s more than twice the price of regular clay), and for any third firing process! Once your work has been fired it can not turn back into clay for millennia – so don’t fire it if you don’t like it! Put it in the bucket for recycling. https://firebirdstudios.com.au/the-process-of-making-pottery/Ceramics have evolved over thousands of years.Earthenware dessert plate, cream colour. Made by Alfred Meakin, England. Backstamped ‘Alfred Meakin England’. flagstaff hill, warrnambool, shipwrecked-coast, flagstaff-hill, flagstaff-hill-maritime-museum, maritime-museum, shipwreck-coast, flagstaff-hill-maritime-village, alfred meakin, ceramics, earthenware, kitchenware -
 Flagstaff Hill Maritime Museum and Village
Domestic object - Jug
The Process of Making Pottery Decorating, Firing, Glazing, Making, Technical There is a rhythm and flow to clay. It can’t be done all at once! Even the making process! It can take weeks to get everything done, especially if you can only work on your pottery once a week! Even though we have three hour classes, it’s often just not enough time! Here is an overview of some of the processes so you have a bit more grasp on some of the technical stuff! Step One – Design There are SO many ideas out there for making stuff in clay! From delicate porcelain jewellery, through to heavy sculptural work and everything in between. Deciding your direction is sometimes not that easy – when you first start, try everything, you will naturally gravitate to the style that you enjoy! The options and variations are endless and can get a wee bit overwhelming too! Check in with me before you start to ensure your ideas will work, what order you might do things, how you could achieve the look you are seeking and any other technical data required! Step Two – Making Clay is thixotropic. This means that as you work with it, the clay first gets sloppier and wetter, before is begins to dry in the atmosphere. For most things, you simply can’t do all parts of the project at once. An example of work order might look like: Get last weeks work out from the shelves Prepare clay for today’s work – roll your clay, prepare balls for throwing, make the first stage of a pinch pot) Clean up last week’s work and put it on the shelf for bisque firing Check that you have any glazing to do – and do enough of it that you will have time to finish your main project Do the next step of your next project – there might be a further step that can’t be complete immediately, in that case, wrap your work well and put onto the shelves. Letting your work rest for a while can really help keep your work clean and professional looking. Many things require bagging under plastic to keep it ready for work the next week – put your name on the outside of the bag so you can find your work easily. We have stickers and markers. Consider how you want to decorate your work – coloured slip can be applied at a fairly wet stage (remembering that it will make your work even wetter!). Trying to apply slip to dry clay won’t work! If you want to do sgraffito – you will need to keep the work leather hard (a state of dryness where you can still work the clay with a little effort and a little water and care). Step Three – Drying Most of the time your work can go into the rack uncovered to let it dry out for the following week. If you want to continue forming or shaping you will need to double bag your work – put your work on a suitable sized bat and put the bat in a bag so the base of the bag is under the bat, then put another bag over the top of the work and tuck the top of the bag under the bat. If you want to trim (or turn) your thrown work the following week, it should also be double bagged. If your work is large, delicate, or of uneven thicknesses, you should lightly cover your work for drying. When considering the drying process, bare in mind the weather, humidity and wind! The hotter and dryer, the faster things dry and work can dry unevenly in the shelves – this can lead to cracking – another time to lightly cover your work for drying. Step Four – Trimming and Cleaning Up Your work is dry! It is called greenware now and it is at it’s most fragile! Handle everything with two hands. I often refer to soft hands – keep everything gentle and with your fingers spread as much as possible. Try to not pick up things like plates too much, and always with both hands! Before your work can be bisque fired it should be “cleaned up”. You work won’t go into the kiln if it has sharp edges – when glazed, sharp edges turn into razor blades! Use a piece of fly wire to rub the work all over – this will scratch a little so be light handed. Use a knife or metal kidney to scrape any areas that require a bit more dynamic treatment than the fly wire offers! Finally, a very light wipe over with a slightly damp sponge can help soften and soothe all of your edges and dags! Trimming thrown work: If you are planning to trim (or turn) your thrown work (and you should be), make sure you bag it well – your work should be leather hard to almost dry for easiest trimming. Use this step to finish the work completely – use a metal kidney to polish the surface, or a slightly damp sponge to give a freshly thrown look. Wipe the sponge around the rim after trimming, and check the inside of the pot for dags! Trimming slip cast work: Usually I will trim the rims of your work on the wheel the following day to make that stage easier, however you will still need to check your work for lumps and bumps. Last but not least – check that your name is still clearly on the bottom of your work. Step Five – Bisque Firing When the work is completely dry it can go into the bisque kiln. The bisque kiln is fired to 1000°C. This process burns off the water in the clay as well as some of the chemically bound water. The structure of the clay is not altered that much at this temperature. Inside the bisque kiln, the work is stacked a little, small bowl inside a larger bowl and onto a heavy plate. Smaller items like decorations or drink coasters might get stacked several high. Consideration is paid to the weight of the stack and shape of the work. A bisque kiln can fire about one and a half times the amount of work that the glaze kiln can fire. The firing takes about 10 hours to complete the cycle and about two days to cool down. Once it has been emptied the work is placed in the glaze room ready for you to decorate! Step Six – Glazing Decorating your work with colour can be a lot of fun – and time consuming! There are three main options for surface treatment at this stage: Oxide Washes Underglazes Glazes Washes and underglazes do not “glaze” the work – It will still need a layer of glaze to fully seal the clay (washes don’t need glaze on surfaces not designed for food or liquid as they can gloss up a little on their own). Underglazes are stable colourants that turn out pretty much how they look in the jar. They can be mixed with each other to form other colours and can be used like water colours to paint onto your work. Mostly they should have a clear glaze on top to seal them. Oxides are a different species – the pink oxide (cobalt) wash turns out bright blue for instance. They don’t always need a glaze on top, and some glazes can change the colour of the wash! The glazes need no other “glaze” on top! Be careful of unknown glaze interactions – you can put any combination of glaze in a bowl or on a plate, but only a single glaze on the outside of any vertical surface! Glazes are a chemical reaction under heat. We don’t know the exact chemicals in the Mayco glazes we use. I can guess by the way they interact with each other, however, on the whole, you need to test every idea you have, and not run the test on a vertical surface! Simply put, glaze is a layer of glass like substance that bonds with the clay underneath. Clay is made of silica, alumina and water. Glaze is made of mostly silica. Silica has a melting point of 1700°C and we fire to 1240°C. The silica requires a “flux” to help it melt at the lower temperature. Fluxes can be all sorts of chemicals – a common one is calcium – calcium has a melting point of 2500°C, however, together they both melt at a much lower temperature! Colourants are metal oxides like cobalt (blue), chrome (green through black), copper (green, blue, even red!), manganese (black, purple and pink) iron (red brown), etc. Different chemicals in the glaze can have dramatic effects. for example, barium carbonate (which we don’t use) turns manganese bright pink! Other elements can turn manganese dioxide brown, blue, purple and reddish brown. Manganese dioxide is a flux in and of itself as well. So, glazes that get their black and purple colours, often interact with other glazes and RUN! Our mirror black is a good example – it mixes really well with many glazes because it fluxes them – causes them to melt faster. It will also bring out many beautiful colours in the glazes because it’s black colouring most definitely comes from manganese dioxide! Glaze chemistry is a whole subject on it’s own! We use commercial Mayco glazes on purpose – for their huge range of colour possibilities, stability, cool interactions, artistic freedom with the ability to easily brush the glazes on and ease of use. We currently have almost 50 glazes on hand! A major project is to test the interactions of all glazes with each other. That is 2,500 test tiles!!!! I’m going to make the wall behind the wheels the feature wall of pretty colours! Step Seven – Glaze (Gloss or sometimes called “Glost”) Firing Most of the time this is the final stage of making your creation (but not always!) The glaze kiln goes to 1240°C. This is called cone 6, or midrange. It is the low end of stoneware temperatures. Stoneware clays and glazes are typically fired at cone 8 – 10, that is 1260 – 1290°C. The energy requirement to go from 1240°C to 1280°C is almost a 30% more! Our clay is formulated to vitrify (mature, turn “glass-like”) at 1240°, as are our glazes. A glaze kiln take around 12 hours to reach temperature and two to three days to cool down. Sometimes a third firing process is required – this is for decoration that is added to work after the glaze firing. For example – adding precious metals and lustres. this firing temperature is usually around 600 – 800°C depending upon the techniques being used. There are many students interested in gold and silver trims – we will be doing this third type of firing soon! After firing your work will be in the student finished work shelves. Remember to pay for it before you head out the door! There is a small extra charge for using porcelain clay (it’s more than twice the price of regular clay), and for any third firing process! Once your work has been fired it can not turn back into clay for millennia – so don’t fire it if you don’t like it! Put it in the bucket for recycling. https://firebirdstudios.com.au/the-process-of-making-pottery/The form of the jug has been in use for many centuries.Stoneware jug. Two tone brown glaze with pierced lip behind spout. Spout chipped.None.flagstaff hill, warrnambool, shipwrecked-coast, flagstaff-hill, flagstaff-hill-maritime-museum, maritime-museum, shipwreck-coast, flagstaff-hill-maritime-village, jug, ceramic jug -
 Eltham District Historical Society Inc
Magazine, Sun News-Pictorial, Bush Fires: A pictorial survey of Victoria's most tragic week, January 8-15, 1939, 1939
THE WEEK REVIEWED (Article; Bush Fires: A pictorial survey of Victoria's most tragic week, January 8-15, 1939. Published in aid of the Bush Fire Relief Fund by the Sun News-Pictorial in co-operation with its newsagents, pp2-3) THE fiercest bush fires Australia has known since its discovery are quiescent at the moment, and Victoria, in the comparative coolness of the change which came with rain on Sunday night, has begun·to count its losses. In the fiery eight days, from Sunday to Sunday, at least sixty-six men, women and children have lost their lives in forest fires, or have succumbed to burns and shock; many others have died from heat; and several serious cases of burns are being treated in hospitals. Two babies in Narrandera district have died, and ten others are in hospital, because of milk soured by the record temperatures of those eight days. Forest damage totals at least a million pounds, and incalculable damage has been done to the seedlings which were to have been the forests of the future. Water conservation will be seriously affected by the silting-up of reservoirs and streams from which protective timber has been taken by the all-engulfing flames. More than a thousand houses have been destroyed, and these, with 40 mills, and schools, post-offices, churches, and other buildings, represent a loss of at least half a million. At least 1500 are homeless. For their aid, money raised in appeals has now passed the £50,000 mark, and the biggest relief organisation ever set up in peace time has swung into operation. The First Hint Victoria's first hint of what was to come appeared on Sunday, January 8, when most parts of the State awoke to find a blistering day awaiting. At 12.20 p.m., when the thermometer reached its highest for the day, 109.6 degrees, the first fire victims were at that moment going to their death on a bush track five feet wide off the main road to Narbethong. They were the forestry officers Charles Isaac Demby and John Hartley Barling, who went to warn Demby of his danger when he parted from his companions, and was himself surrounded by the treacherous fire. It was not until 8 o'clock next morning that the tragic news was flashed throughout the State. Searchers found the two charred bodies close together, one seeking protection in the nook of two logs. Barling's watch had stopped at 1.20. In the meantime, tragedy was spreading its cloak. By Monday, big fires were raging at Toolangi, Erica, Yallourn, Monbulk, Frankston, Dromana, Drouin South, Glenburn, and Blackwood, with smaller outbreaks at many other centres. In the ensuing week, while women and children were evacuated as fast as the flames would permit, Erica-scene of the 1926 fire disaster-thrice escaped doom by a change of wind. Indeed, those who have been in the fire country these past days say that the numbers of times a change of wind has saved towns from destruction is amazing. In the towns they speak of miracles. Monday's Miracles The escapes from Monett's Mill at Erica and from the Hardwood Company's Mill at Murrindindi, near where Demby and Barling went to their death, were Monday's miracles. Twenty came out alive from each mill. At the first a 60ft. dugout provided an oven-like refuge; at the second, 12 women and children survived in the smoke-filled gloom of a three-roomed cottage while their eight men, their clothes sometimes afire, poured water on the wooden walls. Three houses out of ten remained when the fire had passed. Record Temperatures Sunday had been the hottest Melbourne day for 33 years; Monday dropped to a 76.1 degree maximum; but Tuesday dawned hotter than ever, the mercury reaching 112.5. By now rumor was racing ahead of fact; whole towns were being reported lost; the alarm was raised for scores of missing persons. But fact soon overtook rumor, and within a few days the staggering toll began to mount to a figure beyond the wildest imaginings of the panic-stricken. Six died from heat on this torrid Tuesday, and the fires spread in a wide swathe from south-west to north-east across the State. Fish died in shallow streams. A curtain of smoke hid the sky from all Victoria, and hung far out to sea. It alarmed passengers on ships. On the Ormonde, on the voyage to Sydney from Burnie, women ran on deck, believing fire had broken out in the hold. Days later the smoke reached New Zealand. In Melbourne thousands of fire-volunteers were leaving in cars: vans, motor-buses-anything reliable on wheels-to aid the country in its grim fight. In the fires at Rubicon and. Narbethong, seventeen were facing death this day. But not till Wednesday, when Melbourne breathed again in a cool change, while the country still sweltered in temperatures up to 117 degrees, did the news come through the tree blocked roads. A woman and her little daughter, trapped on the road, were among those who died. Their bodies, and those of menfolk with them, were found strewn out at intervals along the road, where the furnace of the surrounding fire had dropped them in their tracks as they ran. Twelve died at a Rubicon mill, five on the road at Narbethong. At Alexandra, not far distant, a baby was born while the fires raged, and stretcher-bearers brought in the injured. On Thursday the State Government voted £5000 for the relief of fire victims. The Governor (Lord Huntingfield) and the Lord Mayor (Cr. Coles) visited some of the stricken areas, and dipped into their pockets personally. Later, the City Council, too, voted £5000. Friday, The 13th Friday, the Thirteenth, justified its evil name. A blistering northerly came early in the morning, presaging destruction, and forcing the mercury to a new record of 114 degrees. Racing fires killed at least ten in those terrible 12 hours. Four children were engulfed in the furnace at Colac. Panic drove them, uncontrollable, into the smoke-filled road when the fire raced down behind their home. They choked to death. In other parts fires were joining to make fronts of scores of miles. Kinglake was being menaced on two fronts, £60,000 worth of timber was going up in smoke in Ballarat district. Warburton was surrounded. Residents at Lorne, favoured resort, were being driven to the sea-front by a fire which destroyed at least 20 homes. Healewille. with flames visible from the town at one stage, was in a trough between two fires which burned four guest-houses, seven homes and left its surrounding beauty-spots wastes of bowed-over, blackened tree-fern fronds; with its famous Sanctuary, however, intact. Most of Omeo was destroyed this black day: Noojee. while 200 residents crouched in the river, was being reduced to a waste of buckled iron and smoking timber; Erica was once again saved by a change of wind. Beneath a pall of smoke, the Rubicon victims were buried at Alexandra. Friday night and the early hours of Saturday saw the streets of beleagured towns strewn with exhausted fire-fighters. Their flails beside them, ready for the next call, they lay where exhaustion overtook them-on footpaths, beside lamp-posts, in gutters, in cars, under trucks. Saturday's dawn brought clear skies and lower temperatures in many parts, and from the burnt-out areas came a great rush of tragic reports. The death-roll rushed past the fifty mark with incredible speed. Some had been trapped on roads, others at mills; some, after burying their treasures, had clung too long to the places they had made their homes for many years. Four men lost their lives because one went back for his dog. By Sunday, when the first of the saving rain came, nearly another score of names had been added to the list.Newspaper magazine, 48 pages (incl. covers). Fully digitised and searchable PDFPublished in aid of the Bush Fire Relief Fund by the Sun News-Pictorial in co-operation with its newsagents.bushfires, 1939 bushfires, black friday, warrandyte -
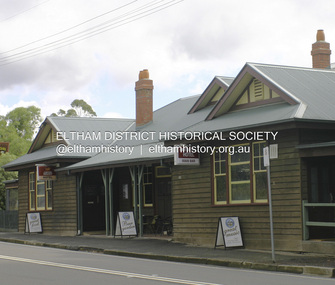 Eltham District Historical Society Inc
Photograph - Digital Photograph, Alan King, Panton Hill Hotel, 27 March 2008
Today’s Panton Hill Hotel was built around 1920. Published: Nillumbik Now and Then / Marguerite Marshall 2008; photographs Alan King with Marguerite Marshall.; p61 Panton Hill was originally known as Kingstown, and consisted of only one hotel when the Orams Reef was discovered in 1859. Kingstown was a quartz mining centre and many old mine shafts remain in the area. Orams Reef was one of the first reefs with a rich find of gold in the area. The Hotel Francais, which had been operating in 1861, was well situated on the way to Queenstown (later St Andrews). So was Herr Hirt’s Hotel and store at Smiths Gully. The Kingstown hotel, known as the Frenchman’s and in 1864 as the Hotel de France, was run by a Monsieur Emile Hude and his wife Jeanne, and known for its good food. They hosted social events, business conventions and debates, attracting patrons from as far as Melbourne. The hotel’s name was changed to Panton Hill Hotel in 1905. In 1883 Charles Caudwell built another hotel nearby, possibly in Long Gully Road,3 which it is thought, was burnt down early last century. Today’s Panton Hill Hotel, built around 1920, is the only one of the cluster of buildings in the main road, not to date from around the turn of last century. It was severely damaged by fire in 2003, then underwent extensive alterations. It is the township’s only hotel and is an example of a modest hotel building exterior, constructed early last century. In its early days the hotel also housed the first post office, newsagency and store. Orams Reef yielded a total of £100,000, and fossikers also found alluvial gold in the creeks and gullies, but there is no record of the total value of their finds. Gold greatly increased the Panton Hill population, which peaked between 1865 and 1885. On holidays large sports meetings were held with wood chopping contests and foot races and the day would end with a ball. Miners came from various countries to seek their fortune, including many from China. The Chinese became unpopular however, and gradually left the district, although some stayed and grew and sold vegetables.5 Panton Hill was named after Joseph Panton, who in 1862 was appointed Police Magistrate for the Woods Point, Heidelberg and Yarra districts. Panton was an outstanding man, who in 1852, was Commissioner of Crown Lands and Assistant Commissioner of Goldfields at Bendigo. In 1874 he was promoted to Chief Magistrate for the Melbourne Police. Panton was also an artist, becoming president of the Victorian Arts Society in 1888, and in 1913, president of the Royal Geographical Society. Despite Panton Hill’s prosperity, it still lacked many services as poor roads made access to Melbourne difficult. A horse-drawn mail coach travelled to Melbourne until 1890, when the railway came to Heidelberg. The nearest doctor was at Yarra Glen or Heidelberg, and the Indian hawker Singh’s annual visit was very welcome. A miner’s shack opposite the school was used as a post office. Today’s general store and post office in the main road dates from early last century, and has changed considerably. While most people searched for gold, the more enterprising ones established farms to feed the diggers. Farmers grew wheat, barley and oats, and sent animal skins to the Eltham tannery, to make furs in Melbourne. As gold became scarce from around 1880, miners took up farming on 19 to 20 acre (8ha) allotments. The first settlers in Cherry Tree Road included Purcell, Smith, Owens, Hughes and Shillinglaw. By 1900 all the land had been taken up around Panton Hill and Hurstbridge. The orchards in Panton Hill and the wider district, particularly of apple and pear, were very successful, and made Panton Hill a cohesive and successful community. About 1914 the Moores built the first cool-store and refrigeration plant at their orchard in Cherry Tree Road. Many settlers planted vineyards and made high quality wine, but in 1922 the blight destroyed them.This collection of almost 130 photos about places and people within the Shire of Nillumbik, an urban and rural municipality in Melbourne's north, contributes to an understanding of the history of the Shire. Published in 2008 immediately prior to the Black Saturday bushfires of February 7, 2009, it documents sites that were impacted, and in some cases destroyed by the fires. It includes photographs taken especially for the publication, creating a unique time capsule representing the Shire in the early 21st century. It remains the most recent comprehenesive publication devoted to the Shire's history connecting local residents to the past. nillumbik now and then (marshall-king) collection, panton hill hotel -
 National Wool Museum
Textile - Children's Jumper, Kathryn Knitwear, c.1953-1965
Kathryn Knitwear, founded by Robert Blake, manufactured high quality children’s knitwear in Melbourne from the 1940s – 1980s. Robert Blake began manufacturing children’s knitwear in his bedroom in Strathmore using a hand powered machine in the late 1940s. The operation moved to Ascot Vale and Essendon, before eventually establishing a factory in Moonee Ponds in the early 1950s. The business continued to expand, necessitating a move to a new factory in Broadmeadows. By 1962, the Broadmeadows factory was producing an average of 20,000 garments per month, which increased to 24,000 by 1964. Robert Blake’s Son, Brendan recalls that “The Kathryn brand was famous around Australia, anywhere children needed to keep warm and dress smartly. It also won a number of wool fashion awards”, including the 1969 Wool Awards, which was held by the Australian Wool Bureau and published in Women’s Weekly. The Kathryn range was designed for durability, comfort and care, without sacrificing style. They used patterning techniques that increase stretchiness, comfort and fit, as well as integrating decorative elements into the fabric to prevent them from being bulky, uncomfortable or tight. Making longevity of style a priority, Brendan Blake remembers that “there was one particular garment that was in the range for at least thirty years”. He also recalls “In the past, when women have found out that I was associated with Kathryn Knitwear, they would often relate to me the story of a garment they had purchased or received as a gift and, when their child had grown out of it, they would hand it on to another child. Several ladies have told me of purchasing garments for their daughters’ glory box, or saving a particular garment after their daughter had grown out of it. Brendan Blake: “At the peak of their operation they employed approximately two hundred people, mainly women and girls. A family would often seek to send their daughter to work in this company because they knew they would be looked after and safe. One lady wrote to me telling me that working at the Moonee Ponds Factory prior to getting married was the happiest time of her life.” In 1963, workers at the Kathryn factory earned £13 per week, which was 8 shillings and 8 pence higher than the minimum weekly wage for female workers in the textile manufacturing industry (£12 11s 4d). By 1970, the Kathryn Knitwear brand expanded from children’s knitwear into womenswear under the brand name ‘Lady Kathryn’, and for boys and men under ‘Robert Blake’. Continuing to diversify their distribution, they also began exporting ‘Kathryn’ garments to New Zealand, the Pacific Islands, and Japan. ‘Kathryn Knitwear’ was well-known for their early adoption of modern materials and techniques that had broad appeal to their customer base. This is shown in their early use of the acrylic fibre ‘Orlon’ in the 50s and 60s and ‘Superwash’ wool in the 1970s. Many of Kathryn Knitwear’s styles, particularly those that were long running staples of the brand, were available in both wool and Orlon to suit the consumer’s preference. Wool has been renowned for its excellent properties for thousands of years, by people from all over the world. Not only good for thick winter woollens, it can help keep you cool in summer, as well as being durable and resistant to water, fire, ultraviolet light, stains and odour. Far from the humble origins of one man in his bedroom with a hand-cranked machine; at its closure in 1980, the Broadmeadows factory of ‘Kathryn’ housed more than 100 machines, including 53 sewing machines and 45 knitting machines. Robert Blake was “a passionate advocate for wool and Australian Made” throughout his whole life. A strong thread that ties through the lifespan of Robert Blake and Kathryn Knitwear is a balance between adopting new innovations without sacrificing the core values of durability, comfort, care and style that had made the brand so well known. Their legacy forms an integral part of both Australian social and manufacturing history.Red children's wool jumper with green and white geometric tartan/plaid pattern on front. Has long sleeves with ribbed cuffs and ribbed crew neck and closes with four red plastic buttons at back neck. Coloured pattern is worked in lines on top of finished fabric in surface crochet in pattern of green, white, green[white label at back neck with blue stitching] ALL WOOLknitwear, clothing, children's clothing, jumper, manufacturing, fashion textile production, machine knitting -
 National Wool Museum
Textile - Children's Jumper, Kathryn Knitwear, c.1970
Kathryn Knitwear, founded by Robert Blake, manufactured high quality children’s knitwear in Melbourne from the 1940s – 1980s. Robert Blake began manufacturing children’s knitwear in his bedroom in Strathmore using a hand powered machine in the late 1940s. The operation moved to Ascot Vale and Essendon, before eventually establishing a factory in Moonee Ponds in the early 1950s. The business continued to expand, necessitating a move to a new factory in Broadmeadows. By 1962, the Broadmeadows factory was producing an average of 20,000 garments per month, which increased to 24,000 by 1964. Robert Blake’s Son, Brendan recalls that “The Kathryn brand was famous around Australia, anywhere children needed to keep warm and dress smartly. It also won a number of wool fashion awards”, including the 1969 Wool Awards, which was held by the Australian Wool Bureau and published in Women’s Weekly. The Kathryn range was designed for durability, comfort and care, without sacrificing style. They used patterning techniques that increase stretchiness, comfort and fit, as well as integrating decorative elements into the fabric to prevent them from being bulky, uncomfortable or tight. Making longevity of style a priority, Brendan Blake remembers that “there was one particular garment that was in the range for at least thirty years”. He also recalls “In the past, when women have found out that I was associated with Kathryn Knitwear, they would often relate to me the story of a garment they had purchased or received as a gift and, when their child had grown out of it, they would hand it on to another child. Several ladies have told me of purchasing garments for their daughters’ glory box, or saving a particular garment after their daughter had grown out of it. Brendan Blake: “At the peak of their operation they employed approximately two hundred people, mainly women and girls. A family would often seek to send their daughter to work in this company because they knew they would be looked after and safe. One lady wrote to me telling me that working at the Moonee Ponds Factory prior to getting married was the happiest time of her life.” In 1963, workers at the Kathryn factory earned £13 per week, which was 8 shillings and 8 pence higher than the minimum weekly wage for female workers in the textile manufacturing industry (£12 11s 4d). By 1970, the Kathryn Knitwear brand expanded from children’s knitwear into womenswear under the brand name ‘Lady Kathryn’, and for boys and men under ‘Robert Blake’. Continuing to diversify their distribution, they also began exporting ‘Kathryn’ garments to New Zealand, the Pacific Islands, and Japan. ‘Kathryn Knitwear’ was well-known for their early adoption of modern materials and techniques that had broad appeal to their customer base. This is shown in their early use of the acrylic fibre ‘Orlon’ in the 50s and 60s and ‘Superwash’ wool in the 1970s. Many of Kathryn Knitwear’s styles, particularly those that were long running staples of the brand, were available in both wool and Orlon to suit the consumer’s preference. Wool has been renowned for its excellent properties for thousands of years, by people from all over the world. Not only good for thick winter woollens, it can help keep you cool in summer, as well as being durable and resistant to water, fire, ultraviolet light, stains and odour. Far from the humble origins of one man in his bedroom with a hand-cranked machine; at its closure in 1980, the Broadmeadows factory of ‘Kathryn’ housed more than 100 machines, including 53 sewing machines and 45 knitting machines. Robert Blake was “a passionate advocate for wool and Australian Made” throughout his whole life. A strong thread that ties through the lifespan of Robert Blake and Kathryn Knitwear is a balance between adopting new innovations without sacrificing the core values of durability, comfort, care and style that had made the brand so well known. Their legacy forms an integral part of both Australian social and manufacturing history.Grey wool Jumper with Blue and grey cable design on front. Vertical cable pattern is two sets of intertwining grey blue cable pairs on a purl stitch background in alternating rows of blue and grey. Front panel of jumper has five cable panels separated by smooth stocking stitch panels. Jumper has long sleeves and crew neck with thick ribbed collar and cuffs. Style B/110, Colourway Silver/Denim, Size 8 .2) 2 Sample tags stapled together with manufacturing information, including sizes and colours available, as well as knit swatch samples for colourways Brown/Woodgrain, Denim/Blue Shadow and Pebble/Oyster.1) [white label at back neck with green and black printed writing] ROBERT BLAKE Size 8 / knitwear HEIGHT 130cm MADE IN AUSTRALIA .2) [blue sample label] STYLE B/110 Crew Neck Wool Pullover SIZES: 2 4 6 8 10 PRICE: $10 [amended to $11 in blue pen] $[written over in blue pen so as to be illegible] [handwritten in blue pen] $12.55 SIZES: 12 14 PRICE: [printed] $12.30 [handwritten over top in blue pen] $13.15 COLORS: Silver/Denim, Brown/Woodgrain, Denim/Blue Shadow, Pebble/Oyster. Dec on Del. [cream brand label] [OBVERSE] ROBERT BLAKE [REVERSE] ROBERT BLAKE KNITWEAR MELBOURNE, AUSTRALIAknitwear, clothing, children's clothing, jumper, manufacturing, fashion textile production, machine knitting -
 National Wool Museum
Textile - Children's Jumper, Kathryn Knitwear, c.1970
Kathryn Knitwear, founded by Robert Blake, manufactured high quality children’s knitwear in Melbourne from the 1940s – 1980s. Robert Blake began manufacturing children’s knitwear in his bedroom in Strathmore using a hand powered machine in the late 1940s. The operation moved to Ascot Vale and Essendon, before eventually establishing a factory in Moonee Ponds in the early 1950s. The business continued to expand, necessitating a move to a new factory in Broadmeadows. By 1962, the Broadmeadows factory was producing an average of 20,000 garments per month, which increased to 24,000 by 1964. Robert Blake’s Son, Brendan recalls that “The Kathryn brand was famous around Australia, anywhere children needed to keep warm and dress smartly. It also won a number of wool fashion awards”, including the 1969 Wool Awards, which was held by the Australian Wool Bureau and published in Women’s Weekly. The Kathryn range was designed for durability, comfort and care, without sacrificing style. They used patterning techniques that increase stretchiness, comfort and fit, as well as integrating decorative elements into the fabric to prevent them from being bulky, uncomfortable or tight. Making longevity of style a priority, Brendan Blake remembers that “there was one particular garment that was in the range for at least thirty years”. He also recalls “In the past, when women have found out that I was associated with Kathryn Knitwear, they would often relate to me the story of a garment they had purchased or received as a gift and, when their child had grown out of it, they would hand it on to another child. Several ladies have told me of purchasing garments for their daughters’ glory box, or saving a particular garment after their daughter had grown out of it. Brendan Blake: “At the peak of their operation they employed approximately two hundred people, mainly women and girls. A family would often seek to send their daughter to work in this company because they knew they would be looked after and safe. One lady wrote to me telling me that working at the Moonee Ponds Factory prior to getting married was the happiest time of her life.” In 1963, workers at the Kathryn factory earned £13 per week, which was 8 shillings and 8 pence higher than the minimum weekly wage for female workers in the textile manufacturing industry (£12 11s 4d). By 1970, the Kathryn Knitwear brand expanded from children’s knitwear into womenswear under the brand name ‘Lady Kathryn’, and for boys and men under ‘Robert Blake’. Continuing to diversify their distribution, they also began exporting ‘Kathryn’ garments to New Zealand, the Pacific Islands, and Japan. ‘Kathryn Knitwear’ was well-known for their early adoption of modern materials and techniques that had broad appeal to their customer base. This is shown in their early use of the acrylic fibre ‘Orlon’ in the 50s and 60s and ‘Superwash’ wool in the 1970s. Many of Kathryn Knitwear’s styles, particularly those that were long running staples of the brand, were available in both wool and Orlon to suit the consumer’s preference. Wool has been renowned for its excellent properties for thousands of years, by people from all over the world. Not only good for thick winter woollens, it can help keep you cool in summer, as well as being durable and resistant to water, fire, ultraviolet light, stains and odour. Far from the humble origins of one man in his bedroom with a hand-cranked machine; at its closure in 1980, the Broadmeadows factory of ‘Kathryn’ housed more than 100 machines, including 53 sewing machines and 45 knitting machines. Robert Blake was “a passionate advocate for wool and Australian Made” throughout his whole life. A strong thread that ties through the lifespan of Robert Blake and Kathryn Knitwear is a balance between adopting new innovations without sacrificing the core values of durability, comfort, care and style that had made the brand so well known. Their legacy forms an integral part of both Australian social and manufacturing history.Brown and Grey children’s jacket with brown accents at pockets and shoulder, centre front zip, curved pocket detail.Style B/117, Colourway Woodgrain/Pebble, Size 8 .2) Sample tags stapled together with manufacturing information, including sizes and colours available, as well as knit swatch samples for colourways Green/Silver, Burgundy/Denim, Navy/Denim, and Rust/Pebble.1) [white label at back neck with green and black printed writing] ROBERT BLAKE Size 8 / knitwear HEIGHT 130cm MADE IN AUSTRALIA .2 [blue sample label] STYLE B/117 Jacket. Zip. Birdseye. Wool. SIZES: 2 4 6 8 10 PRICE: $11.75 [amended to $12.80 in blue pen] $13.85 [amended to $15.05 in blue pen] SIZES: 12 14 PRICE: [printed] $14.95 [amended to $16.15 in blue pen] COLORS: Woodgrain/Pebble Green/Silver [drawn through in black pen] Burgundy/Denim, Navy/Denim, Rust/Pebble Dec on Del. [cream brand label] [OBVERSE] ROBERT BLAKE [REVERSE] ROBERT BLAKE KNITWEAR MELBOURNE, AUSTRALIAknitwear, clothing, children's clothing, jumper, manufacturing, fashion textile production, machine knitting, children's knitwear -
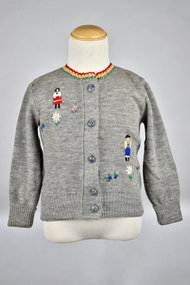 National Wool Museum
Textile - Children's Cardigan, Kathryn Knitwear, c.1965
Kathryn Knitwear, founded by Robert Blake, manufactured high quality children’s knitwear in Melbourne from the 1940s – 1980s. Robert Blake began manufacturing children’s knitwear in his bedroom in Strathmore using a hand powered machine in the late 1940s. The operation moved to Ascot Vale and Essendon, before eventually establishing a factory in Moonee Ponds in the early 1950s. The business continued to expand, necessitating a move to a new factory in Broadmeadows. By 1962, the Broadmeadows factory was producing an average of 20,000 garments per month, which increased to 24,000 by 1964. Robert Blake’s Son, Brendan recalls that “The Kathryn brand was famous around Australia, anywhere children needed to keep warm and dress smartly. It also won a number of wool fashion awards”, including the 1969 Wool Awards, which was held by the Australian Wool Bureau and published in Women’s Weekly. The Kathryn range was designed for durability, comfort and care, without sacrificing style. They used patterning techniques that increase stretchiness, comfort and fit, as well as integrating decorative elements into the fabric to prevent them from being bulky, uncomfortable or tight. Making longevity of style a priority, Brendan Blake remembers that “there was one particular garment that was in the range for at least thirty years”. He also recalls “In the past, when women have found out that I was associated with Kathryn Knitwear, they would often relate to me the story of a garment they had purchased or received as a gift and, when their child had grown out of it, they would hand it on to another child. Several ladies have told me of purchasing garments for their daughters’ glory box, or saving a particular garment after their daughter had grown out of it. Brendan Blake: “At the peak of their operation they employed approximately two hundred people, mainly women and girls. A family would often seek to send their daughter to work in this company because they knew they would be looked after and safe. One lady wrote to me telling me that working at the Moonee Ponds Factory prior to getting married was the happiest time of her life.” In 1963, workers at the Kathryn factory earned £13 per week, which was 8 shillings and 8 pence higher than the minimum weekly wage for female workers in the textile manufacturing industry (£12 11s 4d). By 1970, the Kathryn Knitwear brand expanded from children’s knitwear into womenswear under the brand name ‘Lady Kathryn’, and for boys and men under ‘Robert Blake’. Continuing to diversify their distribution, they also began exporting ‘Kathryn’ garments to New Zealand, the Pacific Islands, and Japan. The decoration on this garment was embroidered by hand by a skilled worker at the Kathryn Knitwear factory. ‘Kathryn Knitwear’ was well-known for their early adoption of modern materials and techniques that had broad appeal to their customer base. This is shown in their early use of the acrylic fibre ‘Orlon’ in the 50s and 60s and ‘Superwash’ wool in the 1970s. Many of Kathryn Knitwear’s styles, particularly those that were long running staples of the brand, were available in both wool and Orlon to suit the consumer’s preference. Wool has been renowned for its excellent properties for thousands of years, by people from all over the world. Not only good for thick winter woollens, it can help keep you cool in summer, as well as being durable and resistant to water, fire, ultraviolet light, stains and odour. Far from the humble origins of one man in his bedroom with a hand-cranked machine; at its closure in 1980, the Broadmeadows factory of ‘Kathryn’ housed more than 100 machines, including 53 sewing machines and 45 knitting machines. Robert Blake was “a passionate advocate for wool and Australian Made” throughout his whole life. A strong thread that ties through the lifespan of Robert Blake and Kathryn Knitwear is a balance between adopting new innovations without sacrificing the core values of durability, comfort, care and style that had made the brand so well known. Their legacy forms an integral part of both Australian social and manufacturing history.Grey children’s cardigan with embroidered flowers and human figures in folk costume, and crocheted design around neck in green, yellow and red. Left panel has embroidered figure of man with blue lederhosen and yellow shirt, black shoes and hat, hat has red accent. Right front panel depicts woman wearing red skirt with white stripe, white shirt, and green headscarf with black stockings and shoes. Flowers are embroidered in pink, white and blue with green and yellow accents for stems and flower centres. Cardigan closes in front with five marbled grey plastic buttons[Label at back neck with blue lettering woven into label] KATHRYN REGD / 22 ALL WOOL CREATED BY ROBERT BLAKEchildren's knitwear, knitwear, clothing, children's clothing, cardigan, manufacturing, fashion textile production, machine knitting, embroidery, embroiderer, folk art, folk embroidery -
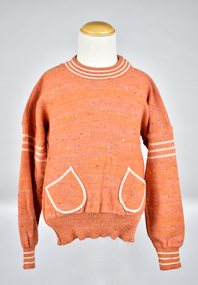 National Wool Museum
Textile - Children's Jumper, Kathryn Knitwear, c.1975
Kathryn Knitwear, founded by Robert Blake, manufactured high quality children’s knitwear in Melbourne from the 1940s – 1980s. Robert Blake began manufacturing children’s knitwear in his bedroom in Strathmore using a hand powered machine in the late 1940s. The operation moved to Ascot Vale and Essendon, before eventually establishing a factory in Moonee Ponds in the early 1950s. The business continued to expand, necessitating a move to a new factory in Broadmeadows. By 1962, the Broadmeadows factory was producing an average of 20,000 garments per month, which increased to 24,000 by 1964. Robert Blake’s Son, Brendan recalls that “The Kathryn brand was famous around Australia, anywhere children needed to keep warm and dress smartly. It also won a number of wool fashion awards”, including the 1969 Wool Awards, which was held by the Australian Wool Bureau and published in Women’s Weekly. The Kathryn range was designed for durability, comfort and care, without sacrificing style. They used patterning techniques that increase stretchiness, comfort and fit, as well as integrating decorative elements into the fabric to prevent them from being bulky, uncomfortable or tight. Making longevity of style a priority, Brendan Blake remembers that “there was one particular garment that was in the range for at least thirty years”. He also recalls “In the past, when women have found out that I was associated with Kathryn Knitwear, they would often relate to me the story of a garment they had purchased or received as a gift and, when their child had grown out of it, they would hand it on to another child. Several ladies have told me of purchasing garments for their daughters’ glory box, or saving a particular garment after their daughter had grown out of it. Brendan Blake: “At the peak of their operation they employed approximately two hundred people, mainly women and girls. A family would often seek to send their daughter to work in this company because they knew they would be looked after and safe. One lady wrote to me telling me that working at the Moonee Ponds Factory prior to getting married was the happiest time of her life.” In 1963, workers at the Kathryn factory earned £13 per week, which was 8 shillings and 8 pence higher than the minimum weekly wage for female workers in the textile manufacturing industry (£12 11s 4d). By 1970, the Kathryn Knitwear brand expanded from children’s knitwear into womenswear under the brand name ‘Lady Kathryn’, and for boys and men under ‘Robert Blake’. Continuing to diversify their distribution, they also began exporting ‘Kathryn’ garments to New Zealand, the Pacific Islands, and Japan. ‘Kathryn Knitwear’ was well-known for their early adoption of modern materials and techniques that had broad appeal to their customer base. This is shown in their early use of the acrylic fibre ‘Orlon’ in the 50s and 60s and ‘Superwash’ wool in the 1970s. Many of Kathryn Knitwear’s styles, particularly those that were long running staples of the brand, were available in both wool and Orlon to suit the consumer’s preference. Wool has been renowned for its excellent properties for thousands of years, by people from all over the world. Not only good for thick winter woollens, it can help keep you cool in summer, as well as being durable and resistant to water, fire, ultraviolet light, stains and odour. Far from the humble origins of one man in his bedroom with a hand-cranked machine; at its closure in 1980, the Broadmeadows factory of ‘Kathryn’ housed more than 100 machines, including 53 sewing machines and 45 knitting machines. Robert Blake was “a passionate advocate for wool and Australian Made” throughout his whole life. A strong thread that ties through the lifespan of Robert Blake and Kathryn Knitwear is a balance between adopting new innovations without sacrificing the core values of durability, comfort, care and style that had made the brand so well known. Their legacy forms an integral part of both Australian social and manufacturing history.Orange jumper with multicoloured heathered tweed effect, white stripe accent on neck, upper arm and sleeve cuffs, two patch pockets mounted on diagonal outlined in thread matching accent colour .2 Sample tags with manufacturing information, including sizes and colours available, as well as knit swatch samples in colourways Blue Tweed/Sky/Magnolia and Cream Tweed/Magnolia/Pine.1) [tag stitched into back neck] KATHRYN REGD PURE NEW WOOL/ SIZE 6 HEIGHT 120cm MADE IN AUSTRALIA .2) [blue sample label] STYLE 589/Pullover S.47. Wool Tweed. SIZES: 2 4 6 8 PRICE: $9.80 [amended to $10.75 in blue pen] $0.35 [handwritten in blue pen] $11.40 COLORS: Pink Tw/Ochre/Mag, Blue Tweed/Sky/Magnolia Cream Tweed/Mag/Pine. [Crossed out in black ink] March on Del.children's knitwear, children's clothing, clothing, knitwear, jumper, manufacturing, fashion textile production, machine knitting, heathered yarn, tweed yarn, flecked yarn, colourwork -
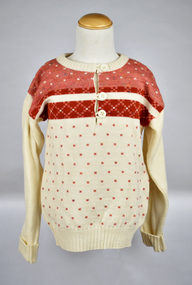 National Wool Museum
Textile - Children's Jumper, Kathryn Knitwear, c.1970
Kathryn Knitwear, founded by Robert Blake, manufactured high quality children’s knitwear in Melbourne from the 1940s – 1980s. Robert Blake began manufacturing children’s knitwear in his bedroom in Strathmore using a hand powered machine in the late 1940s. The operation moved to Ascot Vale and Essendon, before eventually establishing a factory in Moonee Ponds in the early 1950s. The business continued to expand, necessitating a move to a new factory in Broadmeadows. By 1962, the Broadmeadows factory was producing an average of 20,000 garments per month, which increased to 24,000 by 1964. Robert Blake’s Son, Brendan recalls that “The Kathryn brand was famous around Australia, anywhere children needed to keep warm and dress smartly. It also won a number of wool fashion awards”, including the 1969 Wool Awards, which was held by the Australian Wool Bureau and published in Women’s Weekly. The Kathryn range was designed for durability, comfort and care, without sacrificing style. They used patterning techniques that increase stretchiness, comfort and fit, as well as integrating decorative elements into the fabric to prevent them from being bulky, uncomfortable or tight. Making longevity of style a priority, Brendan Blake remembers that “there was one particular garment that was in the range for at least thirty years”. He also recalls “In the past, when women have found out that I was associated with Kathryn Knitwear, they would often relate to me the story of a garment they had purchased or received as a gift and, when their child had grown out of it, they would hand it on to another child. Several ladies have told me of purchasing garments for their daughters’ glory box, or saving a particular garment after their daughter had grown out of it. Brendan Blake: “At the peak of their operation they employed approximately two hundred people, mainly women and girls. A family would often seek to send their daughter to work in this company because they knew they would be looked after and safe. One lady wrote to me telling me that working at the Moonee Ponds Factory prior to getting married was the happiest time of her life.” In 1963, workers at the Kathryn factory earned £13 per week, which was 8 shillings and 8 pence higher than the minimum weekly wage for female workers in the textile manufacturing industry (£12 11s 4d). By 1970, the Kathryn Knitwear brand expanded from children’s knitwear into womenswear under the brand name ‘Lady Kathryn’, and for boys and men under ‘Robert Blake’. Continuing to diversify their distribution, they also began exporting ‘Kathryn’ garments to New Zealand, the Pacific Islands, and Japan. ‘Kathryn Knitwear’ was well-known for their early adoption of modern materials and techniques that had broad appeal to their customer base. This is shown in their early use of the acrylic fibre ‘Orlon’ in the 50s and 60s and ‘Superwash’ wool in the 1970s. Many of Kathryn Knitwear’s styles, particularly those that were long running staples of the brand, were available in both wool and Orlon to suit the consumer’s preference. Wool has been renowned for its excellent properties for thousands of years, by people from all over the world. Not only good for thick winter woollens, it can help keep you cool in summer, as well as being durable and resistant to water, fire, ultraviolet light, stains and odour. Far from the humble origins of one man in his bedroom with a hand-cranked machine; at its closure in 1980, the Broadmeadows factory of ‘Kathryn’ housed more than 100 machines, including 53 sewing machines and 45 knitting machines. Robert Blake was “a passionate advocate for wool and Australian Made” throughout his whole life. A strong thread that ties through the lifespan of Robert Blake and Kathryn Knitwear is a balance between adopting new innovations without sacrificing the core values of durability, comfort, care and style that had made the brand so well known. Their legacy forms an integral part of both Australian social and manufacturing history.Children’s jumper with fair isle pattern in shades of cream and orange. Pale orange tweed yarn on chest and shoulders is flecked throughout with red, yellow, blue and green. Vent at centre front closes with three cream plastic buttons. .2 is a swing tag with manufacturer care instructions retail tags size 8 .3 is a sample tag with manufacturing information, including sizes, prices, and colours available .4 is a swatch sample for Magnolia/Navy/Blue Tweed colourway[tag stitched into back neck] KATHRYN REGD PURE NEW WOOL/ SIZE 8 HEIGHT 190cm MADE IN AUSTRALIAchildren's knitwear, children's clothing, knitwear, clothing, jumper, manufacturing, fashion textile production, machine knitting, variegated yarn, variegated, colourwork, stranded colourwork, fair isle, fair isle colourwork, fair isle knitting -
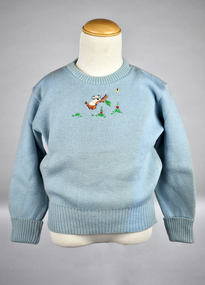 National Wool Museum
Textile - Children's Jumper, Kathryn Knitwear, c.1955-1966
Kathryn Knitwear, founded by Robert Blake, manufactured high quality children’s knitwear in Melbourne from the 1940s – 1980s. Robert Blake began manufacturing children’s knitwear in his bedroom in Strathmore using a hand powered machine in the late 1940s. The operation moved to Ascot Vale and Essendon, before eventually establishing a factory in Moonee Ponds in the early 1950s. The business continued to expand, necessitating a move to a new factory in Broadmeadows. By 1962, the Broadmeadows factory was producing an average of 20,000 garments per month, which increased to 24,000 by 1964. Robert Blake’s Son, Brendan recalls that “The Kathryn brand was famous around Australia, anywhere children needed to keep warm and dress smartly. It also won a number of wool fashion awards”, including the 1969 Wool Awards, which was held by the Australian Wool Bureau and published in Women’s Weekly. The Kathryn range was designed for durability, comfort and care, without sacrificing style. They used patterning techniques that increase stretchiness, comfort and fit, as well as integrating decorative elements into the fabric to prevent them from being bulky, uncomfortable or tight. Making longevity of style a priority, Brendan Blake remembers that “there was one particular garment that was in the range for at least thirty years”. He also recalls “In the past, when women have found out that I was associated with Kathryn Knitwear, they would often relate to me the story of a garment they had purchased or received as a gift and, when their child had grown out of it, they would hand it on to another child. Several ladies have told me of purchasing garments for their daughters’ glory box, or saving a particular garment after their daughter had grown out of it. Brendan Blake: “At the peak of their operation they employed approximately two hundred people, mainly women and girls. A family would often seek to send their daughter to work in this company because they knew they would be looked after and safe. One lady wrote to me telling me that working at the Moonee Ponds Factory prior to getting married was the happiest time of her life.” In 1963, workers at the Kathryn factory earned £13 per week, which was 8 shillings and 8 pence higher than the minimum weekly wage for female workers in the textile manufacturing industry (£12 11s 4d). By 1970, the Kathryn Knitwear brand expanded from children’s knitwear into womenswear under the brand name ‘Lady Kathryn’, and for boys and men under ‘Robert Blake’. Continuing to diversify their distribution, they also began exporting ‘Kathryn’ garments to New Zealand, the Pacific Islands, and Japan. The decoration on this garment was embroidered by hand by a skilled worker at the Kathryn Knitwear factory. ‘Kathryn Knitwear’ was well-known for their early adoption of modern materials and techniques that had broad appeal to their customer base. This is shown in their early use of the acrylic fibre ‘Orlon’ in the 50s and 60s and ‘Superwash’ wool in the 1970s. Many of Kathryn Knitwear’s styles, particularly those that were long running staples of the brand, were available in both wool and Orlon to suit the consumer’s preference. Wool has been renowned for its excellent properties for thousands of years, by people from all over the world. Not only good for thick winter woollens, it can help keep you cool in summer, as well as being durable and resistant to water, fire, ultraviolet light, stains and odour. Far from the humble origins of one man in his bedroom with a hand-cranked machine; at its closure in 1980, the Broadmeadows factory of ‘Kathryn’ housed more than 100 machines, including 53 sewing machines and 45 knitting machines. Robert Blake was “a passionate advocate for wool and Australian Made” throughout his whole life. A strong thread that ties through the lifespan of Robert Blake and Kathryn Knitwear is a balance between adopting new innovations without sacrificing the core values of durability, comfort, care and style that had made the brand so well known. Their legacy forms an integral part of both Australian social and manufacturing history.Pale Blue embroidered jumper featuring a Koala on a tree branch, with green and red foliage and a yellow butterfly embroidered on centre front chest. Jumper has long sleeves and a round collar with ribbed collar and cuffs.[Label at back neck with blue lettering woven into label] KATHRYN REGD ALL WOOL / 24 /CREATED BY ROBERT BLAKEknitwear, children's knitwear, clothing, children's clothing, jumper, manufacturing, fashion textile production, machine knitting, embroidery, embroiderer, koala, australiana -
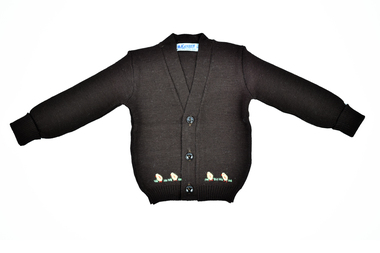 National Wool Museum
Textile - Children's Cardigan, Kathryn Knitwear, c.1960
Kathryn Knitwear, founded by Robert Blake, manufactured high quality children’s knitwear in Melbourne from the 1940s – 1980s. Robert Blake began manufacturing children’s knitwear in his bedroom in Strathmore using a hand powered machine in the late 1940s. The operation moved to Ascot Vale and Essendon, before eventually establishing a factory in Moonee Ponds in the early 1950s. The business continued to expand, necessitating a move to a new factory in Broadmeadows. By 1962, the Broadmeadows factory was producing an average of 20,000 garments per month, which increased to 24,000 by 1964. Robert Blake’s Son, Brendan recalls that “The Kathryn brand was famous around Australia, anywhere children needed to keep warm and dress smartly. It also won a number of wool fashion awards”, including the 1969 Wool Awards, which was held by the Australian Wool Bureau and published in Women’s Weekly. The Kathryn range was designed for durability, comfort and care, without sacrificing style. They used patterning techniques that increase stretchiness, comfort and fit, as well as integrating decorative elements into the fabric to prevent them from being bulky, uncomfortable or tight. Making longevity of style a priority, Brendan Blake remembers that “there was one particular garment that was in the range for at least thirty years”. He also recalls “In the past, when women have found out that I was associated with Kathryn Knitwear, they would often relate to me the story of a garment they had purchased or received as a gift and, when their child had grown out of it, they would hand it on to another child. Several ladies have told me of purchasing garments for their daughters’ glory box, or saving a particular garment after their daughter had grown out of it. Brendan Blake: “At the peak of their operation they employed approximately two hundred people, mainly women and girls. A family would often seek to send their daughter to work in this company because they knew they would be looked after and safe. One lady wrote to me telling me that working at the Moonee Ponds Factory prior to getting married was the happiest time of her life.” In 1963, workers at the Kathryn factory earned £13 per week, which was 8 shillings and 8 pence higher than the minimum weekly wage for female workers in the textile manufacturing industry (£12 11s 4d). By 1970, the Kathryn Knitwear brand expanded from children’s knitwear into womenswear under the brand name ‘Lady Kathryn’, and for boys and men under ‘Robert Blake’. Continuing to diversify their distribution, they also began exporting ‘Kathryn’ garments to New Zealand, the Pacific Islands, and Japan. The decoration on this garment was embroidered by hand by a skilled worker at the Kathryn Knitwear factory. ‘Kathryn Knitwear’ was well-known for their early adoption of modern materials and techniques that had broad appeal to their customer base. This is shown in their early use of the acrylic fibre ‘Orlon’ in the 50s and 60s and ‘Superwash’ wool in the 1970s. Many of Kathryn Knitwear’s styles, particularly those that were long running staples of the brand, were available in both wool and Orlon to suit the consumer’s preference. Wool has been renowned for its excellent properties for thousands of years, by people from all over the world. Not only good for thick winter woollens, it can help keep you cool in summer, as well as being durable and resistant to water, fire, ultraviolet light, stains and odour. Far from the humble origins of one man in his bedroom with a hand-cranked machine; at its closure in 1980, the Broadmeadows factory of ‘Kathryn’ housed more than 100 machines, including 53 sewing machines and 45 knitting machines. Robert Blake was “a passionate advocate for wool and Australian Made” throughout his whole life. A strong thread that ties through the lifespan of Robert Blake and Kathryn Knitwear is a balance between adopting new innovations without sacrificing the core values of durability, comfort, care and style that had made the brand so well known. Their legacy forms an integral part of both Australian social and manufacturing history.Brown children’s cardigan with embroidery of four baby chicks in yellow and red on green grass at bottom of front panels. Closes at centre front with three brown plastic buttons[Label at back neck with blue lettering woven into label] KATHRYN REGD / 20 ALL WOOL CREATED BY ROBERT BLAKEchildren's knitwear, children's clothing, clothing, knitwear, manufacturing, fashion textile production, machine knitting, embroidery, embroiderer, chickens, chicks, baby animals, cute animals -
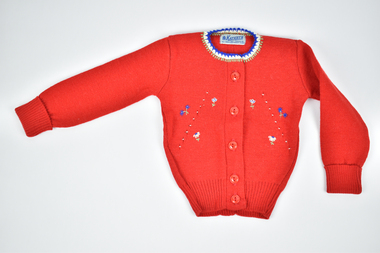 National Wool Museum
Textile - Children's Cardigan, Kathryn Knitwear, c.1965
Kathryn Knitwear, founded by Robert Blake, manufactured high quality children’s knitwear in Melbourne from the 1940s – 1980s. Robert Blake began manufacturing children’s knitwear in his bedroom in Strathmore using a hand powered machine in the late 1940s. The operation moved to Ascot Vale and Essendon, before eventually establishing a factory in Moonee Ponds in the early 1950s. The business continued to expand, necessitating a move to a new factory in Broadmeadows. By 1962, the Broadmeadows factory was producing an average of 20,000 garments per month, which increased to 24,000 by 1964. Robert Blake’s Son, Brendan recalls that “The Kathryn brand was famous around Australia, anywhere children needed to keep warm and dress smartly. It also won a number of wool fashion awards”, including the 1969 Wool Awards, which was held by the Australian Wool Bureau and published in Women’s Weekly. The Kathryn range was designed for durability, comfort and care, without sacrificing style. They used patterning techniques that increase stretchiness, comfort and fit, as well as integrating decorative elements into the fabric to prevent them from being bulky, uncomfortable or tight. Making longevity of style a priority, Brendan Blake remembers that “there was one particular garment that was in the range for at least thirty years”. He also recalls “In the past, when women have found out that I was associated with Kathryn Knitwear, they would often relate to me the story of a garment they had purchased or received as a gift and, when their child had grown out of it, they would hand it on to another child. Several ladies have told me of purchasing garments for their daughters’ glory box, or saving a particular garment after their daughter had grown out of it. Brendan Blake: “At the peak of their operation they employed approximately two hundred people, mainly women and girls. A family would often seek to send their daughter to work in this company because they knew they would be looked after and safe. One lady wrote to me telling me that working at the Moonee Ponds Factory prior to getting married was the happiest time of her life.” In 1963, workers at the Kathryn factory earned £13 per week, which was 8 shillings and 8 pence higher than the minimum weekly wage for female workers in the textile manufacturing industry (£12 11s 4d). By 1970, the Kathryn Knitwear brand expanded from children’s knitwear into womenswear under the brand name ‘Lady Kathryn’, and for boys and men under ‘Robert Blake’. Continuing to diversify their distribution, they also began exporting ‘Kathryn’ garments to New Zealand, the Pacific Islands, and Japan. The decoration on this garment was embroidered by hand by a skilled worker at the Kathryn Knitwear factory. ‘Kathryn Knitwear’ was well-known for their early adoption of modern materials and techniques that had broad appeal to their customer base. This is shown in their early use of the acrylic fibre ‘Orlon’ in the 50s and 60s and ‘Superwash’ wool in the 1970s. Many of Kathryn Knitwear’s styles, particularly those that were long running staples of the brand, were available in both wool and Orlon to suit the consumer’s preference. Wool has been renowned for its excellent properties for thousands of years, by people from all over the world. Not only good for thick winter woollens, it can help keep you cool in summer, as well as being durable and resistant to water, fire, ultraviolet light, stains and odour. Far from the humble origins of one man in his bedroom with a hand-cranked machine; at its closure in 1980, the Broadmeadows factory of ‘Kathryn’ housed more than 100 machines, including 53 sewing machines and 45 knitting machines. Robert Blake was “a passionate advocate for wool and Australian Made” throughout his whole life. A strong thread that ties through the lifespan of Robert Blake and Kathryn Knitwear is a balance between adopting new innovations without sacrificing the core values of durability, comfort, care and style that had made the brand so well known. Their legacy forms an integral part of both Australian social and manufacturing history.Red cardigan embroidered with decorative tuck stitches and floral motifs on front panel, crochet around collar in blue, white and green. Closes at centre front with 5 plastic buttons[Label at back neck with blue lettering woven into label] KATHRYN REGD ALL WOOL / 20 /CREATED BY ROBERT BLAKEchildren's knitwear, knitwear, children's clothing, clothing, cardigan, manufacturing, fashion textile production, machine knitting, embroidery, hand embroidery, floral embroidery, floral motif, tuck stitch -
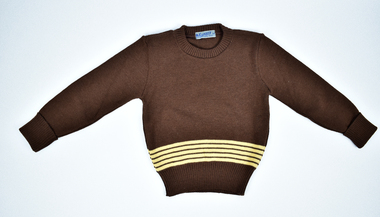 National Wool Museum
Textile - Children's Clothing Set, Kathryn Knitwear, c.1965
Kathryn Knitwear, founded by Robert Blake, manufactured high quality children’s knitwear in Melbourne from the 1940s – 1980s. Robert Blake began manufacturing children’s knitwear in his bedroom in Strathmore using a hand powered machine in the late 1940s. The operation moved to Ascot Vale and Essendon, before eventually establishing a factory in Moonee Ponds in the early 1950s. The business continued to expand, necessitating a move to a new factory in Broadmeadows. By 1962, the Broadmeadows factory was producing an average of 20,000 garments per month, which increased to 24,000 by 1964. Robert Blake’s Son, Brendan recalls that “The Kathryn brand was famous around Australia, anywhere children needed to keep warm and dress smartly. It also won a number of wool fashion awards”, including the 1969 Wool Awards, which was held by the Australian Wool Bureau and published in Women’s Weekly. The Kathryn range was designed for durability, comfort and care, without sacrificing style. They used patterning techniques that increase stretchiness, comfort and fit, as well as integrating decorative elements into the fabric to prevent them from being bulky, uncomfortable or tight. Making longevity of style a priority, Brendan Blake remembers that “there was one particular garment that was in the range for at least thirty years”. He also recalls “In the past, when women have found out that I was associated with Kathryn Knitwear, they would often relate to me the story of a garment they had purchased or received as a gift and, when their child had grown out of it, they would hand it on to another child. Several ladies have told me of purchasing garments for their daughters’ glory box, or saving a particular garment after their daughter had grown out of it. Brendan Blake: “At the peak of their operation they employed approximately two hundred people, mainly women and girls. A family would often seek to send their daughter to work in this company because they knew they would be looked after and safe. One lady wrote to me telling me that working at the Moonee Ponds Factory prior to getting married was the happiest time of her life.” In 1963, workers at the Kathryn factory earned £13 per week, which was 8 shillings and 8 pence higher than the minimum weekly wage for female workers in the textile manufacturing industry (£12 11s 4d). By 1970, the Kathryn Knitwear brand expanded from children’s knitwear into womenswear under the brand name ‘Lady Kathryn’, and for boys and men under ‘Robert Blake’. Continuing to diversify their distribution, they also began exporting ‘Kathryn’ garments to New Zealand, the Pacific Islands, and Japan. ‘Kathryn Knitwear’ was well-known for their early adoption of modern materials and techniques that had broad appeal to their customer base. This is shown in their early use of the acrylic fibre ‘Orlon’ in the 50s and 60s and ‘Superwash’ wool in the 1970s. Many of Kathryn Knitwear’s styles, particularly those that were long running staples of the brand, were available in both wool and Orlon to suit the consumer’s preference. Wool has been renowned for its excellent properties for thousands of years, by people from all over the world. Not only good for thick winter woollens, it can help keep you cool in summer, as well as being durable and resistant to water, fire, ultraviolet light, stains and odour. Far from the humble origins of one man in his bedroom with a hand-cranked machine; at its closure in 1980, the Broadmeadows factory of ‘Kathryn’ housed more than 100 machines, including 53 sewing machines and 45 knitting machines. Robert Blake was “a passionate advocate for wool and Australian Made” throughout his whole life. A strong thread that ties through the lifespan of Robert Blake and Kathryn Knitwear is a balance between adopting new innovations without sacrificing the core values of durability, comfort, care and style that had made the brand so well known. Their legacy forms an integral part of both Australian social and manufacturing history.Three-piece brown and yellow outfit consisting of jumper, pants and hat. Jumper is long sleeved with a high crew neck and five yellow stripes above ribbing along bottom. Pants are brown with wide legs that dramatically taper into the ribbed cuff at bottom. Body of hat is brown and tapers into a long point and has a brown and yellow pompom at the tip. The hat is shaped with a tuck at the back neck near cuff..1 [Label at back neck of jumper with blue lettering woven into label] KATHRYN REGD / 24 ALL WOOL CREATED BY ROBERT BLAKEknitwear, clothing, children's knitwear, children's clothing, manufacturing, fashion textile production, machine knitting, clothing set, pom poms, wool -
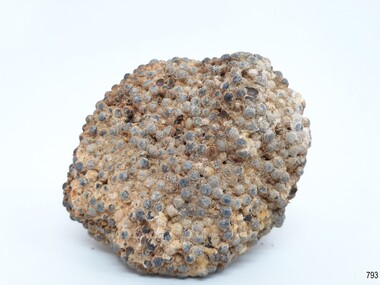 Flagstaff Hill Maritime Museum and Village
Functional object - Lead shot, Circa 1877
This artifact is a sample of small caliber lead shot recovered by Flagstaff Hill divers from the wreck of the Loch Ard in 1975. Included in her diverse and valuable cargo were 22 tons of lead shot, packed in cloth bags and wooden casks. Bulk quantities of lead shot, uniformly round balls of dull grey metal ranging from 2mm “birdshot” to 8mm “buckshot”, were routinely exported to the Australian colonies. Shot was used mostly as projectiles fired from smooth bored guns to bring down moving targets such as wild ducks and small game. It was also useful as ballast, when a dense, “pourable” weight was required to fill cavities or establish volume within a measuring container. The production of consistently round spheres of lead shot required the pouring of molten metal through a sieve and then a long drop through the atmosphere to a water filled basin for final cooling and collection. This “shot tower” process was first patented by William Watts of Bristol in 1782. His calculation of a 150 feet fall was not only to form evenly spherical droplets through surface tension, but also to provide partial cooling and solidification to each shot before they hit the water below. The value of his innovation was the minimising of indentation and shape distortion, avoiding the expense of re-smelting and re-moulding the lead. Lead shot was already being produced in Australia at the time the Loch Ard sinking in March 1878. James Moir had constructed a 157 feet circular stone shot tower near Hobart in 1870, with a peak annual production of 100 tons of lead shot sold in 28 pound linen bags. However colonial demand exceeded this source of local supply. The continued strength of the market for lead shot in the Colony of Victoria prompted substantial investment in additional productive capacity in Melbourne in the next decade. In 1882 Richard Hodgson erected the 160 feet round chimney-shaped Clifton Hill shot tower on Alexandra Parade (VHR H0709) and in 1889 Walter Coop built the 160 feet square tower-shaped Melbourne Central shot tower on La Trobe Street (VHR H0067). At its peak, the Coop Tower produced 6 tons of lead shot per week, or 312 tons per annum. History of the Loch Ard: The Loch Ard got its name from "Loch Ard" a loch that lies to the west of Aberfoyle, and the east of Loch Lomond. It means "high lake" in Scottish Gaelic. The vessel belonged to the famous Loch Line which sailed many vessels from England to Australia. The Loch Ard was built in Glasgow by Barclay, Curle & Co. in 1873, the vessel was a three-masted square-rigged iron sailing ship that measured 79.87 meters in length, 11.58 m in width, and 7 m in depth with a gross tonnage of 1693 tons with a mainmast that measured a massive 45.7 m in height. Loch Ard made three trips to Australia and one trip to Calcutta before its fateful voyage. Loch Ard left England on March 2, 1878, under the command of 29-year-old Captain Gibbs, who was newly married. The ship was bound for Melbourne with a crew of 37, plus 17 passengers. The general cargo reflected the affluence of Melbourne at the time. Onboard were straw hats, umbrellas, perfumes, clay pipes, pianos, clocks, confectionery, linen, and candles, as well as a heavier load of railway irons, cement, lead, and copper. There were other items included that were intended for display in the Melbourne International Exhibition of 1880. The voyage to Port Phillip was long but uneventful. Then at 3 am on June 1, 1878, Captain Gibbs was expecting to see land. But the Loch Ard was running into a fog which greatly reduced visibility. Captain Gibbs was becoming anxious as there was no sign of land or the Cape Otway lighthouse. At 4 am the fog lifted and a lookout aloft announced that he could see breakers. The sheer cliffs of Victoria's west coast came into view, and Captain Gibbs realised that the ship was much closer to them than expected. He ordered as much sail to be set as time would permit and then attempted to steer the vessel out to sea. On coming head-on into the wind, the ship lost momentum, the sails fell limp and Loch Ard's bow swung back towards land. Gibbs then ordered the anchors to be released in an attempt to hold their position. The anchors sank some 50 fathoms - but did not hold. By this time the ship was among the breakers and the tall cliffs of Mutton Bird Island rose behind. Just half a mile from the coast, the ship's bow was suddenly pulled around by the anchor. The captain tried to tack out to sea, but the ship struck a reef at the base of Mutton Bird Island, near Port Campbell. Waves subsequently broke over the ship and the top deck became loosened from the hull. The masts and rigging came crashing down knocking passengers and crew overboard. When a lifeboat was finally launched, it crashed into the side of Loch Ard and capsized. Tom Pearce, who had launched the boat, managed to cling to its overturned hull and shelter beneath it. He drifted out to sea and then on the flood tide came into what is now known as Lochard Gorge. He swam to shore, bruised and dazed, and found a cave in which to shelter. Some of the crew stayed below deck to shelter from the falling rigging but drowned when the ship slipped off the reef into deeper water. Eva Carmichael a passenger had raced onto the deck to find out what was happening only to be confronted by towering cliffs looming above the stricken ship. In all the chaos, Captain Gibbs grabbed Eva and said, "If you are saved Eva, let my dear wife know that I died like a sailor". That was the last Eva Carmichael saw of the captain. She was swept off the ship by a huge wave. Eva saw Tom Pearce on a small rocky beach and yelled to attract his attention. He dived in and swam to the exhausted woman and dragged her to shore. He took her to the cave and broke the open case of brandy that had washed up on the beach. He opened a bottle to revive the unconscious woman. A few hours later Tom scaled a cliff in search of help. He followed hoof prints and came by chance upon two men from nearby Glenample Station three and a half miles away. In a complete state of exhaustion, he told the men of the tragedy. Tom then returned to the gorge while the two men rode back to the station to get help. By the time they reached Loch Ard Gorge, it was cold and dark. The two shipwreck survivors were taken to Glenample Station to recover. Eva stayed at the station for six weeks before returning to Ireland by steamship. In Melbourne, Tom Pearce received a hero's welcome. He was presented with the first gold medal of the Royal Humane Society of Victoria and a £1000 cheque from the Victorian Government. Concerts were performed to honour the young man's bravery and to raise money for those who lost families in the disaster. Of the 54 crew members and passengers on board, only two survived: the apprentice, Tom Pearce, and the young woman passenger, Eva Carmichael, who lost her family in the tragedy. Ten days after the Lochard tragedy, salvage rights to the wreck were sold at auction for £2,120. Cargo valued at £3,000 was salvaged and placed on the beach, but most washed back into the sea when another storm developed. The wreck of Lochard still lies at the base of Mutton Bird Island. Much of the cargo has now been salvaged and some items were washed up into Lochard Gorge. Cargo and artifacts have also been illegally salvaged over many years before protective legislation was introduced in March 1982. One of the most unlikely pieces of cargo to have survived the shipwreck was a Minton majolica peacock- one of only nine in the world. The peacock was destined for the Melbourne 1880 International Exhibition. It had been well packed, which gave it adequate protection during the violent storm. Today the Minton peacock can be seen at the Flagstaff Hill Maritime Museum in Warrnambool. From Australia's most dramatic shipwreck it has now become Australia's most valuable shipwreck artifact and is one of very few 'objects' on the Victorian State Heritage Register.The shipwreck of the Loch Ard is of significance for Victoria and is registered on the Victorian Heritage Register ( S 417). Flagstaff Hill has a varied collection of artifacts from Loch Ard and its collection is significant for being one of the largest accumulation of artifacts from this notable Victorian shipwreck of which the subject items are a small part. The collection's objects give us a snapshot of how we can interpret the story of this tragic event. The collection is also archaeologically significant as it represents aspects of Victoria's shipping history that allows us to interpret Victoria's social and historical themes of the time. Through is associated with the worst and best-known shipwreck in Victoria's history.Lead shot; a group of mixed -sized lead shot. Small 2mm shot is embedded in a sea sediment clump of concretion. Also in the group are also 5 single 2mm shot and 4 single 4mm shot that are clean and free of sediment. The shot was recovered from the wreck of the Loch Ard.Nonewarrnambool, shipwreck coast, flagstaff hill, flagstaff hill maritime village, flagstaff hill maritime museum, shipwreck artefact, lead shot, loch ard, colonial industry, melbourne shot towers, victorian metallurgy, colonial imports -
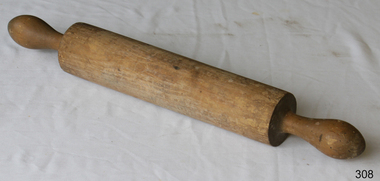 Flagstaff Hill Maritime Museum and Village
Domestic object - Wooden Rolling Pin, First half of 20th Century
A rolling pin is a simple tool used to flatten dough. The first civilisation known to have used the rolling pin was the Etruscans. Their advanced farming ability, along with a tendency to cultivate many plants and animals never before used as food and turn them into sophisticated recipes, were passed to invading Greeks, Romans, and Western Europeans. Thanks to the Etruscans, these cultures are associated with gourmet cooking. To prepare their inventive foods, the Etruscans also developed a wide range of cooking tools, including the rolling pin. Although written recipes did not exist until the fourth century B.C., the Etruscans documented their love of food and its preparation in murals, on vases, and on the walls of their tombs. Cooking wares are displayed with pride; rolling pins appear to have been used first to thin-roll pasta that was shaped with cutting wheels. They also used rolling pins to make bread (which they called puls) from the large number of grains they grew. Natives of the Americas used more primitive bread-making tools that are favoured and unchanged in many villages. Chefs who try to use genuine methods to preserve recipes are also interested in both materials and tools. Hands are used as "rolling pins" for flattening dough against a surface, but also for tossing soft dough between the cook's two hands until it enlarges and thins by handling and gravity. Tortillas are probably the most familiar bread made this way. Over the centuries, rolling pins have been made of many different materials, including long cylinders of baked clay, smooth branches with the bark removed, and glass bottles. As the development of breads and pastries spread from Southern to Western and Northern Europe, wood from local forests was cut and finished for use as rolling pins. The French perfected the solid hardwood pin with tapered ends to roll pastry that is thick in the middle; its weight makes rolling easier. The French also use marble rolling pins for buttery dough worked on a marble slab. Glass is still popular; in Italy, full wine bottles that have been chilled make ideal rolling pins because they are heavy and cool the dough. Countries known for their ceramics make porcelain rolling pins with beautiful decorations painted on the rolling surface; their hollow centres can be filled with cold water (the same principle as the wine bottle), and cork or plastic stoppers cap the ends. Designs for most rolling pins follow long-established practices, although some unusual styles and materials are made and used. Within the family of wooden rolling pins, long and short versions are made as well as those that are solid cylinders (one-piece rolling pins) instead of the familiar style with handles. Very short pins called mini rolling pins make use of short lengths of wood and are useful for one-handed rolling and popular with children and collectors. Mini pins ranging from 5 to 7 in (12.7-17.8 cm) in length are called texturing tools and are produced to create steam holes and decorations in pastry and pie crusts; crafters also use them to imprint clay for art projects. These mini pins are made of hardwoods (usually maple) or plastic. Wood handles are supplied for both wood and plastic tools, however. Blown glass rolling pins are made with straight walls and are solid or hollow. Ceramic rolling pins are also produced in hollow form, and glass and ceramic models can be filled with water and plugged with stoppers. Tapered glass rolling pins with stoppers were made for many centuries when salt imports and exports were prohibited or heavily taxed. The rolling pin containers disguised the true contents. The straight-sided cylinder is a more recent development, although tapered glass pins are still common craft projects made by cutting two wine bottles in half and sealing the two ends together so that the necks serve as handles at each end.Tiny rolling pins are also twisted into shape using formed wire. The pins will not flatten and smooth pastry, and the handles do not turn. The metal pins are popular as kitchen decorations and also to hang pots, pans, and potholders. https://www.encyclopedia.com/sports-and-everyday-life/food-and-drink/food-and-cooking/rolling-pinThe use of the rolling pin to make thin pastry or pasta.Wooden rolling pin with some damage on cylinder section.None.flagstaff hill, warrnambool, shipwrecked-coast, flagstaff-hill, flagstaff-hill-maritime-museum, maritime-museum, shipwreck-coast, flagstaff-hill-maritime-village, rolling pin, cooking, pastry -
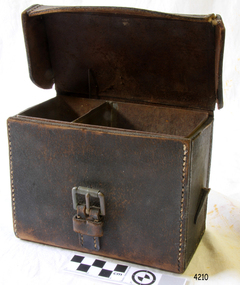 Flagstaff Hill Maritime Museum and Village
Container - Case, Early 20th century
This small case is lined with a metal insert and shows remnants of a carry strap. It could have been used for storing and carrying fuses or cartridges for the life saving Rocket Launcher machine. The protective metal insert would help keep the contents dry or cool and protect from flame. It is part of the collection of rescue equipment in the Rocket House used by the life saving rescue crew. Saving lives in Warrnambool – The coastline of South West Victoria is the site of over 600 shipwrecks and many lost lives; even in Warrnambool’s Lady Bay there were around 16 known shipwrecks between 1850 and 1905, with eight lives lost. Victoria’s Government responded to the need for lifesaving equipment and, in 1858, the provision of rocket and mortar apparatus was approved for the lifeboat stations. In 1859 the first Government-built lifeboat arrived at Warrnambool Harbour and a shed was soon built for it on the Tramway Jetty, followed by a rocket house in 1864 to safely store the rocket rescue equipment. In 1878 the buildings were moved to the Breakwater (constructed from 1874-1890), and in 1910 the new Lifeboat Warrnambool arrived with its ‘self-righting’ design. For almost a hundred years the lifesaving and rescue crews, mostly local volunteers, trained regularly to rehearse and maintain their rescue skills. They were summoned when needed by alarms, gunshots, ringing bells and foghorns. In July 1873 a brass bell was erected at Flagstaff Hill specifically to call the rescue crew upon news of a shipwreck. Some crew members became local heroes but all served an important role. Rocket apparatus was used as recently as the 1950s. Rocket Rescue Method - Rocket rescue became the preferred lifesaving method of the rescue crews, being much safer that using a lifeboat in rough seas and poor conditions. The Government of Victoria adopted lifesaving methods based on Her Majesty’s Coast Guard in Great Britain. It authorised the first line-throwing rescue system in 1858. Captain Manby’s mortar powered a projectile connected to rope, invented in 1808. The equipment was updated to John Dennett’s 8-foot shaft and rocket method that had a longer range of about 250 yards. From the 1860s the breeches buoy and traveller block rocket rescue apparatus was in use. It was suspended on a hawser line and manually pulled to and from the distressed vessel carrying passengers and items. In the early 1870s Colonel Boxer’s rocket rescue method became the standard in Victoria. His two-stage rockets, charged by a gunpowder composition, could fire the line up to 500-600 yards, although 1000 yards range was possible. Boxer’s rocket carried the light line, which was faked, or coiled, in a particular way between pegs in a faking box to prevent twists and tangles when fired. The angle of firing the rocket to the vessel in distress was measured by a quadrant-type instrument on the side of the rocket machine. Decades later, in 1920, Schermuly invented the line-throwing pistol that used a small cartridge to fire the rocket. . The British Board of Trade regularly published instructions for both the beach rescue crew and ship’s crew. It involved setting up the rocket launcher on shore at a particular angle, determined by the Head of the crew and measured by the quadrant, inserting a rocket that had a light-weight line threaded through its shaft, and then firing it across the stranded vessel, the line issuing freely from the faking board. A continuous whip line was then sent out to the ship’s crew, who hauled it in then followed the instructions – in four languages - on the attached tally board. The survivors would haul on the line to bring out the heavier, continuous whip line with a tail block connected to it. They then secured the block to the mast or other strong part the ship. The rescue crew on shore then hauled out a stronger hawser line, which the survivors fixed above the whip’s tail block. The hawser was then tightened by the crew pulling on it, or by using the hooked block on the shore end of the whip and attaching it to a sand anchor. The breeches buoy was attached to the traveller block on the hawser, and the shore crew then used the whip line to haul the breeches buoy to and from the vessel, rescuing the stranded crew one at a time. The rescue crew wore scarlet, numbered armbands and worked on a numerical rotation system, swapping members out to rest them. This small leather carrying case is significant for its connection with the rocket rescue equipment, local history, maritime history and marine technology. Lifesaving has been an important part of the services performed from Warrnambool's very early days, supported by State and Local Government, and based on the methods and experience of Great Britain. Hundreds of shipwrecks along the coast are evidence of the rough weather and rugged coastline. Ordinary citizens, the Harbour employees, and the volunteer boat and rescue crew, saved lives in adverse circumstances. Some were recognised as heroes, others went unrecognised. In Lady Bay, Warrnambool, there were around 16 known shipwrecks between 1850 and 1905. Many lives were saved but tragically, eight lives were lost.Leather case, brown with contrasting stitching, protective metal insert divided into two compartments. Rectangular shape. Roller buckle on front with remnants of the matching strap. Also remnants of a leather strap on the side, possibly a shoulder strap.flagstaff hill maritime museum and village, flagstaff hill, maritime museum, maritime village, warrnambool, great ocean road, shipwreck, life-saving, lifesaving, rescue crew, rescue, rocket rescue, rocket crew, lifeboat men, beach rescue, line rescue, rescue equipment, rocket firing equipment, rocket rescue equipment, maritime accidents, shipwreck victim, rocket equipment, marine technology, rescue boat, lifeboat, volunteer lifesavers, volunteer crew, life saving rescue crew, lifesaving rescue crew, rocket apparatus, rocket rescue method, shore to ship, rocket apparatus rescue, stranded vessel, line throwing mortar, mortar, rocket rescue apparatus, line thrower, line throwing, line-firing pistol, line throwing gun, schermuly pistol, pistol rocket apparatus, line throwing cartridge, l.s.r.c., lsrc, leather case, cartridge case, fuse case, ammunition case -
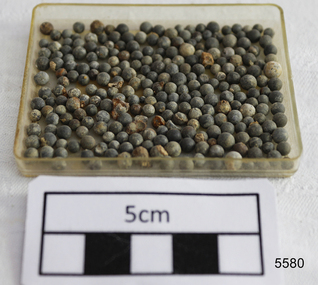 Flagstaff Hill Maritime Museum and Village
Lead shot, Before 1878
The objects comprise a quantity of small calibre lead shot raised from the LOCH ARD shipwreck site by Flagstaff Hill divers in 1976. The Maritime Village’s collection has companion pieces. The three masted, iron hulled, LOCH ARD was wrecked against the tall limestone cliffs of Mutton Bird Island in the early hours of the first of June 1878. Included in her diverse and valuable cargo were 22 tons of lead shot, packed in cloth bags and wooden casks. Bulk quantities of lead shot, uniformly round balls of dull grey metal ranging from 2mm “birdshot” to 8mm “buckshot”, were routinely exported to the Australian colonies. Shot was used mostly as projectiles fired from smooth bored guns to bring down moving targets such as wild ducks and small game. It was also useful as ballast, when a dense, “pourable” weight was required to fill cavities or establish volume within a measuring container. The production of consistently round spheres of lead shot required the pouring of molten metal through a sieve and then a long drop through the atmosphere to a water filled basin for final cooling and collection. This “shot tower” process was first patented by William Watts of Bristol in 1782. His calculation of a 150 feet fall was not only to form evenly spherical droplets through surface tension, but also to provide partial cooling and solidification to each shot before they hit the water below. The value of his innovation was the minimising of indentation and shape distortion, avoiding the expense of re-smelting and re-moulding the lead. Lead shot was already being produced in Australia at the time the LOCH ARD loaded her cargo and left Gravesend on the second of March 1878. James Moir constructed a 157 feet circular stone shot tower near Hobart in 1870, with a peak annual production of 100 tons of lead shot sold in 28 pound linen bags. However colonial demand exceeded this source of local supply. The continued strength of the market for lead shot in the Colony of Victoria prompted substantial investment in additional productive capacity in Melbourne in the next decade. In 1882 Richard Hodgson erected the 160 feet round chimney-shaped Clifton Hill shot tower on Alexandra Parade (VHR H0709) and in 1889 Walter Coop built the 160 feet square tower-shaped Melbourne Central shot tower on La Trobe Street (VHR H0067). At its peak, the Coop Tower produced 6 tons of lead shot per week, or 312 tons per annum. HISTORY OF THE LOCH ARD The LOCH ARD belonged to the famous Loch Line which sailed many ships from England to Australia. Built in Glasgow by Barclay, Curdle and Co. in 1873, the LOCH ARD was a three-masted square rigged iron sailing ship. The ship measured 262ft 7" (79.87m) in length, 38ft (11.58m) in width, 23ft (7m) in depth and had a gross tonnage of 1693 tons. The LOCH ARD's main mast measured a massive 150ft (45.7m) in height. LOCH ARD made three trips to Australia and one trip to Calcutta before its final voyage. LOCH ARD left England on March 2, 1878, under the command of Captain Gibbs, a newly married, 29 year old. She was bound for Melbourne with a crew of 37, plus 17 passengers and a load of cargo. The general cargo reflected the affluence of Melbourne at the time. On board were straw hats, umbrella, perfumes, clay pipes, pianos, clocks, confectionary, linen and candles, as well as a heavier load of railway irons, cement, lead and copper. There were items included that intended for display in the Melbourne International Exhibition in 1880. The voyage to Port Phillip was long but uneventful. At 3am on June 1, 1878, Captain Gibbs was expecting to see land and the passengers were becoming excited as they prepared to view their new homeland in the early morning. But LOCH ARD was running into a fog which greatly reduced visibility. Captain Gibbs was becoming anxious as there was no sign of land or the Cape Otway lighthouse. At 4am the fog lifted. A man aloft announced that he could see breakers. The sheer cliffs of Victoria's west coast came into view, and Captain Gibbs realised that the ship was much closer to them than expected. He ordered as much sail to be set as time would permit and then attempted to steer the vessel out to sea. On coming head on into the wind, the ship lost momentum, the sails fell limp and LOCH ARD's bow swung back. Gibbs then ordered the anchors to be released in an attempt to hold its position. The anchors sank some 50 fathoms - but did not hold. By this time LOCH ARD was among the breakers and the tall cliffs of Mutton Bird Island rose behind the ship. Just half a mile from the coast, the ship's bow was suddenly pulled around by the anchor. The captain tried to tack out to sea, but the ship struck a reef at the base of Mutton Bird Island, near Port Campbell. Waves broke over the ship and the top deck was loosened from the hull. The masts and rigging came crashing down knocking passengers and crew overboard. When a lifeboat was finally launched, it crashed into the side of LOCH ARD and capsized. Tom Pearce, who had launched the boat, managed to cling to its overturned hull and shelter beneath it. He drifted out to sea and then on the flood tide came into what is now known as LOCH ARD Gorge. He swam to shore, bruised and dazed, and found a cave in which to shelter. Some of the crew stayed below deck to shelter from the falling rigging but drowned when the ship slipped off the reef into deeper water. Eva Carmichael had raced onto deck to find out what was happening only to be confronted by towering cliffs looming above the stricken ship. In all the chaos, Captain Gibbs grabbed Eva and said, "If you are saved Eva, let my dear wife know that I died like a sailor". That was the last Eva Carmichael saw of the captain. She was swept off the ship by a huge wave. Eva saw Tom Pearce on a small rocky beach and yelled to attract his attention. He dived in and swam to the exhausted woman and dragged her to shore. He took her to the cave and broke open case of brandy which had washed up on the beach. He opened a bottle to revive the unconscious woman. A few hours later Tom scaled a cliff in search of help. He followed hoof prints and came by chance upon two men from nearby Glenample Station three and a half miles away. In a state of exhaustion, he told the men of the tragedy. Tom returned to the gorge while the two men rode back to the station to get help. By the time they reached LOCH ARD Gorge, it was cold and dark. The two shipwreck survivors were taken to Glenample Station to recover. Eva stayed at the station for six weeks before returning to Ireland, this time by steamship. In Melbourne, Tom Pearce received a hero's welcome. He was presented with the first gold medal of the Royal Humane Society of Victoria and a £1000 cheque from the Victorian Government. Concerts were performed to honour the young man's bravery and to raise money for those who lost family in the LOCH ARD disaster. Of the 54 crew members and passengers on board, only two survived: the apprentice, Tom Pearce and the young woman passenger, Eva Carmichael, who lost all of her family in the tragedy. Ten days after the LOCH ARD tragedy, salvage rights to the wreck were sold at auction for £2,120. Cargo valued at £3,000 was salvaged and placed on the beach, but most washed back into the sea when another storm developed. The wreck of LOCH ARD still lies at the base of Mutton Bird Island. Much of the cargo has now been salvaged and some was washed up into what is now known as LOCH ARD Gorge. Cargo and artefacts have also been illegally salvaged over many years before protective legislation was introduced. One of the most unlikely pieces of cargo to have survived the shipwreck was a Minton porcelain peacock - one of only nine in the world. The peacock was destined for the Melbourne International Exhibition in 1880. It had been well packed, which gave it adequate protection during the violent storm. Today, the Minton peacock can be seen at the Flagstaff Hill Maritime Museum in Warrnambool. From Australia's most dramatic shipwreck it has now become Australia's most valuable shipwreck artefact and is one of very few 'objects' on the Victorian State Heritage Register. The shipwreck of the LOCH ARD is of State significance – Victorian Heritage Register S417 Flagstaff Hill’s collection of artefacts from LOCH ARD is significant for being one of the largest collections of artefacts from this shipwreck in Victoria. It is significant for its association with the shipwreck, which is on the Victorian Heritage Register (VHR S417). The collection is significant because of the relationship between the objects, as together they have a high potential to interpret the story of the LOCH ARD. The LOCH ARD collection is archaeologically significant as the remains of a large international passenger and cargo ship. The LOCH ARD collection is historically significant for representing aspects of Victoria’s shipping history and its potential to interpret sub-theme 1.5 of Victoria’s Framework of Historical Themes (living with natural processes). The collection is also historically significant for its association with the LOCH ARD, which was one of the worst and best known shipwrecks in Victoria’s history. A quantity of lead shot pellets retrieved from the wreck of the LOCH ARD. There are 242 loose 2mm pieces and 17 loose 4mm pieces. They are in good condition, with some shape distortion and sedimentary concretion, and shot tower made.flagstaff hill, warrnambool, shipwrecked coast, flagstaff hill maritime museum, maritime museum, shipwreck coast, flagstaff hill maritime village, great ocean road, loch line, loch ard, captain gibbs, eva carmichael, tom pearce, glenample station, mutton bird island, loch ard gorge, lead shot, colonial industry, melbourne shot towers, victorian metallurgy, colonial imports -
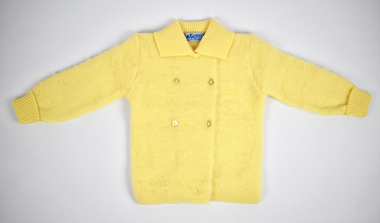 National Wool Museum
Textile - Children's Clothing Set, Kathryn Knitwear, c.1953-1961
Kathryn Knitwear, founded by Robert Blake, manufactured high quality children’s knitwear in Melbourne from the 1940s – 1980s. Robert Blake began manufacturing children’s knitwear in his bedroom in Strathmore using a hand powered machine in the late 1940s. The operation moved to Ascot Vale and Essendon, before eventually establishing a factory in Moonee Ponds in the early 1950s. The business continued to expand, necessitating a move to a new factory in Broadmeadows. By 1962, the Broadmeadows factory was producing an average of 20,000 garments per month, which increased to 24,000 by 1964. Robert Blake’s Son, Brendan recalls that “The Kathryn brand was famous around Australia, anywhere children needed to keep warm and dress smartly. It also won a number of wool fashion awards”, including the 1969 Wool Awards, which was held by the Australian Wool Bureau and published in Women’s Weekly. The Kathryn range was designed for durability, comfort and care, without sacrificing style. They used patterning techniques that increase stretchiness, comfort and fit, as well as integrating decorative elements into the fabric to prevent them from being bulky, uncomfortable or tight. Making longevity of style a priority, Brendan Blake remembers that “there was one particular garment that was in the range for at least thirty years”. He also recalls “In the past, when women have found out that I was associated with Kathryn Knitwear, they would often relate to me the story of a garment they had purchased or received as a gift and, when their child had grown out of it, they would hand it on to another child. Several ladies have told me of purchasing garments for their daughters’ glory box, or saving a particular garment after their daughter had grown out of it. This style of “brushed wool leginette suit” was produced by Kathryn from at least 1953-1964, though this example likely dates from before 1962. In the winter of 1961, the brand sold 4376 suits of this style. It came with an included nylon brush in order to keep the brushed finish of the garments, which can be found under NWM-09016 Brendan Blake: “At the peak of their operation they employed approximately two hundred people, mainly women and girls. A family would often seek to send their daughter to work in this company because they knew they would be looked after and safe. One lady wrote to me telling me that working at the Moonee Ponds Factory prior to getting married was the happiest time of her life.” In 1963, workers at the Kathryn factory earned £13 per week, which was 8 shillings and 8 pence higher than the minimum weekly wage for female workers in the textile manufacturing industry (£12 11s 4d). By 1970, the Kathryn Knitwear brand expanded from children’s knitwear into womenswear under the brand name ‘Lady Kathryn’, and for boys and men under ‘Robert Blake’. Continuing to diversify their distribution, they also began exporting ‘Kathryn’ garments to New Zealand, the Pacific Islands, and Japan. ‘Kathryn Knitwear’ was well-known for their early adoption of modern materials and techniques that had broad appeal to their customer base. This is shown in their early use of the acrylic fibre ‘Orlon’ in the 50s and 60s and ‘Superwash’ wool in the 1970s. Many of Kathryn Knitwear’s styles, particularly those that were long running staples of the brand, were available in both wool and Orlon to suit the consumer’s preference. Wool has been renowned for its excellent properties for thousands of years, by people from all over the world. Not only good for thick winter woollens, it can help keep you cool in summer, as well as being durable and resistant to water, fire, ultraviolet light, stains and odour. Far from the humble origins of one man in his bedroom with a hand-cranked machine; at its closure in 1980, the Broadmeadows factory of ‘Kathryn’ housed more than 100 machines, including 53 sewing machines and 45 knitting machines. Robert Blake was “a passionate advocate for wool and Australian Made” throughout his whole life. A strong thread that ties through the lifespan of Robert Blake and Kathryn Knitwear is a balance between adopting new innovations without sacrificing the core values of durability, comfort, care and style that had made the brand so well known. Their legacy forms an integral part of both Australian social and manufacturing history. This style of “brushed wool leginette suit” was produced by Kathryn from at least 1953-1964, though this example likely dates from before 1962. In the winter of 1961, the brand sold 4376 suits of this style.Four-piece legging suit consisting of cardigan, leggings, hat and mittens in fuzzy yellow brushed wool. Cardigan is double breasted and closes with two rows of yellow plastic buttons, with a fifth button under the collar. Fold-over collar and cuffs are not brushed wool and provide contrasting texture. Leggings have elastic at waist and ankle to go under foot. Bottom of leg has foot flap. Hat is in a bonnet style and has turnback around face and ties under neck. Mittens are each construced in one piece with no additional thumb pocket, and tie at wrists..1) [label at back neck of cardigan] KATHRYN REGD. CREATED BY PURE WOOL / 20 / ROBERT BLAKE .5) [sample label] [OBVERSE] STYLE: LS/W. LEGGING SUIT – BRUSHED WOOL SIZE: 18” 20” PRICE: 39/9 42/6 3 PCE: 42/9 45/6 4 PCE: COLOR: BLUE. LEMON. PINK. WHITE.knitwear, clothing, children's knitwear, children's clothing, manufacturing, fashion textile production, machine knitting, clothing set, brushed wool, wool, fluffy -
 Eltham District Historical Society Inc
Photograph, Time Capsule Ceremony, 10 November 1985, 10/11/1985
On Sunday, 10 November 1985 a time capsule was lowered into a monument installed near the corner of Main Road and Pitt Street in Eltham, within the gardens at the front of what is now the Eltham Community and Reception Centre. This monument commemorates Victoria’s 150th anniversary and the former location of the Eltham Town Centre, which existed along this section of Main Road, then known as Maria Street. Beneath the site is a time capsule to be opened in the year 2035. A plaque was also erected at this site in October 1987 to commemorate the Shire of Eltham Historical Society’s 20th anniversary. The main feature of this monument is a ‘tyring disc’, a blacksmith’s implement that was found on this site. This consists of a large iron disc that was used as a platform for fitting iron tyres (like the one shown on top of the platform) to wooden-spoked cart wheels. The local blacksmith and wheelwright worked together to assemble the wheel, which was clamped to the platform placed close to the fire. The red-hot iron hoop, previously forged to the correct size, was lifted with tongs by the blacksmith over the outside of the rim, then hammered down amid flames from the scorching timber. The wheelwright drenched the tyre with cold water as soon as it was in position. A clamp placed on the naff (hub) and screwed down tightly kept the spokes at a constant angle as the tyre cooled. An even pressure from the contracting tyre tightened the joints at each end of the spokes and formed a vice-like grip, which would last for the life of the wheel. [from EDHS Newsletter No. 45, November 1985:] TIME CAPSULE CEREMONY: Our 150th Anniversary Monument is now under construction in the gardens in front of the Eltham Community Centre. Further details of the project are given under a separate heading below and this item deals with the proposed ceremony. We propose to formally lower the time capsule into its container underneath the monument as part of the Eltham Community Festival. All members are invited to attend the ceremony at 2.00 p.m. on Sunday, 10th November. Come earlier with a picnic lunch if you like. Local people and firms who have contributed money or services for the monument will also be invited. As part of the Festival programme the public are welcome to attend. This is one of the most significant projects the Society has undertaken and members' participation in its finalization would be most gratifying to the organizing committee. 150TH ANNIVERSARY PROJECTS: We have concentrated our efforts on finishing the monument and time capsule project within the 150th year and have found it necessary to abandon the historical tour project. We have applied to the State 150th Committee to transfer the funds allocated for the tour to construction of the monument. The historical tour project will be continued at a later date and photos of historic houses in the area, taken by Doug Orford, will be available for use in an associated display. At the time of writing, the monument construction is on schedule for the ceremony on 10th November. The concrete base has been completed and the main feature of the monument, which is an old tyring plate or disc, will be lifted into place in the next week. The final ceremony will involve lowering the sealed time capsule into place, bolting down its container lid and then concreting over the lid. The capsule will contain mainly items relating to present day Eltham and its people and is to be opened in the year 2035, a video film made by Joh Ebeli and also details of families and organizations who have contributed to construction of the monument. It is proposed to place the items in the capsule on 5th November and any items members think could be included may be submitted up to that date. The Society has received an excellent response from local people, firms and organizations by way of assistance with this project. Graham Beyer, who originated the project, has arranged many of the donations. He and his firm, Package Handling Equipment, have donated the time capsule itself and have carried out fabrication of sections of the monument. The design of the monument was adapted by Graham Beyer from drawings by Joh Ebeli. Charmac Industries has donated the container for the time capsule and a cast gun metal name plate for the monument. BMG Concrete has donated concrete for the base which was constructed by Caridi Construction Company. Northbourne Garden Supplies has donated materials for the paving around the monument. Robert Becker from Eltham Apex directed construction of the paving by Society members. Terry Hutchinson has agreed to donate the use of his crane to lift the tyring disc into place. Financial contributions have been made by the Eltham Chamber of Commerce and the Rotary Club of Eltham. We are grateful to all who have helped, and members' support for firms who have donated their services would be an appropriate recognition. It is planned to print "Time Capsule Certificates" which can be held by organizations or passed on to descendants by individuals. The certificates will indicate an interest in the contents of the capsule when it is opened in fifty years. Certificates will be distributed to Society members and those who have contributed to the project.Nine colour photographsactivities, 1985, time capsule, eltham, eltham festival -
 Eltham District Historical Society Inc
Photograph, Time Capsule Ceremony, 10 November 1985, 10/11/1985
On Sunday, 10 November 1985 a time capsule was lowered into a monument installed near the corner of Main Road and Pitt Street in Eltham, within the gardens at the front of what is now the Eltham Community and Reception Centre. This monument commemorates Victoria’s 150th anniversary and the former location of the Eltham Town Centre, which existed along this section of Main Road, then known as Maria Street. Beneath the site is a time capsule to be opened in the year 2035. A plaque was also erected at this site in October 1987 to commemorate the Shire of Eltham Historical Society’s 20th anniversary. The main feature of this monument is a ‘tyring disc’, a blacksmith’s implement that was found on this site. This consists of a large iron disc that was used as a platform for fitting iron tyres (like the one shown on top of the platform) to wooden-spoked cart wheels. The local blacksmith and wheelwright worked together to assemble the wheel, which was clamped to the platform placed close to the fire. The red-hot iron hoop, previously forged to the correct size, was lifted with tongs by the blacksmith over the outside of the rim, then hammered down amid flames from the scorching timber. The wheelwright drenched the tyre with cold water as soon as it was in position. A clamp placed on the naff (hub) and screwed down tightly kept the spokes at a constant angle as the tyre cooled. An even pressure from the contracting tyre tightened the joints at each end of the spokes and formed a vice-like grip, which would last for the life of the wheel. [from EDHS Newsletter No. 45, November 1985:] TIME CAPSULE CEREMONY: Our 150th Anniversary Monument is now under construction in the gardens in front of the Eltham Community Centre. Further details of the project are given under a separate heading below and this item deals with the proposed ceremony. We propose to formally lower the time capsule into its container underneath the monument as part of the Eltham Community Festival. All members are invited to attend the ceremony at 2.00 p.m. on Sunday, 10th November. Come earlier with a picnic lunch if you like. Local people and firms who have contributed money or services for the monument will also be invited. As part of the Festival programme the public are welcome to attend. This is one of the most significant projects the Society has undertaken and members' participation in its finalization would be most gratifying to the organizing committee. 150TH ANNIVERSARY PROJECTS: We have concentrated our efforts on finishing the monument and time capsule project within the 150th year and have found it necessary to abandon the historical tour project. We have applied to the State 150th Committee to transfer the funds allocated for the tour to construction of the monument. The historical tour project will be continued at a later date and photos of historic houses in the area, taken by Doug Orford, will be available for use in an associated display. At the time of writing, the monument construction is on schedule for the ceremony on 10th November. The concrete base has been completed and the main feature of the monument, which is an old tyring plate or disc, will be lifted into place in the next week. The final ceremony will involve lowering the sealed time capsule into place, bolting down its container lid and then concreting over the lid. The capsule will contain mainly items relating to present day Eltham and its people and is to be opened in the year 2035, a video film made by Joh Ebeli and also details of families and organizations who have contributed to construction of the monument. It is proposed to place the items in the capsule on 5th November and any items members think could be included may be submitted up to that date. The Society has received an excellent response from local people, firms and organizations by way of assistance with this project. Graham Beyer, who originated the project, has arranged many of the donations. He and his firm, Package Handling Equipment, have donated the time capsule itself and have carried out fabrication of sections of the monument. The design of the monument was adapted by Graham Beyer from drawings by Joh Ebeli. Charmac Industries has donated the container for the time capsule and a cast gun metal name plate for the monument. BMG Concrete has donated concrete for the base which was constructed by Caridi Construction Company. Northbourne Garden Supplies has donated materials for the paving around the monument. Robert Becker from Eltham Apex directed construction of the paving by Society members. Terry Hutchinson has agreed to donate the use of his crane to lift the tyring disc into place. Financial contributions have been made by the Eltham Chamber of Commerce and the Rotary Club of Eltham. We are grateful to all who have helped, and members' support for firms who have donated their services would be an appropriate recognition. It is planned to print "Time Capsule Certificates" which can be held by organizations or passed on to descendants by individuals. The certificates will indicate an interest in the contents of the capsule when it is opened in fifty years. Certificates will be distributed to Society members and those who have contributed to the project.Two colour photographsactivities, 1985, time capsule, eltham, eltham festival