Showing 228 items matching " 'as we like it'."
-
 Mission to Seafarers Victoria
Letter - Correspondence, Letter to Lillie from Howard, 29 August 1925
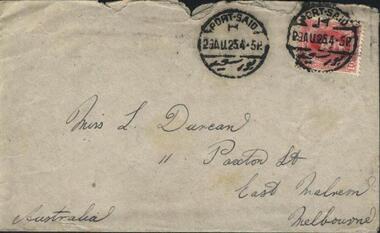
... Well to get on with the news, the next day I had a telegram to report at the Line head office, on the 15th Aug. early, imagine how I swore, as a little do was to [be] held at night, they immediately shored me on this ship S/S City of Norwich to go to Port Said, then join the City of Corinth bound for Boston & New-York so I may come out to “little Aussie” again from there with a little luck, any way we ought to be in New-York about the 19th Sept to stay a month, I will write you more in detail from there, if you feel inclined and have forgiven me for being so long about answering your last letter, could you write to S/S City of Corinth, C/o Norton Lilly & Co, New-York. U.S.A. I would jump like...Well to get on with the news, the next day I had a telegram to report at the Line head office, on the 15th Aug. early, imagine how I swore, as a little do was to [be] held at night, they immediately shored me on this ship S/S City of Norwich to go to Port Said, then join the City of Corinth bound for Boston & New-York so I may come out to “little Aussie” again from there with a little luck, any way we ought to be in New-York about the 19th Sept to stay a month, I will write you more in detail from there, if you feel inclined and have forgiven me for being so long about answering your last letter, could you write to S/S City of Corinth, C/o Norton Lilly & Co, New-York. U.S.A. I would jump like ...The "letters to Lillie" show the international nature of the Mission to Seafarers. They are an important display of the handwriting style of the time, revealing courting attempts and give us an insight into life in 1925. Page 1 S/S City of Norwich Port Said My Dear Old Lillie, Well, I never got so much of a shock in my life, when your postcard turned up 2 days before my birthday, wishing me many happy returns, for which I thank you sincerely, and am sorry to say I had forgotten yours, or being very quiet about your various qualities, you would not tell me. Well to get on with the news, the next day I had a telegram to report at the Line head office, on the 15th Aug. early, imagine how I swore, as a little do was to [be] held at night, they immediately shored me on this ship S/S City of Norwich to go to Port Said, then join the City of Corinth bound for Boston & New-York so I may come out to “little Aussie” again from there with a little luck, any way we ought to be in New-York about the 19th Sept to stay a month, I will write you more in detail from there, if you feel inclined and have forgiven me for being so long about answering your last letter, could you write to S/S City of Corinth, C/o Norton Lilly & Co, New-York. U.S.A. I would jump like L”l Page 2 how is the cow milking going on, but still that joke is as unfair as the small joke about my age now, both afflictions being cured by now I hope. Well really I am no letter writer and can find very little to interest you on paper Lillie, and my photo, I hate being taken as much as you, but will do my best, if you can wait a little please, hoping you are getting one that awfully exciting week with the mission as you call it. You must be A.1 actresses to amuse such a motley crew. Hoping you are all well at home, give Mr & Mrs Duncan my kind regards, sending my best love to you dear. Hoping you will recognize me if I can come along. with tons of love, Howard. P.S. I hope to be a little more sophisticated when I come next time [-] you may be able to tell me. Lillie Duncan was a member of the Harbour Lights Guild and this letter forms part of a collection of letters sent to her by different seafarers.Letter addressed to Miss L Duncan, 11 Paxton St, East Malvern, Melbourne, Australia from Howard in three parts: Part 1.1 (0007.1) Envelope Part 1.2 (0007.2) First page of letter Part 1.3 (0007.3) Second page of letter The pages, as is the envelope, are a creamy yellow colour with black cursive writing on one side of the page. Page 1 of the letter begins with the salutation "My Dear Old Lillie...". Page 2 of the letter concludes with "...you may be able to tell me".The envelope is torn across the top for access to its contents. It has two stamps on the top right hand corner both with the text "Port Said 23AU25.4.5P".lillie duncan, howard, port said, lhlg, ss city of norwich -
 Mission to Seafarers Victoria
Letter - Correspondance, Julius Kokx, Letter to Lillie Duncan from Julius Kokx, 20 August 1925
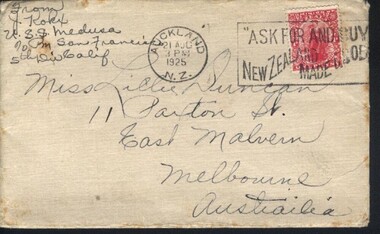
... like you...". Page 5 begins with "married. So what's a...". Page 6 begins with "and as goof as we...". ...like you...". Page 5 begins with "married. So what's a...". Page 6 begins with "and as goof as we...". ...The "letters to Lillie" show the international nature of the Mission to Seafarers. They are an important display of the handwriting style of the time, revealing courting attempts and give us an insight into life in 1925.Lillie Duncan was a member of the Harbour Lights Guild and this letter forms part of a collection of letters sent to her by different seafarers.Letter addressed to Miss Lillie Duncan, 11 Paxton St, East Malvern, Melbourne, Australia from Julius Kokx, U.S.S. Medusa, c/o Postmaster, San Francisco, 5th Div Calif. consisting of eleven parts: Part 0070.1 Envelope Part 0070.2 Medusa Mechanic Newsletter Parts 0070.3 - 0070.11 Handwritten letter The envelope is cream in colour with darker edges from aging whilst the pages are a lighter cream colour. Page 1 of the letter begins with the salutation "Dear Miss Duncan: I recieved both...".Page 2 of the letter begins with "girls in Melbourne. you are the only one...". Page 3 begins with "it but found out it...". Page 4 begins with "a girl like you...". Page 5 begins with "married. So what's a...". Page 6 begins with "and as goof as we...". Page 7 begins with "in and you must...". Page 8 begins with "Have a place to sit..." Page 9 begins with "it will be a long..." and ends with the salutation "The kind sailor as you call him x. Julius Knox." All pages of the letter are only written on one side except for page 9, on which Julius Knox has written his address in the States and in New Zealand.The envelope is torn across the back vertically towards the right of the flap but the flap is mostly in tact. It has three stamps. The first is a circular one in black ink towards the top centre of the envelope reading "AUCKLAND 21 AUG 3PM 1925 N.Z.". The second stamp is a large rectangular one in black ink in the top right of the envelope reading "ASK FOR AND BUY NEW ZEALAND MADE GOODS". The third stamp is slightly obscured by the the second ink stamp. It is a red and white stamp positioned at the top rigt of the envelope reading "Dominion of New Zealand Universal Postage One Penny".lillie duncan, letter, lhlg, julius kokx, uss medusa, auckland, new zealand, san francisco, california, lillian duncan -
 Mission to Seafarers Victoria
Card - Christmas message, Dear 717 Crew Seafarers and my Friends
... So if I forgot to say GOOD BYE because I dont like that word. Hope we will meet each other Oneday [sic] cuz this world is small . ...So if I forgot to say GOOD BYE because I dont like that word. Hope we will meet each other Oneday [sic] cuz this world is small . ...Christmas Greeting sent by seafarers who previously visited the Mission to Seafarers circa 2000 - 2015A4 colour laser print of several collaged images with messageI enjoyed your warm smile but time has come to say goodbye to you and this beautiful place . Again I am in my homeland with wild elephants , white sand and my family enjoying the beusty of pearl in the Indian ocean and its [sic] Sri Lanka. So if I forgot to say GOOD BYE because I dont like that word. Hope we will meet each other Oneday [sic] cuz this world is small . Enjoy the summer!!! Wish you a merry Christmas ! AND God Bless You!!! / MERRY CHRISTMAScrew 717, flinders street, mission to seafarers, christmas, elephant, sri lanka, indian ocean -
 Mission to Seafarers Victoria
Photograph - Gelatin silver photograph, Mr and Mrs Gurney Goldsmith, Dinner is served on board a sailing ship - Eating It in the Half Deck, 1906
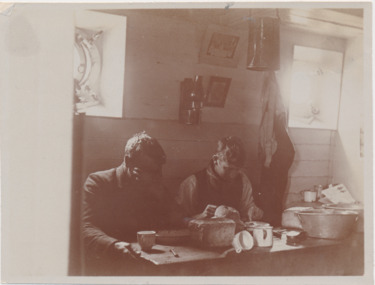
... we can see the portholes of the ship. On the table, there is a loaf bread, tin cups and ware. One of the sailors is holding is forehead with his hand and the other one seems like is eating....we can see the portholes of the ship. On the table, there is a loaf bread, tin cups and ware. One of the sailors is holding is forehead with his hand and the other one seems like is eating. ...The photograph was taken on board the English four-masted barque Crocodile which was a a regular visitor of the Port Phillip bay ports, transporting wheat from Australia to the UK. A rare photograph of seamen's intimate life on board.Sepia photograph depicting two seamen sitting at a table in the galley of the ship Crocodile. In the background we can see the portholes of the ship. On the table, there is a loaf bread, tin cups and ware. One of the sailors is holding is forehead with his hand and the other one seems like is eating.Written in pencil at the back: "12"cook, barque crocodile, liverpool, tureen, goldsmith album, life on board, meals, steward, portholes, galley, kitchen -
 Eltham District Historical Society Inc
Film - Video (VHS), Open Day Eltham Living and Learning Centre, 1988
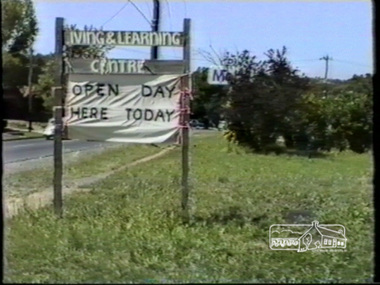
... This cottage-like dwelling has changed ownership several times since it was first built in the 1850s by local tanner John Pearson. The Living and Learning Centre as we...Eltham District Historical Society Inc 728 Main Rd Eltham melbourne This cottage-like dwelling has changed ownership several times since it was first built in the 1850s by local tanner John Pearson. The Living and Learning Centre as we ...This cottage-like dwelling has changed ownership several times since it was first built in the 1850s by local tanner John Pearson. The Living and Learning Centre as we know it today is the product of the energetic, reforming era of the Whitlam Government. Set up by the local council in 1974. Unedited amateur video (filmed by Vivienne?) with some voiceover and chatting with others. Significant VHS tape noise/flicker and colour pulsing. Opens with Living & Learning Centre sign on Main Road and “Open Day Here Today” attached to it. Views of entrance into carpark, dog obedience class demonstration near entrance, leadlight construction display in workshop, basket weaving, face painting, exterior garden landscape with herb garden, brick pottery shed, peppercorn tree, children’s activities, interior views showing artworks of life drawings, general engagement with other people (audio), candle room, pottery, children’s entertainer in garden, wool spinning, some attempts at engagement with Claire Fitzpatrick, Thai Chi demonstration, floral presentations, patchwork, needlepoint, knitting, some interior scenes very dark, weaving, cane basket weaving.VHS Video cassette (poor quality) Converted to MP4 file format 00:31:39; 746MBeltham living and learning centre, open day, dog obedience class, leadlight, basket weaving, face painting, artworks, life drawing, candle room, pottery, wool spinning, claire fitzpatrick, thai chi, patchwork, needlepoint, knitting, weaving, cane basket weaving, main road, eltham, video recording, shire of eltham archives -
 Eltham District Historical Society Inc
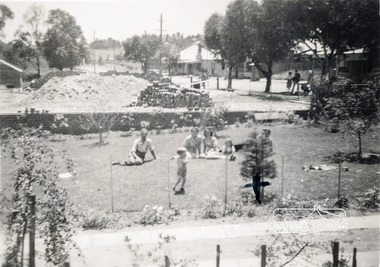
Photograph, Looking north from Staff's Railway Store overlooking garden and foundations of Lyon's Garage
... You can see the foundations and the filling in. Like our lawn. The Xmas tree we had for Michael with X" ...You can see the foundations and the filling in. Like our lawn. The Xmas tree we had for Michael with X" eltham main road lyon's garage michael sinclair eric staff marie (mary) staff mrs rigby mr rigby eileen rigby Black and white photograph Looking north from Staff's Railway Store overlooking garden and foundations of Lyon's Garage. ...L-R: Eric Staff, Michael Sinclair, Marie (Mary) Staff, Mrs Rigby, Eileen Rigby, Mr Rigby (partly hidden); Michael Sinclaiur in foreground. On back of photo: "I had this taken to show you Lyon's Garage. You can see the foundations and the filling in. Like our lawn. The Xmas tree we had for Michael with X" Black and white photographeltham, main road, lyon's garage, michael sinclair, eric staff, marie (mary) staff, mrs rigby, mr rigby, eileen rigby -
 Eltham District Historical Society Inc
Book, Glenvale School (Lilydale, Vic.). Committee of Parents and Friends, Firestorm : Black Saturday's Tragedy, 2009
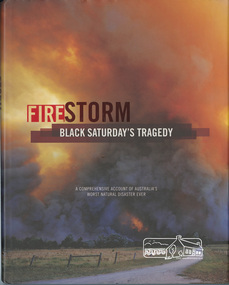
... Extreme temperatures, tornado-like wind speeds and tinder-dry land, culminated in the disaster we now know as Black Saturday. ...Extreme temperatures, tornado-like wind speeds and tinder-dry land, culminated in the disaster we now know as Black Saturday. ...This book is dedicated to all who lost so much on the darkest Saturday in Australia's history. Australia's worst natural disaster was a tragedy beyond belief that scarred Victoria physically and the whole Australian nation physiologically. Extreme temperatures, tornado-like wind speeds and tinder-dry land, culminated in the disaster we now know as Black Saturday. Before the sun would set on the blackest day in Australia's history, thousands of hectares would become blackened landscape and an unparalleled loss of lives could only mean that many areas would never be the same again. This graphic pictorial record takes you through the conditions prior to the day, the horrific fires that destroyed both bush and townships alike, the amazing bravery of emergency services personnel and the tragic aftermath. Accounts from eye-witnesses describe a fire like never seen before, a wild fire that outran every warning system. "A comprehensive account of Australia's worst natural disaster ever"black saturday, bush fires, bushfire, fire damage - buildings, victorian bushfires - 2009 -
 Eltham District Historical Society Inc
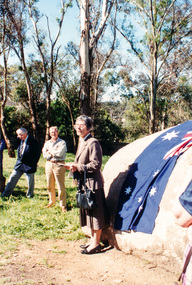
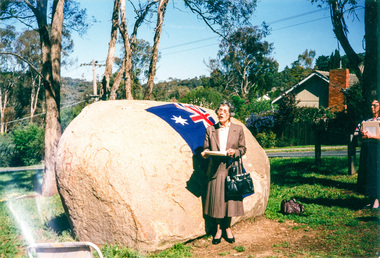
Photograph, Mary Owen, granddaughter of Walter Withers, unveiling the commemorative plaque on Walter Withers Rock at the corner of Bible and Arthur Streets, Eltham, 13 Oct 1990, 13/10/1990
... We are fortunate that so many of Walter Withers' works have been bought by galleries and that people like Andrew Mackenzie have taken the trouble to search out people who knew him and to write about him and his work. ...We are fortunate that so many of Walter Withers' works have been bought by galleries and that people like Andrew Mackenzie have taken the trouble to search out people who knew him and to write about him and his work. ...[from EDHS Newsletter No. 75, November 1990:] WALTER WITHERS PLAQUE At long last we have unveiled our plaque in the Walter Withers Reserve. The function was attended by a number of members and friends of the Society and descendants of the Withers family. Following the unveiling, the group proceeded to the Eltham Shire Office for afternoon tea and a small exhibition of Withers' paintings arranged by Andrew Mackenzie. The unveiling was performed by Mary Owen, a grand-daughter of Walter Withers. Her speech provided an interesting personal perspective on Withers and is repeated in full here: I feel somewhat overwhelmed by the responsibility of paying tribute to the man you have all come to honour today. I have the feeling that most of you probably know more about him and his work than I do. Walter Withers died nearly seven years before I was born and so I never knew him. Sadly, although other members of his family inherited some of his talent, I was not among them and I know very little about art. This is doubly hard to bear because my husband had some ability to draw and my second daughter also has some talent in this direction. My children are all artistic - mostly in the field of music inherited partly from their father - a Welshman who sang like a Welshman - and partly from my grandmother, Fanny Withers who, I believe was no mean pianist. However all this talent gave me a miss and for many years I felt a complete ignoramus in the fields of the arts. It was not until I was nearly fifty years old that I walked into a gallery in Brisbane and, as I wandered around the room, suddenly one picture leapt at me and I knew instantly that it had been painted by my grandfather. I had never seen the picture before and it gave me quite a shock to find that I had recognized the style of painting. I realized then that I had absorbed more than I realized simply by living with pictures and with people who painted them and talked about their painting and the painting of others. When I was a child I sometimes spent school holidays with my Aunt Margery Withers and her husband, Richard McCann. Aunt Marge painted me several times but I'm afraid I was a restless subject and used to sit reading a book and look up grudgingly when she wanted to paint my eyes. During the September holidays my aunt and uncle were busy preparing paintings far the annual exhibition of the Melbourne Twenty Painters, to which they both belonged. I remember how important I used to feel when they took me along to the Athenaeum Gallery on the Friday night before the opening to help hang their pictures. There were many artists there but the two I remember are perhaps surprisingly both women: Miss Bale and Miss Tweddle. I remember how cold it used to be up in that gallery at night. They used to heat water on a gas ring to make tea and Aunt Marge used to bring sandwiches and fruit for our evening meal. Everyone seemed to be poor in those days and no-one dreamed of going out for a meal. It was a case of make-do - even to cutting down frames to fit pictures or cutting pictures to fit the frames. They had to use the same frames from year to year if the pictures didn't sell. The opening was an exciting event for me. I felt I was privileged to meet important people - people who knew a lot more than I - and Uncle Dick would get quite merry after a couple of the tiny sweet sherries which were always distributed. I realise now that quite a lot of "art talk" rubbed off on me during my visits to the Athenaeum and during my stays with my aunt and uncle. I suspect that much of our most useful learning comes this way and those of us who have had the privilege of associating with artists, writers, philosophers and other thinkers have a richness in our lives of which we may be unaware. Walter Withers was a prolific painter and, although he painted for love of it, I suspect that the need to provide for his family drove him, like Mozart, to greater efforts than he might otherwise have achieved. Reading old letters and articles about the Heidelberg artists, I have come to realize something of the constant strain placed on many of them - particularly Withers and McCubbin - by poverty and the need to make ends meet. Withers was ever conscious of the need to provide for his wife and his five children and there are touching letters to his wife, regretting that he was not able to earn more for them. In addition to his painting, he worked hard at teaching and illustrating and, as he grew older, the strain began to tell and his health deteriorated. He seems never to have had a very strong constitution and suffered from rheumatism, which must have made painting quite painful at times. His eldest daughter, Gladys, was eventually confined to a wheelchair with rheumatoid arthritis and I have a tendency to arthritis myself, so I am particularly aware of what this could have meant to him. Recently I found a short letter written by my mother to her mother, Fanny Withers on the anniversary of her father's birthday in 1919, in which she said: "Poor old Dad, I often think now what a lot he must have suffered. His life was too hard and too strenuous for him. He had too many chick-a-biddies, I think. He wasn't equal to so much town life and train journeys with so many delicacies as he had. Since I have been ill, I have realised what he must have felt like.” He certainly drove himself to produce. He travelled all over Victoria by train, buggy, bicycle and on foot and for a time he travelled from Eltham to Melbourne every day by train, although later he lived in Melbourne during the week and only returned to Eltham for the weekends. My mother died seven years after her father's death, when my twin sisters were 10 days old and I was 16 months. So I never knew my mother or my grandfather. But my two aunts, Gladys and Margery, sometimes took me to stay with Gan Withers at Southernwood in Bolton Street . No cars in those days and it seemed a very long hot and dusty walk from the Station. Three memories remain with me of Southernwood. One is the well at the back which I found quite terrifying; the second is Gan killing a snake - even more terrifying. She was a formidable woman, my grandmother and a great ally and support to her husband. I think she was the business end of the partnership. The third memory of Southernwood is my grandfather's studio – down what seemed like a toy staircase inside the room. This and the big walk-in fireplace stayed in my mind from the age of about six until I saw them again about forty years later when the house was being used as a Sunday School. I just wish that money could be found to purchase this old house for the City of Eltham so that a permanent museum could be established in memory of a man who did so much to put Eltham on the map of art history. Recently I have become interested in family history and spent some time in England, Ireland and Wales looking for traces of my ancestors. I realized then how important it is to have records of people who have contributed to our society. We forget so soon and it is amazing how often, within two generations, names, dates and many details are forgotten. We are fortunate that so many of Walter Withers' works have been bought by galleries and that people like Andrew Mackenzie have taken the trouble to search out people who knew him and to write about him and his work. And I am very grateful to the Historical Society of Eltham for recognizing the importance of having a permanent tribute in Eltham to the contribution made by Walter Withers, who loved Eltham so much and who has assured this lovely district a place in the annals of history. I am indebted to Kathleen Mangan; the daughter of another famous Australian painter , Fred McCubbin, - featured in The Age this morning (thanks again to Andrew Mackenzie) for the most apt tribute to Walter Withers. Kathleen is not well and she rang me a couple of days ago, regretting that she could not be present today “to pay tribute” as she said, “to Walter Withers for I always think Walter Withers is the spirit of Eltham.” Thank you, Kathleen. And now I have much pleasure in unveiling the plaque commissioned by the Eltham Historical Society from Bob McLellan of Charmac Industries to commemorate the life and work of Walter Withers, the spirit of Eltham. Mary Owen, 13 October 1990.Three colour photographswalter withers rock, walter withers reserve, mary owen -
 Eltham District Historical Society Inc
Photograph, Mary Owen, granddaughter of Walter Withers, unveiling the commemorative plaque on Walter Withers Rock at the corner of Bible and Arthur Streets, Eltham, 13 Oct 1990, 13/10/1990
... We are fortunate that so many of Walter Withers' works have been bought by galleries and that people like Andrew Mackenzie have taken the trouble to search out people who knew him and to write about him and his work. ...We are fortunate that so many of Walter Withers' works have been bought by galleries and that people like Andrew Mackenzie have taken the trouble to search out people who knew him and to write about him and his work. ...[from EDHS Newsletter No. 75, November 1990:] WALTER WITHERS PLAQUE At long last we have unveiled our plaque in the Walter Withers Reserve. The function was attended by a number of members and friends of the Society and descendants of the Withers family. Following the unveiling, the group proceeded to the Eltham Shire Office for afternoon tea and a small exhibition of Withers' paintings arranged by Andrew Mackenzie. The unveiling was performed by Mary Owen, a grand-daughter of Walter Withers. Her speech provided an interesting personal perspective on Withers and is repeated in full here: I feel somewhat overwhelmed by the responsibility of paying tribute to the man you have all come to honour today. I have the feeling that most of you probably know more about him and his work than I do. Walter Withers died nearly seven years before I was born and so I never knew him. Sadly, although other members of his family inherited some of his talent, I was not among them and I know very little about art. This is doubly hard to bear because my husband had some ability to draw and my second daughter also has some talent in this direction. My children are all artistic - mostly in the field of music inherited partly from their father - a Welshman who sang like a Welshman - and partly from my grandmother, Fanny Withers who, I believe was no mean pianist. However all this talent gave me a miss and for many years I felt a complete ignoramus in the fields of the arts. It was not until I was nearly fifty years old that I walked into a gallery in Brisbane and, as I wandered around the room, suddenly one picture leapt at me and I knew instantly that it had been painted by my grandfather. I had never seen the picture before and it gave me quite a shock to find that I had recognized the style of painting. I realized then that I had absorbed more than I realized simply by living with pictures and with people who painted them and talked about their painting and the painting of others. When I was a child I sometimes spent school holidays with my Aunt Margery Withers and her husband, Richard McCann. Aunt Marge painted me several times but I'm afraid I was a restless subject and used to sit reading a book and look up grudgingly when she wanted to paint my eyes. During the September holidays my aunt and uncle were busy preparing paintings far the annual exhibition of the Melbourne Twenty Painters, to which they both belonged. I remember how important I used to feel when they took me along to the Athenaeum Gallery on the Friday night before the opening to help hang their pictures. There were many artists there but the two I remember are perhaps surprisingly both women: Miss Bale and Miss Tweddle. I remember how cold it used to be up in that gallery at night. They used to heat water on a gas ring to make tea and Aunt Marge used to bring sandwiches and fruit for our evening meal. Everyone seemed to be poor in those days and no-one dreamed of going out for a meal. It was a case of make-do - even to cutting down frames to fit pictures or cutting pictures to fit the frames. They had to use the same frames from year to year if the pictures didn't sell. The opening was an exciting event for me. I felt I was privileged to meet important people - people who knew a lot more than I - and Uncle Dick would get quite merry after a couple of the tiny sweet sherries which were always distributed. I realise now that quite a lot of "art talk" rubbed off on me during my visits to the Athenaeum and during my stays with my aunt and uncle. I suspect that much of our most useful learning comes this way and those of us who have had the privilege of associating with artists, writers, philosophers and other thinkers have a richness in our lives of which we may be unaware. Walter Withers was a prolific painter and, although he painted for love of it, I suspect that the need to provide for his family drove him, like Mozart, to greater efforts than he might otherwise have achieved. Reading old letters and articles about the Heidelberg artists, I have come to realize something of the constant strain placed on many of them - particularly Withers and McCubbin - by poverty and the need to make ends meet. Withers was ever conscious of the need to provide for his wife and his five children and there are touching letters to his wife, regretting that he was not able to earn more for them. In addition to his painting, he worked hard at teaching and illustrating and, as he grew older, the strain began to tell and his health deteriorated. He seems never to have had a very strong constitution and suffered from rheumatism, which must have made painting quite painful at times. His eldest daughter, Gladys, was eventually confined to a wheelchair with rheumatoid arthritis and I have a tendency to arthritis myself, so I am particularly aware of what this could have meant to him. Recently I found a short letter written by my mother to her mother, Fanny Withers on the anniversary of her father's birthday in 1919, in which she said: "Poor old Dad, I often think now what a lot he must have suffered. His life was too hard and too strenuous for him. He had too many chick-a-biddies, I think. He wasn't equal to so much town life and train journeys with so many delicacies as he had. Since I have been ill, I have realised what he must have felt like.” He certainly drove himself to produce. He travelled all over Victoria by train, buggy, bicycle and on foot and for a time he travelled from Eltham to Melbourne every day by train, although later he lived in Melbourne during the week and only returned to Eltham for the weekends. My mother died seven years after her father's death, when my twin sisters were 10 days old and I was 16 months. So I never knew my mother or my grandfather. But my two aunts, Gladys and Margery, sometimes took me to stay with Gan Withers at Southernwood in Bolton Street . No cars in those days and it seemed a very long hot and dusty walk from the Station. Three memories remain with me of Southernwood. One is the well at the back which I found quite terrifying; the second is Gan killing a snake - even more terrifying. She was a formidable woman, my grandmother and a great ally and support to her husband. I think she was the business end of the partnership. The third memory of Southernwood is my grandfather's studio – down what seemed like a toy staircase inside the room. This and the big walk-in fireplace stayed in my mind from the age of about six until I saw them again about forty years later when the house was being used as a Sunday School. I just wish that money could be found to purchase this old house for the City of Eltham so that a permanent museum could be established in memory of a man who did so much to put Eltham on the map of art history. Recently I have become interested in family history and spent some time in England, Ireland and Wales looking for traces of my ancestors. I realized then how important it is to have records of people who have contributed to our society. We forget so soon and it is amazing how often, within two generations, names, dates and many details are forgotten. We are fortunate that so many of Walter Withers' works have been bought by galleries and that people like Andrew Mackenzie have taken the trouble to search out people who knew him and to write about him and his work. And I am very grateful to the Historical Society of Eltham for recognizing the importance of having a permanent tribute in Eltham to the contribution made by Walter Withers, who loved Eltham so much and who has assured this lovely district a place in the annals of history. I am indebted to Kathleen Mangan; the daughter of another famous Australian painter , Fred McCubbin, - featured in The Age this morning (thanks again to Andrew Mackenzie) for the most apt tribute to Walter Withers. Kathleen is not well and she rang me a couple of days ago, regretting that she could not be present today “to pay tribute” as she said, “to Walter Withers for I always think Walter Withers is the spirit of Eltham.” Thank you, Kathleen. And now I have much pleasure in unveiling the plaque commissioned by the Eltham Historical Society from Bob McLellan of Charmac Industries to commemorate the life and work of Walter Withers, the spirit of Eltham. Mary Owen, 13 October 1990.Two colour photographswalter withers rock, walter withers reserve, mary owen -
 Eltham District Historical Society Inc
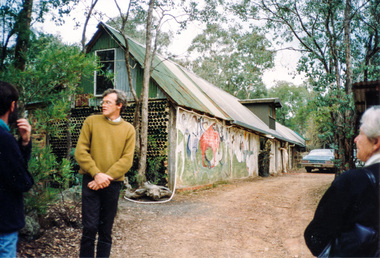
Photograph, Visit to Clifton Pugh's home, Dunmoochin, 26 May 1991, 26/05/1991
... like minded people have made their homes. This is an area of unconventional houses blending in with the surrounding bushland. The Pugh house is a rambling complex including studios and a large pottery kiln. It contains many of Clifton Pugh's works. For this excursion we...like minded people have made their homes. This is an area of unconventional houses blending in with the surrounding bushland. The Pugh house is a rambling complex including studios and a large pottery kiln. It contains many of Clifton Pugh's works. For this excursion we ...[from EDHS Newsletter No. 78, May 1991:] DUNMOOCHIN TRIP "Dunmoochin" was the home of the famous artist Clifton Pugh who died last year. The house also gives an informal name to the surrounding area at Cottles Bridge where artists, conservationists and like minded people have made their homes. This is an area of unconventional houses blending in with the surrounding bushland. The Pugh house is a rambling complex including studios and a large pottery kiln. It contains many of Clifton Pugh's works. For this excursion we have arranged a guided visit of the Pugh house and hope to be able to visit another house in the area. We will also be able to wander through bushland which Clifton had purchased for conservation purposes. This will be an afternoon excursion on Sunday 26th May starting with lunch (bring your own) at 12:30 pm at the Panton Hill Memorial Park. Transport will be by private car but transport can be arranged for those not wishing to drive. There is no cost but we need to be advised of members attending. Advise Russell Yeoman at the May Meeting or by 10th May if you intend to go. We will not be able to add extra people after that date.Three colour photographsactivities, clifton pugh, dunmoochin -
 Eltham District Historical Society Inc
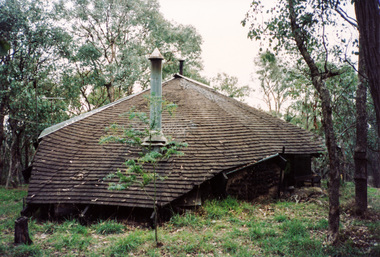
Photograph, Leon Saper residence, 60 Dunmoochin Road, Cottlesbridge, 26 May 1991, 26/05/1991
... like minded people have made their homes. This is an area of unconventional houses blending in with the surrounding bushland. The Pugh house is a rambling complex including studios and a large pottery kiln. It contains many of Clifton Pugh's works. For this excursion we...like minded people have made their homes. This is an area of unconventional houses blending in with the surrounding bushland. The Pugh house is a rambling complex including studios and a large pottery kiln. It contains many of Clifton Pugh's works. For this excursion we ...[from EDHS Newsletter No. 78, May 1991:] DUNMOOCHIN TRIP "Dunmoochin" was the home of the famous artist Clifton Pugh who died last year. The house also gives an informal name to the surrounding area at Cottles Bridge where artists, conservationists and like minded people have made their homes. This is an area of unconventional houses blending in with the surrounding bushland. The Pugh house is a rambling complex including studios and a large pottery kiln. It contains many of Clifton Pugh's works. For this excursion we have arranged a guided visit of the Pugh house and hope to be able to visit another house in the area. We will also be able to wander through bushland which Clifton had purchased for conservation purposes. This will be an afternoon excursion on Sunday 26th May starting with lunch (bring your own) at 12:30 pm at the Panton Hill Memorial Park. Transport will be by private car but transport can be arranged for those not wishing to drive. There is no cost but we need to be advised of members attending. Advise Russell Yeoman at the May Meeting or by 10th May if you intend to go. We will not be able to add extra people after that date.Two colour photographsactivities, clifton pugh, dunmoochin, leon saper -
 Eltham District Historical Society Inc
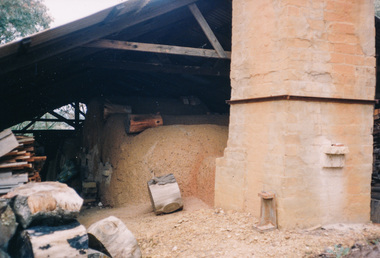
Photograph, Doug Orford, Pottery kiln, visit to Clifton Pugh's home, Dunmoochin, 26 May 1991, 26/05/1991
... like minded people have made their homes. This is an area of unconventional houses blending in with the surrounding bushland. The Pugh house is a rambling complex including studios and a large pottery kiln. It contains many of Clifton Pugh's works. For this excursion we...like minded people have made their homes. This is an area of unconventional houses blending in with the surrounding bushland. The Pugh house is a rambling complex including studios and a large pottery kiln. It contains many of Clifton Pugh's works. For this excursion we ...[from EDHS Newsletter No. 78, May 1991:] DUNMOOCHIN TRIP "Dunmoochin" was the home of the famous artist Clifton Pugh who died last year. The house also gives an informal name to the surrounding area at Cottles Bridge where artists, conservationists and like minded people have made their homes. This is an area of unconventional houses blending in with the surrounding bushland. The Pugh house is a rambling complex including studios and a large pottery kiln. It contains many of Clifton Pugh's works. For this excursion we have arranged a guided visit of the Pugh house and hope to be able to visit another house in the area. We will also be able to wander through bushland which Clifton had purchased for conservation purposes. This will be an afternoon excursion on Sunday 26th May starting with lunch (bring your own) at 12:30 pm at the Panton Hill Memorial Park. Transport will be by private car but transport can be arranged for those not wishing to drive. There is no cost but we need to be advised of members attending. Advise Russell Yeoman at the May Meeting or by 10th May if you intend to go. We will not be able to add extra people after that date.Colour photographactivities, clifton pugh, dunmoochin -
 Eltham District Historical Society Inc
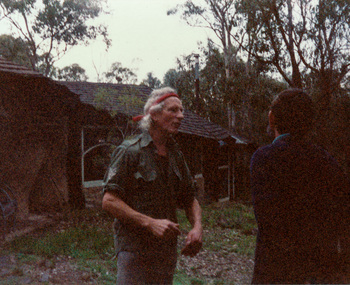
Photograph, Visit to Clifton Pugh's home, Dunmoochin, 26 May 1991, 26/05/1991
... like minded people have made their homes. This is an area of unconventional houses blending in with the surrounding bushland. The Pugh house is a rambling complex including studios and a large pottery kiln. It contains many of Clifton Pugh's works. For this excursion we...like minded people have made their homes. This is an area of unconventional houses blending in with the surrounding bushland. The Pugh house is a rambling complex including studios and a large pottery kiln. It contains many of Clifton Pugh's works. For this excursion we ...[from EDHS Newsletter No. 78, May 1991:] DUNMOOCHIN TRIP "Dunmoochin" was the home of the famous artist Clifton Pugh who died last year. The house also gives an informal name to the surrounding area at Cottles Bridge where artists, conservationists and like minded people have made their homes. This is an area of unconventional houses blending in with the surrounding bushland. The Pugh house is a rambling complex including studios and a large pottery kiln. It contains many of Clifton Pugh's works. For this excursion we have arranged a guided visit of the Pugh house and hope to be able to visit another house in the area. We will also be able to wander through bushland which Clifton had purchased for conservation purposes. This will be an afternoon excursion on Sunday 26th May starting with lunch (bring your own) at 12:30 pm at the Panton Hill Memorial Park. Transport will be by private car but transport can be arranged for those not wishing to drive. There is no cost but we need to be advised of members attending. Advise Russell Yeoman at the May Meeting or by 10th May if you intend to go. We will not be able to add extra people after that date.Three colour photographsactivities, clifton pugh, dunmoochin -
 Eltham District Historical Society Inc
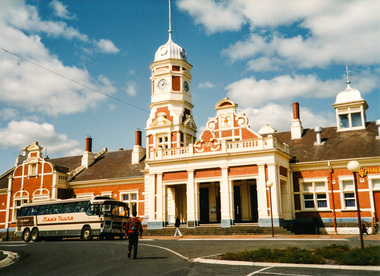
Photograph, Doug Orford, Maryborough Railway Station, Spring Excursion to Maryborough, 27 September 1992, 27/09/1992
... We will return about 6.00 pm and transport home can be arranged if required. Maryborough has a rich history with the gold era being particularly significant. Local historian Betty Osborne has produced the book "Maryborough - a Social History 1854-1905". You might like...We will return about 6.00 pm and transport home can be arranged if required. Maryborough has a rich history with the gold era being particularly significant. Local historian Betty Osborne has produced the book "Maryborough - a Social History 1854-1905". You might like ...[from EDHS Newsletter No. 86, September 1992:] SPRING EXCURSION MARYBOROUGH: As a Spring excursion our bus trip on 27th September is well timed - Maryborough is conducting its Wattle Festival on that weekend. We are to be guests of the Midlands Historical Society who will provide a guide for our tour of the town. This is a somewhat longer trip than we usually undertake so we have an earlier start at 8.00 am and the cost is a little more than usual at $20.00. The entry to the Midlands Society's Worsley Cottage is included. At the end of the town tour we will visit the C.W.A.'s Fair which is part of the Wattle Festival. Afternoon tea will be available there for a small charge. Bring your lunch and something for morning tea if you wish. We will be travelling to Maryborough via Creswick and Clunes and returning via Castlemaine. We will return about 6.00 pm and transport home can be arranged if required. Maryborough has a rich history with the gold era being particularly significant. Local historian Betty Osborne has produced the book "Maryborough - a Social History 1854-1905". You might like to try and obtain it from the library for advance reading or it will be available for purchase on the day at $25.00. To book for this tour please complete the attached from and return with your payment to the September meeting or send it to our post office box. Friends are most welcome as usual.Two colour photographsactivities, maryborough -
 Eltham District Historical Society Inc
Photograph, At Creswick, Spring Excursion to Maryborough, 27 September 1992, 27/09/1992
... We will return about 6.00 pm and transport home can be arranged if required. Maryborough has a rich history with the gold era being particularly significant. Local historian Betty Osborne has produced the book "Maryborough - a Social History 1854-1905". You might like...We will return about 6.00 pm and transport home can be arranged if required. Maryborough has a rich history with the gold era being particularly significant. Local historian Betty Osborne has produced the book "Maryborough - a Social History 1854-1905". You might like ...[from EDHS Newsletter No. 86, September 1992:] SPRING EXCURSION MARYBOROUGH: As a Spring excursion our bus trip on 27th September is well timed - Maryborough is conducting its Wattle Festival on that weekend. We are to be guests of the Midlands Historical Society who will provide a guide for our tour of the town. This is a somewhat longer trip than we usually undertake so we have an earlier start at 8.00 am and the cost is a little more than usual at $20.00. The entry to the Midlands Society's Worsley Cottage is included. At the end of the town tour we will visit the C.W.A.'s Fair which is part of the Wattle Festival. Afternoon tea will be available there for a small charge. Bring your lunch and something for morning tea if you wish. We will be travelling to Maryborough via Creswick and Clunes and returning via Castlemaine. We will return about 6.00 pm and transport home can be arranged if required. Maryborough has a rich history with the gold era being particularly significant. Local historian Betty Osborne has produced the book "Maryborough - a Social History 1854-1905". You might like to try and obtain it from the library for advance reading or it will be available for purchase on the day at $25.00. To book for this tour please complete the attached from and return with your payment to the September meeting or send it to our post office box. Friends are most welcome as usual.Colour photographactivities, maryborough -
 Eltham District Historical Society Inc
Photograph, Doug Orford, Aboriginal waterholes at Maryborough, Spring Excursion to Maryborough, 27 September 1992, 27/09/1992
... We will return about 6.00 pm and transport home can be arranged if required. Maryborough has a rich history with the gold era being particularly significant. Local historian Betty Osborne has produced the book "Maryborough - a Social History 1854-1905". You might like...We will return about 6.00 pm and transport home can be arranged if required. Maryborough has a rich history with the gold era being particularly significant. Local historian Betty Osborne has produced the book "Maryborough - a Social History 1854-1905". You might like ...[from EDHS Newsletter No. 86, September 1992:] SPRING EXCURSION MARYBOROUGH: As a Spring excursion our bus trip on 27th September is well timed - Maryborough is conducting its Wattle Festival on that weekend. We are to be guests of the Midlands Historical Society who will provide a guide for our tour of the town. This is a somewhat longer trip than we usually undertake so we have an earlier start at 8.00 am and the cost is a little more than usual at $20.00. The entry to the Midlands Society's Worsley Cottage is included. At the end of the town tour we will visit the C.W.A.'s Fair which is part of the Wattle Festival. Afternoon tea will be available there for a small charge. Bring your lunch and something for morning tea if you wish. We will be travelling to Maryborough via Creswick and Clunes and returning via Castlemaine. We will return about 6.00 pm and transport home can be arranged if required. Maryborough has a rich history with the gold era being particularly significant. Local historian Betty Osborne has produced the book "Maryborough - a Social History 1854-1905". You might like to try and obtain it from the library for advance reading or it will be available for purchase on the day at $25.00. To book for this tour please complete the attached from and return with your payment to the September meeting or send it to our post office box. Friends are most welcome as usual.Colour photographactivities, maryborough -
 Eltham District Historical Society Inc
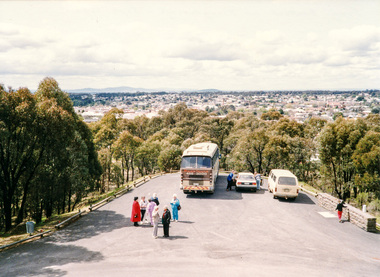
Photograph, Doug Orford, From Maryborough Lookout, Spring Excursion to Maryborough, 27 September 1992, 27/09/1992
... We will return about 6.00 pm and transport home can be arranged if required. Maryborough has a rich history with the gold era being particularly significant. Local historian Betty Osborne has produced the book "Maryborough - a Social History 1854-1905". You might like...We will return about 6.00 pm and transport home can be arranged if required. Maryborough has a rich history with the gold era being particularly significant. Local historian Betty Osborne has produced the book "Maryborough - a Social History 1854-1905". You might like ...[from EDHS Newsletter No. 86, September 1992:] SPRING EXCURSION MARYBOROUGH: As a Spring excursion our bus trip on 27th September is well timed - Maryborough is conducting its Wattle Festival on that weekend. We are to be guests of the Midlands Historical Society who will provide a guide for our tour of the town. This is a somewhat longer trip than we usually undertake so we have an earlier start at 8.00 am and the cost is a little more than usual at $20.00. The entry to the Midlands Society's Worsley Cottage is included. At the end of the town tour we will visit the C.W.A.'s Fair which is part of the Wattle Festival. Afternoon tea will be available there for a small charge. Bring your lunch and something for morning tea if you wish. We will be travelling to Maryborough via Creswick and Clunes and returning via Castlemaine. We will return about 6.00 pm and transport home can be arranged if required. Maryborough has a rich history with the gold era being particularly significant. Local historian Betty Osborne has produced the book "Maryborough - a Social History 1854-1905". You might like to try and obtain it from the library for advance reading or it will be available for purchase on the day at $25.00. To book for this tour please complete the attached from and return with your payment to the September meeting or send it to our post office box. Friends are most welcome as usual.Two colour photographsactivities, maryborough -
 Eltham District Historical Society Inc
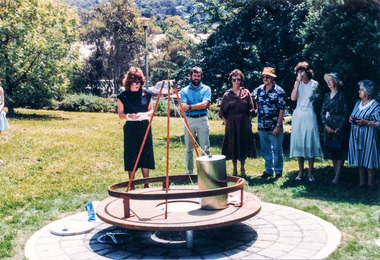
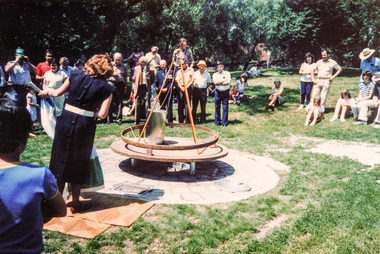
Photograph, Time Capsule Ceremony, 10 November 1985, 10/11/1985
... like grip, which would last for the life of the wheel. [from EDHS Newsletter No. 45, November 1985:] TIME CAPSULE CEREMONY: Our 150th Anniversary Monument is now under construction in the gardens in front of the Eltham Community Centre. Further details of the project are given under a separate heading below and this item deals with the proposed ceremony. We...like grip, which would last for the life of the wheel. [from EDHS Newsletter No. 45, November 1985:] TIME CAPSULE CEREMONY: Our 150th Anniversary Monument is now under construction in the gardens in front of the Eltham Community Centre. Further details of the project are given under a separate heading below and this item deals with the proposed ceremony. We ...On Sunday, 10 November 1985 a time capsule was lowered into a monument installed near the corner of Main Road and Pitt Street in Eltham, within the gardens at the front of what is now the Eltham Community and Reception Centre. This monument commemorates Victoria’s 150th anniversary and the former location of the Eltham Town Centre, which existed along this section of Main Road, then known as Maria Street. Beneath the site is a time capsule to be opened in the year 2035. A plaque was also erected at this site in October 1987 to commemorate the Shire of Eltham Historical Society’s 20th anniversary. The main feature of this monument is a ‘tyring disc’, a blacksmith’s implement that was found on this site. This consists of a large iron disc that was used as a platform for fitting iron tyres (like the one shown on top of the platform) to wooden-spoked cart wheels. The local blacksmith and wheelwright worked together to assemble the wheel, which was clamped to the platform placed close to the fire. The red-hot iron hoop, previously forged to the correct size, was lifted with tongs by the blacksmith over the outside of the rim, then hammered down amid flames from the scorching timber. The wheelwright drenched the tyre with cold water as soon as it was in position. A clamp placed on the naff (hub) and screwed down tightly kept the spokes at a constant angle as the tyre cooled. An even pressure from the contracting tyre tightened the joints at each end of the spokes and formed a vice-like grip, which would last for the life of the wheel. [from EDHS Newsletter No. 45, November 1985:] TIME CAPSULE CEREMONY: Our 150th Anniversary Monument is now under construction in the gardens in front of the Eltham Community Centre. Further details of the project are given under a separate heading below and this item deals with the proposed ceremony. We propose to formally lower the time capsule into its container underneath the monument as part of the Eltham Community Festival. All members are invited to attend the ceremony at 2.00 p.m. on Sunday, 10th November. Come earlier with a picnic lunch if you like. Local people and firms who have contributed money or services for the monument will also be invited. As part of the Festival programme the public are welcome to attend. This is one of the most significant projects the Society has undertaken and members' participation in its finalization would be most gratifying to the organizing committee. 150TH ANNIVERSARY PROJECTS: We have concentrated our efforts on finishing the monument and time capsule project within the 150th year and have found it necessary to abandon the historical tour project. We have applied to the State 150th Committee to transfer the funds allocated for the tour to construction of the monument. The historical tour project will be continued at a later date and photos of historic houses in the area, taken by Doug Orford, will be available for use in an associated display. At the time of writing, the monument construction is on schedule for the ceremony on 10th November. The concrete base has been completed and the main feature of the monument, which is an old tyring plate or disc, will be lifted into place in the next week. The final ceremony will involve lowering the sealed time capsule into place, bolting down its container lid and then concreting over the lid. The capsule will contain mainly items relating to present day Eltham and its people and is to be opened in the year 2035, a video film made by Joh Ebeli and also details of families and organizations who have contributed to construction of the monument. It is proposed to place the items in the capsule on 5th November and any items members think could be included may be submitted up to that date. The Society has received an excellent response from local people, firms and organizations by way of assistance with this project. Graham Beyer, who originated the project, has arranged many of the donations. He and his firm, Package Handling Equipment, have donated the time capsule itself and have carried out fabrication of sections of the monument. The design of the monument was adapted by Graham Beyer from drawings by Joh Ebeli. Charmac Industries has donated the container for the time capsule and a cast gun metal name plate for the monument. BMG Concrete has donated concrete for the base which was constructed by Caridi Construction Company. Northbourne Garden Supplies has donated materials for the paving around the monument. Robert Becker from Eltham Apex directed construction of the paving by Society members. Terry Hutchinson has agreed to donate the use of his crane to lift the tyring disc into place. Financial contributions have been made by the Eltham Chamber of Commerce and the Rotary Club of Eltham. We are grateful to all who have helped, and members' support for firms who have donated their services would be an appropriate recognition. It is planned to print "Time Capsule Certificates" which can be held by organizations or passed on to descendants by individuals. The certificates will indicate an interest in the contents of the capsule when it is opened in fifty years. Certificates will be distributed to Society members and those who have contributed to the project.Nine colour photographsactivities, 1985, time capsule, eltham, eltham festival -
 Eltham District Historical Society Inc
Photograph, Time Capsule Ceremony, 10 November 1985, 10/11/1985
... like grip, which would last for the life of the wheel. [from EDHS Newsletter No. 45, November 1985:] TIME CAPSULE CEREMONY: Our 150th Anniversary Monument is now under construction in the gardens in front of the Eltham Community Centre. Further details of the project are given under a separate heading below and this item deals with the proposed ceremony. We...like grip, which would last for the life of the wheel. [from EDHS Newsletter No. 45, November 1985:] TIME CAPSULE CEREMONY: Our 150th Anniversary Monument is now under construction in the gardens in front of the Eltham Community Centre. Further details of the project are given under a separate heading below and this item deals with the proposed ceremony. We ...On Sunday, 10 November 1985 a time capsule was lowered into a monument installed near the corner of Main Road and Pitt Street in Eltham, within the gardens at the front of what is now the Eltham Community and Reception Centre. This monument commemorates Victoria’s 150th anniversary and the former location of the Eltham Town Centre, which existed along this section of Main Road, then known as Maria Street. Beneath the site is a time capsule to be opened in the year 2035. A plaque was also erected at this site in October 1987 to commemorate the Shire of Eltham Historical Society’s 20th anniversary. The main feature of this monument is a ‘tyring disc’, a blacksmith’s implement that was found on this site. This consists of a large iron disc that was used as a platform for fitting iron tyres (like the one shown on top of the platform) to wooden-spoked cart wheels. The local blacksmith and wheelwright worked together to assemble the wheel, which was clamped to the platform placed close to the fire. The red-hot iron hoop, previously forged to the correct size, was lifted with tongs by the blacksmith over the outside of the rim, then hammered down amid flames from the scorching timber. The wheelwright drenched the tyre with cold water as soon as it was in position. A clamp placed on the naff (hub) and screwed down tightly kept the spokes at a constant angle as the tyre cooled. An even pressure from the contracting tyre tightened the joints at each end of the spokes and formed a vice-like grip, which would last for the life of the wheel. [from EDHS Newsletter No. 45, November 1985:] TIME CAPSULE CEREMONY: Our 150th Anniversary Monument is now under construction in the gardens in front of the Eltham Community Centre. Further details of the project are given under a separate heading below and this item deals with the proposed ceremony. We propose to formally lower the time capsule into its container underneath the monument as part of the Eltham Community Festival. All members are invited to attend the ceremony at 2.00 p.m. on Sunday, 10th November. Come earlier with a picnic lunch if you like. Local people and firms who have contributed money or services for the monument will also be invited. As part of the Festival programme the public are welcome to attend. This is one of the most significant projects the Society has undertaken and members' participation in its finalization would be most gratifying to the organizing committee. 150TH ANNIVERSARY PROJECTS: We have concentrated our efforts on finishing the monument and time capsule project within the 150th year and have found it necessary to abandon the historical tour project. We have applied to the State 150th Committee to transfer the funds allocated for the tour to construction of the monument. The historical tour project will be continued at a later date and photos of historic houses in the area, taken by Doug Orford, will be available for use in an associated display. At the time of writing, the monument construction is on schedule for the ceremony on 10th November. The concrete base has been completed and the main feature of the monument, which is an old tyring plate or disc, will be lifted into place in the next week. The final ceremony will involve lowering the sealed time capsule into place, bolting down its container lid and then concreting over the lid. The capsule will contain mainly items relating to present day Eltham and its people and is to be opened in the year 2035, a video film made by Joh Ebeli and also details of families and organizations who have contributed to construction of the monument. It is proposed to place the items in the capsule on 5th November and any items members think could be included may be submitted up to that date. The Society has received an excellent response from local people, firms and organizations by way of assistance with this project. Graham Beyer, who originated the project, has arranged many of the donations. He and his firm, Package Handling Equipment, have donated the time capsule itself and have carried out fabrication of sections of the monument. The design of the monument was adapted by Graham Beyer from drawings by Joh Ebeli. Charmac Industries has donated the container for the time capsule and a cast gun metal name plate for the monument. BMG Concrete has donated concrete for the base which was constructed by Caridi Construction Company. Northbourne Garden Supplies has donated materials for the paving around the monument. Robert Becker from Eltham Apex directed construction of the paving by Society members. Terry Hutchinson has agreed to donate the use of his crane to lift the tyring disc into place. Financial contributions have been made by the Eltham Chamber of Commerce and the Rotary Club of Eltham. We are grateful to all who have helped, and members' support for firms who have donated their services would be an appropriate recognition. It is planned to print "Time Capsule Certificates" which can be held by organizations or passed on to descendants by individuals. The certificates will indicate an interest in the contents of the capsule when it is opened in fifty years. Certificates will be distributed to Society members and those who have contributed to the project.Two colour photographsactivities, 1985, time capsule, eltham, eltham festival -
 Eltham District Historical Society Inc
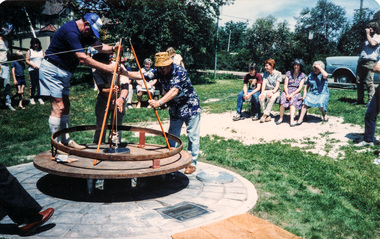
Photograph, Sinking the capsule, Graham Beyer on left and Joh Ebeli, Time Capsule Ceremony, 10 November, 1985, 10/11/1985
... like grip, which would last for the life of the wheel. [from EDHS Newsletter No. 45, November 1985:] TIME CAPSULE CEREMONY: Our 150th Anniversary Monument is now under construction in the gardens in front of the Eltham Community Centre. Further details of the project are given under a separate heading below and this item deals with the proposed ceremony. We...like grip, which would last for the life of the wheel. [from EDHS Newsletter No. 45, November 1985:] TIME CAPSULE CEREMONY: Our 150th Anniversary Monument is now under construction in the gardens in front of the Eltham Community Centre. Further details of the project are given under a separate heading below and this item deals with the proposed ceremony. We ...On Sunday, 10 November 1985 a time capsule was lowered into a monument installed near the corner of Main Road and Pitt Street in Eltham, within the gardens at the front of what is now the Eltham Community and Reception Centre. This monument commemorates Victoria’s 150th anniversary and the former location of the Eltham Town Centre, which existed along this section of Main Road, then known as Maria Street. Beneath the site is a time capsule to be opened in the year 2035. A plaque was also erected at this site in October 1987 to commemorate the Shire of Eltham Historical Society’s 20th anniversary. The main feature of this monument is a ‘tyring disc’, a blacksmith’s implement that was found on this site. This consists of a large iron disc that was used as a platform for fitting iron tyres (like the one shown on top of the platform) to wooden-spoked cart wheels. The local blacksmith and wheelwright worked together to assemble the wheel, which was clamped to the platform placed close to the fire. The red-hot iron hoop, previously forged to the correct size, was lifted with tongs by the blacksmith over the outside of the rim, then hammered down amid flames from the scorching timber. The wheelwright drenched the tyre with cold water as soon as it was in position. A clamp placed on the naff (hub) and screwed down tightly kept the spokes at a constant angle as the tyre cooled. An even pressure from the contracting tyre tightened the joints at each end of the spokes and formed a vice-like grip, which would last for the life of the wheel. [from EDHS Newsletter No. 45, November 1985:] TIME CAPSULE CEREMONY: Our 150th Anniversary Monument is now under construction in the gardens in front of the Eltham Community Centre. Further details of the project are given under a separate heading below and this item deals with the proposed ceremony. We propose to formally lower the time capsule into its container underneath the monument as part of the Eltham Community Festival. All members are invited to attend the ceremony at 2.00 p.m. on Sunday, 10th November. Come earlier with a picnic lunch if you like. Local people and firms who have contributed money or services for the monument will also be invited. As part of the Festival programme the public are welcome to attend. This is one of the most significant projects the Society has undertaken and members' participation in its finalization would be most gratifying to the organizing committee. 150TH ANNIVERSARY PROJECTS: We have concentrated our efforts on finishing the monument and time capsule project within the 150th year and have found it necessary to abandon the historical tour project. We have applied to the State 150th Committee to transfer the funds allocated for the tour to construction of the monument. The historical tour project will be continued at a later date and photos of historic houses in the area, taken by Doug Orford, will be available for use in an associated display. At the time of writing, the monument construction is on schedule for the ceremony on 10th November. The concrete base has been completed and the main feature of the monument, which is an old tyring plate or disc, will be lifted into place in the next week. The final ceremony will involve lowering the sealed time capsule into place, bolting down its container lid and then concreting over the lid. The capsule will contain mainly items relating to present day Eltham and its people and is to be opened in the year 2035, a video film made by Joh Ebeli and also details of families and organizations who have contributed to construction of the monument. It is proposed to place the items in the capsule on 5th November and any items members think could be included may be submitted up to that date. The Society has received an excellent response from local people, firms and organizations by way of assistance with this project. Graham Beyer, who originated the project, has arranged many of the donations. He and his firm, Package Handling Equipment, have donated the time capsule itself and have carried out fabrication of sections of the monument. The design of the monument was adapted by Graham Beyer from drawings by Joh Ebeli. Charmac Industries has donated the container for the time capsule and a cast gun metal name plate for the monument. BMG Concrete has donated concrete for the base which was constructed by Caridi Construction Company. Northbourne Garden Supplies has donated materials for the paving around the monument. Robert Becker from Eltham Apex directed construction of the paving by Society members. Terry Hutchinson has agreed to donate the use of his crane to lift the tyring disc into place. Financial contributions have been made by the Eltham Chamber of Commerce and the Rotary Club of Eltham. We are grateful to all who have helped, and members' support for firms who have donated their services would be an appropriate recognition. It is planned to print "Time Capsule Certificates" which can be held by organizations or passed on to descendants by individuals. The certificates will indicate an interest in the contents of the capsule when it is opened in fifty years. Certificates will be distributed to Society members and those who have contributed to the project.Colour photographactivities, 1985, time capsule, eltham, eltham festival -
 Monbulk RSL Sub Branch
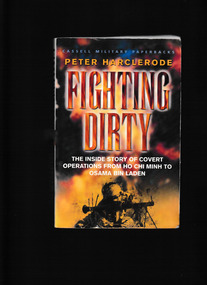
Book, Peter Harclerode, Fighting dirty the inside story of covert operations from Ho Chi Minh to Osama Bin Laden, 2001
... Among the revelations: that the CIA handed out shoulder-fired antiaircraft missiles "like lollipops" to Osama bin Laden and other mujahadeen leaders, weapons they may now turn against us how British SAS operated inside Afghanistan against the Russians and used "former special forces" personnel for clandestine missions why secret militia and locally recruited fighters successfully defeated guerrillas and terrorists in Oman, Malaya, and Borneo, but could not in Indochina and Algeria and how "fighting dirty" sometimes meant helping drug dealers in exchange for their support. Most relevant is the detailed analysis of why Russia failed to conquer Afghanistan, what we ...In the wake of the September 11th horror, nothing could be timelier than this exploration of world terrorism and the forces that fight it--armies and missions often shrouded in mystery. A foremost expert on guerrilla warfare presents, for the first time, a comprehensive investigation of covert military operations from Vietnam to Afghanistan. Among the revelations: that the CIA handed out shoulder-fired antiaircraft missiles "like lollipops" to Osama bin Laden and other mujahadeen leaders, weapons they may now turn against us how British SAS operated inside Afghanistan against the Russians and used "former special forces" personnel for clandestine missions why secret militia and locally recruited fighters successfully defeated guerrillas and terrorists in Oman, Malaya, and Borneo, but could not in Indochina and Algeria and how "fighting dirty" sometimes meant helping drug dealers in exchange for their support. Most relevant is the detailed analysis of why Russia failed to conquer Afghanistan, what we can learn from their experience, and the perils awaiting any invader.Index, bibliography, ill, maps, p.625.non-fictionIn the wake of the September 11th horror, nothing could be timelier than this exploration of world terrorism and the forces that fight it--armies and missions often shrouded in mystery. A foremost expert on guerrilla warfare presents, for the first time, a comprehensive investigation of covert military operations from Vietnam to Afghanistan. Among the revelations: that the CIA handed out shoulder-fired antiaircraft missiles "like lollipops" to Osama bin Laden and other mujahadeen leaders, weapons they may now turn against us how British SAS operated inside Afghanistan against the Russians and used "former special forces" personnel for clandestine missions why secret militia and locally recruited fighters successfully defeated guerrillas and terrorists in Oman, Malaya, and Borneo, but could not in Indochina and Algeria and how "fighting dirty" sometimes meant helping drug dealers in exchange for their support. Most relevant is the detailed analysis of why Russia failed to conquer Afghanistan, what we can learn from their experience, and the perils awaiting any invader. special forces - operations - 20th century, special forces - operations - 20th century -
 Bendigo Historical Society Inc.
Document - HAMILTON COLLECTION: CARTOON DRAWING, Early 1900s
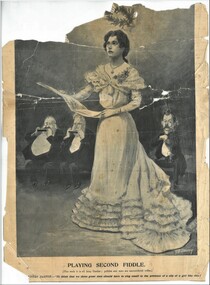
... (This week it is all Amy Castles: politics and wars are considered trifles).MISTER BARTON: ''To think that we three great men should have to sing small in the presence of a slip of a girl like this!''....(This week it is all Amy Castles: politics and wars are considered trifles).MISTER BARTON: ''To think that we three great men should have to sing small in the presence of a slip of a girl like this!''. ...Document. Page from a newspaper with a cartoon drawing (Full page). Cartoon shows a young lady in a long white dress. She is holding a music manuscript and appears to be singing. Behind her are three seated portly gentlemen wearing tuxedos. Two are playing harmonicas and the third is playing the violin. Written below the cartoon, PLAYING SECOND FIDDLE. (This week it is all Amy Castles: politics and wars are considered trifles).MISTER BARTON: ''To think that we three great men should have to sing small in the presence of a slip of a girl like this!''.performing arts, elocution, cartoon drawing -
 Bendigo Historical Society Inc.
Newspaper - JENNY FOLEY COLLECTION: TRIM AND TERRIFIC
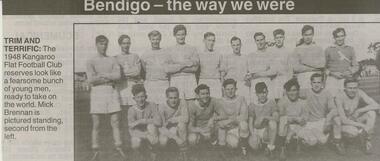
... Bendigo Advertiser '' The way we were'' from Thursday, March 18, 2004. trim and terrific: the 1948 Kangaroo Flat football Club reserves look like a fearsome bunch of young men, ready to take on the world. ...History House 11 Mackenzie Street Bendigo goldfields BHS Collection NEWSPAPER Bendigo advertiser the way we were Bendigo Advertiser '' The way we were'' from Thursday, March 18, 2004. trim and terrific: the 1948 Kangaroo Flat football Club reserves look like a fearsome bunch of young men, ready to take on the world. ...BHS CollectionBendigo Advertiser '' The way we were'' from Thursday, March 18, 2004. trim and terrific: the 1948 Kangaroo Flat football Club reserves look like a fearsome bunch of young men, ready to take on the world. Mick Brennan is pictured standing, second from the left. The clip is in a folder.newspaper, bendigo advertiser, the way we were -
 Bendigo Historical Society Inc.
Document - Anne Currie - A Colonial Wife, 1873 to 1916
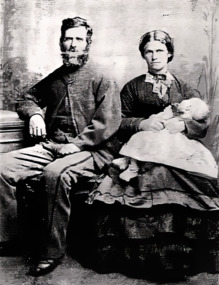
... Pioneer, Anne Currie and her husband John helped open up the area we now know as Lardner or the Drouin area. Anne Currie kept a diary more like a day book of her family's activities throughout their lives. ...History House 11 Mackenzie Street Bendigo goldfields Pioneer, Anne Currie and her husband John helped open up the area we now know as Lardner or the Drouin area. Anne Currie kept a diary more like a day book of her family's activities throughout their lives. ...Pioneer, Anne Currie and her husband John helped open up the area we now know as Lardner or the Drouin area. Anne Currie kept a diary more like a day book of her family's activities throughout their lives. The Diaries were commenced by John on 8th March 1813, but on 28 September of that year there is an entry 'John Currie has tired of keeping a Diary and has handed it over to me - C. Currie' The diary continued with a few breaks right up lo 19162807.11a Photocopy of Catherine and John Currie, photograhped in Melbourne by the famous J.P.Lind prior to journeying to Lardner in November 1875. Albert Currie is the baby aged four months. John is 41 years and Anne Catherine Currie is aged 30 years. 2807.11b Anne Currie - A Colonial Wife. A talk given by Robert Marmion at an Amy Huxtable Memorial Talk. Fifteen typed A4 Pages from the diaries.history, amy huxtable, bendigo, robert marmion, anne currie, albert currie, john currie, lardner drouin -
 Bendigo Historical Society Inc.
Postcard - BENDIGO EASTER FAIR COLLECTION: EASTER MONDAY FESTIVAL, 1906
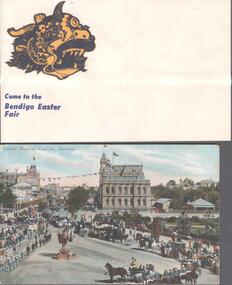
... The postcard is addressed to Miss Bush, Bower House, Bairnsdale and reads: Dear Marlie, you will see a procession like this at Easter. Will we all have fun then! With much love from Kingsley. ...The postcard is addressed to Miss Bush, Bower House, Bairnsdale and reads: Dear Marlie, you will see a procession like this at Easter. Will we all have fun then! With much love from Kingsley. ...Coloured postcard showing the Easter Monday Festival, Bendigo date unknown. The postcard is addressed to Miss Bush, Bower House, Bairnsdale and reads: Dear Marlie, you will see a procession like this at Easter. Will we all have fun then! With much love from Kingsley. The postcard is inside an envelope With a blue and yellow dragon on left hand side and the words Come to the Bendigo Easter Fair.event, easter fair, bendigo easter fair -
 Port Melbourne Historical & Preservation Society
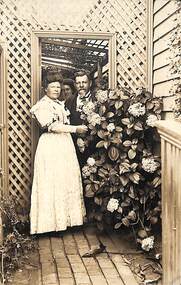
Photograph - Post card of family at 23 Ross Street, Port Melbourne, Kodak Australia, 14 Jan 1908
... On reverse: Mrs H F Proctor, Littleton, Massachuttes (sic) USA. 23 Ross Street, Port Melbourne , Australia, Jan 14 08 Dear Elizabeth Yo said you would like to see us in our home S here we are in our side entrance. ...Priscilla PETERSON Priscilla HUME Frederick PETERSON Lottie PETERSON Families Elizabeth PROCTOR Ross Street On reverse: Mrs H F Proctor, Littleton, Massachuttes (sic) USA. 23 Ross Street, Port Melbourne , Australia, Jan 14 08 Dear Elizabeth Yo said you would like to see us in our home S here we are in our side entrance. ...Post card sent from Priscilla PETERSON ( nee HUME)to her niece Elizabeth PROCTOR (nee HUME) who was living Littleton, Massachusetts, USA in 1908. At the time Pricilla and Frederick were living with their daughter, Lottie at 23 Ross Street, Port Melbourne.Sepia postcard of three members of the Peterson family standing in lattice arch beside a hydrangea bush at 23 Ross Street,, Port Melbourne.On reverse: Mrs H F Proctor, Littleton, Massachuttes (sic) USA. 23 Ross Street, Port Melbourne , Australia, Jan 14 08 Dear Elizabeth Yo said you would like to see us in our home S here we are in our side entrance. Myself, Husband & Lottie. Hope to hear from you soon. Love from all to all. Aunt Priscilla.priscilla peterson, priscilla hume, frederick peterson, lottie peterson, families, elizabeth proctor, ross street -
 Bendigo Historical Society Inc.
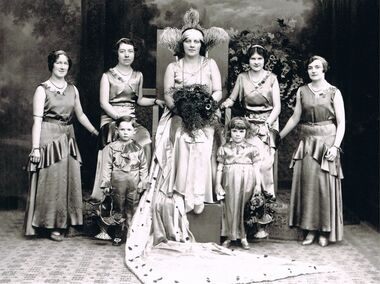
Photograph - PATRICIA COLES (NEE MCLEAN) COLLECTION: BENDIGO EASTER PARADE QUEEN COMPETITION 1929
... We Were’ - 'Hi, please have a look at the attached photo. My name is Peter Moloney, Gwen McPherson’s son; my grandfather was a policeman at Golden Square from about 1935 to 1945. My mother was born in 1920. Given all the information above and also the fact that the 'Queen' in the photo does not look like...We Were’ - 'Hi, please have a look at the attached photo. My name is Peter Moloney, Gwen McPherson’s son; my grandfather was a policeman at Golden Square from about 1935 to 1945. My mother was born in 1920. Given all the information above and also the fact that the 'Queen' in the photo does not look like ...Photograph. The Patricia Coles (nee McLean) Collection. Bendigo Easter Parade Queen Competition 1929. Copy of a black and white photograph of four women, one seated on a central chair, with flowers, and two small children. A boy and a girl. On the reverse the Queen, seated, is identified as Gwen McPherson (Mr McPherson, her father, was a senior policeman in Golden Square). The small girl, front right, is named as June McLean, daughter of Nellie and Tom McLean, United Kingdom Hotel, Golden Square. [Note: Peter MOLONEY, Gwen's son emailed [email protected] 13/10/2014 after the photo appeared in the Bendigo Advertiser, 'The Way We Were’ - 'Hi, please have a look at the attached photo. My name is Peter Moloney, Gwen McPherson’s son; my grandfather was a policeman at Golden Square from about 1935 to 1945. My mother was born in 1920. Given all the information above and also the fact that the 'Queen' in the photo does not look like my mother, who would have been 9 years old in 1929, I am afraid the detail on the photo is incorrect. Hope this information is of some use to you. Peter Moloney.']bendigo, entertainment, easter parade queen competition, bendigo easter fair. bendigo easter parade queen compettion. mclean family of golden square. united kingdom hotel. -
 Bendigo Historical Society Inc.
Negative - DUDLEY HOUSE COLLECTION: NEGATIVES OF DUDLEY HOUSE PLUS 3 IMAGES
... Like all government buildings of this era, its exterior is fairly modest, unlike the opulent styles of later decades. It was originally built as a residence for the district surveyor, who designed the Bendigo street layout that we still use to this day. ...Looks like a wooden fence is enclosing the property can we date image from this?...Looks like a wooden fence is enclosing the property can we date image from this? ...Dudley House brick building is one of the earliest and most intact 1850s buildings remaining in Bendigo CBD. Like all government buildings of this era, its exterior is fairly modest, unlike the opulent styles of later decades. It was originally built as a residence for the district surveyor, who designed the Bendigo street layout that we still use to this day. Strip of Photo Negatives of Dudley House in View Street Bendigo, Victoria Australia. 3 Images date unknown, but car parked out of front of property is from the 1960s. Looks like a wooden fence is enclosing the property can we date image from this?bendigo, buildings, dudley house -
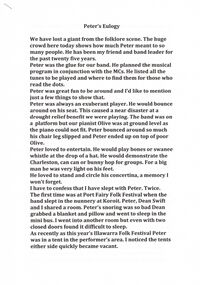 Bendigo Historical Society Inc.
Document - PETER ELLIS COLLECTION: PETER ELLIS OBITUARY
... We have lost a giant from the folklore scene. The huge crowd here today shows how much Peter meant to so many people. He has been my friend and band leader for the past twenty five years. Peter was the glue for our band. He planned the musical program in conjunction with the MCs. He listed all the tunes to be played and where to find them for those who read the dots. Peter was great fun to be around and I'd like...We have lost a giant from the folklore scene. The huge crowd here today shows how much Peter meant to so many people. He has been my friend and band leader for the past twenty five years. Peter was the glue for our band. He planned the musical program in conjunction with the MCs. He listed all the tunes to be played and where to find them for those who read the dots. Peter was great fun to be around and I'd like ...3 A4 pages stapled together. Peter's Eulogy. We have lost a giant from the folklore scene. The huge crowd here today shows how much Peter meant to so many people. He has been my friend and band leader for the past twenty five years. Peter was the glue for our band. He planned the musical program in conjunction with the MCs. He listed all the tunes to be played and where to find them for those who read the dots. Peter was great fun to be around and I'd like to mention just a few things to show that. Peter was always an exuberant player. He would bounce around on his seat. This caused a near disaster at a drought relief benefit we were playing. The band was on a platform but our pianist Olive was at ground level as the piano could not fit. Peter bounced around so much his chair leg slipped and Peter ended up on top of poor Olive. Peter loved to entertain. He would play bones or swanee whistle at the drop of a hat. He would demonstrate the Charleston, can can or bunny hop for groups. For a big man he was very light on his feet. He loved to stand and circle his concertina, a memory I won't forget. I have to confess I have slept with Peter. Twice. The first time was at Port Fairy Folk Festival when the band slept in the nunnery at Koroit. Peter, Dean Swift and I shared a room. Peter's snoring was so bad Dean grabbed a blanket and a pillow and went to sleep in the mini bus. I went into another room but even with two closed doors found it difficult to sleep. As recently as this year's Illawarra Folk Festival Peter was in a tent in the performer's area. I noticed the tents either side quickly became vacant. The next time was in Canberra when Peter and I were at one end of a caravan and Mary Smith was at the other. I don't think poor Mary got much sleep that night. On another occasion in Canberra Peter was Half asleep in his van when another well known female performer (not from the band) came in and stripped off. She realised she was in the wrong van and grabbed her stuff and took off. She returned very red faced the next morning to collect her shoes. Peter maintained he saw nothing. One freezing cold night in Canberra Peter ad I had been at a terrific session in the bar. We had to support each other across the oval towards our caravan. Peter tried to straddle the fence and got stuck. There was a real Canberra frost on the fence and a sensitive part of Peter's anatomy was in grave danger of frost bite. Peter took an eternity to extricate himself. I couldn’t help him as I was laughing so much. We'll never forget making Harry McQueen's bull boar sausages at Nariel. Peter had already organised the meat and intestine casings from the butcher in Corryong. He was such an organiser and the sausages were brilliant. Peter was quirky. He always made a morning cuppa complete with tea cosy. It even left Martin Pearson speechless in the breakfast tent at Illawarra this year. Another example was when he sold his beloved FJ which is parked out the front today. As the new buyer drove off down the road Peter stood there playing 'Now is the hour' and 'wish me luck as you wave me goodbye' on his concertina. Peter loved a joke. He knew Shirley Andrews loathed the tune Danny boy so he played it in her hearing any chance he go. He even gave her a cd with a dozen different performers doing their versions of the song. We once played at the Rifle Brigade Oktoberfest and Peter was just a bit under the weather after being there for two days (the band got free drinks). The late night crowd was getting restless so Peter tried to shut them up by holding his finger up. They got more restless. Peter couldn’t understand it. 'it worked for Grummy Ross,' he wailed. It was the only time we ever over rode him and started playing without him. He wasn’t happy but disaster was averted. The dance club once had a reverse deb ball. Peter shave his beard, got his sister Robyn to make up his face and came to the ball in a lovely gown. It took ages for people to realise who it was.Margaret Hogan said the other night 'Peter let me see and do things I never would have done otherwise.' I think that is true of all of us in the band. We performed in major festivals regularly, travelled widely and had experiences such as playing at the opening of Melbourne Museum or State Parliament. Experience we'd never have had without Peter. I'm glad Peter didn’t suffer. He told me last Monday morning on my last visit he was in no pain. For that I am grateful. He passed away that night. He was taken far too young and has left a huge hole in all our lives. Personally I have lost a great mate, but then we can all say that. We'll miss you Dirty Pierre. John Williams.person, individual, peter ellis oam -
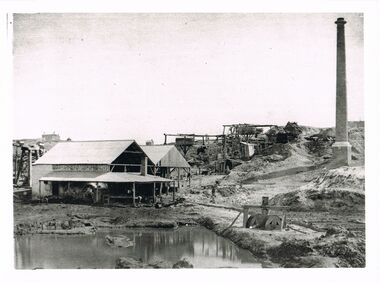 Bendigo Historical Society Inc.
Photograph - WES HARRY COLLECTION: MINING LANDSCAPE BENDIGO
... like building in front of mining dam. On RH side brick chimney. Potentially, the same area as shown in image 2402.237 (see mine sheds, brick chimney and whims). Photograph WES ...Black and white photo copy : image shows line of whims descending towards open shed like building in front of mining dam. On RH side brick chimney. Potentially, the same area as shown in image 2402.237 (see mine sheds, brick chimney and whims).Batchelderplace, bendigo, mining landscape