Showing 151 items
matching artillery regiment
-
 4th/19th Prince of Wales's Light Horse Regiment Unit History Room
Booklet, Artillery Training Vol III Pam No 4 Part 4 Command and Control in Battle 1942, August 1942
Paper covered booklet superseding 1938 editionNot to be publishedartillery training, world war 2 -
4th/19th Prince of Wales's Light Horse Regiment Unit History Room
Booklet, Royal Artillery Training Memorandum No 9, Oct 1943
Paper covered booklet dealing with amendments, new methods in vertical photography, field, medium and heavy artillery, anti tank and anti aircraft artillery artillery training, world war 2 -
4th/19th Prince of Wales's Light Horse Regiment Unit History Room
Booklet, Artillery Training Vol I Artillery in Battle Pam No 1 Organizational Command and Employment 1948, 1948
A soft covered booklet concerned primarily with the handling of artillery at the corps and divisional levelWO Code No 8288artillery command deployment -
4th/19th Prince of Wales's Light Horse Regiment Unit History Room
Range Card - 75 mm Gun, abt 1950's
A plastic encased range card for 75 mm gun showing calibration using M21 telescope for various natures of roundsartillery, range card -
4th/19th Prince of Wales's Light Horse Regiment Unit History Room
Booklet, Australian Military Forces The Division in Battle Pamphlet No 5 Artillery 1969, 1969
Soft covered booklet with amendments 1& 2 covering Artillery - its characteristics, role, equipment & ammunition, organisation, principles of employment, applications of fire etc. 3 copies7610-66-031-4752artillery command deployment -
4th/19th Prince of Wales's Light Horse Regiment Unit History Room
Booklet, Australian Army Manual of Land Warfare Part 2 Artillery Training Vol 4 Pam 1 Planning & Control of Air Defences 1980, 1980
Soft covered booklet providing doctrine on planning and control of air defences7610-66-106-0086artillery, air defence -
4th/19th Prince of Wales's Light Horse Regiment Unit History Room
Booklet, Australian Army Manual of Land Warfare Part 2 Artillery Training Vol 3 Pam 3 Gun Regiments Survey within the Unit 1983, 1983
Soft covered booklet describing the principles and process of battery survey in a field artillery battery and that within the regiment, and the role organisation duties and deployment of a regimental survey section 7610-66-108-8454artillery, survey -
4th/19th Prince of Wales's Light Horse Regiment Unit History Room
Booklet, Australian Army Manual of Land Warfare Part 2 Artillery Training Vol 3 Pam 6 Mortar Locating Troop 1980, 1980
Soft covered booklet providing information and doctrine for the Mortar Locating Troop, Divisional Locating Battery 7610-66-104-8349artillery, mortar locating -
4th/19th Prince of Wales's Light Horse Regiment Unit History Room
Booklet, Australian Army Manual of Land Warfare Part 2 Artillery Training Vol 1 Pam 5 Artillery Staff Duties 1984, 1984
Soft covered booklet to explain to officers of the RAA staff, duties particular to employment of artillery in battle. 2 copies7610-66-120-4339artillery, staff duties -
4th/19th Prince of Wales's Light Horse Regiment Unit History Room
Booklet, Australian Army Manual of Land Warfare Part 2 Vol 1 Pam No 1 Employment of Artillery (All Corps) 1984, 1984
A soft covered booklet describing the role and general principles of field artillery, its equipment and effects, command and communications administration and supply, planning and employment, air defence etc. 2 copies7610-66-118-5456artillery, employment -
4th/19th Prince of Wales's Light Horse Regiment Unit History Room
Document, Jungle Training Centre. Tactics Wing. Artillery Data, Feb 1971
A 13 page photocopy document that is an extract from various official publications to provide students at the Centre with information about artillery.Feb 71artillery -
4th/19th Prince of Wales's Light Horse Regiment Unit History Room
Visible Record Book
Green plastic covered visible record book in which various artillery fire mission pro forma are inserted in clear plastic sleeves onto which fire missions can be written artillery, fire missions -
4th/19th Prince of Wales's Light Horse Regiment Unit History Room
Booklet, Aide-Memoire for Regimental Officers & Non-Commissioned Officers 1957, 1957
A soft covered booklet dealing with Company/Platoon orders, communications, Artillery fire control, various reports etcDSN 7610-010-0288aide-memoire officers ncos -
 4th/19th Prince of Wales's Light Horse Regiment Unit History Room
Film - DVD, The Great Tank Battle of Kursk
The great tank battle of Kursk took place in 1943, when the Germans mounted a huge attack on the Soviet army with a force f some 900,000 men, 2,700 of their most fearsome tanks, 10,000 artillery pieces and 2,000 aircraft. Codenamed 'Operation Citadel', the attack was Adolf Hitler's plan to avenge the disaster that befell the German 6th Army at Stalingrad.DVD in caseThe War File - The Great Tank Battle of Kursk -
4th/19th Prince of Wales's Light Horse Regiment Unit History Room
Order of Ceremony, 4th/19th Prince of Wales's Light Horse Regiment, Laying Up of the Guidons of Victorian Light Horse Regiments and Commemorative Service for the 90th Anniversary of the Charge of the Nek, 08/2005
The 4th/19th Prince of Wales's Light Horse Regiment was the custodian of the guidons of the 8th, 13th, 17th, 19th, and 20th Light Regiments. On 7 August 2005 the Regiment, with due ceremony, presented these guidons to the Trustees of the Shrine of Remembrance to be laid up in the Shrine. The activity also commemorated the charge at The Nek during the Gallipoli campaign of World War 1. This charge over artillery and machine gun swept ground resulted in the slaughter of 8th and 10th Light Horse Regiment members for no tactical gain.Soft covered bookletarmy, gallipoli, ceremonial, shrine of remembrance, the nek, laying up guidons, light horse regiments -
4th/19th Prince of Wales's Light Horse Regiment Unit History Room
Document (3 copies), Pattern 1853 Artillery Carbine/Martini-Henry Rifle MK1/Martini-Enfield MK1, 1800's
Three pages photocopied from a book showing photgraphs of each weapon, the bore or calibre, rifling type, length etc. There is a description of each weapon and its history in brief.martini henry. martini enfield -
4th/19th Prince of Wales's Light Horse Regiment Unit History Room
Booklet, Concealment in the Field 1957, 1957
A soft covered booklet covering the principles, reasons, and aids for concealment in the field, covering vehicles, artillery, infantry, and their weapons, headquarters, admin, maintenance and communications areasWO Code No 9459concealment in the field -
4th/19th Prince of Wales's Light Horse Regiment Unit History Room
Booklet, Notes on the Organization of Field and RHA Regiments and their tactical handling. Military Training Pamphlet No 5 1938, 1938
A soft covered 4 page publication giving a brief on the new organisation of Field and Royal Horse ArtilleryNo to be published -
4th/19th Prince of Wales's Light Horse Regiment Unit History Room
Photograph, 1914/18
A sepia toned photograph on card showing what could be an ammunition limber in the foreground and a cannon in the background which just fired. The location is flat open groundphoto, artillery -
4th/19th Prince of Wales's Light Horse Regiment Unit History Room
Book, Maintenance Manual Canadian Military Pattern Vehicles, Apr 1942
Soft covered maintenance manual for the 15 cwt 4x2, the 15 cwt, 30 cwt, Heavy Duty and Field Artillery Tractor 4x4 Chevrolet MB-C1, The logo of General Motors Canadamaintenance manual, canadian military vehicles -
 Flagstaff Hill Maritime Museum and Village
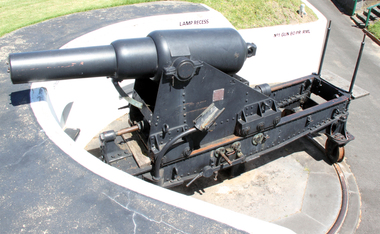
Weapon - Cannon, 1866
In the years following the Crimean War (1854-1857J) there was a great concern in the Colony that Imperial Russia would attempt an invasion. Coastal defences in the colony of Victoria were greatly strengthened by the Government as a result. Warrnambool was originally protected by cannons at Cannon Hill, approximately 1 kilometer west of the Flagstaff Hill Fortifications. These cannons included two 1866 guns, both 80 Pound Rifled Muzzle Loaders (RML) purchased by Victoria’s Colonial Government. They were part of a shipment of 26 such guns sent from England in December 1866. They are registered as No. 23 (80cwt-2qr-0lbs) - Gun 1, and No.13 (81cwt-1qr-12lbs) - Gun 2. They were cast at the Royal Gun Factory, Woolwich Arsenal, in 1866 and have a 6.3 inch bore. Both barrels carry the Royal Cypher of Queen Victoria, Insignia of the Royal Engineers, within the Garter and Motto surmounted by the Crown, with the Royal Cypher of Queen Victoria within the Garter (letters in centre “VR”, motto “HONI SOIT QUI MAL Y PENSE”, "Shame be to him who thinks evil of it."). The guns were originally supplied with wooden carriages. (The Royal Arsenal at Woolwich, England, was established eleven years after the Restoration of King Charles II. It was the principal supplier of armaments to the British and Empire Governments. At the height of its operations during World War One the factory covered 1300 acres and employed very nearly 80,000 workers. Woolwich was the Headquarters of the Royal Artillery since the raising of that Regiment in 1716. The Arsenal was closed in the late 1960’s.) These two cannons were transferred to the Warrnambool Garrison Artillery Battery Fortifications erected at Flagstaff Hill in 1887 as part of Victoria’s Coastal Defences. The original wooden carriages were subsequently replaced with the present iron garrison carriages in 1888. They are a “C” pivot. The ‘racers’ or curved track set into the floor of the gun emplacement (which enabled the guns to be traversed more quickly) are as specified for guns up to 10 inch, being of wrought iron 2.78 inches wide. A temporary third gun, now no longer on Flagstaff Hill’s site, was a 5 inch Rifled Breech Loading (BL) Armstrong gun mounted on an Elswick hydro pneumatic disappearing carriage It was faster to load and fire than the 80 pound RMLs and its arrival spelt the end of the older 80 pound guns’ useful life, apart from being used for practice sessions. The 5 inch BL gun was the main defensive weapon of the Warrnambool Battery until the Battery was downgraded in importance and the gun was recalled to Melbourne in 1910. The State of Victoria took over the ownership of the guns at the time of Australian Federation in 1901. In about 1901/1902 the Garrison Battery was converted to the Warrnambool Battery of the Australian Field Artillery (No 4 Field Battery). It was equipped with 4.7 inch naval guns mounted on field carriages. They were now a mobile unit but continued to use the Warrnambool Garrison area at Flagstaff Hill for practice. When the Fortifications were declared obsolete the two 80 Pounder RML were relocated to Cannon Hill in 1910. On the outbreak of World War One the 4.7 inch guns were recalled to Melbourne, and the Battery was disbanded. Most of the personnel probably re-enlisted in the local 4th Australian Light Horse Regiment. The two 80 Pounder RML were moved back to the Fortifications in 1973. They were both fully restored by Army First Year Apprentices at the Ordinance Factory in Bendigo in time for the centenary year of the fortifications in 1987. The guns are capable of firing 80 pound (32.3kg) armour piercing exploding shells 3.65kms out to sea. They were original manned by volunteers before a paid Garrison was established. Now the Guns are again fired by volunteers on Special Event days. Since restoration the Gun Number 1 had been fired on a regular basis but Gun Number 2 hadn’t been fired since the mid 1990’s. In April 2015 Gun Number 2 was serviced in preparation for the firing of both cannons on the ANZAC Centenary commemorations on April 25th 2015. Other guns from the original Cannon Hill location were obsolete by the time the 1887 Warrnambool Garrison Artillery Battery was built. These guns are (1) a 32 Pounder Muzzle Loading Smooth Bore (SB) cast in 1813 at the famous Carron Foundry, number 80837 and now located in the Warrnambool Botanic Gardens (2) a 68 Pounder Muzzle Loading Smooth Bore cast in 1861 at the equally august Low Moor Foundry, number 10310 and now located on the lawn area at the entrance to Flagstaff Hill Maritime Village. Both of these guns are mounted on their original wooden garrison carriages. There are only seven 32 Pounder SB made by Carron and fifteen 68 Pounder SB made at Low Moor known to exist in the State of Victoria (Conservation Management Plan for Victorian Guns and Cannon, South Western Victoria, May 2008, ref W/F/04)The Warrnambool Garrison has been added to the Victorian Heritage Register H1250 “for its intact battery and guns, a strong reminder of Victoria’s wealth and determination to protect itself from the perceived threat of invasion in the 1880’s.” The City of Warrnambool is one of several custodians of a collection of artillery pieces of heritage significance at a state, national and international level. These pieces are directly related to the defence of south-west Victoria in the 19th century. The care and preservation come under the Heritage Act 1995. Cannon. 80 Pounder Rifled Muzzle Loading (RML) Gun on iron carriage and slide, installed in the Battery at Flagstaff Hill’s Fortifications.. Made in 1866 at the Royal Gun Factory (R-G-F), Woolich, England. Gun Reg No - 23. Flagstaff Hill Garrison Gun 1 (Gun No. 1) Insignia of the Royal Engineers, and the weight of the gun, stamped on top of the gun’s barrel. There is a brass plate on the side of the gun with the details of 1987 restoration.Stamped on axle cover on side of barrel “R-G-F / No 23 / 1866”. Stamped into the metal on top of the barrel, Insignia of the Royal Engineers; Garter and Motto “HONI SOIT QUI MAL Y PENSE”, surmounted by the Crown, with the Royal Cypher of Queen Victoria “VR” within the Garter. Also stamped on top of the gun are 2 inward pointing arrows above the weight ”81-2-0”. Brass plate “RESTORATION / BY / FIRST YEAR / APPRENTICES / ORDANANCE FACTORY / BENDIGO 1987”flagstaff hill, warrnambool, shipwrecked coast, flagstaff hill maritime museum, maritime museum, shipwreck coast, flagstaff hill maritime village, great ocean road, cannon, 80 pounder, rifled muzzle, loading, royal gun factory, woolich -
 Flagstaff Hill Maritime Museum and Village
Weapon - Cannon, 1866
In the years following the Crimean War (1854-1857J) there was a great concern in the Colony that Imperial Russia would attempt an invasion. Coastal defences in the colony of Victoria were greatly strengthened by the Government as a result. Warrnambool was originally protected by cannons at Cannon Hill, approximately 1 kilometer west of the Flagstaff Hill Fortifications. These cannons included two 1866 guns, both 80 Pound Rifled Muzzle Loaders (RML) purchased by Victoria’s Colonial Government. They were part of a shipment of 26 such guns sent from England in December 1866. They are registered as No. 23 (80cwt-2qr-0lbs) - Gun 1, and No.13 (81cwt-1qr-12lbs) - Gun 2. They were cast at the Royal Gun Factory, Woolwich Arsenal, in 1866 and have a 6.3 inch bore. Both barrels carry the Royal Cypher of Queen Victoria, Insignia of the Royal Engineers, within the Garter and Motto surmounted by the Crown, with the Royal Cypher of Queen Victoria within the Garter (letters in centre “VR”, motto “HONI SOIT QUI MAL Y PENSE”, "Shame be to him who thinks evil of it."). The guns were originally supplied with wooden carriages. (The Royal Arsenal at Woolwich, England, was established eleven years after the Restoration of King Charles II. It was the principal supplier of armaments to the British and Empire Governments. At the height of its operations during World War One the factory covered 1300 acres and employed very nearly 80,000 workers. Woolwich was the Headquarters of the Royal Artillery since the raising of that Regiment in 1716. The Arsenal was closed in the late 1960’s.) These two cannons were transferred to the Warrnambool Garrison Artillery Battery Fortifications erected at Flagstaff Hill in 1887 as part of Victoria’s Coastal Defences. The original wooden carriages were subsequently replaced with the present iron garrison carriages in 1888. They are a “C” pivot. The ‘racers’ or curved track set into the floor of the gun emplacement (which enabled the guns to be traversed more quickly) are as specified for guns up to 10 inch, being of wrought iron 2.78 inches wide. A temporary third gun, now no longer on Flagstaff Hill’s site, was a 5 inch Rifled Breech Loading (BL) Armstrong gun mounted on an Elswick hydro pneumatic disappearing carriage It was faster to load and fire than the 80 pound RMLs and its arrival spelt the end of the older 80 pound guns’ useful life, apart from being used for practice sessions. The 5 inch BL gun was the main defensive weapon of the Warrnambool Battery until the Battery was downgraded in importance and the gun was recalled to Melbourne in 1910. The State of Victoria took over the ownership of the guns at the time of Australian Federation in 1901. In about 1901/1902 the Garrison Battery was converted to the Warrnambool Battery of the Australian Field Artillery (No 4 Field Battery). It was equipped with 4.7 inch naval guns mounted on field carriages. They were now a mobile unit but continued to use the Warrnambool Garrison area at Flagstaff Hill for practice. When the Fortifications were declared obsolete the two 80 Pounder RML were relocated to Cannon Hill in 1910. On the outbreak of World War One the 4.7 inch guns were recalled to Melbourne, and the Battery was disbanded. Most of the personnel probably re-enlisted in the local 4th Australian Light Horse Regiment. The two 80 Pounder RML were moved back to the Fortifications in 1973. They were both fully restored by Army First Year Apprentices at the Ordinance Factory in Bendigo in time for the centenary year of the fortifications in 1987. The guns are capable of firing 80 pound (32.3kg) armour piercing exploding shells 3.65kms out to sea. They were original manned by volunteers before a paid Garrison was established. Now the Guns are again fired by volunteers on Special Event days. Since restoration the Gun Number 1 had been fired on a regular basis but Gun Number 2 hadn’t been fired since the mid 1990’s. In April 2015 Gun Number 2 was serviced in preparation for the firing of both cannons on the ANZAC Centenary commemorations on April 25th 2015. Other guns from the original Cannon Hill location were obsolete by the time the 1887 Warrnambool Garrison Artillery Battery was built. These guns are (1) a 32 Pounder Muzzle Loading Smooth Bore (SB) cast in 1813 at the famous Carron Foundry, number 80837 and now located in the Warrnambool Botanic Gardens (2) a 68 Pounder Muzzle Loading Smooth Bore cast in 1861 at the equally august Low Moor Foundry, number 10310 and now located on the lawn area at the entrance to Flagstaff Hill Maritime Village. Both of these guns are mounted on their original wooden garrison carriages. There are only seven 32 Pounder SB made by Carron and fifteen 68 Pounder SB made at Low Moor known to exist in the State of Victoria (Conservation Management Plan for Victorian Guns and Cannon, South Western Victoria, May 2008, ref W/F/05)The Warrnambool Garrison has been added to the Victorian Heritage Register H1250 “for its intact battery and guns, a strong reminder of Victoria’s wealth and determination to protect itself from the perceived threat of invasion in the 1880’s.” The City of Warrnambool is one of several custodians of a collection of artillery pieces of heritage significance at a state, national and international level. These pieces are directly related to the defence of south-west Victoria in the 19th century. The care and preservation come under the Heritage Act 1995. Cannon. 80 Pound Rifled Muzzle Loading (RML) Gun on iron carriage and slide, installed in the Battery at Flagstaff Hill’s Fortifications. Made in 1866 at the Royal Gun Factory (R-G-F), Woolich, England. Gun Reg No 13. Flagstaff Hill Garrison Gun 2 (Gun No. 2). Insignia of the Royal Engineers, and the weight of the gun, stamped on top of the gun’s barrel. There is a brass plate on the side of the gun with the details of 1987 restoration.Stamped into the metal on top of the barrel, Insignia of the Royal Engineers; Garter and Motto “HONI SOIT QUI MAL Y PENSE”, surmounted by the Crown, with the Royal Cypher of Queen Victoria “VR” within the Garter. Also stamped on top of the gun are 2 inward pointing arrows above the weight ”81-1-12”. Brass plate “RESTORATION / BY / FIRST YEAR / APPRENTICES / ORDANANCE FACTORY / BENDIGO 1987”flagstaff hill, warrnambool, shipwrecked coast, flagstaff hill maritime museum, maritime museum, shipwreck coast, flagstaff hill maritime village, great ocean road, colonial defences, victoria’s coastal defences, warrnambool fortification, warrnambool garrison battery, warrnambool volunteer corps, ordinance, armaments, cannon hill fortifications, 4th australian light horse regiment, no 4 field battery, 80 pound cannon rifled muzzle loaders (rml), victorian colonial government, royal gun factory england, woolwich arsenal, royal cypher of queen victoria, garrison gun -
 Federation University Historical Collection
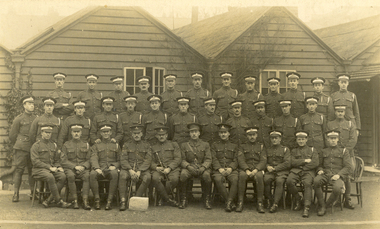
Postcard, "A" Squad Cadets, St John's Wood Barracks, 1917
St John's Wood is a district of north-west London, in the City of Westminster, and at the north-west end of Regent's Park. The King's Troop, Royal Horse Artillery formerly resided at St John's Wood Barracks. The regiment moved to Woolwich on 6 February 2012; the barracks is to be demolished and developed as housing. (http://en.wikipedia.org/wiki/St_John's_Wood)A number of uniformed men pose for a photograph in front of a weatherboard building. The image is of the "A" Squad Cadets at St John's Wood Barracks, London.This card was purchased by an Australian soldier, probably Henry Smerdon Holmes, during World War One. Verso: "A" Squad Cadets. St John's Wood Barracks, London, 12th March 1917chatham family collection, chatham, world, war, world war one, world war 1, world war i, france, harry holmes, holmes, st john's wood -
 Federation University Historical Collection
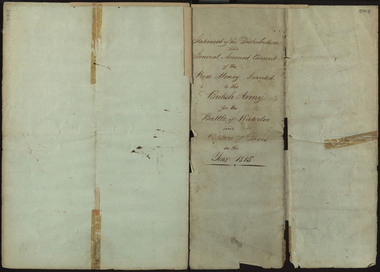
Document, Statement of the Distribution and General Account Current of the Prize Money Granted to the British Army for the Battle of Waterloo and Capture of Paris in the Year 1815, 1815
The Napoleonic Wars were a period of conflict from 1803-1815, caused by unresolved tensions following the end of the French Revolution. Coalitions of European powers fought against Napoleon Bonaparte and the French army, who were defeated at the Battle of Waterloo on the 18th June 1815, in Belgium. The conclusion of the battle would mark a period of sustained peace for Europe, that would bring with it cultural and technological innovation. This document in illustrative of the prize money awarded to different groups of soldiers following the Capture of Paris, separated into different classes. The first class consisted of General Officers, the second of Field Officers and Colonels, the third of Captains, the fourth of Subalterns, the fifth of Serjeants and the sixth of Corporals, Drummers and Privates. The Commander in Chief of the Army also received £61, 178/3/ 5 1/2. In addition to the money given to these classes, which approximately totaled £486,246 / 18/ 1 3/4, a total of £30,000 was paid to the Bank of England and £7,204 / 16/ 7 1/4 was paid to the Chelsea Hospital, to a grand total of £558,940/ 12/ 3. This money given to the Chelsea Hospital was part of the Army Prize Money Act 1814 (54th Geo. 3 c. 86, 14th July 1814), which when passed through parliament entailed that any prize money unclaimed or forfeited would be paid to the Chelsea Hospital. The Royal Hospital Chelsea is a charitable institution which provides support to war veterans and has existed since the reign of Charles II. The document goes into further details of the payments made to specific regiments, who include members of the British cavalry and artillery, rifleman, staff corps and foreign soldiers enlisted to aid with the campaign. The award of prize money following battle was meant to serve as an incentive for aggression and victory, in addition to helping deter looting of the deceased possessions. A paper watermark '1810' on the handwritten document suggests it is an original, and therefore was probably in the possession of a battle participant, most likely of a higher rank. The provenance of the document is unknown but one possibility is through former Ballarat School of Mines staff member Hester Darby, whose parents were Ernest Darby and Leah Hynam. Her maternal line boasted a Battle of Waterloo veteran. A number of handwritten pages 48 cm. x 34.5 cm. (slightly larger than A3) which has been folded in half, and in half again. When attempts were made to tape the torn document together, one page was taped in the wrong order. The top of the third page aligns with the bottom of the fourth page, the top of the fourth page with the bottom of the third. Corrections to this have been made in the transcript. DESCRIPTION ON DISCOVERY: "BALLARAT - Copy of an historic document of prize money paid after the battle of Waterloo and capture of Paris in 1815 has been found among old papers at the Ballarat School of Mines. The full amount of prize money was stated at "£558,913 10/10." Scores of regiments had their shares varying probably, according to the numbers. The document will be retained in the School of Mines Museum, ... (Age, 21 March 1941)The paper has an 1810 watermark on the paper as well as a watermark for S&C Wise. duke of wellington, waterloo, battle of waterloo, napoleon, napoleon bonaparte, british army, paris, darby, veteran, 1815, prize money, waterloo verterans, hester darby -
 Federation University Historical Collection
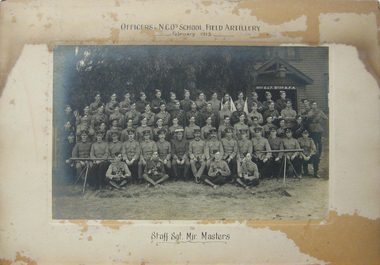
photograph - Black and White, Officers and Non-Commissioned Officers School, Field Artillery, February 1913, 02/1913
A mounted black and white photograph of uniformed men in front of a weatherboard building. They are officers and non commissioned officers of the Field Artillery School, February 1913, 6th and 7th batteries.To Staff Sgt Major Masters. army, field artillery, field artillery school, masters, staff sergeant major masters, volunteer regiment, major masters -
 Australian Commando Association - Victoria
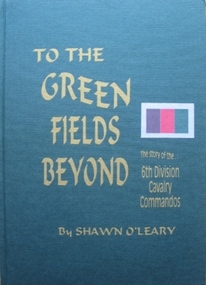
Book - 6th Div, Shawn OLeary, To The Green Fields Beyond:The story of the 6th Division Cavalry Commandos
The comprehensive history of the 6th Australian Division Cavalry Commandos – a (now out of print) reprint of one of the rarer Armoured unit history books. This is the story of one of Australia’s most famous fighting regiments during World War II. As an armoured cavalry unit it fought the Italians and Germans in the sands of the African desert and the Vichy French in the mountains of Syria. Later as a dismounted commando unit it fought the Japanese in the terrifying jungles of New Guinea. The heroism of the men in its ranks and the actions in which they engaged are portrayed in a way which makes battle deeds leap realistically from the pages. “To The Green Fields Beyond” is a documented and detailed book which is of value to everyone who is interested in Australia’s story. Seldom before has such a contribution been made to record of our national history. The book has been approved and sponsored by the Australian War Memorial. The 6th Division Cavalry Regiment was formed in November 1939 and, just two months later, was sent overseas to the Middle East in January 1940. Arriving in Egypt, the regiment immediately went to Palestine, where it joined the rest of the 6th Division and trained using machine-gun carriers and, from October, six old Vickers light tanks. At the end of the year the regiment moved into the Western Desert, where it joined British forces ready for the major offensive to commence on 9 December. Two days later the regiment became the first unit of the 2nd Australian Imperial Force (AIF) to go into action when one of its squadron fought a sharp action against the Italians holding Garn el Grein and Fort Maddalina on 11 and 12 December. By 21 December British forces had captured Sidi Barrrani and the desert was now open for the 6th Division’s advance along the Libyan coast. On 3 January 1941 the division attacked and captured the Italian fort of Bardia. The regiment’s A Squadron, under the command of Major Denzil Macarthur-Onslow, who went on to command the 4th Armoured Brigade, supported the attack. Tobruk was the next Italian fort to be captured, with the regiment again in support and covering the 19th Brigade’s advance. The regiment, though, was under-equipped and without its full compliment of vehicles, using only machine gun carriers. To compensate for this, A Squadron was parity re-equipped with captured Italian light tanks, which had large kangaroos painted on the hulls and turrets to distinguish them from enemy vehicles. After Tobruk, the regiment was used as part of the advance guard in the capture of Derna and then Benghazi. In April the unit moved to Helwan, where it was equipped with Vickers light tanks and machine-gun carriers, and operated with British troops in capturing Sollum. Towards the end of May the regiment moved to Palestine, where it came under the command of the 7th Division for the imminent invasion of Syria. The regiment experienced its heaviest fighting during the Syrian campaign, which began on 7 June. A Squadron was attached to the 21st Brigade and advanced along the coast, where the rugged hills made it difficult to manoeuvre the tanks and carriers. The squadron was relieved by one of the 9th Division Cavalry Regiment’s squadrons on 13 and 14 June. C Squadron, meanwhile, was with the 25th Brigade, and advanced along the Rosh Pinna road, engaging strong enemy defences at Fort Khirbe. C Squadron was relieved by B Squadron, which was later attacked by Vichy French tanks that were supported by heavy artillery and machine-gun fire, which forced the Australians to withdrawal. Always willing or needing to improvise during the campaign, A and B Squadrons both operated three captured French R35 Renault light tanks, while C Squadron provided personnel for a horse troop, quickly nicknamed the “Kelly Gang”, to patrol the high, rugged hills near the Mardjayoun–Banis Road. The regiment remained in Syria as part of the occupation force and returned to Australia in March 1942. It was sent to the Adelaide River, in the Northern Territory, and then later to Murgon, in Queensland. In 1943 and 1944 divisional cavalry regiments were reorganised into cavalry (commando) regiments. In January 1944 the 6th Division Cavalry Regiment became the 2/6th Cavalry (Commando) Regiment. The regiment lost its vehicles and became the administrative headquarters for the 2/7th, 2/9th, and 2/10th Commando Squadrons. The regiment remained with the 6th Division and participated in the Aitpae–Wewak campaign, in New Guinea, during 1945. Includes Nominal Rollnon-fictionThe comprehensive history of the 6th Australian Division Cavalry Commandos – a (now out of print) reprint of one of the rarer Armoured unit history books. This is the story of one of Australia’s most famous fighting regiments during World War II. As an armoured cavalry unit it fought the Italians and Germans in the sands of the African desert and the Vichy French in the mountains of Syria. Later as a dismounted commando unit it fought the Japanese in the terrifying jungles of New Guinea. The heroism of the men in its ranks and the actions in which they engaged are portrayed in a way which makes battle deeds leap realistically from the pages. “To The Green Fields Beyond” is a documented and detailed book which is of value to everyone who is interested in Australia’s story. Seldom before has such a contribution been made to record of our national history. The book has been approved and sponsored by the Australian War Memorial. The 6th Division Cavalry Regiment was formed in November 1939 and, just two months later, was sent overseas to the Middle East in January 1940. Arriving in Egypt, the regiment immediately went to Palestine, where it joined the rest of the 6th Division and trained using machine-gun carriers and, from October, six old Vickers light tanks. At the end of the year the regiment moved into the Western Desert, where it joined British forces ready for the major offensive to commence on 9 December. Two days later the regiment became the first unit of the 2nd Australian Imperial Force (AIF) to go into action when one of its squadron fought a sharp action against the Italians holding Garn el Grein and Fort Maddalina on 11 and 12 December. By 21 December British forces had captured Sidi Barrrani and the desert was now open for the 6th Division’s advance along the Libyan coast. On 3 January 1941 the division attacked and captured the Italian fort of Bardia. The regiment’s A Squadron, under the command of Major Denzil Macarthur-Onslow, who went on to command the 4th Armoured Brigade, supported the attack. Tobruk was the next Italian fort to be captured, with the regiment again in support and covering the 19th Brigade’s advance. The regiment, though, was under-equipped and without its full compliment of vehicles, using only machine gun carriers. To compensate for this, A Squadron was parity re-equipped with captured Italian light tanks, which had large kangaroos painted on the hulls and turrets to distinguish them from enemy vehicles. After Tobruk, the regiment was used as part of the advance guard in the capture of Derna and then Benghazi. In April the unit moved to Helwan, where it was equipped with Vickers light tanks and machine-gun carriers, and operated with British troops in capturing Sollum. Towards the end of May the regiment moved to Palestine, where it came under the command of the 7th Division for the imminent invasion of Syria. The regiment experienced its heaviest fighting during the Syrian campaign, which began on 7 June. A Squadron was attached to the 21st Brigade and advanced along the coast, where the rugged hills made it difficult to manoeuvre the tanks and carriers. The squadron was relieved by one of the 9th Division Cavalry Regiment’s squadrons on 13 and 14 June. C Squadron, meanwhile, was with the 25th Brigade, and advanced along the Rosh Pinna road, engaging strong enemy defences at Fort Khirbe. C Squadron was relieved by B Squadron, which was later attacked by Vichy French tanks that were supported by heavy artillery and machine-gun fire, which forced the Australians to withdrawal. Always willing or needing to improvise during the campaign, A and B Squadrons both operated three captured French R35 Renault light tanks, while C Squadron provided personnel for a horse troop, quickly nicknamed the “Kelly Gang”, to patrol the high, rugged hills near the Mardjayoun–Banis Road. The regiment remained in Syria as part of the occupation force and returned to Australia in March 1942. It was sent to the Adelaide River, in the Northern Territory, and then later to Murgon, in Queensland. In 1943 and 1944 divisional cavalry regiments were reorganised into cavalry (commando) regiments. In January 1944 the 6th Division Cavalry Regiment became the 2/6th Cavalry (Commando) Regiment. The regiment lost its vehicles and became the administrative headquarters for the 2/7th, 2/9th, and 2/10th Commando Squadrons. The regiment remained with the 6th Division and participated in the Aitpae–Wewak campaign, in New Guinea, during 1945. Includes Nominal Rollww2, australian commandos, australian special forces, world war 2 -
 Victorian Interpretive Projects Inc.
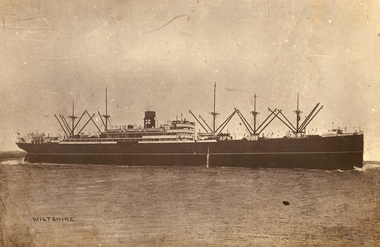
Photograph - Digital, Troopship Wiltshire, 1918, c1918
The HMAT A18 Wiltshire (1912-1922) weighed 10,390 tons with an average cruise speed of 13.5 knots or 25.00 kmph. Described as a refrigerated steamship it was b uilt 1912 by John Brown, Clydebank for the Federal S N Co Ltd, London and was propelled by a twin screw, quadruple expansion engine 2 x 4 cylinders each 6500 hp. Owned by the Commonwealth & Dominion Line Ltd, London, it was leased by the Commonwealth until 2 October 1917. It embarked from Egypt on 2 February 1918. On 18 October 1914 at Melbourne embarked the 4th Light Horse Regiment (Victoria) A, B & C squadron & their Machine Gun Section, the 2nd Field Ambulance (Victoria) First Division. The disembarked the 4th Light Horse Regiment in Egypt on 10 December 1914. On 01 November 1914 The Wiltshire assembled with the first convoy at King George's Sound, Albany Western Australia in transporting the first detachment of the Australian and New Zealand Imperial Expeditionary Forces. It completed nine transport voyages from Australia commencing 18 October 1914 until final voyage from Sydney 9th November 1918. During that time The Wiltshire carried the 4th Field Artillery Brigade (Victoria) 2nd Division Artillery and their 1st Reinforcements, 1st Division Ammunition Column 1st Division Artillery 4th Reinforcements, thirty-four Infantry Battalion Reinforcements, the 10th, 11th & 12th Field Artillery Battery (Victoria) 4th Field Artillery Brigades, the 4th Brigade Ammunition Column 4th Field Artillery Brigade, the 1st Siege Artillery Brigade 15th Reinforcements, the 4th Light Horse Regiment (Victoria) A, B & C squadron & their Machine Gun Section, six Light Horse Brigade Reinforcements, the 1st Veterinary Section (New South Wales) 11th Reinforcements, the 1st Mobile Veterinary Section (New South Wales) 1st Division 11th Reinforcements, the 2nd Mobile Veterinary Section (Victoria, New South Wales) 2nd Division 11th Reinforcements, the 1st Cyclist Battalion (New South Wales and Queensland) 3rd Reinforcements, the 2nd Field Ambulance (Victoria) First Division & Medical Officers. After the conclusion of World War One is was wrecked Rosalie Bay, Great Barrier Island New Zealand 31 May 1922 on passage London for Dunedin. Onboard was a crew of 103 plus 1 stowaway, and 10,000 ton of general cargo. No lives lost and is now a well frequented 'Dive' wrecksite. (http://www.flotilla-australia.com/hmat.htm#A18)Photographic postcard of the troopship Wiltshire out at sea.world war one, world war, wiltshire, troop ship, mmm -
 National Vietnam Veterans Museum (NVVM)
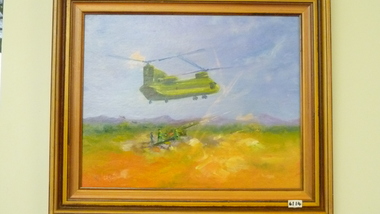
Painting - Framed painting, Chinook, 1969
... SGT. Merson R.A. 1 Field Regiment Royal Aus Artillery Phuoc... - Chinook Howitzers SGT. Merson R.A. 1 Field Regiment Royal Aus ...Painting - oil on board in timber frame brown/gold. Depicting Chinook Helicopter and Howitzer.SGT. Merson R.A. 1 Field Regiment Royal Aus Artillery Phuoc Tuey Province Sth Vietnam.war in art, helicopter - chinook, howitzers -
 National Vietnam Veterans Museum (NVVM)
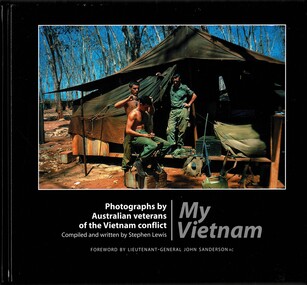
Book, Lewis, Stephen, My Vietnam: Photograph by Australian eterans of the Vietnam conflict. (Copy 2)
... Australian National Serviceman Nui Dat 12th Field Regiment Royal ...My Vietnam is a pictorial journey seen through the cameras of over 80 Australian veterans of the Vietnam conflict.The book is signed by the author. The dustjacket is missing & the hard cover of the book is damaged along the edges & the top of the pages appears water damaged.My Vietnam is a pictorial journey seen through the cameras of over 80 Australian veterans of the Vietnam conflict. 1961-1975 - participation, australian, vietnam war, 1961- 1975 - pictorial works, australian national serviceman, nui dat, 12th field regiment, royal australian artillery -
 National Vietnam Veterans Museum (NVVM)
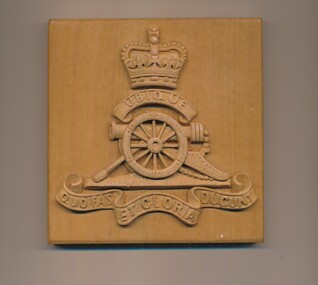
Plaque - Artillery plaque
... This carved emblem of the Royal Regiment of Australian...Small square wooden block carved with a crown/ artillery... of the Royal Regiment of Australian Artillery was collected because ...This carved emblem of the Royal Regiment of Australian Artillery was collected because it commemorates the war in Vietnam.Small square wooden block carved with a crown/ artillery piece/ and Latin mottos is the shield of the Royal Regiment of Australian Artillery.Ubique/Quo Fas Et Gloria Ducuntaustralian army, arillery regiment, australia artillery