Showing 71 items matching "viaduct road"
-
 Melbourne Tram Museum
Slide - Set of 3, Keith Caldwell, 1/11/1978 12:00:00 AM
.1 - Agfa colour slide, blue and white plastic mount, photo by Keith Caldwell 1/11/1978 - of Z3 turning from Flinders St into Spencer St, route 75. Has the Flinders St over pass, over King St and the railway viaduct in the background. In the background is the Great Southern Hotel. .2 - Kodachrome cardboard mount, same date of Z12 southbound in Spencer St passing Bourke St with the Mail Exchange in the back and Z 97 standing in the Bourke St terminus with another Z arriving. Taken from the 2nd floor of Spencer St station building. .3 - as above with Z23 northbound in Spencer St. The cable tram track in Bourke St, can perhaps just been seen.In red ink "1-11.78" and in pencil "MLB 10/78 BX".trams, tramways, spencer st, flinders st, z class, bourke st, tram 3, tram 12, tram 97, tram 23 -
 Melbourne Tram Museum
Slide, Keith Caldwell, Mar. 1962
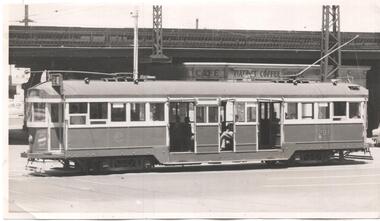
Agfa Colour slide, cardboard, by Keith Caldwell dated March 1962 W6 948 turning from Flinders Lane into William St. In the background is the Railway Viaduct with a Tait Train, F A Nelken building (?), a sign for Cellokraft paper and Magikist Carpet Cleaners.In ink "March 1962"trams, tramways, w6 class, flinders lane, william st, tram 948 -
 Melbourne Tram Museum
Photograph - set of 9 Black & White Photograph/s, Melbourne & Metropolitan Tramways Board (MMTB), 1966
Series of 9 black and white photographs of the traffic congestion in the CBD during 1951. .1 - view looking south along Spencer St from Collins St showing the VR Head office, and the railway viaduct with a Berger Paint advertisement, Has one wide body tram with dash canopy lighting and three W2's. Also one small bus. Has "G3" in pencil on rear. .2 - similar view but with a different vehicle mix - W2 317 (Richmond Route 28), an SW6 route 27 and another W2 (route 41). Includes one large truck carrying Land Rover boxes. Typed on rear "Enlargement of No. 72 - Sheet No. 26 (Report P25/1/8) and in ink initials and "For Testing Engs 1/11/51". .3 - View looking north along Swanston St Princes Bridge with a route 6 tram and Princes Bridge Station and St Pauls Cathedral. On rear in pencil "11/2" .4 - Spencer St - trams crossing Spencer St bridge - W5 781 (Route 10) and a W2 649, route 9, South Melbourne Beach. .5 - Queensbridge under bridge - showing many cars jammed and the railway viaduct. .6 - ?? - Collins St - National Mutual and Shaw Savill Line offices - has a Safety Zone stand. .7 - Collins St looking east from Market St - with many trams in the view and many cars. .8 - Collins at Market St with a SW6 with dash canopy lighting - route 45, followed by a route 9A .9 - same location - total chaos. See also Reg 4520 for another 7 photos of the same series.trams, tramways, traffic control, congestion, spencer st, route 27, route 28, route 41, route 6, princes bridge, swanston st, w2 class, sw6 class, route 10, route 9, spencer st bridge, market st, collins st, route 45, route 9a, tram 317, tram 781, tram 649 -
 Melbourne Tram Museum
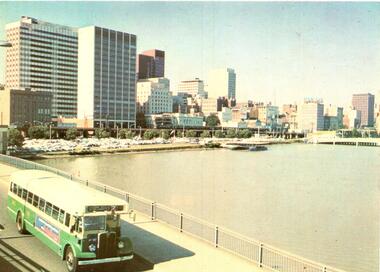
Postcard, Murfett Publishers, MMTB Bus 583 AEC Mk111 no 583, early to mid 1970's
Postcard - full colour, Divided back type of MMTB Bus 583 AEC Mk111 no 583 Reg : AT083 entered service 1953 body by Martin and King - two man crew, 41 seats. Notes from Rod Atkins 24/5/2019: Bound for : "Fisherman's Bend via Williamtown Road" on Spencer Street Bridge heading south. When: It's what is missing in the photo gives us a the clue. It after 1968 as the new Stock Exchange building at 357 Collins Street is completed. but before 1973 when the new MLC building was open at 303 Collins Street on corner of Elizabeth Street. But the "2" between the destination and route number boxes on bus tells us its after November 1970. Therefore I would date the post card photograph to around 1971-1972 and prior to the start of the third viaduct between Flinders St and Spencer St. Published by National View by Murfett Publishers Australia. Has the details on the rear with place for stamp, address etc and logo.trams, tramways, king st, bridges, railways, buses, fisherman's bend -
 Melbourne Tram Museum
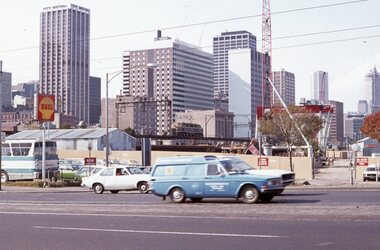
Slide, David Verrier, 22/04/1977 12:00:00 AM
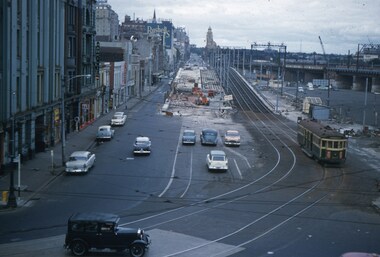
Agfa colour slide, white blue plastic mount. Photograph by David Verrier. View from Spencer St south just before bridge looking back to the city skyline and the Flinders St railway viaduct. An L class is crossing the viaduct. Photo has the City Mutual and SEC Buildings along with some construction work for the new railway viaduct underway. A Shell service station sign is visible. Photos taken 22/4/1977In ink: "Fri 22/4/77 Flinders St Viaduct"trams, tramways, railways, flinders st, melbourne -
 Melbourne Tram Museum
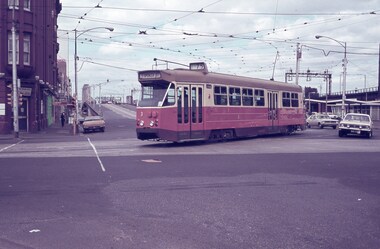
Photograph - Black & White Photograph/s, 1960's?
Black and white photograph of W2 291, eastbound in Flinders St with the Flinders St viaduct and the Viaduct Coffee Lounge shop in the background. Tram showing Route 28 (City Richmond) . No known details of the photographer or date.trams, tramways, flinders st, w2 class, route 28, tram 291 -
 Melbourne Tram Museum
Slide - Set of 2, John Webster, 21/07/1959 12:00:00 AM
Set of two Colour slides, Kodak, white cardboard of trams of the construction of the Flinders St overpass over King St from the railway viaduct over Spencer St, looking east. Shows the temporary track on the south side of the bridge and the large car park under construction from the former cool stores on this site. Also shows the former track into Spencer St. Note the cross over at the base of the bridge. .1 - possibly 357 running a route 27 to Spencer St. Has the Great Southern Hotel on the left side. .2 - similar photo taken from the viaduct, further along - has the Bushels and Penfolds Wines signs in the background.Hand writing on rear in ink; .1 and .2 - "2-4-60 - Tracks - Flinders St Melbourne" Both slides have the speed and the f reading on the left hand side.trams, tramways, trackwork, flinders st, king st, track construction, bridges, w2 class, route 27, tram 357? -
 Melbourne Tram Museum
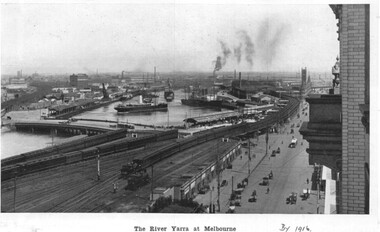
Photograph - Illustration, c1916
Illustration from a photograph reproduced in a magazine of the river Yarra, Flinders St railway yard, the viaduct, the swing basin, the wharves and Queens Bridge. Has a number of cable cars and trains in the view. Taken prior to the construction of the second or duplicate viaduct which was completed during 1915. Construction of the second viaduct on the south side of the original can be seen.in ink in bottom right hand comer "By 1916"trams, tramways, flinders st, railways, shipping, cable trams -
 Melbourne Tram Museum
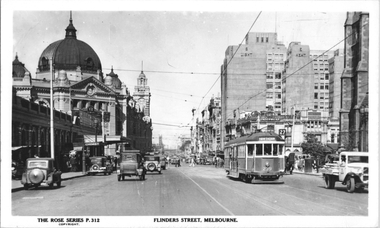
Postcard, Rose Stereograph Co, "Flinders Street Melbourne", late 1930s
Rose Series postcard No. P 312, titled ""Flinders Street Melbourne", looking west along Flinders St from about the Ball and Welch building. Has W2 class tram No. 239 (Hawthorn Route 27) east bound. On the left Is the Princess Bridge Railway Station and Flinders Street Railway station. In the background is the Fish Market and the railway viaduct. On the right is St. Paul Cathedral, Princess Bridge Hotel, Sargood Gardiner Limited Wherehouse plus the recently opened (1936) Snows Department Store. Note the tramway overhead of the curve outside Flinders Street Railway station. Yields information about Flinders St late 1930s.Postcard - printed real photograph with Rose Stereograph Co. name on the rear. Two copies held.tramways, trams, flinders st, tram 239, w2 class, flinders st station, princes bridge station, route 27 -
 Melbourne Tram Museum
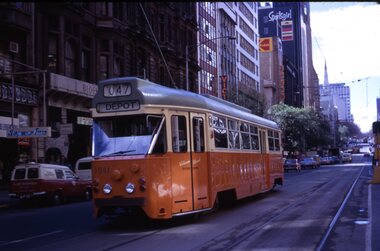
Slide - Set of 11, Ron Scholten, Tram 1041, 1973/1974
Set of 11 colour slides of PCC car 1041 taken during its early operations around Melbourne. Where the slide has a printed date, it is listed. 1 - Collins St, between Elizabeth St and Swanston St, route 47, Depot - Sept. 1973 2 - Batman Ave in Swanston St, route 15, with W2 383 alongside - Sept. 1973 3 - Elizabeth St terminus with Flinders St station in the background - route 19, North Coburg - Sept. 1973 4 - Arriving Batman Ave terminus, route 70, - Sept. 1973 5 - ditto 6 - Bourke St Mall, route 96 East Brunswick - during a trial closure of Bourke St between Elizabeth Street and Swanston Street , given the seats outside Buckley's store - Nov. 1973 7 - Night photo - TMSV slide - MP166 8 - turning from Glenferrie Road into High St - route 6 Glen Iris - a very tight turn - TMSV slide 9 - Wattle Park terminus, route 70 - 1974 10 - Flinders St -route 74 near William St with the railway viaduct in the background. 1974 11 - Interior photo - Ron Scholten - 1973Yields information about PCC car 1041, a prototype all electric tramcarSet of 11 Kodachrome colour slides, cardboard mounts.tramways, pcc class, tram 1041, collins st, elizabeth st, batman ave, st kilda rd., glenferrie road, wattle park, flinders st, interior, bourke st, route 19, route 70, route 74, route 15, route 47, w2 class, tram 383, route 6, route 96, trams -
 St Kilda Historical Society
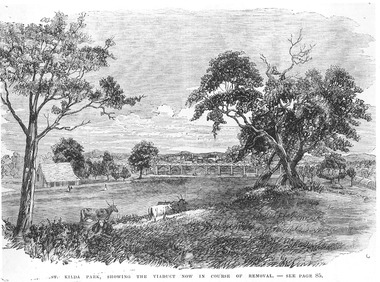
Photograph - Photograph of artwork, St Kilda Park, showing the viaduct now in course of removal, 25/06/1867
St Kilda Park, now Albert Park Reserve, showing cows, eucalyptus trees, oval and a railway viaduct in background. The viaduct was part of the Windsor to St Kilda loop line which operated between 1857 and 1867. The loop line ran from the St Kilda railway station on a combination of wooden viaducts and earth embankments fifteen feet high, crossing over St Kilda and Punt Roads by way of bridges and then gradually decreasing to a level crossing at Union Street and then on to Windsor station. Black and white photograph of a lithograph published in a book (unidentified)ST KILDA PARK, SHOWING THE VIADUCT NOW IN COURSE OF REMOVAL - SEE PAGE 85st kilda railway station, albert park, windsor to st kilda rail loop