Showing 998 items
matching kings
-
 Mission to Seafarers Victoria
Decorative object - Nativity, Mid - Late 20th C
Group of Polychrome matte glazed stoneware nativity figures - Group of 8 (Incomplete)nativity, mary, joseph, shepherds, kings, animals, jesus, angel, sheep, christmas -
 Mission to Seafarers Victoria
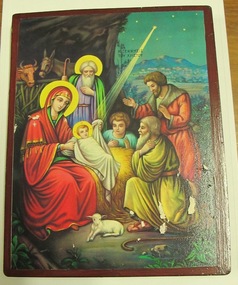
Print - Nativity, Mounted, η γέννηση του Χριστού (The Birth Of Christ), Unknown
IconBrightly-coloured paper cut out of Nativity scene glued to a rectangular, varnished, wooden blockGreek script upper central quadrant: "η γέννηση του Χριστού"nativity, mary, jesus, star, kings, sheep, joseph, orthodox, artwork-paintings, nazareth -
 Bendigo Military Museum
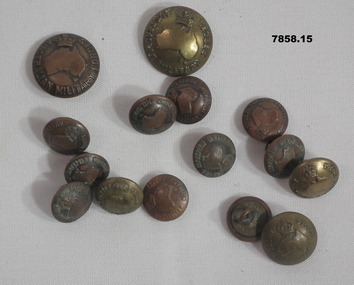
Uniform - BUTTONS, AMF, cWW2
Part of the Cooper Collection.Collection of three large and twelve small copper coloured army uniform buttons. Each features a raised map of 'Australia below a Kings Crown. Word 'Australian Military Forces' written around the edge of each button. metal loop on the back of each for attaching to a ubniform.Various Manufacturers names stamped on back: AJ. PARKES, BRISBANE STOKES & SONS, MELBOURNE J.R. GAUNT & SON LD, LONDON P.J. KING PRY LTD, MELBOURNE, K.G. LUKE PTY LTDcooper collection, buttons, uniform, australian military forces -
 Melbourne Tram Museum
Letter, Ross Wilson, bus route numbers and opening dates, 19/04/1996 12:00:00 AM
Letter - two pages, stapled in the top left hand corner from Ross Wilson of Canberra to Keith Kings regarding bus route numbers and opening dates, in particular the Sorrento line, the HTT extensions to Wattle Valley Road and closure of railway / tramway level crossings.trams, tramways, routes, level crossings, sorrento, htt -
 Surrey Hills Historical Society Collection
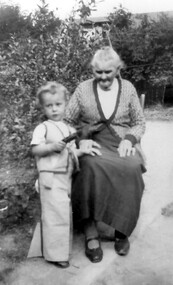
Photograph, Mary Selina Simpson, c1940
Mary Selina Inglefinger was born in 1856 in Kings Plain, NSW and was the eldest daughter of Joseph Inglefinger and his wife Maria Viktoria Bertel (Barthl), both of whom were born in Germany; they applied to come to Australia in 1854. They had 10 children, the first 8 born in Kings Plain. In 1879, Joseph Inglefinger bought James Staig's farm in Boundary (Warrigal) Road, near the corner of Bona Vista Avenue, Surrey Hills. The 1903 and 1905 electoral rolls list them in Boundary Road. In 1875 Mary married Charles Simpson, stepson of James Staig in Scots Church, Melbourne. They had 3 boys and 3 girls. This photograph was taken with her great-grandson in 1940.A black and white photograph of a lady sitting on a chair with a young toddler standing beside her.On back of photo: Mary Selina Simpson / (nee Inglefinger) / c.1940 / (born Mary Maghlina) / born c. 1857(miss) mary inglefinger, (mr) joseph inglefinger, (mr) james staig, warrigal road, surrey hills, bona vista avenue, (mrs) mary simpson, boundary road, (miss) mary maghlina inglefinger -
 Ballarat Tramway Museum
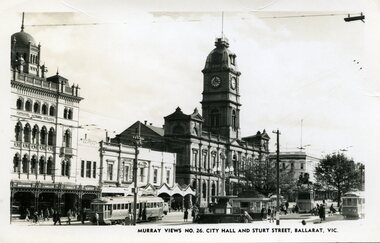
Photograph - Black & White Photograph/s, Murray Views, Murray Views No. 26 City Hall and Sturt St Ballarat Vic, c1950
Demonstrates a typical street view following the delivery of the bogie trams following the second world war and the street scape at the time. Able to determine the tramcar numbers. Yields information about the era of the photograph.B&W print, postcard print of Sturt St Ballarat, looking towards the Town Hall from the Post Office, City terminus. Photo taken by Murray Views to form "Murray Views No. 26, City Hall and Sturt St, Ballarat Vic." No. 22 on south side and No. 34 on north side - see Hi-Res scans. Has the National Mutual, Town Hall and Myers and other buildings in the view. Photo taken c1950, prior to renumbering of No. 22. 2nd copy added 28-12-2021 - most likely a reproduction of the original as it does not have a postcard back.On reverse side - black ink stamp "E.G.Butland" On reverse of 2nd copy - "Ballarat, Sturt St, west from Lydiard Sts" and Keith Kings stamp.tramways, trams, sturt st, bogie trams, tramway centre, town hall, tram 22, tram 34 -
 Linton and District Historical Society Inc
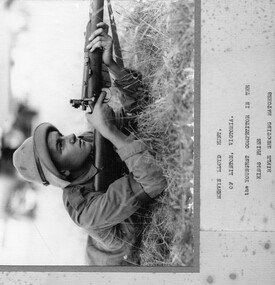
Photograph, Mervyn Lloyd Hunt of Linton, competing in rifle shooting competition, 1935
Mervyn Hunt was a son of Linton Postmaster William George Hunt. The Hunt family moved to Linton in 1926.Black and white photograph of a young man in sports uniform lying on front stretched out on ground holding rifle ready to shoot."Mervyn Lloyd Hunt of Linton, Victoria. The youngest competitor in the Kings Prize rifle shooting matches at Williamstown Rifle Range 2-9 March 1935."mervyn lloyd hunt, sports, rifle shooting -
 Queenscliffe Maritime Museum
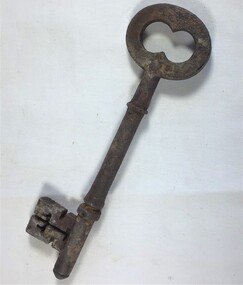
Functional object - door key, lighthouse
Reputed to have been the key of the Queenscliff Lighthouse c.1880. It was passed on from Ted Smith, 10 Kings Rd Paynesville, 3880, whose grandfather, John McDonald, was Lighthouse Keeper at Queenscliff about the 1880. From Queenscliff, Mr. McDonald was posted to Gabo Island. Original lighthouse key late 19th centuryqueenscliff light house, cast iron key, keys, john mcdonald, lighthouse keepers -
 Melbourne Tram Museum
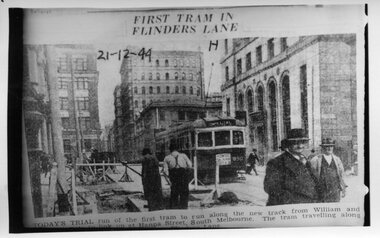
Photograph - Black and White - Newspaper photo, MMTB SW6 Tram in Flinders Lane for first time, 21 Dec 1944
Image shows a newspaper photo of MMTB SW6 Tram 890 in Flinders Lane operating on the official opening run on new diversion line in William Street, from Collins Street to Hanna Street (now Kings Way) to the corner of Sturt Street on 21 Dec 1944The Hanna St line provided an additional line into the City from Domain Junction and was designed to relieve pressure on St Kilda Road. Black and white print of MMTB SW6 Tram in Flinders Lane for first time tramways, trams, flinders lane, new william street line, opening, tram 890, sw6 class -
 Bendigo Military Museum
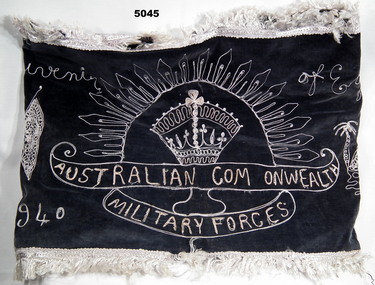
Souvenir - BANNER, c1941
Banner, black velvet with 4cm silk fringe. Embroidered Kings Crown, 2 flags, 3 pyramids, 3 palm trees. 1st line - Souvenir of Egypt. 2nd Line - Australian Com(m)onwealth ('m' missing). 3rd line - 1940 Military Forces 1941.banner, souvenir, textile -
 Coal Creek Community Park & Museum
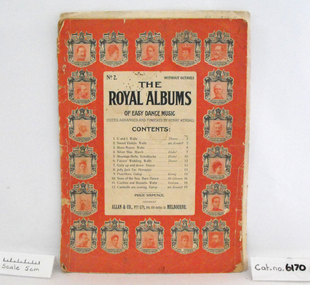
Music Book, The Royal Albums
A beautiful red front cover showing portraits of European kings and queens of the early 20th century around the border (18 in all). Title: "The Royal Albums of Easy Dance Music" - Edited, Arranged and Fingered by Henry Kendall. Contents are shown below title. Hand stitched binding. -
 Melbourne Tram Museum
Ephemera - Tour Notes, Tramway Museum Society of Victoria (TMSV), "90th Special Tour", 15/02/1985 12:00:00 AM
Tour Notes - Single A4 sheet duplicated, prepared by Keith Kings 15/2/1985 for the TMSV 90th tour to Comeng factory on 15/2/1985 to Dandenong to inspect construction of new trams. Using bus 850. Gives details of the tour and the bus being used.trams, tramways, b class, comeng, new trams, buses -
 Melbourne Tram Museum
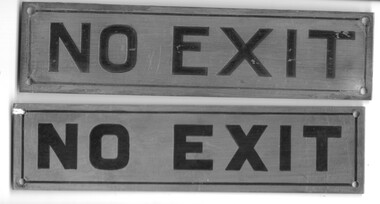
Sign, Melbourne & Metropolitan Tramways Board (MMTB), "NO EXIT", 1940's?
Sign - engraved brass sheet, with black lettering and lining on the outside and screw holes in each corner with the words. "NO EXIT" Two copies held - with slightly different font size and type. 3rd copy added 13/8/2020 - different size - ex Keith Kings - not image.trams, tramways, signs, tramcars, tramways, passenger signs, behaviour -
 Melbourne Legacy
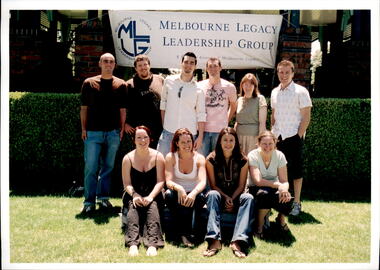
Photograph - Junior legatee outing, Melbourne Legacy Leadership Group, 2000s
The Melbourne Legacy Leadership Group was formed by junior legatees who had become adults. They ran functions for junior legatees in a spirit of service that emulated the work of Legatees. This photo appears to be from the early 2000s. It was taken at a function at the Stapley Pavilion in Kings Domain (Royal Botanic Garden).A record of adult junior legatees helping Legacy provide experiences for the junior legatees.Colour photo of the Leadership Group.Printed on the back 'No.4A' which is the image number.junior legatee outing, leadership group -
 Shepparton RSL Sub Branch
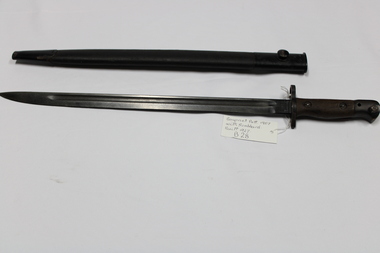
Bayonet plus Scabbard
Made pre WW2, could have been used in WW2 and KoreaWooden Grips are attached to a single edge blade by four screws. Bayonet locking section has a clearing hole. The right hand grip is stamped with the number "2" indicating it is from the second Military District (N.S.W.) The blade curves up to a point. The blade is made of steel and has a full length fuller. It is complete with a leather and steel scabbard marked Mangovite 41. It is a Pattern 1907 Bayonet. The ricasso R.H.S. is marked with 24, broad arrow, and an X, which indicates sold out of service. The Ricasso L.H.S. is marked with a Kings Crown, 1907,and 39 RE -
 Bendigo Military Museum
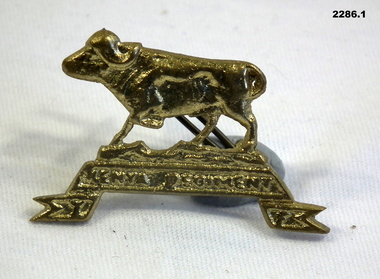
Badge - BADGE COLLECTION, 1930 - 45
Items in the collection re Ian McLeod RWAFF, refer Cat No 2262.2 for service details..1) Badge, metal, gold colour, buffalo, Kenya Regt. .2) Badge, metal, gold colour, crown over horn, Kings African Rifles. .3) Badge, metal, gold colour, dragon, Buffs Regt. .4) Badge, metal, brownish, palm over scroll., R.W.A.F.F.badges, collection -
 Bendigo Military Museum
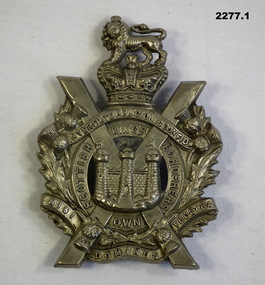
Badge - BADGES, BRITISH COLLECTION, 1930 - 45
Items in the collection re Ian McLeod RWAFF, refer Cat No 2262.2 for service details..1) Badge, pressed metal, silver colour, loin crown, scrolls, wreath "Kings own Scottish Borderers" .2) Badge, pressed metal, silver colour, wreath, crown scrolls "Argyle and Sutherland" .3) Badge, pressed blackened metal, crown, wreath and scrolls "Royal Engineers".badges, british, collection -
 Frankston RSL Sub Branch
Statuette, ALH Officer
Small statuette of a World War 1 ALH (Australian Light Horse) Officer presumably made of pewter, mounted on a marble base. The base has a small replica version of the Australian 'rising sun' badge, the badge is similar to the 'kings crown' version worn during World War 1. -
 Ballarat Tramway Museum
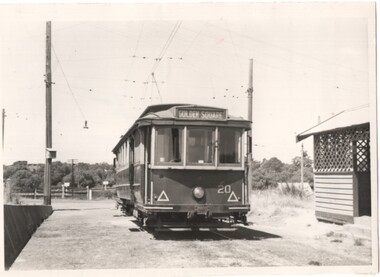
Photograph - Black & White Photograph/s, mid to late 1950's
Black and white photograph of Bendigo 20 at the North Bendigo terminus. Tram showing the destination of Golden Square. Has the tram shelter at the terminus in the photograph. Photographer unknown - see history of object. See Keith Kings, The Bendigo Tramways, re the fitting of reflective tape in 1956, page 59.In the rear in ink "Bendigo"trams, tramways, north bendigo, tram 20 -
 Bendigo Military Museum
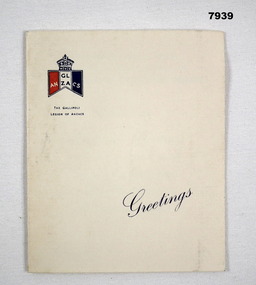
Card - CHRISTMAS CARD, Gallipoli Legion of ANZACS
The Gallipoli Legion of ANZACS was formed in Sydney after WW1 with membership limited to those who fought at ANZAC or were on Gallipoli. The legion folded in 1989. Part of the Cooper collection.Folded card on cream coloured paper. On top LH corner of front page is the emblem of the Gallipoli Legion of ANZACS. Emblem consists of three vertical sections coloured, red, white and blue below a Kings Crown. Text on front cover in blue type. Text on inside in blue type. cooper collection, gallipoli legion of anzacs, card -
The 5th/6th Battalion Royal Victoria Regiment Historical Collection
Medal - Military Medal, GvR, CPL J.S Phillips 138 Hvy Bty RGA
The Military Medal was awarded for acts of gallantry and devotion to duty under fire.Circular medal, single suspension bar. Obverse - head of GVR -georgivs v britt oan rex et ind imp. Reverse - laurel wreath outer edge;kings crown GVR cypher "for bravery in the field" Rim: 833 CPL JS PHILLIPS 138 HV BY RGA833 CPL JS PHILLIPS 138 HV BY RGA5/6 rvr, medal, ww1 -
 Warrnambool and District Historical Society Inc.
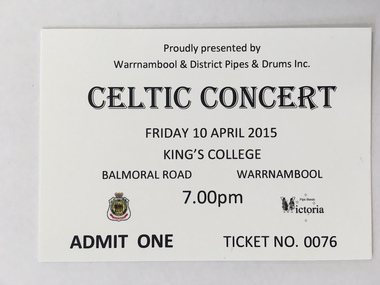
Ticket, Celtic Concert, 2015
This is a ticket of admission to a Celtic concert run by the Warrnambool & District Pipes & Drums held on 10th April 2015 at Kings College Warrnambool. The Warrnambool Pipe Band was established in 1906. It was in recess from 1916 to 1935 when it was re-formed. Today the Warrnambool & District Pipes and Drums perform regularly in the area.This item is of minor interest as a memento of the Warrnambool & District Pipes & Drums A white card with black printing and two logos. CELTIC CONCERT ADMIT ONE -
 Ballarat Tramway Museum
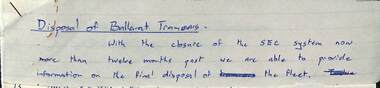
Document - List, "Disposal of Ballarat Tramcars", c1972
List titled "Disposal of Ballarat Tramcars", possibly late 1972 given notes 4 and 10. Lists the disposal of all Ballarat tramcars and where they went too following the closure of the Ballarat system. Based on the handwriting possibly prepared by Keith Kings for publication. Gives the removal date or storage locations.Yields information about the disposal of the Ballarat fleet following closure of the tram system.Handwritten list on two foolscap sheets of ruled paper and one small cut sheet as a heading.tramcars, ballarat, lists, disposal, sale of trams -
 Melbourne Tram Museum
Document - Reports and Correspondence re classification by National Trust of W class tramcars, 1990
Produced at the time when the National Trust actively classified the whole of the remaining W class fleet in Melbourne. Includes correspondence and reports by Frank Strahan, Pat Grainger, correspondence with Keith Kings, fleet history and lists, newspaper cuttings, preservation, a Bibliography, extracts from Mind the Curve and other sources.Provides the background to the classification by the National Trust of the W class tramcars.Reports and Correspondence re classification by National Trust of W class tramcars comprising 30 sheets of A4 paper.trams, tramways, w class, national trust, pat grainger, frank strahan, classification, tramcars -
 Ballarat Tramway Museum
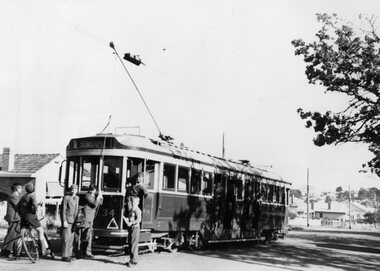
Photograph - Black & White Photograph/s, mid to late 1950's
Yields information about Lydiard St Nth area and a group of school boys posing for the photographer.Black and white photograph of Ballarat 34 at the Lydiard St North terminus with a group of school boys in uniform posing for the photographer. The tram has the destination of Sebastopol. Photographer unknown - see history of object. See Keith Kings, The Bendigo Tramways, re the fitting of reflective tape in 1956, page 59.In the rear in pencil - "Ballarat"trams, tramways, lydiard st nth, tram 34 -
 Ballarat Tramway Museum
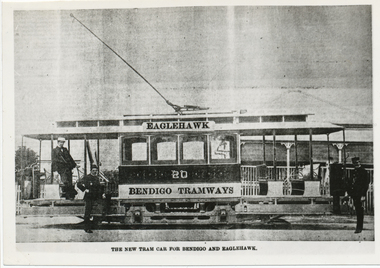
Photograph - Black & White Photograph/s, The Bendigonian, Oct. 2000
Black and White copy print contained within the Wal Jack Bendigo and Geelong Album, see Reg Item 5003 for more details. Photo of City of Brisbane Tram No. 20, altered to show the destination of Eaglehawk and Bendigo Tramways. Copied by Keith Kings from The Bendigonian 24/6/1902. On rear in ink " SA791 Bendigo "The New Tram"-!!! Actually Brisbane No. 20, suitably "touched." Copied ex "The Bendigonian", 24/6/02; previously printed on 2/10/1900.trams, tramways, bendigo, brisbane, new trams, esco, tram 20 -
 Greensborough Historical Society
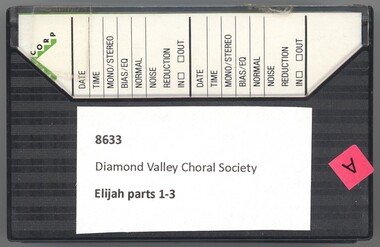
Audio - Audio Cassette, Diamond Valley Choral Society, Elijah, parts 1-3, performed by Diamond Valley Choral Society, 1980s
A recording of 'Elijah', an oratorio by Felix Mendelssohn, first performed in 1846, depicting events in the life of the Prophet Elijah as told in the Old Testament book of Kings. The work is scored for eight vocal soloists (two each of bass, tenor, alto and soprano). This performance by the Diamond Valley Choral Society has no date or venue.2 audio cassettes in clear plastic casesHandwritten on cassette 1: Side A: "Elijah. Part 1; Side B: "Elijah. Part 2" ;on cassette 2: "Elijah, Part 3"diamond valley choral society, elijah (oratorio) -
 Greensborough Historical Society
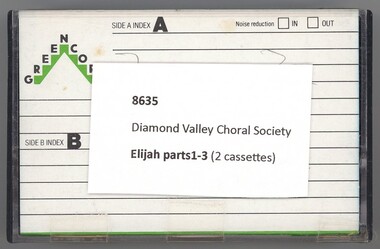
Audio - Audio Cassette, Diamond Valley Choral Society, Elijah, parts 1-3, performed by Diamond Valley Choral Society, 1980s
A recording of 'Elijah', an oratorio by Felix Mendelssohn, first performed in 1846, depicting events in the life of the Prophet Elijah as told in the Old Testament book of Kings. The work is scored for eight vocal soloists (two each of bass, tenor, alto and soprano). This performance by the Diamond Valley Choral Society has no date or venue.2 audio cassettes in clear plastic casesHandwritten on cassette 1: Side A: "Elijah"; on cassette 2: "Elijah"diamond valley choral society, elijah (oratorio) -
Phillip Island and District Historical Society Inc.
Book, Victoria Queen of Great Britain, Leaves from the journal of our life in the Highlands, from 1848 to 1861, to which are prefixed and added extracts from the same journal giving an account of earlier visits to Scotland, and tours in England and Ireland, and yachting excursions / edited by Arthur Helps, 1877
Labelled 'Cowes Free Public Library'. Labelled: 'Phillip Island Historical Society. Cleeland Bequest'. Inscribed ' ... 25/2/91'victoria queen of great britain, homes and haunts, scotland, highlands, diaries, queens, description, travel, journeys, kings, rulers -
 Lara RSL Sub Branch
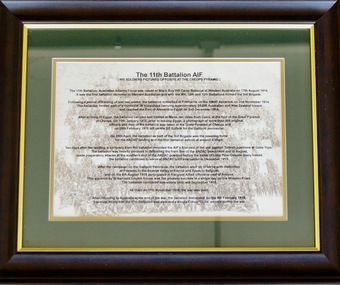
Picture, The 11th Battalion AIF at Cheops
Details of the famous 11 Battalion photo posing on the Cheops Pyramid at Mena 10 miles from Cairo. Also includes a brief history of the Battalion campaigns. Background watermark of the photo of troops on the pyramid. The Battalion returned to Australia at the end of war and was disbanded on 6th of February 1919. Awarded a Kings colour for its service.Famous photo of the 11th Battalion (800 men) posing on the Cheops Pyramid on the 10th of January 1915.Rectangular framed print which describes the famous photo of the 11th AIF Battalion posing on the cheops pyramid (Catalogue item 807)Printed details of the famous 11 Battalion photo posing on the Cheops Pyramid at Mena 10 miles from Cairo. Also includes a brief history of the Battalion campaigns. Background watermark of the photo of troops on the pyramid11th battalion cairo cheops blackboy hill cheops cairo egypt ypres somme