Showing 3000 items matching "black out"
-
 Australian National Surfing Museum
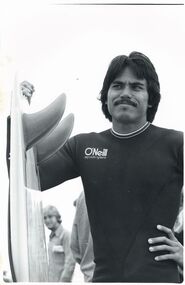
Photograph, Unknown, Reno Abellira Holding Twin Fin Surfboard, circa 1977
Reno Abellira was one of the top surfers to come out of Hawaii during the seventies. He was noted for his speed and style on the wave culminating in success on the early professional surfing circuit. The twin fin surfboard was a natural progression from the single fin and one of the most popular types of surfboard ridden during the mid-seventies.Reno Abellira was one of Hawaii's top surfers and one if its first professional surfers during the seventies. This rare photograph shows Reno holding his 'tools in trade' a twin fin surfboard.Black and white photograph of Hawaiian surfer Reno Abellira holding the tail of a twin fin surfboard. Abellira is wearing an O'Neil full length wetsuit.O'Neill logo on wetsuitreno abellira, twin fin surfboard, o'neill wetsuits -
 Australian National Surfing Museum
Photograph, Unknown, MR and Rabbit Check Out The Sheets, circa 1977
Professional surfers from Australia Mark Richards (centre) and Wayne 'Rabbit' Bartholomew (right) scrutinize judges tally sheets, possibly at Bells Beach in Victoria.Rare photograph featuring MR and 'Rabbit' two of the world's most competitive surfers during the seventies read what appears to be a judges tally sheet.Black and white photograph with chemical discolouration across top.mr, mark richards, 'rabbit', wayne bartholomew, -
 Flagstaff Hill Maritime Museum and Village
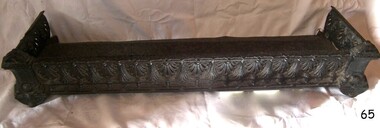
Functional object - Fire fender, Late 19th to early 20th century
A fender is part of the hardware used in open fireplaces to prevent the fire from spilling out of the fireplace. Wood fires were the main source of domestic heating in the 19th century.This fender is significant for its association with domestic heating in the 19th and early 20th century.Fire fender, cast iron, painted black, sides bolted onto front as is base plateflagstaff hill, warrnambool, shipwrecked coast, flagstaff hill maritime museum, shipwreck coast, great ocean road, fire fender, fire guard, domestic heating, fender -
 Flagstaff Hill Maritime Museum and Village
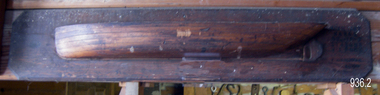
Craft - Ship Model, Peter Payne, Early 1930s to 1960s
Half-hull ship models were an important step in the process of building a vessel. Shipwrights or designers would construct a half-hull scale model of a ship before the vessel was built. They used it to ensure that the dimensions would work together and that the ship look balanced. They would often mount the half hull onto a board in their workshop. The half-hull ship models were also used to show prospective buyers how the design would work and look. Given the plywood construction of the model, it is believed to have been made around the 1930s as plywood construction had started in earnest in Queensland around this time and soon became the centre of the industry because of Queensland's attractive rain forest woods used which also included red cedar, silver ash, black bean, Queensland maple and silky oak. It is also believed the model was a design for a clinker-built barge to be built by Peter Payne who operated a boat building works on the Mordialloc Creek, Victoria going out of business in 1973. Records show Peter Paynes' first craft launched in 1962 and the last in 1973 from Mordialloc Creek works. However, he was one of the most prolific builders from the 1930s and produced many more vessels than the records currently show. There is at this point no further record of the subject model or whether a full version was ever built and for whom is not known at this time.A model that demonstrates the boat-building process is believed to have been made by Peter Payne or someone who worked in his yard. P Payne was a very well-known boating personality, vessel captain and boat builder throughout most of the 20th century. Model barge half hull on wooden of plywood laminated construction. Marked "AUXILIARY BARGE 80'x16'x6' 315 TONS 4" - 1 FOOT" "P and H PAYNE?" "22/E/26" flagstaff hill, warrnambool, flagstaff-hill, flagstaff-hill-maritime-museum, maritime-museum, shipwreck-coast, flagstaff-hill-maritime-village, ship model half hull, ship half model, shipbuilding, shipwright, ship design, peter payne, boat builder victoria, clinker design, barge -
 Flagstaff Hill Maritime Museum and Village
Domestic object - Bowl, Late 19th or early 20th Century
The Process of Making Pottery Decorating, Firing, Glazing, Making, Technical There is a rhythm and flow to clay. It can’t be done all at once! Even the making process! It can take weeks to get everything done, especially if you can only work on your pottery once a week! Even though we have three hour classes, it’s often just not enough time! Here is an overview of some of the processes so you have a bit more grasp on some of the technical stuff! Step One – Design There are SO many ideas out there for making stuff in clay! From delicate porcelain jewellery, through to heavy sculptural work and everything in between. Deciding your direction is sometimes not that easy – when you first start, try everything, you will naturally gravitate to the style that you enjoy! The options and variations are endless and can get a wee bit overwhelming too! Check in with me before you start to ensure your ideas will work, what order you might do things, how you could achieve the look you are seeking and any other technical data required! Step Two – Making Clay is thixotropic. This means that as you work with it, the clay first gets sloppier and wetter, before is begins to dry in the atmosphere. For most things, you simply can’t do all parts of the project at once. An example of work order might look like: Get last weeks work out from the shelves Prepare clay for today’s work – roll your clay, prepare balls for throwing, make the first stage of a pinch pot) Clean up last week’s work and put it on the shelf for bisque firing Check that you have any glazing to do – and do enough of it that you will have time to finish your main project Do the next step of your next project – there might be a further step that can’t be complete immediately, in that case, wrap your work well and put onto the shelves. Letting your work rest for a while can really help keep your work clean and professional looking. Many things require bagging under plastic to keep it ready for work the next week – put your name on the outside of the bag so you can find your work easily. We have stickers and markers. Consider how you want to decorate your work – coloured slip can be applied at a fairly wet stage (remembering that it will make your work even wetter!). Trying to apply slip to dry clay won’t work! If you want to do sgraffito – you will need to keep the work leather hard (a state of dryness where you can still work the clay with a little effort and a little water and care). Step Three – Drying Most of the time your work can go into the rack uncovered to let it dry out for the following week. If you want to continue forming or shaping you will need to double bag your work – put your work on a suitable sized bat and put the bat in a bag so the base of the bag is under the bat, then put another bag over the top of the work and tuck the top of the bag under the bat. If you want to trim (or turn) your thrown work the following week, it should also be double bagged. If your work is large, delicate, or of uneven thicknesses, you should lightly cover your work for drying. When considering the drying process, bare in mind the weather, humidity and wind! The hotter and dryer, the faster things dry and work can dry unevenly in the shelves – this can lead to cracking – another time to lightly cover your work for drying. Step Four – Trimming and Cleaning Up Your work is dry! It is called greenware now and it is at it’s most fragile! Handle everything with two hands. I often refer to soft hands – keep everything gentle and with your fingers spread as much as possible. Try to not pick up things like plates too much, and always with both hands! Before your work can be bisque fired it should be “cleaned up”. You work won’t go into the kiln if it has sharp edges – when glazed, sharp edges turn into razor blades! Use a piece of fly wire to rub the work all over – this will scratch a little so be light handed. Use a knife or metal kidney to scrape any areas that require a bit more dynamic treatment than the fly wire offers! Finally, a very light wipe over with a slightly damp sponge can help soften and soothe all of your edges and dags! Trimming thrown work: If you are planning to trim (or turn) your thrown work (and you should be), make sure you bag it well – your work should be leather hard to almost dry for easiest trimming. Use this step to finish the work completely – use a metal kidney to polish the surface, or a slightly damp sponge to give a freshly thrown look. Wipe the sponge around the rim after trimming, and check the inside of the pot for dags! Trimming slip cast work: Usually I will trim the rims of your work on the wheel the following day to make that stage easier, however you will still need to check your work for lumps and bumps. Last but not least – check that your name is still clearly on the bottom of your work. Step Five – Bisque Firing When the work is completely dry it can go into the bisque kiln. The bisque kiln is fired to 1000°C. This process burns off the water in the clay as well as some of the chemically bound water. The structure of the clay is not altered that much at this temperature. Inside the bisque kiln, the work is stacked a little, small bowl inside a larger bowl and onto a heavy plate. Smaller items like decorations or drink coasters might get stacked several high. Consideration is paid to the weight of the stack and shape of the work. A bisque kiln can fire about one and a half times the amount of work that the glaze kiln can fire. The firing takes about 10 hours to complete the cycle and about two days to cool down. Once it has been emptied the work is placed in the glaze room ready for you to decorate! Step Six – Glazing Decorating your work with colour can be a lot of fun – and time consuming! There are three main options for surface treatment at this stage: Oxide Washes Underglazes Glazes Washes and underglazes do not “glaze” the work – It will still need a layer of glaze to fully seal the clay (washes don’t need glaze on surfaces not designed for food or liquid as they can gloss up a little on their own). Underglazes are stable colourants that turn out pretty much how they look in the jar. They can be mixed with each other to form other colours and can be used like water colours to paint onto your work. Mostly they should have a clear glaze on top to seal them. Oxides are a different species – the pink oxide (cobalt) wash turns out bright blue for instance. They don’t always need a glaze on top, and some glazes can change the colour of the wash! The glazes need no other “glaze” on top! Be careful of unknown glaze interactions – you can put any combination of glaze in a bowl or on a plate, but only a single glaze on the outside of any vertical surface! Glazes are a chemical reaction under heat. We don’t know the exact chemicals in the Mayco glazes we use. I can guess by the way they interact with each other, however, on the whole, you need to test every idea you have, and not run the test on a vertical surface! Simply put, glaze is a layer of glass like substance that bonds with the clay underneath. Clay is made of silica, alumina and water. Glaze is made of mostly silica. Silica has a melting point of 1700°C and we fire to 1240°C. The silica requires a “flux” to help it melt at the lower temperature. Fluxes can be all sorts of chemicals – a common one is calcium – calcium has a melting point of 2500°C, however, together they both melt at a much lower temperature! Colourants are metal oxides like cobalt (blue), chrome (green through black), copper (green, blue, even red!), manganese (black, purple and pink) iron (red brown), etc. Different chemicals in the glaze can have dramatic effects. for example, barium carbonate (which we don’t use) turns manganese bright pink! Other elements can turn manganese dioxide brown, blue, purple and reddish brown. Manganese dioxide is a flux in and of itself as well. So, glazes that get their black and purple colours, often interact with other glazes and RUN! Our mirror black is a good example – it mixes really well with many glazes because it fluxes them – causes them to melt faster. It will also bring out many beautiful colours in the glazes because it’s black colouring most definitely comes from manganese dioxide! Glaze chemistry is a whole subject on it’s own! We use commercial Mayco glazes on purpose – for their huge range of colour possibilities, stability, cool interactions, artistic freedom with the ability to easily brush the glazes on and ease of use. We currently have almost 50 glazes on hand! A major project is to test the interactions of all glazes with each other. That is 2,500 test tiles!!!! I’m going to make the wall behind the wheels the feature wall of pretty colours! Step Seven – Glaze (Gloss or sometimes called “Glost”) Firing Most of the time this is the final stage of making your creation (but not always!) The glaze kiln goes to 1240°C. This is called cone 6, or midrange. It is the low end of stoneware temperatures. Stoneware clays and glazes are typically fired at cone 8 – 10, that is 1260 – 1290°C. The energy requirement to go from 1240°C to 1280°C is almost a 30% more! Our clay is formulated to vitrify (mature, turn “glass-like”) at 1240°, as are our glazes. A glaze kiln take around 12 hours to reach temperature and two to three days to cool down. Sometimes a third firing process is required – this is for decoration that is added to work after the glaze firing. For example – adding precious metals and lustres. this firing temperature is usually around 600 – 800°C depending upon the techniques being used. There are many students interested in gold and silver trims – we will be doing this third type of firing soon! After firing your work will be in the student finished work shelves. Remember to pay for it before you head out the door! There is a small extra charge for using porcelain clay (it’s more than twice the price of regular clay), and for any third firing process! Once your work has been fired it can not turn back into clay for millennia – so don’t fire it if you don’t like it! Put it in the bucket for recycling. https://firebirdstudios.com.au/the-process-of-making-pottery/ The bowl is an example of kitchenware used in the 19th century and still in use today.Bowl white ceramic. Crack on side. Badly stained.Backstamp very faint and unable to be read.flagstaff hill, warrnambool, shipwrecked-coast, flagstaff-hill, flagstaff-hill-maritime-museum, maritime-museum, shipwreck-coast, flagstaff-hill-maritime-village, mixing bowl, food preparation, kitchen equipment, ceramic -
 Flagstaff Hill Maritime Museum and Village
Domestic object - Bowl
The Process of Making Pottery Decorating, Firing, Glazing, Making, Technical There is a rhythm and flow to clay. It can’t be done all at once! Even the making process! It can take weeks to get everything done, especially if you can only work on your pottery once a week! Even though we have three hour classes, it’s often just not enough time! Here is an overview of some of the processes so you have a bit more grasp on some of the technical stuff! Step One – Design There are SO many ideas out there for making stuff in clay! From delicate porcelain jewellery, through to heavy sculptural work and everything in between. Deciding your direction is sometimes not that easy – when you first start, try everything, you will naturally gravitate to the style that you enjoy! The options and variations are endless and can get a wee bit overwhelming too! Check in with me before you start to ensure your ideas will work, what order you might do things, how you could achieve the look you are seeking and any other technical data required! Step Two – Making Clay is thixotropic. This means that as you work with it, the clay first gets sloppier and wetter, before is begins to dry in the atmosphere. For most things, you simply can’t do all parts of the project at once. An example of work order might look like: Get last weeks work out from the shelves Prepare clay for today’s work – roll your clay, prepare balls for throwing, make the first stage of a pinch pot) Clean up last week’s work and put it on the shelf for bisque firing Check that you have any glazing to do – and do enough of it that you will have time to finish your main project Do the next step of your next project – there might be a further step that can’t be complete immediately, in that case, wrap your work well and put onto the shelves. Letting your work rest for a while can really help keep your work clean and professional looking. Many things require bagging under plastic to keep it ready for work the next week – put your name on the outside of the bag so you can find your work easily. We have stickers and markers. Consider how you want to decorate your work – coloured slip can be applied at a fairly wet stage (remembering that it will make your work even wetter!). Trying to apply slip to dry clay won’t work! If you want to do sgraffito – you will need to keep the work leather hard (a state of dryness where you can still work the clay with a little effort and a little water and care). Step Three – Drying Most of the time your work can go into the rack uncovered to let it dry out for the following week. If you want to continue forming or shaping you will need to double bag your work – put your work on a suitable sized bat and put the bat in a bag so the base of the bag is under the bat, then put another bag over the top of the work and tuck the top of the bag under the bat. If you want to trim (or turn) your thrown work the following week, it should also be double bagged. If your work is large, delicate, or of uneven thicknesses, you should lightly cover your work for drying. When considering the drying process, bare in mind the weather, humidity and wind! The hotter and dryer, the faster things dry and work can dry unevenly in the shelves – this can lead to cracking – another time to lightly cover your work for drying. Step Four – Trimming and Cleaning Up Your work is dry! It is called greenware now and it is at it’s most fragile! Handle everything with two hands. I often refer to soft hands – keep everything gentle and with your fingers spread as much as possible. Try to not pick up things like plates too much, and always with both hands! Before your work can be bisque fired it should be “cleaned up”. You work won’t go into the kiln if it has sharp edges – when glazed, sharp edges turn into razor blades! Use a piece of fly wire to rub the work all over – this will scratch a little so be light handed. Use a knife or metal kidney to scrape any areas that require a bit more dynamic treatment than the fly wire offers! Finally, a very light wipe over with a slightly damp sponge can help soften and soothe all of your edges and dags! Trimming thrown work: If you are planning to trim (or turn) your thrown work (and you should be), make sure you bag it well – your work should be leather hard to almost dry for easiest trimming. Use this step to finish the work completely – use a metal kidney to polish the surface, or a slightly damp sponge to give a freshly thrown look. Wipe the sponge around the rim after trimming, and check the inside of the pot for dags! Trimming slip cast work: Usually I will trim the rims of your work on the wheel the following day to make that stage easier, however you will still need to check your work for lumps and bumps. Last but not least – check that your name is still clearly on the bottom of your work. Step Five – Bisque Firing When the work is completely dry it can go into the bisque kiln. The bisque kiln is fired to 1000°C. This process burns off the water in the clay as well as some of the chemically bound water. The structure of the clay is not altered that much at this temperature. Inside the bisque kiln, the work is stacked a little, small bowl inside a larger bowl and onto a heavy plate. Smaller items like decorations or drink coasters might get stacked several high. Consideration is paid to the weight of the stack and shape of the work. A bisque kiln can fire about one and a half times the amount of work that the glaze kiln can fire. The firing takes about 10 hours to complete the cycle and about two days to cool down. Once it has been emptied the work is placed in the glaze room ready for you to decorate! Step Six – Glazing Decorating your work with colour can be a lot of fun – and time consuming! There are three main options for surface treatment at this stage: Oxide Washes Underglazes Glazes Washes and underglazes do not “glaze” the work – It will still need a layer of glaze to fully seal the clay (washes don’t need glaze on surfaces not designed for food or liquid as they can gloss up a little on their own). Underglazes are stable colourants that turn out pretty much how they look in the jar. They can be mixed with each other to form other colours and can be used like water colours to paint onto your work. Mostly they should have a clear glaze on top to seal them. Oxides are a different species – the pink oxide (cobalt) wash turns out bright blue for instance. They don’t always need a glaze on top, and some glazes can change the colour of the wash! The glazes need no other “glaze” on top! Be careful of unknown glaze interactions – you can put any combination of glaze in a bowl or on a plate, but only a single glaze on the outside of any vertical surface! Glazes are a chemical reaction under heat. We don’t know the exact chemicals in the Mayco glazes we use. I can guess by the way they interact with each other, however, on the whole, you need to test every idea you have, and not run the test on a vertical surface! Simply put, glaze is a layer of glass like substance that bonds with the clay underneath. Clay is made of silica, alumina and water. Glaze is made of mostly silica. Silica has a melting point of 1700°C and we fire to 1240°C. The silica requires a “flux” to help it melt at the lower temperature. Fluxes can be all sorts of chemicals – a common one is calcium – calcium has a melting point of 2500°C, however, together they both melt at a much lower temperature! Colourants are metal oxides like cobalt (blue), chrome (green through black), copper (green, blue, even red!), manganese (black, purple and pink) iron (red brown), etc. Different chemicals in the glaze can have dramatic effects. for example, barium carbonate (which we don’t use) turns manganese bright pink! Other elements can turn manganese dioxide brown, blue, purple and reddish brown. Manganese dioxide is a flux in and of itself as well. So, glazes that get their black and purple colours, often interact with other glazes and RUN! Our mirror black is a good example – it mixes really well with many glazes because it fluxes them – causes them to melt faster. It will also bring out many beautiful colours in the glazes because it’s black colouring most definitely comes from manganese dioxide! Glaze chemistry is a whole subject on it’s own! We use commercial Mayco glazes on purpose – for their huge range of colour possibilities, stability, cool interactions, artistic freedom with the ability to easily brush the glazes on and ease of use. We currently have almost 50 glazes on hand! A major project is to test the interactions of all glazes with each other. That is 2,500 test tiles!!!! I’m going to make the wall behind the wheels the feature wall of pretty colours! Step Seven – Glaze (Gloss or sometimes called “Glost”) Firing Most of the time this is the final stage of making your creation (but not always!) The glaze kiln goes to 1240°C. This is called cone 6, or midrange. It is the low end of stoneware temperatures. Stoneware clays and glazes are typically fired at cone 8 – 10, that is 1260 – 1290°C. The energy requirement to go from 1240°C to 1280°C is almost a 30% more! Our clay is formulated to vitrify (mature, turn “glass-like”) at 1240°, as are our glazes. A glaze kiln take around 12 hours to reach temperature and two to three days to cool down. Sometimes a third firing process is required – this is for decoration that is added to work after the glaze firing. For example – adding precious metals and lustres. this firing temperature is usually around 600 – 800°C depending upon the techniques being used. There are many students interested in gold and silver trims – we will be doing this third type of firing soon! After firing your work will be in the student finished work shelves. Remember to pay for it before you head out the door! There is a small extra charge for using porcelain clay (it’s more than twice the price of regular clay), and for any third firing process! Once your work has been fired it can not turn back into clay for millennia – so don’t fire it if you don’t like it! Put it in the bucket for recycling. https://firebirdstudios.com.au/the-process-of-making-pottery/ This bowl is an example of kitchenware used in the 19th century and still in use today.Bowl white ceramic plain that has two sets of edging around lip. Inside bowl has plaster designed to look like cooking mixture.flagstaff hill, warrnambool, shipwrecked-coast, flagstaff-hill, flagstaff-hill-maritime-museum, maritime-museum, shipwreck-coast, flagstaff-hill-maritime-village, kitchen equipment, ceramic -
 Flagstaff Hill Maritime Museum and Village
Domestic object - Bowl, J & G Meakin, Late 19th or early 20th Century
The Process of Making Pottery Decorating, Firing, Glazing, Making, Technical There is a rhythm and flow to clay. It can’t be done all at once! Even the making process! It can take weeks to get everything done, especially if you can only work on your pottery once a week! Even though we have three hour classes, it’s often just not enough time! Here is an overview of some of the processes so you have a bit more grasp on some of the technical stuff! Step One – Design There are SO many ideas out there for making stuff in clay! From delicate porcelain jewellery, through to heavy sculptural work and everything in between. Deciding your direction is sometimes not that easy – when you first start, try everything, you will naturally gravitate to the style that you enjoy! The options and variations are endless and can get a wee bit overwhelming too! Check in with me before you start to ensure your ideas will work, what order you might do things, how you could achieve the look you are seeking and any other technical data required! Step Two – Making Clay is thixotropic. This means that as you work with it, the clay first gets sloppier and wetter, before is begins to dry in the atmosphere. For most things, you simply can’t do all parts of the project at once. An example of work order might look like: Get last weeks work out from the shelves Prepare clay for today’s work – roll your clay, prepare balls for throwing, make the first stage of a pinch pot) Clean up last week’s work and put it on the shelf for bisque firing Check that you have any glazing to do – and do enough of it that you will have time to finish your main project Do the next step of your next project – there might be a further step that can’t be complete immediately, in that case, wrap your work well and put onto the shelves. Letting your work rest for a while can really help keep your work clean and professional looking. Many things require bagging under plastic to keep it ready for work the next week – put your name on the outside of the bag so you can find your work easily. We have stickers and markers. Consider how you want to decorate your work – coloured slip can be applied at a fairly wet stage (remembering that it will make your work even wetter!). Trying to apply slip to dry clay won’t work! If you want to do sgraffito – you will need to keep the work leather hard (a state of dryness where you can still work the clay with a little effort and a little water and care). Step Three – Drying Most of the time your work can go into the rack uncovered to let it dry out for the following week. If you want to continue forming or shaping you will need to double bag your work – put your work on a suitable sized bat and put the bat in a bag so the base of the bag is under the bat, then put another bag over the top of the work and tuck the top of the bag under the bat. If you want to trim (or turn) your thrown work the following week, it should also be double bagged. If your work is large, delicate, or of uneven thicknesses, you should lightly cover your work for drying. When considering the drying process, bare in mind the weather, humidity and wind! The hotter and dryer, the faster things dry and work can dry unevenly in the shelves – this can lead to cracking – another time to lightly cover your work for drying. Step Four – Trimming and Cleaning Up Your work is dry! It is called greenware now and it is at it’s most fragile! Handle everything with two hands. I often refer to soft hands – keep everything gentle and with your fingers spread as much as possible. Try to not pick up things like plates too much, and always with both hands! Before your work can be bisque fired it should be “cleaned up”. You work won’t go into the kiln if it has sharp edges – when glazed, sharp edges turn into razor blades! Use a piece of fly wire to rub the work all over – this will scratch a little so be light handed. Use a knife or metal kidney to scrape any areas that require a bit more dynamic treatment than the fly wire offers! Finally, a very light wipe over with a slightly damp sponge can help soften and soothe all of your edges and dags! Trimming thrown work: If you are planning to trim (or turn) your thrown work (and you should be), make sure you bag it well – your work should be leather hard to almost dry for easiest trimming. Use this step to finish the work completely – use a metal kidney to polish the surface, or a slightly damp sponge to give a freshly thrown look. Wipe the sponge around the rim after trimming, and check the inside of the pot for dags! Trimming slip cast work: Usually I will trim the rims of your work on the wheel the following day to make that stage easier, however you will still need to check your work for lumps and bumps. Last but not least – check that your name is still clearly on the bottom of your work. Step Five – Bisque Firing When the work is completely dry it can go into the bisque kiln. The bisque kiln is fired to 1000°C. This process burns off the water in the clay as well as some of the chemically bound water. The structure of the clay is not altered that much at this temperature. Inside the bisque kiln, the work is stacked a little, small bowl inside a larger bowl and onto a heavy plate. Smaller items like decorations or drink coasters might get stacked several high. Consideration is paid to the weight of the stack and shape of the work. A bisque kiln can fire about one and a half times the amount of work that the glaze kiln can fire. The firing takes about 10 hours to complete the cycle and about two days to cool down. Once it has been emptied the work is placed in the glaze room ready for you to decorate! Step Six – Glazing Decorating your work with colour can be a lot of fun – and time consuming! There are three main options for surface treatment at this stage: Oxide Washes Underglazes Glazes Washes and underglazes do not “glaze” the work – It will still need a layer of glaze to fully seal the clay (washes don’t need glaze on surfaces not designed for food or liquid as they can gloss up a little on their own). Underglazes are stable colourants that turn out pretty much how they look in the jar. They can be mixed with each other to form other colours and can be used like water colours to paint onto your work. Mostly they should have a clear glaze on top to seal them. Oxides are a different species – the pink oxide (cobalt) wash turns out bright blue for instance. They don’t always need a glaze on top, and some glazes can change the colour of the wash! The glazes need no other “glaze” on top! Be careful of unknown glaze interactions – you can put any combination of glaze in a bowl or on a plate, but only a single glaze on the outside of any vertical surface! Glazes are a chemical reaction under heat. We don’t know the exact chemicals in the Mayco glazes we use. I can guess by the way they interact with each other, however, on the whole, you need to test every idea you have, and not run the test on a vertical surface! Simply put, glaze is a layer of glass like substance that bonds with the clay underneath. Clay is made of silica, alumina and water. Glaze is made of mostly silica. Silica has a melting point of 1700°C and we fire to 1240°C. The silica requires a “flux” to help it melt at the lower temperature. Fluxes can be all sorts of chemicals – a common one is calcium – calcium has a melting point of 2500°C, however, together they both melt at a much lower temperature! Colourants are metal oxides like cobalt (blue), chrome (green through black), copper (green, blue, even red!), manganese (black, purple and pink) iron (red brown), etc. Different chemicals in the glaze can have dramatic effects. for example, barium carbonate (which we don’t use) turns manganese bright pink! Other elements can turn manganese dioxide brown, blue, purple and reddish brown. Manganese dioxide is a flux in and of itself as well. So, glazes that get their black and purple colours, often interact with other glazes and RUN! Our mirror black is a good example – it mixes really well with many glazes because it fluxes them – causes them to melt faster. It will also bring out many beautiful colours in the glazes because it’s black colouring most definitely comes from manganese dioxide! Glaze chemistry is a whole subject on it’s own! We use commercial Mayco glazes on purpose – for their huge range of colour possibilities, stability, cool interactions, artistic freedom with the ability to easily brush the glazes on and ease of use. We currently have almost 50 glazes on hand! A major project is to test the interactions of all glazes with each other. That is 2,500 test tiles!!!! I’m going to make the wall behind the wheels the feature wall of pretty colours! Step Seven – Glaze (Gloss or sometimes called “Glost”) Firing Most of the time this is the final stage of making your creation (but not always!) The glaze kiln goes to 1240°C. This is called cone 6, or midrange. It is the low end of stoneware temperatures. Stoneware clays and glazes are typically fired at cone 8 – 10, that is 1260 – 1290°C. The energy requirement to go from 1240°C to 1280°C is almost a 30% more! Our clay is formulated to vitrify (mature, turn “glass-like”) at 1240°, as are our glazes. A glaze kiln take around 12 hours to reach temperature and two to three days to cool down. Sometimes a third firing process is required – this is for decoration that is added to work after the glaze firing. For example – adding precious metals and lustres. this firing temperature is usually around 600 – 800°C depending upon the techniques being used. There are many students interested in gold and silver trims – we will be doing this third type of firing soon! After firing your work will be in the student finished work shelves. Remember to pay for it before you head out the door! There is a small extra charge for using porcelain clay (it’s more than twice the price of regular clay), and for any third firing process! Once your work has been fired it can not turn back into clay for millennia – so don’t fire it if you don’t like it! Put it in the bucket for recycling. https://firebirdstudios.com.au/the-process-of-making-pottery/This bowl was made by renowned pottery company J & G Meakin of England. The firm was established in the mid-1800's. The bowl is an example of kitchenware used in the 19th century and still in use today.Bowl; white ceramic, round and tapering inwards towards base. Made by J and G Meakin England.On base, 'Ironstone China Reg SOL 391413' with symbolflagstaff hill, flagstaff hill maritime museum and village, warrnambool, maritime museum, maritime village, great ocean road, shipwreck coast, mixing bowl, food preparation, j & g meakin, pottery, stoke-on-trent, kitchen equipment, ceramic -
 Flagstaff Hill Maritime Museum and Village
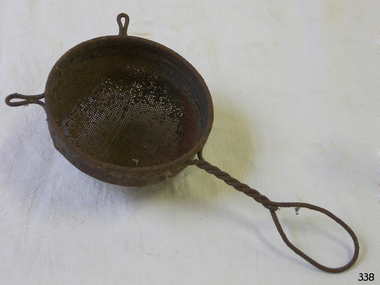
Domestic object - Strainer
Take a stroll through the average beverage aisle in your supermarket, and you might get the impression that tea has always come in small boxes with disposable tea bags. But before those easy to come by boxes, there was the rich and intriguing history of the tea strainer, a beautiful little tool that has helped our ancestors enjoy loose leaf tea for hundreds of years. Enjoying loose-leaf tea, and becoming familiar with this tool, can help spark an appreciation for your tea strainer and infuser collection, or simply inspire you to grow one. Documentation of tea tools such as the tea strainer appear in ancient history, the earliest models were likely made of bamboo, and later evolved into stainless steel, sterling silver, china, porcelain, silicon, and linen. During the Tang Dynasty in China, a small book called “Classic of Tea” was written describing tea utensils, and they were made to help Buddhist monks keep living things (such as small bugs) out of the drinking water. However, using a tea tool to keep run away tea leaves out of a cup did not become a cited use of the strainer until the 17th century when Dutch merchants made tea more readily available to those outside of the Chinese dynasty. British royals then increased the popularity of tea as their preferred beverage, and it was not long before a newfound fanaticism for tea in Great Britain spread to the American colonies, as did a growing demand for products that could separate loose tea leaves from liquid with ease and flair. Why did people use a strainer to separate out tea leaves in Great Britain and not in China? While the method of serving tea from a teapot with the tea loose in the pot was a practice used in both countries, the reason China may not have required a tool to remove leaves from their cup likely had to do with the types of tea leaves they were producing. The British owned tea plantations, in countries such as India, produced finer black tea leaves that did not require as much space to expand inside of a tea pot, where as the leaves prepared on the Chinese plantations would expand far more in the pot, and were therefore less likely to land or be bothersome inside a tea cup. This common approach to serving tea with smaller tea leaves required a solution to avoid ending up with a cup, and mouth, full of tea leaves. The obvious solution was a strainer basket. In the Victorian era, tea strainer baskets, similar to those still used in tea parlors today, were made to sit on top of the cup to capture the leaves when pouring the tea from a tea pot into the individual cups. Another solution was a tea-removing device called a mote spoon. Mote spoons act as search and rescue spoons to remove tea leaves from individual teacups. The tea would be brewed loose in the teapot, so any tea that ended up in the cup could be removed with a long handled spoon with holes in the spoon to remove rogue tea leaves and keep the steeped water in the cup. The handle also helped keep the teapot spout free of leaves and could help unclog any leaves trapped when pouring. Stainless steel tea strainers and tea infusers gained popularity in the late 19th century. Big name tea strainer producers, such as Tiffany and Gorham, could use fine silver to create quality, heavy, and sturdy strainers, for those who could afford it. There were many varieties of strainers at that time, but it was more likely that smaller designers who could not afford to mass-produce these quality strainers out of silver made them into unique shapes to attract consumers with lighter wallets. And borne was the tea strainer we are accustomed to today. Things took an unexpected turn for the tea strainer in the early 1900s when Thomas Sullivan, a tea merchant, shipped out tea samples in small silk bags. Customers did not realize that they were supposed to remove the tea from the bags, and instead boiled the tea, bag and all! The convenience of tossing out the leaves is obvious, and the popularity of tea bags is still seen today. Most premium bags of tea we are accustomed to today are frequently packaged loose for consumption, and when they are available in bags, the leaves are often crowded and do not have enough space to expand. While pyramid tea bags have become a more recent solution to this problem, due to the additional space at the top of the bag, enjoying a variety of quality tea is easier with a tea strainer in your arsenal. Besides, with the wide variety of strainers for your cup or pot in versatile materials such as mesh, silver, or a novelty silicone cartoon shape, loose tea can still reign supreme. Tea strainers sometimes do require more cleanup and measuring, but the experience and quality is always worth the effort. Besides, strainers also allow for mixing favorite tea blends together for an extra dose of delicious creativity! https://www.teamuse.com/article_170413.html The strainer provided the convenience of separating the tea leaves for disposal later.Metal strainer, bowl shaped, with mesh and twisted wire handle.Noneflagstaff hill, warrnambool, shipwrecked-coast, flagstaff-hill, flagstaff-hill-maritime-museum, maritime-museum, shipwreck-coast, flagstaff-hill-maritime-village, strainer -
 Marysville & District Historical Society
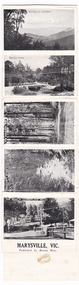
Photograph (item) - Black and white photographs, Valentine Publishing Co. Pty. Ltd, Marysville, Vic, 1923-1963
A series of black and white photographs of scenic attractions taken in and around Marysville in Victoria that was published by the Barton Bros, Marysville and printed by Valentines Publishing Co as a souvenir of Marysville.A series of black and white photographs of scenic attractions taken in and around Marysville in Victoria that was published by the Barton Bros, Marysville and printed by Valentines Publishing Co as a souvenir of Marysville. Thomas Barton was one of the earliest settlers in Marysville and with 16 children and numerous descendants the name of Barton is synonymous with Marysville. Thomas John Barton, along with his business partner, Ewen Hugh Cameron, opened a butcher/abattoirs in Marysville in 1864. This was the first shop in Marysville. They supplied meat and other items to the miners along the Woods Point road. Thomas Barton was an active community member and was a key organiser in setting up the school in Marysville in 1870. After Thomas' death in 1911, his sons Fred and Frank took over the family business and renamed it Barton Bros. the road to cumberland valley (image 1), taggerty river (image 2), the acheron way (image 3), the old ford (image 4), nicholl's lookout (image 5), main street (image 6), mount margaret (image 7), stevenson falls (image 8), cumberland falls (image 9), keppel's falls (image 10), acheron way (image 11), marysville, victoria, barton bros, souvenir, valentine publishing co, thomas john barton, ewen hugh cameron, francis adam barton, frederick barton -
 Marysville & District Historical Society
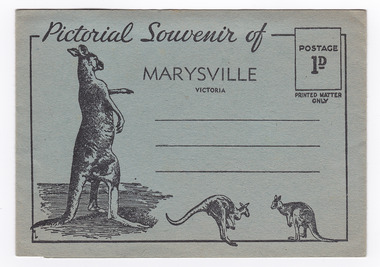
Postcard (item) - Black and white photographs, Pictorial Souvenir of MARYSVILLE VICTORIA, 1936
Fold out postcard which encloses 6 black and white photographs of attractions in and around Marysville in Victoria.Fold out postcard which encloses 6 black and white photographs of attractions in and around Marysville in Victoria.POSTAGE/ 1D/ PRINTED MATTER/ ONLY From If any correspondence is included, full letter rates of postage will apply.marysville, victoria, taggery river (image 1), cora lynn falls (image 2), talbot drive (image 3), steavenson's falls (image 4), main street from bridge (image 5), the log cabin (image 6), postcard, souvenir -
 Marysville & District Historical Society
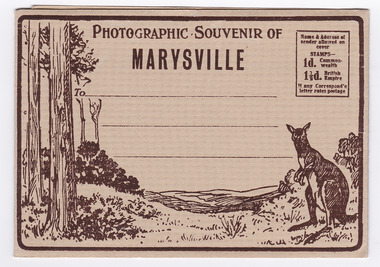
Postcard (item) - Black and white photographs, Barton Bros, Photographic Souvenir of Marysville, 1923-1963
A series of nine black and white photographs of scenic attractions taken in and around Marysville in Victoria that was published by the Barton Bros, Marysville and printed by Valentines Publishing Co as a souvenir of Marysville.A series of nine black and white photographs of scenic attractions taken in and around Marysville in Victoria that was published by the Barton Bros, Marysville, and printed by Valentines Publishing Co as a souvenir of Marysville. Thomas Barton was one of the earliest settlers in Marysville and with 16 children and numerous descendants, the name of Barton is synonymous with Marysville. Thomas John Barton, along with his business partner, Ewen Hugh Cameron, opened a butcher/abattoirs in Marysville in 1864. This was the first shop in Marysville. They supplied meat and other items to the miners along the Woods Point road. Thomas Barton was an active community member and was a key organiser in setting up the school in Marysville in 1870. After Thomas' death in 1911, his sons Fred and Frank took over the family business and renamed it Barton Bros. Name & Address of/ sender allowed on/ cover STAMPS-/ 1d. Common-wealth/ 1 1/2d. British Empire If any Correspond'e/ letter rates postage From Published by BARTON BROS., Marysvillemarysville, victoria, barton bros, acheron way (image 1), keppel's falls (image 2), cumberland falls (image 3), stevenson falls (image 4), taggerty river (image 5), mount margaret (image 6), mount gordan (image 7), nicholl's lookout (image 8), the old ford (image 9), valentine publishing co, souvenir, postcard, thomas barton, ewen hugh cameron, francis adam barton, frederick barton -
 Marysville & District Historical Society
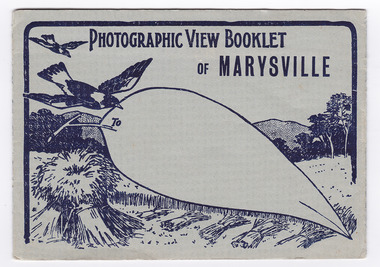
Postcard (item) - Black and white photographs, Barton Bros, Photographic View Booklet of MARYSVILLE, 1923-1963
A series of nine black and white photographs of scenic attractions taken in and around Marysville in Victoria that was published by the Barton Bros, Marysville and printed by Valentines Publishing Co as a souvenir of Marysville.A series of black and white photographs of scenic attractions taken in and around Marysville in Victoria that was published by the Barton Bros, Marysville and printed by Valentines Publishing Co as a souvenir of Marysville. Thomas Barton was one of the earliest settlers in Marysville and with 16 children and numerous descendants, the name of Barton is synonymous with Marysville. Thomas John Barton, along with his business partner, Ewen Hugh Cameron, opened a butcher/abattoirs in Marysville in 1864. This was the first shop in Marysville. They supplied meat and other items to the miners along the Woods Point road. Thomas Barton was an active community member and was a key organiser in setting up the school in Marysville in 1870. After Thomas' death in 1911, his sons Fred and Frank took over the family business and renamed it Barton Bros. To From Published by BARTON BROS., Marysvillemarysville, victoria, barton bros, acheron way (image 1), keppel's falls (image 2), cumberland falls (image 3), stevenson falls (image 4), taggerty river (image 5), mount margaret (image 6), mount gordan (image 7), nicholl's lookout (image 8), the old ford (image 9), postcard, valentine publishing co, souvenir, thomas barton, francis adam barton, frederick barton, ewen hugh cameron -
 Marysville & District Historical Society
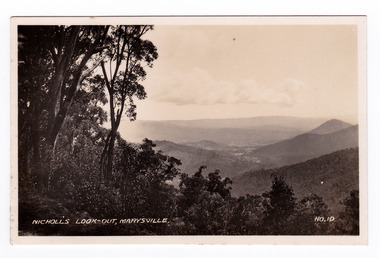
Photograph (item) - Black and white photograph, Valentine Publishing Co. Pty. Ltd, Nicoll's Lookout, Marysville No.10, 1923-1963
An early black and white photograph of Nicholl's Look-out near Marysville in Victoria.An early black and white photograph of Nicholl's Look-out near Marysville in Victoria. This lookout is situated on the Marysville-Wood's Point Road. The Marysville-Woods Point Road was originally part of the Yarra Track, constructed in the early 1860s to provide access between Healesville and the Woods Point Goldfields. Despite the steep terrain and engineering difficulties, the Yarra Track soon became a busy route used by pack horses, horse-drawn drays, and wagons. Today this sealed mountain road is a popular scenic drive between Marysville and Warburton. This photograph was published by the Valentine Publishing Co Pty. Ltd. as a souvenir of Marysville.marysville, victoria, valentine publishing co, souvenir, nicholl's look-out, mining, yarra track -
 Marysville & District Historical Society
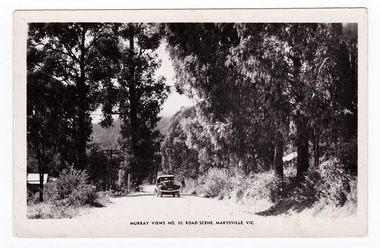
Postcard (item) - Black and white postcard, Murray Views, Murray Views No. 30. Road Scene, Marysville, Vic, Post 1929
An early black and white photograph of a road scene taken in Marysville, Victoria.An early black and white photograph of a road scene taken in Marysville, Victoria. This postcard was produced by Murray Views in Gympie, Queensland as a souvenir of Marysville."Kooringa"/ Monday Dear Mother/ Just a short note/ to say I am well & having a/ good holiday. Went on the/ Cumberland Valley trip last/ week - was very enjoyable./ To-day we are doing the Eildon/ Weir trip - all day. Have had/ fairly good weather - was able/ to go out every day. Will/ ring you later in the week/ about meeting me. If the/ strike is still on will probably/ get you to order a taxi for/ me. Lots of love/ Margaretmarysville, victoria, postcard, murray views, souvenir -
 Marysville & District Historical Society
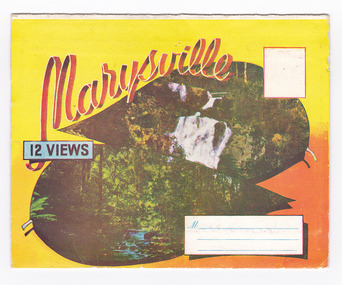
Postcard (item) - Colour photographs, Murray Views, Marysville 12 Views, 1950's
A fold out postcard of 12 colour photographs of scenes and landscapes in and around Marysville in Victoria.A fold out postcard 12 colour photographs of scenes and landscapes in and around Marysville in Victoria. These photographs were produced by Murray Views in Gympie, Queensland as a souvenir of Marysville.Marysville/ 12 VIEWS PRODUCED BY MURRAY VIEWS./ GYMPIE./ Q COPYRIGHT SAMUEL LEE & CO., PRINTERS. STEAVENSON'S FALLS, MARYSVILLE, VIC. TOURISTS AT MARYSVILLE, VIC. "FRUIT SALAD FARM", MARYSVILLE MAIN STREET, MARYSVILLE, VIC. ROAD SCENE, MARYSVILLE, VIC. THE CROSSWAYS, MARYSVILLE, VIC ROAD TO CUMBERLAND VALLEY, MARYSVILLE PANORAMA FROM BLACK SPUR, MARYSVILLE ROAD, MARYSVILLE, VIC. NICHOLL'S LOOKOUT, MARYSVILLE, VIC. TREE FERNS, MARYSVILLE, VIC. THE BRIDGE, MARYSVILLE, VIC.steavenson falls (image 1), tourists in marysville (image 2), taggerty river (image 3), fruit salad farm (image 4), main street marysville (image 5), road scene marysville (image 6), the crossways (image 7), cumberland valley (image 8), black spur (image 9), nicholl's lookout (image 10), tree ferns (image 11), bridge (image 12), marysville, victoria, postcard, souvenir, murray views -
 Marysville & District Historical Society
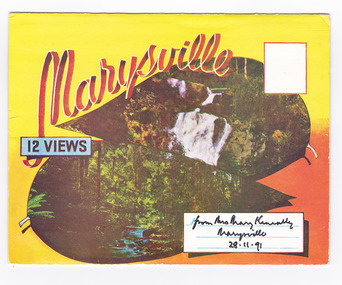
Postcard (item) - Colour photographs, Murray Views, Marysville 12 Views, 1950's
A fold out postcard of 12 colour photographs of scenes and landscapes in and around Marysville in Victoria.A fold out postcard 12 colour photographs of scenes and landscapes in and around Marysville in Victoria. These photographs were produced by Murray Views in Gympie, Queensland as a souvenir of Marysville.Marysville/ 12 VIEWS from Mrs Mary Keneally/ Marysville/ 28.11.91 PRODUCED BY MURRAY VIEWS./ GYMPIE./ Q COPYRIGHT SAMUEL LEE & CO., PRINTERS. STEAVENSON'S FALLS, MARYSVILLE, VIC. TOURISTS AT MARYSVILLE, VIC. "FRUIT SALAD FARM", MARYSVILLE MAIN STREET, MARYSVILLE, VIC. ROAD SCENE, MARYSVILLE, VIC. THE CROSSWAYS, MARYSVILLE, VIC ROAD TO CUMBERLAND VALLEY, MARYSVILLE PANORAMA FROM BLACK SPUR, MARYSVILLE ROAD, MARYSVILLE, VIC. NICHOLL'S LOOKOUT, MARYSVILLE, VIC. TREE FERNS, MARYSVILLE, VIC. THE BRIDGE, MARYSVILLE, VIC.steavenson falls (image 1), tourists in marysville (image 2), taggerty river (image 3), fruit salad farm (image 4), main street marysville (image 5), road scene marysville (image 6), the crossways (image 7), cumberland valley (image 8), black spur (image 9), nicholl's lookout (image 10), tree ferns (image 11), bridge (image 12), marysville, victoria, postcard, souvenir, murray views -
 Marysville & District Historical Society
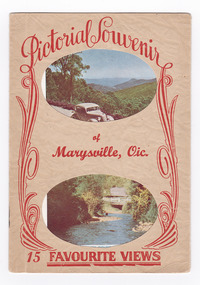
Postcard (item) - Colour and black and white photographs, Murray Views, Pictorial Souvenur of Marysville, Vic. 15 Favourite Views, 1950's
A fold out postcard of 15 colour and black and white photographs of scenes and landscapes in and around Marysville in Victoria.A fold out postcard of 15 colour and black and white photographs of scenes and landscapes in and around Marysville in Victoria. These photographs were produced by Murray Views in Gympie, Queensland as a souvenir of Marysville.Pictorial Souvenir/ of/ Marysville, Vic./ 15 Favourite Views PRODUCED BY MURRAY VIEWS. GYMPIE. Q. COPYRIGHT SAMUEL LEE & CO., PRINTERS Serial No. R 4152 NICHOLL'S LOOKOUT, MARYSVILLE, VIC. TAGGERTY RIVER, MARYSVILLE, VIC ROAD SCENE, MARYSVILLE, VIC. MAIN STREET, MARYSVILLE, VIC. THE CROSSWAYS, MARYSVILLE, VIC. FRUIT SALAD FARM, MARYSVILLE, VIC. ROAD TO CUMBERLAND VALLEY, MARYSVILLE, VIC. CROSSWAYS CABARET, MARYSVILLE, VIC. TREE FERNS, MARYSVILLE, VIC. STEVENSON'S FALLS, MARYSVILLE, VIC. Looking towards Marysville, Vic. Tourists at Marysville, Vic. Taggerty River, Marysville, Vic. On Buxton Road, Marysville, Vic. Panorama from Black Spur, Marysville Road, Marysville, Vic.marysville, victoria, souvenir, postcard, nicholl's lookout (image 1), taggerty river (image 2), road scene (image 3), main street marysville (image 4), crossways hotel (image 5), fruit salad farm (image 6), cumberland valley (image 7), crossways cabaret (image 8), tree ferns (image 9), steavenson falls (image 10), marysville view (image 11), tourists marysville (image 12), taggerty river (image 13), buxton road (image 14), black spur (image 15) -
 Marysville & District Historical Society
Postcard (item) - Colour and black and white photographs, Pictorial Souvenir of Marysville, Vic. 15 Favourite Views
A fold out postcard of 15 colour and black and white photographs of scenes and landscapes in and around Marysville in Victoria.A fold out postcard of 15 colour and black and white photographs of scenes and landscapes in and around Marysville in Victoria. These photographs were produced by Murray Views in Gympie, Queensland as a souvenir of Marysville.Pictorial Souvenir/ of/ Marysville, Vic./ 15 Favourite Views PRODUCED BY MURRAY VIEWS. GYMPIE. Q. COPYRIGHT SAMUEL LEE & CO., PRINTERS Serial No. R 4152 NICHOLL'S LOOKOUT, MARYSVILLE, VIC. TAGGERTY RIVER, MARYSVILLE, VIC ROAD SCENE, MARYSVILLE, VIC. MAIN STREET, MARYSVILLE, VIC. THE CROSSWAYS, MARYSVILLE, VIC. FRUIT SALAD FARM, MARYSVILLE, VIC. ROAD TO CUMBERLAND VALLEY, MARYSVILLE, VIC. CROSSWAYS CABARET, MARYSVILLE, VIC. TREE FERNS, MARYSVILLE, VIC. STEVENSON'S FALLS, MARYSVILLE, VIC. Looking towards Marysville, Vic. Tourists at Marysville, Vic. Taggerty River, Marysville, Vic. On Buxton Road, Marysville, Vic. Panorama from Black Spur, Marysville Road, Marysville, Vic.marysville, victoria, souvenir, postcard, nicholl's lookout (image 1), taggerty river (image 2), road scene (image 3), main street marysville (image 4), crossways hotel (image 5), fruit salad farm (image 6), cumberland valley (image 7), crossways cabaret (image 8), tree ferns (image 9), steavenson falls (image 10), marysville view (image 11), tourists marysville (image 12), taggerty river (image 13), buxton road (image 14), black spur (image 15) -
 Marysville & District Historical Society
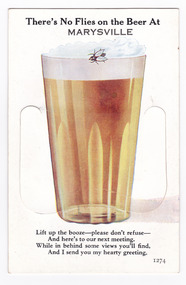
Postcard (item) - Novelty postcard, Valentine Publishing Co. Pty. Ltd, There's No Flies on the Beer At MARYSVILLE, 1940's-1960's
A novelty postcard with pull-out strip of 9 miniature photographs that was produced by the Valentine Publishing Co as a souvenir of Marysville.A novelty postcard with pull-out strip of 9 miniature photographs that was produced by the Valentine Publishing Co as a souvenir of Marysville.There's No Flies on the Beer At/ MARYSVILLE Lift up the booze-please don't refuse-/ And here's to our next meeting./ While in behind some views you'll find,/ And I send you my hearty greeting. 1274 PRINTED PAPER MAILING NOVELTY TO OPEN RAISE FLAP From VALENTINE'S "MAIL NOVELTY" POST CARD COPYRIGHT Printed in Great Britain Tomarysville, victoria, souvenir, crossways cabaret (image 1), taggerty river (image 2), acheron way (image 3), old blacks spur road (image 4), nicholl's lookout (image 5), main street (image 6), sugarloaf bay eildon (image 7), steavenson falls (image 8), cumberland falls (image 9), valentine publishing co, postcard -
 Marysville & District Historical Society
Postcard (item) - Novelty postcard, Valentine Publishing Co. Pty. Ltd, Just a Line from MARYSVILLE, 1940's-1960's
A novelty postcard with pull-out strip of 9 miniature photographs that was produced by the Valentine Publishing Co as a souvenir of Marysville.A novelty postcard with pull-out strip of 9 miniature photographs that was produced by the Valentine Publishing Co as a souvenir of Marysville.Just a Line from MARYSVILLE 1355 PRINTED PAPER/ MAILING NOVELTY TO OPEN RAISE FLAP VALENTINE'S "MAIL NOVELTY" POST CARD/ COPYRIGHT From Printed in Great Britain To Marysville Chalet/ Marysville/ Phone 12 Dear Nev. We had a good/ trip up, left Ballarat/ 1/4 to 2 & Ivy & Kev were waiting 1/2 hr for us &/ Kev took the lead through Melbourne & by cripes/ was I glad to get through it, our darn engine/ kept cutting out, at the stop signs, by cripes I felt/ like crawling under the seat. Its beautiful weather/ here, we done a couple of good walks, going fishing/ this afternoon, Merle & Valerie have mixed up with/ some of the young mob & seem to be doing alright./ Well hope every-thing is going OK down there./ Merle & Val are thinking of going horse riding./ The trees and ferns are gorgeous here, tall I have never/ seen so tall a trees. Well Nev must close now. Love from Mum. Xmarysville, victoria, postcard, souvenie, valentine publishing co, crossways cabaret (image 1), taggerty river (image 2), acheron way (image 3), black spur (image 4), nicholl's lookout (image 5), main street marysville (image 6), sugarloaf bay eildon (image 7), steavenson falls (image 8), cumberland falls (image 9) -
 Marysville & District Historical Society
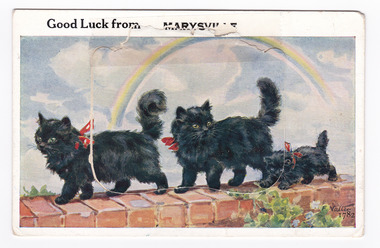
Postcard (item) - Novelty postcard, Valentine Publishing Co. Pty. Ltd, Good Luck from MARYSVILLE, 1940's -1960's
A novelty postcard with pull-out strip of 9 miniature photographs that was produced by the Valentine Publishing Co as a souvenir of Marysville.A novelty postcard with pull-out strip of 9 miniature photographs that was produced by the Valentine Publishing Co as a souvenir of Marysville.Good Luck from MARYSVILLE 1782 PRINTED PAPER MAILING NOVELTY TO OPEN RAISE FLAP From VALENTINE'S "MAIL NOVELTY" POST CARD COPYRIGHT Printed in Great Britain To "Kooringa"/ Sunday Dear Heather. JUST A LINE FROM MARYSVILLE/ TO LET YOU KNOW WE ARE OK AFTER OUR/ TRIP UP. LEFT HOME AT 8-30 THIS MORNING,/ AND AFTER LUNCH AT HEALESVILLE ARRIVED/ HERE AT 1-30. IT CERTAINLY MAKES A/ DIFFERENCE HAVING THE CAR. YOU DO/ ENJOY THE TRIP. WE HAVE A NICE BIG/ ROOM SO SHOULD BE QUITE HAPPY./ LOTS OF LOVE FROM AUNTY AND UNCLE XXXXmarysville, victoria, postcard, souvenir, valentine publishing co, crossways cabaret (image 1), taggerty river (image 2), acheron way (image 3), blacks spur (image 4), nicholl's lookout (image 5), main street marysville (image 6), sugarloaf bay eildon (image 7), steavenson falls (image 8), cumberland falls (image 9) -
 Marysville & District Historical Society
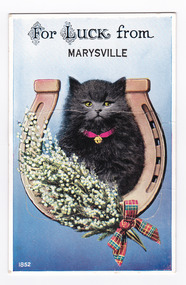
Postcard (item) - Novelty postcard, Valentine Publishing Co. Pty. Ltd, FOR LUCK from MARYSVILLE, 1940's-1960's
A novelty postcard with pull-out strip of 9 miniature photographs that was produced by the Valentine Publishing Co as a souvenir of Marysville.A novelty postcard with pull-out strip of 9 miniature photographs that was produced by the Valentine Publishing Co as a souvenir of Marysville.FOR LUCK from/ MARYSVILLE 1852 VALENTINE'S/ MAILING NOVELTY From VALENTINE'S "MAILING NOVELTY" POSTCARD. COPYRIGHT. Postal Rates/ within Australia Enclosed in/ Envelope 2 1/2"/ Sent Open/ with only/ Name and/ Address of/ Sender 1 1/2 Mt Kitchener House/ Marysville/ 31.1.51 Dear Nancy & Albert/ Well I thought that while I had a/ chance I would drop you a few lines to/ let you know that we are having a good/ time. I read in the Herald last night about/ Uncle Will's death, but he had suffered such/ a lot, that I guess he is better off. When/ Dad & I went to see him last Tues week/ he really looked dreadful. This is a very/ nice place to stay the meals and accommod-/ ation is very nice & they are a very nice/ crowd staying here. Beryl & I went to Alexander/ yesterday with some friends of Beryl's and tomorrow/ we are going the Reefton Spur trip, ? and the Eildon Weir/ trip and then Frid the Cumberland Valley Trip./ Well I must close so for the present lots of Love/ Violetmarysville, victoria, souvenir, postcard, valentine publishing co, cumberland valley road (image 1), taggerty river (image 2), acheron way (image 3), the old ford marysville (image 4), nicholl's lookout (image 5), main street marysville (image 6), mount margaret (image 7), stevenson falls (image 8), cumberland falls (image 9) -
 Marysville & District Historical Society
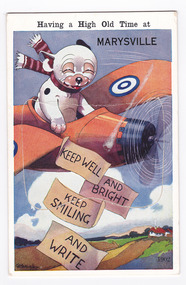
Postcard (item) - Novelty postcard, Having a High Old Time at MARYSVILLE-KEEP WELL AND BRIGHT KEEP SMILING AND WRITE, 1940's-1960's
A novelty postcard with pull-out strip of 9 miniature photographs that was produced by the Valentine Publishing Co as a souvenir of Marysville.A novelty postcard with pull-out strip of 9 miniature photographs that was produced by the Valentine Publishing Co as a souvenir of Marysville.Having a High Old Time at MARYSVILLE KEEP WELL/ AND BRIGHT/ KEEP SMILING/ AND WRITE 1902 VALENTINE'S/ MAILING NOVELTY From VALENTINE'S "MAIL NOVELTY" POSTCARD. COPYRIGHT/ PRINTED IN GT. BRITAIN To Dear Mrs Bannan, I was expecting/ you down to meet "my folks" while they/ were over. Sorry you couldnt fit it in/ They went back last Tuesday & we came/ up here on Wednesday. Weve settled in/ to have a restful holiday. its a lovely/ place spotlessly clean & beautiful meals/ Ive never eaten so much for years. We/ will be here for 10 days so I should put/ on at least a stone the way Im eating/ love & best wishes to you all from Wm Staceymarysville, victoria, postcard, souvenir, valentine publishing co, crossways cabaret (image 1), taggerty river (image 2), acheron way (image 3), blacks spur road (image 4), nicholl's lookout (image 5), main street marysville (image 6), sugarloaf bay eildon (image 7), steavenson falls (image 8), cumberland falls (image 9) -
 Marysville & District Historical Society
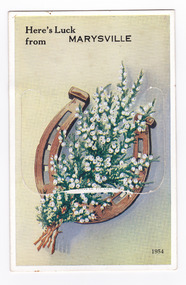
Postcard (item) - Novelty postcard, Valentine Publishing Co. Pty. Ltd, Here's Luck from MARYSVILLE, 1940's-1960's
A novelty postcard with pull-out strip of 9 miniature photographs that was produced by the Valentine Publishing Co as a souvenir of Marysville.A novelty postcard with pull-out strip of 9 miniature photographs that was produced by the Valentine Publishing Co as a souvenir of Marysville.Here's Luck/ from MARYSVILLE 1954 PRINTED PAPER MAILING NOVELTY TO OPEN RAISE FLAP From VALENTINE'S "MAIL NOVELTY" POST CARD COPYRIGHT Printed in Great Britain Tomarysville, victoria, postcard, souvenir, valentine publishing co, crossways cabaret (image 1), taggerty river (image 2), acheron way (image 3), blacks spur road (image 4), nicholl's lookout (image 5), main street marysville (image 6), sugarloaf bay eildon (image 7), steavenson falls (image 8), cumberland falls (image 9) -
 Marysville & District Historical Society
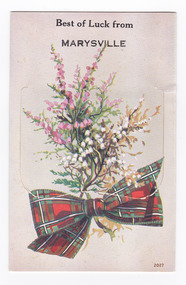
Postcard (item) - Novelty postcard, Valentine Publishing Co. Pty. Ltd, Best of Luck from MARYSVILLE, 1940's-1960's
A novelty postcard with pull-out strip of 9 miniature photographs that was produced by the Valentine Publishing Co as a souvenir of Marysville.A novelty postcard with pull-out strip of 9 miniature photographs that was produced by the Valentine Publishing Co as a souvenir of Marysville.Best of Luck from/ MARYSVILLE 2027 PRINTED PAPER MAILING NOVELTY TO OPEN RAISE FLAP From VALENTINE'S "MAIL NOVELTY" POST CARD COPYRIGHT Printed in Great Britain Tomarysville, victoria, postcard, souvenir, valentine publishing co, crossways cabaret (image 1), taggerty river (image 2), acheron way (image 3), blacks spur road (image 4), nicholl's lookout (image 5), main street marysville (image 6), sugarloaf bay eildon (image 7), steavenson falls (image 8), cumberland falls (image 9) -
 Marysville & District Historical Society
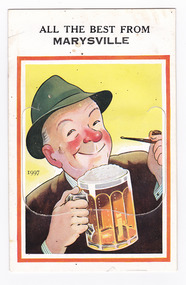
Postcard (item) - Novelty postcard, Valentine Publishing Co. Pty. Ltd, ALL THE BEST FROM MARYSVILLE, 1940's-1960's
A novelty postcard with pull-out strip of 9 miniature photographs that was produced by the Valentine Publishing Co as a souvenir of Marysville.A novelty postcard with pull-out strip of 9 miniature photographs that was produced by the Valentine Publishing Co as a souvenir of Marysville.ALL THE BEST FROM/ MARYSVILLE 1997 PRINTED PAPER MAILING NOVELTY TO OPEN RAISE FLAP From VALENTINE'S "MAIL NOVELTY" POST CARD COPYRIGHT Printed in Great Britain Tomarysville, victoria, postcard, souvenir, valentine publishing co, crossways cabaret (image 1), taggerty river (image 2), acheron way (image 3), blacks spur road (image 4), nicholl's lookout (image 5), main street marysville (image 6), sugarloaf bay eildon (image 7), steavenson falls (image 8), cumberland falls (image 9) -
 Marysville & District Historical Society
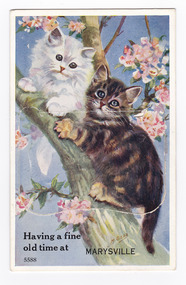
Postcard (item) - Novelty postcard, Valentine Publishing Co. Pty. Ltd, Having a fine old time at MARYSVILLE, 1940's-1960's
A novelty postcard with pull-out strip of 9 miniature photographs that was produced by the Valentine Publishing Co as a souvenir of Marysville.A novelty postcard with pull-out strip of 9 miniature photographs that was produced by the Valentine Publishing Co as a souvenir of Marysville.Having a fine old time at/ MARYSVILLE 5588 PRINTED PAPER MAILING NOVELTY TO OPEN RAISE FLAP From VALENTINE'S "MAIL NOVELTY" POST CARD COPYRIGHT Printed in Great Britain Tomarysville, victoria, postcard, souvenir, valentine publishing co, crossways cabaret (image 1), taggerty river (image 2), acheron way (image 3), blacks spur road (image 4), nicholl's lookout (image 5), main street marysville (image 6), sugarloaf bay eildon (image 7), steavenson falls (image 8), cumberland falls (image 9) -
 Marysville & District Historical Society
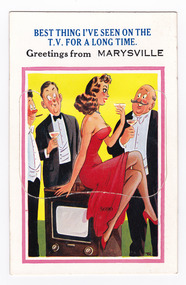
Postcard (item) - Novelty postcard, Valentine Publishing Co. Pty. Ltd, BEST THING I'VE SEE ON THE T.V. FOR A LONG TIME.-Greetings from MARYSVILLE, 1940's-1960's
A novelty postcard with pull-out strip of 9 miniature photographs that was produced by the Valentine Publishing Co as a souvenir of Marysville.A novelty postcard with pull-out strip of 9 miniature photographs that was produced by the Valentine Publishing Co as a souvenir of Marysville.BEST THING I'VE SEEN ON THE/ T.V. FOR A LONG TIME./ Greetings from MARYSVILLE 5690 PRINTED PAPER MAILING NOVELTY TO OPEN RAISE FLAP From VALENTINE'S "MAIL NOVELTY" POST CARD COPYRIGHT Printed in Great Britain Tomarysville, victoria, postcard, souvenir, valentine publishing co, crossways cabaret (image 1), taggerty river (image 2), acheron way (image 3), blacks spur road (image 4), nicholl's lookout (image 5), main street marysville (image 6), sugarloaf bay eildon (image 7), steavenson falls (image 8), cumberland falls (image 9) -
 Flagstaff Hill Maritime Museum and Village
Equipment - Spur, Ca. 1855
Amongst the items of cargo recovered from the wreck of the Schomberg were riding spurs. This spur has been restored to show the type of finish the Spurs would have had when they were new. ABOUT THE SCHOMBERG- When the ship Schomberg was launched in 1855, she was considered the most perfect clipper ship ever to be built. James Blaine’s Black Ball Line had commissioned her to be built for their fleet of passenger liners. The Aberdeen builders designed her to sail faster than the quick clippers designed by North American Donald McKay. She was a three-masted wooden clipper ship, built with diagonal planking of British oat with layers of Scottish larch. Schomberg departed Liverpool for Melbourne on 6 October 1855 under her master Captain ‘Bully’ Forbes, with 430 passengers and 3000 tons of cargo including iron rails and equipment intended the build the Geelong Railway and a bridge over the Yarra from Melbourne to Hawthorn. Schomberg’s journey was slower than the predicted 60 days. She was 78 days out of Liverpool when she ran aground on an uncharted sand spit near Peterborough, Victoria, on 27 December. Overnight, the crew launched a lifeboat to find a safe place to land the ship’s passengers. The scouting party returned to Schomberg and advised Forbes that it was best to wait until morning because the rough seas could easily overturn the small lifeboats. The ship’s Chief Officer spotted SS Queen at dawn and signalled the steamer. The master of the SS Queen approached the stranded vessel and all of Schomberg’s passengers were able to disembark safely. The Black Ball Line’s Melbourne agent sent a steamer to retrieve the passengers’ baggage from the Schomberg. Other steamers helped unload her cargo until the weather changed and prevented the salvage teams from accessing the ship. Local merchants Manifold & Bostock bought the wreck and cargo but did not attempt to salvage the cargo still on board the ship. They eventually sold it on to a Melbourne businessman and two seafarers. After two of the men drowned when they tried to reach Schomberg, salvage efforts were abandoned.This spur is significant as an example of an item in common use in the mid-19th century. The Schomberg collection as a whole is of historical and archaeological significance at a State level. Flagstaff Hill’s collection of artefacts from the Schomberg is also significant for its association with the Victorian Heritage Registered shipwreck (VHR S 612). The collection is of prime significance because of the relationship between the objects salvaged, as together they help us to interpret the story of the Schomberg. The collection as a whole is historically significant for representing aspects of Victoria's maritime history and its potential to interpret social and historical themes. Spur; wish-bone shaped metal with a knob on one end, a drilled hole on the other and a hook shaped extension in the centre that has a hole through it. The edges are smooth and rounded. It was recovered from the wreck of the Schomberg and has since been reconditioned.warrnambool, flagstaff hill, maritime village, maritime museum, great ocean road, shipwreck coast, shipwreck artefact, schomberg, clipper ship, black ball line, 1855 shipwreck, aberdeen clipper ship, captain forbes, peterborough shipwreck, silver plated spur, horse riding, spur, cargo, riding equipment -
 Marysville & District Historical Society
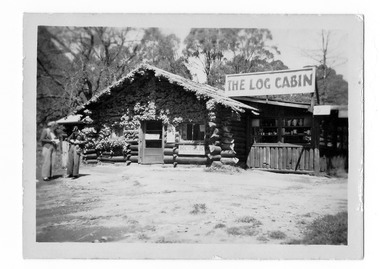
Photograph (Item) - Black and white photograph, Unknown
A black and white photograph of The Log Cabin in Marysville in Victoria.A black and white photograph of The Log Cabin in Marysville in Victoria. The Log Cabin was built by Thomas Henry Branchflower who had arrived from England late in 1921. It was built for Gwendoline Pitman after the death of her father Clarence Pitman and the disappearance of her sister Olive in July 1926. Gwendoline operated an artist and souvenir shop in the newly built Log Cabin in partnership with Peter Mackey who was a Melbourne optician and artist.thomas henry branchflower, gerald branchflower, marysville, mary chain, gwendoline pitman, clarence pitman, kooringa guesthouse, olive pitman, wilbur anderson, peter mackey, photograph, the log cabin