Showing 1743 items matching " concrete"
-
 Glenelg Shire Council Cultural Collection
Photograph - Photograph - Main Breakwater Construction, n.d
Port of Portland Authority Archivesport of portland archives -
Glenelg Shire Council Cultural Collection
Photograph - Photograph - silos under construction, 1964
Port of Portland Authority ArchivesBack: Blue Portland Harbour Trust Stamp 180. 13-11-64 in black ink.port of portland archives, grain silos -
 Flagstaff Hill Maritime Museum and Village
Gas Light Fitting
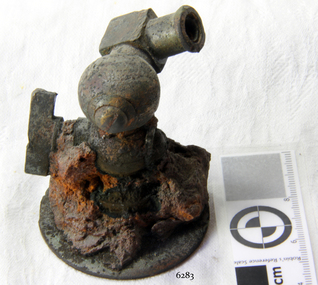
When the ship Schomberg was launched in 1855, she was considered the most perfect clipper ship ever to be built. James Blaine’s Black Ball Line had commissioned her to be built for their fleet of passenger liners. At a cost of £43,103, the Aberdeen builders designed her to sail faster than the quick clippers designed by North American Donald McKay. She was a three masted wooden clipper ship, built with diagonal planking of British oat with layers of Scottish larch. This luxury vessel was designed to transport emigrants to Melbourne in superior comfort. She had ventilation ducts to provide air to the lower decks and a dining saloon, smoking room, library and bathrooms for the first class passengers. At the launch of Schomberg’s maiden voyage, her master Captain ‘Bully’ Forbes, drunkenly predicted that he would make the journey between Liverpool and Melbourne in 60 days. Schomberg departed Liverpool on 6 October 1855 with 430 passengers and 3000 tons cargo including iron rails and equipment intended the build the Geelong Railway and a bridge over the Yarra from Melbourne to Hawthorn. The winds were poor as Schomberg sailed across the equator, slowing her journey considerably. She was 78 days out of Liverpool when she ran aground on a sand-spit near Peterborough, Victoria, on 27 December; the sand spit and the currents were not marked on Forbes’s map. Overnight, the crew launched a lifeboat to find a safe place to land the ship’s passengers. The scouting party returned to Schomberg and advised Forbes that it was best to wait until morning because the rough seas could easily overturn the small lifeboats. The ship’s Chief Officer spotted SS Queen at dawn and signalled the steamer. The master of the SS Queen approached the stranded vessel and all of Schomberg’s passengers were able to disembark safely. The Black Ball Line’s Melbourne agent sent a steamer to retrieve the passengers’ baggage from the Schomberg. Other steamers helped unload her cargo until the weather changed and prevented the salvage teams from accessing the ship. Local merchants Manifold & Bostock bought the wreck and cargo, but did not attempt to salvage the cargo still on board the ship. They eventually sold it on to a Melbourne businessman and two seafarers. After two of the men drowned when they tried to reach Schomberg, salvage efforts were abandoned.32 In 1975, divers from Flagstaff Hill, including Peter Ronald, found an ornate communion set at the wreck. The set comprised a jug, two chalices, a plate and a lid. The lid did not fit any of the other objects and in 1978 a piece of the lid broke off, revealing a glint of gold. As museum staff carefully examined the lid and removed marine growth, they found a diamond ring, which is currently on display in the Great Circle Gallery.33 Flagstaff Hill also holds ship fittings and equipment, personal effects, a lithograph, tickets and photograph from the Schomberg. Most of the artefacts were salvaged from the wreck by Peter Ronald, former director of Flagstaff Hill. The Schomberg, which is on the Victorian Heritage Register (VHR S612), has great historical significance as a rare example of a large, fast clipper ship on the England to Australia run, carrying emigrants at the time of the Victorian gold rush. She represents the technical advances made to break sailing records between Europe and Australia. Flagstaff Hill’s collection of artefacts from the Schomberg is significant for its association with the shipwreck. The collection is primarily significant because of the relationship between the objects, as together they have a high potential to interpret the story of the Schomberg. It is archaeologically significant as the remains of an international passenger Ship. It is historically significant for representing aspects of Victoria’s shipping history and for its association with the shipwreck and the ship, which was designed to be fastest and most luxurious of its day Gas Light Fitting, Brass wall mount of a swinging armed gas bracket, with gate valve. Has heavy concretion. Artefact Reg No S/76. Recovered from the wreck of the Schomberg.warrnambool, shipwrecked-coast, flagstaff-hill, flagstaff-hill-maritime-museum, maritime-museum, shipwreck-coast, flagstaff-hill-maritime-village, schomberg, shipwrecked-artefact, clipper ship, black ball line, 1855 shipwreck, aberdeen clipper ship, captain forbes, peterborough shipwreck, ss queen, gas light fitting, brass gas light fitting -
Glenelg Shire Council Cultural Collection
Photograph - Photograph - Lee Breakwater, n.d
Port of Portland Authority Archivesport of portland archives, lee breakwater, tanker berth -
Glenelg Shire Council Cultural Collection
Photograph - Photograph - Main Breakwater construction, Portland, n.d
Port of Portland Authority Archivesport of portland archives, harbour construction, development, wharf -
Glenelg Shire Council Cultural Collection
Photograph - Photograph - Main Breakwater construction, Portland, n.d
Port of Portland Authority Archivesport of portland archives, main breakwater, construction, portland harbour, harbour development -
Glenelg Shire Council Cultural Collection
Photograph - Photograph - Main Breakwater construction, Portland, n.d
Port of Portland Authority Archivesport of portland archives, main breakwater, construction, harbour development -
Glenelg Shire Council Cultural Collection
Photograph - Photograph - Lee Breakwater, Portland, n.d
Port of Portland Authority Archivesport of portland archives, lee breakwater, construction, tanker berth -
Glenelg Shire Council Cultural Collection
Photograph - Photograph - Canal Bridge Construction, 04/10/1957
Port of Portland Authority ArchivesFront: Back- '4/10/57' - top, blue biroport of portland archives -
 Bendigo Historical Society Inc.
Photograph - NORTH DEBORAH GOLD MINE
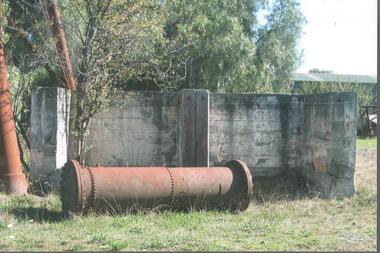
North Deborah Gold Mine, south of Breen Street, Golden Square. Concrete ore bins and section of iron chimney in foreground. Steel poppet leg visible on extreme LH side.Kay MacGregorbendigo, mining, north deborah gold mining company -
 Bendigo Historical Society Inc.
Photograph - BENDIGO HOSPITAL 1975
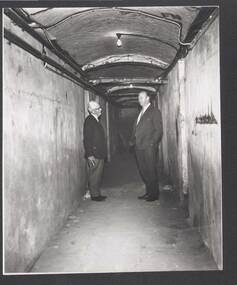
Black and white image: shows two men, in suits, standing in tunnel, presumably under either the Anne Caudle Centre or the hospital site. Tunnel has concrete walls, arched ceiling.bendigo, buildings, hospital, bendigo, hospital, anne caudle, tunnel -
 Victorian Interpretive Projects Inc.
Photograph - Colour, Smeaton Primary School
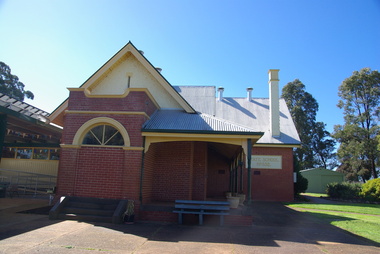
In 1860 Smeaton residents appealed for funds to establish a school. Patrick Curtain, and his co-workers raised more than £150 plus a land grant (Allot A, Sect 2, Township of Smeaton). Head Teacher John Forbes, with assistant Zillah North, opened a timber school building which measured 36ftx18ft (11.0x5.5m) on 1 September 1861 with 44 children. Rising enrolment to 65 in 1868 made building alterations necessary. During 1870-1 a residence of four rooms was supplied and in October 1882 a 20ftx18ft (6.1x5.5m) classroom. In 1907 a new brick building accommodated 122 children. Among notable ex-pupils are Major-General Bridgeford, Frank Wright ( Musical Director of the London County Council), Alex Wright, (AKA singer Andre Navarre), and Les Brooks. (Visions and Realisations) In 2013 it was announced that Smeaton Primary School would close. The Hepburn advocate reported: "A Department of Education spokesman has confirmed the Smeaton Primary School council recently voted unanimously to recommend the school close at the end of the year. The school currently has 12 students with enrollments dwindling during the past few years and no prep students to its boost numbers or its future. The school’s imminent closure comes as the Smeaton community gears up for the town’s 175th anniversary which will be celebrated later this year. School council member Kristi Pedretti said it had not been a decision made lightly. “There are 12 students – only one in grade 6, about eight in grade 5, two in grade 3, and one in grade 1 – and there’s only one girl in the school,” she said. “So it was a combination of everything – having that big group through in grade 5, but no preps coming through, and only one girl. “It’s hard for parents to see a future in the school.” Ms Pedretti has a son in grade 6, Jack, and is herself a former Smeaton Primary School student." .1) Red brick building .2) Smeaton Primary School logo .3) Smeaton Primary School Bell .4) Smeaton Primary School pakyground, including concrete cricket pitch.smeaton, school, education, bell, cricket, state school no. 552 -
Tatura Irrigation & Wartime Camps Museum
Photograph, Alan Whiting, 1924
Taken for the Victorian State Rivers and Water Supply Commission.Mounted medium sized black and white photograph. Waranga Basin earth wall concrete reinforced (middle of picture) / Tree and hut near water filled borrow pits right centre.irrigation, victorian state rivers and water supply commission, waranga basin -
Tatura Irrigation & Wartime Camps Museum
Photograph, Alan Whiting, 1924
Taken for the Victorian State Rivers and Water Supply Commission.Mounted medium sized black and white photograph. Waranga Basin outlet structure and regulator / Concrete arches and pylons / Steel handrails / Rock and earth fill walls either side of channel.irrigation, victorian state rivers and water supply commission, waranga basin -
Tatura Irrigation & Wartime Camps Museum
Photograph, 1936
Photo taken by the photographer for Victoria State Rivers and Water Supply CommissionMedium sized black and white photograph. Eildon Weir spillway / Concrete structure of terraced steps and pylons supporting floodgates / rectangular tower on right / Dam water beyond at top of picture.goulburn, irrigation, photo, victoria state rivers and water supply commission, eildon, eildon weir -
Tatura Irrigation & Wartime Camps Museum
Folder, Camp 13 German POW reunion 1974, 1992
One of the many accessions received by our overseas friends and supporters.Clear plastic folder with green border and back with two colour laser copies - sentry box and concrete building with a close up of the building with 3 returnees and 3 ladies renewing memories.Camp 13 German POW reunion 1974camp 13 reunion, german pow reunion 1974 -
Tatura Irrigation & Wartime Camps Museum
Photograph, Goulburn Weir, 1890
Taken by photographer for State Rivers and Water Supply Commission.Medium sized black and white photograph. Earth and rubble bank bottom right corner - Concrete spillway and platform - overflow water in foreground - Trees on horizon - Dwelling left middle distancevictoria state rivers and water supply commission, goulburn weir -
Tatura Irrigation & Wartime Camps Museum
Photograph, Goulburn Weir, 1890
Taken by photographer for State Rivers and Water Supply Commission.Medium sized black and white photograph. View of concrete and steel weir structure - with water cascading down the spillway steps from West side. Thick foliage beyond on East bankgoulburn weir, victorian state rivers and supply commission -
Tatura Irrigation & Wartime Camps Museum
Photograph, Cattanach Canal, 1957
Taken by the photographer for Victoria State Rivers and Water Supply Commission.Large sepia photograph - Concrete structure, side wings, three centre supports, platform and framework above. Man standing, looking up from base. Cracked earth floor and embankment.Above photo: "Cattanach Canal / Regulator on Connection to No.1 Main Channel"irrigation, victoria state rivers and water supply commission, cattanach canal -
 Friends of Kurth Kiln
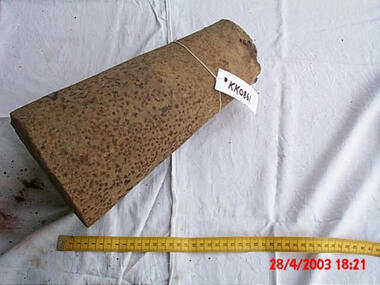
Stone Column
Stranger Stone (Concrete?) Column, cone shaped with hollow cavity in bottom7cmwide by 23cm deep. Two mounting holes in rim of base 2.5cm dia x 23cm deep. Undetermined use. -
 Lakes Entrance Historical Society
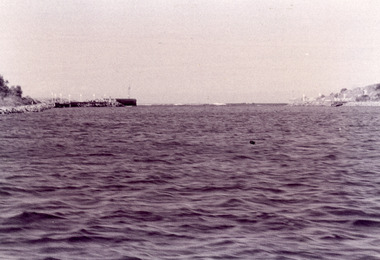
Photograph - The Entrance, Fish, Marie, 1995c
Black and white photograph showing view of entrance with eastern and western concrete and rock piers. Photo taken from boat in the channel. Waves breaking on bar at the entrance, at Lakes Entrance, Victoriaon back - The Entrance - taken from works boat, 1995 topography, waterways, piers -
 Bendigo Historical Society Inc.
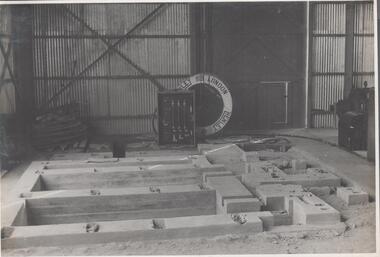
Photograph - Napoleon Gold MIne Winder, 1935
Significant to mining history of Bendigo.Black and white photograph: concrete winder foundations within corrugated iron shed. Leaning on wall in background circular 'lifebuoy' shape white object with 'London, Henley' written around the edge.Written in pencil on back of photograph : ' Main winder foundation 28/4/35'napoleon gold mine, mine machinery, winder, foundations -
 Ithacan Historical Society
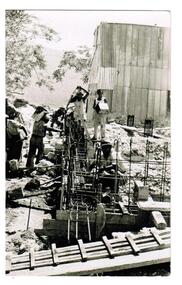
Photograph, Earthquakes: Rebuilding the Church of Taxiarchion, Ithaca, 1953
The Taxiarches church, located on top of Monastery Hill overlooking the village of Platrithia, was being rebuilt followingits total destruction caused by the earthquake across the Ionian Islands in 1953. The earthquake which reached 7.2 on the Richter Scale totally destroyed many towns and villages. A committee was formed to rebuild the church which is now considered to be one of the most beautiful churches on Ithaca.A black and white photograph of workmen rebuilding a damaged structure. Upright steel rods have been placed along the foundations for the outer walls and seven men are pouring concrete into the reenforced trenches.A stamp which has been written in Greek is on the back of the photograph. Translated it reads as follows:REBUILDING COMMITTEE/HOLY CHURCH OF TAXIARCHES/PLATRITHIA - ITHACA -
 Kiewa Valley Historical Society
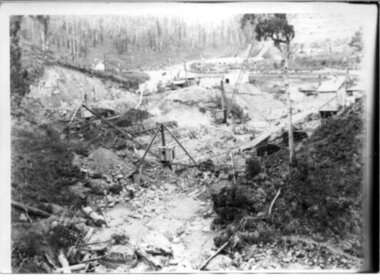
Black and white photograph, Early construction of Junction Dam Wall, c1940
In December of 1939 the excavation of a diversion tunnel was commenced to divert water from the East Kiewa River to allow construction of the dam wall. This was completed in February 1940. Lewis Construction Co. had the contract with excavation starting in February and the first batch of concrete placed in September. In 1942 the S.E.C. took over the construction and the wall was completed in March, 1944. Type of construction: reinforced concrete slab buttress.Of historical importance in the Kiewa area as it shows the form work and preparation necessary before the pouring of concrete for the first dam in the hydro electric scheme. The destruction caused by the 1939 bushfires is also evident in the upper left hand corner.A black and white photograph of the early construction of Junction Dam wall viewed from downstreamOn back of photograph (left hand upper corner) Junction Dam 4-4-81 Dam viewed from downstream 352 Time to use for correct Exp. 40 secjunction dam, bogong, secv -
 Kiewa Valley Historical Society
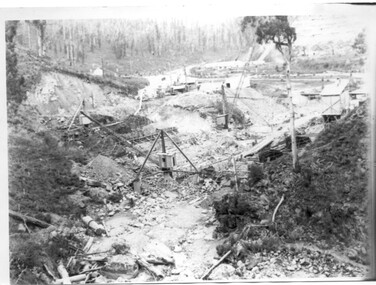
Black and white photo of Junction Dam wall under construction, c1940
In December of 1939 the excavation of a diversion tunnel was commenced to divert water from the East Kiewa River to allow construction of the dam wall. This was completed in February, 1940. Lewis Construction Company had the contract with excavation starting in February and the first batch of concrete placed in September. In 1942 the SECV took over the construction and the wall was completed in March, 1944. Type of construction: Reinforced concrete, slab buttress.Of historical importance in the Kiewa area as it shows the form work and preparation necessary before the pouring of concrete for the first dam in the hydro electric scheme. The destruction caused by the 1939 bushfires is also evident in the upper left hand cornerBlack and white photo, early construction of Junction Dam Wall, viewed from downstreamOn back of photo (left hand upper corner) Junction Dam 5-4-81 Dam viewed from downstream. 352 Time to use for correct exp. 40 sec.bogong, junction dam, secv -
 Federation University Historical Collection
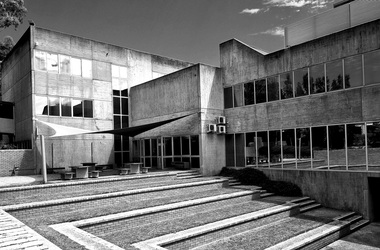
Mount Helen Campus Building T, by Lucie Akers, 2023
Building T at Mount Helen CampusSide View of Building T, taken from outdoor amphitheater. brutalism, federation university australia, mount helen campus, concrete, education, t building -
 Ballarat Heritage Services
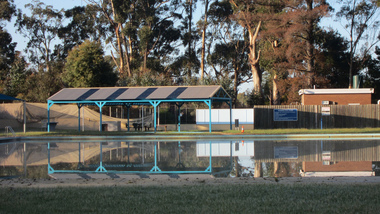
Photograph - digital photographs, Lisa Gervasoni, Beaufort Pre Olympic Swimming Pool, c2010-2017
Colour photograph of the Beaufort Swimming Pool.swimming pool, sport, swimming, pre olympic, concrete, beaufort swimming pool -
 Ballarat Heritage Services
Photograph - digital photographs, Lisa Gervasoni, Winchelsea pre olympic pool, c2010-2017
Colour photograph of Winchelsea pre olympic poolswimming pool, sport, swimming, pre olympic, concrete, winchelsea -
 Ballarat Heritage Services
Photograph - digital photographs, Lisa Gervasoni, Camperdown pre olympic pool, c2010-2017
Colour photograph of the Camperdown Swimming Pool.swimming pool, sport, swimming, pre olympic, concrete, camperdown swiming pool -
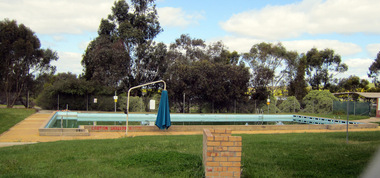 Ballarat Heritage Services
digital photographs, Lisa Gervasoni, pre olympic pool, c2010-2017
swimming pool, sport, swimming, pre olympic, concrete, willaura