Showing 881 items
matching pots
-
 Kiewa Valley Historical Society
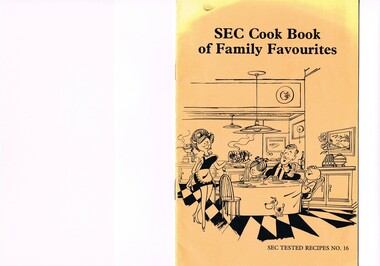
Book - Reference Cooking, SEC Cook Book of Family Favourites, Circa 1950
This SEC cook book was produced circa 1950s when the Kiewa Hydro Electricity Scheme and its Commission was in full swing. The Commission had constructed two settlements, Mount Beauty and Bogong Village to house construction workers and their families in a "closed" community. These "closed" communities were for SEC staff and construction workers only. Entry into these villages was restricted to "SEC pass" carrying construction staff and their families. All facilities such as retail, sporting and other community services was provided by the SEC. This created an isolated community in which limited individual choice or administrative family leeway was available. It was a typical company town (live and work for the company). The Company was in the Kiewa Valley constructing power stations for the Kiewa Hydro Electricity Scheme of Victoria. In one way the individual did not need to be concerned with living costs, educational needs for children, and recreational amenities and therefore "normal" community survival /living methods did not apply. This living, although restrictive, was quite simple. When the scheme was completed, in 1961, marking the end of company town, caused some of the employees, who had enjoyed the "controlled" township environment, a fair degree of angst in having the new 'laissez-faire" controls thrust upon them. This was magnified when both Mount Beauty and Bogong Village became meshed into the Bright Shire, vis-a-vis, local government. This cook book is a prime example of " the company is looking after you" and leave the worrying to us. This environment of a "company town", which creates the atmosphere of minimal personal responsibilities, is still present in a few remote mining towns in Australia at the beginning of the 21st Century.This book is a classical example of the psychological control in which the company had its construction workers families living in. The motto of many companies who had employees in isolated regions was "keep them happy". A happy and contented worker is a more productive worker. This was a period in time (1950s to 1970s) when social psychology was gaining recognition in the Australian workforce as well as internationally. At the end of the construction of all the power stations both the Mount Beauty settlement and the Bogong Village became more integrated into the main stream of rural Australia environment. Development of tourism in the region opened up not only interaction with a greater cross section of the ever expanding type of Australian but also the overseas based non rural culture tourist or immigrant. It allowed the intermingling of ideas in a non company controlled environment. The Mount Beauty and Bogong Village has, and even up to the 3000 Millennium, the same housing construction, as was built by the SEC. There has only been a very gradual change to modern domestic architectural home styles. This SEC cookbook has a folded cover with two staples at the spine, securing eight double sided pages. The white pages contain black print and sketches(3), and one black and white photograph (of the author). The front cover is mainly orange in colour with a gradual fading into yellow(at the top). The cover is approximately 210 g/m2 in thickness and each page is approximately 90 g/m2 thick. Front cover: top of page "SEC Cook Book of Family Favourites", in the middle a sketch, black on orange background, of a smiling mother walking from the kitchen to the dining table with a steaming rolled roast and vegetables in one hand and a gravy pot in the other. The furniture and decor relates to the 1950s. Below this sketch is printed"SEC TESTED RECIPES NO. 16" Inside cover: on top of the page is a black and white sketch of a pineapple, apple pear fish with scales, bunch of grapes with leaves a pork roll (head of pig one end and a roll ending on the other, on top of this food arrangement rests a fruit pie. Below this sketch are printed in black print the books contents.The first side of the first page is a black and white photograph Mary Dunne, the SEC Home Service supervisor who provided a signed foreword. The inside back cover has a promotional segment detailing a black and white photograph of a smiling (and happy) couple in the foreground with an electric stove in the distance. The written motto below this photograph is" to Live better -and save money they'll join the Power People. "the new tariff is(1960s) - First 75kWh --6 cents per kWh Next 435 kWh---2.3 cents per kWh Balance --1.7 cents per kWh The rate per killowatt-hour for the final block drops from 2.1 cents to 1.7 cents --a reduction of 19%.cooking recipes circa 1950s, domestic food, sec victoria cook books, recipes circa 1950s -
 Ringwood and District Historical Society
Programme, Ringwood and District Horticultural and Garden Club, Ringwood and District Horticultural and Garden Club Schedule for the Annual Autumn Show, 1971, 1971
Ringwood and District Horticultural and Garden Club Schedule for the Annual Autumn Show, 1971.12 page booklet- typed Schedule.Front Page Ringwood and District Horticultural and Garden Club Schedule for the Annual Autumn Show To be held in the Assembly Hall, Ringwood High School, Bedford Road, Ringwood Saturday, March 6, 1971. (Doors Open at 2 p.m.) Entries close: 9 p.m. Thursday March 4th, 1971. Admission: Adults: 30 centsChildren: 5 cents Next Page OFFICE BEARERS LIFE MEMBERS: Mrs.Lord, Mrs.W.McDowell, Mr.B.J.Hubbard, Messrs.W.Gillespie, E.Bennett, G.W.Burns, E.T.Kearsley, Les.Ingram, W.McDowell. PRESIDENT:Mr.J.Roberts 39 Warrandyte Road Ringwood, Telephone: 870-1483 VICE-PRESIDENTS: Mrs.D.Hutchinson Mr.V.H.Wilson MENS' COMMITTEE: Mr.G.W.Burns, Mr.W.McDowell, Mr.E.Frame, Mr.V.H.Wilson, MR.J.Percival LADIES COMMITTEE: Mesdames: W.McDowell, D.Hutchinson, A.Mabu, D.Wilson, Miss Isbester TREASURER: Mr.D.Puckey Summit Crescent Ringwood North SECRETARY: Mrs.V.H.Wilson 38 William Street Ringwood, Telephone: 870-7458 ENTRIES CLOSE ON THRUSDAY MARCH 4TH 1971 AT 9 P.M. NO LATE ENTRIES WILL BE ACCEPTED AT THIS SHOW. PROGRAMME Staging of Exhibits 8.30 a.m. till 12 Noon Judging Commences 12.30 p.m. Show Opens 2.30 p.m. Removal of Exhibits 9.00 p.m. Admission: Adults: 30 centsChildren: 5 cents Page One EXHIBITORS MAY MAIL OR TELEPHONE ENTRIES TO THE UNDERMENTIONED:- MRS.V.H.WILSON,38 William Street, Ringwood870-7458 MRS.D.HUTCHINSON, 48 Caroline Street, RINGWOOD 870-8577 ENTRIES CLOSE THURSDAY MARCH 4TH AT 9 P.M. RULES FOR COMPETITORS All Exhibits must be stages by 12 Noon and must not be removed before 9 p.m. Exhibitors must apply on moring of Show to the Secretary for Cards which must be placed in front of Exhibit in the allotted space. All Exhibits, except Floral Art, must be grown by the Exhibitor. Awards will be made by the Judges whose decision is final. Prize Money available at 8 p.m. and if not claimed within one month will revert to the Society. Exhibits should be names. In a close finish this counts. No Exhibitor allowed in Hall whilst Judging is in progress. Any Protest shall be in writing accompanied with a 50 cent deposit lodged with the Secretary before 7 p.m. on day of Show. Protest must be limited to non-accordance of an Exhibit within the Schedule. The Committee is empowered to determine and protest to be forfeited if it deems such to be frivolous. BOWL:- The width of the vessel must be greater than its height. VASE:- The height of the vessel must be greater than its width. Page Two Continuation of: RULES FOR COMPETITORS... The Rules of the Royal Horticultural Society of Victoria will apply. Dahlias will be judged under the Rules and Standards laid down by the National and Royal Dahlias Society of Victoria. A VASE consists of 3 to 6 stems (in Cut Flowers) unless otherwise stated. AWARDS: Bronze Medal of the National Dahlia Society for Best Dahlia Exhibit. BLUE RIBBONS MAY BE AWARDD FOR:- BEST VASE OF CUT FLOWERS BEST DAHLIA OVER 6 INCHES BEST VASE DAHLIAS UNDER 6 INCHESBST FLORAL ART EXHIBIT BEST SEEDLING DAHLIA CERTIFICATES OF MERIT:- GIANT DAHLIA OVER 8 INCHESBEST SHRUB MINIATURE CACTUS DAHLIA BETWEEN 4 1/2" TO 6" BEST POT PLANT CHARM DECORATIVE BETWEEN 6' AND 8' BEST VEGETABLE BEST SINGLE ROSE UNLESS OTHERWISE STATED ENTRY FEE PER SCHEDULE CLA CLASS - 5 CENTS PER ENTRY. PLEASE NOTE THAT ENTRY FEE FOR ITEMS NO. 1 AND 2 IS 25 CENTS IN EACH SECTION ENTRIES CLOSE: THURSDAY MARCH 4TH, 1971 AT 9 P.M. Page Three VICTORIANCHAMPIONSHIPSECTION 1 SCH.NO: FIRST 1DAHLIAS UNDER 8 INCHES 12 Vases (3 of each) Distinct Varieties TROPHY VALUED AT $5.00 29 Giant Dahlias, Distinct Varieties (SPONSORED BY AMETCO TRAVEL AGENCY, RINGWOOD) To be won Three Times - Trophy valued at $20-00 DAHLIAS OPEN SECTION 2 39 Dahlias 3 Medium Cactus, 3 Miniature Cactus, 3 Charm Cactus, Distinct Varieties, Shown separately $2-00 44 Giant Decorative, Distinct Varieties 50c. 51 Giant Decorative 30c. 63 Giant Cactus, Distinct Varieties 50c. 71 Giant Cactus 30c. 86 Medium Garden Cactus N.N.D. 50c. 93 Medium Garden Cactus, Distinct Varieties 50c. 10 3 Medium Decorative Distinct Varieties 50c. 11 1 Medium Decorative 30c. 12 6 Vases Miniature Cactus, Distinct Varieties - 3 of each - 75c 13 3 Vases Miniature Cactus, Distinct Varieties - 3 of each - 50c 14 3 Vases Miniature Decorative, Distinct Varieties - 3 of each 50c 15 1 Vase Miniature Dahlias - 3 Blooms Distinct Variety 30c 16 3 Vases Charm Cactus, Distinct Varieties - 3 of each - 50c 17 3 Vases Charm Decorative - Distinct Varieties - 3 of each 50c Page Four Continuation of: SECTION 2 - DAHLIAS OPEN. SCH.NO. FIRST 18 1 Vase Charm, 3 Blooms, Distinct Variety30c 19 Seedling Dahlia Over Six Inches30c 20 Seedling Dahlia Under Six Inches 30c 21 3 Vases Pompones, Distinct Varieties, 3 of each50c 22 1 Vase Pompones, N.N.D, 50c 23 3 Exhibition Cactus Distinct Varieties 50c 24 1 Exhibition Cactus30c 25 1 Miniature Dahlia20c 26 1 Charm Dahlia 20c 27 1 Vase Dahlias Under 8 Inches, 10 Stalks, N.N.D. 75c SECTION 3: RINGWOOD AND DISTRICT AMATEUR CHAMPIONSHIP DAHLIAS - AMATEUR 28 6 Giant Dahlias, Distinct Varieties $1.00 29 9 Dahlias Distinct Varieties (Shown Separately) 3 Medium Cactus; 3 Miniature Cactus, 3 Charm Cactus $2.00 30 3 Giant Decorative Distinct Varieties 50c 31 1 Giant Decorative30c 32 3 Giant Cactus, Distinct Varieties 30c 34 3 Medium Decoratve Distinct Varieties 50c 35 1 Medium Decorative 30c 36 3 Medium Cactus Distinct Varieties50c 37 1 Medium Cactus 30c 38 3 Vases Miniature Cactus Distinct Varieties (3 of each) 50c 39 1 Vase Miniature Cactus 3 Blooms N.N.D. 50c 40 1 Vase Miniature Decorative 3 Blooms N.N.D.50c Page Five Continuation of: SECTION 3 - AMATEUR DAHLEA CLASS SCH.NO: FIRST 413 Vases Charm Cactus, Distinct Varieties - 3 of each -50c. 421 Vase Charm Cactus, Distinct Variety - 3 Blooms - 30c 433 Vases Charm Decorative, Distinct Varieties, 3 of each50c 441 Vase Charm Decorative 5 Blooms N.N.D. 30c 451 Vase Miniature, 3 Blooms, N.N.D.20c 461 Charm 471 Vase Pompones 5 Blooms N.N.D.50c 481 Vase Show or Ball Dahlias 3 Blooms N.N.D. 50c. SECTION 4: DAHLIAS - NOVICE 491 Giant Dahlia 30c 501 Medium Dahlia 30c 511 Vase Miniature Dahlias, 3 Blooms, N.N.D.30c 521 Vase Charm Dahlias, 3 Blooms, N.N.D. 30c 531 Miniature Dahlia20c 541 Charm Dahlia 20c SECTION 5:R O S E S-O P E N 55Roses, 3 Blooms in Separate Containers, (Distinct Varieties)40c 56Roses, 3 Blooms, 1 colour shown separately 30c 57Roses, 3 Blooms, Bud to Full Bloom 30 c 58Roses, 3 Vases, Distinct Varieties 75c 59Roses, 1 Vase Full Bloom showing stamens 30c 60Roses, 1 Vase C.V.A. 20c Page Six Continuation of: SECTION 5 - R O S E S-O P E N SCH.NO:FIRST 611 Rose in Bloom20c 62Rose, 1 Vase of Floribunda or Grandiflora 30c SECTION 6 - R O S E S - A M A T E U R 63Rose, 1 Bloom20c 64Rose, 1 Vase, C.V.A. 30c 65Roses, 3 Blooms, Distinct Varieties35c 66Roses, 3 Blooms, Bud to Full Bloom 35c 67Roses, 1 Vase Floribunda or Grandiflora30c SECTION 7C U T F L O W E R S -O P E N 683 Vases Cut Flowers, Distinct Kinds, C.V.A. 50c 691 Vase Cut Flowers, Distinct Variety, C.V.A. 25c 701 Vase Cut Flowers, Red Shades, Distinct Kind 25c 711 Vase Cut Flowers, Pink Shades, Distinct Kind25c 721 Vase Cut Flowers, White Shades, Distinct Kind 25c 731 Vase Cut Flowers, Cream or Yellow Shades25c 741 Vase Cut Flowers, Blue Shades 25c 751 Head Hydrangeas25c 763 Vases Geranium or Pelargonium, N.N.D. 25c 771 Vase Asters, C.V.A.25c 781 Vase Zinnias, Distinct Variety, Dahlia Flowered25c 793 Vases Zinnias, Distinct Colours, Dahlia Flowered 25c 801 Vase Lilliput Zinnias, C.V.A. 25c 811 Vase Marigolds. C.V.A. 25c 821 Vase Cut Flowers, not shown in this Schedule 25c 831 Vase Decorative Chrysanthemum, C.V.A., A.N.S.25c Page Seven Continuation of: SECTION 7:CUT FLOWERS - OPEN - SCH.NO: FIRST: 841 Container phlox, C.V.A.25c SECTION 8C U TF L O W E R S - AMATEUR 853 Vases Cut Flowers, Distinct Kinds, C.V.A. 40c 861 Vase Cut Flowers, Distinct Variety, C.V.A. 25c 871 Vase Cut Flowers, Red Shades, Distinct Kinds25c 881 Vase Cut Flowers, Red Shades, Distinct Kinds 25c 891 Vase Cut Flowers, Blue Shades, Distinct Kinds 25c 901 Vase Cut Flowers, White Shades, Distinct Kinds 25c 913 Vases Fuchsias, C.V.A.25c 923 Vases Geraniums or Pelargoniums (N.N.D.) 25c 931 Vase Aster, C.V.A.25c. 941 Vase African Marigolds, Distinct Variety 25c 951 Vase Zinnias, Dahlia Flowered, C.V.A. 25c. 961 Vase Cut Flowers not stated in Schedule 25c 971 Flower not stated in Schedule 25c 981 Vase Geranium, Distinct Variety25c 991 Container Phlox25c Page Eight SECTION 9 - C U T F L O W E R S - N O V I C E SCH.NO:FIRST: 1001 Vase Asters 25c 1011 Vase Snap Dragons C.V.A.25c 1021 Vase Marigold C.V.A.25c 1031 Vase Zemias, Dahlia Flowered, C.V.A. 25c 1041 Vase Zemias, Lilliput, C.V.A. 25c 1051 Container Phlox 25c SECTION 10 F L O R A L A R T O P E N FIRST SECOND 106Arrangement of Flowers for the Home50c 20c 107Table Centre Piece of Mixed Flowers 50c 20c 108Bowl of Dahlias 50c 20c 109Arrangement of Autumn Tones (Any Foliage Allowed)50c 20c 110 Arrangement of Flowers (Dahlias to predominate - May include any plant material and accessories)$1-00 50c 111Dry Arrangement 50c 20c 112Church Arrangement 50c 20c 113A Basket of Fruit 50c 20c 114Line Arrangement (May include any Plant Material) 50c 20c 115"AS I LIKE IT" (May include any Plant Material and Accessories) 50c 20c 116Arrangement, Tall and Stately 50c 20c 117Bowl of Floating Flowers (FLOWERS MUST FLOAT)35c 15c Page Nine SECTION 11 F L O R A L A R T - A M A T E U R SCH.NO: FIRST:SECOND: 118Arrangement of Dahlias35c 15c 119Miniature Arrangement 50c 15c 120Harvest Arrangement of Flowers and/or Vegetables 40c20c 121Arrangement of Gladioli 35c 15c 122One Flower Spray30c 15c 123Arrangement of Five Dahlias 35c 15c 124Presentation Basket50c 20c 125Arrangement in Pink and Gray on Silver 40c 20c S P E C I A L N O T I C E PLEASE NOTE THAT SCHEDULE NUMBERS 106, 118 AND 120, TO BE EXHIBITED IN 2FT.6IN. NICHE.. SECTION 12 F L O R A L A R T - INTERMEDIATE SCH.NO: FIRST: SECOND: 126A Dry Arrangement 30c15c 127Presentation Basket40c20c 128Tall Arrangement 30c15c 129Line Arrangement Five Flowers40c20c ENTRIES CLOSE THURSDAY MARCH 4TH, 1971 AT 9 P.M. Page Ten SECTION 13 F L O R A L A R T - N O V I C E SCH.NO:FIRST: SECOND: 130"My Choice" 30c 15c 131Dry Arrangement 30c 15c 132One Flower Spray 30c 15c 133Presentation Basket 40c 20c 134Arrangement, "AS I LIKE IT"30c 15c SECTION 14V E G E T A B L E S SCH.NO:FIRST: 135Collection of not more than 8 Vegetables $1.50 136Brace (2) of Apple Cuccumbers25c. 137Brace (2) of Long Cuccumbers 25c 138Plate of 4 Tomatoes, smooth, (eith Stalks) 25c. 139Plate of 4 Onions25c 140One Vegetable Marrow25c 141One Pumpkin 25c 142One Lettuce25c 143Plate of Peas - 12 Pods - 25c 144Plate of Climbing Beans - 12 Beans25c. 145Plate of Dwarf Beans - 12 Beans - 25c 146Bunch of Three Carrots with Tops25c 147Bunch of Three Parsnips 25c 148One Head Silver Beet25c 149Plate of 4 Potatoes25c 150Bunch of 3 Red Beet with Tops 25c 1513 Sticks of Rhubarb with Leaves25c 152Vegetable not otherwise specified 25c 1533 Cobs Sweet Corn25c. Page Eleven SECTION 14 - F R U I T SCH.NO: FIRST: SECOND: 154A Dish of 4 Culinary Apples 25c 155A Dish of 4 Dessert Apples 25c 156A Dish of 4 Lemons 25c 157A Dish of 6 Passion Fruit 25c 158A Fruit not otherwise stated 25c SECTION 15 - FLORAL ART - CHILDREN 11 TO 14 YEARS 159Floral Mat 12 inches by 9 inches 75c25c 160Arrangement of 3 Flowers (Any Foliage) 20c10c 161Decorated Saucer of Flowers20c 10c 162Flower Arrangement in Egg Cup 20c10c 163Novelty of any Horticultural Material20c 10c 164Boquet of Flowers 20c 10c 165Miniature Arrangement not to Exceed Three Inches 20c 10c. 166Arranged Vase of Flowers 20c 10c 167Arranged Vase of 6 Dahlias20c 10c. SECTION 16SPECIAL FUCHSIAS SECTION 168Single, 3 Distinct Variety 169Single, 6 Distinct Variety 170Single, 3 C.V.A. 171Single, 6 C.V.A. 172Double, 3 Distinct Variety 173Double, 6 Distinct Variety 174Double, 3 Distinct Variety 175Double, 6 C.V.A. Page Twelve Fuchsias Florets to be displayed on collar in a container (Small). Containers and Collars will be supplied by the Club, PRIZE-CARDS - FIRST, SECOND, WILL BE AWARDED ALSO MERIT CARD. A TROPHY WILL BE AWARDED TO THE BEST EXHIBIT IN SPECIAL FUCHSIAS SECTION SPECIAL OPEN CLASS - POT PLANTS.... SCH.NO:FIRST: 1761 Pot Plant, Foliage30c 1771 Pot Plant, Orchid In Bloom 30c 1781 Pot Succulents 30c 1791 Pot Geranium in Bloom 30c 1801 Pot Geranium Foliage 30c 1813 Indoor Plants - Different Varieties 30c 1825 Pots, at least 3 in Bloom 30c 183Container of Mixed Plants 30c 1841 Pot Plant in Bloom 30c Back Page G A R D E N C O M P E T I T I O N G A R D E N C O M P E T I T I O N sponsored by RINGWOOD CITY COUNCIL (Entries close Thursday February18th) (JUDGING SATURDAY FEBRUARY 27TH, 1971) ENTRIES MAY BE LEFT WITH: MRS.D.HUTCHINSON MRS.V.H.WILSON 43 Caroline Streetor38 William Street RINGWOOD RINGWOOD 870-8577870-7458 JOIN THESOCIETY Our MONTHLY MEETINGS are held on the THIRD MONDAY at 8 p.m. on each month in the PUBLIC LIBRARY, Warrandyte Road, RINGWOOD. YEARLY SUBSCRIPTION: ONE DOLLAR ($1-00) C H R Y S A N T H E M U M S H O W SATURDAY, MAY 8TH, 1971 WATCH FOR FURTHER DETAILS Sunrise Secretarial Service, 12 Grey Street, Ringwood East Telephone: 870-6871 -
 Bendigo Historical Society Inc.
Photograph - HANRO COLLECTION: A COLLECTION OF PHOTOGRAPHS OF DECORATIONS FOR HANRO WINDOW DISPLAY
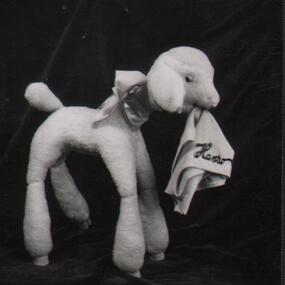
See Item 11000.189A Collection of Photographs of decorations for Hanro Window Display: All black and white photo's. Photo A) A soft toy of a lamb with a bow around its neck and in the mouth is a garment with Hanro embroider on it. On the back is the number 2056 hand written in blue ink. Photo B) has two cane suitcases with handles one smaller than the other. Both have flowers woven through the cane. A petticoat with lace and two thin straps at the top is laid through the larger suitcase and a sign *Hanro* sits on the bench. On the back is 2100 hand written in blue ink and in pencil VV11. Photo C) Is of a Cane French Horn with a bunch of flowers in the horn part. A Hanro sign is attached to the middle of the Horn and a petticoat with a lace bodice and hem and two thin straps is draped through the bottom of the French Horn. Some glue on the back and 2114 in biro, 14 in pencil. Photo D) Is a mock cloths line in front of a dark background with three petticoats. The first has a lace top and hem with two straps pegged to the line, the second is hung upside down with two pegs. It has a lace top with a V neck. The third has a lace V neck top and at the hem line. The garment is pegged to the line by the straps. There are two pots with flowers hanging from the line. Photo E) A vase made of cane with flowers and a Hanro sign attached. Two petticoats either side are laid on the bench both with a lace bodice. There are two Hanro signs on the table. On the back in blue ink hand written is *Dek. Nt.2094 Photo F*. There are three cane baskets with flowers and Hanro signs at the top of each hung on a wall and two cane baskets with flowers on the table. One petticoat is hung up on the wall through the baskets. The petticoat has a lace border at the bodice, The other is laid on the table, has a V neck and lace border. A Hanro sign is in front of the petticoat. On the back printed in blue ink is *Dek. Nr. 2098* Photo G) Is three bunches of flowers to have Hanro sign attached. On the back is *Dek. 2077. Photo H) Is three groups of several crystal balls strung together with pine needles at the top and the sign Hanro at the top of each. On the back hand printed in blue ink is *Dek.2124* The photos were together in a piece of paper which has writing in green ink *Decorations for clients window display*.Reg. V. Brock Studiosphotograph, hanro. reg. v. brock. -
 Numurkah & District Historical Society
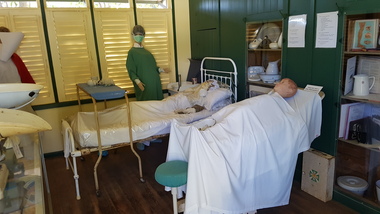
Isolation Ward Medical Displays - overview
Shelf One – North End of Isolation Ward 1 x slipper enamel bedpan 1 x enamel pan with spout 1 x stainless steel bedpan 1 x stainless steel urinal 2 x ceramic urinals 1 x ceramic bowl Shelf Two – North end of Isolation Ward 1 x small enamel kidney dish 2 x slipper ceramic bedpans 1 x enamel wash-bowl & jug Shelf Three – North end of Isolation Ward 1 X dry Steriliser Shelf Four – North end of Isolation Ward 1 X steam Steriliser Shelf One – South end of Isolation Ward 1 x nurse’s dictionary Domestic Medical Practice Book Doctor and Specialist Book Aids to Gynaecological Nursing Book Foundations of Anatomy & Physiology Book 2 x thermometers 1 x stainless steel swab bowl 1 x ophthalmoscope 1 x stainless bowl & bandages 1 x scissors/ tweezers kit 1 x large operating scissors & 1 x operating tweezers 1 x camode pot 1 x sigmoidoscope 3 x plessors Shelf Two – South end of Isolation Ward 1 x ceramic jug Kaarimba Ladies Auxiliary History of Num. Dist. Health Nursing Certificates & Notebooks – Winifred Smith Shelf Three – South end of Isolation Ward Nursing Certificates & Notebooks – Winifred Smith Shelf Four – South end of Isolation Ward 1 x white enamel bucket 1 x enamel bowl Glass Cabinet: Premature Babies Book Handbook of Paediatrics Various health brochures 1 x enamel potty, dry liners, nappy pins 1 x infant welfare leather case 2 x breast pump 2 x dippers Medical Items placed around the room 1 x kidney dish with syringes & bandage 1 x stethoscope 1 x catheters 1 x oxygen tubing 1 x hospital bed (pre-dates 1950’s eg from local private hospital) 1 x operating table and 1 x theatre stool (original Numurkah Hospital 1950’s) 1 x heart table 1 x dental chair, mouthwash dish & stand 3 x wooden crutches 1 x early dentist chair 1 x Infant Welfare Centre sign hospital, medical equipment -
 Eltham District Historical Society Inc
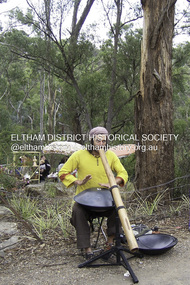
Photograph - Digital Photograph, Marguerite Marshall, Jesse Tree playing the Didgeridoo and Swiss Hang Drum at St Andrews Market, 29 March 2008
Published: Nillumbik Now and Then / Marguerite Marshall 2008; photographs Alan King with Marguerite Marshall.; p175 It’s Saturday morning and thousands of people are visiting St Andrews Market at the corner of Heidelberg-Kinglake Road and Proctor Street. It’s hard to find a park. Cars are banked up along the narrow road and crammed in a nearby parking area. Yet, at the market, people look relaxed and happy amongst the yellow box gums on the site where the Wurundjeri people used to gather. Stone artefacts unearthed there by Koorie researcher, Isabel Ellender, indicate the site was once a Wurundjeri meeting place, according to Aboriginal Affairs Victoria. Acoustic sounds mingle with quiet conversations. A guitarist blows a mouth organ while his bare toes tickle chimes. A tiny busker, perhaps five years old, plays a violin while sounds of a harp emerge from the hall. One stallholder, selling delicious-looking pastries, chats to another in Spanish, then to me in broad Australian. ‘I was born in Fitzroy but my mother came from Mexico and my dad from Serbia,’ she smiles. A New Zealander fell in love with Mongolia and now imports their hand-made embroidered clothes and Yurts (tents) and runs adventure tours. A young woman visited Morocco and when friends admired the shoes she bought, she decided to import them and sell them at the market. Oxfam sells Fair Trade toys and clothes and displays a petition to Make Poverty History. Other stalls sell Himalayan salt, jewellery made from seeds from northern Australia, glass paper-weights from China as well as locally grown vegetables, flowers and organic freshly baked bread. A woman sits in a state of bliss under the hands of a masseur. Another offers Reiki or spiritual healing. A juggler tosses devil sticks – ‘not really about the devil,’ he smiles. This skill was practised thousands of years ago in Egypt and South America he says. At the Chai Tent people lounge on cushions in leisurely conversation. The idea for the market was first mooted among friends over a meal at the home of famous jazz and gospel singer Judy Jacques.2 Jacques remembers a discussion with several local artists including Marlene Pugh, Eric Beach, Les Kossatz, Ray Newell and Peter Wallace. ‘We decided we wanted a meeting place, where all the different factions of locals could meet on common ground, sell their goodies and get to know one another,’ Jacques recalls. They chose the site opposite another meeting place, St Andrews Pub. A week later Jacques rode her horse around the district and encouraged her neighbours to come along to the site to buy or sell. On February 23, 1973, about 20 stallholders arrived with tables. They traded ‘second-hand clothes, vegetables, meat, cheese, eggs, chickens, goats, scones, tea, garden pots and peacock feathers’. Now around 2000 people visit each Saturday. People usually linger until dusk. The market – with around 150 stalls of wares from a wide variety of cultures – stands alongside Montsalvat as the most popular tourist attraction in Nillumbik. By the 1990s St Andrews Market was in danger of being loved to death, as the site was becoming seriously degraded. The market was spreading in all directions and the degradation with it. A local council arborist’s report in 1994 noted exposed tree roots from erosion and compaction. The Department of Sustainability and Environment threatened to close the market if the degradation was not rectified. After many months of research, discussions and lobbying by a few residents, the council formed a Committee of Management, with an Advisory Committee, and introduced an Environment Levy. The State Government, the council and the market, funded terracing of the site to stop erosion, and retain moisture and nutrients. Vehicles were excluded from some sensitive areas and other crucial zones reserved for re-vegetation. Volunteers planted more than 3000 locally grown indigenous species. The old Yellow Box trees fully recovered and are expected to give shade for many years to come.This collection of almost 130 photos about places and people within the Shire of Nillumbik, an urban and rural municipality in Melbourne's north, contributes to an understanding of the history of the Shire. Published in 2008 immediately prior to the Black Saturday bushfires of February 7, 2009, it documents sites that were impacted, and in some cases destroyed by the fires. It includes photographs taken especially for the publication, creating a unique time capsule representing the Shire in the early 21st century. It remains the most recent comprehenesive publication devoted to the Shire's history connecting local residents to the past. nillumbik now and then (marshall-king) collection, didgeridoo, jesse tree, st andrews market, swiss hang drum -
 University of Melbourne, Burnley Campus Archives
Album - Black and white and colour slides, Burnley Views, 1947-1955
Contributor: T.H. KneenCardboard box of 108 35mm glass slides in metal frames made by "Gnome." Box labelled "Burnley Gardens Slides." Also 16 unused slides (1) Swan Street entrance c. (2) Orchid? b/w. (3) Nursery b/w. (4) Pasture area with man working b/w. (5) Draught horse working in the Orchard b/w. (6) Crop of corn in the Orchard c. (7) Magnolia c. (Magnolia x soulangeana). (8) Display of orange flowers c. (9) Lemon tree in the Orchard c. (10) Sign advertising 'Fruit Tree Pruning Demonstarion Sat. 2nd July (1949) c. (11) Jersey cow c. (12) Rock Point c. (13) Dahlias in the Orchard c. (14) Foundation Stone '28th August, 1946' c. (15) Felled Cypress tree 1951 b/w. (16) School truck in front of glasshouses and cacti b/w. (17)Administration Building completed but surrounded by rubble C.1949 c. (18) Plant Research Institute c. (19) Inside a glasshouse. c. (20) Administration Building c. (21) Group of female students dressed up for a function c. (22) Solenostemon (Syn. Coleus) in a glasshouse. (23, 24)Stock Matthiola incana. (25) Blossom in the Orchard c. (26) Orchard c. (27) Picking fruit in the Orchard c. (28) 2 female students holdong large bunches of poppies c. (29) Flowers growing in the Orchard c. (30) House - not Burnley c. (31) Students on an excursion c. (32) Staff member with Gladioli c. (33) Garden view - not Burnley? c. (34) Administration Building c. (35) Roses c. (36) Flowers in the Orchard c. (37) Draught horse working in the Orchard c. (38) Staff member amongst flowers in the Orchard c. (39) Garden view c. ((40) Blossom in the Orchard c. (41) Orchard c. (42) Flowers inside glasshouse c. (43) Mesembryanthemums in pots possibly in the nursery c. (44) Tree b/w. (45) Garden bed c. (46) Sign, 'Agrostology Branch, pasture Plant Research Field,' c. (47) Path to Principal's Residence c. (48) Irrigation in the Orchard b/w. (49) Cactus flowers b/w. (50) Garden view with T.H. Kneen children playing c. (51) (52) Cinerarias (now Pericallis x hybrida) in pots c. (53) Temporary building where the Grey Garden is now b/w. (54) Garden view b/w. (55) Unknown building b/w. (56) Person pruning in the Orchard c. (57) Students working in the Orchard c. (58) Swan Street with recently completed rock wall constructed by the Public Works Department b/w. (59) Lagoon paddock b/w. (60,62) Pavilion and new Administration Building before the Pavilion was removed b/w. (61) As (60) but viewed from a different direction c. (63) Plant c. (64) View through a window on the stairs in the Administration Building c. (65) Plant c. (66) Garden view of trees c. (67) Garden View b/w. (68) Blossom tree c. (69 )Garden view along path to Principal's Residence c. (70) Lagoon Paddock c. (71) Lagoon Paddock with cows b/w. (72) Inside a glasshouse b/w. (73) Entrance sign- Department of Agriculture Burnley Gardens, School of Horticulture & Primary Agriculture, Plant Research laboratory, Agrostology Branch, Fruit Preserving Branch c. (74) Plant Research Laboratory b/w. (75) Students on an excursion c. (76) Glasshouses b/w. (77) Garden view b/w. (78) Kniphophia c. (79) Hibiscus c. (80) Garden view c. (81) Dairy, Silo and dog b/w. (82) Irrigation in then Orchard b/w. (83) Garden view with magnolia c. (84) Flower plots in the Orchard c. (85) Pruning demonstration b/w. (86) Administration Building under construction c. (87) Rock Point c. (88) Mrs Kneen and Magnolia c. (89) Glasshouses c. (90) Sequoia sempervirens b/w. (91) Inside Administration Building c. (92) Luffmann Ponds b/w. (93) Sequoia sempervirend, Mrs Kneen and child c. (94) Garden bed in front of Sequoian sempervirens c. (95) Principals Residence b/w. (96) Poultry pens b/w. 1947 (97) Principals Residence b/w. (98) Student picking fruit from netted tree b/w. (99) Rock Point and Long Border c. (100) Administration Building under construction c. (101) Greenhouse b/w. (102) Rock Point c. (103) Flowers in the Orchard c. (104) Waterlilies in the Pond c. (105) Blossom tree c. (106) Hilda Kirkhope Rockery c. (107) Long Border c. (108) Plant Research Institute with flower border along drive c.burnley gardens, flower, nursery, pasture, draught horse, orchard, crops, magnolia, chicken coops, egg laying competition -
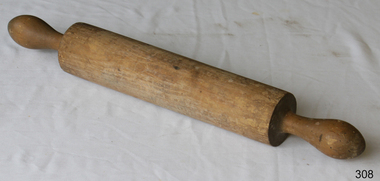 Flagstaff Hill Maritime Museum and Village
Domestic object - Wooden Rolling Pin, First half of 20th Century
A rolling pin is a simple tool used to flatten dough. The first civilisation known to have used the rolling pin was the Etruscans. Their advanced farming ability, along with a tendency to cultivate many plants and animals never before used as food and turn them into sophisticated recipes, were passed to invading Greeks, Romans, and Western Europeans. Thanks to the Etruscans, these cultures are associated with gourmet cooking. To prepare their inventive foods, the Etruscans also developed a wide range of cooking tools, including the rolling pin. Although written recipes did not exist until the fourth century B.C., the Etruscans documented their love of food and its preparation in murals, on vases, and on the walls of their tombs. Cooking wares are displayed with pride; rolling pins appear to have been used first to thin-roll pasta that was shaped with cutting wheels. They also used rolling pins to make bread (which they called puls) from the large number of grains they grew. Natives of the Americas used more primitive bread-making tools that are favoured and unchanged in many villages. Chefs who try to use genuine methods to preserve recipes are also interested in both materials and tools. Hands are used as "rolling pins" for flattening dough against a surface, but also for tossing soft dough between the cook's two hands until it enlarges and thins by handling and gravity. Tortillas are probably the most familiar bread made this way. Over the centuries, rolling pins have been made of many different materials, including long cylinders of baked clay, smooth branches with the bark removed, and glass bottles. As the development of breads and pastries spread from Southern to Western and Northern Europe, wood from local forests was cut and finished for use as rolling pins. The French perfected the solid hardwood pin with tapered ends to roll pastry that is thick in the middle; its weight makes rolling easier. The French also use marble rolling pins for buttery dough worked on a marble slab. Glass is still popular; in Italy, full wine bottles that have been chilled make ideal rolling pins because they are heavy and cool the dough. Countries known for their ceramics make porcelain rolling pins with beautiful decorations painted on the rolling surface; their hollow centres can be filled with cold water (the same principle as the wine bottle), and cork or plastic stoppers cap the ends. Designs for most rolling pins follow long-established practices, although some unusual styles and materials are made and used. Within the family of wooden rolling pins, long and short versions are made as well as those that are solid cylinders (one-piece rolling pins) instead of the familiar style with handles. Very short pins called mini rolling pins make use of short lengths of wood and are useful for one-handed rolling and popular with children and collectors. Mini pins ranging from 5 to 7 in (12.7-17.8 cm) in length are called texturing tools and are produced to create steam holes and decorations in pastry and pie crusts; crafters also use them to imprint clay for art projects. These mini pins are made of hardwoods (usually maple) or plastic. Wood handles are supplied for both wood and plastic tools, however. Blown glass rolling pins are made with straight walls and are solid or hollow. Ceramic rolling pins are also produced in hollow form, and glass and ceramic models can be filled with water and plugged with stoppers. Tapered glass rolling pins with stoppers were made for many centuries when salt imports and exports were prohibited or heavily taxed. The rolling pin containers disguised the true contents. The straight-sided cylinder is a more recent development, although tapered glass pins are still common craft projects made by cutting two wine bottles in half and sealing the two ends together so that the necks serve as handles at each end.Tiny rolling pins are also twisted into shape using formed wire. The pins will not flatten and smooth pastry, and the handles do not turn. The metal pins are popular as kitchen decorations and also to hang pots, pans, and potholders. https://www.encyclopedia.com/sports-and-everyday-life/food-and-drink/food-and-cooking/rolling-pinThe use of the rolling pin to make thin pastry or pasta.Wooden rolling pin with some damage on cylinder section.None.flagstaff hill, warrnambool, shipwrecked-coast, flagstaff-hill, flagstaff-hill-maritime-museum, maritime-museum, shipwreck-coast, flagstaff-hill-maritime-village, rolling pin, cooking, pastry -
 Eltham District Historical Society Inc
Photograph - Digital Photograph, Alan King, Kangaroo Ground General Store, Eltham-Yarra Glen Road, 28 December 2007
The present store was built circa 1900 to replace another which had been destroyed by fire in 1898, which had replaced a predecessor on the opposite side of the road in 1865. The store was also used as a post office until early 2000s. The general store is historically significant because it has a long association with Kangaroo Ground and has been an important centre of community life for more than 120 years - Council meetings used to be conducted in the front room of the store at a time when Kangaroo Ground rivalled Eltham as the major centre of the Shire. The general store is historically and aesthetically significant as one of a group of three well preserved public buildings in the Kangaroo Ground hamlet and as a major heritage component of Kangaroo Ground which was one of the earliest settled areas of the Shire and which has the character of an English village rather than an Australian settlement. Covered under Heritage Overlay, Nillumbik Planning Scheme. Published: Nillumbik Now and Then / Marguerite Marshall 2008; photographs Alan King with Marguerite Marshall.; p77 Today the general store is an uncommon form of trade but the one at Kangaroo Ground continues a long tradition of friendliness and service. For more than 100 years it has been a centre of community life. In the settlement’s early days a previous general store, on the same site, was the meeting place for the Eltham District Road Board, precursor to the Eltham Shire Council. For years Kangaroo Ground rivalled Eltham as the shire’s major centre. It developed very differently from the rest of the shire as its rich soil attracted prosperous Presbyterian Scots who had large agricultural properties.1 The present store was built to replace another one, which had burnt down in 1898, after replacing a predecessor on the other side of the road in 1865. The store retains its outward character and its cellar, although inside it has changed considerably. It now includes a café and offers local produce, milk bar products, grocery items, gas and other fuel. Until early this century the store was also used as a post office. Kangaroo Ground’s first postmaster was Andrew Ross, who first operated from the school opposite, then from his hotel next to the present tennis court site. The first postmaster at this store was Edward Weller, followed in 1868 by James Anderson. At that time a mail coach ran three times a week between Eltham and Woods Point through Kangaroo Ground, Yarra Flats, Healesville, Fernshaw, Marysville and Matlock. Some early postmasters were Rodger, McLaughlin, Greenway and Burns.2 Burns was the only postmaster operating from the store. The others operated from Andrew Ross’s hotel. The mail service improved in 1892 when coaches ran from Melbourne to Queenstown (now known as St Andrews) and changed horses at Kangaroo Ground twice daily. The only telegraph office in the district at that time was at the Kangaroo Ground Post Office. Telegrams to outlying areas such as Queenstown and Kinglake had to be sent by hand. A local resident in the early 1900s often rode his pony to deliver telegrams and was paid one shilling a mile porterage. The store has also contributed to the lighter side of Kangaroo Ground life. During the years that Con Wraight owned the store, between 1906 and 1946, a new piano was needed for the Kangaroo Ground Hall, so monthly dances were held to raise money. When the piano was bought, a grand ball was held in the Kangaroo Ground Hall to celebrate the occasion and supper followed at Mr Wraight’s barn, cleaned especially for the occasion. Every New Year’s Eve, a Scottish piper would set off from between the store and the schoolhouse, playing his pipes, and march to Cameron’s Pigeon Bank homestead on the Kangaroo Ground-Warrandyte Road. Between 1914 and 1922, the store was a station for the Kangaroo Ground Bush Fire Brigade’s tanker. It consisted of a wooden barrel on a cart, fitted with a hand-pump, and stood on the side of the road outside the store. Joy Ness, who belonged to an early Kangaroo Ground family, moved here in 1940 and recalled her impressions of the store at that time: ‘It was a very dark shop stained in a dark colour and on the walls just below the ceiling hung hurricane lamps, ropes, kitchen utensils and other goods for sale. ‘Goods were weighed on a brass scale with weights, on which mothers also weighed their babies, because the nearest Infant Welfare Centre was at Greensborough. The bacon was cut with a hand slicer and later a pot-bellied stove warmed the store. Farmers and other locals used to gossip around it as they collected their daily mail. In those days the butter and cheese were kept in the cellar as no ice was delivered for cooling.’This collection of almost 130 photos about places and people within the Shire of Nillumbik, an urban and rural municipality in Melbourne's north, contributes to an understanding of the history of the Shire. Published in 2008 immediately prior to the Black Saturday bushfires of February 7, 2009, it documents sites that were impacted, and in some cases destroyed by the fires. It includes photographs taken especially for the publication, creating a unique time capsule representing the Shire in the early 21st century. It remains the most recent comprehenesive publication devoted to the Shire's history connecting local residents to the past. nillumbik now and then (marshall-king) collection, eltham-yarra glen road, kangaroo ground general store -
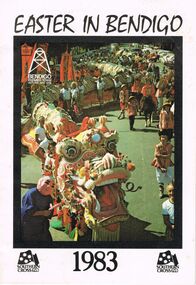 Bendigo Historical Society Inc.
Document - EASTER IN BENDIGO, OFFICIAL PROGRAM, 28 March 1983
Easter in Bendigo, Official Program1983. Premier Town Victoria 1982-85. Easter In Bendigo '83 Welcome to the 1983 Easter Fair. This is a special time for Bendigo. . . The Fair has a long history bating back to 1871. . . Bendigo Base Hospital, Home and Hospital for the Aged or Benevolent Asylum. . . Back in the 1800s. Gone are the days of the ladies' Fancy Bazaar, Fat Baby Contest, Greasy Pig Chase. . . Many old traditions remain. . . Bendigo's links with the Chinese community go back to the dates when the first settlers arrived seeking gold. The Chinese took a very active part in the fist Fair. . . Monday Procession has always been the most famous as many old photographs show. Some of these photos date back before the turn of the century. In those days many people made the journey to Bendigo by train from Melbourne or by horse and buggy from outlying districts.. . ''Sun Loong'', or ''New Dragon''. . . Horse and Harness Parade a great success each tear attracted an immense variety of horses and horse drawn vehicles. . . Torchlight Procession on Sunday Sports Carnival Fireworks. . . Easter Monday requires precise planning and discipline if it is to run smoothly. A volunteer committee meets through the year to see that this happens. The Popular Girl Contest was introduced in 1930, the four main Streets of Bendigo, Pall Mall, Mitchell Street, Hargreaves Street and Williamson Street (formerly View Street), sponsored a popular girl by means of fund raising events. Winner was announced from the Shamrock Hotel balcony Easter Saturday night by the Mayor of Bendigo. The contest is still being held. . . The Shamrock Hotel now fully restored and reopened. . . Sunday night special ceremony, in time for the winning Popular Girl to take pride of place in the Procession. . . The accent is on the cycling. The Easter sports Carnival dates back to the beginning of the Fair in 1871, seven years before the start of the famous Stawell Gift. Sid. Paterson, Hubert Opperman. . . Golden Mile Wheelrace, the final on Monday night. AFT Amateur Madison, woodchopping, boomerang throwing and gala fireworks Sunday and Monday. This year for the first time the Golden Mile goes Pro/Am, an Open event for the first time. This could see the first clash between Danny Clark and Kenrick Tucker. Hopefully Michael Grenda, Tony Hughes, Michael Turtur will also be starters against leading professionals, Terry Hammond, Murray Hall and Ross Forster. The Golden Mile has been conducted every year since 1956 when it was won by John McDonough. Ron Grenda (Tas) won in 1959, Barry Waddell was the first scratchman to win in 1962 and Frank McCaig (Bendigo) has won the event three times in 1963/5/7. The event carries total prize money of $3000 making it (with Wangaratta Wheelrace) the richest Wheelrace in Provincial Victoria. . . Newly completed Hargreaves Mall being a focus for all this activity. . . Rotary Art Show and Easter Fair Society amalgamated their art shows resulting in a combined exhibition of outstanding quality, since then the Rotary Club has added the Antique Fair. The Handcraft Bazaars, a more sophisticated version of the bazaars of old, offers. . . The Bathtub Derby at Lake Weeroona, Music Festival at Queen Elizabeth Oval. . . Easter Fair of 1871 was almost washed out. . . Necessary top abandon the ''Golden Mile'' Wheelrace on two occasions 1960 & 1979. . . 1983 Official Programme, Good Friday April 1, Saturday April 2, Sunday April 3, Monday April 4, Tuesday April 5. . . Holy Week Ecumenical Services: . . The Chinese And The Bendigo Easter Fair, 3 pages on the history of the chinese involvment in the Bendigo Easter Fair. . . A Little Of Dragons: brief history on chinese and dragons. Sun Loong, Yar Loong. The Birth Of A Dragon: In China a story of the birth of a Dragon. . . Such Trial was set a group of Bendigo Businessmen led by Mr A Guy and comprising MR C Michelsen, Mr L Chon, Mr J Granter, Mr J Henderson, Mr B Andres. In 1969 they formed the ''Loong 100 Committee''. The purpose of the committee was to purchase a dragon to replace the ageing Loong, from donations raised. But who could build a worthy successor to the Great Loong? In Hong Kong a 47 year old dragon builder whose traditions and craft came from the famous dragon building city of Fat Shan on the Pearl River, near Canton where Loong was born. Mr Law On created the famous Sun Loong in his tiny 4x4 metre workshop in Hong Kong. . . 1970 Sun Loong was blessed and brought to life by 101 year old Mr James Lew, dotting his eyes with chicken blood. . . To Awaken A Dragon Dragons tend to sleep a lot and are quiet deaf. . . The Dragon is blessed and fed with pomolo leaves then the process of wakening begins with drums. . . 5000 crackers. The Easter Monday Chinese Procession have a long and varied history in China. The Bendigo Procession is no exception to this. In recent years much research has gone into . . The Procession may be divided into six sections. . . Dragon built in 1969 First Displayed in 1970, length-300ft plus, Extra 100ft added in 1980, number carrying: Head 1 plus 5 releifs, Neck 3, Body 52 plus 52 reliefs, head weight 63 lbs. tail weight 36 lbs.. Scales 4,500 approx. Mirrors 90,000 fins 50, beads 30,000 approx. . . Conclusion. . . Advertisements: Bendigo Pottery, Square Deal Cars, Bob Bell of Borough Bricklaying Pty Ltd, Pinups Wine Bar, Cumberland Hotel, Manchester Arms Hotel, British & American Hotel, Langley Hall BYO Restaurant, White Horse Hotel, Ascot Lodge Caravan Park, The Lemonade Factory, The Pepper Pot, M & M J Meade Mobil, Lakeview Motor Inn Restaurant, Truffles Restaurant, Marong Hotel, 4 Penny Dark BYO Restaurant, Chaplin's Coffee Shoppe, Copper Pot Restaurant, Skins of Australia, Central Deborah Gold Mine, Chris Wall Auto Sales, Brian Boru Hotel, The Green Carnation, Sandhurst Town, Dragon Court BYO Chinese Restaurant, Australian Fixed Trust Investors Services Ltd., The Mohair Farm, Bendigo Model Railroaders, Mexican Kitchen Restaurant, BP Super Shops, Coke, Southern Cross TV8.event, easter fair, bendigo easter fair society, easter in bendigo, official program1983. premier town victoria 1982-85. easter bendigo '83 welcome to the 1983 easter fair. this is a special time for bendigo. . . the fair has a long history bating back to 1871. . . bendigo base hospital, home and hospital for the aged or benevolent asylum. . . back in the 1800s ladies' fancy bazaar, fat baby contest, greasy pig chase. . . many old traditions. . . bendigo's links with chinese the first settlers arrived seeking gold. the chinese took a very active part in the fist fair. . . monday procession the most famous as many photographs show, the turn of the century. many people journey to bendigo from melbourne & from outlying districts.. . ''sun loong'', or ''new dragon''. . . horse and harness parade an immense variety of horses, horse drawn vehicles. . . torchlight procession on sunday sports carnival fireworks. . . easter monday precise planning and discipline to run smoothly. a volunteer committee meets through the year. the popular girl contest introduced in 1930, sponsored a popular girl by means of fund raising events. winner announced from shamrock hotel balcony easter saturday night by the mayor. . . the shamrock hotel now reopened. . . sunday night special ceremony, in time for the winning popular girl to take pride in the procession. . . accent is on the cycling. the easter sports carnival dates back to fair in 1871, seven years before stawell gift. sid. paterson, hubert opperman. . . golden mile wheelrace, final on monday night. aft amateur madison, woodchopping, boomerang throwing, gala fireworks sunday& monday. for the first time golden mile goes pro/am. danny clark and kenrick tucker. michael grenda, tony hughes, michael turtur will also be starters against leading professionals, terry hammond, murray hall and ross forster. the golden mile has been conducted every year since 1956, won john mcdonough. ron grenda (tas) won 1959, barry waddell the first scratchman to win 1962, frank mccaig (bendigo) has won 1963/5/7. prize money of $3000 making it (with wangaratta wheelrace) the richest wheelrace in provincial victoria. . . newly completed hargreaves mall. . . rotary art show and easter fair society amalgamated art shows, antique fair. handcraft bazaars, . . the bathtub derby lake weeroona, music festival queen elizabeth oval. . . easter fair of 1871 was almost washed out. . . necessary top abandon the ''golden mile'' wheelrace on two occasions 1960 & 1979. . . 1983 official programme, good friday april 1, saturday april 2, sunday april 3, monday april 4, tuesday april 5. . . holy week ecumenical services: . . chinese and the bendigo easter fair, . dragons: brief history. sun loong, yar loong. in china a story of the birth of a dragon. . . bendigo businessmen mr a guy, mr c michelsen, mr l chon, mr j granter, mr j henderson, mr b andres. 1969 formed ''loong 100 committee'' purchase a dragon to replace ageing loong, donations raised. build successor great loong? hong kong dragon builder traditions craft came from dragon building city fat shan on the pearl river, canton where loong was born. mr law on created the famous sun loong in his tiny 4x4 metre workshop in hong kong. . . 1970 sun loong was blessed and brought to life by 101 year old mr james lew, dotting his eyes with chicken blood. . . to awaken a dragon dragons tend to sleep a lot and are quiet deaf. . .dragon is blessed fed with pomolo leaves wakening begins with drums. . . 5000 crackers. the easter monday chinese procession have a long and varied history in china. the bendigo procession is no exception to this. in recent years much research has gone into… procession may be divided into six sections. dragon 1969 first displayed in 1970, length-300ft plus, extra 100ft added in 1980, number carrying: head 1 plus 5 releifs, neck 3, body 52 plus 52 reliefs, head weight 63 lbs. tail 36 lbs.. scales 4, 500 approx. mirrors 90, 000 fins 50, beads 30, 000 approx. advertisements: bendigo pottery, square deal cars, bob bell of borough bricklaying pty ltd, pinups wine bar, cumberland hotel, manchester arms hotel, british & american hotel, langley hall byo restaurant, white horse hotel, ascot lodge caravan park, the lemonade factory, the pepper pot, m & m j meade mobil, lakeview motor inn restaurant, truffles restaurant, marong hotel, 4 penny dark byo restaurant, chaplin's coffee shoppe, copper pot restaurant, skins of australia, central deborah gold mine, chris wall auto sales, brian boru hotel, the green carnation, sandhurst town, dragon court byo chinese restaurant, australian fixed trust investors services ltd., mohair farm, bendigo model railroaders, mexican kitchen restaurant, bp super shops, coke, southern cross tv8. -
 Flagstaff Hill Maritime Museum and Village
Domestic object - Bowl, Late 19th or early 20th Century
The Process of Making Pottery Decorating, Firing, Glazing, Making, Technical There is a rhythm and flow to clay. It can’t be done all at once! Even the making process! It can take weeks to get everything done, especially if you can only work on your pottery once a week! Even though we have three hour classes, it’s often just not enough time! Here is an overview of some of the processes so you have a bit more grasp on some of the technical stuff! Step One – Design There are SO many ideas out there for making stuff in clay! From delicate porcelain jewellery, through to heavy sculptural work and everything in between. Deciding your direction is sometimes not that easy – when you first start, try everything, you will naturally gravitate to the style that you enjoy! The options and variations are endless and can get a wee bit overwhelming too! Check in with me before you start to ensure your ideas will work, what order you might do things, how you could achieve the look you are seeking and any other technical data required! Step Two – Making Clay is thixotropic. This means that as you work with it, the clay first gets sloppier and wetter, before is begins to dry in the atmosphere. For most things, you simply can’t do all parts of the project at once. An example of work order might look like: Get last weeks work out from the shelves Prepare clay for today’s work – roll your clay, prepare balls for throwing, make the first stage of a pinch pot) Clean up last week’s work and put it on the shelf for bisque firing Check that you have any glazing to do – and do enough of it that you will have time to finish your main project Do the next step of your next project – there might be a further step that can’t be complete immediately, in that case, wrap your work well and put onto the shelves. Letting your work rest for a while can really help keep your work clean and professional looking. Many things require bagging under plastic to keep it ready for work the next week – put your name on the outside of the bag so you can find your work easily. We have stickers and markers. Consider how you want to decorate your work – coloured slip can be applied at a fairly wet stage (remembering that it will make your work even wetter!). Trying to apply slip to dry clay won’t work! If you want to do sgraffito – you will need to keep the work leather hard (a state of dryness where you can still work the clay with a little effort and a little water and care). Step Three – Drying Most of the time your work can go into the rack uncovered to let it dry out for the following week. If you want to continue forming or shaping you will need to double bag your work – put your work on a suitable sized bat and put the bat in a bag so the base of the bag is under the bat, then put another bag over the top of the work and tuck the top of the bag under the bat. If you want to trim (or turn) your thrown work the following week, it should also be double bagged. If your work is large, delicate, or of uneven thicknesses, you should lightly cover your work for drying. When considering the drying process, bare in mind the weather, humidity and wind! The hotter and dryer, the faster things dry and work can dry unevenly in the shelves – this can lead to cracking – another time to lightly cover your work for drying. Step Four – Trimming and Cleaning Up Your work is dry! It is called greenware now and it is at it’s most fragile! Handle everything with two hands. I often refer to soft hands – keep everything gentle and with your fingers spread as much as possible. Try to not pick up things like plates too much, and always with both hands! Before your work can be bisque fired it should be “cleaned up”. You work won’t go into the kiln if it has sharp edges – when glazed, sharp edges turn into razor blades! Use a piece of fly wire to rub the work all over – this will scratch a little so be light handed. Use a knife or metal kidney to scrape any areas that require a bit more dynamic treatment than the fly wire offers! Finally, a very light wipe over with a slightly damp sponge can help soften and soothe all of your edges and dags! Trimming thrown work: If you are planning to trim (or turn) your thrown work (and you should be), make sure you bag it well – your work should be leather hard to almost dry for easiest trimming. Use this step to finish the work completely – use a metal kidney to polish the surface, or a slightly damp sponge to give a freshly thrown look. Wipe the sponge around the rim after trimming, and check the inside of the pot for dags! Trimming slip cast work: Usually I will trim the rims of your work on the wheel the following day to make that stage easier, however you will still need to check your work for lumps and bumps. Last but not least – check that your name is still clearly on the bottom of your work. Step Five – Bisque Firing When the work is completely dry it can go into the bisque kiln. The bisque kiln is fired to 1000°C. This process burns off the water in the clay as well as some of the chemically bound water. The structure of the clay is not altered that much at this temperature. Inside the bisque kiln, the work is stacked a little, small bowl inside a larger bowl and onto a heavy plate. Smaller items like decorations or drink coasters might get stacked several high. Consideration is paid to the weight of the stack and shape of the work. A bisque kiln can fire about one and a half times the amount of work that the glaze kiln can fire. The firing takes about 10 hours to complete the cycle and about two days to cool down. Once it has been emptied the work is placed in the glaze room ready for you to decorate! Step Six – Glazing Decorating your work with colour can be a lot of fun – and time consuming! There are three main options for surface treatment at this stage: Oxide Washes Underglazes Glazes Washes and underglazes do not “glaze” the work – It will still need a layer of glaze to fully seal the clay (washes don’t need glaze on surfaces not designed for food or liquid as they can gloss up a little on their own). Underglazes are stable colourants that turn out pretty much how they look in the jar. They can be mixed with each other to form other colours and can be used like water colours to paint onto your work. Mostly they should have a clear glaze on top to seal them. Oxides are a different species – the pink oxide (cobalt) wash turns out bright blue for instance. They don’t always need a glaze on top, and some glazes can change the colour of the wash! The glazes need no other “glaze” on top! Be careful of unknown glaze interactions – you can put any combination of glaze in a bowl or on a plate, but only a single glaze on the outside of any vertical surface! Glazes are a chemical reaction under heat. We don’t know the exact chemicals in the Mayco glazes we use. I can guess by the way they interact with each other, however, on the whole, you need to test every idea you have, and not run the test on a vertical surface! Simply put, glaze is a layer of glass like substance that bonds with the clay underneath. Clay is made of silica, alumina and water. Glaze is made of mostly silica. Silica has a melting point of 1700°C and we fire to 1240°C. The silica requires a “flux” to help it melt at the lower temperature. Fluxes can be all sorts of chemicals – a common one is calcium – calcium has a melting point of 2500°C, however, together they both melt at a much lower temperature! Colourants are metal oxides like cobalt (blue), chrome (green through black), copper (green, blue, even red!), manganese (black, purple and pink) iron (red brown), etc. Different chemicals in the glaze can have dramatic effects. for example, barium carbonate (which we don’t use) turns manganese bright pink! Other elements can turn manganese dioxide brown, blue, purple and reddish brown. Manganese dioxide is a flux in and of itself as well. So, glazes that get their black and purple colours, often interact with other glazes and RUN! Our mirror black is a good example – it mixes really well with many glazes because it fluxes them – causes them to melt faster. It will also bring out many beautiful colours in the glazes because it’s black colouring most definitely comes from manganese dioxide! Glaze chemistry is a whole subject on it’s own! We use commercial Mayco glazes on purpose – for their huge range of colour possibilities, stability, cool interactions, artistic freedom with the ability to easily brush the glazes on and ease of use. We currently have almost 50 glazes on hand! A major project is to test the interactions of all glazes with each other. That is 2,500 test tiles!!!! I’m going to make the wall behind the wheels the feature wall of pretty colours! Step Seven – Glaze (Gloss or sometimes called “Glost”) Firing Most of the time this is the final stage of making your creation (but not always!) The glaze kiln goes to 1240°C. This is called cone 6, or midrange. It is the low end of stoneware temperatures. Stoneware clays and glazes are typically fired at cone 8 – 10, that is 1260 – 1290°C. The energy requirement to go from 1240°C to 1280°C is almost a 30% more! Our clay is formulated to vitrify (mature, turn “glass-like”) at 1240°, as are our glazes. A glaze kiln take around 12 hours to reach temperature and two to three days to cool down. Sometimes a third firing process is required – this is for decoration that is added to work after the glaze firing. For example – adding precious metals and lustres. this firing temperature is usually around 600 – 800°C depending upon the techniques being used. There are many students interested in gold and silver trims – we will be doing this third type of firing soon! After firing your work will be in the student finished work shelves. Remember to pay for it before you head out the door! There is a small extra charge for using porcelain clay (it’s more than twice the price of regular clay), and for any third firing process! Once your work has been fired it can not turn back into clay for millennia – so don’t fire it if you don’t like it! Put it in the bucket for recycling. https://firebirdstudios.com.au/the-process-of-making-pottery/ The bowl is an example of kitchenware used in the 19th century and still in use today.Bowl white ceramic. Crack on side. Badly stained.Backstamp very faint and unable to be read.flagstaff hill, warrnambool, shipwrecked-coast, flagstaff-hill, flagstaff-hill-maritime-museum, maritime-museum, shipwreck-coast, flagstaff-hill-maritime-village, mixing bowl, food preparation, kitchen equipment, ceramic -
 Flagstaff Hill Maritime Museum and Village
Domestic object - Bowl
The Process of Making Pottery Decorating, Firing, Glazing, Making, Technical There is a rhythm and flow to clay. It can’t be done all at once! Even the making process! It can take weeks to get everything done, especially if you can only work on your pottery once a week! Even though we have three hour classes, it’s often just not enough time! Here is an overview of some of the processes so you have a bit more grasp on some of the technical stuff! Step One – Design There are SO many ideas out there for making stuff in clay! From delicate porcelain jewellery, through to heavy sculptural work and everything in between. Deciding your direction is sometimes not that easy – when you first start, try everything, you will naturally gravitate to the style that you enjoy! The options and variations are endless and can get a wee bit overwhelming too! Check in with me before you start to ensure your ideas will work, what order you might do things, how you could achieve the look you are seeking and any other technical data required! Step Two – Making Clay is thixotropic. This means that as you work with it, the clay first gets sloppier and wetter, before is begins to dry in the atmosphere. For most things, you simply can’t do all parts of the project at once. An example of work order might look like: Get last weeks work out from the shelves Prepare clay for today’s work – roll your clay, prepare balls for throwing, make the first stage of a pinch pot) Clean up last week’s work and put it on the shelf for bisque firing Check that you have any glazing to do – and do enough of it that you will have time to finish your main project Do the next step of your next project – there might be a further step that can’t be complete immediately, in that case, wrap your work well and put onto the shelves. Letting your work rest for a while can really help keep your work clean and professional looking. Many things require bagging under plastic to keep it ready for work the next week – put your name on the outside of the bag so you can find your work easily. We have stickers and markers. Consider how you want to decorate your work – coloured slip can be applied at a fairly wet stage (remembering that it will make your work even wetter!). Trying to apply slip to dry clay won’t work! If you want to do sgraffito – you will need to keep the work leather hard (a state of dryness where you can still work the clay with a little effort and a little water and care). Step Three – Drying Most of the time your work can go into the rack uncovered to let it dry out for the following week. If you want to continue forming or shaping you will need to double bag your work – put your work on a suitable sized bat and put the bat in a bag so the base of the bag is under the bat, then put another bag over the top of the work and tuck the top of the bag under the bat. If you want to trim (or turn) your thrown work the following week, it should also be double bagged. If your work is large, delicate, or of uneven thicknesses, you should lightly cover your work for drying. When considering the drying process, bare in mind the weather, humidity and wind! The hotter and dryer, the faster things dry and work can dry unevenly in the shelves – this can lead to cracking – another time to lightly cover your work for drying. Step Four – Trimming and Cleaning Up Your work is dry! It is called greenware now and it is at it’s most fragile! Handle everything with two hands. I often refer to soft hands – keep everything gentle and with your fingers spread as much as possible. Try to not pick up things like plates too much, and always with both hands! Before your work can be bisque fired it should be “cleaned up”. You work won’t go into the kiln if it has sharp edges – when glazed, sharp edges turn into razor blades! Use a piece of fly wire to rub the work all over – this will scratch a little so be light handed. Use a knife or metal kidney to scrape any areas that require a bit more dynamic treatment than the fly wire offers! Finally, a very light wipe over with a slightly damp sponge can help soften and soothe all of your edges and dags! Trimming thrown work: If you are planning to trim (or turn) your thrown work (and you should be), make sure you bag it well – your work should be leather hard to almost dry for easiest trimming. Use this step to finish the work completely – use a metal kidney to polish the surface, or a slightly damp sponge to give a freshly thrown look. Wipe the sponge around the rim after trimming, and check the inside of the pot for dags! Trimming slip cast work: Usually I will trim the rims of your work on the wheel the following day to make that stage easier, however you will still need to check your work for lumps and bumps. Last but not least – check that your name is still clearly on the bottom of your work. Step Five – Bisque Firing When the work is completely dry it can go into the bisque kiln. The bisque kiln is fired to 1000°C. This process burns off the water in the clay as well as some of the chemically bound water. The structure of the clay is not altered that much at this temperature. Inside the bisque kiln, the work is stacked a little, small bowl inside a larger bowl and onto a heavy plate. Smaller items like decorations or drink coasters might get stacked several high. Consideration is paid to the weight of the stack and shape of the work. A bisque kiln can fire about one and a half times the amount of work that the glaze kiln can fire. The firing takes about 10 hours to complete the cycle and about two days to cool down. Once it has been emptied the work is placed in the glaze room ready for you to decorate! Step Six – Glazing Decorating your work with colour can be a lot of fun – and time consuming! There are three main options for surface treatment at this stage: Oxide Washes Underglazes Glazes Washes and underglazes do not “glaze” the work – It will still need a layer of glaze to fully seal the clay (washes don’t need glaze on surfaces not designed for food or liquid as they can gloss up a little on their own). Underglazes are stable colourants that turn out pretty much how they look in the jar. They can be mixed with each other to form other colours and can be used like water colours to paint onto your work. Mostly they should have a clear glaze on top to seal them. Oxides are a different species – the pink oxide (cobalt) wash turns out bright blue for instance. They don’t always need a glaze on top, and some glazes can change the colour of the wash! The glazes need no other “glaze” on top! Be careful of unknown glaze interactions – you can put any combination of glaze in a bowl or on a plate, but only a single glaze on the outside of any vertical surface! Glazes are a chemical reaction under heat. We don’t know the exact chemicals in the Mayco glazes we use. I can guess by the way they interact with each other, however, on the whole, you need to test every idea you have, and not run the test on a vertical surface! Simply put, glaze is a layer of glass like substance that bonds with the clay underneath. Clay is made of silica, alumina and water. Glaze is made of mostly silica. Silica has a melting point of 1700°C and we fire to 1240°C. The silica requires a “flux” to help it melt at the lower temperature. Fluxes can be all sorts of chemicals – a common one is calcium – calcium has a melting point of 2500°C, however, together they both melt at a much lower temperature! Colourants are metal oxides like cobalt (blue), chrome (green through black), copper (green, blue, even red!), manganese (black, purple and pink) iron (red brown), etc. Different chemicals in the glaze can have dramatic effects. for example, barium carbonate (which we don’t use) turns manganese bright pink! Other elements can turn manganese dioxide brown, blue, purple and reddish brown. Manganese dioxide is a flux in and of itself as well. So, glazes that get their black and purple colours, often interact with other glazes and RUN! Our mirror black is a good example – it mixes really well with many glazes because it fluxes them – causes them to melt faster. It will also bring out many beautiful colours in the glazes because it’s black colouring most definitely comes from manganese dioxide! Glaze chemistry is a whole subject on it’s own! We use commercial Mayco glazes on purpose – for their huge range of colour possibilities, stability, cool interactions, artistic freedom with the ability to easily brush the glazes on and ease of use. We currently have almost 50 glazes on hand! A major project is to test the interactions of all glazes with each other. That is 2,500 test tiles!!!! I’m going to make the wall behind the wheels the feature wall of pretty colours! Step Seven – Glaze (Gloss or sometimes called “Glost”) Firing Most of the time this is the final stage of making your creation (but not always!) The glaze kiln goes to 1240°C. This is called cone 6, or midrange. It is the low end of stoneware temperatures. Stoneware clays and glazes are typically fired at cone 8 – 10, that is 1260 – 1290°C. The energy requirement to go from 1240°C to 1280°C is almost a 30% more! Our clay is formulated to vitrify (mature, turn “glass-like”) at 1240°, as are our glazes. A glaze kiln take around 12 hours to reach temperature and two to three days to cool down. Sometimes a third firing process is required – this is for decoration that is added to work after the glaze firing. For example – adding precious metals and lustres. this firing temperature is usually around 600 – 800°C depending upon the techniques being used. There are many students interested in gold and silver trims – we will be doing this third type of firing soon! After firing your work will be in the student finished work shelves. Remember to pay for it before you head out the door! There is a small extra charge for using porcelain clay (it’s more than twice the price of regular clay), and for any third firing process! Once your work has been fired it can not turn back into clay for millennia – so don’t fire it if you don’t like it! Put it in the bucket for recycling. https://firebirdstudios.com.au/the-process-of-making-pottery/ This bowl is an example of kitchenware used in the 19th century and still in use today.Bowl white ceramic plain that has two sets of edging around lip. Inside bowl has plaster designed to look like cooking mixture.flagstaff hill, warrnambool, shipwrecked-coast, flagstaff-hill, flagstaff-hill-maritime-museum, maritime-museum, shipwreck-coast, flagstaff-hill-maritime-village, kitchen equipment, ceramic -
 Flagstaff Hill Maritime Museum and Village
Domestic object - Bowl, J & G Meakin, Late 19th or early 20th Century
The Process of Making Pottery Decorating, Firing, Glazing, Making, Technical There is a rhythm and flow to clay. It can’t be done all at once! Even the making process! It can take weeks to get everything done, especially if you can only work on your pottery once a week! Even though we have three hour classes, it’s often just not enough time! Here is an overview of some of the processes so you have a bit more grasp on some of the technical stuff! Step One – Design There are SO many ideas out there for making stuff in clay! From delicate porcelain jewellery, through to heavy sculptural work and everything in between. Deciding your direction is sometimes not that easy – when you first start, try everything, you will naturally gravitate to the style that you enjoy! The options and variations are endless and can get a wee bit overwhelming too! Check in with me before you start to ensure your ideas will work, what order you might do things, how you could achieve the look you are seeking and any other technical data required! Step Two – Making Clay is thixotropic. This means that as you work with it, the clay first gets sloppier and wetter, before is begins to dry in the atmosphere. For most things, you simply can’t do all parts of the project at once. An example of work order might look like: Get last weeks work out from the shelves Prepare clay for today’s work – roll your clay, prepare balls for throwing, make the first stage of a pinch pot) Clean up last week’s work and put it on the shelf for bisque firing Check that you have any glazing to do – and do enough of it that you will have time to finish your main project Do the next step of your next project – there might be a further step that can’t be complete immediately, in that case, wrap your work well and put onto the shelves. Letting your work rest for a while can really help keep your work clean and professional looking. Many things require bagging under plastic to keep it ready for work the next week – put your name on the outside of the bag so you can find your work easily. We have stickers and markers. Consider how you want to decorate your work – coloured slip can be applied at a fairly wet stage (remembering that it will make your work even wetter!). Trying to apply slip to dry clay won’t work! If you want to do sgraffito – you will need to keep the work leather hard (a state of dryness where you can still work the clay with a little effort and a little water and care). Step Three – Drying Most of the time your work can go into the rack uncovered to let it dry out for the following week. If you want to continue forming or shaping you will need to double bag your work – put your work on a suitable sized bat and put the bat in a bag so the base of the bag is under the bat, then put another bag over the top of the work and tuck the top of the bag under the bat. If you want to trim (or turn) your thrown work the following week, it should also be double bagged. If your work is large, delicate, or of uneven thicknesses, you should lightly cover your work for drying. When considering the drying process, bare in mind the weather, humidity and wind! The hotter and dryer, the faster things dry and work can dry unevenly in the shelves – this can lead to cracking – another time to lightly cover your work for drying. Step Four – Trimming and Cleaning Up Your work is dry! It is called greenware now and it is at it’s most fragile! Handle everything with two hands. I often refer to soft hands – keep everything gentle and with your fingers spread as much as possible. Try to not pick up things like plates too much, and always with both hands! Before your work can be bisque fired it should be “cleaned up”. You work won’t go into the kiln if it has sharp edges – when glazed, sharp edges turn into razor blades! Use a piece of fly wire to rub the work all over – this will scratch a little so be light handed. Use a knife or metal kidney to scrape any areas that require a bit more dynamic treatment than the fly wire offers! Finally, a very light wipe over with a slightly damp sponge can help soften and soothe all of your edges and dags! Trimming thrown work: If you are planning to trim (or turn) your thrown work (and you should be), make sure you bag it well – your work should be leather hard to almost dry for easiest trimming. Use this step to finish the work completely – use a metal kidney to polish the surface, or a slightly damp sponge to give a freshly thrown look. Wipe the sponge around the rim after trimming, and check the inside of the pot for dags! Trimming slip cast work: Usually I will trim the rims of your work on the wheel the following day to make that stage easier, however you will still need to check your work for lumps and bumps. Last but not least – check that your name is still clearly on the bottom of your work. Step Five – Bisque Firing When the work is completely dry it can go into the bisque kiln. The bisque kiln is fired to 1000°C. This process burns off the water in the clay as well as some of the chemically bound water. The structure of the clay is not altered that much at this temperature. Inside the bisque kiln, the work is stacked a little, small bowl inside a larger bowl and onto a heavy plate. Smaller items like decorations or drink coasters might get stacked several high. Consideration is paid to the weight of the stack and shape of the work. A bisque kiln can fire about one and a half times the amount of work that the glaze kiln can fire. The firing takes about 10 hours to complete the cycle and about two days to cool down. Once it has been emptied the work is placed in the glaze room ready for you to decorate! Step Six – Glazing Decorating your work with colour can be a lot of fun – and time consuming! There are three main options for surface treatment at this stage: Oxide Washes Underglazes Glazes Washes and underglazes do not “glaze” the work – It will still need a layer of glaze to fully seal the clay (washes don’t need glaze on surfaces not designed for food or liquid as they can gloss up a little on their own). Underglazes are stable colourants that turn out pretty much how they look in the jar. They can be mixed with each other to form other colours and can be used like water colours to paint onto your work. Mostly they should have a clear glaze on top to seal them. Oxides are a different species – the pink oxide (cobalt) wash turns out bright blue for instance. They don’t always need a glaze on top, and some glazes can change the colour of the wash! The glazes need no other “glaze” on top! Be careful of unknown glaze interactions – you can put any combination of glaze in a bowl or on a plate, but only a single glaze on the outside of any vertical surface! Glazes are a chemical reaction under heat. We don’t know the exact chemicals in the Mayco glazes we use. I can guess by the way they interact with each other, however, on the whole, you need to test every idea you have, and not run the test on a vertical surface! Simply put, glaze is a layer of glass like substance that bonds with the clay underneath. Clay is made of silica, alumina and water. Glaze is made of mostly silica. Silica has a melting point of 1700°C and we fire to 1240°C. The silica requires a “flux” to help it melt at the lower temperature. Fluxes can be all sorts of chemicals – a common one is calcium – calcium has a melting point of 2500°C, however, together they both melt at a much lower temperature! Colourants are metal oxides like cobalt (blue), chrome (green through black), copper (green, blue, even red!), manganese (black, purple and pink) iron (red brown), etc. Different chemicals in the glaze can have dramatic effects. for example, barium carbonate (which we don’t use) turns manganese bright pink! Other elements can turn manganese dioxide brown, blue, purple and reddish brown. Manganese dioxide is a flux in and of itself as well. So, glazes that get their black and purple colours, often interact with other glazes and RUN! Our mirror black is a good example – it mixes really well with many glazes because it fluxes them – causes them to melt faster. It will also bring out many beautiful colours in the glazes because it’s black colouring most definitely comes from manganese dioxide! Glaze chemistry is a whole subject on it’s own! We use commercial Mayco glazes on purpose – for their huge range of colour possibilities, stability, cool interactions, artistic freedom with the ability to easily brush the glazes on and ease of use. We currently have almost 50 glazes on hand! A major project is to test the interactions of all glazes with each other. That is 2,500 test tiles!!!! I’m going to make the wall behind the wheels the feature wall of pretty colours! Step Seven – Glaze (Gloss or sometimes called “Glost”) Firing Most of the time this is the final stage of making your creation (but not always!) The glaze kiln goes to 1240°C. This is called cone 6, or midrange. It is the low end of stoneware temperatures. Stoneware clays and glazes are typically fired at cone 8 – 10, that is 1260 – 1290°C. The energy requirement to go from 1240°C to 1280°C is almost a 30% more! Our clay is formulated to vitrify (mature, turn “glass-like”) at 1240°, as are our glazes. A glaze kiln take around 12 hours to reach temperature and two to three days to cool down. Sometimes a third firing process is required – this is for decoration that is added to work after the glaze firing. For example – adding precious metals and lustres. this firing temperature is usually around 600 – 800°C depending upon the techniques being used. There are many students interested in gold and silver trims – we will be doing this third type of firing soon! After firing your work will be in the student finished work shelves. Remember to pay for it before you head out the door! There is a small extra charge for using porcelain clay (it’s more than twice the price of regular clay), and for any third firing process! Once your work has been fired it can not turn back into clay for millennia – so don’t fire it if you don’t like it! Put it in the bucket for recycling. https://firebirdstudios.com.au/the-process-of-making-pottery/This bowl was made by renowned pottery company J & G Meakin of England. The firm was established in the mid-1800's. The bowl is an example of kitchenware used in the 19th century and still in use today.Bowl; white ceramic, round and tapering inwards towards base. Made by J and G Meakin England.On base, 'Ironstone China Reg SOL 391413' with symbolflagstaff hill, flagstaff hill maritime museum and village, warrnambool, maritime museum, maritime village, great ocean road, shipwreck coast, mixing bowl, food preparation, j & g meakin, pottery, stoke-on-trent, kitchen equipment, ceramic -
 Flagstaff Hill Maritime Museum and Village
Domestic object - Plate
The Process of Making Pottery Decorating, Firing, Glazing, Making, Technical There is a rhythm and flow to clay. It can’t be done all at once! Even the making process! It can take weeks to get everything done, especially if you can only work on your pottery once a week! Even though we have three hour classes, it’s often just not enough time! Here is an overview of some of the processes so you have a bit more grasp on some of the technical stuff! Step One – Design There are SO many ideas out there for making stuff in clay! From delicate porcelain jewellery, through to heavy sculptural work and everything in between. Deciding your direction is sometimes not that easy – when you first start, try everything, you will naturally gravitate to the style that you enjoy! The options and variations are endless and can get a wee bit overwhelming too! Check in with me before you start to ensure your ideas will work, what order you might do things, how you could achieve the look you are seeking and any other technical data required! Step Two – Making Clay is thixotropic. This means that as you work with it, the clay first gets sloppier and wetter, before is begins to dry in the atmosphere. For most things, you simply can’t do all parts of the project at once. An example of work order might look like: Get last weeks work out from the shelves Prepare clay for today’s work – roll your clay, prepare balls for throwing, make the first stage of a pinch pot) Clean up last week’s work and put it on the shelf for bisque firing Check that you have any glazing to do – and do enough of it that you will have time to finish your main project Do the next step of your next project – there might be a further step that can’t be complete immediately, in that case, wrap your work well and put onto the shelves. Letting your work rest for a while can really help keep your work clean and professional looking. Many things require bagging under plastic to keep it ready for work the next week – put your name on the outside of the bag so you can find your work easily. We have stickers and markers. Consider how you want to decorate your work – coloured slip can be applied at a fairly wet stage (remembering that it will make your work even wetter!). Trying to apply slip to dry clay won’t work! If you want to do sgraffito – you will need to keep the work leather hard (a state of dryness where you can still work the clay with a little effort and a little water and care). Step Three – Drying Most of the time your work can go into the rack uncovered to let it dry out for the following week. If you want to continue forming or shaping you will need to double bag your work – put your work on a suitable sized bat and put the bat in a bag so the base of the bag is under the bat, then put another bag over the top of the work and tuck the top of the bag under the bat. If you want to trim (or turn) your thrown work the following week, it should also be double bagged. If your work is large, delicate, or of uneven thicknesses, you should lightly cover your work for drying. When considering the drying process, bare in mind the weather, humidity and wind! The hotter and dryer, the faster things dry and work can dry unevenly in the shelves – this can lead to cracking – another time to lightly cover your work for drying. Step Four – Trimming and Cleaning Up Your work is dry! It is called greenware now and it is at it’s most fragile! Handle everything with two hands. I often refer to soft hands – keep everything gentle and with your fingers spread as much as possible. Try to not pick up things like plates too much, and always with both hands! Before your work can be bisque fired it should be “cleaned up”. You work won’t go into the kiln if it has sharp edges – when glazed, sharp edges turn into razor blades! Use a piece of fly wire to rub the work all over – this will scratch a little so be light handed. Use a knife or metal kidney to scrape any areas that require a bit more dynamic treatment than the fly wire offers! Finally, a very light wipe over with a slightly damp sponge can help soften and soothe all of your edges and dags! Trimming thrown work: If you are planning to trim (or turn) your thrown work (and you should be), make sure you bag it well – your work should be leather hard to almost dry for easiest trimming. Use this step to finish the work completely – use a metal kidney to polish the surface, or a slightly damp sponge to give a freshly thrown look. Wipe the sponge around the rim after trimming, and check the inside of the pot for dags! Trimming slip cast work: Usually I will trim the rims of your work on the wheel the following day to make that stage easier, however you will still need to check your work for lumps and bumps. Last but not least – check that your name is still clearly on the bottom of your work. Step Five – Bisque Firing When the work is completely dry it can go into the bisque kiln. The bisque kiln is fired to 1000°C. This process burns off the water in the clay as well as some of the chemically bound water. The structure of the clay is not altered that much at this temperature. Inside the bisque kiln, the work is stacked a little, small bowl inside a larger bowl and onto a heavy plate. Smaller items like decorations or drink coasters might get stacked several high. Consideration is paid to the weight of the stack and shape of the work. A bisque kiln can fire about one and a half times the amount of work that the glaze kiln can fire. The firing takes about 10 hours to complete the cycle and about two days to cool down. Once it has been emptied the work is placed in the glaze room ready for you to decorate! Step Six – Glazing Decorating your work with colour can be a lot of fun – and time consuming! There are three main options for surface treatment at this stage: Oxide Washes Underglazes Glazes Washes and underglazes do not “glaze” the work – It will still need a layer of glaze to fully seal the clay (washes don’t need glaze on surfaces not designed for food or liquid as they can gloss up a little on their own). Underglazes are stable colourants that turn out pretty much how they look in the jar. They can be mixed with each other to form other colours and can be used like water colours to paint onto your work. Mostly they should have a clear glaze on top to seal them. Oxides are a different species – the pink oxide (cobalt) wash turns out bright blue for instance. They don’t always need a glaze on top, and some glazes can change the colour of the wash! The glazes need no other “glaze” on top! Be careful of unknown glaze interactions – you can put any combination of glaze in a bowl or on a plate, but only a single glaze on the outside of any vertical surface! Glazes are a chemical reaction under heat. We don’t know the exact chemicals in the Mayco glazes we use. I can guess by the way they interact with each other, however, on the whole, you need to test every idea you have, and not run the test on a vertical surface! Simply put, glaze is a layer of glass like substance that bonds with the clay underneath. Clay is made of silica, alumina and water. Glaze is made of mostly silica. Silica has a melting point of 1700°C and we fire to 1240°C. The silica requires a “flux” to help it melt at the lower temperature. Fluxes can be all sorts of chemicals – a common one is calcium – calcium has a melting point of 2500°C, however, together they both melt at a much lower temperature! Colourants are metal oxides like cobalt (blue), chrome (green through black), copper (green, blue, even red!), manganese (black, purple and pink) iron (red brown), etc. Different chemicals in the glaze can have dramatic effects. for example, barium carbonate (which we don’t use) turns manganese bright pink! Other elements can turn manganese dioxide brown, blue, purple and reddish brown. Manganese dioxide is a flux in and of itself as well. So, glazes that get their black and purple colours, often interact with other glazes and RUN! Our mirror black is a good example – it mixes really well with many glazes because it fluxes them – causes them to melt faster. It will also bring out many beautiful colours in the glazes because it’s black colouring most definitely comes from manganese dioxide! Glaze chemistry is a whole subject on it’s own! We use commercial Mayco glazes on purpose – for their huge range of colour possibilities, stability, cool interactions, artistic freedom with the ability to easily brush the glazes on and ease of use. We currently have almost 50 glazes on hand! A major project is to test the interactions of all glazes with each other. That is 2,500 test tiles!!!! I’m going to make the wall behind the wheels the feature wall of pretty colours! Step Seven – Glaze (Gloss or sometimes called “Glost”) Firing Most of the time this is the final stage of making your creation (but not always!) The glaze kiln goes to 1240°C. This is called cone 6, or midrange. It is the low end of stoneware temperatures. Stoneware clays and glazes are typically fired at cone 8 – 10, that is 1260 – 1290°C. The energy requirement to go from 1240°C to 1280°C is almost a 30% more! Our clay is formulated to vitrify (mature, turn “glass-like”) at 1240°, as are our glazes. A glaze kiln take around 12 hours to reach temperature and two to three days to cool down. Sometimes a third firing process is required – this is for decoration that is added to work after the glaze firing. For example – adding precious metals and lustres. this firing temperature is usually around 600 – 800°C depending upon the techniques being used. There are many students interested in gold and silver trims – we will be doing this third type of firing soon! After firing your work will be in the student finished work shelves. Remember to pay for it before you head out the door! There is a small extra charge for using porcelain clay (it’s more than twice the price of regular clay), and for any third firing process! Once your work has been fired it can not turn back into clay for millennia – so don’t fire it if you don’t like it! Put it in the bucket for recycling. https://firebirdstudios.com.au/the-process-of-making-pottery/Ceramics have evolved over thousands of years.White earthenware dinner plate. Crazing evident all over.Backstamped ‘Made in England S LTD’flagstaff hill, warrnambool, shipwrecked-coast, flagstaff-hill, flagstaff-hill-maritime-museum, maritime-museum, shipwreck-coast, flagstaff-hill-maritime-village, ceramics, tableware -
 Flagstaff Hill Maritime Museum and Village
Domestic object - Plate, Johnson Bros
The Process of Making Pottery Decorating, Firing, Glazing, Making, Technical There is a rhythm and flow to clay. It can’t be done all at once! Even the making process! It can take weeks to get everything done, especially if you can only work on your pottery once a week! Even though we have three hour classes, it’s often just not enough time! Here is an overview of some of the processes so you have a bit more grasp on some of the technical stuff! Step One – Design There are SO many ideas out there for making stuff in clay! From delicate porcelain jewellery, through to heavy sculptural work and everything in between. Deciding your direction is sometimes not that easy – when you first start, try everything, you will naturally gravitate to the style that you enjoy! The options and variations are endless and can get a wee bit overwhelming too! Check in with me before you start to ensure your ideas will work, what order you might do things, how you could achieve the look you are seeking and any other technical data required! Step Two – Making Clay is thixotropic. This means that as you work with it, the clay first gets sloppier and wetter, before is begins to dry in the atmosphere. For most things, you simply can’t do all parts of the project at once. An example of work order might look like: Get last weeks work out from the shelves Prepare clay for today’s work – roll your clay, prepare balls for throwing, make the first stage of a pinch pot) Clean up last week’s work and put it on the shelf for bisque firing Check that you have any glazing to do – and do enough of it that you will have time to finish your main project Do the next step of your next project – there might be a further step that can’t be complete immediately, in that case, wrap your work well and put onto the shelves. Letting your work rest for a while can really help keep your work clean and professional looking. Many things require bagging under plastic to keep it ready for work the next week – put your name on the outside of the bag so you can find your work easily. We have stickers and markers. Consider how you want to decorate your work – coloured slip can be applied at a fairly wet stage (remembering that it will make your work even wetter!). Trying to apply slip to dry clay won’t work! If you want to do sgraffito – you will need to keep the work leather hard (a state of dryness where you can still work the clay with a little effort and a little water and care). Step Three – Drying Most of the time your work can go into the rack uncovered to let it dry out for the following week. If you want to continue forming or shaping you will need to double bag your work – put your work on a suitable sized bat and put the bat in a bag so the base of the bag is under the bat, then put another bag over the top of the work and tuck the top of the bag under the bat. If you want to trim (or turn) your thrown work the following week, it should also be double bagged. If your work is large, delicate, or of uneven thicknesses, you should lightly cover your work for drying. When considering the drying process, bare in mind the weather, humidity and wind! The hotter and dryer, the faster things dry and work can dry unevenly in the shelves – this can lead to cracking – another time to lightly cover your work for drying. Step Four – Trimming and Cleaning Up Your work is dry! It is called greenware now and it is at it’s most fragile! Handle everything with two hands. I often refer to soft hands – keep everything gentle and with your fingers spread as much as possible. Try to not pick up things like plates too much, and always with both hands! Before your work can be bisque fired it should be “cleaned up”. You work won’t go into the kiln if it has sharp edges – when glazed, sharp edges turn into razor blades! Use a piece of fly wire to rub the work all over – this will scratch a little so be light handed. Use a knife or metal kidney to scrape any areas that require a bit more dynamic treatment than the fly wire offers! Finally, a very light wipe over with a slightly damp sponge can help soften and soothe all of your edges and dags! Trimming thrown work: If you are planning to trim (or turn) your thrown work (and you should be), make sure you bag it well – your work should be leather hard to almost dry for easiest trimming. Use this step to finish the work completely – use a metal kidney to polish the surface, or a slightly damp sponge to give a freshly thrown look. Wipe the sponge around the rim after trimming, and check the inside of the pot for dags! Trimming slip cast work: Usually I will trim the rims of your work on the wheel the following day to make that stage easier, however you will still need to check your work for lumps and bumps. Last but not least – check that your name is still clearly on the bottom of your work. Step Five – Bisque Firing When the work is completely dry it can go into the bisque kiln. The bisque kiln is fired to 1000°C. This process burns off the water in the clay as well as some of the chemically bound water. The structure of the clay is not altered that much at this temperature. Inside the bisque kiln, the work is stacked a little, small bowl inside a larger bowl and onto a heavy plate. Smaller items like decorations or drink coasters might get stacked several high. Consideration is paid to the weight of the stack and shape of the work. A bisque kiln can fire about one and a half times the amount of work that the glaze kiln can fire. The firing takes about 10 hours to complete the cycle and about two days to cool down. Once it has been emptied the work is placed in the glaze room ready for you to decorate! Step Six – Glazing Decorating your work with colour can be a lot of fun – and time consuming! There are three main options for surface treatment at this stage: Oxide Washes Underglazes Glazes Washes and underglazes do not “glaze” the work – It will still need a layer of glaze to fully seal the clay (washes don’t need glaze on surfaces not designed for food or liquid as they can gloss up a little on their own). Underglazes are stable colourants that turn out pretty much how they look in the jar. They can be mixed with each other to form other colours and can be used like water colours to paint onto your work. Mostly they should have a clear glaze on top to seal them. Oxides are a different species – the pink oxide (cobalt) wash turns out bright blue for instance. They don’t always need a glaze on top, and some glazes can change the colour of the wash! The glazes need no other “glaze” on top! Be careful of unknown glaze interactions – you can put any combination of glaze in a bowl or on a plate, but only a single glaze on the outside of any vertical surface! Glazes are a chemical reaction under heat. We don’t know the exact chemicals in the Mayco glazes we use. I can guess by the way they interact with each other, however, on the whole, you need to test every idea you have, and not run the test on a vertical surface! Simply put, glaze is a layer of glass like substance that bonds with the clay underneath. Clay is made of silica, alumina and water. Glaze is made of mostly silica. Silica has a melting point of 1700°C and we fire to 1240°C. The silica requires a “flux” to help it melt at the lower temperature. Fluxes can be all sorts of chemicals – a common one is calcium – calcium has a melting point of 2500°C, however, together they both melt at a much lower temperature! Colourants are metal oxides like cobalt (blue), chrome (green through black), copper (green, blue, even red!), manganese (black, purple and pink) iron (red brown), etc. Different chemicals in the glaze can have dramatic effects. for example, barium carbonate (which we don’t use) turns manganese bright pink! Other elements can turn manganese dioxide brown, blue, purple and reddish brown. Manganese dioxide is a flux in and of itself as well. So, glazes that get their black and purple colours, often interact with other glazes and RUN! Our mirror black is a good example – it mixes really well with many glazes because it fluxes them – causes them to melt faster. It will also bring out many beautiful colours in the glazes because it’s black colouring most definitely comes from manganese dioxide! Glaze chemistry is a whole subject on it’s own! We use commercial Mayco glazes on purpose – for their huge range of colour possibilities, stability, cool interactions, artistic freedom with the ability to easily brush the glazes on and ease of use. We currently have almost 50 glazes on hand! A major project is to test the interactions of all glazes with each other. That is 2,500 test tiles!!!! I’m going to make the wall behind the wheels the feature wall of pretty colours! Step Seven – Glaze (Gloss or sometimes called “Glost”) Firing Most of the time this is the final stage of making your creation (but not always!) The glaze kiln goes to 1240°C. This is called cone 6, or midrange. It is the low end of stoneware temperatures. Stoneware clays and glazes are typically fired at cone 8 – 10, that is 1260 – 1290°C. The energy requirement to go from 1240°C to 1280°C is almost a 30% more! Our clay is formulated to vitrify (mature, turn “glass-like”) at 1240°, as are our glazes. A glaze kiln take around 12 hours to reach temperature and two to three days to cool down. Sometimes a third firing process is required – this is for decoration that is added to work after the glaze firing. For example – adding precious metals and lustres. this firing temperature is usually around 600 – 800°C depending upon the techniques being used. There are many students interested in gold and silver trims – we will be doing this third type of firing soon! After firing your work will be in the student finished work shelves. Remember to pay for it before you head out the door! There is a small extra charge for using porcelain clay (it’s more than twice the price of regular clay), and for any third firing process! Once your work has been fired it can not turn back into clay for millennia – so don’t fire it if you don’t like it! Put it in the bucket for recycling. https://firebirdstudios.com.au/the-process-of-making-pottery/Ceramics have evolved over thousands of years.A white earthenware side plate with a gadroon edge. Has water marks and chips on front.‘Johnson Bros England Reg No 15587’flagstaff hill, warrnambool, shipwrecked-coast, flagstaff-hill, flagstaff-hill-maritime-museum, maritime-museum, shipwreck-coast, flagstaff-hill-maritime-village, johnson bros, ceramics, tableware -
 Flagstaff Hill Maritime Museum and Village
Domestic object - Plate, Alfred Meakin
The Process of Making Pottery Decorating, Firing, Glazing, Making, Technical There is a rhythm and flow to clay. It can’t be done all at once! Even the making process! It can take weeks to get everything done, especially if you can only work on your pottery once a week! Even though we have three hour classes, it’s often just not enough time! Here is an overview of some of the processes so you have a bit more grasp on some of the technical stuff! Step One – Design There are SO many ideas out there for making stuff in clay! From delicate porcelain jewellery, through to heavy sculptural work and everything in between. Deciding your direction is sometimes not that easy – when you first start, try everything, you will naturally gravitate to the style that you enjoy! The options and variations are endless and can get a wee bit overwhelming too! Check in with me before you start to ensure your ideas will work, what order you might do things, how you could achieve the look you are seeking and any other technical data required! Step Two – Making Clay is thixotropic. This means that as you work with it, the clay first gets sloppier and wetter, before is begins to dry in the atmosphere. For most things, you simply can’t do all parts of the project at once. An example of work order might look like: Get last weeks work out from the shelves Prepare clay for today’s work – roll your clay, prepare balls for throwing, make the first stage of a pinch pot) Clean up last week’s work and put it on the shelf for bisque firing Check that you have any glazing to do – and do enough of it that you will have time to finish your main project Do the next step of your next project – there might be a further step that can’t be complete immediately, in that case, wrap your work well and put onto the shelves. Letting your work rest for a while can really help keep your work clean and professional looking. Many things require bagging under plastic to keep it ready for work the next week – put your name on the outside of the bag so you can find your work easily. We have stickers and markers. Consider how you want to decorate your work – coloured slip can be applied at a fairly wet stage (remembering that it will make your work even wetter!). Trying to apply slip to dry clay won’t work! If you want to do sgraffito – you will need to keep the work leather hard (a state of dryness where you can still work the clay with a little effort and a little water and care). Step Three – Drying Most of the time your work can go into the rack uncovered to let it dry out for the following week. If you want to continue forming or shaping you will need to double bag your work – put your work on a suitable sized bat and put the bat in a bag so the base of the bag is under the bat, then put another bag over the top of the work and tuck the top of the bag under the bat. If you want to trim (or turn) your thrown work the following week, it should also be double bagged. If your work is large, delicate, or of uneven thicknesses, you should lightly cover your work for drying. When considering the drying process, bare in mind the weather, humidity and wind! The hotter and dryer, the faster things dry and work can dry unevenly in the shelves – this can lead to cracking – another time to lightly cover your work for drying. Step Four – Trimming and Cleaning Up Your work is dry! It is called greenware now and it is at it’s most fragile! Handle everything with two hands. I often refer to soft hands – keep everything gentle and with your fingers spread as much as possible. Try to not pick up things like plates too much, and always with both hands! Before your work can be bisque fired it should be “cleaned up”. You work won’t go into the kiln if it has sharp edges – when glazed, sharp edges turn into razor blades! Use a piece of fly wire to rub the work all over – this will scratch a little so be light handed. Use a knife or metal kidney to scrape any areas that require a bit more dynamic treatment than the fly wire offers! Finally, a very light wipe over with a slightly damp sponge can help soften and soothe all of your edges and dags! Trimming thrown work: If you are planning to trim (or turn) your thrown work (and you should be), make sure you bag it well – your work should be leather hard to almost dry for easiest trimming. Use this step to finish the work completely – use a metal kidney to polish the surface, or a slightly damp sponge to give a freshly thrown look. Wipe the sponge around the rim after trimming, and check the inside of the pot for dags! Trimming slip cast work: Usually I will trim the rims of your work on the wheel the following day to make that stage easier, however you will still need to check your work for lumps and bumps. Last but not least – check that your name is still clearly on the bottom of your work. Step Five – Bisque Firing When the work is completely dry it can go into the bisque kiln. The bisque kiln is fired to 1000°C. This process burns off the water in the clay as well as some of the chemically bound water. The structure of the clay is not altered that much at this temperature. Inside the bisque kiln, the work is stacked a little, small bowl inside a larger bowl and onto a heavy plate. Smaller items like decorations or drink coasters might get stacked several high. Consideration is paid to the weight of the stack and shape of the work. A bisque kiln can fire about one and a half times the amount of work that the glaze kiln can fire. The firing takes about 10 hours to complete the cycle and about two days to cool down. Once it has been emptied the work is placed in the glaze room ready for you to decorate! Step Six – Glazing Decorating your work with colour can be a lot of fun – and time consuming! There are three main options for surface treatment at this stage: Oxide Washes Underglazes Glazes Washes and underglazes do not “glaze” the work – It will still need a layer of glaze to fully seal the clay (washes don’t need glaze on surfaces not designed for food or liquid as they can gloss up a little on their own). Underglazes are stable colourants that turn out pretty much how they look in the jar. They can be mixed with each other to form other colours and can be used like water colours to paint onto your work. Mostly they should have a clear glaze on top to seal them. Oxides are a different species – the pink oxide (cobalt) wash turns out bright blue for instance. They don’t always need a glaze on top, and some glazes can change the colour of the wash! The glazes need no other “glaze” on top! Be careful of unknown glaze interactions – you can put any combination of glaze in a bowl or on a plate, but only a single glaze on the outside of any vertical surface! Glazes are a chemical reaction under heat. We don’t know the exact chemicals in the Mayco glazes we use. I can guess by the way they interact with each other, however, on the whole, you need to test every idea you have, and not run the test on a vertical surface! Simply put, glaze is a layer of glass like substance that bonds with the clay underneath. Clay is made of silica, alumina and water. Glaze is made of mostly silica. Silica has a melting point of 1700°C and we fire to 1240°C. The silica requires a “flux” to help it melt at the lower temperature. Fluxes can be all sorts of chemicals – a common one is calcium – calcium has a melting point of 2500°C, however, together they both melt at a much lower temperature! Colourants are metal oxides like cobalt (blue), chrome (green through black), copper (green, blue, even red!), manganese (black, purple and pink) iron (red brown), etc. Different chemicals in the glaze can have dramatic effects. for example, barium carbonate (which we don’t use) turns manganese bright pink! Other elements can turn manganese dioxide brown, blue, purple and reddish brown. Manganese dioxide is a flux in and of itself as well. So, glazes that get their black and purple colours, often interact with other glazes and RUN! Our mirror black is a good example – it mixes really well with many glazes because it fluxes them – causes them to melt faster. It will also bring out many beautiful colours in the glazes because it’s black colouring most definitely comes from manganese dioxide! Glaze chemistry is a whole subject on it’s own! We use commercial Mayco glazes on purpose – for their huge range of colour possibilities, stability, cool interactions, artistic freedom with the ability to easily brush the glazes on and ease of use. We currently have almost 50 glazes on hand! A major project is to test the interactions of all glazes with each other. That is 2,500 test tiles!!!! I’m going to make the wall behind the wheels the feature wall of pretty colours! Step Seven – Glaze (Gloss or sometimes called “Glost”) Firing Most of the time this is the final stage of making your creation (but not always!) The glaze kiln goes to 1240°C. This is called cone 6, or midrange. It is the low end of stoneware temperatures. Stoneware clays and glazes are typically fired at cone 8 – 10, that is 1260 – 1290°C. The energy requirement to go from 1240°C to 1280°C is almost a 30% more! Our clay is formulated to vitrify (mature, turn “glass-like”) at 1240°, as are our glazes. A glaze kiln take around 12 hours to reach temperature and two to three days to cool down. Sometimes a third firing process is required – this is for decoration that is added to work after the glaze firing. For example – adding precious metals and lustres. this firing temperature is usually around 600 – 800°C depending upon the techniques being used. There are many students interested in gold and silver trims – we will be doing this third type of firing soon! After firing your work will be in the student finished work shelves. Remember to pay for it before you head out the door! There is a small extra charge for using porcelain clay (it’s more than twice the price of regular clay), and for any third firing process! Once your work has been fired it can not turn back into clay for millennia – so don’t fire it if you don’t like it! Put it in the bucket for recycling. https://firebirdstudios.com.au/the-process-of-making-pottery/Ceramics have evolved over thousands of years.Earthenware dessert plate, cream colour. Made by Alfred Meakin, England. Backstamped ‘Alfred Meakin England’. flagstaff hill, warrnambool, shipwrecked-coast, flagstaff-hill, flagstaff-hill-maritime-museum, maritime-museum, shipwreck-coast, flagstaff-hill-maritime-village, alfred meakin, ceramics, earthenware, kitchenware -
 Flagstaff Hill Maritime Museum and Village
Domestic object - Jug
The Process of Making Pottery Decorating, Firing, Glazing, Making, Technical There is a rhythm and flow to clay. It can’t be done all at once! Even the making process! It can take weeks to get everything done, especially if you can only work on your pottery once a week! Even though we have three hour classes, it’s often just not enough time! Here is an overview of some of the processes so you have a bit more grasp on some of the technical stuff! Step One – Design There are SO many ideas out there for making stuff in clay! From delicate porcelain jewellery, through to heavy sculptural work and everything in between. Deciding your direction is sometimes not that easy – when you first start, try everything, you will naturally gravitate to the style that you enjoy! The options and variations are endless and can get a wee bit overwhelming too! Check in with me before you start to ensure your ideas will work, what order you might do things, how you could achieve the look you are seeking and any other technical data required! Step Two – Making Clay is thixotropic. This means that as you work with it, the clay first gets sloppier and wetter, before is begins to dry in the atmosphere. For most things, you simply can’t do all parts of the project at once. An example of work order might look like: Get last weeks work out from the shelves Prepare clay for today’s work – roll your clay, prepare balls for throwing, make the first stage of a pinch pot) Clean up last week’s work and put it on the shelf for bisque firing Check that you have any glazing to do – and do enough of it that you will have time to finish your main project Do the next step of your next project – there might be a further step that can’t be complete immediately, in that case, wrap your work well and put onto the shelves. Letting your work rest for a while can really help keep your work clean and professional looking. Many things require bagging under plastic to keep it ready for work the next week – put your name on the outside of the bag so you can find your work easily. We have stickers and markers. Consider how you want to decorate your work – coloured slip can be applied at a fairly wet stage (remembering that it will make your work even wetter!). Trying to apply slip to dry clay won’t work! If you want to do sgraffito – you will need to keep the work leather hard (a state of dryness where you can still work the clay with a little effort and a little water and care). Step Three – Drying Most of the time your work can go into the rack uncovered to let it dry out for the following week. If you want to continue forming or shaping you will need to double bag your work – put your work on a suitable sized bat and put the bat in a bag so the base of the bag is under the bat, then put another bag over the top of the work and tuck the top of the bag under the bat. If you want to trim (or turn) your thrown work the following week, it should also be double bagged. If your work is large, delicate, or of uneven thicknesses, you should lightly cover your work for drying. When considering the drying process, bare in mind the weather, humidity and wind! The hotter and dryer, the faster things dry and work can dry unevenly in the shelves – this can lead to cracking – another time to lightly cover your work for drying. Step Four – Trimming and Cleaning Up Your work is dry! It is called greenware now and it is at it’s most fragile! Handle everything with two hands. I often refer to soft hands – keep everything gentle and with your fingers spread as much as possible. Try to not pick up things like plates too much, and always with both hands! Before your work can be bisque fired it should be “cleaned up”. You work won’t go into the kiln if it has sharp edges – when glazed, sharp edges turn into razor blades! Use a piece of fly wire to rub the work all over – this will scratch a little so be light handed. Use a knife or metal kidney to scrape any areas that require a bit more dynamic treatment than the fly wire offers! Finally, a very light wipe over with a slightly damp sponge can help soften and soothe all of your edges and dags! Trimming thrown work: If you are planning to trim (or turn) your thrown work (and you should be), make sure you bag it well – your work should be leather hard to almost dry for easiest trimming. Use this step to finish the work completely – use a metal kidney to polish the surface, or a slightly damp sponge to give a freshly thrown look. Wipe the sponge around the rim after trimming, and check the inside of the pot for dags! Trimming slip cast work: Usually I will trim the rims of your work on the wheel the following day to make that stage easier, however you will still need to check your work for lumps and bumps. Last but not least – check that your name is still clearly on the bottom of your work. Step Five – Bisque Firing When the work is completely dry it can go into the bisque kiln. The bisque kiln is fired to 1000°C. This process burns off the water in the clay as well as some of the chemically bound water. The structure of the clay is not altered that much at this temperature. Inside the bisque kiln, the work is stacked a little, small bowl inside a larger bowl and onto a heavy plate. Smaller items like decorations or drink coasters might get stacked several high. Consideration is paid to the weight of the stack and shape of the work. A bisque kiln can fire about one and a half times the amount of work that the glaze kiln can fire. The firing takes about 10 hours to complete the cycle and about two days to cool down. Once it has been emptied the work is placed in the glaze room ready for you to decorate! Step Six – Glazing Decorating your work with colour can be a lot of fun – and time consuming! There are three main options for surface treatment at this stage: Oxide Washes Underglazes Glazes Washes and underglazes do not “glaze” the work – It will still need a layer of glaze to fully seal the clay (washes don’t need glaze on surfaces not designed for food or liquid as they can gloss up a little on their own). Underglazes are stable colourants that turn out pretty much how they look in the jar. They can be mixed with each other to form other colours and can be used like water colours to paint onto your work. Mostly they should have a clear glaze on top to seal them. Oxides are a different species – the pink oxide (cobalt) wash turns out bright blue for instance. They don’t always need a glaze on top, and some glazes can change the colour of the wash! The glazes need no other “glaze” on top! Be careful of unknown glaze interactions – you can put any combination of glaze in a bowl or on a plate, but only a single glaze on the outside of any vertical surface! Glazes are a chemical reaction under heat. We don’t know the exact chemicals in the Mayco glazes we use. I can guess by the way they interact with each other, however, on the whole, you need to test every idea you have, and not run the test on a vertical surface! Simply put, glaze is a layer of glass like substance that bonds with the clay underneath. Clay is made of silica, alumina and water. Glaze is made of mostly silica. Silica has a melting point of 1700°C and we fire to 1240°C. The silica requires a “flux” to help it melt at the lower temperature. Fluxes can be all sorts of chemicals – a common one is calcium – calcium has a melting point of 2500°C, however, together they both melt at a much lower temperature! Colourants are metal oxides like cobalt (blue), chrome (green through black), copper (green, blue, even red!), manganese (black, purple and pink) iron (red brown), etc. Different chemicals in the glaze can have dramatic effects. for example, barium carbonate (which we don’t use) turns manganese bright pink! Other elements can turn manganese dioxide brown, blue, purple and reddish brown. Manganese dioxide is a flux in and of itself as well. So, glazes that get their black and purple colours, often interact with other glazes and RUN! Our mirror black is a good example – it mixes really well with many glazes because it fluxes them – causes them to melt faster. It will also bring out many beautiful colours in the glazes because it’s black colouring most definitely comes from manganese dioxide! Glaze chemistry is a whole subject on it’s own! We use commercial Mayco glazes on purpose – for their huge range of colour possibilities, stability, cool interactions, artistic freedom with the ability to easily brush the glazes on and ease of use. We currently have almost 50 glazes on hand! A major project is to test the interactions of all glazes with each other. That is 2,500 test tiles!!!! I’m going to make the wall behind the wheels the feature wall of pretty colours! Step Seven – Glaze (Gloss or sometimes called “Glost”) Firing Most of the time this is the final stage of making your creation (but not always!) The glaze kiln goes to 1240°C. This is called cone 6, or midrange. It is the low end of stoneware temperatures. Stoneware clays and glazes are typically fired at cone 8 – 10, that is 1260 – 1290°C. The energy requirement to go from 1240°C to 1280°C is almost a 30% more! Our clay is formulated to vitrify (mature, turn “glass-like”) at 1240°, as are our glazes. A glaze kiln take around 12 hours to reach temperature and two to three days to cool down. Sometimes a third firing process is required – this is for decoration that is added to work after the glaze firing. For example – adding precious metals and lustres. this firing temperature is usually around 600 – 800°C depending upon the techniques being used. There are many students interested in gold and silver trims – we will be doing this third type of firing soon! After firing your work will be in the student finished work shelves. Remember to pay for it before you head out the door! There is a small extra charge for using porcelain clay (it’s more than twice the price of regular clay), and for any third firing process! Once your work has been fired it can not turn back into clay for millennia – so don’t fire it if you don’t like it! Put it in the bucket for recycling. https://firebirdstudios.com.au/the-process-of-making-pottery/The form of the jug has been in use for many centuries.Stoneware jug. Two tone brown glaze with pierced lip behind spout. Spout chipped.None.flagstaff hill, warrnambool, shipwrecked-coast, flagstaff-hill, flagstaff-hill-maritime-museum, maritime-museum, shipwreck-coast, flagstaff-hill-maritime-village, jug, ceramic jug -
 Flagstaff Hill Maritime Museum and Village
Functional object - Crucible, The Patent Plumbago Crucible Company, circa 1878
This crucible was raised from the wreck of the LOCH ARD. It is one of six similar relics, in a range of sizes, now in the Flagstaff Hill collection. All bear markings to indicate their manufacture by the Morgan brothers of Battersea, trading as the Patent Plumbago Crucible Co. A crucible is a container used for purifying and melting metals so that they can be cast in a mould to a predetermined shape and use. They must withstand extremely high temperatures, and abrupt cooling, and shed their contents with minimal adherence. The addition of graphite to the traditional firing clays greatly enhanced the durability of industrial crucibles in mid-Victorian Britain, a significant technological advance at a time of great activity in foundries and expansion of demand for refined metals. The Morgans first noticed the advantages of graphite crucibles at the Great Exhibition held in London in 1851. Initially, they contracted to be sole selling agents for the American-made products of Joseph Dixon and Co. from New Jersey, but in 1856 they obtained that firm’s manufacturing rights and began producing their own graphite crucibles from the South London site. The Morgans imported crystalline graphite in 4-5 cwt casks from the British colony of Ceylon (now Sri Lanka) and mixed it with conventional English (Stourbridge) clays to be fired in kilns. Their products were purchased by the Royal Mints in London and India, and exported to official mints in France and Germany. They were successful exhibitors of their crucibles and furnaces at the London Exhibition held in 1861 (Class 1, Mining, quarrying, metallurgy and mineral products, Exhibit 265, Patent Plumbago Crucible Co). The range of sizes represented by the six crucibles retrieved from the LOCH ARD, suggests they may have been part of a sample shipment intended for similar promotion in the Australian colonies ― at Melbourne’s International Exhibition to be held in 1880. The summary of the LOCH ARD cargo manifest, by Don Charlwood in ‘Wrecks and Reputations’, does not mention any crucibles, implying that they were not a large consignment of uniform items. A newspaper account of an 1864 tour of the Morgan brothers’ ‘Black Potteries’ at Battersea indicates: “All the pots were numbered according to their contents, each number standing for one kilogram, or a little over two pounds; a No. 2 crucible contains two kilogrammes; a No. 3, three kilogrammes, and so on.” These numbers are obscured by marine sediment on three of the crucibles in the Flagstaff Hill collection, but those legible on the remaining three are 5, 6, and 8. None of the six is of the same size from a visual appraisal. A brief history of the Loch Ard (1873-1878): - The sailing ship Loch Ard was one of the famous Loch Line of ships that sailed the long voyage from England to Australia. Barclay, Curdle and Co. built the three-masted iron vessel in Glasgow in 1873. It had sailed three trips to Australia and one trip to Calcutta before its fateful voyage. Loch Ard left England on March 2, 1878, under the command of recently married, 29-year-old Captain Gibbs. It was bound for Melbourne with a crew of 37, plus 17 passengers. The general cargo reflected the affluence of Melbourne at the time. Onboard were straw hats, umbrellas, perfumes, clay pipes, pianos, clocks, confectionery, linen and candles, and a heavier load of railway irons, cement, lead and copper. Other cargo included items intended for display in the Melbourne International Exhibition of 1880. The Loch Ard had been sailing for three months and was close to its destination on June 1, 1878. Captain Gibbs had expected to see land at about 3 am but the Loch Ard ran into a fog that greatly reduced visibility and there was no sign of land or the Cape Otway lighthouse. The fog lifted at 4 am and the sheer cliffs of Victoria's west coast were much closer to them than Captain Gibbs expected. He tried to manage the vessel but failed and the ship struck a reef at the base of Mutton Bird Island, near Port Campbell. The top deck loosened from the hull, and the masts and rigging crashed down, knocking passengers and crew overboard. The lifeboat was launched by Tom Pearce but crashed into the side of Loch Ard and capsized. He clung onto its overturned hull and sheltered under it. He drifted out to sea and the tide brought him back to what is now called Loch Ard Gorge. He swam to shore and found a cave for shelter. A passenger, Eva Carmichael, had raced onto the deck to find out what was happening and was confronted by towering cliffs above the ship. She was soon swept off the ship by a huge wave. Eva saw Tom Pearce on a small rocky beach and yelled to attract his attention. He swam out and dragged her to the shelter of the cave. He revived her with a bottle of brandy from a case that had washed up on the beach. Tom scaled a cliff in search of help and followed some horse hoof prints. He came from two men from Glenample Station, three and a half miles away. He told the men of the tragedy and then returned to the gorge while the two men rode back to the station to get help. They reached Loch Ard Gorge and took the two shipwreck survivors to Glenample Station to recover. Eva stayed at the station for six weeks before returning to Ireland by steamship. In Melbourne, Tom Pearce received a hero's welcome and was presented with a medal and some money. Of the 54 crew members and passengers on board, only two survived: the apprentice, Tom Pearce and the young woman passenger, Eva Carmichael, who lost her family in the tragedy. The shipwreck of the LOCH ARD is of State significance ― Victorian Heritage Register S417. Flagstaff Hill’s collection of artefacts from LOCH ARD is significant for being one of the largest collections of artefacts from this shipwreck in Victoria. It is significant for its association with the shipwreck, which is on the Victorian Heritage Register (VHR S417). The collection is significant because of the relationship between the objects, as together they have a high potential to interpret the story of the LOCH ARD. The LOCH ARD collection is archaeologically significant as the remains of a large international passenger and cargo ship. The LOCH ARD collection is historically significant for representing aspects of Victoria’s shipping history and its potential to interpret sub-theme 1.5 of Victoria’s Framework of Historical Themes (living with natural processes). The collection is also historically significant for its association with the LOCH ARD, which was one of the worst and best-known shipwrecks in Victoria’s history.A Morgan’s Patent graphite crucible No.8 (i.e. 8kgs capacity), one of a set. It was recovered from the wreck of the LOCH ARD. It is in its original grey colouring with minimal sediment accretion on the top rim. It rises in a slight curve from a flat circular base to a wider rim with a pouring lip. Maker’s marks on the side of the container clearly identify the manufacturer. The maker's details are stamped into the base around and within a circle. A white sticker is attached. Made by the Patent Plumbago Crucible Company at the Battersea Works in London. Number “8”. Letters “MORGAN’S PATENT”. Details on the base "MORGAN'S PATENT" "THE PATENT PLUMBAGO CRUCIBLE COMPANY" Symbol [8] above "BATTERSEA WORKS LONDON" Handwritten on a white sticker in black pen "LA/89"flagstaff hill, warrnambool, maritime museum, shipwreck coast, great ocean road, loch line, loch ard, captain gibbs, eva carmichael, tom pearce, glenample station, mutton bird island, loch ard gorge, graphite crucible, plumbago crucible, morgans crucible company, flagstaff hill maritime museum and village, fluxing pots, crucible, morgan’s patent, morgan brothers, patent plumbago crucible co, battersea works, london, port campbell -
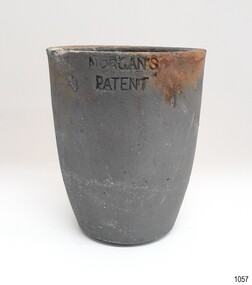 Flagstaff Hill Maritime Museum and Village
Functional object - Crucible, The Patent Plumbago Crucible Company, circa 1878
This crucible was raised from the wreck of the LOCH ARD. It is one of six similar relics, in a range of sizes, now in the Flagstaff Hill collection. All bear markings to indicate their manufacture by the Morgan brothers of Battersea, trading as the Patent Plumbago Crucible Co. A crucible is a container used for purifying and melting metals so that they can be cast in a mould to a predetermined shape and use. They must withstand extremely high temperatures, and abrupt cooling, and shed their contents with minimal adherence. The addition of graphite to the traditional firing clays greatly enhanced the durability of industrial crucibles in mid-Victorian Britain, a significant technological advance at a time of great activity in foundries and expansion of demand for refined metals. The Morgans first noticed the advantages of graphite crucibles at the Great Exhibition held in London in 1851. Initially, they contracted to be sole selling agents for the American-made products of Joseph Dixon and Co. from New Jersey, but in 1856 they obtained that firm’s manufacturing rights and began producing their own graphite crucibles from the South London site. The Morgans imported crystalline graphite in 4-5 cwt casks from the British colony of Ceylon (now Sri Lanka) and mixed it with conventional English (Stourbridge) clays to be fired in kilns. Their products were purchased by the Royal Mints in London and India, and exported to official mints in France and Germany. They were successful exhibitors of their crucibles and furnaces at the London Exhibition held in 1861 (Class 1, Mining, quarrying, metallurgy and mineral products, Exhibit 265, Patent Plumbago Crucible Co). The range of sizes represented by the six crucibles retrieved from the LOCH ARD, suggests they may have been part of a sample shipment intended for similar promotion in the Australian colonies ― at Melbourne’s International Exhibition to be held in 1880. The summary of the LOCH ARD cargo manifest, by Don Charlwood in ‘Wrecks and Reputations’, does not mention any crucibles, implying that they were not a large consignment of uniform items. A newspaper account of an 1864 tour of the Morgan brothers’ ‘Black Potteries’ at Battersea indicates: “All the pots were numbered according to their contents, each number standing for one kilogram, or a little over two pounds; a No. 2 crucible contains two kilogrammes; a No. 3, three kilogrammes, and so on.” These numbers are obscured by marine sediment on three of the crucibles in the Flagstaff Hill collection, but those legible on the remaining three are 5, 6, and 8. None of the six is of the same size from a visual appraisal. A brief history of the Loch Ard (1873-1878): - The sailing ship Loch Ard was one of the famous Loch Line of ships that sailed the long voyage from England to Australia. Barclay, Curdle and Co. built the three-masted iron vessel in Glasgow in 1873. It had sailed three trips to Australia and one trip to Calcutta before its fateful voyage. Loch Ard left England on March 2, 1878, under the command of recently married, 29-year-old Captain Gibbs. It was bound for Melbourne with a crew of 37, plus 17 passengers. The general cargo reflected the affluence of Melbourne at the time. Onboard were straw hats, umbrellas, perfumes, clay pipes, pianos, clocks, confectionery, linen and candles, and a heavier load of railway irons, cement, lead and copper. Other cargo included items intended for display in the Melbourne International Exhibition of 1880. The Loch Ard had been sailing for three months and was close to its destination on June 1, 1878. Captain Gibbs had expected to see land at about 3 am but the Loch Ard ran into a fog that greatly reduced visibility and there was no sign of land or the Cape Otway lighthouse. The fog lifted at 4 am and the sheer cliffs of Victoria's west coast were much closer to them than Captain Gibbs expected. He tried to manage the vessel but failed and the ship struck a reef at the base of Mutton Bird Island, near Port Campbell. The top deck loosened from the hull, and the masts and rigging crashed down, knocking passengers and crew overboard. The lifeboat was launched by Tom Pearce but crashed into the side of Loch Ard and capsized. He clung onto its overturned hull and sheltered under it. He drifted out to sea and the tide brought him back to what is now called Loch Ard Gorge. He swam to shore and found a cave for shelter. A passenger, Eva Carmichael, had raced onto the deck to find out what was happening and was confronted by towering cliffs above the ship. She was soon swept off the ship by a huge wave. Eva saw Tom Pearce on a small rocky beach and yelled to attract his attention. He swam out and dragged her to the shelter of the cave. He revived her with a bottle of brandy from a case that had washed up on the beach. Tom scaled a cliff in search of help and followed some horse hoof prints. He came from two men from Glenample Station, three and a half miles away. He told the men of the tragedy and then returned to the gorge while the two men rode back to the station to get help. They reached Loch Ard Gorge and took the two shipwreck survivors to Glenample Station to recover. Eva stayed at the station for six weeks before returning to Ireland by steamship. In Melbourne, Tom Pearce received a hero's welcome and was presented with a medal and some money. Of the 54 crew members and passengers on board, only two survived: the apprentice, Tom Pearce and the young woman passenger, Eva Carmichael, who lost her family in the tragedy. The shipwreck of the LOCH ARD is of State significance ― Victorian Heritage Register S417 Flagstaff Hill’s collection of artefacts from LOCH ARD is significant for being one of the largest collections of artefacts from this shipwreck in Victoria. It is significant for its association with the shipwreck, which is on the Victorian Heritage Register (VHR S417). The collection is significant because of the relationship between the objects, as together they have a high potential to interpret the story of the LOCH ARD. The LOCH ARD collection is archaeologically significant as the remains of a large international passenger and cargo ship. The LOCH ARD collection is historically significant for representing aspects of Victoria’s shipping history and its potential to interpret sub-theme 1.5 of Victoria’s Framework of Historical Themes (living with natural processes). The collection is also historically significant for its association with the LOCH ARD, which was one of the worst and best-known ahipwrecks in Victoria’s history.A Morgan’s Patent graphite crucible No.4 (i.e. 4kgs capacity), one of a set of three. It was recovered from the wreck of the LOCH ARD. It is in its original grey colouring with minimal sediment accretion on the top rim. It rises in a slight curve from a flat circular base to a wider rim with a pouring lip. Maker’s marks on the side of the container clearly identify the manufacturer. The maker's details are stamped into the base around and within a circle. A white sticker is attached. Made by the Patent Plumbago Crucible Company at the Battersea Works in London.Number or. Letters “MORGAN’S PATENT”. Details on the base "MORGAN'S PATENT" "THE PATENT PLUMBAGO CRUCIBLE COMPANY" Symbol [4] above "BATTERSEA WORKS LONDON" Handwritten on a white sticker in black pen "L89"flagstaff hill, warrnambool, flagstaff hill maritime museum, maritime museum, shipwreck coast, flagstaff hill maritime village, great ocean road, loch line, loch ard, captain gibbs, eva carmichael, tom pearce, glenample station, mutton bird island, loch ard gorge, graphite crucible, plumbago crucible, morgan's crucible company, flagstaff hill maritime museum and village, fluxing pots, crucible, morgan’s patent, morgan brothers, patent plumbago crucible co, battersea works, london, port campbell -
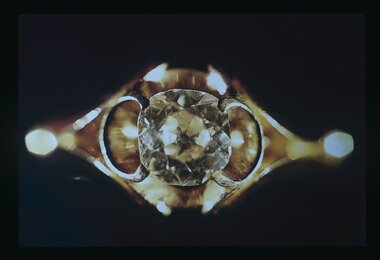 Flagstaff Hill Maritime Museum and Village
Accessory - Diamond ring, about 1855
In 1975, 120 years after the sailing ship Schomberg was wrecked, Flagstaff Hill divers (Peter Ronald, Colin Goodall and Gary Hayden) found an ornate communion set amongst the wreckage. The set comprised a jug, ciborium, lid, chalice and plate. The items, apart from the lid, were then displayed at Flagstaff Hill Maritime Village. The lid had etchings that did not match the chalice and sat in storage for several years. Then in 1978, while the marine concretion inside the lid was being examined, a surface layer came loose and revealed a glint of gold that was assumed to be a piece of brass. The layers of concretion were carefully removed and a ring-like band emerged. Further treatment exposed a 'large faceted stone in an intricate gold setting. Weeks later a detailed examination estimated the value of the ring, known as the Schomberg Diamond, to be $7000. When the Schomberg was launched in 1855, she was considered the "Noblest” ship that ever floated on the water. Schomberg's owners, the Black Ball Line had commissioned the ship for their fleet of passenger liners. She was built by Alexander Hall of Aberdeen at a cost of £43,103 and constructed with 3 skins. One planked fore and aft and two diagonally planked, fastened together with screw-threaded trunnels (wooden rails). Her First Class accommodation was simply luxurious with velvet pile carpets, large mirrors, rosewood, birds-eye maple and mahogany timbers throughout, soft furnishings of satin damask, an oak-lined library with a piano. Overall she had accommodation for 1000 passengers. At the launch, the Schomberg's 34-year-old master, Captain 'Bully' Forbes, had promised to reach Melbourne in sixty days stating, "with or without the help of God." Captain James Nicol Forbes was born in Aberdeen in 1821 and rose to fame with his record-breaking voyages on the famous Black Ball Line ships; Marco Polo and Lightning. In 1852 in the Marco Polo, he made the record passage from London to Melbourne in 68 days. Unfortunately there were 53 deaths on the voyage, but the great news was off the record passage by Captain Forbes. In 1854 he took the clipper “Lighting” to Melbourne in 76 days and back in 63 days, this record was never beaten by a sailing ship. He often drove his crew and ship to breaking point to beat his previous records. He cared little for the comfort of the passengers. On this, the Schomberg's maiden voyage, he was determined to break existing records. Schomberg departed Liverpool on her maiden voyage on 6th October 1855 flying a sign that read "Sixty Days to Melbourne". She departed with 430 passengers and 3000 tons cargo including iron rails and equipment intended to build the Melbourne to Geelong Railway and a bridge over the Yarra from Melbourne to Hawthorn. She also carried a cow for fresh milk, pens for fowls and pigs, 90,000 gallons of water for washing and drinking. She also carried 17,000 letters and 31,800 newspapers. The ship and cargo were insured for $300,000 a fortune for the time. The winds were poor as she sailed across the equator, slowing Schomberg's journey considerably. Land was first sighted on Christmas Day, at Cape Bridgewater near Portland, Captain Forbes followed the coastline towards Melbourne. Forbes was said to be playing cards when called by the third mate Henry Keen, who reported land about 3 miles off. Due in large part to the captain's regarding a card game as more important than his ship, it eventually ran aground on a sand spit near Curdie's Inlet (about 56 km west of Cape Otway) on 26th December 1855, 78 days after leaving Liverpool. The sand spit and the currents were not marked on Forbes's map. Overnight, the crew launched a lifeboat to find a safe place to land the ship’s passengers. The scouting party returned to Schomberg and advised Forbes that it was best to wait until morning because the rough seas could easily overturn the small lifeboats. The ship’s Chief Officer spotted the SS Queen at dawn and signaled the steamer. The master of the Queen approached the stranded vessel and all of Schomberg’s passengers and crew disembarked safely. The Black Ball Line's Melbourne agent sent a steamer to retrieve the passengers' baggage from the Schomberg. Other steamers helped unload her cargo until the weather changed and prevented the salvage teams from accessing the ship. Later one plunderer found a case of Wellington boots, but alas, all were for the left foot. Local merchants Manifold & Bostock bought the wreck and cargo but did not attempt to salvage the cargo still on board the ship. They eventually sold it on to a Melbourne businessman and two seafarers. In 1864 after two of the men drowned when they tried to reach Schomberg, salvage efforts were abandoned. In 1870, nearly 15 years after the wreck parts of the Schomberg had washed ashore on the south island of New Zealand. The wreck now lies in almost 9 meters of water and although the woodwork is mostly disintegrated the shape of the ship can still be determined due to the remaining railway irons, girders and the ship’s frame. A variety of goods and materials can be seen scattered about nearby. The actual lid in which the ring was found has not yet been completely identified and could belong to a coffee pot, sugar bowl or maybe a jug or something similar. Although all survived the wreck no-one came forward to claim the valuable diamond. The Schomberg Diamond is currently on display in the Great Circle Gallery. Flagstaff Hill Maritime Village along with the rest of the communion set. Other artefacts salvaged from the wreck include ship fittings and equipment, personal effects, a lithograph, tickets and photographs from the Schomberg. One of the Schomberg bells is in the Warrnambool Library.The Schomberg Diamond is particularly significant in that it played a crucial part in having the legislation changed to protect shipwrecks, with far tighter control over the salvaging of items from wreck sites. This ring is registered as Artefact S/105 in the Schomberg collection, the Schomberg collection as a whole is of historical and archaeological significance at a State level. Flagstaff Hill’s collection of artefacts from the Schomberg is also significant for its association with the Victorian Heritage Registered shipwreck (VHR S 612). The collection is of prime significant because of the relationship between the objects salvaged, as together they help us to interpret the story of the Schomberg. The collection as a whole is historically significant for representing aspects of Victoria's maritime history and its potential to interpret social and historical themes. A mid-Victorian gentleman's solitaire diamond dress ring with a Brazilian cut diamond (cushion cut), one and one-third carat set within an 18 carat yellow gold ring consisting of four claws within an open scroll setting and a divided scroll shank. Colour is classified as 'J', clarity SII. The setting is handmade. warrnambool, shipwrecked-coast, flagstaff-hill, flagstaff-hill-maritime-museum, maritime-museum, shipwreck-coast, flagstaff-hill-maritime-village, schomberg, shipwrecked-artefact, clipper ship, black ball line, 1855 shipwreck, aberdeen clipper ship, captain forbes, peterborough shipwreck, ss queen, ciborium, ring, schomberg-diamond, schomberg-ring, gentleman's ring, dress ring -
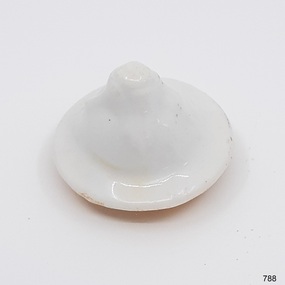 Flagstaff Hill Maritime Museum and Village
Leisure object - Toy, Circa 1878
This ceramic lid is part of a child's tea set, perhaps from a sugar bowl or tea pot. It was recovered from the wreck of the Loch Ard. The Loch Ard got its name from "Loch Ard" a loch that lies to the west of Aberfoyle, and the east of Loch Lomond. It means "high lake" in Scottish Gaelic. The vessel belonged to the famous Loch Line which sailed many vessels from England to Australia. The Loch Ard was built in Glasgow by Barclay, Curle & Co. in 1873, the vessel was a three-masted square-rigged iron sailing ship that measured 79.87 meters in length, 11.58 m in width, and 7 m in depth with a gross tonnage of 1693 tons with a mainmast that measured a massive 45.7 m in height. Loch Ard made three trips to Australia and one trip to Calcutta before its fateful voyage. Loch Ard left England on March 2, 1878, under the command of 29-year-old Captain Gibbs, who was newly married. The ship was bound for Melbourne with a crew of 37, plus 17 passengers. The general cargo reflected the affluence of Melbourne at the time. Onboard were straw hats, umbrellas, perfumes, clay pipes, pianos, clocks, confectionery, linen, and candles, as well as a heavier load of railway irons, cement, lead, and copper. There were other items included that were intended for display in the Melbourne International Exhibition of 1880. The voyage to Port Phillip was long but uneventful. Then at 3 am on June 1, 1878, Captain Gibbs was expecting to see land. But the Loch Ard was running into a fog which greatly reduced visibility. Captain Gibbs was becoming anxious as there was no sign of land or the Cape Otway lighthouse. At 4 am the fog lifted and a lookout aloft announced that he could see breakers. The sheer cliffs of Victoria's west coast came into view, and Captain Gibbs realised that the ship was much closer to them than expected. He ordered as much sail to be set as time would permit and then attempted to steer the vessel out to sea. On coming head-on into the wind, the ship lost momentum, the sails fell limp and Loch Ard's bow swung back towards land. Gibbs then ordered the anchors to be released in an attempt to hold their position. The anchors sank some 50 fathoms - but did not hold. By this time the ship was among the breakers and the tall cliffs of Mutton Bird Island rose behind. Just half a mile from the coast, the ship's bow was suddenly pulled around by the anchor. The captain tried to tack out to sea, but the ship struck a reef at the base of Mutton Bird Island, near Port Campbell. Waves subsequently broke over the ship and the top deck became loosened from the hull. The masts and rigging came crashing down knocking passengers and crew overboard. When a lifeboat was finally launched, it crashed into the side of Loch Ard and capsized. Tom Pearce, who had launched the boat, managed to cling to its overturned hull and shelter beneath it. He drifted out to sea and then on the flood tide came into what is now known as Lochard Gorge. He swam to shore, bruised and dazed, and found a cave in which to shelter. Some of the crew stayed below deck to shelter from the falling rigging but drowned when the ship slipped off the reef into deeper water. Eva Carmichael a passenger had raced onto the deck to find out what was happening only to be confronted by towering cliffs looming above the stricken ship. In all the chaos, Captain Gibbs grabbed Eva and said, "If you are saved Eva, let my dear wife know that I died like a sailor". That was the last Eva Carmichael saw of the captain. She was swept off the ship by a huge wave. Eva saw Tom Pearce on a small rocky beach and yelled to attract his attention. He dived in and swam to the exhausted woman and dragged her to shore. He took her to the cave and broke the open case of brandy that had washed up on the beach. He opened a bottle to revive the unconscious woman. A few hours later Tom scaled a cliff in search of help. He followed hoof prints and came by chance upon two men from nearby Glenample Station three and a half miles away. In a complete state of exhaustion, he told the men of the tragedy. Tom then returned to the gorge while the two men rode back to the station to get help. By the time they reached Loch Ard Gorge, it was cold and dark. The two shipwreck survivors were taken to Glenample Station to recover. Eva stayed at the station for six weeks before returning to Ireland by steamship. In Melbourne, Tom Pearce received a hero's welcome. He was presented with the first gold medal of the Royal Humane Society of Victoria and a £1000 cheque from the Victorian Government. Concerts were performed to honour the young man's bravery and to raise money for those who lost families in the disaster. Of the 54 crew members and passengers on board, only two survived: the apprentice, Tom Pearce, and the young woman passenger, Eva Carmichael, who lost her family in the tragedy. Ten days after the Lochard tragedy, salvage rights to the wreck were sold at auction for £2,120. Cargo valued at £3,000 was salvaged and placed on the beach, but most washed back into the sea when another storm developed. The wreck of Lochard still lies at the base of Mutton Bird Island. Much of the cargo has now been salvaged and some items were washed up into Lochard Gorge. Cargo and artifacts have also been illegally salvaged over many years before protective legislation was introduced in March 1982. One of the most unlikely pieces of cargo to have survived the shipwreck was a Minton majolica peacock- one of only nine in the world. The peacock was destined for the Melbourne 1880 International Exhibition. It had been well packed, which gave it adequate protection during the violent storm. Today the Minton peacock can be seen at the Flagstaff Hill Maritime Museum in Warrnambool. From Australia's most dramatic shipwreck, it has now become Australia's most valuable shipwreck artifact and is one of very few 'objects' on the Victorian State Heritage Register. The shipwreck of the Loch Ard is of significance for Victoria and is registered on the Victorian Heritage Register ( S 417). Flagstaff Hill has a varied collection of artifacts from Loch Ard and its collection is significant for being one of the largest accumulation of artifacts from this notable Victorian shipwreck of which the subject items are a small part. The collection's objects give us a snapshot of how we can interpret the story of this tragic event. The collection is also archaeologically significant as it represents aspects of Victoria's shipping history that allows us to interpret Victoria's social and historical themes of the time. Through is associated with the worst and best-known shipwreck in Victoria's history.Toy; a white ceramic lid from a child's tea set. The underside is hollow. The lid is glazed and the surface of the lid is uneven under the glaze.flagstaff hill, warrnambool, flagstaff hill maritime museum, shipwreck coast, flagstaff hill maritime village, great ocean road, loch line, loch ard, captain gibbs, eva carmichael, tom pearce, glenample station, mutton bird island, loch ard gorge, toy, child's tea set, toy lid -
 Bendigo Historical Society Inc.
Document - THE STUDENT PRINCE, CAPITAL THEATRE, 15 June, 1972
The Student Prince, Capital Theatre, View Street, Bendigo. For a six night season: Thursday 15th, Friday 16th, Saturday 17th and Thursday 22nd, Friday 23, Saturday 24th June, 1972. Bendigo Operatic Society: Mr J McK. Cannon, Mr F Trewarne, Miss Ann Ball, Mr L Spencely, Mrs P Lyon. Committee: Mesdames J Cannon, M Reed, Misses P McCraken & M Welch, Messrs. J Beaumont, J Boquest, G Daws. Photos: Producer-Max Collis, Assistant Producer, Ballet & Wardrobe Mistress-Madge Welch, Assistant Pianist-Edith John, Musical Director-Gwen Grose, Society Pianist- Ruth Gorman. Photos of cast: Margaret McQueenie, John Boquest, John McCormack, Graham Bumford, Graeme Daws, Annette Beckwith, Jill James, Ferd Lorenz, Shane Brennan, Patricia Lyon, Max Rule, Ian Beckwith, John Tonkin, Michael Filippini, Valerie Griffiths, Jim Feteris. Synopsis if Story. Synopsis of Scenes. Bendigo Operatic Society Presents by arrangement with Allan's Music (Australia) Pty. Ltd. ''The Student Prince'' A Max Collis Production. Music by Sigmond Romburg. Book & Lyrics by Dorothy Donnelly. Stage Manager Malcolm Cannon. Musical Director Gwen Grose. Choreography Madge Welch. Wardrobe Miss M Welch, Mrs A Ball. Cast: Kerry Hogan Brian Fitzpatrick, Garry Burns, Alan Petrie, Graham Bumford, John McCormick, John Boquest, Graeme Daws, Annette Beckwith Margaret McQueenie, Michael Filippini, Nicholas Kasterovic, Max Rule, Graham Bumford, Ian Beckwith, Ferd Lorenz, Shane Brennan, Jill James, Patricia Lyon, Valerie Griffiths, Jim Feteris, John Tonkin. Time _ Spring 1860. Female Chorus: Marion Alcock, Ann Ball, Wilma Baldwin, Dorothy Field, Ann Garrat, Dawn Moncrieff, Coral Rivett, Lois Semmens, Marilyn Storey, Marion Wright. Male Chorus: Garry Burns, Edmund, Burke, Peter Edgley, Brian Fitzpatrick, Jim Feteris, Kerry Hogan, Ross Jones, Nicholas Kasterovic, Bernie Keogh, John Keogh, Alan Petrie, Fred Trewarne, Philip Wilkin. Ballet: Dianne Austin, Annette Basset, Wendy Kent, Jocelyn Lyon, Lyn Rowe, Ann Rendell, Helen Southby, Pauline Waugh. Publicity Officer: Mrs J Cannon. Scenery & Properties: M & J Cannon, J Moncrieff, R Spicer. Art Work: M Cannon, S James, B Agnew, Tony Lorenz, J Hall, Karl Steinberg. Prompt: Mrs J Cannon. Lighting: L Reed, H Bridges & T Vincent. Make-up: Mrs H Cannon & Mrs D Coia. Hairdressing: Ross Coiffure. House Manager: Garry McDonald. Bendigo Concert Orchestra Violins: Mrs R Weldon, Mrs A Boulton, Mrs M Robbins, Mrs C Messer, Mr C Gill, Mr J Jordan, Mr P Phillips, Mr T French. Violas: Mr E Jarrett, Mr H Werry. Cellos: Mrs C Bubb. Bass: Mr S Anderson. Flute: Mr C Bubb. Clarinets: Mr R Holyoake. Trombones: Mr W Neuman. Trumpets: Mr D Gray, Mr David Gray, Mr Ian De Araugc. Percussion: Mr Brian Beale. Pianoforte: Mrs P Gorman. Songs From ''The Student Prince'' (wording). Acknowledgement; Bendigo Advertiser, BCV8, 3BO, 3CV, St Mary's. Advertisements through last half of program: Don Semmens Photographic Studio, The Copper Pot Licensed Restaurant, Ross Coiffure Beatty Salon. A and b are both the same copy a in the better of the copies as b is lightly faded. Otherwise excellent condition.program, music, bedigo operatic society, the student prince, capital theatre, view street, bendigo. 15th, 16th, 17th 22nd, 23, 24th june, 1972. bendigo operatic society: mr j mck. cannon, mr f trewarne, miss ann ball, mr l spencely, mrs p lyon. committee: mesdames j cannon, m reed, misses p mccraken & m welch, messrs. j beaumont, j boquest, g daws. photos: producer-max collis, assistant producer, ballet & wardrobe mistress-madge welch, assistant pianist-edith john, musical director-gwen grose, society pianist- ruth gorman. photos of cast: margaret mcqueenie, john boquest, john mccormack, graham bumford, graeme daws, annette beckwith, jill james, ferd lorenz, shane brennan, patricia lyon, max rule, ian beckwith, john tonkin, michael filippini, valerie griffiths, jim feteris. synopsis if story. synopsis of scenes. bendigo operatic society presents by arrangement with allan's music (australia) pty. ltd. ''the student prince'' a max collis production. music by sigmond romburg. book & lyrics by dorothy donnelly. stage manager malcolm cannon. musical director gwen grose. choreography madge welch. wardrobe miss m welch, mrs a ball. cast: kerry hogan brian fitzpatrick, garry burns, alan petrie, graham bumford, john mccormick, john boquest, graeme daws, annette beckwith margaret mcqueenie, michael filippini, nicholas kasterovic, max rule, graham bumford, ian beckwith, ferd lorenz, shane brennan, jill james, patricia lyon, valerie griffiths, jim feteris, john tonkin. time _ spring 1860. female chorus: marion alcock, ann ball, wilma baldwin, dorothy field, ann garrat, dawn moncrieff, coral rivett, lois semmens, marilyn storey, marion wright. male chorus: garry burns, edmund, burke, peter edgley, brian fitzpatrick, jim feteris, kerry hogan, ross jones, nicholas kasterovic, bernie keogh, john keogh, alan petrie, fred trewarne, philip wilkin. ballet: dianne austin, annette basset, wendy kent, jocelyn lyon, lyn rowe, ann rendell, helen southby, pauline waugh. publicity officer: mrs j cannon. scenery & properties: m & j cannon, j moncrieff, r spicer. art work: m cannon, s james, b agnew, tony lorenz, j hall, karl steinberg. prompt: mrs j cannon. lighting: l reed, h bridges & t vincent. make-up: mrs h cannon & mrs d coia. hairdressing: ross coiffure. house manager: garry mcdonald. bendigo concert orchestra violins: mrs r weldon, mrs a boulton, mrs m robbins, mrs c messer, mr c gill, mr j jordan, mr p phillips, mr t french. violas: mr e jarrett, mr h werry. cellos: mrs c bubb. bass: mr s anderson. flute: mr c bubb. clarinets: mr r holyoake. trombones: mr w neuman. trumpets: mr d gray, mr david gray, mr ian de araugc. percussion: mr brian beale. pianoforte: mrs p gorman. songs from ''the student prince'' (wording). acknowledgement; bendigo advertiser, bcv8, 3bo, 3cv, st mary's. advertisements: don semmens photographic studio, the copper pot licensed restaurant, ross coiffure beatty salon. -
Bendigo Historical Society Inc.
Document - A SOUVENIR OF 'THE GLAMOUR GIRLS' REVUE 'THEN AND NOW' 1944, 1944
A Souvenir of 'The Glamour Girls' Revue 'Then and Now' 1944. From Mr & Mrs C Clark. Page 1, Bendigo presents 'The Glamour Girls' in Their Hit Revue 'Then & Now' a Pot Pourri of Dances and Fun, Produced and created by the Team Spirit of Peggy Hinsley, Elaine O'Shea, Joan Albert, Gladys Jordon, Amba Harrington, Moira Knowles. Doris Clow, Betty Angel, Cath Mc Queenie, Thelma Cochrane, Mona Roberts. Under Direction of C Clark. Musical Direction, Edward Thomas. Accompaniste, Leila Camp, Vida Roberts. Violinists, Honor Allfrey, Edgar Jarrett. Drums, Frank Kennedy, Andy Beattie. Costumes, Tivoli Theatres. Page 3/ In lending your personality, your charm and your talent to help raise Funds for the Returned Soldiers' Relief Appeal, you have given not only to the soldiers, but to the Nation a great service. As the producer and originator of the 'Glamour Girl Revue' I wish to place on record my personal thanks to the noble part you have played in making this show the financial success it has proved to be. You will appreciate that no remuneration has given by the Committee for your services, with this decision I am sure you fully concur. I would however, like you to accept this souvenir as a small token of gratitude for the great pleasure it has given my wife and I to have been associated with each and everyone of you as a team. May we have future successes in our services to those in need. Yours truly, (signed) C Clark. Page 5/ Photograph of Mr and Mrs C Clark signed; Sincerely M & C Clark. Extra page has been added here and a black and white photograph of the cast on stage attached using photograph corners. Page 5/ Photo of Peggy. Page 7. Page 9 photo of Elaine. Page 11 photo Joan. Page 13 Gladys. Page 15 Amba. Page 17 Moira. Page 19 Doris. Page 21 Betty. Page 23 Cath. Page 25 Thelma. Page 27 Mona. Page 29 Autographs: Betty Angell, Thelma Crochrane, S M Grossmann, Vida Roberts, Mona Roberts, G E Thomas, J Albert, H M Allfrey, J J Monte, Elaine O'Shea, Andrew Beattie, Moira Knowle, Teen Armstrong, C M McQueenie, Peg Hainsly, Doris Blow, Amba Harrington, J N Armstrong, M Clark, C Clark (autographs in copy A only.) Page 31. ''1940 - Never have so many owed so much to so few.'' - Winston Churchill. A Friend Who Understands. You've shared the joys and troubles The Laughter and the tears, And you've given loyal friendship Through the Changing Varied years, Your voice has been beside me Whispering courage for the day, And you've helped and blessed and cheered me Making glad the uphill way, And of all the many blessings That have reached me from God's hands, There's no gift more sweet and precious Than the Friend - who understands. 1944 ''Never have so few needed so much from so many'' - Returned Soldiers' Relief Appeal. Copy A/ Inscription on front cover To 'YACK'. Signed on page 3, C Clark. Signed on page 5 Sincerely M & C Clark. Page 29 Autographs: Betty Angell, Thelma Crochrane, S M Grossmann, Vida Roberts, Mona Roberts, G E Thomas, J Albert, H M Allfrey, J J Monte, Elaine O'Shea, Andrew Beattie, Moira Knowle, Teen Armstrong, C M McQueenie, Peg Hainsly, Doris Blow, Amba Harrington, J N Armstrong, M Clark, C Clark. Orange ribbon is faded. Copy B/ markings: front cover - Royal Historical Society of Victoria Bendigo Branch stamp, sticker - D1729. Cover and white sticker with D1729 on top right corner. First 2 sheets are torn at top hole punch. Orange ribbon is worn at the back.program, theatre, the glamour girls, a souvenir of 'the glamour girls' revue 'then and now' 1944. from mr & mrs c clark. their hit revue 'then & now' a pot pourri of dances and fun, produced and created peggy hinsley, elaine o'shea, joan albert, gladys jordon, amba harrington, moira knowles. doris clow, betty angel, cath mc queenie, thelma cochrane, mona roberts. under direction of c clark. musical direction, edward thomas. accompaniste, leila camp, vida roberts. violinists, honor allfrey, edgar jarrett. drums, frank kennedy, andy beattie. costumes, tivoli theatres. raise funds for the returned soldiers' relief appeal. as the producer and originator my personal thanks to the part you have this show a success. no remuneration has given by for your services. accept this souvenir as a token of. c clark. photograph of mr and mrs c clark signed; sincerely m & c clark. black and white photograph of the cast, peggy, elaine, joan, gladys, amba, moira, doris, betty, cath, thelma, mona, autographs: betty angell, thelma crochrane, s m grossmann, vida roberts, mona roberts, g e thomas, j albert, h m allfrey, j j monte, elaine o'shea, andrew beattie, moira knowle, teen armstrong, c m mcqueenie, peg hainsly, doris blow, amba harrington, j n armstrong, m clark, c clark. 'yack'. -
 Flagstaff Hill Maritime Museum and Village
Plate, before 1878
This earthenware dinner plate fragment is very similar to others recovered from the wreck of the LOCH ARD. It is uncertain whether the plates were personal belongings or part of the cargo. The Asiatic Pheasant pattern is a transfer design and was the most popular design of the 19th century Victorian era. It is still being produced today. The design was produced as high quality, decorative dinnerware by the potters in the Staffordshire, England, area from the late 1830’s, but no-one is sure exactly who the original designer was. The industrial age made production of this design more affordable to the ordinary person who purchased and proudly displayed settings in their homes. The high demand for production resulted in loss of quality in both potting and design, particularly between 1860-1914 when the design reached its height of popularity, and the results were often a poor match for the earlier pieces’ quality and detail. Some engravers would make copies of the Asiatic Pheasant design (and other designs) onto copper plates and sell them to more than one pottery producer (the Copyright Act of 1842 was intended to control this very thing). Consequently the list of Makers’ Marks associated with the Asiatic Pheasant is well over 100. A single pottery factory could have several owners, all with their own Marks. These factors all make the dating of pieces difficult. Also, after 1891, pieces produced for the export were required to be stamped with “ENGLAND”, but pieces produced for the domestic market in England did not need this stamp, so early pieces and pieces produced for the domestic marked would all be without the “ENGLAND” stamp, confusing the matter. Over time the body shape of the pieces changed, the feathered, curved and fluted edges giving way to the simpler, cheaper oblong shapes. The LOCH ARD belonged to the famous Loch Line which sailed many ships from England to Australia. Built in Glasgow by Barclay, Curdle and Co. in 1873, the LOCH ARD was a three-masted square rigged iron sailing ship. The ship measured 262ft 7" (79.87m) in length, 38ft (11.58m) in width, 23ft (7m) in depth and had a gross tonnage of 1693 tons. The LOCH ARD's main mast measured a massive 150ft (45.7m) in height. LOCH ARD made three trips to Australia and one trip to Calcutta before its final voyage. LOCH ARD left England on March 2, 1878, under the command of Captain Gibbs, a newly married, 29 year old. She was bound for Melbourne with a crew of 37, plus 17 passengers and a load of cargo. The general cargo reflected the affluence of Melbourne at the time. On board were straw hats, umbrella, perfumes, clay pipes, pianos, clocks, confectionary, linen and candles, as well as a heavier load of railway irons, cement, lead and copper. There were items included that intended for display in the Melbourne International Exhibition in 1880. The voyage to Port Phillip was long but uneventful. At 3am on June 1, 1878, Captain Gibbs was expecting to see land and the passengers were becoming excited as they prepared to view their new homeland in the early morning. But LOCH ARD was running into a fog which greatly reduced visibility. Captain Gibbs was becoming anxious as there was no sign of land or the Cape Otway lighthouse. At 4am the fog lifted. A man aloft announced that he could see breakers. The sheer cliffs of Victoria's west coast came into view, and Captain Gibbs realised that the ship was much closer to them than expected. He ordered as much sail to be set as time would permit and then attempted to steer the vessel out to sea. On coming head on into the wind, the ship lost momentum, the sails fell limp and LOCH ARD's bow swung back. Gibbs then ordered the anchors to be released in an attempt to hold its position. The anchors sank some 50 fathoms - but did not hold. By this time LOCH ARD was among the breakers and the tall cliffs of Mutton Bird Island rose behind the ship. Just half a mile from the coast, the ship's bow was suddenly pulled around by the anchor. The captain tried to tack out to sea, but the ship struck a reef at the base of Mutton Bird Island, near Port Campbell. Waves broke over the ship and the top deck was loosened from the hull. The masts and rigging came crashing down knocking passengers and crew overboard. When a lifeboat was finally launched, it crashed into the side of LOCH ARD and capsized. Tom Pearce, who had launched the boat, managed to cling to its overturned hull and shelter beneath it. He drifted out to sea and then on the flood tide came into what is now known as LOCH ARD Gorge. He swam to shore, bruised and dazed, and found a cave in which to shelter. Some of the crew stayed below deck to shelter from the falling rigging but drowned when the ship slipped off the reef into deeper water. Eva Carmichael had raced onto deck to find out what was happening only to be confronted by towering cliffs looming above the stricken ship. In all the chaos, Captain Gibbs grabbed Eva and said, "If you are saved Eva, let my dear wife know that I died like a sailor". That was the last Eva Carmichael saw of the captain. She was swept off the ship by a huge wave. Eva saw Tom Pearce on a small rocky beach and yelled to attract his attention. He dived in and swam to the exhausted woman and dragged her to shore. He took her to the cave and broke open case of brandy which had washed up on the beach. He opened a bottle to revive the unconscious woman. A few hours later Tom scaled a cliff in search of help. He followed hoof prints and came by chance upon two men from nearby Glenample Station three and a half miles away. In a state of exhaustion, he told the men of the tragedy. Tom returned to the gorge while the two men rode back to the station to get help. By the time they reached LOCH ARD Gorge, it was cold and dark. The two shipwreck survivors were taken to Glenample Station to recover. Eva stayed at the station for six weeks before returning to Ireland, this time by steamship. In Melbourne, Tom Pearce received a hero's welcome. He was presented with the first gold medal of the Royal Humane Society of Victoria and a £1000 cheque from the Victorian Government. Concerts were performed to honour the young man's bravery and to raise money for those who lost family in the LOCH ARD disaster. Of the 54 crew members and passengers on board, only two survived: the apprentice, Tom Pearce and the young woman passenger, Eva Carmichael, who lost all of her family in the tragedy. Ten days after the LOCH ARD tragedy, salvage rights to the wreck were sold at auction for £2,120. Cargo valued at £3,000 was salvaged and placed on the beach, but most washed back into the sea when another storm developed. The wreck of LOCH ARD still lies at the base of Mutton Bird Island. Much of the cargo has now been salvaged and some was washed up into what is now known as LOCH ARD Gorge. Cargo and artefacts have also been illegally salvaged over many years before protective legislation was introduced. One of the most unlikely pieces of cargo to have survived the shipwreck was a Minton porcelain peacock - one of only nine in the world. The peacock was destined for the Melbourne International Exhibition in 1880. It had been well packed, which gave it adequate protection during the violent storm. Today, the Minton peacock can be seen at the Flagstaff Hill Maritime Museum in Warrnambool. From Australia's most dramatic shipwreck it has now become Australia's most valuable shipwreck artefact and is one of very few 'objects' on the Victorian State Heritage Register. [References: Flagstaff Hill Maritime Village information sheets and documents, http://www.asiaticpheasants.co.uk/index.html ]Flagstaff Hill’s collection of artefacts from LOCH ARD is significant for being one of the largest collections of artefacts from this shipwreck in Victoria. It is significant for its association with the shipwreck, which is on the Victorian Heritage Register (VHR S417). The collection is significant because of the relationship between the objects, as together they have a high potential to interpret the story of the LOCH ARD. The LOCH ARD collection is archaeologically significant as the remains of a large international passenger and cargo ship. The LOCH ARD collection is historically significant for representing aspects of Victoria’s shipping history and its potential to interpret sub-theme 1.5 of Victoria’s Framework of Historical Themes (living with natural processes). The collection is also historically significant for its association with the LOCH ARD, which was one of the worst and best known shipwrecks in Victoria’s history. Fragment of earthenware dinner plate recovered from the wreck of the Loch Ard. White glazed porcelain with blue Asiatic Pheasant design; this piece shows a pheasant. Sticker underneath has blue pen handwriting "L/58". Asiatic Pheasant Cartouche has Maker’s name (hard to decipher). Stamped underneath "0 1 2 8 1 (or 9)" Sticker underneath has blue pen handwriting "L/58". Asiatic Pheasant Cartouche has Maker’s name (hard to decipher). Stamped underneath "0 1 2 8 1 (or 9)" flagstaff hill, warrnambool, shipwrecked coast, flagstaff hill maritime museum, maritime museum, shipwreck coast, flagstaff hill maritime village, great ocean road, loch line, loch ard, captain gibbs, eva carmichael, tom pearce, glenample station, mutton bird island, loch ard gorge, dinner plate, asiatic pheasant, loch ard, plate -
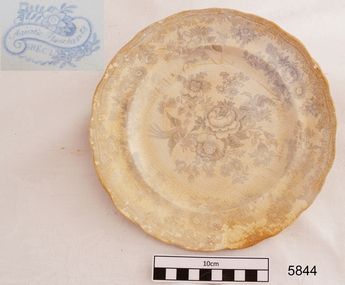 Flagstaff Hill Maritime Museum and Village
Ceramic - Plate, Minton Potteries, before 1878
This earthenware dinner plate was donated by Lorna Jensen. It had belonged to her father Wally O’Brien, who was a cyclist and had ridden in the long Melbourne to Warrnambool Cycle Classic twice. Wally was given this plate by a diving friend who had recovered it from the wreck of the LOCH ARD, on the southwest coast of Victoria. The plate had been sitting in Lorna’s mum’s china cabinet until recently when she and her husband drove to Warrnambool to donate it to Flagstaff Hill Maritime Village. When they stopped at a friend’s home along the way the friend removed it from its plastic bag and tea towel and carefully wrapped it in protective packaging for the rest of its journey. The plate is very similar to other plates recovered from the wreck of the LOCH ARD. It is uncertain whether the plates were personal belongings or part of the cargo. The Asiatic Pheasant pattern is a transfer design and was the most popular design of the 19th-century Victorian era. It is still being produced today. The design was produced as high-quality, decorative dinnerware by the potters in the Staffordshire, England, area from the late 1830s, but no one is sure exactly who the original designer was. The industrial age made the production of this design more affordable to the ordinary person who purchased and proudly displayed settings in their homes. The high demand for production resulted in the loss of quality in both potting and design, particularly between 1860-1914 when the design reached its height of popularity, and the results were often a poor match for the earlier pieces’ quality and detail. Some engravers would make copies of the Asiatic Pheasant design (and other designs) onto copper plates and sell them to more than one pottery producer (the Copyright Act of 1842 was intended to control this very thing). Consequently, the list of Makers’ Marks associated with the Asiatic Pheasant is well over 100. A single pottery factory could have several owners, all with their own Marks. These factors all make the dating of pieces difficult. Also, after 1891, pieces produced for export were required to be stamped with “ENGLAND”, but pieces produced for the domestic market in England did not need this stamp, so early pieces and pieces produced for the domestic market would all be without the “ENGLAND” stamp, confusing the matter. Over time the body shape of the pieces changed, the feathered, curved and fluted edges giving way to simpler, cheaper oblong shapes. The LOCH ARD belonged to the famous Loch Line which sailed many ships from England to Australia. Built in Glasgow by Barclay, Curdle and Co. in 1873, the LOCH ARD was a three-masted square-rigged iron sailing ship. The ship measured 262ft 7" (79.87m) in length, 38ft (11.58m) in width, 23ft (7m) in depth and had a gross tonnage of 1693 tons. The LOCH ARD's main mast measured a massive 150ft (45.7m) in height. LOCH ARD made three trips to Australia and one trip to Calcutta before its final voyage. LOCH ARD left England on March 2, 1878, under the command of Captain Gibbs, a newly married, 29-year-old. She was bound for Melbourne with a crew of 37, plus 17 passengers and a load of cargo. The general cargo reflected the affluence of Melbourne at the time. On board were straw hats, umbrellas, perfumes, clay pipes, pianos, clocks, confectionary, linen and candles, as well as a heavier load of railway irons, cement, lead and copper. There were items included that were intended for display in the Melbourne International Exhibition in 1880. The voyage to Port Phillip was long but uneventful. At 3 am on June 1, 1878, Captain Gibbs was expecting to see land and the passengers were becoming excited as they prepared to view their new homeland in the early morning. But LOCH ARD was running into a fog which greatly reduced visibility. Captain Gibbs was becoming anxious as there was no sign of land or the Cape Otway lighthouse. At 4 am the fog lifted. A man aloft announced that he could see breakers. The sheer cliffs of Victoria's west coast came into view, and Captain Gibbs realised that the ship was much closer to them than expected. He ordered as much sail to be set as time would permit and then attempted to steer the vessel out to sea. On coming head-on into the wind, the ship lost momentum, the sails fell limp and LOCH ARD's bow swung back. Gibbs then ordered the anchors to be released in an attempt to hold their position. The anchors sank some 50 fathoms - but did not hold. By this time LOCH ARD was among the breakers and the tall cliffs of Mutton Bird Island rose behind the ship. Just half a mile from the coast, the ship's bow was suddenly pulled around by the anchor. The captain tried to tack out to sea, but the ship struck a reef at the base of Mutton Bird Island, near Port Campbell. Waves broke over the ship and the top deck was loosened from the hull. The masts and rigging came crashing down knocking passengers and crew overboard. When a lifeboat was finally launched, it crashed into the side of LOCH ARD and capsized. Tom Pearce, who had launched the boat, managed to cling to its overturned hull and shelter beneath it. He drifted out to sea and then on the flood tide came into what is now known as LOCH ARD Gorge. He swam to shore, bruised and dazed, and found a cave in which to shelter. Some of the crew stayed below deck to shelter from the falling rigging but drowned when the ship slipped off the reef into deeper water. Eva Carmichael had raced onto deck to find out what was happening only to be confronted by towering cliffs looming above the stricken ship. In all the chaos, Captain Gibbs grabbed Eva and said, "If you are saved Eva, let my dear wife know that I died like a sailor". That was the last Eva Carmichael saw of the captain. She was swept off the ship by a huge wave. Eva saw Tom Pearce on a small rocky beach and yelled to attract his attention. He dived in and swam to the exhausted woman and dragged her to shore. He took her to the cave and broke open a case of brandy which had washed up on the beach. He opened a bottle to revive the unconscious woman. A few hours later Tom scaled a cliff in search of help. He followed hoof prints and came by chance upon two men from nearby Glenample Station three and a half miles away. In a state of exhaustion, he told the men of the tragedy. Tom returned to the gorge while the two men rode back to the station to get help. By the time they reached LOCH ARD Gorge, it was cold and dark. The two shipwreck survivors were taken to Glenample Station to recover. Eva stayed at the station for six weeks before returning to Ireland, this time by steamship. In Melbourne, Tom Pearce received a hero's welcome. He was presented with the first gold medal of the Royal Humane Society of Victoria and a £1000 cheque from the Victorian Government. Concerts were performed to honour the young man's bravery and to raise money for those who lost family in the LOCH ARD disaster. Of the 54 crew members and passengers on board, only two survived: the apprentice, Tom Pearce and the young woman passenger, Eva Carmichael, who lost all of her family in the tragedy. Ten days after the LOCH ARD tragedy, salvage rights to the wreck were sold at auction for £2,120. Cargo valued at £3,000 was salvaged and placed on the beach, but most washed back into the sea when another storm developed. The wreck of LOCH ARD still lies at the base of Mutton Bird Island. Much of the cargo has now been salvaged and some were washed up into what is now known as LOCH ARD Gorge. Cargo and artefacts have also been illegally salvaged over many years before protective legislation was introduced. One of the most unlikely pieces of cargo to have survived the shipwreck was a Minton porcelain peacock - one of only nine in the world. The peacock was destined for the Melbourne International Exhibition in 1880. It had been well packed, which gave it adequate protection during the violent storm. Today, the Minton peacock can be seen at the Flagstaff Hill Maritime Museum in Warrnambool. From Australia's most dramatic shipwreck, it has now become Australia's most valuable shipwreck artefact and is one of very few 'objects' on the Victorian State Heritage Register.Flagstaff Hill’s collection of artefacts from LOCH ARD is significant for being one of the largest collections of artefacts from this shipwreck in Victoria. It is significant for its association with the shipwreck, which is on the Victorian Heritage Register (VHR S417). The collection is significant because of the relationship between the objects, as together they have a high potential to interpret the story of the LOCH ARD. The LOCH ARD collection is archaeologically significant as the remains of a large international passenger and cargo ship. The LOCH ARD collection is historically significant for representing aspects of Victoria’s shipping history and its potential to interpret sub-theme 1.5 of Victoria’s Framework of Historical Themes (living with natural processes). The collection is also historically significant for its association with the LOCH ARD, which was one of the worst and best known shipwrecks in Victoria’s history.Plate, earthenware dinner plate recovered from the wreck of the Loch Ard. Blue transfer design (Asiatic Pheasant) with a clear over-glaze. The outer rim is scalloped. Printed within cartouche on underside of plate "_ H E C L " Printed within cartouche on plate "_ H E C L "flagstaff hill, warrnambool, flagstaff hill maritime museum and village, shipwreck coast, great ocean road, tom pearce, eva carmichael, loch ard, asiatic pheasant design, dinnerware, ceramic plate, wally o’brien, dinner plate -
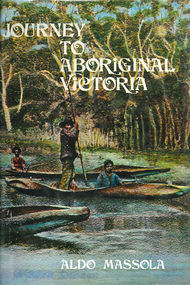 Victorian Aboriginal Corporation for Languages
Book, Aldo Massola, Journey to Aboriginal Victoria, 1969
Looks at the Aboriginal community from the time of white contact, across many parts of Victoria. Chap.1; Melbourne - early missions, camp of Native Police, corroboree trees, canoe trees, grave &? headstone of Derrimut; quarries at Keilor, excavation sites at Green Gully &? Keilor; quarry at Mt. William, notes on inheritance of quarries Coranderrk settlement - Barraks grave, notes on his life; Chap.2; Geelong - Yawangi group of the Wothowurong tribe, camping grounds in area quarries; Notes on William Buckley, Gellibrand (a notable Aboriginal), graves in the Western Cemetery; Chap.3; Colac - war between Colac &? Geelong tribes; Mission at Birregurra, reason for failure of Buntingdale Mission; brass plate to Coc-coc-coine; reserve at Elliminyt, native ovens, camp sites, initiation site &? ritual; quarry sites, axegrinding factory, rock pecking &? engraving; dried hand &? 3 Aboriginal skulls found; Chap.4; The south-west coast - middens, camp sites notes on Framlingham Stn., fish traps at Tyrendarra; Chap.5; The far west - massacres of Aborigines near Casterton; camp sites, oven mounds; the first cricket team formed; Aboriginal cemetery; Chap.6; Hamilton - camps; Mount Rouse Station, axegrinding grooves at Nareeb Nareeb, shelters described, fish traps, massacre at Lake Condah; mission; canoes; Chap.7; Camperdown - legend about Lake Bullen Merri; obelisk erected in memory of Aborigines of district especially chief Wombeetch Puyuun; Jarcoort tribe; fish weirs, camps, intertribal fights between Booluc-burrers, Jarcoorts &? Ellengermote groups; bartering place at Mount Noorat; articles traded, legend of Flat-Top Hill; Chap.8; Ballarat - camp at Lake Wendouree; White Stone Lagoon; legends concerning Mt. Buninyong &? waterfalls at Lal-lal; camp sites; pygmy-type implements near Meredith, quarry at Glue Pot Rocks near Durdidwarrah; brass plate of King Billy; Chap.9; Ararat - Tjapwurong territory; camp sites, quarries, shield &? canoe trees; Bunyip belief at Lake Buninjon of Muk-jarawaint &? Pirtkopen-noot tribes, gives legend; stone implements; mill stones; fish weirs; stone arrangement near Lake Wongan; ground drawing of a bunyip, paintings in rock shelter near Mt. Langi Ghiran; Chap.10; Maryborough - camps, oven mounds, rock wells, stone arrangement at Carisbrook; camp sites at Mt. Franklin; Chap.11; Charlton - belief in Mindye (snake); canoe trees, ovens, camp sites, water holes, rock wells, stone implements; method of rainmaking; Chap.12; Horsham-Stawell, The Wimmera - Wotjobaluk land; camps, fish traps at Toolondo; Black Range cave paintings, Flat Rock shelters (detailed account of these paintings); Bunjils Cave; Chap.13; Horsham-Stawell, The Mallee - camp sites, implements; Ebenezer Mission, Willie Wimmera taken to England by Rev. Chase to become a missionary, died in England; Chap.14; The Murray River, Mildura Swan Hill - Battle of the Rufus; ceremonial ground, Lake Gol Gol, canoe &? shield trees; stone implements; camp sites, fire place arrangements; fish traps; oven mounds; Chap.15; The Murray River, Swan Hill-Echuca - legend about Lake Boga; camps, oven mounds, the Cohuna skull, Kow Swamp, method of burial; Chap.16; Shepparton ovens; brass plates of King Paddy of Kotupna &? King Tattambo of Mulka Stn., native well, camps; Chap.17; Wangaratta -camps, quarry, rock holes, the Faithful massacre; grinding rocks at Earlston; Chap.18; The High Plains - Ya-itma-thang; camps, Bogong moth feasts, native paths for trade &? intertribal fights, articles traded; painted shelters; Koetong Ck. Valley, near Mt. Pilot &? near Barwidgee Ck.; Chap.19; Dandenong - water holes, list of 8 holes in Beaumaris - Black Rock area; camps, middens, stone implements (microliths), legend of Angels Cave, stone axes, Native Police Force, Narre Narre Warren Station, legend about rocks on Bald Hill, kangaroo totemic site; Chap.20; Wonthaggi- Yarram - natives visit Phillip Is., murder of William Cook and Yankee by five Tasmanians (listed as Bon Small Boy, Jack Napoleon Timninaparewa, Fanny Waterpoordeyer, Matilda Nattopolenimma and Truganini) near Cape Patterson, men; camp sites, middens, legend of White Rock; Chap.21; Sale - Bairnsdale, The Lakes Country middens, camps; legend at Wulrunjeri; story of a white woman supposedly living with with the Tutangolung tribe, efforts made to prove story; canoe trees; Chap.22; Sale-Bairnsdale, The Inland Braiakolung tribe, camps, implements, canoe &? shield trees; Ramahyuck Mission, grinding rocks, fights with Omeo tribe; native tracks, death through enemy magic - procedure, belief in ghosts; Chap.23; Lakes Entrance and the Country to the east - Kroatungolung people, legend of Kalimna Valley; camps, stones of Nargun, bunyip, devils at Lake Tyers, excavation at Buchan, carbon dates; middens, ochre at Cape Conrad, stone fish-hook file at Thurra River; note on Bidwel tribe; Each chapter gives historical details, early contacts, relationships with settlers; Aboriginal place names and detailed description of sites and geographical features.b&w photographs, b&w illustrations, colour illustrationsgeelong, colac, hamilton, camperdown, ballarat, ararat, maryborough, charlton, horsham, stawell, murray river, shepparton, wangaratta, dandenong, wonthaggi, yarram, sale, bairnsdale, lakes entrance -
 Flagstaff Hill Maritime Museum and Village
Functional object - Ship's Wheel, 1871 or earlier
The ship building company E. & A. Sewall, from Bath, Maine, USA, built many ships that had wheels with the same decorative, starburst pattern on them as this particular wheel segment, including the Eric the Red. The wheel was manufactured by their local Bath foundry, Geo. Moulton & Co. and sold to the Sewall yard for $100, according to the construction accounts of the vessel. Eric the Red was a wooden, three masted clipper ship. She had 1,580 tons register and was the largest full-rigged ship built at Bath, Maine, USA in 1871. She was built and registered by Arthur Sewall, later to become the partnership E. & A. Sewall, and was the 51st ship built by this company. The annually-published List of Merchant Vessels of the U.S. shows that Bath was still the home port of Eric the Red in 1880. The vessel was named after the Viking discoverer, Eric the Red, who was the first European to reach the shores of North America (in 980AD). The ship Eric the Red at first traded in coal between America and Britain, and later traded in guano nitrates from South America. In 1879 she was re-metalled and was in first class condition. On 10th June 1880 (some records say 12th June) Eric the Red departed New York for Melbourne and then Sydney. She had been commissioned by American trade representatives to carry a special cargo of 500 exhibits (1400 tons) - about a quarter to a third of America’s total exhibits - from America for the U.S.A. pavilion at Melbourne’s first International Exhibition. The exhibits included furniture, ironmongery, wines, chemicals, dental and surgical instruments, paper, cages, bronze lamp trimmings, axles, stamped ware, astronomical and time globes, samples of corn and the choicest of leaf tobacco. Other general cargo included merchandise such as cases of kerosene and turpentine, brooms, Bristol's Sarsaparilla, Wheeler and Wilson sewing machines, Wheeler’s thresher machine, axe handles and tools, cases of silver plate, toys, pianos and organs, carriages and Yankee notions. The Eric the Red left New York under the command of Captain Z. Allen (or some records say Captain Jacques Allen) and 24 other crew including the owner’s son third mate Ned Sewall. There were 2 saloon passengers also. On 4th September 1880 the ship had been sailing for an uneventful 85 days and the voyage was almost at its end. Eric the Red approached Cape Otway in a moderate north-west wind and hazy and overcast atmosphere. Around 1:30am Captain Allen sighted the Cape Otway light and was keeping the ship 5-6 miles offshore to stay clear of the hazardous Otway Reef. However he had badly misjudged his position. The ship hit the Otway Reef about 2 miles out to sea, south west of the Cape Otway light station. Captain Allen ordered the wheel to be put ‘hard up’ thinking that she might float off the reef. A heavy sea knocked the man away from the wheel, broke the wheel ropes and carried away the rudder. The sea swamped the lifeboats, the mizzenmast fell, with all of its rigging, then the mainmast fell and the ship broke in two. Some said that the passenger Vaughan, who was travelling for his health and not very strong, was washed overboard and never seen again. The ship started breaking up. The forward house came adrift with three of the crew on it as well as a longboat, which the men succeeded in launching and keeping afloat by continually bailing with their sea boots. The captain, the third mate (the owner’s son) and others clung to the mizzenmast in the sea. Then the owner’s son was washed away off the mast. Within 10 minutes the rest of the ship was in pieces, completely wrecked, with cargo and wreckage floating in the sea. The captain encouraged the second mate to swim with him to the deckhouse where there were other crew but the second mate wouldn’t go with him. Eventually the Captain made it to the deckhouse and the men pulled him up. At about 4:30am the group of men on the deckhouse saw the lights of a steamer and called for help. At the same time they noticed the second mate and the other man had drifted nearby, still on the spur, and pulled them both onto the wreck. The coastal steamer Dawn was returning to Warrnambool from Melbourne, its sailing time different to its usual schedule. Cries were heard coming from out of the darkness. Captain Jones sent out two life boats, and fired off rockets and blue lights to illuminate the area. They picked up the three survivors who were in the long boat from Eric the Red. Two men were picked up out of the water, one being the owner’s son who was clinging to floating kerosene boxes. At daylight the Dawn then rescued the 18 men from the floating portion of the deckhouse, which had drifted about 4 miles from where they’d struck the reef. Shortly after the rescue the deckhouse drifted onto breakers and was thrown onto rocks at Point Franklin, about 2 miles east of Cape Otway. Captain Jones had signalled to Cape Otway lighthouse the number of the Eric the Red and later signalled that there was a wreck at Otway Reef but there was no response from the lighthouse. The captain and crew of the Dawn spent several more hours searching unsuccessfully for more survivors, even going back as far as Apollo Bay. On board the Dawn the exhausted men received care and attention to their needs and wants, including much needed clothing. Captain Allen was amongst the 23 battered and injured men who were rescued and later taken to Warrnambool for care. Warrnambool’s mayor and town clerk offered them all hospitality, the three badly injured men going to the hospital and others to the Olive Branch Hotel, then on to Melbourne. Captain Allen’s leg injury prevented him from going ashore so he and three other men travelled on the Dawn to Portland. They were met by the mayor who also treated them all with great kindness. Captain Allen took the train back to Melbourne then returned to America. Those saved were Captain Z. Allen (or Jacques Allen), J. Darcy chief mate, James F. Lawrence second mate, Ned Sewall third mate and owner’s son, John French the cook, C. Nelson sail maker, Clarence W. New passenger, and the able seamen Dickenson, J. Black, Denis White, C. Herbert, C. Thompson, A. Brooks, D. Wilson, J. Ellis, Q. Thompson, C. Newman, W. Paul, J. Davis, M. Horenleng, J. Ogduff, T. W. Drew, R. Richardson. Four men had lost their lives; three of them were crew (Gus Dahlgreen ship’s carpenter, H. Ackman steward, who drowned in his cabin, and George Silver seaman) and one a passenger (J. B. Vaughan). The body of one of them had been found washed up at Cape Otway and was later buried in the lighthouse cemetery; another body was seen on an inaccessible ledge. Twelve months later the second mate James F. Lawrence, from Nova Scotia, passed away in the Warrnambool district; an obituary was displayed in the local paper. The captain and crew of the Dawn were recognised by the United States Government in July 1881 for their humane efforts and bravery, being thanked and presented with substantial monetary rewards, medals and gifts. Neither the ship, nor its cargo, was insured. The ship was worth about £15,000 and the cargo was reportedly worth £40,000; only about £2,000 worth had been recovered. Cargo and wreckage washed up at Apollo Bay, Peterborough, Port Campbell, Western Port and according to some reports, even as far away as the beaches of New Zealand. The day after the wreck the government steam ship Pharos was sent from Queenscliff to clear the shipping lanes of debris that could be a danger to ships. The large midship deckhouse of the ship was found floating in a calm sea near Henty Reef. Items such as an American chair, a ladder and a nest of boxes were all on top of the deckhouse. As it was so large and could cause danger to passing ships, Captain Payne had the deckhouse towed towards the shore just beyond Apollo Bay. Between Apollo Bay and Blanket Bay the captain and crew of Pharos collected Wheeler and Wilson sewing machines, nests of boxes, bottles of Bristol’s sarsaparilla, pieces of common American chairs, axe handles, a Wheelers’ Patent thresher and a sailor’s trunk with the words “A. James” on the front. A ship’s flag-board bearing the words “Eric the Red” was found on the deckhouse; finally those on board the Pharos had the name of the wrecked vessel. During this operation Pharos came across the government steamer Victoria and also a steamer S.S. Otway, both of which were picking up flotsam and wreckage. A whole side of the hull and three large pieces of the other side of the hull, with some of the copper sheathing stripped off, had floated on to Point Franklin. Some of the vessels yards and portions of her masts were on shore. The pieces of canvas attached to the yards and masts confirmed that the vessel had been under sail. The beach there was piled with debris several feet high. There were many cases of Diamond Oil kerosene, labelled R. W. Cameron and Company, New York. There were also many large planks of red pine, portions of a small white boat and a large, well-used oar. Other items found ashore included sewing machines (some consigned to ‘Long and Co.”) and notions, axe and scythe handles, hay forks, wooden pegs, rolls of wire (some branded “T.S” and Co, Melbourne”), kegs of nails branded “A.T. and Co.” from the factory of A. Field and Son, Taunton, Massachusetts, croquet balls and mallets, buggy fittings, rat traps, perfumery, cutlery and Douay Bibles, clocks, bicycles, chairs, a fly wheel, a cooking stove, timber, boxes, pianos, organs and a ladder. (Wooden clothes pegs drifted in for many years). There seemed to be no personal luggage or clothing. The Pharos encountered a long line, about one and a half miles, of floating wreckage about 10 miles off land, south east of Cape Otway, and in some places about 40 feet wide. It seemed that more than half of it was from Eric the Red. The ship’s crew rescued 3 cases that were for the Melbourne Exhibition and other items from amongst the debris. There were also chairs, doors, musical instruments, washing boards, nests of trunks and fly catchers floating in the sea. Most of the goods were saturated and smelt of kerosene. A section of the hull lies buried in the sand at Parker River Beach. An anchor with chain is embedded in the rocks east of Point Franklin and a second anchor, thought to be from Eric the Red, is on display at the Cape Otway light station. (There is a photograph of a life belt on the verandah of Rivernook Guest House in Princetown with the words “ERIC THE RED / BOSTON”. This is rather a mystery as the ship was registered in Bath, Maine, USA.) Parts of the ship are on display at Bimbi Park Caravan Park and at Apollo Bay Museum. Flagstaff Hill Maritime Village also has part of the helm (steering wheel), a carved wooden sword (said to be the only remaining portion of the ship’s figurehead; further research is currently being carried out), a door, a metal rod, samples of wood and a medal for bravery. Much of the wreckage was recovered by the local residents before police and other authorities arrived at the scene. Looters went to great effort to salvage goods, being lowered down the high cliff faces to areas with little or no beach to collect items from the wreckage, their mates above watching out for dangerous waves. A Tasmanian newspaper reports on a court case in Stawell, Victoria, noting a man who was caught 2 months later selling tobacco from the wreckage of Eric the Red. Some of the silverware is still treasured by descendants of Mr Mackenzie who was given these items by officials for his help in securing the cargo. The gifts included silver coffee and tea pots, half a dozen silver serviette rings and two sewing machines. The wreck and cargo were sold to a Melbourne man who salvaged a quantity of high quality tobacco and dental and surgical instruments. Timbers from the ship were salvaged and used in the construction of houses and sheds around Apollo Bay, including a guest house, Milford House (since burnt down in bushfires), which had furniture, fittings and timber on the dining room floor from the ship. A 39.7 foot long trading ketch, the Apollo, was also built from its timbers by Mr Burgess in 1883 and subsequently used in Tasmanian waters. It was the first attempt at ship building in Apollo bay. In 1881 a red light was installed about 300 feet above sea level at the base of the Cape Otway lighthouse to warn ships when they were too close to shore; It would not be visible unless a ship came within 3 miles from it. This has proved to be an effective warning. The State Library of Victoria has a lithograph in its collection depicting the steamer Dawn and the shipwrecked men, titled. "Wreck of the ship Eric the Red, Cape Otway: rescue of the crew by the Dawn". “The Eric the Red is historically significant as one of Victoria's major 19th century shipwrecks. (Heritage Victoria Eric the Red; HV ID 239) The wreck led to the provision of an additional warning light placed below the Cape Otway lighthouse to alert mariners to the location of Otway Reef. The site is archaeologically significant for its remains of a large and varied cargo and ship's fittings being scattered over a wide area. The site is recreationally and aesthetically significant as it is one of the few sites along this coast where tourists can visit identifiable remains of a large wooden shipwreck, and for its location set against the background of Cape Otway, Bass Strait, and the Cape Otway lighthouse.“ (Victorian Heritage Database Registration Number S239, Official Number 8745 USA) Segment of a ship's wheel, or helm, from the wreck of the sailing ship Eric the Red. The wheel part is an arc shape from the outer rim of the wheel and is made up of three layers of timber. The centre layer is a dark, dense timber and is wider than the two outer layers, which are less dense and lighter in colour. The wheel segment has a vertically symmetrical, decorative copper plate inlaid on the front. The plate has a starburst pattern; six stars decorate it, each at a point where there is a metal fitting going through the three layers of timber to the rear side of the wheel. On the rear each of the six fittings has an individual copper star around it. The edges of the helm are rounded and bevelled, polished to a shine in a dark stain. Around each of the stars, front and back, the wood is a lighter colour, as though the metal in that area being polished frequently. The length of the segment suggests that it has probably come from a wheel or helm that had ten spokes. (Ref: F.H.M.M. 16th March 1994, 239.6.610.3.7. Artefact Reg No ER/1.)flagstaff hill, warrnambool, shipwrecked-coast, flagstaff-hill, flagstaff-hill-maritime-museum, maritime-museum, shipwreck-coast, flagstaff-hill-maritime-village, ship's-wheel, eric-the-red, helm, shei's wheel, ship's steering wheel -
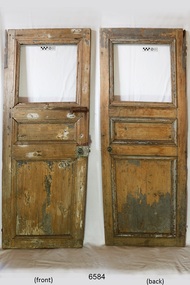 Flagstaff Hill Maritime Museum and Village
Furniture - Door, 1871 or earlier
The wooden door was salvaged from the wreck of the sailing ship Eric the Red, which was a wooden, three masted clipper ship. Eric the Red was the largest full-rigged ship built at Bath, Maine, USA in 1871, having had a 1,580 tons register. She was built and registered by Arthur Sewall, later to become the partnership E. & A. Sewall, the 51st ship built by this company. The annually-published List of Merchant Vessels of the U.S. shows Bath was still the home port of Eric the Red in 1880. The vessel was named after the Viking discoverer, Eric the Red, who was the first European to reach the shores of North America (in 980AD). The ship Eric the Red at first traded in coal between America and Britain, and later traded in guano nitrates from South America. In 1879 she was re-metalled and was in first class condition. On 10th June 1880 (some records say 12th June) Eric the Red departed New York for Melbourne and then Sydney. She had been commissioned by American trade representatives to carry a special cargo of 500 exhibits (1400 tons) – about a quarter to a third of America’s total exhibits - from America for the U.S.A. pavilion at Melbourne’s first International Exhibition. The exhibits included furniture, ironmongery, wines, chemicals, dental and surgical instruments, paper, cages, bronze lamp trimmings, axles, stamped ware, astronomical and time globes, samples of corn and the choicest of leaf tobacco. Other general cargo included merchandise such as cases of kerosene and turpentine, brooms, Bristol's Sarsaparilla, Wheeler and Wilson sewing machines, Wheeler’s thresher machine, axe handles and tools, cases of silver plate, toys, pianos and organs, carriages and Yankee notions. The Eric the Red left New York under the command of Captain Z. Allen (or some records say Captain Jacques Allen) and 24 other crew including the owner’s son third mate Ned Sewall. There were 2 saloon passengers also. The ship had been sailing for an uneventful 85 days and the voyage was almost at its end. On 4th September 1880 the Eric the Red approached Cape Otway with a moderate north-west wind and hazy and overcast atmosphere. Around 1:30am Captain Allen sighted the Cape Otway light and was keeping the ship 5-6 miles offshore to stay clear of the hazardous Otway Reef. However he had badly misjudged his position. The ship hit the Otway Reef about 2 miles out to sea, south west of the Cape Otway light station. He ordered the wheel to be put ‘hard up’ thinking that she might float off the reef. A heavy sea knocked the man away from the wheel, broke the wheel ropes and carried away the rudder. The sea swamped the lifeboats. The mizzenmast fell, with all of its rigging, then the mainmast also fell and the ship broke in two. Some said that the passenger Vaughan, who was travelling for his health and not very strong, was washed overboard and never seen again. The ship started breaking up. The forward house came adrift with three of the crew on it as well as a longboat, which the men succeeded in launching and keeping afloat by continually bailing with their sea boots. The captain, the third mate (the owner’s son) and others clung to the mizzenmast in the sea. Then the owner’s son was washed away off the mast. Within 10 minutes the rest of the ship was in pieces, completely wrecked, with cargo and wreckage floating in the sea. The captain encouraged the second mate to swim with him to the deckhouse where there were other crew but the second mate wouldn’t go with him. Eventually the Captain made it to the deckhouse and the men pulled him up. At about 4:30am the group of men on the deckhouse saw the lights of a steamer and called for help. At the same time they noticed the second mate and the other man had drifted nearby, still on the spur, and pulled them both onto the wreck. The coastal steamer Dawn was returning to Warrnambool from Melbourne, its sailing time different to its usual schedule. Captain Jones sent out two life boats, and fired off rockets and blue lights to illuminate the area. They picked up the three survivors who were in the long boat from Eric the Red. Two men were picked up out of the water, one being the owner’s son who was clinging to floating kerosene boxes. At daylight the Dawn then rescued the 18 men from the floating portion of the deckhouse, which had drifted about 4 miles from where they’d struck the reef. Shortly after the rescue the deckhouse drifted onto breakers and was thrown onto rocks at Point Franklin, about 2 miles east of Cape Otway. Captain Jones had signalled to Cape Otway lighthouse the number of the Eric the Red and later signalled that there was a wreck at Otway Reef but there was no response from the lighthouse. The captain and crew of the Dawn spent several more hours searching unsuccessfully for more survivors, even going back as far as Apollo Bay. On board the Dawn the exhausted men received care and attention to their needs and wants, including much needed clothing. Captain Allen was amongst the 23 battered and injured men who were rescued and later taken to Warrnambool for care. Warrnambool’s mayor and town clerk offered them all hospitality, the three badly injured men going to the hospital for care and others to the Olive Branch Hotel, then on to Melbourne. Captain Allen’s leg injury prevented him from going ashore so he and three other men travelled on the Dawn to Portland. They were met by the mayor who also treated them all with great kindness. Captain Allen took the train back to Melbourne then returned to America. Those saved were Captain Z. Allen (or Jacques Allen), J. Darcy chief mate, James F. Lawrence second mate, Ned Sewall third mate and owner’s son, John French the cook, C. Nelson sail maker, Clarence W. New passenger, and the able seamen Dickenson, J. Black, Denis White, C. Herbert, C. Thompson, A. Brooks, D. Wilson, J. Ellis, Q. Thompson, C. Newman, W. Paul, J. Davis, M. Horenleng, J. Ogduff, T. W. Drew, R. Richardson. Four men had lost their lives; three of them were crew (Gus Dahlgreen ship’s carpenter, H. Ackman steward, who drowned in his cabin, and George Silver seaman) and one a passenger (J. B. Vaughan). The body of one of them had been found washed up at Cape Otway and was later buried in the lighthouse cemetery; another body was seen on an inaccessible ledge. Twelve months later the second mate James F. Lawrence, from Nova Scotia, passed away in the Warrnambool district; an obituary was displayed in the local paper. The captain and crew of the Dawn were recognised by the United States Government in July 1881 for their humane efforts, being thanked and presented with substantial monetary rewards, medals and gifts. Neither the ship, nor its cargo, was insured. The ship was worth about £15,000 and the cargo was reportedly worth £40,000; only about £2,000 worth had been recovered. Cargo and wreckage washed up at Apollo Bay, Peterborough, Port Campbell, Western Port and according to some reports, even as far away as the beaches of New Zealand. The day after the wreck the government steam ship Pharos was sent from Queenscliff to clear the shipping lanes of debris that could be a danger to ships. The large midship deckhouse of the ship was found floating in a calm sea near Henty Reef. Items such as an American chair, a ladder and a nest of boxes were all on top of the deckhouse. As it was so large and could cause danger to passing ships, Captain Payne had the deckhouse towed towards the shore just beyond Apollo Bay. Between Apollo Bay and Blanket Bay the captain and crew of Pharos collected Wheeler and Wilson sewing machines, nests of boxes, bottles of Bristol’s sarsaparilla, pieces of common American chairs, axe handles, a Wheelers’ Patent thresher and a sailor’s trunk with the words “A. James” on the front. A ship’s flag-board bearing the words “Eric the Red” was found on the deckhouse; finally those on board the Pharos had the name of the wrecked vessel. During this operation Pharos came across the government steamer Victoria and also a steamer S.S. Otway, both of which were picking up flotsam and wreckage. A whole side of the hull and three large pieces of the other side of the hull, with some of the copper sheathing stripped off, had floated on to Point Franklin. Some of the vessels yards and portions of her masts were on shore. The pieces of canvas attached to the yards and masts confirmed that the vessel had been under sail. The beach there was piled with debris several feet high. There were many cases of Diamond Oil kerosene, labelled R. W. Cameron and Company, New York. There were also many large planks of red pine, portions of a small white boat and a large, well-used oar. Other items found ashore included sewing machines (some consigned to ‘Long and Co.”) and notions, axe and scythe handles, hay forks, wooden pegs, rolls of wire (some branded “T.S” and Co, Melbourne”), kegs of nails branded “A.T. and Co.” from the factory of A. Field and Son, Taunton, Massachusetts, croquet balls and mallets, buggy fittings, rat traps, perfumery, cutlery and Douay Bibles, clocks, bicycles, chairs, a fly wheel, a cooking stove, timber, boxes, pianos, organs and a ladder. (Wooden clothes pegs drifted in for many years). There seemed to be no personal luggage or clothing. The Pharos encountered a long line, about one and a half miles, of floating wreckage about 10 miles off land, south east of Cape Otway, and in some places about 40 feet wide. It seemed that more than half of it was from Eric the Red. The ship’s crew rescued 3 cases that were for the Melbourne Exhibition and other items from amongst the debris. There were also chairs, doors, musical instruments, washing boards, nests of trunks and fly catchers floating in the sea. Most of the goods were saturated and smelt of kerosene. A section of the hull lies buried in the sand at Parker River Beach. An anchor with chain is embedded in the rocks east of Point Franklin and a second anchor, thought to be from Eric the Red, is on display at the Cape Otway light station. (There is a photograph of a life belt on the verandah of Rivernook Guest House in Princetown with the words “ERIC THE RED / BOSTON”. This is rather a mystery as the ship was registered in Bath, Maine, USA.) Parts of the ship are on display at Bimbi Park Caravan Park and at Apollo Bay Museum. Flagstaff Hill Maritime Village also has part of the helm (steering wheel), a carved wooden sword (said to be the only remaining portion of the ship’s figurehead; further research is currently being carried out), a door, a metal rod and samples of wood. Much of the wreckage was recovered by the local residents before police and other authorities arrived at the scene. Looters went to great effort to salvage goods, being lowered down the high cliff faces to areas with little or no beach to collect items from the wreckage, their mates above watching out for dangerous waves. A Tasmanian newspaper reports on a court case in Stawell, Victoria, noting a man who was caught 2 months later selling tobacco from the wreckage of Eric the Red. Some of the silverware is still treasured by descendants of Mr Mackenzie who was given these items by officials for his help in securing the cargo. The gifts included silver coffee and tea pots, half a dozen silver serviette rings and two sewing machines. The wreck and cargo were sold to a Melbourne man who salvaged a quantity of high quality tobacco and dental and surgical instruments. Timbers from the ship were salvaged and used in the construction of houses and sheds around Apollo Bay, including a guest house, Milford House (since burnt down in bushfires), which had furniture, fittings and timber on the dining room floor from the ship. A 39.7 foot long trading ketch, the Apollo, was also built from its timbers by Mr Burgess in 1883 and subsequently used in Tasmanian waters. It was the first attempt at ship building in Apollo bay. In 1881 a red light was installed about 300 feet above sea level at the base of the Cape Otway lighthouse to warn ships when they were too close to shore; It would not be visible unless a ship came within 3 miles from it. This has proved to be an effective warning. The State Library of Victoria has a lithograph in its collection depicting the steamer Dawn and the shipwrecked men, titled. "Wreck of the ship Eric the Red, Cape Otway: rescue of the crew by the Dawn". “The Eric the Red is historically significant as one of Victoria's major 19th century shipwrecks. (Heritage Victoria Eric the Red; HV ID 239) The wreck led to the provision of an additional warning light placed below the Cape Otway lighthouse to alert mariners to the location of Otway Reef. The site is archaeologically significant for its remains of a large and varied cargo and ship's fittings being scattered over a wide area. The site is recreationally and aesthetically significant as it is one of the few sites along this coast where tourists can visit identifiable remains of a large wooden shipwreck, and for its location set against the background of Cape Otway, Bass Strait, and the Cape Otway lighthouse.“ (Victorian Heritage Database Registration Number S239, Official Number 8745 USA) Door from the wreck of the ship Eric the Red. The wooden singular rectangular door includes three insert panel sections. The top section is square shaped and is missing its panel or glass. The centre timber panel is about a third of the height of the top panel and the bottom timber panel is approximately equal in height to the total height of the two upper panels. The door fastenings include both a metal door latch and traditional door bolt. They are both attached to the front right hand side of the door. The bolt is just below the top panel, and the door latch is in approximately the centre of that side. The door latch has a round mark where a handle could have been attached. The wood of the door has scraping marks in a semi-circle around the door latch where the latch has swung around on its one remaining fastening and grazed the surface. There is a metal hinge at the top section of the door on the opposite side to the latch. The painted surface has been scraped back to expose the wood. The door is shorter than the average height of a person. On the reverse of the door there are lines on the panels, just inside their edges, is what appears to be pencil. The door is not aligned straight but is skew to centre.warrnambool, flagstaff hill, flagstaff hill maritime village, maritime museum, shipwreck coast, great ocean road, shipwreck artefact, eric the red, jaques allen, sewall, 1880, melbourne exhibition 1880, cape otway, otway reef, victorian shipwreck, bass strait, eric-the-red, door -
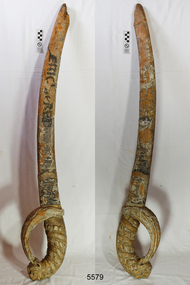 Flagstaff Hill Maritime Museum and Village
Decorative object - Sword, 1871 or earlier
This wooden sword is said to “possibly be the only remaining part of the figurehead from the sailing ship Eric the Red.” It was previously part of the collection of the old Warrnambool Museum and the entry in its inventory says “Wooden sword, portion of the figurehead, held by “Eric the Red” at the bow.” A large part of the ship’s hull was found on the rocks and a figurehead may have been attached or washed up on the shore. The shipping records for E. & A. Sewall, the builders, owners and managers of Eric the Red, are now preserved in the Maine Maritime Museum. There is no photograph on record of Eric the Red but photographs of other ships built around that time by the same company show that these did not have figureheads, and there is no record found of a figurehead for Eric the Red being ordered or paid for. Further research is being carried out. The ship building company E. & A. Sewall, from Bath, Maine, USA, built Eric the Red, a wooden, three masted clipper ship. She had 1,580 tons register and was the largest full-rigged ship built at Bath, Maine, USA in 1871. She was built and registered by Arthur Sewall, later to become the partnership E. & A. Sewall, and was the 51st ship built by this company. The annually-published List of Merchant Vessels of the U.S. shows that Bath was still the home port of Eric the Red in 1880. The vessel was named after the Viking discoverer, Eric the Red, who was the first European to reach the shores of North America (in 980AD). The ship Eric the Red at first traded in coal between America and Britain, and later traded in guano nitrates from South America. In 1879 she was re-metalled and was in first class condition. On 10th June 1880 (some records say 12th June) Eric the Red departed New York for Melbourne and then Sydney. She had been commissioned by American trade representatives to carry a special cargo of 500 exhibits (1400 tons) - about a quarter to a third of America’s total exhibits - from America for the U.S.A. pavilion at Melbourne’s first International Exhibition. The exhibits included furniture, ironmongery, wines, chemicals, dental and surgical instruments, paper, cages, bronze lamp trimmings, axles, stamped ware, astronomical and time globes, samples of corn and the choicest of leaf tobacco. Other general cargo included merchandise such as cases of kerosene and turpentine, brooms, Bristol's Sarsaparilla, Wheeler and Wilson sewing machines, Wheeler’s thresher machine, axe handles and tools, cases of silver plate, toys, pianos and organs, carriages and Yankee notions. The Eric the Red left New York under the command of Captain Z. Allen (or some records say Captain Jacques Allen) and 24 other crew including the owner’s son third mate Ned Sewall. There were 2 saloon passengers also. On 4th September 1880 the ship had been sailing for an uneventful 85 days and the voyage was almost at its end. Eric the Red approached Cape Otway in a moderate north-west wind and hazy and overcast atmosphere. Around 1:30am Captain Allen sighted the Cape Otway light and was keeping the ship 5-6 miles offshore to stay clear of the hazardous Otway Reef. However he had badly misjudged his position. The ship hit the Otway Reef about 2 miles out to sea, south west of the Cape Otway light station. Captain Allen ordered the wheel to be put ‘hard up’ thinking that she might float off the reef. A heavy sea knocked the man away from the wheel, broke the wheel ropes and carried away the rudder. The sea swamped the lifeboats, the mizzenmast fell, with all of its rigging, then the mainmast fell and the ship broke in two. Some said that the passenger Vaughan, who was travelling for his health and not very strong, was washed overboard and never seen again. The ship started breaking up. The forward house came adrift with three of the crew on it as well as a longboat, which the men succeeded in launching and keeping afloat by continually bailing with their sea boots. The captain, the third mate (the owner’s son) and others clung to the mizzenmast in the sea. Then the owner’s son was washed away off the mast. Within 10 minutes the rest of the ship was in pieces, completely wrecked, with cargo and wreckage floating in the sea. The captain encouraged the second mate to swim with him to the deckhouse where there were other crew but the second mate wouldn’t go with him. Eventually the Captain made it to the deckhouse and the men pulled him up. At about 4:30am the group of men on the deckhouse saw the lights of a steamer and called for help. At the same time they noticed the second mate and the other man had drifted nearby, still on the spur, and pulled them both onto the wreck. The coastal steamer Dawn was returning to Warrnambool from Melbourne, its sailing time different to its usual schedule. Cries were heard coming from out of the darkness. Captain Jones sent out two life boats, and fired off rockets and blue lights to illuminate the area. They picked up the three survivors who were in the long boat from Eric the Red. Two men were picked up out of the water, one being the owner’s son who was clinging to floating kerosene boxes. At daylight the Dawn then rescued the 18 men from the floating portion of the deckhouse, which had drifted about 4 miles from where they’d struck the reef. Shortly after the rescue the deckhouse drifted onto breakers and was thrown onto rocks at Point Franklin, about 2 miles east of Cape Otway. Captain Jones had signalled to Cape Otway lighthouse the number of the Eric the Red and later signalled that there was a wreck at Otway Reef but there was no response from the lighthouse. The captain and crew of the Dawn spent several more hours searching unsuccessfully for more survivors, even going back as far as Apollo Bay. On board the Dawn the exhausted men received care and attention to their needs and wants, including much needed clothing. Captain Allen was amongst the 23 battered and injured men who were rescued and later taken to Warrnambool for care. Warrnambool’s mayor and town clerk offered them all hospitality, the three badly injured men going to the hospital and others to the Olive Branch Hotel, then on to Melbourne. Captain Allen’s leg injury prevented him from going ashore so he and three other men travelled on the Dawn to Portland. They were met by the mayor who also treated them all with great kindness. Captain Allen took the train back to Melbourne then returned to America. Those saved were Captain Z. Allen (or Jacques Allen), J. Darcy chief mate, James F. Lawrence second mate, Ned Sewall third mate and owner’s son, John French the cook, C. Nelson sail maker, Clarence W. New passenger, and the able seamen Dickenson, J. Black, Denis White, C. Herbert, C. Thompson, A. Brooks, D. Wilson, J. Ellis, Q. Thompson, C. Newman, W. Paul, J. Davis, M. Horenleng, J. Ogduff, T. W. Drew, R. Richardson. Four men had lost their lives; three of them were crew (Gus Dahlgreen ship’s carpenter, H. Ackman steward, who drowned in his cabin, and George Silver seaman) and one a passenger (J. B. Vaughan). The body of one of them had been found washed up at Cape Otway and was later buried in the lighthouse cemetery; another body was seen on an inaccessible ledge. Twelve months later the second mate James F. Lawrence, from Nova Scotia, passed away in the Warrnambool district; an obituary was displayed in the local paper. The captain and crew of the Dawn were recognised by the United States Government in July 1881 for their humane efforts and bravery, being thanked and presented with substantial monetary rewards, medals and gifts. Neither the ship, nor its cargo, was insured. The ship was worth about £15,000 and the cargo was reportedly worth £40,000; only about £2,000 worth had been recovered. Cargo and wreckage washed up at Apollo Bay, Peterborough, Port Campbell, Western Port and according to some reports, even as far away as the beaches of New Zealand. The day after the wreck the government steam ship Pharos was sent from Queenscliff to clear the shipping lanes of debris that could be a danger to ships. The large midship deckhouse of the ship was found floating in a calm sea near Henty Reef. Items such as an American chair, a ladder and a nest of boxes were all on top of the deckhouse. As it was so large and could cause danger to passing ships, Captain Payne had the deckhouse towed towards the shore just beyond Apollo Bay. Between Apollo Bay and Blanket Bay the captain and crew of Pharos collected Wheeler and Wilson sewing machines, nests of boxes, bottles of Bristol’s sarsaparilla, pieces of common American chairs, axe handles, a Wheelers’ Patent thresher and a sailor’s trunk with the words “A. James” on the front. A ship’s flag-board bearing the words “Eric the Red” was found on the deckhouse; finally those on board the Pharos had the name of the wrecked vessel. During this operation Pharos came across the government steamer Victoria and also a steamer S.S. Otway, both of which were picking up flotsam and wreckage. A whole side of the hull and three large pieces of the other side of the hull, with some of the copper sheathing stripped off, had floated on to Point Franklin. Some of the vessels yards and portions of her masts were on shore. The pieces of canvas attached to the yards and masts confirmed that the vessel had been under sail. The beach there was piled with debris several feet high. There were many cases of Diamond Oil kerosene, labelled R. W. Cameron and Company, New York. There were also many large planks of red pine, portions of a small white boat and a large, well-used oar. Other items found ashore included sewing machines (some consigned to ‘Long and Co.”) and notions, axe and scythe handles, hay forks, wooden pegs, rolls of wire (some branded “T.S” and Co, Melbourne”), kegs of nails branded “A.T. and Co.” from the factory of A. Field and Son, Taunton, Massachusetts, croquet balls and mallets, buggy fittings, rat traps, perfumery, cutlery and Douay Bibles, clocks, bicycles, chairs, a fly wheel, a cooking stove, timber, boxes, pianos, organs and a ladder. (Wooden clothes pegs drifted in for many years). There seemed to be no personal luggage or clothing. The Pharos encountered a long line, about one and a half miles, of floating wreckage about 10 miles off land, south east of Cape Otway, and in some places about 40 feet wide. It seemed that more than half of it was from Eric the Red. The ship’s crew rescued 3 cases that were for the Melbourne Exhibition and other items from amongst the debris. There were also chairs, doors, musical instruments, washing boards, nests of trunks and fly catchers floating in the sea. Most of the goods were saturated and smelt of kerosene. A section of the hull lies buried in the sand at Parker River Beach. An anchor with chain is embedded in the rocks east of Point Franklin and a second anchor, thought to be from Eric the Red, is on display at the Cape Otway light station. (There is a photograph of a life belt on the verandah of Rivernook Guest House in Princetown with the words “ERIC THE RED / BOSTON”. This is rather a mystery as the ship was registered in Bath, Maine, USA.) Parts of the ship are on display at Bimbi Park Caravan Park and at Apollo Bay Museum. Flagstaff Hill Maritime Village also has part of the helm (steering wheel), a carved wooden sword (said to be the only remaining portion of the ship’s figurehead; further research is currently being carried out), a door, a metal rod, samples of wood and a medal for bravery. Much of the wreckage was recovered by the local residents before police and other authorities arrived at the scene. Looters went to great effort to salvage goods, being lowered down the high cliff faces to areas with little or no beach to collect items from the wreckage, their mates above watching out for dangerous waves. A Tasmanian newspaper reports on a court case in Stawell, Victoria, noting a man who was caught 2 months later selling tobacco from the wreckage of Eric the Red. Some of the silverware is still treasured by descendants of Mr Mackenzie who was given these items by officials for his help in securing the cargo. The gifts included silver coffee and tea pots, half a dozen silver serviette rings and two sewing machines. The wreck and cargo were sold to a Melbourne man who salvaged a quantity of high quality tobacco and dental and surgical instruments. Timbers from the ship were salvaged and used in the construction of houses and sheds around Apollo Bay, including a guest house, Milford House (since burnt down in bushfires), which had furniture, fittings and timber on the dining room floor from the ship. A 39.7 foot long trading ketch, the Apollo, was also built from its timbers by Mr Burgess in 1883 and subsequently used in Tasmanian waters. It was the first attempt at ship building in Apollo bay. In 1881 a red light was installed about 300 feet above sea level at the base of the Cape Otway lighthouse to warn ships when they were too close to shore; It would not be visible unless a ship came within 3 miles from it. This has proved to be an effective warning. The State Library of Victoria has a lithograph in its collection depicting the steamer Dawn and the shipwrecked men, titled. "Wreck of the ship Eric the Red, Cape Otway: rescue of the crew by the Dawn".The Eric the Red is historically significant as one of Victoria's major 19th century shipwrecks. (Heritage Victoria Eric the Red; HV ID 239) The wreck led to the provision of an additional warning light placed below the Cape Otway lighthouse to alert mariners to the location of Otway Reef. The site is archaeologically significant for its remains of a large and varied cargo and ship's fittings being scattered over a wide area. The site is recreationally and aesthetically significant as it is one of the few sites along this coast where tourists can visit identifiable remains of a large wooden shipwreck, and for its location set against the background of Cape Otway, Bass Strait, and the Cape Otway lighthouse. (Victorian Heritage Database Registration Number S239, Official Number 8745 USA)This carved wooden sword, recovered from the Eric the Red, is possibly the only portion of the figurehead recovered after the wreck. There are spirals carved from the base of the handle to the top of the sword. The hilt of the sword is a lion’s head holding its tail in its mouth, the tail forming the handle. The blade of the sword has engraved patterns on it. Tiny particles of gold leaf and dark blue paint fragments can be seen between the carving marks. There are remnants of yellowish-orange and crimson paint on the handle. At some time after the sword was salvaged the name of the ship was hand painted on the blade in black paint. The tip of the sword has broken or split and the remaining part is charcoal in appearance. On both the tip and the base of the handle are parts made where the sword could have been joined onto the figurehead There is a white coating over some areas of the sword, similar to white lead putty used in traditional shipbuilding. The words “ERIC the RED” have been hand painted on the blade of the sword in black paint sometime after it was salvaged.flagstaff hill, flagstaff hill maritime museum and village, warrnambool, maritime museum, maritime village, great ocean road, shipwreck coast, sword, wooden sword, eric the red, carved sword, figurehead, snake head on sword -
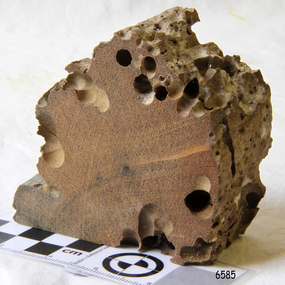 Flagstaff Hill Maritime Museum and Village
Wood Sample, about 1871
This piece of timber from the ship Eric the Red has been eaten through by the marine animals called Teredo Worms, sometimes called sea worms or ‘termites of the sea’. The worms bore holes into wood that is immersed in sea water and bacteria inside the worms digest the wood. Shipbuilders tried to prevent this problem by using coatings of tar, wax, lead or pitch. In the 18th and 19th centuries the outside of their ships were sheathed in copper or a combination of copper and zinc (called Muntz metal) and would be re-metalled periodically to ensure the sheathing would remain effective. In more recent times the ships are protected with a toxic coating. The American ship Eric the Red was a wooden, three masted clipper ship. She had 1,580 tons register and was the largest full-rigged ship built at Bath, Maine, USA in 1871. She was built and registered by Arthur Sewall, later to become the partnership E. & A. Sewall, the 51st ship built by this company. The annually-published List of Merchant Vessels of the U.S. shows Bath was still the home port of Eric the Red in 1880. The vessel was named after the Viking discoverer, Eric ‘the Red-haired’ Thorvaldsson , who was the first European to reach the shores of North America (in 980AD). The ship Eric the Red at first traded in coal between America and Britain, and later traded in guano nitrates from South America. In 1879 she was re-metalled and was in first class condition. On 10th June 1880 (some records say 12th June) Eric the Red departed New York for Melbourne and then Sydney. She had been commissioned by American trade representatives to carry a special cargo of 500 exhibits (1400 tons) – about a quarter to a third of America’s total exhibits - for the U.S.A. pavilion at Melbourne’s first International Exhibition. The exhibits included furniture, ironmongery, wines, chemicals, dental and surgical instruments, paper, cages, bronze lamp trimmings, axles, stamped ware, astronomical and time globes, samples of corn and the choicest of leaf tobacco. Other general cargo included merchandise such as cases of kerosene and turpentine, brooms, Bristol's Sarsaparilla, Wheeler and Wilson sewing machines, Wheeler’s thresher machine, axe handles and tools, cases of silver plate, toys, pianos and organs, carriages and Yankee notions. The Eric the Red left New York under the command of Captain Zaccheus Allen (or some records say Captain Jacques Allen) and 24 other crew including the owner’s son third mate Ned Sewall. There were also 2 saloon passengers on board. The ship had been sailing for an uneventful 85 days and the voyage was almost at its end. As Eric the Red approached Cape Otway there was a moderate north-west wind and hazy and overcast atmosphere. On 4th September 1880 at about 1:30am Captain Allen sighted the Cape Otway light and was keeping the ship 5-6 miles offshore to stay clear of the hazardous Otway Reef. However he had badly misjudged his position. The ship hit the Otway Reef about 2 miles out to sea, south west of the Cape Otway light station. Captain Allen ordered the wheel to be put ‘hard up’ thinking that she might float off the reef. The sea knocked the helmsman away from the wheel, broke the wheel ropes and carried away the rudder. The lifeboats were swamped, the mizzenmast fell, with all of its rigging, then the mainmast also fell and the ship broke in two. Some said that the passenger Vaughan, who was travelling for his health and not very strong, was washed overboard and never seen again. The ship started breaking up. The forward house came adrift with three of the crew on it as well as a longboat, which the men succeeded in launching and keeping afloat by continually bailing with their sea boots. The captain, the third mate (the owner’s son) and others clung to the mizzenmast in the sea. Then the owner’s son was washed away off the mast. Within 10 minutes the rest of the ship was in pieces, completely wrecked, with cargo and wreckage floating in the sea. The captain encouraged the second mate to swim with him to the deckhouse where there were other crew but the second mate wouldn’t go with him. Eventually the Captain made it to the deckhouse and the men pulled him up. At about 4:30am the group of men on the deckhouse saw the lights of a steamer and called for help. At the same time they noticed the second mate and the other man had drifted nearby, still on the spur, and pulled them both onto the wreck. The coastal steamer SS Dawn was returning to Warrnambool from Melbourne, its sailing time different to its usual schedule. She was built in 1876 and bought by the Portland and Belfast Steam Navigation Co. in 1877. At the time of this journey she was commanded by Captain Jones, and was sailing between Melbourne and Portland via Warrnambool. The provedore of the Dawn, Benjamin Lear, heard cries of distress coming through the portholes of the saloon. He gave the alarm and the engines were stopped. Cries could be heard clearly, coming from the land. Captain Jones sent out crew in two boats, and fired off rockets and blue lights to illuminate the area. They picked up the three survivors who were in the long boat from Eric the Red. Two men were picked up out of the water, one being the owner’s son who was clinging to floating kerosene boxes. At daylight the Dawn then rescued the 18 men from the floating portion of the deckhouse, which had drifted about 4 miles from where they’d struck the reef. Shortly after the rescue the deckhouse drifted onto breakers and was thrown onto rocks at Point Franklin, about 2 miles east of Cape Otway. Captain Jones had signalled to Cape Otway lighthouse the number of the Eric the Red and later signalled that there was a wreck at Otway Reef but there was no response from the lighthouse. The captain and crew of the Dawn spent several more hours searching unsuccessfully for more survivors, even going back as far as Apollo Bay. On board the Dawn the exhausted men received care and attention to their needs and wants, including much needed clothing. Captain Allen was amongst the 23 battered and injured men who were rescued and later taken to Warrnambool for care. Warrnambool’s mayor and town clerk offered them all hospitality, the three badly injured men going to the hospital for care and others to the Olive Branch Hotel, then on to Melbourne. Captain Allen’s leg injury prevented him from going ashore so he and three other men travelled on the Dawn to Portland. They were met by the mayor who also treated them all with great kindness. Captain Allen took the train back to Melbourne then returned to America. Those saved were Captain Zaccheus Allen (or Jacques Allen), J. Darcy chief mate, James F. Lawrence second mate, Ned Sewall third mate and owner’s son, John French the cook, C. Nelson sail maker, Clarence W. New passenger, and the able seamen Dickenson, J. Black, Denis White, C. Herbert, C. Thompson, A. Brooks, D. Wilson, J. Ellis, Q. Thompson, C. Newman, W. Paul, J. Davis, M. Horenleng, J. Ogduff, T. W. Drew, R. Richardson. Four men had lost their lives; three of them were crew (Gus Dahlgreen ship’s carpenter, H. Ackman steward, who drowned in his cabin, and George Silver seaman) and one a passenger (J. B. Vaughan). The body of one of them had been found washed up at Cape Otway and was later buried in the lighthouse cemetery; another body was seen on an inaccessible ledge. Twelve months later the second mate James F. Lawrence, from Nova Scotia, passed away in the Warrnambool district; an obituary was displayed in the local paper. Neither the ship, nor its cargo, was insured. The ship was worth about £15,000 and the cargo was reportedly worth £40,000; only about £2,000 worth had been recovered. Cargo and wreckage washed up at Apollo Bay, Peterborough, Port Campbell, Western Port and according to some reports, even as far away as the beaches of New Zealand. The day after the wreck the government steam ship Pharos was sent from Queenscliff to clear the shipping lanes of debris that could be a danger to ships. The large midship deckhouse of the ship was found floating in a calm sea near Henty Reef. Items such as an American chair, a ladder and a nest of boxes were all on top of the deckhouse. As it was so large and could cause danger to passing ships, Captain Payne had the deckhouse towed towards the shore just beyond Apollo Bay. Between Apollo Bay and Blanket Bay the captain and crew of Pharos collected Wheeler and Wilson sewing machines, nests of boxes, bottles of Bristol’s sarsaparilla, pieces of common American chairs, axe handles, a Wheelers’ Patent thresher and a sailor’s trunk with the words “A. James” on the front. A ship’s flag-board bearing the words “Eric the Red” was found on the deckhouse; finally those on board the Pharos had the name of the wrecked vessel. During this operation Pharos came across the government steamer Victoria and also a steamer S.S. Otway, both of which were picking up flotsam and wreckage. A whole side of the hull and three large pieces of the other side of the hull, with some of the copper sheathing stripped off, had floated on to Point Franklin. Some of the vessels yards and portions of her masts were on shore. The pieces of canvas attached to the yards and masts confirmed that the vessel had been under sail. The beach there was piled with debris several feet high. There were many cases of Diamond Oil kerosene, labelled R. W. Cameron and Company, New York. There were also many large planks of red pine, portions of a small white boat and a large, well-used oar. Other items found ashore included sewing machines (some consigned to ‘Long and Co.”) and notions, axe and scythe handles, hay forks, wooden pegs, rolls of wire (some branded “T.S” and Co, Melbourne”), kegs of nails branded “A.T. and Co.” from the factory of A. Field and Son, Taunton, Massachusetts, croquet balls and mallets, buggy fittings, rat traps, perfumery, cutlery and Douay Bibles, clocks, bicycles, chairs, a fly wheel, a cooking stove, timber, boxes, pianos, organs and a ladder. (Wooden clothes pegs drifted in for many years). There seemed to be no personal luggage or clothing. The Pharos encountered a long line, about one and a half miles, of floating wreckage about 10 miles off land, south east of Cape Otway, and in some places about 40 feet wide. It seemed that more than half of it was from Eric the Red. The ship’s crew rescued 3 cases that were for the Melbourne Exhibition and other items from amongst the debris. There were also chairs, doors, musical instruments, washing boards, nests of trunks and fly catchers floating in the sea. Most of the goods were saturated and smelt of kerosene. A section of the hull lies buried in the sand at Parker River Beach. An anchor with chain is embedded in the rocks east of Point Franklin and a second anchor, thought to be from Eric the Red, is on display at the Cape Otway light station. (There is a photograph of a life belt on the verandah of Rivernook Guest House in Princetown with the words “ERIC THE RED / BOSTON”. This is rather a mystery as the ship was registered in Bath, Maine, USA.) Parts of the ship are on display at Bimbi Park Caravan Park and at Apollo Bay Museum. Flagstaff Hill Maritime Village also has part of the helm (steering wheel), a carved wooden sword (said to be the only remaining portion of the ship’s figurehead; further research is currently being carried out), a door, a metal rod, several samples of wood and a medal for bravery, awarded to Nelson Johnson, a crew member of the S.S. Dawn by the U.S. President, for the rescue of the crew. Much of the wreckage was recovered by the local residents before police and other authorities arrived at the scene. Looters went to great effort to salvage goods, being lowered down the high cliff faces to areas with little or no beach to collect items from the wreckage, their mates above watching out for dangerous waves. A Tasmanian newspaper reports on a court case in Stawell, Victoria, noting a man who was caught 2 months later selling tobacco from the wreckage of Eric the Red. Some of the silverware is still treasured by descendants of Mr Mackenzie who was given these items by officials for his help in securing the cargo. The gifts included silver coffee and tea pots, half a dozen silver serviette rings and two sewing machines. A Mr G.W. Black has in his possession a medal and a purse that were awarded to his father, another Dawn crew member who was part of the rescue team. The medal is inscribed and named “To John Black ….” (from “Shipwrecks” by Margaret E. Mackenzie, 3rd edition, published 1964). The wreck and cargo were sold to a Melbourne man who salvaged a quantity of high quality tobacco and dental and surgical instruments. Timbers from the ship were salvaged and used in the construction of houses and sheds around Apollo Bay, including a guest house, Milford House (since burnt down in bushfires), which had furniture, fittings and timber on the dining room floor from the ship. A 39.7 foot long trading ketch, the Apollo, was also built from its timbers by Mr Burgess in 1883 and subsequently used in Tasmanian waters. It was the first attempt at ship building in Apollo bay. In 1881 a red light was installed about 300 feet above sea level at the base of the Cape Otway lighthouse to warn ships when they were too close to shore; It would not be visible unless a ship came within 3 miles from it. This has proved to be an effective warning. Nelson Johnson, recipient of the medal for bravery, married Elizabeth Howard in 1881 and they had 10 children. They lived in South Melbourne, Victoria. Nelson died in 1922 in Fitzroy Victoria, age 66. In 1895 the owners of the S.S. Dawn, the Portland and Belfast Steam Navigation Co., wound up and sold out to the Belfast Company who took over the Dawn for one year before selling her to Howard Smith. She was condemned and sunk in Suva in 1928. The State Library of Victoria has a lithograph in its collection depicting the steamer Dawn and the shipwrecked men, titled. "Wreck of the ship Eric the Red, Cape Otway: rescue of the crew by the Dawn".The wood (timber) sample is listed on the Collections Australia Database, Heritage Victoria, number 239 00010 A “The Eric the Red is historically significant as one of Victoria's major 19th century shipwrecks. (Heritage Victoria Eric the Red; HV ID 239) The wreck led to the provision of an additional warning light placed below the Cape Otway lighthouse to alert mariners to the location of Otway Reef. The site is archaeologically significant for its remains of a large and varied cargo and ship's fittings being scattered over a wide area. The site is recreationally and aesthetically significant as it is one of the few sites along this coast where tourists can visit identifiable remains of a large wooden shipwreck, and for its location set against the background of Cape Otway, Bass Strait, and the Cape Otway lighthouse.“ (Victorian Heritage Database Registration Number S239, Official Number 8745 USA) Wood sample from the wreck of the ship Eric the Red. Triangular shaped, full of sea worm (Teredo worm) holes. The wood is dark in colour and is very light in weight.flagstaff hill, warrnambool, shipwrecked-coast, flagstaff-hill, flagstaff-hill-maritime-museum, maritime-museum, shipwreck-coast, flagstaff-hill-maritime-village, shipwreck-artefact, eric-the-red, zaccheus-allen, sewall, 1880, melbourne-exhibition, cape-otway, otway-reef, wood-sample, s.s.-dawn -
 Flagstaff Hill Maritime Museum and Village
Wood Sample, About 1871
This piece of timber from the ship Eric the Red has been eaten through by the marine animals called Teredo Worms, sometimes called sea worms or ‘termites of the sea’. The worms bore holes into wood that is immersed in sea water and bacteria inside the worms digest the wood. Shipbuilders tried to prevent this problem by using coatings of tar, wax, lead or pitch. In the 18th and 19th centuries the outside of their ships were sheathed in copper or a combination of copper and zinc (called Muntz metal) and would be re-metalled periodically to ensure the sheathing would remain effective. In more recent times the ships are protected with a toxic coating. The American ship Eric the Red was a wooden, three masted clipper ship. She had 1,580 tons register and was the largest full-rigged ship built at Bath, Maine, USA in 1871. She was built and registered by Arthur Sewall, later to become the partnership E. & A. Sewall, the 51st ship built by this company. The annually-published List of Merchant Vessels of the U.S. shows Bath was still the home port of Eric the Red in 1880. The vessel was named after the Viking discoverer, Eric ‘the Red-haired’ Thorvaldsson , who was the first European to reach the shores of North America (in 980AD). The ship Eric the Red at first traded in coal between America and Britain, and later traded in guano nitrates from South America. In 1879 she was re-metalled and was in first class condition. On 10th June 1880 (some records say 12th June) Eric the Red departed New York for Melbourne and then Sydney. She had been commissioned by American trade representatives to carry a special cargo of 500 exhibits (1400 tons) – about a quarter to a third of America’s total exhibits - for the U.S.A. pavilion at Melbourne’s first International Exhibition. The exhibits included furniture, ironmongery, wines, chemicals, dental and surgical instruments, paper, cages, bronze lamp trimmings, axles, stamped ware, astronomical and time globes, samples of corn and the choicest of leaf tobacco. Other general cargo included merchandise such as cases of kerosene and turpentine, brooms, Bristol's Sarsaparilla, Wheeler and Wilson sewing machines, Wheeler’s thresher machine, axe handles and tools, cases of silver plate, toys, pianos and organs, carriages and Yankee notions. The Eric the Red left New York under the command of Captain Zaccheus Allen (or some records say Captain Jacques Allen) and 24 other crew including the owner’s son third mate Ned Sewall. There were also 2 saloon passengers on board. The ship had been sailing for an uneventful 85 days and the voyage was almost at its end. As Eric the Red approached Cape Otway there was a moderate north-west wind and hazy and overcast atmosphere. On 4th September 1880 at about 1:30am Captain Allen sighted the Cape Otway light and was keeping the ship 5-6 miles offshore to stay clear of the hazardous Otway Reef. However he had badly misjudged his position. The ship hit the Otway Reef about 2 miles out to sea, south west of the Cape Otway light station. Captain Allen ordered the wheel to be put ‘hard up’ thinking that she might float off the reef. The sea knocked the helmsman away from the wheel, broke the wheel ropes and carried away the rudder. The lifeboats were swamped, the mizzenmast fell, with all of its rigging, then the mainmast also fell and the ship broke in two. Some said that the passenger Vaughan, who was travelling for his health and not very strong, was washed overboard and never seen again. The ship started breaking up. The forward house came adrift with three of the crew on it as well as a longboat, which the men succeeded in launching and keeping afloat by continually bailing with their sea boots. The captain, the third mate (the owner’s son) and others clung to the mizzenmast in the sea. Then the owner’s son was washed away off the mast. Within 10 minutes the rest of the ship was in pieces, completely wrecked, with cargo and wreckage floating in the sea. The captain encouraged the second mate to swim with him to the deckhouse where there were other crew but the second mate wouldn’t go with him. Eventually the Captain made it to the deckhouse and the men pulled him up. At about 4:30am the group of men on the deckhouse saw the lights of a steamer and called for help. At the same time they noticed the second mate and the other man had drifted nearby, still on the spur, and pulled them both onto the wreck. The coastal steamer SS Dawn was returning to Warrnambool from Melbourne, its sailing time different to its usual schedule. She was built in 1876 and bought by the Portland and Belfast Steam Navigation Co. in 1877. At the time of this journey she was commanded by Captain Jones, and was sailing between Melbourne and Portland via Warrnambool. The provedore of the Dawn, Benjamin Lear, heard cries of distress coming through the portholes of the saloon. He gave the alarm and the engines were stopped. Cries could be heard clearly, coming from the land. Captain Jones sent out crew in two boats, and fired off rockets and blue lights to illuminate the area. They picked up the three survivors who were in the long boat from Eric the Red. Two men were picked up out of the water, one being the owner’s son who was clinging to floating kerosene boxes. At daylight the Dawn then rescued the 18 men from the floating portion of the deckhouse, which had drifted about 4 miles from where they’d struck the reef. Shortly after the rescue the deckhouse drifted onto breakers and was thrown onto rocks at Point Franklin, about 2 miles east of Cape Otway. Captain Jones had signalled to Cape Otway lighthouse the number of the Eric the Red and later signalled that there was a wreck at Otway Reef but there was no response from the lighthouse. The captain and crew of the Dawn spent several more hours searching unsuccessfully for more survivors, even going back as far as Apollo Bay. On board the Dawn the exhausted men received care and attention to their needs and wants, including much needed clothing. Captain Allen was amongst the 23 battered and injured men who were rescued and later taken to Warrnambool for care. Warrnambool’s mayor and town clerk offered them all hospitality, the three badly injured men going to the hospital for care and others to the Olive Branch Hotel, then on to Melbourne. Captain Allen’s leg injury prevented him from going ashore so he and three other men travelled on the Dawn to Portland. They were met by the mayor who also treated them all with great kindness. Captain Allen took the train back to Melbourne then returned to America. Those saved were Captain Zaccheus Allen (or Jacques Allen), J. Darcy chief mate, James F. Lawrence second mate, Ned Sewall third mate and owner’s son, John French the cook, C. Nelson sail maker, Clarence W. New passenger, and the able seamen Dickenson, J. Black, Denis White, C. Herbert, C. Thompson, A. Brooks, D. Wilson, J. Ellis, Q. Thompson, C. Newman, W. Paul, J. Davis, M. Horenleng, J. Ogduff, T. W. Drew, R. Richardson. Four men had lost their lives; three of them were crew (Gus Dahlgreen ship’s carpenter, H. Ackman steward, who drowned in his cabin, and George Silver seaman) and one a passenger (J. B. Vaughan). The body of one of them had been found washed up at Cape Otway and was later buried in the lighthouse cemetery; another body was seen on an inaccessible ledge. Twelve months later the second mate James F. Lawrence, from Nova Scotia, passed away in the Warrnambool district; an obituary was displayed in the local paper. Neither the ship, nor its cargo, was insured. The ship was worth about £15,000 and the cargo was reportedly worth £40,000; only about £2,000 worth had been recovered. Cargo and wreckage washed up at Apollo Bay, Peterborough, Port Campbell, Western Port and according to some reports, even as far away as the beaches of New Zealand. The day after the wreck the government steam ship Pharos was sent from Queenscliff to clear the shipping lanes of debris that could be a danger to ships. The large midship deckhouse of the ship was found floating in a calm sea near Henty Reef. Items such as an American chair, a ladder and a nest of boxes were all on top of the deckhouse. As it was so large and could cause danger to passing ships, Captain Payne had the deckhouse towed towards the shore just beyond Apollo Bay. Between Apollo Bay and Blanket Bay the captain and crew of Pharos collected Wheeler and Wilson sewing machines, nests of boxes, bottles of Bristol’s sarsaparilla, pieces of common American chairs, axe handles, a Wheelers’ Patent thresher and a sailor’s trunk with the words “A. James” on the front. A ship’s flag-board bearing the words “Eric the Red” was found on the deckhouse; finally those on board the Pharos had the name of the wrecked vessel. During this operation Pharos came across the government steamer Victoria and also a steamer S.S. Otway, both of which were picking up flotsam and wreckage. A whole side of the hull and three large pieces of the other side of the hull, with some of the copper sheathing stripped off, had floated on to Point Franklin. Some of the vessels yards and portions of her masts were on shore. The pieces of canvas attached to the yards and masts confirmed that the vessel had been under sail. The beach there was piled with debris several feet high. There were many cases of Diamond Oil kerosene, labelled R. W. Cameron and Company, New York. There were also many large planks of red pine, portions of a small white boat and a large, well-used oar. Other items found ashore included sewing machines (some consigned to ‘Long and Co.”) and notions, axe and scythe handles, hay forks, wooden pegs, rolls of wire (some branded “T.S” and Co, Melbourne”), kegs of nails branded “A.T. and Co.” from the factory of A. Field and Son, Taunton, Massachusetts, croquet balls and mallets, buggy fittings, rat traps, perfumery, cutlery and Douay Bibles, clocks, bicycles, chairs, a fly wheel, a cooking stove, timber, boxes, pianos, organs and a ladder. (Wooden clothes pegs drifted in for many years). There seemed to be no personal luggage or clothing. The Pharos encountered a long line, about one and a half miles, of floating wreckage about 10 miles off land, south east of Cape Otway, and in some places about 40 feet wide. It seemed that more than half of it was from Eric the Red. The ship’s crew rescued 3 cases that were for the Melbourne Exhibition and other items from amongst the debris. There were also chairs, doors, musical instruments, washing boards, nests of trunks and fly catchers floating in the sea. Most of the goods were saturated and smelt of kerosene. A section of the hull lies buried in the sand at Parker River Beach. An anchor with chain is embedded in the rocks east of Point Franklin and a second anchor, thought to be from Eric the Red, is on display at the Cape Otway light station. (There is a photograph of a life belt on the verandah of Rivernook Guest House in Princetown with the words “ERIC THE RED / BOSTON”. This is rather a mystery as the ship was registered in Bath, Maine, USA.) Parts of the ship are on display at Bimbi Park Caravan Park and at Apollo Bay Museum. Flagstaff Hill Maritime Village also has part of the helm (steering wheel), a carved wooden sword (said to be the only remaining portion of the ship’s figurehead; further research is currently being carried out), a door, a metal rod, several samples of wood and a medal for bravery, awarded to Nelson Johnson, a crew member of the S.S. Dawn by the U.S. President, for the rescue of the crew. Much of the wreckage was recovered by the local residents before police and other authorities arrived at the scene. Looters went to great effort to salvage goods, being lowered down the high cliff faces to areas with little or no beach to collect items from the wreckage, their mates above watching out for dangerous waves. A Tasmanian newspaper reports on a court case in Stawell, Victoria, noting a man who was caught 2 months later selling tobacco from the wreckage of Eric the Red. Some of the silverware is still treasured by descendants of Mr Mackenzie who was given these items by officials for his help in securing the cargo. The gifts included silver coffee and tea pots, half a dozen silver serviette rings and two sewing machines. A Mr G.W. Black has in his possession a medal and a purse that were awarded to his father, another Dawn crew member who was part of the rescue team. The medal is inscribed and named “To John Black ….” (from “Shipwrecks” by Margaret E. Mackenzie, 3rd edition, published 1964). The wreck and cargo were sold to a Melbourne man who salvaged a quantity of high quality tobacco and dental and surgical instruments. Timbers from the ship were salvaged and used in the construction of houses and sheds around Apollo Bay, including a guest house, Milford House (since burnt down in bushfires), which had furniture, fittings and timber on the dining room floor from the ship. A 39.7 foot long trading ketch, the Apollo, was also built from its timbers by Mr Burgess in 1883 and subsequently used in Tasmanian waters. It was the first attempt at ship building in Apollo bay. In 1881 a red light was installed about 300 feet above sea level at the base of the Cape Otway lighthouse to warn ships when they were too close to shore; It would not be visible unless a ship came within 3 miles from it. This has proved to be an effective warning. Nelson Johnson, recipient of the medal for bravery, married Elizabeth Howard in 1881 and they had 10 children. They lived in South Melbourne, Victoria. Nelson died in 1922 in Fitzroy Victoria, age 66. In 1895 the owners of the S.S. Dawn, the Portland and Belfast Steam Navigation Co., wound up and sold out to the Belfast Company who took over the Dawn for one year before selling her to Howard Smith. She was condemned and sunk in Suva in 1928. The State Library of Victoria has a lithograph in its collection depicting the steamer Dawn and the shipwrecked men, titled. "Wreck of the ship Eric the Red, Cape Otway: rescue of the crew by the Dawn".The wood (timber) sample is listed on the Collections Australia Database, Heritage Victoria, number 239 00010 A “The Eric the Red is historically significant as one of Victoria's major 19th century shipwrecks. (Heritage Victoria Eric the Red; HV ID 239) The wreck led to the provision of an additional warning light placed below the Cape Otway lighthouse to alert mariners to the location of Otway Reef. The site is archaeologically significant for its remains of a large and varied cargo and ship's fittings being scattered over a wide area. The site is recreationally and aesthetically significant as it is one of the few sites along this coast where tourists can visit identifiable remains of a large wooden shipwreck, and for its location set against the background of Cape Otway, Bass Strait, and the Cape Otway lighthouse.“ (Victorian Heritage Database Registration Number S239, Official Number 8745 USA) Wood sample from the wreck of the ship Eric the Red. Oblong shaped, full of sea worm (Teredo worm) holes. The wood is dark in colour and is very light in weight. flagstaff hill, warrnambool, shipwrecked-coast, flagstaff-hill, flagstaff-hill-maritime-museum, maritime-museum, shipwreck-coast, flagstaff-hill-maritime-village, shipwreck-artefact, eric-the-red, zaccheus-allen, sewall, 1880, melbourne-exhibition, cape-otway, otway-reef, wood-sample, s.s.-dawn