Showing 7341 items
matching ship
-
 Magnet Galleries Melbourne Inc
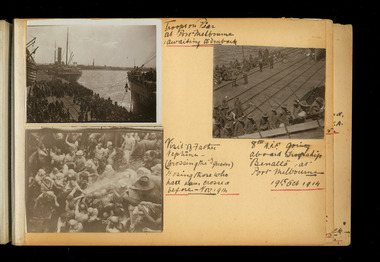
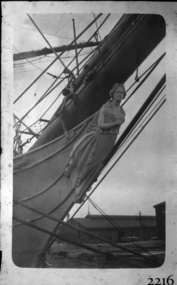
Troops waiting to board / aboard ships, red cliffs00157.tif
Three photos on a page from an albumTroops on pier at port Melbourne awaiting to embark 8th A.I.F. going aboard torp ship 'benalla" at port melbourne sep 1914 visit of father neptune (crossing the equator) hosing those who had never crossed before nov 1914ww1, a.i.f., world war 1, ship, port melbourne, equator, 8th a.i.f, 1914 -
 Warrnambool and District Historical Society Inc.
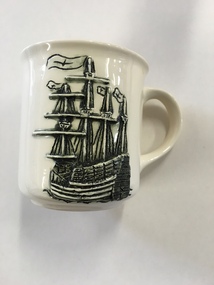
Mug, Mary Rose Ehibition, Late 20th century
This is a souvenir mug produced for visitors to the ‘Mary Rose’ Exhibition in Warrnambool (December 1994 to February 1995). The ship ‘Mary Rose’, built in Portsmouth, England in 1509-10, was historically of major significance. She was the spearhead of a master plan to give England superiority on the high seas. Using new technology of the time, heavy artillery was mounted on the lower decks of this ship and this overloaded the ship. In 1545 she sank in Portsmouth Harbour with the loss of 700 lives as she was about to set sail to defend the English against the French invaders. In 1982 the hull of this ship was raised to the surface and the contents recovered. Over 200 items from the wreck were brought to Warrnambool and displayed in 1994-5 at the Warrnambool Art Gallery. This mug is of interest as it is a memento of the ‘Mary Rose’ Exhibition held in Warrnambool in 1994-5. This exhibition was an important event in the 1990s in Warrnambool and attracted many visitors. This is a cream-coloured china mug with a handle and a raised black and cream image of the ‘Mary Rose’ ship on one side and printed material in brown on the other side. It has the distributor’s name on the bottom with a map of Victoria and a brown dot showing the location of Warrnambool. It is a souvenir of the ‘Mary Rose’ Exhibition held in Warrnambool in 1994-5. “Mary Rose” Exhibition Warrnambool 1994-1995 Lady Bay Creations Warrnambool Australia mary rose ship, mary rose exhibition in warrnambool, history of warrnambool -
 Waverley RSL Sub Branch
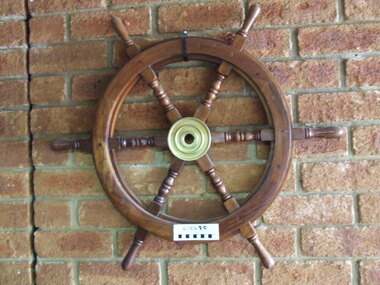
Ships Wheel
Wooden ships wheel -
 Glenelg Shire Council Cultural Collection
Photograph - Photograph - Prime Minister Malcolm Fraser, visiting the Port, on "Tarragal", c. 1983
Port of Portland Authority archivesFront: (no inscriptions) Back: (no inscriptions)port of portland archives, malcolm fraser -
 Flagstaff Hill Maritime Museum and Village
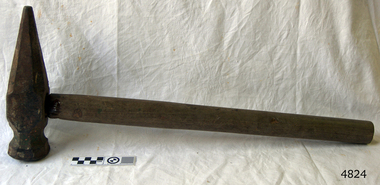
Maul
Large ship’s maul..flagstaff hill, warrnambool, shipwrecked coast, flagstaff hill, flagstaff hill maritime museum, maritime museum, shipwreck coast, flagstaff hill maritime village, great ocean road, maul, ship's maul -
 Flagstaff Hill Maritime Museum and Village
Photograph
Photograph of Ship's figureheadflagstaff hill, warrnambool, shipwrecked-coast, flagstaff-hill, flagstaff-hill-maritime-museum, maritime-museum, shipwreck-coast, flagstaff-hill-maritime-village -
Glenelg Shire Council Cultural Collection
Photograph - Photograph - Visit by HRM Queen Elizabeth II, 1970
Port of Portland Authority archivesFront: (no inscriptions) Back: 35 1/2 (pencil, centre) Crop marks lower edge, pencil. C (pink felt tip pen, upper right corner)port of portland archives -
 Running Rabbits Military Museum operated by the Upwey Belgrave RSL Sub Branch
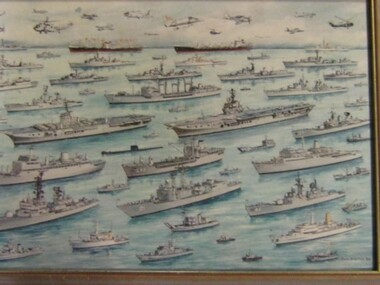
Picture
Ship and Aircraft of the Navypicture, 1960's, ran -
 Running Rabbits Military Museum operated by the Upwey Belgrave RSL Sub Branch
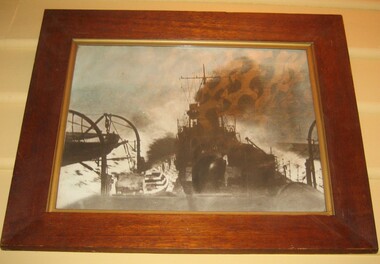
Picture
Ship into Heavy Seapicture, ww2, ran -
 Queenscliffe Maritime Museum
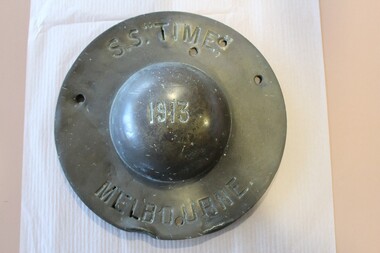
Functional object - Ship's wheel cover from SS Time, 1913 - 1949
Relic from SS Time wrecked on Corsair Rock in 1949. Ship's wheel coverSS Time Melbourne 1913, J Priestman & Co Sunderland UKss time, shipwrecks, ships wheel -
 Ringwood RSL Sub-Branch
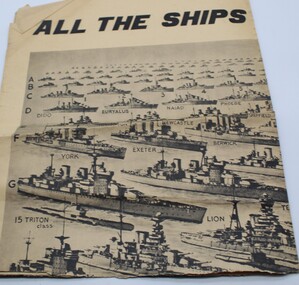
Work on paper - Poster, Assorted Memorabilia
newspaper display of ships -
 Flagstaff Hill Maritime Museum and Village
Photograph - Vessel, S.S. Warrnambool, 1998-2003
This photograph and a matching earlier photograph are the images of a painting of the British steamship SS Warrnambool at Dover Strait in the English Channel. The photographs were donated by the painting’s owner, who acquired the 30” x 56” (76 x 142.5 cm) oil on canvas painting in 1998. Both photographs were accompanied by a letter, one written in 2001, and the other in 2003. The letters confirm that the artist of the painting was Charles Keith Miller, signed with the initials “CKM” and dated “1893”. The painting shown in the photographs was a gift to the Town Council of Warrnambool, presented to Warrnambool folks in Melbourne on December 1, 1892, by the Captain of William Lund’s ship SS Warrnambool. The painting was given by Lund in appreciation of the Ladies of Warrnambool who had presented the ship with a ‘house’ flag bearing the Blue Anchor Line’s symbol of a diagonal blue anchor on a white background; the ladies had made the decision to present the flag only a month earlier. A few days later, December 6th, the SS Warrnambool was on its homeward journey to Britain, sailing via Adelaide. It anchored for a short time off the Port of Warrnambool. A boat was launched from Lady Bay to take a group of friends to the ship with a delivery of gifts. After cheers were roused for both the ship and the Captain, the ship continued on its way. The photograph shows the gifted white flag with a diagonal blue anchor flying from the masthead. The same symbol is painted on the ship’s black funnel. The signal flags on the foremast display ‘M’ ‘R’ ‘V’ ‘B’. These letters are most likely the ship’s call number ‘MRVB’. Although the painting was given as a gift in December 1892, it is post-dated “1893”. Perhaps the painting was given earlier than anticipated; or the date added later, but whatever the reason, the provenance of the painting was confirmed at auctions of this painting and other works by the same artist. CHARLES KEITH MILLER 1836-1907:- Captain Charles Miller left his home in Scotland at the age of 15 years for a life at sea. He earned his Master’s Certificate ten years later. After being the captain of sailing ships he moved over to the steamships because they were faster. In 1866 he married and settled in Glasgow. Over the following eleven years he and his wife had five children, then sadly his wife passed away. Captain Miller returned to the sea for a while but in 1888 he gave up his sea life to spend his time as a marine artist. His understanding of seafaring life and vessels, combined with his artistic skills, gave him the ability to produce fine art and several galleries and museums have collections of his sought-after works. S.S. WARRNAMBOOL 1892-1925:- The steamship SS Warrnambool was built in 1892 by the Sunderland Ship Building Company for the Lund Line of London, founded by William Lund in 1869. It efficiently carried both passengers and cargo across the world to Australia, under the command of her master Captain Joshua Edward Iibery, who had many years of experience with the Blue Anchor Line. The company, referred to as the Blue Anchor Line or BAL, owned a fleet of both sail and steamships. The funnels of all of the steamships were painted black, with a white band around the top bearing a diagonal blue anchor and chain. The company’s house flag was also white with a diagonal blue anchor. The SS Warrnambool carried passengers and cargo in a ‘no frills’ service to and from Europe around the Cape of Good Hope, stopping at some ports in between. The ship was involved in bringing home returned solders in 1895. At one time it carried a doctor from Victoria, Australia, to assist at the war front in South Africa. The ship had a very good reputation for its cargo arriving ‘almost always in excellent condition.’ Exported goods from Australia included iron safes, flour, wool, apples, frozen rabbits, butter, cheese, pork, cattle, poultry and sheep. One remarkable delivery contained Ostriches for Queen Victoria and they survived the journey well. The SS Warrnambool was sold in 1900 to the British and South American Steam Navigation Co. Ltd of Liverpool and was renamed ‘Harmodius’. The company was managed by R.P. Houston & Company of London and its Houston Line funnels were red with a black top. The Harmodius was sold in 1919 to K.S.S. Co. Ltd, managed by Kaye Son & Co. Ltd. of Liverpool, and was renamed ‘Kut’. The line had black funnels with a white ‘K’ in a diamond or between white stripes. In 1926 it was purchased by T.W. Ward Ltd. and broken up. NOTE- other vessels named “Warrnambool” Two other vessels carried the name “Warrnambool” (1)- HMAS Warrnambool J202 (1941-1947), a Bathurst Class corvette vessel owned by the Royal Australian Navy, destroyed by a mine. The photograph is significant for its association with the painting "SS Warrnambool" by well-known early 20th century marine artist Charles Keith Miller, whose paintings are well valued. The painting and the photograph of it are namesakes of Warrnambool and are connected through the gifts exchanged between the ship company owner, the City of Warrnambool and the Ladies of Warrnambool; the House Flag and the painting by C K Miller. The image is a good likeness to original photographs of the late-19th to early-20th century steam and sale vessel. Coloured photograph of a painting, the steamship S.S. Warrnambool. The three-masted ship has lowered sails. It is in calm water, land on one side, and other vessels in the water. The ship has four raised signal flags, a house flag and a blue ensign. The funnel also bears the house flags symbol. Smoke emits from the funnel. Figures are visible onboard. There is a signature and a title on the lower edge of the photograph. (Artist of the painting in the photograph was Charles Keith Miller)House flag symbol, [diagonal blue anchor on white background] Text "CKM" and "1893" Text "S. S. WARRNAMBOOL."flagstaff hill, warrnambool, photograph, steam ship warrnambool, flagstaff hill maritime village, shipwreck coast, ss warrnambool, captain, charles keith miller, ckm, 1893, william lund, warrnambool town council, blue anchor line, lund line, ladies of warrnambool, house flag, diagonal blue anchor, captain miller, sunderland ship building company, migrant ship, 1892 ship, home flag, bal, australian export, s.s.warrnambool, dover strait, english chanel, port of warrnambool, lady bay, mrvb, captain charles miller, captain joshua edward iibery, ostriches, queen victoria, british and south american steam navigation co., harmodius, r.p. houston & company, houston line, k.s.s. co. ltd, kaye son & co. ltd, kut, t.w. ward ltd -
 Flagstaff Hill Maritime Museum and Village
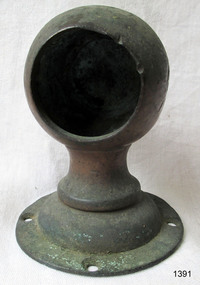
Functional object - Rail holder, About 1893, when the ship was made
This brass rail holder fixture would have been used to hold the end of a rail in place. There is no information as to where the fitting or rail would have been placed on the ship; sailing ships had many brass fittings. It was recovered from the wreck of the La Bella, which lies at the bottom of the Warrnambool Harbour. Some 15 ships are believed to have been wrecked in Lady Bay, but only two have been discovered on the sea floor; the La Bella and the Edinburgh Castle. Both wrecks are popular diving sites and are preserved as significant historical marine and marine archaeological sites. The story of the final voyage of the La Bella is summarised as follows … The ship from which the sailors were rescued was the three-masted, iron and steel barquentine the La Bella, built in Norway in 1893. She was one of two iron and steel ships by Johan Smith, the company being one of the leading shipping families in Tvedestrand, Norway. She was significant to Norwegian shipping, being one of only 27 iron and steel ships ever built in Norway. She was registered in New Zealand and engaged from 1902 in inter-colonial trading of timber in the pacific, between New Zealand and Australia and was often in Port Phillip Bay, Victoria. On 5th October, 1905, the twelve year old La Bella left Lyttleton, New Zealand carrying a cargo of timber bound for Warrnambool, Australia . She was manned by a crew of twelve: the Master, (Captain Mylius, previously 1st Mate of La Bella, appointed Captain to La Bella on 6th February 1903) 2 Mates, Cook, six able seamen, one ordinary seaman and a boy. . Bad weather en route caused her to shelter at Burnie on Tasmania's North West coast. On November 10th, the 37th day of her journey, La Bella approached Warrnambool. Captain Mylius steered her towards Lady Bay Channel in heavy south-west seas and evening mist. He ordered the helmsman to steer for the light. As the ship came round, a tremendous sea struck her on the port quarter, causing her to breach broadside in a north-westerly direction into breakers. The helm was brought round twice more, but each time heavy seas broke over her, the third time throwing the La Bella on to a submerged reef in Lady Bay now known as La Bella Reef (about 100 yards from the Warrnambool breakwater). The sea was so rough that it even wrenched a one-and-a-half ton anchor from its fastenings and into the sea. As Captain Mylius headed to the steel wheelhouse, intending to send up a rocket flare, a huge sea slammed the steel door into him (resulting in massive bruising front and back) Despite his injuries he still managed to set off a blue light, which he held up in his hands. La Bella’s lifeboats were filled with sea water and broke up on their chocks. The blue light was the first indication to people on shore that there was a ship in distress. The Harbour Master, Captain Roe (who lived in the Harbour Master’s House opposite Flagstaff Hill), organised a group of volunteers to crew the lifeboat because the trained crew was unavailable; the crewmen were working on a steamer in Port Fairy at the time. He then poured oil onto the water to try and smooth the sea. At around 11pm three of the crew took shelter in the steel forecastle but the sea crashed into it and broke it up. While the rest of the crew and onlookers watched helplessly in the moonlight the bodies were washed away into the sea, never to be seen again. Some of the crew lashed themselves to the weather rail to keep from being washed away. Watson, the ordinary seaman, became tangled in the rigging lines and was too weak to move, so the 2nd Mate, Robertson, put a line onto him so that he wouldn’t wash off. Around 11pm three of the crew were unconscious from exhaustion. The situation on La Bella was becoming dangerous. The 2nd Mate moved to the ‘house’ and soon afterwards the ship slipped in the heavy sea. The lashings of the 1st Mate and the ‘boy’ Denham had kept them safe until about 2am when they were washed overboard; no one was able to help. One by one, the exhausted crew were being washed overboard, too weak to hold on any longer. During the night the La Bella had broken into two and the deckhouse ran out towards the sea. Two more men drowned when trying to reach the lifeboat. By sunrise the only survivors of the twelve were the Master, 2nd Mate and three seamen. Early in the morning Captain Roe used the rocket apparatus on shore to try and shoot a line to the ship for a safer rescue but each attempt fell short of the target. Several attempts were made by the lifeboat to rescue the stricken sailors, but the rough conditions made this difficult for the boat to get close enough to the ship and the lifeboat had to return to shore. During a final attempt to reach the ship Captain Mylius ordered his men to jump into the sea. Leonard Robertson, 2nd mate, jumped and swam towards the lifeboat, taking hold of the boat hook offered to him. Oscar Rosenholme managed to reach the boat floating on a piece of timber from the ship’s load and a third survivor, Noake, also made the boat. Along with the lifeboat rescue crew, 25 year old William Ferrier rowed his small dingy through the heavy seas and managed to rescue the Captain, whom he landed on the breakwater. Ferrier then returned to the ship to attempt a final rescue, losing his oars and rowlocks into the high sea. Using just a spare paddle he skulled towards the La Bella, reaching her stern in time to cut loose the lone surviving sailor, Payne, from the lashing that held him to the ship; the terrified sailor dropped from the ship and into the dingy. Shortly after the last man was rescued, the La Bella was lifted by a huge wave and crashed back down on the reef; she broke up and sank. The ordeal had lasted ten hours. The survivors were taken to the nearby Bay View Hotel and gratefully received warm food and clothing, medical attention and a place to sleep. In the following days an unidentified body of a young person was washed ashore; it was either Watson or Denham. The body was buried in the Warrnambool cemetery with an appropriate gravestone and inscription. William Ferrier became a national hero as news of the daring rescue spread. In recognition of his bravery in the two daring rescues he was awarded the Silver Medal for Bravery by the Royal Humane Society and was honoured in the letter from the Prime Minister and the Parliament of the Commonwealth, telegrams and a cheque for £20 from the Governor General, over £150 subscribed by the public, including Warrnambool and district and readers of The Argus, and a gold medal from the Glenelg Dinghy Club of South Australia. Ferrier’s rescue efforts are one of the most heroic in Victoria’s shipwreck history. (William Ferrier’s son, Frank, received a similar award almost fifty years later, when he helped rescue four members of the crew on the yacht Merlan, after it ran on to a reef near the Point Lonsdale Lighthouse. ) The wreck of La Bella now lies on her port side in 13 metres of sheltered water inside the reef she struck. The bow section is relatively intact and part of the stern has drifted north-easterly towards the mouth of the Hopkins River. The reef the La Bella struck now bears its name. Those five rescued from the La Bella were Captain George Mylius, Leonard Robertson (2nd Mate, 21 years old), R. Payne, Oscar Rosenholme and Jack Noake. Those seven who lost their lives were Mr Coulson (1st mate), Charles Jackman (cook) Gustave Johnson, Pierre Johann and Robert Gent (all able seamen), Harry Watson (ordinary seaman) and Jack Denham (ship’s boy), Captain Mylius was found guilty of careless navigation; he had sailed into the bay without the services of a pilot. His Master Certificate was suspended for twelve months. Later he was also charged with manslaughter of one of the crew who had died when the La Bella was wrecked, but found not guilty. The event’s adverse publicity and damage to his career took a toll on his health and he died of a heart attack six months after the wreck; he was only thirty-seven. His body was buried in the Melbourne General Cemetery. The La Bella was “the best documented of all sailing ships owned in New Zealand”. Her record books, ship logs, correspondence and supporting papers are still available. At the time of the tragedy, she was owned by Messers David C.Turnbull and Co. of Timaru, New Zealand timber merchants and shipping agents, who had purchased her on 13th December 1901. A detailed account of the last journey of La Bella can be read in “Leonard Robertson, the Whangaroa & La Bella” written by Jack Churchouse, published in 1982 by Millwood Press Ltd, Wellington, NZ. Some 15 – 17 ships are believed to have sunk in Lady Bay, but only two have been discovered on the seafloor; the “La Bella” and the “Edinburgh Castle”. Both wrecks are popular diving sites and are preserved as significant historical marine and marine archaeological sites. As well as this letter, Flagstaff Hill’s La Bella Collection includes a photograph of the wrecked La Bella, a brass rail holder and a postcard of William Ferrier with four of the survivors. This original congratulatory letter sent to William Ferrier by the Prime Minister and Government of Australia demonstrates the importance attached to his efforts for Victoria and to Australia. The letter is part of the La Bella Collection and is significant at both a local and state level. Its connection to the La Bella shipwreck and the rescue of five survivors highlights the dangers of Victoria’s Shipwreck Coast. The letter to William Ferrier from the Australian Government acknowledges the bravery of ordinary Australians who risked their lives to save victims of shipwrecks along the coast. The letter is significant to the history of Warrnambool as it honours William Ferrier, a local fisherman whose descendants continue to live in the area. It highlights the way of life of people who lived in coastal towns in 19th century Victoria and the effects of shipwrecks upon them. The letter connects to the postcard of William Ferrier with four of the five rescued crew, the photograph of the wreck of the La Bella and the artefact from the wreck, the rail holder. This item is significant because of its association with the sailing ship “La Bella” . the “La Bella” is of local and state and national significance. It is one of the only two shipwrecks discovered in Lady Bay, Warrnambool, out of the 15-17 shipwrecks in the bay. Brass rail holder from the wreck "La Bella". This rail holder would have been used as a fitting for the end of a rail. It is made up of two parts and looks a little like a goblet in shape. The top is a hollow spherical shape with a circular hole cut out on one side, into which the end of a round rail would fit. There are two gouge marks close to each other on one side of the hole, about one centimetre apart, at 1 and 2 o’clock position. The sphere has a hollow pipe-like stem with a screw thread turned into the outside of the lower section and the bottom of the stem has been flared out after having the base fitted. The base is round and has a mound in the centre. The edge has four evenly spaced fixture holes around its edge. The metal shows signs of pitting and has mild encrustation. The fitting of the base is loose, allowing it to swivel in a complete circle. The top of the sphere is rough and has a dent in it. Underneath the base there is verdigris; some has flaked off and reveals a bright golden colour underneath. rail holder, brass rail holder, la bella, lady bay, norway, 1893, new zealand, captain mylius, william ferrier, flagstaff hill, warrnambool, shipwrecked coast, flagstaff hill maritime museum, maritime museum, shipwreck coast, flagstaff hill maritime village -
 Flagstaff Hill Maritime Museum and Village
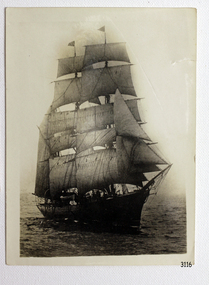
Photograph
Black and White Photograph of the sailing ship Apache. 120mm x 164mm. SH 022 Ships A-B.flagstaff hill, warrnambool, shipwrecked-coast, flagstaff-hill, flagstaff-hill-maritime-museum, maritime-museum, shipwreck-coast, flagstaff-hill-maritime-village, apache, photograph -
 Flagstaff Hill Maritime Museum and Village
Photograph
Black and White Photograph of the sailing ship Albyn. 165mm x 120mm. SH 023 Ships A - B.flagstaff hill, warrnambool, shipwrecked-coast, flagstaff-hill, flagstaff-hill-maritime-museum, maritime-museum, shipwreck-coast, flagstaff-hill-maritime-village, albyn, photograph -
 Flagstaff Hill Maritime Museum and Village
Photograph
Black and White Photograph of the sailing ship Activ. 164mm x 120mm. SH 024 Ships A - B.flagstaff hill, warrnambool, shipwrecked-coast, flagstaff-hill, flagstaff-hill-maritime-museum, maritime-museum, shipwreck-coast, flagstaff-hill-maritime-village, activ, sailing ship activ -
 Flagstaff Hill Maritime Museum and Village
Photograph
Black and White Photograph of the sailing ship Beacon Rock. 1400mm x 87mm. SH034 Ships A - B.flagstaff hill, warrnambool, shipwrecked-coast, flagstaff-hill, flagstaff-hill-maritime-museum, maritime-museum, shipwreck-coast, flagstaff-hill-maritime-village, black and white photograph, beacon rock -
 Flagstaff Hill Maritime Museum and Village
Photograph
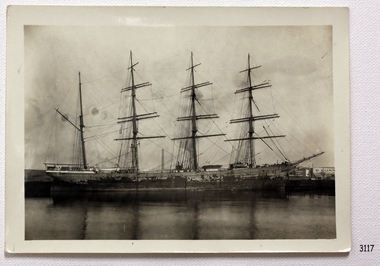
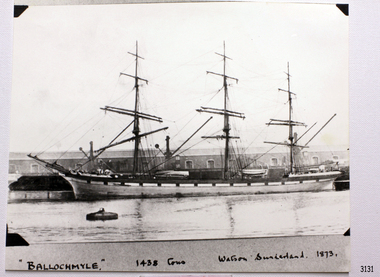
Black and white photograph of the sailing ship Ballochmyle. 256mm x 190mm. SH 040 Ships A - B.flagstaff hill, warrnambool, shipwrecked-coast, flagstaff-hill, flagstaff-hill-maritime-museum, maritime-museum, shipwreck-coast, flagstaff-hill-maritime-village, ballochmyle, photograph -
 Flagstaff Hill Maritime Museum and Village
Postcard
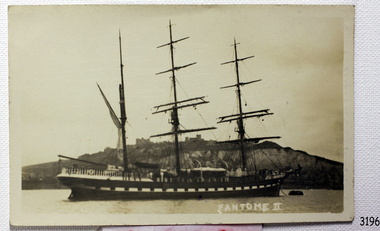
Black and White Postcard of the sailing ship Fantome II . (SH 090[1] Ships F - H).flagstaff hill, warrnambool, shipwrecked-coast, flagstaff-hill, flagstaff-hill-maritime-museum, maritime-museum, shipwreck-coast, flagstaff-hill-maritime-village, fantome ii, post card, postcard -
 Flagstaff Hill Maritime Museum and Village
Postcard
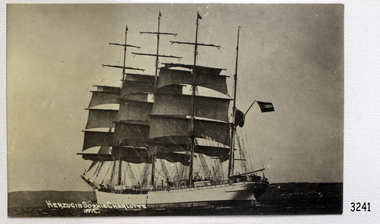
Black and White postcard of the steam ship Herzogin Sophie Charolotte. (SH 130 Ships F - H).flagstaff hill, warrnambool, shipwrecked-coast, flagstaff-hill, flagstaff-hill-maritime-museum, maritime-museum, shipwreck-coast, flagstaff-hill-maritime-village, post card, postcard, herzogin sophie charolotte, steam ship -
 Flagstaff Hill Maritime Museum and Village
Print, James Baines (print)
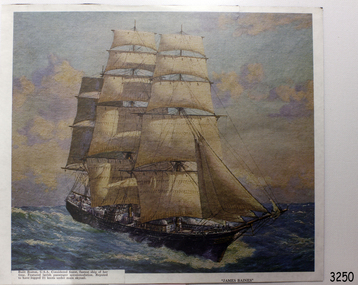
Coloured Print from a painting of the sailing ship James Baines. SH 136.1 Ships I - L.flagstaff hill, warrnambool, shipwrecked-coast, flagstaff-hill, flagstaff-hill-maritime-museum, maritime-museum, shipwreck-coast, flagstaff-hill-maritime-village, painting, james baines -
 Flagstaff Hill Maritime Museum and Village
Postcard
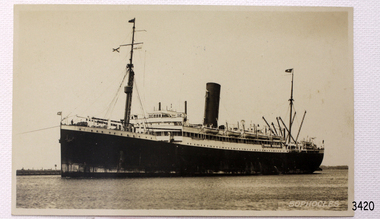
Black and White postcard of steam ship, hand writing on front "Sophocles". (SH 271 Ships S)hand writing on front "Sophocles". flagstaff hill, warrnambool, shipwrecked-coast, flagstaff-hill, flagstaff-hill-maritime-museum, maritime-museum, shipwreck-coast, flagstaff-hill-maritime-village, post card, sophocles, postcard, steam ship -
 Flagstaff Hill Maritime Museum and Village
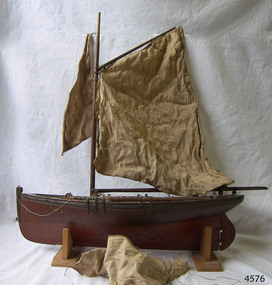
Craft - Ship model, Pioneer Melbourne
Ship model Pioneer Melbourne M1 wooden ship model on 2 wooden stand. Single mast.flagstaff hill, warrnambool, shipwrecked-coast, flagstaff-hill, flagstaff-hill-maritime-museum, maritime-museum, shipwreck-coast, flagstaff-hill-maritime-village -
Glenelg Shire Council Cultural Collection
Photograph - Photograph - Loading unknown cargo (possible fruit) with a ship's crane onto ship, n.d
Port of Portland Authority archivesFront: (no inscriptions) Back: (no inscriptions)port of portland -
Glenelg Shire Council Cultural Collection
Photograph - Photograph - loading unknown cargo onto ship, n.d
Port of Portland Authority archivesFront: (no inscriptions) Back: (no inscriptions)port of portland archives, cargo, cargo handling, portland harbour -
 Glenelg Shire Council Cultural Collection
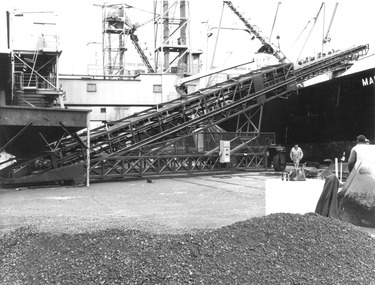
Photograph - Photograph - Lucerne pellets for the Japanese market loaded onto ship with conveyor belt loaded onto ship with conveyor belt, 1972
Port of Portland Authority archivesFront: (no inscriptions) Back: (no inscriptions)port of portland -
Port Melbourne Historical & Preservation Society
Book, Erik C Abramsom, "Sailing Ships of the World", 1992
"Sailing Ships of the World" A 207 page book of sailing ships of the world with a forward by HRH the Prince of Walestransport - shipping, beken of cowes -
Port Melbourne Historical & Preservation Society
Book - Diary, ship movements, Port Melbourne piers, Arrivals and Departures 1st October 1963, 1963 - 1970
Book listing ship movements at Port Melbourne. Ships are listed in chronological order within alphabetical sectionsmelbourne harbor trust - port of melbourne authority, transport - shipping, piers and wharves - miscellaneous -
 Glenelg Shire Council Cultural Collection
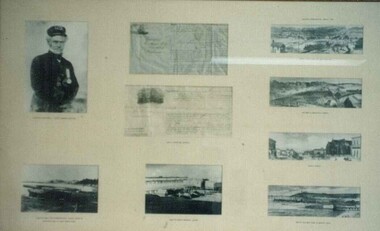
Photograph - Photograph - framed collection of photographs and shipping certificates, n.d
UnknownFramed collection of photographs and shipping certificates in brown timber frame, under glass. 1. Captain Fawthrop; 2. lighter; 3. Henty's pier and original baths; 4. Baths, railway pier, Henty's jetty; 5. Percy St; 6. Railway & Bentinck St; 7. North Portland Railway Station; 8 & 9. 'Shipped' certificates.Front: Captain Fawthrop 'Shipped' certficates Lighter/ Henty's pier and originall baths/ Baths, railway pier, Henty's jetty/ Percy St/ Railway & Bentinck St/ North Portland Railway Station/ Back: (no inscriptions)captain fawthrop, lighter, hentys pier, original baths, baths, railway pier, hentys jetty, percy st, railway and bentinck st, north portland railway station, shipped certificates -
 Flagstaff Hill Maritime Museum and Village
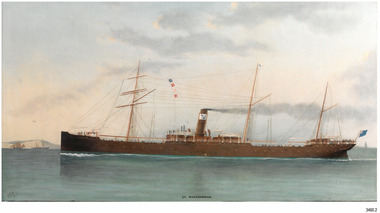
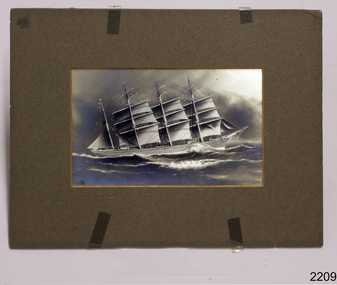
Print - Vessel - Sailing Ship, A.V. Gregory, ca. 1899-1922
This photograph is a print from an original painting by the Australian marine artist A V Gregory (1867-1957), also known as Arthur Victor Gregory. Gregory lived and worked in South Melbourne. He took over the Gregory Studio owned by his father, George Frederick Gregory, painting actively between 1899 and 1932. He usually signed his works as ‘A V Gregory’. Some of his original works have been sold for thousands of dollars. The four-masted iron barque 'Rowena' was built in 1883 by Barclay, Curle & Co. of Glasgow as the 'Cluny Castle', and renamed about 1890 as 'Rowena' by owners Rowena Ship Co.. After consequent owners, the ship was converted to a hulk in 1922 at Port Adelaide. The detailed image of the vessel depicted in this print shows one of the many sail and steam vessels painted by the renowned Victorian marine artist A V Gregory, whose original works are highly valued today by marine collectors.Photograph of a print, black and white, mounted onto card. It depicts the four-masted iron barque ship 'Rowena', originally named 'Cluny Castle'. The original painting was by marine artist A V Gregory.Painted on bow "ROWENA"flagstaff hill, warrnambool, shipwrecked-coast, flagstaff-hill, flagstaff-hill-maritime-museum, maritime-museum, shipwreck-coast, flagstaff-hill-maritime-village, photograph, photograph of rowena, gregory, cluny castle, a v gregory, rowena, iron baque, rowena ship co., barclay, curle & co, glasgow