Showing 3360 items matching "gold museum"
-
 Flagstaff Hill Maritime Museum and Village
Marble Tile, circa 1878
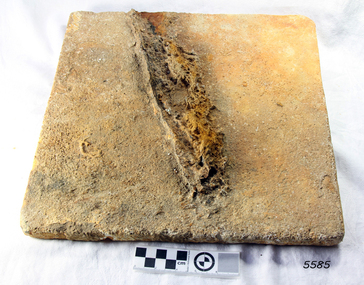
The artefact is a white marble tile raised from the wreck of the LOCH ARD (1878). The cargo manifest of the sunken vessel has the entry “Marble £400”. This is placed directly following the entry “Glass (604 cases)”. This conjunction suggests the marble tile was originally part of a consignment intended for use in a ‘high end’ residential or public building project in the gold and wool rich Colony of Victoria. Traditionally, white or cream marble was imported into Britain from the Mediterranean region of Europe, where beds of sedimentary limestone (calcium and magnesium carbonate) had been buried over a long geological period of time. Deep in the earth’s crust, it had been subjected to immense pressures and high temperatures, sufficient to completely re-crystallise the original deposits. Marble beds began as layers of sediment at the bottom of ancient tropical seas, forming from the skeletal remains of calcareous fossils, shell, and coral fragments. The metamorphic process of prolonged compression and heating recrystallised this skeletal material, destroying all signs of the original sedimentary fabric. The resulting ‘true’ marbles of, for example, White Carrara (Tuscany, Italy), Verdi (green) Antico (Thessaly, Greece), and Rouge (red) Languadoc (Carcassone, France), were highly prized in classical decoration (sculpture and friezes) and architecture (temples and arches). Marble was found in nineteenth century Australia, but in small, uneconomic deposits, not suitable for commercial quarrying. The comparative expense of imported marble restricted its use in colonial buildings to carved fireplaces and mantel pieces, or outdoor ornaments such as fountains, statuary and grave stones. If Carrara marble floor tiles were used, they were used sparingly, as an arresting feature in entrance halls for instance. However, most prominent private and public construction used timber flooring, waxed or ‘jappaned’, with carpet runners and rugs (for example the Austin’s Barwon Park Mansion, 1871), or laid tessellated and ceramic tiles of baked clay infused with colour (for example the Chirnside’s Werribee Park Mansion, 1878). HISTORY OF THE LOCH ARD The LOCH ARD belonged to the famous Loch Line which sailed many ships from England to Australia. Built in Glasgow by Barclay, Curdle and Co. in 1873, the LOCH ARD was a three-masted square rigged iron sailing ship. The ship measured 262ft 7" (79.87m) in length, 38ft (11.58m) in width, 23ft (7m) in depth and had a gross tonnage of 1693 tons. The LOCH ARD's main mast measured a massive 150ft (45.7m) in height. LOCH ARD made three trips to Australia and one trip to Calcutta before its final voyage. LOCH ARD left England on March 2, 1878, under the command of Captain Gibbs, a newly married, 29 year old. She was bound for Melbourne with a crew of 37, plus 17 passengers and a load of cargo. The general cargo reflected the affluence of Melbourne at the time. On board were straw hats, umbrella, perfumes, clay pipes, pianos, clocks, confectionary, linen and candles, as well as a heavier load of railway irons, cement, lead and copper. There were items included that intended for display in the Melbourne International Exhibition in 1880. The voyage to Port Phillip was long but uneventful. At 3am on June 1, 1878, Captain Gibbs was expecting to see land and the passengers were becoming excited as they prepared to view their new homeland in the early morning. But LOCH ARD was running into a fog which greatly reduced visibility. Captain Gibbs was becoming anxious as there was no sign of land or the Cape Otway lighthouse. At 4am the fog lifted. A man aloft announced that he could see breakers. The sheer cliffs of Victoria's west coast came into view, and Captain Gibbs realised that the ship was much closer to them than expected. He ordered as much sail to be set as time would permit and then attempted to steer the vessel out to sea. On coming head on into the wind, the ship lost momentum, the sails fell limp and LOCH ARD's bow swung back. Gibbs then ordered the anchors to be released in an attempt to hold its position. The anchors sank some 50 fathoms - but did not hold. By this time LOCH ARD was among the breakers and the tall cliffs of Mutton Bird Island rose behind the ship. Just half a mile from the coast, the ship's bow was suddenly pulled around by the anchor. The captain tried to tack out to sea, but the ship struck a reef at the base of Mutton Bird Island, near Port Campbell. Waves broke over the ship and the top deck was loosened from the hull. The masts and rigging came crashing down knocking passengers and crew overboard. When a lifeboat was finally launched, it crashed into the side of LOCH ARD and capsized. Tom Pearce, who had launched the boat, managed to cling to its overturned hull and shelter beneath it. He drifted out to sea and then on the flood tide came into what is now known as LOCH ARD Gorge. He swam to shore, bruised and dazed, and found a cave in which to shelter. Some of the crew stayed below deck to shelter from the falling rigging but drowned when the ship slipped off the reef into deeper water. Eva Carmichael had raced onto deck to find out what was happening only to be confronted by towering cliffs looming above the stricken ship. In all the chaos, Captain Gibbs grabbed Eva and said, "If you are saved Eva, let my dear wife know that I died like a sailor". That was the last Eva Carmichael saw of the captain. She was swept off the ship by a huge wave. Eva saw Tom Pearce on a small rocky beach and yelled to attract his attention. He dived in and swam to the exhausted woman and dragged her to shore. He took her to the cave and broke open case of brandy which had washed up on the beach. He opened a bottle to revive the unconscious woman. A few hours later Tom scaled a cliff in search of help. He followed hoof prints and came by chance upon two men from nearby Glenample Station three and a half miles away. In a state of exhaustion, he told the men of the tragedy. Tom returned to the gorge while the two men rode back to the station to get help. By the time they reached LOCH ARD Gorge, it was cold and dark. The two shipwreck survivors were taken to Glenample Station to recover. Eva stayed at the station for six weeks before returning to Ireland, this time by steamship. In Melbourne, Tom Pearce received a hero's welcome. He was presented with the first gold medal of the Royal Humane Society of Victoria and a £1000 cheque from the Victorian Government. Concerts were performed to honour the young man's bravery and to raise money for those who lost family in the LOCH ARD disaster. Of the 54 crew members and passengers on board, only two survived: the apprentice, Tom Pearce and the young woman passenger, Eva Carmichael, who lost all of her family in the tragedy. Ten days after the LOCH ARD tragedy, salvage rights to the wreck were sold at auction for £2,120. Cargo valued at £3,000 was salvaged and placed on the beach, but most washed back into the sea when another storm developed. The wreck of LOCH ARD still lies at the base of Mutton Bird Island. Much of the cargo has now been salvaged and some was washed up into what is now known as LOCH ARD Gorge. Cargo and artefacts have also been illegally salvaged over many years before protective legislation was introduced. One of the most unlikely pieces of cargo to have survived the shipwreck was a Minton porcelain peacock - one of only nine in the world. The peacock was destined for the Melbourne International Exhibition in 1880. It had been well packed, which gave it adequate protection during the violent storm. Today, the Minton peacock can be seen at the Flagstaff Hill Maritime Museum in Warrnambool. From Australia's most dramatic shipwreck it has now become Australia's most valuable shipwreck artefact and is one of very few 'objects' on the Victorian State Heritage Register. HISTORY OF THE LOCH ARD The LOCH ARD belonged to the famous Loch Line which sailed many ships from England to Australia. Built in Glasgow by Barclay, Curdle and Co. in 1873, the LOCH ARD was a three-masted square rigged iron sailing ship. The ship measured 262ft 7" (79.87m) in length, 38ft (11.58m) in width, 23ft (7m) in depth and had a gross tonnage of 1693 tons. The LOCH ARD's main mast measured a massive 150ft (45.7m) in height. LOCH ARD made three trips to Australia and one trip to Calcutta before its final voyage. LOCH ARD left England on March 2, 1878, under the command of Captain Gibbs, a newly married, 29 year old. She was bound for Melbourne with a crew of 37, plus 17 passengers and a load of cargo. The general cargo reflected the affluence of Melbourne at the time. On board were straw hats, umbrella, perfumes, clay pipes, pianos, clocks, confectionary, linen and candles, as well as a heavier load of railway irons, cement, lead and copper. There were items included that intended for display in the Melbourne International Exhibition in 1880. The voyage to Port Phillip was long but uneventful. At 3am on June 1, 1878, Captain Gibbs was expecting to see land and the passengers were becoming excited as they prepared to view their new homeland in the early morning. But LOCH ARD was running into a fog which greatly reduced visibility. Captain Gibbs was becoming anxious as there was no sign of land or the Cape Otway lighthouse. At 4am the fog lifted. A man aloft announced that he could see breakers. The sheer cliffs of Victoria's west coast came into view, and Captain Gibbs realised that the ship was much closer to them than expected. He ordered as much sail to be set as time would permit and then attempted to steer the vessel out to sea. On coming head on into the wind, the ship lost momentum, the sails fell limp and LOCH ARD's bow swung back. Gibbs then ordered the anchors to be released in an attempt to hold its position. The anchors sank some 50 fathoms - but did not hold. By this time LOCH ARD was among the breakers and the tall cliffs of Mutton Bird Island rose behind the ship. Just half a mile from the coast, the ship's bow was suddenly pulled around by the anchor. The captain tried to tack out to sea, but the ship struck a reef at the base of Mutton Bird Island, near Port Campbell. Waves broke over the ship and the top deck was loosened from the hull. The masts and rigging came crashing down knocking passengers and crew overboard. When a lifeboat was finally launched, it crashed into the side of LOCH ARD and capsized. Tom Pearce, who had launched the boat, managed to cling to its overturned hull and shelter beneath it. He drifted out to sea and then on the flood tide came into what is now known as LOCH ARD Gorge. He swam to shore, bruised and dazed, and found a cave in which to shelter. Some of the crew stayed below deck to shelter from the falling rigging but drowned when the ship slipped off the reef into deeper water. Eva Carmichael had raced onto deck to find out what was happening only to be confronted by towering cliffs looming above the stricken ship. In all the chaos, Captain Gibbs grabbed Eva and said, "If you are saved Eva, let my dear wife know that I died like a sailor". That was the last Eva Carmichael saw of the captain. She was swept off the ship by a huge wave. Eva saw Tom Pearce on a small rocky beach and yelled to attract his attention. He dived in and swam to the exhausted woman and dragged her to shore. He took her to the cave and broke open case of brandy which had washed up on the beach. He opened a bottle to revive the unconscious woman. A few hours later Tom scaled a cliff in search of help. He followed hoof prints and came by chance upon two men from nearby Glenample Station three and a half miles away. In a state of exhaustion, he told the men of the tragedy. Tom returned to the gorge while the two men rode back to the station to get help. By the time they reached LOCH ARD Gorge, it was cold and dark. The two shipwreck survivors were taken to Glenample Station to recover. Eva stayed at the station for six weeks before returning to Ireland, this time by steamship. In Melbourne, Tom Pearce received a hero's welcome. He was presented with the first gold medal of the Royal Humane Society of Victoria and a £1000 cheque from the Victorian Government. Concerts were performed to honour the young man's bravery and to raise money for those who lost family in the LOCH ARD disaster. Of the 54 crew members and passengers on board, only two survived: the apprentice, Tom Pearce and the young woman passenger, Eva Carmichael, who lost all of her family in the tragedy. Ten days after the LOCH ARD tragedy, salvage rights to the wreck were sold at auction for £2,120. Cargo valued at £3,000 was salvaged and placed on the beach, but most washed back into the sea when another storm developed. The wreck of LOCH ARD still lies at the base of Mutton Bird Island. Much of the cargo has now been salvaged and some was washed up into what is now known as LOCH ARD Gorge. Cargo and artefacts have also been illegally salvaged over many years before protective legislation was introduced. One of the most unlikely pieces of cargo to have survived the shipwreck was a Minton porcelain peacock - one of only nine in the world. The peacock was destined for the Melbourne International Exhibition in 1880. It had been well packed, which gave it adequate protection during the violent storm. Today, the Minton peacock can be seen at the Flagstaff Hill Maritime Museum in Warrnambool. From Australia's most dramatic shipwreck it has now become Australia's most valuable shipwreck artefact and is one of very few 'objects' on the Victorian State Heritage Register. The wreck of the LOCH ARD is of State significance — Victorian Heritage Register S417 Flagstaff Hill’s collection of artefacts from LOCH ARD is significant for being one of the largest collections of artefacts from this shipwreck in Victoria. It is significant for its association with the shipwreck, which is on the Victorian Heritage Register (VHR S417). The collection is significant because of the relationship between the objects, as together they have a high potential to interpret the story of the LOCH ARD. The LOCH ARD collection is archaeologically significant as the remains of a large international passenger and cargo ship. The LOCH ARD collection is historically significant for representing aspects of Victoria’s shipping history and its potential to interpret sub-theme 1.5 of Victoria’s Framework of Historical Themes (living with natural processes). The collection is also historically significant for its association with the LOCH ARD, which was one of the worst and best known shipwrecks in Victoria’s history. A square marble tile retrieved from the wreck of the LOCH ARD. Most of its surface is covered by a thin layer of limestone and marine growth encrustation that is stained rust-red. There is a piece of corroded iron encrusted at an oblique angle on the tile’s rear face. The tile is ‘rough-worked’, cut to shape and size, but not smoothed or polished. There is a companion tile in similar condition in the Flagstaff Hill collection. From visual observation of the original surface (at low magnification) the tile appears to be of white Carrara-type marble.flagstaff hill, warrnambool, shipwrecked coast, flagstaff hill maritime museum, maritime museum, shipwreck coast, flagstaff hill maritime village, great ocean road, loch line, loch ard, captain gibbs, eva carmichael, tom pearce, glenample station, mutton bird island, loch ard gorge, white marble, marble tile, carrara marble, colonial architecture, victorian building materials -
 Upper Yarra Museum
Document, Circa 1952
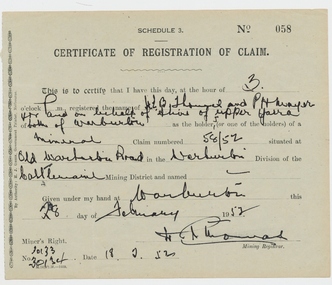
A person wanting to dig for Gold or any other precious metal were required to register a claim on the land to be mined, the claim had to be measured & pegged to be specific as to its size and shape.Certificate Miners Claim No 058gold, document, certificate, miners claim -
 Upper Yarra Museum
Green Gables Letter Box, Unknown
This item was used in the office of Green Gables, Guest House, Warburton, to hold post cards, that were sold to the guests. The Kent Family owned and operated the House from 1949 -1957, this item was kept by the family until 2013.It was then donated to the Upper Yarra Museum.Wooden hardwood, Letter holder, back 28 cm high,13 cm wide.7 cms. deep. 2 compartments inner compartment 20cm. high. Front is 9 cms. with inscription.Stenstil sign in gold with black outline. This is on the lower front panel green gables, warburton, -
 Walhalla Museum
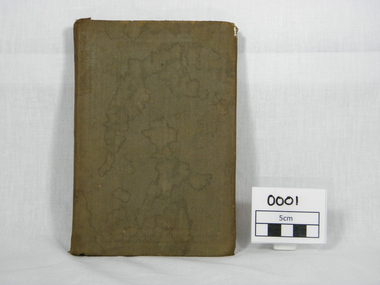
Book, REV. HENRY WOODCOCK, "Fact Stranger Than Fiction", 1870
brown dust cover, some water stains. gold edge pages. 41 on top of spine -
 Bendigo Military Museum
Plaque - PLAQUE, BLANK
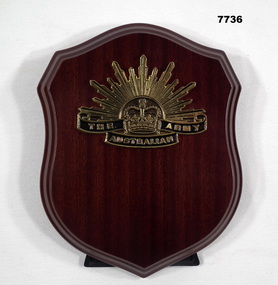
Souvenir Plaque from Australian War Memorial.Small wooden brown shield with a gold plastic Rising Sun Emblem with a crown in the centre and The Australian Army at the bottom. on the back is a plastic fold out stand attached by two screws.Rising Sun Emblem has "THE AUSTRALIAN ARMY".plaque, souvenir -
 Bendigo Military Museum
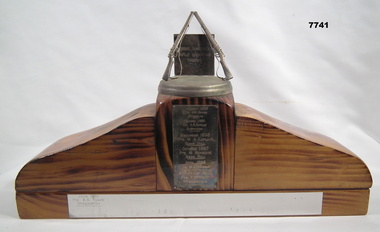
Award - SHOOTING TROPHY, c.1982
Trophy established to recognise winners of shooting trophy of unidentified unit but most likely 8/7th Battalion, Royal Victorian Regiment.Brown wooden stained trophy. Mounted on top of gold coloured tin lid and mounted on lid 2 metal rifles about 10 cm high leaning against a metal plate. With the name of trophy engraved. On front is two metal plates. First plate engraved with 6 past winners and second plate along bottom mostly empty with just one past winner.Title engraved; "Somme Barracks Rifle Shooting Trophy". Also engraved 7 past winners.shooting trophy, 8/7 rvr -
 Bendigo Military Museum
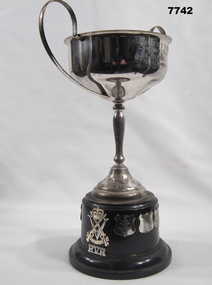
Award - SHOOTING TROPHY
Trophy awarded to members of 2 RVR for Best Student on two promotion courses.Gold Trophy cup with two handles mounted on a round black plastic base. On base is the emblem of the Royal Victorian Regiment. Also around base of stand are 9 silver shields with past winners.Trophy engraved "subject two promotion course 2 RVR Best Student." Also engraved 9 previous winners on base.2 rvr, trophy -
 Bendigo Military Museum
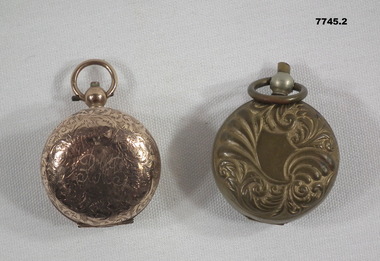
Accessory - SOVEREIGN CASE
1. 9 carat gold sovereign case belonging to 'Robert H. Baron'. Part of the Robert H. Baron, No.3596, and Cooper Collections. See Catalogue No. 1981P for details of R.H. Baron's service.1. Rose gold coloured hinged sovereign case. Circular in shape, interior has spring loaded clip for holding a sovereign. Catch and ring for a chain located on top. Owners initials engraved on front. Message to owner engraved on inside of lid. Outside front and back finely engraved. Hallmark on inside. 2. Brass coloured hinged sovereign case. Circular in shape. Pressed decoration and blank cartouch on front. Back plain. Dark felt lining inside lid. Interior has spring loaded clip for holding a sovereign. Catch and ring for a chain located on top.1. Hallmark stamped on inside and on inside of lid. '9.375'. Engraved on front: R.4.B. Engraved on inside: from Mother to Bob, Xmas, 1924.robert h. baron, cooper collection, sovereign case, accessory -
 Bendigo Military Museum
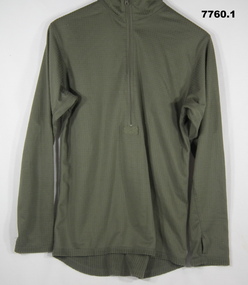
Uniform - THERMALS, UNDERWEAR - ARMY, Unknown
Thermals, top and pants, jungle green colour, polyester/spandex fabric, grid structure and fleece lining. Nylon and metal zipper. 1. Top - polo shirt shape with collar, long sleeves with thumb hole and half zipper front closure. Black colour polyester manufacturers label, back below collar. 2. Pants - Long Johns - elastic waistband, front fly opening, long legs. Manufacturers label, back below waistband - black colour polyester fabric.Manufacturers information on label - white and gold print. 1. "GEN111/ SIZE M/ LONG SLEEVED TOP/ LEVEL 2/ HELIKON.TEX.COM/ ART.ID: BL-UH2-PO/ STOCK NO. 9415-09-229-1357/ NATO SIZE 7585/ 9404/ ACCORDING TO U.S. ARMY / SPECIFICATION." 2. "GEN111/ SIZE M/ LONG-JOHNS/ LEVEL 2/ HELIKON.TEX.COM/ COMFORT DRY/ HELIKON-TEX.COM/ 95% POLYESTER 5% SPANDEX/ AVOID USE OF FABRIC SOFTENERS/ ART.ID: SP.UN2.PO/ STOCK NO. 9415-09-229-1357/ NATO SIZE 7585/ 9404/ ACCORDING TO U.S. ARMY / SPECIFICATION." "PO#1325" uniform, army, underwear, thermals -
 Bendigo Military Museum
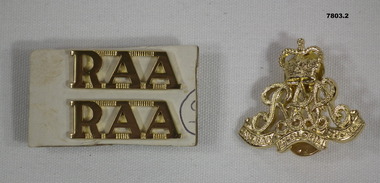
Badge - UNIFORM ID BADGES
Badges attached to uniforms on ceremonial occasions. Items in the collection of "Craig Triffett", refer Cat No. 5997.5. For his service details.1. Two collar badges for RAA Uniforms. Letters "RAA" in gold metal with line across top and bottom. Mounted on apiece of hard cardboard. Each attached by two studs. 2. Gold metallic emblem of the Royal Australian Artillery (RAA). RAA letters written across the motto, going across the bottom and a crown on top. Two gold studs attached to back.Motto "Quo fas et gloria ducunt" which is latin for "Where right and glory lead."raa, badges, craig triffett -
 Bendigo Military Museum
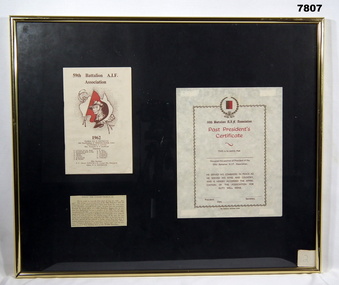
Certificate - CERTIFICATE, FRAMED, 59TH BATTALION, 1962
Certificate, booklet and information article framed together. Certificate - red and brown print on cream coloured paper. This is a "59th Battalion AIF Association/ Past President Certificate" Booklet - red and brown print on cream coloured paper. Title on front "59th A.I.F. Association/1962" Article - black ink print on cream paper with the title "WHAT THE COVER DESIGN IS". Frame - gold coloured aluminium, with black coloured cardboard backing mount, glass front and MDF board on back.framed accessories, certificate, 59th battalion, 8/7 rvr -
 Bendigo Military Museum
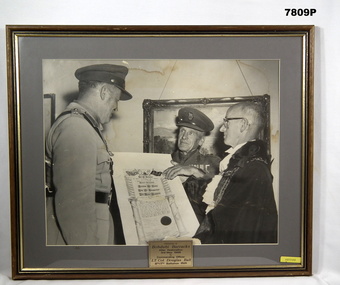
Photograph - PHOTOGRAPH - FRAMED, 1989
Photograph - black and white photograph of three men at a presentation ceremony. Two Army personnel and one civilian with a certificate. Mount - Mid grey colour cardboard. Frame - timber with brown colour varnish and gold colour paint trim. Decorative moulding. Glass front, timber and paper backing. metal plaque - gold colour - on lower edge of frame with etched information.Information on plaque - etched black on gold. "PRESENTED TO/ BOBDUBI BARRACKS/ AFTER RESTORATION/ 3rd MAY 1989/ BY/ COMMANDING OFFICER/ LT. COL. DOUGLAS BALL/ 8TH/7TH BATTALION RVR"framed accessories, photographs, army, 8/7 rvr -
 Bendigo Military Museum
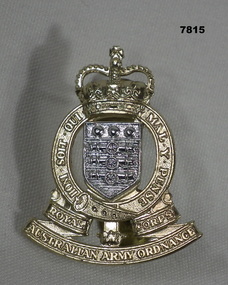
Badge - BADGE - HAT, BADGE, HAT - ROYAL CORP AUSTRALIAN ARMY ORDNANCE
Hat badge issued by Royal Corp Australian Army Ordnance. Queens crown at top of garter with motto "Honi Soit Qui Mal Y Pense". Ribbon at bottom with corp name in metallic gold. Shield shaped crest in garter shows 3 cannon balls in a row at top with 3 cannon displayed vertically beneath, in silver coloured metal. 2 pins mounted on back with clasps.badge, hat, australian army, royal corp of ordnance -
 Bendigo Military Museum
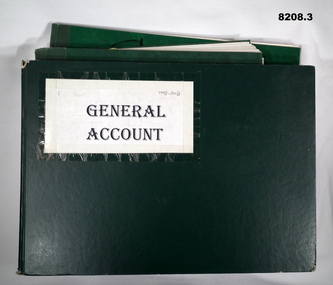
Financial record - ACCOUNT BOOKS BRSL, Bendigo RSL Sub Branch, 1983 - 2003
General Account Income/Expenditure books for the Bendigo RSL Sub Branch which flow on into the early years of Bendigo District RSL Sub Branch Inc. .1) For the years 1983 - 1988. .2) For the years 1989 - 1996. Front cover in texta says "1997" .3) For the years 1998 - 2003. Refer Cat No's 8020 & 8073P for the formation of Bendigo District RSL Sub Branch Inc .1) Book, green covers, blue ruled lines with red and blue vertical lines, entries in blue pen, a small amount in black pencil. .1) Book, green covers, blue ruled lines with red and blue vertical lines, entries are in blue pen and black pencil. .3) Book, green covers, blue ruled lines with blue and black vertical lines, entries are in blue pen and black pencil. Measurements are an average of the three..1) On front cover in black texta pen, "General A/C 83 - 88". Printed in gold, "Analysis Book Collins 800 series" .2) On front cover in black texta, "1989 - 1997". Printed in gold same as .1) .3) On front cover pasted on a sheet of white paper with typed, "GENERAL ACCOUNT", in pencil on, "1998 - 2003"brsl, smirsl, accounts -
 Bendigo Military Museum
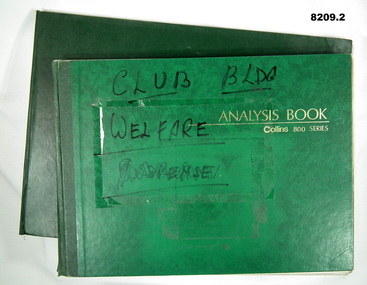
Financial record - ACCOUNT BOOKS BRSL, Bendigo RSL Sub Branch, 1987 - 2003
Account books Income/Expenditure for the Bendigo RSL Sub Branch which flows on into the early days of Bendigo District RSL Sub Branch Inc. .1) Three Acc's listed, Club Building Fund 1983 - 1999, Welfare Patriotic Fund 1987 - 1999, Bissett Acc 1994 - 1999. .2) Three Acc's listed, Building Patriotic Fund 2000 - 2003, Welfare Patriotic Fun 2000 - 2003, Estate Bissett, 2000 - 2003. Refer Cat No's 8020 & 8073P for the formation of the Bendigo District RSL Sub Branch Inc..1) Book, green covers, blue ruled lines with red and blue vertical lines, entries are in blue pen and black pencil. .2) Book, dark green covers, blue ruled lines with blue and black vertical lines, entries are in blue pen and black pencil..1) On front cover in black texta, "Club Bldg, Welfare ..............". In gold print "Analysis book Collins 800 series". .2) On front cover in gold print, "Collins 800 Analysis book 27 money columns - 13245"brsl, smirsl, accounts -
 Bendigo Military Museum
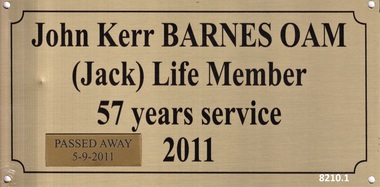
Plaque - RECOGNITION PLAQUES 2011, C.2011
These 3 plaques were originally placed on 3 doors within the Soldiers Memorial Institute building in Pall Mall Bendigo in recognition of the years of service as volunteers to the Bendigo RSL Sub Branch & Bendigo District RSL Sub Branch in 2011. Over time the small plaques were added regarding their ongoing volunteer years and passing. During the renovations to the Soldiers Memorial Institute & Museum which closed in 2016 all plaques were taken down that were in the building. These 3 were not put back in the original positions. .1) John Kerr Barnes OAM, refer Cat No 8040 for his volunteer service. .2) John Edward Fay, refer Cat No 8129P for his volunteer service. .3) William James Norman Smart, refer Cat No 8131.2P for his volunteer service..1) Plaque, metal, front face gold colour, all text and edging in black, one small gold plaque placed on the bottom RH corner. .2) Plaque, metal, front face gold colour, all text and edging in black, 3 small gold colour plaques have been added. .3) Plaque, metal, front face gold colour, all text and edging in black, 2 small gold colour plaques have been added.brsl, smirsl, plaque, recognition, volunteer -
 Bendigo Military Museum
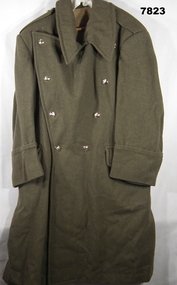
Uniform - GREAT COAT, ARMY
Coat - Khaki colour wool fabric Great Coat. Double breasted with eight buttons. Collar which fastens with two metal hook and eye fasteners. Shoulder epaulettes with buttons. Back has top inverted pleat, below waist inverted pleat with lower vent with two button closure. Double half belt with three buttons back at waist. Thirteen gold colour plastic buttons with metal shank to interior brown colour plastic button. Buttons have raised emblem - crown and shield - This is an Officers Coat. Two inset front pockets with flap. Brown colour cotton sateen lining to coat with two concealed pockets. No manufacturers label.uniform, army, great coat -
 Bendigo Military Museum
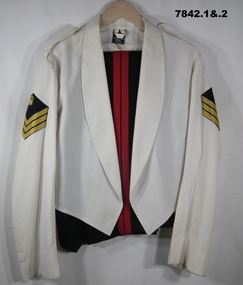
Uniform - MESS DRESS, ARMY, 1972-1973
Uniform Mess Dress issued to "Kevin Finch".Mess Dress style, black colour wool/polyester fabric jacket and trousers. Black colour polyester fabric lining. 1. Jacket - collar with two lapel badges, gold, silver and black metal with crown, star, laurel leaves and lettering "ER/ ROYAL AUSTRALIAN CORPS OF TRANSPORT". Five front pockets - two top patch pockets with button down flaps, at waist fob pocket, two lower inset pockets with flap. Top of the sleeves have three gold colour fabric rank stripes = Sergeant. Gold coloured plastic buttons with shank and metal pin with raised emblem and lettering. Crown, RACT, ER, metal belt keepers. 2. Belt - fabric as jacket, gold colour plastic buckle with two pins with black colour plastic button. Belt sits in metal belt keepers on jacket. 3. Trousers, two side pockets, fob pocket, back inset pocket. Metal and nylon zipper fly with metal hook closer. Black plastic buttons inside on waistband for braces. red colour wool fabric 4cm wide stripe down each side seam. 1. & 3. White cotton fabric manufacturers labels - inside right pocket and waistband.Manufacturers information on labels - black ink print. 1 & 3. "KEITH COURTNEY PTY LTD/ VICTORIA/ 1972-1973/ ^/ NAME/ SERVICE NO." Black ink stamp "FINCH, K".uniform, army, mess dress -
 Bendigo Military Museum
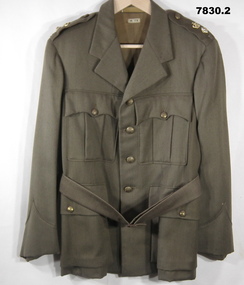
Uniform - JACKET, SERVICE DRESS, ARMY
1. Jacket - khaki colour wool/polyester fabric Service dress style with belt. Buttons - dull gold coloured metal with shank with raised emblem and lettering. Crown, map of Australia and "AUSTRALIAN MILITARY FORCES". Collar, shoulder epaulettes with three metal rank insignia pips. Gold and red crown, officer pip, Letter "R" = Lieutenant Colonel Retired. Four front pockets - top patch pockets with button closure flap. Lower - inset pockets with button closure flap. Khaki colour cotton sateen fabric lining body of jacket, brown strip lining to sleeves. White cotton manufacturers label on lining inside below collar. 2. Belt - khaki colour wool/polyester fabric service dress style. Copper colour metal buckle with two pins. Leather belt keepers and brown plastic buttons.Manufacturers information on label - dark brown ink print. 1. "M.TX".uniform, army, service dress -
 Bendigo Military Museum
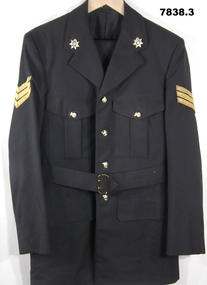
Uniform - MESS DRESS, ARMY, 1987
Uniform issued to S/SGT "Brian Thompson". Years of service 1973 - 1993. 316221.1. Jacket - white colour polyester/cotton fabric, rolled collar jacket, shoulder epaulettes, top of sleeves, black colour rank badge with gold colour crown and three stripes = Staff Sergeant. Manufacturers label back below collar. 2. Trousers - black colour cotton/polyester fabric with fob pocket and two side pockets. Metal and nylon zipper fly. Red colour wool fabric twin 2 cm stripe down each side seam. Manufacturers label back below waistband. Black colour polyester fabric lining waistband and pockets. Black plastic button inside waistband. 3. Cummerbund - Red colour polyester fabric, broad waist sash with three pleats, metal hook and bracket buckle and hook and loop fastener to adjust lengthy. Black colour polyester fabric lining. Manufacturers label. 4. Bowtie - black colour polyester fabric, pre-tied bow tie with metal clasp. Manufacturers label. 5. Braces - set of white colour cotton elastic braces with metal clips to attach to trousers. Metal slide clips to adjust length and plastic strap joiner.Manufacturers information. 1. Jacket - black fabric label - TETOROM/ 65% POLYESTER/ 35% COTTON/ WIMBLEDON WEAR/ MELBOURNE". White fabric label "97R/ WARM MACHINE WASH/ D NOT BLEACH/ MACHINE TUMBLE DRY/ WARM. WARM IRON." 2. "A.G.C.F./ VICTORIA/ 1987/ ^/ ARMY NO/ NAME" 3. "POLYESTER/ DRY/ CLEAN/ (50c) ONLY" 4. POLYESTER/ DRY/CLEAN/ (50c) ONLY"uniform, army, mess dress, brian thompson -
 Bendigo Military Museum
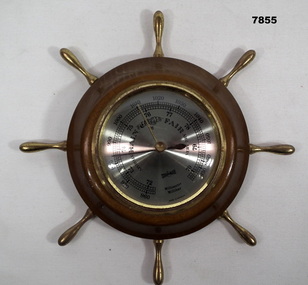
Instrument - BAROMETER
Item donated to "A" Company Sgts Mess by two sergeants, G. Pickens and K. Pickens.Brown wooden round barometer in the shape of a boat steering wheel. Interior function made of copper and glass. Eight spikes all of etal - gold in colour. Plastic backing of working parts. hole drilled in back top to attach to wall.Written on back "Presented to A.Coy Sgt Mess 10th Nov 1990". By Sgt. G. Pickens & Sgt K. Pickens.sgts mess, a. company, barometer -
 Bendigo Military Museum
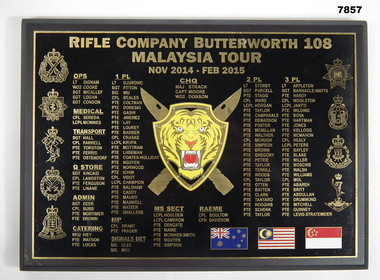
Plaque - PLAQUE, RIFLE COMPANY 108
Over several decades the Australian Army has been rotating a rifle company through the Australian Base at Butterworth, Penang, Malaysia. It's aim now is to train soldiers in jungle warfare and rotation occurs quarterly.Black Wooden Plaque with full listing of all members of Rifle Company Butterworth 108. Personnel in gold print and listed by Company Platoons and various support units with their respective unit badges on each side. Unit badge of cross bayonets and a Tigers head on a shield in the centre. in bottom right corner, 3 flags - Australia/ Malayasia/ Singapore. A hole is drilled into it.Headed "Rifle Company Butterworth 108 Malaysia Tour Nov 14 - Feb 2015.butterworth, rifle company, plaque -
 Bendigo Military Museum
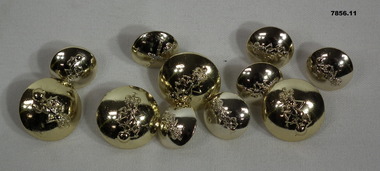
Uniform - BUTTONS, RAEME
Each button bears the Insignia of Royal Australian Electrical and Mechanical Engineers (RAEME). Part of the Cooper Collection.Collection of four large and seven small round gold coloured buttons. Each button bears a unit insignia - RAEME. Each button has a loop on back for attaching to an army jacket.Stamped on back of large buttons: 'STOKES & SONS, MELB'. Stamped on back of small buttons: 'STOKES, MELB.'cooper collection, uniform, buttons, raeme -
 Bendigo Military Museum
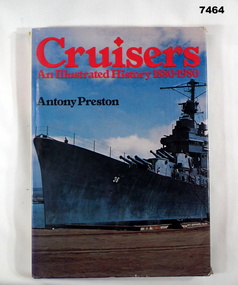
Book - BOOK, NAVAL, Antony PRESTON, "Cruisers- An Illustrated History 1880 -1980", 1980
Hard cover book with dust cover. Hard cover - cardboard with Navy Blue buckram cover. Gold print on spine. Dust cover - paper, red and black print on front, spine, front and back flaps. Illustrated, front cover photograph in colour of a ship dockside. Back cover - photograph in colour of a portion of a ship in a seascape of water, sand and trees in background. 191 pages, cut, plain, white paper. Illustrated in black and white and colour photographs, maps and technical illustrations. Front end paper - handwritten greeting.Front endpaper - blue pen - handwritten, "TO DAD/ FROM VALERIE & IAN - FATHERS DAY 1981". books, navy cruisers -
 Bendigo Military Museum
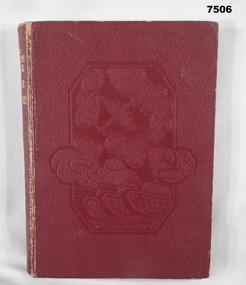
Book - BOOK, WW2, The Sun News - Pictorial, "THE FOURTH YEAR OF WAR IN PICTURES", 1944
Refer Cat No. 7503, 7504, 7505, 4 book collection.Hard cover book. Cover - cardboard, with red colour buckram cover, gold print on spine and embossed illustrations on front cover depicting map, aircraft and tank. End papers - illustrated, sepia tones artwork with aircraft and landscape battle scene. 255 pages - cut, plain, white paper. Illustrated in black and white photographs, maps and battle diagrams. Handwritten inscription on page opposite Title Page.Page opposite Title Page - handwritten black ink inscription - "Wishing Kevin a/ Merry Xmas/ from/ Nathalie 1944".books, pictorial, ww2. -
 Bendigo Military Museum
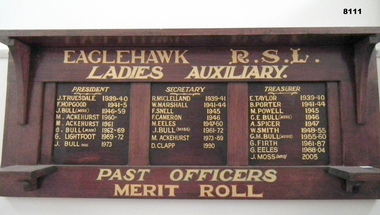
Honour Board - EAGLEHAWK LADIES AUXILIARY RSL HONOUR BOARD, Eaglehawk Womens RSL Auxiliiary, C. 1939 onwards
The Eaglehawk Ladies Auxiliary wound down as part of the Eaglehawk RSL amalgamating with the Bendigo District RSL Sub Branch Inc in 2004/5. Refer cat No 8110 for more history.Honour Board rectangular shape, timber construction, all text in gold paint re the past Presidents, Secretaries & Treasurers from 1939 - 2005.“Eaglehawk R.S.L Ladies Auxiliary - Past Officers merit roll”brsl, smirsl, ehrsl, auxiliary -
 Bendigo Military Museum
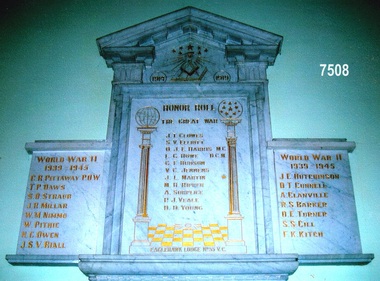
Honour Board - HONOUR BOARD, EAGLEHAWK LODGE, WW1, WW2, Eaglehawk Lodge, Post 1919 & post 1945
The WW1 roll has 11 names with 1 x MC and 1 x DCM award. The WW2 roll has 15 names. The entire structure is in 16 pieces that all fit together.Eaglehawk Lodge No 55 Honour Roll, all marble, all text in gold, the main centre piece is WW1 with Lodge insignia at the top with year dates followed by 2 columns with text and list of names following, at the bottom the Lodge name. Two sections one each side is for WW2 with names on.Centre section, “1914 - 1919 HONOR Roll - The Great War - Eaglehawk - Lodge No 55 VC” Side sections, “World War 11 - 1939 - 1945”memoroabilia, honor, roll, lodge, eaglehawk -
 Bendigo Military Museum
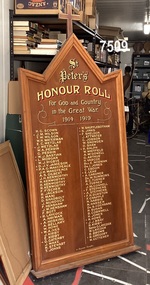
Honour Board - HONOUR BOARD, ST PETERS CHURCH, WW1, St Peter’s Church, Post WW1
St Peter’s Church Eaglehawk, Bendigo. The small crosses indicate those that never came back being 22.Honour Board rectangular shape pointed at the top with a cross on, timber construction, all text & markings in gold.“St Peter’s Honour Roll - For God and Country in the Great War 1914 - 1919”. Cross symbol, “Supreme Sacrifice” at the bottom.honour, st peters, roll -
 Bendigo Military Museum
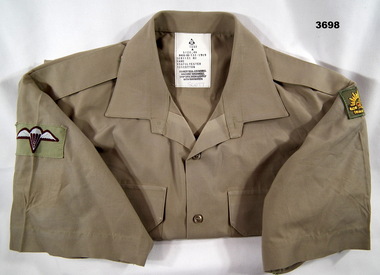
Uniform - SHIRT, ARMY, Australian Defence Industries, 1992
Shirt - Khaki, polyester cotton, short sleeve with shoulder epaulettes and plastic buttons. Right shoulder patch parachute wings, dark red and white embroidery on khaki patch. Left shoulder patch - "THE AUSTRALIAN ARMY" Gold and red embroidery on khaki patch, Rising Sun and Crown. Cotton manufacturers label on back below collar with black print information and owner's label.Cotton label information - black ink print. "ADI/ 1992/^/ SIZE 44/ 8405.66.133.5959/ SERVICE NO/ NAME/ 65% POLYESTER/ 35% COTTON/ DO NOT BOIL OR WRING/ MACHINE WASHABLE/ DRIP DRY, IRON LIGHTLY/ WITH WARM IRON" Handwritten blue ink "SCOTT" uniform, army, shirt -
 Bendigo Military Museum
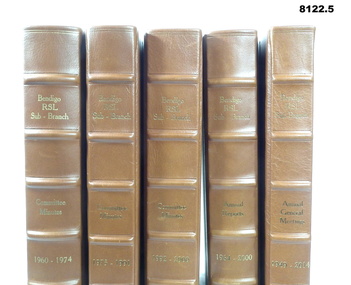
Administrative record - VOLUMES, BDRSL MINUTES
On the spine in gold on all "Bendigo RSL Sub - Branch", on three, "Committee Minutes, on one "Annual reports" and last, "Annual General Minutes". The years to each specific volume. When the History of the Bendigo RSL was being compiled by Murray Poustie the original foolscap documents were put together and then reprinted in these volumes in A4 size. Refer Cat No 8093 re the history Bendigo RSL Sub Branch..1 - .3) Three leather bound volumes with brown spine and corner covers, front and back face green, on the spine is text in gold. These are the minutes of the Bendigo RSL Sub Branch from 1960 - 2000 being 1960 - 74, 1975 - 91 and 1992 - 2000. .4) Same leather volume these being the Annual Reports of the Sub Branch from 1964 - 2000. .5) Same leather volume these being the Annual General meetings from 1949 - 2014. Each has a black book mark ribbon. As well each is slightly different in thickness size.brsl, smirsl, volumes