Showing 12760 items
matching weller
-
 Falls Creek Historical Society
Poster - Kangaroo Hoppet 1996
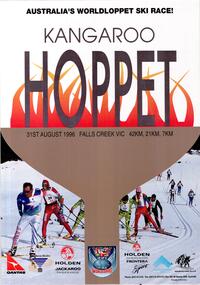
The Kangaroo Hoppet is Australia’s premier long distance cross country ski race, and a member of the Worldloppet series of international cross country ski events. The first race at Falls Creek was held in 1979 under the name of “Australian Birkebeiner”. It was a 21km race with about 80 participants organised by the Birkebeiner Nordic Ski Club of Mount Beauty. The course started and finished at Falls Creek Alpine Resort and took participants out into the Bogong High Plains. After running the event for 10 years, it was decided they should become part of the Worldloppet series of marathon ski races. Representatives from the Birkebeiner Nordic Ski Club and the Australian Ski Federation attended the Worldloppet Annual Meeting in Finland in June 1990 to put the case for the acceptance of an Australian event into the Worldloppet series. Before being admitted, they had to demonstrate that the Birkebeiner Club could run a world class event, so three months later in August 1990 a 42km event named the Australian International Ski Marathon was held at Falls Creek together with a 21km Birkebeiner race and a 7km event called the Birkebeiner Lite. The event was approved by delegates from USA, Norway and Austria, in 1991 Australia became the 12th member of Worldloppet, with the condition that there had to be a name change. After some late night discussion allegedly involving red wine from North East Victoria the main event became the 42km Kangaroo Hoppet, with the minor events being the 21km Australian Birkebeiner, and 7km Joey Hoppet. In the winter of 1991, the first Kangaroo Hoppet was held. It was a great success and has been a regular fixture on the international ski calendar ever since. It features the main 42km event as well as a 21km event and a 7km event. The Hoppet brings the Australian snowfields to an international audience. In 1996 the Men's Winner was Johann Muhlegg from Germany in a time of 1:28:00. The winner of the Women's event was Hanne Lahtinen of Finland in a time of 1:46:50.This poster is significant because it documents an event which brings international attention to Falls Creek and the surrounding region.A large poster with an image of Kangaroo Hoppet competitors with a cauldron of flames superimposed over the top. A title is written in the top half of the poster. The logos of QANTAS, Southern Hydro, Holden Jackaroo, Worldloppet, Holden Fontera, Alpine Resorts Commission Victoria and the Birkebeiner Nordic Ski Club are across the bottom. In top half: AUSTRALIA'S WORLDLOPPET SKI RACE/ KANGAROO HOPPET 31st AUGUST 1996, FALLS CREEK, VIC / 42KM, 21KM, 7KM. At the bottom beneath logos: Phone: (057) 54 3103 Fax: (057) 54 4475 P.O. Box 400 Mt. Beauty 3699 Australia Photograph by Nick Ivancokangaroo hoppet, worldloppet events, falls creek, mt. beauty -
 Falls Creek Historical Society
Poster - Kangaroo Hoppet 1997
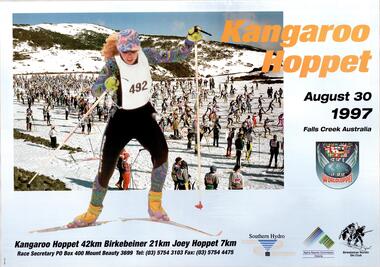
The Kangaroo Hoppet is Australia’s premier long distance cross country ski race, and a member of the Worldloppet series of international cross country ski events. The first race at Falls Creek was held in 1979 under the name of “Australian Birkebeiner”. It was a 21km race with about 80 participants organised by the Birkebeiner Nordic Ski Club of Mount Beauty. The course started and finished at Falls Creek Alpine Resort and took participants out into the Bogong High Plains. After running the event for 10 years, it was decided they should become part of the Worldloppet series of marathon ski races. Representatives from the Birkebeiner Nordic Ski Club and the Australian Ski Federation attended the Worldloppet Annual Meeting in Finland in June 1990 to put the case for the acceptance of an Australian event into the Worldloppet series. Before being admitted, they had to demonstrate that the Birkebeiner Club could run a world class event, so three months later in August 1990 a 42km event named the Australian International Ski Marathon was held at Falls Creek together with a 21km Birkebeiner race and a 7km event called the Birkebeiner Lite. The event was approved by delegates from USA, Norway and Austria, in 1991 Australia became the 12th member of Worldloppet, with the condition that there had to be a name change. After some late night discussion allegedly involving red wine from North East Victoria the main event became the 42km Kangaroo Hoppet, with the minor events being the 21km Australian Birkebeiner, and 7km Joey Hoppet. In the winter of 1991, the first Kangaroo Hoppet was held. It was a great success and has been a regular fixture on the international ski calendar ever since. It features the main 42km event as well as a 21km event and a 7km event. The Hoppet brings the Australian snowfields to an international audience. In 1997 the Men's Winner was Paul Gray from Australia in a time of 1:43:07. The winner of the Women's event was Camille Melvey of Australia in a time of 2:06:58.This poster is significant because it documents an event which brings international attention to Falls Creek and the surrounding region.A large poster featuring a main image of many skiers on the slopes, with a larger image of a female skier superimposed over it. A title is written in the top left section of the poster in orange text. Remaining text is in black. The logos of Worldloppet, Southern Hydro, Alpine Resorts Commission Victoria and the Birkebeiner Nordic Ski Club are also included in the left side of the poster. In top left: Kangaroo Hoppet / August 30 1997 Falls Creek Australia At the bottom beneath images: Kangaroo Hoppet 42km Birkebeiner 21km Joey Hoppet 7km Race Secretary P.O. Box 400 Mt. Beauty 3699 Tel: (03) 5754 3103 Fax: (03) 5754 4475kangaroo hoppet, worldloppet events, falls creek, mt. beauty -
 Falls Creek Historical Society
Poster - Kangaroo Hoppet 1998
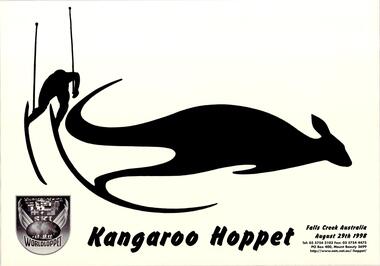
The Kangaroo Hoppet is Australia’s premier long distance cross country ski race, and a member of the Worldloppet series of international cross country ski events. The first race at Falls Creek was held in 1979 under the name of “Australian Birkebeiner”. It was a 21km race with about 80 participants organised by the Birkebeiner Nordic Ski Club of Mount Beauty. The course started and finished at Falls Creek Alpine Resort and took participants out into the Bogong High Plains. After running the event for 10 years, it was decided they should become part of the Worldloppet series of marathon ski races. Representatives from the Birkebeiner Nordic Ski Club and the Australian Ski Federation attended the Worldloppet Annual Meeting in Finland in June 1990 to put the case for the acceptance of an Australian event into the Worldloppet series. Before being admitted, they had to demonstrate that the Birkebeiner Club could run a world class event, so three months later in August 1990 a 42km event named the Australian International Ski Marathon was held at Falls Creek together with a 21km Birkebeiner race and a 7km event called the Birkebeiner Lite. The event was approved by delegates from USA, Norway and Austria, in 1991 Australia became the 12th member of Worldloppet, with the condition that there had to be a name change. After some late night discussion allegedly involving red wine from North East Victoria the main event became the 42km Kangaroo Hoppet, with the minor events being the 21km Australian Birkebeiner, and 7km Joey Hoppet. In the winter of 1991, the first Kangaroo Hoppet was held. It was a great success and has been a regular fixture on the international ski calendar ever since. It features the main 42km event as well as a 21km event and a 7km event. The Hoppet brings the Australian snowfields to an international audience. In 1998 the Men's Winner was Ales Vanek from the Czech Republic in a time of 1:47:05. The winner of the Women's event was Nadejda Simaknek of Russia in a time of 2:08:30.This poster is significant because it documents an event which brings international attention to Falls Creek and the surrounding region.A simple black and white poster featuring a silhouette of a skier and a kangaroo.All text is in black. The logos of Worldloppet is featured in the bottom left corner.Across bottom: Kangaroo Hoppet Falls Creek Australia August 29th 1998 Tel: (03) 5754 3103 Fax: (03) 5754 4475 P.O. Box 400 Mt. Beauty 3699 http://www.netc.net.au/-hoppet/kangaroo hoppet, worldloppet events, falls creek, mt. beauty -
 Falls Creek Historical Society
Poster - Kangaroo Hoppet 1999
The Kangaroo Hoppet is Australia’s premier long distance cross country ski race, and a member of the Worldloppet series of international cross country ski events. The first race at Falls Creek was held in 1979 under the name of “Australian Birkebeiner”. It was a 21km race with about 80 participants organised by the Birkebeiner Nordic Ski Club of Mount Beauty. The course started and finished at Falls Creek Alpine Resort and took participants out into the Bogong High Plains. After running the event for 10 years, it was decided they should become part of the Worldloppet series of marathon ski races. Representatives from the Birkebeiner Nordic Ski Club and the Australian Ski Federation attended the Worldloppet Annual Meeting in Finland in June 1990 to put the case for the acceptance of an Australian event into the Worldloppet series. Before being admitted, they had to demonstrate that the Birkebeiner Club could run a world class event, so three months later in August 1990 a 42km event named the Australian International Ski Marathon was held at Falls Creek together with a 21km Birkebeiner race and a 7km event called the Birkebeiner Lite. The event was approved by delegates from USA, Norway and Austria, in 1991 Australia became the 12th member of Worldloppet, with the condition that there had to be a name change. After some late night discussion allegedly involving red wine from North East Victoria the main event became the 42km Kangaroo Hoppet, with the minor events being the 21km Australian Birkebeiner, and 7km Joey Hoppet. In the winter of 1991, the first Kangaroo Hoppet was held. It was a great success and has been a regular fixture on the international ski calendar ever since. It features the main 42km event as well as a 21km event and a 7km event. The Hoppet brings the Australian snowfields to an international audience. In 1999 the Men's Winner was Vitaly Tchernov from Russia in a time of 1:45:26. The winner of the Women's event was Jannike Oeyen of Norway in a time of 1:54:05.This poster is significant because it documents an event which brings international attention to Falls Creek and the surrounding region.A coloured poster featuring an image of a group of Hoppet skiers from 1998 ascending a slope.The logo of Worldloppet is featured in the top left corner. The logos of QANTAS and the KANGAROO HOPPET are in the bottom corners,Across bottom: KANGAROO HOPPET FALLS CREEK AUSTRALIA AUGUST 28th 1999 Tel: (03) 5754 3103 Fax: (03) 5754 4475 P.O. Box 400 Mount Beauty 3699 http://www.netc.net.au/-hoppet/ e-mail: [email protected] hoppet, worldloppet events, falls creek, mt. beauty -
 Falls Creek Historical Society
Poster - Kangaroo Hoppet 2000
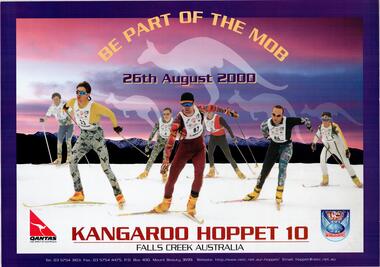
The Kangaroo Hoppet is Australia’s premier long distance cross country ski race, and a member of the Worldloppet series of international cross country ski events. The first race at Falls Creek was held in 1979 under the name of “Australian Birkebeiner”. It was a 21km race with about 80 participants organised by the Birkebeiner Nordic Ski Club of Mount Beauty. The course started and finished at Falls Creek Alpine Resort and took participants out into the Bogong High Plains. After running the event for 10 years, it was decided they should become part of the Worldloppet series of marathon ski races. Representatives from the Birkebeiner Nordic Ski Club and the Australian Ski Federation attended the Worldloppet Annual Meeting in Finland in June 1990 to put the case for the acceptance of an Australian event into the Worldloppet series. Before being admitted, they had to demonstrate that the Birkebeiner Club could run a world class event, so three months later in August 1990 a 42km event named the Australian International Ski Marathon was held at Falls Creek together with a 21km Birkebeiner race and a 7km event called the Birkebeiner Lite. The event was approved by delegates from USA, Norway and Austria, in 1991 Australia became the 12th member of Worldloppet, with the condition that there had to be a name change. After some late night discussion allegedly involving red wine from North East Victoria the main event became the 42km Kangaroo Hoppet, with the minor events being the 21km Australian Birkebeiner, and 7km Joey Hoppet. In the winter of 1991, the first Kangaroo Hoppet was held. It was a great success and has been a regular fixture on the international ski calendar ever since. It features the main 42km event as well as a 21km event and a 7km event. The Hoppet brings the Australian snowfields to an international audience. In 2000 the Men's Winner was Ben Derrick from Australia in a time of 1:56:39. The winner of the Women's event was Camille Melvey of Australia in a time of 2:19:21.This poster is significant because it documents an event which brings international attention to Falls Creek and the surrounding region.A coloured poster featuring an image of a group of seven skiers on the snow against the sunset, with the outline of four kangaroos in the sky. The slogan for the year was in an arc of yellow text above the skiers. The logos of Worldloppet and QANTAS were featured on either side of the text at the bottom. This year celebrated the 10th Kangaroo Hoppet.In arc of gold text: BE PART OF THE MOB / 26th AUGUST 2000 Beneath image: KANGAROO HOPPET 10 FALLS CREEK AUSTRALIA In smaller print along bottom: Tel: (03) 5754 3103 Fax: (03) 5754 4475 P.O. Box 400 Mount Beauty 3699 Website: http://www.netc.net.au/-hoppet/ Email: [email protected] hoppet, worldloppet events, falls creek, mt. beauty -
 Melbourne Legacy
Document - Speech, 'Forty Years On' Foundation Day 1967 address by Past President Brian Armstrong (H30), 1967
In September 1967 Legatee Brian Armstrong gave a speech about the first 40 years of Legacy. He mentions; 'what, in all humility, does our word 'Legacy' conjure up? To each of us, no doubt, something different, according to the the period of our service and our particular interests. To the early ones, many pictures, grave and gay, many voices, two perhaps in particular, both on the brink of a discovery. One, rather triumphant, - 'I've got it, we will call it "Legacy", but we will give instead of take, and look for nothing in return; and two years later, a quiet voice, still with us, thank heaven, "Have you ever through what the dying wish of our cobbers would have been?". This is our link. On the one hand, the still sharp memory of the lost men of Anzac France, Belgium, and the Middle East. One's own private nightmare - the expression in the eyes of the men of one's own Platoon, particularly towards the end, when they were warned for yet another operation. Men who by some miracle had survived twelve and more separate and individual hells between Gallipoli and Villers-Bretonneux and who knew full well that the Hindenberg Line was yet to come. And then we lucky ones were home again . . . Now here it was, the link, the chance to do something of real personal value, something with a real future. We do not speak a great deal of these things, nor would I do so now if I were not sure that everyone of you who wears this small badge has travelled much the same road. " He mentions the Legacy Diary belonging to Frank Meldrum, from 1925, with records on the start of Legacy. It is believed this diary was one of many documents lost in a fire. He mentions the fire destroyed the home and valuable library of Legatee Jimmy Downing. The notation H30 in red pen shows that it was part of the archive project that was trying to capture the history of Legacy. A speech given at a Legacy function that has significant information about the first forty years of Legacy.White foolscap paper with black type x 5 pages of an address by Legatee Armstrong on 26 September 1967.Handwritten H30 in red pen.history, speakers, speech, founding legatee -
 Melbourne Legacy
Drawing, Nostalgia Corner : Supplement to Melbourne Legacy Bulletin 24/7/79, 1979
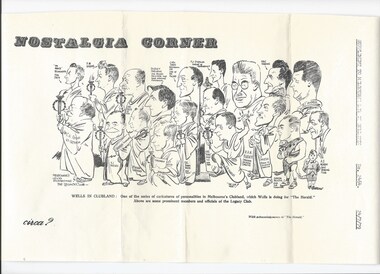
A caricature drawing labelled 'Melbourne Good Samaritans - The Legacy Club', of the early Legatees with their names, roles and some characteristics. The artist was 'Wells' and it was reprinted in the Weekly bulletin in 1979. It was also printed in Blatchford's book in 1932 with the caption 'Some Club Leaders in 1928'. Many of these names appear through the archive but very few have photos, so this is one of the few examples of what some the early Legatees looked like. Some names and roles were: Capt C H Peters - President Capt. 'Dono' Joynt VC - Vice pres. AN Kemsley - The Live Wire WAM Blackett - Chairman Children's Committee CR Carleton - Board of Children's Committee Aaron Beattie - Gym sub committee RM Hall - Employment Col Tommy White - 'Half flight' KJ Mitchell - Distress problems Dr Mark Gardner 'Vin Rouge Ellingworth - Hon Secretary FW Higgins - Comradeship Hal Cohen - 1st Pres Dudley Tregent - The blind solicitor and war widows champion Cyril Smith - Recording sec, one of the Pillars FJ Doolan - Shrine of Remembrance / Eric Harding / AC Rudrum (Treas.) / A S Murray - Boys debating club It was in a folder of documents about the history of Legacy which appears to have been mostly compiled by Legatee Cyril Smith as he has many hand written notes on miscellaneous pieces of paper (some are envelopes addressed to him). The notes were typed up into a summary of the History of Legacy. Also documents relating to the first time Legacy approached the public for donations in September 1956, including newspaper articles that were reprinted, a schedule of information that was approved to be released to the press, and a list of potential donors that was circulated to Legatees in the hope they could contact the ones they knew personally or professionally. The documents from this folder have been added in separate records (see 01262 to 01281). The folder was part of an attempt to capture history of Legacy, generally from the 1950s.The documents provide an insight into the working of Legacy, especially in the 1950s. Legatee Cyril Smith and others were detailing their experiences and knowledge for the future. This reprint captured the spirit of the original Legatees and their roles and characters.A hand drawn picture of Legatees reprinted in the Weekly Bulletin.history, comradeship, founding legatees, cartoon -
 Falls Creek Historical Society
Poster - Kangaroo Hoppet 2024
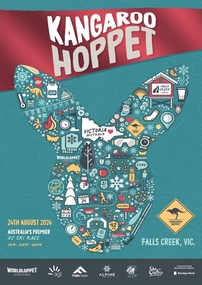
The Kangaroo Hoppet is Australia’s premier long distance cross country ski race, and a member of the Worldloppet series of international cross country ski events. The first race at Falls Creek was held in 1979 under the name of “Australian Birkebeiner”. It was a 21km race with about 80 participants organised by the Birkebeiner Nordic Ski Club of Mount Beauty. The course started and finished at Falls Creek Alpine Resort and took participants out into the Bogong High Plains. After running the event for 10 years, it was decided they should become part of the Worldloppet series of marathon ski races. Representatives from the Birkebeiner Nordic Ski Club and the Australian Ski Federation attended the Worldloppet Annual Meeting in Finland in June 1990 to put the case for the acceptance of an Australian event into the Worldloppet series. Before being admitted, they had to demonstrate that the Birkebeiner Club could run a world class event, so three months later in August 1990 a 42km event named the Australian International Ski Marathon was held at Falls Creek together with a 21km Birkebeiner race and a 7km event called the Birkebeiner Lite. The event was approved by delegates from USA, Norway and Austria, in 1991 Australia became the 12th member of Worldloppet, with the condition that there had to be a name change. After some late night discussion allegedly involving red wine from North East Victoria the main event became the 42km Kangaroo Hoppet, with the minor events being the 21km Australian Birkebeiner, and 7km Joey Hoppet. In the winter of 1991, the first Kangaroo Hoppet was held. It was a great success and has been a regular fixture on the international ski calendar ever since. It features the main 42km event as well as a 21km event and a 7km event. The Hoppet brings the Australian snowfields to an international audience. Unfortunately due to rapidly deteriorating snow conditions on the course, combined with a weather forecast of warm temperatures and rain in the days preceding the event, the Kangaroo Hoppet was cancelled for 2024.This poster is significant because it documents an event which brings international attention to Falls Creek and the surrounding region.A poster featuring a variety of symbols representing the Falls Creek Hoppet within the outline of a kangaroo head. Logos of Worldloppet, AGL, Falls Creek, Alpine Shire Council, the Birkebeiner Nordic Ski Club, Ski Classics and Kangaroo Hoppet are across the bottom of the poster. Text: KANGAROO HOPPET 24th August 2024 Australia's Premier XC Ski Race 7 km 21 km 42 km FALLS CREEK, VIC kangaroo hoppet, worldloppet events, falls creek, mt. beauty -
 Falls Creek Historical Society
Poster - Kangaroo Hoppet 2023
The Kangaroo Hoppet is Australia’s premier long distance cross country ski race, and a member of the Worldloppet series of international cross country ski events. The first race at Falls Creek was held in 1979 under the name of “Australian Birkebeiner”. It was a 21km race with about 80 participants organised by the Birkebeiner Nordic Ski Club of Mount Beauty. The course started and finished at Falls Creek Alpine Resort and took participants out into the Bogong High Plains. After running the event for 10 years, it was decided they should become part of the Worldloppet series of marathon ski races. Representatives from the Birkebeiner Nordic Ski Club and the Australian Ski Federation attended the Worldloppet Annual Meeting in Finland in June 1990 to put the case for the acceptance of an Australian event into the Worldloppet series. Before being admitted, they had to demonstrate that the Birkebeiner Club could run a world class event, so three months later in August 1990 a 42km event named the Australian International Ski Marathon was held at Falls Creek together with a 21km Birkebeiner race and a 7km event called the Birkebeiner Lite. The event was approved by delegates from USA, Norway and Austria, in 1991 Australia became the 12th member of Worldloppet, with the condition that there had to be a name change. After some late night discussion allegedly involving red wine from North East Victoria the main event became the 42km Kangaroo Hoppet, with the minor events being the 21km Australian Birkebeiner, and 7km Joey Hoppet. In the winter of 1991, the first Kangaroo Hoppet was held. It was a great success and has been a regular fixture on the international ski calendar ever since. It features the main 42km event as well as a 21km event and a 7km event. The Hoppet brings the Australian snowfields to an international audience. Unfortunately in 2023 due to poor snow conditions it was decided that a fair and safe competition could not be held on the course and the Kangaroo Hoppet was cancelled.This poster is significant because it documents an event which brings international attention to Falls Creek and the surrounding region.A poster featuring an image of female two skiers after a previous Hoppet presentation. Logos of Worldloppet, AGL, Falls Creek, Alpine Shire Council, Victorian State Government, the Birkebeiner Nordic Ski Club. FIS, Bendigo Bank and Kangaroo Hoppet are across the bottom of the poster. Text: KANGAROO HOPPET Australia's Premier X-Country Ski Race 26 August 2023 Below the logos: 26 August 2023 FALLS CREEK AUSTRALIA 7 km 21 km 42 km hoppet.com.au kangaroo hoppet, worldloppet events, falls creek, mt. beauty -
 Wooragee Landcare Group
Photograph, 5 September 2004
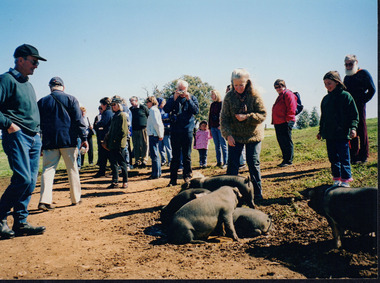
This photograph was taken at Samaria Farm on Sunday the 5th of September when Wooragee Landcare Group took a bus trip to the Tatong area (near Benalla) to look at land use on small farms. The day trip was organised to observe land use on small farms as well as a social event for the Group. Samaria Farm at the time was a nine-hectare property located in northeast Victoria, near Mount Samaria, 130 km Northeast of Melbourne. The photograph features several pigs believed to be the breed called Large Black. The Large Black Pig breed is a traditional, heritage breed that was first imported to Australia from the UK in the early 1900's. It is believed to have originated from the Old English Hog of the 16th and 17th Centuries. The first reference to them in the Australian Pure Bred Pig Herd Book was in 1912. They are a black pig with lop ears and were prized for their superior milking and mothering abilities and soon became popular with early Dairy Farmers who fed them whey from separated milk as part of their butter making process. They proved economical to keep and, being excellent grazing pigs, were also used to pick up windfall fruit in orchards. Their black colouring also enabled them to withstand the hot Australian summers and avoid sunburn which combined with their hardiness and docile temperament made them highly suitable for free-range pork production, however Large Black pigs tend to get very fat and were not suitable for intensive farming so were often crossed with other breeds for pork production. They are now quite rare as a pure breed having been on the edge of extinction for some time. They were rescued in the early 1990s by a rare breeds farmer in the Yarra Ranges. These days they are also the focus of a small conversation effort with six registered breeders currently in Australia. For biosecurity reasons there are no imports of live pigs or pig semen permitted into Australia. This photograph shows a group of people attending one of the events that Wooragee Landcare Group has organized within the educational framework of promoting best land management practices for all types of land uses and ensuring sustainability, in addition to encouraging community interaction via social events. The Large Black pig breed is significant because of their role in early Victorian farming. They are now quite rare as a pure breed having been on the edge of extinction for some time. These days they are the focus of a small conversation effort with six registered breeders currently in Australia. For biosecurity reasons there are no imports of live pigs or pig semen permitted into Australia. Wooragee Landcare Group is important to local community landcare and environmental management practices.Colour rectangular photograph printed on paperObverse: WAN NA EONA2N2. ANN+ 3 4240/ (No. 17) 370samaria farm, wooragee landcare, wooragee landcare group, tatong, benalla, black pigs, large black, traditional breed, heritage breed, pigs, lop ears, free range pork production, early victorian farming -
 Falls Creek Historical Society
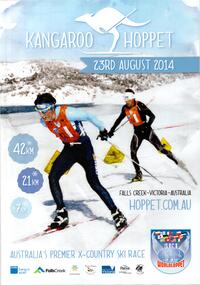
Poster - Kangaroo Hoppet 2014
The Kangaroo Hoppet is Australia’s premier long distance cross country ski race, and a member of the Worldloppet series of international cross country ski events. The first race at Falls Creek was held in 1979 under the name of “Australian Birkebeiner”. It was a 21km race with about 80 participants organised by the Birkebeiner Nordic Ski Club of Mount Beauty. The course started and finished at Falls Creek Alpine Resort and took participants out into the Bogong High Plains. After running the event for 10 years, it was decided they should become part of the Worldloppet series of marathon ski races. Representatives from the Birkebeiner Nordic Ski Club and the Australian Ski Federation attended the Worldloppet Annual Meeting in Finland in June 1990 to put the case for the acceptance of an Australian event into the Worldloppet series. Before being admitted, they had to demonstrate that the Birkebeiner Club could run a world class event, so three months later in August 1990 a 42km event named the Australian International Ski Marathon was held at Falls Creek together with a 21km Birkebeiner race and a 7km event called the Birkebeiner Lite. The event was approved by delegates from USA, Norway and Austria, in 1991 Australia became the 12th member of Worldloppet, with the condition that there had to be a name change. After some late night discussion allegedly involving red wine from North East Victoria the main event became the 42km Kangaroo Hoppet, with the minor events being the 21km Australian Birkebeiner, and 7km Joey Hoppet. In the winter of 1991, the first Kangaroo Hoppet was held. It was a great success and has been a regular fixture on the international ski calendar ever since. It features the main 42km event as well as a 21km event and a 7km event. The Hoppet brings the Australian snowfields to an international audience. In 2014 the Men's Winner was Valerio Leccardi from Switzerland in a time of 1:20:03. The winner of the Women's event was Valentina Shevchenko of Ukraine in a time of 1:31:01. This poster is significant because it documents an event which brings international attention to Falls Creek and the surrounding region.A poster two skiers wearing red vests passing a line of yellow markers in snow. The lake and mountain are in the background. Logos of AGL, Falls Creek All Season Alpine Resort, Alpine Shire, Tourism Victoria, Parks Victoria, the Birkebeiner Nordic Ski Club and the Worldloppet are along the bottom of the poster.Towards top: Kangaroo Hoppet /23RD AUGUST 2014 42KM 21KM 7KM FALLS CREEK VICTORIA AUSTRALIA www.hoppet.com.au kangaroo hoppet, worldloppet events, falls creek, mt. beauty -
 Flagstaff Hill Maritime Museum and Village
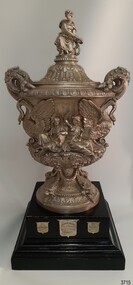
Award - Trophy, c. 1886
This silver trophy is named "Sir W. Clarke's Trophy" after its donor. Sir William John Clarke, Baronet, who was a citizen and philanthropist, well known in Melbourne and throughout Victoria. He gave donations to many public projects including Melbourne University and was a patron of many and varied sports. He encouraged the defence services with prizes for competitions among both military and naval forces. In colonial Australia in the 1880s there was an increase in the size of the colonial military forces, rising from 8,000 in 1883 to 22, 000 in 1885. In 1885 there was a return of unpaid volunteer soldiers, along with a fear of a Russian attack on Australia. As a result, the Sir W.J. Clarke's Trophy was given as a prize in 1885 to Victorian Militia Garrison Battery competition winners, for artillery firing target accuracy. On 12th December 1885, the conclusion of the first artillery competition for Sir W. Clarke's Trophy was held at the Williamstown battery. The first winner of the Sir W. Clarke's Trophy was the Geelong Garrison Battery, with the prize Sir W. Clark's Trophy presented to them in 1886. In 1887 Warrnambool Garrison Artillery, under the command of Major W.S. Helpman, was the proud winner of the Sir W. Clarke’s Trophy. The contest was held at Point Gellibrand with the trophy formally unveiled at the Warrnambool orderly-room on 3rd August 1887. In June 1892 the annual competition was held at the Gellibrand battery in Williamstown. The canvas targets were moored at sea and fired upon from three breech-loading guns mounted on disappearing carriages. Each team was allowed 4 shots fired from each of the 3 guns. An article in the Portland Guardian stated that "the Warrnambool team is certainly looked upon as the certain winners." The same article reported that In this particular year the Government withdrew its previous award of 10-pound cash to the men of the winning team, described in the Portland Guardian as a petty economy of the Government. As the Warrnambool Militia Garrison Artillery had won the Trophy, for the third time, they became Absolute Possessors of the prize. The Trophy is locally significant to the community of Warrnambool for its connection to the Warrnambool Volunteer Rifle Corps., which formed part of the original Warrnambool Garrison to protect the Warrnambool Harbour. The site of the 1888 Warrnambool Garrison and Fortifications is Victorian State Heritage-listed is significant for its intact and operational nature and is one of the best-preserved pieces of Victoria's early colonial heritage.This is the Sir W. Clarke's Trophy for the Victorian Militia Garrison Artillery, first presented in 1886. The silver trophy with lid rests on a square black timber base that displays award shields on each side edge. Inside the hollow trophy is a removable copper alloy bowl with a wide edge. The inner walls of the trophy are unpolished and there is a metal bracing plate between the sides and fitted metal bolts with nuts and washers. near the base. The large, elaborately decorated, silver bowl has a conical pedestal, two handles on the top edge of the bowl and a matching fitted lid. Much of the decoration is three-dimensional. Fine, detailed decoration includes a semi-kneeling figure with an upturned face on top of the lid, vine-like handles resting on necks of swans with outspread wings, figures seated on a ridge, two on each side, with ends of limbs hanging over the ridge, two holding lyres, patterns of leaves, flowers and draped ribbons. The timber base is painted black on the outside. The engraved silver shields around its sides have inscriptions of trophy winners and the name of the trophy. There is a handwritten, pencil inscription of the date 1887 under the timber base. The first award was made in 1886 and the last in 1892. The Warrnambool Garrison wond this trophy three times, including the last award given.Front centre large shield; “VICTORIAN MILITIA / GARRISON ARTILLERY / SIR W. CLARKE’S / TROPHY” Left side, right shield; “1886 / WON BY / GEELONG / GARRISON BATTERY / Major J PRICE / COMMANDING OFFICER” Front, right shield; ” 1887 / WON BY / WARRNAMBOOL / GARRISON ARTILLERY / Major W.S. Helpman / COMMANDING OFFICER” Left side shield: “1888 / WON BY / NORTH MELBOURNE / Garrison Battery / Major F.R.Y. Goldstein / Commanding Officer” Right side, left shield; “1889. / WON BY / WARRNAMBOOL / Garrison Battery / Major W.S. Helpman / Commanding Officer” Right side, centre shield; “1890 / WON BY / HARBOUR TRUST / BATTERY / Major J.H. Haydon / Commanding Officer” Right side, right shield; “1891 / WON BY / WILLIAMSTOWN / BATTERY /l Major W.H. Hall / Commanding Officer” Back, left shield; “1892 / WON BY / WARRNAMBOOL / Garrison Battery / Major W.S. Helpman / Commanding Officer” In pencil underneath timber base “1887”flagstaff hill, warrnambool, shipwrecked coast, flagstaff hill maritime museum, maritime museum, shipwreck coast, flagstaff hill maritime village, great ocean road, sir w. clarke's trophy, warrnambool volunteer rifle corps, statistics of warrnambool volunteer rifle corps, warrnambool volunteer rifle company, warrnambool rifle volunteers, warrnambool garrison, 1886, 1887, 1888, 1889, 1890, 1891, 1892, trophy, garrison, competition, prize, winners -
 Flagstaff Hill Maritime Museum and Village
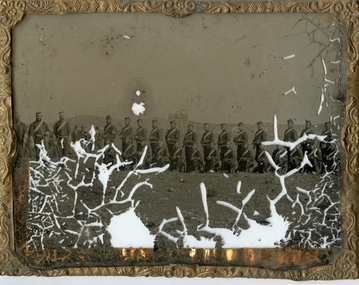
Photograph - Glass plate, circa 1866
This glass plate photograph shows good detail of members of the Warrnambool Garrison posing for their photograph in front of a young township. There are other well-dressed citizens behind them. The three men with frogging on their sleeves were commanders were likely to be commanders. The men are facing north with Cannon Hill and the fortification area in the background. It dates from the 1860s. The firearms held appear to be 1853 pattern Lee Enfield muskets used by the British army in Crimea at this time and in Australia, rather than the later Martini Henry cartridge rifles. The uniforms match other photos of the Warrnambool Garrison Militia and Band in our Collection, taken up until the 1880s. The three storey building in the photograph is likely to be the Manifold & Bostock flour mill, built in 1854 near the ‘cutting’ in Merri Street, which was one of the main streets at the time; if one faced the building’s front from a vantage point and looked south to south-east, the hills around Flagstaff Hill and Cannon Hill would be behind that mill, and the Harbour behind the hills. This is the area of the Fortifications. The glass plate method of photography was widely used during the mid-19th to early-20th century. The donor and maker of the photograph are unknown. Around this time the citizens of Victoria were prospering from the gold rush but felt isolated and uneasy about their security in the colony. In 1854 the Volunteer Act was passed to provide some military defence. In 1858 the Warrnambool Volunteer Rifle Corps was established, disbanded in 1863, then a new Warrnambool Detachment was formed in September 1866. Legislation was passed in 1884 that replaced the volunteers’ corps with a partly paid, permanent Militia Defence Force. The batteries manning the coastal forts of Victoria were termed Garrison Artillery Companies. When the Army was federated in 1901 there were eight Militia Companies in Victoria. Warrnambool and Port Fairy together were known as 8 Coy AGA (Australian Garrison Artillery). Changes to formation and name continued into the 20th century.This photograph is a record of the very early local defence force, circa 1866. The photograph signifies the connection of the colony in Victoria to the growing need for security due to the unrest in Europe at that time. The photograph is also locally significant to the industry of the young township of Warrnambool, showing what is likely to be one of the first flour mills in the town. The photograph is also the only example of the early methods of glass plate photography in our collection. Photograph, rectangular glass plate, positive sepia image. Photograph has brass framed edges that fold over to the back, with mitred corners. The front edges are pressed with a decorative floral pattern. The photograph shows a group of thirty military men, standing or kneeling, in dark uniforms with pillbox forage caps, round-collared jackets with light buttons, light sashes worn from top left shoulder to bottom right side of waist belt, and long, straight-legged trousers. Three of these men have light braid around the buttons on the front of their jackets, light frogging on their sleeve cuffs and stripes on the outside seams of their trousers. The other twenty-seven men have plain uniforms and are holding firearms in their right hands, steadied with their left hands. Other figures are standing behind this group of soldiers, including three or four men wearing top hats, jackets and ties. In the background is a row of buildings. The central building is three stories high. Bare hills are in the far background. The foreground is uneven ground with patches of short grass. Photographer looking towards the south east and Cannon Hill, with the Warrnambool Garrison facing north, ca.1860s.flagstaff hill, warrnambool, shipwrecked coast, flagstaff hill maritime museum, maritime museum, shipwreck coast, flagstaff hill maritime village, great ocean road, glass plate, photography 19th century, colonial forces, military defence, volunteer act 1854, volunteer rifle, garrison artillery, volunteer corps, militia, militia garrison band, pillbox forage caps, helpmann, manifold and bostock, 1853 lee enfield musket, tintype, warrnambool garrison, 1860s, cannon hill, manifold & bostock, flour mill, 3-storey building -
 Bendigo Military Museum
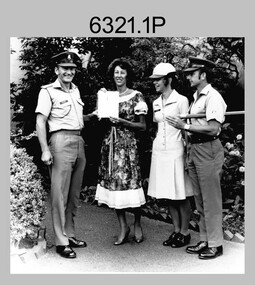
Photograph - Army Survey Regiment – Presentation to Charity Organisation, 1984
These photographs of a presentation to a charity organisation were taken in the grounds of Fortuna Villa, Army Survey Regiment in 1984. SPR Tracy (Parker) Ash was the unit’s Miss Golden North section entrant in the Miss Australia Quest. MAJ Bob Roche, RSM Bob Mason and SPR Parker presented a fundraising cheque to the unidentified representative from the Spastic Society. The the newspaper article is from the Bendigo Advertiser. The following wording is taken from the article: ‘Tracy Parker is a sapper in the Army, and a cartographic technician stationed at Fortuna, Bendigo. Originally from Melbourne, Tracy, 23, is the latest entrant in the Miss Golden North segment of the Miss Australia Quest. The highlight of Tracy’s quest will be an open day at Fortuna, once the magnificent home of Bendigo’s Quartz King, George Lansell. This open day at Fortuna, on Sunday, August 26, between 10 am and 4 pm, will give district residents a rare opportunity of inspecting this magnificent building and its gardens. Tracy said there will be handicrafts, rides, competitions and refreshments available at the open day. The main attraction, apart from the building and gardens, would be a hot air balloon. Admission to the open day would be: Adults $2, children and pensioners $1, family party $5. All proceeds from the open day at Fortuna will go to the Spastic Society. Tracy, like all other Miss Australia candidates work hard for the Spastic Society in fundraising activities. Getting further involved in fundraising, Tracy and her strong committee have organised a 6km fun run for Sunday August 19. Entry forms are available at Bendigo sports stores, and at the end of the fun run will be a barbecue. Apart from her vocation in the Army, and fundraising for the Spastic Society, Tracy Parker has a great love of horses, and associated activities of riding, jumping and showing her horses. Tracy is keen to do well in her fundraising, and with the Australian Army, or more particularly, the ranks of Fortuna behind her, Tracy looks like succeeding.’The first three items are photographs of a presentation to a charity organisation at the Army Survey Regiment, Bendigo in 1984. The fourth item is an article from the Bendigo Advertiser describing Army Survey Regiment’s fund-raising activities. The photographs were printed on photographic paper and are part of the Army Survey Regiment’s Collection. The photographic proof prints were scanned at 600 dpi. Photos .1P and .2P were scanned at 300 dpi. The newspaper article was scanned at 762 dpi. .1) to .3P) - Photo, black & white, 1984, L to R: MAJ Bob Roche, Regional Coordinator Mrs Jan Lamborn, SPR Tracy (Parker) Ash, RSM WO1 Bob Mason. .4) – Bendigo Advertiser newspaper article with photo, black & white, 1984, SPR Tracy (Parker) Ash. .1P to .2P – ‘Presentation of Certificate of Appreciation from Spastic Society. Presented by Regional Coordinator Mrs Jan Lamborn to MAJ Roche, SPR Tracy Ash (entrant in Miss Australia Quest (1984) and WO1 Mason.' .3P – No personnel identified. .4P – SPR Tracy Parker named in newspaper article.royal australian survey corps, rasvy, army survey regiment, army svy regt, fortuna, asr -
 Flagstaff Hill Maritime Museum and Village
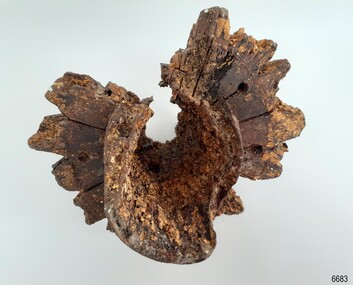
Functional object - Ship's Wheel Hub, 1886-1908
The Falls of Halladale was an iron-hulled, four-masted barque, used as a bulk carrier of general cargo. She left New York in August 1908 bound for Melbourne and Sydney. In her hold was general cargo consisting of roofing tiles, barb wire, stoves, oil, and benzene as well as many other manufactured items. After three months at sea and close to her destination, a navigational error caused the Falls of Halladale to be wrecked on a reef off the Peterborough headland on the 15th of November, 1908. The captain and 29 crew members survived, but her cargo was largely lost, despite two salvage attempts in 1908-09 and 1910. The Court of Marine Inquiry in Melbourne ruled that the foundering of the ship was entirely due to Captain David Wood Thomson's navigational error, not too technical failure of the Clyde-built ship. The Falls of Halladale was built in1886 by Russell & Co., at Greenock shipyards on the River Clyde, Scotland for Wright, Breakenridge & Co of Glasgow. She was one of several designs of Falls Line of ships named after waterfalls in Scotland. The company had been founded between 1870- 1873 as a partnership between Joseph Russell, Anderson Rodger, and William Todd Lithgow. During the period 1882-92 Russell & Co. standardised designs, which sped up their building process so much that they were able to build 271 ships during that time. The Falls of Halladale had a sturdy construction built to carry maximum cargo and able to maintain full sail in heavy gales, one of the last of the 'windjammers' that sailed the Trade Route. She and her sister ship, the Falls of Garry, were the first ships in the world to include fore and aft lifting bridges. Previous to this, heavily loaded vessels could have heavy seas break along the full length of the deck, causing serious injury or even death to those on deck. The new, raised catwalk-type decking allowed the crew to move above the deck in stormy conditions. The Falls of Halladale shipwreck is listed on the Victorian Heritage (No. S255). She was one of the last ships to sail the Trade Routes from Europe and the Americas. Also of significance is that the vessel was one of the first ships to have fore and aft lifting bridges as a significant safety feature still in use on modern vessels today. The subject model is an example of an International Cargo Ship used during the 19th and early 20th centuries to transport goods around the world and representing aspects of Victoria’s shipping industry. Wagon wheel hub with spoke butts. Holes for hardware fittings are visible. Recovered from the wreck of the Falls of Halladale. Noneflagstaff hill, warrnambool, flagstaff-hill, flagstaff-hill-maritime-museum, shipwreck-coast, flagstaff-hill-maritime-village, wheel hub, falls of halladale, russell & co., wreck artifact, cart wheel, ship's wheel, navigation, ship's wheel hub -
 Glenelg Shire Council Cultural Collection
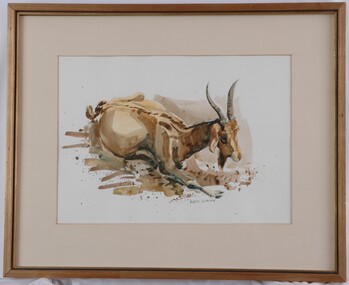
Painting, Robert Ulmann, Goat, c. 1974
Robert Ulmann was born in Zurich, Switzerland, where he studied sculpture and painting, exhibiting annually with the National Art Society of Switzerland and in Paris, Munich and Stockholm. He migrated to Canada in 1956 and became a Canadian citizen. After working on the restoration of sculpture on the west wing of the Parliament Buildings Ottawa, he took up a Government appointment as one of six artist advisers to the Eskimos, initiating handicraft and sculpture programs in isolated settlements across the Central Arctic. He arrived in Australia with his Australian wife, Helen, in 1969, after two adventurous years backpacking and sketching through the United States, Central and South America and the South Pacific. From 1970 to 1972 he was employed by the Northern Territory Administration as a manual arts instructor to the aboriginal people of Docker River, a remote settlement west of Ayers Rock. A series of drawings from this period was exhibited by the Department of the Interior in Canberra, Sydney and Adelaide. Robert Ulmann’s paintings and prints of wildlife from Australia and overseas fill a beautiful studio overlooking the famous Logans Beach whale nursery at Warrnambool in the Western District of Victoria. His previous studio and home, together with 13 years of field sketches and his best work collected together for two books were destroyed by the Ash Wednesday fires at Naringal in 1983. Rob exhibited in Sydney, Melbourne, Adelaide and Perth as well as in the Regional Galleries of Warrnambool, Ballarat, Portland and Horsham, and, among numerous prizes, he won the award for watercolour at six of the annual exhibitions of the Wildlife Art Society of Australasia, between 1978 and 1983. Although his principal interest was in drawing and painting, he retained a fascination with sculpture. His works range from two stone fountains with figures commissioned by the City of Zurich, while he was still a student, to a 4 ½ ton sculpture in bluestone commissioned in 1977 as a memorial to Sir Fletcher Jones., a five metre representation of whale tails in steel, and a life-size bronze of St. John of God commissioned for a private hospital.Image of a goat beginning to rise from a seated position, possible struggling out of mud. Painted in yellow and brown tones, with blue shadows. Earth colours form a rough ground area surrounding the goat. A brown wash provides a cursory background behind the goat's head. Dark cream matt surrounds image. Gold painted wooden frame, with glass.Front: Robert Ulmann (lower centre, paint) Back: (no inscriptions) -
 Federation University Historical Collection
Booklet, The Ballarat School of Mines and Industries 1870-1920 Jubilee Booklet, 1920 (estimated)
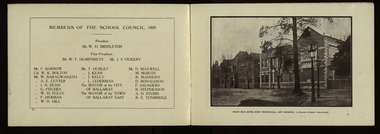
The first school of Mines in Australia was established at Ballarat in 1870. At the time of its jubilee (1930) the following people were members of the School Council: W.H. Middleton (President), W.T. Humphreys (VP), J.S. Vickery (VP), F. Barrow, Col. W.K. Bolton, William Baragwanath, A.E. Cutter, J.N. Dunn, G. Fitches, W.H. Fleay, F. Herman. W.D. Hill, T. Hurley, K. Kean. J. Kelly, L. Lederman, Mayor of Ballarat, Mayour of Ballarat East, D. Maxwell, M. Martin, R. Maddern, D. Ronaldson, F. Saunders, R. Stephenson, A.O. Stubbs, R.E. Tunbridge. The School Staff in 1920 comprised: Herbert H. Smith, Walter Rowbotham, Reginald L. Cutter, M.C. Young, Hilda Wardle, M. Wiliamson, P.S. Richards, L.H. Archibald, J. Woods, Ken Moss, W. Kenneth, Mrs McIlvena. B. Robinson, S. Rowe, E. Hope-Jones, Miss Abrams, L.St.G.P. Austin, Alfred Mica Smith, J.R. Pound, Herbert R. Murphy, N.H. Junner, Maurice Copland, L.H. Archibald, E.J.A. McConnon, Newton King, D.m. Hull, T.R. Gordon, John M. Sutherland, T.K. Jebb, Dick Richards, C. Tonkin, A.W. Steane, J. Paterson, H.W. Malin, R.V. Maddison, S.M. Mayo, F.A. King, W.H. Steane, T.R. Gordon, T.A. Williams, H. Waldron, G. Black, E.J. McConnon, R.V. Duncan. R. Cutter, E.G. Vawdrey, Hilda WardleWhite stapled booklet - landscape format - 20pp + soft covers with blue writing. Includes an historical sketch of the Ballarat School of Mines. Contains images of the school from around 1920. The history outlined in the booklet follows: 'Ballarat has helped to influence the life and destinies of Australia in many ways, the recital of which would perhaps prove tedious to the citizens of less favoured localities! However, it can be said, without much fear of contradiction, that only less known thought Australia than its fame as a gold field is the reputation won for it by its school of Mines, ... Ballarat was still quite a new place when the School was founded, but a very propserous and popular place all the same, with a go-ahead lot of citizens brim full of the spirit of enterprise which seemsto animate mining populations generally. Money was plentiful, and they launched out into ventures, which later, were to develop and take the place of the gold mines, while what is more to the point, they understood the value of education. the old digging days were passing away. So far as Ballarat itself was concerned the day of the cradle and tin dish had already passed into an antiquity "as dead and distant as the age of the Tubal Caon," said dir redmond Barry on declaring the School open. Mining had become a serious business, and the mining engineer, the metallurgist, and the geologist had become a power in the land. In these circumstances the suggestions to found a School of Mines met with ready acceptance. The late Mr James M. Bickett had the honor of bringing forward the proposition at a meeting of the Ballarat Mining Board in October, 1869. it was agreed to, and the Government, having been approached for assistance, granted a lease of the old Supreme Court buildings at a nominal reantal. A modest sum, including 100 pounds from the Borough Council of Ballarat West, was subscribed by a number of sympathisers, and on the 26th October, 1870, the inaugural address was delivered by Sir Redmond Barry, the first President of the School. Classes were commenced on the 23rd January, 1871. The students at first were mostly adults. They were chiefly men emloyed at the mines, who had the wisdom and energy to devote their spare time to study, and, though their attendance was somewhat irregular, they made very good progress. Old prints which have been preserved show them at work at furnaces, big bearded men of the old-fashioned type of miner. It is interesting to note that among those who gave evidence and encouragement was Sir Roderick Murchison, who many years before had advised Cornish miners to emigrate to Australia to search for gold, and who in 1848 was in possession of gold ore sent from this country. Sir Roderick sent a parcel of books for the library, and gave useful advice as to the curriculum which should be adopted. The Museum, which now contains a most valuable collection of minerals, was one of the first things attended to, and the reports presented to the Council from time to time speak of additions being made from all parts of the world. New equipment was constantly being added to the School, a good deal of assay work was done, and some specimens were sent from the East Indies for examination as far back as 1873. By this time there was a difficulty in providing accomodation for the students who wished to enrol, and the number of instructors had grown from two to four. In 1882 the first building was being erected on what was then part of the gaol reserve. A little more than ten years afterwards a buildnig formerly serving as a Methodist Church was absorbed, while later on, the demand for accomodation increasing, the attack upon the gaol was renewed. The School continued to grow in reputation and size, and became the science centre of the district, and in 1889 a learge new building was opened by Sir Alexander Peacock. Students came from over seas as well as from all the States of Australia, and after going through their courses they took with them the name and fame of the old School to all parts of the globe. School of Mines boys have played a great part in developing the mining fields of Western Australia, South Australia, and africa, while old students who have made a name in their profession are constantly dropping in to see how the old place is getting along. It was not to be expected, however, that the Ballarat School would be left without rivals, its very success inspiring competition. Mining Schools were started in other parts of Australia, and, at the same time, Victoria ceased to hold first place as a mining state. On the other hand there was a great advance in manufacturing, and the demand for technicaly trained men became a great and as insistent as ever it had been for trained mining men. The Council was quick to adapt the school to the new conditions, and the result is seen in the institution, which is one of Ballarat's proudest possession. Instruction is given in all branches of technical work, and the classes are filled with students who are building up for Ballarat a reputation as an industrial centre, which promises to equal that which it formerly held as a mining town. Owing to its bracing climate, its abundant opportunities for recreations, and its accessibilty, Ballarat as a city is an ideal place for educational purposed, and is yearly becoming more and more appreciated throughout the State. The chairman of one of Ballarat's biggests industries claims that the workman can do twice the day's work here that he can do in Melbourne. he was a little enthusiastic over it, perhaps, but it is a well-known fact that the healthy and invigourating Ballarat climate is conducive to both physical and mental activity, and the records of the School provide ample proof of it. One of the most interesting and successful branches of the School of Mines and Industries - if the name be enlarged with the enlargement of its scope - is the Technical Art School. "The City of Statues" has from its earliest days been a stronghold of art. Art schools have flourised here, and in 1905 the Education Department came to the conclusion that the best thing to do with them was to place them under the management of the School of Mines Council. A magnificent new Technical Art School was built at a cost of some 12,000 pounds on the site of the old Supreme Court building, and was formally opened on the 23rd July, 1915. The results have not only been justified but surpassed all anticipations. The most comprehensive list of subjects is taught, and this list is constantly added to. Students have flocked to the art School, which may be said to occupy a unique position in Australia, and its record of success is really astonishing. Its students supply art teachers for the newer schools that are being built, and many occupy leading positinos in important business houses. So well is its reputation known that orders are constantly being received, not only from Victoria, but from other States, for honor boards and challenge shields to be designed and made. The most recent addition to the School of Mines and Industries is the Junior Technical School, for which a new building is now being erected on a portion of the gaol site, transferred to the School of Mines Counci by the Government. At the present moment temporary quarters are being occupied. Some students after passing through the Junior School go straight to employment, continuing perhaps to attend the evening trade classes, while others move on to the senior School. In a review of the work of the School of Mines mention must be made of a series of industrial research carried out under supervision of the Principal. One in particular, regarding the suitability of the local ores for the manufacture of pigments attracted much attention, while the experiemtns on the manufacture of white potery from Victorian clayes were considered of sufficient importance by the Federal Advisory Council of Science and Industry to warrant the appointment of a special investigator. The results of these have been most encouraging, and may have far-reaching consequences. The vocational training of returned soldiers also should not be overlooked. The work was taken in hand from the first, before the Repatriation Department gave assistance, and now with the help of the department of the School has become one of the largest vocational training centres in Victoria outside of Melbourne. The soldiers, trained in a variety of occupations, have made remarkable progress, and already considerable numbers have found employment in local workshops and factories. To sum up, the School is divided into the following departments, each well staffed and equipped: - The School of Mines, science, and Engineering; the Techncial Art School, the Boys' Junior Technical School, the Girl's Preparatory Technical Classes, Trade Classes, and the Commercial School. The school of Mines, science and Engineering, comprises the following branches: - Mining, Metallurgy, Geology, Electrical Engineering, Civil Engineering, Mechanical Engineering, Applied Chemistry, and Pharmacy. Battery treatments, Cyanide Testing, Smelting, Assays, and Clay Testing from a regular part of the School's work. Students gaining qualifications obtain concession in their courses at the university, should they proceed there to continue their studies. The technical Art school curriculum includes training in all branches of pictorial and applied art, an Architectural Diploma Course, a Draughtman's Course, technical Art teachers' Course, Photography,Ticket Writing, Art Metal Work, Woodcarving, Needlework, and Leather work. The Trade Classes give instruction in Telephone Mechanics, telegraphy, Carpentry, Cabinet Making, Plumbing, Blacksmithing, Fitting, Electric Wiring, and Printing. Numerous Scholarships are offered every year, and altogether students will find few places to equal the Ballarat School of Mines and Industries as a training place for their life's work. One of the first in the continent to be established, its Jubilee finds it still in the front rank, keeping pace with the times, and offering to the youths of this country the means of taking advantage of Australia's teeming opportunities. william, battery, smith, herbert, drawing from the antique, ballarat school of mines botanical gardens, ballarat school of mines, redmond barry, alfred mica smith, james bickett, museum, dick richards, ballarat junior technical school, s m b, ballarat school of mines and industries, ballarat technical art school, model mine, james m bickett, j m bickett, roderick murchison, vocational training rooms, wesley church, methodist church, alexander peacock, lathes, repatriation, repatriatin department, war service, school council, baragwanath, gold mining, mining laboratory, plaster cast, r.w. richards, anniversary, jubilee -
 Federation University Historical Collection
Booklet, The Ballarat School of Mines and Industries 1870-1920 Jubilee Booklet, 1920 (estimated)
The first school of Mines in Australia was established at Ballarat in 1870. At the time of its jubilee (1930) the following people were members of the School Council: W.H. Middleton (President), W.T. Humphreys (VP), J.S. Vickery (VP), F. Barrow, Col. W.K. Bolton, William Baragwanath, A.E. Cutter, J.N. Dunn, G. Fitches, W.H. Fleay, F. Herman. W.D. Hill, T. Hurley, K. Kean. J. Kelly, L. Lederman, Mayor of Ballarat, Mayour of Ballarat East, D. Maxwell, M. Martin, R. Maddern, D. Ronaldson, F. Saunders, R. Stephenson, A.O. Stubbs, R.E. Tunbridge. The School Staff in 1920 comprised: Herbert H. Smith, Walter Rowbotham, Reginald L. Cutter, M.C. Young, Hilda Wardle, M. Wiliamson, P.S. Richards, L.H. Archibald, J. Woods, Ken Moss, W. Kenneth, Mrs McIlvena. B. Robinson, S. Rowe, E. Hope-Jones, Miss Abrams, L.St.G.P. Austin, Alfred Mica Smith, J.R. Pound, Herbert R. Murphy, N.H. Junner, Maurice Copland, L.H. Archibald, E.J.A. McConnon, Newton King, D.m. Hull, T.R. Gordon, John M. Sutherland, T.K. Jebb, Dick Richards, C. Tonkin, A.W. Steane, J. Paterson, H.W. Malin, R.V. Maddison, S.M. Mayo, F.A. King, W.H. Steane, T.R. Gordon, T.A. Williams, H. Waldron, G. Black, E.J. McConnon, R.V. Duncan. R. Cutter, E.G. Vawdrey, Hilda WardleWhite stapled booklet - landscape format - 20pp + soft covers with blue writing. Includes an historical sketch of the Ballarat School of Mines. Contains images of the school from around 1920. The history outlined in the booklet follows: 'Ballarat has helped to influence the life and destinies of Australia in many ways, the recital of which would perhaps prove tedious to the citizens of less favoured localities! However, it can be said, without much fear of contradiction, that only less known thought Australia than its fame as a gold field is the reputation won for it by its school of Mines, ... Ballarat was still quite a new place when the School was founded, but a very propserous and popular place all the same, with a go-ahead lot of citizens brim full of the spirit of enterprise which seemsto animate mining populations generally. Money was plentiful, and they launched out into ventures, which later, were to develop and take the place of the gold mines, while what is more to the point, they understood the value of education. the old digging days were passing away. So far as Ballarat itself was concerned the day of the cradle and tin dish had already passed into an antiquity "as dead and distant as the age of the Tubal Caon," said dir redmond Barry on declaring the School open. Mining had become a serious business, and the mining engineer, the metallurgist, and the geologist had become a power in the land. In these circumstances the suggestions to found a School of Mines met with ready acceptance. The late Mr James M. Bickett had the honor of bringing forward the proposition at a meeting of the Ballarat Mining Board in October, 1869. it was agreed to, and the Government, having been approached for assistance, granted a lease of the old Supreme Court buildings at a nominal reantal. A modest sum, including 100 pounds from the Borough Council of Ballarat West, was subscribed by a number of sympathisers, and on the 26th October, 1870, the inaugural address was delivered by Sir Redmond Barry, the first President of the School. Classes were commenced on the 23rd January, 1871. The students at first were mostly adults. They were chiefly men emloyed at the mines, who had the wisdom and energy to devote their spare time to study, and, though their attendance was somewhat irregular, they made very good progress. Old prints which have been preserved show them at work at furnaces, big bearded men of the old-fashioned type of miner. It is interesting to note that among those who gave evidence and encouragement was Sir Roderick Murchison, who many years before had advised Cornish miners to emigrate to Australia to search for gold, and who in 1848 was in possession of gold ore sent from this country. Sir Roderick sent a parcel of books for the library, and gave useful advice as to the curriculum which should be adopted. The Museum, which now contains a most valuable collection of minerals, was one of the first things attended to, and the reports presented to the Council from time to time speak of additions being made from all parts of the world. New equipment was constantly being added to the School, a good deal of assay work was done, and some specimens were sent from the East Indies for examination as far back as 1873. By this time there was a difficulty in providing accomodation for the students who wished to enrol, and the number of instructors had grown from two to four. In 1882 the first building was being erected on what was then part of the gaol reserve. A little more than ten years afterwards a buildnig formerly serving as a Methodist Church was absorbed, while later on, the demand for accomodation increasing, the attack upon the gaol was renewed. The School continued to grow in reputation and size, and became the science centre of the district, and in 1889 a learge new building was opened by Sir Alexander Peacock. Students came from over seas as well as from all the States of Australia, and after going through their courses they took with them the name and fame of the old School to all parts of the globe. School of Mines boys have played a great part in developing the mining fields of Western Australia, South Australia, and africa, while old students who have made a name in their profession are constantly dropping in to see how the old place is getting along. It was not to be expected, however, that the Ballarat School would be left without rivals, its very success inspiring competition. Mining Schools were started in other parts of Australia, and, at the same time, Victoria ceased to hold first place as a mining state. On the other hand there was a great advance in manufacturing, and the demand for technicaly trained men became a great and as insistent as ever it had been for trained mining men. The Council was quick to adapt the school to the new conditions, and the result is seen in the institution, which is one of Ballarat's proudest possession. Instruction is given in all branches of technical work, and the classes are filled with students who are building up for Ballarat a reputation as an industrial centre, which promises to equal that which it formerly held as a mining town. Owing to its bracing climate, its abundant opportunities for recreations, and its accessibilty, Ballarat as a city is an ideal place for educational purposed, and is yearly becoming more and more appreciated throughout the State. The chairman of one of Ballarat's biggests industries claims that the workman can do twice the day's work here that he can do in Melbourne. he was a little enthusiastic over it, perhaps, but it is a well-known fact that the healthy and invigourating Ballarat climate is conducive to both physical and mental activity, and the records of the School provide ample proof of it. One of the most interesting and successful branches of the School of Mines and Industries - if the name be enlarged with the enlargement of its scope - is the Technical Art School. "The City of Statues" has from its earliest days been a stronghold of art. Art schools have flourised here, and in 1905 the Education Department came to the conclusion that the best thing to do with them was to place them under the management of the School of Mines Council. A magnificent new Technical Art School was built at a cost of some 12,000 pounds on the site of the old Supreme Court building, and was formally opened on the 23rd July, 1915. The results have not only been justified but surpassed all anticipations. The most comprehensive list of subjects is taught, and this list is constantly added to. Students have flocked to the art School, which may be said to occupy a unique position in Australia, and its record of success is really astonishing. Its students supply art teachers for the newer schools that are being built, and many occupy leading positinos in important business houses. So well is its reputation known that orders are constantly being received, not only from Victoria, but from other States, for honor boards and challenge shields to be designed and made. The most recent addition to the School of Mines and Industries is the Junior Technical School, for which a new building is now being erected on a portion of the gaol site, transferred to the School of Mines Counci by the Government. At the present moment temporary quarters are being occupied. Some students after passing through the Junior School go straight to employment, continuing perhaps to attend the evening trade classes, while others move on to the senior School. In a review of the work of the School of Mines mention must be made of a series of industrial research carried out under supervision of the Principal. One in particular, regarding the suitability of the local ores for the manufacture of pigments attracted much attention, while the experiemtns on the manufacture of white potery from Victorian clayes were considered of sufficient importance by the Federal Advisory Council of Science and Industry to warrant the appointment of a special investigator. The results of these have been most encouraging, and may have far-reaching consequences. The vocational training of returned soldiers also should not be overlooked. The work was taken in hand from the first, before the Repatriation Department gave assistance, and now with the help of the department of the School has become one of the largest vocational training centres in Victoria outside of Melbourne. The soldiers, trained in a variety of occupations, have made remarkable progress, and already considerable numbers have found employment in local workshops and factories. To sum up, the School is divided into the following departments, each well staffed and equipped: - The School of Mines, science, and Engineering; the Techncial Art School, the Boys' Junior Technical School, the Girl's Preparatory Technical Classes, Trade Classes, and the Commercial School. The school of Mines, science and Engineering, comprises the following branches: - Mining, Metallurgy, Geology, Electrical Engineering, Civil Engineering, Mechanical Engineering, Applied Chemistry, and Pharmacy. Battery treatments, Cyanide Testing, Smelting, Assays, and Clay Testing from a regular part of the School's work. Students gaining qualifications obtain concession in their courses at the university, should they proceed there to continue their studies. The technical Art school curriculum includes training in all branches of pictorial and applied art, an Architectural Diploma Course, a Draughtman's Course, technical Art teachers' Course, Photography,Ticket Writing, Art Metal Work, Woodcarving, Needlework, and Leather work. The Trade Classes give instruction in Telephone Mechanics, telegraphy, Carpentry, Cabinet Making, Plumbing, Blacksmithing, Fitting, Electric Wiring, and Printing. Numerous Scholarships are offered every year, and altogether students will find few places to equal the Ballarat School of Mines and Industries as a training place for their life's work. One of the first in the continent to be established, its Jubilee finds it still in the front rank, keeping pace with the times, and offering to the youths of this country the means of taking advantage of Australia's teeming opportunities. william, battery, smith, herbert, drawing from the antique, ballarat school of mines botanical gardens, ballarat school of mines, redmond barry, alfred mica smith, james bickett, museum, dick richards, ballarat junior technical school, s m b, ballarat school of mines and industries, ballarat technical art school, model mine, james m bickett, j m bickett, roderick murchison, vocational training rooms, wesley church, methodist church, alexander peacock, lathes, repatriation, repatriatin department, war service, school council, baragwanath, gold mining, mining laboratory, plaster cast, r.w. richards, anniversary, jubilee -
 Flagstaff Hill Maritime Museum and Village
Domestic object - Bowl, Late 19th or early 20th Century
The Process of Making Pottery Decorating, Firing, Glazing, Making, Technical There is a rhythm and flow to clay. It can’t be done all at once! Even the making process! It can take weeks to get everything done, especially if you can only work on your pottery once a week! Even though we have three hour classes, it’s often just not enough time! Here is an overview of some of the processes so you have a bit more grasp on some of the technical stuff! Step One – Design There are SO many ideas out there for making stuff in clay! From delicate porcelain jewellery, through to heavy sculptural work and everything in between. Deciding your direction is sometimes not that easy – when you first start, try everything, you will naturally gravitate to the style that you enjoy! The options and variations are endless and can get a wee bit overwhelming too! Check in with me before you start to ensure your ideas will work, what order you might do things, how you could achieve the look you are seeking and any other technical data required! Step Two – Making Clay is thixotropic. This means that as you work with it, the clay first gets sloppier and wetter, before is begins to dry in the atmosphere. For most things, you simply can’t do all parts of the project at once. An example of work order might look like: Get last weeks work out from the shelves Prepare clay for today’s work – roll your clay, prepare balls for throwing, make the first stage of a pinch pot) Clean up last week’s work and put it on the shelf for bisque firing Check that you have any glazing to do – and do enough of it that you will have time to finish your main project Do the next step of your next project – there might be a further step that can’t be complete immediately, in that case, wrap your work well and put onto the shelves. Letting your work rest for a while can really help keep your work clean and professional looking. Many things require bagging under plastic to keep it ready for work the next week – put your name on the outside of the bag so you can find your work easily. We have stickers and markers. Consider how you want to decorate your work – coloured slip can be applied at a fairly wet stage (remembering that it will make your work even wetter!). Trying to apply slip to dry clay won’t work! If you want to do sgraffito – you will need to keep the work leather hard (a state of dryness where you can still work the clay with a little effort and a little water and care). Step Three – Drying Most of the time your work can go into the rack uncovered to let it dry out for the following week. If you want to continue forming or shaping you will need to double bag your work – put your work on a suitable sized bat and put the bat in a bag so the base of the bag is under the bat, then put another bag over the top of the work and tuck the top of the bag under the bat. If you want to trim (or turn) your thrown work the following week, it should also be double bagged. If your work is large, delicate, or of uneven thicknesses, you should lightly cover your work for drying. When considering the drying process, bare in mind the weather, humidity and wind! The hotter and dryer, the faster things dry and work can dry unevenly in the shelves – this can lead to cracking – another time to lightly cover your work for drying. Step Four – Trimming and Cleaning Up Your work is dry! It is called greenware now and it is at it’s most fragile! Handle everything with two hands. I often refer to soft hands – keep everything gentle and with your fingers spread as much as possible. Try to not pick up things like plates too much, and always with both hands! Before your work can be bisque fired it should be “cleaned up”. You work won’t go into the kiln if it has sharp edges – when glazed, sharp edges turn into razor blades! Use a piece of fly wire to rub the work all over – this will scratch a little so be light handed. Use a knife or metal kidney to scrape any areas that require a bit more dynamic treatment than the fly wire offers! Finally, a very light wipe over with a slightly damp sponge can help soften and soothe all of your edges and dags! Trimming thrown work: If you are planning to trim (or turn) your thrown work (and you should be), make sure you bag it well – your work should be leather hard to almost dry for easiest trimming. Use this step to finish the work completely – use a metal kidney to polish the surface, or a slightly damp sponge to give a freshly thrown look. Wipe the sponge around the rim after trimming, and check the inside of the pot for dags! Trimming slip cast work: Usually I will trim the rims of your work on the wheel the following day to make that stage easier, however you will still need to check your work for lumps and bumps. Last but not least – check that your name is still clearly on the bottom of your work. Step Five – Bisque Firing When the work is completely dry it can go into the bisque kiln. The bisque kiln is fired to 1000°C. This process burns off the water in the clay as well as some of the chemically bound water. The structure of the clay is not altered that much at this temperature. Inside the bisque kiln, the work is stacked a little, small bowl inside a larger bowl and onto a heavy plate. Smaller items like decorations or drink coasters might get stacked several high. Consideration is paid to the weight of the stack and shape of the work. A bisque kiln can fire about one and a half times the amount of work that the glaze kiln can fire. The firing takes about 10 hours to complete the cycle and about two days to cool down. Once it has been emptied the work is placed in the glaze room ready for you to decorate! Step Six – Glazing Decorating your work with colour can be a lot of fun – and time consuming! There are three main options for surface treatment at this stage: Oxide Washes Underglazes Glazes Washes and underglazes do not “glaze” the work – It will still need a layer of glaze to fully seal the clay (washes don’t need glaze on surfaces not designed for food or liquid as they can gloss up a little on their own). Underglazes are stable colourants that turn out pretty much how they look in the jar. They can be mixed with each other to form other colours and can be used like water colours to paint onto your work. Mostly they should have a clear glaze on top to seal them. Oxides are a different species – the pink oxide (cobalt) wash turns out bright blue for instance. They don’t always need a glaze on top, and some glazes can change the colour of the wash! The glazes need no other “glaze” on top! Be careful of unknown glaze interactions – you can put any combination of glaze in a bowl or on a plate, but only a single glaze on the outside of any vertical surface! Glazes are a chemical reaction under heat. We don’t know the exact chemicals in the Mayco glazes we use. I can guess by the way they interact with each other, however, on the whole, you need to test every idea you have, and not run the test on a vertical surface! Simply put, glaze is a layer of glass like substance that bonds with the clay underneath. Clay is made of silica, alumina and water. Glaze is made of mostly silica. Silica has a melting point of 1700°C and we fire to 1240°C. The silica requires a “flux” to help it melt at the lower temperature. Fluxes can be all sorts of chemicals – a common one is calcium – calcium has a melting point of 2500°C, however, together they both melt at a much lower temperature! Colourants are metal oxides like cobalt (blue), chrome (green through black), copper (green, blue, even red!), manganese (black, purple and pink) iron (red brown), etc. Different chemicals in the glaze can have dramatic effects. for example, barium carbonate (which we don’t use) turns manganese bright pink! Other elements can turn manganese dioxide brown, blue, purple and reddish brown. Manganese dioxide is a flux in and of itself as well. So, glazes that get their black and purple colours, often interact with other glazes and RUN! Our mirror black is a good example – it mixes really well with many glazes because it fluxes them – causes them to melt faster. It will also bring out many beautiful colours in the glazes because it’s black colouring most definitely comes from manganese dioxide! Glaze chemistry is a whole subject on it’s own! We use commercial Mayco glazes on purpose – for their huge range of colour possibilities, stability, cool interactions, artistic freedom with the ability to easily brush the glazes on and ease of use. We currently have almost 50 glazes on hand! A major project is to test the interactions of all glazes with each other. That is 2,500 test tiles!!!! I’m going to make the wall behind the wheels the feature wall of pretty colours! Step Seven – Glaze (Gloss or sometimes called “Glost”) Firing Most of the time this is the final stage of making your creation (but not always!) The glaze kiln goes to 1240°C. This is called cone 6, or midrange. It is the low end of stoneware temperatures. Stoneware clays and glazes are typically fired at cone 8 – 10, that is 1260 – 1290°C. The energy requirement to go from 1240°C to 1280°C is almost a 30% more! Our clay is formulated to vitrify (mature, turn “glass-like”) at 1240°, as are our glazes. A glaze kiln take around 12 hours to reach temperature and two to three days to cool down. Sometimes a third firing process is required – this is for decoration that is added to work after the glaze firing. For example – adding precious metals and lustres. this firing temperature is usually around 600 – 800°C depending upon the techniques being used. There are many students interested in gold and silver trims – we will be doing this third type of firing soon! After firing your work will be in the student finished work shelves. Remember to pay for it before you head out the door! There is a small extra charge for using porcelain clay (it’s more than twice the price of regular clay), and for any third firing process! Once your work has been fired it can not turn back into clay for millennia – so don’t fire it if you don’t like it! Put it in the bucket for recycling. https://firebirdstudios.com.au/the-process-of-making-pottery/ The bowl is an example of kitchenware used in the 19th century and still in use today.Bowl white ceramic. Crack on side. Badly stained.Backstamp very faint and unable to be read.flagstaff hill, warrnambool, shipwrecked-coast, flagstaff-hill, flagstaff-hill-maritime-museum, maritime-museum, shipwreck-coast, flagstaff-hill-maritime-village, mixing bowl, food preparation, kitchen equipment, ceramic -
 Flagstaff Hill Maritime Museum and Village
Domestic object - Bowl
The Process of Making Pottery Decorating, Firing, Glazing, Making, Technical There is a rhythm and flow to clay. It can’t be done all at once! Even the making process! It can take weeks to get everything done, especially if you can only work on your pottery once a week! Even though we have three hour classes, it’s often just not enough time! Here is an overview of some of the processes so you have a bit more grasp on some of the technical stuff! Step One – Design There are SO many ideas out there for making stuff in clay! From delicate porcelain jewellery, through to heavy sculptural work and everything in between. Deciding your direction is sometimes not that easy – when you first start, try everything, you will naturally gravitate to the style that you enjoy! The options and variations are endless and can get a wee bit overwhelming too! Check in with me before you start to ensure your ideas will work, what order you might do things, how you could achieve the look you are seeking and any other technical data required! Step Two – Making Clay is thixotropic. This means that as you work with it, the clay first gets sloppier and wetter, before is begins to dry in the atmosphere. For most things, you simply can’t do all parts of the project at once. An example of work order might look like: Get last weeks work out from the shelves Prepare clay for today’s work – roll your clay, prepare balls for throwing, make the first stage of a pinch pot) Clean up last week’s work and put it on the shelf for bisque firing Check that you have any glazing to do – and do enough of it that you will have time to finish your main project Do the next step of your next project – there might be a further step that can’t be complete immediately, in that case, wrap your work well and put onto the shelves. Letting your work rest for a while can really help keep your work clean and professional looking. Many things require bagging under plastic to keep it ready for work the next week – put your name on the outside of the bag so you can find your work easily. We have stickers and markers. Consider how you want to decorate your work – coloured slip can be applied at a fairly wet stage (remembering that it will make your work even wetter!). Trying to apply slip to dry clay won’t work! If you want to do sgraffito – you will need to keep the work leather hard (a state of dryness where you can still work the clay with a little effort and a little water and care). Step Three – Drying Most of the time your work can go into the rack uncovered to let it dry out for the following week. If you want to continue forming or shaping you will need to double bag your work – put your work on a suitable sized bat and put the bat in a bag so the base of the bag is under the bat, then put another bag over the top of the work and tuck the top of the bag under the bat. If you want to trim (or turn) your thrown work the following week, it should also be double bagged. If your work is large, delicate, or of uneven thicknesses, you should lightly cover your work for drying. When considering the drying process, bare in mind the weather, humidity and wind! The hotter and dryer, the faster things dry and work can dry unevenly in the shelves – this can lead to cracking – another time to lightly cover your work for drying. Step Four – Trimming and Cleaning Up Your work is dry! It is called greenware now and it is at it’s most fragile! Handle everything with two hands. I often refer to soft hands – keep everything gentle and with your fingers spread as much as possible. Try to not pick up things like plates too much, and always with both hands! Before your work can be bisque fired it should be “cleaned up”. You work won’t go into the kiln if it has sharp edges – when glazed, sharp edges turn into razor blades! Use a piece of fly wire to rub the work all over – this will scratch a little so be light handed. Use a knife or metal kidney to scrape any areas that require a bit more dynamic treatment than the fly wire offers! Finally, a very light wipe over with a slightly damp sponge can help soften and soothe all of your edges and dags! Trimming thrown work: If you are planning to trim (or turn) your thrown work (and you should be), make sure you bag it well – your work should be leather hard to almost dry for easiest trimming. Use this step to finish the work completely – use a metal kidney to polish the surface, or a slightly damp sponge to give a freshly thrown look. Wipe the sponge around the rim after trimming, and check the inside of the pot for dags! Trimming slip cast work: Usually I will trim the rims of your work on the wheel the following day to make that stage easier, however you will still need to check your work for lumps and bumps. Last but not least – check that your name is still clearly on the bottom of your work. Step Five – Bisque Firing When the work is completely dry it can go into the bisque kiln. The bisque kiln is fired to 1000°C. This process burns off the water in the clay as well as some of the chemically bound water. The structure of the clay is not altered that much at this temperature. Inside the bisque kiln, the work is stacked a little, small bowl inside a larger bowl and onto a heavy plate. Smaller items like decorations or drink coasters might get stacked several high. Consideration is paid to the weight of the stack and shape of the work. A bisque kiln can fire about one and a half times the amount of work that the glaze kiln can fire. The firing takes about 10 hours to complete the cycle and about two days to cool down. Once it has been emptied the work is placed in the glaze room ready for you to decorate! Step Six – Glazing Decorating your work with colour can be a lot of fun – and time consuming! There are three main options for surface treatment at this stage: Oxide Washes Underglazes Glazes Washes and underglazes do not “glaze” the work – It will still need a layer of glaze to fully seal the clay (washes don’t need glaze on surfaces not designed for food or liquid as they can gloss up a little on their own). Underglazes are stable colourants that turn out pretty much how they look in the jar. They can be mixed with each other to form other colours and can be used like water colours to paint onto your work. Mostly they should have a clear glaze on top to seal them. Oxides are a different species – the pink oxide (cobalt) wash turns out bright blue for instance. They don’t always need a glaze on top, and some glazes can change the colour of the wash! The glazes need no other “glaze” on top! Be careful of unknown glaze interactions – you can put any combination of glaze in a bowl or on a plate, but only a single glaze on the outside of any vertical surface! Glazes are a chemical reaction under heat. We don’t know the exact chemicals in the Mayco glazes we use. I can guess by the way they interact with each other, however, on the whole, you need to test every idea you have, and not run the test on a vertical surface! Simply put, glaze is a layer of glass like substance that bonds with the clay underneath. Clay is made of silica, alumina and water. Glaze is made of mostly silica. Silica has a melting point of 1700°C and we fire to 1240°C. The silica requires a “flux” to help it melt at the lower temperature. Fluxes can be all sorts of chemicals – a common one is calcium – calcium has a melting point of 2500°C, however, together they both melt at a much lower temperature! Colourants are metal oxides like cobalt (blue), chrome (green through black), copper (green, blue, even red!), manganese (black, purple and pink) iron (red brown), etc. Different chemicals in the glaze can have dramatic effects. for example, barium carbonate (which we don’t use) turns manganese bright pink! Other elements can turn manganese dioxide brown, blue, purple and reddish brown. Manganese dioxide is a flux in and of itself as well. So, glazes that get their black and purple colours, often interact with other glazes and RUN! Our mirror black is a good example – it mixes really well with many glazes because it fluxes them – causes them to melt faster. It will also bring out many beautiful colours in the glazes because it’s black colouring most definitely comes from manganese dioxide! Glaze chemistry is a whole subject on it’s own! We use commercial Mayco glazes on purpose – for their huge range of colour possibilities, stability, cool interactions, artistic freedom with the ability to easily brush the glazes on and ease of use. We currently have almost 50 glazes on hand! A major project is to test the interactions of all glazes with each other. That is 2,500 test tiles!!!! I’m going to make the wall behind the wheels the feature wall of pretty colours! Step Seven – Glaze (Gloss or sometimes called “Glost”) Firing Most of the time this is the final stage of making your creation (but not always!) The glaze kiln goes to 1240°C. This is called cone 6, or midrange. It is the low end of stoneware temperatures. Stoneware clays and glazes are typically fired at cone 8 – 10, that is 1260 – 1290°C. The energy requirement to go from 1240°C to 1280°C is almost a 30% more! Our clay is formulated to vitrify (mature, turn “glass-like”) at 1240°, as are our glazes. A glaze kiln take around 12 hours to reach temperature and two to three days to cool down. Sometimes a third firing process is required – this is for decoration that is added to work after the glaze firing. For example – adding precious metals and lustres. this firing temperature is usually around 600 – 800°C depending upon the techniques being used. There are many students interested in gold and silver trims – we will be doing this third type of firing soon! After firing your work will be in the student finished work shelves. Remember to pay for it before you head out the door! There is a small extra charge for using porcelain clay (it’s more than twice the price of regular clay), and for any third firing process! Once your work has been fired it can not turn back into clay for millennia – so don’t fire it if you don’t like it! Put it in the bucket for recycling. https://firebirdstudios.com.au/the-process-of-making-pottery/ This bowl is an example of kitchenware used in the 19th century and still in use today.Bowl white ceramic plain that has two sets of edging around lip. Inside bowl has plaster designed to look like cooking mixture.flagstaff hill, warrnambool, shipwrecked-coast, flagstaff-hill, flagstaff-hill-maritime-museum, maritime-museum, shipwreck-coast, flagstaff-hill-maritime-village, kitchen equipment, ceramic -
 Flagstaff Hill Maritime Museum and Village
Domestic object - Bowl, J & G Meakin, Late 19th or early 20th Century
The Process of Making Pottery Decorating, Firing, Glazing, Making, Technical There is a rhythm and flow to clay. It can’t be done all at once! Even the making process! It can take weeks to get everything done, especially if you can only work on your pottery once a week! Even though we have three hour classes, it’s often just not enough time! Here is an overview of some of the processes so you have a bit more grasp on some of the technical stuff! Step One – Design There are SO many ideas out there for making stuff in clay! From delicate porcelain jewellery, through to heavy sculptural work and everything in between. Deciding your direction is sometimes not that easy – when you first start, try everything, you will naturally gravitate to the style that you enjoy! The options and variations are endless and can get a wee bit overwhelming too! Check in with me before you start to ensure your ideas will work, what order you might do things, how you could achieve the look you are seeking and any other technical data required! Step Two – Making Clay is thixotropic. This means that as you work with it, the clay first gets sloppier and wetter, before is begins to dry in the atmosphere. For most things, you simply can’t do all parts of the project at once. An example of work order might look like: Get last weeks work out from the shelves Prepare clay for today’s work – roll your clay, prepare balls for throwing, make the first stage of a pinch pot) Clean up last week’s work and put it on the shelf for bisque firing Check that you have any glazing to do – and do enough of it that you will have time to finish your main project Do the next step of your next project – there might be a further step that can’t be complete immediately, in that case, wrap your work well and put onto the shelves. Letting your work rest for a while can really help keep your work clean and professional looking. Many things require bagging under plastic to keep it ready for work the next week – put your name on the outside of the bag so you can find your work easily. We have stickers and markers. Consider how you want to decorate your work – coloured slip can be applied at a fairly wet stage (remembering that it will make your work even wetter!). Trying to apply slip to dry clay won’t work! If you want to do sgraffito – you will need to keep the work leather hard (a state of dryness where you can still work the clay with a little effort and a little water and care). Step Three – Drying Most of the time your work can go into the rack uncovered to let it dry out for the following week. If you want to continue forming or shaping you will need to double bag your work – put your work on a suitable sized bat and put the bat in a bag so the base of the bag is under the bat, then put another bag over the top of the work and tuck the top of the bag under the bat. If you want to trim (or turn) your thrown work the following week, it should also be double bagged. If your work is large, delicate, or of uneven thicknesses, you should lightly cover your work for drying. When considering the drying process, bare in mind the weather, humidity and wind! The hotter and dryer, the faster things dry and work can dry unevenly in the shelves – this can lead to cracking – another time to lightly cover your work for drying. Step Four – Trimming and Cleaning Up Your work is dry! It is called greenware now and it is at it’s most fragile! Handle everything with two hands. I often refer to soft hands – keep everything gentle and with your fingers spread as much as possible. Try to not pick up things like plates too much, and always with both hands! Before your work can be bisque fired it should be “cleaned up”. You work won’t go into the kiln if it has sharp edges – when glazed, sharp edges turn into razor blades! Use a piece of fly wire to rub the work all over – this will scratch a little so be light handed. Use a knife or metal kidney to scrape any areas that require a bit more dynamic treatment than the fly wire offers! Finally, a very light wipe over with a slightly damp sponge can help soften and soothe all of your edges and dags! Trimming thrown work: If you are planning to trim (or turn) your thrown work (and you should be), make sure you bag it well – your work should be leather hard to almost dry for easiest trimming. Use this step to finish the work completely – use a metal kidney to polish the surface, or a slightly damp sponge to give a freshly thrown look. Wipe the sponge around the rim after trimming, and check the inside of the pot for dags! Trimming slip cast work: Usually I will trim the rims of your work on the wheel the following day to make that stage easier, however you will still need to check your work for lumps and bumps. Last but not least – check that your name is still clearly on the bottom of your work. Step Five – Bisque Firing When the work is completely dry it can go into the bisque kiln. The bisque kiln is fired to 1000°C. This process burns off the water in the clay as well as some of the chemically bound water. The structure of the clay is not altered that much at this temperature. Inside the bisque kiln, the work is stacked a little, small bowl inside a larger bowl and onto a heavy plate. Smaller items like decorations or drink coasters might get stacked several high. Consideration is paid to the weight of the stack and shape of the work. A bisque kiln can fire about one and a half times the amount of work that the glaze kiln can fire. The firing takes about 10 hours to complete the cycle and about two days to cool down. Once it has been emptied the work is placed in the glaze room ready for you to decorate! Step Six – Glazing Decorating your work with colour can be a lot of fun – and time consuming! There are three main options for surface treatment at this stage: Oxide Washes Underglazes Glazes Washes and underglazes do not “glaze” the work – It will still need a layer of glaze to fully seal the clay (washes don’t need glaze on surfaces not designed for food or liquid as they can gloss up a little on their own). Underglazes are stable colourants that turn out pretty much how they look in the jar. They can be mixed with each other to form other colours and can be used like water colours to paint onto your work. Mostly they should have a clear glaze on top to seal them. Oxides are a different species – the pink oxide (cobalt) wash turns out bright blue for instance. They don’t always need a glaze on top, and some glazes can change the colour of the wash! The glazes need no other “glaze” on top! Be careful of unknown glaze interactions – you can put any combination of glaze in a bowl or on a plate, but only a single glaze on the outside of any vertical surface! Glazes are a chemical reaction under heat. We don’t know the exact chemicals in the Mayco glazes we use. I can guess by the way they interact with each other, however, on the whole, you need to test every idea you have, and not run the test on a vertical surface! Simply put, glaze is a layer of glass like substance that bonds with the clay underneath. Clay is made of silica, alumina and water. Glaze is made of mostly silica. Silica has a melting point of 1700°C and we fire to 1240°C. The silica requires a “flux” to help it melt at the lower temperature. Fluxes can be all sorts of chemicals – a common one is calcium – calcium has a melting point of 2500°C, however, together they both melt at a much lower temperature! Colourants are metal oxides like cobalt (blue), chrome (green through black), copper (green, blue, even red!), manganese (black, purple and pink) iron (red brown), etc. Different chemicals in the glaze can have dramatic effects. for example, barium carbonate (which we don’t use) turns manganese bright pink! Other elements can turn manganese dioxide brown, blue, purple and reddish brown. Manganese dioxide is a flux in and of itself as well. So, glazes that get their black and purple colours, often interact with other glazes and RUN! Our mirror black is a good example – it mixes really well with many glazes because it fluxes them – causes them to melt faster. It will also bring out many beautiful colours in the glazes because it’s black colouring most definitely comes from manganese dioxide! Glaze chemistry is a whole subject on it’s own! We use commercial Mayco glazes on purpose – for their huge range of colour possibilities, stability, cool interactions, artistic freedom with the ability to easily brush the glazes on and ease of use. We currently have almost 50 glazes on hand! A major project is to test the interactions of all glazes with each other. That is 2,500 test tiles!!!! I’m going to make the wall behind the wheels the feature wall of pretty colours! Step Seven – Glaze (Gloss or sometimes called “Glost”) Firing Most of the time this is the final stage of making your creation (but not always!) The glaze kiln goes to 1240°C. This is called cone 6, or midrange. It is the low end of stoneware temperatures. Stoneware clays and glazes are typically fired at cone 8 – 10, that is 1260 – 1290°C. The energy requirement to go from 1240°C to 1280°C is almost a 30% more! Our clay is formulated to vitrify (mature, turn “glass-like”) at 1240°, as are our glazes. A glaze kiln take around 12 hours to reach temperature and two to three days to cool down. Sometimes a third firing process is required – this is for decoration that is added to work after the glaze firing. For example – adding precious metals and lustres. this firing temperature is usually around 600 – 800°C depending upon the techniques being used. There are many students interested in gold and silver trims – we will be doing this third type of firing soon! After firing your work will be in the student finished work shelves. Remember to pay for it before you head out the door! There is a small extra charge for using porcelain clay (it’s more than twice the price of regular clay), and for any third firing process! Once your work has been fired it can not turn back into clay for millennia – so don’t fire it if you don’t like it! Put it in the bucket for recycling. https://firebirdstudios.com.au/the-process-of-making-pottery/This bowl was made by renowned pottery company J & G Meakin of England. The firm was established in the mid-1800's. The bowl is an example of kitchenware used in the 19th century and still in use today.Bowl; white ceramic, round and tapering inwards towards base. Made by J and G Meakin England.On base, 'Ironstone China Reg SOL 391413' with symbolflagstaff hill, flagstaff hill maritime museum and village, warrnambool, maritime museum, maritime village, great ocean road, shipwreck coast, mixing bowl, food preparation, j & g meakin, pottery, stoke-on-trent, kitchen equipment, ceramic -
 Flagstaff Hill Maritime Museum and Village
Domestic object - Plate
The Process of Making Pottery Decorating, Firing, Glazing, Making, Technical There is a rhythm and flow to clay. It can’t be done all at once! Even the making process! It can take weeks to get everything done, especially if you can only work on your pottery once a week! Even though we have three hour classes, it’s often just not enough time! Here is an overview of some of the processes so you have a bit more grasp on some of the technical stuff! Step One – Design There are SO many ideas out there for making stuff in clay! From delicate porcelain jewellery, through to heavy sculptural work and everything in between. Deciding your direction is sometimes not that easy – when you first start, try everything, you will naturally gravitate to the style that you enjoy! The options and variations are endless and can get a wee bit overwhelming too! Check in with me before you start to ensure your ideas will work, what order you might do things, how you could achieve the look you are seeking and any other technical data required! Step Two – Making Clay is thixotropic. This means that as you work with it, the clay first gets sloppier and wetter, before is begins to dry in the atmosphere. For most things, you simply can’t do all parts of the project at once. An example of work order might look like: Get last weeks work out from the shelves Prepare clay for today’s work – roll your clay, prepare balls for throwing, make the first stage of a pinch pot) Clean up last week’s work and put it on the shelf for bisque firing Check that you have any glazing to do – and do enough of it that you will have time to finish your main project Do the next step of your next project – there might be a further step that can’t be complete immediately, in that case, wrap your work well and put onto the shelves. Letting your work rest for a while can really help keep your work clean and professional looking. Many things require bagging under plastic to keep it ready for work the next week – put your name on the outside of the bag so you can find your work easily. We have stickers and markers. Consider how you want to decorate your work – coloured slip can be applied at a fairly wet stage (remembering that it will make your work even wetter!). Trying to apply slip to dry clay won’t work! If you want to do sgraffito – you will need to keep the work leather hard (a state of dryness where you can still work the clay with a little effort and a little water and care). Step Three – Drying Most of the time your work can go into the rack uncovered to let it dry out for the following week. If you want to continue forming or shaping you will need to double bag your work – put your work on a suitable sized bat and put the bat in a bag so the base of the bag is under the bat, then put another bag over the top of the work and tuck the top of the bag under the bat. If you want to trim (or turn) your thrown work the following week, it should also be double bagged. If your work is large, delicate, or of uneven thicknesses, you should lightly cover your work for drying. When considering the drying process, bare in mind the weather, humidity and wind! The hotter and dryer, the faster things dry and work can dry unevenly in the shelves – this can lead to cracking – another time to lightly cover your work for drying. Step Four – Trimming and Cleaning Up Your work is dry! It is called greenware now and it is at it’s most fragile! Handle everything with two hands. I often refer to soft hands – keep everything gentle and with your fingers spread as much as possible. Try to not pick up things like plates too much, and always with both hands! Before your work can be bisque fired it should be “cleaned up”. You work won’t go into the kiln if it has sharp edges – when glazed, sharp edges turn into razor blades! Use a piece of fly wire to rub the work all over – this will scratch a little so be light handed. Use a knife or metal kidney to scrape any areas that require a bit more dynamic treatment than the fly wire offers! Finally, a very light wipe over with a slightly damp sponge can help soften and soothe all of your edges and dags! Trimming thrown work: If you are planning to trim (or turn) your thrown work (and you should be), make sure you bag it well – your work should be leather hard to almost dry for easiest trimming. Use this step to finish the work completely – use a metal kidney to polish the surface, or a slightly damp sponge to give a freshly thrown look. Wipe the sponge around the rim after trimming, and check the inside of the pot for dags! Trimming slip cast work: Usually I will trim the rims of your work on the wheel the following day to make that stage easier, however you will still need to check your work for lumps and bumps. Last but not least – check that your name is still clearly on the bottom of your work. Step Five – Bisque Firing When the work is completely dry it can go into the bisque kiln. The bisque kiln is fired to 1000°C. This process burns off the water in the clay as well as some of the chemically bound water. The structure of the clay is not altered that much at this temperature. Inside the bisque kiln, the work is stacked a little, small bowl inside a larger bowl and onto a heavy plate. Smaller items like decorations or drink coasters might get stacked several high. Consideration is paid to the weight of the stack and shape of the work. A bisque kiln can fire about one and a half times the amount of work that the glaze kiln can fire. The firing takes about 10 hours to complete the cycle and about two days to cool down. Once it has been emptied the work is placed in the glaze room ready for you to decorate! Step Six – Glazing Decorating your work with colour can be a lot of fun – and time consuming! There are three main options for surface treatment at this stage: Oxide Washes Underglazes Glazes Washes and underglazes do not “glaze” the work – It will still need a layer of glaze to fully seal the clay (washes don’t need glaze on surfaces not designed for food or liquid as they can gloss up a little on their own). Underglazes are stable colourants that turn out pretty much how they look in the jar. They can be mixed with each other to form other colours and can be used like water colours to paint onto your work. Mostly they should have a clear glaze on top to seal them. Oxides are a different species – the pink oxide (cobalt) wash turns out bright blue for instance. They don’t always need a glaze on top, and some glazes can change the colour of the wash! The glazes need no other “glaze” on top! Be careful of unknown glaze interactions – you can put any combination of glaze in a bowl or on a plate, but only a single glaze on the outside of any vertical surface! Glazes are a chemical reaction under heat. We don’t know the exact chemicals in the Mayco glazes we use. I can guess by the way they interact with each other, however, on the whole, you need to test every idea you have, and not run the test on a vertical surface! Simply put, glaze is a layer of glass like substance that bonds with the clay underneath. Clay is made of silica, alumina and water. Glaze is made of mostly silica. Silica has a melting point of 1700°C and we fire to 1240°C. The silica requires a “flux” to help it melt at the lower temperature. Fluxes can be all sorts of chemicals – a common one is calcium – calcium has a melting point of 2500°C, however, together they both melt at a much lower temperature! Colourants are metal oxides like cobalt (blue), chrome (green through black), copper (green, blue, even red!), manganese (black, purple and pink) iron (red brown), etc. Different chemicals in the glaze can have dramatic effects. for example, barium carbonate (which we don’t use) turns manganese bright pink! Other elements can turn manganese dioxide brown, blue, purple and reddish brown. Manganese dioxide is a flux in and of itself as well. So, glazes that get their black and purple colours, often interact with other glazes and RUN! Our mirror black is a good example – it mixes really well with many glazes because it fluxes them – causes them to melt faster. It will also bring out many beautiful colours in the glazes because it’s black colouring most definitely comes from manganese dioxide! Glaze chemistry is a whole subject on it’s own! We use commercial Mayco glazes on purpose – for their huge range of colour possibilities, stability, cool interactions, artistic freedom with the ability to easily brush the glazes on and ease of use. We currently have almost 50 glazes on hand! A major project is to test the interactions of all glazes with each other. That is 2,500 test tiles!!!! I’m going to make the wall behind the wheels the feature wall of pretty colours! Step Seven – Glaze (Gloss or sometimes called “Glost”) Firing Most of the time this is the final stage of making your creation (but not always!) The glaze kiln goes to 1240°C. This is called cone 6, or midrange. It is the low end of stoneware temperatures. Stoneware clays and glazes are typically fired at cone 8 – 10, that is 1260 – 1290°C. The energy requirement to go from 1240°C to 1280°C is almost a 30% more! Our clay is formulated to vitrify (mature, turn “glass-like”) at 1240°, as are our glazes. A glaze kiln take around 12 hours to reach temperature and two to three days to cool down. Sometimes a third firing process is required – this is for decoration that is added to work after the glaze firing. For example – adding precious metals and lustres. this firing temperature is usually around 600 – 800°C depending upon the techniques being used. There are many students interested in gold and silver trims – we will be doing this third type of firing soon! After firing your work will be in the student finished work shelves. Remember to pay for it before you head out the door! There is a small extra charge for using porcelain clay (it’s more than twice the price of regular clay), and for any third firing process! Once your work has been fired it can not turn back into clay for millennia – so don’t fire it if you don’t like it! Put it in the bucket for recycling. https://firebirdstudios.com.au/the-process-of-making-pottery/Ceramics have evolved over thousands of years.White earthenware dinner plate. Crazing evident all over.Backstamped ‘Made in England S LTD’flagstaff hill, warrnambool, shipwrecked-coast, flagstaff-hill, flagstaff-hill-maritime-museum, maritime-museum, shipwreck-coast, flagstaff-hill-maritime-village, ceramics, tableware -
 Flagstaff Hill Maritime Museum and Village
Domestic object - Plate, Johnson Bros
The Process of Making Pottery Decorating, Firing, Glazing, Making, Technical There is a rhythm and flow to clay. It can’t be done all at once! Even the making process! It can take weeks to get everything done, especially if you can only work on your pottery once a week! Even though we have three hour classes, it’s often just not enough time! Here is an overview of some of the processes so you have a bit more grasp on some of the technical stuff! Step One – Design There are SO many ideas out there for making stuff in clay! From delicate porcelain jewellery, through to heavy sculptural work and everything in between. Deciding your direction is sometimes not that easy – when you first start, try everything, you will naturally gravitate to the style that you enjoy! The options and variations are endless and can get a wee bit overwhelming too! Check in with me before you start to ensure your ideas will work, what order you might do things, how you could achieve the look you are seeking and any other technical data required! Step Two – Making Clay is thixotropic. This means that as you work with it, the clay first gets sloppier and wetter, before is begins to dry in the atmosphere. For most things, you simply can’t do all parts of the project at once. An example of work order might look like: Get last weeks work out from the shelves Prepare clay for today’s work – roll your clay, prepare balls for throwing, make the first stage of a pinch pot) Clean up last week’s work and put it on the shelf for bisque firing Check that you have any glazing to do – and do enough of it that you will have time to finish your main project Do the next step of your next project – there might be a further step that can’t be complete immediately, in that case, wrap your work well and put onto the shelves. Letting your work rest for a while can really help keep your work clean and professional looking. Many things require bagging under plastic to keep it ready for work the next week – put your name on the outside of the bag so you can find your work easily. We have stickers and markers. Consider how you want to decorate your work – coloured slip can be applied at a fairly wet stage (remembering that it will make your work even wetter!). Trying to apply slip to dry clay won’t work! If you want to do sgraffito – you will need to keep the work leather hard (a state of dryness where you can still work the clay with a little effort and a little water and care). Step Three – Drying Most of the time your work can go into the rack uncovered to let it dry out for the following week. If you want to continue forming or shaping you will need to double bag your work – put your work on a suitable sized bat and put the bat in a bag so the base of the bag is under the bat, then put another bag over the top of the work and tuck the top of the bag under the bat. If you want to trim (or turn) your thrown work the following week, it should also be double bagged. If your work is large, delicate, or of uneven thicknesses, you should lightly cover your work for drying. When considering the drying process, bare in mind the weather, humidity and wind! The hotter and dryer, the faster things dry and work can dry unevenly in the shelves – this can lead to cracking – another time to lightly cover your work for drying. Step Four – Trimming and Cleaning Up Your work is dry! It is called greenware now and it is at it’s most fragile! Handle everything with two hands. I often refer to soft hands – keep everything gentle and with your fingers spread as much as possible. Try to not pick up things like plates too much, and always with both hands! Before your work can be bisque fired it should be “cleaned up”. You work won’t go into the kiln if it has sharp edges – when glazed, sharp edges turn into razor blades! Use a piece of fly wire to rub the work all over – this will scratch a little so be light handed. Use a knife or metal kidney to scrape any areas that require a bit more dynamic treatment than the fly wire offers! Finally, a very light wipe over with a slightly damp sponge can help soften and soothe all of your edges and dags! Trimming thrown work: If you are planning to trim (or turn) your thrown work (and you should be), make sure you bag it well – your work should be leather hard to almost dry for easiest trimming. Use this step to finish the work completely – use a metal kidney to polish the surface, or a slightly damp sponge to give a freshly thrown look. Wipe the sponge around the rim after trimming, and check the inside of the pot for dags! Trimming slip cast work: Usually I will trim the rims of your work on the wheel the following day to make that stage easier, however you will still need to check your work for lumps and bumps. Last but not least – check that your name is still clearly on the bottom of your work. Step Five – Bisque Firing When the work is completely dry it can go into the bisque kiln. The bisque kiln is fired to 1000°C. This process burns off the water in the clay as well as some of the chemically bound water. The structure of the clay is not altered that much at this temperature. Inside the bisque kiln, the work is stacked a little, small bowl inside a larger bowl and onto a heavy plate. Smaller items like decorations or drink coasters might get stacked several high. Consideration is paid to the weight of the stack and shape of the work. A bisque kiln can fire about one and a half times the amount of work that the glaze kiln can fire. The firing takes about 10 hours to complete the cycle and about two days to cool down. Once it has been emptied the work is placed in the glaze room ready for you to decorate! Step Six – Glazing Decorating your work with colour can be a lot of fun – and time consuming! There are three main options for surface treatment at this stage: Oxide Washes Underglazes Glazes Washes and underglazes do not “glaze” the work – It will still need a layer of glaze to fully seal the clay (washes don’t need glaze on surfaces not designed for food or liquid as they can gloss up a little on their own). Underglazes are stable colourants that turn out pretty much how they look in the jar. They can be mixed with each other to form other colours and can be used like water colours to paint onto your work. Mostly they should have a clear glaze on top to seal them. Oxides are a different species – the pink oxide (cobalt) wash turns out bright blue for instance. They don’t always need a glaze on top, and some glazes can change the colour of the wash! The glazes need no other “glaze” on top! Be careful of unknown glaze interactions – you can put any combination of glaze in a bowl or on a plate, but only a single glaze on the outside of any vertical surface! Glazes are a chemical reaction under heat. We don’t know the exact chemicals in the Mayco glazes we use. I can guess by the way they interact with each other, however, on the whole, you need to test every idea you have, and not run the test on a vertical surface! Simply put, glaze is a layer of glass like substance that bonds with the clay underneath. Clay is made of silica, alumina and water. Glaze is made of mostly silica. Silica has a melting point of 1700°C and we fire to 1240°C. The silica requires a “flux” to help it melt at the lower temperature. Fluxes can be all sorts of chemicals – a common one is calcium – calcium has a melting point of 2500°C, however, together they both melt at a much lower temperature! Colourants are metal oxides like cobalt (blue), chrome (green through black), copper (green, blue, even red!), manganese (black, purple and pink) iron (red brown), etc. Different chemicals in the glaze can have dramatic effects. for example, barium carbonate (which we don’t use) turns manganese bright pink! Other elements can turn manganese dioxide brown, blue, purple and reddish brown. Manganese dioxide is a flux in and of itself as well. So, glazes that get their black and purple colours, often interact with other glazes and RUN! Our mirror black is a good example – it mixes really well with many glazes because it fluxes them – causes them to melt faster. It will also bring out many beautiful colours in the glazes because it’s black colouring most definitely comes from manganese dioxide! Glaze chemistry is a whole subject on it’s own! We use commercial Mayco glazes on purpose – for their huge range of colour possibilities, stability, cool interactions, artistic freedom with the ability to easily brush the glazes on and ease of use. We currently have almost 50 glazes on hand! A major project is to test the interactions of all glazes with each other. That is 2,500 test tiles!!!! I’m going to make the wall behind the wheels the feature wall of pretty colours! Step Seven – Glaze (Gloss or sometimes called “Glost”) Firing Most of the time this is the final stage of making your creation (but not always!) The glaze kiln goes to 1240°C. This is called cone 6, or midrange. It is the low end of stoneware temperatures. Stoneware clays and glazes are typically fired at cone 8 – 10, that is 1260 – 1290°C. The energy requirement to go from 1240°C to 1280°C is almost a 30% more! Our clay is formulated to vitrify (mature, turn “glass-like”) at 1240°, as are our glazes. A glaze kiln take around 12 hours to reach temperature and two to three days to cool down. Sometimes a third firing process is required – this is for decoration that is added to work after the glaze firing. For example – adding precious metals and lustres. this firing temperature is usually around 600 – 800°C depending upon the techniques being used. There are many students interested in gold and silver trims – we will be doing this third type of firing soon! After firing your work will be in the student finished work shelves. Remember to pay for it before you head out the door! There is a small extra charge for using porcelain clay (it’s more than twice the price of regular clay), and for any third firing process! Once your work has been fired it can not turn back into clay for millennia – so don’t fire it if you don’t like it! Put it in the bucket for recycling. https://firebirdstudios.com.au/the-process-of-making-pottery/Ceramics have evolved over thousands of years.A white earthenware side plate with a gadroon edge. Has water marks and chips on front.‘Johnson Bros England Reg No 15587’flagstaff hill, warrnambool, shipwrecked-coast, flagstaff-hill, flagstaff-hill-maritime-museum, maritime-museum, shipwreck-coast, flagstaff-hill-maritime-village, johnson bros, ceramics, tableware -
 Flagstaff Hill Maritime Museum and Village
Domestic object - Plate, Alfred Meakin
The Process of Making Pottery Decorating, Firing, Glazing, Making, Technical There is a rhythm and flow to clay. It can’t be done all at once! Even the making process! It can take weeks to get everything done, especially if you can only work on your pottery once a week! Even though we have three hour classes, it’s often just not enough time! Here is an overview of some of the processes so you have a bit more grasp on some of the technical stuff! Step One – Design There are SO many ideas out there for making stuff in clay! From delicate porcelain jewellery, through to heavy sculptural work and everything in between. Deciding your direction is sometimes not that easy – when you first start, try everything, you will naturally gravitate to the style that you enjoy! The options and variations are endless and can get a wee bit overwhelming too! Check in with me before you start to ensure your ideas will work, what order you might do things, how you could achieve the look you are seeking and any other technical data required! Step Two – Making Clay is thixotropic. This means that as you work with it, the clay first gets sloppier and wetter, before is begins to dry in the atmosphere. For most things, you simply can’t do all parts of the project at once. An example of work order might look like: Get last weeks work out from the shelves Prepare clay for today’s work – roll your clay, prepare balls for throwing, make the first stage of a pinch pot) Clean up last week’s work and put it on the shelf for bisque firing Check that you have any glazing to do – and do enough of it that you will have time to finish your main project Do the next step of your next project – there might be a further step that can’t be complete immediately, in that case, wrap your work well and put onto the shelves. Letting your work rest for a while can really help keep your work clean and professional looking. Many things require bagging under plastic to keep it ready for work the next week – put your name on the outside of the bag so you can find your work easily. We have stickers and markers. Consider how you want to decorate your work – coloured slip can be applied at a fairly wet stage (remembering that it will make your work even wetter!). Trying to apply slip to dry clay won’t work! If you want to do sgraffito – you will need to keep the work leather hard (a state of dryness where you can still work the clay with a little effort and a little water and care). Step Three – Drying Most of the time your work can go into the rack uncovered to let it dry out for the following week. If you want to continue forming or shaping you will need to double bag your work – put your work on a suitable sized bat and put the bat in a bag so the base of the bag is under the bat, then put another bag over the top of the work and tuck the top of the bag under the bat. If you want to trim (or turn) your thrown work the following week, it should also be double bagged. If your work is large, delicate, or of uneven thicknesses, you should lightly cover your work for drying. When considering the drying process, bare in mind the weather, humidity and wind! The hotter and dryer, the faster things dry and work can dry unevenly in the shelves – this can lead to cracking – another time to lightly cover your work for drying. Step Four – Trimming and Cleaning Up Your work is dry! It is called greenware now and it is at it’s most fragile! Handle everything with two hands. I often refer to soft hands – keep everything gentle and with your fingers spread as much as possible. Try to not pick up things like plates too much, and always with both hands! Before your work can be bisque fired it should be “cleaned up”. You work won’t go into the kiln if it has sharp edges – when glazed, sharp edges turn into razor blades! Use a piece of fly wire to rub the work all over – this will scratch a little so be light handed. Use a knife or metal kidney to scrape any areas that require a bit more dynamic treatment than the fly wire offers! Finally, a very light wipe over with a slightly damp sponge can help soften and soothe all of your edges and dags! Trimming thrown work: If you are planning to trim (or turn) your thrown work (and you should be), make sure you bag it well – your work should be leather hard to almost dry for easiest trimming. Use this step to finish the work completely – use a metal kidney to polish the surface, or a slightly damp sponge to give a freshly thrown look. Wipe the sponge around the rim after trimming, and check the inside of the pot for dags! Trimming slip cast work: Usually I will trim the rims of your work on the wheel the following day to make that stage easier, however you will still need to check your work for lumps and bumps. Last but not least – check that your name is still clearly on the bottom of your work. Step Five – Bisque Firing When the work is completely dry it can go into the bisque kiln. The bisque kiln is fired to 1000°C. This process burns off the water in the clay as well as some of the chemically bound water. The structure of the clay is not altered that much at this temperature. Inside the bisque kiln, the work is stacked a little, small bowl inside a larger bowl and onto a heavy plate. Smaller items like decorations or drink coasters might get stacked several high. Consideration is paid to the weight of the stack and shape of the work. A bisque kiln can fire about one and a half times the amount of work that the glaze kiln can fire. The firing takes about 10 hours to complete the cycle and about two days to cool down. Once it has been emptied the work is placed in the glaze room ready for you to decorate! Step Six – Glazing Decorating your work with colour can be a lot of fun – and time consuming! There are three main options for surface treatment at this stage: Oxide Washes Underglazes Glazes Washes and underglazes do not “glaze” the work – It will still need a layer of glaze to fully seal the clay (washes don’t need glaze on surfaces not designed for food or liquid as they can gloss up a little on their own). Underglazes are stable colourants that turn out pretty much how they look in the jar. They can be mixed with each other to form other colours and can be used like water colours to paint onto your work. Mostly they should have a clear glaze on top to seal them. Oxides are a different species – the pink oxide (cobalt) wash turns out bright blue for instance. They don’t always need a glaze on top, and some glazes can change the colour of the wash! The glazes need no other “glaze” on top! Be careful of unknown glaze interactions – you can put any combination of glaze in a bowl or on a plate, but only a single glaze on the outside of any vertical surface! Glazes are a chemical reaction under heat. We don’t know the exact chemicals in the Mayco glazes we use. I can guess by the way they interact with each other, however, on the whole, you need to test every idea you have, and not run the test on a vertical surface! Simply put, glaze is a layer of glass like substance that bonds with the clay underneath. Clay is made of silica, alumina and water. Glaze is made of mostly silica. Silica has a melting point of 1700°C and we fire to 1240°C. The silica requires a “flux” to help it melt at the lower temperature. Fluxes can be all sorts of chemicals – a common one is calcium – calcium has a melting point of 2500°C, however, together they both melt at a much lower temperature! Colourants are metal oxides like cobalt (blue), chrome (green through black), copper (green, blue, even red!), manganese (black, purple and pink) iron (red brown), etc. Different chemicals in the glaze can have dramatic effects. for example, barium carbonate (which we don’t use) turns manganese bright pink! Other elements can turn manganese dioxide brown, blue, purple and reddish brown. Manganese dioxide is a flux in and of itself as well. So, glazes that get their black and purple colours, often interact with other glazes and RUN! Our mirror black is a good example – it mixes really well with many glazes because it fluxes them – causes them to melt faster. It will also bring out many beautiful colours in the glazes because it’s black colouring most definitely comes from manganese dioxide! Glaze chemistry is a whole subject on it’s own! We use commercial Mayco glazes on purpose – for their huge range of colour possibilities, stability, cool interactions, artistic freedom with the ability to easily brush the glazes on and ease of use. We currently have almost 50 glazes on hand! A major project is to test the interactions of all glazes with each other. That is 2,500 test tiles!!!! I’m going to make the wall behind the wheels the feature wall of pretty colours! Step Seven – Glaze (Gloss or sometimes called “Glost”) Firing Most of the time this is the final stage of making your creation (but not always!) The glaze kiln goes to 1240°C. This is called cone 6, or midrange. It is the low end of stoneware temperatures. Stoneware clays and glazes are typically fired at cone 8 – 10, that is 1260 – 1290°C. The energy requirement to go from 1240°C to 1280°C is almost a 30% more! Our clay is formulated to vitrify (mature, turn “glass-like”) at 1240°, as are our glazes. A glaze kiln take around 12 hours to reach temperature and two to three days to cool down. Sometimes a third firing process is required – this is for decoration that is added to work after the glaze firing. For example – adding precious metals and lustres. this firing temperature is usually around 600 – 800°C depending upon the techniques being used. There are many students interested in gold and silver trims – we will be doing this third type of firing soon! After firing your work will be in the student finished work shelves. Remember to pay for it before you head out the door! There is a small extra charge for using porcelain clay (it’s more than twice the price of regular clay), and for any third firing process! Once your work has been fired it can not turn back into clay for millennia – so don’t fire it if you don’t like it! Put it in the bucket for recycling. https://firebirdstudios.com.au/the-process-of-making-pottery/Ceramics have evolved over thousands of years.Earthenware dessert plate, cream colour. Made by Alfred Meakin, England. Backstamped ‘Alfred Meakin England’. flagstaff hill, warrnambool, shipwrecked-coast, flagstaff-hill, flagstaff-hill-maritime-museum, maritime-museum, shipwreck-coast, flagstaff-hill-maritime-village, alfred meakin, ceramics, earthenware, kitchenware -
 Flagstaff Hill Maritime Museum and Village
Domestic object - Jug
The Process of Making Pottery Decorating, Firing, Glazing, Making, Technical There is a rhythm and flow to clay. It can’t be done all at once! Even the making process! It can take weeks to get everything done, especially if you can only work on your pottery once a week! Even though we have three hour classes, it’s often just not enough time! Here is an overview of some of the processes so you have a bit more grasp on some of the technical stuff! Step One – Design There are SO many ideas out there for making stuff in clay! From delicate porcelain jewellery, through to heavy sculptural work and everything in between. Deciding your direction is sometimes not that easy – when you first start, try everything, you will naturally gravitate to the style that you enjoy! The options and variations are endless and can get a wee bit overwhelming too! Check in with me before you start to ensure your ideas will work, what order you might do things, how you could achieve the look you are seeking and any other technical data required! Step Two – Making Clay is thixotropic. This means that as you work with it, the clay first gets sloppier and wetter, before is begins to dry in the atmosphere. For most things, you simply can’t do all parts of the project at once. An example of work order might look like: Get last weeks work out from the shelves Prepare clay for today’s work – roll your clay, prepare balls for throwing, make the first stage of a pinch pot) Clean up last week’s work and put it on the shelf for bisque firing Check that you have any glazing to do – and do enough of it that you will have time to finish your main project Do the next step of your next project – there might be a further step that can’t be complete immediately, in that case, wrap your work well and put onto the shelves. Letting your work rest for a while can really help keep your work clean and professional looking. Many things require bagging under plastic to keep it ready for work the next week – put your name on the outside of the bag so you can find your work easily. We have stickers and markers. Consider how you want to decorate your work – coloured slip can be applied at a fairly wet stage (remembering that it will make your work even wetter!). Trying to apply slip to dry clay won’t work! If you want to do sgraffito – you will need to keep the work leather hard (a state of dryness where you can still work the clay with a little effort and a little water and care). Step Three – Drying Most of the time your work can go into the rack uncovered to let it dry out for the following week. If you want to continue forming or shaping you will need to double bag your work – put your work on a suitable sized bat and put the bat in a bag so the base of the bag is under the bat, then put another bag over the top of the work and tuck the top of the bag under the bat. If you want to trim (or turn) your thrown work the following week, it should also be double bagged. If your work is large, delicate, or of uneven thicknesses, you should lightly cover your work for drying. When considering the drying process, bare in mind the weather, humidity and wind! The hotter and dryer, the faster things dry and work can dry unevenly in the shelves – this can lead to cracking – another time to lightly cover your work for drying. Step Four – Trimming and Cleaning Up Your work is dry! It is called greenware now and it is at it’s most fragile! Handle everything with two hands. I often refer to soft hands – keep everything gentle and with your fingers spread as much as possible. Try to not pick up things like plates too much, and always with both hands! Before your work can be bisque fired it should be “cleaned up”. You work won’t go into the kiln if it has sharp edges – when glazed, sharp edges turn into razor blades! Use a piece of fly wire to rub the work all over – this will scratch a little so be light handed. Use a knife or metal kidney to scrape any areas that require a bit more dynamic treatment than the fly wire offers! Finally, a very light wipe over with a slightly damp sponge can help soften and soothe all of your edges and dags! Trimming thrown work: If you are planning to trim (or turn) your thrown work (and you should be), make sure you bag it well – your work should be leather hard to almost dry for easiest trimming. Use this step to finish the work completely – use a metal kidney to polish the surface, or a slightly damp sponge to give a freshly thrown look. Wipe the sponge around the rim after trimming, and check the inside of the pot for dags! Trimming slip cast work: Usually I will trim the rims of your work on the wheel the following day to make that stage easier, however you will still need to check your work for lumps and bumps. Last but not least – check that your name is still clearly on the bottom of your work. Step Five – Bisque Firing When the work is completely dry it can go into the bisque kiln. The bisque kiln is fired to 1000°C. This process burns off the water in the clay as well as some of the chemically bound water. The structure of the clay is not altered that much at this temperature. Inside the bisque kiln, the work is stacked a little, small bowl inside a larger bowl and onto a heavy plate. Smaller items like decorations or drink coasters might get stacked several high. Consideration is paid to the weight of the stack and shape of the work. A bisque kiln can fire about one and a half times the amount of work that the glaze kiln can fire. The firing takes about 10 hours to complete the cycle and about two days to cool down. Once it has been emptied the work is placed in the glaze room ready for you to decorate! Step Six – Glazing Decorating your work with colour can be a lot of fun – and time consuming! There are three main options for surface treatment at this stage: Oxide Washes Underglazes Glazes Washes and underglazes do not “glaze” the work – It will still need a layer of glaze to fully seal the clay (washes don’t need glaze on surfaces not designed for food or liquid as they can gloss up a little on their own). Underglazes are stable colourants that turn out pretty much how they look in the jar. They can be mixed with each other to form other colours and can be used like water colours to paint onto your work. Mostly they should have a clear glaze on top to seal them. Oxides are a different species – the pink oxide (cobalt) wash turns out bright blue for instance. They don’t always need a glaze on top, and some glazes can change the colour of the wash! The glazes need no other “glaze” on top! Be careful of unknown glaze interactions – you can put any combination of glaze in a bowl or on a plate, but only a single glaze on the outside of any vertical surface! Glazes are a chemical reaction under heat. We don’t know the exact chemicals in the Mayco glazes we use. I can guess by the way they interact with each other, however, on the whole, you need to test every idea you have, and not run the test on a vertical surface! Simply put, glaze is a layer of glass like substance that bonds with the clay underneath. Clay is made of silica, alumina and water. Glaze is made of mostly silica. Silica has a melting point of 1700°C and we fire to 1240°C. The silica requires a “flux” to help it melt at the lower temperature. Fluxes can be all sorts of chemicals – a common one is calcium – calcium has a melting point of 2500°C, however, together they both melt at a much lower temperature! Colourants are metal oxides like cobalt (blue), chrome (green through black), copper (green, blue, even red!), manganese (black, purple and pink) iron (red brown), etc. Different chemicals in the glaze can have dramatic effects. for example, barium carbonate (which we don’t use) turns manganese bright pink! Other elements can turn manganese dioxide brown, blue, purple and reddish brown. Manganese dioxide is a flux in and of itself as well. So, glazes that get their black and purple colours, often interact with other glazes and RUN! Our mirror black is a good example – it mixes really well with many glazes because it fluxes them – causes them to melt faster. It will also bring out many beautiful colours in the glazes because it’s black colouring most definitely comes from manganese dioxide! Glaze chemistry is a whole subject on it’s own! We use commercial Mayco glazes on purpose – for their huge range of colour possibilities, stability, cool interactions, artistic freedom with the ability to easily brush the glazes on and ease of use. We currently have almost 50 glazes on hand! A major project is to test the interactions of all glazes with each other. That is 2,500 test tiles!!!! I’m going to make the wall behind the wheels the feature wall of pretty colours! Step Seven – Glaze (Gloss or sometimes called “Glost”) Firing Most of the time this is the final stage of making your creation (but not always!) The glaze kiln goes to 1240°C. This is called cone 6, or midrange. It is the low end of stoneware temperatures. Stoneware clays and glazes are typically fired at cone 8 – 10, that is 1260 – 1290°C. The energy requirement to go from 1240°C to 1280°C is almost a 30% more! Our clay is formulated to vitrify (mature, turn “glass-like”) at 1240°, as are our glazes. A glaze kiln take around 12 hours to reach temperature and two to three days to cool down. Sometimes a third firing process is required – this is for decoration that is added to work after the glaze firing. For example – adding precious metals and lustres. this firing temperature is usually around 600 – 800°C depending upon the techniques being used. There are many students interested in gold and silver trims – we will be doing this third type of firing soon! After firing your work will be in the student finished work shelves. Remember to pay for it before you head out the door! There is a small extra charge for using porcelain clay (it’s more than twice the price of regular clay), and for any third firing process! Once your work has been fired it can not turn back into clay for millennia – so don’t fire it if you don’t like it! Put it in the bucket for recycling. https://firebirdstudios.com.au/the-process-of-making-pottery/The form of the jug has been in use for many centuries.Stoneware jug. Two tone brown glaze with pierced lip behind spout. Spout chipped.None.flagstaff hill, warrnambool, shipwrecked-coast, flagstaff-hill, flagstaff-hill-maritime-museum, maritime-museum, shipwreck-coast, flagstaff-hill-maritime-village, jug, ceramic jug -
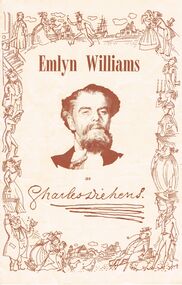 Bendigo Historical Society Inc.
Document - EMLYN WILLIAMS AS CHARLES DICKENS, 1958
Emlyn Williams as Charles Dickens. Giving a Solo Performance of Scenes from the Famous Novels and Stories. Tour of New Zealand and Australia, 1958. D D O'Conner Productions Ltd.., in association with the Australian Elizabethan Theatre Trust. 1 Moving in Society. 2 Paul. 3 Mr Bob Sawyer Gives a Bachelor Party. 4 The Signalman. 5 Mr Chops. 6 The Fancy Ball. The Adoptions . . . The Desk . . . The Nature of the Performance. During the fifties of the last century, Charles Dickens, at the Height of his fame as a novelist, ventured on something quite new; he gave, in Birmingham, a public 'reading' of one of his stories. This turned out to be an historic occasion, opening up an extraordinary career for the great writer. Each 'Reading' was more sensationally successful than the last. The word was put into inverted commas because nothing could have been less like reading than Dickens's dramatic performance. Something like a hundred years later at the Criterion Theatre, EMILYN WILLIAMS appeared before the London public 'as Charles Dicken's, giving a solo performance of scenes from the novels.' At this point the actor had been a star of . . . Personal Manager for Emlyn Williams: Alan Cambell. Stage Director: Tony Ward. Secretary and Accountant: Aubrey Thomas. Manager for the Australian Elizabethan Theatre Trust: Mary Rawdon. EMILYN WILLIAMS. Emlyn Williams, as actor, playwright of director (often in all three capacities simultaneously) has been in the theatre since he acquired the degree of M.A. and shook from his feet the dust of Oxford. Born in Flintshire, North Wales, in 1905, the son of a village inn-keeper, he spoke only Welsh as a child and learned English at school - a boyhood freely depicted in his comedy, 'The Druid's Rest.' At the age of ten he won a scholarship to the local Holywell County School, and at the age of seventeen another scholarship (in French) to Christ Church, Oxford. Once at the University hw discovered the theatre, by means of the Dramatic Society, and realized at once it was to dominate his life. While he . . . Includes photo of E Williams. Advertisement for DECCA Records, Emlyn Williams as Charles Dickens, Volume 1.Back cover photograph of Emlyn Williams. Second Programme in Australia: Emlyn Williams as 'A Boy Growing Up' An entertainment from the stories of Dylan Thomas. 'Gorgeously Funny' - The observer, London. Cover well decorated with sketches and photo of Emlyn WilliamsPeerless Press Pty. Ltd.cottage, miners, emlyn williams as charles dickens. giving a solo performance of scenes from the famous novels and stories. tour of new zealand and australia, 1958. d d o'conner productions ltd.., in association with the australian elizabethan theatre trust. 1 moving in society. 2 paul. 3 mr bob sawyer gives a bachelor party. 4 the signalman. 5 mr chops. 6 the fancy ball. the adoptions . . . the desk . . . the nature of the performance. during the fifties of the last century, novelist, ventured on something quite new, in birmingham, a public 'reading'. an historic occasion, opening up a career 'reading' criterion theatre solo performance novels.' actor had been a star of . . . personal manager for emlyn williams: alan cambell. stage director: tony ward. secretary and accountant: aubrey thomas. manager for the australian elizabethan theatre trust: mary rawdon. actor, playwright of director (often in all three capacities simultaneously) degree of m.a. oxford. born in flintshire, north wales, in 1905, village inn-keeper, spoke welsh learned english at school. comedy, 'the druid's rest.' won a scholarship to the local holywell county school, and at the age of seventeen another scholarship (in french) to christ church, oxford. university he discovered the theatre, dramatic society. photo of e williams. advertisement for decca records, as charles dickens, volume 1.back cover photograph of emlyn williams. second programme in australia: emlyn williams as 'a boy growing up' stories of dylan thomas. 'gorgeously funny' - the observer, london. -
 Bendigo Historical Society Inc.
Document - LONG GULLY HISTORY GROUP COLLECTION: OLD LONG GULLY FROM RAE'S HILL TO MCGOWAN ST
Titled Old Long Gully From Rae's Hill to McGowan St. LG. West Side - Jack Read Painter etc, Norris Bros Black Shop, Norris Bros Wood Yard & Chaff Mills, Iron Bark East Gold Mine, Sunday School, Tennis Courts Sunday School & Church, LG Fire Brigade, Creeth Street, Mine Managers Residence, Shop, Shop Mrs Hocking, Chinese Laundry, Allpress the Baker, Greenfell the Butcher, Hairdresser Beckinsall was the Fire Brigade Hotel, Dick White the Saddler, Store, Hotel Rose of Australia, Woodyard, Blacksmith Shop Wagon Repairer, Hotel Kocks (Pioneer Hotel), 2 China Shops owned by Chinese, Hotel Silver mines Hotel, Police Station, Grocers Shop (per? Reef Mine Hotel) E Bryant, Mine Windmill, Church Residence, Minister. East Side - Hopetoun Band R, Manchester Arms Hotel, Minister House, Church, IOR Hall, Shop Lollies Icecream, Boot Maker & Repairer, Back Smith Shop, Shop Childrens Wear, Butchers Shop, Creeth Street, Grocers Shop, Lolly Shop & Soft Drinks, Boot Maker & Repairer, Residence (Davey's), Lollie Shop (Fields), Dressmaker, LG Post Office (M Webb), Millars Bakers Shop, Butcher Shop, Mechanics Institute Books & Paper & Billiard Room, Connell the Baker, Dr SElby, Pentreath Organ Builder & Tuner, Blacksmith Shop, Hexagon Toilet, Kocks Machine Shop, Kocks Mine Office, Kocks Material Shop, Police Station, Dyson's Dam Warm waer, Air Station, Mine Battery stone crusher 80 head approx, Kocks Mine, Needle Mine. Some notes written at the end - Norm Shotples used to have Barber Shop - he has gone to Queensland, Violet Street started off as the German School, Wells Street used to run through Victorian Consol ? the other side, Comet Hill would like a visit. Contact Helen Gorlay at Violet Street would line to some video. Alan has good info on the Long Gully School. Betty has book. Views of Bendigo. Frank Cusack - Bendigo Trust. Bendigo School Hisking? School, Violet Street. Older levels lo?ing at Architecture.bendigo, history, long gully history group, the long gully history group - old long gully from rae's hill to mcgowan st, jack read, norris bros, iron bark east gold mine, long gully fire brigade, mrs hicking, allpress, greenfell, beckinsall, dick white, rose of australia, hopetoun band r, manchester arms hotel, ior hall, davey's, fields, m webb, millars, mechanics institute & billiard room, kocks pioneer hoel, silver mines hotel, e bryant, windmill mine, pere? reef mine hotel, connell, dr selby, pentreath, kocks machine shop, kocks mine office, kocks material shop, dyson's dam, kocks mine, needle mine, norm shotples, german school, victoria consols, helen gorlay, long gully school, frank cusack, bendigo trust -
Bendigo Historical Society Inc.
Document - NEW CHUM LINE OF REEF - NOTES ON SHAFT DETAILS ON THE NEW CHUM LINE OF REEF
Ten pages and one smaller page of notes showing depth of shaft, sill, size of shaft, relation to line of reef, depth bottom plat, depth to bottom of well, number of compartments, reference and remarks. Mines mentioned are: Young Chum, Old Chum (Old South), Shamrock, Shenandoah, New Chum Railway, Eureka Ext'd, South Belle Vue United, Lansell's 222, Denis Shaft, New Chum United, Ellesmere (North Shaft), New Chum Consolidated, Ellesmere No 1 or (South Shaft) also known as New Chum Coy, Garibaldi, Craven's, Lansell's Bit 180, North Old Chum, New Chum & Victoria, Old Chum, Lazarus New Chum Main, Lazarus New Chum (Old), Victoria Reef Gold (Ironbark), Victoria Consols, Adventure & Advance, Gt Central Victoria, Ballerstedt, Humbold, Victoria (Reef) Quartz, Pearl (later Hercules New Chum), Hercules Extended (Pearl (South) later, North Hercules, Hercules and Energetic, Hercules (Old),South Devonshire, Duchess Tribute, New St Mungo, Duke of Edinburgh, New Victoria Catherine (later Hercules Consols), Dixon's Tribute, Great Victoria Extended, Hopewell, Saxon & Celt Extended, St Mungo, Princess Alexander,West United Devonshire, United Devonshire, Duchess of Edinburgh, Sadowa, (Old) St Mungo, Lady Barkly, Princess Alice (South St Mungo) previously Gov. Barkly, Unicorn (Trib), Phoenix, Williams (New), Acadia Catherine, William United (Old Shaft), Snob's Hill Shaft, York & Durham, Belmont & Saxby, Ellenborough, Catherine Reef Extended, New Franklin, Murchison, Catherine Reef United Main Shaft, Catherine Reef United South Shaft. Small page has notes on the York and Durham: Reference - Matthew Mann - Mine Manager's Report 3/7/1893. This paragraph: Quote - 'Also measured main shaft from surface 1,430 and found it to be 1,416 feet and from Brace - 1,428 feet. Poppet legs 12 feet. Reference - Matthew Mann - Mine Manager's Report 15/7/1893 'Received cheque from La Belle Co. for 2 pound 13 shillings - which I payed into credit of Company'. Note: Report shows this to happen on several occasions. Note initialled AR.document, gold, new chum line of reef, new chum line of reef, notes on shaft details on the new chum line of reef, young chum, old chum (old south), shamrock, shenandoah, new chum railway, eureka ext'd, south belle vue united, lansell's 222, denis shaft, new chum united, ellesmere (north shaft), new chum consolidated, ellesmere no 1 or (south shaft) also known as new chum coy, garibaldi, craven's, lansell's bit 180, north old chum, new chum & victoria, old chum, lazarus new chum main, lazarus new chum (old), victoria reef gold (ironbark), victoria consols, adventure & advance, gt central victoria, ballerstedt, humbold, victoria (reef) quartz, pearl (later hercules new chum), hercules extended (pearl (south) later, north hercules, hercules and energetic, hercules (old), south devonshire, duchess tribute, new st mungo, duke of edinburgh, new victoria catherine (later hercules consols), dixon's tribute, great victoria extended, hopewell, saxon & celt extended, st mungo, princess alexander, west united devonshire, united devonshire, duchess of edinburgh, sadowa, (old) st mungo, lady barkly, princess alice (south st mungo) previously gov. barkly, unicorn (trib), phoenix, williams (new), acadia catherine, william united (old shaft), snob's hill shaft, york & durham, belmont & saxby, ellenborough, catherine reef extended, new franklin, murchison, catherine reef united main shaft, catherine reef united south shaft -
 Bendigo Historical Society Inc.
Document - HISTORY OF BENDIGO PERFORMING ARTS 1870-1963, 1870-1963
History of Bendigo Performing Arts 1870 - 1963. Presented by Charles Murray Bendigo Historical Society Inc. (13 pages,paper clipped). Performers and Palaces November 24, 2000 at the Bendigo Bank Theatre BRAC View Street Bendigo. Negative of The Bendigo Liedertafel in Opera, the performance of 'Pinafore' in 1888. Names of the cast(negative) are: Back row - Miss A Gellmiek(Josephine), Mr F. Macoboy(Ralph Rackstraw), Miss Forsyth(Hebe), Mr. M. Macoboy (Sir Joseph Porter), Miss E. O'Flaherty (Little Buttercap), Mr. L. Germann(Captain Corcoran). Front Row: - Mr. C,. Pallett (Bill Bobstay), Mr. H. Monaghan(Conductor), Dr. Penfold (president), Mr. H. M. Marks(Stage manager), Mr. A. Tawse (Dick Deadeye). The Bendigo Lieddertafel waqs extablished in 1884 by MNr. A. T. Crook. Mr. William Brown, the well known solicitor, took and active part along with his brother, Mr. T. Brown, in its inauguration. Mr. W. Brown always took a warm interest in matters musical, and for many years was one of the most prominent singers in the district. Contemporary with him in the sixties were Mrs. Betham and Mrs. Ellis, and in the seventies, Mrs. E. E. Casey. Negative of halla's Premier City Band. Standing ,from left to right - H. Middleton, T. Ash, J. Graham, G. Foster, W. Hicks, S. Mauley, J. Eaton, V. Byrne (Drum Major), - Sullivan, R. Lindsay, C. Crawford, R. Meakin, D. Westphalen, W. Hall, G. Hunter, B. Broadbent, W. Higginbotham. Sitting, from left to right - T. Sayer, R. E. Crawford, C. Foster, J. Mappin, G. Meakin, G. Coleman, F. Lindsay, Nat. Hallas (Bandmaster), J. Swift, C. Anderson, J. Armstrong, W. Mappin (at back), I. Moore (in front), W. Bannister, J. Whitlam, J. Daley, Bert Daley. Negative of Mr. W. J. Dillon as 'Hamlet'. Negative of Mr. Tone and Mr. Nalder, The Grave Diggers in 'Hamlet'. Negative of Amy Castle. Negative of Mr. E. A. Bindley, Conductor. Negative of miss Pauline Bindley as Hamletta. Negative from 'Boccoccio' 1909. Mr M. Gallagher (Lotteringhi), Mr. G. Brayshaw (Scalza), Mr. A. E. Sayer (Lambertuccio). Negative of Kob Samuels.bendigo, tourism, theatre history 1870-1963 -
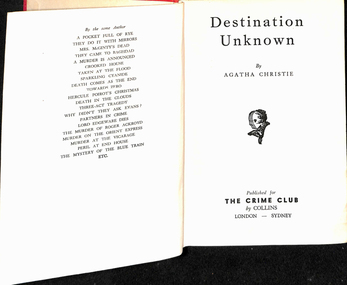 Melbourne Tram Museum
Book, Agatha Christie, "Destination unknown", 1954
Book, hard cover, 12 sections, sewn with end papers, 210 pages, titled "Destination unknown", written by Agatha Christie, published by The Crime Club, 1954. Has the stamp of the Footscray Tramway Library, asking it to be returned within 14 days inside the front cover and in many places throughout the book, along with Number "606" on the inside front cover and on the spine of the book. The book was part of a library run by the depot staff to provide materials during broken shifts and to take home. From Wikipedia - accessed 26/12/2019: Plot summary Hilary Craven, a deserted wife and bereaved mother, is planning suicide in a Moroccan hotel, when she is asked by British secret agent Jessop to undertake a dangerous mission as an alternative to taking an overdose of sleeping pills. The task, which she accepts, is to impersonate the wife of Thomas Betterton, a nuclear scientist who has disappeared and may have defected to the Soviet Union. Soon she finds herself in a group of oddly-assorted travellers being transported to the unknown destination of the title. The destination turns out to be a secret scientific research facility disguised as a modern leper colony and medical research center at a remote location in the Atlas Mountains. The scientists are well-treated, but they are not allowed to leave the facility, and they are locked in secret areas deep inside the mountain whenever government officials and other outsiders visit. Hilary Craven successfully passes herself as Betterton's wife Olive, because he is miserable and wants desperately to escape. Hilary discovers that the facility was built by the fabulously wealthy and somewhat villainous Mr Aristides, for financial rather than political ends. He has lured the world's best young scientists to it with various deceptions so that he can later sell their services back to the world's governments and corporations for a huge profit. She falls in love with Andrew Peters, a handsome young American who was in the group with her on their journey to the facility. With the help of clues she has left along the way, Jessop eventually locates and rescues her and the others held there. Peters turns out also to be on a mission, intent on bringing Betterton to justice for the murder of his first wife. Betterton, revealed to also be a scientific fraud who plagiarized his work, is arrested. Hilary no longer wants to die, and she and Peters are free to begin their life together.On the top of the first page "13/3" indicating the price, "m/arz"? on the bottom left hand corner and inside the front cover the label of "Robertson & Mullens Ltd" booksellers.trams, tramways, footscray depot, libraries, novels, personnel, crews, shifts