Showing 25994 items matching "weatherly-library"
-
 Ringwood and District Historical Society
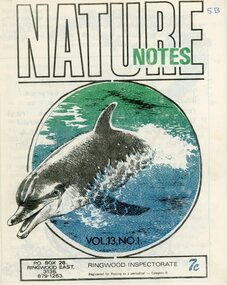
Magazine, Nature Notes magazines 1976 (Vol 13) Issues 1-10
Printed magazinesFrom “The History of Ringwood East Primary School 1924-1990” 'Nature Notes' was a children's nature magazine, produced at Ringwood East Primary School for approximately 10 years. It came to us from Blackburn Lake Primary School and before that Blackburn South Primary School. It was originally developed by Harry Hopkins in 1964. He was a District Inspector of schools and also President of the Gould League at the time. Fred Rodgers and Len Delacca were original contributors, Fred writing on native flora and Len writing on native flora [fauna]. It came to Ringwood East in 1975 with Keith Dyer, a teacher on the staff, as editor. The magazine had a large circulation, supplying to schools, private subscribers and societies as well as sending many complimentary copies to libraries, and museums; distribution was throughout Australia. The Magazine continued to grow under consequent editors, Anne Gibson (who also developed 'Probe' a junior version of 'Nature Notes' designed for grades 2 and 4), Barry Archibald, Colin Bull, Russell Hall, Deborah Brydon and Mandy Charmichael. The editors would research, compile, edit and print the magazine which was a monthly issue. The parents would then come in on a Monday to collate, fold and staple. This usually was a morning’s work but this depended on how many helping hands there were. The Wednesday was packing and posting day and in the early days the parents used to deliver the local orders to save costs. Subscribers were sought through advertisements in various school literature and material. The Parents Club received an annual remuneration for their hard work and in turn were able to help purchase many items needed throughout the school. These magazines were packed with really good nature information and taught children how to look after their environment using articles, puzzles, riddles, questions and quizzes. There were special characters as well like 'Wally the Wombat' and 'Ernie the Echidna' for the children to follow on various adventures every month. Children would enjoy watching them crop up in each edition. The magazine stayed with us at Ringwood East until 1986, when due to restructuring and various other things was moved to Healesville Sanctuary where it adopted a new format and name. From here it has since folded and so the end of 'Nature Notes'. 'Nature Notes' was a very successful magazine. Many people through the years devoted a lot of time and energy to its production and readers throughout Australia, as well as its many creators and producers during its 20-year existence, mourn its passing. Written from material supplied by Barry Archibald (editor 'Nature Notes' 1977-78) Margaret Preece & Lois Aders (parents in charge of collating and packaging during its last years of existence. -
 Ringwood and District Historical Society
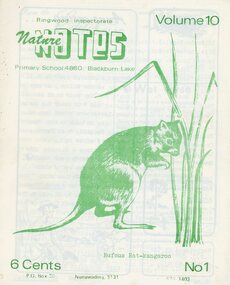
Magazine, Nature Notes magazines 1973 (Vol 10) Issues 1-4, 6-10
Printed magazinesFrom “The History of Ringwood East Primary School 1924-1990” 'Nature Notes' was a children's nature magazine, produced at Ringwood East Primary School for approximately 10 years. It came to us from Blackburn Lake Primary School and before that Blackburn South Primary School. It was originally developed by Harry Hopkins in 1964. He was a District Inspector of schools and also President of the Gould League at the time. Fred Rodgers and Len Delacca were original contributors, Fred writing on native flora and Len writing on native flora [fauna]. It came to Ringwood East in 1975 with Keith Dyer, a teacher on the staff, as editor. The magazine had a large circulation, supplying to schools, private subscribers and societies as well as sending many complimentary copies to libraries, and museums; distribution was throughout Australia. The Magazine continued to grow under consequent editors, Anne Gibson (who also developed 'Probe' a junior version of 'Nature Notes' designed for grades 2 and 4), Barry Archibald, Colin Bull, Russell Hall, Deborah Brydon and Mandy Charmichael. The editors would research, compile, edit and print the magazine which was a monthly issue. The parents would then come in on a Monday to collate, fold and staple. This usually was a morning’s work but this depended on how many helping hands there were. The Wednesday was packing and posting day and in the early days the parents used to deliver the local orders to save costs. Subscribers were sought through advertisements in various school literature and material. The Parents Club received an annual remuneration for their hard work and in turn were able to help purchase many items needed throughout the school. These magazines were packed with really good nature information and taught children how to look after their environment using articles, puzzles, riddles, questions and quizzes. There were special characters as well like 'Wally the Wombat' and 'Ernie the Echidna' for the children to follow on various adventures every month. Children would enjoy watching them crop up in each edition. The magazine stayed with us at Ringwood East until 1986, when due to restructuring and various other things was moved to Healesville Sanctuary where it adopted a new format and name. From here it has since folded and so the end of 'Nature Notes'. 'Nature Notes' was a very successful magazine. Many people through the years devoted a lot of time and energy to its production and readers throughout Australia, as well as its many creators and producers during its 20-year existence, mourn its passing. Written from material supplied by Barry Archibald (editor 'Nature Notes' 1977-78) Margaret Preece & Lois Aders (parents in charge of collating and packaging during its last years of existence. -
 Ringwood and District Historical Society
Magazine, Nature Notes magazines 1975 (Vol 12) Issues 1-10
Printed magazinesFrom “The History of Ringwood East Primary School 1924-1990” 'Nature Notes' was a children's nature magazine, produced at Ringwood East Primary School for approximately 10 years. It came to us from Blackburn Lake Primary School and before that Blackburn South Primary School. It was originally developed by Harry Hopkins in 1964. He was a District Inspector of schools and also President of the Gould League at the time. Fred Rodgers and Len Delacca were original contributors, Fred writing on native flora and Len writing on native flora [fauna]. It came to Ringwood East in 1975 with Keith Dyer, a teacher on the staff, as editor. The magazine had a large circulation, supplying to schools, private subscribers and societies as well as sending many complimentary copies to libraries, and museums; distribution was throughout Australia. The Magazine continued to grow under consequent editors, Anne Gibson (who also developed 'Probe' a junior version of 'Nature Notes' designed for grades 2 and 4), Barry Archibald, Colin Bull, Russell Hall, Deborah Brydon and Mandy Charmichael. The editors would research, compile, edit and print the magazine which was a monthly issue. The parents would then come in on a Monday to collate, fold and staple. This usually was a morning’s work but this depended on how many helping hands there were. The Wednesday was packing and posting day and in the early days the parents used to deliver the local orders to save costs. Subscribers were sought through advertisements in various school literature and material. The Parents Club received an annual remuneration for their hard work and in turn were able to help purchase many items needed throughout the school. These magazines were packed with really good nature information and taught children how to look after their environment using articles, puzzles, riddles, questions and quizzes. There were special characters as well like 'Wally the Wombat' and 'Ernie the Echidna' for the children to follow on various adventures every month. Children would enjoy watching them crop up in each edition. The magazine stayed with us at Ringwood East until 1986, when due to restructuring and various other things was moved to Healesville Sanctuary where it adopted a new format and name. From here it has since folded and so the end of 'Nature Notes'. 'Nature Notes' was a very successful magazine. Many people through the years devoted a lot of time and energy to its production and readers throughout Australia, as well as its many creators and producers during its 20-year existence, mourn its passing. Written from material supplied by Barry Archibald (editor 'Nature Notes' 1977-78) Margaret Preece & Lois Aders (parents in charge of collating and packaging during its last years of existence. -
 Ringwood and District Historical Society
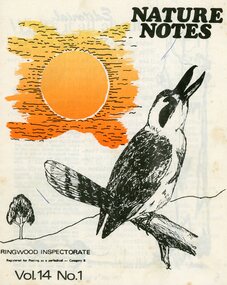
Magazine, Nature Notes magazines 1977 (Vol 14) Issues 1-10
Printed magazinesFrom “The History of Ringwood East Primary School 1924-1990” 'Nature Notes' was a children's nature magazine, produced at Ringwood East Primary School for approximately 10 years. It came to us from Blackburn Lake Primary School and before that Blackburn South Primary School. It was originally developed by Harry Hopkins in 1964. He was a District Inspector of schools and also President of the Gould League at the time. Fred Rodgers and Len Delacca were original contributors, Fred writing on native flora and Len writing on native flora [fauna]. It came to Ringwood East in 1975 with Keith Dyer, a teacher on the staff, as editor. The magazine had a large circulation, supplying to schools, private subscribers and societies as well as sending many complimentary copies to libraries, and museums; distribution was throughout Australia. The Magazine continued to grow under consequent editors, Anne Gibson (who also developed 'Probe' a junior version of 'Nature Notes' designed for grades 2 and 4), Barry Archibald, Colin Bull, Russell Hall, Deborah Brydon and Mandy Charmichael. The editors would research, compile, edit and print the magazine which was a monthly issue. The parents would then come in on a Monday to collate, fold and staple. This usually was a morning’s work but this depended on how many helping hands there were. The Wednesday was packing and posting day and in the early days the parents used to deliver the local orders to save costs. Subscribers were sought through advertisements in various school literature and material. The Parents Club received an annual remuneration for their hard work and in turn were able to help purchase many items needed throughout the school. These magazines were packed with really good nature information and taught children how to look after their environment using articles, puzzles, riddles, questions and quizzes. There were special characters as well like 'Wally the Wombat' and 'Ernie the Echidna' for the children to follow on various adventures every month. Children would enjoy watching them crop up in each edition. The magazine stayed with us at Ringwood East until 1986, when due to restructuring and various other things was moved to Healesville Sanctuary where it adopted a new format and name. From here it has since folded and so the end of 'Nature Notes'. 'Nature Notes' was a very successful magazine. Many people through the years devoted a lot of time and energy to its production and readers throughout Australia, as well as its many creators and producers during its 20-year existence, mourn its passing. Written from material supplied by Barry Archibald (editor 'Nature Notes' 1977-78) Margaret Preece & Lois Aders (parents in charge of collating and packaging during its last years of existence. -
 Ringwood and District Historical Society
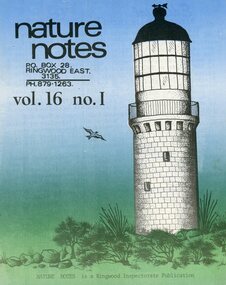
Magazine, Nature Notes magazines 1979 (Vol 16) Issues 1-5, 7-8, 10
Printed magazinesFrom “The History of Ringwood East Primary School 1924-1990” 'Nature Notes' was a children's nature magazine, produced at Ringwood East Primary School for approximately 10 years. It came to us from Blackburn Lake Primary School and before that Blackburn South Primary School. It was originally developed by Harry Hopkins in 1964. He was a District Inspector of schools and also President of the Gould League at the time. Fred Rodgers and Len Delacca were original contributors, Fred writing on native flora and Len writing on native flora [fauna]. It came to Ringwood East in 1975 with Keith Dyer, a teacher on the staff, as editor. The magazine had a large circulation, supplying to schools, private subscribers and societies as well as sending many complimentary copies to libraries, and museums; distribution was throughout Australia. The Magazine continued to grow under consequent editors, Anne Gibson (who also developed 'Probe' a junior version of 'Nature Notes' designed for grades 2 and 4), Barry Archibald, Colin Bull, Russell Hall, Deborah Brydon and Mandy Charmichael. The editors would research, compile, edit and print the magazine which was a monthly issue. The parents would then come in on a Monday to collate, fold and staple. This usually was a morning’s work but this depended on how many helping hands there were. The Wednesday was packing and posting day and in the early days the parents used to deliver the local orders to save costs. Subscribers were sought through advertisements in various school literature and material. The Parents Club received an annual remuneration for their hard work and in turn were able to help purchase many items needed throughout the school. These magazines were packed with really good nature information and taught children how to look after their environment using articles, puzzles, riddles, questions and quizzes. There were special characters as well like 'Wally the Wombat' and 'Ernie the Echidna' for the children to follow on various adventures every month. Children would enjoy watching them crop up in each edition. The magazine stayed with us at Ringwood East until 1986, when due to restructuring and various other things was moved to Healesville Sanctuary where it adopted a new format and name. From here it has since folded and so the end of 'Nature Notes'. 'Nature Notes' was a very successful magazine. Many people through the years devoted a lot of time and energy to its production and readers throughout Australia, as well as its many creators and producers during its 20-year existence, mourn its passing. Written from material supplied by Barry Archibald (editor 'Nature Notes' 1977-78) Margaret Preece & Lois Aders (parents in charge of collating and packaging during its last years of existence. -
 Ringwood and District Historical Society
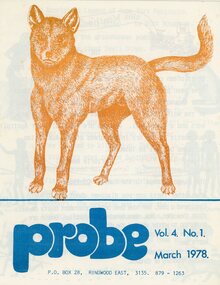
Magazine, Probe magazines 1978 (Vol 4) Issues 1-5, 7-10
Printed magazinesFrom “The History of Ringwood East Primary School 1924-1990” 'Nature Notes' was a children's nature magazine, produced at Ringwood East Primary School for approximately 10 years. It came to us from Blackburn Lake Primary School and before that Blackburn South Primary School. It was originally developed by Harry Hopkins in 1964. He was a District Inspector of schools and also President of the Gould League at the time. Fred Rodgers and Len Delacca were original contributors, Fred writing on native flora and Len writing on native flora [fauna]. It came to Ringwood East in 1975 with Keith Dyer, a teacher on the staff, as editor. The magazine had a large circulation, supplying to schools, private subscribers and societies as well as sending many complimentary copies to libraries, and museums; distribution was throughout Australia. The Magazine continued to grow under consequent editors, Anne Gibson (who also developed 'Probe' a junior version of 'Nature Notes' designed for grades 2 and 4), Barry Archibald, Colin Bull, Russell Hall, Deborah Brydon and Mandy Charmichael. The editors would research, compile, edit and print the magazine which was a monthly issue. The parents would then come in on a Monday to collate, fold and staple. This usually was a morning’s work but this depended on how many helping hands there were. The Wednesday was packing and posting day and in the early days the parents used to deliver the local orders to save costs. Subscribers were sought through advertisements in various school literature and material. The Parents Club received an annual remuneration for their hard work and in turn were able to help purchase many items needed throughout the school. These magazines were packed with really good nature information and taught children how to look after their environment using articles, puzzles, riddles, questions and quizzes. There were special characters as well like 'Wally the Wombat' and 'Ernie the Echidna' for the children to follow on various adventures every month. Children would enjoy watching them crop up in each edition. The magazine stayed with us at Ringwood East until 1986, when due to restructuring and various other things was moved to Healesville Sanctuary where it adopted a new format and name. From here it has since folded and so the end of 'Nature Notes'. 'Nature Notes' was a very successful magazine. Many people through the years devoted a lot of time and energy to its production and readers throughout Australia, as well as its many creators and producers during its 20-year existence, mourn its passing. Written from material supplied by Barry Archibald (editor 'Nature Notes' 1977-78) Margaret Preece & Lois Aders (parents in charge of collating and packaging during its last years of existence. -
 Ringwood and District Historical Society
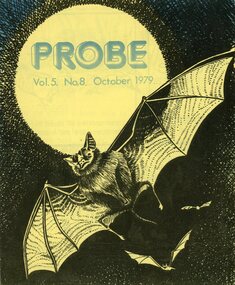
Magazine, Probe magazines 1979 (Vol 5) Issues 8-10
Printed magazinesFrom “The History of Ringwood East Primary School 1924-1990” 'Nature Notes' was a children's nature magazine, produced at Ringwood East Primary School for approximately 10 years. It came to us from Blackburn Lake Primary School and before that Blackburn South Primary School. It was originally developed by Harry Hopkins in 1964. He was a District Inspector of schools and also President of the Gould League at the time. Fred Rodgers and Len Delacca were original contributors, Fred writing on native flora and Len writing on native flora [fauna]. It came to Ringwood East in 1975 with Keith Dyer, a teacher on the staff, as editor. The magazine had a large circulation, supplying to schools, private subscribers and societies as well as sending many complimentary copies to libraries, and museums; distribution was throughout Australia. The Magazine continued to grow under consequent editors, Anne Gibson (who also developed 'Probe' a junior version of 'Nature Notes' designed for grades 2 and 4), Barry Archibald, Colin Bull, Russell Hall, Deborah Brydon and Mandy Charmichael. The editors would research, compile, edit and print the magazine which was a monthly issue. The parents would then come in on a Monday to collate, fold and staple. This usually was a morning’s work but this depended on how many helping hands there were. The Wednesday was packing and posting day and in the early days the parents used to deliver the local orders to save costs. Subscribers were sought through advertisements in various school literature and material. The Parents Club received an annual remuneration for their hard work and in turn were able to help purchase many items needed throughout the school. These magazines were packed with really good nature information and taught children how to look after their environment using articles, puzzles, riddles, questions and quizzes. There were special characters as well like 'Wally the Wombat' and 'Ernie the Echidna' for the children to follow on various adventures every month. Children would enjoy watching them crop up in each edition. The magazine stayed with us at Ringwood East until 1986, when due to restructuring and various other things was moved to Healesville Sanctuary where it adopted a new format and name. From here it has since folded and so the end of 'Nature Notes'. 'Nature Notes' was a very successful magazine. Many people through the years devoted a lot of time and energy to its production and readers throughout Australia, as well as its many creators and producers during its 20-year existence, mourn its passing. Written from material supplied by Barry Archibald (editor 'Nature Notes' 1977-78) Margaret Preece & Lois Aders (parents in charge of collating and packaging during its last years of existence. -
 Ringwood and District Historical Society
Archive, Parent Record for Nature Notes & Probe magazines Collection
Parent Record for Archive collection of photographs, documents, minutes etc relating to the Nature Notes and Probe magazines published by the Ringwood Electorate State/Primary SchoolsFrom “The History of Ringwood East Primary School 1924-1990” 'Nature Notes' was a children's nature magazine, produced at Ringwood East Primary School for approximately 10 years. It came to us from Blackburn Lake Primary School and before that Blackburn South Primary School. It was originally developed by Harry Hopkins in 1964. He was a District Inspector of schools and also President of the Gould League at the time. Fred Rodgers and Len Delacca were original contributors, Fred writing on native flora and Len writing on native flora [fauna]. It came to Ringwood East in 1975 with Keith Dyer, a teacher on the staff, as editor. The magazine had a large circulation, supplying to schools, private subscribers and societies as well as sending many complimentary copies to libraries, and museums; distribution was throughout Australia. The Magazine continued to grow under consequent editors, Anne Gibson (who also developed 'Probe' a junior version of 'Nature Notes' designed for grades 2 and 4), Barry Archibald, Colin Bull, Russell Hall, Deborah Brydon and Mandy Charmichael. The editors would research, compile, edit and print the magazine which was a monthly issue. The parents would then come in on a Monday to collate, fold and staple. This usually was a morning’s work but this depended on how many helping hands there were. The Wednesday was packing and posting day and in the early days the parents used to deliver the local orders to save costs. Subscribers were sought through advertisements in various school literature and material. The Parents Club received an annual remuneration for their hard work and in turn were able to help purchase many items needed throughout the school. These magazines were packed with really good nature information and taught children how to look after their environment using articles, puzzles, riddles, questions and quizzes. There were special characters as well like 'Wally the Wombat' and 'Ernie the Echidna' for the children to follow on various adventures every month. Children would enjoy watching them crop up in each edition. The magazine stayed with us at Ringwood East until 1986, when due to restructuring and various other things was moved to Healesville Sanctuary where it adopted a new format and name. From here it has since folded and so the end of 'Nature Notes'. 'Nature Notes' was a very successful magazine. Many people through the years devoted a lot of time and energy to its production and readers throughout Australia, as well as its many creators and producers during its 20-year existence, mourn its passing. Written from material supplied by Barry Archibald (editor 'Nature Notes' 1977-78) Margaret Preece & Lois Aders (parents in charge of collating and packaging during its last years of existence. -
 Ringwood and District Historical Society
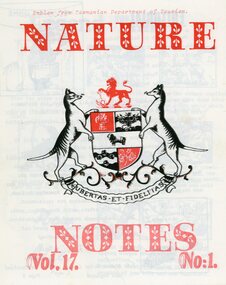
Magazine, Nature Notes magazines 1980 (Vol 17) Issues 1-10
Printed magazinesFrom “The History of Ringwood East Primary School 1924-1990” 'Nature Notes' was a children's nature magazine, produced at Ringwood East Primary School for approximately 10 years. It came to us from Blackburn Lake Primary School and before that Blackburn South Primary School. It was originally developed by Harry Hopkins in 1964. He was a District Inspector of schools and also President of the Gould League at the time. Fred Rodgers and Len Delacca were original contributors, Fred writing on native flora and Len writing on native flora [fauna]. It came to Ringwood East in 1975 with Keith Dyer, a teacher on the staff, as editor. The magazine had a large circulation, supplying to schools, private subscribers and societies as well as sending many complimentary copies to libraries, and museums; distribution was throughout Australia. The Magazine continued to grow under consequent editors, Anne Gibson (who also developed 'Probe' a junior version of 'Nature Notes' designed for grades 2 and 4), Barry Archibald, Colin Bull, Russell Hall, Deborah Brydon and Mandy Charmichael. The editors would research, compile, edit and print the magazine which was a monthly issue. The parents would then come in on a Monday to collate, fold and staple. This usually was a morning’s work but this depended on how many helping hands there were. The Wednesday was packing and posting day and in the early days the parents used to deliver the local orders to save costs. Subscribers were sought through advertisements in various school literature and material. The Parents Club received an annual remuneration for their hard work and in turn were able to help purchase many items needed throughout the school. These magazines were packed with really good nature information and taught children how to look after their environment using articles, puzzles, riddles, questions and quizzes. There were special characters as well like 'Wally the Wombat' and 'Ernie the Echidna' for the children to follow on various adventures every month. Children would enjoy watching them crop up in each edition. The magazine stayed with us at Ringwood East until 1986, when due to restructuring and various other things was moved to Healesville Sanctuary where it adopted a new format and name. From here it has since folded and so the end of 'Nature Notes'. 'Nature Notes' was a very successful magazine. Many people through the years devoted a lot of time and energy to its production and readers throughout Australia, as well as its many creators and producers during its 20-year existence, mourn its passing. Written from material supplied by Barry Archibald (editor 'Nature Notes' 1977-78) Margaret Preece & Lois Aders (parents in charge of collating and packaging during its last years of existence. -
 Ringwood and District Historical Society
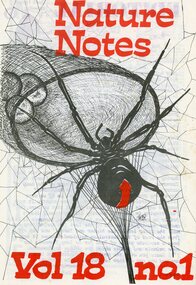
Magazine, Nature Notes magazines 1981 (Vol 18) Issues 1-10
Printed magazinesFrom “The History of Ringwood East Primary School 1924-1990” 'Nature Notes' was a children's nature magazine, produced at Ringwood East Primary School for approximately 10 years. It came to us from Blackburn Lake Primary School and before that Blackburn South Primary School. It was originally developed by Harry Hopkins in 1964. He was a District Inspector of schools and also President of the Gould League at the time. Fred Rodgers and Len Delacca were original contributors, Fred writing on native flora and Len writing on native flora [fauna]. It came to Ringwood East in 1975 with Keith Dyer, a teacher on the staff, as editor. The magazine had a large circulation, supplying to schools, private subscribers and societies as well as sending many complimentary copies to libraries, and museums; distribution was throughout Australia. The Magazine continued to grow under consequent editors, Anne Gibson (who also developed 'Probe' a junior version of 'Nature Notes' designed for grades 2 and 4), Barry Archibald, Colin Bull, Russell Hall, Deborah Brydon and Mandy Charmichael. The editors would research, compile, edit and print the magazine which was a monthly issue. The parents would then come in on a Monday to collate, fold and staple. This usually was a morning’s work but this depended on how many helping hands there were. The Wednesday was packing and posting day and in the early days the parents used to deliver the local orders to save costs. Subscribers were sought through advertisements in various school literature and material. The Parents Club received an annual remuneration for their hard work and in turn were able to help purchase many items needed throughout the school. These magazines were packed with really good nature information and taught children how to look after their environment using articles, puzzles, riddles, questions and quizzes. There were special characters as well like 'Wally the Wombat' and 'Ernie the Echidna' for the children to follow on various adventures every month. Children would enjoy watching them crop up in each edition. The magazine stayed with us at Ringwood East until 1986, when due to restructuring and various other things was moved to Healesville Sanctuary where it adopted a new format and name. From here it has since folded and so the end of 'Nature Notes'. 'Nature Notes' was a very successful magazine. Many people through the years devoted a lot of time and energy to its production and readers throughout Australia, as well as its many creators and producers during its 20-year existence, mourn its passing. Written from material supplied by Barry Archibald (editor 'Nature Notes' 1977-78) Margaret Preece & Lois Aders (parents in charge of collating and packaging during its last years of existence. -
 Ringwood and District Historical Society
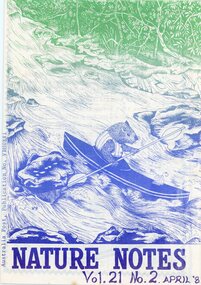
Magazine, Nature Notes magazines 1984 (Vol 21) Issues 1-5, 7-10
Printed magazinesFrom “The History of Ringwood East Primary School 1924-1990” 'Nature Notes' was a children's nature magazine, produced at Ringwood East Primary School for approximately 10 years. It came to us from Blackburn Lake Primary School and before that Blackburn South Primary School. It was originally developed by Harry Hopkins in 1964. He was a District Inspector of schools and also President of the Gould League at the time. Fred Rodgers and Len Delacca were original contributors, Fred writing on native flora and Len writing on native flora [fauna]. It came to Ringwood East in 1975 with Keith Dyer, a teacher on the staff, as editor. The magazine had a large circulation, supplying to schools, private subscribers and societies as well as sending many complimentary copies to libraries, and museums; distribution was throughout Australia. The Magazine continued to grow under consequent editors, Anne Gibson (who also developed 'Probe' a junior version of 'Nature Notes' designed for grades 2 and 4), Barry Archibald, Colin Bull, Russell Hall, Deborah Brydon and Mandy Charmichael. The editors would research, compile, edit and print the magazine which was a monthly issue. The parents would then come in on a Monday to collate, fold and staple. This usually was a morning’s work but this depended on how many helping hands there were. The Wednesday was packing and posting day and in the early days the parents used to deliver the local orders to save costs. Subscribers were sought through advertisements in various school literature and material. The Parents Club received an annual remuneration for their hard work and in turn were able to help purchase many items needed throughout the school. These magazines were packed with really good nature information and taught children how to look after their environment using articles, puzzles, riddles, questions and quizzes. There were special characters as well like 'Wally the Wombat' and 'Ernie the Echidna' for the children to follow on various adventures every month. Children would enjoy watching them crop up in each edition. The magazine stayed with us at Ringwood East until 1986, when due to restructuring and various other things was moved to Healesville Sanctuary where it adopted a new format and name. From here it has since folded and so the end of 'Nature Notes'. 'Nature Notes' was a very successful magazine. Many people through the years devoted a lot of time and energy to its production and readers throughout Australia, as well as its many creators and producers during its 20-year existence, mourn its passing. Written from material supplied by Barry Archibald (editor 'Nature Notes' 1977-78) Margaret Preece & Lois Aders (parents in charge of collating and packaging during its last years of existence. -
 Ringwood and District Historical Society
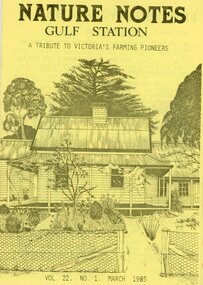
Magazine, Nature Notes magazines 1985 (Vol 22) Issues 1-9
Printed magazinesFrom “The History of Ringwood East Primary School 1924-1990” 'Nature Notes' was a children's nature magazine, produced at Ringwood East Primary School for approximately 10 years. It came to us from Blackburn Lake Primary School and before that Blackburn South Primary School. It was originally developed by Harry Hopkins in 1964. He was a District Inspector of schools and also President of the Gould League at the time. Fred Rodgers and Len Delacca were original contributors, Fred writing on native flora and Len writing on native flora [fauna]. It came to Ringwood East in 1975 with Keith Dyer, a teacher on the staff, as editor. The magazine had a large circulation, supplying to schools, private subscribers and societies as well as sending many complimentary copies to libraries, and museums; distribution was throughout Australia. The Magazine continued to grow under consequent editors, Anne Gibson (who also developed 'Probe' a junior version of 'Nature Notes' designed for grades 2 and 4), Barry Archibald, Colin Bull, Russell Hall, Deborah Brydon and Mandy Charmichael. The editors would research, compile, edit and print the magazine which was a monthly issue. The parents would then come in on a Monday to collate, fold and staple. This usually was a morning’s work but this depended on how many helping hands there were. The Wednesday was packing and posting day and in the early days the parents used to deliver the local orders to save costs. Subscribers were sought through advertisements in various school literature and material. The Parents Club received an annual remuneration for their hard work and in turn were able to help purchase many items needed throughout the school. These magazines were packed with really good nature information and taught children how to look after their environment using articles, puzzles, riddles, questions and quizzes. There were special characters as well like 'Wally the Wombat' and 'Ernie the Echidna' for the children to follow on various adventures every month. Children would enjoy watching them crop up in each edition. The magazine stayed with us at Ringwood East until 1986, when due to restructuring and various other things was moved to Healesville Sanctuary where it adopted a new format and name. From here it has since folded and so the end of 'Nature Notes'. 'Nature Notes' was a very successful magazine. Many people through the years devoted a lot of time and energy to its production and readers throughout Australia, as well as its many creators and producers during its 20-year existence, mourn its passing. Written from material supplied by Barry Archibald (editor 'Nature Notes' 1977-78) Margaret Preece & Lois Aders (parents in charge of collating and packaging during its last years of existence. -
 Ringwood and District Historical Society
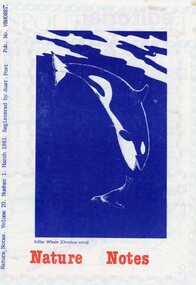
Magazine, Nature Notes magazines 1983 (Vol 20) Issues 1-5, 7-10
Printed magazinesFrom “The History of Ringwood East Primary School 1924-1990” 'Nature Notes' was a children's nature magazine, produced at Ringwood East Primary School for approximately 10 years. It came to us from Blackburn Lake Primary School and before that Blackburn South Primary School. It was originally developed by Harry Hopkins in 1964. He was a District Inspector of schools and also President of the Gould League at the time. Fred Rodgers and Len Delacca were original contributors, Fred writing on native flora and Len writing on native flora [fauna]. It came to Ringwood East in 1975 with Keith Dyer, a teacher on the staff, as editor. The magazine had a large circulation, supplying to schools, private subscribers and societies as well as sending many complimentary copies to libraries, and museums; distribution was throughout Australia. The Magazine continued to grow under consequent editors, Anne Gibson (who also developed 'Probe' a junior version of 'Nature Notes' designed for grades 2 and 4), Barry Archibald, Colin Bull, Russell Hall, Deborah Brydon and Mandy Charmichael. The editors would research, compile, edit and print the magazine which was a monthly issue. The parents would then come in on a Monday to collate, fold and staple. This usually was a morning’s work but this depended on how many helping hands there were. The Wednesday was packing and posting day and in the early days the parents used to deliver the local orders to save costs. Subscribers were sought through advertisements in various school literature and material. The Parents Club received an annual remuneration for their hard work and in turn were able to help purchase many items needed throughout the school. These magazines were packed with really good nature information and taught children how to look after their environment using articles, puzzles, riddles, questions and quizzes. There were special characters as well like 'Wally the Wombat' and 'Ernie the Echidna' for the children to follow on various adventures every month. Children would enjoy watching them crop up in each edition. The magazine stayed with us at Ringwood East until 1986, when due to restructuring and various other things was moved to Healesville Sanctuary where it adopted a new format and name. From here it has since folded and so the end of 'Nature Notes'. 'Nature Notes' was a very successful magazine. Many people through the years devoted a lot of time and energy to its production and readers throughout Australia, as well as its many creators and producers during its 20-year existence, mourn its passing. Written from material supplied by Barry Archibald (editor 'Nature Notes' 1977-78) Margaret Preece & Lois Aders (parents in charge of collating and packaging during its last years of existence. -
 Ringwood and District Historical Society
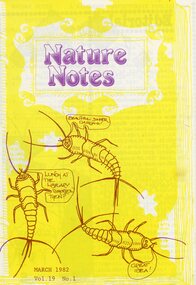
Magazine, Nature Notes magazines 1982 (Vol 19) Issues 1-10
Printed magazinesFrom “The History of Ringwood East Primary School 1924-1990” 'Nature Notes' was a children's nature magazine, produced at Ringwood East Primary School for approximately 10 years. It came to us from Blackburn Lake Primary School and before that Blackburn South Primary School. It was originally developed by Harry Hopkins in 1964. He was a District Inspector of schools and also President of the Gould League at the time. Fred Rodgers and Len Delacca were original contributors, Fred writing on native flora and Len writing on native flora [fauna]. It came to Ringwood East in 1975 with Keith Dyer, a teacher on the staff, as editor. The magazine had a large circulation, supplying to schools, private subscribers and societies as well as sending many complimentary copies to libraries, and museums; distribution was throughout Australia. The Magazine continued to grow under consequent editors, Anne Gibson (who also developed 'Probe' a junior version of 'Nature Notes' designed for grades 2 and 4), Barry Archibald, Colin Bull, Russell Hall, Deborah Brydon and Mandy Charmichael. The editors would research, compile, edit and print the magazine which was a monthly issue. The parents would then come in on a Monday to collate, fold and staple. This usually was a morning’s work but this depended on how many helping hands there were. The Wednesday was packing and posting day and in the early days the parents used to deliver the local orders to save costs. Subscribers were sought through advertisements in various school literature and material. The Parents Club received an annual remuneration for their hard work and in turn were able to help purchase many items needed throughout the school. These magazines were packed with really good nature information and taught children how to look after their environment using articles, puzzles, riddles, questions and quizzes. There were special characters as well like 'Wally the Wombat' and 'Ernie the Echidna' for the children to follow on various adventures every month. Children would enjoy watching them crop up in each edition. The magazine stayed with us at Ringwood East until 1986, when due to restructuring and various other things was moved to Healesville Sanctuary where it adopted a new format and name. From here it has since folded and so the end of 'Nature Notes'. 'Nature Notes' was a very successful magazine. Many people through the years devoted a lot of time and energy to its production and readers throughout Australia, as well as its many creators and producers during its 20-year existence, mourn its passing. Written from material supplied by Barry Archibald (editor 'Nature Notes' 1977-78) Margaret Preece & Lois Aders (parents in charge of collating and packaging during its last years of existence. -
 Ringwood and District Historical Society
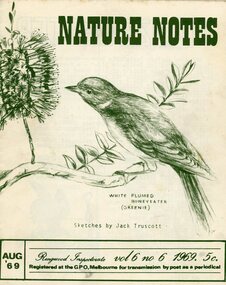
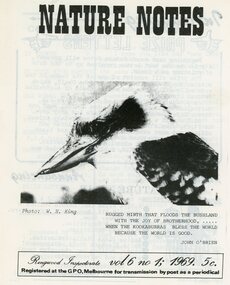
Magazine, Nature Notes magazines 1969 (Vol 6) Issues 1 to 2, 4 to 10
Printed magazinesFrom “The History of Ringwood East Primary School 1924-1990” 'Nature Notes' was a children's nature magazine, produced at Ringwood East Primary School for approximately 10 years. It came to us from Blackburn Lake Primary School and before that Blackburn South Primary School. It was originally developed by Harry Hopkins in 1964. He was a District Inspector of schools and also President of the Gould League at the time. Fred Rodgers and Len Delacca were original contributors, Fred writing on native flora and Len writing on native flora [fauna]. It came to Ringwood East in 1975 with Keith Dyer, a teacher on the staff, as editor. The magazine had a large circulation, supplying to schools, private subscribers and societies as well as sending many complimentary copies to libraries, and museums; distribution was throughout Australia. The Magazine continued to grow under consequent editors, Anne Gibson (who also developed 'Probe' a junior version of 'Nature Notes' designed for grades 2 and 4), Barry Archibald, Colin Bull, Russell Hall, Deborah Brydon and Mandy Charmichael. The editors would research, compile, edit and print the magazine which was a monthly issue. The parents would then come in on a Monday to collate, fold and staple. This usually was a morning’s work but this depended on how many helping hands there were. The Wednesday was packing and posting day and in the early days the parents used to deliver the local orders to save costs. Subscribers were sought through advertisements in various school literature and material. The Parents Club received an annual remuneration for their hard work and in turn were able to help purchase many items needed throughout the school. These magazines were packed with really good nature information and taught children how to look after their environment using articles, puzzles, riddles, questions and quizzes. There were special characters as well like 'Wally the Wombat' and 'Ernie the Echidna' for the children to follow on various adventures every month. Children would enjoy watching them crop up in each edition. The magazine stayed with us at Ringwood East until 1986, when due to restructuring and various other things was moved to Healesville Sanctuary where it adopted a new format and name. From here it has since folded and so the end of 'Nature Notes'. 'Nature Notes' was a very successful magazine. Many people through the years devoted a lot of time and energy to its production and readers throughout Australia, as well as its many creators and producers during its 20-year existence, mourn its passing. Written from material supplied by Barry Archibald (editor 'Nature Notes' 1977-78) Margaret Preece & Lois Aders (parents in charge of collating and packaging during its last years of existence. -
 Ringwood and District Historical Society
Magazine, Nature Notes magazines 1968 (Vol 5) Issues 3 to 10
Printed magazinesFrom “The History of Ringwood East Primary School 1924-1990” 'Nature Notes' was a children's nature magazine, produced at Ringwood East Primary School for approximately 10 years. It came to us from Blackburn Lake Primary School and before that Blackburn South Primary School. It was originally developed by Harry Hopkins in 1964. He was a District Inspector of schools and also President of the Gould League at the time. Fred Rodgers and Len Delacca were original contributors, Fred writing on native flora and Len writing on native flora [fauna]. It came to Ringwood East in 1975 with Keith Dyer, a teacher on the staff, as editor. The magazine had a large circulation, supplying to schools, private subscribers and societies as well as sending many complimentary copies to libraries, and museums; distribution was throughout Australia. The Magazine continued to grow under consequent editors, Anne Gibson (who also developed 'Probe' a junior version of 'Nature Notes' designed for grades 2 and 4), Barry Archibald, Colin Bull, Russell Hall, Deborah Brydon and Mandy Charmichael. The editors would research, compile, edit and print the magazine which was a monthly issue. The parents would then come in on a Monday to collate, fold and staple. This usually was a morning’s work but this depended on how many helping hands there were. The Wednesday was packing and posting day and in the early days the parents used to deliver the local orders to save costs. Subscribers were sought through advertisements in various school literature and material. The Parents Club received an annual remuneration for their hard work and in turn were able to help purchase many items needed throughout the school. These magazines were packed with really good nature information and taught children how to look after their environment using articles, puzzles, riddles, questions and quizzes. There were special characters as well like 'Wally the Wombat' and 'Ernie the Echidna' for the children to follow on various adventures every month. Children would enjoy watching them crop up in each edition. The magazine stayed with us at Ringwood East until 1986, when due to restructuring and various other things was moved to Healesville Sanctuary where it adopted a new format and name. From here it has since folded and so the end of 'Nature Notes'. 'Nature Notes' was a very successful magazine. Many people through the years devoted a lot of time and energy to its production and readers throughout Australia, as well as its many creators and producers during its 20-year existence, mourn its passing. Written from material supplied by Barry Archibald (editor 'Nature Notes' 1977-78) Margaret Preece & Lois Aders (parents in charge of collating and packaging during its last years of existence. -
 Ringwood and District Historical Society
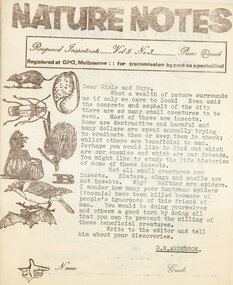
Magazine, Nature Notes magazines 1966 (Vol 3) Issues 3 & 8 only
Printed magazinesFrom “The History of Ringwood East Primary School 1924-1990” 'Nature Notes' was a children's nature magazine, produced at Ringwood East Primary School for approximately 10 years. It came to us from Blackburn Lake Primary School and before that Blackburn South Primary School. It was originally developed by Harry Hopkins in 1964. He was a District Inspector of schools and also President of the Gould League at the time. Fred Rodgers and Len Delacca were original contributors, Fred writing on native flora and Len writing on native flora [fauna]. It came to Ringwood East in 1975 with Keith Dyer, a teacher on the staff, as editor. The magazine had a large circulation, supplying to schools, private subscribers and societies as well as sending many complimentary copies to libraries, and museums; distribution was throughout Australia. The Magazine continued to grow under consequent editors, Anne Gibson (who also developed 'Probe' a junior version of 'Nature Notes' designed for grades 2 and 4), Barry Archibald, Colin Bull, Russell Hall, Deborah Brydon and Mandy Charmichael. The editors would research, compile, edit and print the magazine which was a monthly issue. The parents would then come in on a Monday to collate, fold and staple. This usually was a morning’s work but this depended on how many helping hands there were. The Wednesday was packing and posting day and in the early days the parents used to deliver the local orders to save costs. Subscribers were sought through advertisements in various school literature and material. The Parents Club received an annual remuneration for their hard work and in turn were able to help purchase many items needed throughout the school. These magazines were packed with really good nature information and taught children how to look after their environment using articles, puzzles, riddles, questions and quizzes. There were special characters as well like 'Wally the Wombat' and 'Ernie the Echidna' for the children to follow on various adventures every month. Children would enjoy watching them crop up in each edition. The magazine stayed with us at Ringwood East until 1986, when due to restructuring and various other things was moved to Healesville Sanctuary where it adopted a new format and name. From here it has since folded and so the end of 'Nature Notes'. 'Nature Notes' was a very successful magazine. Many people through the years devoted a lot of time and energy to its production and readers throughout Australia, as well as its many creators and producers during its 20-year existence, mourn its passing. Written from material supplied by Barry Archibald (editor 'Nature Notes' 1977-78) Margaret Preece & Lois Aders (parents in charge of collating and packaging during its last years of existence. -
 Ringwood and District Historical Society
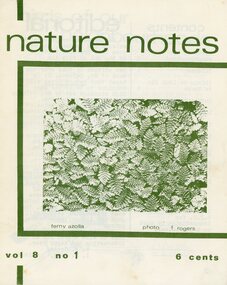
Magazine, Nature Notes magazines 1971 (Vol 8) Issues 1 to 10
Printed magazinesFrom “The History of Ringwood East Primary School 1924-1990” 'Nature Notes' was a children's nature magazine, produced at Ringwood East Primary School for approximately 10 years. It came to us from Blackburn Lake Primary School and before that Blackburn South Primary School. It was originally developed by Harry Hopkins in 1964. He was a District Inspector of schools and also President of the Gould League at the time. Fred Rodgers and Len Delacca were original contributors, Fred writing on native flora and Len writing on native flora [fauna]. It came to Ringwood East in 1975 with Keith Dyer, a teacher on the staff, as editor. The magazine had a large circulation, supplying to schools, private subscribers and societies as well as sending many complimentary copies to libraries, and museums; distribution was throughout Australia. The Magazine continued to grow under consequent editors, Anne Gibson (who also developed 'Probe' a junior version of 'Nature Notes' designed for grades 2 and 4), Barry Archibald, Colin Bull, Russell Hall, Deborah Brydon and Mandy Charmichael. The editors would research, compile, edit and print the magazine which was a monthly issue. The parents would then come in on a Monday to collate, fold and staple. This usually was a morning’s work but this depended on how many helping hands there were. The Wednesday was packing and posting day and in the early days the parents used to deliver the local orders to save costs. Subscribers were sought through advertisements in various school literature and material. The Parents Club received an annual remuneration for their hard work and in turn were able to help purchase many items needed throughout the school. These magazines were packed with really good nature information and taught children how to look after their environment using articles, puzzles, riddles, questions and quizzes. There were special characters as well like 'Wally the Wombat' and 'Ernie the Echidna' for the children to follow on various adventures every month. Children would enjoy watching them crop up in each edition. The magazine stayed with us at Ringwood East until 1986, when due to restructuring and various other things was moved to Healesville Sanctuary where it adopted a new format and name. From here it has since folded and so the end of 'Nature Notes'. 'Nature Notes' was a very successful magazine. Many people through the years devoted a lot of time and energy to its production and readers throughout Australia, as well as its many creators and producers during its 20-year existence, mourn its passing. Written from material supplied by Barry Archibald (editor 'Nature Notes' 1977-78) Margaret Preece & Lois Aders (parents in charge of collating and packaging during its last years of existence. -
 Ringwood and District Historical Society
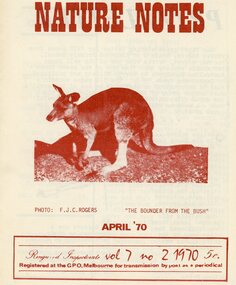
Magazine, Nature Notes magazines 1970 (Vol 7) Issues 2 to 10
Printed magazinesFrom “The History of Ringwood East Primary School 1924-1990” 'Nature Notes' was a children's nature magazine, produced at Ringwood East Primary School for approximately 10 years. It came to us from Blackburn Lake Primary School and before that Blackburn South Primary School. It was originally developed by Harry Hopkins in 1964. He was a District Inspector of schools and also President of the Gould League at the time. Fred Rodgers and Len Delacca were original contributors, Fred writing on native flora and Len writing on native flora [fauna]. It came to Ringwood East in 1975 with Keith Dyer, a teacher on the staff, as editor. The magazine had a large circulation, supplying to schools, private subscribers and societies as well as sending many complimentary copies to libraries, and museums; distribution was throughout Australia. The Magazine continued to grow under consequent editors, Anne Gibson (who also developed 'Probe' a junior version of 'Nature Notes' designed for grades 2 and 4), Barry Archibald, Colin Bull, Russell Hall, Deborah Brydon and Mandy Charmichael. The editors would research, compile, edit and print the magazine which was a monthly issue. The parents would then come in on a Monday to collate, fold and staple. This usually was a morning’s work but this depended on how many helping hands there were. The Wednesday was packing and posting day and in the early days the parents used to deliver the local orders to save costs. Subscribers were sought through advertisements in various school literature and material. The Parents Club received an annual remuneration for their hard work and in turn were able to help purchase many items needed throughout the school. These magazines were packed with really good nature information and taught children how to look after their environment using articles, puzzles, riddles, questions and quizzes. There were special characters as well like 'Wally the Wombat' and 'Ernie the Echidna' for the children to follow on various adventures every month. Children would enjoy watching them crop up in each edition. The magazine stayed with us at Ringwood East until 1986, when due to restructuring and various other things was moved to Healesville Sanctuary where it adopted a new format and name. From here it has since folded and so the end of 'Nature Notes'. 'Nature Notes' was a very successful magazine. Many people through the years devoted a lot of time and energy to its production and readers throughout Australia, as well as its many creators and producers during its 20-year existence, mourn its passing. Written from material supplied by Barry Archibald (editor 'Nature Notes' 1977-78) Margaret Preece & Lois Aders (parents in charge of collating and packaging during its last years of existence. -
 Melton City Libraries
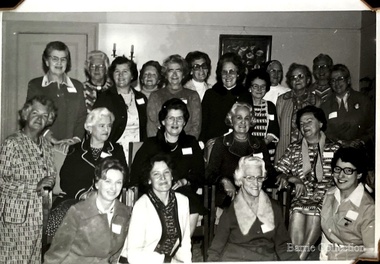
Photograph, Country Women's Association Choir Victoria, Unknown
Information from research by Mabel Rogers from the first meeting in August 1939 – 1969 Notable Events of the CWA The document contains information about meetings and events and numbers of members who attended. December 2013 – a selection of some of the items of interest have been extracted by Wendy Barrie NOTABLE EVENTS Page 1 1938 August 10th 1938 Minutes of inaugural meeting of Melton Branch Country Women’s Association. Cr Coburn introduced Mrs Toose, Ballarat G.P. [Group President] 42 ladies were present, including visitors from Bacchus Marsh and Smeaton Branches. September – Miss A Raleigh was elected Magazine Secretary October- 26 members present. Penny Collection for Million Members Fund November December – Mrs Swan gave demonstration of basketry, using stringy bark, Eucalyptus bark and reeds 1939 February 1939 – 18 members present. Branch total 50. Donation towards Pedal Transmitting Set. Inquiries made of Shire Council re permission to fence War Memorial March April – cost of fence material beyond Branch Funds May- 24 members present June, July, August – birthday celebrations. September 25 members present October – Meeting hled at Toolern Vale Bird Sanctuary 36 members present November – 1st Annual Meeting December – Owing to harvest operations, only 11 members present. 1940 February electric kettle and urn to be purchased for Mechanics Institute. Also to install a power point. [Electricity was connected to Melton in December 1939] April end of page 1 Page 2 May – Council Permission to be sought, to plant trees on oval below Shire Hall P.M.G. to be asked to supply a seat outside telephone booth for convenience of callers after P.O. was closed. June- Wives of A.I.F. soldiers be made honorary members. “1d per week drive” for gift for the Empire. July, September, October November – Group President stressed the importance of keeping Branches together during time of war. Collection of sheep skins to be made into vests for fighting forces worthy of consideration. Group President, Mrs Morgan-Paylor. December 1941 February 30 members present March – Eight members attend Ballarat Group Conference. Approach Council re fencing and preparation of land for tree plantation May – Mrs Swan demonstrated making of slippers from pieces of sheepskin June – Empire Gift Scheme of 1d per week to be continued for another year or duration of the war. July – Demonstration on making camouflage nets August, September Group Conference at Smeaton, October, November meetings held 1942 February- Enquiries to be made as how to help with A.R.P. work March, April, May, June,- Headquarters busy on war work. July end of page 2 Page 3 August, September. October – 15 Camouflage Nets forwarded to Headquarters November- Mrs Glasson Group President presided at Annual Meeting. Meetings to be held at 3 monthly intervals. Overseas link, enquiries be made of Melton Mowbray had a C.W.A. Branch 1943 February- Overseas link to be Lampeter, Cardiganshire, Wales May- 7 Camouflage Nets to Headquarters. American overseas link Nov 5th Annual Meeting, letters received from Wales and America 1944 May – Approach to be made to Council re formation of Baby Health Centre July – Ball held for Baby Health Centre effort. Admission 3/- 1945 February- Mrs Lemke present at meeting May August- Miss Strahan of Womens Hospital gave a talk on “Work of Almoner Departments in Public Hospitals” November Annual meeting. eight food parcels sent to Britain, 2 to Lampeter 1946 meetings held every two months May- Congratulations to Mrs Swan, Group President Elect June – 20 members present. August- 8th Birthday celebrated with a Social Evening Music was supplied by Mrs E.W. Barrie September - Scone competition 1. Mrs Beaty, 2. Miss Robinson 3. Mrs Exell November- Eggs sent to Somers House 1947 February – Demonstration of Glove-making March – revert to monthly meetings April - decided to have an auto tray made for the Branch May – Branch decided to plant a tree for Princess Elizabeth’s 21st Birthday.. Council to be asked if agreeable to continue arrangements in 1940, to fence C.W.A. Plantation end of page 3 Page 4 June - Food parcels sent to Overseas Link July – Invitations to birthday celebrations sent to Bacchus Marsh, Ballan, Sunbury, Mt Egerton August September - Collection of silver coin taken a donation from Branch towards wedding gift to Princess Elizabeth … forwarded to H.Q. November – C.W.A. together with Red Cross and Bacchus Marsh C.W.A. to provide afternoon tea and luncheon at Eynesbury sale. 1948 February – Food parcels sent to ex-Prisoner-of-war. Publicity agent appointed April – Decided to apply for trees to be planted in area already chosen a beauty spot May – Additional listeners to Broadcast Session were appointed June July – Gift of books received from Overseas Link. I was decided to stat a Library . Miss Raleigh to at a Librarian. August – 5 pound donation from Branch funds to “Save the Children” Appeal. September, October, November 1949 January – At Group Conference, delegates to vote in favour of resolution that State School children be allowed to sit for exams in own school March – Decided to contact Council for permission to fence off Water Reserve April, May – Another parcel to be sent to Ret. British P.O.W. Association June July – Fancy Dress Children’s Ball to be held for Annual Effort August – 11th Birthday September – Bank Balance November – 11th annual Meeting. Members agree to supply small gifts to Ballarat Mental Hospital 1950 February – Five books were received from Lampeter March – Branch to support idea of holding a Music Drama Festival in Group April – Miss Smith elected Group President May – C.W.A. Science Van visited Melton June – Demonstration of Macrame work - July August – 12th Birthday Celebration end page 4 Page 5 September, October November 12th Annual Meeting, Miss Smith Group President. Melton's Country Women's Association Choirlocal special interest groups, local identities -
 Eltham District Historical Society Inc
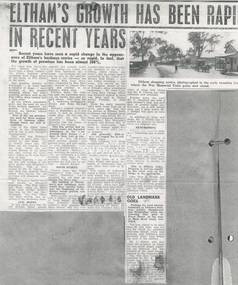
Document - Newspaper article, Eltham's growth has been rapid in recent years, c.1960
ELTHAM’S GROWTH HAS BEEN RAPID IN RECENT YEARS Unknown local paper c.1960s Recent years have seen a rapid change in the appearance of Eltham’s business centre - so rapid, in fact, that the growth of premises has been almost 300%. For more than thirty-five years Eltham had little more than a dozen traders - the town's business area spreading from Pryor Street in the north, to Pitt Street in the south. The greatest density of businesses - no more than a handful of shops - were situated in the present shopping centre but other essential services such as the Post Office, were located half a mile away. As the town's population grew and the need for more shops became apparent, the growth was centralised around the railway station and Shire hall. Few of the old premises are used for their original form of business today, though many are still in existence. One of the oldest (seen clearly in the illustration) still in use is now Ferrari's Greengrocery. This shop was Eltham's butchery in early days, conducted by Jim Ryan. Up to twenty years ago, Mr. Ryan ran his business from the shop. whilst his son toured Eltham in his horse and cart, cutting his customers' orders as he went from door to door. Another business - one of the few still trading in the same goods-was Burgoyne's Hardware. This is now owned by Mr. R. Clinton, a new shop has recently been added and shortly the old premises will disappear completely. The Burgoyne family were well known to Eltham's population. The Post Office and Store (then in Main Road, near Bridge Street) was run by Mr. and Mrs. Burgoyne. The Post Office was later moved, and attached to the hardware store. OLD HOTEL In this same area was the old Eltham Hotel, almost opposite the present hotel. The building still stands, but has been converted into a house. The hitching rail can still be seen by the roadside. Back in the township was Barber's Blue Gum store, later conducted by Mrs. Burges (mother of Garnet Burges) and claimed to be Eltham's oldest shop. Further down the road, just past the hardware store, was the barber shop and billiard saloon. Next door was E. J. Andrew's news agency, library and State Savings Bank. Eltham's original chemist's shop, or dispensary as it was called, is now an electrical repair shop. On this side of the street too, was Mrs. Monteith - Draper. Mr Monteith was the owner of Eltham' s bus service. This bus service had no regular route, but deposited passengers at the point nearest their homes - a. door to door taxi service. Next to Mrs. Monteith stood another grocery - and general store, and next again, the local blacksmith. Another of Butcher Ryan's sons was Eltham's blacksmith and obviously an enterprising man he conducted a timber business next door to his smithy's shop. These two premises are still run by one man - Garnet Burges. BOOM STARTS Twenty years ago, when Thompson's took over Eltham's pharmacy they occupied the old shop adjoining the Shire hall. The building of Thompson's new premises, from which· they operate today, was the beginning of Eltham's recent growth and development. With another grocery store and a bakery at the corner of York Street, a butcher near Franklin Street, a cobbler's shop opposite the State School (did you ever wonder what that-little building attached to one of Eltham's oldest houses had been?), and an estate agency conducted by Mr. Clark, now Eltham Real Estate - only one trader remained - and today, still carries on, the only original owner of one of Eltham's .oldest established businesses - Mr. Dave Lyon, of Lyon Bros. Garage, which was formerly located in what was later used as Chenowyth's Foundry in Main Road. From the early twenties until little more than six or seven years ago that was the picture of Eltham. Some businesses had changed hands - many years before Mr. C. Rains had acquired Andrew's news agency, Mrs. Monteith's drapery had become Mrs. R. Smith's home-made cake shop, to change again and again to many other types of business. But generally, Eltham was unchanged, for nearly thirty years. Then suddenly new shops mushroomed. The new news agency and drapery, the chemist and adjoining shops, a new butcher, a green grocer and several more. POPULATION DOUBLED In the space of a few years, fifteen new shops, two banks, a restaurant and a post office were built at Eltham. New types of businesses found a ready market in an area which was quickly almost doubling its population. A little over twelve months ago, another wave of progress hit Eltham. Since then eight more shops have been built - a cake shop and fish shop in Dalton [sic – Dudley] Street - for building areas are unprocurable in the Main Street shopping centre now – have been built by Mr. D. Kimball; a new ladies’ and children’s wear shop has been opened by Rains; Eltham Dry Cleaners have another of these new shops, and Mr. R. Clinton has built elaborate new premises. Further down the road, Mr. C. Campbell has built a new butcher's shop, and next door, at present under construction, are a self service store and a shop which Mr. J. Hodges will open on completion. In addition to these new shops, Mr. J. Millett has extended his grocery to almost twice its original size. FLOURISHING Outside the central area, other businesses are flourishing. Latimer's felt factory is being developed in a picturesque rustic setting; P. J. Timber and Trading Company have recently completed a large showroom and timber yard, and in the town itself Nicholson and Merritt are now completing the extension of their foot wear factory to double its former area. This is Eltham today. Progress is moving rapidly in this rural area on the fringe of the metropolis. Less than a decade has seen vast development. The years to complete that span of time will see even greater changes and greater prosperity in this heart: of the Diamond Valley. OLD LANDMARK GOES Perhaps the most famous landmark in Eltham's' business section disappeared last Wednesday when the towering blue gum in Pryor Street at the rear of Main Road shops was felled. The tree, stated to be more than 80 feet high, was the one for which the adjoining café was named, when that business was Eltham’s only provision store, long before the turn of the century. Mr. J. Millett, who now owns the property on which the tree stood, deeply regretted its removal, but was mindful of the need for expansion in the business area. The "Old Blue Gum" was removed by Mr. A. Wilson, expert tree feller, from Heidelberg. Its proportions might be assessed by these facts – it took a gang of experienced men two days to completely fell and clear the tree, and, falling sections being brought down by cable tipped electricity wires on the opposite side of Pryor Street.andrew's news agency, bakery, barber shop, barber's blue gum store, billiard saloon, blacksmith, blue gum, burgoyne's hardware, butcher, cake shop, chemist's shop, chenowyth's foundry, cobbler's shop, dave lyon, dispensary, draper shop. mr monteith, dudley street, e. j. andrew's news agency, electrical repair shop, eltham bus service, eltham butchery, eltham dry cleaners, eltham hotel, eltham railway station, eltham real estate, eltham shire hall, eltham shopping centre, eltham shops, eltham town centre, estate agency, expert tree feller, ferrari's greengrocery, fish shop, foot wear factory, franklin street, garnet burges, general store, grocery, heidelberg, horace clark, jim ryan, ladies’ and children’s wear shop, latimer's felt factory, library, lyon bros. garage, main road, mr. a. wilson, mr. c. campbell, mr. c. rains, mr. d. kimball, mr. j. hodges, mr. j. millett, mr. r. clinton, mrs. burges, mrs. monteith, mrs. monteith's drapery, mrs. r. smith's home-made cake shop, nicholson and merritt, p. j. timber and trading company, pitt street, post office, pryor street, self service store, shopping centre, state savings bank, taxi service, thompson's pharmacy, york street -
 Eltham District Historical Society Inc
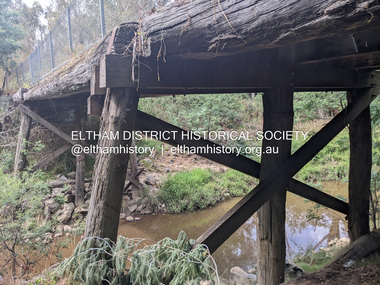
Photograph, Tess Justine (Nillumbik Shire Council), Murray's Bridge over the Diamond Creek, Eltham North, 19 Feb 2022
Murray's Bridge over the Diamond Creek on the Diamond Creek Trail just prior to demolition and replacement with a new steel bridge. Heritage advice obtained by Nillumbik Shire Council, following a suggestion by the Eltham District Historical Society (EDHS), is that the original bridge appears to have been a simplified version of the Country Roads Board’s (CRB) standard timber bridge design of the early-to-mid 1920s. In c1990 Murray’s bridge was renovated with three recycled steel girders as part of a bike/pedestrian path in the reserve. During these alterations many parts of the bridge were removed, and some were replaced. Heritage advice indicates the condition of Murray’s bridge is poor. The remaining original parts are all in poor condition, with severe weathering, splitting and rot, especially to the stringers retained on the bridge. Heritage advice is that Murray’s Bridge does not have sufficient significance in the cultural history of the Nillumbik area to warrant inclusion in the Nillumbik Shire Heritage Overlay and also does not have sufficient significance as a rare survivor to warrant inclusion in the Nillumbik Shire Heritage Overlay. There are no indications in the historical record that this site was individually important to the cultural history of this area. EDHS is comfortable with the heritage advice provided to Council and has worked closely on this project with Council. EDHS has suggested some of the removed timbers be used in the vicinity of the bridge for landscaping and possibly seating, so as to retain these remnants close to the site of the original bridge, which is the last old timber bridge along the lower reaches of the Diamond Creek. Mary (Sweeney) Murray and John Wright Murray selected 80 acres, Lot C Section 16 and Lot 5 Section 17 Parish of Nillumbik, under an occupation license in 1866. John died in 1867 and freehold was granted to his son John in 1873. The farm was known as ‘Laurel Hill’. John Junior was an Eltham Shire councillor and sometime president from 1887 up until 1897. He added Lot A Section 16 to the farm in ca1888. John and his younger brother James arranged to rent/purchase Lot B Section 17, across Diamond Creek to the west, in ca1900. It appears that John and James farmed separately for a few years, with a new homestead built for James ad family on the high point of Lot B Section 17 in ca1910. John sold off Lot 5 Section 17 in 1912. When John died in 1912 James took over the land on both sides of the Diamond Creek. The old homestead on the west side of the Creek disappeared. A farm bridge over Diamond Creek from this period may have been located close to the northern boundary of the farm. John Langlands, owner of the farm known as ‘Ihurst’ on the west side of Diamond Creek to the south of the Murray’s land, died in 1907. In 1909 his land was then subdivided into 100 lots to become the ‘Glen Park Estate’. Other similar subdivisions of nineteenth century farms around Eltham in this period included the ‘Franktonia (or Beard’s) Estate’ to the northeast and ‘Bonsack’s Estate’ between Eltham and Greensborough. Soon after the opening of the railway extension line from Eltham to Hurstbridge in 1912, Glen Park and nearby residents including James Murray agitated for a railway station or siding to be located half-way between Eltham and Hurstbridge, so that the Glen Park residents who used the railway daily did not have to walk into the Eltham or Hurstbridge stations. Some believed Coleman’s Corner (opposite Edendale Farm) was an appropriate spot for the platform. James Murray was among those who thought the railway should be located on his land, closer to half-way between Eltham and Hurstbridge stations. The Railways Commissioners warned that the locals would have to fund these works themselves. The Glen Park Estate residents initially had difficulty accessing Eltham by road, with only an old low-level bridge over Diamond Creek at the south end of their estate. A new timber trestle bridge across the creek, now on Wattletree Road, was opened in 1915. Road access to the north was gained in 1927 when the new Murray’s Road, which crossed the Murray’s land, was built. Residents continued to agitate for a Glen Park station. By 1926 the Railways Commissioners’ preferred site was on the Murray’s land. They arranged an estimate of cost of a full-length platform. The estimate was too much for the locals, who in 1928 argued unsuccessfully for a shorter and hence cheaper platform. By 1929 Murray had agreed to donate the land, but the locals would still have to fund the works. Murray decided, unilaterally it would appear, to commence work on a timber trestle road bridge over Diamond Creek to link the new Murray Road to the proposed station. Late in 1929 he stopped work on the bridge, for reasons unknown, but started work again and completed the bridge in 1931. There is no further newspaper evidence of the campaign for the Glen Park station until 1939, when Murray and another local, Mr Maxwell, met the Railways Commissioner. The Glen Park locale now included 45 homes on the west side of the creek and 20 on the Eltham side. Most of the residents used the train every day. The Commissioner remained adamant that only a full-length platform could be built for safety reasons. It appears the campaign dissolved at this point. The increasing move to cars may have had an impact. There is no evidence of Murray’s bridge ever being connected to Murray’s Road, or of it having wide use for any purpose by locals. James Murray died in 1947 and the farm was taken over by his son James (Jim). Jim started to sell off parts of the farm in the 1980s, retaining a few acres around the ca1910 homestead and building a new house there. Recreation reserves were established along the creek. In ca1990 Murray’s bridge was renovated with steel girders as part of a bike/pedestrian path in the reserve. The old farmhouse was demolished in ca2014. * * * A theory posted on local community Facebook groups was that the bridge was built in the 1860s and was built to be more robust than was necessary for the movement of cows from one side of the creek to the other. It was suggested the robustness was necessary to support the weight of gold ore being transferred from a mine on Murray’s land to a railway siding near Murrays Bridge (presumably for transfer and processing at Diamond Creek). Perhaps this may have been one of the motivators for Murray, who really knows? Knowing when mining operations ceased on his land and how that fits the overall timeline would be useful but at the time the bridge was built, local gold production was minimal at best. The known facts are: • The railway line came to Eltham in 1902. • The extension of the railway from Eltham to Hurstbridge was constructed in 1912 so no railway line even existed through Murray's property until 1912 and the Victorian Railways maps at the time show no such siding on Murray’s property. • In 1923 a new company was formed in anticipation of the old Diamond Creek Gold Mine being re-opened. The mine had been previously closed and flooded. It was noted in the press at the time that the mine was within a mile of the railway. Nothing really came of this. • Construction of Murrays Bridge was commenced by James Murray in early 1929 in anticipation of a proposed flag station being nominated on his land, but work ceased shortly afterwards. The proposed flag station was commonly referred to as Glen Park as the residents of the Glen Park Estate wanted Option 1, located near them with the platform adjacent to Colemans corner. This was probably never going to fly as it was virtually in eyesight of Eltham station. Allandale Road was the third option, but the Commissioners' preferred option was No. 2 - on Murray's property. • The Railway Commissioners were not going to finance any such station and the works had to be funded by private landowners and residents, hence Murray investing in this himself. • Murray recommenced work two years later and finished his bridge in 1931 but unfortunately for him, the proposed flag station never eventuated. The bluestone siding you reference may well have been built by Murray as part of the proposed station platform. • Up until then, apart from the Main Road bridge, which was washed away in 1924, virtually all local crossings over the Diamond Creek were low lying bridges – Kaylocks Bridge at Brougham Street, Diamond Street bridge, Glen Park Road bridge. It is expected that Murray also had a low-lying bridge to connect his land either side of the creek. These were all washed away or severely damaged multiple times in the 1920s. Lessons were learnt, and Murrays Bridge appears to have been built in accordance with Country Road Board standards of the time. Flood damage was ongoing, and even more recently constructed raised bridges kept getting washed away, e.g., the new Wattle Tree Road bridge in 1958 just months after completion. Murray’s bridge was reinforced with steel some 30 years ago presumably to provide additional floodwater resistance, given the history of bridges disappearing in floodwaters. • In March 1932 it was reported in the Advertiser that there were still some prospectors operating around Eltham North who apart from further scarring the face of the earth over the previous two years had gained significant experience but little gold - hardly a driving factor for constructing a dedicated railway siding and bridge to transfer gold ore. It is far more probable that James Murray was hoping to have the railway station located on his property and invested his money by building the bridge to lead to it as well as a station platform. Had the station eventuated, it may well have driven up the value of his land for subdivision and new housing estates like the Glen Park Estate. That did not eventuate. Whilst the bridge was indeed old (90 years), the core structure being completed in 1931, it had been modified substantially from original and hence had no significant historic value – i.e., it was not a representative example of its type, construction, and age. Given that the bridge was not worthy of saving, the Eltham District Historical Society with Council’s support, and the Eltham Woodworkers group endeavoured to see what suitable sized timbers were salvageable to fabricate a commemorative seat. Unfortunately, the experts at the Woodworkers group were unable to salvage any suitable length/width timbers to fabricate the seat due to the presence of rot. Last remaining wooden trestle bridge on the Diamond Creek Trail just prior to demolition and replacementBorn digital image (27)diamond creek (creek), diamond creek trail, murrays bridge, ‘laurel hill’, john wright murray, mary (sweeney) murra, john murray jnr, james murray, john langlands, ‘ihurst’, ‘glen park estate’, beard's estate, franktonia, bonsack's estate, glen park estate, glen park railway station -
 Flagstaff Hill Maritime Museum and Village
Domestic object - Bowl, Late 19th or early 20th Century
The Process of Making Pottery Decorating, Firing, Glazing, Making, Technical There is a rhythm and flow to clay. It can’t be done all at once! Even the making process! It can take weeks to get everything done, especially if you can only work on your pottery once a week! Even though we have three hour classes, it’s often just not enough time! Here is an overview of some of the processes so you have a bit more grasp on some of the technical stuff! Step One – Design There are SO many ideas out there for making stuff in clay! From delicate porcelain jewellery, through to heavy sculptural work and everything in between. Deciding your direction is sometimes not that easy – when you first start, try everything, you will naturally gravitate to the style that you enjoy! The options and variations are endless and can get a wee bit overwhelming too! Check in with me before you start to ensure your ideas will work, what order you might do things, how you could achieve the look you are seeking and any other technical data required! Step Two – Making Clay is thixotropic. This means that as you work with it, the clay first gets sloppier and wetter, before is begins to dry in the atmosphere. For most things, you simply can’t do all parts of the project at once. An example of work order might look like: Get last weeks work out from the shelves Prepare clay for today’s work – roll your clay, prepare balls for throwing, make the first stage of a pinch pot) Clean up last week’s work and put it on the shelf for bisque firing Check that you have any glazing to do – and do enough of it that you will have time to finish your main project Do the next step of your next project – there might be a further step that can’t be complete immediately, in that case, wrap your work well and put onto the shelves. Letting your work rest for a while can really help keep your work clean and professional looking. Many things require bagging under plastic to keep it ready for work the next week – put your name on the outside of the bag so you can find your work easily. We have stickers and markers. Consider how you want to decorate your work – coloured slip can be applied at a fairly wet stage (remembering that it will make your work even wetter!). Trying to apply slip to dry clay won’t work! If you want to do sgraffito – you will need to keep the work leather hard (a state of dryness where you can still work the clay with a little effort and a little water and care). Step Three – Drying Most of the time your work can go into the rack uncovered to let it dry out for the following week. If you want to continue forming or shaping you will need to double bag your work – put your work on a suitable sized bat and put the bat in a bag so the base of the bag is under the bat, then put another bag over the top of the work and tuck the top of the bag under the bat. If you want to trim (or turn) your thrown work the following week, it should also be double bagged. If your work is large, delicate, or of uneven thicknesses, you should lightly cover your work for drying. When considering the drying process, bare in mind the weather, humidity and wind! The hotter and dryer, the faster things dry and work can dry unevenly in the shelves – this can lead to cracking – another time to lightly cover your work for drying. Step Four – Trimming and Cleaning Up Your work is dry! It is called greenware now and it is at it’s most fragile! Handle everything with two hands. I often refer to soft hands – keep everything gentle and with your fingers spread as much as possible. Try to not pick up things like plates too much, and always with both hands! Before your work can be bisque fired it should be “cleaned up”. You work won’t go into the kiln if it has sharp edges – when glazed, sharp edges turn into razor blades! Use a piece of fly wire to rub the work all over – this will scratch a little so be light handed. Use a knife or metal kidney to scrape any areas that require a bit more dynamic treatment than the fly wire offers! Finally, a very light wipe over with a slightly damp sponge can help soften and soothe all of your edges and dags! Trimming thrown work: If you are planning to trim (or turn) your thrown work (and you should be), make sure you bag it well – your work should be leather hard to almost dry for easiest trimming. Use this step to finish the work completely – use a metal kidney to polish the surface, or a slightly damp sponge to give a freshly thrown look. Wipe the sponge around the rim after trimming, and check the inside of the pot for dags! Trimming slip cast work: Usually I will trim the rims of your work on the wheel the following day to make that stage easier, however you will still need to check your work for lumps and bumps. Last but not least – check that your name is still clearly on the bottom of your work. Step Five – Bisque Firing When the work is completely dry it can go into the bisque kiln. The bisque kiln is fired to 1000°C. This process burns off the water in the clay as well as some of the chemically bound water. The structure of the clay is not altered that much at this temperature. Inside the bisque kiln, the work is stacked a little, small bowl inside a larger bowl and onto a heavy plate. Smaller items like decorations or drink coasters might get stacked several high. Consideration is paid to the weight of the stack and shape of the work. A bisque kiln can fire about one and a half times the amount of work that the glaze kiln can fire. The firing takes about 10 hours to complete the cycle and about two days to cool down. Once it has been emptied the work is placed in the glaze room ready for you to decorate! Step Six – Glazing Decorating your work with colour can be a lot of fun – and time consuming! There are three main options for surface treatment at this stage: Oxide Washes Underglazes Glazes Washes and underglazes do not “glaze” the work – It will still need a layer of glaze to fully seal the clay (washes don’t need glaze on surfaces not designed for food or liquid as they can gloss up a little on their own). Underglazes are stable colourants that turn out pretty much how they look in the jar. They can be mixed with each other to form other colours and can be used like water colours to paint onto your work. Mostly they should have a clear glaze on top to seal them. Oxides are a different species – the pink oxide (cobalt) wash turns out bright blue for instance. They don’t always need a glaze on top, and some glazes can change the colour of the wash! The glazes need no other “glaze” on top! Be careful of unknown glaze interactions – you can put any combination of glaze in a bowl or on a plate, but only a single glaze on the outside of any vertical surface! Glazes are a chemical reaction under heat. We don’t know the exact chemicals in the Mayco glazes we use. I can guess by the way they interact with each other, however, on the whole, you need to test every idea you have, and not run the test on a vertical surface! Simply put, glaze is a layer of glass like substance that bonds with the clay underneath. Clay is made of silica, alumina and water. Glaze is made of mostly silica. Silica has a melting point of 1700°C and we fire to 1240°C. The silica requires a “flux” to help it melt at the lower temperature. Fluxes can be all sorts of chemicals – a common one is calcium – calcium has a melting point of 2500°C, however, together they both melt at a much lower temperature! Colourants are metal oxides like cobalt (blue), chrome (green through black), copper (green, blue, even red!), manganese (black, purple and pink) iron (red brown), etc. Different chemicals in the glaze can have dramatic effects. for example, barium carbonate (which we don’t use) turns manganese bright pink! Other elements can turn manganese dioxide brown, blue, purple and reddish brown. Manganese dioxide is a flux in and of itself as well. So, glazes that get their black and purple colours, often interact with other glazes and RUN! Our mirror black is a good example – it mixes really well with many glazes because it fluxes them – causes them to melt faster. It will also bring out many beautiful colours in the glazes because it’s black colouring most definitely comes from manganese dioxide! Glaze chemistry is a whole subject on it’s own! We use commercial Mayco glazes on purpose – for their huge range of colour possibilities, stability, cool interactions, artistic freedom with the ability to easily brush the glazes on and ease of use. We currently have almost 50 glazes on hand! A major project is to test the interactions of all glazes with each other. That is 2,500 test tiles!!!! I’m going to make the wall behind the wheels the feature wall of pretty colours! Step Seven – Glaze (Gloss or sometimes called “Glost”) Firing Most of the time this is the final stage of making your creation (but not always!) The glaze kiln goes to 1240°C. This is called cone 6, or midrange. It is the low end of stoneware temperatures. Stoneware clays and glazes are typically fired at cone 8 – 10, that is 1260 – 1290°C. The energy requirement to go from 1240°C to 1280°C is almost a 30% more! Our clay is formulated to vitrify (mature, turn “glass-like”) at 1240°, as are our glazes. A glaze kiln take around 12 hours to reach temperature and two to three days to cool down. Sometimes a third firing process is required – this is for decoration that is added to work after the glaze firing. For example – adding precious metals and lustres. this firing temperature is usually around 600 – 800°C depending upon the techniques being used. There are many students interested in gold and silver trims – we will be doing this third type of firing soon! After firing your work will be in the student finished work shelves. Remember to pay for it before you head out the door! There is a small extra charge for using porcelain clay (it’s more than twice the price of regular clay), and for any third firing process! Once your work has been fired it can not turn back into clay for millennia – so don’t fire it if you don’t like it! Put it in the bucket for recycling. https://firebirdstudios.com.au/the-process-of-making-pottery/ The bowl is an example of kitchenware used in the 19th century and still in use today.Bowl white ceramic. Crack on side. Badly stained.Backstamp very faint and unable to be read.flagstaff hill, warrnambool, shipwrecked-coast, flagstaff-hill, flagstaff-hill-maritime-museum, maritime-museum, shipwreck-coast, flagstaff-hill-maritime-village, mixing bowl, food preparation, kitchen equipment, ceramic -
 Flagstaff Hill Maritime Museum and Village
Domestic object - Bowl
The Process of Making Pottery Decorating, Firing, Glazing, Making, Technical There is a rhythm and flow to clay. It can’t be done all at once! Even the making process! It can take weeks to get everything done, especially if you can only work on your pottery once a week! Even though we have three hour classes, it’s often just not enough time! Here is an overview of some of the processes so you have a bit more grasp on some of the technical stuff! Step One – Design There are SO many ideas out there for making stuff in clay! From delicate porcelain jewellery, through to heavy sculptural work and everything in between. Deciding your direction is sometimes not that easy – when you first start, try everything, you will naturally gravitate to the style that you enjoy! The options and variations are endless and can get a wee bit overwhelming too! Check in with me before you start to ensure your ideas will work, what order you might do things, how you could achieve the look you are seeking and any other technical data required! Step Two – Making Clay is thixotropic. This means that as you work with it, the clay first gets sloppier and wetter, before is begins to dry in the atmosphere. For most things, you simply can’t do all parts of the project at once. An example of work order might look like: Get last weeks work out from the shelves Prepare clay for today’s work – roll your clay, prepare balls for throwing, make the first stage of a pinch pot) Clean up last week’s work and put it on the shelf for bisque firing Check that you have any glazing to do – and do enough of it that you will have time to finish your main project Do the next step of your next project – there might be a further step that can’t be complete immediately, in that case, wrap your work well and put onto the shelves. Letting your work rest for a while can really help keep your work clean and professional looking. Many things require bagging under plastic to keep it ready for work the next week – put your name on the outside of the bag so you can find your work easily. We have stickers and markers. Consider how you want to decorate your work – coloured slip can be applied at a fairly wet stage (remembering that it will make your work even wetter!). Trying to apply slip to dry clay won’t work! If you want to do sgraffito – you will need to keep the work leather hard (a state of dryness where you can still work the clay with a little effort and a little water and care). Step Three – Drying Most of the time your work can go into the rack uncovered to let it dry out for the following week. If you want to continue forming or shaping you will need to double bag your work – put your work on a suitable sized bat and put the bat in a bag so the base of the bag is under the bat, then put another bag over the top of the work and tuck the top of the bag under the bat. If you want to trim (or turn) your thrown work the following week, it should also be double bagged. If your work is large, delicate, or of uneven thicknesses, you should lightly cover your work for drying. When considering the drying process, bare in mind the weather, humidity and wind! The hotter and dryer, the faster things dry and work can dry unevenly in the shelves – this can lead to cracking – another time to lightly cover your work for drying. Step Four – Trimming and Cleaning Up Your work is dry! It is called greenware now and it is at it’s most fragile! Handle everything with two hands. I often refer to soft hands – keep everything gentle and with your fingers spread as much as possible. Try to not pick up things like plates too much, and always with both hands! Before your work can be bisque fired it should be “cleaned up”. You work won’t go into the kiln if it has sharp edges – when glazed, sharp edges turn into razor blades! Use a piece of fly wire to rub the work all over – this will scratch a little so be light handed. Use a knife or metal kidney to scrape any areas that require a bit more dynamic treatment than the fly wire offers! Finally, a very light wipe over with a slightly damp sponge can help soften and soothe all of your edges and dags! Trimming thrown work: If you are planning to trim (or turn) your thrown work (and you should be), make sure you bag it well – your work should be leather hard to almost dry for easiest trimming. Use this step to finish the work completely – use a metal kidney to polish the surface, or a slightly damp sponge to give a freshly thrown look. Wipe the sponge around the rim after trimming, and check the inside of the pot for dags! Trimming slip cast work: Usually I will trim the rims of your work on the wheel the following day to make that stage easier, however you will still need to check your work for lumps and bumps. Last but not least – check that your name is still clearly on the bottom of your work. Step Five – Bisque Firing When the work is completely dry it can go into the bisque kiln. The bisque kiln is fired to 1000°C. This process burns off the water in the clay as well as some of the chemically bound water. The structure of the clay is not altered that much at this temperature. Inside the bisque kiln, the work is stacked a little, small bowl inside a larger bowl and onto a heavy plate. Smaller items like decorations or drink coasters might get stacked several high. Consideration is paid to the weight of the stack and shape of the work. A bisque kiln can fire about one and a half times the amount of work that the glaze kiln can fire. The firing takes about 10 hours to complete the cycle and about two days to cool down. Once it has been emptied the work is placed in the glaze room ready for you to decorate! Step Six – Glazing Decorating your work with colour can be a lot of fun – and time consuming! There are three main options for surface treatment at this stage: Oxide Washes Underglazes Glazes Washes and underglazes do not “glaze” the work – It will still need a layer of glaze to fully seal the clay (washes don’t need glaze on surfaces not designed for food or liquid as they can gloss up a little on their own). Underglazes are stable colourants that turn out pretty much how they look in the jar. They can be mixed with each other to form other colours and can be used like water colours to paint onto your work. Mostly they should have a clear glaze on top to seal them. Oxides are a different species – the pink oxide (cobalt) wash turns out bright blue for instance. They don’t always need a glaze on top, and some glazes can change the colour of the wash! The glazes need no other “glaze” on top! Be careful of unknown glaze interactions – you can put any combination of glaze in a bowl or on a plate, but only a single glaze on the outside of any vertical surface! Glazes are a chemical reaction under heat. We don’t know the exact chemicals in the Mayco glazes we use. I can guess by the way they interact with each other, however, on the whole, you need to test every idea you have, and not run the test on a vertical surface! Simply put, glaze is a layer of glass like substance that bonds with the clay underneath. Clay is made of silica, alumina and water. Glaze is made of mostly silica. Silica has a melting point of 1700°C and we fire to 1240°C. The silica requires a “flux” to help it melt at the lower temperature. Fluxes can be all sorts of chemicals – a common one is calcium – calcium has a melting point of 2500°C, however, together they both melt at a much lower temperature! Colourants are metal oxides like cobalt (blue), chrome (green through black), copper (green, blue, even red!), manganese (black, purple and pink) iron (red brown), etc. Different chemicals in the glaze can have dramatic effects. for example, barium carbonate (which we don’t use) turns manganese bright pink! Other elements can turn manganese dioxide brown, blue, purple and reddish brown. Manganese dioxide is a flux in and of itself as well. So, glazes that get their black and purple colours, often interact with other glazes and RUN! Our mirror black is a good example – it mixes really well with many glazes because it fluxes them – causes them to melt faster. It will also bring out many beautiful colours in the glazes because it’s black colouring most definitely comes from manganese dioxide! Glaze chemistry is a whole subject on it’s own! We use commercial Mayco glazes on purpose – for their huge range of colour possibilities, stability, cool interactions, artistic freedom with the ability to easily brush the glazes on and ease of use. We currently have almost 50 glazes on hand! A major project is to test the interactions of all glazes with each other. That is 2,500 test tiles!!!! I’m going to make the wall behind the wheels the feature wall of pretty colours! Step Seven – Glaze (Gloss or sometimes called “Glost”) Firing Most of the time this is the final stage of making your creation (but not always!) The glaze kiln goes to 1240°C. This is called cone 6, or midrange. It is the low end of stoneware temperatures. Stoneware clays and glazes are typically fired at cone 8 – 10, that is 1260 – 1290°C. The energy requirement to go from 1240°C to 1280°C is almost a 30% more! Our clay is formulated to vitrify (mature, turn “glass-like”) at 1240°, as are our glazes. A glaze kiln take around 12 hours to reach temperature and two to three days to cool down. Sometimes a third firing process is required – this is for decoration that is added to work after the glaze firing. For example – adding precious metals and lustres. this firing temperature is usually around 600 – 800°C depending upon the techniques being used. There are many students interested in gold and silver trims – we will be doing this third type of firing soon! After firing your work will be in the student finished work shelves. Remember to pay for it before you head out the door! There is a small extra charge for using porcelain clay (it’s more than twice the price of regular clay), and for any third firing process! Once your work has been fired it can not turn back into clay for millennia – so don’t fire it if you don’t like it! Put it in the bucket for recycling. https://firebirdstudios.com.au/the-process-of-making-pottery/ This bowl is an example of kitchenware used in the 19th century and still in use today.Bowl white ceramic plain that has two sets of edging around lip. Inside bowl has plaster designed to look like cooking mixture.flagstaff hill, warrnambool, shipwrecked-coast, flagstaff-hill, flagstaff-hill-maritime-museum, maritime-museum, shipwreck-coast, flagstaff-hill-maritime-village, kitchen equipment, ceramic -
 Flagstaff Hill Maritime Museum and Village
Domestic object - Bowl, J & G Meakin, Late 19th or early 20th Century
The Process of Making Pottery Decorating, Firing, Glazing, Making, Technical There is a rhythm and flow to clay. It can’t be done all at once! Even the making process! It can take weeks to get everything done, especially if you can only work on your pottery once a week! Even though we have three hour classes, it’s often just not enough time! Here is an overview of some of the processes so you have a bit more grasp on some of the technical stuff! Step One – Design There are SO many ideas out there for making stuff in clay! From delicate porcelain jewellery, through to heavy sculptural work and everything in between. Deciding your direction is sometimes not that easy – when you first start, try everything, you will naturally gravitate to the style that you enjoy! The options and variations are endless and can get a wee bit overwhelming too! Check in with me before you start to ensure your ideas will work, what order you might do things, how you could achieve the look you are seeking and any other technical data required! Step Two – Making Clay is thixotropic. This means that as you work with it, the clay first gets sloppier and wetter, before is begins to dry in the atmosphere. For most things, you simply can’t do all parts of the project at once. An example of work order might look like: Get last weeks work out from the shelves Prepare clay for today’s work – roll your clay, prepare balls for throwing, make the first stage of a pinch pot) Clean up last week’s work and put it on the shelf for bisque firing Check that you have any glazing to do – and do enough of it that you will have time to finish your main project Do the next step of your next project – there might be a further step that can’t be complete immediately, in that case, wrap your work well and put onto the shelves. Letting your work rest for a while can really help keep your work clean and professional looking. Many things require bagging under plastic to keep it ready for work the next week – put your name on the outside of the bag so you can find your work easily. We have stickers and markers. Consider how you want to decorate your work – coloured slip can be applied at a fairly wet stage (remembering that it will make your work even wetter!). Trying to apply slip to dry clay won’t work! If you want to do sgraffito – you will need to keep the work leather hard (a state of dryness where you can still work the clay with a little effort and a little water and care). Step Three – Drying Most of the time your work can go into the rack uncovered to let it dry out for the following week. If you want to continue forming or shaping you will need to double bag your work – put your work on a suitable sized bat and put the bat in a bag so the base of the bag is under the bat, then put another bag over the top of the work and tuck the top of the bag under the bat. If you want to trim (or turn) your thrown work the following week, it should also be double bagged. If your work is large, delicate, or of uneven thicknesses, you should lightly cover your work for drying. When considering the drying process, bare in mind the weather, humidity and wind! The hotter and dryer, the faster things dry and work can dry unevenly in the shelves – this can lead to cracking – another time to lightly cover your work for drying. Step Four – Trimming and Cleaning Up Your work is dry! It is called greenware now and it is at it’s most fragile! Handle everything with two hands. I often refer to soft hands – keep everything gentle and with your fingers spread as much as possible. Try to not pick up things like plates too much, and always with both hands! Before your work can be bisque fired it should be “cleaned up”. You work won’t go into the kiln if it has sharp edges – when glazed, sharp edges turn into razor blades! Use a piece of fly wire to rub the work all over – this will scratch a little so be light handed. Use a knife or metal kidney to scrape any areas that require a bit more dynamic treatment than the fly wire offers! Finally, a very light wipe over with a slightly damp sponge can help soften and soothe all of your edges and dags! Trimming thrown work: If you are planning to trim (or turn) your thrown work (and you should be), make sure you bag it well – your work should be leather hard to almost dry for easiest trimming. Use this step to finish the work completely – use a metal kidney to polish the surface, or a slightly damp sponge to give a freshly thrown look. Wipe the sponge around the rim after trimming, and check the inside of the pot for dags! Trimming slip cast work: Usually I will trim the rims of your work on the wheel the following day to make that stage easier, however you will still need to check your work for lumps and bumps. Last but not least – check that your name is still clearly on the bottom of your work. Step Five – Bisque Firing When the work is completely dry it can go into the bisque kiln. The bisque kiln is fired to 1000°C. This process burns off the water in the clay as well as some of the chemically bound water. The structure of the clay is not altered that much at this temperature. Inside the bisque kiln, the work is stacked a little, small bowl inside a larger bowl and onto a heavy plate. Smaller items like decorations or drink coasters might get stacked several high. Consideration is paid to the weight of the stack and shape of the work. A bisque kiln can fire about one and a half times the amount of work that the glaze kiln can fire. The firing takes about 10 hours to complete the cycle and about two days to cool down. Once it has been emptied the work is placed in the glaze room ready for you to decorate! Step Six – Glazing Decorating your work with colour can be a lot of fun – and time consuming! There are three main options for surface treatment at this stage: Oxide Washes Underglazes Glazes Washes and underglazes do not “glaze” the work – It will still need a layer of glaze to fully seal the clay (washes don’t need glaze on surfaces not designed for food or liquid as they can gloss up a little on their own). Underglazes are stable colourants that turn out pretty much how they look in the jar. They can be mixed with each other to form other colours and can be used like water colours to paint onto your work. Mostly they should have a clear glaze on top to seal them. Oxides are a different species – the pink oxide (cobalt) wash turns out bright blue for instance. They don’t always need a glaze on top, and some glazes can change the colour of the wash! The glazes need no other “glaze” on top! Be careful of unknown glaze interactions – you can put any combination of glaze in a bowl or on a plate, but only a single glaze on the outside of any vertical surface! Glazes are a chemical reaction under heat. We don’t know the exact chemicals in the Mayco glazes we use. I can guess by the way they interact with each other, however, on the whole, you need to test every idea you have, and not run the test on a vertical surface! Simply put, glaze is a layer of glass like substance that bonds with the clay underneath. Clay is made of silica, alumina and water. Glaze is made of mostly silica. Silica has a melting point of 1700°C and we fire to 1240°C. The silica requires a “flux” to help it melt at the lower temperature. Fluxes can be all sorts of chemicals – a common one is calcium – calcium has a melting point of 2500°C, however, together they both melt at a much lower temperature! Colourants are metal oxides like cobalt (blue), chrome (green through black), copper (green, blue, even red!), manganese (black, purple and pink) iron (red brown), etc. Different chemicals in the glaze can have dramatic effects. for example, barium carbonate (which we don’t use) turns manganese bright pink! Other elements can turn manganese dioxide brown, blue, purple and reddish brown. Manganese dioxide is a flux in and of itself as well. So, glazes that get their black and purple colours, often interact with other glazes and RUN! Our mirror black is a good example – it mixes really well with many glazes because it fluxes them – causes them to melt faster. It will also bring out many beautiful colours in the glazes because it’s black colouring most definitely comes from manganese dioxide! Glaze chemistry is a whole subject on it’s own! We use commercial Mayco glazes on purpose – for their huge range of colour possibilities, stability, cool interactions, artistic freedom with the ability to easily brush the glazes on and ease of use. We currently have almost 50 glazes on hand! A major project is to test the interactions of all glazes with each other. That is 2,500 test tiles!!!! I’m going to make the wall behind the wheels the feature wall of pretty colours! Step Seven – Glaze (Gloss or sometimes called “Glost”) Firing Most of the time this is the final stage of making your creation (but not always!) The glaze kiln goes to 1240°C. This is called cone 6, or midrange. It is the low end of stoneware temperatures. Stoneware clays and glazes are typically fired at cone 8 – 10, that is 1260 – 1290°C. The energy requirement to go from 1240°C to 1280°C is almost a 30% more! Our clay is formulated to vitrify (mature, turn “glass-like”) at 1240°, as are our glazes. A glaze kiln take around 12 hours to reach temperature and two to three days to cool down. Sometimes a third firing process is required – this is for decoration that is added to work after the glaze firing. For example – adding precious metals and lustres. this firing temperature is usually around 600 – 800°C depending upon the techniques being used. There are many students interested in gold and silver trims – we will be doing this third type of firing soon! After firing your work will be in the student finished work shelves. Remember to pay for it before you head out the door! There is a small extra charge for using porcelain clay (it’s more than twice the price of regular clay), and for any third firing process! Once your work has been fired it can not turn back into clay for millennia – so don’t fire it if you don’t like it! Put it in the bucket for recycling. https://firebirdstudios.com.au/the-process-of-making-pottery/This bowl was made by renowned pottery company J & G Meakin of England. The firm was established in the mid-1800's. The bowl is an example of kitchenware used in the 19th century and still in use today.Bowl; white ceramic, round and tapering inwards towards base. Made by J and G Meakin England.On base, 'Ironstone China Reg SOL 391413' with symbolflagstaff hill, flagstaff hill maritime museum and village, warrnambool, maritime museum, maritime village, great ocean road, shipwreck coast, mixing bowl, food preparation, j & g meakin, pottery, stoke-on-trent, kitchen equipment, ceramic -
 Flagstaff Hill Maritime Museum and Village
Domestic object - Plate
The Process of Making Pottery Decorating, Firing, Glazing, Making, Technical There is a rhythm and flow to clay. It can’t be done all at once! Even the making process! It can take weeks to get everything done, especially if you can only work on your pottery once a week! Even though we have three hour classes, it’s often just not enough time! Here is an overview of some of the processes so you have a bit more grasp on some of the technical stuff! Step One – Design There are SO many ideas out there for making stuff in clay! From delicate porcelain jewellery, through to heavy sculptural work and everything in between. Deciding your direction is sometimes not that easy – when you first start, try everything, you will naturally gravitate to the style that you enjoy! The options and variations are endless and can get a wee bit overwhelming too! Check in with me before you start to ensure your ideas will work, what order you might do things, how you could achieve the look you are seeking and any other technical data required! Step Two – Making Clay is thixotropic. This means that as you work with it, the clay first gets sloppier and wetter, before is begins to dry in the atmosphere. For most things, you simply can’t do all parts of the project at once. An example of work order might look like: Get last weeks work out from the shelves Prepare clay for today’s work – roll your clay, prepare balls for throwing, make the first stage of a pinch pot) Clean up last week’s work and put it on the shelf for bisque firing Check that you have any glazing to do – and do enough of it that you will have time to finish your main project Do the next step of your next project – there might be a further step that can’t be complete immediately, in that case, wrap your work well and put onto the shelves. Letting your work rest for a while can really help keep your work clean and professional looking. Many things require bagging under plastic to keep it ready for work the next week – put your name on the outside of the bag so you can find your work easily. We have stickers and markers. Consider how you want to decorate your work – coloured slip can be applied at a fairly wet stage (remembering that it will make your work even wetter!). Trying to apply slip to dry clay won’t work! If you want to do sgraffito – you will need to keep the work leather hard (a state of dryness where you can still work the clay with a little effort and a little water and care). Step Three – Drying Most of the time your work can go into the rack uncovered to let it dry out for the following week. If you want to continue forming or shaping you will need to double bag your work – put your work on a suitable sized bat and put the bat in a bag so the base of the bag is under the bat, then put another bag over the top of the work and tuck the top of the bag under the bat. If you want to trim (or turn) your thrown work the following week, it should also be double bagged. If your work is large, delicate, or of uneven thicknesses, you should lightly cover your work for drying. When considering the drying process, bare in mind the weather, humidity and wind! The hotter and dryer, the faster things dry and work can dry unevenly in the shelves – this can lead to cracking – another time to lightly cover your work for drying. Step Four – Trimming and Cleaning Up Your work is dry! It is called greenware now and it is at it’s most fragile! Handle everything with two hands. I often refer to soft hands – keep everything gentle and with your fingers spread as much as possible. Try to not pick up things like plates too much, and always with both hands! Before your work can be bisque fired it should be “cleaned up”. You work won’t go into the kiln if it has sharp edges – when glazed, sharp edges turn into razor blades! Use a piece of fly wire to rub the work all over – this will scratch a little so be light handed. Use a knife or metal kidney to scrape any areas that require a bit more dynamic treatment than the fly wire offers! Finally, a very light wipe over with a slightly damp sponge can help soften and soothe all of your edges and dags! Trimming thrown work: If you are planning to trim (or turn) your thrown work (and you should be), make sure you bag it well – your work should be leather hard to almost dry for easiest trimming. Use this step to finish the work completely – use a metal kidney to polish the surface, or a slightly damp sponge to give a freshly thrown look. Wipe the sponge around the rim after trimming, and check the inside of the pot for dags! Trimming slip cast work: Usually I will trim the rims of your work on the wheel the following day to make that stage easier, however you will still need to check your work for lumps and bumps. Last but not least – check that your name is still clearly on the bottom of your work. Step Five – Bisque Firing When the work is completely dry it can go into the bisque kiln. The bisque kiln is fired to 1000°C. This process burns off the water in the clay as well as some of the chemically bound water. The structure of the clay is not altered that much at this temperature. Inside the bisque kiln, the work is stacked a little, small bowl inside a larger bowl and onto a heavy plate. Smaller items like decorations or drink coasters might get stacked several high. Consideration is paid to the weight of the stack and shape of the work. A bisque kiln can fire about one and a half times the amount of work that the glaze kiln can fire. The firing takes about 10 hours to complete the cycle and about two days to cool down. Once it has been emptied the work is placed in the glaze room ready for you to decorate! Step Six – Glazing Decorating your work with colour can be a lot of fun – and time consuming! There are three main options for surface treatment at this stage: Oxide Washes Underglazes Glazes Washes and underglazes do not “glaze” the work – It will still need a layer of glaze to fully seal the clay (washes don’t need glaze on surfaces not designed for food or liquid as they can gloss up a little on their own). Underglazes are stable colourants that turn out pretty much how they look in the jar. They can be mixed with each other to form other colours and can be used like water colours to paint onto your work. Mostly they should have a clear glaze on top to seal them. Oxides are a different species – the pink oxide (cobalt) wash turns out bright blue for instance. They don’t always need a glaze on top, and some glazes can change the colour of the wash! The glazes need no other “glaze” on top! Be careful of unknown glaze interactions – you can put any combination of glaze in a bowl or on a plate, but only a single glaze on the outside of any vertical surface! Glazes are a chemical reaction under heat. We don’t know the exact chemicals in the Mayco glazes we use. I can guess by the way they interact with each other, however, on the whole, you need to test every idea you have, and not run the test on a vertical surface! Simply put, glaze is a layer of glass like substance that bonds with the clay underneath. Clay is made of silica, alumina and water. Glaze is made of mostly silica. Silica has a melting point of 1700°C and we fire to 1240°C. The silica requires a “flux” to help it melt at the lower temperature. Fluxes can be all sorts of chemicals – a common one is calcium – calcium has a melting point of 2500°C, however, together they both melt at a much lower temperature! Colourants are metal oxides like cobalt (blue), chrome (green through black), copper (green, blue, even red!), manganese (black, purple and pink) iron (red brown), etc. Different chemicals in the glaze can have dramatic effects. for example, barium carbonate (which we don’t use) turns manganese bright pink! Other elements can turn manganese dioxide brown, blue, purple and reddish brown. Manganese dioxide is a flux in and of itself as well. So, glazes that get their black and purple colours, often interact with other glazes and RUN! Our mirror black is a good example – it mixes really well with many glazes because it fluxes them – causes them to melt faster. It will also bring out many beautiful colours in the glazes because it’s black colouring most definitely comes from manganese dioxide! Glaze chemistry is a whole subject on it’s own! We use commercial Mayco glazes on purpose – for their huge range of colour possibilities, stability, cool interactions, artistic freedom with the ability to easily brush the glazes on and ease of use. We currently have almost 50 glazes on hand! A major project is to test the interactions of all glazes with each other. That is 2,500 test tiles!!!! I’m going to make the wall behind the wheels the feature wall of pretty colours! Step Seven – Glaze (Gloss or sometimes called “Glost”) Firing Most of the time this is the final stage of making your creation (but not always!) The glaze kiln goes to 1240°C. This is called cone 6, or midrange. It is the low end of stoneware temperatures. Stoneware clays and glazes are typically fired at cone 8 – 10, that is 1260 – 1290°C. The energy requirement to go from 1240°C to 1280°C is almost a 30% more! Our clay is formulated to vitrify (mature, turn “glass-like”) at 1240°, as are our glazes. A glaze kiln take around 12 hours to reach temperature and two to three days to cool down. Sometimes a third firing process is required – this is for decoration that is added to work after the glaze firing. For example – adding precious metals and lustres. this firing temperature is usually around 600 – 800°C depending upon the techniques being used. There are many students interested in gold and silver trims – we will be doing this third type of firing soon! After firing your work will be in the student finished work shelves. Remember to pay for it before you head out the door! There is a small extra charge for using porcelain clay (it’s more than twice the price of regular clay), and for any third firing process! Once your work has been fired it can not turn back into clay for millennia – so don’t fire it if you don’t like it! Put it in the bucket for recycling. https://firebirdstudios.com.au/the-process-of-making-pottery/Ceramics have evolved over thousands of years.White earthenware dinner plate. Crazing evident all over.Backstamped ‘Made in England S LTD’flagstaff hill, warrnambool, shipwrecked-coast, flagstaff-hill, flagstaff-hill-maritime-museum, maritime-museum, shipwreck-coast, flagstaff-hill-maritime-village, ceramics, tableware -
 Flagstaff Hill Maritime Museum and Village
Domestic object - Plate, Johnson Bros
The Process of Making Pottery Decorating, Firing, Glazing, Making, Technical There is a rhythm and flow to clay. It can’t be done all at once! Even the making process! It can take weeks to get everything done, especially if you can only work on your pottery once a week! Even though we have three hour classes, it’s often just not enough time! Here is an overview of some of the processes so you have a bit more grasp on some of the technical stuff! Step One – Design There are SO many ideas out there for making stuff in clay! From delicate porcelain jewellery, through to heavy sculptural work and everything in between. Deciding your direction is sometimes not that easy – when you first start, try everything, you will naturally gravitate to the style that you enjoy! The options and variations are endless and can get a wee bit overwhelming too! Check in with me before you start to ensure your ideas will work, what order you might do things, how you could achieve the look you are seeking and any other technical data required! Step Two – Making Clay is thixotropic. This means that as you work with it, the clay first gets sloppier and wetter, before is begins to dry in the atmosphere. For most things, you simply can’t do all parts of the project at once. An example of work order might look like: Get last weeks work out from the shelves Prepare clay for today’s work – roll your clay, prepare balls for throwing, make the first stage of a pinch pot) Clean up last week’s work and put it on the shelf for bisque firing Check that you have any glazing to do – and do enough of it that you will have time to finish your main project Do the next step of your next project – there might be a further step that can’t be complete immediately, in that case, wrap your work well and put onto the shelves. Letting your work rest for a while can really help keep your work clean and professional looking. Many things require bagging under plastic to keep it ready for work the next week – put your name on the outside of the bag so you can find your work easily. We have stickers and markers. Consider how you want to decorate your work – coloured slip can be applied at a fairly wet stage (remembering that it will make your work even wetter!). Trying to apply slip to dry clay won’t work! If you want to do sgraffito – you will need to keep the work leather hard (a state of dryness where you can still work the clay with a little effort and a little water and care). Step Three – Drying Most of the time your work can go into the rack uncovered to let it dry out for the following week. If you want to continue forming or shaping you will need to double bag your work – put your work on a suitable sized bat and put the bat in a bag so the base of the bag is under the bat, then put another bag over the top of the work and tuck the top of the bag under the bat. If you want to trim (or turn) your thrown work the following week, it should also be double bagged. If your work is large, delicate, or of uneven thicknesses, you should lightly cover your work for drying. When considering the drying process, bare in mind the weather, humidity and wind! The hotter and dryer, the faster things dry and work can dry unevenly in the shelves – this can lead to cracking – another time to lightly cover your work for drying. Step Four – Trimming and Cleaning Up Your work is dry! It is called greenware now and it is at it’s most fragile! Handle everything with two hands. I often refer to soft hands – keep everything gentle and with your fingers spread as much as possible. Try to not pick up things like plates too much, and always with both hands! Before your work can be bisque fired it should be “cleaned up”. You work won’t go into the kiln if it has sharp edges – when glazed, sharp edges turn into razor blades! Use a piece of fly wire to rub the work all over – this will scratch a little so be light handed. Use a knife or metal kidney to scrape any areas that require a bit more dynamic treatment than the fly wire offers! Finally, a very light wipe over with a slightly damp sponge can help soften and soothe all of your edges and dags! Trimming thrown work: If you are planning to trim (or turn) your thrown work (and you should be), make sure you bag it well – your work should be leather hard to almost dry for easiest trimming. Use this step to finish the work completely – use a metal kidney to polish the surface, or a slightly damp sponge to give a freshly thrown look. Wipe the sponge around the rim after trimming, and check the inside of the pot for dags! Trimming slip cast work: Usually I will trim the rims of your work on the wheel the following day to make that stage easier, however you will still need to check your work for lumps and bumps. Last but not least – check that your name is still clearly on the bottom of your work. Step Five – Bisque Firing When the work is completely dry it can go into the bisque kiln. The bisque kiln is fired to 1000°C. This process burns off the water in the clay as well as some of the chemically bound water. The structure of the clay is not altered that much at this temperature. Inside the bisque kiln, the work is stacked a little, small bowl inside a larger bowl and onto a heavy plate. Smaller items like decorations or drink coasters might get stacked several high. Consideration is paid to the weight of the stack and shape of the work. A bisque kiln can fire about one and a half times the amount of work that the glaze kiln can fire. The firing takes about 10 hours to complete the cycle and about two days to cool down. Once it has been emptied the work is placed in the glaze room ready for you to decorate! Step Six – Glazing Decorating your work with colour can be a lot of fun – and time consuming! There are three main options for surface treatment at this stage: Oxide Washes Underglazes Glazes Washes and underglazes do not “glaze” the work – It will still need a layer of glaze to fully seal the clay (washes don’t need glaze on surfaces not designed for food or liquid as they can gloss up a little on their own). Underglazes are stable colourants that turn out pretty much how they look in the jar. They can be mixed with each other to form other colours and can be used like water colours to paint onto your work. Mostly they should have a clear glaze on top to seal them. Oxides are a different species – the pink oxide (cobalt) wash turns out bright blue for instance. They don’t always need a glaze on top, and some glazes can change the colour of the wash! The glazes need no other “glaze” on top! Be careful of unknown glaze interactions – you can put any combination of glaze in a bowl or on a plate, but only a single glaze on the outside of any vertical surface! Glazes are a chemical reaction under heat. We don’t know the exact chemicals in the Mayco glazes we use. I can guess by the way they interact with each other, however, on the whole, you need to test every idea you have, and not run the test on a vertical surface! Simply put, glaze is a layer of glass like substance that bonds with the clay underneath. Clay is made of silica, alumina and water. Glaze is made of mostly silica. Silica has a melting point of 1700°C and we fire to 1240°C. The silica requires a “flux” to help it melt at the lower temperature. Fluxes can be all sorts of chemicals – a common one is calcium – calcium has a melting point of 2500°C, however, together they both melt at a much lower temperature! Colourants are metal oxides like cobalt (blue), chrome (green through black), copper (green, blue, even red!), manganese (black, purple and pink) iron (red brown), etc. Different chemicals in the glaze can have dramatic effects. for example, barium carbonate (which we don’t use) turns manganese bright pink! Other elements can turn manganese dioxide brown, blue, purple and reddish brown. Manganese dioxide is a flux in and of itself as well. So, glazes that get their black and purple colours, often interact with other glazes and RUN! Our mirror black is a good example – it mixes really well with many glazes because it fluxes them – causes them to melt faster. It will also bring out many beautiful colours in the glazes because it’s black colouring most definitely comes from manganese dioxide! Glaze chemistry is a whole subject on it’s own! We use commercial Mayco glazes on purpose – for their huge range of colour possibilities, stability, cool interactions, artistic freedom with the ability to easily brush the glazes on and ease of use. We currently have almost 50 glazes on hand! A major project is to test the interactions of all glazes with each other. That is 2,500 test tiles!!!! I’m going to make the wall behind the wheels the feature wall of pretty colours! Step Seven – Glaze (Gloss or sometimes called “Glost”) Firing Most of the time this is the final stage of making your creation (but not always!) The glaze kiln goes to 1240°C. This is called cone 6, or midrange. It is the low end of stoneware temperatures. Stoneware clays and glazes are typically fired at cone 8 – 10, that is 1260 – 1290°C. The energy requirement to go from 1240°C to 1280°C is almost a 30% more! Our clay is formulated to vitrify (mature, turn “glass-like”) at 1240°, as are our glazes. A glaze kiln take around 12 hours to reach temperature and two to three days to cool down. Sometimes a third firing process is required – this is for decoration that is added to work after the glaze firing. For example – adding precious metals and lustres. this firing temperature is usually around 600 – 800°C depending upon the techniques being used. There are many students interested in gold and silver trims – we will be doing this third type of firing soon! After firing your work will be in the student finished work shelves. Remember to pay for it before you head out the door! There is a small extra charge for using porcelain clay (it’s more than twice the price of regular clay), and for any third firing process! Once your work has been fired it can not turn back into clay for millennia – so don’t fire it if you don’t like it! Put it in the bucket for recycling. https://firebirdstudios.com.au/the-process-of-making-pottery/Ceramics have evolved over thousands of years.A white earthenware side plate with a gadroon edge. Has water marks and chips on front.‘Johnson Bros England Reg No 15587’flagstaff hill, warrnambool, shipwrecked-coast, flagstaff-hill, flagstaff-hill-maritime-museum, maritime-museum, shipwreck-coast, flagstaff-hill-maritime-village, johnson bros, ceramics, tableware -
 Flagstaff Hill Maritime Museum and Village
Domestic object - Plate, Alfred Meakin
The Process of Making Pottery Decorating, Firing, Glazing, Making, Technical There is a rhythm and flow to clay. It can’t be done all at once! Even the making process! It can take weeks to get everything done, especially if you can only work on your pottery once a week! Even though we have three hour classes, it’s often just not enough time! Here is an overview of some of the processes so you have a bit more grasp on some of the technical stuff! Step One – Design There are SO many ideas out there for making stuff in clay! From delicate porcelain jewellery, through to heavy sculptural work and everything in between. Deciding your direction is sometimes not that easy – when you first start, try everything, you will naturally gravitate to the style that you enjoy! The options and variations are endless and can get a wee bit overwhelming too! Check in with me before you start to ensure your ideas will work, what order you might do things, how you could achieve the look you are seeking and any other technical data required! Step Two – Making Clay is thixotropic. This means that as you work with it, the clay first gets sloppier and wetter, before is begins to dry in the atmosphere. For most things, you simply can’t do all parts of the project at once. An example of work order might look like: Get last weeks work out from the shelves Prepare clay for today’s work – roll your clay, prepare balls for throwing, make the first stage of a pinch pot) Clean up last week’s work and put it on the shelf for bisque firing Check that you have any glazing to do – and do enough of it that you will have time to finish your main project Do the next step of your next project – there might be a further step that can’t be complete immediately, in that case, wrap your work well and put onto the shelves. Letting your work rest for a while can really help keep your work clean and professional looking. Many things require bagging under plastic to keep it ready for work the next week – put your name on the outside of the bag so you can find your work easily. We have stickers and markers. Consider how you want to decorate your work – coloured slip can be applied at a fairly wet stage (remembering that it will make your work even wetter!). Trying to apply slip to dry clay won’t work! If you want to do sgraffito – you will need to keep the work leather hard (a state of dryness where you can still work the clay with a little effort and a little water and care). Step Three – Drying Most of the time your work can go into the rack uncovered to let it dry out for the following week. If you want to continue forming or shaping you will need to double bag your work – put your work on a suitable sized bat and put the bat in a bag so the base of the bag is under the bat, then put another bag over the top of the work and tuck the top of the bag under the bat. If you want to trim (or turn) your thrown work the following week, it should also be double bagged. If your work is large, delicate, or of uneven thicknesses, you should lightly cover your work for drying. When considering the drying process, bare in mind the weather, humidity and wind! The hotter and dryer, the faster things dry and work can dry unevenly in the shelves – this can lead to cracking – another time to lightly cover your work for drying. Step Four – Trimming and Cleaning Up Your work is dry! It is called greenware now and it is at it’s most fragile! Handle everything with two hands. I often refer to soft hands – keep everything gentle and with your fingers spread as much as possible. Try to not pick up things like plates too much, and always with both hands! Before your work can be bisque fired it should be “cleaned up”. You work won’t go into the kiln if it has sharp edges – when glazed, sharp edges turn into razor blades! Use a piece of fly wire to rub the work all over – this will scratch a little so be light handed. Use a knife or metal kidney to scrape any areas that require a bit more dynamic treatment than the fly wire offers! Finally, a very light wipe over with a slightly damp sponge can help soften and soothe all of your edges and dags! Trimming thrown work: If you are planning to trim (or turn) your thrown work (and you should be), make sure you bag it well – your work should be leather hard to almost dry for easiest trimming. Use this step to finish the work completely – use a metal kidney to polish the surface, or a slightly damp sponge to give a freshly thrown look. Wipe the sponge around the rim after trimming, and check the inside of the pot for dags! Trimming slip cast work: Usually I will trim the rims of your work on the wheel the following day to make that stage easier, however you will still need to check your work for lumps and bumps. Last but not least – check that your name is still clearly on the bottom of your work. Step Five – Bisque Firing When the work is completely dry it can go into the bisque kiln. The bisque kiln is fired to 1000°C. This process burns off the water in the clay as well as some of the chemically bound water. The structure of the clay is not altered that much at this temperature. Inside the bisque kiln, the work is stacked a little, small bowl inside a larger bowl and onto a heavy plate. Smaller items like decorations or drink coasters might get stacked several high. Consideration is paid to the weight of the stack and shape of the work. A bisque kiln can fire about one and a half times the amount of work that the glaze kiln can fire. The firing takes about 10 hours to complete the cycle and about two days to cool down. Once it has been emptied the work is placed in the glaze room ready for you to decorate! Step Six – Glazing Decorating your work with colour can be a lot of fun – and time consuming! There are three main options for surface treatment at this stage: Oxide Washes Underglazes Glazes Washes and underglazes do not “glaze” the work – It will still need a layer of glaze to fully seal the clay (washes don’t need glaze on surfaces not designed for food or liquid as they can gloss up a little on their own). Underglazes are stable colourants that turn out pretty much how they look in the jar. They can be mixed with each other to form other colours and can be used like water colours to paint onto your work. Mostly they should have a clear glaze on top to seal them. Oxides are a different species – the pink oxide (cobalt) wash turns out bright blue for instance. They don’t always need a glaze on top, and some glazes can change the colour of the wash! The glazes need no other “glaze” on top! Be careful of unknown glaze interactions – you can put any combination of glaze in a bowl or on a plate, but only a single glaze on the outside of any vertical surface! Glazes are a chemical reaction under heat. We don’t know the exact chemicals in the Mayco glazes we use. I can guess by the way they interact with each other, however, on the whole, you need to test every idea you have, and not run the test on a vertical surface! Simply put, glaze is a layer of glass like substance that bonds with the clay underneath. Clay is made of silica, alumina and water. Glaze is made of mostly silica. Silica has a melting point of 1700°C and we fire to 1240°C. The silica requires a “flux” to help it melt at the lower temperature. Fluxes can be all sorts of chemicals – a common one is calcium – calcium has a melting point of 2500°C, however, together they both melt at a much lower temperature! Colourants are metal oxides like cobalt (blue), chrome (green through black), copper (green, blue, even red!), manganese (black, purple and pink) iron (red brown), etc. Different chemicals in the glaze can have dramatic effects. for example, barium carbonate (which we don’t use) turns manganese bright pink! Other elements can turn manganese dioxide brown, blue, purple and reddish brown. Manganese dioxide is a flux in and of itself as well. So, glazes that get their black and purple colours, often interact with other glazes and RUN! Our mirror black is a good example – it mixes really well with many glazes because it fluxes them – causes them to melt faster. It will also bring out many beautiful colours in the glazes because it’s black colouring most definitely comes from manganese dioxide! Glaze chemistry is a whole subject on it’s own! We use commercial Mayco glazes on purpose – for their huge range of colour possibilities, stability, cool interactions, artistic freedom with the ability to easily brush the glazes on and ease of use. We currently have almost 50 glazes on hand! A major project is to test the interactions of all glazes with each other. That is 2,500 test tiles!!!! I’m going to make the wall behind the wheels the feature wall of pretty colours! Step Seven – Glaze (Gloss or sometimes called “Glost”) Firing Most of the time this is the final stage of making your creation (but not always!) The glaze kiln goes to 1240°C. This is called cone 6, or midrange. It is the low end of stoneware temperatures. Stoneware clays and glazes are typically fired at cone 8 – 10, that is 1260 – 1290°C. The energy requirement to go from 1240°C to 1280°C is almost a 30% more! Our clay is formulated to vitrify (mature, turn “glass-like”) at 1240°, as are our glazes. A glaze kiln take around 12 hours to reach temperature and two to three days to cool down. Sometimes a third firing process is required – this is for decoration that is added to work after the glaze firing. For example – adding precious metals and lustres. this firing temperature is usually around 600 – 800°C depending upon the techniques being used. There are many students interested in gold and silver trims – we will be doing this third type of firing soon! After firing your work will be in the student finished work shelves. Remember to pay for it before you head out the door! There is a small extra charge for using porcelain clay (it’s more than twice the price of regular clay), and for any third firing process! Once your work has been fired it can not turn back into clay for millennia – so don’t fire it if you don’t like it! Put it in the bucket for recycling. https://firebirdstudios.com.au/the-process-of-making-pottery/Ceramics have evolved over thousands of years.Earthenware dessert plate, cream colour. Made by Alfred Meakin, England. Backstamped ‘Alfred Meakin England’. flagstaff hill, warrnambool, shipwrecked-coast, flagstaff-hill, flagstaff-hill-maritime-museum, maritime-museum, shipwreck-coast, flagstaff-hill-maritime-village, alfred meakin, ceramics, earthenware, kitchenware -
 Flagstaff Hill Maritime Museum and Village
Domestic object - Jug
The Process of Making Pottery Decorating, Firing, Glazing, Making, Technical There is a rhythm and flow to clay. It can’t be done all at once! Even the making process! It can take weeks to get everything done, especially if you can only work on your pottery once a week! Even though we have three hour classes, it’s often just not enough time! Here is an overview of some of the processes so you have a bit more grasp on some of the technical stuff! Step One – Design There are SO many ideas out there for making stuff in clay! From delicate porcelain jewellery, through to heavy sculptural work and everything in between. Deciding your direction is sometimes not that easy – when you first start, try everything, you will naturally gravitate to the style that you enjoy! The options and variations are endless and can get a wee bit overwhelming too! Check in with me before you start to ensure your ideas will work, what order you might do things, how you could achieve the look you are seeking and any other technical data required! Step Two – Making Clay is thixotropic. This means that as you work with it, the clay first gets sloppier and wetter, before is begins to dry in the atmosphere. For most things, you simply can’t do all parts of the project at once. An example of work order might look like: Get last weeks work out from the shelves Prepare clay for today’s work – roll your clay, prepare balls for throwing, make the first stage of a pinch pot) Clean up last week’s work and put it on the shelf for bisque firing Check that you have any glazing to do – and do enough of it that you will have time to finish your main project Do the next step of your next project – there might be a further step that can’t be complete immediately, in that case, wrap your work well and put onto the shelves. Letting your work rest for a while can really help keep your work clean and professional looking. Many things require bagging under plastic to keep it ready for work the next week – put your name on the outside of the bag so you can find your work easily. We have stickers and markers. Consider how you want to decorate your work – coloured slip can be applied at a fairly wet stage (remembering that it will make your work even wetter!). Trying to apply slip to dry clay won’t work! If you want to do sgraffito – you will need to keep the work leather hard (a state of dryness where you can still work the clay with a little effort and a little water and care). Step Three – Drying Most of the time your work can go into the rack uncovered to let it dry out for the following week. If you want to continue forming or shaping you will need to double bag your work – put your work on a suitable sized bat and put the bat in a bag so the base of the bag is under the bat, then put another bag over the top of the work and tuck the top of the bag under the bat. If you want to trim (or turn) your thrown work the following week, it should also be double bagged. If your work is large, delicate, or of uneven thicknesses, you should lightly cover your work for drying. When considering the drying process, bare in mind the weather, humidity and wind! The hotter and dryer, the faster things dry and work can dry unevenly in the shelves – this can lead to cracking – another time to lightly cover your work for drying. Step Four – Trimming and Cleaning Up Your work is dry! It is called greenware now and it is at it’s most fragile! Handle everything with two hands. I often refer to soft hands – keep everything gentle and with your fingers spread as much as possible. Try to not pick up things like plates too much, and always with both hands! Before your work can be bisque fired it should be “cleaned up”. You work won’t go into the kiln if it has sharp edges – when glazed, sharp edges turn into razor blades! Use a piece of fly wire to rub the work all over – this will scratch a little so be light handed. Use a knife or metal kidney to scrape any areas that require a bit more dynamic treatment than the fly wire offers! Finally, a very light wipe over with a slightly damp sponge can help soften and soothe all of your edges and dags! Trimming thrown work: If you are planning to trim (or turn) your thrown work (and you should be), make sure you bag it well – your work should be leather hard to almost dry for easiest trimming. Use this step to finish the work completely – use a metal kidney to polish the surface, or a slightly damp sponge to give a freshly thrown look. Wipe the sponge around the rim after trimming, and check the inside of the pot for dags! Trimming slip cast work: Usually I will trim the rims of your work on the wheel the following day to make that stage easier, however you will still need to check your work for lumps and bumps. Last but not least – check that your name is still clearly on the bottom of your work. Step Five – Bisque Firing When the work is completely dry it can go into the bisque kiln. The bisque kiln is fired to 1000°C. This process burns off the water in the clay as well as some of the chemically bound water. The structure of the clay is not altered that much at this temperature. Inside the bisque kiln, the work is stacked a little, small bowl inside a larger bowl and onto a heavy plate. Smaller items like decorations or drink coasters might get stacked several high. Consideration is paid to the weight of the stack and shape of the work. A bisque kiln can fire about one and a half times the amount of work that the glaze kiln can fire. The firing takes about 10 hours to complete the cycle and about two days to cool down. Once it has been emptied the work is placed in the glaze room ready for you to decorate! Step Six – Glazing Decorating your work with colour can be a lot of fun – and time consuming! There are three main options for surface treatment at this stage: Oxide Washes Underglazes Glazes Washes and underglazes do not “glaze” the work – It will still need a layer of glaze to fully seal the clay (washes don’t need glaze on surfaces not designed for food or liquid as they can gloss up a little on their own). Underglazes are stable colourants that turn out pretty much how they look in the jar. They can be mixed with each other to form other colours and can be used like water colours to paint onto your work. Mostly they should have a clear glaze on top to seal them. Oxides are a different species – the pink oxide (cobalt) wash turns out bright blue for instance. They don’t always need a glaze on top, and some glazes can change the colour of the wash! The glazes need no other “glaze” on top! Be careful of unknown glaze interactions – you can put any combination of glaze in a bowl or on a plate, but only a single glaze on the outside of any vertical surface! Glazes are a chemical reaction under heat. We don’t know the exact chemicals in the Mayco glazes we use. I can guess by the way they interact with each other, however, on the whole, you need to test every idea you have, and not run the test on a vertical surface! Simply put, glaze is a layer of glass like substance that bonds with the clay underneath. Clay is made of silica, alumina and water. Glaze is made of mostly silica. Silica has a melting point of 1700°C and we fire to 1240°C. The silica requires a “flux” to help it melt at the lower temperature. Fluxes can be all sorts of chemicals – a common one is calcium – calcium has a melting point of 2500°C, however, together they both melt at a much lower temperature! Colourants are metal oxides like cobalt (blue), chrome (green through black), copper (green, blue, even red!), manganese (black, purple and pink) iron (red brown), etc. Different chemicals in the glaze can have dramatic effects. for example, barium carbonate (which we don’t use) turns manganese bright pink! Other elements can turn manganese dioxide brown, blue, purple and reddish brown. Manganese dioxide is a flux in and of itself as well. So, glazes that get their black and purple colours, often interact with other glazes and RUN! Our mirror black is a good example – it mixes really well with many glazes because it fluxes them – causes them to melt faster. It will also bring out many beautiful colours in the glazes because it’s black colouring most definitely comes from manganese dioxide! Glaze chemistry is a whole subject on it’s own! We use commercial Mayco glazes on purpose – for their huge range of colour possibilities, stability, cool interactions, artistic freedom with the ability to easily brush the glazes on and ease of use. We currently have almost 50 glazes on hand! A major project is to test the interactions of all glazes with each other. That is 2,500 test tiles!!!! I’m going to make the wall behind the wheels the feature wall of pretty colours! Step Seven – Glaze (Gloss or sometimes called “Glost”) Firing Most of the time this is the final stage of making your creation (but not always!) The glaze kiln goes to 1240°C. This is called cone 6, or midrange. It is the low end of stoneware temperatures. Stoneware clays and glazes are typically fired at cone 8 – 10, that is 1260 – 1290°C. The energy requirement to go from 1240°C to 1280°C is almost a 30% more! Our clay is formulated to vitrify (mature, turn “glass-like”) at 1240°, as are our glazes. A glaze kiln take around 12 hours to reach temperature and two to three days to cool down. Sometimes a third firing process is required – this is for decoration that is added to work after the glaze firing. For example – adding precious metals and lustres. this firing temperature is usually around 600 – 800°C depending upon the techniques being used. There are many students interested in gold and silver trims – we will be doing this third type of firing soon! After firing your work will be in the student finished work shelves. Remember to pay for it before you head out the door! There is a small extra charge for using porcelain clay (it’s more than twice the price of regular clay), and for any third firing process! Once your work has been fired it can not turn back into clay for millennia – so don’t fire it if you don’t like it! Put it in the bucket for recycling. https://firebirdstudios.com.au/the-process-of-making-pottery/The form of the jug has been in use for many centuries.Stoneware jug. Two tone brown glaze with pierced lip behind spout. Spout chipped.None.flagstaff hill, warrnambool, shipwrecked-coast, flagstaff-hill, flagstaff-hill-maritime-museum, maritime-museum, shipwreck-coast, flagstaff-hill-maritime-village, jug, ceramic jug -
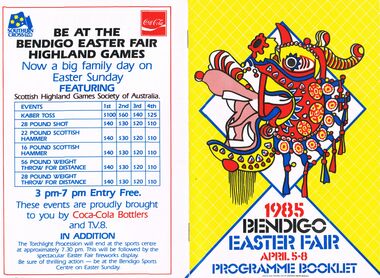 Bendigo Historical Society Inc.
Document - BENDIGO EASTER FAIR 1985, 5 April 1985
Bendigo Easter Fair 1985, April 5-8. Programme Booklet. Friday: Sun Loon Display, Easter Bowling Carnival, Rotary Easter Art Show, Book Bazaar, Model Railroaders Exhibition, Dudley House, Exhibition of Dolls, Embroiderers Guild, Art Gallery. Saturday: Mardi-Gras Street Carnival, Busking, Outdoor Theatre, Arts & Music, Bendigo Theatre Company, Cynthia Holland & Bendigo Talent Club Sun Loong Display, Rotary Art Show, Handcraft Bazaar, Motorcycle Show-Sandhurst Historic Vehicle Club Trams, Central Deborah, Dudley House, Exhibition Dolls, Antique Fair, Model Railroaders, Fire Brigades' Carnival for Children, Horse & Harness Parade, Book Bazaar, Bowling Carnival, Football, Photographic Exhibition, Family Activities, Cinema 180, Exhibition of Paintings silver furniture & porcelain, Embroiders Guild. Sunday: Horse Spectacular, Model Railroaders, Rotary Art Show, Handcraft Bazaar, Antique & Historical Display of Arms Weapons & Military, Antique Fair, Torchlight Procession, Awakening of Dragon, Exhibition of Dolls, Dudley House, Trams, Central Deborah, Book Bazaar, Mardi-Gras Street Carnival, Hargreaves Mall, Motorcycle Show, Photographic Exhibition, Family Activities, Cinema 180, Art Gallery, Embroiderers Guild. Monday: Philatelic Society Exhibition, Rotary Art Show, Handcraft Bazaar, Antique Fair, Model Railroaders, Bendigo District Bowling Assn. Easter Bowling Carnival, Exhibition of Dolls, Dudley House Bendigo Branch Royal Historical Society, Trams, Central Deborah, Motorcycle Show, Antique and Historical Display of Arms Weapons & Militaria, Mardi-Gras Street Carnival, Hargreaves Mall, Gala Street Procession, Carnival For Children, Sun Loong on Display, Photographic Exhibition, Fusion, Cinema 180, Art Gallery, Embroiders Guild. Church Services in Bendigo City Area During Easter (listings for Thursday, Good Friday, Eater Saturday, Easter Day). The Bendigo & District Tourism Association Welcomes you to Victoria's Premier Town. Listing of events over Easter with map to guide all around. Bendigo Easter Fair Incorporated Phone: (054) 43 9191Bendigo Easter Fair Inc. would like to thank the Ministry for the Arts for its continued assistance over the past 11 years. 3 1/2 pages of information on the Bendigo Easter Fair and its rich history dating back to 1871. The first Fair was held to aid 2 charities: Bendigo Base Hospital and the Home and Hospital for the Aged (Benevolent Asylum). Gone are the days of the Fancy Bazaar, Fat Baby Contest and the greasy Pig Chase, many tradition remain the same. Links to the Chinese community date back to when the first settlers arrived seeking gold. This gives the Fair its unique quality and Brings visitors in their thousands each Easter. The Monday Procession has always been the most famous as many old photographs show. Some photos taken before the turn of the century. Many made the journey to Bendigo from Melbourne and outlying districts. Visitors line the route to see floats, bands, and the once a year appearance of the Chinese Dragon, ''Sun Loong'' or ''New Dragon''. The longest Imperial Dragon in the World; 300ft plus in length. His predecessor, ''Long'', is acclaimed as the worlds oldest Imperial Dragon. Easter Saturday Procession has taken form of a Horse and Harness Parade, attracting and immense variety of entrants. The torchlight Procession on Sunday evening includes fireworks, Fire Brigades, Fire Trucks, firemen, marching girls and illuminated floats. The Army has helped with the procession since around the time of Federation. 15th Transport Squadron (15 Tpt. Sqdn.), processions are assembled & dispatched with Army efficiency. Marshalling the Monday Procession this year will be done by the Army as well as our own Easter Fair marshalls with a new communications system.1930 the Popular Girl contest was introduced. The four main streets of Bendigo, Pall Mall, Mitchell Street, Hargreaves Street and Williamson Street (formerly View Street), sponsored their particular girl by means of raffles, street stalls and a variety of fund raising. The winner was the one that raised the most money, and was announced from the balcony of the Shamrock Hotel, by the Mayor of Bendigo on Easter Saturday Night. The Popular girl contest is still held with a lot of the fund raising now done by service clubs and voluntary organizations. 1984 fund raising efforts, in excess of $50,000 was distributed to charities in our area. The combined Bendigo Brigades' record support for the Easter Fair goes back of many years in a variety of ways. Bendigo people are known for their love of sport and the choice in the city is very wide. There will be no Easter Sports Carnival this year but Easter Fair will still be holding functions at the Bendigo Sports Centre in Park Road. Bendigo city centre will be alive with stalls, raffles and rides of every description over the three days of sports, Sat-Sun. Hargreaves Mall will be the focus of relaxation, buskers, community theatre, arts with craft activity & musical entertainment. The Rotary Club of Bendigo and the Easter Fair Society had had independent Arts Shows but in 1981amalgamate their shows. 1981 Rotary Club of Bendigo added the Antique Fair to the Easter Program, held in the RSL Memorial Hall, Pall Mall. Last year some event were cancelled, but last year's Fair was quite a success. With many outdoor activities, the weather plays a vital role. It has been necessary to alter some venues in the past years, with Easter being a week early in April this year we are looking forward to fine conditions. The Chinese and Bendigo Easter Fair, The First Chinese arrived on the goldfields in mid 1850's in teams or groups to work the rich alluvial gold fields of Dai Gum San (Big Gold Mountain). Most were of poorer class from the district of See Yup, an area of four villages near the provincial capital Canton (Kwangchow). By far the largest group came from the village of Toi Shan. The alluvial gold quickly petered out so by the time of the first Bendigo Easter Fair in 1871 most Chinese had either left for richer fields or turned to other pursuits such as stores, market gardens, laundries, herbalists etc.. Many of course had died on the fields from the rigors of mining of diseases not encountered in their homeland. The Benevolent Asylum (Home & Hospital for the age) and Bendigo Base Hospital had become places of rest, help and haven for old, sick and lonely Chinese. SO when the idea was mooted to hold a charity fair to raise money for these worthy establishments, the Chinese were only too happy to join with the Easter Fair Society in this charitable work. It has for over 113 years. Chinese showed their costumes, scenery, and weapons of warfare, but it was not until 1892, that the first of the 5 loongs (dragons) appeared.. . The pageant was marshalled by Mr T Chapman and headed by Mr Moody, attired in habiliments of a most gorgeous character on a gaily caparisoned horse, and his get up as a Chinese grandee was perfect. . . Tom toms , bagpipes. . Wind instrument resembling a clarinet. . Bagpipes,.. The Weekly Advertiser, Friday, April 22,1892. . . Today the Chinese Association, made up of descendants and families of the early Chinese and associate members, carries on the charitable works of their predecessors. A Little Of Dragons, We have all heard of St. George Bendigo dragons (loongs) have none of these characteristics, in fact they have only brought good to Bendigo. There are 3 chief species of Chinese Dragons of which ''The Lung'' (Loong) is the most powerful. It is also the spiritual dragon which produces wind and rain. It has 9 resemblances, the head of a camel, horns of a deer, eyes of a rabbit ears of a cow, neck of a snake, belly of a frog, scales of a carp, claws of a hawk and palm of a tiger. Loong is a vegetarian, favourite food pomelo (ooluk), the father of our modern grapefruit. The abode, according to legend is the sky or water. He is also deaf, thus requiring loud noises to awaken him and to keep him awake. . . Number of claws they have represent rank. Dragons have 2, 3, 4 or 5 claws, the latter being reserved for the Emperor. Loong and Sun Loong have both five claw dragons. Bendigo has had 5 or 6 dragons, the number being confused by the fact each dragon was called 'Loong'. Today Three dragons remain in Bendigo, Loong, Sun Loong, and Yar Loong. Loong is the oldest Imperial Dragon in the world. He continued his walk through the streets of Bendigo til his retirement in 1970. He was created in Fat Shan in the Peoples Republic of China. Built of. . . Sun Loong replaced Loong after the 2 dragon procession of 1970. Created by Mr Law On, . . Yar Loong is a night dragon, came in 1930's. . . Long history of dragons. . The Birth Of A Dragon. . . To awaken A Dragon. . . The Easter Monday Chinese Procession. . . Procession divided into 6 sections,.. The Easter Monday Procession comprises,… over 350 people. Conclusion It is hoped that in the near future a museum can be built to house the priceless regalia gathered together over the last century and a half by the Bendigo Chinese Association. Advertisements; Historic Bendigo Pottery, Mim's Restaurant, Antique Fair (Rotary), The Copper Pot, Sandhurst Town (Develop Victoria Council Tourism Award 1983-1985), Bendigo Motor Co. (Mazda), Diggers, Chaplin's, Bendigo's Dunny Diner, Arakoon, Quin's Bluebird, Allara Motor Lodge, Lakeview Motor Inn, The Armoured Car Company, Gillies, Mardi Gras Street Carnival, Handcraft Bazaar, Art Show (Rotary) Bendigo Model Railroaders (Easter Exhibition), Bendigo Easter Fair Highland Games brought to you by TV8 and Coca-Cola Bottlers. Design and Finished Art By Graphics Group, Bendigo.Graphics Group Bendigoevent, easter fair, bendigo easter fair incorporated, bendigo easter fair 1985, april 5-8. programme. friday: sun loon display, easter bowling carnival, rotary easter art show, book bazaar, model railroaders exhibition, dudley house, exhibition of dolls, embroiderers guild, art gallery. saturday: mardi-gras street carnival, busking, outdoor theatre, arts & music, bendigo theatre company, cynthia holland & bendigo talent club sun loong display, rotary art show, handcraft bazaar, motorcycle show-sandhurst historic vehicle club trams, central deborah, dudley house, exhibition dolls, antique fair, model railroaders, fire brigades' carnival for children, horse & harness parade, book bazaar, bowling carnival, football, photographic exhibition, family activities, cinema 180, exhibition of paintings silver furniture & porcelain, embroiders guild. sunday: horse spectacular, model railroaders, rotary art show, handcraft bazaar, antique & historical display of arms weapons & military, antique fair, torchlight procession, awakening of dragon, exhibition of dolls, dudley house, trams, central deborah, book bazaar, mardi-gras street carnival, hargreaves mall, motorcycle show, photographic exhibition, family activities, cinema 180, art gallery, embroiderers guild. monday: philatelic society exhibition, rotary art show, handcraft bazaar, antique fair, model railroaders, bendigo district bowling assn. easter bowling carnival, exhibition of dolls, dudley house bendigo branch royal historical society, trams, central deborah, motorcycle show, antique and historical display of arms weapons & militaria, mardi-gras street carnival, hargreaves mall, gala street procession, carnival for children, sun loong on display, photographic exhibition, fusion, cinema 180, art gallery, embroiders guild. church services bendigo city easter , eater saturday bendigo & district tourism association victoria's premier town. bendigo easter fair incorporated bendigo easter fair rich history 1871. base hospital and the home and hospital for the aged (benevolent asylum). fancy bazaar, fat baby contest greasy pig chase, many old photographs floats, bands, chinese dragon, ''sun loong'' or ''new dragon''. the longest imperial dragon in the world; 300ft plus in length easter saturday procession horse harness parade. torchlight procession on sunday evening includes fireworks, fire brigades, fire trucks, firemen, marching girls and illuminated floats. army helped federation. 15th transport squadron (15 tpt. sqdn). monday procession by the army 1930 popular girl contest introduced. four main streets, pall mall, mitchell street, hargreaves street williamson street. winner announced shamrock hotel, easter saturday night. popular girl contest fund raising service clubs voluntary organizations. 1984 fund raising efforts, in excess $50, 000 distributed to charities. combined bendigo brigades'. no easter sports carnival holding functions bendigo sports centre in park road. stalls, raffles three days sports, sat-sun. relaxation, buskers, community theatre, arts with craft activity & musical rotary club of bendigo easter fair society independent arts shows in 1981amalgamate antique fair, held last year some event cancelled. with many outdoor activities, weather plays vital role. alter some venues in the past, easter being a week early first chinese arrived goldfields in mid 1850's dai gum san (big gold mountain). see yup, canton (kwangchow). toi shan. first easter fair in 1871 for richer fields other pursuits stores, market gardens, laundries, herbalists etc. benevolent asylum (home & hospital for the age) bendigo base hospital had become places of rest, help and haven for old, chinese. charity fair to raise money, chinese join easter fair society in this charitable work. costumes, scenery, weapons of warfare, 1892, the first of the 5 loongs. marshalled by mr t chapman by mr moody, caparisoned horse, chinese grandee. tom toms, wind instrument. bagpipes, advertiser, april 22, 1892. chinese association, descendants chinese and associate charitable works. st. george ''the lung'' most powerful. spiritual dragon wind rain. 9 resemblances, camel, deer, rabbit cow, snake, frog, carp, hawk tiger. a vegetarian, pomelo (ooluk), the abode, legend is the sky or water. deaf loud noises to keep him awake. claws represent rank. 2, 3, 4 or 5 claws, reserved for emperor. had 5 or 6 dragons called 'loong'. three dragons loong, sun loong, yar loong. loong oldest imperial dragon in the world. retirement 1970. created in fat shan peoples republic of china. built of. sun loong, loong 2 dragon procession 1970. created mr law on, yar loong a night dragon1930's.history dragons. birth of a dragon. awaken a dragon. easter monday chinese procession divided 6 sections 350 people. priceless regalia last century bendigo chinese association. advertisements; historic bendigo pottery, mim's restaurant, antique fair (rotary), the copper pot, sandhurst town (develop victoria council tourism award 1983-1985), bendigo motor co. (mazda), diggers, chaplin's, bendigo's dunny diner, arakoon, quin's bluebird, allara motor lodge, lakeview motor inn, armoured car company, gillies, mardi gras street carnival, handcraft bazaar, art show model railroaders highland games tv8 coca-cola. art by graphics group