Showing 176 items
matching b squadron
-
 4th/19th Prince of Wales's Light Horse Regiment Unit History Room
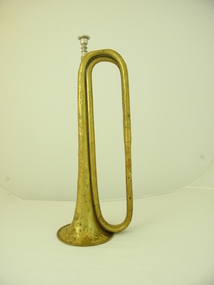
Instrument - Trumpet, Cavalry, Couesnon Cie, 1901 (exact)
The 2nd Light Horse Regiment was raised at Enoggera in Queensland on 18 August 1914. Its recruits came mainly from Queensland but some hailed from the northern rivers district of New South Wales. The 2nd was one of three regiments of the 1st Light Horse Brigade – the first Australian mounted formation raised by Australia during the First World War. The regiment sailed from Brisbane on 25 September and disembarked in Egypt on 9 December. The 2nd Light Horse Regiment deployed to Gallipoli without its horses and landed there on 12 May 1915, joining the New Zealand and Australian Division. It played a defensive role for most of the campaign but did attack the Turkish trenches opposite Quinn’s Post, one of the most contested positions along the ANZAC Line. The first assault wave was mown down and fortunately the officer commanding the attack had the wisdom and courage to call it off. The 2nd was withdrawn from the front line in September and left the peninsula on 18 December. Back in Egypt, the 2nd Light Horse joined the ANZAC Mounted Division. Between January and May 1916, the regiment was deployed to protect the Nile valley from bands of pro-Turkish Senussi Arabs. On 18 May, as part of its parent brigade, it joined the forces defending the Suez Canal. The 1st Light Horse Brigade played a significant role in turning back the Turkish advance on the canal at the battle of Romani on 4 August. In ensuing days the regiments of the brigade participated in the immediate follow-up of the defeated Turks, but were soon withdrawn to rest. The 2nd Light Horse Regiment rejoined the Allied advance across the Sinai in November and was subsequently involved in the fighting to secure the Turkish outposts on the Palestine frontier – Maghdaba on 23 December 1916 and Rafa on 9 January 1917. A stint of protective duty along the line of communications through the Sinai followed. The 2nd’s next major engagement was the abortive second battle of Gaza on 19 April. Gaza finally fell on 7 November, after a wide outflanking move via Beersheba, in which the 1st Light Horse Brigade played a part. With the capture of Gaza, the Turkish position in southern Palestine collapsed. The 2nd Light Horse Regiment participated in the advance to Jaffa that followed, and was then committed to operations to clear and occupy the west bank of the Jordan River. It was involved in the Amman (24–27 February) and Es Salt (30 April–4 May) raids and the repulse of a major German and Turkish attack on 14 July 1918. The final British offensive of the campaign was launched along the Mediterranean coast on 19 September 1918, with the ANZAC Mounted Division taking part in a subsidiary effort east of the Jordan aimed at Amman. Turkey surrendered on 30 October 1918. The 2nd Light Horse Regiment sailed for Australia on 13 March 1919 without their horses, which were either shot or transferred to Indian cavalry units. Events in the daily routine of the soldier were signalled by bugle and trumpet calls. This trumpet is signicant because historically, it was issued to the 2nd Australian Light Horse Regiment in 1912. This Regiment served with distinction in Gallipoli and Palestine in World War 1. It is probable, but not confirmed, that tthe trumpet was used by the Regiment during these operations. Each light horse regiment was divided into four squadrons. Each squadron had a trumpeter sergeant, equipped with a cavalry trumpet, who was employed at the Squadron Headquarters Technically called a cavalry trumpet, this brass instrument can be described as a "simple trumpet" ie. the direct forerunner of the modern valve trumpet. It is in E flat not B flat as is the bugle. Both were carried slung over the player's body by means of green tasselled cords.Crest with inscription: "Exposition Universelle De Paris" with circular logo with inscribed "1900". "Hors Concours Membre De Jury". Logo formed of initials (not deciphered). "Couesnon Cie 94 Rue Dangouleme Paris". Bomb burst type logo with "01" in centre. "W H Paling & Co Ltd Sydney NSW Brisbane" On bell: "Mounted Rifles (2nd ALH)" trumpet, cavalry, musical instrument, 2nd light horse, mounted rifles -
 4th/19th Prince of Wales's Light Horse Regiment Unit History Room
Work on paper - Photo Album, Chanter Collection, Lynn Chanter, Photographs taken by Chanter WW1, 1915-1919
... Squadron Photo captions 82 B X W photos mounted on 9 sheets ...Photos taken by Albert Allen Linton Chanter during his service with 4th Light Horse Regiment and 4th Machine Gun Squadron from 1914-1918Historically significant photos of WW1 service of 4th Light Horse member82 B X W photos mounted on 9 sheets of cardboard. Housed in museum standard lip binderPhoto captionsphotos, chanter, ww1, egypt, palestine, romni, el arish, 4th light horse brigade, 4th machine gun squadron -
4th/19th Prince of Wales's Light Horse Regiment Unit History Room
Order of Ceremony, The Royal Australian Amored (sic) Corps the Keeffe Family & Eoghan McDonald Celebrates (sic) the Unveiling of a Commemorative Plaque 16 November 2014, 2014
The 13th Australian Armoured Regiment was a Gippsland militia unit that had been called up for full time duty in December 1941 as a traditional light horse regiment. The early months of 1942 had seen the regiment lose its horses, a conversion to a motor regiment and finally to an armoured regiment in May. During this period there were considerable changes in personnel, however the regiment maintained its strong links to Gippsland and its former identity. Between May and November 1942, individual soldiers had become proficient in their trade training and the regiment changed its focus to troop and squadron activities. On 16 November 1942, the unit was located at the Puckapunyal Army Camp. C Squadron's training program involved a night driving exercise where a column of armoured and B vehicles would depart camp at 0245 hours and proceed to a site to the East of Seymour and set up a bivouac between Whiteheads Creek and Highlands Road. Numerous army camps surrounded the Seymour area; and much of the surrounding farm land had been acquired for military purposes. By November 1942 exercises such as C Squadron's were commonplace and had been repeated on numerous occasions since 1939. At 0400 hrs, C Squadron's vehicles reached O'Sullivan's Paddock on the Kobyboyn Road; prior to reaching the Old Telegraph Road the column turned to the North towards a known crossing point on Whiteheads Creek. The column consisted of seven M3 Medium Tanks and four Universal Carriers. In the case of Corporal McLeod's vehicle, there were seven crewmen rather than the usual five man crew. On arrival at the creek crossing, Captain C.M.I. 'Sandy' Pearson dismounted and with the assistance of Sergeant R.J. Ball began to guide individual tanks across the creek. Four tanks had crossed the creek without difficulty when Corporal McLeod's tank, ARN 24652, began its descent. Captain Pearson stated at the Coroner's Inquiry in December 1942, "Whilst climbing out of the ford the vehicle swerved to the left, apparently striking the tree. It was not the portion of the tank (front) that struck the tree. The tank straightened and appeared to be well under control, suddenly the bank on the left collapsed to the extent of 3ft by 12ft by15ft long causing the vehicle to slide into the creek and turn upside down." Captain Pearson and Sergeant Ball were faced with a nightmarish situation: The Grant had come to rest upside down in soft mud, six crew members were unaccounted for, escape hatches could not be opened and the weight of the tank was settling deeper into the water and mud. Compounding the problem was that the location of the tank did not allow for the other tanks to safely conduct a recovery. It was truly the darkest night.Single A4 card. folded, Contains an account of the raising of 13 Armoured Regiment in December 1941and a tank accident during a night creek crossing in which six crewmen were killed, and, Order of Ceremony for plaque unveiling, Guest of Honour LtCol Stuart Cree CO/CI School of Armour13 armored regiment, tank accident, puckapunyal -
 Federation University Historical Collection
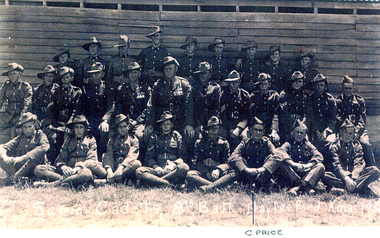
Photograph, Colin Campbell Price and the 8th Battalion Senior Cadets at Daylesford
Five images relating to Colin Campbell Price and military Service. .1) Colin Campbell Price .2) 8th Battalion Senior Cadets at Daylesford, 193? .3) HMAS Albatross 808 Squadron in front of an aeroplane and hanger. .4) Darwin mess mates of Colin Price .5) Twenty uniformed men in 1948 - Fleet Arm - HMS Condor - C4 Conversion Course. Back Row L-R: K. Roberts, J. Lamb, N. Hallas, A. Woods, H. Gid=bson, G. Coker-Godson, M. Green, K. Nicholls, M. Gardener. Centre Row L -R: D. Eastgate, B. Gilroy, R.Smith, G. Foale, J. Sergeant, A. Sara, R. Higgins. Front Row L-R: Colin Price, E. Barker, S. Cox, S. Paul -
 Australian Commando Association - Victoria
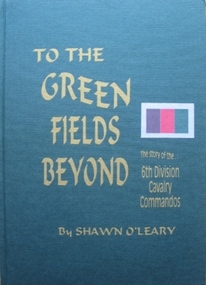
Book - 6th Div, Shawn OLeary, To The Green Fields Beyond:The story of the 6th Division Cavalry Commandos
... . C Squadron was relieved by B Squadron, which was later ...The comprehensive history of the 6th Australian Division Cavalry Commandos – a (now out of print) reprint of one of the rarer Armoured unit history books. This is the story of one of Australia’s most famous fighting regiments during World War II. As an armoured cavalry unit it fought the Italians and Germans in the sands of the African desert and the Vichy French in the mountains of Syria. Later as a dismounted commando unit it fought the Japanese in the terrifying jungles of New Guinea. The heroism of the men in its ranks and the actions in which they engaged are portrayed in a way which makes battle deeds leap realistically from the pages. “To The Green Fields Beyond” is a documented and detailed book which is of value to everyone who is interested in Australia’s story. Seldom before has such a contribution been made to record of our national history. The book has been approved and sponsored by the Australian War Memorial. The 6th Division Cavalry Regiment was formed in November 1939 and, just two months later, was sent overseas to the Middle East in January 1940. Arriving in Egypt, the regiment immediately went to Palestine, where it joined the rest of the 6th Division and trained using machine-gun carriers and, from October, six old Vickers light tanks. At the end of the year the regiment moved into the Western Desert, where it joined British forces ready for the major offensive to commence on 9 December. Two days later the regiment became the first unit of the 2nd Australian Imperial Force (AIF) to go into action when one of its squadron fought a sharp action against the Italians holding Garn el Grein and Fort Maddalina on 11 and 12 December. By 21 December British forces had captured Sidi Barrrani and the desert was now open for the 6th Division’s advance along the Libyan coast. On 3 January 1941 the division attacked and captured the Italian fort of Bardia. The regiment’s A Squadron, under the command of Major Denzil Macarthur-Onslow, who went on to command the 4th Armoured Brigade, supported the attack. Tobruk was the next Italian fort to be captured, with the regiment again in support and covering the 19th Brigade’s advance. The regiment, though, was under-equipped and without its full compliment of vehicles, using only machine gun carriers. To compensate for this, A Squadron was parity re-equipped with captured Italian light tanks, which had large kangaroos painted on the hulls and turrets to distinguish them from enemy vehicles. After Tobruk, the regiment was used as part of the advance guard in the capture of Derna and then Benghazi. In April the unit moved to Helwan, where it was equipped with Vickers light tanks and machine-gun carriers, and operated with British troops in capturing Sollum. Towards the end of May the regiment moved to Palestine, where it came under the command of the 7th Division for the imminent invasion of Syria. The regiment experienced its heaviest fighting during the Syrian campaign, which began on 7 June. A Squadron was attached to the 21st Brigade and advanced along the coast, where the rugged hills made it difficult to manoeuvre the tanks and carriers. The squadron was relieved by one of the 9th Division Cavalry Regiment’s squadrons on 13 and 14 June. C Squadron, meanwhile, was with the 25th Brigade, and advanced along the Rosh Pinna road, engaging strong enemy defences at Fort Khirbe. C Squadron was relieved by B Squadron, which was later attacked by Vichy French tanks that were supported by heavy artillery and machine-gun fire, which forced the Australians to withdrawal. Always willing or needing to improvise during the campaign, A and B Squadrons both operated three captured French R35 Renault light tanks, while C Squadron provided personnel for a horse troop, quickly nicknamed the “Kelly Gang”, to patrol the high, rugged hills near the Mardjayoun–Banis Road. The regiment remained in Syria as part of the occupation force and returned to Australia in March 1942. It was sent to the Adelaide River, in the Northern Territory, and then later to Murgon, in Queensland. In 1943 and 1944 divisional cavalry regiments were reorganised into cavalry (commando) regiments. In January 1944 the 6th Division Cavalry Regiment became the 2/6th Cavalry (Commando) Regiment. The regiment lost its vehicles and became the administrative headquarters for the 2/7th, 2/9th, and 2/10th Commando Squadrons. The regiment remained with the 6th Division and participated in the Aitpae–Wewak campaign, in New Guinea, during 1945. Includes Nominal Rollnon-fictionThe comprehensive history of the 6th Australian Division Cavalry Commandos – a (now out of print) reprint of one of the rarer Armoured unit history books. This is the story of one of Australia’s most famous fighting regiments during World War II. As an armoured cavalry unit it fought the Italians and Germans in the sands of the African desert and the Vichy French in the mountains of Syria. Later as a dismounted commando unit it fought the Japanese in the terrifying jungles of New Guinea. The heroism of the men in its ranks and the actions in which they engaged are portrayed in a way which makes battle deeds leap realistically from the pages. “To The Green Fields Beyond” is a documented and detailed book which is of value to everyone who is interested in Australia’s story. Seldom before has such a contribution been made to record of our national history. The book has been approved and sponsored by the Australian War Memorial. The 6th Division Cavalry Regiment was formed in November 1939 and, just two months later, was sent overseas to the Middle East in January 1940. Arriving in Egypt, the regiment immediately went to Palestine, where it joined the rest of the 6th Division and trained using machine-gun carriers and, from October, six old Vickers light tanks. At the end of the year the regiment moved into the Western Desert, where it joined British forces ready for the major offensive to commence on 9 December. Two days later the regiment became the first unit of the 2nd Australian Imperial Force (AIF) to go into action when one of its squadron fought a sharp action against the Italians holding Garn el Grein and Fort Maddalina on 11 and 12 December. By 21 December British forces had captured Sidi Barrrani and the desert was now open for the 6th Division’s advance along the Libyan coast. On 3 January 1941 the division attacked and captured the Italian fort of Bardia. The regiment’s A Squadron, under the command of Major Denzil Macarthur-Onslow, who went on to command the 4th Armoured Brigade, supported the attack. Tobruk was the next Italian fort to be captured, with the regiment again in support and covering the 19th Brigade’s advance. The regiment, though, was under-equipped and without its full compliment of vehicles, using only machine gun carriers. To compensate for this, A Squadron was parity re-equipped with captured Italian light tanks, which had large kangaroos painted on the hulls and turrets to distinguish them from enemy vehicles. After Tobruk, the regiment was used as part of the advance guard in the capture of Derna and then Benghazi. In April the unit moved to Helwan, where it was equipped with Vickers light tanks and machine-gun carriers, and operated with British troops in capturing Sollum. Towards the end of May the regiment moved to Palestine, where it came under the command of the 7th Division for the imminent invasion of Syria. The regiment experienced its heaviest fighting during the Syrian campaign, which began on 7 June. A Squadron was attached to the 21st Brigade and advanced along the coast, where the rugged hills made it difficult to manoeuvre the tanks and carriers. The squadron was relieved by one of the 9th Division Cavalry Regiment’s squadrons on 13 and 14 June. C Squadron, meanwhile, was with the 25th Brigade, and advanced along the Rosh Pinna road, engaging strong enemy defences at Fort Khirbe. C Squadron was relieved by B Squadron, which was later attacked by Vichy French tanks that were supported by heavy artillery and machine-gun fire, which forced the Australians to withdrawal. Always willing or needing to improvise during the campaign, A and B Squadrons both operated three captured French R35 Renault light tanks, while C Squadron provided personnel for a horse troop, quickly nicknamed the “Kelly Gang”, to patrol the high, rugged hills near the Mardjayoun–Banis Road. The regiment remained in Syria as part of the occupation force and returned to Australia in March 1942. It was sent to the Adelaide River, in the Northern Territory, and then later to Murgon, in Queensland. In 1943 and 1944 divisional cavalry regiments were reorganised into cavalry (commando) regiments. In January 1944 the 6th Division Cavalry Regiment became the 2/6th Cavalry (Commando) Regiment. The regiment lost its vehicles and became the administrative headquarters for the 2/7th, 2/9th, and 2/10th Commando Squadrons. The regiment remained with the 6th Division and participated in the Aitpae–Wewak campaign, in New Guinea, during 1945. Includes Nominal Rollww2, australian commandos, australian special forces, world war 2 -
National Vietnam Veterans Museum (NVVM)
Film - Film, DVD, A & B Squadrons: 1st Armoured Regiment, Vietnam 1969-1970
... etc. A & B Squadrons: 1st Armoured Regiment, Vietnam 1969-1970 ...Silent footage of Nui Dat, Horseshoe, SAS Hill etc.australia - army. 1st armoured regiment -
 Bendigo Historical Society Inc.
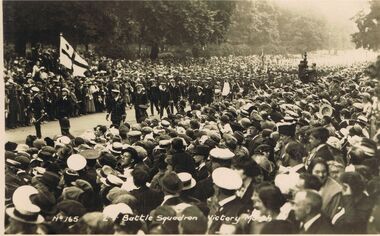
Postcard - ACC LOCK COLLECTION: B&W PHOTO NO.165, 2ND BATTLE SQUADRON VICTORY MARCH, POSTCARD, 1914-1918
... Postcard, WW1, B&W photo of the 2nd Battle Squadron, Victory March ...Postcard, WW1, B&W photo of the 2nd Battle Squadron, Victory March. Crowds lining both sides of a street. Men of the British Royal Navy led by officers marching with flag bearer at the front. Location not indicated but probably London.postcard, postcard, ww1, victory march, london, 2nd battle squadron -
 Monbulk RSL Sub Branch
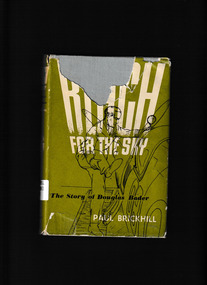
Book, William Collins, Reach for the sky, 1955
The story of Douglas Bader's life is the stuff of legend. After losing both his legs in a flying accident he returned to the RAF at the beginning the Second World War to become Britain's most famous airman and hero. In the Battle of Britain he led his squadron of Spitfires to kill after kill, keeping them going with his unstoppable banter. Shot down in occupied France, his German captors had to confiscate his tin legs in order to stop him trying to escape. And Bader faced it all, disability, leadership and capture, with a charm and determination that was to become an inspiration to all around himIndex, ill (b/w plates), p.342.non-fictionThe story of Douglas Bader's life is the stuff of legend. After losing both his legs in a flying accident he returned to the RAF at the beginning the Second World War to become Britain's most famous airman and hero. In the Battle of Britain he led his squadron of Spitfires to kill after kill, keeping them going with his unstoppable banter. Shot down in occupied France, his German captors had to confiscate his tin legs in order to stop him trying to escape. And Bader faced it all, disability, leadership and capture, with a charm and determination that was to become an inspiration to all around himbader douglas - biography, battle of britain - history -
 Monbulk RSL Sub Branch
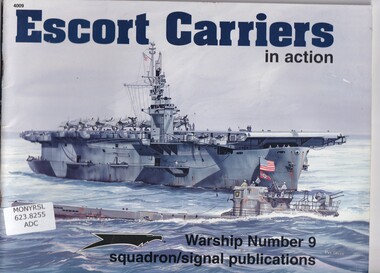
Book, Al Adcock, Escort carriers in action, 1996
A mainly pictorial account of the actions of escort carriers in World War 2.ill (b/w), p.50.non-fictionA mainly pictorial account of the actions of escort carriers in World War 2.aircraft carriers - united states, escort carriers -
 Monbulk RSL Sub Branch
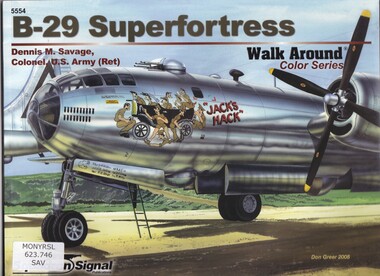
Book, Squadron Signal Publications, B-29 Superfortress, 2008
... Superfortress. ill (maimly col), p.80. B-29 Superfortress Book Squadron ...A mainly pictorial account of the B-29 Superfortress.ill (maimly col), p.80.non-fictionA mainly pictorial account of the B-29 Superfortress.b-29 superfortress, world war 1939-1945 - aerial operations - united states -
 Monbulk RSL Sub Branch
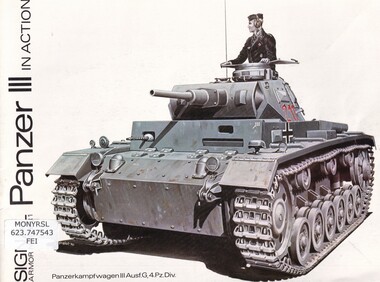
Book, Squadron Signal Publications, Panzer III in action, 1972
A pictorial account of the PanzerkampfwagemIIAusf.G,4.Pz.Div, also the Sturmgeschutz IIIill (b/w), p.48.non-fictionA pictorial account of the PanzerkampfwagemIIAusf.G,4.Pz.Div, also the Sturmgeschutz IIIpzkpfw iii - pictorial works, armoured vehicles - military -
 Monbulk RSL Sub Branch
Book, Squadron signal publications, German half tracks in action, 1972
Pictorial review of the varied versions of German half tracksill (b/w) p.48.non-fictionPictorial review of the varied versions of German half tracksarmoured vehicles - germany, half tracks - germany -
 Monbulk RSL Sub Branch
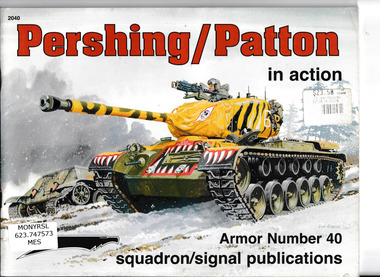
Book, Squadron /Signal Publications, Pershing / Patton in action, 2002
A historical and pictorial of the Patton / Pershing tankill (b/w,col), p.49.non-fictionA historical and pictorial of the Patton / Pershing tankm26 pershing, m47 patton -
 Monbulk RSL Sub Branch
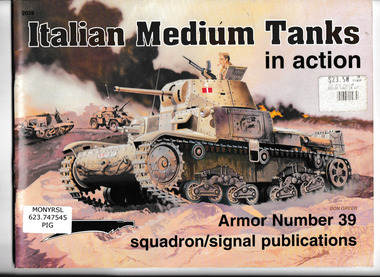
Book, Nicola Pignato, Italian medium tanks in action, 2001
A pictorial and descriptive of Italian medium tanksill (b/w,col), p.49.non-fictionA pictorial and descriptive of Italian medium tanksarmoured vehicles - italy - history, tanks - military - italy -
 Monbulk RSL Sub Branch
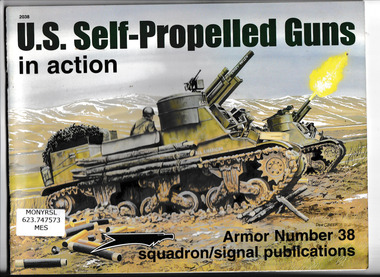
Book, Squadron/Signal Publications, US Self propelled guns in action, 1999
A pictorial and descriptive history of United states self propelled gunsill (b/w,col), p.49.non-fictionA pictorial and descriptive history of United states self propelled gunsarmoured vehicles - united states - history, self propelled guns - united states - history -
 Monbulk RSL Sub Branch
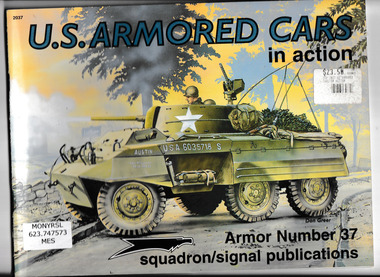
Book, Jim Mesko, U.S Armoured cars in action, 1998
A pictorial and descriptive history of US armored carsill (b/w,col), p.49non-fictionA pictorial and descriptive history of US armored carsarmoured vehicles - united states - history, military science - united states - history -
 Monbulk RSL Sub Branch
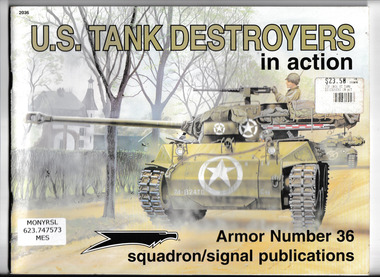
Book, Jim Mesko, U.S Tank destroyers in action, 1998
A pictorial and descriptive history of US tank destroyersill (b/w, col), p.49.non-fictionA pictorial and descriptive history of US tank destroyerstank destroyers - united states - history, world war 1939-1945 - tank warfare -
 Monbulk RSL Sub Branch
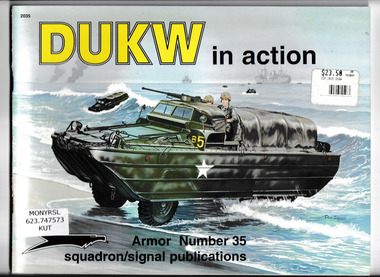
Book, Timothy J Kutta, DUKW in action, 1996
A descriptive and pictorial history of the DUKW amphibious vehicleill (b/w, col), p.49.non-fictionA descriptive and pictorial history of the DUKW amphibious vehicleamphibious vehicles - united states - history, amphibious warfare - history -
 Monbulk RSL Sub Branch
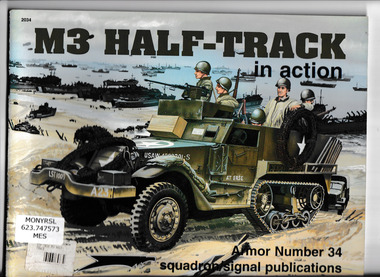
Book, Jim Mesko, M3 half track in action, 1996
A descriptive and pictorial history of the M3 half trackill (b/w,col), p.49.non-fictionA descriptive and pictorial history of the M3 half trackarmoured vehicles - united states - history, world war 1939-1945 - armoured vehicles -
 Monbulk RSL Sub Branch
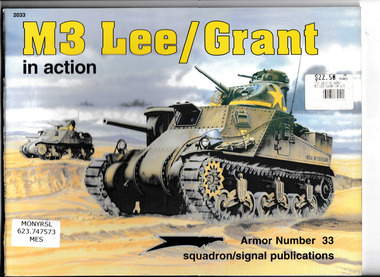
Book, Jim Mesko, M3 Lee / Grant, 1995
A descriptive and pictorial history of the M3 Lee/Grant tankill (b/w,col(,p.49.non-fictionA descriptive and pictorial history of the M3 Lee/Grant tankm3 tank, world war 1939-1945 - armoured vehicles -
 Monbulk RSL Sub Branch
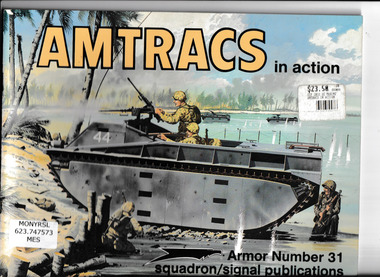
Book, Jim Mesko, AMTRACS in action, 1993
A descriptive and pictorial history of the AMTRAC amphibious vehicleill )b/w,col) ,p.49.non-fictionA descriptive and pictorial history of the AMTRAC amphibious vehicleamphibious warfare - history, armoured vehicles - amtrac - history -
 Monbulk RSL Sub Branch
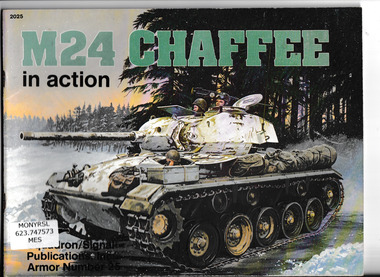
Book, Jim Mesko, M24 Chafee in action, 1988
A descriptive and pictorial history of the M24 Chaffee tankill (b/w,col), p.49.non-fictionA descriptive and pictorial history of the M24 Chaffee tankarmoured vehicles - united states - history, m24 chaffee tank -
 Monbulk RSL Sub Branch
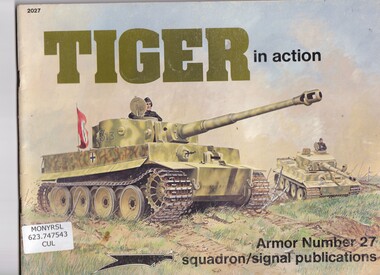
Book, Bruce Culver, Tiger in action, 1989
A descriptive and pictorial history of the Tiger tankill (b/w,col), p.49.non-fictionA descriptive and pictorial history of the Tiger tankworld war 1939-1945 - tank warfare, tiger (tank) -
 Monbulk RSL Sub Branch
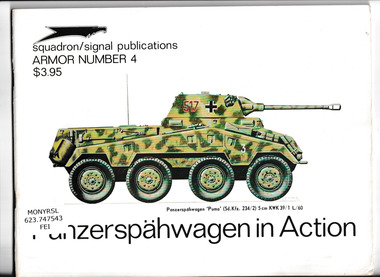
Book, Uwe feist, Panzerspahwagen in action, 1972
A descriptive and pictorial history of German armoured carsill (b/w,col), p.47.non-fictionA descriptive and pictorial history of German armoured carsarmoured vehicles - germany - hiistory, panzerspahwagen -
 Monbulk RSL Sub Branch
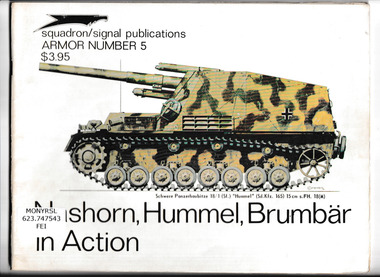
Book, Uwe Feist, Nashorn, Hummel, Brumbar in action, 1973
A descriptive and pictorial history of German self propelled gunsill (b/w,col), p.47non-fictionA descriptive and pictorial history of German self propelled gunsarmoured warfare - germany - history, self propelled guns - germany -
 Monbulk RSL Sub Branch
Book, Uwe Feist, Soviet panzers in action, 1973
A descriptive and pictorial history of Soviet tanksill (b/w,col),p.49.non-fictionA descriptive and pictorial history of Soviet tanksarmoured warfare - soviet union - history, tanks - soviet union -
 Monbulk RSL Sub Branch
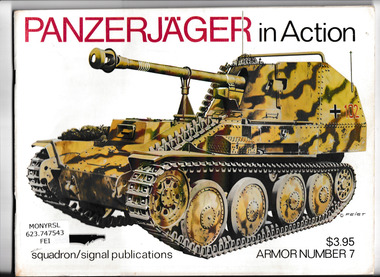
Book, Uwe Feist, Panzerjager in action, 1973
A descriptive and pictorial history of German self propelled gunsill (b/w,col), p.49.non-fictionA descriptive and pictorial history of German self propelled gunsarmoured warfare - germany - history, self propelled guns - germany -
 Monbulk RSL Sub Branch
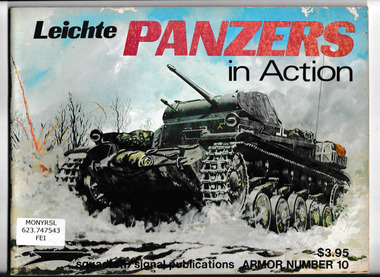
Book, Uwe Feist, Leichte panzers in action, 1974
A descriptive and pictorial history of early German tanksill (b/w,col) p.50.non-fictionA descriptive and pictorial history of early German tanksarmoured warfare - germany - history, panzer i, panzer ii -
 Monbulk RSL Sub Branch
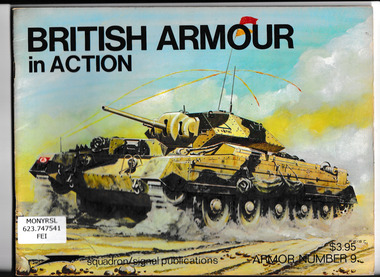
Book, Uwe Feist, British armour in action, 1974
A descriptive and pictorial history of British tanksill (b/w,col) p.49.non-fictionA descriptive and pictorial history of British tanksarmoured warfare - britain - history, tanks - britain, matilda, crusader -
 Monbulk RSL Sub Branch
Book, Broce Culver, Panther in action, 1975
A descriptive and pictorial history of the Panther tankill (b/w, col), p.50.non-fictionA descriptive and pictorial history of the Panther tankarmoured warfare - germany - history, panther tank