Showing 352 items matching "route 12"
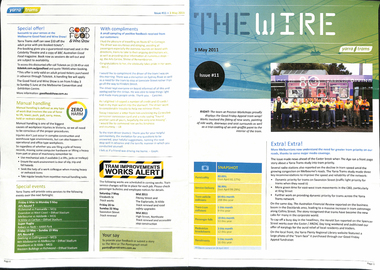
-
 Melbourne Tram Museum
Magazine, Yarra Trams, "The Wire", 5/2011 to 1/2015
... - Royal visit, photos, Z3 158, route 86 works in High St. (see...- Royal visit, photos, Z3 158, route 86 works in High St. (see ...0 - No 9 - 1/4/2011 - Rhinos on skateboards, Did you know, Spencer St works, .1 - No. 11 of 3/5/2011 with the revised Yarra trams logo, traffic priority, work over Easter in Spencer St at Bourke and Collins St, Good Friday appeal, safety, passenger feedback and future works. .2 - No. 13 - 31/5/2011 - new uniform, cleaning, CEPR, trackwork - Fitzroy St, Northcote, Rhino, Carlton Control. .3 - No. 14 - 15/6/2011 - Haymarket Roundabout, accessibility, maintenance, CSE. 3a - No. 16 - 19/7/2011 - Managers on the move, Trevor Jones, Yarra's vision, Richard Ch'ng and Rhino update. .4 - No. 17 - 2/8/2011 - High St Westgarth trackwork, Swanston St, IMF CEO visit .5 - No. 18 - 16/8/2011 - Performance benchmarks met, Preston Workshops, repairs to 3018, tram signal priority. .6 - No . 19 - 30/8/2011 - New E class trams, routes "a" or "d", TramTracker in shelters, police, fare evasion .7 - No. 20 - 15/9/2011 - Football trams, Superstops, Bridge Road, Rhinos. .8 - No. 21 - 27/9/2011 - CEO's journey to work, accessibility, increased patronage, E class. .8a - No. 22 - 11/10/2011 - Minister Mulder visit, E class, Customer experience, Elizabeth Kerdelhue Corporate Affairs Director, flood indicator in Wellington Parade, Keolis - Orleans and PTV coming your way. .9 - No. 23 - 25/10/2011 - forthcoming royal visit, opening for Footscray Road extension, Rhinos, Stockholm .10 - No. 24 - 8/11/2011- Royal visit, photos, Z3 158, route 86 works in High St. (see htd5043i21 for a image from an unknown newspaper of the actual event - features Z3 158.) .11 - No. 25 - 22/11/2011 - new staff guide, Gold Coast tram line, Macarthur St, overhead, fund raising, route numbering update. .12 - No. 26 - 6/12/2011 - Swanston St Superstops, Newmarket bridge strikes, rhinos. .13 - No. 27 - 20/12/2011 - Christmas carnival, Lenny Bates, portable crossover, uniforms. .14 - No. 28 - 17/1/2012 - Passing of Len Bates, Myki, Gardiner railway station. 14a - No. 29 - 31/1/2012 - Southbank depot, patronage, myki, think like a passenger, fatigue management, .15 - No. 30 - 15/2/2012 - visit of Keolis, SNCF people, list of Executive leadership team with photos, Swanston St works, Myki introduction. .16 - No. 31 - 29/2/2012 - patronage up, tram postage stamps, Myki, rhinos. .17 - No. 32 - 14/3/2012 - St Kilda Rd trackwork, fund raising, Southbank Depot extensions, Myki, driving conditions, grand prix. .18 - No. 33 - 30/3/2012 - introduction of the PTV, end of MetLink and Transport Ticketing Authority, changes in management structure, trackwork, Gold Coast tramway and Keolis. .19 - No. 34 - Dr Jake - Royal children's Hospital super stop, route 96 - Premium line. .20 - No. 35, 2/5/2012 - Revision of Rules, trackwork in St Kilda Road and Elizabeth St, Myki, safety - Zero Harm. .21 - No. 69 - 25/9/2013 - Passengers paying their way, E class update, Mal Ashworth retires, progress report, feedback, new chime on trams. .22 - No. 70 - 9/10/2013 - Art comes alive, tram 925, driver simulator at Preston Workshops, E class project, 90th Glen Huntly. .23 - No. 83 - 23/4/2014 - Screen time for trams, new PIDs on B class, assistance animals, Operations Centre, Preston Workshops, Electrical log sheets to SLV. .24 - No. 89 - 23/7/2014 - punctuality, refresh of network map (fold-out map), women drivers. .25 - No. 97 - 19/11/2014 - Revitalising route 96, Keolis news, free tram zone, guide dogs. .26 - No. 99 - 17/12/2014 - Accessibility week, new uniform top for CSE's, free tram zone, world trade centre stop upgrade, heat stress, Art tram 158. .27 - No. 100 - 14/1/2015 - Route 96 complete, New Years eve free travel, fare compliance, patronage down, .28 - No. 12 - 16/5/2011 - Gold coast tramway, performance dashboard, tramworks and the rhino .29 - No. 16 - 19/7/2011 - Depot managers, tevor jones, record patronage, vision, rhino .30 - No. 17 - 2/8/2011 - High St Westgarth works, Duncan Smith, David Clarke Training, Swanston St works, and Preston Workshops . .32 - No. 39 - 28/6.2012 - maintenance, Emmanual Sorin, transformation, fare evasion, and Combino in Potsdam. .33 - No. 105 - 25/3/2015 - Grand Prix, Elgin and Lygon upgrade, Camberwell Junction, PTV hub, overhead.Demonstrates Yarra trams staff newsletters.Set of 33 Yarra Trams internal newsletter "The Wire", All A4, printed in full colour. All four pages unless noted otherwise, full colour, performance snapshot on front cover.trams, tramways, yarra trams, traffic control, trackwork, spencer st, fund raising, operations, rhinos, carlton control, high st, haymarket, preston workshops, e class, route numbers, bridge road, wellington parade, ptv, royal visit, footscray road, new tramway, gold coast, macarthur st, swanston st, superstops, newmarket, gardiner, burke road, level crossings, railway squares, myki, metlink, tickets, route 96, rules, st kilda road, elizabeth st, tram 158, tram 925, glen huntly depot, simulator, b class, opeations centre, art trams, patronage -
 Melbourne Tram Museum
Album - Photo Album, John Etkins, Ray Marsh, 1990's
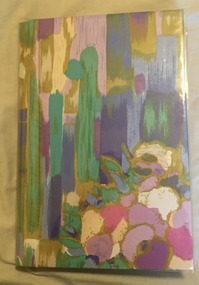
... – 25-4-1993 – 7 trams in all 43 646 Route 12, with fire... in all 43 646 Route 12, with fire station in background ...Photo Album - 48 sheets bound with a white circular metal/plastic spiral bound within a heavy duty cardboard cover, with glued cover pages, plastic covered with an index sheet. Allows for three photographs per page. Not known whether the plastic envelope for each photograph is of archival quality. No Manufacture detail, though has a bar code on the bottom left hand corner of the rear cover. Cover is a reproduction from a painted art piece. Listing of photographs given on htd1800-RayMarshalbum.pdf Dates given when written on the rear of the photograph. Compiled by John Etkins from photographs given to him by Ray Marsh. 1990's to 1993 generally. Page Tram/s Notes – dates given when on rear of photograph. 1 226 Loading passengers – ex MMTB Annual Report? 1 957 City Circle 1 “hands off our trams” protest march 2 2100, 231 South Melbourne Depot – 10-4-1993 2 676 And many others – Hawthorn Depot 2 217 Princes Bridges 3 380, 104 St Kilda Road 3 106, 104 Essendon Depot 3 431 As a W1 4 1011 Fresh fruit tram, Preston Depot 6-12-1992, 4 824 Day in Day out, Brunswick and Victoria Parade 29-4-1993 4 722 Art tram 5 ? Advert tram – Imperial China 5 237 Stubbsy tram – TrippleM? 6 856 City Circle – with gas and fuel building – 31-7-1994 6 925 City Circle - with gas and fuel building – 31-7-1994 6 728 City Circle – 10-8-1994 7 246 Navy tram x three pics – July 1992 8 ? Gold tram advertising Georges 8 990 Advertising Telstra– 29-4-1993 8 749 Art tram? 9 990 NRMA - 1-3-1994 9 727, 215 Public Transport 9 920 Advert tram with a picket fence 10 Bendigo 21 Preston Workshops 11-3-1993 10 774? W5 being rebuilt at Preston – 21-10-1991 11 ? Bogie cable trailer at Preston – 29-4-1993 11 922 Interior view of a tram – being modernised – 11-3-1993 11 922 Preston Workshops 29-4-1993 12 1018 Workcare tram at Preston 1994 – 11-8-1994 12 774 Preston Workshops – 20-12-1993 12 8 Preston Workshops – 1-10-1992 13 380 Preston Workshops 13 8 Preston Workshops 13 20, 8 Preston Workshops 14 721 Preston Workshops 20-12-1993 14 ? Tramways painted artist tram featuring a driver and workshop 14 Traverser Preston Workshops 15 2110, 2106 Preston Workshops 15 ? Preston Workshops 15 2130 Interior Preston Workshops 20-12-1993 16 Set of three pics Elizabeth St floods – 17-2-1972 17 Set of three pics Elizabeth St floods – 17-2-1972 18 676 Turning into Swanston St from Batman Ave 18 676 Kew Depot – 10-11-1991 18 237, 676, 611 Kew Depot – 10-11-1991 19 214, 676 South Melbourne Depot – Kingsway 19 217 Spencer St 19 214 Advertising Kew Depot Open Day -8-12-1991 20 231, 676 Advertising Kew Depot Open Day -8-12-1991 20 Zoo tram, 256 Outside Kew Depot 20 214 Hawthorn Open Day with band 21 Zoo tram x 3 pics And horses, Kew Open day 22 231, 431 Kew Depot 22 892, 214 Kew Depot 75 years, Postcard – 1991 22 282 Kew Depot – with the name Monique on the tram and a lady standing alongside 23 238, 233 Kew Depot 23 236, 892, 282 Kew Depot – 25-4-1992 23 232, 236, 282 Kew Depot 24 2112 Port Melbourne line – with long grass – 11-4-1993 24 469, 2037, ? 2015 South Melbourne Depot 24 1018 or 976? Advertising a PTC Open Day – 20-10-1991 – In Swanston St - see Reg Item 1845 25 250 Bourke St 25 2100 Running into Preston Workshops 25 282, 1003 Collins St in the rain 26 Logo PMTT 26 Point cover With P&MTT cast into the cover 26 Foundation Stone Person reblocking in gold, a PMTT Foundation Stone 27 Logo Tramway Board 27 Logo MMTB logo 27 Logo Footscray Tramways Trust 28 217 And 2’gauge W2 – South Melbourne Depot – 20-10-1991 28 164 Somewhere? 28 1018 Advert tram – “Moro”, Preston flyover 29 V214 x 3 pics Kew Depot 30 611 Whitehorse Road, Balwyn 5-10-1991 30 976 x 2 pics Advert tram – have a red instead 31 610 Malvern Depot 31 138 (max tract) Flinders St 31 138 (max tract) Bourke into Spencer 32 844 Victoria Parade with R10 behind 32 264 With a TV interview being undertaken 32 2066 Elizabeth St – 29-4-1993 33 255 x 2 pics Derailed at Kew Depot 33 253 Derailed outside the Beehive Hotel 34 214, 892, 611 Re-enactment of Victoria Bridge to Esplanade service – 10-11-91 34 726 Art tram? – Swanston St with overhead trucks in background 34 10W Reblocking scrubber car at Brunswick Depot 1999 35 2085 At Preston workshops over an inspection track section 35 731 St Georges Road, road being rebuilt – Nov. 1991 35 Preston Jtn Junction at Workshops being relaid 36 1003 St Georges Road, Nov. 1991 trackworks 36 St Georges Rd Track being rebuilt – Nov. 1991 has temp track cross over 36 Victoria St Victoria St being reconstructed 6-9-1992 37 East Burwood Extension works – 18-2-1993 37 East Burwood Re-building crossover – 18-2-1993 37 Victoria St Victoria St being reconstructed 6-9-1992 38 19W, 16W Bylands – 5-12-1993 38 R10 Kew Depot 38 Workers Kew Depot pushing on a post 39 R10 R10 towing a B class tram- Royal Parade? 39 11W, 10W? South Melbourne Depot 39 Overhead Overhead truck at Kew Depot 40 Kew Depot Demolition works opposite depot 40 613? Malvern Depot on special tram 40 256 zoo tram Royal Park tram at Kew Depot 41 B class Bundoora line 1993 41 231, 611 Kew depot 75th anniversary tram 41 469, 287 Kew depot 42 510 Spring St into Bourke St – 28-4-1993. “42nd street promotion. 42 153 High St Northcote, Bundoora 42 611 Kew Depot, Nov. 1991 43 195? Simpson St siding – 25-4-1993 – 7 trams in all 43 646 Route 12, with fire station in background – Gisborne and Victoria 43 961 Burke Road, Camberwell, 10-8-1994 44 760 Art tram 44 938 Sam the tram, Flinders St 44 1014 Gilbert Road, West Preston, June 1994, advert for AGC 45 965 Daimaru advert tram, Swanston St 45 1018 Express post advert tram, Swanston St. 45 1024 Advert – lego exhibition – Swanston St 46 104 Camberwell depot 46 611 Looking towards driver’s controls from interior. 46 W1 Interior photo showing tip over seats 47 Cable car Interior photo – could be zoo tram 47 510 Interior, 28-4-1993 47 214 Kew Depot, night shot, Oct. 1991 48 246, 237 Kew depot, 13-9-1993 – Stubbsy and Energy Victoria advert 48 246, 231, 237 Kew depot, Navy, 75th anniversary of Kew and Fox Fm advert 48 2014, 2072 South Melbourne – tt line? Advert tram 49 59 And six other trams in front of Preston Workshops 49 1024 MMTB Christmas Tram, 1970 49 2001 Camberwell Depot 50 725 Preston depot area – tram has a red upper half 50 725 South Melbourne depot – now has Xmas decorations 50 1026 Bourke St, Christmas 6-12-1993 51 933 Victoria Parade shunt and other A class tram – Autumn 51 829 Art tram 51 39 Advert tram – Crime prevention 52 Connie Connie at night = has jeans on 52 1?? Has a MET inspector standing in front of number – Latrobe uni tram 52 611 Kew Depot 53 237 Fox FM Black Thunder tram at Kew Depot, August 1992 53 237, 611, 892 Victoria Bridge re-enactment – 10-11-1991 53 237 At Kew depot with 4 people, including Hugh Waldron 53 442, 10W South Melbourne Restaurant tram and works car 53 W2 At Wattle Park 53 School art Photo of students holding artwork on the zoo tram 256 at Kew 54 138 And many others 54 469 Launch of the Melbourne Tram by the PTC 54 School art Photo of students holding artwork on the zoo tram 256 at Kew 55 B2 Elizabeth St terminus, Christmas 1994 55 8 Z8 Swanston St, April 1993 55 504 Clifton Pugh – Preston Workshops 56 138, 180, 214 Hawthorn Depot display 56 650, 510 Hawthorn Depot 56 469 Camberwell 57 568 Bridge Road Richmond by cable tram depot 57 ? Advert tram – Falls Creek 57 995 Malvern Road, 18-5-1992 58 457, 217 etc Swanston St display 58 231, 611 Kew 75th Anniversary 58 682 Artist tram at Malvern Depot – 18-5-1992 59 1018 Country Road advert tram 59 8 Z class – decorated tram – Essendon Depot 59 947 Metland Safety Express – safety tram – Kew depot 60 101 x 2pics Decorated for RAAF 70th Anniversary 60 2082 Near East Preston Depot, with destination “Next Stop Mill Park” 61 475 After sale and disposal 61 585 After sale and disposal 61 651 After sale and disposal – Diamond Creek – 9-8-1994 62 386 After sale and disposal – Sunbury 62 590 After sale and disposal – Hall ACT 62 476 After sale and disposal – Kinglake 63 11W Bundoora Extension – track being opened 63 947 Metland Safety Express – safety tram – Kew depot 63 Model 2,3 2’ gauge model trams 64 Model 2 Ditto 64 250 After sale and disposal 64 293 After sale and disposal – Diamond Ck – 9-8-1994 65 246, 231, 237 Kew depot, Navy, 75th anniversary of Kew and Fox Fm advert 65 1002 Advert tram – Salvation Army 65 231, 29 Kew Depot 66 246, 231, 237 Kew depot, Navy, 75th anniversary of Kew and Fox Fm advert 66 646, 935, 1002 Kew depot 66 220, 60 Preston Workshops? 67 851, 814 Malvern Depot 3-9-1992 67 726 Malvern Rd at Glenferrie Road – 18-5-1992 67 237, 133 Victoria Parade 1996 68 814 and others Interior Malvern Depot – 18-5-1992 68 231 75th Kew depot anniversary at depot 68 231 75th Kew depot anniversary at depot 69 1024 Malvern Depot 10-11-1991 69 1011 Advert tram Melbourne City Toyota 69 106, 180 Swanston St 70 190, 568 Camberwell Depot 70 431 Flinders St – tram event 70 20, 138 Camberwell Depot 71 431 Flinders St – tram event 71 237 Fox FM Thunder Tram 71 2057, 2014 Elizabeth St, Vic Market 29-4-1993 72 676, 611, 892 Victoria Bridge re-enactment – 10-11-1991 72 Ceremony Victoria Bridge – mayor and others event 72 214 214 on the bridge 73 164 Lygon St – former outer circle line level crossing in view 73 841 Swanston Walk 29-4-1993 74 821 St Georges Road, April 1993 74 431, 231 Victoria Parade 74 217, 676 Passing Camberwell Depot 75 Oporto 018 Clarendon St 6-3-2003 75 3007 Albert Park – 7-3-2003 75 3001, 018, 3502 Docklands – 10-3-2003 76 Oporto 018 Docklands – 16-1-2003 76 Oporto 018 Flinders St 7-3-2003 76 3502 Swanston St at Flinders St -8-3-2003 77 16 Kew Depot, Jan 1991 77 112, 110 Bundoora 4-9-1992 77 738 Camberwell Feb 1991 78 1011 Thornbury Jan 1991 advert for City Toyota 78 101 Bundoora – RAAF tram 4-9-1992 78 814 Art tram – Swanston St August 1992 79 1024, 469, Z3 Preston Workshops – 469 as the Melbourne Tram – 9-9-1992 79 961 Malvern Depot 3-9-1992 79 242 Single line working in Victoria St 6-9-1992 80 781 Thornbury, the hump, Preston Workshops Jan 1991 80 2104 Preston Workshops 9-9-1992 80 2100 Launch, Preston Workshops 9-9-1992 81 5W + 1A 5 x W at Kew Depot 3-2-1991 81 676 Kew Depot 21-2-1991 81 873, 2016 Brunswick depot 2-3-1991 82 231 Kew Depot Yard – 21-1-1991 82 157, 158 Brunswick Depot – 2-3-1991 82 2057, 873, 158 Brunswick Depot – 2-3-1991 83 802 Art Tram - Franklin St from the signal box 2-3-1991 83 990 990 Evian advert tram, Franklin St signal box 2-3-1991 83 920 GIO Advert Tram with Bushels tea and Yellow Pages? Adverts 84 721 Art Tram, Franklin St signal box 84 976 St Georges Road, Jan 1991 – advert tram Capital society 84 731 St Georges Road, Jan. 1991 Art tram 85 10W Victoria Parade, Brunswick St, 1/3/1991 85 10W, 9 or 11W South Melbourne depot 85 10W Bundoora Terminus 4-2-1991 86 11W City Baths 86 10, 16 Camberwell Depot 6-12-1990 86 944 Glenhuntly Depot 18-2-1991 87 2011 Spring St – Princess Theatre, March 1990 87 294, 239, 277, 243, 259, 280 Kew Depot 87 296 Kew Depot 88 1015, 16 Batman Ave 19-1-1991 88 963, 948, 935, 996, 892 Kew Depot 3-2-1991 88 Victoria St Victoria St Richmond Reconstruction 6-2-1992 89 1014, 990 Batman Ave 19-1-1991 (Image added i5 and rear view added 23-12-2018, scanned for Dale Budd. 89 920 920 – GIO advert tram, 760 art Tram Collins at Spencer 17-10-1990 89 610, 611 Kooyong Station level crossing 30-12-1990 90 95 Royal Park, 15-2-1991 90 2057, 873, 158 Brunswick Depot – 2-3-1991 90 10 Camberwell Depot 6-12-1990 91 Bendigo 44 In Prahran and Malvern Tramways Trust Colours 1986 –Black and white photo. Listed 5-11-2016See note page 1 and on image 3trams, tramways, album, photo album, tramcars, the met, yarra trams, kew depot, brunswick depot, advertising trams, transporting art, preston depot, hawthorn, bundoora, st georges rd, victoria st, camberwell depot, tram r10, 8, 10w, 10, 11w, 16, 16w, oporto 018, 19w, 20, bendigo 21, 29, 39, bendigo 44, 59, 60, 95, 101, 104, 106, 110, 112, 133, 138, 153, 157, 158, 164, 180, 190, 195?, 214, 215, 217, 220, 226, 231, 232, 233, 236, 237, 238, 239, 242, 243, 246, 250, 253, 255, 256, 259, 264, 277, 280, 282, 287, 293, 294, 296, 380, 386, 431, 442, 457, 469, 475, 476, 504, 510, 568, 585, 590, 610, 611, 613?, 646, 651, 676, 682, 721, 722, 725, 726, 727, 728, 731, 738, 749, 760, 774, 781, 802, 814, 821, 824, 829, 841, 844, 851, 856, 873, 892, 920, 922, 925, 933, 935, 938, 944, 947, 948, 957, 961, 963, 965, 976, 990, 995, 996, 1002, 1003, 1011, 1014, 1015, 1018, 1024, 1026, 2001, 2011, 2014, 2015, 2016, 2037, 2057, 2057, 2066, 2072, 2082, 2085, 2100, 2104, 2106, 2112, 2130, 3001, 3007, 3502 -
 Bendigo Military Museum
Photograph - PHOTOGRAPHS WW1, Originals: 1915
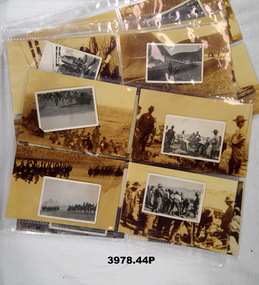
The photos in the collection relate to Thomas Robert JONES No 1982 AIF. Refer Reg No 1377 for his service details..1) - .22) Photos, black / white, showing men, training, the desert, Dardanelles, Turkish prisoners, leaving Egypt. .23) - .44) Enlargement copies of photos .1) - .22), sepia.Hand written on the rear in pen: .1) Housing parade on the desert Egypt, bugler band 6th Battalion. .2) Australian Field Artillery exercising horses near the pyramids. .3) Some of the buglers of the 6th Battalion with their identification disks as eyeglasses. .4) Serving out rations. .5) 6th Battalion having a short halt during a route march on the desert. .6) 18 Pounder Field Gun Australian Artillery. .7) 'Come to the Cook House Door' 6th Battalion AIF. .8) Lieut WATSON - Machine Gun being vaccinated by Lieut BALFE A Coy. Both these Officers are amongst the fallen. .9) 6th Battalion AIF preparing to leave Mena Camp for the Dardanelles. .10) A Turk captured on the morning of 25th April 1915 on board the troop ship Galeka. .11) Wounded alongside of hospital ship Galeka. .12) HMS Vengeance at the Dardanelles. .13) Hospital ship Sudan off Gaba Tepe. .14) Observation balloon off Cape Helles. .15) British Destroyer off Cape Helles. .16) Cape Helles, Dandanelles. .17) Turkish prisoners captured at the Suez _ _ _ Barracks, Cairo. .18) Turkish prisoners. .19) <> Guides near pyramids Mena. .20) Method of irrigation on the Nile, Egypt. .21) Going on leave into Cairo. .22) View of Cairo mosques in foreground taken from the Citadel. .23) - .44) On rear in stamp form: Dennis Major, 7 Bancroft St Bendigo Vic 3550. Tel & fax 03 544 2445 photography, military, ww1 -
 Seaworks Maritime Museum
Model ship, SS Iberia, 1873
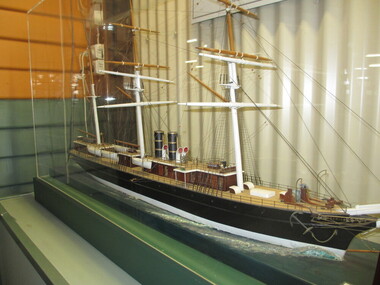
SS Iberia (1873-1903) was built by John Elder & Co. (Govan yard no.162 Glasgow) and launched 6 December 1873 at a cost £151,600. However, due to strike delays, her maiden voyage was not until 21 October 1874. The Iberia was one of the last of the barque-rigged, clipper-bow type of steamer built for the Pacific Steam Navigation Company. At the time, she was also the second largest ship in world, after the Great Eastern. In 1877, a joint Orient Line and Pacific Steam Navigation Co. venture began a fortnightly mail service, first sailing between England and Australia on 12 May 1880, via Gibraltar, Naples, Port Said, Ismalia, Suez, Colombo, Albany, Adelaide, Melbourne, Sydney. Details: - Tonnage: 4,671 g, 2,982 n. - Dimensions: 433ft 6in (132.13m) x 45ft (13.72m) x 35ft 1in (10.69m). - Powered by a single screw, compound inverted 2 cylinder; 750 NHP; 4,000 IHP engine with steam pressure of 70 lbs, 4 cylindrical boilers, 2 to each funnel. - Speed 14 knots - 1873 Passengers: 100 1st, 150 2nd, 340 3rd Class. - 1893 Passengers: 140 first, 50 second, 800 third Some significant dates in her history include: - 1881: Replaced "Aconcagua" as standby vessel on the London - Suez- Melbourne - Sydney route - 1882: Government transport during the Egyptian Arabi Pasha Campaigns - 1883 Jan 25: Placed on regular service to Australia - 1890 Jun 11: Reverted to the Liverpool - Valparaiso route - 1893: Iberia sailed to Australia to replace a disabled ship. The journey via the Cape was non-stop at 14 knots in 32 days - 1893- Fitted with triple expansion engine; 3 cylinders, 600 NHP; 4 cylindrical boilers; 13 knots; fitted by J.Rollo & Sons, Liverpool - 1903: Broken up at Genoa. 1873 single screw, compound inverted, 2 cylinder; 750 NHP, 4000 IHP, Steam pressure 70 lbs, 4 cylindrical boilers, 2 to each funnel, 14 knots. Second largest ship in the world in 1874 (after the Great Eastern). Cost 151, 600 pounds. 1893 Triple expansion engine fitted. 3 cylinders 600 NHP, 4 cylindrical boilers, 15 knots, fitted by D Rollo and Sons, LiverpoolThe body of the model is carved and molded wood painted in black and white, the planked deck with detailed fittings and rigging, raised on a wooden base with simulated waves. At this time yards removed. "Iberia" -
 Mission to Seafarers Victoria
Print - Reproduction of a painting, Captain James Cook - The First Voyage 1768-1771
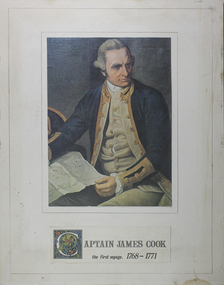
The first voyage of Lieutenant James Cook was a combined Royal Navy and Royal Society expedition to the south Pacific Ocean aboard HMS Endeavour, from 1768 to 1771. The aims of this first expedition were to observe the transit of Venus across the Sun (3–4 of June 1769). Departing from Plymouth in August 1768, the expedition crossed the Atlantic, rounded Cape Horn and reached Tahiti in time to observe the transit of Venus. In September 1769 the expedition reached New Zealand. In April 1770 they became the first known Europeans to reach the east coast of Australia, making landfall near present-day Point Hicks, and then proceeding north to Botany Bay. The expedition continued northward along the Australian coastline. In October 1770 they reached the port of Batavia in the Dutch East Indies. They resumed their journey on 26 December, rounded the Cape of Good Hope on 13 March 1771, and reached the English port of Deal on 12 July. The voyage lasted almost three years. Voyage 1 (1768–1771): ship Endeavour Route: London – Madiera – Rio de Janeiro – Cape Horn – Tuamotu Island – Tahiti – Society Islands – New Zealand – New Holland (Australia) – East Timor – Java – Batavia – Cape of Good Hope – St Helena – Ascension – LondonCook joined the British merchant navy as a teenager and joined the Royal Navy in 1755.Colour reproduction of portrait of Captain Cook by Nathaniel Dance (1735-1811)Captain James Cook - The First Voyage 1768-1771captain james cook, nathaniel dance (1735-1811), endeavour, navigators, sea voyage -
 Marysville & District Historical Society
Photograph (Item) - Black and white photograph, Yarra Track Hotel, c1900
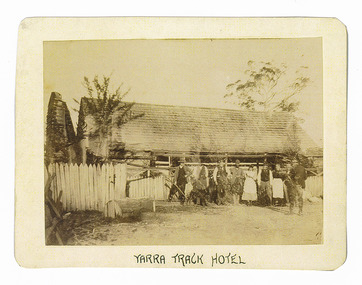
An early black and white photograph of a hotel along the Yarra Track.An early black and white photograph of a hotel along the Yarra Track. The Yarra Track is the former name of the gold fields road from Healesville to the Woods Point and Jordan Goldfields, in Victoria, Australia. A direct route via the Yarra River and the Great Divide was discovered by Rieck in September 1862 and became known as the Yarra Track. Early in 1863, the Victorian Government decided to construct a 193-kilometre (120 mile) road along the route. Its original width varied between 4 and 6 metres (12 and 20 feet), and was designed to accommodate horse-drawn vehicles. The Track involved the climbing of the Black Spur, descent into the Acheron Valley, and then through Marysville to the Cumberland where it followed the existing route. Unable to ascertain both the location and name of hotel.ARMSTRONG COLLECTION 42 STATION STREET/ SANDRINGHAM 3191/ TEL. (03) 9521 5442/ IAN M.L. ARMSTRONG OAMyarra track, healesville, wood's point, jordan goldfields, victoria, yarra river, great divide, reick, black spur, acheron valley, marysville, cumberland creek -
 Marysville & District Historical Society
Photograph (Item) - Black and white photograph, The "Scandinavians' - (Deserted), c1900
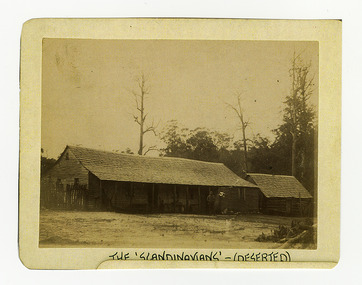
An early black and white photograph of The Scandinavian's Hotel and Boarding House along the Yarra Track.An early black and white photograph of The Scandinavian's Hotel and Boarding House along the Yarra Track. The Yarra Track is the former name of the gold fields road from Healesville to the Woods Point and Jordan Goldfields, in Victoria, Australia. A direct route via the Yarra River and the Great Divide was discovered by Rieck in September 1862 and became known as the Yarra Track. Early in 1863, the Victorian Government decided to construct a 193-kilometre (120 mile) road along the route. Its original width varied between 4 and 6 metres (12 and 20 feet), and was designed to accommodate horse-drawn vehicles. The Track involved the climbing of the Black Spur, descent into the Acheron Valley, and then through Marysville to the Cumberland where it followed the existing route.ARMSTRONG COLLECTION 42 STATION STREET/ SANDRINGHAM 3191/ TEL. (03) 9521 5442/ IAN M.L. ARMSTRONG OAMthe scandinavians', yarra track, healesville, wood's point, jordan goldfields, victoria, yarra river, great divide, reick, black spur, acheron valley, marysville, cumberland creek -
 Marysville & District Historical Society
Photograph (Item) - Black and white photograph, The "Scandinavians' - (Deserted), c1900
An early black and white photograph of The Scandinavian's Hotel and Boarding House along the Yarra Track.An early black and white photograph of The Scandinavian's Hotel and Boarding House along the Yarra Track. The Yarra Track is the former name of the gold fields road from Healesville to the Woods Point and Jordan Goldfields, in Victoria, Australia. A direct route via the Yarra River and the Great Divide was discovered by Rieck in September 1862 and became known as the Yarra Track. Early in 1863, the Victorian Government decided to construct a 193-kilometre (120 mile) road along the route. Its original width varied between 4 and 6 metres (12 and 20 feet), and was designed to accommodate horse-drawn vehicles. The Track involved the climbing of the Black Spur, descent into the Acheron Valley, and then through Marysville to the Cumberland where it followed the existing route.ARMSTRONG COLLECTION 42 STATION STREET/ SANDRINGHAM 3191/ TEL. (03) 9521 5442/ IAN M.L. ARMSTRONG OAMthe scandinavians', yarra track, healesville, wood's point, jordan goldfields, victoria, yarra river, great divide, reick, black spur, acheron valley, marysville, cumberland creek -
 Marysville & District Historical Society
Photograph (Item) - Black and white photograph, Camp Opposite The "Scandinavians', c1900
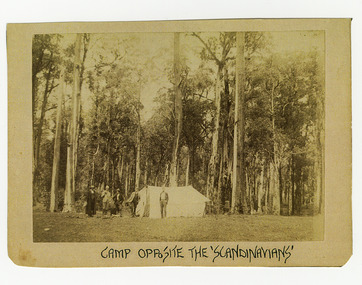
An early black and white photograph of a camp which was opposite The Scandinavian's Hotel and Boarding House along the Yarra Track.An early black and white photograph of a camp which was opposite The Scandinavian's Hotel and Boarding House along the Yarra Track. The Yarra Track is the former name of the gold fields road from Healesville to the Woods Point and Jordan Goldfields, in Victoria, Australia. A direct route via the Yarra River and the Great Divide was discovered by Rieck in September 1862 and became known as the Yarra Track. Early in 1863, the Victorian Government decided to construct a 193-kilometre (120 mile) road along the route. Its original width varied between 4 and 6 metres (12 and 20 feet), and was designed to accommodate horse-drawn vehicles. The Track involved the climbing of the Black Spur, descent into the Acheron Valley, and then through Marysville to the Cumberland where it followed the existing route.ARMSTRONG COLLECTION 42 STATION STREET/ SANDRINGHAM 3191/ TEL. (03) 9521 5442/ IAN M.L. ARMSTRONG OAMthe scandinavians', yarra track, healesville, wood's point, jordan goldfields, victoria, yarra river, great divide, reick, black spur, acheron valley, marysville, cumberland creek -
 Marysville & District Historical Society
Document (Item) - Research Document, Judith Vimpani, William Cavanagh Farrell (1844-1901), 04-2020
An account of the life of William Cavanagh Farrell.An account of the life of William Cavanagh Farrell who was important to Marysville as his review in 1863 of the routes to Wood's Point led to the Yarra Track ascending the Black Spur and going on to what became the resort town of Marysville on the Steavenson River. The Yarra Track is the former name of the gold fields road from Healesville to the Woods Point and Jordan Goldfields, in Victoria, Australia. A direct route via the Yarra River and the Great Divide was discovered by Reick in September 1862 and became known as the Yarra Track. Early in 1863, the Victorian Government decided to construct a 193-kilometre (120 mile) road along the route. Its original width varied between 4 and 6 metres (12 and 20 feet), and was designed to accommodate horse-drawn vehicles. The Track involved the climbing of the Black Spur, descent into the Acheron Valley, and then through Marysville to the Cumberland where it followed the existing route.willaim cavanagh farrell, marysville, victoria, wood's point, yarra track, black spur, steavenson's creek, steavenson river, george theodore rieck -
Marysville & District Historical Society
Document (Item) - Research Document, Judith Vimpani, George Theodore Rieck (1833-pos 1884), 04-2020
An account of the life of George Theodore Rieck.An account of the life of George Theodore Rieck. The Yarra Track is the former name of the gold fields road from Healesville to the Woods Point and Jordan Goldfields, in Victoria, Australia. A direct route via the Yarra River and the Great Divide was discovered by Rieck in September 1862 and became known as the Yarra Track. Early in 1863, the Victorian Government decided to construct a 193 kilometre (120 mile) road along the route. Its original width varied between 4 and 6 metres (12 and 20 feet), and was designed to accommodate horse-drawn vehicles. The Track involved the climbing of the Black Spur, descent into the Acheron Valley, and then through Marysville to the Cumberland where it followed the existing route.george theordore rieck, marysville, victoria, james murphy, new chum creek, wood's point, gold mining, matlock, walhalla, yarra track -
Marysville & District Historical Society
Booklet (Item) - Information booklet, Artworkz Tourism, The Big Culvert, Unknown
An information booklet that was produced as a guide to The Big Culvert.An information booklet that was produced as a guide to The Big Culvert. The Big Culvert is a historic granite and bluestone arch along the Yarra Track, a major route to Melbourne through the 1800s. Built in 1870 and a major piece of infrastructure for its time, the heritage listed culvert allowed water to flow under often-flooded the road. The Yarra Track is the former name of the gold fields road from Healesville to the Woods Point and Jordan Goldfields, in Victoria, Australia. A direct route via the Yarra River and the Great Divide was discovered by Rieck in September 1862 and became known as the Yarra Track. Early in 1863, the Victorian Government decided to construct a 193-kilometre (120 mile) road along the route. Its original width varied between 4 and 6 metres (12 and 20 feet), and was designed to accommodate horse-drawn vehicles. The Track involved the climbing of the Black Spur, descent into the Acheron Valley, and then through Marysville to the Cumberland where it followed the existing route.the big culvert, yarra track, victoria, healesville, wood's point goldfields, jordan goldfields, black spur, acheron valley, cumberland valley -
Marysville & District Historical Society
Flyer (Item) - Information flyer, Artworkz Tourism, The Big Culvert, 26-03-2016
An information flyer that was produced as a guide to The Big Culvert.An information flyer that was produced as a guide to The Big Culvert. The Big Culvert is a historic granite and bluestone arch along the Yarra Track, a major route to Melbourne through the 1800s. Built in 1870 and a major piece of infrastructure for its time, the heritage listed culvert allowed water to flow under often-flooded the road. The Yarra Track is the former name of the gold fields road from Healesville to the Woods Point and Jordan Goldfields, in Victoria, Australia. A direct route via the Yarra River and the Great Divide was discovered by Rieck in September 1862 and became known as the Yarra Track. Early in 1863, the Victorian Government decided to construct a 193-kilometre (120 mile) road along the route. Its original width varied between 4 and 6 metres (12 and 20 feet), and was designed to accommodate horse-drawn vehicles. The Track involved the climbing of the Black Spur, descent into the Acheron Valley, and then through Marysville to the Cumberland where it followed the existing route.the big culvert, yarra track, victoria, healesville, wood's point goldfields, jordan goldfields, black spur, acheron valley, cumberland valley -
 Marysville & District Historical Society
Photograph (Item) - Black and white photograph, Unknown
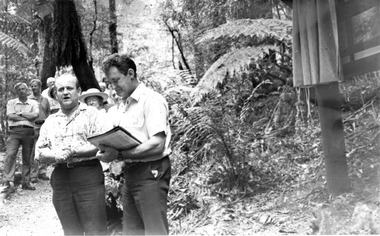
A black and white photograph taken at the unveiling of the sign placed at The Big Culvert.A black and white photograph taken at the unveiling of the sign placed at The Big Culvert. The Big Culvert is a historic granite and bluestone arch along the Yarra Track, a major route to Melbourne through the 1800s. Built in 1870 and a major piece of infrastructure for its time, the heritage listed culvert allowed water to flow under often-flooded the road. The Yarra Track is the former name of the gold fields road from Healesville to the Woods Point and Jordan Goldfields, in Victoria, Australia. A direct route via the Yarra River and the Great Divide was discovered by Rieck in September 1862 and became known as the Yarra Track. Early in 1863, the Victorian Government decided to construct a 193-kilometre (120 mile) road along the route. Its original width varied between 4 and 6 metres (12 and 20 feet), and was designed to accommodate horse-drawn vehicles. The Track involved the climbing of the Black Spur, descent into the Acheron Valley, and then through Marysville to the Cumberland where it followed the existing route.Unveiling of sign/ at "Big Culvert" In front Max Cockerrell and - Rear: second back Geoff Pope R.H.S. rear: Nancy "/ Anne "the big culvert, yarra track, victoria, healesville, wood's point goldfields, jordan goldfields, black spur, acheron valley, cumberland valley -
 Marysville & District Historical Society
Photograph (Item) - Colour photograph, 20-09-2008
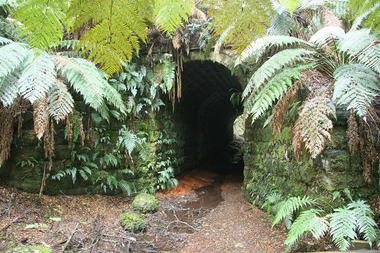
A colour photograph of the entrance to The Big Culvert.A colour photograph of the entrance to The Big Culvert. The Big Culvert is a historic granite and bluestone arch along the Yarra Track, a major route to Melbourne through the 1800s. Built in 1870 and a major piece of infrastructure for its time, the heritage listed culvert allowed water to flow under often-flooded the road. The Yarra Track is the former name of the gold fields road from Healesville to the Woods Point and Jordan Goldfields, in Victoria, Australia. A direct route via the Yarra River and the Great Divide was discovered by Rieck in September 1862 and became known as the Yarra Track. Early in 1863, the Victorian Government decided to construct a 193-kilometre (120 mile) road along the route. Its original width varied between 4 and 6 metres (12 and 20 feet), and was designed to accommodate horse-drawn vehicles. The Track involved the climbing of the Black Spur, descent into the Acheron Valley, and then through Marysville to the Cumberland where it followed the existing route.the big culvert, yarra track, victoria, healesville, wood's point goldfields, jordan goldfields, black spur, acheron valley, cumberland valley -
 Federation University Historical Collection
Postcard Booklet, Souvenir de Neuve-Englise - 12 Vues du Bombardement, 1917
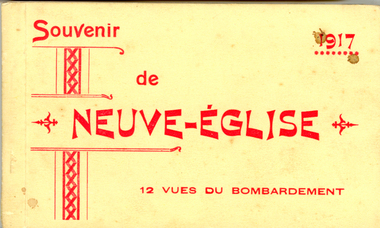
Views of places before and after bombardment during World War One.Small cream covered postcard booklet containing 12 postcards. The cover has red printing on the front. Tissue separates each individual postcard. The views shows scenes after the Bombardment of august 1916Front cover: In red print with border down LHS - Souvenir de NEUVE-ENGLISE 12 vues du bombardement "1917" in red print on top right hand corner Verso individual postcards: "Carte Postale" at top Correspondence (LHS top) and Adresse (RHS top) separated by a line in the middle of page LHS bottom corner "Vise Paris 850. Names of scenes on each postcard.postcard, 1917, views, wwi, world war one, first world war, 1st ww, 1916, bombarded church, steenwerck street, ypres, old council house, estaminet de la tete d'argent, "welcome" public house, boarding school for girls, la chapelle, rue de bailleul, bailleul, moulin, windmill, route de dranoutre, mill, brasserie "glorie" au borg, "glorie", brewery, carte postale, postcard, 1917, views, wwi, world war one, first world war, 1st ww, 1916, bombarded church, steenwerck street, ypres, old council house, estaminet de la tete d'argent, "welcome" public house, boarding school for girls, la chapelle, rue de bailleul, bailleul, moulin, windmill, route de dranoutre, mill, brasserie "glorie" au borg, "glorie", brewery, carte postale -
 Flagstaff Hill Maritime Museum and Village
Poster - Shipping Timetable, Barclay and Fry Ltd. London, Time Table of Australian Sailings, circa 1939
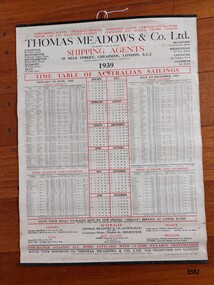
"Freight forwarding" is the arranging of the shipping of goods from their point of origin to their final destination. Freight Forwarders worked as an intermediary between companies that needed to ship products and the shipping and transportation firms that could ensure delivery. A key element of "freight forwarding" was the advice and professional handling of documentation and customs requirements provided. Early "freight forwarders" tended to be innkeepers who forwarded on the luggage of their hotel guests. One of the first "freight forwarding" companies was established by Thomas Meadows in 1836 which made it one of the earliest freight companies in Europe. More reliable rail and steamships were beginning to be used to transport goods and this created a demand for the new "freight forwarding" industry. The combination of railroads and steamships became very important in the late 19th and early 20th century. International shipments became common and freight forwarding that could handle their complexity became an integral part of the manufacturing and shipping landscape. Thomas Meadows & Company Ltd moved to offices in Milk Street, London in 1854 (where they remained until 1969 when they moved out of the city to Leytonstone) and continued in the freight business until 1987 when the company was acquired by Rockwell International Freight. The growth of Thomas Meadows & Company Ltd coincided with the growth and development of the colony of Victoria with an increasing need for the transporting of large numbers of people as well as important goods required by the growing colony - furniture, spirits, food, clothing, agricultural implements, household items etc. In the late 1840's only two or three overseas ships a month visited Melbourne but by late 1852 (after gold was discovered) more than a dozen ships arrived each week. By 1939, Thomas Meadows & Co. Ltd. had offices in Canada, U.S.A., New Zealand, France, Belgium and in Flinders Street Melbourne. This poster was sold by "Smarts Authorised Newsagency" in 1988 in Warrnambool - a business that had been owned by Neil and Shirley Smart at 168 Timor Street, Warrnambool since 1976. Previously it had been "Reed's Newsagency and Book Shop" (a local business established by William Reed circa 1912 and known as "William Reed Bookseller and Stationer"). The original owners, Reed's Newsagency and Bookshop were operating the shop in 1939 which suggests the poster may have been on display (for the information of their customers) in their shop at that time. This poster is significant through its association with Thomas Meadows and Co. Ltd. who is considered to be the founder of the "freight forwarding" industry in the early 19th century. It is an example of advertising used by shipping agents in the mid-19th to early 20th centuries. Its information includes the addresses of the firm's different offices in the U.K. and abroad, ships, shipping lines and ports used and the timetable the vessels were likely to follow. It is also significant through its association with a well known and long standing local Warrnambool business.A 1939 Timetable of "Australian Sailings" produced by the shipping agents Thomas Meadows and Co Ltd. It lists all their ships (plus dates and ports) sailing from the UK to Australia as well as the addresses of their offices in other cities in the U.K., Canada, U.S.A., Australia, New Zealand, France and Belgium. It has three vertical columns depicting (from left to right) January to June sailings, a simple 1939 calendar and their July to December 1939 sailings. The poster is attached on the top and bottom to two thin black metal strips. The top strip has a metal ring with a hole. A stamped label on the back of the poster has the name, telephone number and address of Smarts newsagency plus the date.Front of poster - "FORWARDING AGENTS. INSURANCE BROKERS.PASSENGER AGENTS.CARTAGE CONTRACTORS / MOTOR CAR AND MACHINERY PACKERS.FURNITURE AND GENERALEXPORT PACKERS" "THOMAS MEADOWS & CO Ltd." "ESTABLISHED OVER 100 YEARS" "SHIPPING AGENTS / 35 MILK STREET, CHEAPSIDE, LONDON, E.C.2" "PACKING WAREHOUSES IN LONDON & MANCHESTER" "1939" "TIME TABLE OF AUSTRALIAN SAILINGS" "JANUARY TO JUNE, 1939/ FROM LONDON" "JULY TO DECEMBER, 1939 / FROM LONDON" "HAVE YOUR SMALL PACKAGES SENT BY OUR SPECIAL "SMALLS" SERVICE AT LOWER RATES/RATES TO PORT ONLY OR INCLUDING DELIVERY THROUGHOUT AUSTRALIA" "INSURANCE AGAINST ALL RISKS EFFECTED WITH CLAIMS PAYABLE DESTINATION" "ROUTE YOUR SHIPMENTS VIA THOMAS MEADOWS & CO LTD. FOR PROMPTNESS AND ECONOMY" Stamp on back of poster - "SMART'S AUTHORISED NEWSAGENCY' "168 Timor Street, Warrnambool 3280" "Telephone: (055) 62 2092" "12 DEC 1988" Sticker at bottom - "51"flagstaff hill maritime museum and village, great ocean road, shipping, shipping agents, freight forwarding, freight, shipping time table, thomas meadows & co. ltd., thomas meadows shipping agent, shipping and forwarding agent, smart's newsagency, warrnambool, warrnambool newsagency, chart, poster, smart's authorised newsagency, neil and shirley smart, william reed, reed's newsagency and bookshop -
 City of Moorabbin Historical Society (Operating the Box Cottage Museum)
Document, x 2 ,Photograph colour x1, Reciept NSW Govt. Immigration Dept., Ticket Orient Line 'Osterley' 1915 Mr Rietmann, Osterley steam ship, 1915
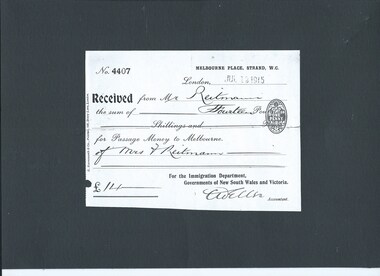
August Rietmann (1877-1951) of Lustdorf ,Switzerland, married Maria Frieda Oesschlager (2/21878- 22/7/1942) of Baden Baden, Germany on 6/8/1910 In August 8th 1915 August and his wife Frieda migrated to Melbourne, Victoria, Australia sailing on the Steam Ship ‘Osterley’ from Marseilles to Melbourne They leased Box Cottage, Ormond in 1917 and raised two children, Stefanie (1918 -2006) and William (1920- 1997). 1935 August purchased the property and the family used the Cottage during the day and slept in the Front House. August was a monumental mason, potter and sculptor, and was employed at Corbens Ltd Clifton Hill, to carve war memorials in Victoria post WW1 c 1915-1922. During the 1920's August set up his own business in pressed cement making pot plants, columns,paving slabs and lampstands. He continued to carve headstones and figures and took contract work for Artists eg Paul Mountford. He built a workshop in the Barn and used the Cottage for plaster moulding. His son William joined the business and and the family continued to use the site after August died in 1951. Rietmann Landscaping Ltd moved to Bay Road Highett in 1953 and later to Carrum. The land, containing the Box Cottage, was sold to Lewis Timber Pty Ltd in 1970 and Mr Lewis proposed that Moorabbin City Council should preserve the heritage Cottage. In 1984 the Cottage was dismantled and reconstructed in the adjacent Joyce Park. 'Osterley' SS of the Orient Line, 12,129 tons, was a Royal Mail Steam- Ship sailing to and from Australia c1915The Rietman family is an example of the diverse nationalities that lived and worked productively in Moorabbin Shire 1871–1933 , the City of Moorabbin 1934-1994 and continues today in the Cities of Glen Eira, Kingston, Bayside, and Monash. August, a sculptor and stone mason, was employed by Corben Pty Ltd Clifton Hill to carve WW1 Memorials before establishing his own successful masonry business in the Box Cottage during the latter 1920s. After becoming interested in pressed cement casting, he took on apprentices (1930s Depression) and among his products were garden furniture, pots and also street lamp standards, some of which were installed in St Kilda Road. After August’s death in 1951, his family continued the business ‘Rietman’s Landscaping Ltd.’, at Highett and Carrum.Printed Documents a) Mr A Rietmann Receipt from Immigration Department of New South Wales Australia; b) Original Ticket Orient Line Ship 'Osterley' Marseilles to Melbourne 1915 c) Photograph colour of 'Osterley' Steam Shipa) No. 4407 MELBOURNE PLACE, THE STRAND W.C. /London July 12 1915/ Received from Mr Rietmann Fourteen Pounds for passage Money to Melbourne b) ORIENT LINE/ ROYAL MAIL STEAM-SHIPS TO AUSTRALIA/ ............THIRD CLASS PASSENGER CONTRACT TICKET..............OSTERLEY ... to take in passengers of the Port of Marseilles for ..........MELBOURNE............on the Eighth day of August 1915 ..........Mr August Rietmann .......................£15:4 : - to be paid before embarkation c) Osterly Steam ship en route to Melbourneport of marseilles france, melbourne australia, orient steam ship line, osterley steam ship,rietmann august, rietman august, rietmann frieda, rietman frieda, stonnington city town hall, war memorials, world war 1 1914-1918, rietman stefanie, rennick stefanie, francis stefanie, rietman william, rietman ray, mountford paul, malvern city town hall,box cottage museum ormond, box william, box elizabeth, joyce park ormond, rietman's landscaping pty ltd, bay road highett, macrobertson pty ltd, coleraine soldier memorial 1921, -
 Tramway Heritage Centre
Photograph Album (part of), Ray Pearson's Photo Album - Trams of Victorian Railways, Ballarat, Bendigo, Geelong
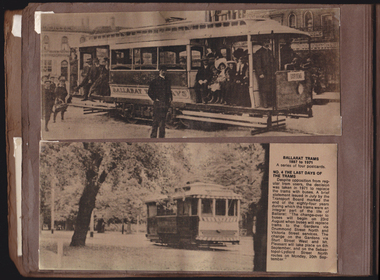
Page 4 of Ray Pearson's Photo Album. Brown card page with two metallic look postcards (landscape format) placed on page using clear plastic photo corners. Both postcard images depict trams in Ballarat. Both postcards have come loose of two of their photo corners (top and bottom on the left) and are not secure on the page.Printed text to back of postcard at top: BALLARAT TRAMS / 1887 to 1971 / A series of four postcards. / NO. 2 EARLY ELECTRIC TRAMS / Electric trams first ran in / Ballarat on 18th Aigust, 1905. / Twelve of the horse trams were / converted to electric cars by lengthening them at both ends. / Eight of the remaining horse / trams were used as trailers to / the motor cars. / The electric trams were / given a secret trial during the / previous night to the opening / date, but the drivers clanged / the gongs so much that it / brought people out of their / beds in night attire. They / formed an unofficial guard of / honour around Wendouree / Parade. / The trams were gaily decor- / ated for Opening Day. As the / line of cars came down Camp / Hill (Sturt Street) filled with / local dignitaries, the brakes on / the last car failed and it crashed / into the one in front. The win- / dows of both cars were / smashed, and the occupants / who had been sitting in state / made an undignified exit. / Seating accommodation was / from 32 to 36. Six small electric / trams were purchased from the / Sydney Tramways in 1905 and / were converted to a similar / pattern to the 12 re-built / Ballarat horse trams. In 1906 / two open summer cars with / open cross seats (popularly / called toast racks) / were intro- / duced. These trams were packed at week-ends with / families en route to picnic by / the lake. A fine printed vertical line runs down the centre of the blank writing space to the left of the body text. Above is written: POSTCARD Printed text to right of image on bottom postcard: BALLARAT TRAMS / 1887 to 1971 / A series of four postcards. / NO. 4 THE LAST DAYS OF THE TRAMS / Despite opposition from reg- / ular tram users, the decision / was taken in 1971 to replace / the trams with buses. A brief / statement issued in July by the / Transport Boar marked the / end of the eighty-four years / during which the trams were an / integral part of the life of / Ballarat: “The change-over to / buses will begin on 23rd / August when buses will replace / trams to the Gardens via / Drummond Street North and / Victoria Street services. The / change on the Gardens via / Sturt Street West and Mt. / Pleasant will take place on 6th / September, and on the Sebas- / topol-Lydiard Street North / routes on Monday, 20th Sep- / tember.” A fine printed vertical line runs down the centre of the blank writing space to the left of the body text. Above is written: POSTCARDpostcard, ballarat trams, ballarat tramways, vintage trams, tram postcard, electric trams -
Moorabbin Air Museum
Map (item) - Aloha Airlines - map of the islands of Hawaii, Aloha Airlines - map of the islands of Hawaii circa 1955
-
Moorabbin Air Museum
Manual - Compass Airlines Route Data Cards and Stored Flight Plans Jeppesen, Compass Stored Flight Plans
-
Moorabbin Air Museum
Booklet (item) - Standard milages for Australian Domestic Airline Routes - Dept Civil Aviation Dec 1962
-
 Victorian Aboriginal Corporation for Languages
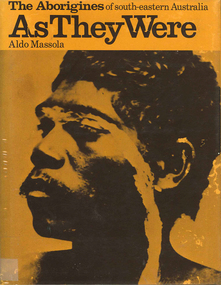
Book, Aldo Massola, The Aborigines of south-eastern Australia : as they were, 1971
Contents: p.1-3; Origins, arrival in Australia; p.4-9; How they lived - camp sites, dating (including carbon dating); p.10-27; Physical appearance, skin colour, hair, clothing, body ornaments, cicatrization; exchange system, distribution of food, marriage &? sexual relations; the tribe - structure, relationship to land, territory, gives map showing locations of tribes, New South Wales, Victoria &? eastern South Australia, leadership, government, division of labour, status of women, estimated population at white settlement, density of population (Victoria); p.28-31; Language - names &? naming, reproduces Wembawemba vocabulary, notes use of secret languages, gives 12 rules for pronounciation; p.32-53; Religion, spirit beliefs, totemism, moieties, phratries, marriage rules; mythology, gives eaglehawk &? crow myth from Lake Victoria &? other myths illustrating origins of fire &? natural rock formations, mythical beasts (Bunyip, Mindie), stellar beliefs; magic, medicine men, powers, native remedies for sickness, describes ceremony held in Melbourne, 1847 to avert evil, sorcery, pointing bone, love magic, rain makers; messengers, appearance, etiquette, message sticks; p.54-71; Rock art, motifs, colours, decorative art, engraving of utensils, rock engravings, manufacture &? use of pigments, engraving techniques; trade system, objects bartered, meeting places for trade (Victoria), map shows possible routes (south east Australia); corroborees, purpose, body ornaments &? decorations, musical instruments; p.72-93; Ceremonial life, marriage, punishment for infidelity, birth, childhood, games &? amusements, initiation, etiquette of visiting tribes, details of ceremony, womens role, earth figures &? ground designs, bull roarers, female puberty ceremonies; p.94-133; Shelters, fire making, cooking, construction of canoes, wooden implements, use of reeds, animal skins &? sinews, shells; stone tools, cylindro conical stones, scrapers, knives &? microliths; hunting weapons, spear, other methods pits, nets; fishing methods &? spears, traps; food sharing, womens responsibilities for collecting, digging stick, cooking methods, insect foods, plant foods, water resources; manufacture &? use of spears, spear throwers, shields, clubs, boomerangs; inter- &? intratribal fighting; p.134-147; Death, disposal of body - eating of the dead, burial, cremation, platform exposure, dendroglyphs (N.S.W.), Aboriginal burial grounds (Darling &? Murray Rivers), mourning, widowhood, kopi caps (N.S.W.), causes of death, inquest ceremonies, revenge expedition, after death beliefs; p.148-157; The end of the tribes white settlement &? its impact on Aboriginal life, friction between natives &? settlers, establishment of Protectorates; copiously illustrated throughout.maps, b&w illustrations, b&w photographswemba wemba, murray river, darling river, lake victoria -
 Victorian Aboriginal Corporation for Languages
Book, Ian Macfarlane, Historical records of Victoria : foundation series : volume 2A : the Aborigines of Port Phillip 1835-1839, 1982
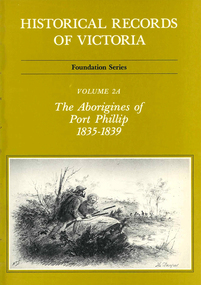
Reproductions of various transactions and reports dealing with Aboriginal people in Port Phillip in the period 1835-39, beginning with some of the earliest reports and tracing the evolution of government interaction and policy towards Aborigines in the 19th century. Covers mission work, government reports, the native police, conflicts with squatters, with numerous illustrations and original reports. Contents: Part I, Evolution of British policy Ch. 1. Proposals to appoint protectors of aborigines Ch. 2. Racial conflict in the year of official settlement at Port Phillip Ch. 3. House of Commons Select Committee on Aborigines Part II, The Wesleyan Mission at Buntingdale Ch. 4. Establishment and early operations of the Wesleyan mission Part III, The Government acts Ch. 5. Establishing the first government mission 1835-7 Ch. 6. Food and clothing for the Aborigines Ch. 7. Punishment of Aborigines found drunk, 1836-8 Ch. 8. Operations of the government mission, November 1837 to March 1839 Ch. 9. First attempt to form a native police corps Part IV, Growing conflict with squatters, 1837-8 Ch. 10. The disappearance of Gellibrand and Hesse Ch. 11. Attacks in the Western District Ch. 12. Attacks on the overland routes to Port Phillip Ch. 13. Evolution of policy in Sydney, 1838.b&w illustrations, b&w photographs, tables, document reproductionsvictorian history, colonisation, justice system -
 Moorabbin Air Museum
Manual (Item) - Commonwealth of Australia Department of Civil Aviation: Aircraft Radio Operators' Manual, General Regulations, Operation Procedure and Miscellaneous Instructions to be observed by Aircraft Radio Operators engaged on Airline Routes within Australian Territory
issued by the Department of Civil Aviation during 1944, documents correct procedures for aircraft radio operators within Australia. department of civil aviation, aircraft radio operators -
Moorabbin Air Museum
Map (Item) - BOAC Britannia Fleet London to Colombo Route Map BA774
-
Moorabbin Air Museum
Document (Item) - A Report On Meteorological Conditions Affecting Aviation Over The Sydney To Vancouver Air Route
Commonwealth Of Australia Department Of The Interior Meteorological Branch -
Moorabbin Air Museum
Manual (Item) - Darwin-Singapore - Route Meteorological Conditions
-
Moorabbin Air Museum
Manual (Item) - Application of this model to Domestic Australian routes, Boeing Model 417
-
Moorabbin Air Museum
Manual (Item) - Application and economic analysis of this model to Royal Dutch airlines routes, Boeing Model 377 Number SR-11