Showing 7535 items
matching melbourne tramway museum
-
 Melbourne Tram Museum
Newspaper, Burwood Bulletin, "Burwood Trams", 2016
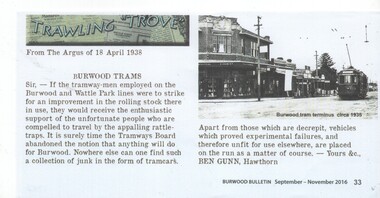
Photocopy of an item from the Burwood Bulletin September - November 2016, page 33, titled "Burwood Trams" reprinting a letter from The Argus, 18 April 1938 by Ben Gunn of Hawthorn complaining about the condition of the tramcars on the Burwood and Wattle Park lines and that new trams should be provided. Has a photo of the Burwood terminus - c1935 - see Reg Item 134 for the original photograph from a postcard.trams, tramways, burwood, tram 133 -
 Melbourne Tram Museum
Document, National Trust, "Trust News Victoria - Vol 27, No. 2, October 1998", Oct. 1998
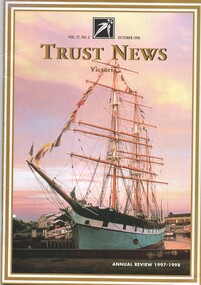
Magazine - 48 pages - full colour print on full gloss or plain paper titled "Trust News Victoria - Vol 27, No. 2, October 1998". Contains a 24 page Annual Review or report of the Victorian branch. Has a number of items of tram and rail interest. page 6 - Decorative tram poles in Fitzroy St Kilda and Peel St North Melbourne page 7 - St Kilda Railway Station platforms page 8 - "Trams back on Track" about the return W class trams - has a photo of 750 in St Kilda Road with the Shrine of Remembrance in the background. page 7 of the annual report - Hawthorn Tram Depot and Heritage Tram Fleettrams, tramways, w class, st kilda, overhead, fitzroy st, peel st, hawthorn, hawthorn depot, national trust -
 Melbourne Tram Museum
Document - Photocopies, Weston Bate and others, "Challenging Traditions - A History of Melbourne Grammar', 2016
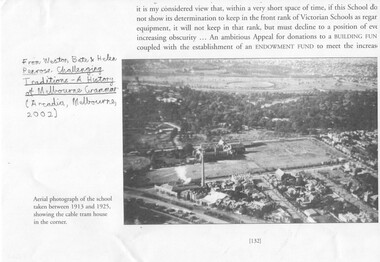
Set of three photocopies of photographs from "Challenging Traditions - A History of Melbourne Grammar (Arcdia, Melbourne 2002) showing the cable tram winding house on the corner of St Kilda Road and Bromby St in 1919 and after redevelopment c1930. .1 - looking north with steam coming from the winding house. .2 - looking south east with winding house and surround buildings .3 - after closure and redevelopment of the site, looking north east. .4 - photo of the intersection of Victoria Parade and Gisborne St showing the cable tram track, cable trams, MFB and Eye and Ear Hospital. Shows the track layout partly. A photograph from a book "Melbourne from the Air"trams, tramways, st kilda rd, cable trams, victoria parade, brunswick st, winding houses, fitzroy -
 Melbourne Tram Museum
Document - Report, The Met, "Upfield Corridor Study - The Principal Report - For Consultation", Dec. 1988
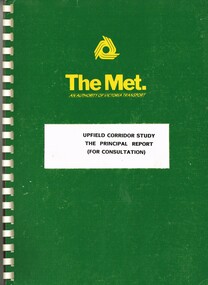
Report - 50 A4 pages contained within heavy green card covers with The Met logo on the top, white comb bound titled "Upfield Corridor Study - The Principal Report - For Consultation". Published by the Metropolitan Transit Authority, Planning Division, Dec. 1988. Has a table of contents and list of tables and figures. Looks at the conversion of the Upfield Rail line to light rail, options for both rail and tram, affects on road traffic. Provides a summary.trams, tramways, upfield light rail, sydney rd, north coburg, conversion -
 Melbourne Tram Museum
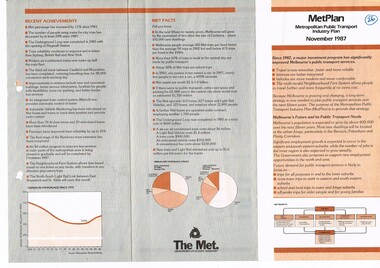
Pamphlet, The Met, "Metplan - Metropolitan Public Transport Industry Plan - November 1987", Nov. 1987
Three fold pamphlet, titled "Metplan - Metropolitan Public Transport Industry Plan - November 1987", providing an update of the planning for the Melbourne Public Transport system. Gives three strategies, for going ahead. Has graphs, list of recent achievements and Met Facts. Has the Met logo.Has "26" circled in ink on the front cover.trams, tramways, metplan, public transport, buses, tramways, planning, railways -
 Melbourne Tram Museum
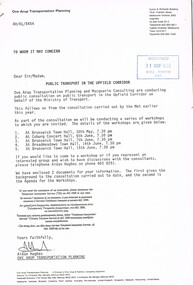
Document - Report, Ove Arup Transportation Planning, "Public Transport in the Upfield Corridor", May. 1989
Consultative report - 8 A4 pages, stapled in the top right hand corner, titled "Public Transport in the Upfield Corridor". Prepared by Ove Arup Transportation Planning, dated May 1989. Provides an outline of the consultation process, dates, gives an outline of the options for the corridor, social costs, access to facilities, shoppers and business, costs and benefits. Two copies held. Second copy stamped 31/5/1989 -WMR Registry HDV.trams, tramways, upfield light rail, sydney rd, north coburg, conversion -
 Melbourne Tram Museum
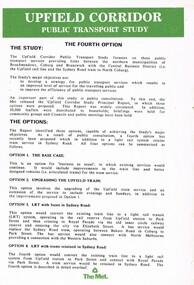
Pamphlet, The Met, "Upfield Corridor Public Transport Study", early 1989
Pamphlet - two A4 sheets - may not have been issued at the same time, titled "Upfield Corridor Public Transport Study", looking at a fourth option for the Upfield line. Lists the four options and gives details of the 4th option - retaining a tram services in Sydney Road between Bell Street and Park St during business hours. Notes the consultative period has been extended to June 1989, gives advice that Ove Arup Transportation Planning has been recently appointed, prior appoints and contact details.trams, tramways, upfield light rail, sydney rd, north coburg, conversion -
 Melbourne Tram Museum
Document - Report, Metropolitan Transit Authority (MTA), "Hong Kong Light Rail System", c1990
Report - 20 A4 pages stapled in the top left hand corner - titled "Hong Kong Light Rail System" with a table of contents, explaining the joint venture between the MTA and Leighton Asia and other major sub-contractors including Comeng, with diagrams, project roles, the vehicles.trams, tramways, light rail, hong kong, comeng, the met, mta -
 Melbourne Tram Museum
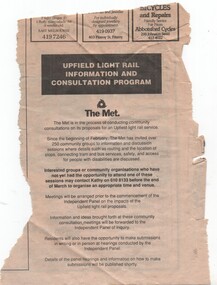
Newspaper, The Met, "Upfield Light Rail Information and Consultation Program", 1990
Newspaper clipping possibly from a local newspaper advertising that an Independent Panel of Inquiry has been formed and details will be published shortly. Advising that community group meetings have been held and that further are available. Titled "Upfield Light Rail Information and Consultation Program" On the rear has an advert for the election of Gerry Hand to the Federal seat of Melbourne.trams, tramways, light rail, upfield light rail, conversion, sydney rd -
 Melbourne Tram Museum
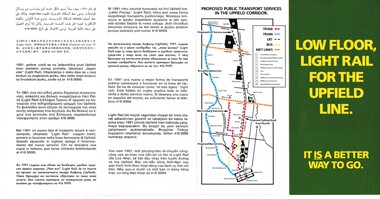
Pamphlet, The Met, "Low Floor light rail for the Upfield line - it is a better way to go", c1989
Pamphlet - four fold DL size full colour titled "Low Floor light rail for the Upfield line - it is a better way to go", explaining or providing advice on the proposal for the conversion of the Upfield line to Light rail and timing. Has a map of the proposal - has a translation in 11 languages. Includes a map showing the proposals, project details, why, level crossings, rail services and timing and proposals for a shuttle along Sydney Road. Second copy added 17-7-2017.trams, tramways, light rail, upfield light rail, conversion, sydney rd -
 Melbourne Tram Museum
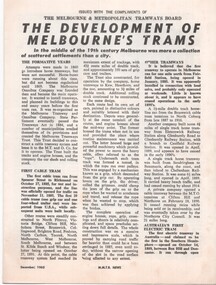
Pamphlet, Keith Kings, "The Development of Melbourne's Trams", 1966
Pamphlet - single sheet four pages, titled "The Development of Melbourne's Trams", reprinted from the Dec 1965 issue of MMTB news, issued with the compliments of the MMTB. Item written by Keith Kings. Gives a short history of Melbourne trams and buses, cable trams, Doncaster tramways, steam tram (Cheltenham), electric traction, formation of the MMTB, Rolling stock, Bourke St, Preston Workshops and night buses and rolling stock.trams, tramways, mmtb, cable trams, history, doncaster, cheltenham, tramcars -
 Melbourne Tram Museum
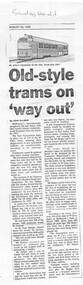
Newspaper, John Gillman, Sunday Herald, "old-style trams on way out", Aug. 1989
Photocopy of a newspaper clipping reduced to A4 size from the Sunday Herald, August 20, 1989 about the conversion of the Melbourne tram system from conductors to ticket machines, conversion of W class trams to a one man and more modern looking version, phasing out of W class trams. Quotes Mr Jim Harper, Secretary of the union and spokesman for the Transport Minister, Mr. Jim Kennan. Gives some numbers regarding vehicle requirements. Written by John Gillman.trams, tramways, w class, tickets, conversion, unions, ticket machines -
 Melbourne Tram Museum
Document - Report, Dave McCabe, "Proposal Strategy for Introduction of Articulated trams to System", Oct. 1988
Three page, A4 document, multiple copied of a report titled "Proposal Strategy for Introduction of Articulated trams to System". Dated 3/10/1988, prepared by Trams Operations Development Department, looks the objectives of the articulated trams, factors impacting on the strategy, proposal for route introductions, timings, alternatives, depot and route impacts. Prepared by Dave McCabe, Manager Tram Operations Development. Note it has no notes regarding the use on the Upfield line.trams, tramways, b class, tramcars, articulated trams, routes, depots -
 Melbourne Tram Museum
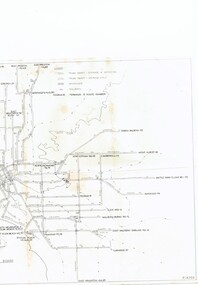
Drawing, Melbourne & Metropolitan Tramways Board (MMTB), "MMTB Electric Tramway System 1971", 1971
Map or drawing titled "MMTB Electric Tramway System 1971", giving a detailed layout of the Melbourne tram system in 1971. shows depot, storage depots, workshops and tramway terminus names and route numbers. Has a drawing number of P14359 See Reg Item 253 for a 1979 copy.trams, tramways, mmtb, melbourne, map, routes -
 Melbourne Tram Museum
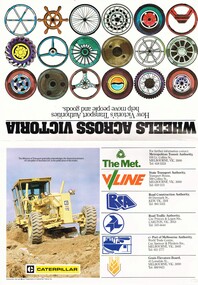
Pamphlet, Victoria Transport, "Wheels across Victoria", c1985
Pamphlet, folded A2 size sheet to A4 landscape, full colour printed, titled "Wheels across Victoria", sub-titled "How Victoria's Transport Authorities help move people and goods" Provides information on the activities of the Road Construction Authority, Road Traffic Authority, Metropolitan Transit Authority, RCA, RTA, MTA. V/Line, GEB and Ports, Grain Elevators Board and the various port authorities. On the inside has a introduction by the Minister for Transport Tom Roper and a game for up to 6 people moving markers from Gippsland to the NW corner of the state. Uses a dice. Published by Victoria Transport with the assistance of Caterpillar Australia ltd. Has the various authority logos.trams, tramways, rta, rca, vline, mta, victorian government -
 Melbourne Tram Museum
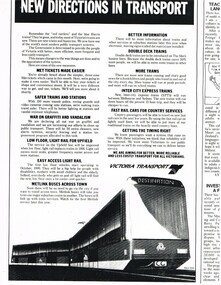
Pamphlet, Victoria Transport, "New Directions in Transport", c1989
Photocopy of a pamphlet, A4, titled "New Directions in Transport", issued c1989, providing details of investment by the State Government in Victorian transport includes Met tickets, low floor vehicles for Upfield, buses, trams, double deck trains and new trains for interstate services. Has the Victoria Transport logo.trams, tramways, public transport, new trams, upfield light rail, light rail, minister for transport -
 Melbourne Tram Museum
Document - Instruction, Noel Gipps, "St Kilda Junction Signal Box Procedures", c1970?
Typed instruction - quarto sheet - "St Kilda Junction Signal Box Procedures" - could be a copy of the actual instructions provided in the signal box - gives what the AM and PM shifts were required to undertake. Has a poem on the based that was affixed to the wall of the signal box. On the bottom section has the address of Mr. Noel Gippstrams, tramways, st kilda junction, instructions, signalmen, signals, poem -
 Melbourne Tram Museum
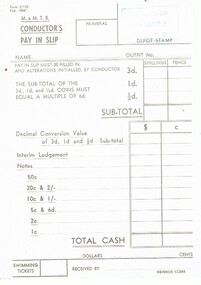
Document - Form/s, Melbourne & Metropolitan Tramways Board (MMTB), "M&MTB Conductor's Pay in slip", Feb. 1966
Printed form on off white paper titled "M&MTB Conductor's Pay in slip", form number 3/135, dated February 1966, at the time of the conversion of the Australian currency to the decimal system. Enabled the conductors to record what amount they paid into the revenue office, with space for table number, name, out fit number, amounts, number of swimming tickets and signature of revenue clerk. See Reg Item 1460 for a 1988 and 809 for March 1972 examples. Has the Malvern Depot stamp in the top right hand corner - 11 Jan 1969trams, tramways, mmtb, conductors, forms, pay in forms, decimal conversion, decimal currency -
 Melbourne Tram Museum
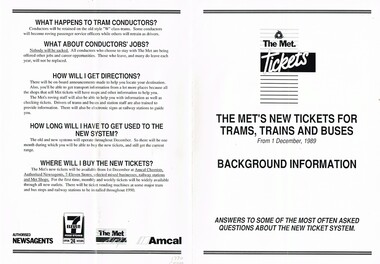
Pamphlet, The Met, "The Met's new Tickets for Trams, trains and buses - Background Information", Nov. 1989
Pamphlet - 4 page folded from A3 sheet, printed on gloss paper titled "The Met's new Tickets for Trams, trains and buses - Background Information", providing answers to the most often asked questions about the new ticket system - scratch tickets - about costs, availability, what a scratch ticket is, single trip tickets on trams, 60 plus tickets, ticket inspection and removal of conductors and where to buy new tickets. Has the The Met shop, 7 eleven and Amcal chemist logos. To be introduced on 1/12/1989. Two copies heldtrams, tramways, tickets, scratch tickets, conductors, the met -
 Melbourne Tram Museum
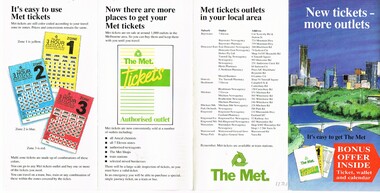
Pamphlet, The Met, "New tickets more outlets", Get the new Met Tickets all around town", c1/1990
Set of two pamphlets about the availability of the new Met Tickets (Scratch Tickets) .1 - four fold full colour pamphlet, titled "New tickets more outlets" - where tickets could be purchased scratched, ticket types, short trip tickets, 60 plus tickets, use and locations where tickets could be purchased including a list of vendors in the Doncaster to Ringwood area. .2 - Single A4 sheet - double sided advertising locations in the city area where Met Tickets could be purchased from and that tickets could not be purchased be purchased on a tram or bus. Emergency tickets could be purchased however.trams, tramways, tickets, scratch tickets, the met -
 Melbourne Tram Museum
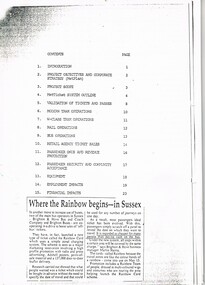
Document - Report, The Met, "MetTicket System Concept Report", Aug. 1989
Report - 24 pages - photocopy of the original report, stapled in the top left hand corner, printed on the rear of another data report. Titled "MetTicket System Concept Report". Looks at the concept of the Met Ticket (scratch), project objective, scope, validation process, use on trams, rail and bus, retail agency sales, passenger onus or responsible to scratch the ticket, revenue protection, passenger security and acceptance, equipment, impacts on employment and financial. Has a table of contents. On the base of the first page has a copy of an article from an UK paper, about the Brighton and Hove Bus company using a similar system.trams, tramways, tickets, scratch tickets, the met, reports -
 Melbourne Tram Museum
Document - Report, The Met, "MetTicket Tram Operations Employee Information (No. 2)", Late 1989
Report - 10 pages - stapled in the top left hand corner, titled "MetTicket Tram Operations Employee Information (No. 2)", giving a update on the details of the new scratch system, implementation, redeployment and retraining, operating procedures for one person trams and details of the new tickets and fares. Not dated, late 1989.trams, tramways, tickets, scratch tickets, the met, reports, tram drivers, drivers, one man trams -
 Melbourne Tram Museum
Document - Folder with papers, The Met, "Opening of the St Kilda Light Rail Project", "Moving Victoria", "What Melbourne's been waiting for arrives this Friday", Nov. 1987
Folder issued for the opening of the St Kilda Light Rail 20-21 November 1987, comprising six items. .1 - Folder - folded green card with the "Metropolitan Transit" logo in the bottom left hand corner .2 - Pamphlet - Light Rail Transit Link - same as Reg Item 457 .3 - News Release or Press Release - two A4 pages titled "Light Rail: Transport for the next Century" - Quotes the Minister Tom Roper, has details on the B class trams. .4 - Opening ticket - see also Reg Item 602 .5 - "Moving Victoria" - 40 page book - card covers, colour printed centre stapled with table of contents setting out the Victorian Government forward look and Transport Budget for 1987 - 1988 - for the various transport departments. .6 - Pamphlet - two fold black and white on gloss paper - titled "What Melbourne's been waiting for arrives this Friday" - published by the Met about the opening of the St Kilda line and free rides.trams, tramways, tickets, st kilda, conversion, light rail, opening, b class, minister for transport -
 Melbourne Tram Museum
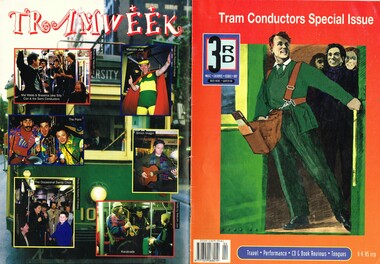
Magazine, The Boite (Vic) Inc, "3rd - Tram Conductors Special Issue", Winter 1998
Magazine - 16 pages, colour covers, centre stapled printed on gloss paper, titled "3rd - Tram Conductors Special Issue", Winter 1998, published by The Boite (Vic) Inc - music, culture, arts. Has a number of items about the removal or finishing up of conductors on Melbourne trams with poems or articles written by Malcolm Just, Paul Bateman, Tanya Wolkenberg and Tom Moore. Includes a review of "Melbourne's Marvellous Trams" book, Has a number of photos of conductors at work. 2nd copy for donation of Colin Jones.trams, tramways, conductors, tramways, tickets, poem -
 Melbourne Tram Museum
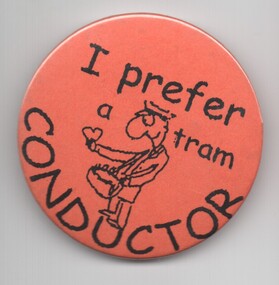
Ephemera - Badge, "I prefer a tram Conductor", mid 1990's
Plastic badge - white back with a pin clip and orange back paper with clear plastic cover - cartoon by Michael Leunig - "I prefer a tram Conductor". Has "Made in Australia" embossed on the rear.trams, tramways, conductors, tramways, badges -
 Melbourne Tram Museum
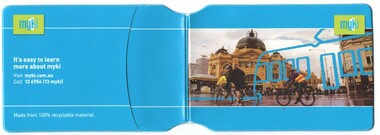
Document - Folder, Myki, c2012
.1 Blue - white inside, printed plastic folder with colour print of Flinders St Street station on the front for holding a Myki touch card and contact details for Myki on the rear with Myki logos. 2nd copy added 4-4-2017 .2 - RFID Card - Myki Seniors Card - No. 3 08425 0258 6484 2 - green white, with a various logos, myki contact details, embedded RFID chiptrams, tramways, myki, tickets, rfid cards -
 Melbourne Tram Museum
Functional object - Ticket Wallet, Metcard, Set of two ticket wallets, folders or documents issued by Metlink, c2012
Set of two ticket wallets, folders or documents issued by Metlink, the marketing body and umbrella brand for public train, tram and bus transport operators in Greater Melbourne. .1 - Wallet marked "My Metcard", blue with Metcard and Metlink logos, with a 5 Senior daily standard Metcard inside it - appears to have been used in 2012. .2 - Red and white wallet, marked "Get on Board with Heart" and Melbourne Heath (Foundation?) logo on the front and Metcard details on the rear.trams, tramways, metcard, metlink, tickets -
 Melbourne Tram Museum
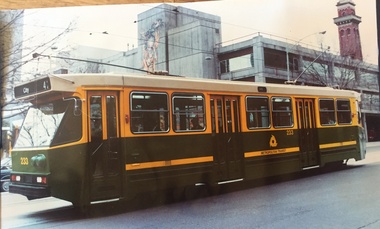
Photograph - Colour Print/s, The Met, mid 1980's
Large plasticised colour print of A class No. 233, when new, in Gisborne Street running a route 42, City with the MFESB Fire station No. 1 (Eastern Hill) in the background. Has Metropolitan Transit Logos on the side of the tram.trams, tramways, a class, gisborne st, city, fire station, tram 233 -
 Melbourne Tram Museum
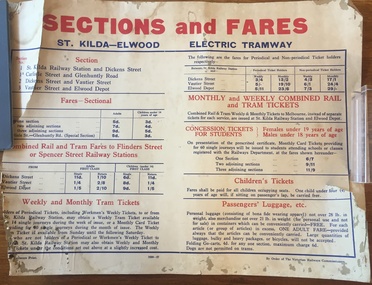
Poster, Victorian Railways, "Sections and Fares - St Kilda - Elwood Electric Tramway", 1957
Poster printed in two colours (red and blue) on heavy cartridge paper titled "Sections and Fares - St Kilda - Elwood Electric Tramway" - following the closure of the tramway back to the Elwood depot. Gives details of the Sections, Fares, combined rail and tram fares to Flinders St or Spencer St stations, weekly and monthly tickets, student and concession tickets, children's tickets and passengers luggage. Printed by the Victorian Railways - print number 3589-57.trams, tramways, vr, st kilda brighton, elwood depot, tickets, fares, sections, victorian railways -
 Melbourne Tram Museum
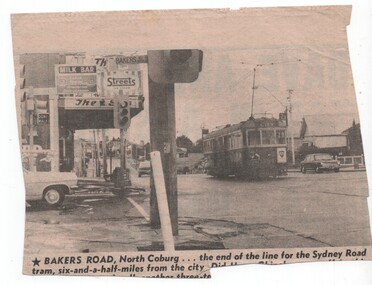
Newspaper, The Truth, Bakers Road tram terminus, c1971
Newspaper Clipping - from possibly The Truth newspaper (see item on rear about the TV series Dave and Mabel) of W5 794 or 734 at the Bakers Road Sydney Road terminus, c1970. Tram showing route number 20. In the background is a milkbar on the corner advertising The Sun, and Streets ice cream. Shows the poor road condition at the corner. A web search shows that the TV programme - Snake Gully ran during 1971 and 1972 - see http://www.classicaustraliantv.com/SnakeGullyEps.htm - accessed 2/11/2016trams, tramways, sydney rd, route 20, bakers rd, tram 734, tram 794