Showing 1573 items
matching garden show
-
 Ballarat Tramway Museum
Slide - 35mm slide/s, Travis Jeffrey, 8/01/1956 12:00:00 AM
Cardboard, Kodachrome slide, white with red band around slide on non viewing side of Geelong No. 18 at East Terminus. Photo shows a crewman boarding the front end of the tram. Possibly taken on the last day of the Chilwell - East West line, 8/1/1956. See Reg. Item 476.5 for a similar photograph taken by Geoff Grant and 2675 for another copy of the slide. Photographer unknown.tramways, trams, geelong, east, tram 18 -
 Ballarat Tramway Museum
Slide - 35mm slide/s, Travis Jeffrey, c1962
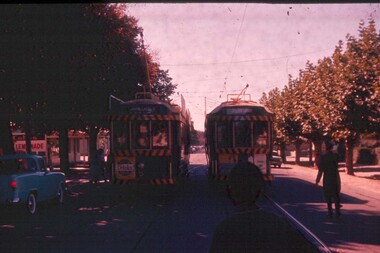
Agfa plastic mount (blue base, white cover) with a photo of Bendigo No. 5 and No. 24 crossing at Myrtle St. loop. No. 5 has destination of Charing Cross and a Cohns Drinks Advertisement on front panel. No. 24 has destination of Golden Square. On the front dash panel is advertisement for Huttons Hams and a Streets Ice-cream advertisement. Note the empty roof advertisement panel on No. 24 - refer to Reg. Item 2632, which shows the tram at Golden Square."BES 21" in penciltramways, trams, bendigo, golden square, myrtle st, tram 5, tram 24 -
 Ballarat Tramway Museum
Slide - 35mm slide/s, Travis Jeffrey, late 1960's or early 1970's
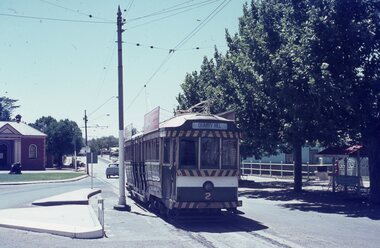
Agfa plastic mount (blue base, white cover) with a photo of Bendigo No. 2 at Eaglehawk terminus, looking along the terminal track. Photo has the traffic island arrangements, and shows the waiting shelter on the right hand side of the photo. Photo taken late 1960's early 1970's. No. 2 has the destination of Quarry Hill and two SEC roof advertisements on the tram."BES 39" in penciltramways, trams, bendigo, eaglehawk, tram 2 -
 Ballarat Tramway Museum
Slide - 35mm slide/s - set of 3, Travis Jeffrey, late 1960's or early 1970's
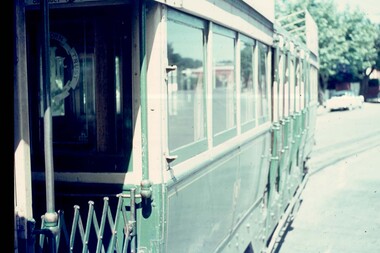
Series of three Agfa plastic mount (blue base, white cover) with a photo of Bendigo Nos. 2 running into the depot. Photo taken late 1960's early 1970's from the window of another tram. Reg Item 2652.2 and .3 show depot building and .2, has the scrubber in the background as well."BES 43", "45", "46" in pencil.tramways, trams, bendigo, crews, depot junction, tram 2, scrubber -
 Ballarat Tramway Museum
Slide - 35mm slide/s, Travis Jeffrey, late 1960's or early 1970's
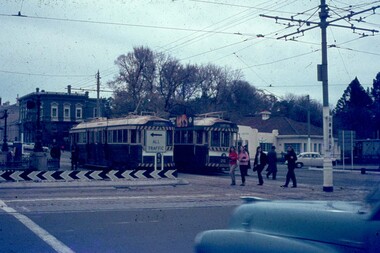
Agfa plastic mount (blue base, white cover) with a photo of Bendigo Nos. 3 and 26 at Charing Cross. The trams are bound for Eaglehawk, Quarry Hill respectively. Photo shows the traffic arrangements at Charing Cross prior to closure. Photo taken late 1960's early 1970's from the window of another tram. No. 3 has two roof advertisement racks which are empty, while No. 26 has a SEC briquettes roof advertisement."BES 48" in pencil.tramways, trams, bendigo, charing cross, tram 3, tram 26 -
 Ballarat Tramway Museum
Postcard, Nu-color-vue or Nucolorvue Productions, Bendigo No. 3 at Charing Cross, late 1960's
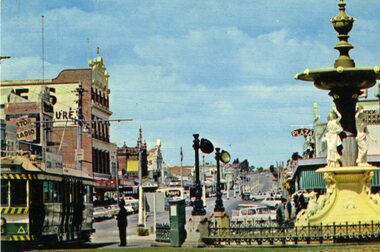
Nu-colour-Vue series postcard No. BE 24 of Bendigo No. 3 at Charing Cross with Mitchell St in the background. Shows part of the tram, fountain and the buildings on either side of Mitchell St. Photo taken mid to late 1960's. Has advertisements on buildings for Astor Radio, Fountain Plaza and a Peters Ice cream van in the photograph. On rear of postcard are the details of the photo, manufacturer, copy right statement and location to place the stamp.trams, tramways, bendigo, charing cross, mitchell st -
 Ballarat Tramway Museum
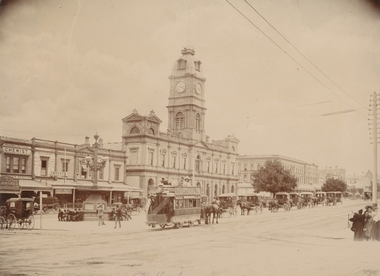
Postcard, WTP, "Sturt Street, Ballarat", 1905?
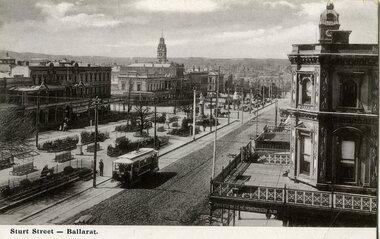
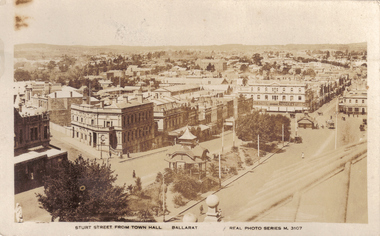
Photo appears to be taken soon after the opening of the electric trams, as the tramway is well paved compared to the rest of the street which shows vehicle tracks etc. For similar images see Reg. items 834, 838, 2151 and 8998. Note the roof of a small horse-drawn vehicle crossing in the center foreground of the photograph - this vehicle is shown in detail in other images. Shows buildings along the north side of Sturt St. and the building at the SE corner of Doveton St. ESCo tram has a destination board on the front dash of the tram.Yields information about Sturt St soon after the opening of the Ballarat Electric tramwayPrinted black and white postcard of an ESCo tram near the intersection of Doveton St. and Sturt St. travelling west along the south side of Sturt Street. Could be a reproduction postcard - very high gloss finish of photograph. Titled "Sturt Street, Ballarat" in the bottom left-hand corner printed on a white strip at the bottom of the postcard. On rear of photograph are printed letters "W.T.P." - possibly publisher, in the stamp area "Printed in Germany". Card has been marked for areas for the correspondence and address. In bottom right hand corner "$8-" in pencil.trams, tramways, ballarat, doveton st, sturt st, esco -
 Ballarat Tramway Museum
Slide - 35mm slide/s, mid 1950's
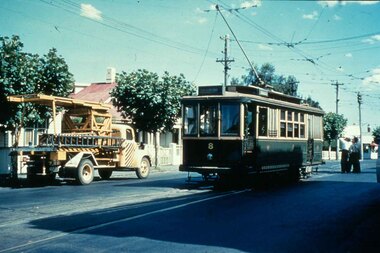
Agfachrome Professional plastic mount (blue base, white cover) reproduction slide of a colour slide of Geelong No. 8 at intersection Pakington and Aphrasia St - Newtown to the right. Photo taken mid 1950's. Photo shows Geelong overhead service truck on the right side of the photograph and a group of workers (tram crew and overhead crew) looking up at the overhead itself. "G 10" and "1 -10" in pencil.tramways, trams, geelong, pakington st, overhead, tram 8 -
 Ballarat Tramway Museum
Slide - 35mm slide/s, mid 1950's
Agfachrome Professional plastic mount (blue base, white cover) reproduction slide of a colour slide of Geelong Pengelley No. 18 at East Terminus. Photo shows a crewman boarding the front end of the tram. Possibly taken on the last day of the Chilwell - East West line, 8/1/1956. See Reg. Item 476.5 for a similar photograph taken by Geoff Grant and 2610 for another copy of the slide. Photographer unknown. "G 15" and "1 -15" in pencil.tramways, trams, geelong, east, tram 18 -
 Ballarat Tramway Museum
Slide - 35mm slide/s, mid 1950's
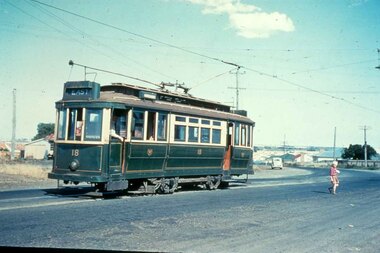
Yields information about the Geelong tramway system and one of the terminus and the appearance at the time.Agfachrome Professional plastic mount (blue base, white cover) reproduction slide of a colour slide of Geelong Pengelley No. 18 at East Terminus Ormond and Boundary Roads. Photo shows a child walking away from the tram. Tram has the destination of East. Photographer unknown. Taken on the last day of the first closures, 8/1/1956. See also Reg Item 4389 for a print of this slide. "G 16" and "1 -16" in pencil.tramways, trams, geelong, east, closure, last day, tram 18 -
 Ballarat Tramway Museum
Photograph - Black and White photograph/s - mounted, Hornly's Ballarat, 24/01/1926 12:00:00 AM
Block mounted photograph of the ESCo Employees Tramway Picnic 24.1.1926. Photograph is of the workers and families standing in front of seven buses or trucks, possibly at Moorabool Reservoir. On the left hand side is a truck with a ladder on the side, sign written to show it belongs to the Electric Supply Co. of Victoria. The black and white photograph has been mounted on to a heavy cardboard grey coloured with dark grey bands around the photograph and the edge of the mounting. The bottom right hand corner has been indented with the studio's name "Hornly's Studio Ballarat".trams, tramways, esco, hornly's, picnics, employees -
 Ballarat Tramway Museum
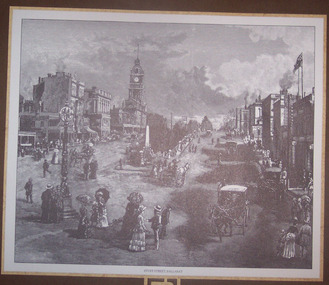
Photograph - Illustration/s, Haddon Smith Pty Ltd, "Sturt Street Ballarat", Sept. 1973
Reproduction of an illustration of Sturt St. Ballarat from Grenville St, c1880, prior to horse trams. Shows people milling in the street around Grenville St in their "Sunday best". Has a number of horse drawn vehicles in the street. Reproduction of a print from a 19th century Australian Publication, prepared and published by Dovers Pty Ltd. 9/1973 and printed by Allprint. Printed on good quality light weight ivory board or card and mounted on the top edge onto a preprinted backing sheet with the details of the publication and paper used printed onto it. Embossed with "Dovers" logo along bottom edge. Appears to have been cut out of another publication. Noted as being designed by Haddon Smith Pty Ltd Acquired from J. Ellis of Tuncurry NSW by W.Doubleday on eBay for $6.50 25/4/2004 See paperwork with worksheet.trams, tramways, sturt st, ballarat, horse drawn vehicle -
 Ballarat Tramway Museum
Photograph - Block Mounted Photograph, Black, 1897
Block mounted photograph of Ballarat Horse Tram No. 16, westbound, on the North side of Sturt St at the intersection of Lydiard St. with the Ballarat Town Hall in the background. Has 10 horse drawn cabs parked along the median strip in the photograph as well. Shows the buildings along the south side of Sturt St. On the side of the tramcar are the roof advertisement for Havelock Tobacco and on the stair, advertisement for Bonanza's store. See image btm2726p for higher resolution scan and 2726i1 for close up scene of the tram car. Photograph mounted onto heavy pre-printed cardboard with detail corners and lining. Has stamp in bottom left hand corner "Black, Photo" and along bottom edge of photo "Ballarat". Reg. Item 767 dates the photograph as 1897.trams, tramways, horse trams, horse cabs, sturt st, town hall, tram 16 -
 Ballarat Tramway Museum
Postcard, Kodak, ESCo crossbench tram No. 19
Printed black and white photographic postcard of Ballarat ESCo crossbench tram No. 19 at the intersection of Armstrong and Sturt St. travelling east along the north side of Sturt Street. Photo appears to be taken in the early days of tram operation - small destination box. Has the Ballarat Town Hall, the National Mutual Life building, Snows and other buildings on the south side of Sturt. St. Has a number of horse drawn vehicles in the image as well. Titled "Sturt Street, Ballarat" in bottom right hand corner". On rear of postcard, printed is the words "Post Card", areas for "Correspondence" and "Address Only" and in stamp area in a square "Kodak Australia" twice. Handwritten on the card is "With Best Wishes for a Happy New Year to all Rostella / W. Lovett". Images .1 - shows postcard, .2 - close up, of No. 19, note Inspector along side tram, the stance of the motorman/driver, and conductor on the rear platform of the tram. Appears to have a destination of "Gardens ?" .3 - rear of postcard Handwritten letter on card.trams, tramways, esco, sturt st, postcards, armstrong st -
 Ballarat Tramway Museum
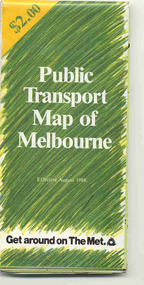
Map, Ministry of Transport and The Met, "Public Transport Map of Melbourne" - "Effective August 1988", 1988
Map - Pocket size - folded - public transport map of Melbourne, printed in colour on art paper, showing public transport services in greater Melbourne, an index of localities. The City Saver area shown in detail. On the rear, route numbers, line maps of tram routes, train lines, outer metropolitan services, ticketing information, Transport Neighbourhoods, . Shows the St Kilda and Port Melbourne light rail lines. Price $2. Shows "The Met" logo. On front under The Met logo and above the scale bar is "Effective 1/7/1988". Niltrams, tramways, melbourne, map, routes -
 Ballarat Tramway Museum
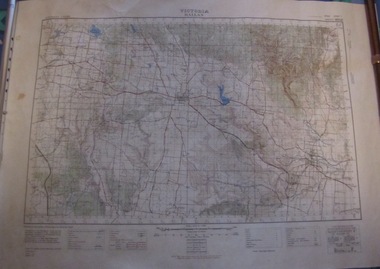
Map, Australian Survey Corps, "Victoria Ballan", 1933
Topographic map of the Ballan area - includes Bacchus Marsh and Bungaree, No. 837, Zone 7, Army Map, dated 1933, 1:63360. Shows rail lines, roads, elevations, contours. Collected with relevance to the Museum's association with the area, at Bungareetrams, tramways, bungaree, map -
 Ballarat Tramway Museum
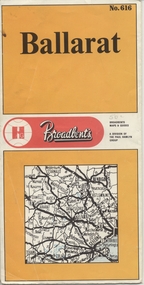
Map, Broadbent's, "Broadbent's Map 616 Ballarat", c1960
Yields information about the extent of Ballarat in the early to mid 1960's shows the tram lines and other rail lines in the district.Printed street map titled "Broadbent's Map 1616 Ballarat" printed in colour on one side only of a folded (10) sheet. Shows the suburbs of Ballarat, tram lines, has a scale in miles, Ballarat District map and an index to streets. Also points interest and historical interest. also shows railways lines. Map used as the base for the tram line map in the display area in the depot. Large Res scan made 28/1/2011."50c" in pencil on front cover.trams, tramways, map, ballarat, broadbent's, railways -
 Ballarat Tramway Museum
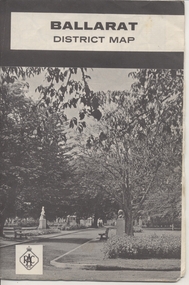
Map, Royal Automobile Club of Victoria, "Ballarat District Map - RACV", c1966
Yields information about the extent of Ballarat in the early to mid 1960's shows the tram lines and other rail lines in the district.Printed street map titled "Ballarat District Map", published by the RACV, showing the central part of Ballarat, Ballarat Outlets, streets, principal attractions, Ballarat and district maps and information, and a list of sporting and entertainment facilities. Has the tram lines shown dotted, does not run out to Sebastopol or the Lydiard St North terminus. Each map in the bottom left hand corner has the numbers "1166", possibly indicating the date.trams, tramways, map, ballarat, racv, railways -
 Ballarat Tramway Museum
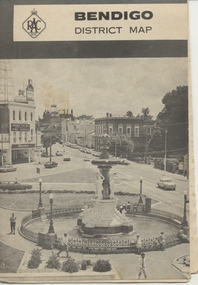
Map, Royal Automobile Club of Victoria, "Bendigo District Map - RACV", c1971
Printed street map titled "Bendigo District Map", published by the RACV, showing the central part of Bendigo, Bendigo Outlets, streets, principal attractions, Bendigo and district maps and information, and a list of sporting and entertainment facilities. Has the tram lines shown dotted, only shows the full extent of the Golden Square line. The main map has the number "0171" in the bottom left hand corner, indicating the publication date.in ink on the Bendigo Outlet map, "3/4" along bottom edge.trams, tramways, map, bendigo, racv, railways -
 Ballarat Tramway Museum
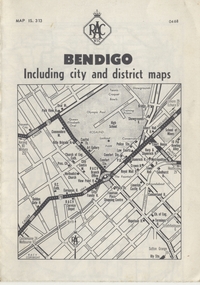
Map, Royal Automobile Club of Victoria, "Bendigo Including city and district maps - RACV", c1968
Printed street map titled "Bendigo Including city and district maps", published by the RACV, showing the central part of Bendigo on the front cover, Bendigo Outlets and notes on the city itself. Has the tram lines shown dotted, only shows the full extent of the Golden Square line. Inside has a district road map. The front cover has the number "0468" in the bottom left hand corner, indicating the publication date.in ink on the Bendigo Outlet map, has various notes showing the location of crossing loops on and off the map and the location of the tram depot itself.trams, tramways, map, bendigo, racv, railways -
 Ballarat Tramway Museum
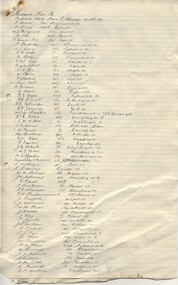
Document - Letter/s, State Electricity Commission of Victoria (SECV), "Crossing Under Tramway Tracks", 1937
Yields information about the correspondence that was sent to Ballarat from Bendigo about underground services under tram tracks, the changes and the list of the people it was sent to.Set of five documents: Documents 2 and 5 same as Reg Item 4946, but marked up to show changes to the Bendigo docs for the Ballarat situation - in pencil. Cover sheet pinned to the four sheets is a handwritten ink foolscap ruled sheet showing all the addressees that the letter was to be sent to. Other sheets are: Letter on SECV letterhead, "Bendigo Electricity Supply and Tramways", not dated, gives phone number, address, duplicated in black ink, titled "Crossing Under Tramway Tracks", consisting of one foolscap sheet. quarto sheet, as a blank form - application form to install the service. cut sheet - blank form - Permit for Crossings under Tramway Tracks cut sheet - blank form - "Pipe crossings under tramway tracks" See Reg Item 4945 for Ballarat, possibly used as a model for the Ballarat document, given Reg Item 4943 correspondence and see Reg Item 4947 for cover letter for these documents and Reg Item 4946 for the original Bendigo docs.in ink "1" and "2" "3" and "4" on sheets in ink and on sheet 4 - change noted re "Technical Assistant" changed to "Tramway Inspector"trams, tramways, letters, sec, tram track, bendigo -
 Ballarat Tramway Museum
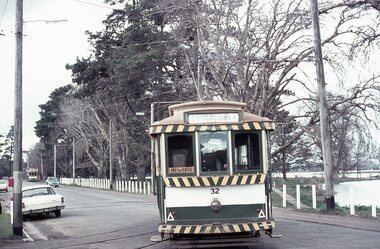
Photograph - Digital image Set of 10, Stuart Lodington, 1971
Set of 10 digital images of Ballarat trams prior to closure, scanned from original slides by Stuart Lodington, 1971 prior to closure of the system. .1 - No. 32 entering the depot from Wendouree Parade, with the Lake in the background. Shows the depot fire alarm on an adjacent pole. .2 - No. 26 at Sebastopol, before turning the pole. Has a bus stop sign on a pole already. .3 - No. 27 and 26? crossing at the Bell St loop in Skipton St. No. 27 has a Twin Lakes sign. .4 - No. 32 outbound to the Gardens in Hamilton Ave about to enter Wendouree Parade with Loreto convent and Olympic monument the background. .5 - No. 26, Albert St Sebastopol, approaching the Sebastopol terminus, with Sebastopol Food Stores building on the left of the photo. .6 - No. 12 leaving the Parker St. Loop, Sturt St West after crossing a tram. No. 12 has destination of Victoria St. .7 - No. 12 inward bound in Lydiard St North with Fine Art Gallery in the background, 3BA. No. 12 has destination of Sebastopol and has a Twin Lakes sign. .8 - No. 12 inward bound, Sturt St West, No. 12 has destination of Victoria St and has a Twin Lakes sign. .9 - No. 26 at Sebastopol terminus, outside the Royal Mail Hotel, has a bus stop sign on a pole. Tram pole yet to be turned, but destination adjusted to Lydiard St. North. .10 - No. 12 at Sebastopol terminus, outside the Royal Mail Hotel. No. 12 has destination of Lydiard St Nth and has a Twin Lakes sign.trams, tramways, ballarat, sturt st west, sebastopol, skipton st, wendouree parade, hamilton ave, depot, depot junction, parker st loop, bell st, lydiard st nth, tram 32, tram 26, tram 27, tram 12 -
 Ballarat Tramway Museum
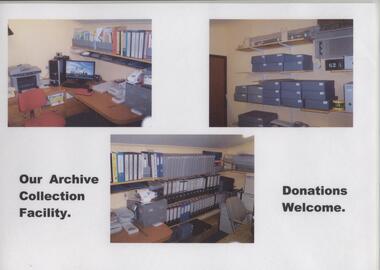
Photograph - Colour Print/s, Warren Doubleday, 30/08/2010 12:00:00 AM
Yields information about the BTM Archives storage room August 2010.Laminated A4 colour print containing three photographs of the interior of the archives room taken by Warren Doubleday 30 August 2010. Shows the layout of the room at the time.trams, tramways, btm, archives room -
 Ballarat Tramway Museum
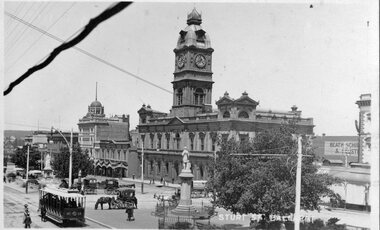
Photograph - Digital image, c1916
Shows the details of buildings in the east end of Sturt St, c1916.Digital image from a postcard from the collection of David Critchley, of Ballarat, Sturt St c1916. This 'birds eye' view of Sturt St reveals on of the early fleet standing at the city terminus probably during the Great War. Note the absence of motor cars and women's skirts are somewhat shorter - an economy concession with the shortage of cloth during the war years. A Valentines photo postcard. David scanned this pic at a higher resolution than normal, so you should be able to zoom in on the tram, which has been fitted with windshields and looks typically well used and unloved as did most of the original Ballarat fleet in their latter years. Image supplied by email 30/8/2011 - not to be published without David's authority.trams, tramways, sturt st, bridge st, esco -
 Ballarat Tramway Museum
Photograph - Digital Image, Black & White Photograph/s, Marc Dahlstrom, c1971
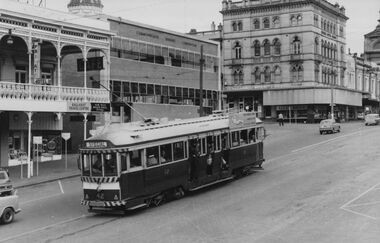
Digital image from a black and white print of tram 42 running a "Special" climbing the Sturt St hill up to Lydiard St, shows the steep hill. In the background is Cooks Private Hotel, Ballarat Travel Centre, Commonwealth Bank, National Mutual Building and Alan Bros. Photo by Marc Dahlstrom c1971. 5056.1 - physical print of the same image, with the Marc Dahlstrom stamp on the rear - added 8-5-2016.On rear is the Marc Dahlstrom stamp.trams, tramways, sturt st, lydiard st, tram 42 -
 Ballarat Tramway Museum
Photograph - Digital image, c1971
Yields information about Ballarat streetscape and its trams in the closing days of the SEC tramway system.Digital image from a black and white print of tram 31 climbing the hill in Sturt St up to Lydiard St, shows the steepness of the hill. Tram has two Johnnie Walker whisky roof advertisements, a Twin Lakes sign and is showing Special. In the background are a Discount store, a Thrifty furniture van, Cooks Private Hotel, the Commonwealth Bank and the National Mutual Building. Photo by Marc Dahlstrom c1971.On rear is the Marc Dahlstrom stamp.trams, tramways, sturt st, lydiard st, tram 31 -
 Ballarat Tramway Museum
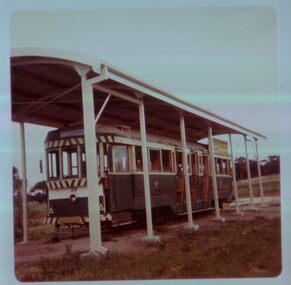
Photograph - Digital image, Bill Kingsley, Ex SEC tram No. 39 under the shelter at Lismore, Jun. 1974
Yields information about the way former SEC Ballarat tram No. 39 was house in Lismore following the closure of the SEC tramways and recovery by the BTPS.Digital image from a colour print of Ex SEC tram No. 39 under the shelter at Lismore, circa June 74 (date stamp on back of photo). Printed on Kodak paper. Photo by Bill Kingsley. Shows the substantial nature of the shelter provided for the tram."39 Lismore (Bill K)" in ink.trams, tramways, lismore, tram disposal, tram 39 -
 Ballarat Tramway Museum
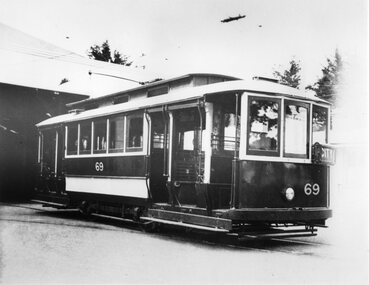
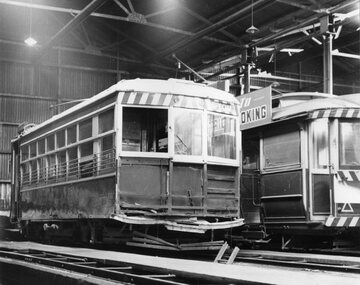
Photograph - Black & White Photograph/s, State Electricity Commission of Victoria (SECV), Feb. 1937
Yields information about the condition of a tramcar received from Adelaide prior to conversion and repainting by the SEC to a Ballarat tram. Shows the layout of the tram.Black and white photo print , ex Adelaide No. 69, (renumbered Ballarat 23) following receipt from Adelaide 2/1937 and prior to repainting in the SEC colour scheme. Photographed in the depot yard with the depot buildings in the background. Tram has destination of 'CITY'. Has William Scot address label in bottom right hand corner and "Ballarat Ex Adelaide 69 became Ballarat 23" and in top left hand corner "30) SEC Alan Bradley"tramways, trams, adelaide, ballarat depot, rehabilitation, tram 69, tram 23 -
 Ballarat Tramway Museum
Photograph - Black & White Photograph/s, Chris Wurr, early 1970's
Yields information about the appearance of Bendigo Birney trams early 1970's en route to North Bendigo and its tree lined streets.Black and White Photograph of SEC Bendigo 30, Birney at North Bendigo terminus with the driver turning the trolley pole. Tram has the destination of Golden Square. Photo shows the fitting in the overhead to help locate the trolley pole on the inbound wire. Photo Chris Wurr, early 1970's. "Photo by Chris Wurr" stamped on the rear.trams, tramways, bendigo, north bendigo, overhead, birney, tram 30 -
 Ballarat Tramway Museum
Photograph - Black & White Photograph/s, Chris Wurr, early 1970's
Yields information about the appearance of Bendigo Birney trams early 1970's and the Charing Cross area.Black and White Photograph of Bendigo No. 11, Birney, stored in the Bendigo tram depot, early 1970's following an accident. See Bendigo Tramways excerpt re this tram, ex their web site 9/6/2009. Has another, possibly stored tram along side. Photo shows the damaged end panel removed, distorted bumper bar and broken life guard tray. Photo Chris Wurr, early 1970's. "In 1968, the SECV assessed damage to the tram after an accident with an automobile. Upon inspection, it was found that the side bearers of the tram body had spread, and the centre bearers had been severely distorted because of the impact. Repairs of this nature required costly engineering work and with the closure of the tramway being imminent, it was decided to place Car 11 in storage on 6 road until the cessation of SECV services in 1972. Work commenced on the restoration of this tram in 1975 and it returned to service in 1986, being painted in the SECV livery of the 1950s." See Bendigo Tramway web site, accessed 9/6/2009 for notes re accident damage."Photo by Chris Wurr" stamped on the rear. On rear in pencil "B'go 11"trams, tramways, bendigo, depot, tram 11