Showing 15004 items matching " try-me-well"
-
 Flagstaff Hill Maritime Museum and Village
Domestic object - Fork, c.1878
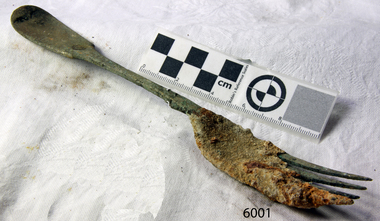
This fork is from the wreck of the Loch Ard, that sailed from Gravesend, London. The manifest listed an array of manufactured goods being exported to the Colony of Victoria. Included in the cargo manifest was a large number of hardware & cutlery items. This fork is representative of similar items of silver electro-plated cutlery salvaged from the Loch Ard wreck site, comprising nickel silver electroplated spoons and forks of various sizes but all sharing the same general shape and design. Some of the pieces display their makers’ mark of William Page & Co Birmingham UK. Within the Flagstaff Hills cutlery collection donated from the Loch Ard, maker’s marks are often obscured by sedimentary accretion or verdigris after a century of submersion in the ocean. However sufficient detail has survived to indicate that the collection of samples of electroplated cutlery probably originated from the same cargo consignment from the Loch Ard and were made by William Page & Co. William Page was born in 1811 and died in 1885. He was active as a manufacturer of cutlery from 1829 with premises at 74 Belmont Rd, Dales End as a "close plater" (someone who works sheet metal), and he began electroplating in 1855. William Page & Co was also active from 1880 at Cranemore St, Cattle’s Grove also 55 Albion St, Birmingham, in 1936 the firm became Ltd. The firm used the trademarks "Asrista, Bolivian Silver, Silverite, Roman Silver, Roumanian Silver and Trevor Plate. In 1938 William Page was a supplier to the British Government, marking it's products with the broad arrow symbol and was also present at Sheffield. History of the Loch Ard: The Loch Ard got its name from ”Loch Ard” a loch which lies to the west of Aberfoyle, and the east of Loch Lomond. It means "high lake" in Scottish Gaelic. The vessel belonged to the famous Loch Line which sailed many vessels from England to Australia. The Loch Ard was built in Glasgow by Barclay, Curdle and Co. in 1873, the vessel was a three-masted square-rigged iron sailing ship that measured 79.87 meters in length, 11.58 m in width, and 7 m in depth with a gross tonnage of 1693 tons with a mainmast that measured a massive 45.7 m in height. Loch Ard made three trips to Australia and one trip to Calcutta before its fateful voyage. Loch Ard left England on March 2, 1878, under the command of 29-year-old Captain Gibbs, who was newly married. The ship was bound for Melbourne with a crew of 37, plus 17 passengers. The general cargo reflected the affluence of Melbourne at the time. Onboard were straw hats, umbrella, perfumes, clay pipes, pianos, clocks, confectionery, linen and candles, as well as a heavier load of railway irons, cement, lead and copper. There were other items included that were intended for display in the Melbourne International Exhibition of 1880. The voyage to Port Phillip was long but uneventful. Then at 3 am on June 1, 1878, Captain Gibbs was expecting to see land. But the Loch Ard was running into a fog which greatly reduced visibility. Captain Gibbs was becoming anxious as there was no sign of land or the Cape Otway lighthouse. At 4 am the fog lifted and a lookout aloft announced that he could see breakers. The sheer cliffs of Victoria's west coast came into view, and Captain Gibbs realised that the ship was much closer to them than expected. He ordered as much sail to be set as time would permit and then attempted to steer the vessel out to sea. On coming head-on into the wind, the ship lost momentum, the sails fell limp and Loch Ard's bow swung back towards land. Gibbs then ordered the anchors to be released in an attempt to hold its position. The anchors sank some 50 fathoms - but did not hold. By this time the ship was among the breakers and the tall cliffs of Mutton Bird Island rose behind. Just half a mile from the coast, the ship's bow was suddenly pulled around by the anchor. The captain tried to tack out to sea, but the ship struck a reef at the base of Mutton Bird Island, near Port Campbell. Waves subsequently broke over the ship and the top deck became loosened from the hull. The masts and rigging came crashing down knocking passengers and crew overboard. When a lifeboat was finally launched, it crashed into the side of Loch Ard and capsized. Tom Pearce, who had launched the boat, managed to cling to its overturned hull and shelter beneath it. He drifted out to sea and then on the flood tide came into what is now known as Loch Ard Gorge. He swam to shore, bruised and dazed, and found a cave in which to shelter. Some of the crew stayed below deck to shelter from the falling rigging but drowned when the ship slipped off the reef into deeper water. Eva Carmichael a passenger had raced onto the deck to find out what was happening only to be confronted by towering cliffs looming above the stricken ship. In all the chaos, Captain Gibbs grabbed Eva and said, "If you are saved Eva, let my dear wife know that I died like a sailor". That was the last Eva Carmichael saw of the captain. She was swept off the ship by a huge wave. Eva saw Tom Pearce on a small rocky beach and yelled to attract his attention. He dived in and swam to the exhausted woman and dragged her to shore. He took her to the cave and broke the open case of brandy which had washed up on the beach. He opened a bottle to revive the unconscious woman. A few hours later Tom scaled a cliff in search of help. He followed hoof prints and came by chance upon two men from nearby Glenample Station three and a half miles away. In a complete state of exhaustion, he told the men of the tragedy. Tom then returned to the gorge while the two men rode back to the station to get help. By the time they reached Loch Ard Gorge, it was cold and dark. The two shipwreck survivors were taken to Glenample Station to recover. Eva stayed at the station for six weeks before returning to Ireland by steamship. In Melbourne, Tom Pearce received a hero's welcome. He was presented with the first gold medal of the Royal Humane Society of Victoria and a £1000 cheque from the Victorian Government. Concerts were performed to honour the young man's bravery and to raise money for those who lost family in the disaster. Of the 54 crew members and passengers on board, only two survived: the apprentice, Tom Pearce and the young woman passenger, Eva Carmichael, who lost her family in the tragedy. Ten days after the Loch Ard tragedy, salvage rights to the wreck were sold at auction for £2,120. Cargo valued at £3,000 was salvaged and placed on the beach, but most washed back into the sea when another storm developed. The wreck of Loch Ard still lies at the base of Mutton Bird Island. Much of the cargo has now been salvaged and some items were washed up into Loch Ard Gorge. Cargo and artefacts have also been illegally salvaged over many years before protective legislation was introduced in March 1982. The shipwreck of the Loch Ard is of significance for Victoria and is registered on the Victorian Heritage Register ( S 417). Flagstaff Hill has a varied collection of artefacts from Loch Ard and its collection is significant for being one of the largest accumulation of artefacts from this notable Victorian shipwreck. The collections object is to also give us a snapshot into history so we can interpret the story of this tragic event. The collection is also archaeologically significant as it represents aspects of Victoria's shipping history that allows us to interpret Victoria's social and historical themes of the time. The collections historically significance is that it is associated unfortunately with the worst and best-known shipwreck in Victoria's history. Silver plated copper alloy table fork from the wreck of the Loch Ard. William Pageflagstaff hill, warrnambool, shipwrecked coast, flagstaff hill maritime museum, maritime museum, shipwreck coast, flagstaff hill maritime village, great ocean road, loch line, loch ard, captain gibbs, eva carmichael, tom pearce, glenample station, mutton bird island, loch ard gorge, electroplated cutlery, fork -
Flagstaff Hill Maritime Museum and Village
Domestic object - Fork, 1878
This fork is from the wreck of the Loch Ard that sailed from Gravesend London. The manifest listed an array of manufactured goods being exported to the Colony of Victoria. Included in the cargo manifest was a large number of hardware & cutlery items. This fork is representative of similar items of silver electro-plated cutlery salvaged from the Loch Ard wreck site, comprising nickel silver electroplated spoons and forks of various sizes but all sharing the same general shape and design. Some of the pieces display their makers’ mark of William Page & Co Birmingham UK. Within the Flagstaff Hills cutlery collection donated from the Loch Ard, maker’s marks are often obscured by sedimentary accretion or verdigris after a century of submersion in the ocean. However sufficient detail has survived to indicate that the collection of samples of electroplated cutlery probably originated from the same cargo consignment from the Loch Ard and were made by William Page & Co. William Page was born in 1811 and died in 1885. He was active as a manufacturer of cutlery from 1829 with premises at 74 Belmont Rd, Dales End as a "close plater" (someone who works sheet metal), and he began electroplating in 1855. William Page & Co was also active from 1880 at Cranemore St, Cattle’s Grove also 55 Albion St, Birmingham, in 1936 the firm became Ltd. The firm used the trademarks "Asrista, Bolivian Silver, Silverite, Roman Silver, Roumanian Silver and Trevor Plate. In 1938 William Page was a supplier to the British Government, marking it's products with the broad arrow symbol and was also present at Sheffield. History of the Loch Ard: The Loch Ard got its name from ”Loch Ard” a loch which lies to the west of Aberfoyle, and the east of Loch Lomond. It means "high lake" in Scottish Gaelic. The vessel belonged to the famous Loch Line which sailed many vessels from England to Australia. The Loch Ard was built in Glasgow by Barclay, Curdle and Co. in 1873, the vessel was a three-masted square-rigged iron sailing ship that measured 79.87 meters in length, 11.58 m in width, and 7 m in depth with a gross tonnage of 1693 tons with a mainmast that measured a massive 45.7 m in height. Loch Ard made three trips to Australia and one trip to Calcutta before its fateful voyage. Loch Ard left England on March 2, 1878, under the command of 29-year-old Captain Gibbs, who was newly married. The ship was bound for Melbourne with a crew of 37, plus 17 passengers. The general cargo reflected the affluence of Melbourne at the time. On board were straw hats, umbrella, perfumes, clay pipes, pianos, clocks, confectionery, linen and candles, as well as a heavier load of railway irons, cement, lead and copper. There were other items included that were intended for display in the Melbourne International Exhibition of 1880. The voyage to Port Phillip was long but uneventful. Then at 3 am on June 1, 1878, Captain Gibbs was expecting to see land. But the Loch Ard was running into a fog which greatly reduced visibility. Captain Gibbs was becoming anxious as there was no sign of land or the Cape Otway lighthouse. At 4 am the fog lifted and a lookout aloft announced that he could see breakers. The sheer cliffs of Victoria's west coast came into view, and Captain Gibbs realised that the ship was much closer to them than expected. He ordered as much sail to be set as time would permit and then attempted to steer the vessel out to sea. On coming head-on into the wind, the ship lost momentum, the sails fell limp and Loch Ard's bow swung back towards land. Gibbs then ordered the anchors to be released in an attempt to hold its position. The anchors sank some 50 fathoms - but did not hold. By this time the ship was among the breakers and the tall cliffs of Mutton Bird Island rose behind. Just half a mile from the coast, the ship's bow was suddenly pulled around by the anchor. The captain tried to tack out to sea, but the ship struck a reef at the base of Mutton Bird Island, near Port Campbell. Waves subsequently broke over the ship and the top deck became loosened from the hull. The masts and rigging came crashing down knocking passengers and crew overboard. When a lifeboat was finally launched, it crashed into the side of Loch Ard and capsized. Tom Pearce, who had launched the boat, managed to cling to its overturned hull and shelter beneath it. He drifted out to sea and then on the flood tide came into what is now known as Loch Ard Gorge. He swam to shore, bruised and dazed, and found a cave in which to shelter. Some of the crew stayed below deck to shelter from the falling rigging but drowned when the ship slipped off the reef into deeper water. Eva Carmichael a passenger had raced onto the deck to find out what was happening only to be confronted by towering cliffs looming above the stricken ship. In all the chaos, Captain Gibbs grabbed Eva and said, "If you are saved Eva, let my dear wife know that I died like a sailor". That was the last Eva Carmichael saw of the captain. She was swept off the ship by a huge wave. Eva saw Tom Pearce on a small rocky beach and yelled to attract his attention. He dived in and swam to the exhausted woman and dragged her to shore. He took her to the cave and broke the open case of brandy which had washed up on the beach. He opened a bottle to revive the unconscious woman. A few hours later Tom scaled a cliff in search of help. He followed hoof prints and came by chance upon two men from nearby Glenample Station three and a half miles away. In a complete state of exhaustion, he told the men of the tragedy. Tom then returned to the gorge while the two men rode back to the station to get help. By the time they reached Loch Ard Gorge, it was cold and dark. The two shipwreck survivors were taken to Glenample Station to recover. Eva stayed at the station for six weeks before returning to Ireland by steamship. In Melbourne, Tom Pearce received a hero's welcome. He was presented with the first gold medal of the Royal Humane Society of Victoria and a £1000 cheque from the Victorian Government. Concerts were performed to honour the young man's bravery and to raise money for those who lost family in the disaster. Of the 54 crew members and passengers on board, only two survived: the apprentice, Tom Pearce and the young woman passenger, Eva Carmichael, who lost her family in the tragedy. Ten days after the Loch Ard tragedy, salvage rights to the wreck were sold at auction for £2,120. Cargo valued at £3,000 was salvaged and placed on the beach, but most washed back into the sea when another storm developed. The wreck of Loch Ard still lies at the base of Mutton Bird Island. Much of the cargo has now been salvaged and some items were washed up into Loch Ard Gorge. Cargo and artefacts have also been illegally salvaged over many years before protective legislation was introduced in March 1982. The shipwreck of the Loch Ard is of significance for Victoria and is registered on the Victorian Heritage Register ( S 417). Flagstaff Hill has a varied collection of artefacts from Loch Ard and its collection is significant for being one of the largest accumulation of artefacts from this notable Victorian shipwreck. The collections object is to also give us a snapshot into history so we can interpret the story of this tragic event. The collection is also archaeologically significant as it represents aspects of Victoria's shipping history that allows us to interpret Victoria's social and historical themes of the time. The collections historically significance is that it is associated unfortunately with the worst and best-known shipwreck in Victoria's history. Silver plated copper alloy table fork from the wreck of the Loch Ard. William Pageflagstaff hill, warrnambool, shipwrecked coast, flagstaff hill maritime museum, maritime museum, shipwreck coast, flagstaff hill maritime village, great ocean road, loch line, loch ard, captain gibbs, eva carmichael, tom pearce, glenample station, mutton bird island, loch ard gorge, electroplated cutlery, fork -
Flagstaff Hill Maritime Museum and Village
Domestic object - Fork, c.1878
This fork is from the wreck of the Loch Ard, that sailed from Gravesend, London. The manifest listed an array of manufactured goods being exported to the Colony of Victoria. Included in the cargo manifest was a large number of hardware & cutlery items. This fork is representative of similar items of silver electro-plated cutlery salvaged from the Loch Ard wreck site, comprising nickel silver electroplated spoons and forks of various sizes but all sharing the same general shape and design. Some of the pieces display their makers’ mark of William Page & Co Birmingham UK. Within the Flagstaff Hills cutlery collection donated from the Loch Ard, maker’s marks are often obscured by sedimentary accretion or verdigris after a century of submersion in the ocean. However sufficient detail has survived to indicate that the collection of samples of electroplated cutlery probably originated from the same cargo consignment from the Loch Ard and were made by William Page & Co. William Page was born in 1811 and died in 1885. He was active as a manufacturer of cutlery from 1829 with premises at 74 Belmont Rd, Dales End as a "close plater" (someone who works sheet metal), and he began electroplating in 1855. William Page & Co was also active from 1880 at Cranemore St, Cattle’s Grove also 55 Albion St, Birmingham, in 1936 the firm became Ltd. The firm used the trademarks "Asrista, Bolivian Silver, Silverite, Roman Silver, Roumanian Silver and Trevor Plate. In 1938 William Page was a supplier to the British Government, marking it's products with the broad arrow symbol and was also present at Sheffield. History of the Loch Ard: The Loch Ard got its name from ”Loch Ard” a loch which lies to the west of Aberfoyle, and the east of Loch Lomond. It means "high lake" in Scottish Gaelic. The vessel belonged to the famous Loch Line which sailed many vessels from England to Australia. The Loch Ard was built in Glasgow by Barclay, Curdle and Co. in 1873, the vessel was a three-masted square-rigged iron sailing ship that measured 79.87 meters in length, 11.58 m in width, and 7 m in depth with a gross tonnage of 1693 tons with a mainmast that measured a massive 45.7 m in height. Loch Ard made three trips to Australia and one trip to Calcutta before its fateful voyage. Loch Ard left England on March 2, 1878, under the command of 29-year-old Captain Gibbs, who was newly married. The ship was bound for Melbourne with a crew of 37, plus 17 passengers. The general cargo reflected the affluence of Melbourne at the time. Onboard were straw hats, umbrella, perfumes, clay pipes, pianos, clocks, confectionery, linen and candles, as well as a heavier load of railway irons, cement, lead and copper. There were other items included that were intended for display in the Melbourne International Exhibition of 1880. The voyage to Port Phillip was long but uneventful. Then at 3 am on June 1, 1878, Captain Gibbs was expecting to see land. But the Loch Ard was running into a fog which greatly reduced visibility. Captain Gibbs was becoming anxious as there was no sign of land or the Cape Otway lighthouse. At 4 am the fog lifted and a lookout aloft announced that he could see breakers. The sheer cliffs of Victoria's west coast came into view, and Captain Gibbs realised that the ship was much closer to them than expected. He ordered as much sail to be set as time would permit and then attempted to steer the vessel out to sea. On coming head-on into the wind, the ship lost momentum, the sails fell limp and Loch Ard's bow swung back towards land. Gibbs then ordered the anchors to be released in an attempt to hold its position. The anchors sank some 50 fathoms - but did not hold. By this time the ship was among the breakers and the tall cliffs of Mutton Bird Island rose behind. Just half a mile from the coast, the ship's bow was suddenly pulled around by the anchor. The captain tried to tack out to sea, but the ship struck a reef at the base of Mutton Bird Island, near Port Campbell. Waves subsequently broke over the ship and the top deck became loosened from the hull. The masts and rigging came crashing down knocking passengers and crew overboard. When a lifeboat was finally launched, it crashed into the side of Loch Ard and capsized. Tom Pearce, who had launched the boat, managed to cling to its overturned hull and shelter beneath it. He drifted out to sea and then on the flood tide came into what is now known as Loch Ard Gorge. He swam to shore, bruised and dazed, and found a cave in which to shelter. Some of the crew stayed below deck to shelter from the falling rigging but drowned when the ship slipped off the reef into deeper water. Eva Carmichael a passenger had raced onto the deck to find out what was happening only to be confronted by towering cliffs looming above the stricken ship. In all the chaos, Captain Gibbs grabbed Eva and said, "If you are saved Eva, let my dear wife know that I died like a sailor". That was the last Eva Carmichael saw of the captain. She was swept off the ship by a huge wave. Eva saw Tom Pearce on a small rocky beach and yelled to attract his attention. He dived in and swam to the exhausted woman and dragged her to shore. He took her to the cave and broke the open case of brandy which had washed up on the beach. He opened a bottle to revive the unconscious woman. A few hours later Tom scaled a cliff in search of help. He followed hoof prints and came by chance upon two men from nearby Glenample Station three and a half miles away. In a complete state of exhaustion, he told the men of the tragedy. Tom then returned to the gorge while the two men rode back to the station to get help. By the time they reached Loch Ard Gorge, it was cold and dark. The two shipwreck survivors were taken to Glenample Station to recover. Eva stayed at the station for six weeks before returning to Ireland by steamship. In Melbourne, Tom Pearce received a hero's welcome. He was presented with the first gold medal of the Royal Humane Society of Victoria and a £1000 cheque from the Victorian Government. Concerts were performed to honour the young man's bravery and to raise money for those who lost family in the disaster. Of the 54 crew members and passengers on board, only two survived: the apprentice, Tom Pearce and the young woman passenger, Eva Carmichael, who lost her family in the tragedy. Ten days after the Loch Ard tragedy, salvage rights to the wreck were sold at auction for £2,120. Cargo valued at £3,000 was salvaged and placed on the beach, but most washed back into the sea when another storm developed. The wreck of Loch Ard still lies at the base of Mutton Bird Island. Much of the cargo has now been salvaged and some items were washed up into Loch Ard Gorge. Cargo and artefacts have also been illegally salvaged over many years before protective legislation was introduced in March 1982. The shipwreck of the Loch Ard is of significance for Victoria and is registered on the Victorian Heritage Register ( S 417). Flagstaff Hill has a varied collection of artefacts from Loch Ard and its collection is significant for being one of the largest accumulation of artefacts from this notable Victorian shipwreck. The collections object is to also give us a snapshot into history so we can interpret the story of this tragic event. The collection is also archaeologically significant as it represents aspects of Victoria's shipping history that allows us to interpret Victoria's social and historical themes of the time. The collections historically significance is that it is associated unfortunately with the worst and best-known shipwreck in Victoria's history. Silver plated copper alloy table fork from the wreck of the Loch Ard. William Pageflagstaff hill, warrnambool, shipwrecked coast, flagstaff hill maritime museum, maritime museum, shipwreck coast, flagstaff hill maritime village, great ocean road, loch line, loch ard, captain gibbs, eva carmichael, tom pearce, glenample station, mutton bird island, loch ard gorge, electroplated cutlery, fork -
Flagstaff Hill Maritime Museum and Village
Domestic object - Fork, c.1878
This fork is from the wreck of the Loch Ard that sailed from Gravesend London. The manifest listed an array of manufactured goods being exported to the Colony of Victoria. Included in the cargo manifest was a large number of hardware & cutlery items. This fork is representative of similar items of silver electro-plated cutlery salvaged from the Loch Ard wreck site, comprising nickel silver electroplated spoons and forks of various sizes but all sharing the same general shape and design. Some of the pieces display their makers’ mark of William Page & Co Birmingham UK. Within the Flagstaff Hills cutlery collection donated from the Loch Ard, maker’s marks are often obscured by sedimentary accretion or verdigris after a century of submersion in the ocean. However sufficient detail has survived to indicate that the collection of samples of electroplated cutlery probably originated from the same cargo consignment from the Loch Ard and were made by William Page & Co. William Page was born in 1811 and died in 1885. He was active as a manufacturer of cutlery from 1829 with premises at 74 Belmont Rd, Dales End as a "close plater" (someone who works sheet metal), and he began electroplating in 1855. William Page & Co was also active from 1880 at Cranemore St, Cattle’s Grove also 55 Albion St, Birmingham, in 1936 the firm became Ltd. The firm used the trademarks "Asrista, Bolivian Silver, Silverite, Roman Silver, Roumanian Silver and Trevor Plate. In 1938 William Page was a supplier to the British Government, marking it's products with the broad arrow symbol and was also present at Sheffield. History of the Loch Ard: The Loch Ard got its name from ”Loch Ard” a loch which lies to the west of Aberfoyle, and the east of Loch Lomond. It means "high lake" in Scottish Gaelic. The vessel belonged to the famous Loch Line which sailed many vessels from England to Australia. The Loch Ard was built in Glasgow by Barclay, Curdle and Co. in 1873, the vessel was a three-masted square-rigged iron sailing ship that measured 79.87 meters in length, 11.58 m in width, and 7 m in depth with a gross tonnage of 1693 tons with a mainmast that measured a massive 45.7 m in height. Loch Ard made three trips to Australia and one trip to Calcutta before its fateful voyage. Loch Ard left England on March 2, 1878, under the command of 29-year-old Captain Gibbs, who was newly married. The ship was bound for Melbourne with a crew of 37, plus 17 passengers. The general cargo reflected the affluence of Melbourne at the time. On board were straw hats, umbrella, perfumes, clay pipes, pianos, clocks, confectionery, linen and candles, as well as a heavier load of railway irons, cement, lead and copper. There were other items included that were intended for display in the Melbourne International Exhibition of 1880. The voyage to Port Phillip was long but uneventful. Then at 3 am on June 1, 1878, Captain Gibbs was expecting to see land. But the Loch Ard was running into a fog which greatly reduced visibility. Captain Gibbs was becoming anxious as there was no sign of land or the Cape Otway lighthouse. At 4 am the fog lifted and a lookout aloft announced that he could see breakers. The sheer cliffs of Victoria's west coast came into view, and Captain Gibbs realised that the ship was much closer to them than expected. He ordered as much sail to be set as time would permit and then attempted to steer the vessel out to sea. On coming head-on into the wind, the ship lost momentum, the sails fell limp and Loch Ard's bow swung back towards land. Gibbs then ordered the anchors to be released in an attempt to hold its position. The anchors sank some 50 fathoms - but did not hold. By this time the ship was among the breakers and the tall cliffs of Mutton Bird Island rose behind. Just half a mile from the coast, the ship's bow was suddenly pulled around by the anchor. The captain tried to tack out to sea, but the ship struck a reef at the base of Mutton Bird Island, near Port Campbell. Waves subsequently broke over the ship and the top deck became loosened from the hull. The masts and rigging came crashing down knocking passengers and crew overboard. When a lifeboat was finally launched, it crashed into the side of Loch Ard and capsized. Tom Pearce, who had launched the boat, managed to cling to its overturned hull and shelter beneath it. He drifted out to sea and then on the flood tide came into what is now known as Loch Ard Gorge. He swam to shore, bruised and dazed, and found a cave in which to shelter. Some of the crew stayed below deck to shelter from the falling rigging but drowned when the ship slipped off the reef into deeper water. Eva Carmichael a passenger had raced onto the deck to find out what was happening only to be confronted by towering cliffs looming above the stricken ship. In all the chaos, Captain Gibbs grabbed Eva and said, "If you are saved Eva, let my dear wife know that I died like a sailor". That was the last Eva Carmichael saw of the captain. She was swept off the ship by a huge wave. Eva saw Tom Pearce on a small rocky beach and yelled to attract his attention. He dived in and swam to the exhausted woman and dragged her to shore. He took her to the cave and broke the open case of brandy which had washed up on the beach. He opened a bottle to revive the unconscious woman. A few hours later Tom scaled a cliff in search of help. He followed hoof prints and came by chance upon two men from nearby Glenample Station three and a half miles away. In a complete state of exhaustion, he told the men of the tragedy. Tom then returned to the gorge while the two men rode back to the station to get help. By the time they reached Loch Ard Gorge, it was cold and dark. The two shipwreck survivors were taken to Glenample Station to recover. Eva stayed at the station for six weeks before returning to Ireland by steamship. In Melbourne, Tom Pearce received a hero's welcome. He was presented with the first gold medal of the Royal Humane Society of Victoria and a £1000 cheque from the Victorian Government. Concerts were performed to honour the young man's bravery and to raise money for those who lost family in the disaster. Of the 54 crew members and passengers on board, only two survived: the apprentice, Tom Pearce and the young woman passenger, Eva Carmichael, who lost her family in the tragedy. Ten days after the Loch Ard tragedy, salvage rights to the wreck were sold at auction for £2,120. Cargo valued at £3,000 was salvaged and placed on the beach, but most washed back into the sea when another storm developed. The wreck of Loch Ard still lies at the base of Mutton Bird Island. Much of the cargo has now been salvaged and some items were washed up into Loch Ard Gorge. Cargo and artefacts have also been illegally salvaged over many years before protective legislation was introduced in March 1982. The shipwreck of the Loch Ard is of significance for Victoria and is registered on the Victorian Heritage Register ( S 417). Flagstaff Hill has a varied collection of artefacts from Loch Ard and its collection is significant for being one of the largest accumulation of artefacts from this notable Victorian shipwreck. The collections object is to also give us a snapshot into history so we can interpret the story of this tragic event. The collection is also archaeologically significant as it represents aspects of Victoria's shipping history that allows us to interpret Victoria's social and historical themes of the time. The collections historically significance is that it is associated unfortunately with the worst and best-known shipwreck in Victoria's history. Silver plated copper alloy table fork from the wreck of the Loch Ard. William Pageflagstaff hill, warrnambool, shipwrecked coast, flagstaff hill maritime museum, maritime museum, shipwreck coast, flagstaff hill maritime village, great ocean road, loch line, loch ard, captain gibbs, eva carmichael, tom pearce, glenample station, mutton bird island, loch ard gorge, electroplated cutlery, fork -
Flagstaff Hill Maritime Museum and Village
Domestic object - Fork, c.1878
This fork is from the wreck of the Loch Ard that sailed from Gravesend London. The manifest listed an array of manufactured goods being exported to the Colony of Victoria. Included in the cargo manifest was a large number of hardware & cutlery items. This fork is representative of similar items of silver electro-plated cutlery salvaged from the Loch Ard wreck site, comprising nickel silver electroplated spoons and forks of various sizes but all sharing the same general shape and design. Some of the pieces display their makers’ mark of William Page & Co Birmingham UK. Within the Flagstaff Hills cutlery collection donated from the Loch Ard, maker’s marks are often obscured by sedimentary accretion or verdigris after a century of submersion in the ocean. However sufficient detail has survived to indicate that the collection of samples of electroplated cutlery probably originated from the same cargo consignment from the Loch Ard and were made by William Page & Co. William Page was born in 1811 and died in 1885. He was active as a manufacturer of cutlery from 1829 with premises at 74 Belmont Rd, Dales End as a "close plater" (someone who works sheet metal), and he began electroplating in 1855. William Page & Co was also active from 1880 at Cranemore St, Cattle’s Grove also 55 Albion St, Birmingham, in 1936 the firm became Ltd. The firm used the trademarks "Asrista, Bolivian Silver, Silverite, Roman Silver, Roumanian Silver and Trevor Plate. In 1938 William Page was a supplier to the British Government, marking it's products with the broad arrow symbol and was also present at Sheffield. History of the Loch Ard: The Loch Ard got its name from ”Loch Ard” a loch which lies to the west of Aberfoyle, and the east of Loch Lomond. It means "high lake" in Scottish Gaelic. The vessel belonged to the famous Loch Line which sailed many vessels from England to Australia. The Loch Ard was built in Glasgow by Barclay, Curdle and Co. in 1873, the vessel was a three-masted square-rigged iron sailing ship that measured 79.87 meters in length, 11.58 m in width, and 7 m in depth with a gross tonnage of 1693 tons with a mainmast that measured a massive 45.7 m in height. Loch Ard made three trips to Australia and one trip to Calcutta before its fateful voyage. Loch Ard left England on March 2, 1878, under the command of 29-year-old Captain Gibbs, who was newly married. The ship was bound for Melbourne with a crew of 37, plus 17 passengers. The general cargo reflected the affluence of Melbourne at the time. On board were straw hats, umbrella, perfumes, clay pipes, pianos, clocks, confectionery, linen and candles, as well as a heavier load of railway irons, cement, lead and copper. There were other items included that were intended for display in the Melbourne International Exhibition of 1880. The voyage to Port Phillip was long but uneventful. Then at 3 am on June 1, 1878, Captain Gibbs was expecting to see land. But the Loch Ard was running into a fog which greatly reduced visibility. Captain Gibbs was becoming anxious as there was no sign of land or the Cape Otway lighthouse. At 4 am the fog lifted and a lookout aloft announced that he could see breakers. The sheer cliffs of Victoria's west coast came into view, and Captain Gibbs realised that the ship was much closer to them than expected. He ordered as much sail to be set as time would permit and then attempted to steer the vessel out to sea. On coming head-on into the wind, the ship lost momentum, the sails fell limp and Loch Ard's bow swung back towards land. Gibbs then ordered the anchors to be released in an attempt to hold its position. The anchors sank some 50 fathoms - but did not hold. By this time the ship was among the breakers and the tall cliffs of Mutton Bird Island rose behind. Just half a mile from the coast, the ship's bow was suddenly pulled around by the anchor. The captain tried to tack out to sea, but the ship struck a reef at the base of Mutton Bird Island, near Port Campbell. Waves subsequently broke over the ship and the top deck became loosened from the hull. The masts and rigging came crashing down knocking passengers and crew overboard. When a lifeboat was finally launched, it crashed into the side of Loch Ard and capsized. Tom Pearce, who had launched the boat, managed to cling to its overturned hull and shelter beneath it. He drifted out to sea and then on the flood tide came into what is now known as Loch Ard Gorge. He swam to shore, bruised and dazed, and found a cave in which to shelter. Some of the crew stayed below deck to shelter from the falling rigging but drowned when the ship slipped off the reef into deeper water. Eva Carmichael a passenger had raced onto the deck to find out what was happening only to be confronted by towering cliffs looming above the stricken ship. In all the chaos, Captain Gibbs grabbed Eva and said, "If you are saved Eva, let my dear wife know that I died like a sailor". That was the last Eva Carmichael saw of the captain. She was swept off the ship by a huge wave. Eva saw Tom Pearce on a small rocky beach and yelled to attract his attention. He dived in and swam to the exhausted woman and dragged her to shore. He took her to the cave and broke the open case of brandy which had washed up on the beach. He opened a bottle to revive the unconscious woman. A few hours later Tom scaled a cliff in search of help. He followed hoof prints and came by chance upon two men from nearby Glenample Station three and a half miles away. In a complete state of exhaustion, he told the men of the tragedy. Tom then returned to the gorge while the two men rode back to the station to get help. By the time they reached Loch Ard Gorge, it was cold and dark. The two shipwreck survivors were taken to Glenample Station to recover. Eva stayed at the station for six weeks before returning to Ireland by steamship. In Melbourne, Tom Pearce received a hero's welcome. He was presented with the first gold medal of the Royal Humane Society of Victoria and a £1000 cheque from the Victorian Government. Concerts were performed to honour the young man's bravery and to raise money for those who lost family in the disaster. Of the 54 crew members and passengers on board, only two survived: the apprentice, Tom Pearce and the young woman passenger, Eva Carmichael, who lost her family in the tragedy. Ten days after the Loch Ard tragedy, salvage rights to the wreck were sold at auction for £2,120. Cargo valued at £3,000 was salvaged and placed on the beach, but most washed back into the sea when another storm developed. The wreck of Loch Ard still lies at the base of Mutton Bird Island. Much of the cargo has now been salvaged and some items were washed up into Loch Ard Gorge. Cargo and artefacts have also been illegally salvaged over many years before protective legislation was introduced in March 1982. The shipwreck of the Loch Ard is of significance for Victoria and is registered on the Victorian Heritage Register ( S 417). Flagstaff Hill has a varied collection of artefacts from Loch Ard and its collection is significant for being one of the largest accumulation of artefacts from this notable Victorian shipwreck. The collection's object is to also give us a snapshot into history so we can interpret the story of this tragic event. The collection is also archaeologically significant as it represents aspects of Victoria's shipping history that allows us to interpret Victoria's social and historical themes of the time. The collection's historical significance is that it is associated unfortunately with the worst and best-known shipwreck in Victoria's history. Silver plated copper alloy table fork from the wreck of the Loch Ard. William Pageflagstaff hill, warrnambool, shipwrecked coast, flagstaff hill maritime museum, maritime museum, shipwreck coast, flagstaff hill maritime village, great ocean road, loch line, loch ard, captain gibbs, eva carmichael, tom pearce, glenample station, mutton bird island, loch ard gorge, electroplated cutlery, fork -
Flagstaff Hill Maritime Museum and Village
Domestic object - Fork, c.1878
This fork is from the wreck of the Loch Ard, that sailed from Gravesend, London. The manifest listed an array of manufactured goods being exported to the Colony of Victoria. Included in the cargo manifest was a large number of hardware & cutlery items. This fork is representative of similar items of silver electro-plated cutlery salvaged from the Loch Ard wreck site, comprising nickel silver electroplated spoons and forks of various sizes but all sharing the same general shape and design. Some of the pieces display their makers’ mark of William Page & Co Birmingham UK. Within the Flagstaff Hills cutlery collection donated from the Loch Ard, maker’s marks are often obscured by sedimentary accretion or verdigris after a century of submersion in the ocean. However sufficient detail has survived to indicate that the collection of samples of electroplated cutlery probably originated from the same cargo consignment from the Loch Ard and were made by William Page & Co. William Page was born in 1811 and died in 1885. He was active as a manufacturer of cutlery from 1829 with premises at 74 Belmont Rd, Dales End as a "close plater" (someone who works sheet metal), and he began electroplating in 1855. William Page & Co was also active from 1880 at Cranemore St, Cattle’s Grove also 55 Albion St, Birmingham, in 1936 the firm became Ltd. The firm used the trademarks "Asrista, Bolivian Silver, Silverite, Roman Silver, Roumanian Silver and Trevor Plate. In 1938 William Page was a supplier to the British Government, marking it's products with the broad arrow symbol and was also present at Sheffield. History of the Loch Ard: The Loch Ard got its name from ”Loch Ard” a loch which lies to the west of Aberfoyle, and the east of Loch Lomond. It means "high lake" in Scottish Gaelic. The vessel belonged to the famous Loch Line which sailed many vessels from England to Australia. The Loch Ard was built in Glasgow by Barclay, Curdle and Co. in 1873, the vessel was a three-masted square-rigged iron sailing ship that measured 79.87 meters in length, 11.58 m in width, and 7 m in depth with a gross tonnage of 1693 tons with a mainmast that measured a massive 45.7 m in height. Loch Ard made three trips to Australia and one trip to Calcutta before its fateful voyage. Loch Ard left England on March 2, 1878, under the command of 29-year-old Captain Gibbs, who was newly married. The ship was bound for Melbourne with a crew of 37, plus 17 passengers. The general cargo reflected the affluence of Melbourne at the time. Onboard were straw hats, umbrella, perfumes, clay pipes, pianos, clocks, confectionery, linen and candles, as well as a heavier load of railway irons, cement, lead and copper. There were other items included that were intended for display in the Melbourne International Exhibition of 1880. The voyage to Port Phillip was long but uneventful. Then at 3 am on June 1, 1878, Captain Gibbs was expecting to see land. But the Loch Ard was running into a fog which greatly reduced visibility. Captain Gibbs was becoming anxious as there was no sign of land or the Cape Otway lighthouse. At 4 am the fog lifted and a lookout aloft announced that he could see breakers. The sheer cliffs of Victoria's west coast came into view, and Captain Gibbs realised that the ship was much closer to them than expected. He ordered as much sail to be set as time would permit and then attempted to steer the vessel out to sea. On coming head-on into the wind, the ship lost momentum, the sails fell limp and Loch Ard's bow swung back towards land. Gibbs then ordered the anchors to be released in an attempt to hold its position. The anchors sank some 50 fathoms - but did not hold. By this time the ship was among the breakers and the tall cliffs of Mutton Bird Island rose behind. Just half a mile from the coast, the ship's bow was suddenly pulled around by the anchor. The captain tried to tack out to sea, but the ship struck a reef at the base of Mutton Bird Island, near Port Campbell. Waves subsequently broke over the ship and the top deck became loosened from the hull. The masts and rigging came crashing down knocking passengers and crew overboard. When a lifeboat was finally launched, it crashed into the side of Loch Ard and capsized. Tom Pearce, who had launched the boat, managed to cling to its overturned hull and shelter beneath it. He drifted out to sea and then on the flood tide came into what is now known as Loch Ard Gorge. He swam to shore, bruised and dazed, and found a cave in which to shelter. Some of the crew stayed below deck to shelter from the falling rigging but drowned when the ship slipped off the reef into deeper water. Eva Carmichael a passenger had raced onto the deck to find out what was happening only to be confronted by towering cliffs looming above the stricken ship. In all the chaos, Captain Gibbs grabbed Eva and said, "If you are saved Eva, let my dear wife know that I died like a sailor". That was the last Eva Carmichael saw of the captain. She was swept off the ship by a huge wave. Eva saw Tom Pearce on a small rocky beach and yelled to attract his attention. He dived in and swam to the exhausted woman and dragged her to shore. He took her to the cave and broke the open case of brandy which had washed up on the beach. He opened a bottle to revive the unconscious woman. A few hours later Tom scaled a cliff in search of help. He followed hoof prints and came by chance upon two men from nearby Glenample Station three and a half miles away. In a complete state of exhaustion, he told the men of the tragedy. Tom then returned to the gorge while the two men rode back to the station to get help. By the time they reached Loch Ard Gorge, it was cold and dark. The two shipwreck survivors were taken to Glenample Station to recover. Eva stayed at the station for six weeks before returning to Ireland by steamship. In Melbourne, Tom Pearce received a hero's welcome. He was presented with the first gold medal of the Royal Humane Society of Victoria and a £1000 cheque from the Victorian Government. Concerts were performed to honour the young man's bravery and to raise money for those who lost family in the disaster. Of the 54 crew members and passengers on board, only two survived: the apprentice, Tom Pearce and the young woman passenger, Eva Carmichael, who lost her family in the tragedy. Ten days after the Loch Ard tragedy, salvage rights to the wreck were sold at auction for £2,120. Cargo valued at £3,000 was salvaged and placed on the beach, but most washed back into the sea when another storm developed. The wreck of Loch Ard still lies at the base of Mutton Bird Island. Much of the cargo has now been salvaged and some items were washed up into Loch Ard Gorge. Cargo and artefacts have also been illegally salvaged over many years before protective legislation was introduced in March 1982. The shipwreck of the Loch Ard is of significance for Victoria and is registered on the Victorian Heritage Register ( S 417). Flagstaff Hill has a varied collection of artefacts from Loch Ard and its collection is significant for being one of the largest accumulation of artefacts from this notable Victorian shipwreck. The collections object is to also give us a snapshot into history so we can interpret the story of this tragic event. The collection is also archaeologically significant as it represents aspects of Victoria's shipping history that allows us to interpret Victoria's social and historical themes of the time. The collections historically significance is that it is associated unfortunately with the worst and best-known shipwreck in Victoria's history. Silver plated copper alloy table fork from the wreck of the Loch Ard. William Pageflagstaff hill, warrnambool, shipwrecked coast, flagstaff hill maritime museum, maritime museum, shipwreck coast, flagstaff hill maritime village, great ocean road, loch line, loch ard, captain gibbs, eva carmichael, tom pearce, glenample station, mutton bird island, loch ard gorge, electroplated cutlery, fork -
Flagstaff Hill Maritime Museum and Village
Domestic object - Fork, c.1878
This fork is from the wreck of the Loch Ard that sailed from Gravesend London. The manifest listed an array of manufactured goods being exported to the Colony of Victoria. Included in the cargo manifest was a large number of hardware & cutlery items. This fork is representative of similar items of silver electro-plated cutlery salvaged from the Loch Ard wreck site, comprising nickel silver electroplated spoons and forks of various sizes but all sharing the same general shape and design. Some of the pieces display their makers’ mark of William Page & Co Birmingham UK. Within the Flagstaff Hills cutlery collection donated from the Loch Ard, maker’s marks are often obscured by sedimentary accretion or verdigris after a century of submersion in the ocean. However sufficient detail has survived to indicate that the collection of samples of electroplated cutlery probably originated from the same cargo consignment from the Loch Ard and were made by William Page & Co. William Page was born in 1811 and died in 1885. He was active as a manufacturer of cutlery from 1829 with premises at 74 Belmont Rd, Dales End as a "close plater" (someone who works sheet metal), and he began electroplating in 1855. William Page & Co was also active from 1880 at Cranemore St, Cattle’s Grove also 55 Albion St, Birmingham, in 1936 the firm became Ltd. The firm used the trademarks "Asrista, Bolivian Silver, Silverite, Roman Silver, Roumanian Silver and Trevor Plate. In 1938 William Page was a supplier to the British Government, marking it's products with the broad arrow symbol and was also present at Sheffield. History of the Loch Ard: The Loch Ard got its name from ”Loch Ard” a loch which lies to the west of Aberfoyle, and the east of Loch Lomond. It means "high lake" in Scottish Gaelic. The vessel belonged to the famous Loch Line which sailed many vessels from England to Australia. The Loch Ard was built in Glasgow by Barclay, Curdle and Co. in 1873, the vessel was a three-masted square-rigged iron sailing ship that measured 79.87 meters in length, 11.58 m in width, and 7 m in depth with a gross tonnage of 1693 tons with a mainmast that measured a massive 45.7 m in height. Loch Ard made three trips to Australia and one trip to Calcutta before its fateful voyage. Loch Ard left England on March 2, 1878, under the command of 29-year-old Captain Gibbs, who was newly married. The ship was bound for Melbourne with a crew of 37, plus 17 passengers. The general cargo reflected the affluence of Melbourne at the time. On board were straw hats, umbrella, perfumes, clay pipes, pianos, clocks, confectionery, linen and candles, as well as a heavier load of railway irons, cement, lead and copper. There were other items included that were intended for display in the Melbourne International Exhibition of 1880. The voyage to Port Phillip was long but uneventful. Then at 3 am on June 1, 1878, Captain Gibbs was expecting to see land. But the Loch Ard was running into a fog which greatly reduced visibility. Captain Gibbs was becoming anxious as there was no sign of land or the Cape Otway lighthouse. At 4 am the fog lifted and a lookout aloft announced that he could see breakers. The sheer cliffs of Victoria's west coast came into view, and Captain Gibbs realised that the ship was much closer to them than expected. He ordered as much sail to be set as time would permit and then attempted to steer the vessel out to sea. On coming head-on into the wind, the ship lost momentum, the sails fell limp and Loch Ard's bow swung back towards land. Gibbs then ordered the anchors to be released in an attempt to hold its position. The anchors sank some 50 fathoms - but did not hold. By this time the ship was among the breakers and the tall cliffs of Mutton Bird Island rose behind. Just half a mile from the coast, the ship's bow was suddenly pulled around by the anchor. The captain tried to tack out to sea, but the ship struck a reef at the base of Mutton Bird Island, near Port Campbell. Waves subsequently broke over the ship and the top deck became loosened from the hull. The masts and rigging came crashing down knocking passengers and crew overboard. When a lifeboat was finally launched, it crashed into the side of Loch Ard and capsized. Tom Pearce, who had launched the boat, managed to cling to its overturned hull and shelter beneath it. He drifted out to sea and then on the flood tide came into what is now known as Loch Ard Gorge. He swam to shore, bruised and dazed, and found a cave in which to shelter. Some of the crew stayed below deck to shelter from the falling rigging but drowned when the ship slipped off the reef into deeper water. Eva Carmichael a passenger had raced onto the deck to find out what was happening only to be confronted by towering cliffs looming above the stricken ship. In all the chaos, Captain Gibbs grabbed Eva and said, "If you are saved Eva, let my dear wife know that I died like a sailor". That was the last Eva Carmichael saw of the captain. She was swept off the ship by a huge wave. Eva saw Tom Pearce on a small rocky beach and yelled to attract his attention. He dived in and swam to the exhausted woman and dragged her to shore. He took her to the cave and broke the open case of brandy which had washed up on the beach. He opened a bottle to revive the unconscious woman. A few hours later Tom scaled a cliff in search of help. He followed hoof prints and came by chance upon two men from nearby Glenample Station three and a half miles away. In a complete state of exhaustion, he told the men of the tragedy. Tom then returned to the gorge while the two men rode back to the station to get help. By the time they reached Loch Ard Gorge, it was cold and dark. The two shipwreck survivors were taken to Glenample Station to recover. Eva stayed at the station for six weeks before returning to Ireland by steamship. In Melbourne, Tom Pearce received a hero's welcome. He was presented with the first gold medal of the Royal Humane Society of Victoria and a £1000 cheque from the Victorian Government. Concerts were performed to honour the young man's bravery and to raise money for those who lost family in the disaster. Of the 54 crew members and passengers on board, only two survived: the apprentice, Tom Pearce and the young woman passenger, Eva Carmichael, who lost her family in the tragedy. Ten days after the Loch Ard tragedy, salvage rights to the wreck were sold at auction for £2,120. Cargo valued at £3,000 was salvaged and placed on the beach, but most washed back into the sea when another storm developed. The wreck of Loch Ard still lies at the base of Mutton Bird Island. Much of the cargo has now been salvaged and some items were washed up into Loch Ard Gorge. Cargo and artefacts have also been illegally salvaged over many years before protective legislation was introduced in March 1982. The shipwreck of the Loch Ard is of significance for Victoria and is registered on the Victorian Heritage Register ( S 417). Flagstaff Hill has a varied collection of artefacts from Loch Ard and its collection is significant for being one of the largest accumulation of artefacts from this notable Victorian shipwreck. The collections object is to also give us a snapshot into history so we can interpret the story of this tragic event. The collection is also archaeologically significant as it represents aspects of Victoria's shipping history that allows us to interpret Victoria's social and historical themes of the time. The collections historically significance is that it is associated unfortunately with the worst and best-known shipwreck in Victoria's history. Silver plated copper alloy table fork from the wreck of the Loch Ard. Some verdigris.William Pageflagstaff hill, warrnambool, shipwrecked coast, flagstaff hill maritime museum, maritime museum, shipwreck coast, flagstaff hill maritime village, great ocean road, loch line, loch ard, captain gibbs, eva carmichael, tom pearce, glenample station, mutton bird island, loch ard gorge, electroplated cutlery, fork -
 Flagstaff Hill Maritime Museum and Village
Domestic object - Fork, circa 1878
This fork is from the wreck of the Loch Ard, that sailed from Gravesend, London. The manifest listed an array of manufactured goods being exported to the Colony of Victoria. Included in the cargo manifest was a large number of hardware & cutlery items. This fork is representative of similar items of silver electro-plated cutlery salvaged from the Loch Ard wreck site, comprising nickel silver electroplated spoons and forks of various sizes but all sharing the same general shape and design. Some of the pieces display their makers’ mark of William Page & Co Birmingham UK. Within the Flagstaff Hills cutlery collection donated from the Loch Ard, maker’s marks are often obscured by sedimentary accretion or verdigris after a century of submersion in the ocean. However sufficient detail has survived to indicate that the collection of samples of electroplated cutlery probably originated from the same cargo consignment from the Loch Ard and were made by William Page & Co. William Page was born in 1811 and died in 1885. He was active as a manufacturer of cutlery from 1829 with premises at 74 Belmont Rd, Dales End as a "close plater" (someone who works sheet metal), and he began electroplating in 1855. William Page & Co was also active from 1880 at Cranemore St, Cattle’s Grove also 55 Albion St, Birmingham, in 1936 the firm became Ltd. The firm used the trademarks "Asrista, Bolivian Silver, Silverite, Roman Silver, Roumanian Silver and Trevor Plate. In 1938 William Page was a supplier to the British Government, marking it's products with the broad arrow symbol and was also present at Sheffield. History of the Loch Ard: The Loch Ard got its name from ”Loch Ard” a loch which lies to the west of Aberfoyle, and the east of Loch Lomond. It means "high lake" in Scottish Gaelic. The vessel belonged to the famous Loch Line which sailed many vessels from England to Australia. The Loch Ard was built in Glasgow by Barclay, Curdle and Co. in 1873, the vessel was a three-masted square-rigged iron sailing ship that measured 79.87 meters in length, 11.58 m in width, and 7 m in depth with a gross tonnage of 1693 tons with a mainmast that measured a massive 45.7 m in height. Loch Ard made three trips to Australia and one trip to Calcutta before its fateful voyage. Loch Ard left England on March 2, 1878, under the command of 29-year-old Captain Gibbs, who was newly married. The ship was bound for Melbourne with a crew of 37, plus 17 passengers. The general cargo reflected the affluence of Melbourne at the time. Onboard were straw hats, umbrella, perfumes, clay pipes, pianos, clocks, confectionery, linen and candles, as well as a heavier load of railway irons, cement, lead and copper. There were other items included that were intended for display in the Melbourne International Exhibition of 1880. The voyage to Port Phillip was long but uneventful. Then at 3 am on June 1, 1878, Captain Gibbs was expecting to see land. But the Loch Ard was running into a fog which greatly reduced visibility. Captain Gibbs was becoming anxious as there was no sign of land or the Cape Otway lighthouse. At 4 am the fog lifted and a lookout aloft announced that he could see breakers. The sheer cliffs of Victoria's west coast came into view, and Captain Gibbs realised that the ship was much closer to them than expected. He ordered as much sail to be set as time would permit and then attempted to steer the vessel out to sea. On coming head-on into the wind, the ship lost momentum, the sails fell limp and Loch Ard's bow swung back towards land. Gibbs then ordered the anchors to be released in an attempt to hold its position. The anchors sank some 50 fathoms - but did not hold. By this time the ship was among the breakers and the tall cliffs of Mutton Bird Island rose behind. Just half a mile from the coast, the ship's bow was suddenly pulled around by the anchor. The captain tried to tack out to sea, but the ship struck a reef at the base of Mutton Bird Island, near Port Campbell. Waves subsequently broke over the ship and the top deck became loosened from the hull. The masts and rigging came crashing down knocking passengers and crew overboard. When a lifeboat was finally launched, it crashed into the side of Loch Ard and capsized. Tom Pearce, who had launched the boat, managed to cling to its overturned hull and shelter beneath it. He drifted out to sea and then on the flood tide came into what is now known as Loch Ard Gorge. He swam to shore, bruised and dazed, and found a cave in which to shelter. Some of the crew stayed below deck to shelter from the falling rigging but drowned when the ship slipped off the reef into deeper water. Eva Carmichael a passenger had raced onto the deck to find out what was happening only to be confronted by towering cliffs looming above the stricken ship. In all the chaos, Captain Gibbs grabbed Eva and said, "If you are saved Eva, let my dear wife know that I died like a sailor". That was the last Eva Carmichael saw of the captain. She was swept off the ship by a huge wave. Eva saw Tom Pearce on a small rocky beach and yelled to attract his attention. He dived in and swam to the exhausted woman and dragged her to shore. He took her to the cave and broke the open case of brandy which had washed up on the beach. He opened a bottle to revive the unconscious woman. A few hours later Tom scaled a cliff in search of help. He followed hoof prints and came by chance upon two men from nearby Glenample Station three and a half miles away. In a complete state of exhaustion, he told the men of the tragedy. Tom then returned to the gorge while the two men rode back to the station to get help. By the time they reached Loch Ard Gorge, it was cold and dark. The two shipwreck survivors were taken to Glenample Station to recover. Eva stayed at the station for six weeks before returning to Ireland by steamship. In Melbourne, Tom Pearce received a hero's welcome. He was presented with the first gold medal of the Royal Humane Society of Victoria and a £1000 cheque from the Victorian Government. Concerts were performed to honour the young man's bravery and to raise money for those who lost family in the disaster. Of the 54 crew members and passengers on board, only two survived: the apprentice, Tom Pearce and the young woman passenger, Eva Carmichael, who lost her family in the tragedy. Ten days after the Loch Ard tragedy, salvage rights to the wreck were sold at auction for £2,120. Cargo valued at £3,000 was salvaged and placed on the beach, but most washed back into the sea when another storm developed. The wreck of Loch Ard still lies at the base of Mutton Bird Island. Much of the cargo has now been salvaged and some items were washed up into Loch Ard Gorge. Cargo and artefacts have also been illegally salvaged over many years before protective legislation was introduced in March 1982. The shipwreck of the Loch Ard is of significance for Victoria and is registered on the Victorian Heritage Register ( S 417). Flagstaff Hill has a varied collection of artefacts from Loch Ard and its collection is significant for being one of the largest accumulation of artefacts from this notable Victorian shipwreck. The collections object is to also give us a snapshot into history so we can interpret the story of this tragic event. The collection is also archaeologically significant as it represents aspects of Victoria's shipping history that allows us to interpret Victoria's social and historical themes of the time. The collections historically significance is that it is associated unfortunately with the worst and best-known shipwreck in Victoria's history. Large Nickel Silver plated dinner fork, fiddle-back design handle, narrow stem with flared collar and elongated forks.makers’ mark “W” & “P” placed within a raised diamond outline, which is in turn contained within a sunken crown shape identifying the manufacturer as William Page & Co of Birmingham.flagstaff hill, warrnambool, shipwrecked coast, flagstaff hill maritime museum, maritime museum, shipwreck coast, flagstaff hill maritime village, great ocean road, loch line, loch ard, captain gibbs, eva carmichael, tom pearce, glenample station, mutton bird island, loch ard gorge, electroplated cutlery, fork -
Flagstaff Hill Maritime Museum and Village
Domestic object - Fork, c.1878
This fork is from the wreck of the Loch Ard, that sailed from Gravesend, London. The manifest listed an array of manufactured goods being exported to the Colony of Victoria. Included in the cargo manifest was a large number of hardware & cutlery items. This fork is representative of similar items of silver electro-plated cutlery salvaged from the Loch Ard wreck site, comprising nickel silver electroplated spoons and forks of various sizes but all sharing the same general shape and design. Some of the pieces display their makers’ mark of William Page & Co Birmingham UK. Within the Flagstaff Hills cutlery collection donated from the Loch Ard, maker’s marks are often obscured by sedimentary accretion or verdigris after a century of submersion in the ocean. However sufficient detail has survived to indicate that the collection of samples of electroplated cutlery probably originated from the same cargo consignment from the Loch Ard and were made by William Page & Co. William Page was born in 1811 and died in 1885. He was active as a manufacturer of cutlery from 1829 with premises at 74 Belmont Rd, Dales End as a "close plater" (someone who works sheet metal), and he began electroplating in 1855. William Page & Co was also active from 1880 at Cranemore St, Cattle’s Grove also 55 Albion St, Birmingham, in 1936 the firm became Ltd. The firm used the trademarks "Asrista, Bolivian Silver, Silverite, Roman Silver, Roumanian Silver and Trevor Plate. In 1938 William Page was a supplier to the British Government, marking it's products with the broad arrow symbol and was also present at Sheffield. History of the Loch Ard: The Loch Ard got its name from ”Loch Ard” a loch which lies to the west of Aberfoyle, and the east of Loch Lomond. It means "high lake" in Scottish Gaelic. The vessel belonged to the famous Loch Line which sailed many vessels from England to Australia. The Loch Ard was built in Glasgow by Barclay, Curdle and Co. in 1873, the vessel was a three-masted square-rigged iron sailing ship that measured 79.87 meters in length, 11.58 m in width, and 7 m in depth with a gross tonnage of 1693 tons with a mainmast that measured a massive 45.7 m in height. Loch Ard made three trips to Australia and one trip to Calcutta before its fateful voyage. Loch Ard left England on March 2, 1878, under the command of 29-year-old Captain Gibbs, who was newly married. The ship was bound for Melbourne with a crew of 37, plus 17 passengers. The general cargo reflected the affluence of Melbourne at the time. Onboard were straw hats, umbrella, perfumes, clay pipes, pianos, clocks, confectionery, linen and candles, as well as a heavier load of railway irons, cement, lead and copper. There were other items included that were intended for display in the Melbourne International Exhibition of 1880. The voyage to Port Phillip was long but uneventful. Then at 3 am on June 1, 1878, Captain Gibbs was expecting to see land. But the Loch Ard was running into a fog which greatly reduced visibility. Captain Gibbs was becoming anxious as there was no sign of land or the Cape Otway lighthouse. At 4 am the fog lifted and a lookout aloft announced that he could see breakers. The sheer cliffs of Victoria's west coast came into view, and Captain Gibbs realised that the ship was much closer to them than expected. He ordered as much sail to be set as time would permit and then attempted to steer the vessel out to sea. On coming head-on into the wind, the ship lost momentum, the sails fell limp and Loch Ard's bow swung back towards land. Gibbs then ordered the anchors to be released in an attempt to hold its position. The anchors sank some 50 fathoms - but did not hold. By this time the ship was among the breakers and the tall cliffs of Mutton Bird Island rose behind. Just half a mile from the coast, the ship's bow was suddenly pulled around by the anchor. The captain tried to tack out to sea, but the ship struck a reef at the base of Mutton Bird Island, near Port Campbell. Waves subsequently broke over the ship and the top deck became loosened from the hull. The masts and rigging came crashing down knocking passengers and crew overboard. When a lifeboat was finally launched, it crashed into the side of Loch Ard and capsized. Tom Pearce, who had launched the boat, managed to cling to its overturned hull and shelter beneath it. He drifted out to sea and then on the flood tide came into what is now known as Loch Ard Gorge. He swam to shore, bruised and dazed, and found a cave in which to shelter. Some of the crew stayed below deck to shelter from the falling rigging but drowned when the ship slipped off the reef into deeper water. Eva Carmichael a passenger had raced onto the deck to find out what was happening only to be confronted by towering cliffs looming above the stricken ship. In all the chaos, Captain Gibbs grabbed Eva and said, "If you are saved Eva, let my dear wife know that I died like a sailor". That was the last Eva Carmichael saw of the captain. She was swept off the ship by a huge wave. Eva saw Tom Pearce on a small rocky beach and yelled to attract his attention. He dived in and swam to the exhausted woman and dragged her to shore. He took her to the cave and broke the open case of brandy which had washed up on the beach. He opened a bottle to revive the unconscious woman. A few hours later Tom scaled a cliff in search of help. He followed hoof prints and came by chance upon two men from nearby Glenample Station three and a half miles away. In a complete state of exhaustion, he told the men of the tragedy. Tom then returned to the gorge while the two men rode back to the station to get help. By the time they reached Loch Ard Gorge, it was cold and dark. The two shipwreck survivors were taken to Glenample Station to recover. Eva stayed at the station for six weeks before returning to Ireland by steamship. In Melbourne, Tom Pearce received a hero's welcome. He was presented with the first gold medal of the Royal Humane Society of Victoria and a £1000 cheque from the Victorian Government. Concerts were performed to honour the young man's bravery and to raise money for those who lost family in the disaster. Of the 54 crew members and passengers on board, only two survived: the apprentice, Tom Pearce and the young woman passenger, Eva Carmichael, who lost her family in the tragedy. Ten days after the Loch Ard tragedy, salvage rights to the wreck were sold at auction for £2,120. Cargo valued at £3,000 was salvaged and placed on the beach, but most washed back into the sea when another storm developed. The wreck of Loch Ard still lies at the base of Mutton Bird Island. Much of the cargo has now been salvaged and some items were washed up into Loch Ard Gorge. Cargo and artefacts have also been illegally salvaged over many years before protective legislation was introduced in March 1982. The shipwreck of the Loch Ard is of significance for Victoria and is registered on the Victorian Heritage Register ( S 417). Flagstaff Hill has a varied collection of artefacts from Loch Ard and its collection is significant for being one of the largest accumulation of artefacts from this notable Victorian shipwreck. The collections object is to also give us a snapshot into history so we can interpret the story of this tragic event. The collection is also archaeologically significant as it represents aspects of Victoria's shipping history that allows us to interpret Victoria's social and historical themes of the time. The collections historically significance is that it is associated unfortunately with the worst and best-known shipwreck in Victoria's history. Silver plated copper alloy table forks entree from the wreck of the Loch Ard. William Pageflagstaff hill, warrnambool, shipwrecked coast, flagstaff hill maritime museum, maritime museum, shipwreck coast, flagstaff hill maritime village, great ocean road, loch line, loch ard, captain gibbs, eva carmichael, tom pearce, glenample station, mutton bird island, loch ard gorge, electroplated cutlery, fork -
Flagstaff Hill Maritime Museum and Village
Domestic object - Forks, c.1878
This fork is from the wreck of the Loch Ard, that sailed from Gravesend, London. The manifest listed an array of manufactured goods being exported to the Colony of Victoria. Included in the cargo manifest was a large number of hardware & cutlery items. This fork is representative of similar items of silver electro-plated cutlery salvaged from the Loch Ard wreck site, comprising nickel silver electroplated spoons and forks of various sizes but all sharing the same general shape and design. Some of the pieces display their makers’ mark of William Page & Co Birmingham UK. Within the Flagstaff Hills cutlery collection donated from the Loch Ard, maker’s marks are often obscured by sedimentary accretion or verdigris after a century of submersion in the ocean. However sufficient detail has survived to indicate that the collection of samples of electroplated cutlery probably originated from the same cargo consignment from the Loch Ard and were made by William Page & Co. William Page was born in 1811 and died in 1885. He was active as a manufacturer of cutlery from 1829 with premises at 74 Belmont Rd, Dales End as a "close plater" (someone who works sheet metal), and he began electroplating in 1855. William Page & Co was also active from 1880 at Cranemore St, Cattle’s Grove also 55 Albion St, Birmingham, in 1936 the firm became Ltd. The firm used the trademarks "Asrista, Bolivian Silver, Silverite, Roman Silver, Roumanian Silver and Trevor Plate. In 1938 William Page was a supplier to the British Government, marking it's products with the broad arrow symbol and was also present at Sheffield. History of the Loch Ard: The Loch Ard got its name from ”Loch Ard” a loch which lies to the west of Aberfoyle, and the east of Loch Lomond. It means "high lake" in Scottish Gaelic. The vessel belonged to the famous Loch Line which sailed many vessels from England to Australia. The Loch Ard was built in Glasgow by Barclay, Curdle and Co. in 1873, the vessel was a three-masted square-rigged iron sailing ship that measured 79.87 meters in length, 11.58 m in width, and 7 m in depth with a gross tonnage of 1693 tons with a mainmast that measured a massive 45.7 m in height. Loch Ard made three trips to Australia and one trip to Calcutta before its fateful voyage. Loch Ard left England on March 2, 1878, under the command of 29-year-old Captain Gibbs, who was newly married. The ship was bound for Melbourne with a crew of 37, plus 17 passengers. The general cargo reflected the affluence of Melbourne at the time. Onboard were straw hats, umbrella, perfumes, clay pipes, pianos, clocks, confectionery, linen and candles, as well as a heavier load of railway irons, cement, lead and copper. There were other items included that were intended for display in the Melbourne International Exhibition of 1880. The voyage to Port Phillip was long but uneventful. Then at 3 am on June 1, 1878, Captain Gibbs was expecting to see land. But the Loch Ard was running into a fog which greatly reduced visibility. Captain Gibbs was becoming anxious as there was no sign of land or the Cape Otway lighthouse. At 4 am the fog lifted and a lookout aloft announced that he could see breakers. The sheer cliffs of Victoria's west coast came into view, and Captain Gibbs realised that the ship was much closer to them than expected. He ordered as much sail to be set as time would permit and then attempted to steer the vessel out to sea. On coming head-on into the wind, the ship lost momentum, the sails fell limp and Loch Ard's bow swung back towards land. Gibbs then ordered the anchors to be released in an attempt to hold its position. The anchors sank some 50 fathoms - but did not hold. By this time the ship was among the breakers and the tall cliffs of Mutton Bird Island rose behind. Just half a mile from the coast, the ship's bow was suddenly pulled around by the anchor. The captain tried to tack out to sea, but the ship struck a reef at the base of Mutton Bird Island, near Port Campbell. Waves subsequently broke over the ship and the top deck became loosened from the hull. The masts and rigging came crashing down knocking passengers and crew overboard. When a lifeboat was finally launched, it crashed into the side of Loch Ard and capsized. Tom Pearce, who had launched the boat, managed to cling to its overturned hull and shelter beneath it. He drifted out to sea and then on the flood tide came into what is now known as Loch Ard Gorge. He swam to shore, bruised and dazed, and found a cave in which to shelter. Some of the crew stayed below deck to shelter from the falling rigging but drowned when the ship slipped off the reef into deeper water. Eva Carmichael a passenger had raced onto the deck to find out what was happening only to be confronted by towering cliffs looming above the stricken ship. In all the chaos, Captain Gibbs grabbed Eva and said, "If you are saved Eva, let my dear wife know that I died like a sailor". That was the last Eva Carmichael saw of the captain. She was swept off the ship by a huge wave. Eva saw Tom Pearce on a small rocky beach and yelled to attract his attention. He dived in and swam to the exhausted woman and dragged her to shore. He took her to the cave and broke the open case of brandy which had washed up on the beach. He opened a bottle to revive the unconscious woman. A few hours later Tom scaled a cliff in search of help. He followed hoof prints and came by chance upon two men from nearby Glenample Station three and a half miles away. In a complete state of exhaustion, he told the men of the tragedy. Tom then returned to the gorge while the two men rode back to the station to get help. By the time they reached Loch Ard Gorge, it was cold and dark. The two shipwreck survivors were taken to Glenample Station to recover. Eva stayed at the station for six weeks before returning to Ireland by steamship. In Melbourne, Tom Pearce received a hero's welcome. He was presented with the first gold medal of the Royal Humane Society of Victoria and a £1000 cheque from the Victorian Government. Concerts were performed to honour the young man's bravery and to raise money for those who lost family in the disaster. Of the 54 crew members and passengers on board, only two survived: the apprentice, Tom Pearce and the young woman passenger, Eva Carmichael, who lost her family in the tragedy. Ten days after the Loch Ard tragedy, salvage rights to the wreck were sold at auction for £2,120. Cargo valued at £3,000 was salvaged and placed on the beach, but most washed back into the sea when another storm developed. The wreck of Loch Ard still lies at the base of Mutton Bird Island. Much of the cargo has now been salvaged and some items were washed up into Loch Ard Gorge. Cargo and artefacts have also been illegally salvaged over many years before protective legislation was introduced in March 1982. The shipwreck of the Loch Ard is of significance for Victoria and is registered on the Victorian Heritage Register ( S 417). Flagstaff Hill has a varied collection of artefacts from Loch Ard and its collection is significant for being one of the largest accumulation of artefacts from this notable Victorian shipwreck. The collections object is to also give us a snapshot into history so we can interpret the story of this tragic event. The collection is also archaeologically significant as it represents aspects of Victoria's shipping history that allows us to interpret Victoria's social and historical themes of the time. The collections historically significance is that it is associated unfortunately with the worst and best-known shipwreck in Victoria's history. Silver plated copper alloy table forks entree from the wreck of the Loch Ard. William Pageflagstaff hill, warrnambool, shipwrecked coast, flagstaff hill maritime museum, maritime museum, shipwreck coast, flagstaff hill maritime village, great ocean road, loch line, loch ard, captain gibbs, eva carmichael, tom pearce, glenample station, mutton bird island, loch ard gorge, electroplated cutlery, fork -
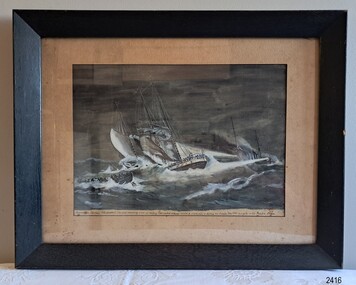 Flagstaff Hill Maritime Museum and Village
Print - Lithograph, sea rescue, R.N. Duffield, Australian cruiser “MELBOURNE” (Tons 5600) rescuing crew of sinking four-masted schooner “HELEN B. STERLING” of Halifax NS Canada, Tons 1343 in a gale in the Pacific Ocean, 19-11-1924
This framed lithograph print in watercolour and gouache was produced on November 19th, 1924, by 20th-century marine artist, Mr R.N. Duffield. It depicts the event of a sea rescue that took place two years earlier. The framer was A.L. Frith of Footscray, Melbourne, who actively advertised from 1933 to 1935. The now disbanded Shiplovers' Society of Victoria (1930-2018) donated the print, and it seems likely that this print was framed for that organisation. This graphic image shows the conditions in which the rescue from the wrecked Helen B. Sterling happened. Captain George Harris was master of the American-owned, four-masted windjammer. His wife Edith and their ten-year-old son Leslie were on board, along with a crew of fifteen seamen. The ship set off from Newcastle, NSW, on January 5th, 1922, loaded with a cargo of coal to deliver to the Society Islands and on to San Francisco. Young Leslie later wrote a lively school composition for his teacher about his experiences on board the Helen B Sterling. He tells of a fire that broke out the day after they departed and burned a hole in a beam. Then another troublesome time on the 9th, when a strong gale blew a sail off the ship. Finally, he tells of the highlight of his voyage when, on the 18th January, the ship was right in the path of a strong cyclone, which broke the mainmast. Huge waves crashed over both sides of the deck, meeting in the middle, and the ship began to sink. The rescue from the wreck was an exciting time for the young boy, and even more so when one of his cats survived after being carefully wrapped in a pillowcase and thrown down from the ship for the boy. Reporters later wrote about Leslie’s comments, “... what had grieved him most was the thought that he might never see his two little sisters again”. Captain Harris said in a published statement, “… the gale was the worst he had met in his 12 years’ experience at sea. All went well for the first week. We then encountered a strong blow from the south-east. We tried the gasoline pump, but the engine broke down, and we had to do the pumping by hand. We at once shortened sail, but the sea increased in fury to such an extent that men were washed from the pumps. I was below at 5:30 on Sunday morning [January 22nd, 1922] when the main mast went over the side, … I at once sent out SOS signals, and got word that HMAS Melbourne was coming to our assistance. I had made a mistake with regard to our position, but did not know it until 11:30 o’clock, when I sent out the correct location. This was picked up by the Melbourne and I received the following reply: “We will reach you about 2 am. Keep a good heart. The Melbourne will do all she can.” Our ship was practically awash when we were taken off.” (Ref: the ‘Helen B. Sterling Disaster’, Maitland Weekly Mercury, NSW, 4-2-1922.) Officers from the Royal Australian Navy, Captain Henry J Feakes (later Rear-Admiral) and Commander Wilfrid Ward Hunt, were on board the light cruiser, HMAS Melbourne (1913-1928), when it left Sydney for New Zealand. After the SOS was received, the ship sped at full steam towards the sinking Helen B. Sterling. They found the vessel at about midnight and shone bright search lights on the distressed ship to illuminate the desperate scene. The Melbourne was unable to move close to the schooner, so sixteen seamen, including Commander Hunt, volunteered to man the Melbourne’s lifesaving 12-oared cutter. They rowed the sea boat with great urgency towards the victims of the sinking ship, keen to save lives no matter what the conditions. When the cutter was close to the Sterling, a line was secured between the Sterling and the cutter. The weary, waterlogged and anxious men on board could be rescued, one at a time, in the breeches buoy equipment, which looked like canvas shorts with a lifesaving ring in the waistband. The victims were hauled along the line and pulled aboard by many willing hands. All eighteen crew and passengers were saved, including Captain Harris and his family. The seamen of the Melbourne received a heroes’ welcome when they arrived in New Zealand. The grateful survivors were taken to Auckland, where they received the care and comfort they needed. Melbourne’s Lord Mayor, Cr. Swanston, on behalf of the citizens of Melbourne, formally recognised the heroic rescue efforts of the seamen of the HMAS Melbourne on March 2nd, 1922, at a special presentation. Two large flags, a White Ensign and an Australian “Jack" Flag, were presented to the Captain of HMAS Melbourne, and souvenirs were awarded to the sea boat’s crew and its Commander, Wilfred Ward Hunt. Commander Hunt was also presented with an original watercolour depicting the heroic rescue from the wreck of the Helen B. Sterling, painted just after the event by renowned marine artist Arthur V Gregory (1867-1957), and he received a silver cigarette case bearing the City’s coat of arms and the inscription, "To Commander Ward Hunt from the Citizens of Melbourne as a memento of the rescue of the crew of Helen B. Stirling by H.M.A.S. Melbourne, on 23.1.22". Both the painting and the cigarette case are now treasured items inherited by his grandson; a reminder of “… a very fine naval gentleman who believed in leading by example." R.N. DUFFIELD: - The Lithograph print in our collection by 20th-century English artist R.N. Duffield is dated Nov. 19, 1924. It is very similar to, and possibly created from, the original A V Gregory watercolour presented to Commander Hunt and dated 1922. Mr R.N. Duffield has art works in the Yarmouth Museums, Norfolk Museums Collection; “Orient Liner Otranto …,” and "Convoy of six ships at sea", both painted in watercolour and gouache during the 1940s. Some of his other works, also painted in watercolour and gouache, have been advertised for sale on Internet sites. Some details differ between the original A.V. Gregory and this Lithograph Print: - -the words on the bow on the original watercolour are “Helen B. Sterling, Blain”, which is in Washington, USA, where the Sterling Shipping Company was registered from around 1919; the words on the print are “Helen B. Sterling, Halifax, N S”, for Nova Scotia, Canada, which is the hometown of Sterling Shipping Company founder’s wife, Helen B Sterling. -The watercolour is coloured and has fine details; the print is monochrome - The A V Gregory signed the watercolour in 1922, on the lower left; the print is signed with the Lithographer’s name on the lower right; “R N Duffield, Nov. 19. 1924” ARTHUR VICTOR GREGORY (1867-1957): - A.V. Gregory is a renowned marine artist who worked in watercolour and gouache. He painted actively between 1899 and 1932, creating over 3o0 works. South Melbourne, Victoria, was where he lived and worked. This Lithograph print is significant in that it depicts the rescuing of the passengers and crew of the schooner “Helen B Stirling”. At the time this was a significant event that made most Australian and New Zealand papers because of the involvement of the Australian cruiser “Melbourne”. The image demonstrates the perilous conditions experienced by seafarers. It includes an example of the line and breeches buoy method used to save lives at sea from the 1860s and into the 20th century. It reflects a time in our history when sail and steam ships cruised the world’s seas together, the former trading with a cargo of coal from Newcastle, the latter defending our country in World War I. The print is part of Flagstaff Hill Maritime Museum’s Collection of maritime artworks that depict famous events, vessels and locations, showing the evolution of sea craft, and aiding the interpretation of our maritime history. The Lithograph print is behind glass in a black painted timber frame and mounted under a cream matte. The vivid image depicts a sea rescue in progress. The night scene is illuminated by a light beaming from a steamship, the Cruiser HMAS Melbourne. It reveals figures on the deck of a sinking sailing ship, the schooner Helen B. Sterling, as foaming waves roll across it. The stricken ship has a broken main mast, and a sail has been detached. A small figure is floating in the choppy sea, secured in a breeches buoy that is attached to a rescue line between a lifesaving cutter and the sailing ship. The crewmen in the cutter are ready to haul the shipwrecked victim aboard, while the figures on the foundering ‘Sterling’ watch them. The print’s paper-covered wooden backboard is attached to the frame with small tacks. A metal hanging wire is secured to two dissimilar eyelet screws. Inscriptions include text on the bow of the sinking vessel, a handwritten title below the picture, and a handwritten name in the print’s lower right corner. On the reverse are two oval, black ink stamps and a round cream label with printed text. The hand-painted print was reproduced from a lithograph, signed in the lower right, by R.N. Duffield of England, on November 19th, 1924. A Frith of Footscray, Melbourne framed it. Painted on the ship’s bow: “HELEN B. STERLING / HALIFAX N S” [Nova Scotia, Canada] Handwritten below the print: “AUSTRALIAN CRUISER “MEMBOURNE” (Tons 5600) rescuing crew of sinking four-masted schooner “HELEN B. STERLING” of Halifax NS Canada, Tons 1343 in a gale in the Pacific Ocean.” Handwritten on lower right: “R.N. DUFFIELD / Nov. 19. 1924” (underlined) On paper label: “Phone: / Footscray 398 [some of the text has torn off] / “A. FRITH / PICTURE FRAMER / Manufacturer / 17 Paisley Street / Footscray.“ On both oval stamps: “SHIPLOVERS SOCIETY OF VICTORIA / LIBRARY” flagstaff hill, flagstaff hill maritime museum and village, warrnambool, maritime museum, maritime village, great ocean road, shipwreck coast, lithograph, lithograph print, reproduction print, helen b. sterling, the sterling, american owned schooner, halifax, halifax n s, halifax nova scotia, nova scotia, halifax n s canada, schooner, windjammer, sailing ship, four-masted ship, captain george harris, george harris, edith harris, leslie harris, sterling shipping line, hmas melbourne, hmas melbourne (1), cruiser hmas melbourne, the melbourne, australian cruiser, captain henry j feakes, commander wilfred ward hunt, sinking ship, shipwreck, sea rescue, gale, cyclone, 1922 rescue, shipwreck rescue, breeches buoy, line rescue, rescue line, lifesaving, cutter, cutter melbourne, sea boat, lifesaving crew, 12-oar cutter, shipwreck victim, r.n. duffield, marine artist, nov. 19. 1924, 20th century artist, a frith, footscray picture framer, shiplovers’ society of victoria, shiplovers’ society library, watercolour, a v gregory, arthur victor gregory, melbourne artist, newcastle coal, newcastle nsw, society islands, san fracisco, aukland new zealand, school composition, ship’s cat, sos signal, lord mayor cr. swanston, heroes, cigarette case -
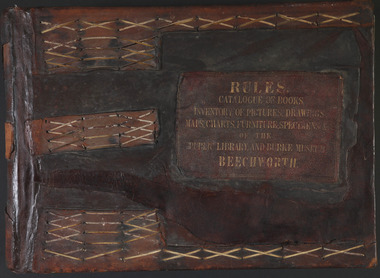 The Beechworth Burke Museum
Book - 1875 Catalogue, William Detmold, RULES / CATALOGUE OF BOOKS / INVENTORY OF PICTURES, DRAWINGS, / MAPS, CHARTS, FURNITURE, SPECIMENS / OF THE / PUBLIC LIBRARY AND BURKE MUSEUM / BEECHWORTH, 1875
This large, leather bound journal was made for the Public Library and Burke Museum in Beechworth by book manufacturer, William Detmold in 1875. It was commissioned by the President of the Library and Burke Museum committee, Dr Antoine Mousse, for the purpose of cataloguing all the items in the collection. The cataloguer was the curator at that time, William Morton, whose hand-writing appears in the journal today. When William Morton first started recording in this journal in 1875, there were already a number of existing items in the institution. The Public Library and Burke Museum in Beechworth had actually been operating since the 1850s; first as a Young Men’s Association in 1856, then as Beechworth Athenaeum in 1858, then as the Beechworth Public Library in 1860. Then in 1861 when news of the death of Beechworth’s former police superintended, Robert O’Hara Burke, reached the town, it was agreed that the Public Library would also become a museum to tribute his legacy, renaming it as the ‘Public Library and Robert O’Hara Burke Memorial Museum, Beechworth’. Many of the items from the early institutions would have been used to form the nucleus of this new organisation. Plus, the additional items that were either collected or donated to develop it into a museum. The catalogue is extensive. There are exactly 461 pages of recorded items, each page detailing the various collections the museum acquired in the late 19th century. Collections recorded in this catalogue include a large collection of geological specimens, that were given to the museum in 1868 by the Geological Survey Department of Victoria. A large collection of taxidermy mounts, that were given to the museum as skins by the Museum of Australia in 1865. An extensive collection of Aboriginal artefacts that were purchased from amateur anthropologist R. E . Johns in 1868. As well as artworks, charts, photographs, machinery, maps etc., all of which have been held in the museum since. This catalogue also details the governance and management of the organisation. There were originally 30 rules that governed the actions for the management committee and, while anyone could read in the free library, only subscribers could borrow two books and one periodical. At first, subscriptions rates were 7/6 a quarter. This was later changed to £1 per annum, paid quarterly in advance. This was a considerable amount; 7/6 per quarter meant that the annual fee was £1.10. This was equivalent to about £650.00 or about $1,182.00AUD today, while the reduced subscription fee of £1 a year was the equivalent to £450.00 or about $818.00AUD today. Membership of the athenaeum would have been the reserve of the town's notable citizens. The vale of the catalogue lies not only in its historical connect with the establishment of the Athenaeum and the current museum, but also in its record of the names and positions of all members of the institution's committees of management from 1875-1876. This is a unique object that contains important records for a notable country town. Large brown leather bound book made in 1875 for the Beechworth library and museum by William Detmond. Inside is a comprehensive and detailed itemised listing of the paintings, drawings, charts, photographs, specimens and books that entered the institution from 1850 -1882. non-fictionCover: RULES / CATALOGUE OF BOOKS / INVENTORY OF PICTURES, DRAWINGS, / MAPS, CHARTS, FURNITURE, SPECIMENS / OF THE / PUBLIC LIBRARY AND BURKE MUSEUM / BEECHWORTHburke museum, beechworth, catalogue, museum catalogue, 1875, william morton, william detmold, exposition universelle, ferdinand von mueller, public library, collection, book, leather bound, restored, digitised, robert o'hara burke, hand-written -
Eltham District Historical Society Inc
Document - Folder, Marshall, Robert
Robert Marshall grew up on a small farm in Panton Hills in the 1950s and became an architect, designing in an Australian style, sometimes working with Alistair Knox. Marshall first stood for local council in 1974, having to overcome a childhood stutter by relaxation techniques. He was active in the formation of Nillumbik shire; after 20 years as councillor, he was elected president for 1978 and 1979. In February 1997, his adopted son Stewart Anthony Marshall died as the result of a drug mix-up. He lived in St Andrews and his business was in Hurstbridge. Contents Newspaper article: "Rob Marshall: fist of steel in a glove of green", The Valley Voice, 24 January 1979, describing Robert Marshall's childhood and his thoughts about house design and conservation. Newspaper article: "Councillor marshals energy for next round", Diamond Valley News, no date, Robert Marshall plans to stand again for council after the amalgamation of council, describing. his vision for the district citing Alistair Knox and Don Maling as pioneers. Newspaper article: "...and your new shire president", Diamond Valley News, March 1997, Former Eltham councillor Robert Marshall elected Nillumbik Shire president. Newspaper article: "Drug mix-up led to death: court told", unknown newspaper, 28 May 1997, Report of Coroners Court hearing into death of Stewart Anthony Marshall, Robert Marshall's son. Newspaper article: "Shire chief set to pay outstanding rate bill", Diamond Valley News, 30 July 1997, Robert Marshall had not paid rates in protest during government-appointed commissioners were in power but was paying off the debt. Newspaper article: "An architect for a better way of life", Diamond Valley News, 11 August 1981, Describing Robert Marshall's travels after qualifying as an architect, his early life and his philosophy on conservation. Newspaper article: "He presides over the city's last green belt. But was does Robert Marshall make the State Government see red?" The Age, 10 January 1998, Describing dispute between Nillumbik Shire president Robert Marshall and CEO Barry Rochford, and Rochford's termination package and Marshall's environmental campaigns including the old Eltham Shire Office site. Newspaper letter: "For good governance", letter from Robert Marshall, following his defeat at recent council election after 25 years in local government, comments on his actions as president and wishes new councillors well. Newspaper clippings, A4 photocopies, etcrobert marshall, panton hills victoria, alistair knox, stewart anthony marshall, ross ray qc, vauclause hospital, benny monheit, adam bernhaut, geoff pittaway, metropolitan ambulance service, ambulance service victoria, eltham gateway action group, barry rochford, eltham shire offices site, frank lynch, eltham chamber of commerce, barry miller, rob maclellan planning minister, green wedge, don maling -
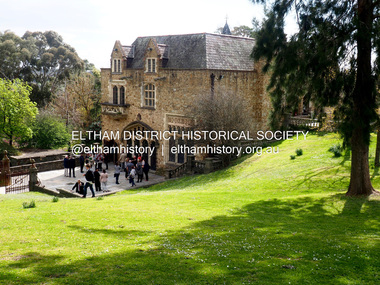 Eltham District Historical Society Inc
Photograph - Digital Photograph, Jim Connor, Eltham Cemetery Trust's launch at Montsalvat of Our Eltham - Artistic Recollections, 21 September 2017
Our Eltham - Artistic Recollections by Jim Connor, EDHS newsletter No. 236 October 2017 The Eltham Cemetery Trust, established in 1858, selected the existing burial site at Mount Pleasant Road on high ground overlooking the village of Eltham. The first recorded burial took place in 1861 in the Church of England section. Headstones depict the names of many early and well known local families. In recent years the Trust has encouraged the use of creative artistic elements within the natural bushland environment in their landscaped grounds adjoining Montsalvat. Their ongoing vision has been to offer the local communty a fresh and unique relationship to the Cemetery. On Thursday 21st September 2017 their latest commissioned art project titled ‘Our Eltham - Artistic Recollections’ was unveiled. It is a collection of panels collaboratively created by artist Nerina Lascelles and ceramicist Linda Detoma. The project was designed and constructed by Leigh Wykes using Australian stone with ironwork by Neil Carter. All contributors to this installation, located adjacent to the car park near Metery Road, are residents of the Eltham area. Our Eltham - Artistic Recollections is described as a celebration of life in the Shire since the opening of the Eltham Cemetery more than 150 years ago. Depicting scenes of life in and around Eltham, the collection offers deeper connections to the Eltham area through a series of visual narratives of Eltham’s past, environment and community. The project involves the artistic interpretation by Nerina Lascelles of historic and current images symbolically intermixed with locally indigenous flowers and plants. These are displayed on thirty-one ceramic panels by Linda Detoma, mounted within an iron fence by Neil Carter, upon an attractive rock wall constructed by Leigh Wykes. The Eltham District Historical Society is pleased to have contributed to this project. Russell Yeoman and Jim Connor from our Society have collaborated with Liz Pidgeon, Local and Family History Librarian at Yarra Plenty Regional Library on a selection of photographs, many from the Shire of Eltham Pioneers Collection we hold in partnership, located at Eltham Library. We also provided information on the images chosen. The Eltham Cemetery Trust has produced a booklet about this artwork, which can be viewed on the Cemetery website at: http://www.elthamcemetery.com/oureltham/#1 Our Eltham - Artistic Recollections is a significant monumental installation, which will encourage visitors to come to view this outstanding combination of local creative skills, set within the attractive grounds of the Eltham Cemetery. jim connor collection, eltham cemetery trust, montsalvat, our eltham artistic recollections, 2017-09-21 -
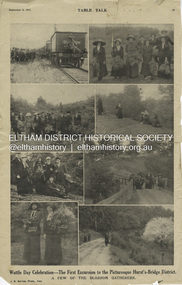 Eltham District Historical Society Inc
Magazine Article, J.E. Barnes, Wattle Day Celebration - The First Excursion to the Picturesque Hurst’s-Bridge District; A few of the blossom gatherers; Table Talk, September 5, p23, 1912
The September 5, 1912 issue of Table Talk celebrated "Wattle Day" where new plantings are made of the national flower and featured images from both Melbourne as well as the first excursion to Hurstbridge. Those from Hurstbridge were photographed by notable WW1 photographer, J.E. Barnes. Also digitised and accessible via National Library of Australia Trove website - (1912, September 5). Table Talk (Melbourne, Vic. : 1885 - 1939), p. 23. Retrieved July 28, 2024, from http://nla.gov.au/nla.news-page17413107 See an article on reflections about Wattle Day on page 29 - SOME REFLECTIONS UPON WATTLE DAY. (1912, September 5). Table Talk (Melbourne, Vic. : 1885 - 1939), p. 29. Retrieved July 28, 2024, from http://nla.gov.au/nla.news-article146180986 The inaugural Hurstbridge Wattle Day Festival was held Saturday, September 1, 1912 when a specially commissioned train brought 1,000 visitors to the district to enjoy the splendour of the wattle in bloom. “Melbourne’s first “Wattle Day” Campaign, the day when Australia’s national flower was to be all pervading in the streets of the metropolis, and sold in sprigs and bunches by hundred of lady volunteers, for purposes of charity, was not blessed with happy climatic conditions on Monday [2 Sep 1912]” - WATTLE DAY. (1912, September 7). Leader (Melbourne, Vic. : 1862 - 1918, 1935), p. 39. Retrieved July 28, 2024, from http://nla.gov.au/nla.news-article198116738 “In connection with Wattle Day celebrations a special train conveyed a thousand people to Hurst's-Bridge last Saturday afternoon [1 Sep 1912]. Lengthy reports of the excursion appeared in the daily papers last Monday. - WATTLE DAY. (1912, September 6). Evelyn Observer and Bourke East Record (Vic. : 1902 - 1917), p. 2 (MORNING.). Retrieved July 28, 2024, from http://nla.gov.au/nla.news-article60656027 See a review of the excursion to Hurst’s-Bridge - HURST'S-BRIDGE EXCURSION. (1912, September 2). The Age (Melbourne, Vic. : 1854 - 1954), p. 9. Retrieved July 28, 2024, from http://nla.gov.au/nla.news-article196255907 The excursion to Hurst’s-Bridge was considered such a success that the Railway department arranged to run another special train to the station on Saturday, October 5, 1912 - HURST'S-BRIDGE EXCURSION. (1912, October 2). The Age (Melbourne, Vic. : 1854 - 1954), p. 10. Retrieved July 28, 2024, from http://nla.gov.au/nla.news-article203325447Inaugural Hurstbridge Wattle Day Festival held 1 September 1912d3-class steam locomotive, hurstbridge wattle festival, special train, tait train, tourism, wattle day campaign, wattle day festival, david smyth collection -
 Eltham District Historical Society Inc
Photograph, Peter Pidgeon, Official opening of the restored Eltham Courthouse, 730 Main Road, Eltham, 23 Mar 2022
Eltham Courthouse Officially Reopened (Jim Connor, EDHS Newsletter No. 263 April 2022) In the Conservation Management Plan prepared in 2006 for the Eltham Justice Precinct there is mention that more than 350 court houses have been built by the Public Works Department since 1856, when the Department was established. It also states Eltham was in an early group of 'Victorian Free Classical' structures, featuring a projecting entry porch and gabled roof. Characteristically, this group shares a simple, rectangular shape, central placement of the court room with smaller-scale offices set back at the sides or rear of the court room, arched openings, and decorative string courses. The Statement of Significance listed in the Victorian Heritage Register states: ‘The Eltham Court House dates from the time when the town was largely self-contained. It was initiated in response to itinerant gold prospectors who turned to crime when their quest was unsuccessful. This type of localised solution is characteristic of the self reliance preserved in Eltham today. The court house is an important symbol of the spirit which makes Eltham distinctive as a community.’ It also states: ‘The Eltham Court House, built in 1860, is one of only two intact examples in the state of this simple design with projecting entry.’ So with this background it is most appropriate this valued historic building has recently been the subject of a total restoration, as detailed in previous newsletters. This was a major project undertaken by Nillumbik Shire Council. At a small function in the Eltham Courthouse, on 23rd March 2022, Nillumbik Shire Council Mayor Fran Eyre declared the fully restored building officially reopened. In doing so the Mayor spoke about the earlier law and order function of the court and the importance of this building to the Eltham community. Wingrove Ward Councillor Geoff Paine then highlighted the importance of historical societies and groups within the shire and their valued activities in recording and preserving their local history. EDHS president Jim Connor thanked everyone involved with the project and provided an overview of the history of the courthouse. Michael Ioannides, Council’s project manager, spoke about how the restoration process proceeded and those involved in undertaking the works required. Cr. Natalie Duffy, various council officers, EDHS executive committee members, as well as representatives of the head contractor Ducon Building Services and the heritage advisors, RBA architects and Conservation Consultants, were also in attendance, as was a representative of Nillumbik U3A. After the formal part there was some light hearted interpretation of how past legal proceedings may, or may not have, occurred within this courthouse, before some refreshments were shared in the former second courthouse at the rear, which is now utilised by Nillumbik U3A. This was a successful celebration of a very worthwhile project.Born digital image (38)conservation consultants, cr. geoff paine, cr. natalie duffy, ducon building services, eltham courthouse, eltham district historical society, eltham justice precinct, jim connor, mayor cr. fran eyre, michael ioannides, nillumbik shire council, nillumbik u3a, opening ceremony, rba architects, restoration project -
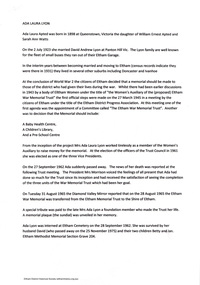 Eltham District Historical Society Inc
Document - Folder, Lyon, 2014
ADA LAURA LYON Ada Laura Apted was born in 1898 at Queenstown, Victoria the daughter of William Ernest Apted and Sarah Ann Watts On the 2 July 1923 she married David Andrew Lyon at Panton Hill Vic. The Lyon family are well known for the fleet of small buses they ran out of their Eltham Garage. In the interim years between becoming married and moving to Eltham (census records indicate they were there in 1931) they lived in several other suburbs including Doncaster and Ivanhoe At the conclusion of World War 2 the citizens of Eltham decided that a memorial should be made to those of the district who had given their lives during the war. Whilst there had been earlier discussions in 1943 by a body of Eltham Women under the title of "the Women's Auxiliary of the (proposed) Eltham War Memorial Trust'' the first official steps were made on the 27 March 1945 in a meeting by the citizens of Eltham under the title of the Eltham District Progress Association. At this meeting one of the first agenda was the appointment of a committee called "The Eltham War Memorial Trust''. Another was to decision that the Memorial should include: A Baby Health Centre, A Children's Library, And a Pre-School Centre From the inception of the project Mrs Ada Laura Lyon worked tirelessly as a member of the Women's Auxiliary to raise money for the memorial. At the election of the officers of the Trust Council in 1961 she was elected as one of the three Vice Presidents. On the 27 September 1962 Ada suddenly passed away. The news of her death was reported at the following Trust meeting. The President Mrs Morrison voiced the feelings of all present that Ada had done so much for the Trust since its inception and had received the satisfaction of seeing the completion of the three units of the War Memorial Trust which had been her goal. On Tuesday 31 August 1965 the Diamond Valley Mirror reported that on the 28 August 1965 the Eltham War Memorial was transferred from the Eltham Memorial Trust to the Shire of Eltham. A special tribute was paid to the late Mrs Ada Lyon a foundation member who made the Trust her life. A memorial plaque (the sundial) was unveiled in her memory. Ada Lyon was interned at Eltham Cemetery on the 28 September 1962. She was survived by her husband David (who passed away on the 25 November 1975) and their two children Betty and Ian. Eltham Methodist Memorial Section Grave 204. [Author: Jim Allen c.2014] Folder of information on Lyon family. Contents: 1. Ada Laura Lyon (nee Apted) - biography written by Jim Allen (1 A4 page)biography, ada laura lyon (nee apted), david andrew lyon, eltham war memorial trust, sarah ann watts, william ernest apted -
 Bendigo Military Museum
photograph - Cartographic Squadron Production – Army Survey Regiment, Fortuna, c1980
This collection of 12 photos was most likely taken in 1980. The photos were most likely taken in Cartographic Squadron’s Ante Room, the Attic and small offices on the top floor of Fortuna Villa. The computer based Editwriter typesetting system was introduced in 1975 as a replacement to the aging Fotosetter machine. It was operated by a specialised technician, who generated a large variety of map type styles and sizes quickly and reliably, as well as text panels. CPL Richards performed this task for several years and in photo .1P and .2P is reading off a type order next to the computer monitor. Output on Copy proof adhesive backed stripping type film replaced messy wax and spray adhesives in 1978. The Editwriter capability supported all RASvy units and contractor type setting requirements. Scribing was the cartographic process of drafting features such as drainage, relief, vegetation, roads and culture on specially coated map reproduction material. The cartographic technician scribed out the map feature such as a contour to a specified line width on the map sheet, using a tool affixed with a sapphire tipped cutter. The quality control edit (Proving) stage of map production was the first opportunity to inspect a proof of the map independently and systematically. Proving tasks were carried out by technicians conversant of the map product specification and task requirement, however, was not involved in its production. Corrections were identified, marked up and sent to back to the correcting section or contractors. Terrain Embossing was a manual map production technique to produce hill shading on medium to small scale graphics and air charts. SPR John Martin is seen in photos .8P to.10P using a fine embossing metal stylus to push down on the drainage impression on a thin malleable opaque plastic material (AK Poligraphy). Ridge lines were then pushed down using the contour impression as a guide, on the opposing side of the AK Poligraphy to create a 3D plastic model terrain effect. The map impression was sprayed with white paint and photographed to create a contone tone hill shade. SPR Gina (Coore) Neilson is seen in photo .11P washing a contone positive of a land mass in a solution. The contone components were registered to the map sheet, as shown in photo .12P and masked using an air brush and a halftone negative was then created. The terrain embossing method of producing hill shading was more efficient to produce than previous specialised artistic methods such pencil/eraser and air brush. Furthermore, a more consistent enhancement of terrain on charts was achieved between technicians.This is a set of 12 photographs of Cartographic Squadron performing four map production tasks at the Army Survey Regiment, Fortuna, Bendigo c1980. The first ten photographs were on 35mm negative film and were scanned at 96 dpi. Photos .11P and .12P were on photographic paper and scanned at 300 dpi. They are part of the Army Survey Regiment’s Collection. .1) - Photo, black & white, c1980, Editwriter typesetter, CPL Paul Richards. .2) - Photo, black & white, c1980, Editwriter typesetter, CPL Paul Richards. .3) - Photo, black & white, c1980, Scribing contours on a RAAF Chart, SPR Megan (McBurney) Reynolds. .4) - Photo, black & white, c1980, Scribing contours on a RAAF Chart, SPR Megan (McBurney) Reynolds. .5) - Photo, black & white, c1980, Scribing contours on a RAAF Chart, SPR Rod Skidmore. .6) - Photo, black & white, c1980, Scribing contours on a RAAF Chart, SPR Rod Skidmore. .7) - Photo, black & white, c1980, Formal quality control edit (Proving), CPL Ian Belmont. .8) - Photo, black & white, c1980, Hill Shade Terrain Embossing, SPR John Martin. .9) - Photo, black & white, c1980, Hill Shade Terrain Embossing, SPR John Martin. .10) - Photo, black & white, c1980, Hill Shade Terrain Embossing, SPR John Martin. .11) - Photo, black & white, c1980, Hill Shade Terrain Embossing, SPR Gina (Coore) Neilson. .12) - Photo, black & white, c1980, Hill Shade Terrain Embossing, unidentified..1P to .10P No personnel are identified. .11P and .12P annotated ‘Terrain Embossing’royal australian survey corps, rasvy, army survey regiment, army svy regt, fortuna, asr, carto -
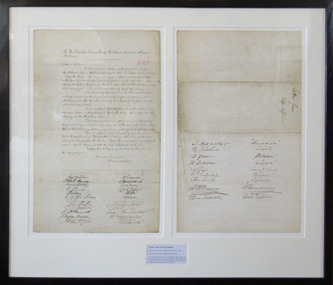 Mission to Seafarers Victoria
Print - Reproduction, Petition, The Photography Department (Jeremy Dillon), Captains' Petition, 2016
This is a reproduction of the original 1897 Captains' petition to build a Central Institute on the Yarra river. "To the Executive Committee of the Victorian Seamen's Mission, Melbourne. "Ladies and Gentleman, "We, the undersigned captains of several ships now lying at the Melbourne wharves think it most desirable that the Victorian Seamen's Mission, being the mission that has for so many years shown a most part their interest in the spiritual, moral, and social well-being of the seamen of all nationalities, shall him on the banks of the Yarra an institute such as that at Port Melbourne, where sailors of every grade could profitably and pleasantly spend their evenings. At almost every other seaport in the world such institutions are being provided for seamen, and we are satisfied from our opinion of the Melbourne public that the matter needs only to be prominently brought under their notice to be accomplished. We are confident that the good work of the mission is being hampered by its not having such a place near the shipping at the Melbourne wharves. Our crews are at present placed at a great dis advantage through not having an institute more convenient to the scene of their labours than that at Port Melbourne, which, on a very wet or a very hot, is not easily reached. If a site could be obtained immediately above the Gasworks but on the other side of Flinders street extension, that is to say, on the lower part of the land on which the Harbour Trust offices are built, it would be most convenient for the shipping on both the north and south side of the river. Trusting that it may be possible to do some thing to meet this long felt want, We suscribe ourselves, Yours respectfully, Geo.H Steven, master ship Dharwar; Thos. Curd, master ship Narcissus; James Horne, master ship Loch Garry; T.Tait, master ship Loch Ryan; T. Nilsen, master ship Hebe; G. Ch Christian, master ship Anna; R.E. Peasley, master ship Seminole; Wm. Martin, master ship Loch Ness; T.C. Martin, master ship Loch Tay; W.H. Bennett, master ship Loch Vennachar; J. Raglan Brodie, master s.s. Warrnambool; James E. Coles, master ship Mermerus; J. H. Walker, master ship Hinemoa; R.J. Johns, master ship Ariel; D. Gorchem (sic. Gerckens), master ship Matador; H. Petersen, master ship Nesaia; Wm. J. Reid, master s.s. Star of New Zealand; A. F. Svhanstrom, master ship Hermes; Alex. Smith, master ship Sophocles; W. Y. Bunn, master ship Carmanian; William Anderson, master ship Loch Katrine."Framed and mounted reproduction of Captains' petitionpetition, seamen's mission, yarra river, captains, victoria, melbourne, ships, australia-wharf, signatures, 717-flinders-street-docklands, maritime welfare services, mission to seafarers, mission to seamen, mermerus, captain coles, sir john coode, loch line, loch ness, loch gary, loch ryan, ss warrnambool, loch tay, loch vennachar, matador, nesaia, d. gerckens, h. petersen, a.f. svhanstrom, hermes, ariel, loch katrine, william anderson, dharwar, narcissus, hebe, anna, hinemoa, sophocles, carmanian, early origins, 2016, exhibitions -
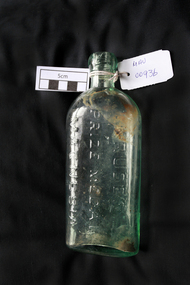 City of Moorabbin Historical Society (Operating the Box Cottage Museum)
Manufactured Glass, bottle 'Kruse's Magnesia', 20thC
Johann August (John) Kruse was instrumental in the development of the pharmaceutical industry and pharmacy training in Victoria. He was a driving force behind the creation of the Pharmaceutical Society of Victoria and was appointed a founding member of the Society's inaugural council in 1857. He manufactured many pharmaceuticals and health products such as mineral waters and 'Kruse's Fluid Magnesia' (1863) which is still in use today. He later went on to produce insecticides and dynamite, then established his own analytical chemistry service. In 1878 Kruse established Victoria's first pharmacy training facility - the Melbourne School of Pharmacy. There pharmacy apprentices were taught chemistry, botany, materia medica and Latin, while country students could study by correspondence. The School was endorsed and monitored by the Pharmacy Board of Victoria to which Kruse was appointed in 1880. Kruse's pharmacy school was the forerunner of the Victorian College of Pharmacy, Monash University, which remains Victoria's only pharmacy training institute. In 1853, shortly after qualifying as pharmacist at the University of Göttingen, Johann August (John) Kruse, moved to London. The medical practitioner Dr S. Weil sent Kruse to Victoria, Australia to manage a new pharmacy and tobacconist's shop which he was having built at 136 Bridge Rd in Richmond. In 1856 Kruse opened a second pharmacy 'John Kruse and Company Chemists and Druggists' at 207 Bourke Street. 1857 the Richmond shop was destroyed by fire, so all pharmaceutical production was moved to the Bourke St premises and later to his new location at 184 Bourke St.. Kruse was forced to sell his business in 1868 to Felton Grimwade and Company and work for them as manager of their chemical works. By the early 1870s he had regained financial independence so left the company to establish his own businesses again. He opened up a pharmacy at 31 Swanston St and in c1874 leased Victoria's premier natural springs, Clifton Springs, on the northern side of the Bellarine Peninsula, where he established a bottling plant. Suspensions of magnesium hydroxide in water, often called Milk of Magnesia, are used as an antacid to neutralize stomach acid, and as a laxative. Milk of magnesia is sold for medical use as chewable tablets, capsules, and as liquids having various added flavours Kruses Fluid Magnesia 300ml Extralife Kruse’s Fluid Magnesia, Magnesium supplement. Rapidly absorbed, easily digested. Improves general well being, corrects magnesium deficiency. Helps relieve indigestion, when due to acidity. In 1878 Kruse established Victoria's first pharmacy training facility - the Melbourne School of Pharmacy, the forerunner of the Victorian College of Pharmacy, Monash University, which remains Victoria's only pharmacy training institute. A glass bottle containing ‘Kruse’s’ Magnesia’ medicineKRUSE’S / PRIZE MEDAL / MAGNESIA/ K / FELTON-GRIMWADE & CO. MELBOURNE Directions for use ......glass works, pharmaceutical glass, pharmacy, kruse johann august (john), dr weil s, ., victorian college of pharmacy, monash university, university of göttingen, felton grimwade and company, magnesium bicarbonate, magnesium oxide -
4th/19th Prince of Wales's Light Horse Regiment Unit History Room
Order of Ceremony, The Royal Australian Amored (sic) Corps the Keeffe Family & Eoghan McDonald Celebrates (sic) the Unveiling of a Commemorative Plaque 16 November 2014, 2014
The 13th Australian Armoured Regiment was a Gippsland militia unit that had been called up for full time duty in December 1941 as a traditional light horse regiment. The early months of 1942 had seen the regiment lose its horses, a conversion to a motor regiment and finally to an armoured regiment in May. During this period there were considerable changes in personnel, however the regiment maintained its strong links to Gippsland and its former identity. Between May and November 1942, individual soldiers had become proficient in their trade training and the regiment changed its focus to troop and squadron activities. On 16 November 1942, the unit was located at the Puckapunyal Army Camp. C Squadron's training program involved a night driving exercise where a column of armoured and B vehicles would depart camp at 0245 hours and proceed to a site to the East of Seymour and set up a bivouac between Whiteheads Creek and Highlands Road. Numerous army camps surrounded the Seymour area; and much of the surrounding farm land had been acquired for military purposes. By November 1942 exercises such as C Squadron's were commonplace and had been repeated on numerous occasions since 1939. At 0400 hrs, C Squadron's vehicles reached O'Sullivan's Paddock on the Kobyboyn Road; prior to reaching the Old Telegraph Road the column turned to the North towards a known crossing point on Whiteheads Creek. The column consisted of seven M3 Medium Tanks and four Universal Carriers. In the case of Corporal McLeod's vehicle, there were seven crewmen rather than the usual five man crew. On arrival at the creek crossing, Captain C.M.I. 'Sandy' Pearson dismounted and with the assistance of Sergeant R.J. Ball began to guide individual tanks across the creek. Four tanks had crossed the creek without difficulty when Corporal McLeod's tank, ARN 24652, began its descent. Captain Pearson stated at the Coroner's Inquiry in December 1942, "Whilst climbing out of the ford the vehicle swerved to the left, apparently striking the tree. It was not the portion of the tank (front) that struck the tree. The tank straightened and appeared to be well under control, suddenly the bank on the left collapsed to the extent of 3ft by 12ft by15ft long causing the vehicle to slide into the creek and turn upside down." Captain Pearson and Sergeant Ball were faced with a nightmarish situation: The Grant had come to rest upside down in soft mud, six crew members were unaccounted for, escape hatches could not be opened and the weight of the tank was settling deeper into the water and mud. Compounding the problem was that the location of the tank did not allow for the other tanks to safely conduct a recovery. It was truly the darkest night.Single A4 card. folded, Contains an account of the raising of 13 Armoured Regiment in December 1941and a tank accident during a night creek crossing in which six crewmen were killed, and, Order of Ceremony for plaque unveiling, Guest of Honour LtCol Stuart Cree CO/CI School of Armour13 armored regiment, tank accident, puckapunyal -
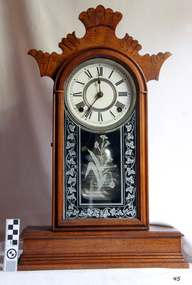 Flagstaff Hill Maritime Museum and Village
Domestic object - Clock, late 1900s early 20th Century
In 1850 the Ansonia Clock Company was formed as a subsidiary of the Ansonia Brass Company by Phelps and two Bristol Connecticut clock makers, Theodore Terry and Franklin C. Andrews. Terry & Andrews were the largest clock manufacturers in Bristol at the time with more than 50 employees using 58 tons of brass in the production of about 25,000 clocks in 1849. Phelps decided to get into the clock making business to expand the market for his brass, while Terry and Andrews got access to better quality brass at better prices. They had then sold 50% of their business to Phelps and moved the business to Ansonia, Connecticut. In 1877 the clock company purchased a factory in New York and moved most of its production thereafter being spun off from the brass company. Henry J. Davies of Brooklyn, himself a clock maker, inventor and case designer, joined the newly reconstituted company as one of its founders. As President, he is thought to have been largely responsible for the figurine clocks, swing clocks and other unusual and desirable novelties for which the Ansonia firm became known. By 1879, a second factory was opened in Brooklyn, New York and by June 1880 employed 360 workers, while the Connecticut factory continued producing clocks as well with a workforce of 100 men and 25 women. Hence, clocks marked "Connecticut" were generally produced before 1879, while those marked "New York" were all produced after 1880 After the New York factory burnt down in 1880 the company rebuilt the factory on the same site, and reopened the expanded factory in 1881, with a capacity to exceed that of the Connecticut factory which by 1883 had closed. By 1886, the company had sales offices in New York, Chicago and London, with more than 225 different clock models being manufactured. In 1899, Phelps' grandson William Earle Dodge Stokes commissioned architect Duboy to build the "greatest and grandest hotel in Manhattan, New York” which became the city's first air-conditioned building. In 1929 the majority of the timekeeping machinery and tooling was sold to the Soviet government's US trading company Amtorg, just before the stock market crash. The parts, machinery and key skilled workers were shipped out of the USA to form the basis, along with the remains of a watch company purchased a year later, of the clock and watch industry in Moscow such as Poljot and Sekonda. In 1969, the rights to the use of the name, trademarks, and goodwill were transferred to Ansonia Clock Co., Inc., Lynnwood, Washington. The item marks the beginning of mass produced clocks in the United States, cheaply priced and available to all. The company had many innervation's during it’s life regards clock and later wrist watch making that led the way for other companies in many different countries to emulate.Clock, pendulum mantle model. Carved scallop "Ginger bread house" cottage clock. Oak case, white enamel face, floral etched glass door. Clock has an hour bell chime. Glass front opens to allow rewinding. Made by Ansonia Clock Co, New York. Marked "Manufactured by Ansonia Clock Co. New York, USA"flagstaff hill, warrnambool, shipwrecked coast, flagstaff hill maritime museum, maritime museum, shipwreck coast, flagstaff hill maritime village, great ocean road, mantle clock, clock, pendulum clock, time keeper, horology, ansonia, ansonia clock co, america -
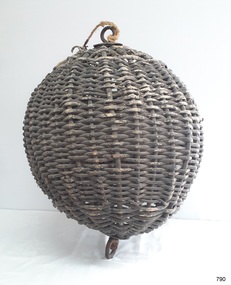 Flagstaff Hill Maritime Museum and Village
Equipment - Distant Signal, 1897-1931
This three-dimensional Distant Signal is part of a Flagstaff Signal set of ball, cone and drum shapes. It has been woven and then fabricated with strong metal swivel fittings and loops for suspending from a high point on a flagstaff at a signal station or on a ship’s masthead. The cane signal was constructed to withstand all weather and to be visible from a long distance. The gaps between the woven cane allow air to pass through, minimising possible swaying. Similar sets were made from rope or fabric. Warrnambool's Flagstaff was erected in 1854. Its primary use was to display visual signals that could convey messages between land and sea. It was also used to notify the local population of the approach of ships. One of the popular signalling codes in use in the early-to-mid 1800s was the Marryat’s Code but there were others in use as well; there was no one standard code. In 1857 the International Marine Conference adopted an International Code of Signals as a standard communications system for all vessels that could be understood in many different languages. The Normanby Advertiser reported on June 5th 1857 a query from the Post Master General as to whether the request of the Chief Harbour Master would be carried out, in that Warrnambool would receive a new flagstaff and a set of Marryatt’s signal flags. The Table of Codes was published, showing how to use combinations of these flags to send messages. The Code was revised in 1887 to cover situations where distance, light, wind and weather conditions affected the visibility of the flags and prevented clear communication. The first report of the International Code of Signals Committee of 1897 warned signalmen not to rely on ordinary semaphore flags and introduced a Distant Signal Code using either particular semaphore flags or the three-dimensional shapes of a ball, cone and drum that aligned with the semaphore flag shapes of a circle, pennant and square. International Code of Signals In 1931, after World War I’s experiences in using signal codes, the International Code of Signals conference in Washington revised and published the rules for the conduct of signalling. One of the changes was that “the use of the Distant Signals and of fixed semaphore was abandoned”. It is of interest to know that modern marine law in many countries insists that a set of Day Shapes must be carried onboard vessels of a certain size. These highly visible geometric shapes are used at sea in daylight to communicate messages between vessels. They are used in a similar way to the Distant Signals, in that different combinations of shapes represent different messages. The set of shapes includes a ball, cylinder, cone and diamond. The shapes are hung between the top of the vessel’s foremast and the front of the vessel. They are only coloured black and are about 1.5 metres high. The vertical line of shapes can mean messages such as Boat not under command, Fishing, and Under sail and power.Distant Signals were an important means of marine communication from the late 1880s to the early 1930s, including during World War I. They were an advancement to the International Shipping Codes and safety. The cane signals’ shapes appear to be the same from whatever direction they are viewed, removing confusion about the message they convey. The same shapes continue to be used today for the sets of Day Shapes used as marine navigational signals that are mandatory on certain-sized vessels.Distant Signal Ball, part of a Flagstaff signal set. A round woven cane ball, painted black, with a metal rod passing through the centre. The rod has a loop at each end, then a concave, octagonal metal plate that rests on the outside surface of the ball, serving as a washer. The rod has swivels at each end.flagstaff hill, flagstaff hill maritime museum and village, warrnambool, maritime museum, maritime village, great ocean road, shipwreck coast, distant signal, signal, maritime signal, ball signal, signal shape, flagstaff signal, signal station, masthead signal, communications, marine technology, signals, marine signals, flaghoists, international marine conference, international code of signals, signal codes, marine safety, signal flags, day shape, daymark, day symbol, navigation, warrnambool flagstaff, 1854, 1857 1931, 1887, 1897 -
 Flagstaff Hill Maritime Museum and Village
Equipment - Distant Signal, 1897-1931
This three-dimensional Distant Signal is part of a Flagstaff Signal set of ball, cone and drum shapes. It has been woven and then fabricated with strong metal swivel fittings and loops for suspending from a high point on a flagstaff at a signal station or on a ship’s masthead. The cane signal was constructed to withstand all weather and to be visible from a long distance. The gaps between the woven cane allow air to pass through, minimising possible swaying. Similar sets were made from rope or fabric. Warrnambool's Flagstaff was erected in 1854. Its primary use was to display visual signals that could convey messages between land and sea. It was also used to notify the local population of the approach of ships. One of the popular signalling codes in use in the early-to-mid 1800s was the Marryat’s Code but there were others in use as well; there was no one standard code. In 1857 the International Marine Conference adopted an International Code of Signals as a standard communications system for all vessels that could be understood in many different languages. The Normanby Advertiser reported on June 5th 1857 a query from the Post Master General as to whether the request of the Chief Harbour Master would be carried out, in that Warrnambool would receive a new flagstaff and a set of Marryatt’s signal flags. The Table of Codes was published, showing how to use combinations of these flags to send messages. The Code was revised in 1887 to cover situations where distance, light, wind and weather conditions affected the visibility of the flags and prevented clear communication. The first report of the International Code of Signals Committee of 1897 warned signalmen not to rely on ordinary semaphore flags and introduced a Distant Signal Code using either particular semaphore flags or the three-dimensional shapes of a ball, cone and drum that aligned with the semaphore flag shapes of a circle, pennant and square. International Code of Signals In 1931, after World War I’s experiences in using signal codes, the International Code of Signals conference in Washington revised and published the rules for the conduct of signalling. One of the changes was that “the use of the Distant Signals and of fixed semaphore was abandoned”. It is of interest to know that modern marine law in many countries insists that a set of Day Shapes must be carried onboard vessels of a certain size. These highly visible geometric shapes are used at sea in daylight to communicate messages between vessels. They are used in a similar way to the Distant Signals, in that different combinations of shapes represent different messages. The set of shapes includes a ball, cylinder, cone and diamond. The shapes are hung between the top of the vessel’s foremast and the front of the vessel. They are only coloured black and are about 1.5 metres high. The vertical line of shapes can mean messages such as Boat not under command, Fishing, and Under sail and power.Distant Signals were an important means of marine communication from the late 1880s to the early 1930s, including during World War I. They were an advancement to the International Shipping Codes and safety. The cane signals’ shapes appear to be the same from whatever direction they are viewed, removing confusion about the message they convey. The same shapes continue to be used today for the sets of Day Shapes used as marine navigational signals that are mandatory on certain-sized vessels.Distant Signal Cone, part of a Flagstaff signal set. A woven cane cone, painted black, with a metal rod passing through the centre and two crossed metal bars at the base. The central rod has a loop at the top and passes through the bars at the base, finishing in a metal loop. The rod has swivels at each end.flagstaff hill, warrnambool, flagstaff hill maritime museum and village, shipwreck coast, marine navigation, marine communications, communication signal, lifesaving, ship at sea, day shape, masthead signal, day signal, day mark signals, marine technology, safety equipment, navigation equipment, marine day shape, day marker, cane day shape, signal cone, day signal cone, cone signal, cone day shape, distant signal, flagstaff signal, signal station, communications, signals, marine signals, flaghoists, international marine conference, international code of signals, signal codes, marine safety, signal flags, daymark, day symbol, navigation, warrnambool flagstaff, 1854, 1857 1931, 1887, 1897 -
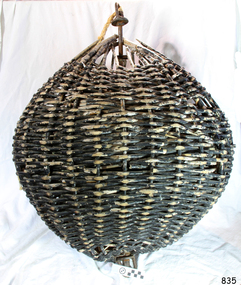 Flagstaff Hill Maritime Museum and Village
Equipment - Distant Signal, 1897-1931
This three-dimensional Distant Signal is part of a Flagstaff Signal set of ball, cone and drum shapes. It has been woven and then fabricated with strong metal swivel fittings and loops for suspending from a high point on a flagstaff at a signal station or on a ship’s masthead. The cane signal was constructed to withstand all weather and to be visible from a long distance. The gaps between the woven cane allow air to pass through, minimising possible swaying. Similar sets were made from rope or fabric. Warrnambool's Flagstaff was erected in 1854. Its primary use was to display visual signals that could convey messages between land and sea. It was also used to notify the local population of the approach of ships. One of the popular signalling codes in use in the early-to-mid 1800s was the Marryat’s Code but there were others in use as well; there was no one standard code. In 1857 the International Marine Conference adopted an International Code of Signals as a standard communications system for all vessels that could be understood in many different languages. The Normanby Advertiser reported on June 5th 1857 a query from the Post Master General as to whether the request of the Chief Harbour Master would be carried out, in that Warrnambool would receive a new flagstaff and a set of Marryatt’s signal flags. The Table of Codes was published, showing how to use combinations of these flags to send messages. The Code was revised in 1887 to cover situations where distance, light, wind and weather conditions affected the visibility of the flags and prevented clear communication. The first report of the International Code of Signals Committee of 1897 warned signalmen not to rely on ordinary semaphore flags and introduced a Distant Signal Code using either particular semaphore flags or the three-dimensional shapes of a ball, cone and drum that aligned with the semaphore flag shapes of a circle, pennant and square. International Code of Signals In 1931, after World War I’s experiences in using signal codes, the International Code of Signals conference in Washington revised and published the rules for the conduct of signalling. One of the changes was that “the use of the Distant Signals and of fixed semaphore was abandoned”. It is of interest to know that modern marine law in many countries insists that a set of Day Shapes must be carried onboard vessels of a certain size. These highly visible geometric shapes are used at sea in daylight to communicate messages between vessels. They are used in a similar way to the Distant Signals, in that different combinations of shapes represent different messages. The set of shapes includes a ball, cylinder, cone and diamond. The shapes are hung between the top of the vessel’s foremast and the front of the vessel. They are only coloured black and are about 1.5 metres high. The vertical line of shapes can mean messages such as Boat not under command, Fishing, and Under sail and power.Distant Signals were an important means of marine communication from the late 1880s to the early 1930s, including during World War I. They were an advancement to the International Shipping Codes and safety. The cane signals’ shapes appear to be the same from whatever direction they are viewed, removing confusion about the message they convey. The same shapes continue to be used today for the sets of Day Shapes used as marine navigational signals that are mandatory on certain-sized vessels.Distant Signal Ball, part of a Flagstaff signal set. A round woven cane ball, painted black, with a metal rod passing through the centre. The rod has a loop at each end, then a concave, octagonal metal plate that rests on the outside surface of the ball, serving as a washer. The rod has swivels at each end.flagstaff hill, warrnambool, flagstaff hill maritime museum and village, shipwreck coast, marine navigation, marine communications, communication signal, lifesaving, ship at sea, day shape, masthead signal, day signal, day mark signals, marine technology, safety equipment, navigation equipment, marine day shape, day marker, cane day shape, signal ball, day signal ball, ball signal, ball day shape, distant signal, flagstaff signal, signal station, communications, signals, marine signals, flaghoists, international marine conference, international code of signals, signal codes, marine safety, signal flags, daymark, day symbol, navigation, warrnambool flagstaff, 1854, 1857 1931, 1887, 1897 -
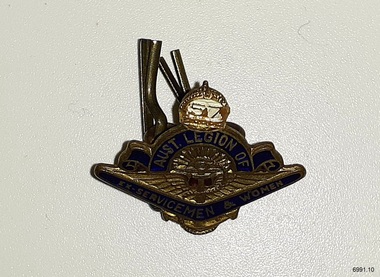 Flagstaff Hill Maritime Museum and Village
Badge - Australian Legion of Ex-Servicemen and Women, Stokes, Membership badge, 1957
The badge was issued by the Victorian branch (indicated by the 'V' on the reverse) of the Australian Legion of Ex-Servicemen and Women and is referred to as The Badge of Unity or Tri-Services badge, uniting the armed services of Australia; the Army (rising sun), the Navy (anchor) and the Air Force (pair of wings). The number '57' on the crown represents the year of paid membership; 1957. The badge belonged to Dr W R Angus, who served in the Australian Army as a military doctor during WWII. It was made in Melbourne by Stokes in 1957, around 100 years after the firm was established by Thomas Stokes in Mincing Lane, Melbourne. The firm was operating from Caledonian Lane/Post Office Place in the 1950s. The badge is one of a set of badges collected by Dr W R Angus from the organisations in which he was involved. They are now part of Flagstaff Hill’s comprehensive W.R. Angus Collection, donated by the family of Dr W R Angus, surgeon and oculist. Australian Legion of Ex-Servicemen and Women was formed in 1944 to "entourage fellowship and assist those who have served". The organisation is open to members from Australia, British Commonwealth and Allied ex-service personnel. The W.R. Angus Collection: - The W.R. Angus Collection includes historical medical equipment, surgical instruments and material once belonging to Dr Edward Ryan and Dr Thomas Francis Ryan, (both of Nhill, Victoria) as well as Dr Angus’ own belongings. The Collection’s history spans the medical practices of the two Doctors Ryan, from 1885-1926 plus that of Dr Angus, up until 1969. It includes historical medical and surgical equipment and instruments from the doctors Edward and Thomas Ryan of Nhill, Victoria. Dr Angus married Gladys in 1927 at Ballarat, the nearest big city to Nhill where he began as a Medical Assistant. He was also Acting House surgeon at the Nhill hospital where their two daughters were born. During World War II He served as a Military Doctor in the Australian Defence Force. Dr Angus and his family moved to Warrnambool in 1939, where Dr Angus operated his own medical practice. He later added the responsibility of part-time Port Medical Officer and was the last person appointed to that position. Both Dr Angus and his wife were very involved in the local community, including the planning stages of the new Flagstaff Hill and the layout of the gardens there. Dr Angus passed away in March 1970.This Badge of Unity, or Tri-Service badge, is significant for connecting Doctor Angus with organisations that support men and women who performed military service for Australia. The badge was for membership with the organisation, which supports ex-servicemen and women of the three military forces; Army, Navy and Air Force. The W.R. Angus Collection is significant for still being located at the site it is connected with, Doctor Angus being the last Port Medical Officer in Warrnambool. The Collection includes historical medical objects that date back to the late 1800s.Badge; a gold-coloured metal and enamel badge. The blue boomerang-shaped band is below an arch of blue, below a crown with a number and coloured red, white and blue. There are symbols in the centre; a rising sun, above a pair of wings, with an anchor in the centre of both. There is red and blue scrollwork behind the symbols. Inscriptions are on the front and back of the badge. There are two loops and pins on the back of the badge. It is a membership badge of the Victorian branch of the Australian Legion of Ex-Servicemen and Women and was made by Stokes in 1957. The badge has a Serial Number. This badge is part of a set of badges collected by Dr Angus and is part of the W.R. Angus Collection.FRONT; “AUST. LEGION OF / EX-SERVICEMEN & WOMEN” On crown “57” REVERSE; “V” “13156" "STOKES” flagstaff hill, warrnambool, maritime museum, maritime village, great ocean road, shipwreck coast, w.r. angus, badge, ladies’ badge, military service, stokes, melbourne, australian legion of ex-servicemen and women, membership badge, 1957 membership badge, ex=service personnel, heraldry, world war ii, second world war, tri-services symbol, badge of unity, rising sun, anchor, pair of wings -
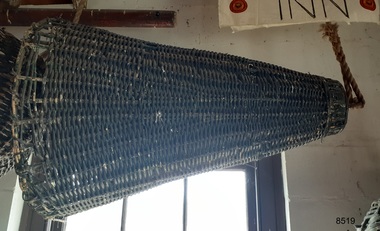 Flagstaff Hill Maritime Museum and Village
Equipment - Distant Signal, 1897-1931
This three-dimensional Distant Signal is part of a Flagstaff Signal set of ball, cone and drum shapes. It has been woven and then fabricated with strong metal swivel fittings and loops for suspending from a high point on a flagstaff at a signal station or on a ship’s masthead. The cane signal was constructed to withstand all weather and to be visible from a long distance. The gaps between the woven cane allow air to pass through, minimising possible swaying. Similar sets were made from rope or fabric. Warrnambool's Flagstaff was erected in 1854. Its primary use was to display visual signals that could convey messages between land and sea. It was also used to notify the local population of the approach of ships. One of the popular signalling codes in use in the early-to-mid 1800s was the Marryat’s Code but there were others in use as well; there was no one standard code. In 1857 the International Marine Conference adopted an International Code of Signals as a standard communications system for all vessels that could be understood in many different languages. The Normanby Advertiser reported on June 5th 1857 a query from the Post Master General as to whether the request of the Chief Harbour Master would be carried out, in that Warrnambool would receive a new flagstaff and a set of Marryatt’s signal flags. The Table of Codes was published, showing how to use combinations of these flags to send messages. The Code was revised in 1887 to cover situations where distance, light, wind and weather conditions affected the visibility of the flags and prevented clear communication. The first report of the International Code of Signals Committee of 1897 warned signalmen not to rely on ordinary semaphore flags and introduced a Distant Signal Code using either particular semaphore flags or the three-dimensional shapes of a ball, cone and drum that aligned with the semaphore flag shapes of a circle, pennant and square. International Code of Signals In 1931, after World War I’s experiences in using signal codes, the International Code of Signals conference in Washington revised and published the rules for the conduct of signalling. One of the changes was that “the use of the Distant Signals and of fixed semaphore was abandoned”. It is of interest to know that modern marine law in many countries insists that a set of Day Shapes must be carried onboard vessels of a certain size. These highly visible geometric shapes are used at sea in daylight to communicate messages between vessels. They are used in a similar way to the Distant Signals, in that different combinations of shapes represent different messages. The set of shapes includes a ball, cylinder, cone and diamond. The shapes are hung between the top of the vessel’s foremast and the front of the vessel. They are only coloured black and are about 1.5 metres high. The vertical line of shapes can mean messages such as Boat not under command, Fishing, and Under sail and power.Distant Signals were an important means of marine communication from the late 1880s to the early 1930s, including during World War I. They were an advancement to the International Shipping Codes and safety. The cane signals’ shapes appear to be the same from whatever direction they are viewed, removing confusion about the message they convey. The same shapes continue to be used today for the sets of Day Shapes used as marine navigational signals that are mandatory on certain-sized vessels.Distant Signal Cone, part of a Flagstaff signal set. A woven cane cone, painted black, with a metal rod passing through the centre and two crossed metal bars at the base. The central rod has a loop at the top and passes through the bars at the base, finishing in a metal loop. The rod has swivels at each end.flagstaff hill, warrnambool, flagstaff hill maritime museum and village, shipwreck coast, marine navigation, marine communications, communication signal, lifesaving, ship at sea, day shape, masthead signal, day signal, day mark signals, marine technology, safety equipment, navigation equipment, marine day shape, day marker, cane day shape, signal cone, day signal cone, cone signal, cone day shape, distant signal, flagstaff signal, signal station, communications, signals, marine signals, flaghoists, international marine conference, international code of signals, signal codes, marine safety, signal flags, daymark, day symbol, navigation, warrnambool flagstaff, 1854, 1857 1931, 1887, 1897 -
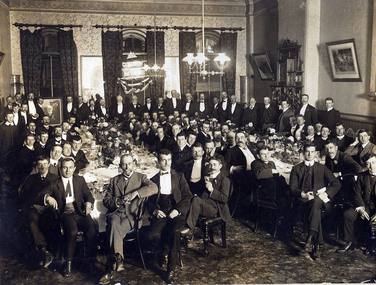 Federation University Historical Collection
Photograph - Photograph (Black & White), Victa Studios, Presentation to Professor Alfred Mica Smith of the Ballarat School of Mines at Craig's Royal Hotel, c1924, c1924
This photo is thought to have been taken at the time of Alfred Mica Smith's retirement from the Ballarat School of Mines. It is most probably also the unveiling of the Max Meldrum portrait of Smith. Alfred Mica Smith retired from the Ballarat School of Mines in 1922 after an association of 41 years and aged 78 years. At the August meeting of the Ballarat School of Mines Council in 1881 it was resolved that 'Alfred Mica Smith Esq., B.Sc., be appointed Professor in Chemistry and Metallurgy and be Superintendent of the Laboratories, for the period of twelve months at a stipend of five hundred pounds per annum, and to commence duty as soon as possible'. (signed: James Oddie, Vice-President) Smith played a major role in the years of 1887-1893 when SMB was affiliated with Melbourne University. In 1912 he became Professor of Metallurgy and received an annual salary of 250 pounds. Alfred Mica Smith presented many scholarly papers, gave evidence at government enquiries into the safety of mines and became an authority on mine safety and ventilation. He was on the Mines Ventilation Board. Professor Smith was the public analyst for the City of Ballarat and Town of Ballarat East, as well as to a number of other boroughs and shires. He was also Chief juror to the Adelaide International Exhibition, chemical section. He provided information to the Royal Commission on gold mining (1889, 1891), and was President to the chemistry section of Australian Association for the Advancement of Science, Associate of American and Australasian Institute of Mining Engineering, Member of the Science Faculty Melbourne University, and Hon. Life Member of the Miner Managers' Association of Australia. He also was involved in many educational and community affairs such as President of the SMB Students' Association, President of the Ballarat Science Society, first President of the Ballarat Camera Club, Vice President of the Field Naturalists' Club, and he presented Ballaarat Fine Art Gallery with his collection of paintings and porcelain ware. His legacies include the mutual regard between him and his students, the many tributes by former students, the Mica Smith scholarship (established in 1923) and now known as the Corbould-Mica Smith Travelling Scholarship, his portrait in oils by noted artist Max Meldrum, and the marble bust of Smith sculptured by Paul Montford. Money for a scholarship in sanitary science at the University of Manchester in the name of his uncle R. A. Smith was left being set up in 1928. Smith died of cancer on 14 May 1926 and his remains, cremated at Springvale, were interred in the Ballaarat New Cemetery. See http://guerin.ballarat.edu.au/curator/honour-roll/honourroll_Smith,%20Alfred%20Mica.shtml Black and white mounted photograph showing a number of men sitting around two dining tables at Craig's Royal Hotel in Ballarat. Professor Alfred Mica Smith of the Ballarat School of Mines is standing 15 from the left, and is the subject of the painting on an easel to the left. The painting was presented to the Ballarat Fine Art GalleryLower right of mount 'Victa Studios Ballarat' Verso (typed and glued on): Presentation to professor Mica Smith, Craig's Hotelballarat school of mines, craig's hotel, craig's royal hotel, alfred mica smith, art gallery of ballarat, ballarat fine art gallery, portrait, frederick martell, daniel walker -
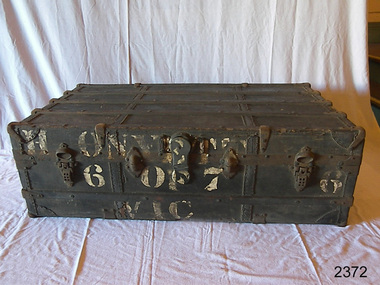 Flagstaff Hill Maritime Museum and Village
Functional object - Travel Trunk, 1890-1920
Steamer trunks (named after their location of storage in the cabin of a steamship, or "steamer") which are sometimes referred to as flat-tops, first appeared in the late 1870s, although the greater bulk of them date from the 1880–1920 period. They are distinguished by either their flat or slightly curved tops and were usually covered in canvas, leather or patterned paper and about (36 cm) tall to accommodate steamship luggage regulations. Steamer trunks were originally called a cabin trunk. An orthodox name for this type of trunk would be a "packer" trunk, but since it has been widely called a steamer for so long, it is now a hallmark of the style. A trunk, also known as a travel trunk, is a large cuboid container designed to hold clothes and other personal belongings. They are most commonly used for extended periods away from home. Trunks are differentiated from chests by their more rugged construction due to their intended use as luggage, instead of storage. Among the many styles of trunks, there are Jenny Lind, Saratoga, monitor, steamer or Cabin, barrel-staves, octagon or bevel-top, wardrobe, dome-top, barrel-top, wall trunks, and even full dresser trunks. These differing styles often only lasted for a decade or two and along with the hardware can be extremely helpful in dating an unmarked trunk. Although trunks have been around for thousands of years in China and elsewhere, the most common styles seen and referred to today date from the late 18th century to the early 20th century when they were supplanted in the market by the cost-effective and lighter suitcase. There were hundreds of trunk manufacturers in the United States and a few of the larger and well-known companies were Rhino Trunk & Case, C.A. Taylor, Haskell Brothers, Martin Maier, Romadka Bros, Goldsmith & Son, Crouch & Fitzgerald, M. M. Secor, Winship, Hartmann, Belber, Oshkosh, Seward, and Leatheroid. One of the largest American manufacturers of trunks at one point the Seward Trunk Co. of Petersburg, Virginia still makes them for school and camp, and another company Shwayder Trunk Company of Denver, Colorado would eventually become Samsonite. Another is the English luxury goods manufacturer H.J. Cave trading since 1839. Their Osilite trunk was used by such famous customers as T.E. Lawrence and Ruth Vincent Some of the better known French trunk makers were Louis Vuitton, Goyard, Moynat, and Au Départ. Only a few remain with the most prominent US company being Rhino Trunk and Case, Inc who probably manufacture more trunks than any company in the world.A snapshot into our social history regards how travel was undertaken over a hundred years ago and how people travelled so differently than today as they often packed for extended travel on ships. Travel then was so different with people having to pack a very large wardrobe of clothes to last for some time possibly for months overseas. The subject item looks like it was of military issue and was used for travel during the first world war by a military man from Victoria and was one of six similar trunks. This assessment is based on the type of locks used the trunk itself could have been made in America or Britain as the locks used in both countries came from American lock makers.Trunk wooden large covered with leather wood cleats and brass locks, also unreadable tableIn white paint "H Onvett, 6 of 7 and bottom right of front the number 6 (Owner)flagstaff hill, warrnambool, shipwrecked-coast, flagstaff-hill, flagstaff-hill-maritime-museum, maritime-museum, shipwreck-coast, flagstaff-hill-maritime-village, trunk