Showing 19038 items
matching gardens.
-
 Ballarat Tramway Museum
Photograph - Black & White Photograph/s, Charles Craig, mid 1950's
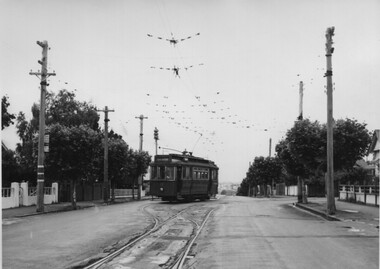
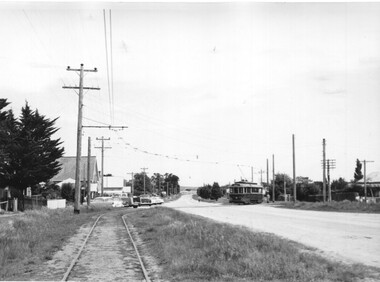
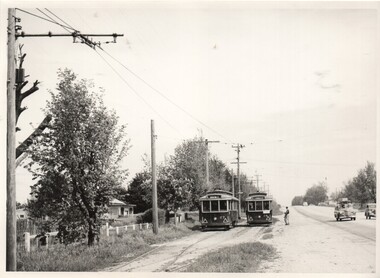
Photograph of the intersection of No. 17 with the destination of Beach in Pakington St at the junction with Aphrasia St. Shows the nature of the layout of the junction and has signs indicating a tram stop and "End of Section". Two large prints held - and one small one, with a vertical frame. trams, tramways, geelong, signs, aphrasia st, pakington st, tram 17 -
 Ballarat Tramway Museum
Photograph - Black & White Photograph/s, Charles Craig, mid 1950's
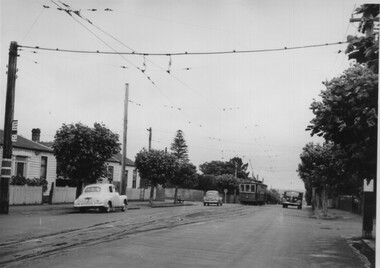
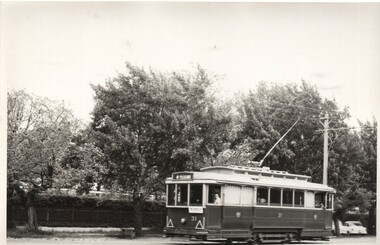
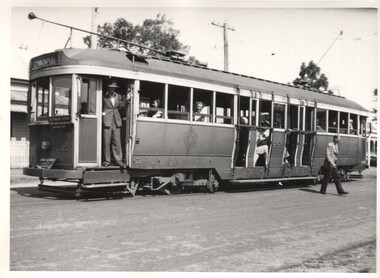
Photograph of a Geelong single trucker, leaving the loop in Pakington St, outside the Newtown Town Hall, heading north. Two copies held - one large and one small print. (location advised by Dave O'Neil 31-12-2016 by e-mail)trams, tramways, geelong, signs, newtown, pakington st -
 Ballarat Tramway Museum
Photograph - Black & White Photograph/s, Charles Craig, mid 1950's
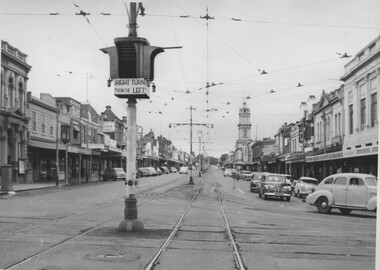
Photograph of the intersection of Ryrie and Moorabool Streets Geelong looking West along Ryrie St, showing the bar type traffic lights and that right hand turns were done from the left lane. Note the Safety zone sign. Two prints held - one large and one small in a vertical form with the traffic lights featured.. trams, tramways, geelong, ryrie st, moorabool st, traffic lights, safety zone -
 Ballarat Tramway Museum
Photograph - Black & White Photograph/s, Charles Craig, mid 1950's
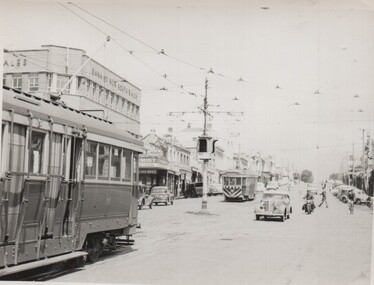
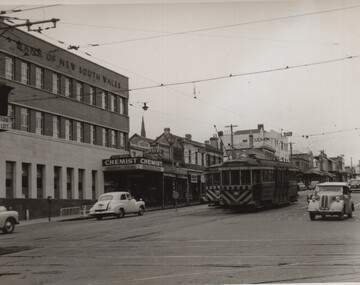
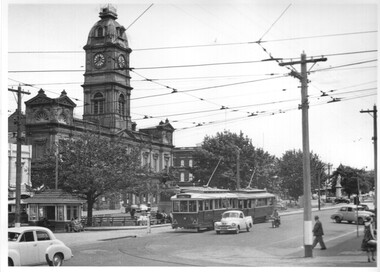
Photograph of the intersection of Ryrie and Moorabool Streets Geelong looking south along Moorabool St, showing the bar type traffic lights and two bogie trams in Ryrie St, one with safety or hazard stripes. Has the Bank of NSW in the view. trams, tramways, geelong, ryrie st, moorabool st, traffic lights -
 Ballarat Tramway Museum
Photograph - Black & White Photograph/s, Charles Craig, mid 1950's
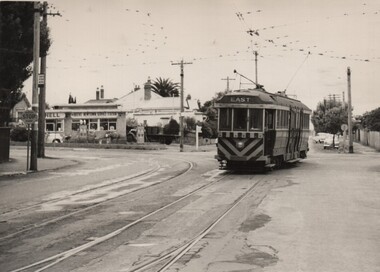
Photograph of the intersection of a bogie tram with destination of East and hazard stripes and dash canopy lighting turning from Pakington St (from West) into Aberdeen St at Pakington St junction. In the background is the Shell service station. Note the metal tram stop sign on the left. Two copies of the print held. trams, tramways, geelong, aberdeen st, east, west, tram stops -
 Ballarat Tramway Museum
Photograph - Black & White Photograph/s, Charles Craig, mid 1950's
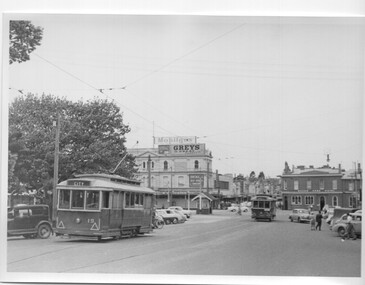
Photograph of the intersection of Ryrie and Moorabool Streets Geelong looking south along Moorabool St, with two bogie trams in Ryrie St, both with safety or hazard stripes. Trams have the destination of Belmont and North. Has the Bank of NSW in the view, E. A. O'Meara Chemist advertising Kodak film and the Geelong Nursery Nook. Adjacent to the tram for Belmont is the safety zone sign. trams, tramways, geelong, ryrie st, moorabool st, traffic lights -
 Ballarat Tramway Museum
Drawing - Illustration/s, Geelong 18
Illustration or printed photograph from a newspaper or magazine adhered to a sheet of cardboard of Geelong 18, converted for one man operation with the destination of West. Tram in green and cream colour scheme - late 1930's? trams, tramways, geelong -
 Ballarat Tramway Museum
Photograph - Black & White Photograph/s, Charles Craig, 21/04/1962 12:00:00 AM
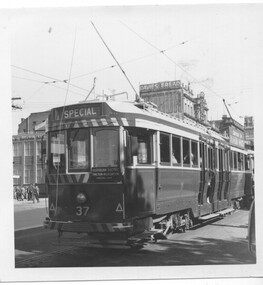
Yields information about tram 37 and an AETA charter.Photograph of the rear of tram 37 in City Loop, Sturt St, on an AETA tour, 21-4-1962 with an AETA auxiliary board. Photo Charles Craig? Has in the background the Mechanics Institute buildings with a Davies Bread and Robur tea advertisement. Has in red ink on rear - "AETA tour 21-4-62".trams, tramways, ballarat, city loop, aeta, sturt st, tram 37 -
 Ballarat Tramway Museum
Photograph - Black & White Photograph/s, Charles Craig, late 1960's early 1970's
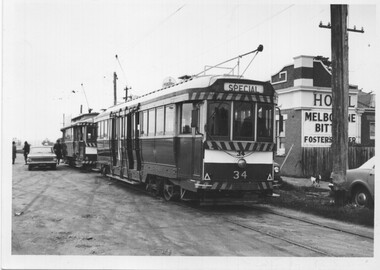
Yields information about tram operations on the Sebastopol line.Photograph of Ballarat trams (from the rear), 30 and 34 at the Sebastopol terminus - undated - late 1960's early 1970's with the Royal Mail hotel in the background. No. 34 running a special. On the hotel is a sign for Melbourne Bitter and Foster's Lager. Photo by Charles Craig? Has in red ink on rear - "34 and 30 Sebastopol"trams, tramways, sebastopol, tram 30, tram 34 -
 Ballarat Tramway Museum
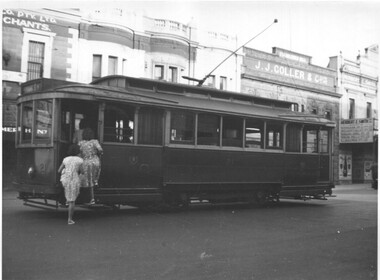
Photograph - Black & White Photograph/s, Charles Craig, early 1950's?
Yields information about the use of the trams and the appearance of Lydiard St North buildings during the early 1950's.Photograph of No. 21, in Lydiard St North, near the Railway Station, boarding two lady passengers. Has J. J. Coller & Co. building and the Hersert E Smith building and sign in the view. Early 1950's? photo by Charles Craig. trams, tramways, lydiard st north, tram 21 -
 Ballarat Tramway Museum
Photograph - Black & White Photograph/s set of 2, Charles Craig, tram No. 27 travelling to Sebastopol in Albert St, early 1950's
Yields information about the traffic and appearance of Albert St Sebastopol during the 1950's and the buildings on either side of the street.Set of two black and white photographs of trams Photo possibly early 1950's of No. 27 travelling to Sebastopol in Albert St. .1 - crossing the roadway near Ophir St with the Trinity Church in the background. .2 - Tram at the Sebastopol Terminus with the new housing on the left side of the roadway and the Royal Mail Hotel. Both photos by Charles Craig trams, tramways, albert st, sebastopol, ophir st, tram 27 -
 Ballarat Tramway Museum
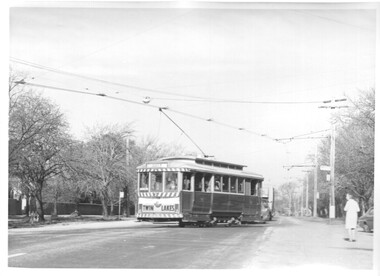
Photograph - Black & White Photograph/s, Charles Craig, late 1950's
Yields information about the tram 31 and Sturt St West during the late 1950's.Black and white photograph of tram No. 31 Sturt St west inbound to the City and then Mt Pleasant. Photo by Charles Craig possibly late 1950's. trams, tramways, sturt st west, mt pleasant, tram 31 -
 Ballarat Tramway Museum
Photograph - Black & White Photograph/s, Charles Craig, late 1950's
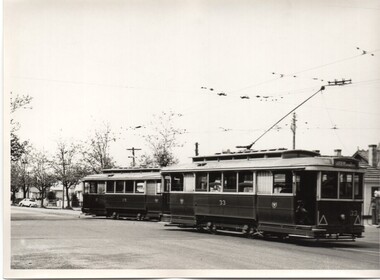
Yields information about the trams at Hospital Corner during the late 1950's.Black and white photograph of trams 28 and 33 at the intersection with Sturt and Drummond St North. Tram 33 has destination of Sturt via Drummond North. Tram 28 is inbound. Has the Shell service station bowser in the background. Photo by Charles Craig possibly late 1950's. trams, tramways, sturt st, drummond st nth, hospital corner, tram 33, tram 28 -
 Ballarat Tramway Museum
Photograph - Black & White Photograph/s set of 2, Charles Craig, early 1950's
Yields information about the use of the Gray St loop on the Sebastopol line during the early 1950's and its appearance.Black and white photographs of trams 27 and 25 crossing at the Grey St loop in Albert St on the Sebastopol line. Passengers are either waiting or boarding the trams. Tram 27 has the destination of Rubicon St. Note the overgrown area around the loop. Both photos by Charles Craig possibly early 1950's. trams, tramways, sebastopol, albert st, grey st, rubicon st, tram 25, tram 27 -
 Ballarat Tramway Museum
Photograph - Black & White Photograph/s, Charles Craig, 14/03/1949 12:00:00 AM
Yields information about the use of the first bogie tram to be used in Ballarat and its use on an AETA tour.Black and white photograph of Ballarat bogie tram No. 22 (later 37) on an AETA tour. Photo location - possibly Mt Pleasant. See Wal Jack notes btm5533 on this tram. Photo by Charles Craig, dated by G.Cleak - 14.3.1949 - Labour Day. See also Reg item 7591 for a photo of this tram on the same tour at the Sebastopol terminus a md 8513 for a similar photograph. 2 copies held. trams, tramways, bogie trams, aeta, tours, tram 22 -
 Ballarat Tramway Museum
Photograph - Black & White Photograph/s, Charles Craig, 1950's
Yields information about the use of the appearance of City terminus and vehicles during the late 1950's.Black and white photograph of Ballarat tram 11 and another single trucker at the City tram stop, Sturt St, with the Town Hall in the background. Tram 11 has the destination of Mt Pleasant. In the view is the City Shelter and a number of Holden motor cars. Photo by Charles Craig possibly late 1950's. trams, tramways, sturt st, town hall, city, shelters, tram 11 -
 Ballarat Tramway Museum
Photograph - Black & White Photograph/s, Charles Craig, 1950's
Yields information about the use of the appearance of City Loop and the intersection with Grenville St during the late 1950's.Black and white photograph of Ballarat tram 19 in the City Loop and tram 30 in Sturt St, leaving Grenville St. Photo has a number of motor vehicles in the view, along with the Bucks Head Hotel, S E Dickins Grocery store on the north side of Bridge St, with adverts for Mobilgas and Greys cigarettes. The Grenville St shelter is in the view as well. Photo by Charles Craig possibly late 1950's. trams, tramways, sturt st, grenville st, city loop, tram 19, tram 30 -
 Ballarat Tramway Museum
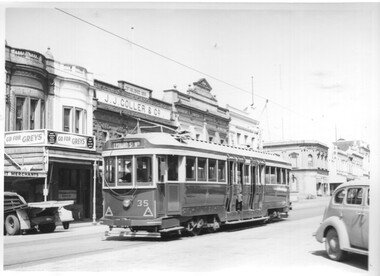
Photograph - Black & White Photograph/s, Charles Craig, 1950's
Yields information about the use of the appearance of tram 35 and Lydiard St North between Mair St and the railway station during the late 1950's.Black and white photograph of Ballarat tram 35, northbound in Lydiard St North with the J J Coller & Co building, Herbert E Smith Merchant in the background. Advert for Greys cigarettes in the view. The buildings on the corner of Mair St are in the view as well. Photo by Charles Craig possibly late 1950's. trams, tramways, lydiard st north, mair st, tram 35 -
 Ballarat Tramway Museum
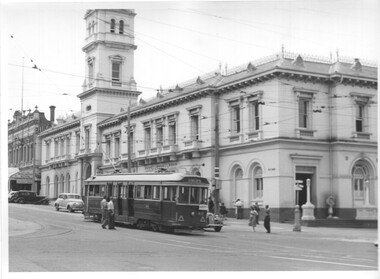
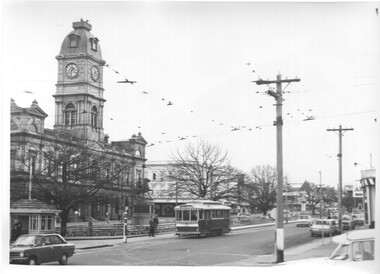
Photograph - Black & White Photograph/s, Charles Craig, 1950's
Yields information about the use of the appearance of tram 40 in Lydiard St North and the Ballarat Post Office during the late 1950's.Black and white photograph of Ballarat tram 40 southbound in Lydiard St North, about to cross Sturt St, enroute to Sebastopol. Photos has the Ballarat Post Office in the background. Photo by Charles Craig possibly late 1950's. Two copies held. trams, tramways, lydiard st north, sturt st, post office, tram 40 -
 Ballarat Tramway Museum
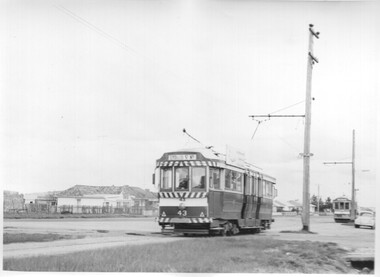
Photograph - Black & White Photograph/s, Charles Craig, early 1970's
Yields information about the use of the appearance of City terminus and vehicles during the early 1970's and demonstrates night photography.Black and white photograph of Ballarat tram 43 and a single trucker at the City terminus. No. 43 has the destination of Mt. Pleasant. In the background is the statute of Robert Burns. Photo by Charles Craig possibly early 1970's. trams, tramways, sturt st, city, night photo, tram 43 -
 Ballarat Tramway Museum
Photograph - Black & White Photograph/s, Charles Craig, early 1970's
Yields information about the use of the appearance of City terminus and vehicles during the early 1970's and demonstrates night photography.Black and white photograph of Ballarat trams 32 and 33 at the City terminus with the ANZ Bank and the Post Office in the background. No 32 has the destination of Mt. Pleasant. Photo by Charles Craig possibly early 1970's. trams, tramways, sturt st, city, night photo, tram 32, tram 33 -
 Ballarat Tramway Museum
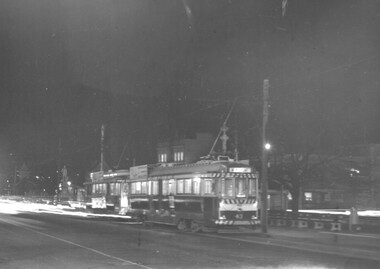
Photograph - Black & White Photograph/s, Charles Craig, early 1970's
Yields information about the use of the appearance of City terminus and vehicles during the early 1970's and demonstrates night photography.Black and white photograph of Ballarat tram 30 at the City terminus at night. Tram has the destination of Lydiard St North. In the background is the SEC offices and Racey's store. The small stop pole with the End of Section sign is in the photograph. Photo by Charles Craig possibly early 1970's. trams, tramways, sturt st, city, night photo, tram 30 -
 Ballarat Tramway Museum
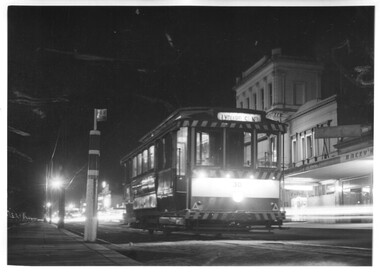
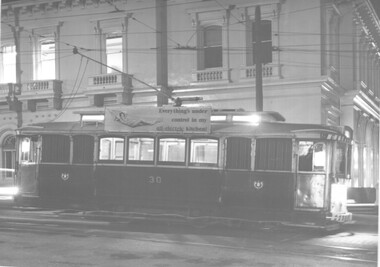
Photograph - Black & White Photograph/s, Charles Craig, early 1970's
Yields information about the use of the appearance of City terminus and vehicles during the early 1970's and demonstrates night photography.Black and white photograph of Ballarat tram 30, stopped at the intersection of Sturt and Lydiard St North with the Post Office in the background. The tram has a SEC roof advert - "Everything's Under control in my all electric kitchen" Photo by Charles Craig possibly early 1970's. trams, tramways, sturt st, city, night photo, lydiard st north, tram 30 -
 Ballarat Tramway Museum
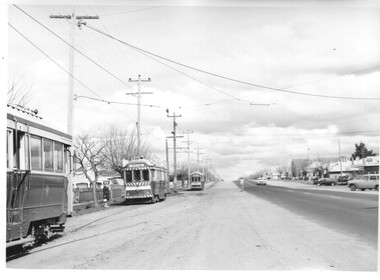
Photograph - Black & White Photograph/s, Charles Craig, early 1970's
Yields information about the use of the use of the Sebastopol line and the Grey St loop during the last days of the SEC operated system when a number of Special trams were operated.Black and White photograph of three bogie trams at the Grey St Crossing loop, Albert St Sebastopol. Has a lady passenger waiting at the stop. Tram 41 is running a Special to Sebastopol. Photographer in Albert St, probably just before closure. Photo by Charles Craig possibly early 1970's. trams, tramways, albert st, gray st, sebastopol, tram 41 -
 Ballarat Tramway Museum
Photograph - Black & White Photograph/s, Charles Craig, early 1970's
Yields information about the use of the use of the Sebastopol line and the terminus during the last days of the SEC operated system when a number of Special trams were operated.Black and White photograph of two bogie cars at the Sebastopol terminus - No. 43 is on the way to Lydiard St North and the tram at the terminus, possibly No. 41 (see previous Reg item 6778) is waiting. The style of the houses at the terminus is in the background. Photo by Charles Craig possibly early 1970's. trams, tramways, albert st, sebastopol, tram 41, tram 43 -
 Ballarat Tramway Museum
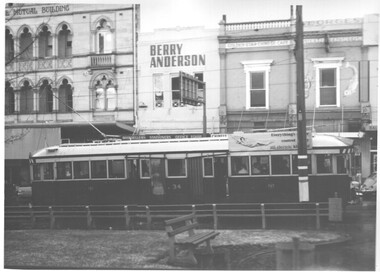
Photograph - Black & White Photograph/s, Charles Craig, early 1970's
Yields information about the use of the use of the City terminus during the last days of the SEC operated system.Black and White photograph of No. 34 at the City Terminus, Sturt St, south side - tram has an SEC Roof Advert re electric cooking. In the background is the National Mutual Building, Berry Anderson stationary shop, Golden Start Chinese Cafe and the Georges Oyster bar and fish shop. Photo by Charles Craig possibly early 1970's. trams, tramways, sturt st, city, tram 34 -
 Ballarat Tramway Museum
Photograph - Black & White Photograph/s set of 2, Charles Craig, Aug. 1971
Yields information about the intersection of Sturt St and Hamilton Ave by trams prior to the closure of the SEC operated system.Black and White photograph of Nos 13 and 14 turning from Hamilton Ave into Sturt St west. Both tram have the destination of City. No. 13 has a Twin Lakes sign. Photo by Charles Craig possibly August 1971, prior to closure as the new bus stops signs are in view. trams, tramways, sturt st west, closure, hamilton ave, tram 13, tram 14 -
 Ballarat Tramway Museum
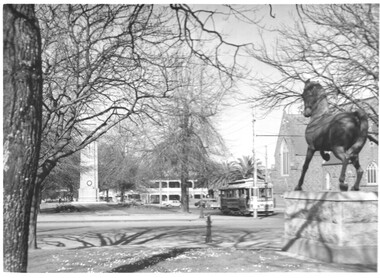
Photograph - Black & White Photograph/s - set of 3, Charles Craig, Aug. 1971
Yields information about the intersection of Lyons St and Sturt St and statues in the median strip.Set of three Black and White photographs of trams near the intersection of Sturt St and Lyons St. .1 - Single trucker outbound, Lyons St, with the Golden City Hotel and St Patrick's Cathedral in the view, along with the Cenotaph and the Adam Lindsay Gordon Statue of a Horse (1969) (See reference for city of Ballarat document) .2 - 43 - with St Patrick's Cathedral. .3 - 30 (determined from a high res scan), with the Town Hall and the Cenotaph in the background. Photo by Charles Craig August 1971. See http://www.ballarat.vic.gov.au/media/499947/sturt%20street%20gardens%20calm%20plan.pdf - accessed 2-2-2017. trams, tramways, sturt st, statues, town hall, st patricks, lyons st, tram 43, tram 30 -
 Ballarat Tramway Museum
Photograph - Black & White Photograph/s set of 2, Charles Craig, Aug. 1971
Yields information about the intersection of Sturt St and Lydiard St North and its use by trams.Set of two Black and White photographs of trams near the intersection of Sturt St and Lydiard St North of No. 14 at the City terminus and turning from Sturt St into Lydiard St North. Tram has the destination of Lydiard St North. Has the Town Hall, Myer's in the background. Photo by Charles Craig - early 1971. trams, tramways, sturt st, statues, town hall, shelters, lydiard st north, tram 14 -
 Ballarat Tramway Museum
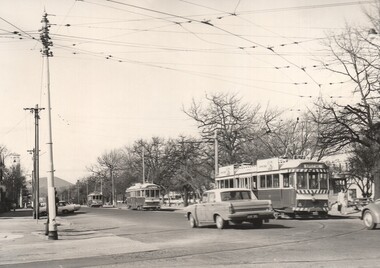
Photograph - Black & White Photograph/s set of 2, Charles Craig, 1971
Yields information about the intersection of Sturt St and Drummond St and its use by trams in the period before the closure of the SEC system.Set of two Black and White photographs of trams near the intersection of Sturt St and Drummond St North, Hospital Corner. .1 - No. 41, another bogie and a single trucker travel along Sturt St south, the last tram has a destination of Special. .2 - Photo looking at the median strip with a tram on either side. Single trucker with a Twin Lakes sign inbound and another single truck outbound. Shows the position of the shelter and the ESCo switch box. Has a Marshal battery advert on a building in the background. Photo by Charles Craig - during 1971. trams, tramways, sturt st, hospital corner, drummond st, tram 41