Showing 219 items
matching plate drying
-
 Federation University Historical Collection
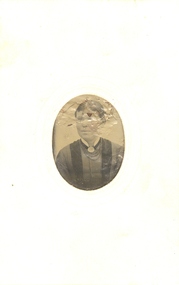
Photograph - Little Gem tintype, Portrait of a Woman
... superseded by gelatin emulsion dry plates in the 1880s, though street ...The tintype (or ferrotype or Melainotype) was produced on metallic sheet (not, actually, tin) instead of glass. The plate was coated with collodion and sensitized just before use. It was introduced by Adolphe Alexandre Martin in 1853. The most common size was about the same as the carte-de-visite, 5.5cm x 9.0cm, but both larger and smaller ferrotypes were made. The smallest were "Little Gem" tintypes, about the size of a postage-stamp, made simultaneously on a single plate in a camera with 12 or 16 lenses. They were often produced by travelling photographers, and were cheaper than Ambrotypes so made photography available to working classes, not just to the more well-to-do. The print would come out laterally reversed (as one sees oneself in a mirror). Being quite rugged, tintypes could be sent by post. Tintypes were eventually superseded by gelatin emulsion dry plates in the 1880s, though street photographers in various parts of the world continued with this process until the 1950s. (Above information abridged from http://www.rleggat.com/photohistory/history/tintype.htm) The firm of Gove and Allen opened in Sydney in 1880 and were responsible for the belated popularizing of the gem tintype in Australia. The firm traded as both The American Gem Studio and The American Studio. Others franchises were opened in Melbourne, Ballarat and Sandhurst (Bendigo). The Sandhurst branch closed in 1882 and Adelaide in 1884. All Gove and Allen studios had ceased trading by 1885. The studio addresses were: 23 King William St, Adelaide; 324 George St, Sydney; 95 Swanston St, Melbourne; Howard Place, Sandhurst; 7 Queen St, Brisbane; The card mounts used in Gove and Allen studios in Australia are identical to those used in America. They were initially made of plain white card with embossing around the oval image opening in the mount while some also had simple geometric and floral printed designs as well. Although Gove and Allen studios produced the majority of gem tintypes in Australia, other studios offered them including: - London, American & Sydney Photo Company, 328 George St, Sydney; - David Edelsten, 55 & 57 Bourke St, Melbourne; - Burman's Portrait Rooms, St. George's Hall, 209 Bourke St, Melbourne; - Bell's Gem Portrait Studio, 57 Bourke St East, Melbourne; - R. H. Kenny, Bridge St, Ballarat; - Marinus W. Bent, Sandhurst (Bendigo); - George Fisher, Victoria; - Anson Brothers, Hobart Town. (Abridged information from http://members.ozemail.com.au/~msafier/photos/tintypes.html) .3) A tintype portrait of a woman, attached to a card. little gem, tintype, woman, unidentified woman, women -
 Federation University Historical Collection
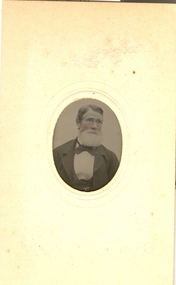
Photograph - Little Gem tintype, Portrait of a Man
... superseded by gelatin emulsion dry plates in the 1880s, though street ...The tintype (or ferrotype or Melainotype) was produced on metallic sheet (not, actually, tin) instead of glass. The plate was coated with collodion and sensitized just before use. It was introduced by Adolphe Alexandre Martin in 1853. The most common size was about the same as the carte-de-visite, 5.5cm x 9.0cm, but both larger and smaller ferrotypes were made. The smallest were "Little Gem" tintypes, about the size of a postage-stamp, made simultaneously on a single plate in a camera with 12 or 16 lenses. They were often produced by travelling photographers, and were cheaper than Ambrotypes so made photography available to working classes, not just to the more well-to-do. The print would come out laterally reversed (as one sees oneself in a mirror). Being quite rugged, tintypes could be sent by post. Tintypes were eventually superseded by gelatin emulsion dry plates in the 1880s, though street photographers in various parts of the world continued with this process until the 1950s. (Above information abridged from http://www.rleggat.com/photohistory/history/tintype.htm) The firm of Gove and Allen opened in Sydney in 1880 and were responsible for the belated popularizing of the gem tintype in Australia. The firm traded as both The American Gem Studio and The American Studio. Others franchises were opened in Melbourne, Ballarat and Sandhurst (Bendigo). The Sandhurst branch closed in 1882 and Adelaide in 1884. All Gove and Allen studios had ceased trading by 1885. The studio addresses were: 23 King William St, Adelaide; 324 George St, Sydney; 95 Swanston St, Melbourne; Howard Place, Sandhurst; 7 Queen St, Brisbane; The card mounts used in Gove and Allen studios in Australia are identical to those used in America. They were initially made of plain white card with embossing around the oval image opening in the mount while some also had simple geometric and floral printed designs as well. Although Gove and Allen studios produced the majority of gem tintypes in Australia, other studios offered them including: - London, American & Sydney Photo Company, 328 George St, Sydney; - David Edelsten, 55 & 57 Bourke St, Melbourne; - Burman's Portrait Rooms, St. George's Hall, 209 Bourke St, Melbourne; - Bell's Gem Portrait Studio, 57 Bourke St East, Melbourne; - R. H. Kenny, Bridge St, 6 Sturt St Ballarat; - Marinus W. Bent, Sandhurst (Bendigo); - George Fisher, Victoria; - Anson Brothers, Hobart Town. (Abridged information from http://members.ozemail.com.au/~msafier/photos/tintypes.html) .8)A tintype portrait of a man's head, attached to a card. The cheeks have been hand coloured.little gem -
 Flagstaff Hill Maritime Museum and Village
Domestic object - Plate
The Process of Making Pottery Decorating, Firing, Glazing, Making, Technical There is a rhythm and flow to clay. It can’t be done all at once! Even the making process! It can take weeks to get everything done, especially if you can only work on your pottery once a week! Even though we have three hour classes, it’s often just not enough time! Here is an overview of some of the processes so you have a bit more grasp on some of the technical stuff! Step One – Design There are SO many ideas out there for making stuff in clay! From delicate porcelain jewellery, through to heavy sculptural work and everything in between. Deciding your direction is sometimes not that easy – when you first start, try everything, you will naturally gravitate to the style that you enjoy! The options and variations are endless and can get a wee bit overwhelming too! Check in with me before you start to ensure your ideas will work, what order you might do things, how you could achieve the look you are seeking and any other technical data required! Step Two – Making Clay is thixotropic. This means that as you work with it, the clay first gets sloppier and wetter, before is begins to dry in the atmosphere. For most things, you simply can’t do all parts of the project at once. An example of work order might look like: Get last weeks work out from the shelves Prepare clay for today’s work – roll your clay, prepare balls for throwing, make the first stage of a pinch pot) Clean up last week’s work and put it on the shelf for bisque firing Check that you have any glazing to do – and do enough of it that you will have time to finish your main project Do the next step of your next project – there might be a further step that can’t be complete immediately, in that case, wrap your work well and put onto the shelves. Letting your work rest for a while can really help keep your work clean and professional looking. Many things require bagging under plastic to keep it ready for work the next week – put your name on the outside of the bag so you can find your work easily. We have stickers and markers. Consider how you want to decorate your work – coloured slip can be applied at a fairly wet stage (remembering that it will make your work even wetter!). Trying to apply slip to dry clay won’t work! If you want to do sgraffito – you will need to keep the work leather hard (a state of dryness where you can still work the clay with a little effort and a little water and care). Step Three – Drying Most of the time your work can go into the rack uncovered to let it dry out for the following week. If you want to continue forming or shaping you will need to double bag your work – put your work on a suitable sized bat and put the bat in a bag so the base of the bag is under the bat, then put another bag over the top of the work and tuck the top of the bag under the bat. If you want to trim (or turn) your thrown work the following week, it should also be double bagged. If your work is large, delicate, or of uneven thicknesses, you should lightly cover your work for drying. When considering the drying process, bare in mind the weather, humidity and wind! The hotter and dryer, the faster things dry and work can dry unevenly in the shelves – this can lead to cracking – another time to lightly cover your work for drying. Step Four – Trimming and Cleaning Up Your work is dry! It is called greenware now and it is at it’s most fragile! Handle everything with two hands. I often refer to soft hands – keep everything gentle and with your fingers spread as much as possible. Try to not pick up things like plates too much, and always with both hands! Before your work can be bisque fired it should be “cleaned up”. You work won’t go into the kiln if it has sharp edges – when glazed, sharp edges turn into razor blades! Use a piece of fly wire to rub the work all over – this will scratch a little so be light handed. Use a knife or metal kidney to scrape any areas that require a bit more dynamic treatment than the fly wire offers! Finally, a very light wipe over with a slightly damp sponge can help soften and soothe all of your edges and dags! Trimming thrown work: If you are planning to trim (or turn) your thrown work (and you should be), make sure you bag it well – your work should be leather hard to almost dry for easiest trimming. Use this step to finish the work completely – use a metal kidney to polish the surface, or a slightly damp sponge to give a freshly thrown look. Wipe the sponge around the rim after trimming, and check the inside of the pot for dags! Trimming slip cast work: Usually I will trim the rims of your work on the wheel the following day to make that stage easier, however you will still need to check your work for lumps and bumps. Last but not least – check that your name is still clearly on the bottom of your work. Step Five – Bisque Firing When the work is completely dry it can go into the bisque kiln. The bisque kiln is fired to 1000°C. This process burns off the water in the clay as well as some of the chemically bound water. The structure of the clay is not altered that much at this temperature. Inside the bisque kiln, the work is stacked a little, small bowl inside a larger bowl and onto a heavy plate. Smaller items like decorations or drink coasters might get stacked several high. Consideration is paid to the weight of the stack and shape of the work. A bisque kiln can fire about one and a half times the amount of work that the glaze kiln can fire. The firing takes about 10 hours to complete the cycle and about two days to cool down. Once it has been emptied the work is placed in the glaze room ready for you to decorate! Step Six – Glazing Decorating your work with colour can be a lot of fun – and time consuming! There are three main options for surface treatment at this stage: Oxide Washes Underglazes Glazes Washes and underglazes do not “glaze” the work – It will still need a layer of glaze to fully seal the clay (washes don’t need glaze on surfaces not designed for food or liquid as they can gloss up a little on their own). Underglazes are stable colourants that turn out pretty much how they look in the jar. They can be mixed with each other to form other colours and can be used like water colours to paint onto your work. Mostly they should have a clear glaze on top to seal them. Oxides are a different species – the pink oxide (cobalt) wash turns out bright blue for instance. They don’t always need a glaze on top, and some glazes can change the colour of the wash! The glazes need no other “glaze” on top! Be careful of unknown glaze interactions – you can put any combination of glaze in a bowl or on a plate, but only a single glaze on the outside of any vertical surface! Glazes are a chemical reaction under heat. We don’t know the exact chemicals in the Mayco glazes we use. I can guess by the way they interact with each other, however, on the whole, you need to test every idea you have, and not run the test on a vertical surface! Simply put, glaze is a layer of glass like substance that bonds with the clay underneath. Clay is made of silica, alumina and water. Glaze is made of mostly silica. Silica has a melting point of 1700°C and we fire to 1240°C. The silica requires a “flux” to help it melt at the lower temperature. Fluxes can be all sorts of chemicals – a common one is calcium – calcium has a melting point of 2500°C, however, together they both melt at a much lower temperature! Colourants are metal oxides like cobalt (blue), chrome (green through black), copper (green, blue, even red!), manganese (black, purple and pink) iron (red brown), etc. Different chemicals in the glaze can have dramatic effects. for example, barium carbonate (which we don’t use) turns manganese bright pink! Other elements can turn manganese dioxide brown, blue, purple and reddish brown. Manganese dioxide is a flux in and of itself as well. So, glazes that get their black and purple colours, often interact with other glazes and RUN! Our mirror black is a good example – it mixes really well with many glazes because it fluxes them – causes them to melt faster. It will also bring out many beautiful colours in the glazes because it’s black colouring most definitely comes from manganese dioxide! Glaze chemistry is a whole subject on it’s own! We use commercial Mayco glazes on purpose – for their huge range of colour possibilities, stability, cool interactions, artistic freedom with the ability to easily brush the glazes on and ease of use. We currently have almost 50 glazes on hand! A major project is to test the interactions of all glazes with each other. That is 2,500 test tiles!!!! I’m going to make the wall behind the wheels the feature wall of pretty colours! Step Seven – Glaze (Gloss or sometimes called “Glost”) Firing Most of the time this is the final stage of making your creation (but not always!) The glaze kiln goes to 1240°C. This is called cone 6, or midrange. It is the low end of stoneware temperatures. Stoneware clays and glazes are typically fired at cone 8 – 10, that is 1260 – 1290°C. The energy requirement to go from 1240°C to 1280°C is almost a 30% more! Our clay is formulated to vitrify (mature, turn “glass-like”) at 1240°, as are our glazes. A glaze kiln take around 12 hours to reach temperature and two to three days to cool down. Sometimes a third firing process is required – this is for decoration that is added to work after the glaze firing. For example – adding precious metals and lustres. this firing temperature is usually around 600 – 800°C depending upon the techniques being used. There are many students interested in gold and silver trims – we will be doing this third type of firing soon! After firing your work will be in the student finished work shelves. Remember to pay for it before you head out the door! There is a small extra charge for using porcelain clay (it’s more than twice the price of regular clay), and for any third firing process! Once your work has been fired it can not turn back into clay for millennia – so don’t fire it if you don’t like it! Put it in the bucket for recycling. https://firebirdstudios.com.au/the-process-of-making-pottery/Ceramics have evolved over thousands of years.White earthenware dinner plate. Crazing evident all over.Backstamped ‘Made in England S LTD’flagstaff hill, warrnambool, shipwrecked-coast, flagstaff-hill, flagstaff-hill-maritime-museum, maritime-museum, shipwreck-coast, flagstaff-hill-maritime-village, ceramics, tableware -
 Flagstaff Hill Maritime Museum and Village
Domestic object - Plate, Johnson Bros
The Process of Making Pottery Decorating, Firing, Glazing, Making, Technical There is a rhythm and flow to clay. It can’t be done all at once! Even the making process! It can take weeks to get everything done, especially if you can only work on your pottery once a week! Even though we have three hour classes, it’s often just not enough time! Here is an overview of some of the processes so you have a bit more grasp on some of the technical stuff! Step One – Design There are SO many ideas out there for making stuff in clay! From delicate porcelain jewellery, through to heavy sculptural work and everything in between. Deciding your direction is sometimes not that easy – when you first start, try everything, you will naturally gravitate to the style that you enjoy! The options and variations are endless and can get a wee bit overwhelming too! Check in with me before you start to ensure your ideas will work, what order you might do things, how you could achieve the look you are seeking and any other technical data required! Step Two – Making Clay is thixotropic. This means that as you work with it, the clay first gets sloppier and wetter, before is begins to dry in the atmosphere. For most things, you simply can’t do all parts of the project at once. An example of work order might look like: Get last weeks work out from the shelves Prepare clay for today’s work – roll your clay, prepare balls for throwing, make the first stage of a pinch pot) Clean up last week’s work and put it on the shelf for bisque firing Check that you have any glazing to do – and do enough of it that you will have time to finish your main project Do the next step of your next project – there might be a further step that can’t be complete immediately, in that case, wrap your work well and put onto the shelves. Letting your work rest for a while can really help keep your work clean and professional looking. Many things require bagging under plastic to keep it ready for work the next week – put your name on the outside of the bag so you can find your work easily. We have stickers and markers. Consider how you want to decorate your work – coloured slip can be applied at a fairly wet stage (remembering that it will make your work even wetter!). Trying to apply slip to dry clay won’t work! If you want to do sgraffito – you will need to keep the work leather hard (a state of dryness where you can still work the clay with a little effort and a little water and care). Step Three – Drying Most of the time your work can go into the rack uncovered to let it dry out for the following week. If you want to continue forming or shaping you will need to double bag your work – put your work on a suitable sized bat and put the bat in a bag so the base of the bag is under the bat, then put another bag over the top of the work and tuck the top of the bag under the bat. If you want to trim (or turn) your thrown work the following week, it should also be double bagged. If your work is large, delicate, or of uneven thicknesses, you should lightly cover your work for drying. When considering the drying process, bare in mind the weather, humidity and wind! The hotter and dryer, the faster things dry and work can dry unevenly in the shelves – this can lead to cracking – another time to lightly cover your work for drying. Step Four – Trimming and Cleaning Up Your work is dry! It is called greenware now and it is at it’s most fragile! Handle everything with two hands. I often refer to soft hands – keep everything gentle and with your fingers spread as much as possible. Try to not pick up things like plates too much, and always with both hands! Before your work can be bisque fired it should be “cleaned up”. You work won’t go into the kiln if it has sharp edges – when glazed, sharp edges turn into razor blades! Use a piece of fly wire to rub the work all over – this will scratch a little so be light handed. Use a knife or metal kidney to scrape any areas that require a bit more dynamic treatment than the fly wire offers! Finally, a very light wipe over with a slightly damp sponge can help soften and soothe all of your edges and dags! Trimming thrown work: If you are planning to trim (or turn) your thrown work (and you should be), make sure you bag it well – your work should be leather hard to almost dry for easiest trimming. Use this step to finish the work completely – use a metal kidney to polish the surface, or a slightly damp sponge to give a freshly thrown look. Wipe the sponge around the rim after trimming, and check the inside of the pot for dags! Trimming slip cast work: Usually I will trim the rims of your work on the wheel the following day to make that stage easier, however you will still need to check your work for lumps and bumps. Last but not least – check that your name is still clearly on the bottom of your work. Step Five – Bisque Firing When the work is completely dry it can go into the bisque kiln. The bisque kiln is fired to 1000°C. This process burns off the water in the clay as well as some of the chemically bound water. The structure of the clay is not altered that much at this temperature. Inside the bisque kiln, the work is stacked a little, small bowl inside a larger bowl and onto a heavy plate. Smaller items like decorations or drink coasters might get stacked several high. Consideration is paid to the weight of the stack and shape of the work. A bisque kiln can fire about one and a half times the amount of work that the glaze kiln can fire. The firing takes about 10 hours to complete the cycle and about two days to cool down. Once it has been emptied the work is placed in the glaze room ready for you to decorate! Step Six – Glazing Decorating your work with colour can be a lot of fun – and time consuming! There are three main options for surface treatment at this stage: Oxide Washes Underglazes Glazes Washes and underglazes do not “glaze” the work – It will still need a layer of glaze to fully seal the clay (washes don’t need glaze on surfaces not designed for food or liquid as they can gloss up a little on their own). Underglazes are stable colourants that turn out pretty much how they look in the jar. They can be mixed with each other to form other colours and can be used like water colours to paint onto your work. Mostly they should have a clear glaze on top to seal them. Oxides are a different species – the pink oxide (cobalt) wash turns out bright blue for instance. They don’t always need a glaze on top, and some glazes can change the colour of the wash! The glazes need no other “glaze” on top! Be careful of unknown glaze interactions – you can put any combination of glaze in a bowl or on a plate, but only a single glaze on the outside of any vertical surface! Glazes are a chemical reaction under heat. We don’t know the exact chemicals in the Mayco glazes we use. I can guess by the way they interact with each other, however, on the whole, you need to test every idea you have, and not run the test on a vertical surface! Simply put, glaze is a layer of glass like substance that bonds with the clay underneath. Clay is made of silica, alumina and water. Glaze is made of mostly silica. Silica has a melting point of 1700°C and we fire to 1240°C. The silica requires a “flux” to help it melt at the lower temperature. Fluxes can be all sorts of chemicals – a common one is calcium – calcium has a melting point of 2500°C, however, together they both melt at a much lower temperature! Colourants are metal oxides like cobalt (blue), chrome (green through black), copper (green, blue, even red!), manganese (black, purple and pink) iron (red brown), etc. Different chemicals in the glaze can have dramatic effects. for example, barium carbonate (which we don’t use) turns manganese bright pink! Other elements can turn manganese dioxide brown, blue, purple and reddish brown. Manganese dioxide is a flux in and of itself as well. So, glazes that get their black and purple colours, often interact with other glazes and RUN! Our mirror black is a good example – it mixes really well with many glazes because it fluxes them – causes them to melt faster. It will also bring out many beautiful colours in the glazes because it’s black colouring most definitely comes from manganese dioxide! Glaze chemistry is a whole subject on it’s own! We use commercial Mayco glazes on purpose – for their huge range of colour possibilities, stability, cool interactions, artistic freedom with the ability to easily brush the glazes on and ease of use. We currently have almost 50 glazes on hand! A major project is to test the interactions of all glazes with each other. That is 2,500 test tiles!!!! I’m going to make the wall behind the wheels the feature wall of pretty colours! Step Seven – Glaze (Gloss or sometimes called “Glost”) Firing Most of the time this is the final stage of making your creation (but not always!) The glaze kiln goes to 1240°C. This is called cone 6, or midrange. It is the low end of stoneware temperatures. Stoneware clays and glazes are typically fired at cone 8 – 10, that is 1260 – 1290°C. The energy requirement to go from 1240°C to 1280°C is almost a 30% more! Our clay is formulated to vitrify (mature, turn “glass-like”) at 1240°, as are our glazes. A glaze kiln take around 12 hours to reach temperature and two to three days to cool down. Sometimes a third firing process is required – this is for decoration that is added to work after the glaze firing. For example – adding precious metals and lustres. this firing temperature is usually around 600 – 800°C depending upon the techniques being used. There are many students interested in gold and silver trims – we will be doing this third type of firing soon! After firing your work will be in the student finished work shelves. Remember to pay for it before you head out the door! There is a small extra charge for using porcelain clay (it’s more than twice the price of regular clay), and for any third firing process! Once your work has been fired it can not turn back into clay for millennia – so don’t fire it if you don’t like it! Put it in the bucket for recycling. https://firebirdstudios.com.au/the-process-of-making-pottery/Ceramics have evolved over thousands of years.A white earthenware side plate with a gadroon edge. Has water marks and chips on front.‘Johnson Bros England Reg No 15587’flagstaff hill, warrnambool, shipwrecked-coast, flagstaff-hill, flagstaff-hill-maritime-museum, maritime-museum, shipwreck-coast, flagstaff-hill-maritime-village, johnson bros, ceramics, tableware -
 Flagstaff Hill Maritime Museum and Village
Domestic object - Plate, Alfred Meakin
The Process of Making Pottery Decorating, Firing, Glazing, Making, Technical There is a rhythm and flow to clay. It can’t be done all at once! Even the making process! It can take weeks to get everything done, especially if you can only work on your pottery once a week! Even though we have three hour classes, it’s often just not enough time! Here is an overview of some of the processes so you have a bit more grasp on some of the technical stuff! Step One – Design There are SO many ideas out there for making stuff in clay! From delicate porcelain jewellery, through to heavy sculptural work and everything in between. Deciding your direction is sometimes not that easy – when you first start, try everything, you will naturally gravitate to the style that you enjoy! The options and variations are endless and can get a wee bit overwhelming too! Check in with me before you start to ensure your ideas will work, what order you might do things, how you could achieve the look you are seeking and any other technical data required! Step Two – Making Clay is thixotropic. This means that as you work with it, the clay first gets sloppier and wetter, before is begins to dry in the atmosphere. For most things, you simply can’t do all parts of the project at once. An example of work order might look like: Get last weeks work out from the shelves Prepare clay for today’s work – roll your clay, prepare balls for throwing, make the first stage of a pinch pot) Clean up last week’s work and put it on the shelf for bisque firing Check that you have any glazing to do – and do enough of it that you will have time to finish your main project Do the next step of your next project – there might be a further step that can’t be complete immediately, in that case, wrap your work well and put onto the shelves. Letting your work rest for a while can really help keep your work clean and professional looking. Many things require bagging under plastic to keep it ready for work the next week – put your name on the outside of the bag so you can find your work easily. We have stickers and markers. Consider how you want to decorate your work – coloured slip can be applied at a fairly wet stage (remembering that it will make your work even wetter!). Trying to apply slip to dry clay won’t work! If you want to do sgraffito – you will need to keep the work leather hard (a state of dryness where you can still work the clay with a little effort and a little water and care). Step Three – Drying Most of the time your work can go into the rack uncovered to let it dry out for the following week. If you want to continue forming or shaping you will need to double bag your work – put your work on a suitable sized bat and put the bat in a bag so the base of the bag is under the bat, then put another bag over the top of the work and tuck the top of the bag under the bat. If you want to trim (or turn) your thrown work the following week, it should also be double bagged. If your work is large, delicate, or of uneven thicknesses, you should lightly cover your work for drying. When considering the drying process, bare in mind the weather, humidity and wind! The hotter and dryer, the faster things dry and work can dry unevenly in the shelves – this can lead to cracking – another time to lightly cover your work for drying. Step Four – Trimming and Cleaning Up Your work is dry! It is called greenware now and it is at it’s most fragile! Handle everything with two hands. I often refer to soft hands – keep everything gentle and with your fingers spread as much as possible. Try to not pick up things like plates too much, and always with both hands! Before your work can be bisque fired it should be “cleaned up”. You work won’t go into the kiln if it has sharp edges – when glazed, sharp edges turn into razor blades! Use a piece of fly wire to rub the work all over – this will scratch a little so be light handed. Use a knife or metal kidney to scrape any areas that require a bit more dynamic treatment than the fly wire offers! Finally, a very light wipe over with a slightly damp sponge can help soften and soothe all of your edges and dags! Trimming thrown work: If you are planning to trim (or turn) your thrown work (and you should be), make sure you bag it well – your work should be leather hard to almost dry for easiest trimming. Use this step to finish the work completely – use a metal kidney to polish the surface, or a slightly damp sponge to give a freshly thrown look. Wipe the sponge around the rim after trimming, and check the inside of the pot for dags! Trimming slip cast work: Usually I will trim the rims of your work on the wheel the following day to make that stage easier, however you will still need to check your work for lumps and bumps. Last but not least – check that your name is still clearly on the bottom of your work. Step Five – Bisque Firing When the work is completely dry it can go into the bisque kiln. The bisque kiln is fired to 1000°C. This process burns off the water in the clay as well as some of the chemically bound water. The structure of the clay is not altered that much at this temperature. Inside the bisque kiln, the work is stacked a little, small bowl inside a larger bowl and onto a heavy plate. Smaller items like decorations or drink coasters might get stacked several high. Consideration is paid to the weight of the stack and shape of the work. A bisque kiln can fire about one and a half times the amount of work that the glaze kiln can fire. The firing takes about 10 hours to complete the cycle and about two days to cool down. Once it has been emptied the work is placed in the glaze room ready for you to decorate! Step Six – Glazing Decorating your work with colour can be a lot of fun – and time consuming! There are three main options for surface treatment at this stage: Oxide Washes Underglazes Glazes Washes and underglazes do not “glaze” the work – It will still need a layer of glaze to fully seal the clay (washes don’t need glaze on surfaces not designed for food or liquid as they can gloss up a little on their own). Underglazes are stable colourants that turn out pretty much how they look in the jar. They can be mixed with each other to form other colours and can be used like water colours to paint onto your work. Mostly they should have a clear glaze on top to seal them. Oxides are a different species – the pink oxide (cobalt) wash turns out bright blue for instance. They don’t always need a glaze on top, and some glazes can change the colour of the wash! The glazes need no other “glaze” on top! Be careful of unknown glaze interactions – you can put any combination of glaze in a bowl or on a plate, but only a single glaze on the outside of any vertical surface! Glazes are a chemical reaction under heat. We don’t know the exact chemicals in the Mayco glazes we use. I can guess by the way they interact with each other, however, on the whole, you need to test every idea you have, and not run the test on a vertical surface! Simply put, glaze is a layer of glass like substance that bonds with the clay underneath. Clay is made of silica, alumina and water. Glaze is made of mostly silica. Silica has a melting point of 1700°C and we fire to 1240°C. The silica requires a “flux” to help it melt at the lower temperature. Fluxes can be all sorts of chemicals – a common one is calcium – calcium has a melting point of 2500°C, however, together they both melt at a much lower temperature! Colourants are metal oxides like cobalt (blue), chrome (green through black), copper (green, blue, even red!), manganese (black, purple and pink) iron (red brown), etc. Different chemicals in the glaze can have dramatic effects. for example, barium carbonate (which we don’t use) turns manganese bright pink! Other elements can turn manganese dioxide brown, blue, purple and reddish brown. Manganese dioxide is a flux in and of itself as well. So, glazes that get their black and purple colours, often interact with other glazes and RUN! Our mirror black is a good example – it mixes really well with many glazes because it fluxes them – causes them to melt faster. It will also bring out many beautiful colours in the glazes because it’s black colouring most definitely comes from manganese dioxide! Glaze chemistry is a whole subject on it’s own! We use commercial Mayco glazes on purpose – for their huge range of colour possibilities, stability, cool interactions, artistic freedom with the ability to easily brush the glazes on and ease of use. We currently have almost 50 glazes on hand! A major project is to test the interactions of all glazes with each other. That is 2,500 test tiles!!!! I’m going to make the wall behind the wheels the feature wall of pretty colours! Step Seven – Glaze (Gloss or sometimes called “Glost”) Firing Most of the time this is the final stage of making your creation (but not always!) The glaze kiln goes to 1240°C. This is called cone 6, or midrange. It is the low end of stoneware temperatures. Stoneware clays and glazes are typically fired at cone 8 – 10, that is 1260 – 1290°C. The energy requirement to go from 1240°C to 1280°C is almost a 30% more! Our clay is formulated to vitrify (mature, turn “glass-like”) at 1240°, as are our glazes. A glaze kiln take around 12 hours to reach temperature and two to three days to cool down. Sometimes a third firing process is required – this is for decoration that is added to work after the glaze firing. For example – adding precious metals and lustres. this firing temperature is usually around 600 – 800°C depending upon the techniques being used. There are many students interested in gold and silver trims – we will be doing this third type of firing soon! After firing your work will be in the student finished work shelves. Remember to pay for it before you head out the door! There is a small extra charge for using porcelain clay (it’s more than twice the price of regular clay), and for any third firing process! Once your work has been fired it can not turn back into clay for millennia – so don’t fire it if you don’t like it! Put it in the bucket for recycling. https://firebirdstudios.com.au/the-process-of-making-pottery/Ceramics have evolved over thousands of years.Earthenware dessert plate, cream colour. Made by Alfred Meakin, England. Backstamped ‘Alfred Meakin England’. flagstaff hill, warrnambool, shipwrecked-coast, flagstaff-hill, flagstaff-hill-maritime-museum, maritime-museum, shipwreck-coast, flagstaff-hill-maritime-village, alfred meakin, ceramics, earthenware, kitchenware -
 Flagstaff Hill Maritime Museum and Village
Domestic object - Jug
The Process of Making Pottery Decorating, Firing, Glazing, Making, Technical There is a rhythm and flow to clay. It can’t be done all at once! Even the making process! It can take weeks to get everything done, especially if you can only work on your pottery once a week! Even though we have three hour classes, it’s often just not enough time! Here is an overview of some of the processes so you have a bit more grasp on some of the technical stuff! Step One – Design There are SO many ideas out there for making stuff in clay! From delicate porcelain jewellery, through to heavy sculptural work and everything in between. Deciding your direction is sometimes not that easy – when you first start, try everything, you will naturally gravitate to the style that you enjoy! The options and variations are endless and can get a wee bit overwhelming too! Check in with me before you start to ensure your ideas will work, what order you might do things, how you could achieve the look you are seeking and any other technical data required! Step Two – Making Clay is thixotropic. This means that as you work with it, the clay first gets sloppier and wetter, before is begins to dry in the atmosphere. For most things, you simply can’t do all parts of the project at once. An example of work order might look like: Get last weeks work out from the shelves Prepare clay for today’s work – roll your clay, prepare balls for throwing, make the first stage of a pinch pot) Clean up last week’s work and put it on the shelf for bisque firing Check that you have any glazing to do – and do enough of it that you will have time to finish your main project Do the next step of your next project – there might be a further step that can’t be complete immediately, in that case, wrap your work well and put onto the shelves. Letting your work rest for a while can really help keep your work clean and professional looking. Many things require bagging under plastic to keep it ready for work the next week – put your name on the outside of the bag so you can find your work easily. We have stickers and markers. Consider how you want to decorate your work – coloured slip can be applied at a fairly wet stage (remembering that it will make your work even wetter!). Trying to apply slip to dry clay won’t work! If you want to do sgraffito – you will need to keep the work leather hard (a state of dryness where you can still work the clay with a little effort and a little water and care). Step Three – Drying Most of the time your work can go into the rack uncovered to let it dry out for the following week. If you want to continue forming or shaping you will need to double bag your work – put your work on a suitable sized bat and put the bat in a bag so the base of the bag is under the bat, then put another bag over the top of the work and tuck the top of the bag under the bat. If you want to trim (or turn) your thrown work the following week, it should also be double bagged. If your work is large, delicate, or of uneven thicknesses, you should lightly cover your work for drying. When considering the drying process, bare in mind the weather, humidity and wind! The hotter and dryer, the faster things dry and work can dry unevenly in the shelves – this can lead to cracking – another time to lightly cover your work for drying. Step Four – Trimming and Cleaning Up Your work is dry! It is called greenware now and it is at it’s most fragile! Handle everything with two hands. I often refer to soft hands – keep everything gentle and with your fingers spread as much as possible. Try to not pick up things like plates too much, and always with both hands! Before your work can be bisque fired it should be “cleaned up”. You work won’t go into the kiln if it has sharp edges – when glazed, sharp edges turn into razor blades! Use a piece of fly wire to rub the work all over – this will scratch a little so be light handed. Use a knife or metal kidney to scrape any areas that require a bit more dynamic treatment than the fly wire offers! Finally, a very light wipe over with a slightly damp sponge can help soften and soothe all of your edges and dags! Trimming thrown work: If you are planning to trim (or turn) your thrown work (and you should be), make sure you bag it well – your work should be leather hard to almost dry for easiest trimming. Use this step to finish the work completely – use a metal kidney to polish the surface, or a slightly damp sponge to give a freshly thrown look. Wipe the sponge around the rim after trimming, and check the inside of the pot for dags! Trimming slip cast work: Usually I will trim the rims of your work on the wheel the following day to make that stage easier, however you will still need to check your work for lumps and bumps. Last but not least – check that your name is still clearly on the bottom of your work. Step Five – Bisque Firing When the work is completely dry it can go into the bisque kiln. The bisque kiln is fired to 1000°C. This process burns off the water in the clay as well as some of the chemically bound water. The structure of the clay is not altered that much at this temperature. Inside the bisque kiln, the work is stacked a little, small bowl inside a larger bowl and onto a heavy plate. Smaller items like decorations or drink coasters might get stacked several high. Consideration is paid to the weight of the stack and shape of the work. A bisque kiln can fire about one and a half times the amount of work that the glaze kiln can fire. The firing takes about 10 hours to complete the cycle and about two days to cool down. Once it has been emptied the work is placed in the glaze room ready for you to decorate! Step Six – Glazing Decorating your work with colour can be a lot of fun – and time consuming! There are three main options for surface treatment at this stage: Oxide Washes Underglazes Glazes Washes and underglazes do not “glaze” the work – It will still need a layer of glaze to fully seal the clay (washes don’t need glaze on surfaces not designed for food or liquid as they can gloss up a little on their own). Underglazes are stable colourants that turn out pretty much how they look in the jar. They can be mixed with each other to form other colours and can be used like water colours to paint onto your work. Mostly they should have a clear glaze on top to seal them. Oxides are a different species – the pink oxide (cobalt) wash turns out bright blue for instance. They don’t always need a glaze on top, and some glazes can change the colour of the wash! The glazes need no other “glaze” on top! Be careful of unknown glaze interactions – you can put any combination of glaze in a bowl or on a plate, but only a single glaze on the outside of any vertical surface! Glazes are a chemical reaction under heat. We don’t know the exact chemicals in the Mayco glazes we use. I can guess by the way they interact with each other, however, on the whole, you need to test every idea you have, and not run the test on a vertical surface! Simply put, glaze is a layer of glass like substance that bonds with the clay underneath. Clay is made of silica, alumina and water. Glaze is made of mostly silica. Silica has a melting point of 1700°C and we fire to 1240°C. The silica requires a “flux” to help it melt at the lower temperature. Fluxes can be all sorts of chemicals – a common one is calcium – calcium has a melting point of 2500°C, however, together they both melt at a much lower temperature! Colourants are metal oxides like cobalt (blue), chrome (green through black), copper (green, blue, even red!), manganese (black, purple and pink) iron (red brown), etc. Different chemicals in the glaze can have dramatic effects. for example, barium carbonate (which we don’t use) turns manganese bright pink! Other elements can turn manganese dioxide brown, blue, purple and reddish brown. Manganese dioxide is a flux in and of itself as well. So, glazes that get their black and purple colours, often interact with other glazes and RUN! Our mirror black is a good example – it mixes really well with many glazes because it fluxes them – causes them to melt faster. It will also bring out many beautiful colours in the glazes because it’s black colouring most definitely comes from manganese dioxide! Glaze chemistry is a whole subject on it’s own! We use commercial Mayco glazes on purpose – for their huge range of colour possibilities, stability, cool interactions, artistic freedom with the ability to easily brush the glazes on and ease of use. We currently have almost 50 glazes on hand! A major project is to test the interactions of all glazes with each other. That is 2,500 test tiles!!!! I’m going to make the wall behind the wheels the feature wall of pretty colours! Step Seven – Glaze (Gloss or sometimes called “Glost”) Firing Most of the time this is the final stage of making your creation (but not always!) The glaze kiln goes to 1240°C. This is called cone 6, or midrange. It is the low end of stoneware temperatures. Stoneware clays and glazes are typically fired at cone 8 – 10, that is 1260 – 1290°C. The energy requirement to go from 1240°C to 1280°C is almost a 30% more! Our clay is formulated to vitrify (mature, turn “glass-like”) at 1240°, as are our glazes. A glaze kiln take around 12 hours to reach temperature and two to three days to cool down. Sometimes a third firing process is required – this is for decoration that is added to work after the glaze firing. For example – adding precious metals and lustres. this firing temperature is usually around 600 – 800°C depending upon the techniques being used. There are many students interested in gold and silver trims – we will be doing this third type of firing soon! After firing your work will be in the student finished work shelves. Remember to pay for it before you head out the door! There is a small extra charge for using porcelain clay (it’s more than twice the price of regular clay), and for any third firing process! Once your work has been fired it can not turn back into clay for millennia – so don’t fire it if you don’t like it! Put it in the bucket for recycling. https://firebirdstudios.com.au/the-process-of-making-pottery/The form of the jug has been in use for many centuries.Stoneware jug. Two tone brown glaze with pierced lip behind spout. Spout chipped.None.flagstaff hill, warrnambool, shipwrecked-coast, flagstaff-hill, flagstaff-hill-maritime-museum, maritime-museum, shipwreck-coast, flagstaff-hill-maritime-village, jug, ceramic jug -
 Tatura Irrigation & Wartime Camps Museum
Photographic Glass Plates, : AUSTRAL DRY PLATE, T. Baker & Co., Austral Laboratory, Williams Family, 1900
... : AUSTRAL DRY PLATE, T. Baker & Co., Austral Laboratory,... Photographic Glass Plates : AUSTRAL DRY PLATE, T. Baker & Co., Austral ...Williams store was a department store near the corner of Hogan and Thomson Streets with a house attached. These glass plates were found in 1973 by Mr Jack Smith who owned the building then.33 glass negatives discovered in the ceiling of a Tatura historic home. Some family photos (F. Williams of Williams Store); some hymns with music and some coastal scenes.early photography, glass negatives, williams family -
 Victorian Aboriginal Corporation for Languages
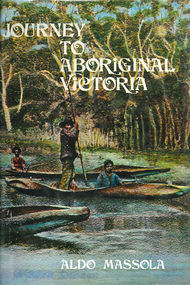
Book, Aldo Massola, Journey to Aboriginal Victoria, 1969
Looks at the Aboriginal community from the time of white contact, across many parts of Victoria. Chap.1; Melbourne - early missions, camp of Native Police, corroboree trees, canoe trees, grave &? headstone of Derrimut; quarries at Keilor, excavation sites at Green Gully &? Keilor; quarry at Mt. William, notes on inheritance of quarries Coranderrk settlement - Barraks grave, notes on his life; Chap.2; Geelong - Yawangi group of the Wothowurong tribe, camping grounds in area quarries; Notes on William Buckley, Gellibrand (a notable Aboriginal), graves in the Western Cemetery; Chap.3; Colac - war between Colac &? Geelong tribes; Mission at Birregurra, reason for failure of Buntingdale Mission; brass plate to Coc-coc-coine; reserve at Elliminyt, native ovens, camp sites, initiation site &? ritual; quarry sites, axegrinding factory, rock pecking &? engraving; dried hand &? 3 Aboriginal skulls found; Chap.4; The south-west coast - middens, camp sites notes on Framlingham Stn., fish traps at Tyrendarra; Chap.5; The far west - massacres of Aborigines near Casterton; camp sites, oven mounds; the first cricket team formed; Aboriginal cemetery; Chap.6; Hamilton - camps; Mount Rouse Station, axegrinding grooves at Nareeb Nareeb, shelters described, fish traps, massacre at Lake Condah; mission; canoes; Chap.7; Camperdown - legend about Lake Bullen Merri; obelisk erected in memory of Aborigines of district especially chief Wombeetch Puyuun; Jarcoort tribe; fish weirs, camps, intertribal fights between Booluc-burrers, Jarcoorts &? Ellengermote groups; bartering place at Mount Noorat; articles traded, legend of Flat-Top Hill; Chap.8; Ballarat - camp at Lake Wendouree; White Stone Lagoon; legends concerning Mt. Buninyong &? waterfalls at Lal-lal; camp sites; pygmy-type implements near Meredith, quarry at Glue Pot Rocks near Durdidwarrah; brass plate of King Billy; Chap.9; Ararat - Tjapwurong territory; camp sites, quarries, shield &? canoe trees; Bunyip belief at Lake Buninjon of Muk-jarawaint &? Pirtkopen-noot tribes, gives legend; stone implements; mill stones; fish weirs; stone arrangement near Lake Wongan; ground drawing of a bunyip, paintings in rock shelter near Mt. Langi Ghiran; Chap.10; Maryborough - camps, oven mounds, rock wells, stone arrangement at Carisbrook; camp sites at Mt. Franklin; Chap.11; Charlton - belief in Mindye (snake); canoe trees, ovens, camp sites, water holes, rock wells, stone implements; method of rainmaking; Chap.12; Horsham-Stawell, The Wimmera - Wotjobaluk land; camps, fish traps at Toolondo; Black Range cave paintings, Flat Rock shelters (detailed account of these paintings); Bunjils Cave; Chap.13; Horsham-Stawell, The Mallee - camp sites, implements; Ebenezer Mission, Willie Wimmera taken to England by Rev. Chase to become a missionary, died in England; Chap.14; The Murray River, Mildura Swan Hill - Battle of the Rufus; ceremonial ground, Lake Gol Gol, canoe &? shield trees; stone implements; camp sites, fire place arrangements; fish traps; oven mounds; Chap.15; The Murray River, Swan Hill-Echuca - legend about Lake Boga; camps, oven mounds, the Cohuna skull, Kow Swamp, method of burial; Chap.16; Shepparton ovens; brass plates of King Paddy of Kotupna &? King Tattambo of Mulka Stn., native well, camps; Chap.17; Wangaratta -camps, quarry, rock holes, the Faithful massacre; grinding rocks at Earlston; Chap.18; The High Plains - Ya-itma-thang; camps, Bogong moth feasts, native paths for trade &? intertribal fights, articles traded; painted shelters; Koetong Ck. Valley, near Mt. Pilot &? near Barwidgee Ck.; Chap.19; Dandenong - water holes, list of 8 holes in Beaumaris - Black Rock area; camps, middens, stone implements (microliths), legend of Angels Cave, stone axes, Native Police Force, Narre Narre Warren Station, legend about rocks on Bald Hill, kangaroo totemic site; Chap.20; Wonthaggi- Yarram - natives visit Phillip Is., murder of William Cook and Yankee by five Tasmanians (listed as Bon Small Boy, Jack Napoleon Timninaparewa, Fanny Waterpoordeyer, Matilda Nattopolenimma and Truganini) near Cape Patterson, men; camp sites, middens, legend of White Rock; Chap.21; Sale - Bairnsdale, The Lakes Country middens, camps; legend at Wulrunjeri; story of a white woman supposedly living with with the Tutangolung tribe, efforts made to prove story; canoe trees; Chap.22; Sale-Bairnsdale, The Inland Braiakolung tribe, camps, implements, canoe &? shield trees; Ramahyuck Mission, grinding rocks, fights with Omeo tribe; native tracks, death through enemy magic - procedure, belief in ghosts; Chap.23; Lakes Entrance and the Country to the east - Kroatungolung people, legend of Kalimna Valley; camps, stones of Nargun, bunyip, devils at Lake Tyers, excavation at Buchan, carbon dates; middens, ochre at Cape Conrad, stone fish-hook file at Thurra River; note on Bidwel tribe; Each chapter gives historical details, early contacts, relationships with settlers; Aboriginal place names and detailed description of sites and geographical features.b&w photographs, b&w illustrations, colour illustrationsgeelong, colac, hamilton, camperdown, ballarat, ararat, maryborough, charlton, horsham, stawell, murray river, shepparton, wangaratta, dandenong, wonthaggi, yarram, sale, bairnsdale, lakes entrance -
 Mont De Lancey
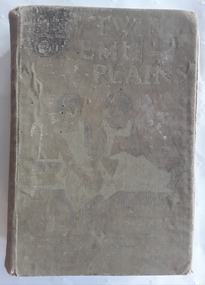
Book, Mary Grant Bruce, The Twins of Emu Plain, 1923
Twin 16 year old sisters bravely assist their father on his farm while Emu Palins is in the grip of a disastrous and seemingly endless drought. Being young the twins treat trouble as a tremendous joke , and by their lightheartedness and practical help their harassed parents are able to carry on. Adventure and incident abound in this tale.A very marked and damaged brown fabric covered book with the faded title The Twins of Emu Plains printed on the front cover with twin girls sitting on a window seat reading a letter. The back cover has dried mould at the bottom and also inside at the back on some pages. The inside front and back of the spine is showing signs of breaking away from the covers. There are a few illustrated black and white plates. Foxing is seen on the edges of the pages. p.256.fictionTwin 16 year old sisters bravely assist their father on his farm while Emu Palins is in the grip of a disastrous and seemingly endless drought. Being young the twins treat trouble as a tremendous joke , and by their lightheartedness and practical help their harassed parents are able to carry on. Adventure and incident abound in this tale.adventure fiction, farm life fiction, drought - australia -
 Mont De Lancey
Plate
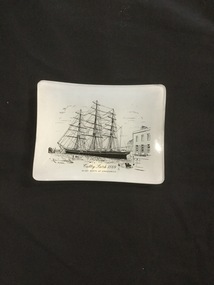
... February 1870. plates ships sailing ships Small white plate ...Cutty Sark is the world’s only surviving extreme clipper. Launched on 22 November 1869 in Dumbarton, Scotland, it embarked on its maiden voyage from London to Shanghai on 16 February 1870.Small white plate with black photo of the "Cutty Sark 1869" in dry berth at Greenwich.plates, ships, sailing ships -
 Wodonga & District Historical Society Inc
Negative - Haeusler Glass Negatives Collection -- Haeuslers inspecting fruit
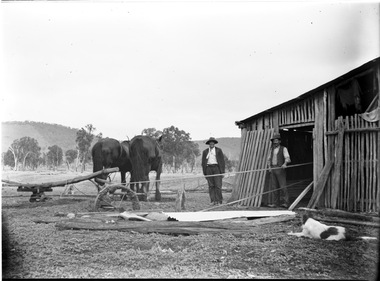
... dry plate photography... family glass negatives dry plate photography Digital image ...The Wodonga Historical Society Haeusler Collection provides invaluable insight into life in late nineteenth and early twentieth century north east Victoria. The collection comprises manuscripts, personal artefacts used by the Haeusler family on their farm in Wodonga, and a set of glass negatives which offer a unique visual snapshot of the domestic and social lives of the Haeusler family and local Wodonga community. The Haeusler family migrated from Prussia (Germany) to South Australia in the 1840s and 1850s, before purchasing 100 acres of Crown Land made available under the Victorian Lands Act 1862 (also known as ‘Duffy’s Land Act’) in 1866 in what is now Wodonga West. The Haeusler family were one of several German families to migrate from South Australia to Wodonga in the 1860s. This digital image was produced from one of the glass negatives that form part of the collection, probably taken by Louis Haeusler (b.1887) with the photographic equipment in the Wodonga Historical Society Haeusler Collection. This item is unique and has well documented provenance and a known owner. It forms part of a significant and representative historical collection which reflects the local history of Wodonga. It contributes to our understanding of domestic and family life in early twentieth century Wodonga, as well as providing interpretative capacity for themes including local history and social history.Digital image created from the Haeusler Glass negative collection. The image shows the men inspecting the fruit for codlin moth which was new to the area. August Klinge holds a water divining rod behind his back.wodonga pioneers, haeusler family, glass negatives, dry plate photography -
 Wodonga & District Historical Society Inc
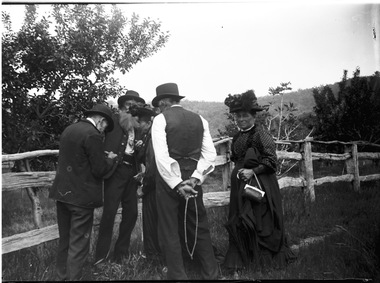
Negative - Haeusler Glass Negatives Collection - Three ladies in a horse and buggy
... dry plate photography... family glass negatives dry plate photography horse and buggy ...The Wodonga Historical Society Haeusler Collection provides invaluable insight into life in late nineteenth and early twentieth century north east Victoria. The collection comprises manuscripts, personal artefacts used by the Haeusler family on their farm in Wodonga, and a set of glass negatives which offer a unique visual snapshot of the domestic and social lives of the Haeusler family and local Wodonga community. The Haeusler family migrated from Prussia (Germany) to South Australia in the 1840s and 1850s, before purchasing 100 acres of Crown Land made available under the Victorian Lands Act 1862 (also known as ‘Duffy’s Land Act’) in 1866 in what is now Wodonga West. The Haeusler family were one of several German families to migrate from South Australia to Wodonga in the 1860s. This digital image was produced from one of the glass negatives that form part of the collection, probably taken by Louis Haeusler (b.1887) with the photographic equipment in the Wodonga Historical Society Haeusler Collection. This item is unique and has well documented provenance and a known owner. It forms part of a significant and representative historical collection which reflects the local history of Wodonga. It contributes to our understanding of domestic and family life in early twentieth century Wodonga, as well as providing interpretative capacity for themes including local history and social history.Digital image created from the Haeusler Glass negative collectionwodonga pioneers, haeusler family, glass negatives, dry plate photography, horse and buggy, transport -
 Wodonga & District Historical Society Inc
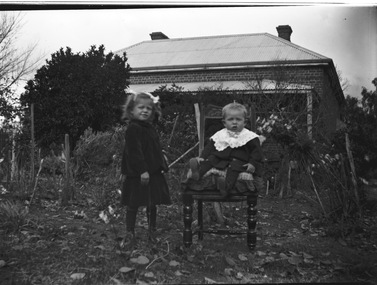
Negative - Haeusler Glass Negatives Collection - Margery Children
... dry plate photography... family glass negatives dry plate photography Digital image ...The Wodonga Historical Society Haeusler Collection provides invaluable insight into life in late nineteenth and early twentieth century north east Victoria. The collection comprises manuscripts, personal artefacts used by the Haeusler family on their farm in Wodonga, and a set of glass negatives which offer a unique visual snapshot of the domestic and social lives of the Haeusler family and local Wodonga community. The Haeusler family migrated from Prussia (Germany) to South Australia in the 1840s and 1850s, before purchasing 100 acres of Crown Land made available under the Victorian Lands Act 1862 (also known as ‘Duffy’s Land Act’) in 1866 in what is now Wodonga West. The Haeusler family were one of several German families to migrate from South Australia to Wodonga in the 1860s. This digital image was produced from one of the glass negatives that form part of the collection, probably taken by Louis Haeusler (b.1887) with the photographic equipment in the Wodonga Historical Society Haeusler Collection. This item is unique and has well documented provenance and a known owner. It forms part of a significant and representative historical collection which reflects the local history of Wodonga. It contributes to our understanding of domestic and family life in early twentieth century Wodonga, as well as providing interpretative capacity for themes including local history and social history.Digital image created from the Haeusler Glass negative collectionwodonga pioneers, haeusler family, glass negatives, dry plate photography -
 Wodonga & District Historical Society Inc
Negative - Haeusler Glass Negatives Collection - Two men operating a chaff cutter
... dry plate photography... family glass negatives dry plate photography Digital image ...The Wodonga Historical Society Haeusler Collection provides invaluable insight into life in late nineteenth and early twentieth century north east Victoria. The collection comprises manuscripts, personal artefacts used by the Haeusler family on their farm in Wodonga, and a set of glass negatives which offer a unique visual snapshot of the domestic and social lives of the Haeusler family and local Wodonga community. The Haeusler family migrated from Prussia (Germany) to South Australia in the 1840s and 1850s, before purchasing 100 acres of Crown Land made available under the Victorian Lands Act 1862 (also known as ‘Duffy’s Land Act’) in 1866 in what is now Wodonga West. The Haeusler family were one of several German families to migrate from South Australia to Wodonga in the 1860s. This digital image was produced from one of the glass negatives that form part of the collection, probably taken by Louis Haeusler (b.1887) with the photographic equipment in the Wodonga Historical Society Haeusler Collection. This item is unique and has well documented provenance and a known owner. It forms part of a significant and representative historical collection which reflects the local history of Wodonga. It contributes to our understanding of domestic and family life in early twentieth century Wodonga, as well as providing interpretative capacity for themes including local history and social history.Digital image created from the Haeusler Glass negative collection. An image of two men operating a chaff cutter which is drawn by horses. The men are believed to be Fred and Harry Klinge, working at their shed on the Klinge property, "The Laurels". wodonga pioneers, haeusler family, glass negatives, dry plate photography -
 Wodonga & District Historical Society Inc
Negative - Haeusler Glass Negatives Collection - Man with horse and cart
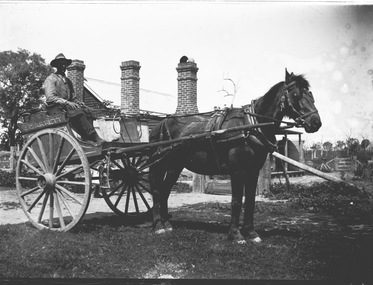
... dry plate photography... dry plate photography John Garrett The name on the cart above ...The Wodonga Historical Society Haeusler Collection provides invaluable insight into life in late nineteenth and early twentieth century north east Victoria. The collection comprises manuscripts, personal artefacts used by the Haeusler family on their farm in Wodonga, and a set of glass negatives which offer a unique visual snapshot of the domestic and social lives of the Haeusler family and local Wodonga community. The Haeusler family migrated from Prussia (Germany) to South Australia in the 1840s and 1850s, before purchasing 100 acres of Crown Land made available under the Victorian Lands Act 1862 (also known as ‘Duffy’s Land Act’) in 1866 in what is now Wodonga West. The Haeusler family were one of several German families to migrate from South Australia to Wodonga in the 1860s. This digital image was produced from one of the glass negatives that form part of the collection, probably taken by Louis Haeusler (b.1887) with the photographic equipment in the Wodonga Historical Society Haeusler Collection. John Garrett brought a butchering business from Thomas Boyes in Wodonga in 1902. He was president of the local Turf Club and was elected to the Wodonga Council in 1911. This item is unique and has well documented provenance and a known owner. It forms part of a significant and representative historical collection which reflects the local history of Wodonga. It contributes to our understanding of domestic and family life in early twentieth century Wodonga, as well as providing interpretative capacity for themes including local history and social history.Digital image created from the Haeusler Glass negative collection. An image of a man driving a horse and cart. A house can be seen in the background.The name on the cart above the wheel says "J.C. GARRETT"wodonga pioneers, haeusler family, glass negatives, dry plate photography, john garrett -
 Wodonga & District Historical Society Inc
Negative - Haeusler Glass Negatives Collection - Wodonga West Primary School
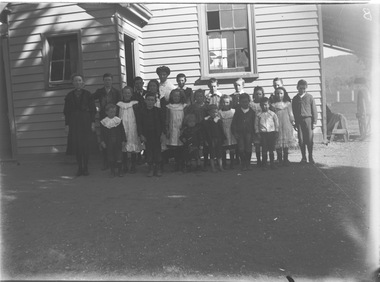
... dry plate photography... family glass negatives dry plate photography wodonga west primary ...The Wodonga Historical Society Haeusler Collection provides invaluable insight into life in late nineteenth and early twentieth century north east Victoria. The collection comprises manuscripts, personal artefacts used by the Haeusler family on their farm in Wodonga, and a set of glass negatives which offer a unique visual snapshot of the domestic and social lives of the Haeusler family and local Wodonga community. The Haeusler family migrated from Prussia (Germany) to South Australia in the 1840s and 1850s, before purchasing 100 acres of Crown Land made available under the Victorian Lands Act 1862 (also known as ‘Duffy’s Land Act’) in 1866 in what is now Wodonga West. The Haeusler family were one of several German families to migrate from South Australia to Wodonga in the 1860s. This digital image was produced from one of the glass negatives that form part of the collection, probably taken by Louis Haeusler (b.1887) with the photographic equipment in the Wodonga Historical Society Haeusler Collection. This item is unique and has well documented provenance and a known owner. It forms part of a significant and representative historical collection which reflects the local history of Wodonga. It contributes to our understanding of domestic and family life in early twentieth century Wodonga, as well as providing interpretative capacity for themes including local history and social history.Digital image created from the Haeusler Glass negative collection. A group of children and their teacher outside Wodonga West Primary School No. 1058. C.1910. The school was located near the current intersection of McKoy Street and the Hume Freeway in West Wodonga on land donated by J.W. Klinge, replacing an older school north of the railway line. It operated from January 1870 to May 1950 when the nine remaining students transferred to Wodonga Primary School. wodonga pioneers, haeusler family, glass negatives, dry plate photography, wodonga west primary school, schools wodonga -
 Wodonga & District Historical Society Inc
Negative - Haeusler Glass Negatives Collection - Man with horses and equipment in a paddock
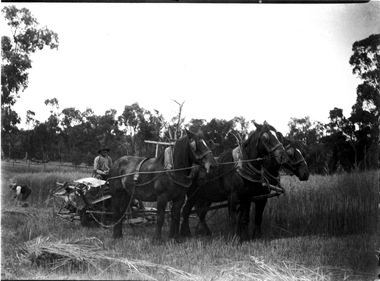
... dry plate photography... family glass negatives dry plate photography agricultural work ...The Wodonga Historical Society Haeusler Collection provides invaluable insight into life in late nineteenth and early twentieth century north east Victoria. The collection comprises manuscripts, personal artefacts used by the Haeusler family on their farm in Wodonga, and a set of glass negatives which offer a unique visual snapshot of the domestic and social lives of the Haeusler family and local Wodonga community. The Haeusler family migrated from Prussia (Germany) to South Australia in the 1840s and 1850s, before purchasing 100 acres of Crown Land made available under the Victorian Lands Act 1862 (also known as ‘Duffy’s Land Act’) in 1866 in what is now Wodonga West. The Haeusler family were one of several German families to migrate from South Australia to Wodonga in the 1860s. This digital image was produced from one of the glass negatives that form part of the collection, probably taken by Louis Haeusler (b.1887) with the photographic equipment in the Wodonga Historical Society Haeusler Collection. This item is unique and has well documented provenance and a known owner. It forms part of a significant and representative historical collection which reflects the local history of Wodonga. It contributes to our understanding of domestic and family life in early twentieth century Wodonga, as well as providing interpretative capacity for themes including local history and social history.Digital image created from the Haeusler Glass negative collection. A man with a team of four horses and equipment working in a paddock. A second man is working in the background. wodonga pioneers, haeusler family, glass negatives, dry plate photography, agricultural work -
 Wodonga & District Historical Society Inc
Negative - Haeusler Glass Negatives Collection - Nellie Haeusler and J. Mann with Sunday School children, West Wodonga
... dry plate photography... family glass negatives dry plate photography sunday school west ...The Wodonga Historical Society Haeusler Collection provides invaluable insight into life in late nineteenth and early twentieth century north east Victoria. The collection comprises manuscripts, personal artefacts used by the Haeusler family on their farm in Wodonga, and a set of glass negatives which offer a unique visual snapshot of the domestic and social lives of the Haeusler family and local Wodonga community. The Haeusler family migrated from Prussia (Germany) to South Australia in the 1840s and 1850s, before purchasing 100 acres of Crown Land made available under the Victorian Lands Act 1862 (also known as ‘Duffy’s Land Act’) in 1866 in what is now Wodonga West. The Haeusler family were one of several German families to migrate from South Australia to Wodonga in the 1860s. This digital image was produced from one of the glass negatives that form part of the collection, probably taken by Louis Haeusler (b.1887) with the photographic equipment in the Wodonga Historical Society Haeusler Collection. This item is unique and has well documented provenance and a known owner. It forms part of a significant and representative historical collection which reflects the local history of Wodonga. It contributes to our understanding of domestic and family life in early twentieth century Wodonga, as well as providing interpretative capacity for themes including local history and social history.Digital image created from the Haeusler Glass negative collection. Nellie Haeusler and J. Mann with a group of Sunday School children in West Wodonga C. 1910wodonga pioneers, haeusler family, glass negatives, dry plate photography, sunday school west wodonga -
 Wodonga & District Historical Society Inc
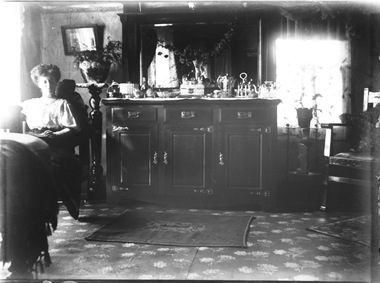
Negative - Haeusler Glass Negatives Collection - Mrs. McFarlane at Mac's Hotel, Wodonga West
... dry plate photography.... wodonga pioneers haeusler family glass negatives dry plate ...The Wodonga Historical Society Haeusler Collection provides invaluable insight into life in late nineteenth and early twentieth century north east Victoria. The collection comprises manuscripts, personal artefacts used by the Haeusler family on their farm in Wodonga, and a set of glass negatives which offer a unique visual snapshot of the domestic and social lives of the Haeusler family and local Wodonga community. The Haeusler family migrated from Prussia (Germany) to South Australia in the 1840s and 1850s, before purchasing 100 acres of Crown Land made available under the Victorian Lands Act 1862 (also known as ‘Duffy’s Land Act’) in 1866 in what is now Wodonga West. The Haeusler family were one of several German families to migrate from South Australia to Wodonga in the 1860s. This digital image was produced from one of the glass negatives that form part of the collection, probably taken by Louis Haeusler (b.1887) with the photographic equipment in the Wodonga Historical Society Haeusler Collection. Mac's Hotel, is believed to have begun in 1868. For most of its life run by William and Mary McFarlane, the son in law and daughter of Mary Ann King. In 1867 Mary Ann King had taken over the licence of the Wodonga Hotel in Sydney Road. Mac’s Hotel closed in 1891 when William withdrew his application for renewal of licence.This item is unique and has well documented provenance and a known owner. It forms part of a significant and representative historical collection which reflects the local history of Wodonga. It contributes to our understanding of domestic and family life in early twentieth century Wodonga, as well as providing interpretative capacity for themes including local history and social history.Digital image created from the Haeusler Glass negative collection. Mrs. McFarlane at Mac's Hotel. Wodonga West. wodonga pioneers, haeusler family, glass negatives, dry plate photography, sunday school west wodonga -
 Wodonga & District Historical Society Inc
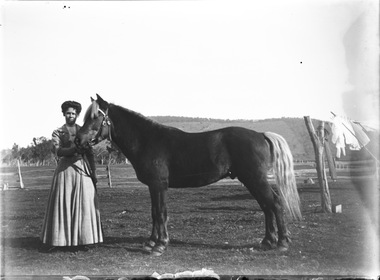
Negative - Haeusler Glass Negatives Collection - Woman holding horse
... dry plate photography... family glass negatives dry plate photography Digital image ...The Wodonga Historical Society Haeusler Collection provides invaluable insight into life in late nineteenth and early twentieth century north east Victoria. The collection comprises manuscripts, personal artefacts used by the Haeusler family on their farm in Wodonga, and a set of glass negatives which offer a unique visual snapshot of the domestic and social lives of the Haeusler family and local Wodonga community. The Haeusler family migrated from Prussia (Germany) to South Australia in the 1840s and 1850s, before purchasing 100 acres of Crown Land made available under the Victorian Lands Act 1862 (also known as ‘Duffy’s Land Act’) in 1866 in what is now Wodonga West. The Haeusler family were one of several German families to migrate from South Australia to Wodonga in the 1860s. This digital image was produced from one of the glass negatives that form part of the collection, probably taken by Louis Haeusler (b.1887) with the photographic equipment in the Wodonga Historical Society Haeusler Collection. This item is unique and has well documented provenance and a known owner. It forms part of a significant and representative historical collection which reflects the local history of Wodonga. It contributes to our understanding of domestic and family life in early twentieth century Wodonga, as well as providing interpretative capacity for themes including local history and social history.Digital image created from the Haeusler Glass negative collection. Image of a woman holding a horse in a paddock. Clothes can be seen drying on a line on the right of the image,wodonga pioneers, haeusler family, glass negatives, dry plate photography -
 Wodonga & District Historical Society Inc
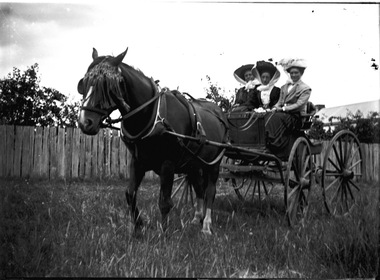
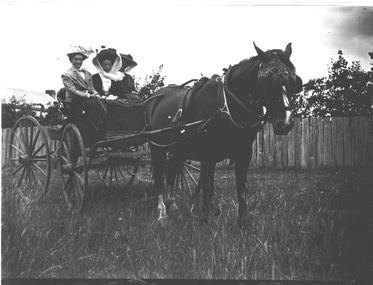
Negative - Haeusler Glass Negatives Collection - Ladies in buggy
... dry plate photography... family glass negatives dry plate photography Digital image ...The Wodonga Historical Society Haeusler Collection provides invaluable insight into life in late nineteenth and early twentieth century north east Victoria. The collection comprises manuscripts, personal artefacts used by the Haeusler family on their farm in Wodonga, and a set of glass negatives which offer a unique visual snapshot of the domestic and social lives of the Haeusler family and local Wodonga community. The Haeusler family migrated from Prussia (Germany) to South Australia in the 1840s and 1850s, before purchasing 100 acres of Crown Land made available under the Victorian Lands Act 1862 (also known as ‘Duffy’s Land Act’) in 1866 in what is now Wodonga West. The Haeusler family were one of several German families to migrate from South Australia to Wodonga in the 1860s. This digital image was produced from one of the glass negatives that form part of the collection, probably taken by Louis Haeusler (b.1887) with the photographic equipment in the Wodonga Historical Society Haeusler Collection. This item is unique and has well documented provenance and a known owner. It forms part of a significant and representative historical collection which reflects the local history of Wodonga. It contributes to our understanding of domestic and family life in early twentieth century Wodonga, as well as providing interpretative capacity for themes including local history and social history.Digital image created from the Haeusler Glass negative collection. 3 ladies in a horse and buggy similar to earlier image, but this time with a house in the background.wodonga pioneers, haeusler family, glass negatives, dry plate photography -
 Wodonga & District Historical Society Inc
Negative - Haeusler Glass Negatives Collection - Mick Egan's house being built by Louis Haeusler
... dry plate photography... family glass negatives dry plate photography house construction ...The Wodonga Historical Society Haeusler Collection provides invaluable insight into life in late nineteenth and early twentieth century north east Victoria. The collection comprises manuscripts, personal artefacts used by the Haeusler family on their farm in Wodonga, and a set of glass negatives which offer a unique visual snapshot of the domestic and social lives of the Haeusler family and local Wodonga community. The Haeusler family migrated from Prussia (Germany) to South Australia in the 1840s and 1850s, before purchasing 100 acres of Crown Land made available under the Victorian Lands Act 1862 (also known as ‘Duffy’s Land Act’) in 1866 in what is now Wodonga West. The Haeusler family were one of several German families to migrate from South Australia to Wodonga in the 1860s. This digital image was produced from one of the glass negatives that form part of the collection, probably taken by Louis Haeusler (b.1887) with the photographic equipment in the Wodonga Historical Society Haeusler Collection. This item is unique and has well documented provenance and a known owner. It forms part of a significant and representative historical collection which reflects the local history of Wodonga. It contributes to our understanding of domestic and family life in early twentieth century Wodonga, as well as providing interpretative capacity for themes including local history and social history.Digital image created from the Haeusler Glass negative collection. Image of Louis Haeusler building Mick Egan's house. The house is now under the Hume Weir,wodonga pioneers, haeusler family, glass negatives, dry plate photography, house construction -
 Wodonga & District Historical Society Inc
Negative - Haeusler Glass Negatives Collection - A woman, 2 men and 2 children all unidentified
... dry plate photography... family glass negatives dry plate photography Digital image from ...The Wodonga Historical Society Haeusler Collection provides invaluable insight into life in late nineteenth and early twentieth century north east Victoria. The collection comprises manuscripts, personal artefacts used by the Haeusler family on their farm in Wodonga, and a set of glass negatives which offer a unique visual snapshot of the domestic and social lives of the Haeusler family and local Wodonga community. The Haeusler family migrated from Prussia (Germany) to South Australia in the 1840s and 1850s, before purchasing 100 acres of Crown Land made available under the Victorian Lands Act 1862 (also known as ‘Duffy’s Land Act’) in 1866 in what is now Wodonga West. The Haeusler family were one of several German families to migrate from South Australia to Wodonga in the 1860s. This digital image was produced from one of the glass negatives that form part of the collection, probably taken by Louis Haeusler (b.1887) with the photographic equipment in the Wodonga Historical Society Haeusler Collection. This item is unique and has well documented provenance and a known owner. It forms part of a significant and representative historical collection which reflects the local history of Wodonga. It contributes to our understanding of domestic and family life in early twentieth century Wodonga, as well as providing interpretative capacity for themes including local history and social history.Digital image from the Haeusler Glass negative collection. Image of an unidentified woman, two men and two children with dogs in the foreground on the right. They are standing in a gateway between trees.wodonga pioneers, haeusler family, glass negatives, dry plate photography -
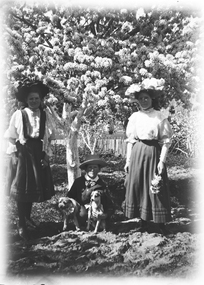 Wodonga & District Historical Society Inc
Negative - Haeusler Glass Negatives Collection - Mrs. Walter McFarlane with two children and a dog
... dry plate photography... family glass negatives dry plate photography mcfarlane family ...The Wodonga Historical Society Haeusler Collection provides invaluable insight into life in late nineteenth and early twentieth century north east Victoria. The collection comprises manuscripts, personal artefacts used by the Haeusler family on their farm in Wodonga, and a set of glass negatives which offer a unique visual snapshot of the domestic and social lives of the Haeusler family and local Wodonga community. The Haeusler family migrated from Prussia (Germany) to South Australia in the 1840s and 1850s, before purchasing 100 acres of Crown Land made available under the Victorian Lands Act 1862 (also known as ‘Duffy’s Land Act’) in 1866 in what is now Wodonga West. The Haeusler family were one of several German families to migrate from South Australia to Wodonga in the 1860s. This digital image was produced from one of the glass negatives that form part of the collection, probably taken by Louis Haeusler (b.1887) with the photographic equipment in the Wodonga Historical Society Haeusler Collection. This item is unique and has well documented provenance and a known owner. It forms part of a significant and representative historical collection which reflects the local history of Wodonga. It contributes to our understanding of domestic and family life in early twentieth century Wodonga, as well as providing interpretative capacity for themes including local history and social history.Digital image created from the Haeusler Glass negative collection. An image of Mrs. Walter McFarlane on the right with two children, standing under a tree in full bloom. The boy in the centre is holding two dogs.wodonga pioneers, haeusler family, glass negatives, dry plate photography, mcfarlane family -
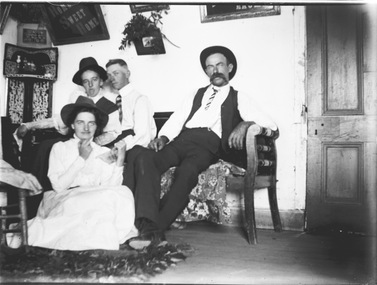 Wodonga & District Historical Society Inc
Negative - Haeusler Glass Negatives Collection - Mr. and Mrs. Young and children
... dry plate photography... family glass negatives dry plate photography young family wodonga ...The Wodonga Historical Society Haeusler Collection provides invaluable insight into life in late nineteenth and early twentieth century north east Victoria. The collection comprises manuscripts, personal artefacts used by the Haeusler family on their farm in Wodonga, and a set of glass negatives which offer a unique visual snapshot of the domestic and social lives of the Haeusler family and local Wodonga community. The Haeusler family migrated from Prussia (Germany) to South Australia in the 1840s and 1850s, before purchasing 100 acres of Crown Land made available under the Victorian Lands Act 1862 (also known as ‘Duffy’s Land Act’) in 1866 in what is now Wodonga West. The Haeusler family were one of several German families to migrate from South Australia to Wodonga in the 1860s. This digital image was produced from one of the glass negatives that form part of the collection, probably taken by Louis Haeusler (b.1887) with the photographic equipment in the Wodonga Historical Society Haeusler Collection. This item is unique and has well documented provenance and a known owner. It forms part of a significant and representative historical collection which reflects the local history of Wodonga. It contributes to our understanding of domestic and family life in early twentieth century Wodonga, as well as providing interpretative capacity for themes including local history and social history.Digital image created from the Haeusler Glass negative collection. An image of Mr. and Mrs. Young and two children, seated inside their house.wodonga pioneers, haeusler family, glass negatives, dry plate photography, young family wodonga -
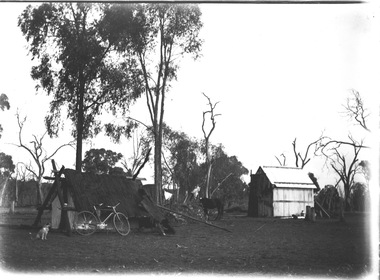 Wodonga & District Historical Society Inc
Negative - Haeusler Glass Negatives Collection - Louis Haeusler living in a tent while building his house
... dry plate photography... family glass negatives dry plate photography louis haeusler ...The Wodonga Historical Society Haeusler Collection provides invaluable insight into life in late nineteenth and early twentieth century north east Victoria. The collection comprises manuscripts, personal artefacts used by the Haeusler family on their farm in Wodonga, and a set of glass negatives which offer a unique visual snapshot of the domestic and social lives of the Haeusler family and local Wodonga community. The Haeusler family migrated from Prussia (Germany) to South Australia in the 1840s and 1850s, before purchasing 100 acres of Crown Land made available under the Victorian Lands Act 1862 (also known as ‘Duffy’s Land Act’) in 1866 in what is now Wodonga West. The Haeusler family were one of several German families to migrate from South Australia to Wodonga in the 1860s. This digital image was produced from one of the glass negatives that form part of the collection, probably taken by Louis Haeusler (b.1887) with the photographic equipment in the Wodonga Historical Society Haeusler Collection. This item is unique and has well documented provenance and a known owner. It forms part of a significant and representative historical collection which reflects the local history of Wodonga. It contributes to our understanding of domestic and family life in early twentieth century Wodonga, as well as providing interpretative capacity for themes including local history and social history.Digital image created from the Haeusler Glass negative collection. Louis Haeusler lived in this tent whilst he was building his house in Bonegilla. wodonga pioneers, haeusler family, glass negatives, dry plate photography, louis haeusler -
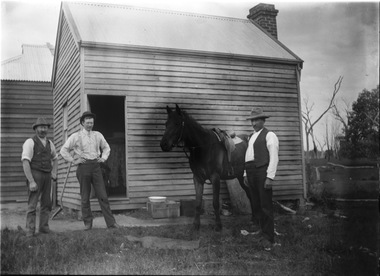 Wodonga & District Historical Society Inc
Negative - Haeusler Glass Negatives Collection - Three men and a horse beside a building
... dry plate photography... family glass negatives dry plate photography Digital image ...The Wodonga Historical Society Haeusler Collection provides invaluable insight into life in late nineteenth and early twentieth century north east Victoria. The collection comprises manuscripts, personal artefacts used by the Haeusler family on their farm in Wodonga, and a set of glass negatives which offer a unique visual snapshot of the domestic and social lives of the Haeusler family and local Wodonga community. The Haeusler family migrated from Prussia (Germany) to South Australia in the 1840s and 1850s, before purchasing 100 acres of Crown Land made available under the Victorian Lands Act 1862 (also known as ‘Duffy’s Land Act’) in 1866 in what is now Wodonga West. The Haeusler family were one of several German families to migrate from South Australia to Wodonga in the 1860s. This digital image was produced from one of the glass negatives that form part of the collection, probably taken by Louis Haeusler (b.1887) with the photographic equipment in the Wodonga Historical Society Haeusler Collection. This item is unique and has well documented provenance and a known owner. It forms part of a significant and representative historical collection which reflects the local history of Wodonga. It contributes to our understanding of domestic and family life in early twentieth century Wodonga, as well as providing interpretative capacity for themes including local history and social history.Digital image created from the Haeusler Glass negative collection. Three men and a horse standing beside a building.wodonga pioneers, haeusler family, glass negatives, dry plate photography -
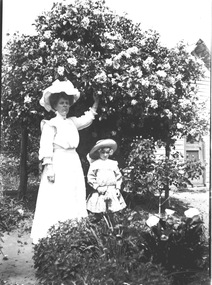 Wodonga & District Historical Society Inc
Negative - Haeusler Glass Negatives Collection - Woman and young girl under a flowering bush
... dry plate photography... family glass negatives dry plate photography Digital image ...The Wodonga Historical Society Haeusler Collection provides invaluable insight into life in late nineteenth and early twentieth century north east Victoria. The collection comprises manuscripts, personal artefacts used by the Haeusler family on their farm in Wodonga, and a set of glass negatives which offer a unique visual snapshot of the domestic and social lives of the Haeusler family and local Wodonga community. The Haeusler family migrated from Prussia (Germany) to South Australia in the 1840s and 1850s, before purchasing 100 acres of Crown Land made available under the Victorian Lands Act 1862 (also known as ‘Duffy’s Land Act’) in 1866 in what is now Wodonga West. The Haeusler family were one of several German families to migrate from South Australia to Wodonga in the 1860s. This digital image was produced from one of the glass negatives that form part of the collection, probably taken by Louis Haeusler (b.1887) with the photographic equipment in the Wodonga Historical Society Haeusler Collection. This item is unique and has well documented provenance and a known owner. It forms part of a significant and representative historical collection which reflects the local history of Wodonga. It contributes to our understanding of domestic and family life in early twentieth century Wodonga, as well as providing interpretative capacity for themes including local history and social history.Digital image created from the Haeusler Glass negative collection. It depicts an unidentified woman and child standing beneath a flowering bush. A house is partially visible in the background.wodonga pioneers, haeusler family, glass negatives, dry plate photography -
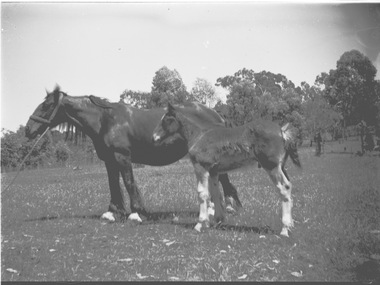 Wodonga & District Historical Society Inc
Negative - Haeusler Glass Negatives Collection - Horse and foal
... dry plate photography... family glass negatives dry plate photography Digital image ...The Wodonga Historical Society Haeusler Collection provides invaluable insight into life in late nineteenth and early twentieth century north east Victoria. The collection comprises manuscripts, personal artefacts used by the Haeusler family on their farm in Wodonga, and a set of glass negatives which offer a unique visual snapshot of the domestic and social lives of the Haeusler family and local Wodonga community. The Haeusler family migrated from Prussia (Germany) to South Australia in the 1840s and 1850s, before purchasing 100 acres of Crown Land made available under the Victorian Lands Act 1862 (also known as ‘Duffy’s Land Act’) in 1866 in what is now Wodonga West. The Haeusler family were one of several German families to migrate from South Australia to Wodonga in the 1860s. This digital image was produced from one of the glass negatives that form part of the collection, probably taken by Louis Haeusler (b.1887) with the photographic equipment in the Wodonga Historical Society Haeusler Collection. This item is unique and has well documented provenance and a known owner. It forms part of a significant and representative historical collection which reflects the local history of Wodonga. It contributes to our understanding of domestic and family life in early twentieth century Wodonga, as well as providing interpretative capacity for themes including local history and social history.Digital image created from the Haeusler Glass negative collection. It depicts a horse and foal standing in a paddock. There is a line of trees in the background.wodonga pioneers, haeusler family, glass negatives, dry plate photography -
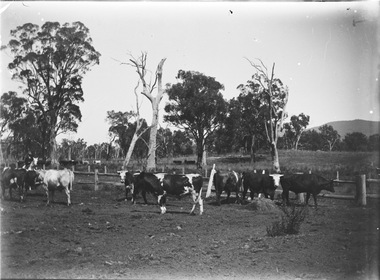 Wodonga & District Historical Society Inc
Negative - Haeusler Glass Negatives Collection - Cows in a paddock
... dry plate photography... family glass negatives dry plate photography farming wodonga ...The Wodonga Historical Society Haeusler Collection provides invaluable insight into life in late nineteenth and early twentieth century north east Victoria. The collection comprises manuscripts, personal artefacts used by the Haeusler family on their farm in Wodonga, and a set of glass negatives which offer a unique visual snapshot of the domestic and social lives of the Haeusler family and local Wodonga community. The Haeusler family migrated from Prussia (Germany) to South Australia in the 1840s and 1850s, before purchasing 100 acres of Crown Land made available under the Victorian Lands Act 1862 (also known as ‘Duffy’s Land Act’) in 1866 in what is now Wodonga West. The Haeusler family were one of several German families to migrate from South Australia to Wodonga in the 1860s. This digital image was produced from one of the glass negatives that form part of the collection, probably taken by Louis Haeusler (b.1887) with the photographic equipment in the Wodonga Historical Society Haeusler Collection. This item is unique and has well documented provenance and a known owner. It forms part of a significant and representative historical collection which reflects the local history of Wodonga. It contributes to our understanding of domestic and family life in early twentieth century Wodonga, as well as providing interpretative capacity for themes including local history and social history.Digital image created from the Haeusler Glass negative collection. A herd of cows in a paddock. There is a man on horseback on the left hand side of the image.wodonga pioneers, haeusler family, glass negatives, dry plate photography, farming wodonga