Showing 300 items
matching railway station bendigo
-
 Bendigo Historical Society Inc.
Document - BADHAM COLLECTION: THE VICTORIAN RAILWAYS INSTITUTE CERTIFICATE THE VICTORIAN RAILWAYS INSTITUTE
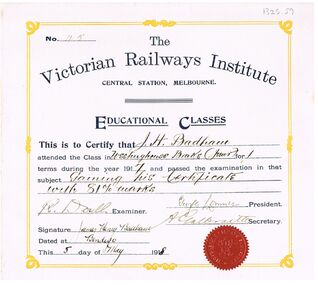
The Victorian Railways Institute Central Station, Melbourne. Certificate Educational Classes Certificate showing JH Badham's attendance of the class in Westinghouse Brake. Senior for 1 terms during the year 1917 and passed that subject 81%, dated 5.5.1918. Certificate no. 45, on paper with red seal.document, certificate, man being sufficiently educated, the victorian railways institute central station , melbourne certificate educational classes certificate -
 Bendigo Historical Society Inc.
Document - BADHAM COLLECTION: THE VICTORIAN RAILWAYS INSTITUTE CERTIFICATE
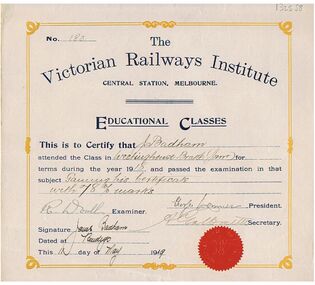
The Victorian Railways Institute Central Station, Melbourne. Certificate Educational Classes Certificate showing JH Badham's attendance of the class in Westinghouse Brake. Senior for 2 terms during the year 1918 and passed that subject 78%, dated 11.5.1919. Certificate no. 183, on paper with red seal.document, certificate, man being sufficiently educated, the victorian railways institute central station , melbourne certificate educational classes certificate -
 Bendigo Historical Society Inc.
Document - BADHAM COLLECTION: THE VICTORIAN RAILWAYS INSTITUTE CERTIFICATE
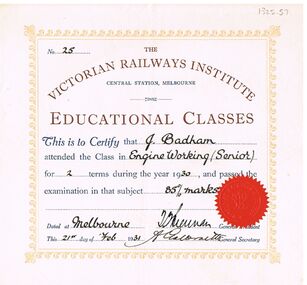
The Victorian Railways Institute Central Station, Melbourne. Certificate Educational Classes Certificate showing JH Badham's attendance of the class in engine working. Senior for 2 terms during the year 1930 and passed that subject 85%, dated 21.2.1931. Certificate no. 25, on paper with red seal.document, certificate, man being sufficiently educated, the victorian railways institute central station , melbourne certificate educational classes certificate -
 Bendigo Historical Society Inc.
Document - BADHAM COLLECTION: THE VICTORIAN RAILWAYS INSTITUTE CERTIFICATE
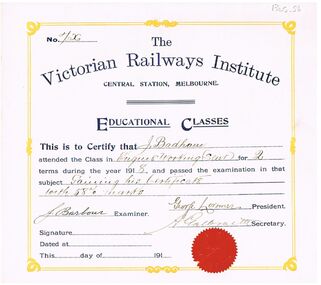
The Victorian Railways Institute Central Station, Melbourne. Certificate Educational Classes Certificate showing JH Badham's attendance of the class in engine working. Senior for 2 terms during the year 1918 and passed that subject 58%.document, certificate, man being sufficiently educated, the victorian railways institute central station , melbourne certificate educational classes certificate -
 Bendigo Historical Society Inc.
Document - BADHAM COLLECTION: THE VICTORIAN RAILWAYS INSTITUTE CERTIFICATE
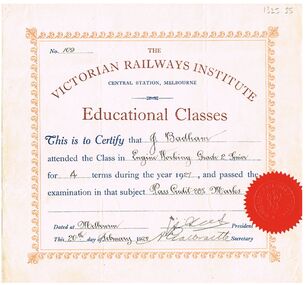
The Victorian Railways Institute Central Station, Melbourne. Certificate Educational Classes Certificate showing JH Badham's attendance of the class in engine working. Senior for 4 terms during the year 1927 and passed that subject 88%, dated 20.2.1928. Certificate no.109, on paper with red seal.document, certificate, man being sufficiently educated, the victorian railways institute central station , melbourne certificate educational classes certificate -
 Bendigo Historical Society Inc.
Document - BADHAM COLLECTION: THE VICTORIAN RAILWAYS INSTITUTE CERTIFICATE
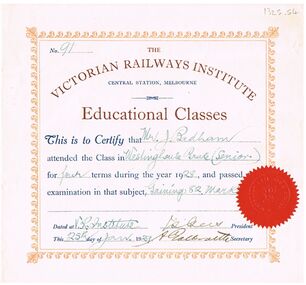
The Victorian Railways Institute Central Station, Melbourne. Certificate Educational Classes Certificate showing JH Badham's attendance of the class in Westinghouse Brake. Senior for 4 terms during the year 1928 and passed that subject 82%, dated 25.1.1929. Certificate no. 91, on paper with red seal.document, certificate, man being sufficiently educated, the victorian railways institute central station , melbourne certificate educational classes certificate -
 Bendigo Historical Society Inc.
Document - BADHAM COLLECTION: THE VICTORIAN RAILWAYS INSTITUTE CERTIFICATE
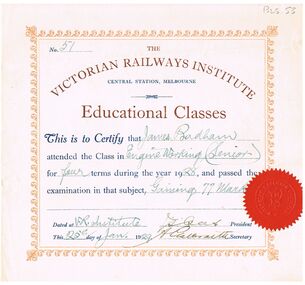
The Victorian Railways Institute Central Station, Melbourne. Certificate Educational Classes Certificate showing JH Badham's attendance of the class in engine working. Senior for 4 terms during the year 1928 and passed that subject 77%, dated 25.1.1929. Certificate no. 51, on paper with red seal.document, certificate, man being sufficiently educated, the victorian railways institute central station , melbourne certificate educational classes certificate -
 Bendigo Historical Society Inc.
Document - BADHAM COLLECTION: THE VICTORIAN RAILWAYS INSTITUTE CERTIFICATE
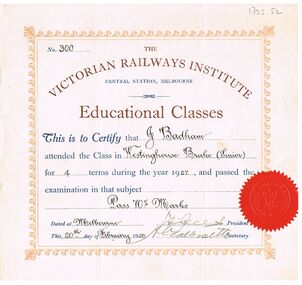
The Victorian Railways Institute Central Station, Melbourne. Certificate Educational Classes Certificate showing JH Badham's attendance of the class in Westinghouse Brake. Senior for 4 terms during the year 1927 and passed that subject 70%, dated 20.2.1928. Certificate no. 300, on paper with red seal.document, certificate, man being sufficiently educated, the victorian railways institute central station , melbourne certificate educational classes certificate -
 Bendigo Historical Society Inc.
Document - BADHAM COLLECTION: THE VICTORIAN RAILWAYS INSTITUTE CERTIFICATE
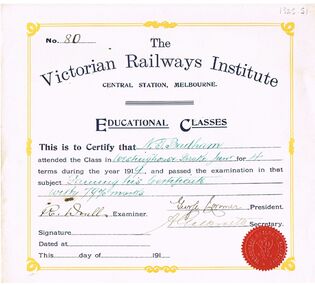
The Victorian Railways Institute Central Station, Melbourne. Certificate Educational Classes Certificate showing JH Badham's attendance of the class in Westinghouse Brake. Senior for 42 terms during the year 1919 and passed that subject 79%. Certificate no. 80, on paper with red seal.document, certificate, man being sufficiently educated, the victorian railways institute central station , melbourne certificate educational classes certificate -
 Bendigo Historical Society Inc.
Document - BADHAM COLLECTION: THE VICTORIAN RAILWAYS INSTITUTE CERTIFICATE
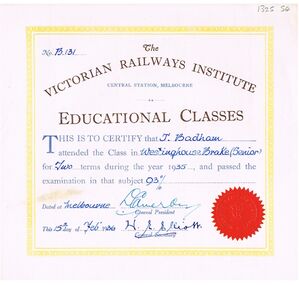
The Victorian Railways Institute Central Station, Melbourne. Certificate Educational Classes Certificate showing JH Badham's attendance of the class in Westinghouse Brake. Senior for 2 terms during the year 1935 and passed that subject 93% dated 15.2.1936. Certificate no. B131, on paper with red seal.document, certificate, man being sufficiently educated, the victorian railways institute central station , melbourne certificate educational classes certificate -
 Bendigo Historical Society Inc.
Document - BADHAM COLLECTION: THE VICTORIAN RAILWAYS INSTITUTE CERTIFICATE
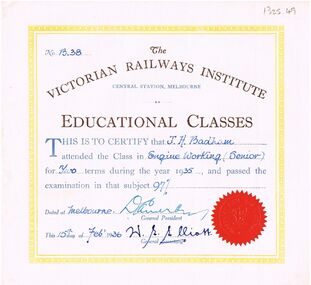
The Victorian Railways Institute Central Station, Melbourne. Certificate Educational Classes Certificate showing JH Badham's attendance of the class in engine working. Senior for 2 terms during the year 1935 and passed that subject 97% dated 15.2.1936. Certificate no. B38, on paper with red seal.document, certificate, man being sufficiently educated, the victorian railways institute central station , melbourne certificate educational classes certificate -
 Bendigo Historical Society Inc.
Document - BADHAM COLLECTION: THE VICTORIAN RAILWAYS INSTITUTE CERTIFICATE
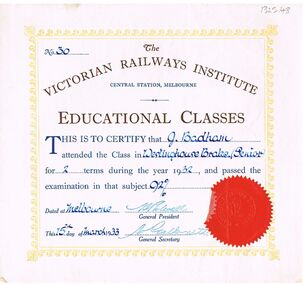
The Victorian Railways Institute Central Station, Melbourne. Certificate Educational Classes Certificate showing JH Badham's attendance of the class in Westinghouse Brake. Senior for 2 terms during the year 1932 and passed that subject 92% dated 15.3.1933. Certificate no. 30, paper with red seal.document, certificate, man being sufficiently educated, the victorian railways institute central station , melbourne certificate educational classes certificate -
 Bendigo Historical Society Inc.
Document - BADHAM COLLECTION: THE VICTORIAN RAILWAYS INSTITUTE CERTIFICATE
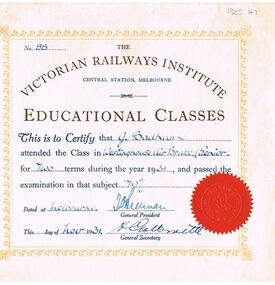
The Victorian Railways Institute Central Station, Melbourne. Certificate Educational Classes Certificate showing JH Badham's attendance of the class in Westinghouse air brake. Senior for 2 terms during the year 1931 and passed that subject 79% dated Nov .1931. Certificate no. 204, on paper with red seal.document, certificate, man being sufficiently educated, the victorian railways institute central station , melbourne certificate educational classes certificate -
 Bendigo Historical Society Inc.
Document - BADHAM COLLECTION: THE VICTORIAN RAILWAYS INSTITUTE CERTIFICATE
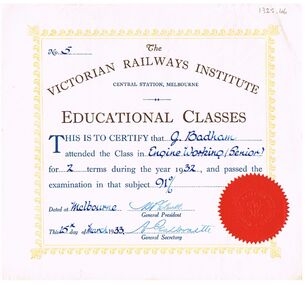
The Victorian Railways Institute Central Station, Melbourne. Certificate Educational Classes Certificate showing JH Badham's attendance of the class in engine working. Senior for 2 terms during the year 1932 and passed that subject 91% dated 15.3.1933. Certificate no.5, on paper with red seal.document, certificate, man being sufficiently educated, the victorian railways institute central station , melbourne certificate educational classes certificate -
 Bendigo Historical Society Inc.
Document - BADHAM COLLECTION: THE VICTORIAN RAILWAYS INSTITUTE CERTIFICATE
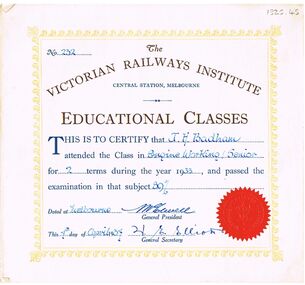
The Victorian Railways Institute Central Station, Melbourne. Certificate Educational Classes Certificate showing JH Badham's attendance of the class in engine working. Senior for 2 terms during the year 1933 and passed that subject 89% dated 4.4.1934. Certificate no. 232 paper with red seal.document, certificate, man being sufficiently educated, the victorian railways institute central station , melbourne certificate educational classes certificate -
 Bendigo Historical Society Inc.
Document - BADHAM COLLECTION: THE VICTORIAN RAILWAYS INSTITUTE CERTIFICATE EDUCATIONAL CLASSES CERTIFICATE
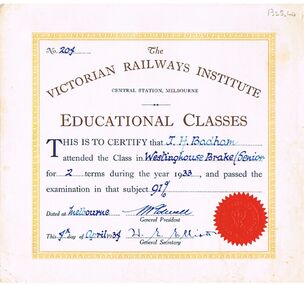
The Victorian Railways Institute Central Station, Melbourne. Certificate Educational Classes Certificate showing JH Badham's attendance of the class in Westinghouse Brake. Senior for 2 terms during the year 1933 and passed that subject 91% dated 4.4.1934. Certificate no. 204, paper with red seal.document, memo, railway, the victorian railways institute central station , melbourne certificate educational classes certificate -
 Bendigo Historical Society Inc.
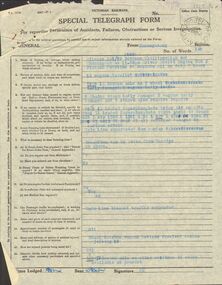
Document - BADHAM COLLECTION: VICTORIAN RAILWAYS SPECIAL TELEGRAPH FORM
Victorian railways special telegraph form with official office date stamped. Bendigo Tel. Office, date 3.3.1962 from Manangatang Station. Telegraph showing details of derailment of 12 wagons and damage caused. Thin paper, top sheet typed in blue ink - pinned - 5 x sheets. Includes 3x typed sheets and second sheet written in black biro.document, memo, railway, victorian railways special telegraph form / manangatang station / -
 Bendigo Historical Society Inc.
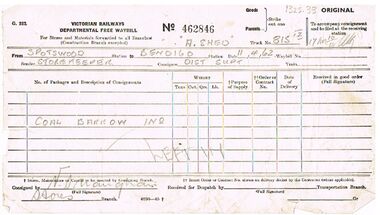
Document - BADHAM COLLECTION: VICTORIAN RAILWAYS DEPARTMENTAL FREE WAYBILL
... DOCUMENT Memo railway N D Maughan / Spotswood station to Bendigo ...Victorian railways departmental free waybill no.462846 11.4.1962, goods- coal barrow from Spotswood station to Bendigo station signed N D Maughan. Small paper memo.document, memo, railway, n d maughan / spotswood station to bendigo station -
 Bendigo Historical Society Inc.
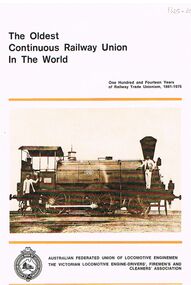
Magazine - BADHAM COLLECTION: AUSTRALIAN FEDERATED UNION OF LOCOMOTIVE ENGINEMEN MAGAZINE
Australian Federated Union of Locomotive enginemen magazine 20.8.1975. Showing union seal in glossy paper, stapled and old photo of old steam engine on front cover. Title 'The oldest Continuous Railway Union in the world' sub-title 'The Victorian federated union of locomotive engine-drivers, firemen's and cleaners Association'. Photos include official logo, the loco theatre - Victoria St North Melbourne, the earliest photo of Spencer street station 1860, North Melbourne 1902, the 'spirit' leaving Spencer St. Station 1937, men who formed the A.F.U.L.E. 1920.magazine, organization, victorian railways, australian federated union of locomotive enginemen / the victorian federated union of locomotive engine-drivers , firemen's and cleaners association / -
 Bendigo Historical Society Inc.
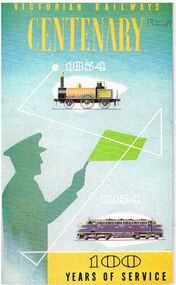
Document - BADHAM COLLECTION: VICTORIAN RAILWAYS CENTENARY 1854-1954 100 YEARS OF SERVICE BOOKLET
Victorian Railways Centenary 1854-1954 100 years of service booklet. Printed in glossy paper, page 1 contains article of 'condensed from a history of the Victorian Railways' which compiled by L.F. Harrigan. The contents include topics of Early private railways (1846-1878), The Melbourne and Hobsons Bay Railway Company - Gala opening, The Victorian government railways four periods of time (during 1856-1864, 1865-1911, 1883-1954, 1950 -1960). Photos inside include the seal of the Melbourne and Hobson's Bay Railway Company, South Yarra station 1874, opening of the Geelong and Melbourne railway June 25 1857, a hotel advertisement of 1857 featuring the Geelong and Melbourne railway - showing 'the British hotel Corio St Geelong, Spencer St station in 1872, the Taradale viaduct, on the Bendigo line in 1864, Harcourt station in 1865, Spirit of Progress, train on the Gembrook line. 1908 steam trains between Flinders St and Richmond the first electric train in Australia on a test run 6.10.1918, moving wheat by train 1901. The aircraft fuselages at Newport workshops during WWII, Bren gun carrier. Newport workshops at Queen Elizabeth Spencer St station 1954. The newsletter published by the Victorian Railways Public Relations and Betterment Board by the direction of the Commissioner.book, magazine, victorian railways, victorian railways / compiled by l.f. harrigan / -the melbourne and hobsons bay railway company - gala opening / south yarra station 1874 / published by the victorian railways public relations and betterment board by the direction of the commissioner -
 Bendigo Historical Society Inc.
Document - ''A BRIEF LIFE HISTORY OF HENRY KENTISH AND HIS SON CECIL W KENTISH''
''A brief life history of Henry Kentish and his son Cecil W Kentish''; Author Cecil W Kentish. 32 page typed booklet describing the travels of the Kentish family in the period 1836 to mid 1920s in some detail - Adelaide, Melbourne, Bendigo, Bridgewater, Queensland. Little detail after mid-1920s (page 32).Cecil W. Kentishperson, individual, henry kentish, henry kentish, cecil wallace. kentish, thomas frone kentish, james kentish, sir john hindmarsh, lieutenant colonel george gawler, mt macedon, black forest, looney joe, wesleyan church, mr james jeffrey, dr backhaus, frances elizabeth webb, pyramid view, durham ox, mt hope station, pyramid railway station -
 Bendigo Historical Society Inc.
Document - BADHAM COLLECTION: THE VICTORIAN RAILWAYS INSTITUTE SAFE WORKING CERTIFICATE 19717, 05/05/1918
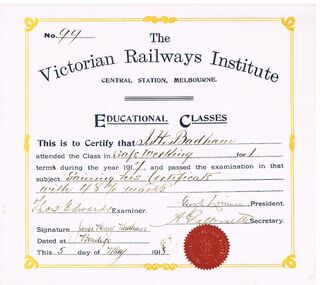
The Victorian Railways Institute Central Station, Melbourne, Safe Working Certificate 1917. Educational Classes, certifying that J Badham attended the class in Safe Working for one term during 1917, gaining his certificate with 48% marks Parchment certificate with yellow border and red embossed seal of The Victorian Railways Institute. Certificate number 99. Dated 5th May 1918.document, certificate, victorian railways, the victorian railways institute. melbourne , safe working certificate 1917 -
 Bendigo Historical Society Inc.
Map - HEATHCOTE : COUNTY OF BENDIGO, 11-4-35
... and Bendigo Railway, C.R.B. Main Road. By authority H.J. Green, Govt..., Argyle Station Ground, Wallan and Bendigo Railway, C.R.B. Main ...Map. Heathcote, County of Bendigo, County of Dalhousie,Township of Heathcote, McIvor Creek, Argyle Station Ground, Wallan and Bendigo Railway, C.R.B. Main Road. By authority H.J. Green, Govt. Printer. Photo-Lithographed at the Department of Lands and Survey, Melbourne. 11-4-35. Price 2/-. (number 88 in map cupboard 1)H.J. Green, Govt.Printermap, bendigo, heathcote -
Bendigo Historical Society Inc.
Map - PANNOOBAMAWM : COUNTY OF BENDIGO, 1957
Map. Pannoobamawm, County of Bendigo, Turrumberry, Terrick Terrick East, Wanurp, Pannoomilloo, Bamawm, Elmore to Cohuna Railway, McColl Station Ground, Lockington Station Ground. By authority W.M. Houston, Government Printer, Melbourne. Drawn and reproduced at the Department of Lands and Survey, Melbourne 1957. Price 2/-. (number 80 in map cupboard 1)W.M. Houston, Government Printer, Melbourne.map, bendigo, pannoobamawm -
Bendigo Historical Society Inc.
Map - MARONG : COUNTY OF BENDIGO, June 1953
... Creek, Township of Marong, Bendigo Railway Line, Marong Railway... of Marong, Bendigo Railway Line, Marong Railway Station, Crusoe ...Map> Marong, County of Bendigo, Nerring, Sandhurst, Lockwood, Shelbourne, Woodstock, Leichardt, Bullock Creek, Fletcher Creek, Township of Marong, Bendigo Railway Line, Marong Railway Station, Crusoe Aqueduct. Drawn and reproduced at the Dept. of Lands and Survey, Melbourne, Victoria. June 1953. Price 2/-. By authority W.M. Houston, Government Printer. (number 74 in map cupboard 1)W.M. Houston, Government Printer.map, bendigo, marong -
Bendigo Historical Society Inc.
Map - CAMPBELL COLLECTION: BENDIGO AND DISTRICT MAPS, 8-7-29
Map. Rifle Range, Parishes of Wellsford and Sandhurst. Scale 20 chains to 1 inch. Total area in plan is 5916 acres. Wallan and Bendigo Railway to Axedale Township and station 8 miles, to Longlea Railway Station 2 1/2 - 3 miles. Rifle Range. Compiled in W.P.B. from Assessment and Parish Plans, by H.A.D. 8-7-29H.A.D.(Darby).map, bendigo, allotments -
Bendigo Historical Society Inc.
Map - CAMPBELL COLLECTION: BENDIGO AND DISTRICT MAPS, 8-7-29
Map. Rifle Range, Parishes of Wellsford and Sandhurst. Scale 20 chains to 1 inch. Total area by Planimeter 5916 acres. Wallan and Bendigo Railway line. Rifle Range. Axedale township and station 8 miles. To Longlea Ryl station 2 1/2 miles. To Epsom 1 1/2 miles. To Bendigo 3 miles. Compiled in W.P.D. from Assessment and Parish Plans by H.A.D 8-7- 29 (number 367 in map cupboard 1)H.A.D.(H.A.Darby)map, bendigo, allotments -
Bendigo Historical Society Inc.
Map - CAMPBELL COLLECTION: BENDIGO AND DISTRICT MAPS
Map. Eppalock, Sedgwick and Strathfieldsaye, scale 20 chains to 1 inch. Road to Bendigo 13 1/2 miles at top right of map, Longlea Railway Station 5 1/2 miles, Bendigo 11 miles, Strathfieldsaye 5 miles on left of map. Total area 3972 acres. Prepared in W.P.B. from Assessment Plan and Parish Plans. H.A. Darby 14-6-29.H.A.Darbymap, bendigo, agricultural lands -
 Bendigo Historical Society Inc.
Photograph - PORTRAIT OF A LADY
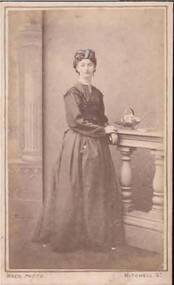
Small full length portrait of a lady standing next to a fence leaning against it with her arm resting on it. Long sleeves, high neck and buttoned down to the waist. The skirt has a pocket at the side with gloves in it. She is wearing earrings and has a blue ribbon in her hair. The bodice has dark ribbon and a feather trim.Alfred Wren, Mitchell Street, near Railway Station, Sandhurstphotograph, portrait, female, portrait of a lady, alfred wren -
 Bendigo Historical Society Inc.
Photograph - BENDIGO LANDSCAPE 1937, 1937
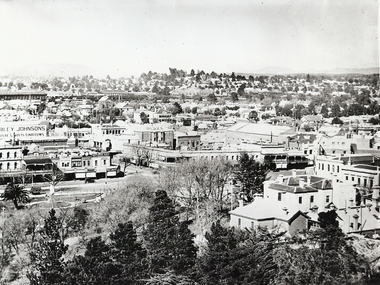
black and white photo: view of Bendigo CBD from lookout tower looking east of south towards Railway Station, shows Sandhurst Club at bottom right corner, Queen Victoria statue in gardens, intersection of Pall Mall, Mitchell and View Strets. In image ' ...rley Johnsons ' Mathews Bros' ' Plume' ' Plaza' ' A.E. Sayer' On back ' Bendigo, Victoria, 1937, Ellison Coll'place, landscape view, bendigo