Showing 3473 items matching " domestic object"
-
 Bendigo Historical Society Inc.
Domestic Object - GRAYDON COLLECTION: JELLY MOULD, 1880's
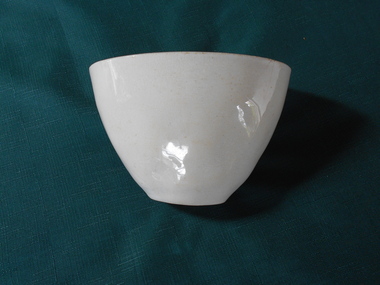
... Domestic Object... DOMESTIC EQUIPMENT Food consumption jelly mould Object. Cream ...Object. Cream coloured ceramic jelly mould. U-shaped patterns inside. Oval shape.domestic equipment, food consumption, jelly mould -
 Bendigo Historical Society Inc.
Domestic Object - FAVALORO COLLECTION: DINNER PLATE, 1940's - 1960's
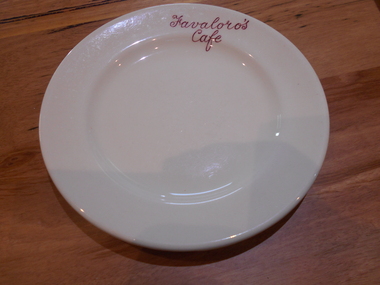
... Domestic Object... on the edge of the plate in red. Domestic Object FAVALORO COLLECTION ...Object. Cream coloured ceramic dinner plate. ''FAVOROLO'S CAFE'' printed on the edge of the plate in red.On under side of plate ''Duraline'' Super Vitrefied Cirindley Hotel ware of England, Loftus Moran Pty Ltd Melbourne 9-61.domestic equipment, table setting, dinner plate -
 Bendigo Historical Society Inc.
Domestic Object - FAVALORO COLLECTION: DESSERT BOWLS, 1940's-1960's
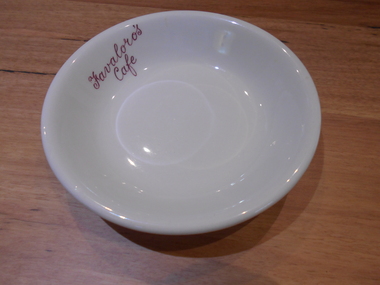
... Domestic Object... of the bowl in red - seven bowls. Domestic Object FAVALORO COLLECTION ...Objects. Cream coloured ceramic dessert bowl, ''Favaloro'sCafe'' printed on the edge of the bowl in red - seven bowls.on under side of bowls ''Duraline'' super vitrified grindley hotelware of England , Lotus Moran Pty Ltd Melbourne 9-61domestic equipment, table setting, ceramic dessert bowl -
 Bendigo Historical Society Inc.
Domestic Object - FAVALORO COLLECTION: SANDWICH PLATES, 1940's -1960's
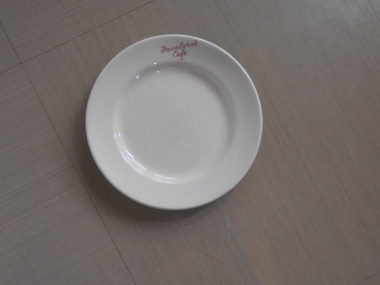
... Domestic Object... of the plates in red, - twenty plates. Domestic Object FAVALORO ...Object. Cream coloured ceramic sandwich plates ''Favaloro's Cafe'' printed on the edge of the plates in red, - twenty plates.on under side of plate ''Duraline'' Super Vitrified Gringley Hoteware of England, Lotus Moran Pty Ltd Melbourne 9-61domestic equipment, table setting, ceramic sandwich plates -
 Bendigo Historical Society Inc.
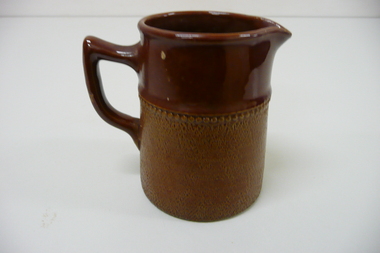
Domestic Object - SMALL POTTERY JUG
... Domestic Object... and rough pattern on bottom. Domestic Object SMALL POTTERY JUG ...Small brown Langley ware jug with applied handle, smooth glaze on top portion and rough pattern on bottom.1/4 Pintdomestic equipment, food consumption, jugs -
 Bendigo Historical Society Inc.
Domestic Object - CHINA TEAPOT
... Domestic Object... DOMESTIC EQUIPMENT Food consumption teapot Made in Japan White ...White china teapot with lid and rubber drip free spout end, decorated with blue banding and flowers of red, yellow and blue.Made in Japandomestic equipment, food consumption, teapot -
 Bendigo Historical Society Inc.
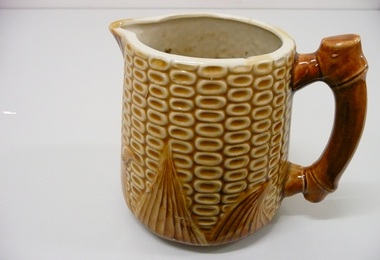
Domestic Object - CHINA MILK JUG
... Domestic Object... base. Domestic Object CHINA MILK JUG ...Caramel coloured china milk jug with stick shaped handle and leaf decoration around base.domestic equipment, food consumption, jugs -
 Bendigo Historical Society Inc.
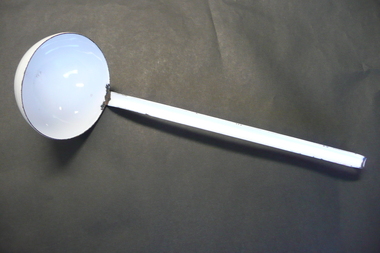
Domestic Object - ENAMELLED LADLE
... Domestic Object... ladle with long handle. Domestic Object ENAMELLED LADLE ...White enamelled ladle with long handle.Swedendomestic equipment, food preparation, kitchen -
 Bendigo Historical Society Inc.
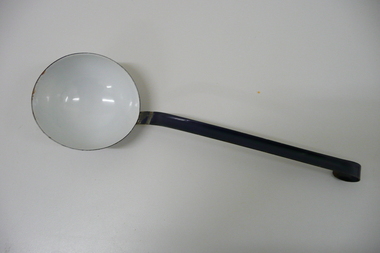
Domestic Object - ENAMELLED LADLE
... Domestic Object... with long blue handle. Domestic Object ENAMELLED LADLE ...White enamelled ladle with long blue handle.domestic equipment, food preparation, kitchen -
 Bendigo Historical Society Inc.
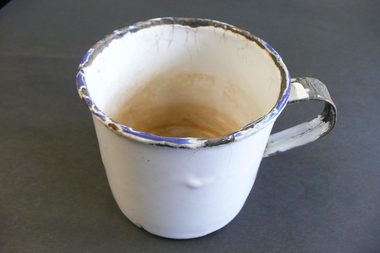
Domestic Object - ENAMELLED MUG
... Domestic Object... with applied handle. Domestic Object ENAMELLED MUG ...White enamelled mug with applied handle.domestic equipment, food consumption, cups -
 Bendigo Historical Society Inc.
Domestic Object - TIN PANNIKIN
... Domestic Object... with applied handle. Domestic Object TIN PANNIKIN ...Tin plate pannikin with applied handle.domestic equipment, food consumption, cups -
 Bendigo Historical Society Inc.
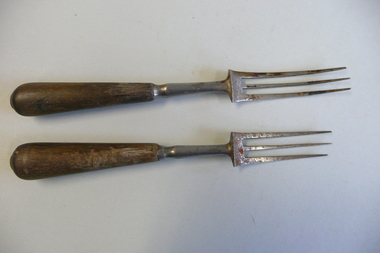
Domestic Object - 2 WOODEN HANDLED FORKS
... Domestic Object... DOMESTIC EQUIPMENT Food consumption fork Steel 2 three pronged ...2 three pronged steel forks with wooden handles, one slightly longer.Steeldomestic equipment, food consumption, fork -
 Bendigo Historical Society Inc.
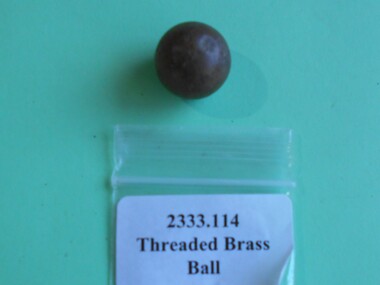
Domestic Object - QC BINKS COLLECTION: THREADED BRASS BALL
... Domestic Object... that was discovered by QC Binks while he was metal detecting. Domestic Object ...A threaded brass ball that was discovered by QC Binks while he was metal detecting.bendigo, gold mining, qc binks, qc binks -
 Royal Australian and New Zealand College of Obstetricians & Gynaecologists (RANZCOG)
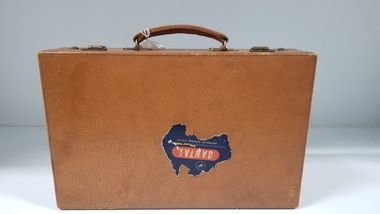
Domestic object - Briefcase used by Dr Hannah June Pash
... Domestic object... a set of four passport photographs of a woman. Domestic object ...Brown leather suitcase with metal clasps. Top of case carries a 'Qantas' sticker in the shape of mainland Australia. Briefcase contains a sleeve for holding a British passport and a small address book, which match the suitcase. Suitcase also contains a set of four passport photographs of a woman. -
 Royal Australian and New Zealand College of Obstetricians & Gynaecologists (RANZCOG)
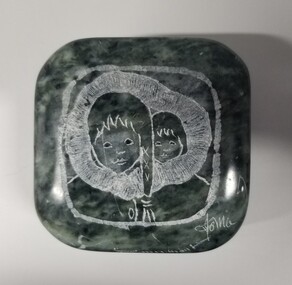
Domestic object - Commemorative paperweight, SOGC Golden Jubilee, 1994
... Domestic object..., alongside the engraved words 'Quebec/Canada'. Domestic object ...This paperweight was created as part of the Golden Jubilee celebrations for SOGC (Society of Obstetricians and Gynaecologists of Canada) in 1994.Marble paperweight in the shape of a rounded square. Front of paperweight is engraved with a head and shoulders image of two Inuit figures, possibly a mother a child, wearing one coat between them and peering out of the same hood. The paperweight is signed by the artist at bottom right of front of paperweight. Back of paperweight is engraved with the text 'SOGC/1944-1994'. Bottom right of back of paperweight is signed by the artist, alongside the engraved words 'Quebec/Canada'. -
 Stanley Athenaeum & Public Room
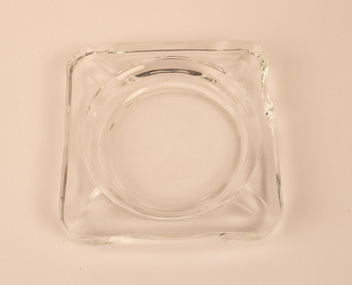
Domestic object - Square ashtray
... Domestic object...-country Glass ashtray square in shape Square ashtray Domestic ...Glass ashtray square in shape -
 Stanley Athenaeum & Public Room
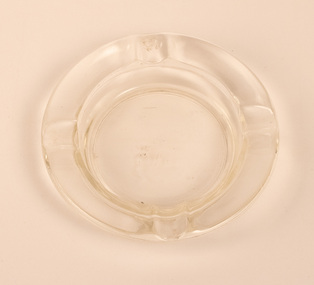
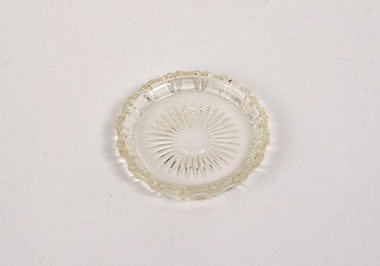
Domestic object - Small round ashtray
... Domestic object...-country Glass ashtray round in shape Small round ashtray Domestic ...Glass ashtray round in shape -
 Stanley Athenaeum & Public Room
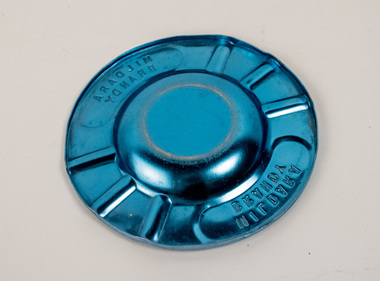
Domestic object - Small round ashtray
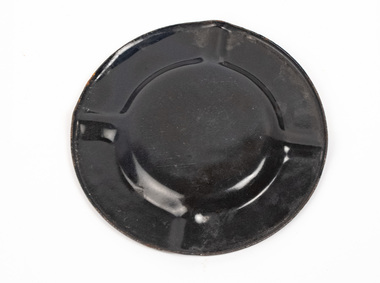
... Domestic object... Domestic object Small round ashtray ...Anodized ashtray round in shape -
 Stanley Athenaeum & Public Room
Domestic object - Ashtray
... Domestic object... with purple para - 'SEPPELTS PORT' with emblem. Ashtray Domestic ...Anodized ashtray round in shape with purple para - 'SEPPELTS PORT' with emblem. Guard your honour -
 Stanley Athenaeum & Public Room
Domestic object - Ashtray
... Domestic object...-country Orange glass ashtray square in shape . Ashtray Domestic ...Orange glass ashtray square in shape . -
 Stanley Athenaeum & Public Room
Domestic object - Ashtray
... Domestic object... in shape . Ashtray Domestic object Ashtray ...Clear glass ashtray square in shape . pattern on side and base -
 Stanley Athenaeum & Public Room
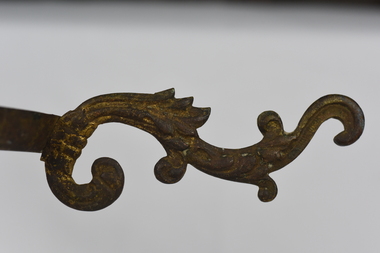
Domestic object - Fire-Surround, Cast Iron Fire-Surround
... Domestic object... on RH side. Cast Iron Fire-Surround Domestic object Fire ...Cast Iron fire-surround. Ornate border with 2 metal round feet in front. One knob on LH side with one missing and 2 knobs on RH side. -
 Stanley Athenaeum & Public Room
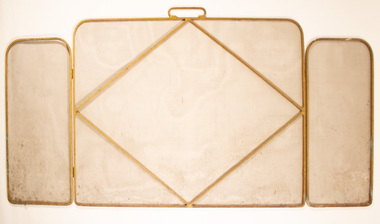
Domestic object - Fire Guard
... Domestic object... Guard Domestic object Fire Guard ...Brass coloured metal and mesh fireguard. Two side wings (width 24 cm each)hinged that open out from middle frame (86cm wide). small metal handle in middle on top of screen. -
 Stanley Athenaeum & Public Room
Domestic object - Lamp, Spider lamp
... Domestic object.../Athenaeum. Spider lamp Domestic object Lamp ...Lamp hanger and chain with font holder. The lamp would have had a glass font. Screw part of a burner - the lamp chimney would have sat on the edge. Funnel to side fill of lamp. In pieces. Used as lighting in the library/Athenaeum.German maker - Dietz 1858 patent -
 Geoffrey Kaye Museum of Anaesthetic History
Domestic object - Salt and Pepper shakers, Dr John Hains, 1995
... Domestic object..., each with a thin gold band above the base. Domestic object Salt ...Dr John Hains, presented these two shakers to Dr Neville Davis, President of ANZCA (1995 to 1996). Dr Hains expressed in his letter to Dr. Davis, how these two shakers are made from a red cedar branch which had fallen on his property in Queensland. A pair of hand crafted red cedar salt and pepper shakers, each with a thin gold band above the base.dr john hains, red cedar, hand crafted -
 Clunes Museum
Domestic object - MANCHESTER
... Domestic object... web edge, beige Domestic object MANCHESTER ....1 Two handmade runners with lace border, cotton lining hand stitched yellow diamonds on netting material .2 Two round doilies knitted with crochet scalloped edges, off white .3 Rectangular doily, knitted with spider web edge, beigeNilknitting, crochet work, embroidery, table linen -
Clunes Museum
Domestic object - Boiler
... Domestic object..., galvanised .2 Lid, Metal, galvanised Domestic object Boiler ....1 Boiler with handle, metal, galvanised .2 Lid, Metal, galvanisedOval Stamped Metal plate affixed to lid " Weickhart Makers, Clunes"weickhart, manufacturing in clunes, metal tools -
Clunes Museum
Domestic object - SALT SPOON
... Domestic object... CUTLERY SPOON A DELICATE FAN SHAPED SALT SPOON, SILVER Domestic ...A DELICATE FAN SHAPED SALT SPOON, SILVER salt spoon, cutlery, spoon -
Clunes Museum
Domestic object - GINGER TIN
... Domestic object... IN THE TIN Domestic object GINGER TIN ...A ROUND METAL GINGER TIN. THERE IS SOME GINGER POWDER IN THE TINginger tin, tin -
Clunes Museum
Domestic object - COFFEE AND CHICORY TIN
... Domestic object... PICKERS. THERE IS COFFEE INSIDE Domestic object COFFEE AND CHICORY ...BUSHELLS COFFEE AND CHICORY TIN WITH A MOUNTAIN SCENE WITH COFFEE BEAN PICKERS. THERE IS COFFEE INSIDEBUSHELLS BLUE LABEL COFFEE & CHICORY. CONTAINS NOT LESS THAN 75 PARTS PERCENTUM PURE COFFEE HAS THE AROMAbushells, coffee and chicory