Showing 163 items matching "df-206"
-
 Moorabbin Air Museum
Document - Comparison of Douglas Model DF Flying Boat and Several Designs of Other Manufacturers Report No. 1149, Douglas Aircraft Co., Inc
-
Moorabbin Air Museum
Document - Operation of Douglas DF Flying Boat over a 1,400 Mile Route Report No. 1422, Douglas Aircraft Co., Inc
-
 Surrey Hills Historical Society Collection
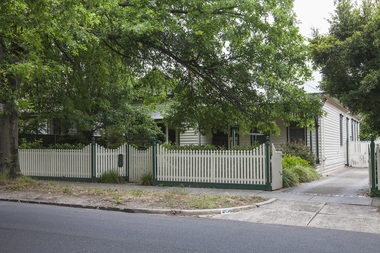
Photograph - 206 Prospect Hill Road, Surrey Hills, On The Street Where You Live Project
Photos documenting this address as part of a photographic series undertaken by volunteer photographers during 2013 and 2014 for The Street Where You Live Project. This was organised through the Surrey Hills Neighbourhood Centre and covered the postcode 3127 in the cities of Boroondara and Whitehorse.These photos provide a snapshot of real estate in the suburbs of Mont Albert and Surrey Hills during a period of rapid change with many properties on large blocks demolished to create higher density residential development or renewal of single dwellings. At particular risk were properties not covered by heritage overlays, especially interwar housing and post 1950's housing. -
 Heidelberg Theatre Company Inc..
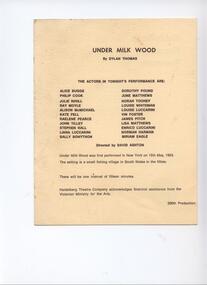
Program Photos Review Newsletter, Under Milk Wood by Dylan Thomas directed by David Ashton
1981, 206, director david ashton, heidelberg theatre company inc -
 Bass Coast Shire Council - Robert Smith Collection
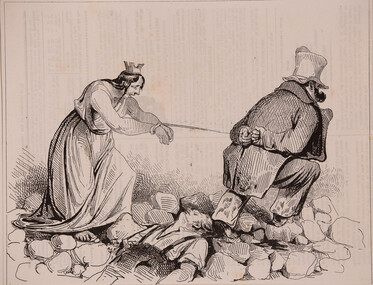
Artwork, other - 206 Dieu mene la France, Honore Daumier
French 1808 - 1879Pen Lithograph -
Moorabbin Air Museum
Manual (Item) - TM 55-1510-206-20 AC-1 / CV -2 (Caribou) Maintenance Manual
-
Victorian Harness Racing Heritage Collection at Lord's Raceway Bendigo
Document - Record, Harness Horse, Columbus
Stephen Spark compiled horses performance records starting in 1983 on his typewriter. Columbus raced from 1953 (2yo) through to 1965 (14yo). Career: 49 wins 56 seconds 34 thirds 206 starts. Typed document in black and red ink.harness racing, australasian harness racing, horse career, performance records, bendigo harness racing club, bhrc, columbus, k wellington, g rothacker -
 Melbourne Tram Museum
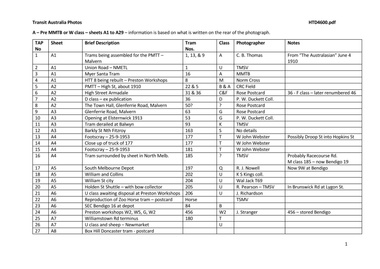
Album - Photo Album, Transit Australia Publishing, "TAP - Part A - Pre MMTB or W class – sheets A1 to A29", 1950's to 1990's
Photo Album - titled "TAP - Part A - Pre MMTB or W class – sheets A1 to A29 ", from Transit Australia Publishing. Photos used in the Destination City and other publications series. For a detailed list of photographs see htd4600i.pdf. For individual photo images see: \dbtext\hawthtramcoll\photo collections\htd4600-TAP-PartA, images TAP1 to TAP65. TAP01_Malvern Depot-assembling-trams.jpg TAP02_M1_Union Rd. Ascot Vale.jpg TAP03_Myer-Santa-tram_WilliamSt_MMTB.jpg TAP03_Myer-Santa-tram_William St_MMTB-obverse.jpg TAP04_8_Preston WS_Norm Cross.jpg TAP05_22-5_High St-Prahran_1910_CRC Field.jpg TAP06_31-36_High St-Armadale Rose Postcard.jpg TAP07_36_Dandenong Rd_c1917_Duckett Collection.jpg TAP08_Glenferrie Rd. Rose Postcard.jpg TAP09_52_Glenferrie Rd. Rose Postcard.jpg TAP10_53_Glenhuntly Rd_13Nov1913_Duckett Collection.jpg TAP11_93_Balwyn.jpg TAP12_163_Barkly St.jpg TAP13_177_Footscray_25Sep1953_W John Webster.jpg TAP14_177_Radiax Truck_Footscray_25Sep1953_W John Webster.jpg TAP15_181_Footscray_25Sep1953_WJ ohn Webster.jpg TAP16_185_Newmarket.jpg TAP17_197_SouthMelb_RJNowell.jpg TAP18_202_WilliamSt-late1920s.jpg TAP19_204_WilliamSt-late1920s.jpg TAP20_205_BowCollector.jpg TAP21_206_Preston_Mar1948_JackRichardson.jpg TAP22_ZooHorseTRam_TMSV-Postcard.jpg TAP22_ZooHorseTRam_TMSV-Postcard-obverse.jpg TAP23_16_Bendigo.jpg TAP24_456-others_Preston_Jul1947_JackStranger.jpg TAP25_180_WilliamstownRd.jpg TAP26_U_RacecourseRd.jpg TAP27_BoxHill-saloon.jpg TAP28_NMET-9-trailer_MtAlexanderRd.jpg TAP29_16_NicholsonSt-Coburgt_MMTB.jpg TAP30_26_CamberwellDepot_MMTB.jpg TAP32_47_MalvernDepot_MMTB.jpg TAP33_44-18_Bendigo.jpg TAP34_50_.jpg TAP35_60_KewDepot_MMTB.jpg TAP36_83_MalvernDepot_MMTB.jpg TAP37_275-6-93_Preston_RayPearson.jpg TAP38_99_KewDepot_Jan1937_RayPearson.jpg TAP39-122_McCraeSt_NormCross.jpg TAP40_137_HawthornDepot_MMTB.jpg TAP41_138_BourkeSt_20Oct1991_RayMarsh.jpg TAP42_140_PointOrmond.jpg TAP43_141_MalvernDepot_WJohnWebster.jpg TAP44_150_PointOrmond.jpg TAP45B_159_SwanstonSt_KSKings_14Mar1948.jpg TAP45C_159_SwanstonSt_KSKings_14Mar1948.jpg TAP46_171_SouthMelbourneDepot_MMTB.jpg TAP47_174_StGeorgesRd_JohnBeckett_1949.jpg TAP48_177_FootscrayDepot.jpg TAP49_177_FootscrayDepot_WJohnWebster.jpg TAP50_178_PointOrmond.jpg TAP51_178_ElsternwickRS_WJohnWebster.jpg TAP52A_179_LeedsSt-Footscray.jpg TAP52A_179_LeedsSt-Footscray_LCrow.jpg TAP52B_179_LeedsSt-Footscray_LCrow.jpg TAP53_187_SouthMelbourneDepot_MMTB.jpg TAP54_190_CamberwellDepot_GeoffGrant_7May1955.jpg TAP55_191_ElizabethSt-terminus_JohnBeckett.jpg TAP56_192_StKildaSA.jpg TAP57_200_MillerSt.jpg TAP58_205_LygonSt-into-BrunswickRd.jpg TAP59_208_EssendonDepot_MMTB.jpg TAP60_V214_MillerSt_1978_MMTB.jpg TAP61_15_EssendonDepot_MMTB.jpg TAP62_PrinceofWales-decoration_1920.jpg TAP63_EssendonDepot-PowerHouse.jpg TAP64_DoncasterTram_IllustratedAustrlianNews_9Nov1889.jpg TAP65_180_BourkeSt-at-SpencerSt.jpg Transit Australia Photos - Pre W class - sheets A1 to A29 -trams, tramways, transit australia, destination city, tramcars, depots, pmtt, htt, mbctt, nmetl, doncaster, bendigo, tram 1, tram 13, tram 9, 16, tram 8, tram 22, tram 5, tram 31, tram 36, tram 50, tram 63, tram 53, tram 93, tram 163, tram 177, tram 181, tram 185, tram 197, tram 202, tram 204, tram 205, tram 206, tram 84, tram 456, tram 180, tram 9, tram 26, tram 31, tram 36, tram 47, tram 44, tram 60, tram 83, tram 275, tram 93, tram 99, tram 122, tram 137, tram 138, tram 140, tram 141, tram 150, tram 159, tram 171, tram 174, tram 177, tram 178, tram 179, tram 187, tram 190, tram 191, tram 200, tram 205, tram 214, tram 15, tram 180 -
 Melbourne Tram Museum
Album - Photo Album, Transit Australia Publishing, "TAP - Part F - Work Trams", 1950's to 1990's
Photo Album - titled "TAP - Part F - Work Trams Sheets F1 to F34", from Transit Australia Publishing. Photos used in the Destination City and other publications series. For a detailed list of photographs see htd4605i.pdf. For individual photo images see: \dbtext\hawthtramcoll\photo collections\TAP-, images TAP316 to TAP395. TAP316_2A_Preston_c1927_GJNowell.jpg TAP317_4_Preston_KSKings.jpg TAP318_4_SouthMelbourne_RayPearson.jpg TAP319_5_SouthMelbourne_9Mar1959KeithKings.jpg TAP320_5_CollinsSt.jpg TAP321_First6_Preston_RayPearson.jpg TAP322_7_HawthornDepot_RayPearson.jpg TAP323_7_SouthMelbourne_KeithKings_9Mar1959.jpg TAP324_7_SouthMelbourne_KeithKings_14Mar1965.jpg TAP325_8_HighSt-Preston_BASilcove.jpg TAP326_9W_Preston_NormCross_1979.jpg TAP328_11W_Preston_HughBallment_Mar1982.jpg TAP329_9_BourkeSt_2Sep1969_DavidClark.jpg TAP330_9_SouthMelbourne_KeithKings_29Jul1959.jpg TAP331_10_SouthMelbourne_KeithKings_26Dec1968.jpg TAP332_10_SouthMelbourne_ABeebe.jpg TAP334_First11_Hawthorn_RayPearson.jpg TAP335_11W_Bundoora_28Aug1995_HughWaldron.jpg TAP336_16_Preston_28Sep1961_KeithKings.jpg TAP337_17_HannaSt_29Jan1960_KeithKings.jpg TAP338_17_GleferrieRd_DavidClark_30Jul1969.jpg TAP339_209-18_Preston_RayPearson.jpg TAP340_18_Preston_Mar1948_JackRichardson.jpg TAP341_19_FlemingtonRd_4Jun1970_DavidClark.jpg TAP342_19_HannaSt-perway-yard_ABeebe.jpg TAP343_20_SouthMelbourne-perway-yard_27Mar1964_KeithKings.jpg TAP344_30_DogCar_Camberwell_PWDuckett.jpg TAP345_190_Camberwell_JBStranger.jpg TAP346_198_Preston_27Dec1968_KeithKings.jpg TAP347_199_Preston_15Aug1959_KeithKings.jpg TAP348a_199_HannaSt-perway_ABeebe.jpg TAP348_199_HannaSt-perway_ABeebe.jpg TAP349_206_Preston_1Nov1949_KeithKings.jpg TAP350_267_SouthMelbourne_30Jan1967_KeithKings.jpg TAP351_485_SouthMelbourne_9Mar19641967_KeithKings.jpg TAP352_533_lightrail_DaleBudd.jpg TAP353_890_HawthornDepot_27Apr1992_RJMarsh.jpg TAP354_9-7-8_HannaSt-perway_ABeebe.jpg TAP355_2Grinder_StKildaRd_ABeebe.jpg TAP356_2Grinder_HannaSt-perway_9Mar1959_KeithKings.jpg TAP357_3Grinder_HannaSt-perway_c1960_KeithKings.jpg TAP358_3Grinder_HannaSt-perway_9Mar1959_KeithKings.jpg TAP359_BallastTrailer-24_Preston_PTC.jpg TAP360_BallastTrailer-24_DandenongRd_12April1964_KeithKings.jpg TAP361_BallastTrailer-24_Aerodrome_CharlesCraig.jpg TAP362_LongBallastTrailer_Preston_Mar1948_ABeebe.jpg TAP363-exHTT-trailer_Dwg-R115_KeithKings.jpg TAP364-exNMETLCo-trailer_Dwg-R1452_KeithKings.jpg TAP365-exPMTT-cleaner_Dwg-549_KeithKings.jpg TAP366_3_Preston_1932_RayPearson.jpg TAP367_5_StKildaRd-at-CityRd_WJohnWebster.jpg TAP368_(Second-6_Preston_c1961_PTC.jpg TAP369_7-HighSt-StKilda_Feb1959_JimSeletto.jpg TAP370a_7_SouthMelbourne_1950s_JohnBeckett.jpg TAP370_7_SouthMelbourne_1950s_LMarshallWood.jpg TAP371_7_SouthMelbourne_WJohnWebster.jpg TAP372_7_StKildaRd-into-ParkSt_Feb1978_GaryDavey.jpg TAP373_8_SwanstonSt_LindsayCrow.jpg TAP374_8_StKildaRd-at-CityRd_WJohnWebster.jpg TAP375_8_Preston_MMTB.jpg TAP376_8_PrincesBridge_1954_JimSeletto.jpg TAP377_16W_Preston_1980_RayMarsh.jpg TAP378_First16_Preston_1930s_RayPearson.jpg TAP379_17_ColdbloRd_WJohnWebster.jpg TAP380_17_HannaSt_RayPearson.jpg TAP381_19_Preston_RayPearson.jpg TAP382_233_LineMarker_PTC.jpg TAP383_533_TestTram_MMTB.jpg TAP384_Grinder3_ChapelSt-at-Carlisle_1969_JeffBounds.jpg TAP386_Second6_HighSt_c1962_PTC.jpg TAP387_11_HighSt-StKildaRd_JimSeletto.jpg TAP388_15_PrestonWorkshops_1966_JimSeletto.jpg TAP389_17_SouthMelbourneDepot_DaleBudd.jpg TAP390_221_Derail-trainer_SouthMelbourneDepot_NormCross.jpg TAP391_485-trailer_JimSeletto.jpg TAP392_485-dropcentre_DaleBudd.jpg TAP393_Grinder_SouthMelbourneDepot_MMTB.jpg TAP394_Grinder3_Preston_PTC.jpg TAP395_Trailer-20_Preston_NormCross.jpgtrams, tramways, transit australia, destination city, tramcars, depots, work trams, tram 2a, tram 4, tram 5, tram 6, tram 7, tram 8, tram 9w, tram 11w, tram 9, tram 10, tram 11, tram 16, tram 17, tram 209, tram 18, tram 19, tram 20, tram 30, tram 190, tram 198, tram 199, tram 206, tram 267, tram 485, tram 544, tram 890, tram 24, tram 5, tram 6, tram 233, tram 533, tram 15, tram 221, tram 485 -
 Melbourne Tram Museum
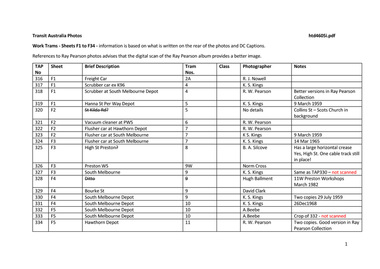
Negative, Wal Jack, 12/03/1946 12:00:00 AM
Black and white negative, by Wal Jack, of U206, along with 19, 38, 35, and 37. C class trams No. 19 at the end of 2 road was painted at the time for the Centenary of Brunswick and Coburg (Ray Pearson) and is the second car to carry this number. Wal's album notes that the photo dated 12-3-1946trams, tramways, brunswick depot, freight tram, c class, tram 206, tram 19, tram 38, tram 35, tram 37, u class, e class -
 Melbourne Tram Museum
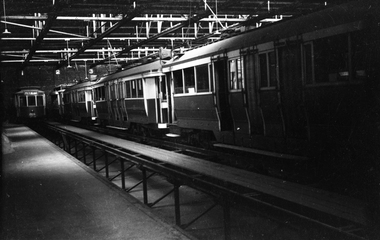
Negative, Wal Jack, 19/01/1941 12:00:00 AM
Black and white negative by Wal Jack of U206 and a C Class or N class stored at Preston Workshops. Based on image the number of the second car is number 125. Note the two cable grip cars and the bus body in the background. Rod Atkins advised 11/10/2020: "The bus body is one of the four James Motors of South Melbourne body's first fitted to the group of 12 Thornycroft "J" chassis in 1924-1925 numbered 13 to 24. Then in 1929 they were all transferred to the ADC chassis but four were retained in late thirties to early forties for possible further use. The four bodies were then fitted to the new International K6 chassis in 1943. The vehicle numbers were 19 to 308 16 to 309 24 to 311 and 18 to 312. They were finally disposed of in 1949." Photo 19-1-1941, based on other similar photo dates.trams, tramways, preston workshops, u class, c class, n class, grip tram, buses, tram 206, tram 125 -
 Melbourne Tram Museum
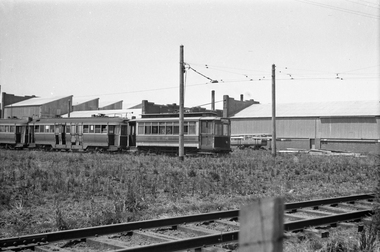
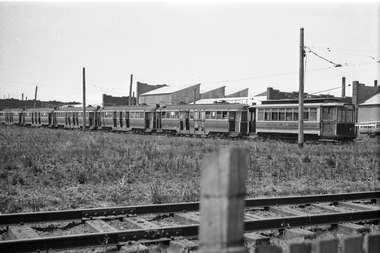
Negative, Wal Jack, 19/01/1941 12:00:00 AM
Black and white negative by Wal Jack of U206 and five maximum traction cars - N 125, C 28, P 138, E 143 and another ex HTT car stored at Preston Workshops. The car numbers were detailed in the album held by the Ballarat Tramway Museum. Photo dated 19-1-41trams, tramways, preston workshops, u class, c class, n class, e class, p class, stored trams, tram 206, tram 125, tram 28, tram 38, tram 143 -
 Moorabbin Air Museum
Document (item) - CAC History Bell JetRanger 206 General Info