
Showing 180 items matching "fragile"
-
 Melton City Libraries
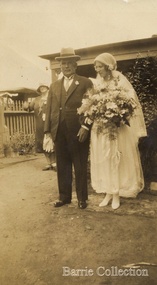
Photograph, Charles Ernest Barrie with daughter Mary Ena Barrie, 1930
... Sister Faith who was a small fragile woman with a tremendous spirit was a frequent visitor at our home where she loved the warmth, good food and the loving companionship of the family for many years. ...Sister Faith who was a small fragile woman with a tremendous spirit was a frequent visitor at our home where she loved the warmth, good food and the loving companionship of the family for many years. ...Mary Ena married Keith John Robinson son of Isaac and Henrietta nee Raleigh of Creighton Melton. Mary and her father are photographed beside the Darlingsford house prior to her wedding in February 1930. Mary their first child was born in 1907. In circa 1980 she wrote about her parents and her early life. Page 1 of part of the original hand written script - Mother and father were married at the Methodist Church Melton by the Rev B E Williams on Aug 23rd 1906 and lived in the house beside the chaff mill for some years. [The family left Melton South in 1910. In 1911 they moved to the farm “Darlingsford” near the town of Melton home for their nine children born between 1907 - 1922 They had three daughters and six sons, the second boy died of diphtheria 1916 aged 5 years.] Page 2 Mary writes… Each winter Father would send a 20 ton truck to the Collingwood Central Methodist Mission to be distributed to the needy people in the area. Sr. Faith who was at the mission for many years became a very much loved friend of my parents and the family. I remember her as a prolific writer of childrens stories in the Methodist paper the “Spectator”. I still treasure a book sister Faith gave me for my birthday. Father and Mother gave the first donation of 10 pounds to open the fund to start “Yooralla” for crippled children all because a small boy asked for a bag of sweets for his brother who was crippled and not able to attend kindergarten. Sister Faith who was a small fragile woman with a tremendous spirit was a frequent visitor at our home where she loved the warmth, good food and the loving companionship of the family for many years. Later she ran the Chaucer Library in Collins just below Georges near the Athenaeum Theatre. Mother was an avid reader and many of the books she read came from this library. Page 4 – Mary writes….. Dad was always involved in district affairs ever ready to help someone in need, especially as a J. P. helping young people who may have been in trouble. He was always involved in the care of his [eight] brothers who were in need at times. He was an elder at the Scots Church Melton and Sunday School Superintendant when the Sunday School thrived. The anniversary became a special event with good singing supplemented by good music by Dad’s friends from Footscray saxophone and violin. The church would be packed both Sundays. The family home was open to all and sundry from the little Salvation Army lass from Bacchus Marsh driving a horse and jinker (without any experience) round the district. collecting, came looking for a bed for the night (and later crept into bed with me because she was terrified). The Methodist local preachers regularly spent several night and breakfast while visiting people in the Melton area. They were stationed at Bacchus Marsh and again drove a horse and jinker. One preacher I remember with gratitude was Mr Webster a retired school master and a fine man. Another was Pastor Tuttlebee again with no experience driving a horse and jinker. The first time he called Mother found him taking the winkers off the horse whilst it was still harnessed to the jinker. Another regular visitor was Mr Lister the federal member for Corio, he always stayed with us when he had meeting in this area. Another evening just as dusk another minister and his dear little wife were driving the horse and buggy to a new parish at Ballarat. They had asked at the Mac’s Hotel for accommodation, and their reply was we have no accommodation, go down to Mr and Mrs Barrie they will put you up for the night. They were most grateful to be taken in and cared for, somehow it seemed the most natural thing in the world that they would be welcome. A copy of Mary’s writing was given to her niece Wendy in 1990. Mary Ena Barrie's wedding daylocal identities -
 Flagstaff Hill Maritime Museum and Village
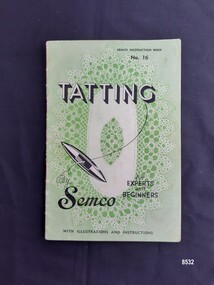
Book - Craft book, Norma Benporath, Tatting, circa 1940's
... It was known in Italy as "occhi" and in France as "la frivolite". Tatting looks fragile but is both strong and durable. An article in a column named "Wives and Daughters" published in the Star newspaper in May 1910 describes the durability of tatting lace - "there is edging and insertion still in existence that have outworn two sets of pillow slips." ...It was known in Italy as "occhi" and in France as "la frivolite". Tatting looks fragile but is both strong and durable. An article in a column named "Wives and Daughters" published in the Star newspaper in May 1910 describes the durability of tatting lace - "there is edging and insertion still in existence that have outworn two sets of pillow slips." ...Tatting is a form of knotted lace making using thread and a small shuttle. Twisted threads are tied around or through small, pointed shuttles that can be made of bone, mother of pearl, tortoise shell, steel or plastic. This produces a stable, strong lace using simple knots of two half hitches to make rings and chains embellished with picots. The origins of tatting are not clear but early versions of decorative knotting were used by the Egyptians on their ceremonial dress. Tatting also has elements of fishermen's net making techniques and the decorative knotting that was practiced by aristocratic women from the 15th century. Tatting, as we know it today, emerged in the first half of the 19th century. The new availability of mercerised thread from 1835 encouraged a burgeoning of lace crafts of all sorts. It was known in Italy as "occhi" and in France as "la frivolite". Tatting looks fragile but is both strong and durable. An article in a column named "Wives and Daughters" published in the Star newspaper in May 1910 describes the durability of tatting lace - "there is edging and insertion still in existence that have outworn two sets of pillow slips." In the 19th century and well into the 20th century, tatting was used like crochet and knitted lace for decorative edgings, collars, doilies, tray cloths etc. At first, different tatting patterns were passed along by word of mouth from person to person, however in time, patterns regularly appeared in newspapers and magazines well into the 1950's. This book has photographs and detailed instructions for a wide range of tatted edgings and insertions suitable for household linens such as towels, doilies and tablecloths as well as patterns for whole mats. Stanley E. Mullen (a businessman) developed Semco Pty Ltd which began as a Melbourne based importation company in 1907. The first three letters of Semco's name were his initials. In 1915 it began manufacturing women's apparel, whitework and transfer patterns. In 1924 the company moved to Black Rock, Victoria and continued to produce an extensive range of needlework patterns and handcraft instruction booklets, threads etc. up until the late 1970's. Semco had a staff that included many young women. It was noted by E.J. Trait (editor of the local newspaper "Standard News") that the firm provided them with good working conditions and the correct rate of pay for women in a time of war - the starting rate for 15 year olds, mainly girls at Semco was 25 shillings per week. During World War 2, Manpower Regulations could be used to coerce workers to move into jobs that supported the war effort, but Trait argued that being employed at Semco could make this unlikely as the firm made some goods essential for the war effort. He even suggested that women be encouraged to produce needlework items (and play a part in the war effort) by sending them as presents, to the troops up north. He also heaped praise on the Semco workplace - noting that no Saturday work was the norm, allowing employees to shop and have "hair-do's" before enjoying a relaxing weekend! Semco also had a female cricket side in the women's Saturday association. After the war the firm stayed in production until the early 1990's when it was taken over by Coates-Paton Pty Ltd. Norma Benporath (1900 - 1998) was an expert in tatting techniques and taught and published extensively on the subject. She was born in New Zealand with impaired sight but cataract surgery restored 50% vision to one eye. She was inspired to learn tatting whilst watching her aunt tat and being told that tatting did not require as much sharp vision as embroidery. She quickly learnt to design her own patterns and published over 1000 tatted lace patterns between 1929 and 1952. She became a regular contributor to magazines (such as Home Beautiful) and newspapers across Australia. Her designs were also published in New Zealand, South Africa as well as the U.K. and U.S.A. When Semco, a thread manufacturer, noticed a rise in the sale of fine crochet threads, they realized they had an untapped market to explore. Norma designed a collection of tatting patterns for Semco that were used to help promote their threads. Norma also worked with Semco to produce a line of threads and shuttles specifically suited to tatting. In 1997, Norma was inducted into the "Order of Australia" for "Service to the craft of tatting as a designer and through the international publication of her patterns".This item is an excellent example of the needle work being enjoyed by women in the 1940's in Australia and the skills of the Australian designer, Norma Benporath. It is also an example of the trend that emerged for craft companies such as Semco to publish pattern books in order to advertise their own materials.A 32 page soft cover instruction book with green front and back covers showing two tatted doily designs. The book includes black and white photographs and written patterns by Norma Benporath.Front cover - "TATTING" "For / EXPERTS/ and / BEGINNERS" "By/Semco" "SEMCO INSTRUCTION BOOK" "No. 16" "WITH ILLUSTRATIONS AND INSTRUCTIONS" "9" Back cover - "FOR INSTRUCTIONS FOR WORKING SEE PAGE 22" "Published by Semco Pty. Ltd." "BLACK ROCK, 29, VIC"flagstaff hill maritime museum and village, warrnambool, great ocean road, tatting, tatting instruction book, tatting patterns, tatting shuttle, semco, semco pty ltd, norma benporath, needlework, handcrafts, household linen, craftwork -
 Eltham District Historical Society Inc
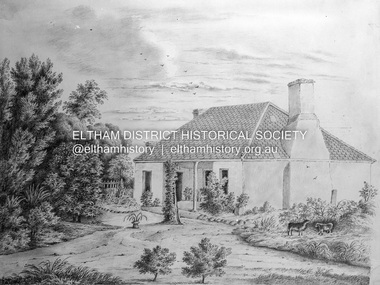
Negative - Photograph, Charles Bertie, Sketch; Sweeney's Cottage, Culla Hill, Eltham (n.d.), c.1905
... The original sketch was photographed in 1970 for reproduction in the Shire history publication Pioneers & Painters (1971). The very fragile original was kept in the Council strongroom and suffered significant damage to its edges over the years, no doubt it has also yellowed. ...The original sketch was photographed in 1970 for reproduction in the Shire history publication Pioneers & Painters (1971). The very fragile original was kept in the Council strongroom and suffered significant damage to its edges over the years, no doubt it has also yellowed. ...In the early 1900s, Mary Sweeney commissioned artist Charles Bertie to paint the main house at Culla Hill. He charged her 5 shillings for the picture and 18 pence for the frame She took this painting with her when she married Michael Carrucan in 1910 and it hung in the Dalton Street farmhouse for many years. At a later time (1960s), the Burstons (the then owners of Culla Hill) had a card printed from the painting. The original sketch was photographed in 1970 for reproduction in the Shire history publication Pioneers & Painters (1971). The very fragile original was kept in the Council strongroom and suffered significant damage to its edges over the years, no doubt it has also yellowed. A comparison of the original as digitised (2022) with the negative taken 50 years earlier also reveals that the left 20% of the sketch has been cut off, probably due to damage. In June 1842 Thomas Sweeney applied to the Superintendent, C.J. La Trobe, asking permission to purchase a portion of the recently surveyed ‘Parish of Nillumbik'. His request was allowed and handed to the sub-treasurer and Land Board. He paid £110 for 110 acres and called the land 'Culla Hill'. He first built a temporary house, a slab hut 12 feet by 10 feet, in which he lived with his wife, an Irish girl whom he had married in 1838. (His first wife had been drowned at Port Jackson.) Some time later he built a permanent residence on the model of a Tipperary farmhouse. It was a rectangular building of hand-made bricks and stone quarried from the Western Hill with a recessed verandah in front, and bore a slate roof. The out-buildings consisted of a detached kitchen, stable and a barn. It was in this house that succeeding generations of Sweeneys were reared. The original slab hut became a washhouse and survived till recent years. 'Culla Hill' became a social centre for the district, church services being held there on various occasions. The first wheat crop in the district was planted by Sweeney who also supplied the first grain for a mill that later was built at Eltham. He took an active interest in the development of the district. At this time travelling people--many of them runaway sailors or convicts--often passed the settlement, and some of them stayed and worked with Sweeney. A tribe of aborigines living on the river below 'Culla Hill' were apparently on good terms with Sweeney, for it is said that they helped him with the building of his house. Very little is known about the aborigines who originally lived in the Eltham district. There must have been many of them; their stone axes, grinding stones, and anvil stones have been found in the gullies around Research and canoe trees and artifacts were found on the Kangaroo Ground hills. Early settlers remembered a tribe that camped on the site of the present railway bridge at Eltham. They held corroborees there and visited settlers for hand-outs of 'flour and bacca’. There was an aboriginal reserve on the Yarra, upstream from Eltham, but most of those who had collected there later went to live on the Pound Reserve at Warrandyte, where the last aborigines in the area finally ended their days. The Pound Reserve, of 1,103 acres, was established at Pound Bend in 1841. The chief protector, George Robinson, and his four assistants, were given instructions to care for the aged and sick, to provide blankets and rations for all who lived there, to train the able-bodied men in agriculture and other trades and to find them jobs. The Yarra blacks, who later came under the protection of William Thomas, have been described as a 'fine race, well made and above the average height'. Thomas Sweeney died on 6 September 1867 and was buried in the Eltham Cemetery. To his wife Margaret and his son John, he left the entire property of 'Culla Hill'. To his other son Patrick, he left 150 acres, including a small two-roomed wooden cottage. He had five daughters: Kate and Margaret (twins) who were born in 1842, Ellen 1846, Annie 1848 and Johanna 1851. John Sweeney farmed 'Culla Hill' until his death in 1909. He had ten children; one of them, Mary, became Mrs M. Carrucan whose son, Mr John Carrucan, still lives at Eltham. 'Culla Hill' passed out of the Sweeneys possession in 1939 and was renamed by its new owners, 'Sweeneys', in memory of its pioneers. - Pioneers & Painters: One Hundred Years of Eltham and its Shire, Alan Marshall 1971, pp10-12 Original colour sketch artwork 4 x 5 inch black and white negative of original colour sketchculla hill, art, charles bertie, drawing, mary carrucan (nee sweeney), sketches, sweeney's cottage -
 City of Melbourne Libraries
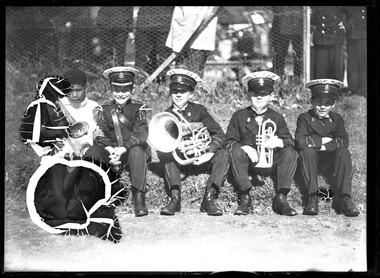
Photograph, Bull, Hugh Jones, 1897-1993, Boy bandsmen
... This slide is quite badly damaged, reminding us of the fragility of this photographic form. The colour is washed out across most of the slide, and the left of the slide is badly degraded as if the photographic solution hasn’t quite taken. ...This slide is quite badly damaged, reminding us of the fragility of this photographic form. The colour is washed out across most of the slide, and the left of the slide is badly degraded as if the photographic solution hasn’t quite taken. ...Published: 7 Dec 1934 Published title: A FIJIAN TROMBONIST. Published caption: Although the young Fijian here for the Eucharistic Congress had no uniform, he did not feel out of it with the members of St. Vincent de Paul’s Band at the Sacre Coeur, East Malvern, this week. Trove article identifier: http://nla.gov.au/nla.news-article205071643 Description: A young Fijian boy sits with young members of the St Vincent de Paul’s Band, all seated on the grass in sunshine. The three young band members are jauntily dressed in braided hats, long pants and smart dark jackets, white shirts, dark bow tie, and dark long trousers and boots. One holds a French horn, one a trumpet. In contrast, the young Fijian boy is shoeless, hatless, and dressed in white – a white shirt, and possibly a white “skirt” as observed to be worn by Fijian policemen in their home country at that time. He carries a trombone, which perhaps belongs to the young band member sitting beside him. Research by project volunteer, Louise McKenzie: A photo in the Argus on the previous day shows “two Papuans, Aloysius and Bernard, … talking to Archbishop O’Shea of Wellington (N.Z.).” In a turn of phrase which would be far from acceptable today, the caption notes that the juxtaposition of the dark skinned boys and the white skinned Archbishop makes “A picturesque Contrast”. The photo is also staged in a way that has the two dark skinned boys (wearing white shirts and white “skirts”, and no hats), standing, looking down on the Archbishop in his elaborate clothing and headcovering. The Age caption advises that they are at Sacre Coeur, East Melbourne. The reason for the event – a garden party – was held as part of the National Eucharistic Congress which took place in Melbourne from Sunday 2 – Sunday 9 December 1934. An initiative of the Roman Catholic Church, it was their contribution to Melbourne’s Centenary Celebrations. At this garden party the Papal Legate, Cardinal MacRory, accompanied by dignatories including the Papal Chamberlain, met Old Girls of Sacre Coeur Convent. The Cardinal’s sister was at one time Mother Superior of this Convent. The featuring of Fijian and Papuan boys in these articles reflected the diverse nature of Catholic Church representatives worldwide who attended the Eucharistic Congress which featured as part of Melbourne’s Centenary celebrations. Notable visitors to the Congress included the Papal Legate, His Excellence Cardinal MacRory, several Monsignors from Rome, the Archbishop of Liverpool representing England, Scotland and Wales, together with representatives from New Zealand, China, South Africa, Ireland, the Islands of the Pacific, India, Malta, USA, and of course from across Australia. St Vincent de Paul “Our History” advises that the Society was founded in France in 1833 by a group of dedicated Catholics who put their faith into action to support the poor in their community. The “Vinnies” website “1854 onwards” sets out milestones of the Society’s close involvement with Melbourne from its infancy in March 1854 up to today. A well researched blog by Jeremy de Korte dated February 28, 2024 – Band Blasts from the Past – Anecdotes, Stories and Personalities, notes: Orphanage bands in Australia were a copy of practices in England where the teaching of music in boys’ institutions was commonplace (Sheldon, 2009). There was, however, a major difference to the outcomes of this musical education between the two countries. Boys who were trained as musicians in English institutions readily found themselves recruited into the bands of the British Army and Navy (Sheldon, 2009). Whereas the musicians that graduated from the Orphanage bands in Australia found themselves positions in the wider band movement. … We know that Orphanage bands in Australia have had a long and distinguished history, as well as enviable reputations. The St. Augustine’s Band from Geelong is probably the most famous of them all, and it is mentioned that by 1898 they were already putting the call out for a new set of instruments (“ST. AUGUSTINE’S ORPHANAGE BAND.,” 1898). St. Augustine’s went on to win many competitions at South Street in Ballarat and toured extensively – in one instance, in 1906 they won the A Grade Championships at South Street (Royal South Street Society, 1906). The band at St. Vincent’s de Paul in Melbourne was no less famous than their counterpart in Geelong and in 1921 they gained the services of Mr. Leslie Hoffman, a graduate of the St. Augustine’s Band, as their conductor (“St. Vincent’s Bandmaster,” 1921). This slide is quite badly damaged, reminding us of the fragility of this photographic form. The colour is washed out across most of the slide, and the left of the slide is badly degraded as if the photographic solution hasn’t quite taken. But the culprits are most likely time and mode of storage. References: A FIJIAN TROMBONIST--SUITE FOR DOLL'S HOUSE--LUNCH TIME AT THE SPORTS--A FULL SLIDE. (1934, December 7). The Age (Melbourne, Vic. : 1854 - 1954), p. 3. Retrieved April 9, 2024, from http://nla.gov.au/nla.news-article205071643 "INTERSTATE TENNIS -- EUCHARISTIC GARDEN PARTY" The Argus (Melbourne, Vic. : 1848 - 1957) 6 December 1934: 9. Web. 9 Apr 2024 Photographer notations on slide: "Boy bandsmen B61".1930-1939, bands, catholic church -
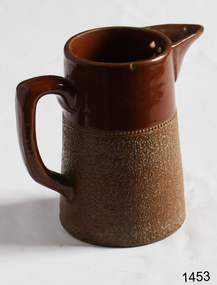 Flagstaff Hill Maritime Museum and Village
Domestic object - Jug
... It is called greenware now and it is at it’s most fragile! Handle everything with two hands. I often refer to soft hands – keep everything gentle and with your fingers spread as much as possible. ...It is called greenware now and it is at it’s most fragile! Handle everything with two hands. I often refer to soft hands – keep everything gentle and with your fingers spread as much as possible. ...The Process of Making Pottery Decorating, Firing, Glazing, Making, Technical There is a rhythm and flow to clay. It can’t be done all at once! Even the making process! It can take weeks to get everything done, especially if you can only work on your pottery once a week! Even though we have three hour classes, it’s often just not enough time! Here is an overview of some of the processes so you have a bit more grasp on some of the technical stuff! Step One – Design There are SO many ideas out there for making stuff in clay! From delicate porcelain jewellery, through to heavy sculptural work and everything in between. Deciding your direction is sometimes not that easy – when you first start, try everything, you will naturally gravitate to the style that you enjoy! The options and variations are endless and can get a wee bit overwhelming too! Check in with me before you start to ensure your ideas will work, what order you might do things, how you could achieve the look you are seeking and any other technical data required! Step Two – Making Clay is thixotropic. This means that as you work with it, the clay first gets sloppier and wetter, before is begins to dry in the atmosphere. For most things, you simply can’t do all parts of the project at once. An example of work order might look like: Get last weeks work out from the shelves Prepare clay for today’s work – roll your clay, prepare balls for throwing, make the first stage of a pinch pot) Clean up last week’s work and put it on the shelf for bisque firing Check that you have any glazing to do – and do enough of it that you will have time to finish your main project Do the next step of your next project – there might be a further step that can’t be complete immediately, in that case, wrap your work well and put onto the shelves. Letting your work rest for a while can really help keep your work clean and professional looking. Many things require bagging under plastic to keep it ready for work the next week – put your name on the outside of the bag so you can find your work easily. We have stickers and markers. Consider how you want to decorate your work – coloured slip can be applied at a fairly wet stage (remembering that it will make your work even wetter!). Trying to apply slip to dry clay won’t work! If you want to do sgraffito – you will need to keep the work leather hard (a state of dryness where you can still work the clay with a little effort and a little water and care). Step Three – Drying Most of the time your work can go into the rack uncovered to let it dry out for the following week. If you want to continue forming or shaping you will need to double bag your work – put your work on a suitable sized bat and put the bat in a bag so the base of the bag is under the bat, then put another bag over the top of the work and tuck the top of the bag under the bat. If you want to trim (or turn) your thrown work the following week, it should also be double bagged. If your work is large, delicate, or of uneven thicknesses, you should lightly cover your work for drying. When considering the drying process, bare in mind the weather, humidity and wind! The hotter and dryer, the faster things dry and work can dry unevenly in the shelves – this can lead to cracking – another time to lightly cover your work for drying. Step Four – Trimming and Cleaning Up Your work is dry! It is called greenware now and it is at it’s most fragile! Handle everything with two hands. I often refer to soft hands – keep everything gentle and with your fingers spread as much as possible. Try to not pick up things like plates too much, and always with both hands! Before your work can be bisque fired it should be “cleaned up”. You work won’t go into the kiln if it has sharp edges – when glazed, sharp edges turn into razor blades! Use a piece of fly wire to rub the work all over – this will scratch a little so be light handed. Use a knife or metal kidney to scrape any areas that require a bit more dynamic treatment than the fly wire offers! Finally, a very light wipe over with a slightly damp sponge can help soften and soothe all of your edges and dags! Trimming thrown work: If you are planning to trim (or turn) your thrown work (and you should be), make sure you bag it well – your work should be leather hard to almost dry for easiest trimming. Use this step to finish the work completely – use a metal kidney to polish the surface, or a slightly damp sponge to give a freshly thrown look. Wipe the sponge around the rim after trimming, and check the inside of the pot for dags! Trimming slip cast work: Usually I will trim the rims of your work on the wheel the following day to make that stage easier, however you will still need to check your work for lumps and bumps. Last but not least – check that your name is still clearly on the bottom of your work. Step Five – Bisque Firing When the work is completely dry it can go into the bisque kiln. The bisque kiln is fired to 1000°C. This process burns off the water in the clay as well as some of the chemically bound water. The structure of the clay is not altered that much at this temperature. Inside the bisque kiln, the work is stacked a little, small bowl inside a larger bowl and onto a heavy plate. Smaller items like decorations or drink coasters might get stacked several high. Consideration is paid to the weight of the stack and shape of the work. A bisque kiln can fire about one and a half times the amount of work that the glaze kiln can fire. The firing takes about 10 hours to complete the cycle and about two days to cool down. Once it has been emptied the work is placed in the glaze room ready for you to decorate! Step Six – Glazing Decorating your work with colour can be a lot of fun – and time consuming! There are three main options for surface treatment at this stage: Oxide Washes Underglazes Glazes Washes and underglazes do not “glaze” the work – It will still need a layer of glaze to fully seal the clay (washes don’t need glaze on surfaces not designed for food or liquid as they can gloss up a little on their own). Underglazes are stable colourants that turn out pretty much how they look in the jar. They can be mixed with each other to form other colours and can be used like water colours to paint onto your work. Mostly they should have a clear glaze on top to seal them. Oxides are a different species – the pink oxide (cobalt) wash turns out bright blue for instance. They don’t always need a glaze on top, and some glazes can change the colour of the wash! The glazes need no other “glaze” on top! Be careful of unknown glaze interactions – you can put any combination of glaze in a bowl or on a plate, but only a single glaze on the outside of any vertical surface! Glazes are a chemical reaction under heat. We don’t know the exact chemicals in the Mayco glazes we use. I can guess by the way they interact with each other, however, on the whole, you need to test every idea you have, and not run the test on a vertical surface! Simply put, glaze is a layer of glass like substance that bonds with the clay underneath. Clay is made of silica, alumina and water. Glaze is made of mostly silica. Silica has a melting point of 1700°C and we fire to 1240°C. The silica requires a “flux” to help it melt at the lower temperature. Fluxes can be all sorts of chemicals – a common one is calcium – calcium has a melting point of 2500°C, however, together they both melt at a much lower temperature! Colourants are metal oxides like cobalt (blue), chrome (green through black), copper (green, blue, even red!), manganese (black, purple and pink) iron (red brown), etc. Different chemicals in the glaze can have dramatic effects. for example, barium carbonate (which we don’t use) turns manganese bright pink! Other elements can turn manganese dioxide brown, blue, purple and reddish brown. Manganese dioxide is a flux in and of itself as well. So, glazes that get their black and purple colours, often interact with other glazes and RUN! Our mirror black is a good example – it mixes really well with many glazes because it fluxes them – causes them to melt faster. It will also bring out many beautiful colours in the glazes because it’s black colouring most definitely comes from manganese dioxide! Glaze chemistry is a whole subject on it’s own! We use commercial Mayco glazes on purpose – for their huge range of colour possibilities, stability, cool interactions, artistic freedom with the ability to easily brush the glazes on and ease of use. We currently have almost 50 glazes on hand! A major project is to test the interactions of all glazes with each other. That is 2,500 test tiles!!!! I’m going to make the wall behind the wheels the feature wall of pretty colours! Step Seven – Glaze (Gloss or sometimes called “Glost”) Firing Most of the time this is the final stage of making your creation (but not always!) The glaze kiln goes to 1240°C. This is called cone 6, or midrange. It is the low end of stoneware temperatures. Stoneware clays and glazes are typically fired at cone 8 – 10, that is 1260 – 1290°C. The energy requirement to go from 1240°C to 1280°C is almost a 30% more! Our clay is formulated to vitrify (mature, turn “glass-like”) at 1240°, as are our glazes. A glaze kiln take around 12 hours to reach temperature and two to three days to cool down. Sometimes a third firing process is required – this is for decoration that is added to work after the glaze firing. For example – adding precious metals and lustres. this firing temperature is usually around 600 – 800°C depending upon the techniques being used. There are many students interested in gold and silver trims – we will be doing this third type of firing soon! After firing your work will be in the student finished work shelves. Remember to pay for it before you head out the door! There is a small extra charge for using porcelain clay (it’s more than twice the price of regular clay), and for any third firing process! Once your work has been fired it can not turn back into clay for millennia – so don’t fire it if you don’t like it! Put it in the bucket for recycling. https://firebirdstudios.com.au/the-process-of-making-pottery/The form of the jug has been in use for many centuries.Stoneware jug. Two tone brown glaze with pierced lip behind spout. Spout chipped.None.flagstaff hill, warrnambool, shipwrecked-coast, flagstaff-hill, flagstaff-hill-maritime-museum, maritime-museum, shipwreck-coast, flagstaff-hill-maritime-village, jug, ceramic jug -
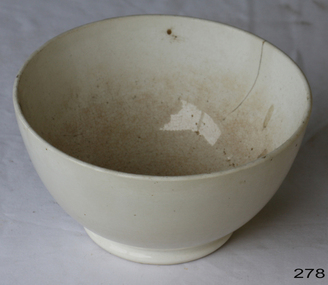 Flagstaff Hill Maritime Museum and Village
Domestic object - Bowl, Late 19th or early 20th Century
... It is called greenware now and it is at it’s most fragile! Handle everything with two hands. I often refer to soft hands – keep everything gentle and with your fingers spread as much as possible. ...It is called greenware now and it is at it’s most fragile! Handle everything with two hands. I often refer to soft hands – keep everything gentle and with your fingers spread as much as possible. ...The Process of Making Pottery Decorating, Firing, Glazing, Making, Technical There is a rhythm and flow to clay. It can’t be done all at once! Even the making process! It can take weeks to get everything done, especially if you can only work on your pottery once a week! Even though we have three hour classes, it’s often just not enough time! Here is an overview of some of the processes so you have a bit more grasp on some of the technical stuff! Step One – Design There are SO many ideas out there for making stuff in clay! From delicate porcelain jewellery, through to heavy sculptural work and everything in between. Deciding your direction is sometimes not that easy – when you first start, try everything, you will naturally gravitate to the style that you enjoy! The options and variations are endless and can get a wee bit overwhelming too! Check in with me before you start to ensure your ideas will work, what order you might do things, how you could achieve the look you are seeking and any other technical data required! Step Two – Making Clay is thixotropic. This means that as you work with it, the clay first gets sloppier and wetter, before is begins to dry in the atmosphere. For most things, you simply can’t do all parts of the project at once. An example of work order might look like: Get last weeks work out from the shelves Prepare clay for today’s work – roll your clay, prepare balls for throwing, make the first stage of a pinch pot) Clean up last week’s work and put it on the shelf for bisque firing Check that you have any glazing to do – and do enough of it that you will have time to finish your main project Do the next step of your next project – there might be a further step that can’t be complete immediately, in that case, wrap your work well and put onto the shelves. Letting your work rest for a while can really help keep your work clean and professional looking. Many things require bagging under plastic to keep it ready for work the next week – put your name on the outside of the bag so you can find your work easily. We have stickers and markers. Consider how you want to decorate your work – coloured slip can be applied at a fairly wet stage (remembering that it will make your work even wetter!). Trying to apply slip to dry clay won’t work! If you want to do sgraffito – you will need to keep the work leather hard (a state of dryness where you can still work the clay with a little effort and a little water and care). Step Three – Drying Most of the time your work can go into the rack uncovered to let it dry out for the following week. If you want to continue forming or shaping you will need to double bag your work – put your work on a suitable sized bat and put the bat in a bag so the base of the bag is under the bat, then put another bag over the top of the work and tuck the top of the bag under the bat. If you want to trim (or turn) your thrown work the following week, it should also be double bagged. If your work is large, delicate, or of uneven thicknesses, you should lightly cover your work for drying. When considering the drying process, bare in mind the weather, humidity and wind! The hotter and dryer, the faster things dry and work can dry unevenly in the shelves – this can lead to cracking – another time to lightly cover your work for drying. Step Four – Trimming and Cleaning Up Your work is dry! It is called greenware now and it is at it’s most fragile! Handle everything with two hands. I often refer to soft hands – keep everything gentle and with your fingers spread as much as possible. Try to not pick up things like plates too much, and always with both hands! Before your work can be bisque fired it should be “cleaned up”. You work won’t go into the kiln if it has sharp edges – when glazed, sharp edges turn into razor blades! Use a piece of fly wire to rub the work all over – this will scratch a little so be light handed. Use a knife or metal kidney to scrape any areas that require a bit more dynamic treatment than the fly wire offers! Finally, a very light wipe over with a slightly damp sponge can help soften and soothe all of your edges and dags! Trimming thrown work: If you are planning to trim (or turn) your thrown work (and you should be), make sure you bag it well – your work should be leather hard to almost dry for easiest trimming. Use this step to finish the work completely – use a metal kidney to polish the surface, or a slightly damp sponge to give a freshly thrown look. Wipe the sponge around the rim after trimming, and check the inside of the pot for dags! Trimming slip cast work: Usually I will trim the rims of your work on the wheel the following day to make that stage easier, however you will still need to check your work for lumps and bumps. Last but not least – check that your name is still clearly on the bottom of your work. Step Five – Bisque Firing When the work is completely dry it can go into the bisque kiln. The bisque kiln is fired to 1000°C. This process burns off the water in the clay as well as some of the chemically bound water. The structure of the clay is not altered that much at this temperature. Inside the bisque kiln, the work is stacked a little, small bowl inside a larger bowl and onto a heavy plate. Smaller items like decorations or drink coasters might get stacked several high. Consideration is paid to the weight of the stack and shape of the work. A bisque kiln can fire about one and a half times the amount of work that the glaze kiln can fire. The firing takes about 10 hours to complete the cycle and about two days to cool down. Once it has been emptied the work is placed in the glaze room ready for you to decorate! Step Six – Glazing Decorating your work with colour can be a lot of fun – and time consuming! There are three main options for surface treatment at this stage: Oxide Washes Underglazes Glazes Washes and underglazes do not “glaze” the work – It will still need a layer of glaze to fully seal the clay (washes don’t need glaze on surfaces not designed for food or liquid as they can gloss up a little on their own). Underglazes are stable colourants that turn out pretty much how they look in the jar. They can be mixed with each other to form other colours and can be used like water colours to paint onto your work. Mostly they should have a clear glaze on top to seal them. Oxides are a different species – the pink oxide (cobalt) wash turns out bright blue for instance. They don’t always need a glaze on top, and some glazes can change the colour of the wash! The glazes need no other “glaze” on top! Be careful of unknown glaze interactions – you can put any combination of glaze in a bowl or on a plate, but only a single glaze on the outside of any vertical surface! Glazes are a chemical reaction under heat. We don’t know the exact chemicals in the Mayco glazes we use. I can guess by the way they interact with each other, however, on the whole, you need to test every idea you have, and not run the test on a vertical surface! Simply put, glaze is a layer of glass like substance that bonds with the clay underneath. Clay is made of silica, alumina and water. Glaze is made of mostly silica. Silica has a melting point of 1700°C and we fire to 1240°C. The silica requires a “flux” to help it melt at the lower temperature. Fluxes can be all sorts of chemicals – a common one is calcium – calcium has a melting point of 2500°C, however, together they both melt at a much lower temperature! Colourants are metal oxides like cobalt (blue), chrome (green through black), copper (green, blue, even red!), manganese (black, purple and pink) iron (red brown), etc. Different chemicals in the glaze can have dramatic effects. for example, barium carbonate (which we don’t use) turns manganese bright pink! Other elements can turn manganese dioxide brown, blue, purple and reddish brown. Manganese dioxide is a flux in and of itself as well. So, glazes that get their black and purple colours, often interact with other glazes and RUN! Our mirror black is a good example – it mixes really well with many glazes because it fluxes them – causes them to melt faster. It will also bring out many beautiful colours in the glazes because it’s black colouring most definitely comes from manganese dioxide! Glaze chemistry is a whole subject on it’s own! We use commercial Mayco glazes on purpose – for their huge range of colour possibilities, stability, cool interactions, artistic freedom with the ability to easily brush the glazes on and ease of use. We currently have almost 50 glazes on hand! A major project is to test the interactions of all glazes with each other. That is 2,500 test tiles!!!! I’m going to make the wall behind the wheels the feature wall of pretty colours! Step Seven – Glaze (Gloss or sometimes called “Glost”) Firing Most of the time this is the final stage of making your creation (but not always!) The glaze kiln goes to 1240°C. This is called cone 6, or midrange. It is the low end of stoneware temperatures. Stoneware clays and glazes are typically fired at cone 8 – 10, that is 1260 – 1290°C. The energy requirement to go from 1240°C to 1280°C is almost a 30% more! Our clay is formulated to vitrify (mature, turn “glass-like”) at 1240°, as are our glazes. A glaze kiln take around 12 hours to reach temperature and two to three days to cool down. Sometimes a third firing process is required – this is for decoration that is added to work after the glaze firing. For example – adding precious metals and lustres. this firing temperature is usually around 600 – 800°C depending upon the techniques being used. There are many students interested in gold and silver trims – we will be doing this third type of firing soon! After firing your work will be in the student finished work shelves. Remember to pay for it before you head out the door! There is a small extra charge for using porcelain clay (it’s more than twice the price of regular clay), and for any third firing process! Once your work has been fired it can not turn back into clay for millennia – so don’t fire it if you don’t like it! Put it in the bucket for recycling. https://firebirdstudios.com.au/the-process-of-making-pottery/ The bowl is an example of kitchenware used in the 19th century and still in use today.Bowl white ceramic. Crack on side. Badly stained.Backstamp very faint and unable to be read.flagstaff hill, warrnambool, shipwrecked-coast, flagstaff-hill, flagstaff-hill-maritime-museum, maritime-museum, shipwreck-coast, flagstaff-hill-maritime-village, mixing bowl, food preparation, kitchen equipment, ceramic -
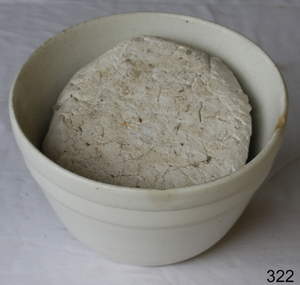 Flagstaff Hill Maritime Museum and Village
Domestic object - Bowl
... It is called greenware now and it is at it’s most fragile! Handle everything with two hands. I often refer to soft hands – keep everything gentle and with your fingers spread as much as possible. ...It is called greenware now and it is at it’s most fragile! Handle everything with two hands. I often refer to soft hands – keep everything gentle and with your fingers spread as much as possible. ...The Process of Making Pottery Decorating, Firing, Glazing, Making, Technical There is a rhythm and flow to clay. It can’t be done all at once! Even the making process! It can take weeks to get everything done, especially if you can only work on your pottery once a week! Even though we have three hour classes, it’s often just not enough time! Here is an overview of some of the processes so you have a bit more grasp on some of the technical stuff! Step One – Design There are SO many ideas out there for making stuff in clay! From delicate porcelain jewellery, through to heavy sculptural work and everything in between. Deciding your direction is sometimes not that easy – when you first start, try everything, you will naturally gravitate to the style that you enjoy! The options and variations are endless and can get a wee bit overwhelming too! Check in with me before you start to ensure your ideas will work, what order you might do things, how you could achieve the look you are seeking and any other technical data required! Step Two – Making Clay is thixotropic. This means that as you work with it, the clay first gets sloppier and wetter, before is begins to dry in the atmosphere. For most things, you simply can’t do all parts of the project at once. An example of work order might look like: Get last weeks work out from the shelves Prepare clay for today’s work – roll your clay, prepare balls for throwing, make the first stage of a pinch pot) Clean up last week’s work and put it on the shelf for bisque firing Check that you have any glazing to do – and do enough of it that you will have time to finish your main project Do the next step of your next project – there might be a further step that can’t be complete immediately, in that case, wrap your work well and put onto the shelves. Letting your work rest for a while can really help keep your work clean and professional looking. Many things require bagging under plastic to keep it ready for work the next week – put your name on the outside of the bag so you can find your work easily. We have stickers and markers. Consider how you want to decorate your work – coloured slip can be applied at a fairly wet stage (remembering that it will make your work even wetter!). Trying to apply slip to dry clay won’t work! If you want to do sgraffito – you will need to keep the work leather hard (a state of dryness where you can still work the clay with a little effort and a little water and care). Step Three – Drying Most of the time your work can go into the rack uncovered to let it dry out for the following week. If you want to continue forming or shaping you will need to double bag your work – put your work on a suitable sized bat and put the bat in a bag so the base of the bag is under the bat, then put another bag over the top of the work and tuck the top of the bag under the bat. If you want to trim (or turn) your thrown work the following week, it should also be double bagged. If your work is large, delicate, or of uneven thicknesses, you should lightly cover your work for drying. When considering the drying process, bare in mind the weather, humidity and wind! The hotter and dryer, the faster things dry and work can dry unevenly in the shelves – this can lead to cracking – another time to lightly cover your work for drying. Step Four – Trimming and Cleaning Up Your work is dry! It is called greenware now and it is at it’s most fragile! Handle everything with two hands. I often refer to soft hands – keep everything gentle and with your fingers spread as much as possible. Try to not pick up things like plates too much, and always with both hands! Before your work can be bisque fired it should be “cleaned up”. You work won’t go into the kiln if it has sharp edges – when glazed, sharp edges turn into razor blades! Use a piece of fly wire to rub the work all over – this will scratch a little so be light handed. Use a knife or metal kidney to scrape any areas that require a bit more dynamic treatment than the fly wire offers! Finally, a very light wipe over with a slightly damp sponge can help soften and soothe all of your edges and dags! Trimming thrown work: If you are planning to trim (or turn) your thrown work (and you should be), make sure you bag it well – your work should be leather hard to almost dry for easiest trimming. Use this step to finish the work completely – use a metal kidney to polish the surface, or a slightly damp sponge to give a freshly thrown look. Wipe the sponge around the rim after trimming, and check the inside of the pot for dags! Trimming slip cast work: Usually I will trim the rims of your work on the wheel the following day to make that stage easier, however you will still need to check your work for lumps and bumps. Last but not least – check that your name is still clearly on the bottom of your work. Step Five – Bisque Firing When the work is completely dry it can go into the bisque kiln. The bisque kiln is fired to 1000°C. This process burns off the water in the clay as well as some of the chemically bound water. The structure of the clay is not altered that much at this temperature. Inside the bisque kiln, the work is stacked a little, small bowl inside a larger bowl and onto a heavy plate. Smaller items like decorations or drink coasters might get stacked several high. Consideration is paid to the weight of the stack and shape of the work. A bisque kiln can fire about one and a half times the amount of work that the glaze kiln can fire. The firing takes about 10 hours to complete the cycle and about two days to cool down. Once it has been emptied the work is placed in the glaze room ready for you to decorate! Step Six – Glazing Decorating your work with colour can be a lot of fun – and time consuming! There are three main options for surface treatment at this stage: Oxide Washes Underglazes Glazes Washes and underglazes do not “glaze” the work – It will still need a layer of glaze to fully seal the clay (washes don’t need glaze on surfaces not designed for food or liquid as they can gloss up a little on their own). Underglazes are stable colourants that turn out pretty much how they look in the jar. They can be mixed with each other to form other colours and can be used like water colours to paint onto your work. Mostly they should have a clear glaze on top to seal them. Oxides are a different species – the pink oxide (cobalt) wash turns out bright blue for instance. They don’t always need a glaze on top, and some glazes can change the colour of the wash! The glazes need no other “glaze” on top! Be careful of unknown glaze interactions – you can put any combination of glaze in a bowl or on a plate, but only a single glaze on the outside of any vertical surface! Glazes are a chemical reaction under heat. We don’t know the exact chemicals in the Mayco glazes we use. I can guess by the way they interact with each other, however, on the whole, you need to test every idea you have, and not run the test on a vertical surface! Simply put, glaze is a layer of glass like substance that bonds with the clay underneath. Clay is made of silica, alumina and water. Glaze is made of mostly silica. Silica has a melting point of 1700°C and we fire to 1240°C. The silica requires a “flux” to help it melt at the lower temperature. Fluxes can be all sorts of chemicals – a common one is calcium – calcium has a melting point of 2500°C, however, together they both melt at a much lower temperature! Colourants are metal oxides like cobalt (blue), chrome (green through black), copper (green, blue, even red!), manganese (black, purple and pink) iron (red brown), etc. Different chemicals in the glaze can have dramatic effects. for example, barium carbonate (which we don’t use) turns manganese bright pink! Other elements can turn manganese dioxide brown, blue, purple and reddish brown. Manganese dioxide is a flux in and of itself as well. So, glazes that get their black and purple colours, often interact with other glazes and RUN! Our mirror black is a good example – it mixes really well with many glazes because it fluxes them – causes them to melt faster. It will also bring out many beautiful colours in the glazes because it’s black colouring most definitely comes from manganese dioxide! Glaze chemistry is a whole subject on it’s own! We use commercial Mayco glazes on purpose – for their huge range of colour possibilities, stability, cool interactions, artistic freedom with the ability to easily brush the glazes on and ease of use. We currently have almost 50 glazes on hand! A major project is to test the interactions of all glazes with each other. That is 2,500 test tiles!!!! I’m going to make the wall behind the wheels the feature wall of pretty colours! Step Seven – Glaze (Gloss or sometimes called “Glost”) Firing Most of the time this is the final stage of making your creation (but not always!) The glaze kiln goes to 1240°C. This is called cone 6, or midrange. It is the low end of stoneware temperatures. Stoneware clays and glazes are typically fired at cone 8 – 10, that is 1260 – 1290°C. The energy requirement to go from 1240°C to 1280°C is almost a 30% more! Our clay is formulated to vitrify (mature, turn “glass-like”) at 1240°, as are our glazes. A glaze kiln take around 12 hours to reach temperature and two to three days to cool down. Sometimes a third firing process is required – this is for decoration that is added to work after the glaze firing. For example – adding precious metals and lustres. this firing temperature is usually around 600 – 800°C depending upon the techniques being used. There are many students interested in gold and silver trims – we will be doing this third type of firing soon! After firing your work will be in the student finished work shelves. Remember to pay for it before you head out the door! There is a small extra charge for using porcelain clay (it’s more than twice the price of regular clay), and for any third firing process! Once your work has been fired it can not turn back into clay for millennia – so don’t fire it if you don’t like it! Put it in the bucket for recycling. https://firebirdstudios.com.au/the-process-of-making-pottery/ This bowl is an example of kitchenware used in the 19th century and still in use today.Bowl white ceramic plain that has two sets of edging around lip. Inside bowl has plaster designed to look like cooking mixture.flagstaff hill, warrnambool, shipwrecked-coast, flagstaff-hill, flagstaff-hill-maritime-museum, maritime-museum, shipwreck-coast, flagstaff-hill-maritime-village, kitchen equipment, ceramic -
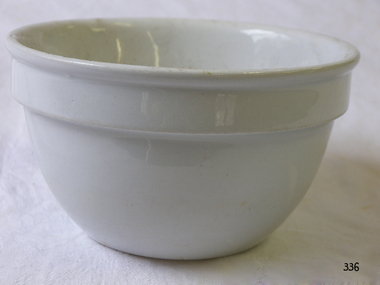 Flagstaff Hill Maritime Museum and Village
Domestic object - Bowl, J & G Meakin, Late 19th or early 20th Century
... It is called greenware now and it is at it’s most fragile! Handle everything with two hands. I often refer to soft hands – keep everything gentle and with your fingers spread as much as possible. ...It is called greenware now and it is at it’s most fragile! Handle everything with two hands. I often refer to soft hands – keep everything gentle and with your fingers spread as much as possible. ...The Process of Making Pottery Decorating, Firing, Glazing, Making, Technical There is a rhythm and flow to clay. It can’t be done all at once! Even the making process! It can take weeks to get everything done, especially if you can only work on your pottery once a week! Even though we have three hour classes, it’s often just not enough time! Here is an overview of some of the processes so you have a bit more grasp on some of the technical stuff! Step One – Design There are SO many ideas out there for making stuff in clay! From delicate porcelain jewellery, through to heavy sculptural work and everything in between. Deciding your direction is sometimes not that easy – when you first start, try everything, you will naturally gravitate to the style that you enjoy! The options and variations are endless and can get a wee bit overwhelming too! Check in with me before you start to ensure your ideas will work, what order you might do things, how you could achieve the look you are seeking and any other technical data required! Step Two – Making Clay is thixotropic. This means that as you work with it, the clay first gets sloppier and wetter, before is begins to dry in the atmosphere. For most things, you simply can’t do all parts of the project at once. An example of work order might look like: Get last weeks work out from the shelves Prepare clay for today’s work – roll your clay, prepare balls for throwing, make the first stage of a pinch pot) Clean up last week’s work and put it on the shelf for bisque firing Check that you have any glazing to do – and do enough of it that you will have time to finish your main project Do the next step of your next project – there might be a further step that can’t be complete immediately, in that case, wrap your work well and put onto the shelves. Letting your work rest for a while can really help keep your work clean and professional looking. Many things require bagging under plastic to keep it ready for work the next week – put your name on the outside of the bag so you can find your work easily. We have stickers and markers. Consider how you want to decorate your work – coloured slip can be applied at a fairly wet stage (remembering that it will make your work even wetter!). Trying to apply slip to dry clay won’t work! If you want to do sgraffito – you will need to keep the work leather hard (a state of dryness where you can still work the clay with a little effort and a little water and care). Step Three – Drying Most of the time your work can go into the rack uncovered to let it dry out for the following week. If you want to continue forming or shaping you will need to double bag your work – put your work on a suitable sized bat and put the bat in a bag so the base of the bag is under the bat, then put another bag over the top of the work and tuck the top of the bag under the bat. If you want to trim (or turn) your thrown work the following week, it should also be double bagged. If your work is large, delicate, or of uneven thicknesses, you should lightly cover your work for drying. When considering the drying process, bare in mind the weather, humidity and wind! The hotter and dryer, the faster things dry and work can dry unevenly in the shelves – this can lead to cracking – another time to lightly cover your work for drying. Step Four – Trimming and Cleaning Up Your work is dry! It is called greenware now and it is at it’s most fragile! Handle everything with two hands. I often refer to soft hands – keep everything gentle and with your fingers spread as much as possible. Try to not pick up things like plates too much, and always with both hands! Before your work can be bisque fired it should be “cleaned up”. You work won’t go into the kiln if it has sharp edges – when glazed, sharp edges turn into razor blades! Use a piece of fly wire to rub the work all over – this will scratch a little so be light handed. Use a knife or metal kidney to scrape any areas that require a bit more dynamic treatment than the fly wire offers! Finally, a very light wipe over with a slightly damp sponge can help soften and soothe all of your edges and dags! Trimming thrown work: If you are planning to trim (or turn) your thrown work (and you should be), make sure you bag it well – your work should be leather hard to almost dry for easiest trimming. Use this step to finish the work completely – use a metal kidney to polish the surface, or a slightly damp sponge to give a freshly thrown look. Wipe the sponge around the rim after trimming, and check the inside of the pot for dags! Trimming slip cast work: Usually I will trim the rims of your work on the wheel the following day to make that stage easier, however you will still need to check your work for lumps and bumps. Last but not least – check that your name is still clearly on the bottom of your work. Step Five – Bisque Firing When the work is completely dry it can go into the bisque kiln. The bisque kiln is fired to 1000°C. This process burns off the water in the clay as well as some of the chemically bound water. The structure of the clay is not altered that much at this temperature. Inside the bisque kiln, the work is stacked a little, small bowl inside a larger bowl and onto a heavy plate. Smaller items like decorations or drink coasters might get stacked several high. Consideration is paid to the weight of the stack and shape of the work. A bisque kiln can fire about one and a half times the amount of work that the glaze kiln can fire. The firing takes about 10 hours to complete the cycle and about two days to cool down. Once it has been emptied the work is placed in the glaze room ready for you to decorate! Step Six – Glazing Decorating your work with colour can be a lot of fun – and time consuming! There are three main options for surface treatment at this stage: Oxide Washes Underglazes Glazes Washes and underglazes do not “glaze” the work – It will still need a layer of glaze to fully seal the clay (washes don’t need glaze on surfaces not designed for food or liquid as they can gloss up a little on their own). Underglazes are stable colourants that turn out pretty much how they look in the jar. They can be mixed with each other to form other colours and can be used like water colours to paint onto your work. Mostly they should have a clear glaze on top to seal them. Oxides are a different species – the pink oxide (cobalt) wash turns out bright blue for instance. They don’t always need a glaze on top, and some glazes can change the colour of the wash! The glazes need no other “glaze” on top! Be careful of unknown glaze interactions – you can put any combination of glaze in a bowl or on a plate, but only a single glaze on the outside of any vertical surface! Glazes are a chemical reaction under heat. We don’t know the exact chemicals in the Mayco glazes we use. I can guess by the way they interact with each other, however, on the whole, you need to test every idea you have, and not run the test on a vertical surface! Simply put, glaze is a layer of glass like substance that bonds with the clay underneath. Clay is made of silica, alumina and water. Glaze is made of mostly silica. Silica has a melting point of 1700°C and we fire to 1240°C. The silica requires a “flux” to help it melt at the lower temperature. Fluxes can be all sorts of chemicals – a common one is calcium – calcium has a melting point of 2500°C, however, together they both melt at a much lower temperature! Colourants are metal oxides like cobalt (blue), chrome (green through black), copper (green, blue, even red!), manganese (black, purple and pink) iron (red brown), etc. Different chemicals in the glaze can have dramatic effects. for example, barium carbonate (which we don’t use) turns manganese bright pink! Other elements can turn manganese dioxide brown, blue, purple and reddish brown. Manganese dioxide is a flux in and of itself as well. So, glazes that get their black and purple colours, often interact with other glazes and RUN! Our mirror black is a good example – it mixes really well with many glazes because it fluxes them – causes them to melt faster. It will also bring out many beautiful colours in the glazes because it’s black colouring most definitely comes from manganese dioxide! Glaze chemistry is a whole subject on it’s own! We use commercial Mayco glazes on purpose – for their huge range of colour possibilities, stability, cool interactions, artistic freedom with the ability to easily brush the glazes on and ease of use. We currently have almost 50 glazes on hand! A major project is to test the interactions of all glazes with each other. That is 2,500 test tiles!!!! I’m going to make the wall behind the wheels the feature wall of pretty colours! Step Seven – Glaze (Gloss or sometimes called “Glost”) Firing Most of the time this is the final stage of making your creation (but not always!) The glaze kiln goes to 1240°C. This is called cone 6, or midrange. It is the low end of stoneware temperatures. Stoneware clays and glazes are typically fired at cone 8 – 10, that is 1260 – 1290°C. The energy requirement to go from 1240°C to 1280°C is almost a 30% more! Our clay is formulated to vitrify (mature, turn “glass-like”) at 1240°, as are our glazes. A glaze kiln take around 12 hours to reach temperature and two to three days to cool down. Sometimes a third firing process is required – this is for decoration that is added to work after the glaze firing. For example – adding precious metals and lustres. this firing temperature is usually around 600 – 800°C depending upon the techniques being used. There are many students interested in gold and silver trims – we will be doing this third type of firing soon! After firing your work will be in the student finished work shelves. Remember to pay for it before you head out the door! There is a small extra charge for using porcelain clay (it’s more than twice the price of regular clay), and for any third firing process! Once your work has been fired it can not turn back into clay for millennia – so don’t fire it if you don’t like it! Put it in the bucket for recycling. https://firebirdstudios.com.au/the-process-of-making-pottery/This bowl was made by renowned pottery company J & G Meakin of England. The firm was established in the mid-1800's. The bowl is an example of kitchenware used in the 19th century and still in use today.Bowl; white ceramic, round and tapering inwards towards base. Made by J and G Meakin England.On base, 'Ironstone China Reg SOL 391413' with symbolflagstaff hill, flagstaff hill maritime museum and village, warrnambool, maritime museum, maritime village, great ocean road, shipwreck coast, mixing bowl, food preparation, j & g meakin, pottery, stoke-on-trent, kitchen equipment, ceramic -
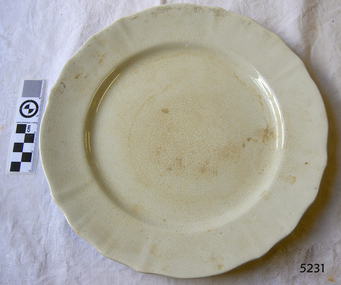 Flagstaff Hill Maritime Museum and Village
Domestic object - Plate
... It is called greenware now and it is at it’s most fragile! Handle everything with two hands. I often refer to soft hands – keep everything gentle and with your fingers spread as much as possible. ...It is called greenware now and it is at it’s most fragile! Handle everything with two hands. I often refer to soft hands – keep everything gentle and with your fingers spread as much as possible. ...The Process of Making Pottery Decorating, Firing, Glazing, Making, Technical There is a rhythm and flow to clay. It can’t be done all at once! Even the making process! It can take weeks to get everything done, especially if you can only work on your pottery once a week! Even though we have three hour classes, it’s often just not enough time! Here is an overview of some of the processes so you have a bit more grasp on some of the technical stuff! Step One – Design There are SO many ideas out there for making stuff in clay! From delicate porcelain jewellery, through to heavy sculptural work and everything in between. Deciding your direction is sometimes not that easy – when you first start, try everything, you will naturally gravitate to the style that you enjoy! The options and variations are endless and can get a wee bit overwhelming too! Check in with me before you start to ensure your ideas will work, what order you might do things, how you could achieve the look you are seeking and any other technical data required! Step Two – Making Clay is thixotropic. This means that as you work with it, the clay first gets sloppier and wetter, before is begins to dry in the atmosphere. For most things, you simply can’t do all parts of the project at once. An example of work order might look like: Get last weeks work out from the shelves Prepare clay for today’s work – roll your clay, prepare balls for throwing, make the first stage of a pinch pot) Clean up last week’s work and put it on the shelf for bisque firing Check that you have any glazing to do – and do enough of it that you will have time to finish your main project Do the next step of your next project – there might be a further step that can’t be complete immediately, in that case, wrap your work well and put onto the shelves. Letting your work rest for a while can really help keep your work clean and professional looking. Many things require bagging under plastic to keep it ready for work the next week – put your name on the outside of the bag so you can find your work easily. We have stickers and markers. Consider how you want to decorate your work – coloured slip can be applied at a fairly wet stage (remembering that it will make your work even wetter!). Trying to apply slip to dry clay won’t work! If you want to do sgraffito – you will need to keep the work leather hard (a state of dryness where you can still work the clay with a little effort and a little water and care). Step Three – Drying Most of the time your work can go into the rack uncovered to let it dry out for the following week. If you want to continue forming or shaping you will need to double bag your work – put your work on a suitable sized bat and put the bat in a bag so the base of the bag is under the bat, then put another bag over the top of the work and tuck the top of the bag under the bat. If you want to trim (or turn) your thrown work the following week, it should also be double bagged. If your work is large, delicate, or of uneven thicknesses, you should lightly cover your work for drying. When considering the drying process, bare in mind the weather, humidity and wind! The hotter and dryer, the faster things dry and work can dry unevenly in the shelves – this can lead to cracking – another time to lightly cover your work for drying. Step Four – Trimming and Cleaning Up Your work is dry! It is called greenware now and it is at it’s most fragile! Handle everything with two hands. I often refer to soft hands – keep everything gentle and with your fingers spread as much as possible. Try to not pick up things like plates too much, and always with both hands! Before your work can be bisque fired it should be “cleaned up”. You work won’t go into the kiln if it has sharp edges – when glazed, sharp edges turn into razor blades! Use a piece of fly wire to rub the work all over – this will scratch a little so be light handed. Use a knife or metal kidney to scrape any areas that require a bit more dynamic treatment than the fly wire offers! Finally, a very light wipe over with a slightly damp sponge can help soften and soothe all of your edges and dags! Trimming thrown work: If you are planning to trim (or turn) your thrown work (and you should be), make sure you bag it well – your work should be leather hard to almost dry for easiest trimming. Use this step to finish the work completely – use a metal kidney to polish the surface, or a slightly damp sponge to give a freshly thrown look. Wipe the sponge around the rim after trimming, and check the inside of the pot for dags! Trimming slip cast work: Usually I will trim the rims of your work on the wheel the following day to make that stage easier, however you will still need to check your work for lumps and bumps. Last but not least – check that your name is still clearly on the bottom of your work. Step Five – Bisque Firing When the work is completely dry it can go into the bisque kiln. The bisque kiln is fired to 1000°C. This process burns off the water in the clay as well as some of the chemically bound water. The structure of the clay is not altered that much at this temperature. Inside the bisque kiln, the work is stacked a little, small bowl inside a larger bowl and onto a heavy plate. Smaller items like decorations or drink coasters might get stacked several high. Consideration is paid to the weight of the stack and shape of the work. A bisque kiln can fire about one and a half times the amount of work that the glaze kiln can fire. The firing takes about 10 hours to complete the cycle and about two days to cool down. Once it has been emptied the work is placed in the glaze room ready for you to decorate! Step Six – Glazing Decorating your work with colour can be a lot of fun – and time consuming! There are three main options for surface treatment at this stage: Oxide Washes Underglazes Glazes Washes and underglazes do not “glaze” the work – It will still need a layer of glaze to fully seal the clay (washes don’t need glaze on surfaces not designed for food or liquid as they can gloss up a little on their own). Underglazes are stable colourants that turn out pretty much how they look in the jar. They can be mixed with each other to form other colours and can be used like water colours to paint onto your work. Mostly they should have a clear glaze on top to seal them. Oxides are a different species – the pink oxide (cobalt) wash turns out bright blue for instance. They don’t always need a glaze on top, and some glazes can change the colour of the wash! The glazes need no other “glaze” on top! Be careful of unknown glaze interactions – you can put any combination of glaze in a bowl or on a plate, but only a single glaze on the outside of any vertical surface! Glazes are a chemical reaction under heat. We don’t know the exact chemicals in the Mayco glazes we use. I can guess by the way they interact with each other, however, on the whole, you need to test every idea you have, and not run the test on a vertical surface! Simply put, glaze is a layer of glass like substance that bonds with the clay underneath. Clay is made of silica, alumina and water. Glaze is made of mostly silica. Silica has a melting point of 1700°C and we fire to 1240°C. The silica requires a “flux” to help it melt at the lower temperature. Fluxes can be all sorts of chemicals – a common one is calcium – calcium has a melting point of 2500°C, however, together they both melt at a much lower temperature! Colourants are metal oxides like cobalt (blue), chrome (green through black), copper (green, blue, even red!), manganese (black, purple and pink) iron (red brown), etc. Different chemicals in the glaze can have dramatic effects. for example, barium carbonate (which we don’t use) turns manganese bright pink! Other elements can turn manganese dioxide brown, blue, purple and reddish brown. Manganese dioxide is a flux in and of itself as well. So, glazes that get their black and purple colours, often interact with other glazes and RUN! Our mirror black is a good example – it mixes really well with many glazes because it fluxes them – causes them to melt faster. It will also bring out many beautiful colours in the glazes because it’s black colouring most definitely comes from manganese dioxide! Glaze chemistry is a whole subject on it’s own! We use commercial Mayco glazes on purpose – for their huge range of colour possibilities, stability, cool interactions, artistic freedom with the ability to easily brush the glazes on and ease of use. We currently have almost 50 glazes on hand! A major project is to test the interactions of all glazes with each other. That is 2,500 test tiles!!!! I’m going to make the wall behind the wheels the feature wall of pretty colours! Step Seven – Glaze (Gloss or sometimes called “Glost”) Firing Most of the time this is the final stage of making your creation (but not always!) The glaze kiln goes to 1240°C. This is called cone 6, or midrange. It is the low end of stoneware temperatures. Stoneware clays and glazes are typically fired at cone 8 – 10, that is 1260 – 1290°C. The energy requirement to go from 1240°C to 1280°C is almost a 30% more! Our clay is formulated to vitrify (mature, turn “glass-like”) at 1240°, as are our glazes. A glaze kiln take around 12 hours to reach temperature and two to three days to cool down. Sometimes a third firing process is required – this is for decoration that is added to work after the glaze firing. For example – adding precious metals and lustres. this firing temperature is usually around 600 – 800°C depending upon the techniques being used. There are many students interested in gold and silver trims – we will be doing this third type of firing soon! After firing your work will be in the student finished work shelves. Remember to pay for it before you head out the door! There is a small extra charge for using porcelain clay (it’s more than twice the price of regular clay), and for any third firing process! Once your work has been fired it can not turn back into clay for millennia – so don’t fire it if you don’t like it! Put it in the bucket for recycling. https://firebirdstudios.com.au/the-process-of-making-pottery/Ceramics have evolved over thousands of years.White earthenware dinner plate. Crazing evident all over.Backstamped ‘Made in England S LTD’flagstaff hill, warrnambool, shipwrecked-coast, flagstaff-hill, flagstaff-hill-maritime-museum, maritime-museum, shipwreck-coast, flagstaff-hill-maritime-village, ceramics, tableware -
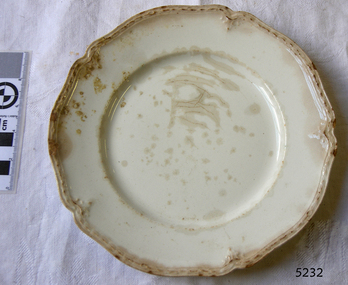 Flagstaff Hill Maritime Museum and Village
Domestic object - Plate, Johnson Bros
... It is called greenware now and it is at it’s most fragile! Handle everything with two hands. I often refer to soft hands – keep everything gentle and with your fingers spread as much as possible. ...It is called greenware now and it is at it’s most fragile! Handle everything with two hands. I often refer to soft hands – keep everything gentle and with your fingers spread as much as possible. ...The Process of Making Pottery Decorating, Firing, Glazing, Making, Technical There is a rhythm and flow to clay. It can’t be done all at once! Even the making process! It can take weeks to get everything done, especially if you can only work on your pottery once a week! Even though we have three hour classes, it’s often just not enough time! Here is an overview of some of the processes so you have a bit more grasp on some of the technical stuff! Step One – Design There are SO many ideas out there for making stuff in clay! From delicate porcelain jewellery, through to heavy sculptural work and everything in between. Deciding your direction is sometimes not that easy – when you first start, try everything, you will naturally gravitate to the style that you enjoy! The options and variations are endless and can get a wee bit overwhelming too! Check in with me before you start to ensure your ideas will work, what order you might do things, how you could achieve the look you are seeking and any other technical data required! Step Two – Making Clay is thixotropic. This means that as you work with it, the clay first gets sloppier and wetter, before is begins to dry in the atmosphere. For most things, you simply can’t do all parts of the project at once. An example of work order might look like: Get last weeks work out from the shelves Prepare clay for today’s work – roll your clay, prepare balls for throwing, make the first stage of a pinch pot) Clean up last week’s work and put it on the shelf for bisque firing Check that you have any glazing to do – and do enough of it that you will have time to finish your main project Do the next step of your next project – there might be a further step that can’t be complete immediately, in that case, wrap your work well and put onto the shelves. Letting your work rest for a while can really help keep your work clean and professional looking. Many things require bagging under plastic to keep it ready for work the next week – put your name on the outside of the bag so you can find your work easily. We have stickers and markers. Consider how you want to decorate your work – coloured slip can be applied at a fairly wet stage (remembering that it will make your work even wetter!). Trying to apply slip to dry clay won’t work! If you want to do sgraffito – you will need to keep the work leather hard (a state of dryness where you can still work the clay with a little effort and a little water and care). Step Three – Drying Most of the time your work can go into the rack uncovered to let it dry out for the following week. If you want to continue forming or shaping you will need to double bag your work – put your work on a suitable sized bat and put the bat in a bag so the base of the bag is under the bat, then put another bag over the top of the work and tuck the top of the bag under the bat. If you want to trim (or turn) your thrown work the following week, it should also be double bagged. If your work is large, delicate, or of uneven thicknesses, you should lightly cover your work for drying. When considering the drying process, bare in mind the weather, humidity and wind! The hotter and dryer, the faster things dry and work can dry unevenly in the shelves – this can lead to cracking – another time to lightly cover your work for drying. Step Four – Trimming and Cleaning Up Your work is dry! It is called greenware now and it is at it’s most fragile! Handle everything with two hands. I often refer to soft hands – keep everything gentle and with your fingers spread as much as possible. Try to not pick up things like plates too much, and always with both hands! Before your work can be bisque fired it should be “cleaned up”. You work won’t go into the kiln if it has sharp edges – when glazed, sharp edges turn into razor blades! Use a piece of fly wire to rub the work all over – this will scratch a little so be light handed. Use a knife or metal kidney to scrape any areas that require a bit more dynamic treatment than the fly wire offers! Finally, a very light wipe over with a slightly damp sponge can help soften and soothe all of your edges and dags! Trimming thrown work: If you are planning to trim (or turn) your thrown work (and you should be), make sure you bag it well – your work should be leather hard to almost dry for easiest trimming. Use this step to finish the work completely – use a metal kidney to polish the surface, or a slightly damp sponge to give a freshly thrown look. Wipe the sponge around the rim after trimming, and check the inside of the pot for dags! Trimming slip cast work: Usually I will trim the rims of your work on the wheel the following day to make that stage easier, however you will still need to check your work for lumps and bumps. Last but not least – check that your name is still clearly on the bottom of your work. Step Five – Bisque Firing When the work is completely dry it can go into the bisque kiln. The bisque kiln is fired to 1000°C. This process burns off the water in the clay as well as some of the chemically bound water. The structure of the clay is not altered that much at this temperature. Inside the bisque kiln, the work is stacked a little, small bowl inside a larger bowl and onto a heavy plate. Smaller items like decorations or drink coasters might get stacked several high. Consideration is paid to the weight of the stack and shape of the work. A bisque kiln can fire about one and a half times the amount of work that the glaze kiln can fire. The firing takes about 10 hours to complete the cycle and about two days to cool down. Once it has been emptied the work is placed in the glaze room ready for you to decorate! Step Six – Glazing Decorating your work with colour can be a lot of fun – and time consuming! There are three main options for surface treatment at this stage: Oxide Washes Underglazes Glazes Washes and underglazes do not “glaze” the work – It will still need a layer of glaze to fully seal the clay (washes don’t need glaze on surfaces not designed for food or liquid as they can gloss up a little on their own). Underglazes are stable colourants that turn out pretty much how they look in the jar. They can be mixed with each other to form other colours and can be used like water colours to paint onto your work. Mostly they should have a clear glaze on top to seal them. Oxides are a different species – the pink oxide (cobalt) wash turns out bright blue for instance. They don’t always need a glaze on top, and some glazes can change the colour of the wash! The glazes need no other “glaze” on top! Be careful of unknown glaze interactions – you can put any combination of glaze in a bowl or on a plate, but only a single glaze on the outside of any vertical surface! Glazes are a chemical reaction under heat. We don’t know the exact chemicals in the Mayco glazes we use. I can guess by the way they interact with each other, however, on the whole, you need to test every idea you have, and not run the test on a vertical surface! Simply put, glaze is a layer of glass like substance that bonds with the clay underneath. Clay is made of silica, alumina and water. Glaze is made of mostly silica. Silica has a melting point of 1700°C and we fire to 1240°C. The silica requires a “flux” to help it melt at the lower temperature. Fluxes can be all sorts of chemicals – a common one is calcium – calcium has a melting point of 2500°C, however, together they both melt at a much lower temperature! Colourants are metal oxides like cobalt (blue), chrome (green through black), copper (green, blue, even red!), manganese (black, purple and pink) iron (red brown), etc. Different chemicals in the glaze can have dramatic effects. for example, barium carbonate (which we don’t use) turns manganese bright pink! Other elements can turn manganese dioxide brown, blue, purple and reddish brown. Manganese dioxide is a flux in and of itself as well. So, glazes that get their black and purple colours, often interact with other glazes and RUN! Our mirror black is a good example – it mixes really well with many glazes because it fluxes them – causes them to melt faster. It will also bring out many beautiful colours in the glazes because it’s black colouring most definitely comes from manganese dioxide! Glaze chemistry is a whole subject on it’s own! We use commercial Mayco glazes on purpose – for their huge range of colour possibilities, stability, cool interactions, artistic freedom with the ability to easily brush the glazes on and ease of use. We currently have almost 50 glazes on hand! A major project is to test the interactions of all glazes with each other. That is 2,500 test tiles!!!! I’m going to make the wall behind the wheels the feature wall of pretty colours! Step Seven – Glaze (Gloss or sometimes called “Glost”) Firing Most of the time this is the final stage of making your creation (but not always!) The glaze kiln goes to 1240°C. This is called cone 6, or midrange. It is the low end of stoneware temperatures. Stoneware clays and glazes are typically fired at cone 8 – 10, that is 1260 – 1290°C. The energy requirement to go from 1240°C to 1280°C is almost a 30% more! Our clay is formulated to vitrify (mature, turn “glass-like”) at 1240°, as are our glazes. A glaze kiln take around 12 hours to reach temperature and two to three days to cool down. Sometimes a third firing process is required – this is for decoration that is added to work after the glaze firing. For example – adding precious metals and lustres. this firing temperature is usually around 600 – 800°C depending upon the techniques being used. There are many students interested in gold and silver trims – we will be doing this third type of firing soon! After firing your work will be in the student finished work shelves. Remember to pay for it before you head out the door! There is a small extra charge for using porcelain clay (it’s more than twice the price of regular clay), and for any third firing process! Once your work has been fired it can not turn back into clay for millennia – so don’t fire it if you don’t like it! Put it in the bucket for recycling. https://firebirdstudios.com.au/the-process-of-making-pottery/Ceramics have evolved over thousands of years.A white earthenware side plate with a gadroon edge. Has water marks and chips on front.‘Johnson Bros England Reg No 15587’flagstaff hill, warrnambool, shipwrecked-coast, flagstaff-hill, flagstaff-hill-maritime-museum, maritime-museum, shipwreck-coast, flagstaff-hill-maritime-village, johnson bros, ceramics, tableware -
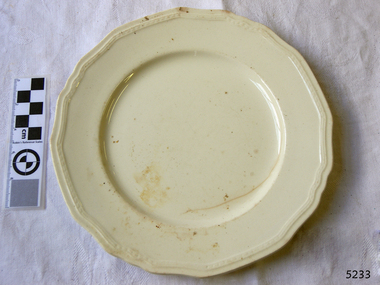 Flagstaff Hill Maritime Museum and Village
Domestic object - Plate, Alfred Meakin
... It is called greenware now and it is at it’s most fragile! Handle everything with two hands. I often refer to soft hands – keep everything gentle and with your fingers spread as much as possible. ...It is called greenware now and it is at it’s most fragile! Handle everything with two hands. I often refer to soft hands – keep everything gentle and with your fingers spread as much as possible. ...The Process of Making Pottery Decorating, Firing, Glazing, Making, Technical There is a rhythm and flow to clay. It can’t be done all at once! Even the making process! It can take weeks to get everything done, especially if you can only work on your pottery once a week! Even though we have three hour classes, it’s often just not enough time! Here is an overview of some of the processes so you have a bit more grasp on some of the technical stuff! Step One – Design There are SO many ideas out there for making stuff in clay! From delicate porcelain jewellery, through to heavy sculptural work and everything in between. Deciding your direction is sometimes not that easy – when you first start, try everything, you will naturally gravitate to the style that you enjoy! The options and variations are endless and can get a wee bit overwhelming too! Check in with me before you start to ensure your ideas will work, what order you might do things, how you could achieve the look you are seeking and any other technical data required! Step Two – Making Clay is thixotropic. This means that as you work with it, the clay first gets sloppier and wetter, before is begins to dry in the atmosphere. For most things, you simply can’t do all parts of the project at once. An example of work order might look like: Get last weeks work out from the shelves Prepare clay for today’s work – roll your clay, prepare balls for throwing, make the first stage of a pinch pot) Clean up last week’s work and put it on the shelf for bisque firing Check that you have any glazing to do – and do enough of it that you will have time to finish your main project Do the next step of your next project – there might be a further step that can’t be complete immediately, in that case, wrap your work well and put onto the shelves. Letting your work rest for a while can really help keep your work clean and professional looking. Many things require bagging under plastic to keep it ready for work the next week – put your name on the outside of the bag so you can find your work easily. We have stickers and markers. Consider how you want to decorate your work – coloured slip can be applied at a fairly wet stage (remembering that it will make your work even wetter!). Trying to apply slip to dry clay won’t work! If you want to do sgraffito – you will need to keep the work leather hard (a state of dryness where you can still work the clay with a little effort and a little water and care). Step Three – Drying Most of the time your work can go into the rack uncovered to let it dry out for the following week. If you want to continue forming or shaping you will need to double bag your work – put your work on a suitable sized bat and put the bat in a bag so the base of the bag is under the bat, then put another bag over the top of the work and tuck the top of the bag under the bat. If you want to trim (or turn) your thrown work the following week, it should also be double bagged. If your work is large, delicate, or of uneven thicknesses, you should lightly cover your work for drying. When considering the drying process, bare in mind the weather, humidity and wind! The hotter and dryer, the faster things dry and work can dry unevenly in the shelves – this can lead to cracking – another time to lightly cover your work for drying. Step Four – Trimming and Cleaning Up Your work is dry! It is called greenware now and it is at it’s most fragile! Handle everything with two hands. I often refer to soft hands – keep everything gentle and with your fingers spread as much as possible. Try to not pick up things like plates too much, and always with both hands! Before your work can be bisque fired it should be “cleaned up”. You work won’t go into the kiln if it has sharp edges – when glazed, sharp edges turn into razor blades! Use a piece of fly wire to rub the work all over – this will scratch a little so be light handed. Use a knife or metal kidney to scrape any areas that require a bit more dynamic treatment than the fly wire offers! Finally, a very light wipe over with a slightly damp sponge can help soften and soothe all of your edges and dags! Trimming thrown work: If you are planning to trim (or turn) your thrown work (and you should be), make sure you bag it well – your work should be leather hard to almost dry for easiest trimming. Use this step to finish the work completely – use a metal kidney to polish the surface, or a slightly damp sponge to give a freshly thrown look. Wipe the sponge around the rim after trimming, and check the inside of the pot for dags! Trimming slip cast work: Usually I will trim the rims of your work on the wheel the following day to make that stage easier, however you will still need to check your work for lumps and bumps. Last but not least – check that your name is still clearly on the bottom of your work. Step Five – Bisque Firing When the work is completely dry it can go into the bisque kiln. The bisque kiln is fired to 1000°C. This process burns off the water in the clay as well as some of the chemically bound water. The structure of the clay is not altered that much at this temperature. Inside the bisque kiln, the work is stacked a little, small bowl inside a larger bowl and onto a heavy plate. Smaller items like decorations or drink coasters might get stacked several high. Consideration is paid to the weight of the stack and shape of the work. A bisque kiln can fire about one and a half times the amount of work that the glaze kiln can fire. The firing takes about 10 hours to complete the cycle and about two days to cool down. Once it has been emptied the work is placed in the glaze room ready for you to decorate! Step Six – Glazing Decorating your work with colour can be a lot of fun – and time consuming! There are three main options for surface treatment at this stage: Oxide Washes Underglazes Glazes Washes and underglazes do not “glaze” the work – It will still need a layer of glaze to fully seal the clay (washes don’t need glaze on surfaces not designed for food or liquid as they can gloss up a little on their own). Underglazes are stable colourants that turn out pretty much how they look in the jar. They can be mixed with each other to form other colours and can be used like water colours to paint onto your work. Mostly they should have a clear glaze on top to seal them. Oxides are a different species – the pink oxide (cobalt) wash turns out bright blue for instance. They don’t always need a glaze on top, and some glazes can change the colour of the wash! The glazes need no other “glaze” on top! Be careful of unknown glaze interactions – you can put any combination of glaze in a bowl or on a plate, but only a single glaze on the outside of any vertical surface! Glazes are a chemical reaction under heat. We don’t know the exact chemicals in the Mayco glazes we use. I can guess by the way they interact with each other, however, on the whole, you need to test every idea you have, and not run the test on a vertical surface! Simply put, glaze is a layer of glass like substance that bonds with the clay underneath. Clay is made of silica, alumina and water. Glaze is made of mostly silica. Silica has a melting point of 1700°C and we fire to 1240°C. The silica requires a “flux” to help it melt at the lower temperature. Fluxes can be all sorts of chemicals – a common one is calcium – calcium has a melting point of 2500°C, however, together they both melt at a much lower temperature! Colourants are metal oxides like cobalt (blue), chrome (green through black), copper (green, blue, even red!), manganese (black, purple and pink) iron (red brown), etc. Different chemicals in the glaze can have dramatic effects. for example, barium carbonate (which we don’t use) turns manganese bright pink! Other elements can turn manganese dioxide brown, blue, purple and reddish brown. Manganese dioxide is a flux in and of itself as well. So, glazes that get their black and purple colours, often interact with other glazes and RUN! Our mirror black is a good example – it mixes really well with many glazes because it fluxes them – causes them to melt faster. It will also bring out many beautiful colours in the glazes because it’s black colouring most definitely comes from manganese dioxide! Glaze chemistry is a whole subject on it’s own! We use commercial Mayco glazes on purpose – for their huge range of colour possibilities, stability, cool interactions, artistic freedom with the ability to easily brush the glazes on and ease of use. We currently have almost 50 glazes on hand! A major project is to test the interactions of all glazes with each other. That is 2,500 test tiles!!!! I’m going to make the wall behind the wheels the feature wall of pretty colours! Step Seven – Glaze (Gloss or sometimes called “Glost”) Firing Most of the time this is the final stage of making your creation (but not always!) The glaze kiln goes to 1240°C. This is called cone 6, or midrange. It is the low end of stoneware temperatures. Stoneware clays and glazes are typically fired at cone 8 – 10, that is 1260 – 1290°C. The energy requirement to go from 1240°C to 1280°C is almost a 30% more! Our clay is formulated to vitrify (mature, turn “glass-like”) at 1240°, as are our glazes. A glaze kiln take around 12 hours to reach temperature and two to three days to cool down. Sometimes a third firing process is required – this is for decoration that is added to work after the glaze firing. For example – adding precious metals and lustres. this firing temperature is usually around 600 – 800°C depending upon the techniques being used. There are many students interested in gold and silver trims – we will be doing this third type of firing soon! After firing your work will be in the student finished work shelves. Remember to pay for it before you head out the door! There is a small extra charge for using porcelain clay (it’s more than twice the price of regular clay), and for any third firing process! Once your work has been fired it can not turn back into clay for millennia – so don’t fire it if you don’t like it! Put it in the bucket for recycling. https://firebirdstudios.com.au/the-process-of-making-pottery/Ceramics have evolved over thousands of years.Earthenware dessert plate, cream colour. Made by Alfred Meakin, England. Backstamped ‘Alfred Meakin England’. flagstaff hill, warrnambool, shipwrecked-coast, flagstaff-hill, flagstaff-hill-maritime-museum, maritime-museum, shipwreck-coast, flagstaff-hill-maritime-village, alfred meakin, ceramics, earthenware, kitchenware -
 Victorian Aboriginal Corporation for Languages
Periodical, Australian Institute of Aboriginal and Torres Strait Islander Studies, Australian Aboriginal studies : journal of the Australian Institute of Aboriginal and Torres Strait Islander Studies, 2008
... The research also shows that many Aboriginal people, no matter what their material and personal resources, are conscious of how fragile and unpredictable their economic lives can be, and that involvement in the customary economy is a kind of mutual insurance to guarantee survival if times get tough. ...The research also shows that many Aboriginal people, no matter what their material and personal resources, are conscious of how fragile and unpredictable their economic lives can be, and that involvement in the customary economy is a kind of mutual insurance to guarantee survival if times get tough. ...Mawul Rom Project: Openness, obligation and reconciliation Morgan Brigg (Universtiy of Queensland) and Anke Tonnaer (University of Aarhus, Denmark) Aboriginal Australian initiatives to restore balanced relationships with White Australians have recently become part of reconciliation efforts. This paper provides a contextualised report on one such initiative, the Mawul Rom crosscultural mediation project. Viewing Mawul Rom as a diplomatic venture in the lineage of adjustment and earlier Rom rituals raises questions about receptiveness, individual responsibility and the role of Indigenous ceremony in reconciliation efforts. Yolngu ceremonial leaders successfully draw participants into relationship and personally commit them to the tasks of cross-cultural advocacy and reconciliation. But Mawul Rom must also negotiate a paradox because emphasis on the cultural difference of ceremony risks increasing the very social distance that the ritual attempts to confront. Managing this tension will be a key challenge if Mawul Rom is to become an effective diplomatic mechanism for cross-cultural conflict resolution and reconciliation. Living in two camps: the strategies Goldfields Aboriginal people use to manage in the customary economy and the mainstream economy at the same time Howard Sercombe (Strathclyde University, Glasgow) The economic sustainability of Aboriginal households has been a matter of public concern across a range of contexts. This research, conducted in the Eastern Goldfields of Western Australia, shows how economically successful Aboriginal persons manage ?dual economic engagement?, or involvement in the customary economy and the mainstream economy at the same time. The two economies sometimes reinforce each other but are more often in conflict, and management of conflicting obligations requires high degrees of skill and innovation. As well as creating financially sustainable households, the participants contributed significantly to the health of their extended families and communities. The research also shows that many Aboriginal people, no matter what their material and personal resources, are conscious of how fragile and unpredictable their economic lives can be, and that involvement in the customary economy is a kind of mutual insurance to guarantee survival if times get tough. Indigenous population data for evaluation and performance measurement: A cautionary note Gaminiratne Wijesekere (Dept. of Families, Housing, Community Services and Indigenous Affairs, Canberra) I outline the status of population census counts for Indigenous peoples, identifying information on Indigenous births and deaths, and internal migration estimates. I comment on the ?experimental? Indigenous population projections and question the rationale for having two sets of projections. Program managers and evaluators need to be mindful of limitations of the data when using these projections for monitoring, evaluating and measuring Indigenous programs. Reaching out to a younger generation using a 3D computer game for storytelling: Vincent Serico?s legacy Theodor G Wyeld (Flinders University, Adeliade) and Brett Leavy (CyberDreaming Australia) Sadly, Vincent Serico (1949?2008), artist, activist and humanist, recently passed away. Born in southern Queensland in Wakka Wakka/Kabi Kabi Country (Carnarvon Gorge region) in 1949, Vincent was a member of the Stolen Generations. He was separated from his family by White administration at four years of age. He grew up on the Cherbourg Aboriginal Reserve in the 1950s, when the policies of segregation and assimilation were at their peak. Only returning to his Country in his early forties, Vincent started painting his stories and the stories that had been passed on to him about the region. These paintings manifest Vincent?s sanctity for tradition, storytelling, language, spirit and beliefs. A team of researchers was honoured and fortunate to have worked closely with Vincent to develop a 3D simulation of his Country using a 3D computer game toolkit. Embedded in this simulation of his Country, in the locations that their stories speak to, are some of Vincent?s important contemporary art works. They are accompanied by a narration of Vincent?s oral history about the places, people and events depicted. Vincent was deeply concerned about members of the younger generation around him ?losing their way? in modern times. In a similar vein, Brett Leavy (Kooma) sees the 3D game engine as an opportunity to engage the younger generation in its own cultural heritage in an activity that capitalises on a common pastime. Vincent was an enthusiastic advocate of this approach. Working in consultation with Vincent and the research team, CyberDreaming developed a simulation of Vincent?s Country for young Aboriginal and non-Aboriginal persons from the Carnarvon Gorge region to explore Vincent?s life stories of the region. The use of Vincent?s contemporary paintings as storyboards provides a traditional medium for the local people to interactively re-engage with traditional values. Called Serico?s World, it represents a legacy to his life?s works, joys and regrets. Here we discuss the background to this project and Vincent?s contribution. A singular beeswax representation of Namarrkon, the Lightning Man, from western Arnhem Land RG Gunn (La Trobe University) and RL Whear (Jawoyn Association) Samples from a beeswax representation of Namarrkon, the Lightning Man, from western Arnhem Land were analysed for radiocarbon and dated to be about 150 years old. An underlying beeswax figure was found to be approximately 1100 years old. The Dreaming Being Namarrkon is well known throughout Arnhem Land, although his sphere of activity is concentrated around the northern half of the Arnhem Land plateau. Namarrkon is well represented in rock-paintings in this area and continues to be well represented in contemporary canvas-paintings by artists from the broader plateau region. We conclude that representations of Namarrkon in both painted and beeswax forms appear to be parallel manifestations of the late Holocene regionalisation of Arnhem Land. ?Missing the point? or ?what to believe ? the theory or the data?: Rationales for the production of Kimberley points Kim Akerman (Moonah) In a recent article, Rodney Harrison presented an interesting view on the role glass Kimberley points played in the lives of the Aborigines who made and used them. Harrison employed ethnographic and historical data to argue that glass Kimberley points were not part of the normal suite of post-contact artefacts used primarily for hunting and fighting or Indigenous exchange purposes, but primarily were created to service a non-Indigenous market for aesthetically pleasing artefacts. Harrison asserted that this market determined the form that these points took. A critical analysis of the data does not substantiate either of these claims. Here I do not deal with Harrison?s theoretical material or arguments; I focus on the ethnographic and historical material that he has either omitted or failed to appreciate in developing his thesis and which, in turn, renders it invalid. The intensity of raw material utilisation as an indication of occupational history in surface stone artefact assemblages from the Strathbogie Ranges, central Victoria Justin Ian Shiner (La Trobe University, Bundoora) Stone artefact assemblages are a major source of information on past human?landscape relationships throughout much of Australia. These relationships are not well understood in the Strathbogie Ranges of central Victoria, where few detailed analyses of stone artefact assemblages have been undertaken. The purpose of this paper is to redress this situation through the analysis of two surface stone artefact assemblages recorded in early 2000 during a wider investigation of the region?s potential for postgraduate archaeological fieldwork. Analysis of raw material utilisation is used to assess the characteristics of the occupational histories of two locations with similar landscape settings. The analysis indicates variability in the intensity of raw material use between the assemblages, which suggests subtle differences in the occupational history of each location. The results of this work provide a direction for future stone artefact studies within this poorly understood region.document reproductions, maps, b&w photographs, colour photographskimberley, mawul rom project, 3d computer game, storytelling, vincent serico, beeswax, namarrkon, artefact assemblages, strathbogie ranges, groote eylandt, budd billy ii -
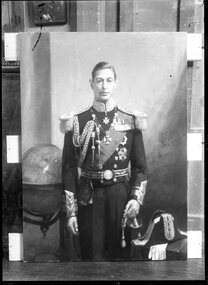 City of Melbourne Libraries
Photograph, Bull, Hugh Jones, 1897-1993, "A Royal Portrait" (Duke of York), 1933
... The other two sculptures were not displayed due to ongoing conversations with family members and the fragility of the sculptures. It is anticipated that they may be displayed in the future. ...The other two sculptures were not displayed due to ongoing conversations with family members and the fragility of the sculptures. It is anticipated that they may be displayed in the future. ...Published: The Age, Sat 14 October 1933 Published title: A Royal Portrait Published caption: "Seen at his studio, Alphington, Mr. W. B. Mclnnes's portrait of the Duke of York, which he painted recently on commission from the trustees of the Castlemaine Gallery, at St. John’s Wood, London, impresses as a vital record of one whose natural habitat is a palace, and whose place in life is one of near relationship to the throne of England. The Duke is painted in the uniform of the admiral of the fleet, a highly ornate vesture entailing much elaboration of gold and numerous medals, in dealing with which the artist has not failed to centre his attention on the head, and has succeeded in producing what is undoubtedly a soundly painted portrait and a good likeness. During the five fittings Mr. Mclnnes, apart from the ordinary social amenities, found his Royal sitter little inclined to talk, though he spoke feelingly of his trip to Australia and the pleasure it had given him: but with the Duchess the tendency to be sociable was much more clearly pronounced. She took, and expressed, a keen interest in the social and political matters of the day with a special concern for the supremacy of England and Australia in all questions relating to sport, such as cricket, tennis and golf. She spoke well of her portrait painted by Quinn, and regretted that she would not see the two hung side by side at the Castlemaine Gallery." Description: An unframed painting of a standing, middle-aged man dressed in the uniform of a Royal Navy admiral of the Fleet with medals, sash, ornate belt, cuffs and epaulettes. His left hand rests on the handle of a sword in its scabbard and his bicorn hat and white gloves are on a table beside him. To his right is a globe of the world showing Australia. Research by project volunteer, Fiona Collyer: In 1933, Castlemaine Art Gallery trustees commissioned artist W.B. McInnes (1889-1939) to paint a portrait of Prince Albert, Duke of York as a companion piece to the portrait of his wife, the Duchess of York, that the gallery had commissioned Australian official war artist James Quinn (1869-1951) to paint in 1930. During the First World War, the Duchess’s childhood home, Glamis Castle in Scotland was used as a makeshift military hospital and convalescence home for wounded soldiers. Many servicemen from the Castlemaine area recuperated there and had fond memories of the kindness of the teenage Lady Elizabeth Bowes-Lyon (1900-2002, later Duchess of York) who spent the war years running errands and aiding in the welfare and morale of the patients. In 1927, the Duke and Duchess of York (later King George VI and Queen Elizabeth) came to Australia to formally open the newly built Parliament House in Canberra and to tour the country. While visiting Victoria in April, they embarked on a whistle-stop train journey to Bendigo, stopping at Kyneton for ten minutes and Castlemaine for 15 minutes. At Kyneton, an excited crowd of 10,000 people welcomed the couple with “three cheers and three cheers for Baby Betty” before the Duchess was presented with a bouquet of locally grown roses and the Duke a bound album of photographs of noted beauty spots of the district. Next the Royal Couple stopped at Castlemaine to the cheers of 15,000 people. There the couple were presented with a basket of prime quality Harcourt apples and a pair of cot blankets, manufactured at Castlemaine Woollen Mills, a birthday gift for baby Princess Betty. The Duchess recognised Colonel W.E. James, of the Seventh Battalion, who had convalesced at Glamis Castle in 1917, and they chatted before the train departed, while the Duke shook hands with returned soldiers. Last stop was the town of Bendigo which was colourfully decorated with bunting and flags, arches and flowers. 3000 pigeons were released on their arrival and the liberated birds circled overhead for several minutes as if to welcome the Royal Couple. A crowd of 50,000 cheering people lined the streets in bright sunshine as the couple drove by. From an arch over Hargreaves Street, pretty girls showered the pair with rose petals. The Duke was presented with a gold nugget and an album, handsomely bound in morocco, of a history of the Bendigo mining industry, while the Duchess received a bouquet of prize winning white chrysanthemums. After 75 minutes in Bendigo they journeyed back to Melbourne for a State reception. While the couple were in Melbourne, the Duke often played lawn tennis at the Government House courts with three times Grand Slam champion Norman Brookes, who declared that while he considered the Duke a second class player whose serve lacked sting, he had a fine backhand and with time and practice he could become a first class player. The federal Parliament had previously been situated in Melbourne, but Canberra was chosen as the location for Australia’s capital as a compromise between fierce rival states, Victoria and NSW. It is written in the Constitution that the federal capital would be in “the State of NSW... distant not less than one hundred miles from Sydney.” The word Canberra is thought to derive from the local Ngunnawal word “Kanbarra” meaning “meeting place”. The Provisional Parliament House was a large, white, three storey building facetiously dubbed “The Wedding Cake”, plonked down in a bare, former sheep paddock. It was decorated for the event with Union Jacks and Australian red ensign flags. On 9 May, the day of the opening, the expectant crowd assembled in front of the building. Only two of the spectators were Aboriginal. One was Jimmy Clements (1847-1927, aka Nangar or Yangar, but popularly known as “King Billy”), accompanied by his three dogs. (The title “King” or “Queen” was often given by white settlers to Aborigines who were seen as allies and could maintain good relations between First Nations groups and the colonists. Some were given inscribed brass breastplates or gorgets to wear.) Jimmy was an excellent horse breaker and expert tracker for the police. He was also the nephew of “Queen” Nellie Hamilton (1842-1897) of the Canberra-Queanbeyan region, home of the Ngambri and Ngunnawal people. Nellie was the oldest surviving full-blooded Aboriginal woman in the district. The other was George John Noble (1840s-1928, aka Ooloogan, also “Marvellous” due to his regular use of the word). Both were initiated Wiradjuri walamira elders: “clever men” believed to have the ability to heal physical and spiritual ailments. They were also travelling showmen, skilled at boomerang and spear throwing and often performed at country agricultural shows and football matches. They had walked barefoot for three days from the Brungle Mission, near Gundagai. 11 May 1927, The Argus reported that “King Billy... claims sovereign rights to the Federal Territory” which the National Archives of Australia describes as “possibly the first recorded instance of Aboriginal protest at Parliament House in Canberra.” 10 May 1927, The Argus reported on Jimmy Clements: “During the wait great interest was taken in the appearance near the east stand of an aborigine, a member of the Gundagai tribe, and a well known character in the district. He was very old and grey and ruggedly picturesque. He was determined to go his own way in spite of the arguments of two inspectors and one sergeant of police. Immediately and instinctively the crowd in the stands rallied to his side. There were choruses of advice and encouragement for him to do as he pleased. A well-known clergyman stood up and called out that the aborigine had a better right than any man present to a place on the steps of the House of Parliament and in the Senate during the ceremony. The old man’s persistence and the sympathy of the crowd won him an excellent position and also a shower of small change that must have amounted to 30/ or 40/ [shillings].” At 10.30 am, Australia’s eighth Prime Minister, Mr Stanley Bruce (1923-1929) welcomed the Royal couple onto the crimson carpeted portico. Unfortunately, Dame Nellie Melba’s rendition of “God Save the King” and the greater part of the Duke’s reply was drowned out by the roar of squadrons of aeroplanes circling overhead. A brief religious service followed, conducted by leaders of the Methodist, Presbyterian and Anglican churches. Interestingly, there was no Roman Catholic representation at the ceremony even though around one quarter of Australians were Catholic at the time. The Duke unlocked the front doors with a golden key, then unveiled a statue of his father King George V by sculptor Sir Bertram Mackennal in the King’s Hall. Then the official party, Senators, members of the House of Representatives and invited guests entered the Senate chamber where the Duke read a message from the King, establishing Canberra as the seat of the Federal Government, watched on by Australia’s elite. The conclusion of the ceremony was announced by a gay fanfare of trumpets from the entrance of Parliament House and a 21 gun salute and answered by cheers from the crowd. The dignitaries then feasted on a luncheon of turtle soup, poached schnapper, fillets of beef, roast chicken and ham, straw potatoes, green peas, Canberra Pudding (a pudding made with dripping, dried fruit and jam), fruit, ices, coffee and cheese. They toasted the King with non-alcoholic fruit punch as the Federal Capital Territory (later ACT) was a “dry” area and no speeches were made. The diary entry that day of Ethel Baird, Lady Stonehaven, the wife of the Governor-General, is brief and to the point: “To P.H. & waited for Yorks. Ceremony went off without a hitch. Ghastly Banquet Lunch.” Later that day, the Duke mounted a coal black mare, police horse Number 303 which had been hastily re-named “Black Bess” for the occasion, to receive the final salute from the assembled troops and returned soldiers dressed in mufti. The RAAF squadron were flying overhead in “V” formations when suddenly, one of the planes, piloted by Flying Officer Francis Charles Ewen, left the formation, nose-diving 900 metres from Parliament House and landing behind the Y.W.C.A. refreshment marquee. Francis, aged only 28, tragically died of his wounds later that day. The Federal Capital Commission contracted Sargent’s Pies of Sydney to supply 5000 meals for the event. They supplied pies, sausage rolls, scones and sandwiches with the agreed price of 3 shillings a head. Only 1200 meals were served and the uneaten remainder dumped, with the Commission bearing the cost of the unsold food. An estimated crowd of 20,000 attended the opening, far fewer than the expected 100,000. Many visitors travelled long distances, bringing their own hampers of food and camping in tents as there was very limited accommodation available. Thousands of people around Australia listened to the ceremony broadcast on the wireless, with receiving sets installed in schools, public halls and workplaces and it was also filmed for posterity. The next morning, the Royal couple, along with Prime Minister Bruce and Mrs Bruce held an informal public reception on the steps of Parliament House where early settlers, residents and visitors to Canberra filed past them. The Press widely reported Jimmy Clements’ encounter with the Duke and Duchess. The Sun-Pictorial reported 11 May 1927: "MET THE DUKE. ABORIGINE KING HE APPROVED Sugarbag: Sports Suit. John Clements, otherwise King Billy, a full blooded aborigine king, aged 86, was among the 2000 who filed past the Duke and the Duchess at the public reception at Canberra to day. “How you likem Duke and Duchess Billy?” he was asked afterwards. “I think they are both very nice.” he replied in good English. King Billy was a very bedraggled figure, with tangled locks and a beard which almost hid his wrinkled and black face. He wore an old sports suit and carried a sugarbag. Passing the Duke and Duchess he turned full towards them. The crowd cheered, and the Duke and Duchess smiled. The Duke was particularly amused.” The Canberra Times reported 13 May 1927: "A REAL AUSTRALIAN. A quaint but pathetic figure stood in broad relief in the queue of ranks at the reception. Where his dusky forbears have gathered in native ceremonial for centuries past, a lone representative of a fast vanishing race saluted visiting Royalty. Despite the grotesque garb and untamed mane the aborigine comported himself not without dignity. With his three faithful dogs, he made an immediate target for a battery of cameras.” "The Argus reported 11 May 1927: "...an ancient aborigine who calls himself King Billy and who claims sovereign rights to the federal Territory walked slowly forward alone and saluted the Duke and Duchess. They cheerily acknowledged his greeting. The old aborigine, with his long, matted beard and nondescript clothing, is a popular identity of Canberra, and must be one of the most extraordinary figures who has received a Royal salute.” The Sun (Sydney) reported 10 May 1927: “Suddenly, in the midst of the forest of green and white colored hats of women, appeared a head with a shaggy leonine mane and a patriarchal beard. Jacky, the aboriginal, an identity of the district, who is also known as the King of Canberra, had arrived to testify to his loyalty. He saluted the Duke with an excellent dash, and shambled past with his faithful sheep dog aide-de-camp at his heels. The Duke and Duchess were highly amused at this quaint figure moving along with a sort of bodyguard of shrieking young boys and girls.” The Sydney Morning Herald 11 May 1927 mistook Jimmy for his friend “Marvellous”: “...the appearance of an aged aboriginal widely known in the district as “Marvellous, the uncrowned king of Queanbeyan." His beaming black countenance was almost hidden beneath a shock of hair and beard. Bare-footed and carrying a sugar bag in one hand and a tiny Australian flag in the other, he at first mistook a policeman at the foot of the steps for the Duke. To his great embarrassment and to the vast amusement of the onlookers, the policeman became the object of a hearty salutation. However, "Marvellous" was quickly shepherded back to a position in the procession and as he passed along brought his hand up to an approved military salute for the benefit of their Royal Highnesses. The Duke returned it with a special wave.” The Labor Daily 11 May 1927 irreverently reported on the scene: "People March Past. Some 400 people, old identities of Canberra marched past. They were mostly aged ladies with memories faithfully preserving the traditions of other days and curtsied reverently. The younger generations, who speedily joined the procession, behaved differently however. Surely it was the most motley collection that ever passed before Royalty. Men without collars jostled others well dressed. Fat women, young women, children of all heights and ages were there. The oldest inhabitants, in the persons of the abo, "Marbly", and his companion were present. The poor old fellows evidently were keen to get closer to the Duke than the procession dared go, but they were overawed by the stern glances of military men.” The Canberra Times reported 13 May 1927: "...and towards the end of the procession, a full-blooded aboriginal, bareheaded and barefooted, and carrying an old swag on his back, made a picturesque figure as he several times saluted the Royal couple, his old eyes beaming inexpressible delight.” The Register reported 11 May 1927: "PUBLIC MARCH PAST. Old “Jacky”, an aboriginal identity of the district, who has been following the proceedings of the various ceremonies with apparently great interest, appeared in the march past. He halted in front of the steps and raised his hand to his shaggy grey locks in an attempt at a salute. Smiling, the Duke returned the salute, and the Duchess bestowed a charming smile on the figure of mingled pathos and comedy.” Tweed Daily reported 12 May 1927: “King Billy” WAS THERE. Appropriately enough, the inevitable “King Billy” with his refreshing impression of possum and gum-leaves, was present at the dedication of the Federal capital at Canberra. Bare-footed, in a dingy old suit and battered felt hat, he wandered on to the empty stand after the illustrious assemblage had passed into Parliament House. A desolate figure in all that he stood for, he proved, an amiable representative of the dispossessed race. He cheerfully waved a Union Jack for the camera man, and grinned into the very eye of a movie man’s camera without flinching.” Footage of Jimmy filmed that day features in the film “The Birth Of White Australia” produced in 1928 and shows him enthusiastically waving a small Union Jack flag in front of Parliament House with his three dogs at his feet. The caption reads " "King Billy" calls for cheers for the son of the great white King across the seas. “Mine tinkit that pfellers father budgeree King liket me” supposedly says Jimmy." Jimmy told the Daily Telegraph, 13 May 1927 “I have opened your Parliament House on my own ground, now you can go and look at it." Jimmy died on 28 August 1927, aged 80. The Herald newspaper on 30 August 1927, published an illustration depicting Jimmy’s dog standing on his grave, his customary chimney pot hat leaning on his headstone. The caption reads: “The Dead King — His Only Mourner. Drawn by Will Dyson (King Billy, last of the Canberra aborigines, lived just long enough to see the Duke of York open Australia’s capital on the site where his tribe once roamed. He died in the Queanbeyan Hospital yesterday morning.)” A letter published in the Sydney Morning Herald, 19 September 1927 reported: "Old King Billy... Sir, ...I would like to mention... the passing away of one, if not the last remaining aboriginal chieftains. He may be called “Old King Billy,” and his death occurred here in Queanbeyan a few weeks ago. The removal of this well-known black has left another big gap in all that remains distinctively Australian in character. He was one of the last remaining tribe of the Monaro district, and one of the most predominant personalities throughout the Commonwealth. ...he had lived through 80 years all told. He was on many occasions sought by artists for his splendid physique and personality as a model, and many a journey he has had to make to Sydney on that account. A more striking and pronounced type could not be found. ...A very fine cast in lifelike form is to be seen in the Australian Museum, Sydney ...his last important appearance in public was at the Commonwealth celebrations at Canberra, to which territory he partly belonged. ...we have no aborigine statue chiselled to the memory of their race, a more fitting and lasting memorial could not be undertaken than to have one modelled from this fine figure and erected to the memory of his race at Canberra... It would be a fitting adornment if planted with the Australian gumtrees for any avenue or garden. [King Billy] ...a very intelligent fellow, responding readily to kindness and common sense. Hoping yet to see a befitting testimonial and a lasting memorial to a race that is rapidly and I may say, unfortunately, disappearing, I am etc., SYDNEY R.OAKLEY, Queanbeyan." The “lifelike form” referred to by the correspondent was a sculpture that Jimmy Clements had posed for: “The Wunderlich Aboriginal Group” for The Australian Museum in Sydney. In 1925, Mr Ernest Wunderlich, director of Wunderlich Limited, manufacturer of building materials and President of the Board of Trustees at The Australian Museum, commissioned renowned sculptor George Rayner Hoff (sculptor of the Anzac Memorial in Hyde Park, Sydney, National War Memorial in Adelaide, and “Lion” the original Holden Motor Company car emblem) to sculpt a life sized Aboriginal family group diorama as a gift to the Museum. There was much concern at this time that the Aboriginal population and especially the “full blooded” were fading into oblivion so fast that they may soon become extinct. Three “full blooded” Aborigines were chosen for models. An article in The Australian Museum magazine, July/September 1926 about The Wunderlich Aboriginal Group explained “...it will not be many years before the aborigine, in New South Wales and Victoria at least, will be an entity of the past. Every year sees a shrinkage in their number, and the coastal tribes that once roamed the Sydney district are, unfortunately, no longer with us. ...the man, who is hurling a boomerang, is Yangar, or “Jimmy Clements,” son of Gayan-Bleuet-Galoom, the late “King of Orange,” western New South Wales. “Jimmy” is an old man, but well preserved. He has a very retentive memory and recollects the various tribal customs and initiation ceremonies, but regarding these he is extremely reticent and will not communicate his “honoured secrets.” The female figure is “Nellie Walker,” a daughter of Geri-Bungel, and a native of Bombala, Monaro district, southern New South Wales. The boy is Harold Marsh, aged nine years, who was born at Kinchela, Macleay River, northern New South Wales. He is now living at the Brewarrina settlement... In the selection of aborigines great care had to be taken to ensure that the individuals were pure bloods, and to the Aborigines’ Protection Board and the Police Department of this State thanks are due for the valuable assistance rendered by them.” Ngarigo woman, Nellie Bungil Walker (1867-1932) had five children, two died as babies and her remaining children were taken from her. She worked as a domestic and was living at La Perouse Aboriginal Community, Sydney at the time of her sculpture’s creation. In the years after the sculpture was made, Nellie and Rayner remained friends. Yaegl boy Harold “Harry” Marsh was from the Kinchela Aboriginal Training Home for boys near Kempsey, (1924-1970), an agricultural training institution under the jurisdiction of the Aboriginal Protection Board to house Aboriginal boys forcibly removed from their families “in the interest of the moral or physical welfare” of the boys. The boys at Kinchela were aged 5-15 years old and referred to as numbers, not names and any connection to Aboriginal culture or language was forbidden. Brutal and cruel physical punishment and sexual assaults were rampant. Survivors recall being flogged and chained naked to a huge Morton Bay fig tree overnight or “sent down the line” where every boy was ordered to punch the “wrong doer” as hard as possible for fear that they would be next. The Kinchela children are acknowledged as part of the Stolen Generation. In 1925, Rayner Hoff created a terracotta bust “Harry Marsh” which is in the collection of the Art Gallery of New South Wales. The figures of the trio were modelled in clay before being cast in plaster and hand-coloured by Museum artist Miss Ethel A. King. The finished figures were completed with wigs and fur pelts and with Jimmy hurling a boomerang and Nellie holding a dilly-bag. They were placed in a glass cabinet in the Australian Ethnology Gallery. The subjects were not named. The Sydney Morning Herald 1 July 1926 critiqued the sculptures. "A GROUP OF STATUARY. MUSEUM’S ACQUISITION. Artistically the group is very fine, for the sculptor has caught his subjects in attitudes that reveal all the stalwart athletic lines of their bodies... The man, who is depicted as about 60 years of age, is bearded, immense, and savagely primitive-is throwing a boomerang, and beside him a boy, aged about 11 years is following beneath a shading hand, the flight of birds at which the hunter aims. Behind them, patient, obedient, stand(s) the woman waiting with her dilly bag to gather the spoils.” In 1996, Nellie’s daughter, Victoria Kempsey née Walker, happened to visit The Australian Museum and saw the sculpture of her mother, displayed semi-naked in a glass cabinet, alongside glass cabinets of taxidermied animals. She had last seen her mother 62 years previously when Nellie was dying from tuberculosis. Greatly distressed, Victoria wrote to the Museum requesting that they remove the sculpture, which they did. In 2023, a documentary was produced called “Her Name Is Nanny Nellie” which follows the journey of Nellie Walker’s great-granddaughter Auntie Irene Ridgeway discovering Nellie’s story, honouring her life and restoring her sculpture. Irene told Refinery29 Australia that “It was about reclaiming her life, reclaiming her history and who she really was as a real person. She was not a naked and unnamed lady standing in a museum. It's giving them back their families, they weren't just there to be looked at as flora and fauna or as 'natives'." The documentary was written and directed by Irene’s son Daniel King and premiered at the 2023 Adelaide Film Festival and broadcast on NITV. The restored sculpture of Nellie, dressed in 1920s style clothing was displayed at The Australian Museum, Sydney in The Bayala Nura Gallery in 2023. Irene wanted Nellie to be depicted in the way she actually was when she posed for the sculpture in 1925. The other two sculptures were not displayed due to ongoing conversations with family members and the fragility of the sculptures. It is anticipated that they may be displayed in the future. Melbourne born William Beckwith (Bill) McInnes (1889-1939) studied drawing at National Gallery School in Melbourne from the age of 14 under the tuition of artist Frederick McCubbin before succeeding his former teacher as Master of Drawing at the School from 1916-1934. He was acting Director of the NGV and Head of the National Gallery School from 1934. In 1927, Bill and official war artist H. Septimus Power were commissioned to paint the opening of the new federal Parliament House in Canberra. Septimus painted the general scene of the arrival of the Royal entourage in front of Parliament House, while Bill depicted the ceremony inside the Senate chamber. Bill was widely acclaimed for his landscapes and lauded as the heir to great Australian landscape artist Arthur Streeton. He won the Archibald Prize seven times (including the inaugural, a portrait of architect Desbrowe Annear) which made him a highly sought after portrait painter and he earned kudos for his commission to paint the Duke of York. During the breaks in painting the portrait, the pair chatted and Bill was surprised by the Duke’s wide knowledge of Australian affairs. The Duke was particularly interested to hear how the rabbit crisis was being handled. Bill’s work is held in major Australian galleries including the NGV, which has 12 of his paintings in their collection. Bill was married to fellow artist Violet McInnes and they lived at “The Poplars” in Alphington with their six children. Violet painted still life of flowers and portraits. In 1941, she entered her portrait of fellow artist Sybil Craig into the Archibald Prize and in 1945 Violet was appointed an official war artist. Defending his traditional style Bill said “...we in Australia have not been bitten by Cubism or Futurism or other of the “isms”...and I am glad of it”. References: THE DUCHESS OF YORK. (1931, December 7). The Argus (Melbourne, Vic. : 1848 - 1957), p. 8. Retrieved April 3, 2025, from http://nla.gov.au/nla.news-article4427568 WAR NURSE (1930, March 11). The Sun (Sydney, NSW : 1910 - 1954), p. 1. Retrieved April 3, 2025, from http://nla.gov.au/nla.news-article223714728 The Royal Visit. (1927, April 29). The Age (Melbourne, Vic. : 1854 - 1954), p. 9. Retrieved April 4, 2025, from http://nla.gov.au/nla.news-article205813465 Canberra. (1927, April 30). Advocate (Burnie, Tas. : 1890 - 1954), p. 5. Retrieved January 10, 2025, from http://nla.gov.au/nla.news-article68233606 Australian Dictionary of Biography, Nangar, https://adb.anu.edu.au/biography/nangar-33736 Australian Dictionary of Biography, Jimmy Clements, https://en.wikipedia.org/wiki/Jimmy_Clements Wikipedia, George John Noble, https://en.wikipedia.org/wiki/George_John_Noble PARLIAMENT AT CANBERRA. (1927, May 14). The Australasian (Melbourne, Vic. : 1864 - 1946), p. 37 (METROPOLITAN EDITION). Retrieved December 25, 2024, from http://nla.gov.au/nla.news-article140733921 CANBERRA CEREMONY (1927, May 10). The Argus (Melbourne, Vic. : 1848 - 1957), p. 19. Retrieved November 3, 2024, from http://nla.gov.au/nla.news-article3853643 CANBERRA. (1927, May 11). The Argus (Melbourne, Vic. : 1848 - 1957), p. 20. Retrieved November 24, 2024, from http://nla.gov.au/nla.news-article3853897 THE FINAL SCENES (1927, May 11). The Labor Daily (Sydney, NSW : 1924 - 1938), p. 5. Retrieved January 10, 2025, from http://nla.gov.au/nla.news-article236614453 TWIN SONS (1927, May 10). The Sun (Sydney, NSW : 1910 - 1954), p. 11. Retrieved April 4, 2025, from http://nla.gov.au/nla.news-article223616143 National Archives of Australia, Aboriginal [Jimmy Clements, a Wiradjuri elder] on steps of Parliament House (King Billy), https://recordsearch.naa.gov.au/SearchNRetrieve/Interface/ViewImage.aspx?B=3050026 Sydney Morning Herald, The chant of Jimmy Clements: I’ll do the honours on my ground, thanks, https://www.smh.com.au/national/the-chant-of-jimmy-clements-i-ll-do-the-honours-on-my-ground-thanks-20241023-p5kkt5.html MET THE DUKE (1927, May 11). The Sun News-Pictorial (Melbourne, Vic. : 1922 - 1954; 1956), p. 14. Retrieved November 3, 2024, from http://nla.gov.au/nla.news-article275177101 PUBLIC MARCH PAST. (1927, May 11). The Register (Adelaide, SA : 1901 - 1929), p. 11. Retrieved April 2, 2025, from http://nla.gov.au/nla.news-article54271512 A REAL AUSTRALIAN (1927, May 13). The Canberra Times (ACT : 1926 - 1995), p. 12. Retrieved December 18, 2024, from http://nla.gov.au/nla.news-article1213124 THE PEOPLE'S DAY (1927, May 13). The Canberra Times (ACT : 1926 - 1995), p. 3. Retrieved April 3, 2025, from http://nla.gov.au/nla.news-article1213105 KING BILLY" WAS THERE. (1927, May 12). Tweed Daily (Murwillumbah, NSW : 1914 - 1949), p. 2. Retrieved November 27, 2024, from http://nla.gov.au/nla.news-article190193273 A BUSY DAY. (1927, May 11). The Sydney Morning Herald (NSW : 1842 - 1954), p. 15. Retrieved November 3, 2024, from http://nla.gov.au/nla.news-article16374845 Nothing Wrong With Canberra Opening, Says "King Billy" (1927, May 13). The Daily Telegraph (Sydney, NSW : 1883 - 1930), p. 2. Retrieved November 3, 2024, from http://nla.gov.au/nla.news-article245750627 THIS IS MARVELLOUS! (1927, May 11). The Sun News-Pictorial (Melbourne, Vic. : 1922 - 1954; 1956), p. 16. Retrieved December 9, 2024, from http://nla.gov.au/nla.news-article275177155 Mildenhall's Canberra, Royal Visit, May 1927. Canberra citizens passing the Royal Party on the front steps of Parliament House at the Civic Reception 1927 [photograph], https://mildenhall.moadoph.gov.au/rephoto/62 Australian Dictionary of Biography, 1927 - Jimmy Clements, John Noble, and the Opening of Parliament House, https://adb.anu.edu.au/the-quest-for-indigenous-recognition/jimmy-clements YouTube, The Birth of White Australia (1928), amateurish racism on the big screen [Jimmy Clements at 11.12 minutes in], https://www.youtube.com/watch?v=OByX4iPsTgo YouTube, We Were Just Little Boys, https://m.youtube.com/watch?v=u4Hw9d91k2E WASTE AT CANBERRA. (1927, May 20). The South Eastern Times (Millicent, SA : 1906 - 1954), p. 1. Retrieved April 4, 2025, from http://nla.gov.au/nla.news-article200058308 YouTube, Museum of Australian Democracy at Old Parliament House, Whispers in the Corridors-An Aboriginal Presence, https://www.youtube.com/watch?v=fwifXP61M5Y History Snoop, Air Fatality in Canberra Scars an Historic Day in Australia, https://www.historysnoop.com/air-fatality-in-canberra/ YouTube, NFSA Films, The Opening Of Canberra, Australia's Capital City, https://www.youtube.com/watch?v=pOA8llA0iE0 Pauline Conolly, Pudding & Pies at Parliament House, https://paulineconolly.com/2022/pudding-and-pies-at-parliament-house/ THE MENU (1927, May 5). The Sun (Sydney, NSW : 1910 - 1954), p. 13 (FINAL EXTRA). Retrieved April 2, 2025, from http://nla.gov.au/nla.news-article223623278 PROMISING (1927, May 7). The Sun (Sydney, NSW : 1910 - 1954), p. 2. Retrieved December 15, 2024, from http://nla.gov.au/nla.news-article223616208 The Dead King -- His Only Mourner (1927, August 30). The Herald (Melbourne, Vic. : 1861 - 1954), p. 6. Retrieved November 3, 2024, from http://nla.gov.au/nla.news-article244196114 The VOICE of the CITY (1927, August 31). The Daily Telegraph (Sydney, NSW : 1883 - 1930), p. 4. Retrieved December 26, 2024, from http://nla.gov.au/nla.news-article246406061 THE LAST OF HIS TRIBE. (1927, September 2). Bairnsdale Advertiser and Tambo and Omeo Chronicle (Vic. : 1882 - 1946), p. 6. Retrieved December 24, 2024, from http://nla.gov.au/nla.news-article269318935 GONE WEST. (1927, September 17). The Irwin Index (Mingenew, WA : 1926 - 1956), p. 1. Retrieved December 23, 2024, from http://nla.gov.au/nla.news-article251554113 King Billy Dead. (1927, September 10). The Port Macquarie News and Hastings River Advocate (NSW : 1882 - 1950), p. 5. Retrieved December 1, 2024, from http://nla.gov.au/nla.news-article112534982 DEATH OF KING BILLY OF CANBERRA. (1927, September 16). Huon Times (Franklin, Tas. : 1910 - 1933), p. 5. Retrieved December 23, 2024, from http://nla.gov.au/nla.news-article136428435 OLD KING BILLY. (1927, September 19). The Sydney Morning Herald (NSW : 1842 - 1954), p. 5. Retrieved November 19, 2024, from http://nla.gov.au/nla.news-article16404722 "Marvellous" is Dead. (1928, March 30). The Gundagai Times and Tumut, Adelong and Murrumbidgee District Advertiser (NSW : 1868 - 1931), p. 2. Retrieved December 8, 2024, from http://nla.gov.au/nla.news-article122748136 LAST OF LACHLAN RIVER TRIBE (1926, May 3). Evening News (Sydney, NSW : 1869 - 1931), p. 7. Retrieved December 18, 2024, from http://nla.gov.au/nla.news-article117289515 Coal Strike Effects (1926, June 11). The Daily Telegraph (Sydney, NSW : 1883 - 1930), p. 14. Retrieved November 30, 2024, from http://nla.gov.au/nla.news-article245759732 SBS On Demand, Her name is Nanny Nellie, https://www.sbs.com.au/ondemand/movie/her-name-is-nanny-nellie/2300137539512 The Australian Museum Magazine, Vol. 2, No. 11, July-Sept 1926, The Wunderlich Aboriginal Group, https://shorturl.at/uViTe ABC News, King Billy and Marvellous were not invited to the 1927 opening of Parliament House — but that didn't stop their fight for sovereignty, https://shorturl.at/HGpjC Museum of Australian Democracy at Old Parliament House, The thieving diva: behind the scenes of the opening ceremony at Parliament House, https://www.moadoph.gov.au/explore/stories/heritage/the-thieving-diva-behind-the-scenes-of-the-opening-ceremony-at-parliament Refinery29, Beyond a museum glass case: one First Nations woman's quest to reclaim her ancestors' story, https://www.refinery29.com/en-au/my-name-is-nelly-documentary-irene-ridgeway-interview Sydney Morning Herald, Why it took 100 years to restore the dignity of Nanny Nellie, https://www.smh.com.au/national/why-it-took-100-years-to-restore-the-dignity-of-nanny-nellie-20230719-p5dpjo.html Australian Museum, Meeting Nanny Nellie, https://australian.museum/publications/explore_summer2024/nanny-nellie/ ABORIGINES. (1926, July 1). The Sydney Morning Herald (NSW : 1842 - 1954), p. 14. Retrieved November 29, 2024, from http://nla.gov.au/nla.news-article16302447 Wikipedia, Kinchela Aboriginal Boys Training Home, https://en.wikipedia.org/wiki/Kinchela_Aboriginal_Boys%27_Training_Home Art Gallery NSW, Harry Marsh by Rayner Hoff, https://www.artgallery.nsw.gov.au/collection/works/59.2000/ Art Gallery of South Australia, Lion (produced for the Holden Motor Company) by Rayner Hoff, https://www.agsa.sa.gov.au/collection-publications/collection/works/lion-produced-for-the-holden-motor-company/27253/ Wikipedia, William Beckwith McInnes, https://en.wikipedia.org/wiki/William_Beckwith_McInnes DUKE OF YORK PORTRAIT UNIVEILED IN CASTLEMAINE GALLERY (1933, December 4). The Sun News-Pictorial (Melbourne, Vic. : 1922 - 1954; 1956), p. 18. Retrieved April 4, 2025, from http://nla.gov.au/nla.news-article276125581 Castlemaine Art Museum, Portrait of His Royal Majesty the Duke of York, https://collection.castlemaineartmuseum.org.au/objects/181/portrait-of-his-royal-majesty-the-duke-of-yorkPhotographer notations on slide: "Portrait of Duke of York by W.B. McInnes 1933 B4".1930-1939, aboriginal culture, royal visits, openings (events), sculpture, land rights, museums, museum displays -
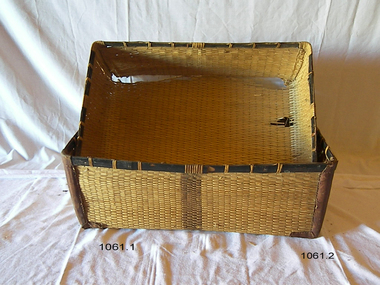 Flagstaff Hill Maritime Museum and Village
Domestic object - Basket, 1890-1920s
... These types of wicker or cane containers started to go out of fashion due to their fragility around the 1920s into the 1940s due as well to the introduction of synthetic materials. flagstaff hill warrnambool shipwrecked-coast flagstaff-hill flagstaff-hill-maritime-museum maritime-museum shipwreck-coast flagstaff-hill-maritime-village None Wicker cane rectangular shaped domestic storage container with reinforced leather pads on 4 corner sides. lid fits inside the other. ...Before the invention of woven baskets, people used tree bark to make simple containers. These containers could be used to transport gathered food and other items but crumbled after only a few uses. Weaving strips of bark or other plant material to support the bark containers would be the next step, followed by entirely woven baskets. The last innovation appears to be baskets so tightly woven that they could hold water. Depending on soil conditions, baskets may or may not be preserved in the archaeological record. Sites in the Middle East show that weaving techniques were used to make mats and possibly also baskets, circa 8000 BCE. Twined baskets date back to 7000 in Oasisamerica. Baskets made with interwoven techniques were common at 3000 BCE. Baskets were originally designed as multi-purpose vessels to carry and store materials and to keep stray items about the home. The plant life available in a region affects the choice of material, which in turn influences the weaving technique. Rattan and other members of the Arecaceae or palm tree family, the thin grasses of temperate regions, and broad-leaved tropical bromeliads each require a different method of twisting and braiding to be made into a basket. The practice of basket making has evolved into an art. Artistic freedom allows basket makers with a wide choice of colours, materials, sizes, patterns, and details.Before the advent of plastics (1907), the is now used for many different types and styles of storage container rattan, wicker or cane was used to make containers with a lid for the storage of linens etc. The subject item was probability used at the end of the Victorian era and into the Edwardian period around the 1900s as a household storage facility. These types of wicker or cane containers started to go out of fashion due to their fragility around the 1920s into the 1940s due as well to the introduction of synthetic materials. Wicker cane rectangular shaped domestic storage container with reinforced leather pads on 4 corner sides. lid fits inside the other. Black cane piece around top edge.Noneflagstaff hill, warrnambool, shipwrecked-coast, flagstaff-hill, flagstaff-hill-maritime-museum, maritime-museum, shipwreck-coast, flagstaff-hill-maritime-village -
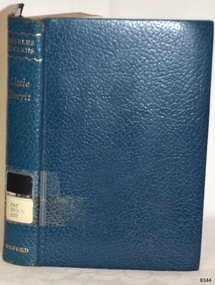 Flagstaff Hill Maritime Museum and Village
Book - A Fictional story, Chapman & Hall Ltd, Little Dorrit, 1890s
... The theme centres around Amy Dorrit who lives her whole early life in Marshalsea, supporting her family with quiet dignity while her father clings to fragile genteel pretensions. Arthur Clennam, disillusioned after years in China, becomes involved with the Dorrits and uncovers a web of secrets involving his own mother, a hidden inheritance, and shady business dealings. ...Charles Dickens (1812–1870) was one of the great English novelists of the Victorian era, famous for vivid characters, social criticism, and stories that were first published in serial form. He began as a journalist, rose to enormous popularity during his lifetime, and wrote major works such as Oliver Twist, David Copperfield, and Great Expectations. Little Dorrit is about Amy “Little” Dorrit, a gentle, selfless woman born and raised in the Marshalsea debtors’ prison where her father, William Dorrit, has been imprisoned for unpaid debts. The story follows her as she works as a seamstress outside the prison, gradually becoming entangled with Arthur Clennam, a businessman returning from abroad. Dickens interweaves a sharp critique of Victorian bureaucracy, finance, and class throughout the story. The theme centres around Amy Dorrit who lives her whole early life in Marshalsea, supporting her family with quiet dignity while her father clings to fragile genteel pretensions. Arthur Clennam, disillusioned after years in China, becomes involved with the Dorrits and uncovers a web of secrets involving his own mother, a hidden inheritance, and shady business dealings. William Dorrit suddenly inherits a fortune and is able to lift the family out of poverty and into fashion conscious society.The novel shows how money distorts their characters and relationships, while Amy remains the moral centre.Little Dorrit. Author: Charles Dickens. Publisher: Chapman & Hall Ltd, London. Date: 1890s. (See note section this document for more information on Edition). Green cloth hardcover with Authors name to front cover in gold. Spine has gold title lettering. The spine has a Library label.fictionCharles Dickens (1812–1870) was one of the great English novelists of the Victorian era, famous for vivid characters, social criticism, and stories that were first published in serial form. He began as a journalist, rose to enormous popularity during his lifetime, and wrote major works such as Oliver Twist, David Copperfield, and Great Expectations. Little Dorrit is about Amy “Little” Dorrit, a gentle, selfless woman born and raised in the Marshalsea debtors’ prison where her father, William Dorrit, has been imprisoned for unpaid debts. The story follows her as she works as a seamstress outside the prison, gradually becoming entangled with Arthur Clennam, a businessman returning from abroad. Dickens interweaves a sharp critique of Victorian bureaucracy, finance, and class throughout the story. The theme centres around Amy Dorrit who lives her whole early life in Marshalsea, supporting her family with quiet dignity while her father clings to fragile genteel pretensions. Arthur Clennam, disillusioned after years in China, becomes involved with the Dorrits and uncovers a web of secrets involving his own mother, a hidden inheritance, and shady business dealings. William Dorrit suddenly inherits a fortune and is able to lift the family out of poverty and into fashion conscious society.The novel shows how money distorts their characters and relationships, while Amy remains the moral centre. flagstaff hill, warrnambool, shipwrecked coast, flagstaff hill maritime museum, maritime museum, shipwreck coast, flagstaff hill maritime village, great ocean road, book, pattison collection, warrnambool library, warrnambool mechanics’ institute, ralph eric pattison, corangamite regional library service, warrnambool city librarian, mechanics’ institute library, victorian library board, warrnambool books and records, warrnambool children’s library, little dorrit, charles dickens -
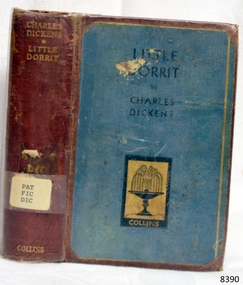 Flagstaff Hill Maritime Museum and Village
Book - A Fictional Story, Charles Dickens, Little Dorrit, 1968
... The theme centres around Amy Dorrit who lives her whole early life in Marshalsea, supporting her family with quiet dignity while her father clings to fragile genteel pretensions. Arthur Clennam, disillusioned after years in China, becomes involved with the Dorrits and uncovers a web of secrets involving his own mother, a hidden inheritance, and shady business dealings. ...Charles Dickens (1812–1870) was one of the great English novelists of the Victorian era, famous for vivid characters, social criticism, and stories that were first published in serial form. He began as a journalist, rose to enormous popularity during his lifetime, and wrote major works such as Oliver Twist, David Copperfield, and Great Expectations. Little Dorrit is about Amy “Little” Dorrit, a gentle, selfless woman born and raised in the Marshalsea debtors’ prison where her father, William Dorrit, has been imprisoned for unpaid debts. The story follows her as she works as a seamstress outside the prison, gradually becoming entangled with Arthur Clennam, a businessman returning from abroad. Dickens interweaves a sharp critique of Victorian bureaucracy, finance, and class throughout the story. The theme centres around Amy Dorrit who lives her whole early life in Marshalsea, supporting her family with quiet dignity while her father clings to fragile genteel pretensions. Arthur Clennam, disillusioned after years in China, becomes involved with the Dorrits and uncovers a web of secrets involving his own mother, a hidden inheritance, and shady business dealings. William Dorrit suddenly inherits a fortune and is able to lift the family out of poverty and into fashion conscious society.The novel shows how money distorts their characters and relationships, while Amy remains the moral centre.Little Dorrit Author: Charles Dickens Publisher: Collins Further Information: We do have 2 more copies of this same book. All have been published by different companies. ( R.N. 8159 and R.N. 8344)fictionCharles Dickens (1812–1870) was one of the great English novelists of the Victorian era, famous for vivid characters, social criticism, and stories that were first published in serial form. He began as a journalist, rose to enormous popularity during his lifetime, and wrote major works such as Oliver Twist, David Copperfield, and Great Expectations. Little Dorrit is about Amy “Little” Dorrit, a gentle, selfless woman born and raised in the Marshalsea debtors’ prison where her father, William Dorrit, has been imprisoned for unpaid debts. The story follows her as she works as a seamstress outside the prison, gradually becoming entangled with Arthur Clennam, a businessman returning from abroad. Dickens interweaves a sharp critique of Victorian bureaucracy, finance, and class throughout the story. The theme centres around Amy Dorrit who lives her whole early life in Marshalsea, supporting her family with quiet dignity while her father clings to fragile genteel pretensions. Arthur Clennam, disillusioned after years in China, becomes involved with the Dorrits and uncovers a web of secrets involving his own mother, a hidden inheritance, and shady business dealings. William Dorrit suddenly inherits a fortune and is able to lift the family out of poverty and into fashion conscious society.The novel shows how money distorts their characters and relationships, while Amy remains the moral centre. flagstaff hil, warrnambool, flagstaff hill maritime museum, maritime museum, shipwreck coast, flagstaff hill maritime village, great ocean road, book, pattison collection, warrnambool library, warrnambool mechanics’ institute, ralph eric pattison, corangamite regional library service, warrnambool city librarian, mechanics’ institute library, victorian library board, warrnambool books and records, warrnambool children’s library, little dorrit, charles dickens -
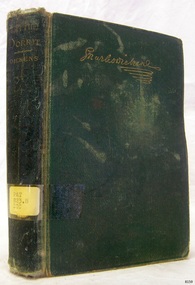 Flagstaff Hill Maritime Museum and Village
Book - A Fictional Story, Charles Dickens, Little Dorrit, 1890s
... The theme centers around Amy Dorrit who lives her whole early life in Marshalsea, supporting her family with quiet dignity while her father clings to fragile genteel pretensions. Arthur Clennam, disillusioned after years in China, becomes involved with the Dorrits and uncovers a web of secrets involving his own mother, a hidden inheritance, and shady business dealings. ...Charles Dickens (1812–1870) was one of the great English novelists of the Victorian era, famous for vivid characters, social criticism, and stories that were first published in serial form. He began as a journalist, rose to enormous popularity during his lifetime, and wrote major works such as Oliver Twist, David Copperfield, and Great Expectations. Little Dorrit is about Amy “Little” Dorrit, a gentle, selfless woman born and raised in the Marshalsea debtors’ prison where her father, William Dorrit, has been imprisoned for unpaid debts. The story follows her as she works as a seamstress outside the prison, gradually becoming entangled with Arthur Clennam, a businessman returning from abroad. Dickens interweaves a sharp critique of Victorian bureaucracy, finance, and class throughout the story. The theme centers around Amy Dorrit who lives her whole early life in Marshalsea, supporting her family with quiet dignity while her father clings to fragile genteel pretensions. Arthur Clennam, disillusioned after years in China, becomes involved with the Dorrits and uncovers a web of secrets involving his own mother, a hidden inheritance, and shady business dealings. William Dorrit suddenly inherits a fortune and is able to lift the family out of poverty and into fashion conscious society.The novel shows how money distorts their characters and relationships, while Amy remains the moral centre.Little Dorrit. Author: Charles Dickens. Publisher: Chapman & Hall Ltd, London. Date: 1890s. (See note section this document for more information on Edition). Green cloth hardcover with Authors name to front cover in gold. Spine has gold title lettering. The spine has a Library label.fictionCharles Dickens (1812–1870) was one of the great English novelists of the Victorian era, famous for vivid characters, social criticism, and stories that were first published in serial form. He began as a journalist, rose to enormous popularity during his lifetime, and wrote major works such as Oliver Twist, David Copperfield, and Great Expectations. Little Dorrit is about Amy “Little” Dorrit, a gentle, selfless woman born and raised in the Marshalsea debtors’ prison where her father, William Dorrit, has been imprisoned for unpaid debts. The story follows her as she works as a seamstress outside the prison, gradually becoming entangled with Arthur Clennam, a businessman returning from abroad. Dickens interweaves a sharp critique of Victorian bureaucracy, finance, and class throughout the story. The theme centers around Amy Dorrit who lives her whole early life in Marshalsea, supporting her family with quiet dignity while her father clings to fragile genteel pretensions. Arthur Clennam, disillusioned after years in China, becomes involved with the Dorrits and uncovers a web of secrets involving his own mother, a hidden inheritance, and shady business dealings. William Dorrit suddenly inherits a fortune and is able to lift the family out of poverty and into fashion conscious society.The novel shows how money distorts their characters and relationships, while Amy remains the moral centre. book, the old curiosity shop, charles dickens, shipwrecked-coast, flagstaff-hill, flagstaff-hill-maritime-museum, warrnambool, maritime-museum, flagstaff-hill-maritime-village, pattison collection, warrnambool library, warrnambool mechanics’ institute, ralph eric pattison, corangamite regional library service, warrnambool city librarian, mechanics’ institute library, victorian library board, warrnambool books and records, warrnambool children’s library, great ocean road -
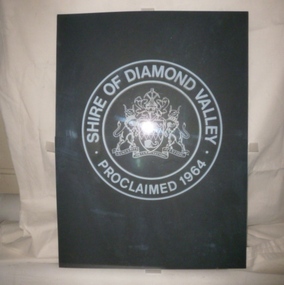 Greensborough Historical Society
Decorative object - Door Pane, glass, Shire of Diamond Valley, 30/09/1964
... As a large piece of glass it is fragile and could have easily been lost or broken when the Diamond Valley offices changed ownership. ...This glass door insert is one of a pair previously inserted into the entrance doors to the Shire of Diamond Valley offices in Greensborough. The Shire of Diamond Valley was a Local Government Area located about 20 kilometres northeast of Melbourne. The shire covered an area of 74.38 square kilometres and existed from 30/09/1964 until 1994. After the local government mergers of 1994, the Shire of Diamond Valley offices were used by the Nillumbik Council.This etched glass is a reminder of the Shire of Diamond Valley. As a large piece of glass it is fragile and could have easily been lost or broken when the Diamond Valley offices changed ownership.Clear glass door insert. Etched with insignia of Shire of Diamond Valley.Glass is etched with the coat of arms of the Shire of Diamond Valley surrounded by inscription 'Shire of Diamond Valley. Proclaimed 1964'.shire of diamond valley, emblems, glass etching, local government buildings, door panels -
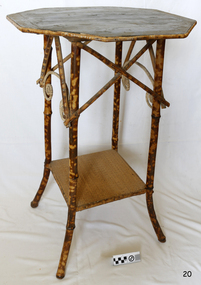 Flagstaff Hill Maritime Museum and Village
Furniture - Plant Stand, 1880
... This item was highly sort after in its time and although mass produced, not many examples remain because the item is so fragile so this example is a valuable addition to the Flagstaff collection. ...During the years 1869-1935, there were well over 250 registered bamboo furniture producers in Britain. The earliest recorded firm was Hubert Bill of 14 Little Camden St, London N.W., who claimed to have been established in 1869, while Daniel Jacobs & Sons of Hackney Road, London, were still in business in 1915, after 45 years of production. Design, quality, price and methods of construction were fairly consistent throughout the whole period, but it was the imaginative and often eccentric choice of subject matter that marked differentiation between the various firms. While most produced standard tables, stands and fire-screens, the more adventurous offered for sale items such as corner shelve units, charcoal barbecue grills and musical tea tables. Shelves were often covered with embossed leather paper designs, at first imported from Japan and then later produced in England. Some firms incorporated the knobbly roots of the bamboo stems into their designs, generally to form feet. Occasionally, handles to drawers and cupboards were made with these roots, although they were more commonly carved as imitations. Handles were mostly of cheap metal or brass. The ends of the bamboo canes were capped with stamped metal or turned bone, ivory or wooden discs. Methods of construction fell into three categories. First and most common is that of pegging. Bamboo stems being hollow, thick dowels can easily be glued into the joints. Some firms farmed out this work of `plugging' the ends of the canes to part-time workers at home. The second method, that of pinning, was far less satisfactory as bamboo tends to split lengthwise and therefore the jointed pieces eventually disintegrated. The most efficient method was that patented in 1888 (patent No. 2383) by the firm of W. F. Needham in Birmingham. It consisted of metal shoes and covers for all joints, which were made by wrapping a metal strip around the stems and soldering the overlapping ends. Some joints were further strengthened by a small pin or screw. Needham was by far the largest and most successful manufacturer, and their individual and superior method of construction undoubtedly gained them their reputation. A. Englander & Searle of 34 Gt Eastern St and 31 Mare St, Hackney, London, were a firm particularly concerned with methods of construction. Although they seem to have entered the bamboo furniture market at a comparatively late date, about 1898, they produced inexpensive' bamboo, aimed particularly at the export trade. Stating in their catalogue that bamboo furniture “can be exported in one piece or it can be exported in pieces and put together again. The fixing up is much facilitated by a system of marking and numbering. Further, no glue is required for putting together as the screw system is applied”. This method of construction best fits the Etagere and this item in the Flagstaff collection, and it is believed to have been made by A Englander & Searle, exported in a knock-down form to Australia, purchased in kit form from a dealer here and put together by the purchaser. The bamboo plant stand is a significant item as it highlight furniture fashion of the late Victorian era. This item was highly sort after in its time and although mass produced, not many examples remain because the item is so fragile so this example is a valuable addition to the Flagstaff collection. It is believed,the construction method used is by a notable and respected maker in England of bamboo furniture that was aimed specifically at the export market and probably came to Australia in kit form to be assembled by the purchaser.Plant stand: a bamboo plant stand with a hexagonal pine timber top edged with tortoise shell bamboo. The top is supported on four tortoise shell bamboo legs joined at the base by a square cane-covered shelf. The tortoise shell appearance is brown lacquer. This stand is part of the Giles Collection. flagstaff hill, warrnambool, shipwrecked coast, flagstaff hill maritime museum, shipwreck coast, furniture, plant stand, bamboo furniture, etagere, victorian furniture, simulated bamboo, tortise shell, a englander & searle, domestic furniture, giles collection, henry giles, cooramook, mailor’s flat, wangoom, 19th century household goods -
 Kiewa Valley Historical Society
Photograph Bogong, Bogong Township Circa 1950, circa 1940s to 1950s
... This photo clearly presents a period of restricted human occupation of a very fragile Alpine environment(up to 4000 workmen involved). ...The Bogong Village was originally constructed (1937-1940) by the State Electricity Commission to house, engineers and construction workers working on the Kiewa Hydroelectric Scheme. These workers were initially settled in 26 houses and were mainly of European heritage. At the completion of the scheme, in the 1960's, the village was opened to public/tourism use. This photograph shows the village before beautification for tourism was introduced and "bare bones" homes and village usage existed.This photo clearly presents a period of restricted human occupation of a very fragile Alpine environment(up to 4000 workmen involved). This was the beginning of a planned and controlled form of sustainable tourist orientated development of the Victorian Alps and high plains region. The Bogong Township was the base camp for workers employed by the State Electricity Commission. After the construction phase was completed, the planning and controls originating from this period have been modified to allow a greater public access of this unique environment.Photograph of a framed glass enclosed black and white photograph of the Bogong settlement Paper details "KodakXtraLife paper" on back of photo. bogong village, bogong township, sec alpine constructions, hydro, kiewa scheme -
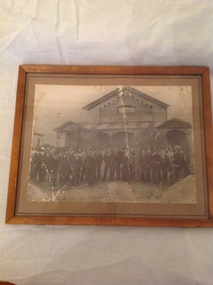 Wycheproof & District Historical Society Inc.
Framed photograph, 1890
... This is the only known photo of the Opening of the Wycheproof Court House. It is fragile and precious. wycheproof court-house Early days photo of large group of men standing proudly in front of the just constructed Wycheproof Court House in 1890. ...The Wycheproof Court House Opened 24-9-1890.The Law Department Closed the Court House during the 1980s. The building became the home of the Wycheproof Craft Group and then the Wycheproof And District Historical Society. Financial support from Heritage Victoria enabled interior renovations to be completed in 2007.This is the only known photo of the Opening of the Wycheproof Court House. It is fragile and precious.Early days photo of large group of men standing proudly in front of the just constructed Wycheproof Court House in 1890.wycheproof, court-house -
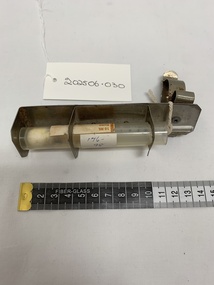 Alfred Hospital Nurses League - Nursing History Collection
Equipment - mercury thermometer and metal bracket with plastic holder, mercury thermometer and holder for bed, 20250626
... The thermometer is a very fragile glass vessel, often dropped and smashed on the floor, resulting in mercury on the floor. thermometer AHNL patient assessment plastic tube marked 176-98, bracket marked 176-98 (original catalogue notes 176-098) metal holder with bracket, plastic tube (not original) holding mercury thermometer mercury thermometer and holder for bed Equipment mercury thermometer and metal bracket with plastic holder ...Taking observations of a patient is a very important part of nursing assessment, and a thermometer would be used to assess a patient's temperature as required, at least daily for most patients. Nurses used this item commonly every day. The thermometer was attached to the patient's bed. The thermometers were supposed to be cleaned before use - kept in chlorhexidine solution in the holding tube, wiped over with alcohol swab prior to use in later years. The process of cleaning changed over the years in line with infection control practices. The thermometer is a very fragile glass vessel, often dropped and smashed on the floor, resulting in mercury on the floor. metal holder with bracket, plastic tube (not original) holding mercury thermometerplastic tube marked 176-98, bracket marked 176-98 (original catalogue notes 176-098)thermometer, ahnl, patient assessment -
 Warrnambool and District Historical Society Inc.
Household, Pair of Over-Shoes, 1940s
... These shoes are of interest as examples of the footwear worn by women in the mid 20th century to protect lighter and more fragile shoes. Women’s Fashions History of Warrnambool ‘Dunlop’ ‘DZM’ ‘LZA’ This is a pair of black rubber over-shoes or galoshes for wearing over high-heeled shoes. ...These over shoes or galoshes would have been worn by a woman wishing to protect the high-heel shoes she was wearing at the time. They would have been used in wintry weather or when walking over rough and wet country roads or tracks, perhaps when going dancing or to a function of some sort. With the advent of common car use and better roads, this type of over-shoe would no longer be used today.These shoes are of interest as examples of the footwear worn by women in the mid 20th century to protect lighter and more fragile shoes. This is a pair of black rubber over-shoes or galoshes for wearing over high-heeled shoes. They have moulded rubber soles with high heels, rubber uppers with a flap to cover the ankles and an opening with two metal press studs with black button tops. The inside is lined with light brown cloth. ‘Dunlop’ ‘DZM’ ‘LZA’ women’s fashions, history of warrnambool -
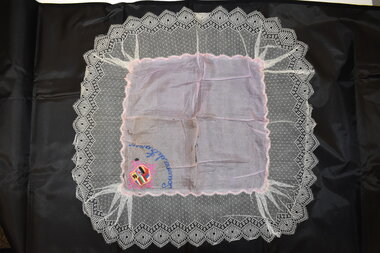 Warrnambool and District Historical Society Inc.
Souvenir Handkerchief, World War One
... This item, although fragile, is of considerable interest, firstly as an attractive embroidered piece and secondly, because of its association with World War One as an example of the souvenirs brought back from France to Australia by returning soldiers. ...This item has been brought back to Australia by a returning soldier from World War One (1914-1918). At a time when France was completely disrupted by the ravages of war many French women, especially those in rural areas, earned a living by making souvenir pieces of embroidery to sell to soldiers in the Allied forces. These embroidered pieces took the form of postcards, doyleys, centerpieces, handkerchiefs etc. The items are noted for the handcraft skills shown by the makers and are prized by collectors today. This item, although fragile, is of considerable interest, firstly as an attractive embroidered piece and secondly, because of its association with World War One as an example of the souvenirs brought back from France to Australia by returning soldiers. This is an oblong-shaped handkerchief or doyley. It has a pink or mauve silk square in the middle with a coloured motif embroidered in one corner. This s a shield with representations of several European flags and embroidered wording underneath. The silk square is edged in a wave pattern in pink. The square has a white lace border. The item is slightly stained and has fold marks.Souvenir de Franceworld war one -
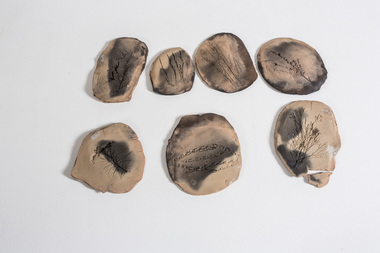 Nillumbik Shire Council
Clay: Leanne Mooney, Leanne Mooney, Tiles from the Boomerang Studio, 2002
... This work is an interpretation of the fragility and value of Nillumbik’s indigenous flora and of its conflict with introduced species. ...'Tiles from the Boomerang Studio' is a prototype of the work 'Year 2052', created while Mooney was an Artist in Resident at Laughing Waters in the Boomerang studio in 2002. Records of flora were collected in and around the Gordon Ford garden in Laughing Waters Road. The work 'Year 2052' is made up of '77' tiles and was acquired by Geelong (Regional) Art Gallery in 2003. Whilst working at the Boomerang studio, local based artist Mooney noticed that “a battle raged in the bush between non-indigenous plants and indigenous plants”. She also noticed how humans “invade” land, changing the surrounding environment and causing irreversible damage. This work is an interpretation of the fragility and value of Nillumbik’s indigenous flora and of its conflict with introduced species. The title of the work (Year 2052) and look of these ‘fossilised specimens’ asks viewers to cast themselves into the future and to look back at today. “These tiles have been found; an incomplete record of flora collected in and around the Gordon Ford garden in Laughing Waters Road. The tiles appear to have been made at the beginning of the millennium. The viewer is asked to contemplate which species are missing”. Mooney works with collected indigenous items to emphasis the beauty of their natural shapes, while at the same time introducing selected materials of contrast or sympathy. Her work creates a great sense of “stillness and peace, of simplicity and connection with the natural world as well at the vanishing Australian bush.”This work is made up of seven handbuilt earthenware oval/round clay 'tiles' - (eight pieces - with one tile intentionally broken), brown in colour and bisque and blackware fired, giving a matt black ash coating on each of the tiles' surface. Each tile has an imprint of a floral specimen indigenous to the Laughing Waters area in Eltham. Each tile has an imprint of the following specimens: tiles, earthenware, flora, indigenous, bisque, boomerang, ford, laughing waters -
 Darebin Art Collection
Photograph, Gerhard Hillmann, Hand-Y-Cap (the Power of Fragility), 2002
... Hand-Y-Cap (the Power of Fragility) Photograph Gerhard Hillmann ...My interpretation of the organic world is embedded deep within each artwork I create. Because I believe we are all part of the landscape & not separate, many of my images explore this human nature connection. I feel compelled to respond to the environment in a creative way & aim to promote a deeper appreciation and understanding of nature. Beyond linguistics, an image has the ability to transcend language barriers and travel the world -
 Mrs Aeneas Gunn Memorial Library
Book, Oxford University Press, Dombey and son
... He pins all his hopes for the future of his shipping firm on his fragile son whilst his daughter, Florence, goes unnoticed and neglected. ...Paul Dombey is an ambitious, calculating London merchant. He pins all his hopes for the future of his shipping firm on his fragile son whilst his daughter, Florence, goes unnoticed and neglected. It is only when the firm faces ruin, and Dombey is staring at a life of desolate solitude that Florence may finally be valued. Can this heartless businessman be redeemed?p.878.fictionPaul Dombey is an ambitious, calculating London merchant. He pins all his hopes for the future of his shipping firm on his fragile son whilst his daughter, Florence, goes unnoticed and neglected. It is only when the firm faces ruin, and Dombey is staring at a life of desolate solitude that Florence may finally be valued. Can this heartless businessman be redeemed? english fiction, charles dickens 1812-1870 -
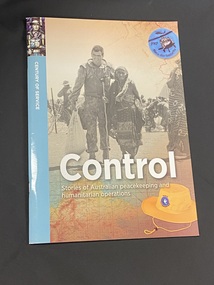 Returned Nurses RSL Sub-branch
Book - Illustrated paperback book, Department of Veterans' Affairs, Canberra, Control : stories of Australian peacemaking and humanitarian operations, 2019
... The following stories are about people who have shown gret self-control, fostering security and safety in exceptionally fragile environments. They have served all over the world, witnessing the struggles and triumphs of the human spirit in the face of conflict and disaster. ...More than 30,000 Australians have served on peacekeeping operations since 1947, and many have delivered humanitarian aid at home and abroad. In complex and dangerous situations they have provided stability along with commitment and compassion, building hope for the future. The following stories are about people who have shown gret self-control, fostering security and safety in exceptionally fragile environments. They have served all over the world, witnessing the struggles and triumphs of the human spirit in the face of conflict and disaster. Some have given their lives in the service of others. - from TroveStaple bound paperback book. There is a blue strip along the left side with a stained glass image of a soldier at the top and 'century of service' printed sideways in white text below. The cover shows a black and white photo of a soldier assisting a civilian down a road and more civilians in the background, covered by a feint overlay of a map. The title is printed in large white print near the bottom of the page and an image of yellow 'peace monitoring group' hat in the bottom right corner.non-fictionMore than 30,000 Australians have served on peacekeeping operations since 1947, and many have delivered humanitarian aid at home and abroad. In complex and dangerous situations they have provided stability along with commitment and compassion, building hope for the future. The following stories are about people who have shown gret self-control, fostering security and safety in exceptionally fragile environments. They have served all over the world, witnessing the struggles and triumphs of the human spirit in the face of conflict and disaster. Some have given their lives in the service of others. - from Trove war and peacekeeping, peacekeeping forces, humanitarian assistance -
 Linton Mechanics Institute and Free Library Collection
Book - Novel, Snow, Charles H, White mountains, n.d. [1938]
... Led by the determined yet haunted Alex Thorne, they face treacherous ice walls, sudden avalanches, and the fragility of human bonds under extreme duress. ...In the mist-shrouded peaks of New Hampshire's White Mountains, a group of rugged climbers embarks on a perilous ascent, driven by ambition and the thrill of conquest. Led by the determined yet haunted Alex Thorne, they face treacherous ice walls, sudden avalanches, and the fragility of human bonds under extreme duress. Set in the untamed wilderness of the early 20th century, the narrative weaves survival against nature's fury with introspective revelations.252p. ; light brown cover with original dust jacket cut and pasted onto front cover featuring man riding horsefictionIn the mist-shrouded peaks of New Hampshire's White Mountains, a group of rugged climbers embarks on a perilous ascent, driven by ambition and the thrill of conquest. Led by the determined yet haunted Alex Thorne, they face treacherous ice walls, sudden avalanches, and the fragility of human bonds under extreme duress. Set in the untamed wilderness of the early 20th century, the narrative weaves survival against nature's fury with introspective revelations. fiction, western, charles h. snow -
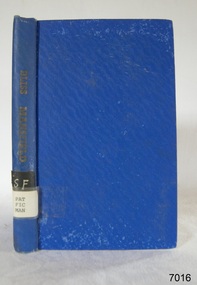 Flagstaff Hill Maritime Museum and Village
Book - Fictional Short Stories, Katherine Mansfield, Bliss and Other Stories, 1920-1932
... The main themes of these stories are that they explore repressed sexuality, alienation, the fragility of domestic happiness, and the gap between social performance and inner life. ...Bliss and Other Stories is Katherine Mansfield's second published collection; the first edition was released in 1920. It gathers stories she wrote between 1916 and 1919, including 'Prelude', a vivid, impressionistic portrait of her New Zealand childhood and family, 'Je ne parle pas Français', a sardonic look at bohemian Parisian life, as well as 'Bliss', the title story about Bertha Young, a 30-year-old wife and mother who feels an overwhelming, inexplicable joy, only to discover at her dinner party that her husband is having an affair with Pearl Fulton, a woman Bertha herself is drawn to. Other Katherine Mansfield works include 'The Man without a Temperament', 'Pictures', 'Psychology', 'A Dill Pickle', 'The Little Governess', 'Revelations', 'The Escape', and others. The main themes of these stories are that they explore repressed sexuality, alienation, the fragility of domestic happiness, and the gap between social performance and inner life. Mansfield uses stream-of-consciousness, symbolic imagery notably the pear tree in the story 'Bliss' and what critics call 'moments of being', or sudden flashes of psychological truth.Hard cover book. Bliss & Other Stories Author: Katherine Mansfield Publisher: Constable & Co Ltd Date: 1920-1932 Further Information: Light blue Cloth hardcover with lettering and patterning to spine in gilt. The spine has a Library label with an inscription.fictionBliss and Other Stories is Katherine Mansfield's second published collection; the first edition was released in 1920. It gathers stories she wrote between 1916 and 1919, including 'Prelude', a vivid, impressionistic portrait of her New Zealand childhood and family, 'Je ne parle pas Français', a sardonic look at bohemian Parisian life, as well as 'Bliss', the title story about Bertha Young, a 30-year-old wife and mother who feels an overwhelming, inexplicable joy, only to discover at her dinner party that her husband is having an affair with Pearl Fulton, a woman Bertha herself is drawn to. Other Katherine Mansfield works include 'The Man without a Temperament', 'Pictures', 'Psychology', 'A Dill Pickle', 'The Little Governess', 'Revelations', 'The Escape', and others. The main themes of these stories are that they explore repressed sexuality, alienation, the fragility of domestic happiness, and the gap between social performance and inner life. Mansfield uses stream-of-consciousness, symbolic imagery notably the pear tree in the story 'Bliss' and what critics call 'moments of being', or sudden flashes of psychological truth.warrnambool, shipwrecked-coast, flagstaff-hill, flagstaff-hill-maritime-museum, maritime-museum, shipwreck-coast, flagstaff-hill-maritime-village, shipwrecked-artefact, book, bliss and other stories, katherine mansfield, warrnambool mechanics’ institute, pattison collection, warrnambool library, ralph eric pattison, corangamite regional library service, warrnambool city librarian, mechanics’ institute library, victorian library board, warrnambool books and records, warrnambool children’s library
