Showing 174 items
matching north queensland
-
 Queenscliffe Maritime Museum
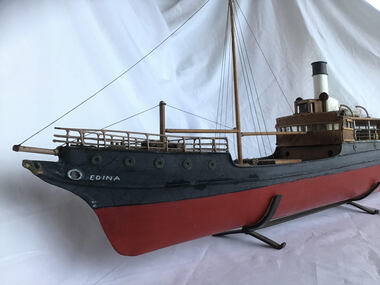
Leisure object - Model SS Edina, Les Hess
The SS ‘Edina’ is one of the most remembered vessels that plied the waters of Victoria’s Port Phillip Bay. Often referred to as the ‘Old Lady of Port Phillip’. Her active service included the North Sea trade, ‘Crimean War’, ‘American Civil War’, Victoria’s west coast run, New Zealand to Melbourne trade, Queensland coastal trade, and of course, the Port Phillip Bay runs between the years 1880 to 1938. ‘SS’ being an abbreviation for ‘Screw Steamer’ signifying that she was propelled by a steam engine rotating a single propeller, or ‘screw’ as it was know at the time.Model of a well known bay steamer operating in Port Phillip between 1880 and 1938.Model of SS Edinamodel, ss edina, screw steamers, port phillip, bay steamers -
 Queenscliffe Maritime Museum
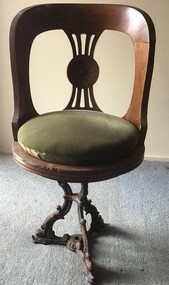
Furniture - Chair
The SS Edina's active service included the North Sea trade, ‘Crimean War’, ‘American Civil War’, Victoria’s west coast run, New Zealand to Melbourne trade, Queensland coastal trade, and of course, the Port Phillip Bay runs between the years 1880 to 1938.A saloon swivel timber chair with green velvet cushion and cast iron base from the SS Edinachair, steamers, ss edina -
 Bayside Gallery - Bayside City Council Art & Heritage Collection
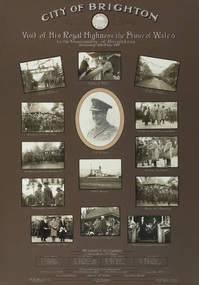
Photograph - gelatin silver photograph, Visit of His Royal Highness the Prince of Wales to the Municipality of Brighton, 1920
In 1920 the Prince of Wales embarked on a journey to Australia on behalf of his father, King George V. While the visit was intended to strengthen the relationship between Australia and the Empire, the main objective was to offer thanks to the Australian men and women for the sacrifices and contributions that they had made during World War I. The Royal Tour began in April 1920 and covered 110 cities and towns across the country. The Prince spent eleven days in New South Wales, nine days in Victoria, four days in Tasmania, eleven days in Western Australia, six days in South Australia and eight days in Queensland. On Saturday 5 June 1920, following a morning at the races in Flemington, the Prince spent the afternoon at ANZAC Hostel in Brighton, where he chatted to wounded soldiers and, according to the newspaper reports at the time, "won the hearts of all present."prince of wales, his royal highness, hrh, royal tour, anzac hostel, brighton, mayor, cr. thomas wilson, j.h. taylor, town clerk, soldiers, diggers, crowd, guard of honour, captain grieve, h.m.s. renown, north road, kamesborough, bayside -
 Bayside Gallery - Bayside City Council Art & Heritage Collection
Photograph - gelatin silver photograph, Visit of His Royal Highness the Prince of Wales to Brighton, 1920
In 1920 the Prince of Wales embarked on a journey to Australia on behalf of his father, King George V. While the visit was intended to strengthen the relationship between Australia and the Empire, the main objective was to offer thanks to the Australian men and women for the sacrifices and contributions that they had made during World War I. The Royal Tour began in April 1920 and covered 110 cities and towns across the country. The Prince spent eleven days in New South Wales, nine days in Victoria, four days in Tasmania, eleven days in Western Australia, six days in South Australia and eight days in Queensland. On Saturday 5 June 1920, following a morning at the races in Flemington, the Prince spent the afternoon at ANZAC Hostel in Brighton, where he chatted to wounded soldiers and, according to the newspaper reports at the time, "won the hearts of all present."prince of wales, his royal highness, hrh, royal tour, anzac hostel, brighton, mayor, cr. thomas wilson, j.h. taylor, town clerk, soldiers, diggers, crowd, north road, kamesborough, bayside -
 Bayside Gallery - Bayside City Council Art & Heritage Collection
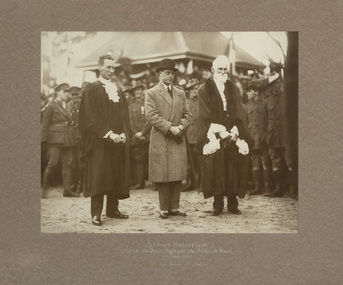
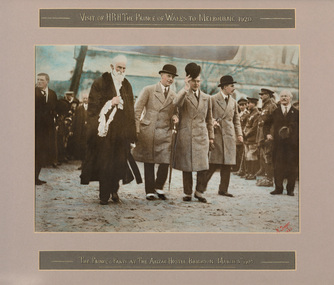
Photograph - hand tinted gelatin silver photograph, H. Singer, The Prince and party at The Anzac Hostel, Brighton, 1920
In 1920 the Prince of Wales embarked on a journey to Australia on behalf of his father, King George V. While the visit was intended to strengthen the relationship between Australia and the Empire, the main objective was to offer thanks to the Australian men and women for the sacrifices and contributions that they had made during World War I. The Royal Tour began in April 1920 and covered 110 cities and towns across the country. The Prince spent eleven days in New South Wales, nine days in Victoria, four days in Tasmania, eleven days in Western Australia, six days in South Australia and eight days in Queensland. On Saturday 5 June 1920, following a morning at the races in Flemington, the Prince spent the afternoon at ANZAC Hostel in Brighton, where he chatted to wounded soldiers and, according to the newspaper reports at the time, "won the hearts of all present."prince of wales, his royal highness, hrh, royal tour, anzac hostel, brighton, mayor, cr. thomas wilson, soldiers, diggers, crowd, north road, kamesborough, bayside -
 Mont De Lancey
Postcard - Postcards, The Valentine Publishing Co. Pty. Ltd, c 1950's
The souvenir packs of cards open up with various photographs inside. Five are published by Nucolorvue Productions, Mentone, Victoria. One set by Murray Views, Gympie, Queensland. Two sets by The Valentine Publishing Co. Pty.Ltd Melbourne. One set of Colour Photographs by Capt.Frank Hurley. The single postcard is by Valentine's "Mail Novelty" Post Card Copyright. One is addressed to 'Mrs. H. Ellis c/- Mr. E. M. Straw, Harcourt, Vic.'Nine packages of photo souvenir postcards from various Australian cities and towns and one single postcard of a Scottie dog peering out of a doorway. It has a lift up flap with mini folded photographs of Lakes Entrance underneath. Other phoyogtaph selected views and fold out photograph packets of: Sydney, Warrnambool, Mildura, Albury, Shepparton Murray Valley, Orbost Adelaide Hills. The Scottie dog card has handwritten in blue ballpoint pen on the back -' You owe me 5/-' All other sets have the publishing details and a description of the area on the back.postcards, photographic postcards, postal stationery -
 Wodonga & District Historical Society Inc
Book - Beyond the Blazing Stump, Russell Walker, 1999
A collection of poems written over a period of 20 years, based on the author's experiences as he travelled in north eastern Victoria, NSW and southern Queensland. Many of the verses are based on events which took place at Perry's Blazing Stump Hotel at Bandiana near Wodonga, Victoria. The "Blazing Stump" got its name from the custom of early travellers bringing a log or stump to the fire to keep it burning for the next campers. The Melrose referred to in some poems is Melrose Primary School in West Wodonga.A volume of 102 pages, including an anthology of poems with illustrations.fictionA collection of poems written over a period of 20 years, based on the author's experiences as he travelled in north eastern Victoria, NSW and southern Queensland. Many of the verses are based on events which took place at Perry's Blazing Stump Hotel at Bandiana near Wodonga, Victoria. The "Blazing Stump" got its name from the custom of early travellers bringing a log or stump to the fire to keep it burning for the next campers. The Melrose referred to in some poems is Melrose Primary School in West Wodonga.australian poetry, perry's stump hotel -
 Victorian Railway History Library
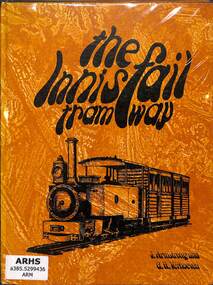
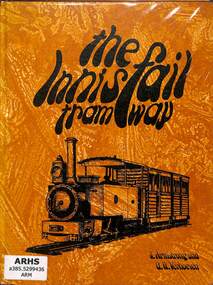
Book, Armstrong, John et al, The Innisfail Tramway, 1973
... and the Mourilyan tramway of North Queensland ill, maps, p.96. The Innisfail ...The story of the history and development of the Geraldton Shire Tramway and the Mourilyan tramway of North Queenslandill, maps, p.96.non-fictionThe story of the history and development of the Geraldton Shire Tramway and the Mourilyan tramway of North Queenslandlight railways - australia - history, narrow gauge railroads -- australia -- queensland -- history. -
 Victorian Railway History Library
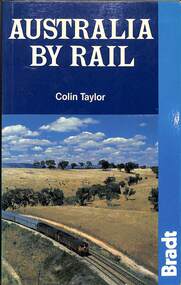
Book, Taylor, Colin, Australia By Rail, 1988
From the vast emptiness of the Nullarbor Plain, on the longest straight rail line in the world, to the twisting tracks of outback Queensland and the rainforests of the north, Australia's railways offer a rich variety of contrasting experiences. Taking the train is an ideal way to explore the continent in comfort and style. Features include: fully revised fifth edition- updated and expanded: with seventy maps including the new Ghan extension to Darwin, rail travel for all budgets--from the five-star luxury of the Great South Pacific Express to economy sleeping berths for budget-conscious travellers, plus full details of the Austrailpass and other passes and ticket bargains, railway route guides with seventy rail maps--all main lines and branches, what to look out for when travelling, and where to stop, railway history--and the battle for the survival of rail in Australia, city guides and maps--the best sights, recommended hotels, and restaurants in many stops along the lines; with extensive sections on Sydney, Melbourne, Brisbane, Adelaide, Perth, Darwin, and Canberra.ill, maps, p.144.non-fictionFrom the vast emptiness of the Nullarbor Plain, on the longest straight rail line in the world, to the twisting tracks of outback Queensland and the rainforests of the north, Australia's railways offer a rich variety of contrasting experiences. Taking the train is an ideal way to explore the continent in comfort and style. Features include: fully revised fifth edition- updated and expanded: with seventy maps including the new Ghan extension to Darwin, rail travel for all budgets--from the five-star luxury of the Great South Pacific Express to economy sleeping berths for budget-conscious travellers, plus full details of the Austrailpass and other passes and ticket bargains, railway route guides with seventy rail maps--all main lines and branches, what to look out for when travelling, and where to stop, railway history--and the battle for the survival of rail in Australia, city guides and maps--the best sights, recommended hotels, and restaurants in many stops along the lines; with extensive sections on Sydney, Melbourne, Brisbane, Adelaide, Perth, Darwin, and Canberra.railroad travel -- australia -- guidebooks, railroad travel -- australia -
 Victorian Railway History Library
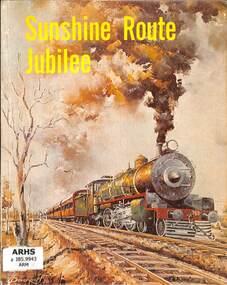
Book, Australian Railway Historical Society - Queensland Division et al, Sunshine Route Jubilee, 1975
A pictorial history of the North Coast mainline of the Queensland Government railways from Brisbane to Cairns to mark its 50th anniversary.ill, maps, p.80.non-fictionA pictorial history of the North Coast mainline of the Queensland Government railways from Brisbane to Cairns to mark its 50th anniversary.queensland railways -- history., railroad construction - queensland - history -
 Victorian Railway History Library
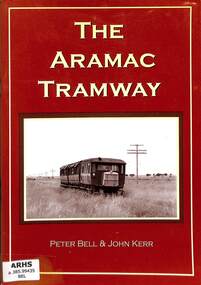
Book, Bell, Peter et al, The Aramac Tramway, 2002
... Barcaldine to Aramac in Far North Queensland. index, ill, maps, p.48 ...A history of the 3'6" tramway from Barcaldine to Aramac in Far North Queensland.index, ill, maps, p.48.non-fictionA history of the 3'6" tramway from Barcaldine to Aramac in Far North Queensland.railroad construction - queensland - history, aramac tramway - queensland - history -
 Victorian Railway History Library
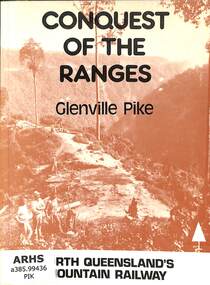
Book, Pike, Glenville, Conquest of the Ranges: North Queensland's Mountain Railway, 1984
... operations - Queensland - history A history of the railways north ...A history of the railways north of Cairns over the Kuranda Range in Queensland.ill, p.146.non-fictionA history of the railways north of Cairns over the Kuranda Range in Queensland.railroad construction - queensland - history, railroad operations - queensland - history -
 Victorian Railway History Library
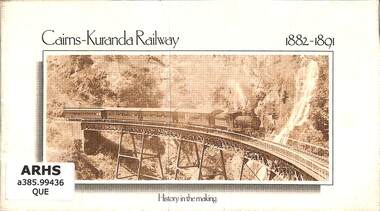
Booklet, Cairns-Kuranda Railway 1882-1891: History in the Making
A pictorial history of the railways north of Cairns over the Kuranda Range in Queensland.ill, maps, p.19.non-fictionA pictorial history of the railways north of Cairns over the Kuranda Range in Queensland.railroad construction - queensland - history, railroad operations - queensland - history -
 Victorian Railway History Library
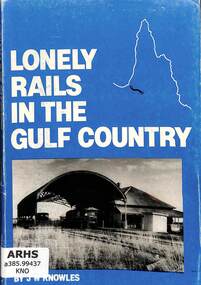
Book, Knowles, J.W, Lonely Rails in the Gulf Country, 1983
... from Croydon to Normanton in Far North Queensland. ill, maps, p ...A pictorial history of the railway from Croydon to Normanton in Far North Queensland.ill, maps, p.76.non-fictionA pictorial history of the railway from Croydon to Normanton in Far North Queensland.railroad construction - queensland - history, railroad operations - queensland - history -
 Victorian Railway History Library
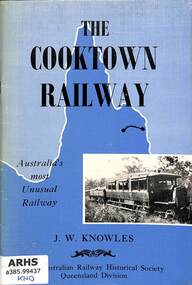
Book, Knowles, J.W, The Cooktown Railway: Australia's Most Unusual Railway, 1983
... from Cooktown to Laura in Far North Queensland. index, ill ...A pictorial history of the railway from Cooktown to Laura in Far North Queensland.index, ill, maps, p.92.non-fictionA pictorial history of the railway from Cooktown to Laura in Far North Queensland.railroad construction - queensland - history, railroad operations - queensland - history -
 Victorian Railway History Library
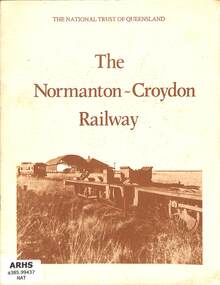
Book, The National Trust of Queensland, The Normanton-Croydon Railway, 1980
... Normanton to Croydon in Far North Queensland. ill, maps, p.6 ...A short history of the railway from Normanton to Croydon in Far North Queensland.ill, maps, p.6.non-fictionA short history of the railway from Normanton to Croydon in Far North Queensland.railroad construction - queensland - history, railroad operations - queensland - history -
 Victorian Railway History Library
Book, Armstrong, John et al, 1973
... Tramway and the Mourilyan Tramway of North Queensland. ill, maps ...The story of the history and development of the Geraldton Shire Tramway and the Mourilyan Tramway of North Queensland.ill, maps, p.103.non-fictionThe story of the history and development of the Geraldton Shire Tramway and the Mourilyan Tramway of North Queensland.railroads - queensland - history, tramways - australia -
 Ballarat Tramway Museum
Album - Postcards & Photographs - Vic Solomons and others - Australian Tramways, Vic Solomons, 2023
Contains 184 images of postcards and photographs collected primarily by Vic Solomons of Sydney, with others from the collection of Wal Jack and Warren Doubleday. Covers almost all of Australia's tramway systems. 1 Post Card Hay St Perth Looking East No 3 Unknown Perth 2 Post Card Cars 30 & 90 both on Route 19 pass in Barrack St looking South Perth WA 1935.02.18 Perth 3 Post Card Hay St Looking East Perth WA Unknown Perth 4 Post Card William St Perth WA Unknown Perth 5 Post Card Perth from Shaftsbury Hotel Unknown Perth 6 Post Card Hay St Perth WA Looking East Unknown Perth 7 Post Card Barrack St Perth Unknown Perth 8 Post Card Murray Views No 3 High St Showing Town Hall Fremantle WA Unknown Fremantle 9 Post Card High St Fremantle WA Unknown Fremantle 10 Post Card View of Bolder City Golden Mile in the Background (Section No 1) 1908.08.20 Kalgoolie 11 Post Card Hannan St Kalgoolie 1900.08.19 Kalgoolie 12 Post Card Hannan St Kalgoolie WA (No 2) Unknown Kalgoolie 13 Post Card Intersection Hannan & Maritana Sts Kalgoolie WA Unknown Kalgoolie 14 Post Card Hannan St Kalgoolie Unknown Kalgoolie 15 Post Card Lane Street Bolder City Unknown Kalgoolie 16 Post Card Hobart Double Deck Tram Unknown Hobart 17 Post Card Macquarie St Hobart Unknown Hobart 18 Photo Liverpool Street Hobart Unknown Hobart 19 Photo Hobart 21 Unknown Hobart 20 Photo Hobart 14 in Elizabeth St Hobart Unknown Hobart 21 Post Card Macquarie St Hobart Unknown Hobart 22 Post Card Macquarie St Hobart Tas Unknown Hobart 23 Photo Double Decker Tram 3 at G.P.O. Hobart Tas No 31 Unknown Hobart 24 Post Card Double Decker Tram 19 Hobart Tas A B Series No 24 Unknown Hobart 25 Photo Hobart Municipal Tramways Tas No 95 Unknown Hobart 26 Post Card Elizabeth St Hobart Unknown Hobart 27 Post Card Elizabeth St Hobart Unknown Hobart 28 Post Card Elizabeth St Hobart Unknown Hobart 29 Post Card Elizabeth St Hobart Tas Unknown Hobart 30 Post Card HMT 21 with crew at Beach Road Terminus Unknown Hobart 31 Post Card HMT 9 & another with crew at Beach Road Terminus. Front cover photo of Destination GPO 1921.01.00 Hobart 32 Post Card Cascade Road and Mount Wellington Hobart Unknown Hobart 33 Post Card Elizabeth St Hobart Unknown Hobart 34 Post Card Elizabeth St Hobart Unknown Hobart 35 Post Card Elizabeth St Hobart 1915.04.07 Hobart 36 Post Card Macquarie St Hobart Tas Unknown Hobart 37 Post Card Macquarie St showing Post Office Hobart 1908.03.12 Hobart 38 Post Card Hobart Municipal Tramways 21 Unknown Hobart 39 Post Card Elizabeth St Hobart Tas Unknown Hobart 40 Post Card Liverpool Street Hobart Unknown Hobart 41 Post Card Electric Tram Launceston Tas 446 W J Little Photo 1919.02.08 Launbceston 42 Post Card Launceston Tram no 3 1911.08.30 Launbceston 43 Post Card Launceston Tram no 3 passes tram No 1 Unknown Launbceston 44 Post Card Tram 6 at Trevallyn a popular suburb Launceston Tasmania Unknown Launbceston 45 Post Card Tram 7 at Trevallyn Road Terminus Launceston Tasmania Unknown Launbceston 46 Post Card Tram 4 in Brisbane St Launceston Unknown Launbceston 47 Post Card Tram 9 in Brisbane St Launceston Tasmania Unknown Launbceston 48 Post Card Camerom Street Launceston Tasmania Unknown Launbceston 49 Post Card Murray Views No 15 Jetty Road Glenelg Terminus 1962-02-08 Adelaide 50 Post Card Bay Tram at Jetty Road Terminus Glenelg SA Unknown Adelaide 51 Post Card Tram 3 in King William Street Adelaide S Aust Unknown Adelaide 52 Post Card Valentine Series No 3065 The Old Horse Tram Victor Harbour Unknown Victor Harbour 53 Post Card Bourke Street Melbourne with Cable Car Looking East 1904.04.25 Melbourne 54 Post Card Opening of New Electric Tramway Elsternwick 1913-11-13 Melbourne 55 Post Card Cable trams in Clarendon St Sth Melb Unknown Melbourne 56 Post Card Pall Mall from Charing Cross Bendigo Unknown Bendigo 57 Post Card Tram 4 & 7 pass at The Fountain and Mitchell Street Bendigo Vic Rose Series P 3198 Unknown Bendigo 58 Post Card M&MTB 133 at Charing Cross bound for Eaglehawk Bendigo Vic Murray Views No 45 Unknown Bendigo 59 Post Card Pall Mall Bendigo Vic Unknown Bendigo 60 Post Card Charing Cross & Mitchell St Bendigo Trams passing 1919.00.00 Bendigo 61 Post Card Pall Mall Looking East Unknown Bendigo 62 Post Card Electric Trams and City Hotel Bendigo Vic Unknown Bendigo 63 Post Card Moorabool Street Geelong V 23 Unknown Geelong 64 Post Card Murray Views No 3 Moorabool Street Geelong Vic Unknown Geelong 65 Post Card The Rose Series P 2487 Ryrie Street Geelong Vic Unknown Geelong 66 Post Card Southern Cross Series 2696 Ryrie Stret Geelong Vic Unknown Geelong 67 Post Card The Rose Series P 1490 Ryrie Street Geelong Vic 1920-03-04 Geelong 68 Post Card Valentine Series No 1568 Lower Sturt Street Ballarat Unknown Ballarat 69 Post Card Rose Series P 1710 Sturt Street Ballarat Victoria Unknown Ballarat 70 Post Card Sturt Street Ballarat Victoria Unknown Ballarat 71 Post Card Horse Tram In Sturt Street Ballarat 1905.11.10 Ballarat 72 Post Card Sturt Street Ballarat Looking North-West Unknown Ballarat 73 Post Card Shoppes Square Sturt Street Ballarat Looking North Unknown Ballarat 74 Post Card Junction Sturt and Lydiard Streets Ballarat 1909-09-01 Ballarat 75 Post Card The Electric Supply Co Souvenir Tram Ticket No 3085of the opening of Electric System August 18 1905 1905.08.18 Ballarat 76 Post Card Sturt Street Ballarat Victoria 1907.11.25 Ballarat 77 Post Card Off to the Gardens Electric Tram Ballarat Unknown Ballarat 78 Post Card Sturt Street Ballarat 1907.04.16 Ballarat 79 Post Card Sturt Street Ballarat Looking East Electric tram with Double Deck Trailer 1911.04.17 Ballarat 80 Post Card Sturt Street Ballarat Looking East Unknown Ballarat 81 Post Card Sturt Street Ballarat Looking West 1911.03.01 Ballarat 82 Post Card Town Hall and Sturt Street Ballarat Unknown Ballarat 83 Post Card Lydiard Street Ballarat 1906.11.23 Ballarat 84 Post Card Looking North along Adelaide Street from George Street Brisbane Sidues Series No 764 Unknown Brisbane 85 Post Card Looking South along Queen Street from the Creek Street Intersection Brisbane Qld Sirues Series No 1379 Unknown Brisbane 86 Post Card George Street from near Supreme Court Brisbane Unknown Brisbane 87 Post Card Queen and Eagle Streets Brisbane 1907.07.04 Brisbane 88 Post Card Queen Street showing His Majesty’s Theatre Brisbane Unknown Brisbane 89 Post Card Queen Street Treasury Building 1908.01.20 Brisbane 90 Post Card G P O and Queen Street Brisbane Unknown Brisbane 91 Post Card Queen Street Brisbane Looking from Wharf Street Unknown Brisbane 92 Post Card Customs House Brisbane 1905.02.16 Brisbane 93 Post Card Queen St Brisbane 1905.09.16 Brisbane 94 Post Card Queen St Brisbane 1907.11.19 Brisbane 95 Post Card Treasury Buildings Brisbane Unknown Brisbane 96 Post Card Queen and Eagle Streets Brisbane Unknown Brisbane 97 Post Card The Valley Corner Brisbane Unknown Brisbane 98 Post Card Brisbane Queen Street opposite General Post Office Unknown Brisbane 99 Post Card North Quay and Milton Beach Brisbane Q Unknown Brisbane 100 Post Card Victoria Bridge Brisbane South Side 1907.08.14 Brisbane 101 Post Card Victoria Bridge Brisbane Unknown Brisbane 102 Post Card Breakfast Creek Bridge Brisbane Q Unknown Brisbane 103 Post Card Melbourne Street Station South Brisbane Queensland Unknown Brisbane 104 Post Card General Post Office Queen Street Brisbane 1955.09.23 Brisbane 105 Post Card Customs House Brisbane 1904.11.04 Brisbane 106 Post Card Queen St Brisbane 1919.11.00 Brisbane 107 Post Card Queen St Brisbane Sidues Series No 627 Unknown Brisbane 108 Post Card Creek Street Brisbane Queensland Unknown Brisbane 109 Post Card Customs House and Garden Reach Brisbane Queensland 1910.00.08 Brisbane 110 Post Card Queen and Creek Streets Brisbane 1909.06.07 Brisbane 111 Post Card Queensland National Bank andd Queen Street Brisbane Queensland Unknown Brisbane 112 Post Card Queen Street and Treasury Buildings Brisbane 0000.09.07 Brisbane 113 Post Card Queen Street showing “Courier” Buildings Brisbane Unknown Brisbane 114 Post Card Intersection George & Roma Streets Brisbane Q 1916.05.11 Brisbane 115 Post Card Adelaide Street Brisbane Q Unknown Brisbane 116 Post Card G P O Queen Street Brisbane Q Unknown Brisbane 117 Post Card Treasury Building Brisbane 1906.03-20 Brisbane 118 Post Card Queen and Eagle Streets Brisbane 1907.02.01 Brisbane 119 Post Card Queen St Brisbane Unknown Brisbane 120 Post Card Queen St Brisbane Q Unknown Brisbane 121 Post Card Victoria Bridge Brisbane 1906.07.30 Brisbane 122 Post Card An Unusual View showing Head of Queen Street Victoria Bridge & South SideSuburbs Brisbane Q Unknown Brisbane 123 Post Card Petries Bight Brisbane Q Unknown Brisbane 124 Post Card South End Victoria Bridge Brisbane Q Unknown Brisbane 125 Post Card Customs House Brisbane Unknown Brisbane 126 Post Card Photo of toastrack car circa 1910 Unknown Brisbane 127 Post Card Treasury Buildings Brisbane Unknown Brisbane 128 Post Card East Street Rockhampton with Steam Tram & trailer Unknown Rockhampton 129 Post Card Post Office Rockhampton with steam tram Unknown Rockhampton 130 Post Card East Street Rockhampton with Steam Trams Rose Series P 7154 Unknown Rockhampton 131 Post Card William Street Rockhampton Rose Series P 7156 Unknown Rockhampton 132 Post Card Central East Street Rockhampton Q with Steam Trams Unknown Rockhampton 133 Photo Sturt St Ballarat Unknown Ballarat 134 Photo Bridge Street Ballarat Unknown Ballarat 135 Post Card George St Sydney Unknown Sydney 136 Post Card Elizabeth St Sydney Unknown Sydney 137 Post Card Railway Square Unknown Sydney 138 Post Card Sydney Harbor Bridge - pending receipt 139 Post Card Kings Cross - Mowbray Series with description on rear from C Roy G Field Unknown Sydney 140 Post Card Kings Cross - Mowbray Series with description on rear from C Roy G Field Unknown Sydney 141 Post Card Central Railway Station Sydney - Rose Series P6033 1954-01-26 Sydney 142 Post card William Street Darlinghurst looking towards City - Rose Series P6602 unknown Sydney 143 Post Card Circular Quay Sydney - Rose Series P6680 Unknown Sydney 144 Post Card View at Manly NSW - Rose Series B1003 Unknown Sydney 145 Post Card Hunter St Newcastle NSW - Rose Series P7843 Unknown Newcastle 146 Post Card Bank Corner Newcastle NSW - Mowbray Series No. 155 Unknown Newcastle 147 Post Card Hunter St Newcastle NSW Unknown Newcastle 148 Post Card Criterion Hotel Hunter St Newcastle NSW Unknown Newcastle 149 Photo Horse tram at Newtown Station 1894 to 1898 - PTC photo c1894 Newtown 150 Photo Steam tram motor No 3 at Railway Square 1879 1879 Sydney 151 Photo Railway steam tram c1900 with a horse drawn double deck bus c1900 Sydney 152 Photo Steam motor 5A and doubled deck bus Unknown Sydney 153 Photo Steam motor 53A with detail notes on rear 1922 Sydney 154 Photo Cable tram set at Milsons Point ferry terminal c1900 Sydney 155 Photo Early Sydney electric car - Ocean St - Rose Bay Unknown Sydney 156 Photo George St looking souoth c1905 c1905 Sydney 157 Photo Tram 165 at Circular Quay Unknown Sydney 158 Photo Tramcar ferry or transporter at The Spit Unknown Sydney 159 Photo tram 882 George St at Marti Place, 1937 1937 Sydney 160 Photo Tram 826 Railway Sq area Unknown Sydney 161 Photo Railway Sq in background, Broadway with double decker bus and toastrack car late 1930s Sydney 162 Photo Coupled St Pitt St? - photo Ben Parle Feb. 1950 Sydney 163 Photo Electric tram No. 2 - North Sydney with side trolley pole running Unknown Sydney 164 Photo George St - Horden's Corner Unknown Sydney 165 Photo George St at Martin Place c1920 Sydney 166 Photo Castlereagh St Sydney c1928 c1928 Sydney 167 Photo Railway Sqare c1920 c1920 Sydney 168 Photo Darling St Countereweight Unknown Sydney 169 Photo Trolley bus depot Unknown Sydney 170 Photo Trolley bus No. 14 Unknown Sydney 171 Photo Newcastle Railway Station with steam tram - Wharf Road?? Unknown Newcastle 172 Photo High St West Maitland - steam tram Unknown Maitland 173 Photo High St West Maitland - steam tram Unknown Maitland 174 Post Card Argent St near tram terminal Broken Hill NSW c1900 Broken Hill 175 postcard Argent St looking south Broken Hill - with Ken Magor's notes on rear Unknown Broken Hill 176 Photo Toronto - steam tram 61A Unknown Toronto 177 Photo 124A trial run 1911? Sutherland - Cronulla line 1911 Sutherland 178 Photo 103A at a tram stop Unknown Sydney 179 Photo Cable tram set at Crows Nest terminus grip car 12, trailer 22 Unknown Sydney 180 Photo Cable tram Queens Square Sydney 1903 Sydney 181 Photo cars 2078 and 2077 Chatswood late 1950s Sydney 182 Photo car 1877 Balmain area late 1950s Sydney 183 Photo Trolley bus - Rockdale destination Late 1950s Sydney 184 Photo Broken Hill steam tram - motor 18A North Tram Unknown Broken Hill 185 Photo Millars Point Sydney NSW - ferry/tram interchange, unknown Sydney All items imaged including the rear or back where there was writing of information. All files stored on the Museum's Photo Collections directory. Demonstrates through the medium of many images, Australian tramway systems and Ballarat's place in them.Album - heavy card covers, plastic lined with postcard or 6x4 photo sleeves.australia, tramways, postcards, photographs, steam trams, horse trams, cable trams, trolley buses -
 Melbourne Tram Museum
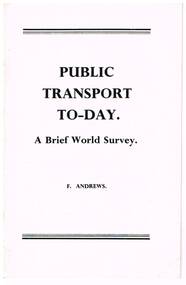
Book, F. Andrews, "Public Transport Today; A brief World Survey", late 1960's early 1970's
Twenty page booklet, centre stapled, printed with photographs on glossy paper, titled "Public Transport Today; A brief World Survey", by F. Andrews of Queensland, late 1960's early 1970's. Looks at the current developments in light rail, tramways, transit lines, in North America, Continental Europe and the future in public transport. Has many photographs of tramways and tramcars. Two copies held.trams, tramways, public transport, tramways, europe, usa, canada -
 Flagstaff Hill Maritime Museum and Village
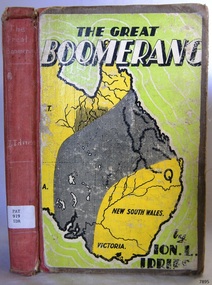
Book - Historical, Australia, The Great Boomerang
... “Gouger”. Idriess then moved to North Queensland in search ...This item is from the ‘Pattison Collection’, a collection of books and records that was originally owned by the Warrnambool Mechanics’ Institute, which was founded in Warrnambool in 1853. By 1886 the Warrnambool Mechanics’ Institute (WMI) had grown to have a Library, Museum and Fine Arts Gallery, with a collection of “… choice productions of art, and valuable specimens in almost every branch and many wonderful national curiosities are now to be seen there, including historic relics of the town and district.” It later included a School of Design. Although it was very well patronised, the lack of financial support led the WMI in 1911 to ask the City Council to take it over. In 1935 Ralph Pattison was appointed as City Librarian to establish and organise the Warrnambool Library as it was then called. When the WMI building was pulled down in 1963 a new civic building was erected on the site and the new Warrnambool Library, on behalf of the City Council, took over all the holdings of the WMI. At this time some of the items were separated and identified as the ‘Pattison Collection’, named after Ralph Pattison. Eventually the components of the WMI were distributed from the Warrnambool Library to various places, including the Art Gallery, Historical Society and Flagstaff Hill. Later some were even distributed to other regional branches of Corangamite Regional Library and passed to and fro. It is difficult now to trace just where all of the items have ended up. The books at Flagstaff Hill Maritime Village generally display stamps and markings from Pattison as well as a variety of other institutions including the Mechanics’ Institute itself. RALPH ERIC PATTISON Ralph Eric Pattison was born in Rockhampton, Queensland, in 1891. He married Maude Swan from Warrnambool in 1920 and they set up home in Warrnambool. In 1935 Pattison accepted a position as City Librarian for the Warrnambool City Council. His huge challenge was to make a functional library within two rooms of the Mechanics’ Institute. He tirelessly cleaned, cleared and sorted a disarrayed collection of old books, jars of preserved specimens and other items reserved for exhibition in the city’s museum. He developed and updated the library with a wide variety of books for all tastes, including reference books for students; a difficult task to fulfil during the years following the Depression. He converted all of the lower area of the building into a library, reference room and reading room for members and the public. The books were sorted and stored using a cataloguing and card index system that he had developed himself. He also prepared the upper floor of the building and established the Art Gallery and later the Museum, a place to exhibit the many old relics that had been stored for years for this purpose. One of the treasures he found was a beautiful ancient clock, which he repaired, restored and enjoyed using in his office during the years of his service there. Ralph Pattison was described as “a meticulous gentleman whose punctuality, floorless courtesy and distinctive neat dress were hallmarks of his character, and ‘his’ clock controlled his daily routine, and his opening and closing of the library’s large heavy doors to the minute.” Pattison took leave during 1942 to 1945 to serve in the Royal Australian Navy, Volunteer Reserve as Lieutenant. A few years later he converted one of the Museum’s rooms into a Children’s Library, stocking it with suitable books for the younger generation. This was an instant success. In the 1950’s he had the honour of being appointed to the Victorian Library Board and received more inspiration from the monthly conferences in Melbourne. He was sadly retired in 1959 after over 23 years of service, due to the fact that he had gone over the working age of council officers. However he continued to take a very keen interest in the continual development of the Library until his death in 1969. The Pattison Collection, along with other items at Flagstaff Hill Maritime Village, was originally part of the Warrnambool Mechanics' Institute’s collection. The Warrnambool Mechanics’ Institute Collection is primarily significant in its totality, rather than for the individual objects it contains. Its contents are highly representative of the development of Mechanics' Institute libraries across Australia, particularly Victoria. A diversity of publications and themes has been amassed, and these provide clues to our understanding of the nature of and changes in the reading habits of Victorians from the 1850s to the middle of the 20th century. The collection also highlights the Warrnambool community’s commitment to the Mechanics’ Institute, reading, literacy and learning in the regions, and proves that access to knowledge was not impeded by distance. These items help to provide a more complete picture of our community’s ideals and aspirations. The Warrnambool Mechanics Institute book collection has historical and social significance for its strong association with the Mechanics Institute movement and the important role it played in the intellectual, cultural and social development of people throughout the latter part of the nineteenth century and the early twentieth century. The collection of books is a rare example of an early lending library and its significance is enhanced by the survival of an original collection of many volumes. The Warrnambool Mechanics' Institute’s publication collection is of both local and state significance. About Ion L Idriess Ion Llewellyn Idriess was born in Waverley, Sydney, New South Wales on 20th September 1889 and passed away on 6th June 1979 in Mona Vale, Sydney, New South Wales at the age 89. After Idriess finished school he worked in the assay office of Broken Hill Proprietary mine. Both Idriess and his mother had typhoid fever when Ion was about 15 years old and it caused his mother’s death. After spending time with his Grandmother in Sydney he found work on a paddle-steamer and had a relapse of the fever. He then went into the western district of New South Wales where he worked in many different itinerant jobs, including rabbit poisoner, boundary rider, drover, sandalwood harvester, shearer, dingo shooter and opal miner. While opal mining at Lightning Ridge he wrote short stories, about life on the opal fields, for the Bulletin using the name “Gouger”. Idriess then moved to North Queensland in search of gold, tin and sandalwood. He travelled over a great deal of the Cape York Peninsula spending a lot of this travel time with local indigenous people; thus began his lifelong interest in their customs. He then spent time on cattle stations in the Gulf of Carpentaria. In 1914 Idriess travelled to Townsville and enlisted in the 5th Light Horse as a trooper. He became a specialist in sniping and was a spotter for the noted sniper Billy Sing. He saw service in Palestine, Sinai and Turkey. Idriess was wounded at Beersheba and after fighting the Battle of Gaza he was invalided home in March 1918. After recovering from his wounds Idriess again travelled to Cape York Peninsula where he worked with pearlers and missionaries in the Torres Strait Islands. He then went gold mining in Papua New Guinea, buffalo shooting in the Northern Territory of Australia and then exploring in Central and Western Australia. LITERARY WORKS OF IDRIESS In 1928 Idriess settled in Sydney and published the first of his 47 books. In 1931 - “Lasseter’s Last Ride”, became his first best seller. In the years 1932 and 1940 he published three books in each year. “The Cattle King” (1936) and “Flynn of the Inland” (1932) have gone through reprinting forty to fifty times. His last book was published in 1969. Idriess’ books where in general non-fiction and were written in a colourful and immediate story style, taken from life experiences gained during his travels. Idriess was appointed an Officer of the Most Excellent Order of the British Empire (OBE) for his service to literature in 1968. The Great Boomerang Author: Ion L Idriess Publisher: Angus & Robertson Date: 1948Label on spine cover with typed text PAT 919 IDR Pastedown front endpaper has sticker from Corangamite Regional Library Service warrnambool, shipwrecked-coast, flagstaff-hill, flagstaff-hill-maritime-museum, maritime-museum, shipwreck-coast, flagstaff-hill-maritime-village, shipwrecked-artefact, book, pattison collection, warrnambool library, warrnambool mechanics’ institute, ralph eric pattison, corangamite regional library service, warrnambool city librarian, mechanics’ institute library, victorian library board, warrnambool books and records, warrnambool children’s library, great ocean road, the great boomerang, ion l idriess -
 Bendigo Historical Society Inc.
Document - John Beebe's Observatory Bendigo, Peter Anderson's article 2020
John Beebe was born in Sandhurst (Bendigo) in 1866. In his earlier years, John and his brother William operated a stonemason's business in Bendigo, designing and making monuments. John graduated as an architect in 1900 . By 1910, John was in sole practice in Bendigo, when he was appointed as architect for the Anglican Diocese. His churches from this period St. Paul's bluestone church in Axedale and St. John's in North Bendigo. He moved to Brisbane in 1916, possibly for health reasons. He died on 15 December 1936 and is buried in the Lutwyche cemetery in Brisbane in an unmarked grave. Lutwyche Cemetery Kedron, Brisbane City, Queensland, Australia Plot MONUMENTAL-COE3-25A-21 https://www.findagrave.com/memorial/239489809/john-beebe Four page collection of research on the observatory built by John Beebe at his residence at 55 Condon Street, Kennington. Articles are: one page brief biography "John Beebe's Observatory in Condon Street'; includes mention of how he acquired the telescope that was built into the brick observatory at Condon Street. "the building is a very rare survivor and an important relic of late 19 century scientific endeavour in Bendigo and should be placed on the Victorian Heritage Register'. Second article: two pages 'John Beebe, Architect, owner of East Bendigo Observatory. His later life in Queensland 1916 - 1936, by Peter Anderson April 2020. Article includes family history; John Beebe earlier life' John's brother William and his son Wilfred John Beebe; John's career in Bendigo; Astronomy in Bendigo; Fellowship of the Royal Astronomical Society and the move to Brisbane, Queensland and speculation upon the reasons. Third article: 'Our heritage in danger - amazing observatory comes to light' by Mike Butcher. Article addresses the significance of Beebe's observatory building ' and is representative of the city's early endeavours into scientific research'. At end of article a colour photo of the observatory with the heading 'John Beebe's observatory in Condon Street under threat of demolition'. john beebe, william beebe, observatory, 55 condon street kennington, stonemason, architect, st. pauls axedale, st. john's north bendigo, heritage significance -
Moorabbin Air Museum
Photograph (series) - (SP) Lindsay Walker collection of photographs, slides and documents. Various aircraft as described in Context. Many Ansett historic items
-
 The Beechworth Burke Museum
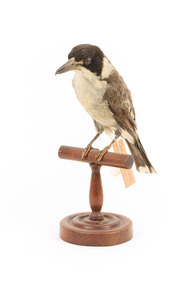
Animal specimen - Grey Butcherbird, Trustees of the Australian Museum, 1860-1880
Grey Butcherbirds live in wooded habitats, including suburban areas, from the north of Western Australia, across different parts of the top of the country, through to mid-eastern Queensland, and then south along the eastern side of the country all the way down to Tasmania. They have a 'lovely, lilting song', and are fiercely protective of their nests and chicks, swooping at presumed attackers with enough strength to sometimes draw blood. Adult Grey Butcher Birds are typically a light grey colour with dark heads and white underparts, while their young are typically olive-brown. The mix of these two types of colouring on this animal suggests that it is a younger bird. This bird appears thinner than most Grey Butcher Birds, but it is unclear if this is because of its age or because of inaccurate taxidermy. This specimen is part of a collection of almost 200 animal specimens that were originally acquired as skins from various institutions across Australia, including the Australian Museum in Sydney and the National Museum of Victoria (known as Museums Victoria since 1983), as well as individuals such as amateur anthropologist Reynell Eveleigh Johns between 1860-1880. These skins were then mounted by members of the Burke Museum Committee and put-on display in the formal space of the Museum’s original exhibition hall where they continue to be on display. This display of taxidermy mounts initially served to instruct visitors to the Burke Museum of the natural world around them, today it serves as an insight into the collecting habits of the 19th century.This specimen is part of a significant and rare taxidermy mount collection in the Burke Museum. This collection is scientifically and culturally important for reminding us of how science continues to shape our understanding of the modern world. They demonstrate a capacity to hold evidence of how Australia’s fauna history existed in the past and are potentially important for future environmental research. This collection continues to be on display in the Museum and has become a key part to interpreting the collecting habits of the 19th century. This specimen is particularly special in the Burke Museum Collection as it is part of a male/female pair (see Relationships). Many birds in the collection were originally donated in male/female pairs, but at least one specimen has been lost, leaving these as one of the few surviving sets.This Grey Butcherbird (likely male, based on size) has a bill that is dark grey at the front with a sharp hook but becomes lighter towards the face. The majority of the feathers on its back are light brown with some grey feathers around the lower half. It's crown area is a dark black colour and its tail is a dark grey. The feathers of its underparts and a small patch on either side of the neck are a yellow-white colour. There are also grey feathers coming through on its underparts. The eyes are brown. The bird stands on a brown, wooden perch with a circular bar, curved stand, and circular base. It has an identification tag tied around its left leg.19a / Collared Crow. Shrike / See Catalogue, Page 10 /taxidermy mount, taxidermy, animalia, burke museum, beechworth, australian museum, skin, australian birds, butcher bird, butcherbird, grey butcherbird, collared crow-shrike, australian butcherbird, tasmanian butcherbird, tasmania, bird pair -
 Flagstaff Hill Maritime Museum and Village
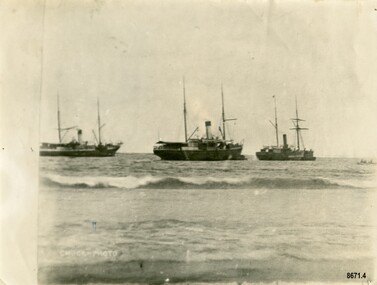
Photograph - Steamers - Julia Percy, Dawn and Coorong, Chuck Photo Ballarat, Circa 1885
This photograph was one of ten photographs donated to Flagstaff Hill Maritime Museum and Village by Fred Trewartha. Frederick John Fox Trewartha (Fred) was a well-known Warrnambool businessman. He was born in Beeac near Geelong in 1920 and came to Warrnambool with his family as a very young child. He was apprenticed to his father John, as a saddler and later opened his own shop on Raglan Parade. He then moved into working with tarpaulins and canvases for the trucking industry. Fred was keenly interested in photography (and was a member of the Warrnambool Cine Club), yachting and boat building. He kept his yacht moored at Port Fairy for many years and participated in sailing events locally and interstate. He also built boats with his sons. He had the opportunity to meet many older sailors and it's thought this photo (and others in the set) may have been given to him by one of these men. Fred Trewartha died in 2016 in Warrnambool. Shipping was the cheapest and most practical means of carrying produce and goods during the period 1840-1890. Regular domestic steamer services commenced in the Warrnambool district in the late 1850’s and by 1870 the passenger trade was booming. Four coastal traders made regular stops at Warrnambool in the 1880's - S. S. Julia Percy, S. S. Dawn, S. S. Nelson and S. S. Casino. The S.S. Julia Percy (later named Leeuwin) was an iron passenger-cargo steam ship built in 1876. At one point in time the Julia Percy would sail from Warrnambool to Melbourne every Friday and return from Melbourne to Warrnambool every Tuesday. The cost of a return ticket for a Saloon Fare was £1.0.0. The Julia Percy was built in Glasgow by Thomas Wingate & Company, Whiteinch, in 1876 for the Warrnambool Steam Packet Company, which commissioned it for trade in Victoria’s western district. It was first registered in Warrnambool, Victoria in 1876. Two steamships, the Julia Percy and the Nelson, collided on 25th December 1881. The Julia Percy was at that time owned by its first owners, the Warrnambool Steam Packet Company, and she sailed under the command of Captain Chapman. It had left Melbourne the evening of 24th December, with about 150 passengers, sailing in fine weather through Port Phillip Heads around 9pm. It was headed for Warrnambool, Belfast (now named Port Fairy) and Portland. The Julia Percy was off Apollo Bay when Captain Chapman was woken by the ship’s whistle after midnight, the steamer Nelson being on a collision course with the Julia Percy. The Nelson struck Julia Percy midship. Boats were lowered from the ship (apart from a damaged lifeboat) and about 30-40 of the passengers boarded the Nelson. The engine room and the forehold were checked and found clear of water. The company manager, Mr. Evans, had been on the Nelson, so he boarded and inspected the Julia Percy and the decision was made to continue on to Warrnambool with the passengers as there appeared to be no immediate danger. However, Captain Thomas Smith said the Nelson was taking on water, so Julia Percy followed it for about an hour towards Melbourne on standby in case of need. Then Julia Percy turned around towards Warrnambool again. Shortly afterwards the Nelson turned to follow her, the ships stopped and passengers were returned to Julia Percy, and three from Julia Percy boarded the Nelson. Both ships proceeded on their way. Julia Percy passed Cape Otway light afterwards, signaling that there had been a collision. It was discovered later that one of the passengers was missing, then thought to have boarded the Nelson but later thought to have fallen into the sea and drowned while trying to jump from Julia Percy to Nelson. There had been 3 tickets purchased under the same name of that passenger “Cutler”; a father, son and friend named Wordsworth, which had caused quite some confusion. No further mishap occurred to either ship and both the Julia Percy and the Nelson reached their destinations safely. An enquiry was instigated by the Victoria Steam Navigation Board regarding the cause of the accident between the two steamships, in connection with the death of Cutler who was supposed to have lost his life by the collision. The enquiry resulted in Captain Thomas Smith having his master's certificate suspended for six months. The Julia Percy changed hands several times. Its next owner was the Western Steam Navigation Co (1887), managed by Mr. T.H. Osborne (the company’s office was on the corner of Timor and Liebig Streets - its north-western wall is now part of the current Warrnambool Regional Art Gallery.) The Melbourne Steamship Co became the next owners (1890), followed by William Howard Smith and Sons (1901) for use in Queensland coastal trades and then it was bought by George Turnbull in 1903 and used for local mail contract in Western Australia. The Julia Percy was sold to the Melbourne Steamship Company Ltd. (1906) and re-named the “Leeuwin” but continued in her Western Australian coastal run. It was converted into a coal hulk in Melbourne in 1910 as a result of damaged caused when it was driven against the jetty at Dongara during a gale. The ship was eventually dismantled and scuttled off Port Phillip Heads on 28 December 1934. The steamship "Dawn" was a 522-ton coastal trader built in 1876 and the vessel operated around the Victorian west coast from 1877 until 1898 for the Portland & Belfast Steam Navigation Co. sailing between Melbourne and Portland, via Warrnambool. The vessel was then owned in October 1885 by the renamed company, Belfast & Koroit Steam Navigation Co., until March 1896 when its ownership moved to W Howard Smith & Sons Ltd. This Melbourne company used the ship to service most ports around Australia. Captain F. Chapman took over from Captain Jones and served on the SS Dawn from 1898 until 1900 when he took command of the SS Casino. On September 4th 1880, the three masted clipper ship, "Eric the Red" struck Otway Reef, near Cape Otway. The S. S. Dawn, under the command of Captain Jones, was returning to Warrnambool from Melbourne, its sailing time different to its usual schedule. The provedore of the Dawn, Benjamin Lear, heard cries of distress coming through the portholes of the saloon. He gave the alarm and the engines were stopped. Cries could be heard clearly, coming from the land. Captain Jones sent out crew in two boats, and fired off rockets and blue lights to illuminate the area. They picked up the three survivors who were in the long boat from "Eric the Red". Two men were picked up out of the water, one being the owner’s son who was clinging to floating kerosene boxes. At daylight the Dawn then rescued the 18 men from the floating portion of the deckhouse, which had drifted about 4 miles from where they’d struck the reef. Shortly after the rescue the deckhouse drifted onto breakers and was thrown onto rocks at Point Franklin, about 2 miles east of Cape Otway. Captain Jones had signalled to Cape Otway lighthouse the number of the Eric the Red and later signalled that there was a wreck at Otway Reef but there was no response from the lighthouse. The captain and crew of the Dawn spent several more hours searching unsuccessfully for more survivors, even going back as far as Apollo Bay. On board the Dawn the exhausted men received care and attention to their needs and wants, including much needed clothing. Four men (three crew and one passenger) died. A week after the shipwreck, the Australian Government had also conveyed its thanks to the Captain and crew of the S.S. Dawn - “Captain Griffith Jones, S.S. Dawn, The Hon. Mr Clark desires that the thanks of the Government should be conveyed to you for the prompt, persevering and seamanlike qualities displayed by you, your officers and crew in saving the number of lives you did on the occasion referred to. The Hon. The Commissioner has also been pleased to award you a souvenir in commemoration of the occasion, and a sum of 65 pounds to be awarded to your officers and crew according to annexed scale. I am, &c, W Collins Rees, for and in the absence of the Chief Harbour Master.” The Awards are as follows: - Crew of DAWN'S lifeboat-Chief Officer, Mr G. Peat, 15 pounds; boat's crew-G. Sterge, A.B., 5 pounds; T. Hammond, A.B., 5 pounds; J. Black, A.B., 5 pounds; H. Edwards, A.B., 5 pounds. Dinghy's Crew-Second Officer, Mr Christie, 10 pounds; boat's crew -F. Lafer, A.B., 5 pounds; W. Johnstone, A.B., 5 pounds; Mr Lear, provedore, 5 pounds; Mr Dove, purser, 5 pounds. Captain Jones receives a piece of plate. (from “Wreck of the ship Eric the Red” by Jack Loney). Medals of Bravery were awarded to the Captain and crew of the S.S. Dawn by the President of the United States, through the Consul-general (Mr Oliver M. Spencer), in July 1881 “ … in recognition of their humane efforts in rescuing the 23 survivors of the American built wooden sailing ship, the Eric the Red, on 4th September 1880.” The men were also presented with substantial monetary rewards and gifts. The city of Warrnambool’s care of the survivors was also mentioned by the President at the presentation, saying that “the city hosted and supported the crew ‘most graciously’. The Medal of Bravery awarded to Nelson Johnson is in the collection at Flagstaff Hill Maritime Museum and Village in Warrnambool. Prior to 1882, and the arrival of the S. S. Casino, the "Dawn" was the only steamer to be able to navigate up the Moyne River at Port Fairy and unload at the wharf. The other regular steamers had to anchor in the bay instead. In February 1891 (as reported in The Age newspaper) the "Dawn" became the first vessel to berth alongside the newly completed Warrnambool Breakwater. The occasion was celebrated with a number of prominent townspeople assembling on board to "participate of a glass of wine". In 1895 the owners of the S.S. Dawn, the Portland and Belfast Steam Navigation Co., wound up and sold out to the Belfast Company who took over the Dawn for one year before selling it to Howard Smith. It took over the Melbourne to Warrnambool run in 1906 when the S. S. Flinders was sold. The S. S. Dawn was condemned and sunk in Suva in 1928. The State Library of Victoria has a lithograph in its collection depicting the steamer Dawn and the shipwrecked men, titled. "Wreck of the ship Eric the Red, Cape Otway: rescue of the crew by the Dawn". The third ship depicted in the photograph was thought to be the S. S. Coorong but there was a question mark next to its name. The photograph was thought to have been taken in 1885 and it's possible the S.S. Coorong was working in Clarence River, N. S. W. by this time. The steamer "Coorong" was built in 1862 by J. G. Lawrie of Glasgow. It was an "iron screw" steamer of 304 tons. It had many owners including Joseph Darwent of Adelaide (1863 - 1871), McMeckan Blackwood and Company, Melbourne (1871 - 1877), Mount Gambier Steamship Company Ltd. (1877 - 1881). William Whineham, Port Adelaide (1882), John See and Company, Sydney (1884 - 1892) and the North Coast Steam Navigation Company Ltd, Sydney (1892 - 1910). In 1911 it was hulked in Sydney Harbour and in 1921 it was being used as a coal hulk at Sydney. It had been originally imported into South Australia for the Port Augusta trade (primarily transporting goods needed by the early settlers) however the owners recognized that it had too much space for that purpose, so it was moved to work on the Adelaide to Melbourne line. Its passenger accommodation was enlarged and it enjoyed a "first class reputation" and by 1874 had made 313 voyages between Melbourne and Adelaide. Its captains included Captain McLean, Captain Ashton and Captain Dowell. In 1867, when 25 miles west of Cape Otway, while travelling from Adelaide to Melbourne, it came across the crew of the schooner "Black Watch" who had abandoned ship after it began quickly taking on water. The crew (six men) were able to get away in a small boat with a compass, chart and few candles. They were "excessively cold from exposure to the weather" when the S. S. Coorong picked them up. In 1877 the Coorong ran aground when entering the Outer Harbour at Adelaide (but was not damaged) and in 1882 it was stranded (for a short time) near Curdies Inlet (Victoria) with some slight damage to its bottom plates. Note - A ship with the same name "Coorong" (a coal carrying barque) was often on the Newcastle / Wollongong to Adelaide route also stopped several times in Warrnambool in the mid 1880's. The photograph has the label "Chuck Photos" printed on the front. Thomas Foster Chuck (born 1826 in London) was a photographer and entrepreneur who arrived in Victoria in 1861. The following year he produced and toured a "Grand Moving Diarama" of dramatic painted scenes from the Burke and Wills expedition. By 1866 he had established a photography studio in Daylesford and later he returned to Melbourne where he opened a studio in the Royal Arcade. In 1874 a collection of Chuck's photographs won a gold medal at the Annual International Exhibition in London. Throughout the 1870's he took over 700 individual photographs of prominent citizens for his historical photographic montage titled "Historical Pictures of the Explorers and Early Colonists of Victoria" which is now in the collection of the National Library of Australia. By 1888 he had sold his Melbourne studio and had established a studio in Ballarat (with his son Thomas Henry Chuck). In 1886 they produced an album titled "Warrnambool and District 1886, Western Hotel - J. Fox proprietor" containing over sixty large photographs of local coastal scenes and seascapes, for the use of patrons of the Western Hotel. This photo (of the three steamers in Lady Bay) was taken at this time and is in the album. Thomas Chuck died on December 7th, 1898, in Albert Park, Melbourne and his son Thomas Henry continued to operate the photography studio in Ballarat into the 1920's.This photograph is a significant record of several of the well-known coastal traders (S. S. Julia Percy, S. S. Dawn and possibly S. S. Coorong) that sailed along the southwest coast of Victoria for many years - transporting goods and passengers between Melbourne and Warrnambool in the 1880's. They are also significant in the role they played in the history of Warrnambool and the other coastal ports they visited as well as being examples of the dangers and hazards associated with navigating the waters along the southern coast of Australia. It is also a good example of a photograph taken by a well-known and significant photographer of that era.Black and white photograph of three steam ships anchored in Lady Bay, Warrnambool. They each have a funnel and two masts and are side on to the beach. A small rowboat with a crew can be seen on the far right. The words "CHUCK-PHOTO" are on the bottom left of the photograph. On the back of the photograph is the name and telephone number of the donor (handwritten in black ball point pen) and the names of the three steamships and date written in uppercase letters in dark blue ink. There is a four-figure number stamped in the centre of the back.Front - "CHUCK-PHOTO" Back - Name of donor and telephone number "6944" "JULIA PERCY, DAWN & KOORONG(?) IN LADY BAY 1885"flagstaff hill maritime museum and village, warrnambool, great ocean road, fred trewartha, s. s. julia percy, s. s. dawn, s. s. nelson, s. s. casino, leeuwin, steamer, steamship, coastal trader, warrnambool steam packet company, captain chapman, victorian steam navigation board, western steam navigation company, melbourne steamship company, william howard smith and sons, portland and belfast steam navigation company, w howard smith and sons ltd, eric the red, captain jones, medal of bravery, rescue, moyne river, warrnambool breakwater, lady bay, s. s. coorong, mount gambier steamship company, black watch, thomas foster chuck, chuck photos, chuck photography