Showing 1680 items
matching stopes
-
 Federation University Historical Collection
Book, Ballarat School of Mines Students' Magazine, 1907-1909, 1907-9
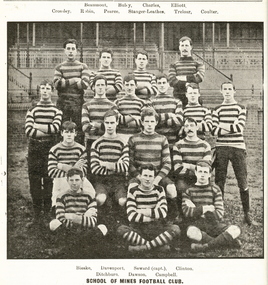
Bound volume of the Ballarat School of Mines Students' Magazine for 1907-1909. Articles include the location and pegging of a tramway Route, the transmission of Power by Rope Driving by A.E.C. Kerr, A visit to the Briseis Mine, and New Brothers' Home, Mining Engineers in Tasmania, Obituaries for David Ham and Matthew Lyndsay, Pioneer Mining at Leichhardt, Automatic Ore Feeders and Chacedony Park by J.H. Adams. Images include the Ballarat School of Mines Football Team and the Ballarat School of Mines Sports Committee. 1907 * Hubert Krause 1908 * The location and Pegging of a Tramway Route by Yamba * The Unity of things by John Brittain * The transmission of power by Rope Driving, by A.E.C. Kerr * A visit to the Briseis Mine, and New Brothers' Home (includes photographs) * Mining Engineers in Tasmania * Limericks Sluiced at Snake Valley * David Ham Obituary * Matthew Lyndsay Obituary * Some Bunsen Memories by Professor Alfred Mica Smith * Geological Camp to Daylesford * Practical Mathematics by Hubert F. Hall * Pioneer Mining - Leickhardt * Automatic Ore Feeders * A Unique Ore Deposit (Lucknow Goldfield, NSW) * A country Ramble * The Alkaline Titration for Zinc * Chalcedony Park, Arizona, United States of America by J.H. Adams * Notetaking at Lectures * Smelter Cost-Keeping by Oliver E. Jaeger * Benefits of Physical Culture * Mineral Tasmania and its Wonderful Resources by F.F. Bradford * A holiday Trip to Queensland * The Compression of Air as Applied to Mining * Machine V Hand Drilling * The mining in the Malay States * William Thomas Grownow Obituary (includes image) * Timbering Stopes (Includes images) * Trip to Melbourne * Two Problems of Alluvial Mining by Richard Hain * The Berry Leads (includes plan of mines) * Black Pudding Supper * Observations for Meridian * NOtes on Coking Plants (includes plan) * How Old is the Earth * Conglomerations * A Pat Formula * The making of a Suitable Muffle for General Assay Work * Reduction of Gold Chloride by Charcoal * Chemical Definitions * Old Boys (R.J. Allen, W.B. Blyth, F. Brinsden, Lindsay D. Cameron, George W. Cornwell, John M. Currie, C.M. Harris, T. Wighton-Hood, W. Lakeland, W.S. Macartney, Fred A. Marriott, Karl B. Moore, G.E. Sander, Sherb. H. Sheppard, Norman S. Stuckby, John Sutherland, Lewis A. Westcott, Walter White, O.C. Witherden, Gerald Young) 1909 * The Graduates Problem * An Interesting Nevada Cyanide Plant (Bamberger De Lamar Gold Mines) * Easter Geological Camp to Ingliston * New Methods for the Volumetric Estimation of Lead * William Charles Kernott Obituary * Mount Morgan Mine by G.W. Williams * Tin Dredging at Tingha, New South Wales * Notes on the Iodide estimation of Copper * Photograph of the Ballarat School of Mines Students' Association Committee * The Importance of Mine Ventilation to the Students by F. Howells * Life in Mining Camp * Wise Words to Mining School Students * Military Search Lights * Gleaning s on resistance * Ministerial Visit to the Ballarat School of Mines by the Hon. A.A. Billson, Minister of Education , accompanied by Frank Tate, Director of Education. * Picture Making in Photography Composition * Mountains of Fire * A Walking Engine - New Military Machine - Guns into Action - Caterpillar No. 1. (Tank) * Fireless Locomotives * Elmore Concentrating Process (includes plan of Elmore Concentrator) * Mount Pani Limited * Surveying for Irrigation * Weights and Measures * Carbon Monoxide * Joseph Francis Usher obituary * The Problem of the Metalliferous Veins * Ballarat School of Mines Ambulance Class * Treatment of Gold in a battery Without the Use of Copper Plates by E.C. Hurdsfield * Meteorites * Werribee Gorge * Dredging in the Ovens Valley * Electrical Chatter - Electrocution by an Imaginary Eye-Witness * The Electric Furnace in Iron Metallurgy ballarat school of mines, ballarat school of mines football team, football, sports, tramway, mining engineers, david ham, matthew lyndsay, jack adams, berry lead, hepburn consuls, madame berry, west ristori, ristori no 1, allendale, dyke's co, charleson's mill, australian extended, mining, r.j. allen,, w.b. blyth, f. brinsden, lindsay d. cameron, george w. cornwell, john m. currie, c.m. harris, t. wighton-hood, w. lakeland, w.s. macartney, fred a. marriott, karl b. moore, g.e. sander, sherb. h. sheppard, norman s. stuckby, john sutherland, lewis a. westcott, walter white, o.c. witherden, gerald young, ballarat school of mines students' association, hubert krause, krause, vfl, afl -
 Eltham District Historical Society Inc
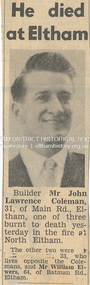
Newspaper - News Clipping, Herald, He died at Eltham. Herald, March 4, p3, 4 Mar 1965
John Lawrence Coleman (1934-1965) born January 10, was the son of Raymond John Coleman and Hanna May (Gillet) Coleman. He married Margaret Frances Dare in 1955 and was the father of two children. He died whilst attempting to rescue an older man trapped in the bushfire at North Eltham on March 3, 1965 He died at Eltham (Herald, 4 March 1965, p3) [Picture of John Lawrence Coleman] Builder Mr John Lawrence Coleman, 31, of Main Rd., Eltham, one of three men burnt to death yesterday in the fire at North Eltham. The other two were XXXXX, 33 who lives opposite the Colemans and Mr William Elwers, 64 of Batman Rd., Eltham. * * * Frank Martin was a volunteer with the Eltham rural fire brigade at the time of the 1965 bushfires which burnt Eltham North and Research. Frank was asked to assist with the removal of three bodies from the back gully (now Orchard Avenue). They were badly burnt and one was found stuck under a fence as though trying to escape. Volunteers John Coleman Jnr, William Elwers and George Crowe were killed trying to protect Eltham from bushfire – they were local heroes. At the time, John Coleman Jnr was survived by his wife Margaret and two young children – John 11 and Vicky 2. Margaret Coleman lived in the family home until 1992 when she sold it and moved to Tasmania to be close to her son. She died in 1997 aged 65 years. 75 yr old Ken Gaston grew up on Edendale farm, which was originally a poultry farm but is now owned and run by the Shire of Nillumbik as an educational farm for schools and visitors. He was Captain of the Eltham rural fire brigade in 1965 when John Coleman Jnr was burnt to death in the Eltham North bushfires serving as an unofficial volunteer. He was able to draw where the original Wattletree Road was and at the time was verified with the location of some remaining bitumen and a post from the original bridge over the Diamond Creek located near the junction of the Diamond Creek and another small creek which is further down from Research or Christmas Creek as locals refer to it. The original Main Road ran behind Colemans before the railway line was built beyond Eltham in 1912. (Information recorded by Harry Gilham, President EDHS c.2011) * * * Bushfires rage in Victoria, Snowy: Three dead (1965, March 4). The Canberra Times (ACT : 1926 - 1995), p. 1. Retrieved May 19, 2022, from http://nla.gov.au/nla.news-article131758981 Includes two photos of the fire in North Eltham “Firemen make for safety as fire rages in Upper Glen Park Road, North Eltham, Victoria. The smoke hides a house.” and “A house explodes into flames at North Eltham, Victoria. Firemen said bottled gas went up.” Canberra Times (ACT : 1926 - 1995), Thursday 4 March 1965, page 1 ________________________________________ Firemen make for safety as fire rages in Upper Glen Park Road. North Eltham. Victoria. The smoke hides a house. A house explodes into flames at North Eltham. Victoria. Firemen said bottled gas went up. Bushfires rage in Victoria, Snowy: Three dead MELBOURNE, Wednesday.—Three people died today in a bush» fire which raged through North Eltham, about 15 miles from Melbourne. The victims were three men. A fourth man is feared to be dead. Another bushfire. sparked off by the heatwave sizzling over south-eastern Australia, is burning out of control in the Kosciusko State Park, in the Snowy Mountains. Firefighters fear that if it reaches pine forests up the Yarrangobilly River, they will be powerless to stop it. The three victims of the North Eltbam fire were trapped by flames in a valley. Their bodies were found only a few yards apart. They were named by police tonight as Mr. George Crowe, 78, of North Eltham, William John Ewers, 64, and John Laurence Coleman, 31, both of Eltham. The other two have not been identified. They are believed to be a man aged about 40 and an 18-year-old youth. At least 12 homes were destroyed by the fire, the worst in Victoria since 1962, when eight lives were lost and hundreds of homes burnt down at Warrandyte. At one time the township of Eltham was threatened, but a cool change swept in from the south and held back the wall of flames. More than 100 dogs, worth about £4,000, died when the fire raced through two kennels in Short Street, Eltham. and Upper Glen Park Road, North Eltham. A trickle of water Residents ran into the streets as the blaze raced towards their houses. Others frantically dug firebreaks around their homes. Mrs. Sue Recourt wept when firemen arrived while she was vainly trying to stop the flames with a trickle of water from the garden hose. A stack of firewood was blazing, but the firemen managed to save the house and rescue four goats. Many homes in Eltham were saved after flames had crept to within feet of their fences. Students at North Eltham State School had to be evacuated when the blaze threatened the building. Fire fighters were severely hampered by lack of water and narrow roads. The blaze, which began in above century heat, turned toward Wattle Glen, where two houses were gutted. Then the flames raced towards Hurstbridge to the north. Firemen battling desperately, controlled the fire late this afternoon. Five forest fires were still burning in Victoria tonight. IN VICTORIA THIS WEEK Tragic lack of central fire authority (1965, March 9). The Canberra Times (ACT : 1926 - 1995), p. 2. Retrieved May 19, 2022, from http://nla.gov.au/nla.news-article131759928 Canberra Times (ACT : 1926 - 1995), Tuesday 9 March 1965, page 2 ________________________________________ IN VICTORIA THIS WEEK Tragic lack of central fire authority From Rohan Rivett It was the worst week for Victorian fire fighters since Black Friday 27 years ago. On that day one pilot up in a spotter plane said afterwards: "It seemed at times that half the State was on fire." This time, for three days on end, Gippsland men, women and children had moments of conviction that their towns would have blackened into anonymity before the weekend was out. The week began with horror at Eltham on the North-eastern edge of Melbourne. Eltham today is something of an artists' colony. Oil painters, water colourists, potters and sculptors proliferate. A number of University folk have emulated the example of Professor MacMahon Ball who pioneered the way by moving to Eltham and carving a home out of the bush in the thirties. Innermost Eltham is barely 14 miles from the G.P.O. Farthest Eltham stretches miles beyond. It served to illustrate the tragi-ludicrous truncation of Victoria's fire control. Part of Eltham is under the protection of the Melbourne Fire Brigade. But this responsibility ceases at some invisible and incomprehensible line — apparently determined by the meanderings of the water mains. At this point everybody's property throughout the rest of Eltham is dependent on the Country Fire Authority. Half an hour before midday on Wednesday, a fire suddenly started on the West side of Upper Glen road on the edge of Eltham. Before the fire brigade could arrive, it was burning on a widening front through timber and high grass north of Eltham. Two wind changes in rapid succession saw the fire leaping Diamond Creek. With a freshening wind it struck home after home in three streets. More than one of them exploded suddenly as if hit by an incendiary bomb. There is no piped gas in the Eltham area, hence many housewives use bottle gas. The flames outside caused the bottles to explode. Altogether twelve homes were completely incinerated and four more were badly damaged. Thirty prize dogs perished. About three hours after the fire started it raced suddenly down a gully hillside trapping an elderly man. Two other men apparently raced to the rescue. Flames caught the three men within yards of each other, not 200 yards off the Upper Glen Park Road where safety lay. They were burned to death. Next evening an angry and convincing secretary of the Fire Brigade Union, Mr. W. M. Webber, came on television and appealed to the people of Victoria to end the ridiculous and dangerous dualism in fire-fighting control. The Eltham fire, he said, had precisely illustrated the situation. The Metropolitan Fire Brigade area touched Eltham, but where the fire had gutted and killed, was just outside its area. Mr. Webber said his union had constantly urged one authority for the State with a complete reorganisation of fire protection. On Wednesday the union had repeated its call for an inquiry into fire protection in Victoria to the Chief Secretary, Mr Rylah. "No matter how close the liaison between the two organisations, there are always divided sections of thinking," Mr. Webber told viewers. "I don't know how much tragedy the com-munity can take before it demands that it is properly protected." Rumours that differences in gauge between taps and hose nozzles (as between the two authorities) accentuated the damage were denied by fire chiefs who said that all appliances were now carrying adaptors so that hoses could be linked to mains everywhere. But there is grave concern in the Metropolitan Fire Brigade's higher councils at the action of several Federal authorities with projects in and around Melbourne. They are installing non-standard equipment without reference to the State authorities or any dovetailing of appliances and equipment. Public alarm was not diminished by the publication on Friday and Saturday of a heart tearing letter from the young widow of John Lawrence Coleman, 31 year old father of two, who had died in the flames apparently trying to rescue the old man trapped in the gully. By that time, a Vast area of Gippsland was in flames and the troops had been sent in to back up the overworked and often helpless fire-fighters. By Saturday, the Leader of the Opposition, Mr. Stoneham, who has previously demanded a Royal Commission into fire-fighting arrangements, repeated his demand. To add to the Chief Secretary's worries he was publicly rebuked for allegedly implying on television that lives had been lost at Eltham because people went to the wrong place at the wrong time. In a letter to the Press, Professor MacMahon Ball pointed out that two of the men involved were experienced bushmen who had gone "to help an old man in great danger fully aware of the danger to themselves". As Victoria faced its sixth day of total State-wide fire ban, it looked likely that even official resistance was not going to silence the demand for one central authority to control the fire fiend. At the moment, the 400 square miles where two million Victorians live in Greater Melbourne are divorced from the rest of the State in planning, communications, equipment and control of personnel. No one doubts the whole-hearted co-operation and willingness to back each other up of the M.F.B. and the C.F.A., both at top-level and among the firemen themselves. However, when a city straggles so deeply into the country side, the absence of a single authority, to oversee and analyse the fire threat as a whole, suggests suicidal policy of divide and fuel. Emphasis of the tragic loss of a member of a pioneering family who died whilst helping others in his communitybushfire, cfa, country fire authority, fire brigrade, glen park road, heroes, john lawrence coleman, north eltham, victorian bushfires - 1965, volunteers, william john elwers, fire fighter, frank martin, george john crowe, ken gaston, orchard avenue -
 Melton City Libraries
Photograph, Wendy Barrie, Unknown
Eldest daughter of Edna and Bon Barrie, born on 03 November 1943 in Melbourne, Victoria, Memoirs of Wendy Barrie, recalling the early formative years of life in Melton: In 1949 I started school at Melton State School no 430 and was driven the 2½ miles to there by my parents at first. Later we walked home in the afternoons or were picked up by car as we made our way home along the Western Highway. In 1956 I went to Bacchus Marsh High School. There were 4 students in grade 6 and 3 of us went to the High School. The students from Melton, Melton South and Toolern Vale State Schools went by bus to Bacchus Marsh High School as far a fifth form. My parents drove me to the pick up point and during the five years of travel to High School. The bus travelled via Toolern Vale and later went through Exford and through Parwan. On the return journey in the afternoon the bus went in the reverse direction. The bridge at Exford was an old narrow wooden one, and the students had to get off the bus and walk across, with the driver crossing in the empty bus for safety reasons. There was a travelling allowance paid to parents and it was estimated from the distance the crow flies, a straight line. We lived a Ferris Lane, just where the Harness Racing entrance is now situated about 2 ½ miles by road to school too close to qualify for the subsidy. While at State School Melton we would walk home in a group with the Nixon and Gillespie children, along the main road over the bridge near the Shire Offices and down a hill. I was being dinked on Joyce Gillespie’s bike while holding onto the seat, toppled off the bike striking my chin and teeth on the bitumen and cracking my jaw. I was about 9 years old and stayed a couple of days in the Quamby Hospital in Bacchus Marsh, it seemed like and eternity at the time and quite traumatic being separated from my family. I can remember contemplating how I could get out of the window and run away but realised it was too far to walk home. Often we would cut across the Common on our way home from school picking up stray golf balls and collecting them from the creek when it dried out. We were warned about not accepting lifts from strangers passing along the Melbourne/ Ballarat Road. The only danger we faced was being swooped by the magpies particularly on the open ground on the Common. We were also fairly cautious when the Gypsies camped on the Common in the area just about opposite the small reservoir. “Mum” grandma Myers loved to have us call in on our way home, and usually would cut a slice of Jongebloed’s bread and spread it with home made butter. Sometimes we waited there until we were collected by car, usually driven by our mother. Margaret Nixon and Joyce Gillespie were a few grades ahead of me and Barbara Nixon was born just two months earlier than me. Our mothers were great friends for over 6o years, born in the same month three years apart. They lived within a few days of the same age as each other at the time their deaths. Dad and George Nixon attended Melton school at the same time. Sarah nee Hornbuckle Nixon and my grandfather Frederick Myers Snr were at school together at the same in the 1880s. The Nixon family lived in Keilor Road just past the Toolern Creek near the turnoff. Tom and Ann Collins lived on the southern side of the Western highway and Keilor road intersection. Jim and Ruby Gillespie’s house was further long Keilor road on the right. They backed onto the Myers who lived on the north side of Western Highway east of Myers Gully (Ryans Creek). The Bridge over the Toolern Creek as very narrow and as truck traffic increased there were accidents. One truck took out the side railing and plunged upside down into the bank and into the shallow water. Another fatal accident happened between a car and a truck right in front of the Myers house. Grandfather Fred had been a bike rider all his life, as far as the Riverina in his younger years, wryly made the comment about the drivers the speeding along the Ballarat Road were setting out to kill themselves. The road was busy particularly after the Races at Ballarat when the crowds were hurrying home to Melbourne. Train travel had changed very little from the time my mothers generation to mine. The timetable meant the usual rush to Melton South by bike in her case and if she was running late the train pulled up on the crossing. I was driven to the Station from home past Keith and Mary Gillespie’s house near the Ferris Road rail crossing to Bridge road to Melton South for the 7.32 train. While attending Sunshine High School in 1961 I would meet up with three other students, two of whom I knew from Bacchus Marsh High School days. We usually got into the same compartment on the train, it was a typical country train with a corridor along the side and compartments with a door, roof racks and sometimes heated metal containers for the feet in the winter. Some of the trains came through from Horsham and Ballarat, and the Overland from Adelaide passed through in the evening, we could hear it in the distance from the Ferris Lane home. The carriages had 1st and economy class compartments showing photographs of county scenes and holiday destinations. The engine was the large A class diesel. They are still running to Bacchus Marsh 50 years later, due to the need for the greatly increased number of commuters travelling to work in the city. Sometimes the carriages were pull by a Steam engine, these were a problem in the summer time because the sparks caused fires along the train lines and then quickly spread into the dry grass, crops and stubble. The Motor Train left Spencer Street at 4.23 pm and was the best train for me to catch. Ferris Road was a designated stop and train pulled up on the road crossing. It had steps at the door and rungs to hold while alighting to the ground. The ballast along the tracks was rough and uneven and awkward to land on. The train was painted blue and yellow with the letters VR pained on the front. This saved may parents the afternoon trip to collect me from the Station. On the walk home on the gravel road I would pass Uncle Tom and Aunty May’s house before reaching home. Melva Gillespie was studying at Sunshine Technical School and we sometimes both got off the train at the same time. On other occasions the Motor Train was replaced with a diesel engine with carriages, it was also required to stop and the driver had to be notified in advance. This meant getting into the guards van a Rockbank. It was more difficult alighting from the carriage as the gap was greater and more precarious to swing out and land on the ground. A few times in my last year of study at Melbourne Teachers College in Grattan Street Carlton. I managed to catch the 2.30 pm train to Serviceton, it was express to Melton and was very quick trip. The last train, was the 5.25 pm diesel to Ballarat and I usually caught this train to Melton South Station. On one occasion after being held up on the tram in Bourke street I had to make a mad dash to the platform chasing the train as it was just moving off and yelling to the guard, fortunately I was noticed and the train ground to halt. I scrambled into the end door and took most of the journey home to recover. After the last year at High School I continued to travel on the train, 2 years to Prahran Technical School changing at North Melbourne. There were a lot school children travelling to private schools and some at the primary level and mainly from Bacchus Marsh. Rockbank children also travelled by train from the beginning of their high school years, quite a few went to Sunshine High School. During my third year of teacher training I travelled to Flinders Street to RMIT for ceramics classes and Grattan St Teachers College located in the grounds of Melbourne University. There were many teachers being trained at the Secondary Teachers College due to the baby bulge creating a great shortage of teachers. Sunshine High School was very well represented amongst the different courses in Primary, Secondary and Art and Crafts. I attended Melbourne University lectures, studying a Fine Art subject. Bernard Smith was the most notable of the lecturers. he replaced Professor Joseph Bourke who had taken leave for the years. In 1962 he published the art book “Australian Painting”. The secondary art and craft student teachers from the College were in the majority, taking this subject and were well regarded due to their practical art and craft methods and their teaching round experience. In December 1964 I graduated as a Trained Secondary Teacher – Art and Crafts. The graduating ceremony was held at Wilson Hall. I received my appointment to work at Maryborough High School. Uncle Max and Aunty Rosemary Myers arranged my accommodation. Uncle Max was a teacher at the Maryborough Technical School fat the time. The appointment was suddenly changed when just before the school year was about to start when I received notification that I was now required to move to Warracknabeal High School. I was subject to a bond for the three years of training and three years of teaching and was under an obligation to comply with the directive of the Education Department. My father stood as guarantor when I was accepted as student at the Melbourne Teachers’ College, thus enabling me to receive my teacher training, and a 5 pounds a week allowance for expenses. After teaching for two years at Warracknabeal High School I was fortunate enough the gain a transfer to Sunshine West High School, returning to live at home in Melton and travelling by car to work with a fellow colleague, Jock Smith who lived at Station road Melton. I completed bond obligation and resigned at the end of the year. The employment regulations at that time did not allow the option of leave of absence for, indefinite overseas travel. I returned to Australia in October 1969. Visiting Arthur Hart the Principal of Sunshine High School he arranged with the Education Department for my re-employment at Sunshine High School until the end of the year. In 1970 I was transferred, and returned to Sunshine West High School where I worked for the next three years. In January 1968 I sailed on the “Oriana” to South Hampton with two teaching friends from Warracknabeal High School on a travelling and working holiday. Doreen Kiely, a former Bacchus Marsh High student and fellow train traveller from Bacchus Marsh, was already working in London, had arranged our accommodation at the London Travellers Club Hotel, Braham Gardens, Earls Court SW5. We based our stay at this address in London and travelled around Scotland, Ireland and England. In the summer we took a four month trip around the Continent and the Mediterranean. I registered with The Royal Borough Of Kingston Upon Thames as a Supply teacher, and worked at Chessington School form autumn to spring the following year and living with Mrs Rose Gillies at Kinross Avenue, Worcester Park, Surrey. In the spring of 1969 visiting Norway, Sweden and Finland joining an organised camping group to the Artic Circle, entered Russia at Leningrad (St Petersburg) Moscow, Minsk, to Poland and Czechoslovakia. In August returning to Worcester Park for the flight to Montreal to stay with cousin Lynette and husband Jurgen. A side trip was taken to Toronto, Niagara Falls and New York. The flight home from Montreal to Melbourne took 52 hours. A ½ day break in Vancouver before boarding the Qantas boeing 707 via San Francisco, Honolulu, Fiji, Sydney to Melbourne. Around the world in 21 months. Photographs of Wendy local identities -
 Melbourne Tram Museum
Newsletter, Tramways rank and file group, "Trammie Link", 1978 - 1982 and 1991 and 1992
Set of 14 duplicated newsletters printed on coloured quarto or foolscap duplicated paper, "Trammie Link" .1 - November 1978 - 1 quarto sheet - complaining about the lack of union leadership - published by a "tramways rank and file group" .2 - March 1979 - 4 sheets - training, shift work, Burke Road tram, route 72 tram, Gardiner, lifeguards, uniforms. .3 - April 1979 - 4 sheets - disciplinary panel, rosters, Camberwell depot, route 72, buses, North Fitzroy, Doncaster, Clifton Hill, Z class cars. .4 - May 1979 - 4 sheets - discipline, lifeguards, bus safety, union issues. .5 - June 1979 - 3 sheets - politics and unions, Preston depot, Camberwell depot, wage indexation, union matters, finance for public transport, Tramway Record. .6 - August 1979 - 10 pages- Preston Depot, item written by Jim Harper, public transport and government, hook turns, union meetings, women, ACTU, wages, shift work, rosters, depots, wage indexation, shift lengths. .7 - June 1980? - two pages - undated - Service cuts at North Fitzroy, depot committees, news from depots, and note re a meeting on Monday 7 July. .8 - July 1979? - 4 pages - strikes, union campaigns, depot management, industrial issues, discipline, depot facilities. .9 - Sep. 1980 - 3 pages - Lonie report, buses, closure, public transport, union, 35 hour week, unions. .10 - Oct. 1980 - 4 pages - union elections, industrial campaigns, 35 hour week, Lonie repot, public transport. .11 - Oct. 1982 - 3 pages - Preston workshops and new trams, new trams, W class trams, accidents. .12 - Undated - 2 pages about Paul Krutulis - a scab or an Agent Provocateur - see https://www.anu.edu.au/polsci/marx/interventions/years/11revival.htm - accessed 30-8-2016. - Extracted are the 4th and 5th paragraph below which give a bit of a background. .13 - July 1991 - 4 pages - open letter to Jim Harper re union Amalgamation, rank file view, what it would mean to workers - a negative view. Amalgamation was a major push of the Hawke - Keating Government. .14 - March 1992 - supportive of Jim Harper, dismissive of Lou DiGregorio, Union executive, union amalgamation, cross linking of tram routes, racial discrimination within the PTC, Kew Depot, ACTU. Lists the rank and file committee - see key associations. Latham’s frustrations were shared by several would-be heroes in Victoria. In 1977 Paul Krutulis gained an exemption from union membership from the Arbitration Commission as a conscientious objector, only to find that tramway workers at Kew planned to stop work as soon as he appeared. Commissioner Cohen then recommended his dismissal, saying she “had to deal with the reality of the situation.” Krutulis later became president of a group called People Against Communism, before being murdered in September. Thus Krutulis departed the scene to be followed in early 1978 by motor mechanic Jack Kane, who had crossed a picket line at a Melbourne City Council depot. The AMWU forced the Council to sack him before it would end the strike. In September of the same year, Barbara Biggs succeeded in provoking a confrontation in the tramways where Krutulis had failed, by refusing to join the union and prompting 100 unionists at Brunswick depot to go on strike. The union executive had arranged token action confined to this depot, but the members wanted more. The strike spread to Preston, then 2,000 trammies at a mass meeting voted for an indefinite strike amidst “rowdy outbursts”. When Biggs complained at being excluded from the meeting a conductress told her, “We should have let you in, love. You would have been torn to pieces.” Paul was murdered by his brother George in Sydney - see the Age 29/11/1977, but there seems to be some conspiracy theories abounding as well.Handwritten note / letter from Chris Jacobson.trams, tramways, unions, training, shifts, uniforms, route 75, gardiner, light rail, camberwell, z class, buses, discipline, tramway record, preston, north fitzroy, services, strike, depots, discipline, lonie report, public transport, preston workshops, rtbu, actu, ptc -
 Flagstaff Hill Maritime Museum and Village
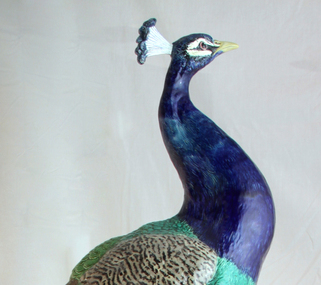
Decorative object - Peacock, Minton Majolica life-size model, Paul Comolera, artist, Designed: c. 1873; Made: c. 1875
This majestic peacock embodies technical achievement, skill and ingenuity of artisans during the 19th century. It is now known as the 'Loch Ard Peacock' and was designed and modelled in 1873 by Paul Comolera (1818-1897), and fired in one piece at the Minton factory at Stoke-on-Trent in the United Kingdom in 1875. The peacock has been portrayed in symbolic motifs and has figured heavily in folktales and fables since antiquity, and many cultures around the world see it as a symbol of beauty, rebirth and power. Wealthy Victorians, loved majolica, and the large peacock would have been the ultimate home accessory, as a conservatory ornament – combining their desire for nature, the exotic and vibrant colours. The peacock model was listed in catalogues by Minton & Co. for a retail price of 35 guineas or sold as a pair for 90 guineas. Minton & Co. was founded in 1793 by Thomas Minton (1765–1836) and became famous pottery and porcelain manufacturers. Comolera was a French artist and sculptor, renowned for dramatic naturalistic forms, and life-size renditions of birds and animals that won him admiration in public and artistic circles. He was employed by Minton & Co. from 1873 to 1880, and the life-sized peacock became his best known work. Comolera, kept a live peacock loaned from the nearby Duke of Sutherland's Trentham Hall Estate in his studio, to create a life-size model of fine buff earthenware model, which was then hand painted in brilliantly coloured green and blue glazes to mimic the peafowl’s dazzling plumage. There are no surviving production records, but according to documents in the Minton Archive, nine peacocks were made by Comolera. However, today some historians now believe that twelve were fired at the Minton factory, research is still on-going. These peacocks were so admired that the Minton & Co. used them as exhibition showpieces at International Exhibitions in London, Paris, and the United States of America, assuring the company had a worldwide reputation. So, when Melbourne hosted an International Exposition in 1880, Minton & Co. sent out ceramics, tiles and in particular, this peacock was intended to be part of their exhibit in the British Court in the Exhibition Building, built in the Carlton Gardens. The early dispatch date (1878) indicates that the company may have intended to exhibit their wares including the peacock at the 1879 Sydney International Exhibition, but the company did not take up this option. The ship that Minton & Co. used to bring the peacock and their other wares to the Australian colonies was the ill-fated Loch Ard, which sunk after striking Mutton Bird Island near Port Campbell, Victoria in calm foggy weather in June 1878 on the final leg on the ships journey to Melbourne. The loss of 52 lives made it one of Victoria’s worst shipwrecks. Therefore, this peacock never made it to the grand exposition in Melbourne, as Minton & Co. had planned. Charles McGillivray dragged this peacock, still in its original packing case onto the beach in the gorge just two days after the Loch Ard went down. The peacock was rescued unscathed apart from a chip on its beak (only repaired in 1988). After a disagreement with Melbourne Customs Officer, Joseph Daish, McGillivray stopped his salvage operations, leaving the peacock on the beach. The second salvagers were James Miller and Thomas Keys. Miller was a member of the firm Howarth, Miller and Matthews, Geelong, who had brought the salvage rights to the Loch Ard wreck on 10 June. When Miller and Keys arrived at the wreck site, a storm had washed many of the salvaged goods including this peacock back into the sea. The two men found the peacock in its case ‘bobbing along in the water’, and pulled it back to the beach. To ensure the peacock wasn't washed out to sea again, Miller and Keys hauled the packing case containing the peacock up the gorge's cliff face to the top, ready to be transported. In an interview in 1928, Keys claimed that at the time of the rescue the head had broken from the body. This account was proven to be true in 1988, following the birds display in Brisbane. This peacock began its life in Australia, not in grandeur of an International Exhibition as intended, but in the hallway of a simple domestic house in Geelong. It appears Minton &Co. did not attempt to buy this peacock back. Florence Miller, daughter of James Miller (Loch Ard salvage rights holder), later remarked that the only item of real value rescued from the wreck had been the peacock and that this had been kept by her father in the family home for many years, and became a treasured family possession. As such, this 'Loch Ard peacock' was almost forgotten and mistaken with other Minton peacocks around the world. Florence tried to sell the peacock due to financial difficulties in the 1930s but was unsuccessful. While attempting to sell the peacock, it was displayed in the window of the Argus newspaper office on Collins Street, and at the National Museum on 1st June 1935, the date of the 57th anniversary of the Loch Ard wreck. As a result, the peacock again attracted public attention with books, newspaper and magazine articles being published telling the story of its survival from a shipwreck. After Miller's death, the peacock remained in an antique dealer's shop in Melbourne for many years until it was bought at auction by Frank Ridley-Lee, in the 1940s, who displayed the bird at his home in Ivanhoe/Heidelberg. The peacock remained in the hands of the Ridley-Lee, until it was offered for sale in 1975 as part of Mrs Ridley-Lee's estate. In 1975, an advertisement in Melbourne newspaper, the Age announced the sale by auction of the art collection of the Ridley-Lee estate that included this peacock. The peacock was not sold at this time, as the reserve price of $4500 was not met. This news was passed on to the board of the newly created Flagstaff Hill Maritime Village. Urgent efforts were made to raise the necessary funds through fundraising by the Warrnambool City Council and public donations. The Fletcher Jones Company and the Victorian Government contributed half of the of the cost. On 9 September 1975, the peacock was purchased by Flagstaff Hill Maritime Village, and it found a new home at the maritime museum. Since, it has only left Warrnambool twice. Firstly, in 1980 at the centenary celebrations of the Royal Exhibition Building in Melbourne, and secondly, in 1988, the peacock was given pride of place at the entrance to the Victorian Pavilion at the Brisbane World Expo, acknowledging that this Minton majolica peacock is the most significant shipwreck object in Australia. The Minton majolica peacock is considered of historical social and aesthetic significance to Victoria and is one of only a few 'objects' registered on the Victorian Heritage Register (H 2132), as it is a most notable and rare object associated with the Minton factory of the 1870s and works by the celebrated sculptor Paul Comolera along with the wreck of the Loch Ard on the Victorian coastline. This Minton peacock is historically significant for its rarity; it was one of only 9-12 known to exist. The shipwreck of the Loch Ard is also of significance for Victoria and is registered on the Victorian Heritage Register Ref (S 417). Flagstaff Hill has a varied collection of artefacts from Loch Ard and its collection is significant for being one of the largest accumulation of artefacts from this notable Victorian shipwreck. The collections object is to also give us a snapshot into history so we can interpret the story of this tragic event. The collection is also archaeologically significant as it represents aspects of Victoria's shipping history that allows us to interpret Victoria's early social and historical themes. The collection is historically significant is that it is associated, unfortunately with the worst and best-known shipwreck in Victoria's history. The peacock, resplendent in polychrome glaze, stands perched on a rocky plinth decorated with vines, leaves, flowers, blackberries and wild mushrooms. The peacock’s breast is cobalt blue; the wings and legs are in naturalistic colours. The tail is a mass of feathers coloured in green, ochre blue and brown — a fantastic display of artistry and Minton expertise. Inscribed at the base :P Comolera, and a Minton & Co. design number: 2045.flagstaff hill, warrnambool, maritime museum, shipwreck coast, loch ard, loch ard gorge, peacock, paul comolera, victorian heritage register, minton peacock, minton & co., stoke upon trent, bird figures, mintons, ceramics, international expositions, majolica, naturalistic, staffordshire -
 Flagstaff Hill Maritime Museum and Village
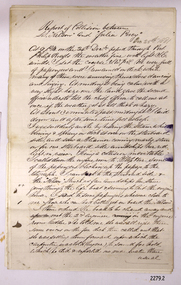
Document, 12-01-1882
This hand written letter, in black ink script on blue lined paper, is impressed with the official stamp of the Victoria Steam Navigation Board. The left margin has the reference “S82/12" It is transcribed: "Victoria Steam Navigation Board, Melbourne, January 12th 1882 To Frederick Chapman, Master, S.S. "Julia Percy" You are herewith furnished with a copy of the report of the Official Court which assembled to enquire into the circumstances attending the collision between the steamers "Julia Percy" and "Nelson" off Apollo Bay near Cape Otway on the morning of the 25th December 1881, and you are hereby expected to attend at the Board Room, Custom House, Melbourne, at 2pm, on 13th January instant to show cause why you should not be censured accordingly. [Signature] Secretary" This document refers to the matter of a collision between two steamships, the Julia Percy and the Nelson, on 25th December 1881. The Julia Percy was at that time owned by her first owners, the Warrnambool Steam Packet Company, and she sailed under the command of Captain Chapman. She had left Melbourne the evening of 24th December, with about 150 passengers, sailing in fine weather through Port Phillip Heads around 9pm. She was headed for Warrnambool, Belfast (now named Port Fairy) and Portland. The Julia Percy was off Apollo Bay when Captain Chapman was woken by the ship’s whistle after midnight, the steamer Nelson being on a collision course with the Julia Percy.[See Link.] The Nelson struck Julia Percy midship. Boats were lowered from the ship (apart from a damaged lifeboat) and about 30-40 of the passengers boarded the Nelson. The engine room and the forehold were checked and found clear of water. The company manager, Mr Evans, had been on the Nelson, so he boarded and inspected the Julia Percy and the decision was made to continue on to Warrnambool with the passengers as there appeared to be no immediate danger. However, Captain Thomas Smith said the Nelson was taking on water, so Julia Percy followed her for about an hour towards Melbourne on standby in case of need. Then Julia Percy turned around towards Warrnambool again. Shortly afterwards the Nelson turned to follow her, the ships stopped and passengers were returned to Julia Percy, and three from Julia Percy boarded the Nelson. Both ships proceeded on their way. Julia Percy passed Cape Otway light afterwards, signalling that there had been a collision. It was discovered later that one of the passengers was missing, then thought to have boarded the Nelson but later thought to have fallen into the sea and drowned while trying to jump from Julia Percy to Nelson. There had been 3 tickets purchased under the same name of that passenger “Cutler”; a father, son and friend named Wordsworth, which had caused quite some confusion. No further mishap occurred to either ship and both the Julia Percy and the Nelson reached their destinations safely. An enquiry was instigated by the Victoria Steam Navigation Board regarding the cause of the accident between the two steamships, in connection with the death of Cutler who was supposed to have lost his life by the collision. The enquiry resulted in the following decision: "The Victorian Steam Navigation Board having taken into consideration the points urged by Captain Thos [Thomas] Smith and also by his legal advisers, is of opinion that the charge prepared against him has been sustained, but taking into consideration Captain Smith’s previous good conduct and character, the board suspends his master’s certificate No 227 issued by this board for a period of six calendar months from this date – Robert Fullarton, Chairman. “The Victorian Steam Navigation Board having beard the statement of Captain Frederick Chapman urged in his defense to the charge of dereliction of duty as master of the Julia Percy, in having no standing order on board that vessel to be called in the event of any approaching steamer’s lights being seen, find such charge sustained, and censure him accordingly – Robert Fullarton, Chairman.” ABOUT “JULIA PERCY” The S.S. Julia Percy (later named Leeuwin ) was an iron passenger-cargo steam ship built in 1876. At one point in time the Julia Percy would sail from Warrnambool to Melbourne every Friday and return from Melbourne to Warrnambool every Tuesday. The cost of a return ticket for a Saloon Fare was £1.0.0. She would sail “if practical and weather permitting”. Shipping was the cheapest and most practical means of carrying produce and goods during the period 1840-1890. Regular domestic steamer services commenced in the Warrnambool district in the late 1850’s and by 1870 the passenger trade was booming. Produce was loaded from the jetty into ‘lighters’ (small boats), which took it to the ships at anchorage in the bay. Passengers were taken to the ship’s side then climbed aboard up ladders or gangways. The coming of the railway in October 1889 meant the gradual decline and end of the steam shipping era. The Julia Percy was built in Glasgow by Thomas Wingate & Company, Whiteinch, in 1876 for the Warrnambool Steam Packet Company, which commissioned her for trade in Victoria’s western district. She was first registered in Warrnambool, Victoria in 1876. The Julia Percy changed hands several times. Her next owner was the Western Steam Navigation Co (1887), managed by Mr. T.H. Osborne (the company’s office was on the corner of Timor and Liebig Streets, Its north-western wall is now part of the current Warrnambool Regional Art Gallery. ) The Melbourne Steamship Co became the next owners (1890), followed by William Howard Smith and Sons (1901) for use in Queensland coastal trades, then she was bought by George Turnbull in 1903 and used for local mail contract in Western Australia. The Julia Percy was sold to the Melbourne Steamship Company Ltd. (1906) and re-named the “Leeuwin” but continued in her Western Australian coastal run. She was converted into a coal hulk in Melbourne in 1910 as a result of damaged caused when she was driven against the jetty at Dongara during a gale. The ship was eventually dismantled and scuttled in Bass Strait on 28 December 1934. The document is significant for its association with the wreck of the Leeuwin (Julia Percy), which is on the Victorian Heritage Register, VHR S413. . It is historically significant for being a rare artefact that has potential to interpret aspects of Western Victoria’s 19th century steamship trade and Victorian cultural history. The Leeuwin (Julia Percy) is listed on the Victorian Heritage Register as being historically significant ‘as one of only four wrecks of steamships in Victorian waters associated with the western district of Victoria’s coastal steamship trade. Reports of Victoria Steam Navigation Board about the collision on 25th December 1881 between the steamers " Julia Percy" and "Nelson". Letter from Victoria Steam Navigation Board, Melbourne to Frederick Chapman, Master, S.S. "Julia Percy", dated January 12th 1882. reference on letter in left margin "S82/12"flagstaff hill, flagstaff hill –maritime museum, maritime museum, shipwreck coast, flagstaff hill maritime village, victoria steam navigation board, captain frederick chapman, captain thomas smith, thomas wingate & company, steamer julia percy, steamer leeuwin, steamer nelson, steam ship, warrnambool steam packet company, t. h. ostorne, western steam navigation co., charles cutler -
 Ballarat and District Irish Association
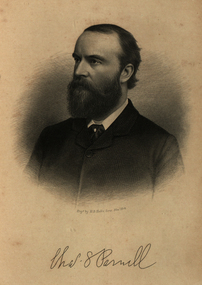
Image, Charles Parnell, c1864, 1864
Parnell was an Irish nationalist and statesman who led the fight for Irish Home Rule in the 1880s. Charles Stewart Parnell was born on 27 June 1846 in County Wicklow into a family of Anglo-Irish Protestant landowners. He studied at Cambridge University and was elected to parliament in 1875 as a member of the Home Rule League (later re-named by Parnell the Irish Parliamentary Party). His abilities soon became evident. In 1878, Parnell became an active opponent of the Irish land laws, believing their reform should be the first step on the road to Home Rule. In 1879, Parnell was elected president of the newly founded National Land League and the following year he visited the United States to gain both funds and support for land reform. In the 1880 election, he supported the Liberal leader William Gladstone, but when Gladstone's Land Act of 1881 fell short of expectations, he joined the opposition. By now he had become the accepted leader of the Irish nationalist movement. Parnell now encouraged boycott as a means of influencing landlords and land agents, and as a result he was sent to jail and the Land League was suppressed. From Kilmainham prison he called on Irish peasants to stop paying rent. In March 1882, he negotiated an agreement with Gladstone - the Kilmainham Treaty - in which he urged his followers to avoid violence. But this peaceful policy was severely challenged by the murder in May 1882 of two senior British officials in Phoenix Park in Dublin by members of an Irish terrorist group. Parnell condemned the murders. In 1886, Parnell joined with the Liberals to defeat Lord Salisbury's Conservative government. Gladstone became prime minister and introduced the first Irish Home Rule Bill. Parnell believed it was flawed but said he was prepared to vote for it. The Bill split the Liberal Party and was defeated in the House of Commons. Gladstone's government fell soon afterwards.(http://www.bbc.co.uk/history/historic_figures/parnell_charles.shtml, accessed 21 January 2014) The Irish National Land League (Irish: Conradh na Talún) was an Irish political organisation of the late 19th century which sought to help poor tenant farmers. Its primary aim was to abolish landlordism in Ireland and enable tenant farmers to own the land they worked on. The period of the Land League's agitation is known as the Land War. Within decades of the league's foundation, through the efforts of William O'Brien and George Wyndham (a descendant of Lord Edward FitzGerald), the 1902 Land Conference produced the Land (Purchase) Act 1903 which allowed Irish tenant farmers buy out their freeholds with UK government loans over 68 years through the Land Commission (an arrangement that has never been possible in Britain itself). For agricultural labourers, D.D. Sheehan and the Irish Land and Labour Association secured their demands from the Liberal government elected in 1905 to pass the Labourers (Ireland) Act 1906, and the Labourers (Ireland) Act 1911, which paid County Councils to build over 40,000 new rural cottages, each on an acre of land. By 1914, 75% of occupiers were buying out their landlords, mostly under the two Acts. In all, under the pre-UK Land Acts over 316,000 tenants purchased their holdings amounting to 15 million acres (61,000 km2) out of a total of 20 million acres (81,000 km2) in the country. Sometimes the holdings were described as "uneconomic", but the overall sense of social justice was undeniable. (http://en.wikipedia.org/wiki/Irish_National_Land_League, accessed 21 January 2014) The Irish National Land League was founded at the Imperial Hotel in Castlebar, the County town of Mayo, on 21 October 1879. At that meeting Charles Stewart Parnell was elected president of the league. Andrew Kettle, Michael Davitt, and Thomas Brennan were appointed as honorary secretaries. This united practically all the different strands of land agitation and tenant rights movements under a single organisation. The two aims of the Land League, as stated in the resolutions adopted in the meeting, were: ...first, to bring out a reduction of rack-rents; second, to facilitate the obtaining of the ownership of the soil by the occupiers. That the object of the League can be best attained by promoting organisation among the tenant-farmers; by defending those who may be threatened with eviction for refusing to pay unjust rents; by facilitating the working of the Bright clauses of the Irish Land Act during the winter; and by obtaining such reforms in the laws relating to land as will enable every tenant to become owner of his holding by paying a fair rent for a limited number of years. Charles Stewart Parnell, John Dillon, Michael Davitt, and others including Cal Lynn then went to America to raise funds for the League with spectacular results. Branches were also set up in Scotland, where the Crofters Party imitated the League and secured a reforming Act in 1886. The government had introduced the first ineffective Land Act in 1870, then the equally inadequate Acts of 1880 and 1881 followed. These established a Land Commission that started to reduce some rents. Parnell together with all of his party lieutenants, including Father Eugene Sheehy known as "the Land League priest", went into a bitter verbal offensive and were imprisoned in October 1881 under the Irish Coercion Act in Kilmainham Jail for "sabotaging the Land Act", from where the No-Rent Manifesto was issued, calling for a national tenant farmer rent strike which was partially followed. Although the League discouraged violence, agrarian crimes increased widely. Typically a rent strike would be followed by evictions by the police, or those tenants paying rent would be subject to a local boycott by League members. Where cases went to court, witnesses would change their stories, resulting in an unworkable legal system. This in turn led on to stronger criminal laws being passed that were described by the League as "Coercion Acts". The bitterness that developed helped Parnell later in his Home Rule campaign. Davitt's views were much more extreme, seeking to nationalise all land, as seen in his famous slogan: "The land of Ireland for the people of Ireland". Parnell aimed to harness the emotive element, but he and his party preferred for tenant farmers to become freeholders on the land they rented, instead of land being vested in "the people".(http://en.wikipedia.org/wiki/Irish_National_Land_League, accessed 21 January 2014)Image of bearded man known as Charles Stewart Parnellballarat irish, parnell, charles parnell, home rule -
 Federation University Historical Collection
Book, D.C. Davies et al, Metalliferous Minerals and Mining, 1892
... stopes ...Brown hard covered, illustrated book of 518 pages. It includes a bookplate of the Ballarat Ironworkers' and Polytechnical Association Library Rules. The book was bequethed to the Ironworkers' Association by the late James Oddie.mining, minerals, quartz, nova scotia, california, germany, ural mountains, gold deposits, virginia, new england, new brunswick, brazil, australia, new south wales, mount morgan, new zealand, africa, statistics, india, phillipines, aruba island, silver, russia, nevada, ruby hill, nevada, utah, emma mine, nevada, colarado, red mountain district, colorado, yankee girl mine, arizona, mexico, peru, bolivia, chili\copper, south africa, italy, austria, norway, swedan, france, cornwall, dolcoath mine, sandstone, parys mines of anglesea, carnarvonshire, cardiganshire, wicklow, ireland, mississippi valley, wisconsin, lake superior, wyoming, cuba, jamaica, venezuela, south australia, york peninsula, flinders ranges, japan, tin, banca, malaysia, bohemia, saxony, sweden, spain, cligga point, rin lodes of cornwall, andalusia, belgium, shropshire, isle of man, durham, westmoreland, limestone, flintshire, dengigshire, canada, lead, zinc, siberia, hungary, silesia, sardinia, algeria, ireland, new jersey, iron, lancashire, missouri, michigan, superstitions, equipment, cages, stopes, winzes, timbering, ventilation, fans, drilling, boring, dynamite, electricity, blasting, horse whims, water wheels, boilers, petterson's elephant ore stamp, stamper battery, jogs, linkenbach table, panning, cradle, quartz mining, hydraulic mining, alluvia; mining, altai mountains, north wales, neugluck mine, freiberg, christbescherung mine, drei prinzen lode, miask, woodville, virginia, gongo soco, brazil, sierra nevada, california, st john del rey mine, brazil, leydenberg gold field, south africa, banket reefs, transvaal, kongsberg, norway, santa rosa mine, peru, huelva, spain, dolcoath mine, cornwall, parys mine, anglesea, waterbury copper mine, lake superior, copiapo, chilli, altenberg, saxony, whea; uny, cornwall, wast wheel mine. redruth, cornwall, cligga point, cornwall, old hewas mine, cornwall, hartz, germany, snailbeach mine, shropshire, llangynog, north wales, van mine, mongomeryshire -
 Melton City Libraries
Newspaper, Oral History Day, 1992
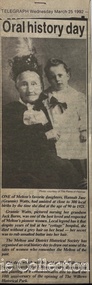
Mary Tolhurst M&DHS - March 29th Dunvegan Willows Park Melton 1992 Ladies Oral History Day Graham Minns President Ray Radford MC Sound recording transfer to CD 2011 by Tom Wood Edited typescript by Wendy Barrie 2013 I was born in Rockbank, and when I was five years old moved to Toolern Vale and started and finished school there. Toolern Vale only consisted of the Store, Post Office and shop, where you could buy your fodder, and pollard supplies, the Hall, the little Church and the bluestone School. The School changed shape three times from the 1800s[1869] til the time I went there. There was four generations of my family that went there and it was destroyed by fire in 1965. Marjorie nee Myers Butler. Yes, I remember along with it your lovely Ronisch piano. Mary, quite true! Marj what you say about the Ronisch piano. When I came the age to learn music my mum and dad couldn’t really afford it, but still what parents do for their children. They had Marj go along with them and pick this lovely Ronisch piano. It was known round the district. Everyone commented about the loss that lovely piano. After leaving school it was war time, 1939, then it was work, When I was 7 year old I was put out into the cow yard. In 1940 when the soldiers were going away our milk was confiscated it had to go to Bacchus Marsh. It used to go the Sunbury to be brine cooled and then go to Melbourne. Then they took it then to the Lifeguard Milk Factory at Bacchus Marsh. It had to go as condensed milk to the soldiers. This year is 50 years of the Land Army. I was an unofficial Land Army but they still kept check on me. I went onto married life and I followed the cows right through [howls of laughter] and we went on until the 1965 fire. That’s when we got out of the cows. Marjorie asks, was Granny Watts your grandmother or great grandmother? Mary: She was my great grandmother, the midwife of Melton. The 1965 fire started ¾ of a mile above our place, Frank Ryan’s sheds were burnt and his house was saved, then it wiped the School out, the Hall, the Church the Post Office and Store and little house that was Charlie Charlton’s in the early days. Mrs Wilson’s place was saved by the Fire Brigade by pulling boards off the side, and from there it went over the hill and it was stopped at the Rockbank Railway Station. If it had of got over the railway they said it would have gone into Werribee. A lot was burnt out in that strip. Mary nee Nixon Collins: 18 houses burnt that day. Audience question, did Melton get burnt that day? Ray: No. It came down through the Toolern Vale road and cut across about a mile and a half from the cross roads at Toolern Vale from north westerly to the south east and cut through over the Keilor road. Mary: It came in across the creek at Funstons in Toolern, then through Jim Minns. Dorothy was it your place then [nee Knox Beaty] to Ken Beatty’s and from there it went through to Doug McIntosh’s and to Cockbills and the wind changed and it came across to the railway line, and that is where they stopped it. [the cause of the fire was controversial, they had been burning off the night before and there was some talk of someone starting it. It was very hot and very strong wind, it was a terrible day] Ray: When the fire went through McIntosh’s they had a haystack on the north side of their house and the haystack got caught and the fire burnt a hole through the side of the house and the boys pyjamas on the bed. The house was saved. It came through like and express train roaring at you, I was at McIntosh’s when it went roaring past. You couldn’t see, dust and ash and tremendous heat. The fire started about 12 o’clock Jack [husband] said to me, fire, I said where, where? Just up the road, what have I got to do? and he went out and he had gone to the fire and left me. I tried to get the animals and I put out buckets of water, putting the buckets of water out saved my life. Chas Jones and another friend of his came in and they picked up the buckets of water, I thought I had better get out because the fire was on the haystack up the paddock and when I went to go out through the north side of the house and couldn’t get out, I’ll go through the front gate so I went around the other side of the house. I got caught there and Chassy Jones and his friend came round carrying the bucket of water and I panicked. He threw the bucket of water over me. Well that is what saved my life because I was damp, whenever we tried to leave the ball of fire came over me and over my shoulder and my hair was scorched. Chassy Jones lost his truck and Keith Watt his big truck because he had the water tank on it and they couldn’t get out of the yard. Granny Watt’s house, the first private hospital had condemned and Jack and I pulled it down and had it moved up to Toolern and had it in the yard a fortnight and it was all burnt and we didn’t get the shed we wanted. Every 13 years right up until Ash Wednesday fires, there has always been fire close at hand. The 1952 fire went down the back of the house, the 1965 fire took the house, and the house that I live in now, it is the third house that has been on that spot. When the Hunters owned it, Mrs Hunter was nearly burnt in her bed. They had a 13 roomed house. In 1924 the house burnt down, and there was another house was built there and that was the one that burnt down. Edna: So Mary built a brick veneer house. Marjorie: like the three little pigs [laughter] Collins - Mary M &DHS - March 29th 1992 Ladies oral history day at Dunvegan, Willows Park Melton. Graham Minns President Ray Radford MC Sound recording transferred to CD 2011 Edited typescript by Wendy Barrie 2013 Mary Collins nee Nixon born in Terang 1907 down in the Western District and we shifted to Melton when I was 5 and a half then I started school here in Melton, and spent all my school life at Melton State School, next to the Church of England, it’s called the Primary School now. I got my Qualifying and Merit Certificate then I left School because there wasn’t a High School. When I was 16 I got and job in the Melton Post Office and I worked there, I was the first girl in Melton to deliver the mail, and worked on the telephone and the Bank business. Mrs Ross and myself behind the counter, there were about 500 – 600 people in the Shire at that time and now when I go into the new Post Office there is 36,000 here there’s still 2 people behind the counter [laughter from the audience] and wait in a queue right out to the door. Times haven’t changed much have they! There was a manual telephone and you had to ring the handle, and there were eight subscribers when I went there and when I left there were 46 I had coaxed that number to join the telephone, even the police station didn’t have the phone on. The two Hotels and the two Chaff mills and Mr Ernie Barrie, Parkers the butcher, the Shire Office was No 8, and the Police house was next to the Courthouse on the corner. They were number 9. I can remember a lot of the numbers still. The Post Office was the Agency for the Commonwealth Bank [comment from audience member] I used to do the Bank business too, I left after four years there, mother wasn’t very well. The Inspector who used to come up to the Post Office asked me if I would take up casual Post Mistress and to go around the different districts but I refused and when Mrs Ross’s holidays were due I was the replacement. I wasn’t 21. I loved my work meeting everybody and most people had horse and jinkers and when the elderly would come in there would be Mr Tom Morrow, he only had one arm and Mrs Dunn came from Bulman’s road in their horse and jinker. They were elderly I would see them pull up out the front and quickly get their mail and run out to them because they didn’t have to get out of the jinker to tie up their horse. If someone had a baby in arms I would tear out and hold the baby while they got down. Mrs Ross was very very strict. I had to sweep the Post Office, she had a couple of mats and there would be a threepence or a sixpence under the mats show she knew whether I lifted the mat, I was whether I was honest or not. Graham: How much were your wages? I got 27/7 pence a week for a 52 hour week. I had to work every holiday except Good Friday and Christmas Day and even when it was Monday holiday I always had to go to work from 9am - !0 am, the Post Office was always open. In the winter I had to wait until twenty past six in case there were any telegrams to deliver. I delivered them on a push bike. One time Tom Barrie told me this years afterwards. I used to go home for lunch. We lived on the Keilor road and I used to ride my bike home. On the hot days the boys used to go and swim in the swimming pool down near a turn in the creek there was a hole where the boys would swim in the nude, they didn’t have any bathers and they didn’t have any watches in those days. Tom Barrie said they always used to watched for me as I was always about 3 minutes past 1, my lunch hour was from 1-2. One particular day they missed seeing me and swam on, and of course they were all late for school when they got back and were all kept in a night. I did get a fortnight holiday. I loved my work and I knew everyone in the district right from Toolern Vale to the Marsh and everybody at Melton South. Did you listen into conversations on the Switchboard? Oh no. [laughter] Melton did not have electricity then. I had to fill the lamps everyday with kerosene. The Staughton Memorial was outside the Post Office. It had four posts with the chain looped around it, and that’s where the people used to tie up their horses. Marjorie nee Myers Butler comments about sitting and swinging on the chains. Mr Fred Coburn lit the acetylene gas light in the Memorial. It was the only streetlight in Melton. There was no electricity until 1939. Ray Radford comments about another gas street light which was on the corner of Station road. [later] Mary passes around her school photos. Mary mentions the names of those who have passed away, Maisie McDonald, ,Marian Wraith, Hilda McCreey, and Valda McDonald. I have written the names on the back. Marjorie comments about Marie Jongebloed and Greta are the only two girls left out of big family of ten I think there were [hesitates] 4 or 5 girls and the rest were boys. Mary. Flora Woodley, Dorrie Flynn and Margaret McDonald are still alive. They are my age we were all born about 1907. Marjorie points out herself in a later photo [1921 and 1922 School ] Mary mentions the name Walsh and identyfies following names, the Parker boys, Ken Beaty, Malc and Linda Cameron, Maisie Mc Donald, Ted Radford, George Nixon, Norman Minns, he was later the Shire Secretary of Werribee. One of the Woodley girls. [Maisie Arthur] Marjorie: Rosie Shearwood, June Whiting Mary. Lily Mc Donald, she has passed away. Isabel Harrison nee Tinkler, she lives at Werribee, Doreen Rogers, Marjorie Walker, Jess McIntosh, Mary Gillespie. Mr Malone was the Junior teacher Mr Roe and Miss Cooke. Fred Myers, my sister [Elizabeth] and the year was 1921. Myers (Barrie) School Photo Collection. Many of the names were identified at the 1970 Centenary of Melton State School No. 430. Edna Barrie organised, compiled and typed the lists to accompany these photos for the year 1921. The 1922 photo shows the higher grades. Ladies Oral History Day event held by Melton and District Historical Society, article featured in the Telegraphlocal identities, local special interest groups -
 Ballarat Tramway Museum
Film - Movie Film & Box, Kodak, 1960 to 1971
Yields information in movie film format of Ballarat trams in 1960 through to 1971, how the system operated and was used by people, including special trams., Yields information in movie film format of Ballarat trams in 1960 through to 1971, how the system operated and was used by people, including special trams.Movie film - 8mm, approx. 15 mins, without leader strip on a plastic reel, within a clear plastic case - Standard 8, titled "Ballarat Trams". See Reg Item 4957 for DVD and Mini DVD. Has been transferred to DVD - see Reg item 4957 Made by Arthur Hill. Also transferred to DVD by Rod Cook Oct. 2015, via Roger Greenwood for use in his DVD, "The City of Ballarat Trams, Gardens & Gold" of 2016. See Reg Item 6883. In Arthur's letter - on file - Made between 1960 and August 1971. Synopsis: based on time. Between 1960 and 1968 0:00 Trams Ahead sign before the Victoria St terminus with 20 at terminus 0.14 - No. 20 leaving Victoria St terminus and being followed along Victoria St by car and then passengers jointing the tram at a tram stop. 00.40 - No. 12 (c1960) in bound along Lydiard St North and arriving in the Gregory St loop. 00.56 - No. 12 and 14 crossing at Gregory St. 01.20 - No. 33 and a bogie car crossing at depot loop. 01.31 - No. 18 travelling along Wendouree Parade with the Lake in the background. 01.42 - No 41 at depot junction and running into the depot No. 2 road with a short sequence of a tramway signal. 02.17 - SEC Sign at the depot gate, shot of 41 in No. 2 road, with the lights other way around, Caution beware of trams sign and a red signal. 02.31- Timetable sign at Gardens Loop 02.36 - No. 30 arriving at Loop and view of a signal with no lights showing. 02.48 - Destination roll being changed through a number of destinations. 03.26 - No. 20 arriving at Carlton St loop with the Olympic monument in the background and the red signal light going out. 03.31 - a lady standing at the front of No. 20, with an ice cream in hand, and No. 17 arriving at the Carlton St loop with a short sped up sequence and No. 20 departing from the loop, followed by No. 17 leaving the loop, heading into the city. 03.41 - No. 13 inbound from Sebastopol crossing Albert St and heading into the city. 04.12 - view of signal and contactor, the light going green and the tram passing underneath. 04.24 - No. 12 at the Sebastopol terminus and departing. 04.51 - No. 12 crossing Albert St Sebastopol. 05.16 - Following No. 12 along Albert St, with Borough Offices in background initially. 05.28 - No. 12 arriving at the Grey St loop with No. 14 arriving at the loop from the city and both trams departing. March 1971 05.58 - No. 30 being followed along Barkly St, Mt Pleasant and the pole being turned at the terminus 06.32 - No. 30 picking up a lady passenger. 06.38 - view from the front of a tram, with the drivers hand and a cigarette, view from the back of the tram, along the Mt Pleasant route and running through the loop and then turning into Main St - has the Ballarat (East) fire station in one sequence, and finally running along Main St. 07.35 - view from tram, with car turning into Bridge St. and then running into Sturt St passed the Parking Loop, and along Sturt St. 08.32 - Points at Drummond St North being changed, doors changed over and the tram running along Drummond St. North, through the Mill St loop and into Macarthur St and in Wendouree Parade, with the Lake Wendouree in view and crossing No. 12 at the Depot Loop, with crews chatting, past the depot, a lady passenger getting off the tram near Forest St., and arriving at Gardens Loop with the same lady passenger who got on in Barkly St, getting off the tram. 11.09 - view of No. 30 at Gardens Loop, departing the loop. August 1971 11.30 - R761 crossing Melton (Exford Wier) on the special train to Ballarat and then the bridge between Ballan and Gordon Stations. 12.16 - View from the front of a tram, following No. 26 along Lydiard St North, crossing at Gregory St and returning to the City. 12.39 - No. 14 and one other tram running along Albert St to Sebastopol, crossing No. 21 at Grey St and then to Sebastopol terminus, crossing Albert St and return and running along Albert St. 13.36 - No. 26, 39 crossing 13 at Gardens Loop. 14.00 - view looking across Lake Wendouree. 14.07 - 26 arriving at Victoria St, running part of Destination roll, passengers getting off with hotel in the background, trolley pole being turned and then with 39 following tram along Victoria St, crossing at the King St Loop. 15.07 - view of a trolley pole tracking through the overhead at curve 15.10 - end. Written labels giving title information on reel.trams, tramways, ballarat, sebastopol, lydiard st north, victoria st, mt pleasant, lake wendouree, depot, tram 12, tram 13, tram 14, tram 17, tram 18, tram 21, tram 26, tram 33, tram 39, tram 41 -
 Melton City Libraries
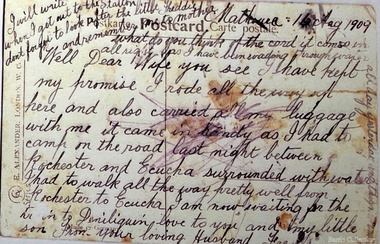
Postcard, Postcards from Fred and Mattie Myers, 1909-1914
Post Card: Melton Railway Station 1909 Mattie to Fred My Dear Fred I received your letter and the L2 10/- I was very pleased to hear that I could write again. You say you will come home after the last shead. I should think so. I had a letter from E Jenkins so I am going down to see her next week we call the baby Fernie now I hope you will agree. Dear Fern has got the whooping cough. Written on the side: I suppose you will be away four weeks yet. Love from Mattie will write on Sunday. This letter appears to be connected with the post card Barwonleigh Saturday October 1908 handwriting My Dear Mattie I received your letter and was sorry to hear of our dear little babys misfortune how did it happen do you know what was the cause of it Mrs Watts must be a blind old fool not to have known what it was when you took him to her the first time poor dear you must be worried to death with all this trouble tell me what the doctor thinks of the rupture. I do hope dear he will get over this all right you must be nearly dead going without sleep for so long I had a bit of misfortune myself on Thursday the machine locked and jumped out of my hand and stuck in my bone I kept on working but it was very painful as all the holding is done with the..next page ..knee the boss also has been chipping a good deal this week he says the next time he has occasion to speak to me I will have to go he is very particular. I would like to go through if possible even if I do a lot less. I have about sixteen hundred done up to now and would get another nine hundred if I was let alone but I suppose we will live lovie even if I go do you know if they are full handed at Eynesbury if I thought I could get a week there I would cut myself out here quick. Well dear lovie I am sending you a couple of pounds as I suppose you will want it to get a truss. I don’t think they are very expensive and hope things will find this better with you. Well my dear love I must close with fond love for you and baby from your loving Husband Fred Post Card: 16 Aug 1909 - Mathoura The card depicts a small sailing boat laden with blue flowers. Well Dear Wife you see I have kept my promise. I rode all the way up here and also carried all my luggage with me it came in handy as I had to camp on the road last night between Rochester and Echuca surrounded by water. I had to walk all the way pretty well from Rochester to Echuca. I am now waiting for the train to Deniliquin. Love to you and my little son Fred. From you loving Husband Fred Written along the top and side of the card. what do you think if the card comes in all right as I have been wading through water all day yesterday and this might be …? will write when I get to the Station, don’t forget to look after the little Freddie and remember me to mother. Post Card: 1909 - view across the Flat from the Creek looking to the Presbyterian Church in the distance with some small dwellings in the foreground. To Mr Fred Myers Wandook Stn Denniliquin NSW Dear Fred, received your letter I am sorry to hear you are having such wet weather I will write a letter tomorrow baby is better With Love from M Post Card: 1910 Postmark Stamp 1d Aug 12 1910 Moama NSW Melton postmark stamped Aug 25? Hare Street, looking south Echuca Mrs F Myers, Melton P O Vic Dear Mattie, Just a line to let you know I got here all right I go to Pericotta tonight and to Cobran to morrow best love to all from yours Fred Letter Cobran Stn Via Deniliquin N.S.W. Sunday 21st Aug extract I am having a good time here, a good cook and the best of everything no fires to light or kettles to boil just get up and wire in… plenty hard work the sheep are pretty tough but much better than Wandook. I am well among them here we had a little rain on Friday but not enough to stop us so we have got one full week in .. the weather is lovely. I have been basking in the sunshine mainly in the morning and feel strong and fit a as fiddle, they are a grand lot of men here I only knew one out of the lots but know them all pretty well now, we have a bit of a concert here every nights almost there are a few good singers here and we also had a phonograph up from the station with all the latest records we have two dancers among ourselves very boisterous affairs indeed thy do make the dust fly. I have not ventured to take part in it and don’t think I will either. I get enough dancing all day long and besides I have to furnish the music you ought to see them going when I rattle up the concertina. Letter Cobran Stn via Deniliquin Thursday Sept 1st 1910 [abbreviated] My Dear Mattie, I received your welcome letter today. I though I was never going to get one as it was Sunday fortnight when I wrote to you but we only the mail here twice a week so it takes a long time to write and get an answer. I also got a reply from Eynesbury and a favourable reply it starts on the 13th Oct. …. I have 800 sheep shorn up to date and am fifth among about 30 men. I am sending two more [Ls] this time which I drew on Saturday. I don’t like sending too much more this time as there is a chance of it going astray and it is not very easily earned…. Things must be humming in Melton with all them babies coming and people getting married… I suppose we will be having new neighbours soon. If Mr Watts is selling out he was getting more property then he could keep. I hope you will soon have rain…. you will have to watch our little boy the dear little rascal he must be getting very cute opening the gates he will be tumbling into the tank …. I love to think of the happy times we have had together and hope that we will love one another to the end .. the mail will not leave here until Monday Love to you dear wife and baby Fred Post Card: – I Cling to you like Ivy Cobran September 18th 1910 Fred awaits a letter from Mattie I still have three weeks here yet.. I am sending L2 tell if you got the other 1L 1911 Letters Fred to Mattie October Spring Plains Oct 1911 Mia Mia Post Office I had a great job to catch the train at Diggers Rest as after I turned off the Keilor Rd it was very way and muddy and I had to walk a lot of the way and got there just in time. I came right into Redesdale by the train and stopped there last night… they had heavy rain on thursday up here and a tremendous fall of hail which covered the ground over a foot deep. There are only 4 shearers here yet.. I saw some of the sheep they look very rough and big so there will be no big tallies done, the men are saying he is giving 2s per hundred extra, so that will help a little. We are going to start Cobran via Deniliquin. Post Card: three scenes of Mathoura 10/9/1914 EB on a photo copy 10/9/12 ? Mathoura Thursday Dear Mattie, Just a line to let you know I got up here all right. I rode the seat out of my trousers. I have done 100 miles on the bike. I met none of the old hands this time so will go out on my own… Your loving husband Fred, did Marjie miss me at all. Post Card: Cobran 15th Sept 1912 Hearts and intertwined flowers and little envelope he has written Marjorie …just a line to let you know I will cut out here Friday next in find, we have had two falls of rain since I wrote and it has bean blowing a hurricane for couple of days and may blow up again however if we are delayed I will send you a card Wednesday I am longing to see you and the two little kiddies again…. Fred Copy only Golf Hill Sep 26th Cut out 31 Oct Total 2332 1913 Post Card: Scene View Street, Bendigo August 1913 Mathoura Tuesday My Dear Mattie Just a line to let you know I got up here all right. Teddy Ginger and another couple of chaps on the way ……. Letter Cobran Sunday Aug 7th 1913 My Dear Mattie Just a line to let you know that weather permitting we will cut out here about Thursday morning….I have not got any more shearing here. I have not heard from the other place…. Expect me about Friday …. I suppose Freddie and Marjie will be glad to see me, Marjie will climb all over me. I will be glad to se you all again you will have a fortnight before Golf Hill starts. I see in the Express you sent that Annie McPherson of (Dunvegan) is engaged to Len Farrell, she appears to be going to take no risks with him she wont let him slip through her hands like the banker did…… Fred Post Card: 1914 Garland of roses Warrambeen Stn Shelford PO October 14th 1914 Birthday wishes. Post Card: Love’s Golden Chain Golf Hill Tuesday Oct 17 1914 Birthday wishes [ this one might be a different year] Letter Cobran Wed 2nd Sept 1914 My Dear Mattie, I received your welcome letter today and also the papers which were very acceptable as we don’t get many papers here we only get see one at odd times as we get none for the hut this year.. I have not seen a bit of butter since I left home as it is too dear for us for sinners here. Poor Marjie had a cold.. so the little kid wants to go to the war, she must think it is good like a picnic. We had light rain on Monday as usual only half a day’s shearing in the shed so that is all we done this week, we took a vote 9 to 6 no shearing so nothing till to morrow morning Thursday so there is still a good fortnights shearing to do, will do nothing Saturday polling day as we have to go 13 miles is near Services where I was last year so we will want the full day 50 men to vote and some will probably have to walk to get there, all solid for Labour. I have just had an interval for lunch, pudding, yeast buns and rock cakes… We are doing nothing but eating and sleeping this week. Fred I am sending L1 in this which will do you till I come back if I keep drawing up I will have none when I finish so make the most of it. Post Card: Two doves with violets 1915 Cobran Wed 18th Sept [could be 1912] Sorry to tell you we are delayed with rain so will not be home till next week… only 3 days of shearing to do…. expect me about the middle of next week….I wish I was with you now and the dear little ones Fred Post Card: Iris Flowers Barwonleigh Stn Tuesday Oct 14th 1918 Happy birthday greetings from Fred Post Card: Irrigation channel Swan Hill 5 Year not shown Swan Hill Tuesday night Just a few lines to let you know I got this far all right. I had to walk nearly all the way to Gisborne and got there last night and took the train here today. It has been raining all the way between Gisborne and here. Moulamein tomorrow. I think it will be another case of walking as it is wet here no metal roads all mud. best love to yourself and the little ones and also mother. will write Sunday Post Card: The White Man’s Burden.The writing on the back rubbed out Mattie has written, I was weighed and I am 8 stone 10 pounds. 14 Post Cards, some have the original dates, others have the date added later by Martha. Two envelopes, one with addressed to Melton postmark Moule, stamp torn off, the other Cards from my dear Fred. The letters and the notebooks can be cross checked according the their contents. Italics show the dates added by Mattie local identities -
 Melbourne Tram Museum
Magazine, Melbourne & Metropolitan Tramways Board (MMTB), "Metra News", 1980 to 1982
Magazine, two colour printed on A2 sheet, folded to A3, "METRA News", published by the MMTB. Each issue unless noted otherwise four pages. Major items listed. Each issue has personnel news, including new staff, promotions, overseas items; .0 - Autumn 1980 - Passenger counting, Survey provides data, We lead the way with Z3, Wattle Park, transport in Moscow, Spike Milligan, Melbourne's decorated trams, transporting art, sports, training, and Raymond Stock, Assistant Traffic Manager Revenue. See htd1026i1 and i2 for images. .1 - Winter 1980 - Bourke St Mall is popular, Senior citizens help design new tram (Z3), A bus-only lane in Johnstone St., Depot Employees' Social and facility Melbourne. Has a profile on Mr R. C. Drummond, Traffic Manager. .2 - Spring 1980 - Christmas Message, supporting those children with polio in 1938, Trolley buses, Z3 trams being built, use of parafil in overhead, cleaning truck. Has a profile on Ken Hall, Assistant Chief Engineer - Mechanical and Reg Robinson who was the organiser for the 1938 polio event - bus driver / instructor. .3 - Summer 1981 - MMTB involvement with Australia Day pageant, note involvement of TMSV, Bendigo, BTPS 27 (26 Jan. 1981), film on apprentices, tram stop shelters, resilient track work, trolley buses, the supply and systems department including Hawthorn clothing workroom and printing department (photos) and profile on Mr Jerry Compton, Supply and systems department. (Two copies held) .4 - Autumn 1981 - new buildings at Footscray, South Melbourne, trolley buses for Melbourne?, building MAN buses, why join the Tramways Benefit Society, article that looks at the Engineering Branch and profile of John Grigg, Chief Engineer. (Two copies held) .5 - Winter 1981 - New passenger shelters, image of the Elizabeth St shelter proposal, where do old trams go?, "Around the Clock" Emergency Service (item on R10) (See Reg item 1004 for photo), formation of Tramway's Sporting Associations, retirement of Board's driver Peter Savage, bus driving school transferred to Hawthorn, Apprentices and Profile on Bill Sibbison, Depot Manager North Fitzroy. .6 - Spring 1981 - 8 pages - Making of Squizzy Taylor film - Flinders St station, Engineering Amenities at South Melbourne opened, traverser at Preston Workshops, track work - pressing curves at South Melbourne, Conductresses re-union, model tramway at the Royal Show, retirements, sporting association, tramway band, AVM, reducing noise levels, lists Editorial committee. .7 - Summer 1981 - 8 pages - Its Christmas Party time, want to charter a tram or bus?, portable radios, MMTB role in Paraplegic Games, MMTB Architect Gene Marshall retires, photo of WW2 most popular conductresses ball, MMTB Highlights, O-Bahn. Has a profile on Rob Downing - Deputy Chairman. Also Dick Newnham - lift operator at head office, Bob Moffatt - driver turned actor. Also has a follow up on the making of the Squizzy Taylor film "What's wrong with Squizzy" and a photo of the Editorial team and their names. .8 - Autumn 1982 - 8 pages - item on "Taking Melbourne by Storm", photo of Austerity bus 500, Radio Centre, Clifton Pugh tram 504, Essendon Depot (see Reg Item 1005) includes of photos of managers, revenue etc, story on the most popular conductress photo by Win Gibson (see Reg item 180 and 181), new apprentices, John Murdoch model train (Diamond Valley) builder, Sunday vintage tram service (V214) and L class to the zoo. Has a profile on Mr. Peter Saul, Architect. (two copies held) (see image 1178i5 for cover) .9 - Winter 1982 - 8 pages - changes to Doncaster bus - Eastern Free extension, changes to Ministry will affect Board - Steve Crabb, new uniforms, Footscray Depot, apprentice awards, follow up on Austerity buses, Norm Cross and Destination City, Profile on Alan Nolan Runningsheds Engineer, and Mike McLeod MMTB Photographer. (two copies held) .10 - Spring 1982 - book - see Melbourne by tram, Bundoora tramway work, new articulated vehicles (B class trams), Elizabeth St modal interchange shelter, Brunswick depot, demise of the F class bus (Mark VI), profile of Daryl Meade bus engineer, Joe Saccasan carpenter building branch and a list of Jargon. (two copies held).trams, tramways, mmtb, z3 class, bourke st, track equipment, overhead, most popular conductress competition, hawthorn depot, clothing, trolley buses, fund raising, footscray, welfare, sale of trams, recovery, r10 vehicle, flinders st, films, radio centre, essendon depot, theatre, transporting art, austerity buses, footscray depot, doncaster, minister for transport, shelters, bundoora, brunswick depot, buses, mont albert, route 42 -
 Eltham District Historical Society Inc
Magazine, Sun News-Pictorial, Bush Fires: A pictorial survey of Victoria's most tragic week, January 8-15, 1939
THE WEEK REVIEWED (Article; Bush Fires: A pictorial survey of Victoria's most tragic week, January 8-15, 1939. Published in aid of the Bush Fire Relief Fund by the Sun News-Pictorial in co-operation with its newsagents, pp2-3) THE fiercest bush fires Australia has known since its discovery are quiescent at the moment, and Victoria, in the comparative coolness of the change which came with rain on Sunday night, has begun·to count its losses. In the fiery eight days, from Sunday to Sunday, at least sixty-six men, women and children have lost their lives in forest fires, or have succumbed to burns and shock; many others have died from heat; and several serious cases of burns are being treated in hospitals. Two babies in Narrandera district have died, and ten others are in hospital, because of milk soured by the record temperatures of those eight days. Forest damage totals at least a million pounds, and incalculable damage has been done to the seedlings which were to have been the forests of the future. Water conservation will be seriously affected by the silting-up of reservoirs and streams from which protective timber has been taken by the all-engulfing flames. More than a thousand houses have been destroyed, and these, with 40 mills, and schools, post-offices, churches, and other buildings, represent a loss of at least half a million. At least 1500 are homeless. For their aid, money raised in appeals has now passed the £50,000 mark, and the biggest relief organisation ever set up in peace time has swung into operation. The First Hint Victoria's first hint of what was to come appeared on Sunday, January 8, when most parts of the State awoke to find a blistering day awaiting. At 12.20 p.m., when the thermometer reached its highest for the day, 109.6 degrees, the first fire victims were at that moment going to their death on a bush track five feet wide off the main road to Narbethong. They were the forestry officers Charles Isaac Demby and John Hartley Barling, who went to warn Demby of his danger when he parted from his companions, and was himself surrounded by the treacherous fire. It was not until 8 o'clock next morning that the tragic news was flashed throughout the State. Searchers found the two charred bodies close together, one seeking protection in the nook of two logs. Barling's watch had stopped at 1.20. In the meantime, tragedy was spreading its cloak. By Monday, big fires were raging at Toolangi, Erica, Yallourn, Monbulk, Frankston, Dromana, Drouin South, Glenburn, and Blackwood, with smaller outbreaks at many other centres. In the ensuing week, while women and children were evacuated as fast as the flames would permit, Erica-scene of the 1926 fire disaster-thrice escaped doom by a change of wind. Indeed, those who have been in the fire country these past days say that the numbers of times a change of wind has saved towns from destruction is amazing. In the towns they speak of miracles. Monday's Miracles The escapes from Monett's Mill at Erica and from the Hardwood Company's Mill at Murrindindi, near where Demby and Barling went to their death, were Monday's miracles. Twenty came out alive from each mill. At the first a 60ft. dugout provided an oven-like refuge; at the second, 12 women and children survived in the smoke-filled gloom of a three-roomed cottage while their eight men, their clothes sometimes afire, poured water on the wooden walls. Three houses out of ten remained when the fire had passed. Record Temperatures Sunday had been the hottest Melbourne day for 33 years; Monday dropped to a 76.1 degree maximum; but Tuesday dawned hotter than ever, the mercury reaching 112.5. By now rumor was racing ahead of fact; whole towns were being reported lost; the alarm was raised for scores of missing persons. But fact soon overtook rumor, and within a few days the staggering toll began to mount to a figure beyond the wildest imaginings of the panic-stricken. Six died from heat on this torrid Tuesday, and the fires spread in a wide swathe from south-west to north-east across the State. Fish died in shallow streams. A curtain of smoke hid the sky from all Victoria, and hung far out to sea. It alarmed passengers on ships. On the Ormonde, on the voyage to Sydney from Burnie, women ran on deck, believing fire had broken out in the hold. Days later the smoke reached New Zealand. In Melbourne thousands of fire-volunteers were leaving in cars: vans, motor-buses-anything reliable on wheels-to aid the country in its grim fight. In the fires at Rubicon and. Narbethong, seventeen were facing death this day. But not till Wednesday, when Melbourne breathed again in a cool change, while the country still sweltered in temperatures up to 117 degrees, did the news come through the tree blocked roads. A woman and her little daughter, trapped on the road, were among those who died. Their bodies, and those of menfolk with them, were found strewn out at intervals along the road, where the furnace of the surrounding fire had dropped them in their tracks as they ran. Twelve died at a Rubicon mill, five on the road at Narbethong. At Alexandra, not far distant, a baby was born while the fires raged, and stretcher-bearers brought in the injured. On Thursday the State Government voted £5000 for the relief of fire victims. The Governor (Lord Huntingfield) and the Lord Mayor (Cr. Coles) visited some of the stricken areas, and dipped into their pockets personally. Later, the City Council, too, voted £5000. Friday, The 13th Friday, the Thirteenth, justified its evil name. A blistering northerly came early in the morning, presaging destruction, and forcing the mercury to a new record of 114 degrees. Racing fires killed at least ten in those terrible 12 hours. Four children were engulfed in the furnace at Colac. Panic drove them, uncontrollable, into the smoke-filled road when the fire raced down behind their home. They choked to death. In other parts fires were joining to make fronts of scores of miles. Kinglake was being menaced on two fronts, £60,000 worth of timber was going up in smoke in Ballarat district. Warburton was surrounded. Residents at Lorne, favoured resort, were being driven to the sea-front by a fire which destroyed at least 20 homes. Healewille. with flames visible from the town at one stage, was in a trough between two fires which burned four guest-houses, seven homes and left its surrounding beauty-spots wastes of bowed-over, blackened tree-fern fronds; with its famous Sanctuary, however, intact. Most of Omeo was destroyed this black day: Noojee. while 200 residents crouched in the river, was being reduced to a waste of buckled iron and smoking timber; Erica was once again saved by a change of wind. Beneath a pall of smoke, the Rubicon victims were buried at Alexandra. Friday night and the early hours of Saturday saw the streets of beleagured towns strewn with exhausted fire-fighters. Their flails beside them, ready for the next call, they lay where exhaustion overtook them-on footpaths, beside lamp-posts, in gutters, in cars, under trucks. Saturday's dawn brought clear skies and lower temperatures in many parts, and from the burnt-out areas came a great rush of tragic reports. The death-roll rushed past the fifty mark with incredible speed. Some had been trapped on roads, others at mills; some, after burying their treasures, had clung too long to the places they had made their homes for many years. Four men lost their lives because one went back for his dog. By Sunday, when the first of the saving rain came, nearly another score of names had been added to the list.Newspaper magazine, 48 pages (incl. covers). Fully digitised and searchable PDFPublished in aid of the Bush Fire Relief Fund by the Sun News-Pictorial in co-operation with its newsagents.bushfires, 1939 bushfires, black friday, warrandyte -
Ringwood and District Historical Society
Biography, Ringwood and District Historical Society, Interview notes - short biography on Miss Daisy Paddock, teacher at Ringwood State School, circa 1970s, c.1970s
Single page of notes/interview record of Miss Daisy Paddock, teacher at the Ringwood State School in Greenwood Avenue (now Federation Estate) - Interview write-up by Ringwood History Group.Transcript: "Miss Janet Daisy Paddock She was an extremely well-liked and well-regarded teacher at the old RW State School in Greenwood Ave (Now Federation Estate). She taught between the years of 1927 until 1941, then again after the war from 1951 until final retirement in 1961. In fact she was so liked that her former pupils formed "The 2997 Club" , which met in her honour every year for a meal (and, of course, their guest of honour). 2997 was the RW SS number. In some of her letters about early life in RW, she recalls the RW Mail being produced and printed in a small wooden building in Adelaide St. [Adelaide St is officially no longer on the RW map but it went from the highway nearly to Mullum Creek, between Melbourne St and Warrandyte Road.^ In fact there is an unmarked 100 metres of road that is on the west side of Officeworks that ends in a roundabout at the bottom of Eastland carpark. I don't believe it is exactly in the same position as the old Adelaide Street but it pretty close. That would put the old Mail office in the vicinity of the Maroondah Council service centre in Eastland.] She also recalls that there were nearly a dam on every corner. In fact, I recall in my 1950s/60s childhood that there were still many dams around. As I previously mentioned, with the RW-Mitcham claybelt, there wasn't much top soil and the orange clay is very fine, so when the banks of the dam get wet, it wass very slippery. I often remember playing around in those dams, as most boys did in those days. A friend and I spied an old bath used to water some horses so after some trial and errors we made it waterproof and fashioned a couple of paddles out of wooden fence pailings. The first launch in the local dam was fine and we managed to manouver through the bullrushes into the middle. The only thing that I forgot about was that I had a d<^ that went everywhere with me and, rather than bark from the bank, he swam over to us and tried to get aboard. Bath tubs are not known for their seaworthness and he tipped us all in the drink. Of course the bath sank like a rock. We scrambled on the bank and he added insult to injury when, as all dogs do, gave the usual shake and sprayed us with water. My mind often comes back to one dam right next to the Croydon pub - that provided water to the Magg's orchard - dug in the usual fashion on about 3 metres deep scraped in the local clay, it was at this dam in the early sixties that a young boy drowned. After that we were pretty careful around dams. Going back to Daisy's memories, she recalls that the kids often started late on Monday mornings as Monday was Market Day at RW. They used to watch the stock being herded into the yards and people getting off the steam trains. Her family home was at Gruyere and her father used to drive to RW market and stop midway at the Burnt Bridge hotel and rest the horses. [I suspect that he may have watered other things besides the horses.] They eventually moved to RW in Thanet St. Miss Paddock still remembers the old RW school at the corner of RW St and Whitehorse Road, it was very small so they built the new school in Greenwood Ave. RW had a population of around 2,(K)0 when Daisy became an Assistant Class Five. She used to walk through the open paddocks, surrounded by bush and orchards. She goes on to say that the bush was alive with wildlife and a natural playground for the children. Miss Paddock was a member of the Soroptomist Club in RW (equivalent to Rotary), active in the church and local community. At our archives, we have a plaque that grac^ the entrance to the school, naming it the Miss Daisy Paddock library, in honour of a great woman in our city." -
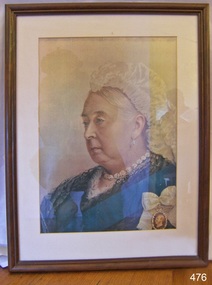 Flagstaff Hill Maritime Museum and Village
Print - Portrait of Queen Victoria, Hoy Art Picture Framing, Original probably painted in 1887 or 1897 to commemorate 50 or 60 years on the throne
Queen Victoria was born at Kensington Palace, London, on 24 May 1819. She was the only daughter of Edward, Duke of Kent, the fourth son of George III. Her father died shortly after her birth and she became heir to the throne because the three uncles who were ahead of her in the succession - George IV, Frederick Duke of York, and William IV - had no legitimate children who survived. Warmhearted and lively, Victoria had a gift for drawing and painting; educated by a governess at home, she was a natural diarist and kept a regular journal throughout her life. On William IV's death in 1837, she became Queen at the age of 18. Queen Victoria is associated with Britain's great age of industrial expansion, economic progress and, especially, empire. At her death, it was said, Britain had a worldwide empire on which the sun never set. In the early part of her reign, she was influenced by two men: her first Prime Minister, Lord Melbourne, and then her husband, Prince Albert, whom she married in 1840. Both men taught her much about how to be a ruler in a 'constitutional monarchy, in which the monarch had very few powers but could use much influence. Albert took an active interest in the arts, science, trade and industry; the project for which he is best remembered was the Great Exhibition of 1851, the profits from which helped to establish the South Kensington museums complex in London. Her marriage to Prince Albert produced nine children between 1840 and 1857. Most of her children married into other Royal families in Europe. Edward VII (born 1841), married Alexandra, daughter of Christian IX of Denmark. Alfred, Duke of Edinburgh and of Saxe-Coburg and Gotha (born 1844) married Marie of Russia. Arthur, Duke of Connaught (born 1850) married Louise Margaret of Prussia. Leopold, Duke of Albany (born 1853) married Helen of Waldeck-Pyrmont. Victoria, Princess Royal (born 1840) married Friedrich III, German Emperor. Alice (born 1843) married Ludwig IV, Grand Duke of Hesse and by Rhine. Helena (born 1846) married Christian of Schleswig-Holstein. Louise (born 1848) married John Campbell, 9th Duke of Argyll. Beatrice (born 1857) married Henry of Battenberg. Victoria bought Osborne House (later presented to the nation by Edward VII) on the Isle of Wight as a family home in 1845, and Albert bought Balmoral in 1852. Victoria was deeply attached to her husband and she sank into depression after he died, aged 42, in 1861. She had lost a devoted husband and her principal trusted adviser in affairs of state. For the rest of her reign she wore black. Until the late 1860s she rarely appeared in public; although she never neglected her official Correspondence, and continued to give audiences to her ministers and official visitors, she was reluctant to resume a full public life. She was persuaded to open Parliament in person in 1866 and 1867, but she was widely criticised for living in seclusion and quite a strong republican movement developed. Seven attempts were made on Victoria's life, between 1840 and 1882 - her courageous attitude towards these attacks greatly strengthened her popularity. With time, the private urgings of her family and the flattering attention of Benjamin Disraeli, Prime Minister in 1868 and from 1874 to 1880, the Queen gradually resumed her public duties. In foreign policy, the Queen's influence during the middle years of her reign was generally used to support peace and reconciliation. In 1864, Victoria pressed her ministers not to intervene in the Prussia-Denmark war, and her letter to the German Emperor (whose son had married her daughter) in 1875 helped to avert a second Franco-German war. On the Eastern Question in the 1870s - the issue of Britain's policy towards the declining Turkish Empire in Europe - Victoria (unlike Gladstone) believed that Britain, while pressing for necessary reforms, ought to uphold Turkish hegemony as a bulwark of stability against Russia, and maintain bi-partisanship at a time when Britain could be involved in war. Victoria's popularity grew with the increasing imperial sentiment from the 1870s onwards. After the Indian Mutiny of 1857, the government of India was transferred from the East India Company to the Crown, with the position of Governor-General upgraded to Viceroy, and in 1877 Victoria became Empress of India under the Royal Titles Act passed by Disraeli's government. During Victoria's long reign, direct political power moved away from the sovereign. A series of Acts broadened the social and economic base of the electorate. These acts included the Second Reform Act of 1867; the introduction of the secret ballot in 1872, which made it impossible to pressurise voters by bribery or intimidation; and the Representation of the Peoples Act of 1884 - all householders and lodgers in accommodation worth at least £10 a year, and occupiers of land worth £10 a year, were entitled to vote. Despite this decline in the Sovereign's power, Victoria showed that a monarch who had a high level of prestige and who was prepared to master the details of political life could exert an important influence. This was demonstrated by her mediation between the Commons and the Lords, during the acrimonious passing of the Irish Church Disestablishment Act of 1869 and the 1884 Reform Act. It was during Victoria's reign that the modern idea of the constitutional monarch, whose role was to remain above political parties, began to evolve. But Victoria herself was not always non-partisan and she took the opportunity to give her opinions, sometimes very forcefully, in private. After the Second Reform Act of 1867, and the growth of the two-party (Liberal and Conservative) system, the Queen's room for manoeuvre decreased. Her freedom to choose which individual should occupy the premiership was increasingly restricted. In 1880, she tried, unsuccessfully, to stop William Gladstone - whom she disliked as much as she admired Disraeli and whose policies she distrusted - from becoming Prime Minister. She much preferred the Marquess of Hartington, another statesman from the Liberal party which had just won the general election. She did not get her way. She was a very strong supporter of the Empire, which brought her closer both to Disraeli and to the Marquess of Salisbury, her last Prime Minister. Although conservative in some respects - like many at the time she opposed giving women the vote - on social issues, she tended to favour measures to improve the lot of the poor, such as the Royal Commission on housing. She also supported many charities involved in education, hospitals and other areas. Victoria and her family travelled and were seen on an unprecedented scale, thanks to transport improvements and other technical changes such as the spread of newspapers and the invention of photography. Victoria was the first reigning monarch to use trains - she made her first train journey in 1842. In her later years, she became the symbol of the British Empire. Both the Golden (1887) and the Diamond (1897) Jubilees, held to celebrate the 50th and 60th anniversaries of the Queen's accession, were marked with great displays and public ceremonies. On both occasions, Colonial Conferences attended by the Prime Ministers of the self-governing colonies were held. Despite her advanced age, Victoria continued her duties to the end - including an official visit to Dublin in 1900. The Boer War in South Africa overshadowed the end of her reign. As in the Crimean War nearly half a century earlier, Victoria reviewed her troops and visited hospitals; she remained undaunted by British reverses during the campaign: 'We are not interested in the possibilities of defeat; they do not exist.' Victoria died at Osborne House on the Isle of Wight, on 22 January 1901 after a reign which lasted almost 64 years, then the longest in British history. Her son, Edward VII succeeded her. She was buried at Windsor beside Prince Albert, in the Frogmore Royal Mausoleum, which she had built for their final resting place. Above the Mausoleum door are inscribed Victoria's words: "Farewell best beloved, here, at last, I shall rest with thee, with thee in Christ I shall rise again." Source: https://www.royal.uk/queen-victoria This picture captures Queen Victoria in her later years. It may well have been painted to commemorate her Golden Anniversary in 1887, or her Diamond Anniversary in 1897.Picture, print, reproduction of a drawing or photograph of Queen Victoria. She is wearing a dark-coloured dress, white headdress and a diamond necklace and earrings. On her left shoulder is the Royal Order of Victoria and Albert, awarded to female members of the British Royal Family and female courtiers. There are four grades or classes of this Royal Order as well as the Sovereign's Badge, which is exclusive to her. Also across her left shoulder, is a blue riband representing the Order of the Garter. The picture is in a medium-coloured timber frame with a white string across the width at the rear. The label says it was framed by Hoy Art, Warrnambool. The signature of the Queen is on the picture but is not obvious since the picture has been re-framed."HOY ART / PICTURE FRAMING / 48 Kepler St, Warrnambool 3280 / Phone (055) 62 8022" Signature (hidden by new framing) "Victoria H.R.S."flagstaff hill, warrnambool, shipwrecked-coast, flagstaff-hill, flagstaff-hill-maritime-museum, maritime-museum, shipwreck-coast, flagstaff-hill-maritime-village, picture of queen victoria, queen victoria, the royal order of victoria and albert, the order of the garter, hoy art -
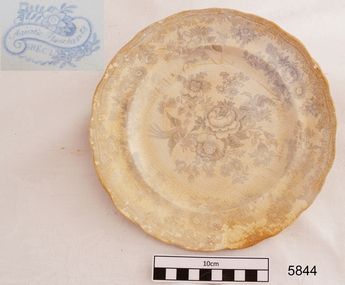 Flagstaff Hill Maritime Museum and Village
Ceramic - Plate, Minton Potteries, before 1878
This earthenware dinner plate was donated by Lorna Jensen. It had belonged to her father Wally O’Brien, who was a cyclist and had ridden in the long Melbourne to Warrnambool Cycle Classic twice. Wally was given this plate by a diving friend who had recovered it from the wreck of the LOCH ARD, on the southwest coast of Victoria. The plate had been sitting in Lorna’s mum’s china cabinet until recently when she and her husband drove to Warrnambool to donate it to Flagstaff Hill Maritime Village. When they stopped at a friend’s home along the way the friend removed it from its plastic bag and tea towel and carefully wrapped it in protective packaging for the rest of its journey. The plate is very similar to other plates recovered from the wreck of the LOCH ARD. It is uncertain whether the plates were personal belongings or part of the cargo. The Asiatic Pheasant pattern is a transfer design and was the most popular design of the 19th-century Victorian era. It is still being produced today. The design was produced as high-quality, decorative dinnerware by the potters in the Staffordshire, England, area from the late 1830s, but no one is sure exactly who the original designer was. The industrial age made the production of this design more affordable to the ordinary person who purchased and proudly displayed settings in their homes. The high demand for production resulted in the loss of quality in both potting and design, particularly between 1860-1914 when the design reached its height of popularity, and the results were often a poor match for the earlier pieces’ quality and detail. Some engravers would make copies of the Asiatic Pheasant design (and other designs) onto copper plates and sell them to more than one pottery producer (the Copyright Act of 1842 was intended to control this very thing). Consequently, the list of Makers’ Marks associated with the Asiatic Pheasant is well over 100. A single pottery factory could have several owners, all with their own Marks. These factors all make the dating of pieces difficult. Also, after 1891, pieces produced for export were required to be stamped with “ENGLAND”, but pieces produced for the domestic market in England did not need this stamp, so early pieces and pieces produced for the domestic market would all be without the “ENGLAND” stamp, confusing the matter. Over time the body shape of the pieces changed, the feathered, curved and fluted edges giving way to simpler, cheaper oblong shapes. The LOCH ARD belonged to the famous Loch Line which sailed many ships from England to Australia. Built in Glasgow by Barclay, Curdle and Co. in 1873, the LOCH ARD was a three-masted square-rigged iron sailing ship. The ship measured 262ft 7" (79.87m) in length, 38ft (11.58m) in width, 23ft (7m) in depth and had a gross tonnage of 1693 tons. The LOCH ARD's main mast measured a massive 150ft (45.7m) in height. LOCH ARD made three trips to Australia and one trip to Calcutta before its final voyage. LOCH ARD left England on March 2, 1878, under the command of Captain Gibbs, a newly married, 29-year-old. She was bound for Melbourne with a crew of 37, plus 17 passengers and a load of cargo. The general cargo reflected the affluence of Melbourne at the time. On board were straw hats, umbrellas, perfumes, clay pipes, pianos, clocks, confectionary, linen and candles, as well as a heavier load of railway irons, cement, lead and copper. There were items included that were intended for display in the Melbourne International Exhibition in 1880. The voyage to Port Phillip was long but uneventful. At 3 am on June 1, 1878, Captain Gibbs was expecting to see land and the passengers were becoming excited as they prepared to view their new homeland in the early morning. But LOCH ARD was running into a fog which greatly reduced visibility. Captain Gibbs was becoming anxious as there was no sign of land or the Cape Otway lighthouse. At 4 am the fog lifted. A man aloft announced that he could see breakers. The sheer cliffs of Victoria's west coast came into view, and Captain Gibbs realised that the ship was much closer to them than expected. He ordered as much sail to be set as time would permit and then attempted to steer the vessel out to sea. On coming head-on into the wind, the ship lost momentum, the sails fell limp and LOCH ARD's bow swung back. Gibbs then ordered the anchors to be released in an attempt to hold their position. The anchors sank some 50 fathoms - but did not hold. By this time LOCH ARD was among the breakers and the tall cliffs of Mutton Bird Island rose behind the ship. Just half a mile from the coast, the ship's bow was suddenly pulled around by the anchor. The captain tried to tack out to sea, but the ship struck a reef at the base of Mutton Bird Island, near Port Campbell. Waves broke over the ship and the top deck was loosened from the hull. The masts and rigging came crashing down knocking passengers and crew overboard. When a lifeboat was finally launched, it crashed into the side of LOCH ARD and capsized. Tom Pearce, who had launched the boat, managed to cling to its overturned hull and shelter beneath it. He drifted out to sea and then on the flood tide came into what is now known as LOCH ARD Gorge. He swam to shore, bruised and dazed, and found a cave in which to shelter. Some of the crew stayed below deck to shelter from the falling rigging but drowned when the ship slipped off the reef into deeper water. Eva Carmichael had raced onto deck to find out what was happening only to be confronted by towering cliffs looming above the stricken ship. In all the chaos, Captain Gibbs grabbed Eva and said, "If you are saved Eva, let my dear wife know that I died like a sailor". That was the last Eva Carmichael saw of the captain. She was swept off the ship by a huge wave. Eva saw Tom Pearce on a small rocky beach and yelled to attract his attention. He dived in and swam to the exhausted woman and dragged her to shore. He took her to the cave and broke open a case of brandy which had washed up on the beach. He opened a bottle to revive the unconscious woman. A few hours later Tom scaled a cliff in search of help. He followed hoof prints and came by chance upon two men from nearby Glenample Station three and a half miles away. In a state of exhaustion, he told the men of the tragedy. Tom returned to the gorge while the two men rode back to the station to get help. By the time they reached LOCH ARD Gorge, it was cold and dark. The two shipwreck survivors were taken to Glenample Station to recover. Eva stayed at the station for six weeks before returning to Ireland, this time by steamship. In Melbourne, Tom Pearce received a hero's welcome. He was presented with the first gold medal of the Royal Humane Society of Victoria and a £1000 cheque from the Victorian Government. Concerts were performed to honour the young man's bravery and to raise money for those who lost family in the LOCH ARD disaster. Of the 54 crew members and passengers on board, only two survived: the apprentice, Tom Pearce and the young woman passenger, Eva Carmichael, who lost all of her family in the tragedy. Ten days after the LOCH ARD tragedy, salvage rights to the wreck were sold at auction for £2,120. Cargo valued at £3,000 was salvaged and placed on the beach, but most washed back into the sea when another storm developed. The wreck of LOCH ARD still lies at the base of Mutton Bird Island. Much of the cargo has now been salvaged and some were washed up into what is now known as LOCH ARD Gorge. Cargo and artefacts have also been illegally salvaged over many years before protective legislation was introduced. One of the most unlikely pieces of cargo to have survived the shipwreck was a Minton porcelain peacock - one of only nine in the world. The peacock was destined for the Melbourne International Exhibition in 1880. It had been well packed, which gave it adequate protection during the violent storm. Today, the Minton peacock can be seen at the Flagstaff Hill Maritime Museum in Warrnambool. From Australia's most dramatic shipwreck, it has now become Australia's most valuable shipwreck artefact and is one of very few 'objects' on the Victorian State Heritage Register.Flagstaff Hill’s collection of artefacts from LOCH ARD is significant for being one of the largest collections of artefacts from this shipwreck in Victoria. It is significant for its association with the shipwreck, which is on the Victorian Heritage Register (VHR S417). The collection is significant because of the relationship between the objects, as together they have a high potential to interpret the story of the LOCH ARD. The LOCH ARD collection is archaeologically significant as the remains of a large international passenger and cargo ship. The LOCH ARD collection is historically significant for representing aspects of Victoria’s shipping history and its potential to interpret sub-theme 1.5 of Victoria’s Framework of Historical Themes (living with natural processes). The collection is also historically significant for its association with the LOCH ARD, which was one of the worst and best known shipwrecks in Victoria’s history.Plate, earthenware dinner plate recovered from the wreck of the Loch Ard. Blue transfer design (Asiatic Pheasant) with a clear over-glaze. The outer rim is scalloped. Printed within cartouche on underside of plate "_ H E C L " Printed within cartouche on plate "_ H E C L "flagstaff hill, warrnambool, flagstaff hill maritime museum and village, shipwreck coast, great ocean road, tom pearce, eva carmichael, loch ard, asiatic pheasant design, dinnerware, ceramic plate, wally o’brien, dinner plate -
 Flagstaff Hill Maritime Museum and Village
Cap Liner, Between 1870 and 1908
This Zinc Cap Porcelain Liner was recovered from the (1908) shipwreck site of the FALLS OF HALLADALE. The purpose of cap liners was to assist with the safe preserving and storage of perishable foodstuffs in an age when refrigeration was generally unavailable. These round, coarse-glass inserts formed part of the screw lids used with the Ball Mason style of canning fruit jars. The liner was placed inside the zinc cap to stop the contents of the jar reacting with the zinc. It prevented the metallic tainting of food as well as the corrosion of the metallic lid. On March 30, 1869, Lewis R Boyd was issued with patent # 88439 for an “Improved Mode of Preventing Corrosion in Metallic Caps”. From the 1870s to the 1950s, large quantities of these liners were produced by a number of glass manufacturing companies. They are consequently difficult to date or identify. “It is assumed that most of the earlier versions of these liners have the name ‘BOYD’S’ or ‘BOYD’ embossed on them. Later versions may or may not have the name included in the lettering”. (http://www.glassbottlemarks.com). Only a few were made of porcelain, the great majority being made first of transparent and later of translucent or opaque glass. The different emblems of triangles, circles, and crosses embossed on the front face of the liners are assumed to signify mould or model types rather than the company that produced them. This particular artefact is one of 14 cap liners that were retrieved from the shipwreck site and are now part of the Flagstaff Hill Maritime Village collection. The Maltese Cross and “BOYD’S GENUINE PORCELAIN LINED” lettering are unique to this piece. However, it is evident from the markings and materials of the other cap liners, that they originally formed sets or series. Six are larger (8 mm depth x 85mm diameter), of greenish hue with ground glass texture, and support the raised emblem of a compass needle. Two are medium-sized (75mm diameter) with two raised dots in a central circle and the lettering “Patd. APR 25.82”. This particular cap liner is likely to have also been one of a mass-produced line being imported from America. The iron-hulled sailing ship FALLS OF HALLADALE was a bulk carrier of general cargo en route from New York to Melbourne and Sydney. In her hold, along with 56,763 tiles of unusual beautiful green American slates (roofing tiles), 5,673 coils of barbed wire, 600 stoves, 500 sewing machines, 6500 gallons of oil, 14400 gallons of benzene, and many other manufactured items, were 117 cases of crockery and glassware. The FALLS OF HALLADALE came aground on a reef off the Peterborough headland at 3 am on the morning of the 15th of November, 1908. The captain and 29 crew members all survived, but her valuable cargo was largely lost, despite two salvage attempts in1908-09 and 1910. The iron-hulled, four-masted barque, the Falls of Halladale, was a bulk carrier of general cargo. She left New York in August 1908 on her way to Melbourne and Sydney. In her hold, along with 56,763 tiles of unusual beautiful green American slates (roofing tiles), 5,673 coils of barbed wire, 600 stoves, 500 sewing machines, 6500 gallons of oil, 14400 gallons of benzene, and many other manufactured items, were 117 cases of crockery and glassware. Three months later and close to her destination, a navigational error caused the Falls of Halladale to be wrecked on a reef off the Peterborough headland at 3 am on the morning of the 15th of November, 1908. The captain and 29 crew members all survived, but her valuable cargo was largely lost, despite two salvage attempts in 1908-09 and 1910. ABOUT THE ‘FALLS OF HALLADALE’ (1886 - 1908) Built: in1886 by Russell & Co., Greenock shipyards, River Clyde, Scotland, UK. The company was founded in 1870 (or 1873) as a partnership between Joseph Russell (1834-1917), Anderson Rodger and William Todd Lithgow. During the period 1882-92 Russell & Co., they standardised designs, which sped up their building process so much that they were able to build 271 ships over that time. In 1886 they introduced a 3000 ton class of sailing vessel with auxiliary engines and brace halyard winches. In 1890 they broke the world output record. Owner: Falls Line, Wright, Breakenridge & Co, 111 Union Street, Glasgow, Scotland. Configuration: Four masted sailing ship; iron-hulled barque; iron masts, wire rigging, fore & aft lifting bridges. Size: Length 83.87m x Breadth 12.6m x Depth 7.23m, Gross tonnage 2085 ton Wrecked: the night of 14th November 1908, Curdies Inlet, Peterborough south west Victoria Crew: 29 The Falls of Halladale was a four-masted sailing ship built-in 1886 in Glasgow, Scotland, for the long-distance cargo trade and was mostly used for Pacific grain trade. She was owned by Wright, Breakenridge & Co of Glasgow and was one of several Falls Line ships, all of which were named after waterfalls in Scotland. The lines flag was of red, blue and white vertical stripes. The Falls of Halladale had a sturdy construction built to carry maximum cargo and able to maintain full sail in heavy gales, one of the last of the ‘windjammers’ that sailed the Trade Route. She and her sister ship, the Falls of Garry, were the first ships in the world to include fore and aft lifting bridges. Previous to this, heavily loaded vessels could have heavy seas break along the full length of the deck, causing serious injury or even death to those on deck. The new, raised catwalk-type decking allowed the crew to move above the deck stormy conditions. This idea is still used today on the most modern tankers and cargo vessels and has proved to be an important step forward in the safety of men at sea. On 4th August 1908, with new sails, 29 crew, and 2800 tons of cargo, the Falls of Halladale left New York, bound for Melbourne and Sydney via the Cape of Good Hope. The cargo on board was valued at £35,000 and included 56,763 tiles of American slate roofing tiles (roof slates), 5,673 coils of barbed wire, 600 stoves, 500 sewing machines, 6,500 gallons of oil, 14,400 gallons of benzene, plumbing iron, 117 cases of crockery and glassware and many other manufactured items. The Falls of Halladale had been at sail for 102 days when, at 3 am on the night of 14th November 1908, under full sail in calm seas with a six knots breeze behind and misleading fog along the coast, the great vessel rose upon an ocean swell and settled on top of a submerged reef near Peterborough on south-west Victoria’s coast. The ship was jammed on the rocks and began filling with water. The crew launched the two lifeboats and all 29 crew landed safely on the beach over 4 miles away at the Bay of Islands. The postmistress at Peterborough, who kept a watch for vessels in distress, saw the stranding and sent out an alert to the local people. A rescue party went to the aid of the sailors and the Port Campbell rocket crew was dispatched, but the crew had all managed to reach shore safely by the time help arrived. The ship stayed in full sail on the rocky shelf for nearly two months, attracting hundreds of sightseers who watched her slowly disintegrate until the pounding seas and dynamiting by salvagers finally broke her back, and her remains disappeared back into deeper water. The valuable cargo was largely lost, despite two salvage attempts in 1908-09 and 1910. Further salvage operations were made from 1974-1986, during which time 22,000 slate tiles were recovered with the help of 14 oil drums to float them, plus personal artefacts, ship fittings, reams of paper and other items. The Court of Marine Inquiry in Melbourne ruled that the foundering of the ship was entirely due to Captain David Wood Thomson’s navigational error, not too technical failure of the Clyde-built ship. The shipwreck is a popular site for divers, about 300m offshore and in 3 – 15m of water. Some of the original cargo can be seen at the site, including pieces of roof slate and coils of barbed wire. The Falls of Halladale shipwreck is listed on the Victorian Heritage Register (No. S255). She was one of the last ships to sail the Trade Routes. She is one of the first vessels to have fore and aft lifting bridges. She is an example of the remains of an International Cargo Ship and also represents aspects of Victoria’s shipping industry. The wreck is protected as a Historic Shipwreck under the Commonwealth Historic Shipwrecks Act (1976). A circular translucent glass disc in good condition with raised upper case lettering around 8mm rim – “BOYD’S GENUINE PORCELAIN LINED” - and a raised central emblem of a Maltese Cross. On the reverse face in the centre of the disc, there is a raised numeral “3”. falls of halladale, wright, breakenridge & co of glasgow, unusual beautiful green american slates (roofing tiles), warrnambool, shipwrecked-coast, flagstaff-hill, flagstaff-hill-maritime-museum, maritime-museum, shipwreck-coast, flagstaff-hill-maritime-village, shipwrecked-artefact, zinc cap porcelain liner, boyd’s genuine porcelain lined, glass lid, opaque disc, food preserving, fruit bottling, cap liner, shipwrecked coast, flagstaff hill maritime museum, shipwreck artefact, 1908 shipwreck -
 Unions Ballarat
Ballarat Trades Hall Scrapbook: newspaper clippings 1988-1993, The Courier (newspaper), various
Newspaper clippings 1991-1993. 1. Teachers' strike: Major disruptions as 500 stop work [Ballarat] Paper: The Courier Date: 2 December 1992 2. Strikes in 3 sectors [Ballarat] Paper: The Courier Date: 3 December 1992 3. Letter to the editor: Change priorities for a better city [Ballarat] Paper: The Courier? Author: P. Murphy Date: n.d. 4. Traynor's comments criticised [regarding penalty rates] Paper: The Courier? Date: 27 July 1991 5. Trades Hall seeks urgent talks on health funding [Ballarat] Paper: The Courier? Date: 29 July 1991 6. Stewart condemns weekend shearing [Ballarat] Paper: The Courier Date: 1 August 1991 7. Working class poet [Geoff Goodfellow] recites with the power of language Paper: The Courier Date: 8 August 1991 8. Budget '91: Budget brings little local joy Paper: The Courier? Date: 21 August 1991 9. State Budget '91: Budget hits low income earners Paper: The Courier? Date: 28 August 1991 10. Job cuts face local bakery [Sunicrust, Ballarat] Paper: The Courier? Date: 29 August 1991 11. Factory closure will put 50 out of work [Vitclay, Ballarat] Paper: The Courier? Date: 3 September 1991 12. Protest for jobs urged [Ballarat] Paper: The Courier Date: 7 September 1991 13. Bank staff cuts 'astound' Trades Hall secretary [Ballarat] Paper: The Courier? Date: 12 September 1991 14. Pixelated black and white portrait photo of Graeme Shearer 15. Abattoirs picket line supported [Camperdown] Paper: The Courier Date: n.d. 16. Shearers to set up AWU committee [Ballarat} Paper: The Courier Date: 19 September 1991 17. Group fights for Ballarat national rail freight link Paper: The Courier Date: 1 October 1991 18. National jobless rate 10.2.% [Ballarat] Paper: The Courier? Date: 11 October 1991 19. Shearers establish committee [Ballarat] Paper: The Courier Date: 23 October 1991 20. Wage decision backed by employers, unions [Ballarat] Paper: The Courier Date: n.d. 21. Meeting to focus on aged care: QEGC budget cuts spark local concern [Central Highlands] Paper: The Courier Date: 4 December 1991 22. Mayor urges jobless to rally to the cause [Ballarat] Paper: The Courier? Date: 7 December 1991 23. New dole record: District's jobless queue lengthens again [Ballarat] Paper: The Courier? Date: 13 December 1991 24. Begonia bans: Unions act on retirement village [Ballarat] Paper: The Courier? Date: 24 December 1991 25. Another stoppage over WorkCare [Ballarat] Paper: The Courier? Date: 5 August 1990 26. BTHC hits anti-strike proposal Paper: The Courier Date: 16 November 1991 27. Businesses eager; unions more wary. Paper: The Courier? Date: 22 November 1991 28a. Project halted: review of $60m retirement village [Ballarat] 28b. Retirement Group 'too big, too fast' [Ballarat] 28c. Retirement village work halted [Ballarat] Paper: The Courier? Date: n.d. 29. QEGC managers criticised over budget cutbacks [Ballarat] Paper: The Courier? Date: n.d. 30. Unions' aid call [Ballarat] 30a. How unions want the $6 billion spent Paper: The Courier? Date: 11 February 1991 31. Threat to bread: Bunge strike action escalates [Ballarat] Paper: The Courier? Date: 27 February 1992 32. Bunge moves rye to Albury: Workers walk out [Ballarat] Paper: The Courier? Date: 26 February 1992 33. Merry makers' labours worry Trades Hall [Kryal Castle, Ballarat] Paper: The Courier? Date: 21 February 1992 34. Agreement will put end to retirement village dispute [Ballarat] Paper: The Courier Date: 22 February 1992 35. Mill strikers call for reinstatements [Ballarat] Paper: The Courier Date: 27 February 1992 36. No debate for BRB [Ballarat] Paper: The Courier? Date: n.d. 37. Statement will be our only hope [Ballarat] Paper: The Courier Date: 12 February 1992 38. Union hits catering [Ballarate & Victoria] Paper: The Courier? Date: ?? February 1992 39. Thanks - Bunge strikers thank you to Graeme Shearer et al Paper: The Courier? Date: n.d. 40. ANZ under fire from Trades Hall Secretary [Ballarat] Paper: The Courier Date: 19 March 1992 41. Assurance sought over Melb rail line [Ballarat] Paper: The Courier Date: 18 March 1992 42. In and out of town: Premier to visit [Ballarat] Paper: The Courier? Date: n.d. 43. Regional board wants to improve its image [Ballarat] Paper: The Courier? Date: n.d. 44. Time to amalgamate (letter to the editor) [Ballarat] Paper: The Courier Date: 13 May 1992 45. Another unemployment record for Ballarat Paper: The Courier? Date: 8 May 1992 46. Trouble brews in Ballarat (opinion) Paper: The Courier? Date: 9 May 1992 47. Trades Hall warns of student exploitation [Ballarat] Paper: The Courier Date: 29 February 1992 48. Bunge unions stay firm [Ballarat] Paper: The Courier? Date: 12 March 1992 49. Workers, Bunge settle dispute [Ballarat] Paper: The Courier? Date: 4 March 1992 50. Proposal could end Bunge strike [Ballarat] Paper: The Courier? Date: 3 March 1992 51. Village payment / payment at village Paper: The Courier? Date: 6 March 1992 52. Public outcry over hike in milk price [Ballarat] Paper: The Courier? Date: n.d. 53. Workers dig deep to help Somalia [Ballarat] Paper: The Courier? Date: 10 October 1992 54. 'Callous attack on the poor': union chief [Ballarat] Paper: The Courier? Date: 13 October 1992 55. No Labour swing, says Shearer [Ballarat] Paper: The Courier? Date: 6 October 1992 56. Ballarat joins strike Paper: The Courier Date: 24 October 1992 57. Workers would revolt against Libs: Shearer Paper: The Courier? Date: 28 September 1992 58. Wage rise disgraceful [Ballarat] Paper: The Courier? Date: 31 October 1992 59. Shearer seeks guarantees for rail link [Ballarat] Paper: The Courier? Date: 19 September 1992 60. Cleaners ready to tackle Coalition [Ballarat] Paper: The Courier? Date: 19 September 1992 61. The Ballarat strike (picture) Paper: The Courier? Date: 11 November 1992 62. Workers voice their concern [Daylesford] Paper: The Courier? Date: 11 November 1992 63. The Ballarat strike Paper: The Courier Date: 11 November 1992 64. 53 railway jobs to go: union chief [Ballarat] Paper: The Courier? Date: 23 November 1992 65. Trades Hall urges support for rally [Ballarat] Paper: The Courier? Date: 25 November 1992 66. Doubt cast on our unemployed rate [Ballarat] Paper: The Courier Date: 20 August 1992 67. Wage claim justified: Shearer Paper: The Courier? Date: 20 August 1992 68. Pool plan for jobs money attacked Paper: The Courier Date: 22 August 1992 69. Fight for rail link [Geelong-Ballarat] Paper: Geelong Advertiser Date: 18 September 1992 70. Rail pledge demand Paper: Geelong Advertiser Date: 1 October 1992 Condition: very poor 71. Union calls for railway guarantee [Ballarat] Paper: n.a. Date: 21 October 1992 72. A strike is the last thing Victoria needs Paper: The Courier Date: 27 ? 1992 73.Industry turmoil: Ford plant is up for sale [Ballarat] Paper: The Courier? Date: 20 August 1992 74. Regional Board retains job counsellor [Ballarat] Paper: The Courier Date: 20 August 1992 75. Jobless figures need special consideration [Ballarat] Paper: The Courier Date: 20 August 1992 76a. Local strike chaos: All services likely to be affected [Ballarat] 76b.Strike is an act of hypocrisy [Ballarat] Paper: The Courier Date: 10 November 1992 77. Ronaldson angered by union attack blunder [Ballarat] Paper: The Courier Date: 11 November 1992 78. Ballarat rally against Govt Paper: The Courier Date: 4 November 1992 79.Payouts a form of 'blackmail' [Ballarat] Paper: The Courier? Date: 27 November 1992 80. Union leader gives job loss breakdown [Ballarat] Paper: The Courier? Date: 27 November 1992 81. Deficit levy protest: Unions seize on wide discontent [Ballarat] Paper: The Courier? Date: 26 November 1992? 82. WorkCover under fire at city rally [Ballarat] Paper: The Courier Date: 26 November 1992 83. Coalition is 'cruel': Shearer Paper: The Courier? Date: 22 August 1992 84. Policy to 'decimate unions' Paper: The Courier? Date: 26th August 1992 85. Review immigration call Paper: The Courier? Date: 16 July 1992 86. Union boss blasts Libs' proposals [Ballarat] Paper: The Courier Date: n.d. 87. Both towns could win rail link: NRC [Geelong-Ballarat] Paper: The Courier? Date: n.d. 88. Teachers rally against cuts [Ballarat] Paper: The Courier? Date: 20 May 1993 89. Five workers die in 2 years Paper: The Courier Date: 14 October 1996Significant collection of press articles that include comment from Unions Ballarat Secretary, Graeme Shearer, around the period when Jeff Kennett (Liberal Party Victoria) became premier of Victoria. Focus upon a variety of social and industrial issues impacting the Ballarat region.Newspaper articles - scanned.btlc, ballarat trades and labour council, shearer graeme, kennett jeff, railway link geelong-ballarat, liberal party victoria, industrial action - rallies, workcover, various, ballarat trades and labour council - secretary -
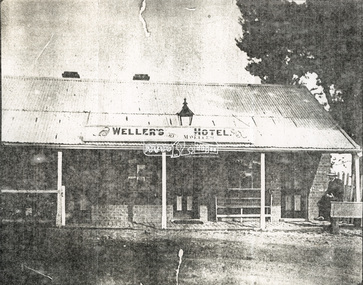 Eltham District Historical Society Inc
Document - Folder, Wellers of Kangaroo Ground, 1984-2017
Wellers of Kangaroo Ground Vertical File Contents: 1. Article: History of Wellers Restaurant by Sandra Cahir, revised 2017. 7 pages 2. Article: Weller’s Hotel of Kangaroo Ground (final draft) by Jim Allan, 1 June 2017, including feedback email from Sandra Cahir (7 May 2017). 3. Printout of online image - Kangaroo Ground landholders from 1841, Kangaroo Ground Presbyterian Church. (2022, June 29). Retrieved from https://kgpc.pcvic.org.au/images/history_images/Kangaroo-Ground-landholders.jpg 4. Folder of printouts of historical newspaper articles referencing the hotel 1866-1911 https://trove.nla.gov.au/list/163201 5. Printouts (various versions) from Victorian Heritage Database (National Trust and Nillumbik Shire) https://vhd.heritagecouncil.vic.gov.au/ 6. Collection of research notes, copies of records from various publications including EDHS Chronology of Events and Kangaroo Ground: The Highland Taken by Mick Woiwod, pp90, 180-181 (EDHS_01618). 7. Report: Request for ministerial amendment to use the property as a restaurant, includes existing conditions and plan for development, 1 November 1984 8. Papers donated by Diana and Peter Bassett-Smith including: a. Photocopy of Weller’s Hotel, Licensee M. Weller b. Letter: Shire of Eltham to Office of the Secretary for Planning and Environment, 23 Feb 1984 - Information regarding inclusion of Wellers Hotel into the Historic Buildings Register c. Letter: Historic Buildings Council letter to Peter Bassett-Smith seeking historical information on Wellers Hotel, 10 Jan 1985 d. Memo: Peter Bassett-Smith to Robert N. Hendrey on history of Wellers Hotel, 28 Jan 1985 - Includes extract of information about Mary Weller, Dept. of Crown Lands and Survey Map NILLUMBIK showing properties of John Weller and E. Weller and a Diamond Valley News article from 10 April 1973, p11, "Eltham on old coach route" 9. Information about the Weller family including family trees from various sources a. Edward Weller, Pioneer Families in Victoria, http://mepnab.netau.net/w/w09.html, 1 Jan 2017 (link broken) b. The WELLER family tree. (2017, January 1), 2 pages. Retrieved from https://www.weller.org.uk/cgi-bin/FamilyTree/ShowFamily.pl? and 27 pages Retrieved from https://www.weller.org.uk/cgi-bin/FamilyTree/ShowFamily.pl?ListAllPeople=A c. Edward WELLER on the WELLER family tree. (2017, January 1), 1 page. Retrieved from https://www.weller.org.uk/cgi-bin/FamilyTree/ShowFamily.pl?PersonID=516 d. Photograph (print copy), believed to be Edward Weller, 1836-1883 e. Photograph (print copy), Gravestone of Weller family at Kangaroo Cemetery f. Wellers of Kangaroo Ground, 1 page, possibly from History, http://www.wellers.com.au (broken) c.2016 g. Edward and Mary Weller miscellaneous biographical research notes (by Jim Allen?) including from Ancestry.com, and extracts from Chappel file (EDHS_04448) with relevant names highlighted h. Information about the Vernon Pitman family from Ancestry.com 10. Newspaper articles: a. Cobb & Co called here by Marguerite Marshall; Diamond Valley News, May 4, 1982, p2 b. Rich is history, 30 August 1983 (very similar to previous article) c. Weller’s Pub - restaurant, craft store or art gallery? Diamond Valley News, October 22, 1985, p3 d. Despite years of neglect a magical charm lies waiting, Diamond Valley News, October 29, 1985 e. Old pub fate still in doubt, Diamond Valley News, (?) 29 October 1985 f. Renovated Weller’s Pub to begin its new stage of life, DVN 26 January 1988 g. Wellers Restaurant, Lynne Hillier, Network, October 1988, p14 h. Revolution at Wellers, Nillumbik Mail, December 20, 2000 i. Wellers brings on good times, Valley Weekly, June 22, 2005 j. Dine in with ideal outlook, Valley News, 10 August 2005 k. Advertisement: Wellers of Kangaroo Ground, Enjoy lunch, afternoon tea and dinner at Wellers from Tuesday to Sunday, Valley Weekly, Wednesday, August 31, 2005 l. Advertisement: Wellers of Kangaroo Ground, Appearing live; Normie Rowe Fri 24 Feb, Diamond Valley Leader February 22, 2006, p11 m. Advertisement: Wellers of Kangaroo Ground, Lunch Special, Diamond Valley Leader March 27, 2010 n. Braithwaite abounds to Kangaroo Ground, Gig Guide, The Age, Friday, October 8, 2010, p14 o. History up for grabs, Diamond Valley Leader, March 28, 2012 p. Advertisement: Wellers Restaurant, Freehold only for sale, Morrison Kleeman, Diamond Valley Leader, March 28, 2012 q. Restaurant’s crash course, Megan Bailey, Diamond Valley Leader, January 1, 2014, p3. Also accessible online - Staff praised after car crashes through Kangaroo Ground eatery. (2022, June 29). Retrieved from https://www.heraldsun.com.au/leader/north/staff-praised-after-car-crashes-through-kangaroo-ground-eatery/news-story/021c896a1ab6d76bd6b73f2e57dc1854 r. Eatery set for revival, Brittany Shanahan, Diamond Valley Leader 15 February 2017; Also, online as Much-loved Wellers of Kangaroo Ground to be relaunched as Italian restaurant Fondata 1872. (2022, June 29). Retrieved from https://www.heraldsun.com.au/leader/north/muchloved-wellers-in-kangaroo-ground-to-be-relaunched-as-italian-restaurant-fondata-1872/news-story/665777fb347584ef483867ae2b536a8f s. Fondata 1872 proves a big hit with food, Diamond Valley Leader 3 May 2017, p3 11. Wellers of Kangaroo Restaurant Bar Entertainment Functions, tri-fold brochure promotional brochure 12. Website Printout: Wellers Restaurant, Live Guide, (2017, January 5). Retrieved from http://www.liveguide.com.au/Restaurants_Bars/VIC/Kangaroo_Ground/Food_Styles/3... 13. Website Printout: Wellers of Kangaroo Ground, Only Melbourne (2017, January 30). Retrieved from http://www.onlymelbourne.com.au/wellers-of-kangaroo-ground 14. Printouts from Fondata 1872 website and Facebook page including colour photograph of sign in front and business card (2017). Related EDHS Collection items • Wellers Hotel of Kangaroo Ground by Jim Allen, Part 1, Newsletter No. 235, Eltham District Historical Society, August 2017. Retrieved from https://elthamhistory.files.wordpress.com/2017/08/edhs-nl-235-aug-2017.pdf • Wellers Hotel of Kangaroo Ground by Jim Allen, Part 2, Newsletter No. 236, Eltham District Historical Society, October 2017. Retrieved from https://elthamhistory.files.wordpress.com/2017/10/edhs-nl-236-oct-2017.pdf • EDHS_03997 - Slide, Wellers Hotel, Pitmans Corner, Eltham-Yarra Glen Road, Kangaroo Ground, c.1975 https://victoriancollections.net.au/items/5e59e36221ea671798ac40eb • EDHS_03998 - Slide, Wellers Hotel, Pitmans Corner, Eltham-Yarra Glen Road, Kangaroo Ground, c.1975 https://victoriancollections.net.au/items/5e59e39e21ea671798ac9c27 • EDHS_03999 - Slide, Wellers Hotel, Pitmans Corner, Eltham-Yarra Glen Road, Kangaroo Ground, c.1975 https://victoriancollections.net.au/items/5e59e3c721ea671798acd2ef • EDHS_04000 - Slide, Wellers Hotel, Pitmans Corner, Eltham-Yarra Glen Road, Kangaroo Ground, c.1975 https://victoriancollections.net.au/items/5e59e3e021ea671798acfd68 • EDHS_04066-18 - Photograph, Wellers Restaurant, Eltham-Yarra Glen Road, Kangaroo Ground, c.Mar. 1989 https://victoriancollections.net.au/items/610f4dafa346aadcee7ac79c • EDHS_04041-26 - Photograph, Wellers Restaurant, 150 Eltham-Yarra Glen Road, Kangaroo Ground, c.May 1988 https://victoriancollections.net.au/items/610e2f4a7d65e7c945a35e69 • EDHS_04437 – Newsclipping, Renovated Weller's Pub to begin its new stage of life by Linley Hartley, Diamond Valley News, 26 January 1988 https://victoriancollections.net.au/items/5de4913921ea6710a46a85c7 • EDHS_04438 - Newsclipping, Wellers Restaurant by Lynne Hillier, Network, October 1988, p14 https://victoriancollections.net.au/items/5de4916f21ea6710a46aea0f • ArtStreams magazine (from Volume 9, 2004) ‘partnered' with Wellers in promoting and supporting the arts and culture. Various advertisements throughout, particular with live performance acts. Numerous references throughout to art and music performances on site. • Stephen Cummings and Joe Camilleri at Wellers Kangaroo Ground, ArtStreams, Vol. 9, No. 4, Sep/Oct 2004, p17 EDHS_04406 - Journal, ArtStreams: Whittlesea, Banyule, Darebin, Manningham, Nillumbik, Yarra; Vol. 9, No. 4, Sep-Oct 2004 https://victoriancollections.net.au/items/5bcc086021ea6804a82a92a9 • Daryl Braithwaite rocks up at Wellers, Fiona Sievers, ArtStreams, Vol.10 No.2, 2005, pp6-7 EDHS_04409 - Journal, ArtStreams: Vol. 10, No. 2, 2005 https://victoriancollections.net.au/items/60f5416ab06f0c13a9419541 • Ephemeral Sculpture by Peter Dougherty, ArtStreams, Vol.10 No.3, 2005, pp7-9. About sculptures created in or on the grounds of culinary establishments throughout the Shire. - Denise Keele-Bedford constructed ‘Ou Well’ at Wellers Restaurant and Vicky Shukuroglou, also at Wellers set up cotton banners printed and painted with natural dyes from onion skins, spinach, radish beetroot, turmeric and charcoal. EDHS_04410 - Journal, ArtStreams: Vol. 10, No. 3, 2005 https://victoriancollections.net.au/items/60f5436db06f0c13a941ae19 • Music at Wellers Restaurant, ArtStreams, Vol.10 No.4, 2005, p23 EDHS_04411 - Journal, ArtStreams: Vol. 10, No. 4, 2005 https://victoriancollections.net.au/items/60f543e4b06f0c13a941b059 • Weller’s Pub, Diamond Valley sketchbook / text by Brian McKinlay ; drawings by Graham Hawley, 1973, pp42-43 EDHS_00856 - https://victoriancollections.net.au/items/590852edd0ce7b14e8177da3 • Gold Field Coaches Stopped Here, Nillumbik now and then / Marguerite Marshall; photographs Alan King with Marguerite Marshall, 2008, pp86-87 EDHS_00977 - https://victoriancollections.net.au/items/5935f315d0cdd42c80f9cc52 External Links: • Historic Kangaroo Ground venue comes up for rare sale. (2022, June 29). Retrieved from https://www.smh.com.au/business/companies/historic-kangaroo-ground-venue-comes-up-for-rare-sale-20120325-1vshw.html • Wellers, Kangaroo Ground property sold with leaseback. (2022, June 29). Retrieved from https://www.urban.com.au/expert-insights/investing/37735-wellers-kangaroo-ground-property-sold-with-leaseback • Wellers, Kangaroo Ground | With Mark Seymour, at one of his …. (2022, June 29). Retrieved from https://www.flickr.com/photos/robertmilesdesign/4564390893/ • 2016 Notice of proposed deregistration - WELLERS OF KANGAROO GROUND PTY LTD 124 435 409. (2022, June 29). Retrieved from https://publishednotices.asic.gov.au/browsesearch-notices/notice-details/WELLERS-OF-KANGAROO-GROUND-PTY-LTD-124435409/35d43b89-159a-4435-963f-daec688a61ca • Search results for: Websites (archived). (2022, June 29). Retrieved from https://trove.nla.gov.au/search/category/websites?keyword=%22wellers%20restaurant%22 29 June 2022 edward weller, wellers of kangaroo ground, wellers hotel, wellers restaurant, mary weller, pittmans corner, fondata 1812 at wellers, historic buildings register, hotels, john weller, kangaroo ground, pitman's corner, bassett-smith collection -
 Eltham District Historical Society Inc
Photograph, Tess Justine (Nillumbik Shire Council), Murray's Bridge over the Diamond Creek, Eltham North, 19 Feb 2022
Murray's Bridge over the Diamond Creek on the Diamond Creek Trail just prior to demolition and replacement with a new steel bridge. Heritage advice obtained by Nillumbik Shire Council, following a suggestion by the Eltham District Historical Society (EDHS), is that the original bridge appears to have been a simplified version of the Country Roads Board’s (CRB) standard timber bridge design of the early-to-mid 1920s. In c1990 Murray’s bridge was renovated with three recycled steel girders as part of a bike/pedestrian path in the reserve. During these alterations many parts of the bridge were removed, and some were replaced. Heritage advice indicates the condition of Murray’s bridge is poor. The remaining original parts are all in poor condition, with severe weathering, splitting and rot, especially to the stringers retained on the bridge. Heritage advice is that Murray’s Bridge does not have sufficient significance in the cultural history of the Nillumbik area to warrant inclusion in the Nillumbik Shire Heritage Overlay and also does not have sufficient significance as a rare survivor to warrant inclusion in the Nillumbik Shire Heritage Overlay. There are no indications in the historical record that this site was individually important to the cultural history of this area. EDHS is comfortable with the heritage advice provided to Council and has worked closely on this project with Council. EDHS has suggested some of the removed timbers be used in the vicinity of the bridge for landscaping and possibly seating, so as to retain these remnants close to the site of the original bridge, which is the last old timber bridge along the lower reaches of the Diamond Creek. Mary (Sweeney) Murray and John Wright Murray selected 80 acres, Lot C Section 16 and Lot 5 Section 17 Parish of Nillumbik, under an occupation license in 1866. John died in 1867 and freehold was granted to his son John in 1873. The farm was known as ‘Laurel Hill’. John Junior was an Eltham Shire councillor and sometime president from 1887 up until 1897. He added Lot A Section 16 to the farm in ca1888. John and his younger brother James arranged to rent/purchase Lot B Section 17, across Diamond Creek to the west, in ca1900. It appears that John and James farmed separately for a few years, with a new homestead built for James ad family on the high point of Lot B Section 17 in ca1910. John sold off Lot 5 Section 17 in 1912. When John died in 1912 James took over the land on both sides of the Diamond Creek. The old homestead on the west side of the Creek disappeared. A farm bridge over Diamond Creek from this period may have been located close to the northern boundary of the farm. John Langlands, owner of the farm known as ‘Ihurst’ on the west side of Diamond Creek to the south of the Murray’s land, died in 1907. In 1909 his land was then subdivided into 100 lots to become the ‘Glen Park Estate’. Other similar subdivisions of nineteenth century farms around Eltham in this period included the ‘Franktonia (or Beard’s) Estate’ to the northeast and ‘Bonsack’s Estate’ between Eltham and Greensborough. Soon after the opening of the railway extension line from Eltham to Hurstbridge in 1912, Glen Park and nearby residents including James Murray agitated for a railway station or siding to be located half-way between Eltham and Hurstbridge, so that the Glen Park residents who used the railway daily did not have to walk into the Eltham or Hurstbridge stations. Some believed Coleman’s Corner (opposite Edendale Farm) was an appropriate spot for the platform. James Murray was among those who thought the railway should be located on his land, closer to half-way between Eltham and Hurstbridge stations. The Railways Commissioners warned that the locals would have to fund these works themselves. The Glen Park Estate residents initially had difficulty accessing Eltham by road, with only an old low-level bridge over Diamond Creek at the south end of their estate. A new timber trestle bridge across the creek, now on Wattletree Road, was opened in 1915. Road access to the north was gained in 1927 when the new Murray’s Road, which crossed the Murray’s land, was built. Residents continued to agitate for a Glen Park station. By 1926 the Railways Commissioners’ preferred site was on the Murray’s land. They arranged an estimate of cost of a full-length platform. The estimate was too much for the locals, who in 1928 argued unsuccessfully for a shorter and hence cheaper platform. By 1929 Murray had agreed to donate the land, but the locals would still have to fund the works. Murray decided, unilaterally it would appear, to commence work on a timber trestle road bridge over Diamond Creek to link the new Murray Road to the proposed station. Late in 1929 he stopped work on the bridge, for reasons unknown, but started work again and completed the bridge in 1931. There is no further newspaper evidence of the campaign for the Glen Park station until 1939, when Murray and another local, Mr Maxwell, met the Railways Commissioner. The Glen Park locale now included 45 homes on the west side of the creek and 20 on the Eltham side. Most of the residents used the train every day. The Commissioner remained adamant that only a full-length platform could be built for safety reasons. It appears the campaign dissolved at this point. The increasing move to cars may have had an impact. There is no evidence of Murray’s bridge ever being connected to Murray’s Road, or of it having wide use for any purpose by locals. James Murray died in 1947 and the farm was taken over by his son James (Jim). Jim started to sell off parts of the farm in the 1980s, retaining a few acres around the ca1910 homestead and building a new house there. Recreation reserves were established along the creek. In ca1990 Murray’s bridge was renovated with steel girders as part of a bike/pedestrian path in the reserve. The old farmhouse was demolished in ca2014. * * * A theory posted on local community Facebook groups was that the bridge was built in the 1860s and was built to be more robust than was necessary for the movement of cows from one side of the creek to the other. It was suggested the robustness was necessary to support the weight of gold ore being transferred from a mine on Murray’s land to a railway siding near Murrays Bridge (presumably for transfer and processing at Diamond Creek). Perhaps this may have been one of the motivators for Murray, who really knows? Knowing when mining operations ceased on his land and how that fits the overall timeline would be useful but at the time the bridge was built, local gold production was minimal at best. The known facts are: • The railway line came to Eltham in 1902. • The extension of the railway from Eltham to Hurstbridge was constructed in 1912 so no railway line even existed through Murray's property until 1912 and the Victorian Railways maps at the time show no such siding on Murray’s property. • In 1923 a new company was formed in anticipation of the old Diamond Creek Gold Mine being re-opened. The mine had been previously closed and flooded. It was noted in the press at the time that the mine was within a mile of the railway. Nothing really came of this. • Construction of Murrays Bridge was commenced by James Murray in early 1929 in anticipation of a proposed flag station being nominated on his land, but work ceased shortly afterwards. The proposed flag station was commonly referred to as Glen Park as the residents of the Glen Park Estate wanted Option 1, located near them with the platform adjacent to Colemans corner. This was probably never going to fly as it was virtually in eyesight of Eltham station. Allandale Road was the third option, but the Commissioners' preferred option was No. 2 - on Murray's property. • The Railway Commissioners were not going to finance any such station and the works had to be funded by private landowners and residents, hence Murray investing in this himself. • Murray recommenced work two years later and finished his bridge in 1931 but unfortunately for him, the proposed flag station never eventuated. The bluestone siding you reference may well have been built by Murray as part of the proposed station platform. • Up until then, apart from the Main Road bridge, which was washed away in 1924, virtually all local crossings over the Diamond Creek were low lying bridges – Kaylocks Bridge at Brougham Street, Diamond Street bridge, Glen Park Road bridge. It is expected that Murray also had a low-lying bridge to connect his land either side of the creek. These were all washed away or severely damaged multiple times in the 1920s. Lessons were learnt, and Murrays Bridge appears to have been built in accordance with Country Road Board standards of the time. Flood damage was ongoing, and even more recently constructed raised bridges kept getting washed away, e.g., the new Wattle Tree Road bridge in 1958 just months after completion. Murray’s bridge was reinforced with steel some 30 years ago presumably to provide additional floodwater resistance, given the history of bridges disappearing in floodwaters. • In March 1932 it was reported in the Advertiser that there were still some prospectors operating around Eltham North who apart from further scarring the face of the earth over the previous two years had gained significant experience but little gold - hardly a driving factor for constructing a dedicated railway siding and bridge to transfer gold ore. It is far more probable that James Murray was hoping to have the railway station located on his property and invested his money by building the bridge to lead to it as well as a station platform. Had the station eventuated, it may well have driven up the value of his land for subdivision and new housing estates like the Glen Park Estate. That did not eventuate. Whilst the bridge was indeed old (90 years), the core structure being completed in 1931, it had been modified substantially from original and hence had no significant historic value – i.e., it was not a representative example of its type, construction, and age. Given that the bridge was not worthy of saving, the Eltham District Historical Society with Council’s support, and the Eltham Woodworkers group endeavoured to see what suitable sized timbers were salvageable to fabricate a commemorative seat. Unfortunately, the experts at the Woodworkers group were unable to salvage any suitable length/width timbers to fabricate the seat due to the presence of rot. Last remaining wooden trestle bridge on the Diamond Creek Trail just prior to demolition and replacementBorn digital image (27)diamond creek (creek), diamond creek trail, murrays bridge, ‘laurel hill’, john wright murray, mary (sweeney) murra, john murray jnr, james murray, john langlands, ‘ihurst’, ‘glen park estate’, beard's estate, franktonia, bonsack's estate, glen park estate, glen park railway station -
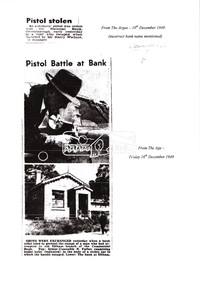 Eltham District Historical Society Inc
Folder, Commercial Bank of Australia Eltham Branch Hold-Up, 15 December 1949
Thursday, December 15, 1949, the quiet little bank was embroiled in an infamous wild shoot-out between a daring thief and two bank officers. Today, the building still carries the scars ; a bullet hole remains visible in a cedar bench testifying to the events that played out that day. 3.30 a.m., Friday, December 9. The manager of the Commercial Bank branch at Greensborough, Mr Harry Wallace and his wife are asleep in their bedroom of the little house behind the branch. Harry is awakened by a noise and sees an intruder in a corner of the bedroom. He calls out but the intruder who has switched off the power in anticipation flees through a side door and scarpers down Main Street. Harry summons the police but a search by First Constable Thomas of the Greensborough Police assisted by a wireless patrol car is unsuccessful. A report is filed noting the theft of a .25 calibre pistol from the wardrobe. Thursday, December 15th. It is 1pm and the Commercial Bank has just opened. The branch is only open Mondays and Thursdays from 1-3pm. The morning started off a little cool with some scattered showers but it has fined up and the temperature is now around 61 degrees (16 C). A new grey Singer sports car with soft-top pulls up on the opposite side of the road and a young man, neatly dressed in a dark blue suit, wearing a grey hat and carrying a brief case exits the vehicle. He looks around then crosses the road and walks up the steps and through the door into the bank. There are three people inside; Mr. Jack Burgoyne whose grocery store is situated just 50 yards up the road, Mr. Lindsay A. Spears, the Eltham Agency Receiving Officer and by chance, Mr Harry Wallace, manager of the Greensborough branch. Jack Burgoyne takes note of the young stranger; thinking to himself he appears nervous. The man approaches the counter and introduces himself as John Henderson of Greensborough and explains that he wishes to open a new account. He places his hat and £3 on the counter. Mr Spears attends to the paperwork. He asks the young man to sign two forms, which he does but then he withdraws from the counter and starts walking towards the door. Suddenly he spins around pulling an automatic pistol from his right-hand pocket. He exclaims forcefully; “The game’s on! I’ll take the lot!” Spears appears to comply by pretending to open a drawer. The man shouts loudly, “Keep your hand away from that drawer.” Spears instead reaches for a pistol in his pocket and challenges the man, “Here it is. Come and get it!” At the same time, Harry Wallace pulls a pistol from his pocket as well. The bandit fires a shot but misses, the bullet striking the counter. Both Spears and Wallace open fire and Jack Burgoyne ducks for cover. As the bandit turns and runs for the door leaving his £3 behind, he fires another shot, which strikes the ceiling. Spears fires back, and thinks he may have hit him in the foot. The bandit flees the bank and heads for the grey Singer car, registration NO-106, parked opposite. Wallace and Spears pursue him to the door and open fire again, striking the car three times around the driver’s door. Spears lets off eight shots and Wallace, seven before his gun jams. The getaway car initially heads slowly down Main Road towards Bridge Street. About 100 yards down the road, Dave Adams, a PMG employee, who has heard the shots, throws a steel manhole step at the driver. It hits the roof of the car nine inches above the driver’s head and tears the hood. Another witness claims to have seen the door blow open and the driver raise his hand. The car gathers speed and swings left into Bridge Street racing along at about 60 miles an hour careering recklessly past council employee, Mr. Percy Williams, who is driving a dray along Smarts Road [believed to be Bridge Street]. At the end of the road the Singer fails to get round the sharp turn and crashes into an embankment skidding to a stop outside the home of Mr John Clifford. One side of the car is wrecked. Mr Clifford, an aircraft engineer hears the fast travelling car bump heavily into the road bank at about 1.25 p.m. Hearing the whine of an engine he goes outside to find the grey Singer parked at the side of the road. Jack George also lives at the corner and hears the car crash. “The bandit opened the car door, ran 50 yards, and suddenly turned back,” exclaims Jack. “He took something from the car. It might have been a gun.” In his haste, the bandit drops his grey felt hat, size 6 7/8, on the road and dashes up Sherbourne Road for about 200 yards then disappears into the scrub carrying a brief case and a bundle in which a sailor’s cap can be seen. About 3 p.m., Mr H.D. Pettie of Mountain View Road, Montmorency is looking through his field glasses and notices a young man walking through thick scrub on private property some distance from his house. The man is wearing a sailor’s cap and disappears along the railway track toward Montmorency. As the day progresses, ten police cars, one motor cycle, and about 40 police led by Det. Sgt. McMennemin of Malvern CIB are searching for him. They believe he is hiding in thick scrub along the bank of the creek about half-a-mile outside Eltham township. Wireless patrol cars, four mobile traffic cars and the CIB area cars from Malvern and Kew are taking part. Police check the thief’s car and discover it was stolen from Helen Baxter, of Doncaster Road, North Balwyn from outside Victoria Barracks. Harry Wallace informs the police that he believes he recognised the bandit as the man who took his pistol from his bedroom the previous Friday morning. As night falls, armed police are posted at strategic points in the Eltham-Greensborough district. Police in cars are watching the roads. Others are searching the bush and checking passengers on trains. Little do they realise the young man has already slipped out of the net. SEQUEL YOUTH OF 19 CHARGED WITH ATTEMPTED ARMED ROBBERY OF BANK AT ELTHAM Weekly Times, Wednesday 15 February 1950, page 6 Detectives who raided a house in Bell St., Coburg, Melbourne, charged a 19-year-old youth, of South Yarra, with attempted armed robbery at the Commercial Bank’s Eltham (Vic.) receiving depot on Dec. 15. Police say they recovered a loaded automatic pistol, diamond and signet rings worth more than £200, a complete set of house-breaking instruments, a sailor’s uniform, and chloroform gauze in the raid. The youth was charged that while armed with an offensive weapon, he attempted to rob Lindsay George Spears of a sum of money. He was further charged on six counts of breaking, entering and stealing. Police allege that the person who tried to hold up Mr Spears in the Commercial Bank receiving depot at Eltham on December 15. escaped in a stolen car, after Mr Spears and Mr Henry Wallace, manager of the bank’s Greensborough branch, had fired at him. After the car crashed, he escaped into thick scrub and is alleged to have changed into a sailor’s uniform. On December 9 an automatic pistol was stolen from Mr Wallace’s bedroom at the Greensborough bank. The chloroform pad recovered is alleged to have been stolen from the Dental Supply Company, Plenty Road, Preston. The rings are alleged to have been taken in a £513 burglary from the shop of James Paton. Sydney Road, Coburg. Det. Sgt. H. McMennemin conducted the investigations with Senior Dets. R. Newton and M Downie, Detectives l. Dent, R. Rayner, P. Pedersen and M. Handley and First Constable A. Thomas. The youth will appear at Eltham Court on February 22. Manager’s Gun Used in Holdup at Bank The Age, Thursday 23 February 1950, page 4 It was stated in Eltham court yesterday that a youth who robbed a bank manager of his pistol, later used it in an attempt to hold-up the bank. Kay Arthur Morgan, 19, draftsman, of Castle-street, South Yarra, was committed for trial on charges of breaking and entering, and stealing a pistol and attempted robbery while armed with an offensive weapon. He pleaded guilty. The manager of Eltham branch of the Commercial Bank of Australia Ltd., Henry Clifton Cabot Wallace, said he disturbed someone in the bedroom, in which he and his wife were sleeping, at 3 a.m. on December. 9, 1949. Later he found that his automatic- pistol was missing. On December 15 a youth, who said his name was John Henderson, entered the bank and opened a new account. As the youth was leaving the bank he turned round with a pistol in his hand and said: — “I want the lot.” Spear indicated a drawer under the counter; and said.— “Here it is. Come and get it.” The youth said:— “Keep your hand away from that drawer.” Witness said Spear then drew his pistol from his hip pocket. The youth fired at them, and Spear returned the fire. “I pulled my pistol and fired, too” said witness. The youth fired again, ran out to a car and drove off. Witness and Spear fired several shots at the car. The youth was the accused Morgan, sitting in court, witness said. Evidence was given that one bullet was found in the celling and the other in the bank. Morgan was allowed £100 bail on each charge. Morgan ended up serving three years for the failed armed robbery and became a notorious criminal. He had twin sons, Peter and Doug and even though only ten years old, Morgan would get his sons to act as lookouts whilst he committed burglaries. The lads became building contractors but when the industry suffered a downturn in 1977 and they were short on cash, they returned to the family business. Over the following 23 months they undertook 24 raids on country and outer-suburban TABs and banks. Whilst robbing one country bank for the third time, just like their father, it all went wrong ending up with a police officer shot. They were nick-named the “After-dark” bandits and are considered to be Australia’s last bushrangers. They were convicted and served 17 years in prison.5 x A4 photocopied pagesbank hold-up, cba bank, det sgt mcmennemin, eltham, h.d. pettie, harry wallace, jack burgoyne, kay arthur morgan, lindsay a. spears, main road -
 Melbourne Tram Museum
Album - David Frost Slide Collection, David Frost
Photo - see pdf file for further information. Number Brief Description date DFC1 A general view from the former railway platform at Port Melb Station looking towards Station Pier on opening day 20-12-1987 DFC2 A2 285 in the Tramway Platform at Port Melbourne Station on opening Day 20-12-1987 DFC3 A2 285 in the Tramway Platform at Port Melbourne Station on opening Day 20-12-1987 DFC4 A2 285 in the Tramway Platform at Port Melbourne Station on opening Day 20-12-1987 DFC5 A2 273 at St Kilda Tramway Station on opening day 22-11-1987 DFC6 A2 273 turning from Fitzroy St into St Kilda Tramway Station on opening day 22-11-1987 DFC7 B1 2001 at St Kilda Tramway Station turning into Fitzroy St on opening day 22-11-1987 DFC8 B1 2002 enters St Kilda Tramway Station on opening day 22-11-1987 DFC9 An A2 approaches St Kilda Tramway Station on opening day 22-11-1987 DFC10 Concreting the connecting curve from Fitroy St into St Kilda Station c July 1987 DFC11 An MTA AEC MKVI bus in Grey St St Kilda at Dalgety St with Tramway works in the background c July 1987 DFC12 Grey St St Kilda at Dalgety St with Tramway works in the background in Fitzroy St c July 1987 DFC13 Concreting the connecting curve from Fitroy St into St Kilda Station c July 1987 DFC14 Restaurant Tram 442 in Fitzroy St at Grey St Passing MTA bus 59 outside St Kilda Station c1986 DFC15 Former VR tram stop sign painted on a pole at Glenhuntly Rd & Broadway DFC16 Former VR Elwood Tram Depot under demolition 1996 DFC17 Former VR Elwood Tram Depot under demolition 1996 DFC18 Former VR Elwood Tram Depot under demolition 1996 DFC19 Former VR Elwood Tram Depot under demolition 1996 DFC20 Former VR Elwood Tram Depot under demolition 1996 DFC21 Former VR Elwood Tram Depot under demolition 1996 DFC22 Former VR Elwood Tram Depot under demolition 1996 DFC23 Former VR Elwood Tram Depot under demolition 1996 DFC24 MTS Tower waggon in use at the former VR Elwood Tram Depot under demolition 1996 DFC25 A Sign advertising the sale of the Former VR Elwood Tram Depot – 10/8/1996 1996 DFC26 Former VR Elwood Tram Depot under demolition 1996 DFC27 Interior of a shed at the former VR Elwood Tram Depot under demolition 1996 DFC28 Former VR Elwood Tram Depot under demolition 1996 DFC29 Former VR Elwood Tram Depot under demolition 1996 DFC30 Former VR Elwood Tram Depot under demolition 1996 DFC31 VR 20, former breakdown car in Bob Prentice’s Back Yard Jan 1974 DFC32 VR 20 on a low loader en route to Bob Prentice’s for preservation 1959 DFC33 VR 20 as the breakdown car on the St Kilda Electric Street Railway c1955 DFC34 VR 39 waits in St Kilda St as breakdown car 20 enters Elwood Depot c1955 DFC35 VR 54 and 50 in the rear yard of Elwood Depot c1958 DFC36 VR 50 in the rear yard of Elwood Depot c1958 DFC37 VR 50 in the rear yard of Elwood Depot c1958 DFC38 VR 28 in St Kilda St outside Elwood depot after the line had been cut back to this point c1958 DFC39 VR 29 in St Kilda St outside Elwood depot after the line had been cut back to this point c1958 DFC40 VR 35 passes 28 on the St Kilda Electric Street Railway c1955 DFC41 VR 39 on the St Kilda Electric Street Railway c1955 DFC42 Y1 613 on a tour c1970 DFC43 VR 54 in St Kilda St outside Elwood Depot c1955 DFC44 VR 28 at Brighton Beach Terminus c1955 DFC45 VR 33 being washed in the wash bay at the rear of Elwood Depot c1955 DFC46 VR 20 breakdown car running into Elwood Depot c1955 DFC47 VR 3 in the rear yard at Elwood Depot c1955 DFC48 VR 51 on an AETA Tour running out of Elwood Depot c1958 DFC49 VR 28 on the St Kilda Electric Street Railway c1955 DFC50 VR 28 with crew in St Kilda St outside Elwood depot after the line had been cut back to this point 1959 DFC51 VR 52 in Grey St near Fitzroy St c1958 DFC52 VR 51 on a AETA Tour passes 33 in Grey St near Fitzroy St c1958 DFC53 VR 29 in Grey St near Fitzroy St c1958 DFC54 VR51 on an AETA Tour shunts as 52 waits on the St Kilda Electric Street Railway c1958 DFC55 VR 51 on the Black Rock Electric Street Railway c1955 DFC56 VR 28 in St Kilda St outside Elwood depot after the line had been cut back to this point c1958 DFC57 Combined Rail-Tram Tickets of the Black Rock Electric Street Railway Feb 1975 DFC58 Combined Rail-Tram Tickets of the St Kilda Electric Street Railway Feb 1975 DFC59 Electric Street Railway & Motor Coach Paper Tear off Tickets Feb 1975 DFC60 VR 52 & 53 on Rt 82 pass in Cordite Ave near Wests Rd Sept 1975 DFC61 Z 68 & 52 in East Preston Depot in M&MTB Livery c1977 DFC62 Copy photo of VR 18 in Elwood Depot c1910 DFC63 VR 51 as a one man car at Black Rock Terminus c1955 DFC64 VR 53 on Rt 82 in Droop St Footscray Jan 1974 DFC65 B2 2027 on Rt 96 in South Melb Station c1988 DFC66 VR 20 as preserved in Bob Prentice’s backyard High St Prahran Jan 1974 DFC67 VR 700 on Rt 82 in Droop St Footsray c1978 DFC68 VR 28 as the last car from ST Kilda Station 28-2-1959 DFC69 VR 700 at the Rt 82 Moonee Ponds Terminus c1978 DFC70 VR 52 waiting time at the Rt 82 Footscray Terminus, the driver intently stares at the bundy clock as the Braid and the Connie gossip Jul 1972 DFC71 VR 54 shunting outside Elwood Depot to return to St Kilda Station 1959 DFC72 SW6 969 in MTA Livery blocking the entrance to South Melb Depot presumably during the scratch ticket dispute Jan 1990 DFC73 VR 52 & 53 on Rt 82 pass in Droop St Footscray Sept 1975 DFC74 VR 700 after withdrawl in the Newport Railway museum in the process of a repaint c1985 DFC75 VR 700 after withdrawl in the Newport Railway museum in the process of a repaint c1985 DFC76 VR 700 on Rt 82 in Droop St Footsray at The Cresent c1978 DFC77 VR 700 on Rt 82 in Droop St Footsray c1978 DFC78 Former VR tram depot in use as an MTA Bus depot c1990 DFC79 VR 52 waiting time at the Rt 82 Footscray Terminus Jul 1972 DFC80 VR 52 waiting time at the Rt 82 Footscray Terminus with Connie changing the pole Jul 1972 DFC81 VR 52 at the Rt 82 Moonee Ponds Terminus with the crew chatting 7-12-1974 DFC82 VR 52 on Rt 82 on the reserved track in Raleigh Rd Ascot Vale Jan 1974 DFC83 VR 53 on Rt 82 in Leeds St Footscray about to turn into Hopkins St April 1976 DFC84 VR 53 on Rt 82 in Droop St Footsray Jan 1974 DFC85 VR 700 on Rt 82 in Droop St Footsray at Hopkins St c1978 DFC86 Z 52 in MTA livery on Rt 19 in Elizabeth St near Bourke St c1985 DFC87 VR 52 at the Rt 82 Moonee Ponds Terminus Jul 1972 DFC88 VR 53 at the Rt 82 Footscray Terminus Jan 1974 DFC89 VR 52 freshly outshopped from the workshops and W7 1011 at the Bourke St Terminus with 52 on display for the 1968 railway exhibition 1968 DFC90 Painting of W class 369 in Chocolate & Cream c1930 DFC91 Charing Cross, Bendigo at night c1965 DFC92 Ballarat ? c1965 DFC93 Bendigo 18 on an AETA tour in McCrae St near Tramway Ave c1965 DFC94 View from the roof of a tram in the body shop at Preston Workshops 1977 DFC95 View from the roof of a tram in the body shop at Preston Workshops 1977 DFC96 View from the roof of a tram in the body shop at Preston Workshops showing the panto on 546 1977 DFC97 Interior view of Carlton Control Centre showing desk and wall panel c1968 DFC98 W2 493 on Rt 55 in Kingsway outside South Melb Depot Aug 1973 DFC99 W2 496 in Sturt St at Kingsway on Rt 1 Jul 1973 DFC100 Z class truck c1975 DFC101 Z3 116 in Bourke St at King St as new c1979 DFC102 Bob Prentice on tour c1968 DFC103 SW6 900 as an advertising tram for Newsday at night 1969 DFC104 597 Jul 1973 DFC105 W2 480 on Rt 3 passing under the railway bridge at Caulfield Oct 1972 DFC106 Interior view of Carlton Control Centre showing desk c1968 DFC107 SW6 856 on Rt 77 at night Jul 1973 DFC108 W2 496 in Sturt St at Kingsway on Rt 1 Jul 1973 DFC109 PCC 980 on a tour at South Melb Depot c1968 DFC110 SW6 856 on Rt 77 at night Jul 1973 DFC111 View from the roof of a tram in the body shop at Preston Workshops showing the panto on 546 1977 DFC112 Dandenong Rd from Chapel St Nov 1968 DFC113 A Z class car turns from Gertrude into Nicholson St c1990 DFC114 SW6 900 as an advertising tram for Newsday at night 1969 DFC115 Port Melbourne Station showing Centennial bridge and station building prior to closure. 10-1987 DFC116 Port Melbourne station with train prior to closure, looking south 10-1987 Demonstrates the work of David Frost in photography and or collecting slides.Assembled album in a black presentation folder of 116 colour slides, 6 slide sleeves, collected or photographed by David Frost. Many are TMSV or Windsor Publications slides. All photographs have been scanned and placed on the Museum's G drive. A list of all photographs with details has been compiled. melbourne, tramways, trams, vr trams, elwood, st kilda light rail, port melbourne, opening, elwood depot, buses -
 Federation University Historical Collection
Letter - Correspondence, Walter M. Hitchcock, Letters from Walter M. Hitchcock concerning a model of a Ballarat tent (and more), 1911, 1911 (exact)
The tent model mentioned in the letters was displayed in the Ballarat School of Mines Museum. During the 1960s it was transferred to the Ballarat Historical Society. Two handwritten letters on paper with black mourning edge written by Walter M. Hitchcock to the Ballarat School of Mines, and another written by Walter's brother George M. Hitchcock.Letter transcription follow: Letter from Walter M. Hitchcock regarding the death of James Oddie and early gold mining at Ballarat, 1910 and 1911 48 The Memorial Hall Farringdon St London Dec1/10 The Secretary Ballarat Museum Dear Sir, I am just now sending you this line, i anticipation of further correspondence later on, simply to forward you a Post Card of the 1st mining tent erected 1851 on the site of he then newly proclaimed Township of Ballarat, which, as the sole survivor of the party who built the original, I have had the pleasure in making, and have decided to present it to your museum, Sir Jno Lasenor out Agent General for Victoria came to a Bazaar recently held in London. where I had it on view in the museum from 3 days, - and desired I would allow its [ ? ] exhibited in the first large window of the beautiful new building of the Victoria Agency situate in the Strand. It is there for the past few days and he may wish it to remain a week or two longer, I know of no other exhibition of it to delay it being packed and shipped to my relatives in Geelong (Mr [?] Bright of Hitchock's Firm) who may wish to show it in one of their windows before forwarding it to your museum - I have had an itemised pane glass case made for it with drop down end and [?} it stands on a plateau of moss, to represent grass 32 x 13 x 13 high and chimney 14 1/2 - the case is made 34 x 26 x 20 high inside - I shall have it very carefully packed - tent emptied tools, beds, &c &c in separate packing and insured for 50 pounds - I will send you full details later on. I hope and believe your President will accept it in due time Meantime believe me to be very truly Cat Walter Hitchcock G.F.B. 48 The Memorial Hall Farringdon St London March 15th 1911 The Secretary Ballarat School of Mines Dear Sir, Thanks for your letter received last week – I have unaccountably mislaid it, so cannot address you personally, shall no doubt find it among office papers. The model is being fetched today from Victorian Agent General’s (Sir John [Lavernor?] office window in the Strand where many thousands, he tells me, have stopped in passing to see it (their first peep of Ballaarat). It will be on view at Blackheath (Kent) for a week, then packed and shipped without further delay. I shall enclose in the glass case (which is 26 x 34 x 16 in high) some spare minced moss and gas (smoke) in case in transit the plateau suffers by shaking (though it is well glued down). All the tools, mining appliances, cradle, windlass, &c will be separately packed enclosed – which you can easily place in respective positions. HRH Prince of Wales has graciously accepted a photo of it – and in my letter to him when sending it for his acceptance I said – as he would probably ere long visit Australia as did his grandfather and father, which ought to (and certainly will) include at least a day or two in seeing your beautiful City, and also something of your mines &c instead of the hurried visit of his father (2 hours) when he, as Duke of York, unveiled a statue to the memory of those slain in the sad Boer War, which now is admitted by almost everybody to have been a big political mistake, - though in the future with England’s present wise policy towards that country it will prove for Africa’s welfare. It may interest you to know that when I ascertained that Geelong was not to be visited by the Royal Pair – I went up to St James’s Palace by appointed time the Duke’s private Secy Sir Arthur Bigge – taking with me a specially illustrated paper issued in Melb. showing many pictures of the beauties and industries of Geelong – Sir Arthur was impressed but said all the arrangements for the Royal stay in Victoria (10 days) were made locally, by Lord Hopetoun and collegues and committee, and were practically closed – which meant that only a brief trip to Ballarat to uncover the memorial was intended outside Melbourne. Perhaps if we were Melbourne residents we should have succumbed to the prevailing spirit of selfishness – forgetting (or trying to forget) that there are many beauty spots in Victoria and centres of great interest - Ballarat, Geelong, Bendigo, &c that ought to have been visited instead of Melbourne only. Finding Sir Arthur favorably impressed about Geelong I thanked him and returned to City work again. I at once called to Geelong whose mayor and friends had been twice unsuccessful in trying for the Melbourne functions programme being altered to include a visit to Geelong and lovely spots in the Western District, reporting my interview with Sir A B and his favourable reception of my representations, but that any alteration to the programme of engagements during the Royal visit must be made locally and by the local authorities. This had the desired success for on receipt of my message the Geelong mayor and colleagues again reopened the question and went to Melbourne, resulting in a concession (but what an altogether inadequate one) and they graciously ? consented to the train, on its way with the Duke and Duchess to your city, to stop at the Geelong stn (15 minutes) and so it came about that by a hasty local effort, 3,000 school children, and not a few of the leading people including the Mayor &c were gathered to welcome them in Geelong. The National anthem being sung, an Address read and presented and kindly replied to. Now Ballarat should doubtless has influence. See to it when our P. Of Wales visits Victoria – an unselfish ¬ programme is fixed up – and HRH afforded ample opportunity of visiting leisurely your city, Geelong, Bendigo and other centres of beauty and importance. The Prince himself will be the gainer by such an equitable and enlightened programme, - and come back with all the more favourable views of the marvellous development ever since our family first settled in Geelong in 1850. A far preferable result of such a visit than night after night having Melbourne Banquets and the visiting of its undoubted attractions - whilst all the rest of the State remained unvisited. Such an official mistake must not be made again. I will write you again, stating name of steamer of which the model is shipped and date of departure – it is firmly built on a backing of 3/8 in oak tall uprights so through the 7/8 in plateau and am entrusting the packing be very careful. I expressed firm – so that except possibly any breakage in glass case – it should reach you in due time all right. The top of case will be screwed so that it can be readily removed temporarily to enable my [ ? ] firm to show it in one of their windows. Believe me Yours very truly Captn Walter M. Hitchcock My brother will deliver it on my a/c – all carriage paid. Mt very kind regards to my friend since 1850 Jas Oddie. University of Ballarat Historical Collection Cat. No. 8133.3 & .4 Letter from Walter M. Hitchcock regarding the death of James Oddie and early gold mining at Ballarat, 1911 48 The Memorial Hall Farringdon St London April 20th 1911 My Dear Sir, It is with no ordinary feeling of regret that I received the tidings of the death of my good friend, your fellow citizen for many years, Mr James Oddie. Living at Geelong from March 1850 I came to know him there as carrying on a foundry business in Ashby. With the discovery of gold at Ballarat started off almost of the working people, as well as of all other classes of the male population. Mr Oddie arrived in Ballarat I believe on or about September 1st 1851. My three comrades and I arrived October 1st 1851 – among the many thousands soon gathered within a mile or so of Golden Point – my friend Oddie and I often met. I returning to Geelong after a year mining – my friend on the other hand remaining at Ballarat ever since – a marvellous record, and I am sure his life has been one of unique value to your City in many ways, - his age (87) naturally prepared me for his call home – and only two mails before the news came I received from him on of his kindly chatty letters in which amongst other things – he referred with pleasure to having received from me two 10 x 12 photos – one being of my model and that he was arranging to have it placed in a shop window in your city. I am interested in the fact of your having known each of my three comrades of 1851/52. It was J.M. Garrett and I who got permission to conduct public Sunday morning service in their large Marquee – used all the week for issue of Licenses in the absence of any church buildings, and it being on wet Sundays impossible to have services as usual under the trees – Ballarat then was more like a Gentleman’s Park – than bush country – but the axe soon did its work – and all were felled for our cooking, and hencewith to make our kindling etc. Shafting of holes not being at first done because too shallow – our deepest (at Eureka) was only 115 ft. Bendigo I hear had now mines of 4,000 ft in depth (deeper than our tin or coal mines here). I fortunately have, in excellent state of preservation, my last of 12 licenses dated October 1 1852 and have recently purchased here a Miner’s Right dated 1864, to that when explaining on matters re Gold Licensing I can show sample of each. With kind regards Believe me Yours sincerely Walter M. Hitchcock Geelong June 20/11 Dear Sir, By rail to day through Messrs Bannister I send the model of miner’s tent packed in a case 50 donated by my brother Captain Walter M. Hitchcock of London. This model was made by my brother and represents the tent he worked in on the Ballarat Gold Fields in the year 1851 or 2. In a separate parcel a few extras omitted from the case. Please send me receipts in duplicate, one for my brother, the other for the Customs, Geelong, as being donated to your institution, after some little correspondence it was admitted [??] any payment for duty. You probably have my brother’s address and would like to acknowledge its arrival, direct. I hope it is in good order. I did not open it for show in Geelong, as there would be less risk of breakage on repacking. With kind remembrances. I am Yours Faithfully Geo. M. Hitchcock. A Mr G. F. B. Sharick who is living near my home called in to see my model – he said he knew FM [Fred Martell] and was lately at Ballaratballarat school of mines, frederick martell, fred martell, james oddie, walter m hitchcock, walter hitchcock, f m garratt, george hitchcock, hitchcock, golden point, gold discovery, j m garrett, gold license, j.m. garrett, t.m. hall, george m. hitchcock, f.m. garratt, walter m. hitchcock -
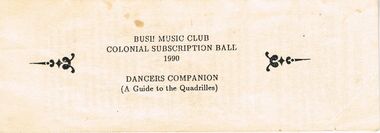 Bendigo Historical Society Inc.
Document - PETER ELLIS COLLECTION: BUSH MUSIC CLUB COLONIAL BALL, 1990
Small off white coloured booklet Bush Music Club Inc. Colonial Subscription Ball 1990 Dancers Companion (A guide to the Quadrilles) The Quadrille Figure 1 (Le Pantelon) (2x32) 8 Top couples R and L through. (without giving hands). 8 Set & turn Partners 8 Top ladies chain. 4 Top couples promenade across set. 4 Half R and L to place. 32 Side couples repeat Figure 2 (Le 'Ete) (4x24) 4 Top couples advance & retire. 4 Cross over (without changing places with partner). 8 Repeat back to place. 8 Set & turn partners. 24 Sides repeat. 48 Top and Sides repeat. Figure 3 (La Poule) (4x32) 4 Lady 1, Man 2 adv, tough RH, retire to opposite place. 4 Lady 1, Man 2 adv, join LH give RH to partner 4 Line of 4 balance fwd & back twice. 4 Men lead partners to opp. Place. 4 Lady 1, Man 2 adv. & ret. 4 Lady 1, Man 2 adv, honour & ret. 4 Top couples, advance & retire. 4 Half R & L to place. 32 Repeat with Lady 2, Man !. 32 Repeat with Lady 3, Man 4. 32 Repeat with Lady 4, Man 3. The Quadrille Figure 4. (La Pastourelle) (4x32) 4 1st couple advance & retire. 4 1st couple adv, lady join 2nd couple. 4 Line of 3 adv. & ret, 1st man retire. 4 Line of 3 adv. Ladies cross to 1st man. 4 Line of 3 adv. & ret, 2nd man retire. 4 Re-advance, form circle with 2nd man. 4 Circle L half way round. 4 Half R & L to place. 32 Repeat with 2nd couple leading. 32 Repeat with 3rd couple leading. 32 Repeat with 4th couple leading. Figure 5 (La Finale) (4 x 32 + 8) 4 All advance & retire. 4 Turn partners. 4 Ladies adv, curtsey & retire. 4 Men advance, bow & retire. 8 All set & turn corners. 8 Promenade with corner. (men to original place with corner) 96 Repeat 3 times to return to partner. 4 All advance & retire. Turn Partners. Notes: 1 Couples numbered 2 Set & turn is a 'balance' set and open hand turn. The Prince Imperial's Quadrille Figure 1. (4x24) 4 Top couples visit right, honour sides. 4 Top men retire with partner & side lady to opposite place, (ladies facing each other). 8 Ladies grand chain to places 8 All set and turn partners 24 Top couples repeat back to place. 48 Repeat with side couples. Figure 2 (4 x 24) 4 1st Lady, 2nd man adv & turn in centre finish facing 2nd lady. 2 2nd lady pass through to 1st man. 2 Both couples turn out to place. 4 top couples advance & retire. 4 Ladies chain back to place. (Nariel) 8 Chasse-croise. (4 steps past partner RH turn corner 4 steps back, LH turn with partner.) 24 Repeat wth 2nd lady, 1st man leading 24 Repeat wth 3rd lady, 4th man leading 24 Repeat wth 4th lady, 3rd man leading. Figure 3 (4x32) 4 1st lady to centre, curtsey to partner. (RH in RH, ACW turn in to centre) 4 2nd lady to centre, curtsey to partner. 4 3rd lady to centre, curtsey to partner.4 4th lady to centre, curtsey to partner. 8 ladies join hands, circle R, small steps after circle R, Men join circle, (giving RH to partner). 4 Balance for 4 (step lift x 4) 4 Turn partners to place, bow & curtsey. 32 Repeat, Lady 2, 1, 4 & 3 to centre 32 Repeat Lady 3, 4, 2 & 1 to centre 32 Repeat, Lady 4, 3, 1 & 2 to centre The Prince Imperial's Quadrille Figure 4 (4x32) 4 Top couples advance & retire. 4 Top couples adv, ladies move to R, as men retire to place. 8 Line of 3 adv & ret twice. 4 Single men adv, bow and retire. 4 Re-advance and turn to face partner. 4 Circle L half way round (with partner & side couple). 4 Half R & L to place. 32 Repeat with side couples leading. 32 Repeat with top couples leading (men moving to left as ladies retire) 32 Repeat with Side couple leading. (Men moving to left as ladies retire) Figure 5 (4x32 +32) 16 Ladies to the right, (RH turn with corner man then continue round to the right turning each man) 4 1st Lady, 2nd man advance & retire 4 re-advance & turn RH (finish facing partners) 8 set & turn partners (finishing in place) 32 Repeat with 2nd Lady, 1st man leading 32 repeat with 3rd lady, 4th man leading 32 Repeat with 4th Lady, 3rd man leading 16 Ladies to the right again. 4 Men turn partners to centre. 4 All bow and curtsey. 8 Promenade set ( hall) Note: Set & turn is a 'balance' set and open hand turn. The Parisienne Quadrille Figure 1 (1x32) 8 Couples R and L through. (without giving hands) 8 set & turn partners 8 Ladies chain. 4 Couples promenade across set. 4 Half R and L to place. Figure 2 (2x24) 4 Couples advance & retire. 4 Cross over (without changing places with partners) 8 Repeat back to place. 8 Set & turn partners. 24 Repeat. Figure 3 (2x32) 4 Lady 1, Man 2 adv, touch RH, retire to opposite place. 4 Lady 1, Man 2 adv, join LH, give RH to partner. 4 Line of 4 balance fwd & back twice 4 Men lead partners to opp. Place 4 Lady 1, Man 2 adv & retire 4 Lady 1, Man 2 adv, honour & ret. 4 Couples, advance & retire. 4 Half R & L to place. 32 Repeat with Lady 2, Man 1. The Parisienne Quadrille Figure 4. (2x32) 4 1st couple advance & retire. 4 1st couple adv, lady join 2nd couple. 4 Line of 3 adv. & ret, 1st man retire. 4 Line of 3 adv. Ladies cross to 1st man. 4 Line of 3 adv. & ret, 2nd man retire. 4 Re-advance, form circle with 2nd man. 4 Circle L half way round. 4 Half R & L to place. 32 Repeat with 2nd couple leading. Figure 5 (2x32) 4 Couples advance & retire 4 Cross over 8 Repeat back to place. 8 Ladies chain across & back.8 Set & turn partners. 32 Repeat Notes: 1 This 'quadrille' is similar to the first set (1st 4 figures) and is danced as two couple sets. 2 Set & turn is a 'balance' set and open hand turn. The Lancers Quadrille Figure 1 (4x24) 4 1st lady, 2nd man advance & retire, 4 Adv, turn two hands, return to place. 4 1st couple lead through across set 4 2nd couple lead through back 8 all set & turn corners. 24 Repeat, 2nd lady, 1st man leading 24 Repeat 3rd lady, 4th man leading 24 Repeat, 4th lady, 3rd man leading Figure 2 (4x24) 4 1st couple advance & retire. 2 1st lady adv to centre, turn to face partner 2 1st couple honour each other. 8 1st couple set and turn then sides form top & bottom lines 4 Lines advance & retire, 4 Advance and turn partners to place. 24 Repeat with 2nd couple leading 24 Repeat with 3rd couple leading 24 Repeat with 4th couple leading Figure 3. (2x32) 4 Ladies advance, curtsey & retire. 4 Men adv, bow, turn by left, bow to partners, then join RH in centre, (ladies RH on partners left elbow). 8 Promenade round set to place. 4 Ladies adv, curtsey & retire again. 4 Men adv, bow, turn by right, bow to partners, join LH in centre, right arm behind partner. 8 Promenade round to set in place. 32 Repeat. The Lancers Quadrille. Figure 4. (4x24) 8 Top couples visit R then L 4 Right Hands around with LH couple 4 then left hands around. 8 Circle left with that couple. 24 Repeat with side couples leading. 24 repeat, top couples visit L then R. 24 Repeat, side couples visit L then R. Figure 5. (4x48 +24) 8 All grand chain 1/2 way round and honour partners. 8 Continue grand chain to place and honour partners. 8 1st couple visit, return to place, facing out with sides in behind. 2 Change places with partner, 2 All rock fwd and back 2 change places again 2 All rock fwd and back 8 Cast out reform in lines 4 Lines advance & retire 4 Advance & turn partners to place 48 Repeat with 2nd couple leading 48 Repeat with 3rd couple leading 48 Repeat with 4th couple leading. 8 Grand chain 1/2 way round and honour partners. 8 continue grand chain to place and honour partners 8 swing partners (R arm round partner, LH in air) Note: All figures walked. Set & Turn is a 'balance' set and open two hand turn. The Caledonians Quadrille Figure 1. (2x32) 4 Top couples R.H. across, move CW (Ladies hands joined over Mens). 4 then L.H. across, move ACW. 8 Set & swing Partners 8 Top ladies chain. 4 Top couples promenade across set. 4 Half R and L to place. 32 Side couples repeat. Figure 2. (4x24) 8 1st Man advance & retire twice. 8 Set & swing corners. 8 Promenade with corners (to men's position.) 24 2nd man repeat. 48 3rd and 4th man repeat. Figure 3. (4x32) 4 Lady 1, Man 2 advance & retire. 4 Re-advance, 2 hand turn to place. 8 1st & 2nd couples lead through and back. (1st lead through across, 2nd back) 8 Set & swing corners. 4 All advance & retire. 4 Swing partners. 32 Repeat with Lady 2, Man 1. 32 Repeat with Lady 3, Man 4. 32 Repeat with Lady 4, Man 3. The Caledonians Quadrille Figure 4. (4x24) 2 Lady 1, Man 2 advance and stop. 2 Lady 2, Man 1 advance and stop. 4 Turn partners back to place. 2 All ladies to the right 4 steps. 2 All men to the left 4 steps. 2 All ladies to the right 4 steps. 2 All men to the left 4 steps. 4 Promenade to place. 4 Swing partners. 24 Repeat with Lady 2, Man 1 leading. 24 Repeat with Lady 3, Man 4 leading. 24 Repeat with Lady 4, Man 3 leading. Figure 5. (4x48 + 16) 8 1st couple visit. 4 Ladies advance, curtsey & retire. 4 Men advance, bow & retire. 8 All set & swing partners. 8 Grand chain 1/2 way round and honour partners. 4 Promenade to place 4 and swing partners. 8 Chasse-croise, (4 steps past partner, RH to corner balance fwd & back, then 4 steps back, LH to partner balance fwd & back). 48 Repeat with 2nd couple leading. 48 Repeat with 3rd couple leading. 48 Repeat with 4th couple leading. 8 All promenade set. 8 Swing partners. Note: Set & swing is 'normal' set and cross hand swing. The Royal Irish Quadrille Figure 1. (2x32) 8 Top couples to Right, R & L through 8 Set & swing Partners. 8 Ladies chain. 4 Couples promenade across (to the other couples position). 4 Half R & L to place. 32 Repeat with tops to the left. Figure 2. (4x24) 4 Top couples to Right, adv & ret. 4 Cross over (without changing places with partner). 8 Repeat back to place. 8 Set & swing partners. 24 Repeat with top couples to the Left. 48 Tops repeat with Right and Left sides. Figure 3. (4x32) 4 Lady 1,2 and Man on Right, advance, touch RH, retire to opposite place. 4 Advance again, join LH, give RH to partner. 4 Line of 4 balance fwd & back twice. 4 Men Lead partners to opp. Place. 4 Lady 1,2 and opp. Man adv & ret. 4 Advance, honour & retire. 4 Couples, advance & retire. 4 Half R & L to place. 32 Repeat with Ladies 3,4 leading. 64 Repeat with Tops facing left. The Royal Irish Quadrille Figure 4. (4x32) 4 Top couples to Right, adv & ret. 4 Re-adv, Top Ladies join opp. Couple. 4 Line of 3 adv & ret. Top men retire. 4 Line of 3 adv, ladies join other man. 4 Line of 3 adv & ret, Side men retire. 4 Re-advance, form circle with opp. Man. 4 Circle L half way round. 4 Half R & L to place. 32 Repeat with Side ladies leading. 64 Repeat with Top couples facing left. Figure 5. (4 x 32 + 8) 4 All advance & retire. 4 Swing partners. 4 Ladies advance, curtsey & retire. 4 Men advance, bow & retire. 8 All set & swing corners. 8 Promenade with corner. (Men to original place with corner). 96 Repeat 3 times to return to partner. 4 All advance & retire. 4 Swing partners. Notes: 1. This is The Quadrille danced diagonally, with Top couples dancing first with the side couple on their right, then the left. Ie. 1-3 and 2-4 then 1-4 and 2-3. 2. Set & swing is 'normal' set and irish swing.The Eightsome Reel Numbering: Clockwise 1-2-3-4 Part A (40 Bars) 4 All join hands, circle left 4 All circle right. 4 Grand Cross, Ladies join RH. 4 Grand Cross, Men join LH. 8 Set & turn Partners 16 Grand chain right round set. Part B ( 8x48 bars) 1st Lady advance to centre, Others join hands in circle. 8 Circle left and right 4 Set once and turn partner 1st Lady sets to partner then open hand turn once with partner. 4 Set once and turn opposite 1st Lady sets to opposite man, then open hand turn once. 8 Reel of 3, 1st Lady, partner and opposite man 1st Lady remains in centre. 8 Circle left and right again 4 Set once and turn side man 1st lady and man on right. 4 Set once and turn other side man 1st lady and man on left. 8 Reel of 3, 1st lady, and two side men. 48 2nd lady repeat. 96 3rd and 4th ladies repeat. 192 Men repeat same movement. The Eightsome Reel Part C (40 Bars) 8 All circle left and right. 4 Grand cross - Ladies join RH. 4 Grand Cross - Men join LH. 8 All set and turn partners. 16 Grand Chain round set. Note: Set is 'normal' set. Turn is open hand turn. NOTES 1. The Quadrille 2. The Prince Imperials 3. The Parisienne Quadrille 4. The Lancers Quadrille 5. The Caledonians Quadrille 6. The Royal Irish Quadrille 7. The Eightsome Reelperson, individual, peter ellis oam -
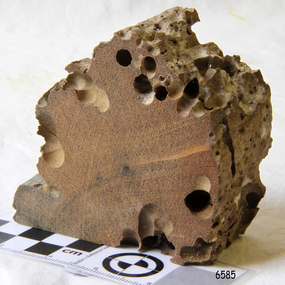 Flagstaff Hill Maritime Museum and Village
Wood Sample, about 1871
This piece of timber from the ship Eric the Red has been eaten through by the marine animals called Teredo Worms, sometimes called sea worms or ‘termites of the sea’. The worms bore holes into wood that is immersed in sea water and bacteria inside the worms digest the wood. Shipbuilders tried to prevent this problem by using coatings of tar, wax, lead or pitch. In the 18th and 19th centuries the outside of their ships were sheathed in copper or a combination of copper and zinc (called Muntz metal) and would be re-metalled periodically to ensure the sheathing would remain effective. In more recent times the ships are protected with a toxic coating. The American ship Eric the Red was a wooden, three masted clipper ship. She had 1,580 tons register and was the largest full-rigged ship built at Bath, Maine, USA in 1871. She was built and registered by Arthur Sewall, later to become the partnership E. & A. Sewall, the 51st ship built by this company. The annually-published List of Merchant Vessels of the U.S. shows Bath was still the home port of Eric the Red in 1880. The vessel was named after the Viking discoverer, Eric ‘the Red-haired’ Thorvaldsson , who was the first European to reach the shores of North America (in 980AD). The ship Eric the Red at first traded in coal between America and Britain, and later traded in guano nitrates from South America. In 1879 she was re-metalled and was in first class condition. On 10th June 1880 (some records say 12th June) Eric the Red departed New York for Melbourne and then Sydney. She had been commissioned by American trade representatives to carry a special cargo of 500 exhibits (1400 tons) – about a quarter to a third of America’s total exhibits - for the U.S.A. pavilion at Melbourne’s first International Exhibition. The exhibits included furniture, ironmongery, wines, chemicals, dental and surgical instruments, paper, cages, bronze lamp trimmings, axles, stamped ware, astronomical and time globes, samples of corn and the choicest of leaf tobacco. Other general cargo included merchandise such as cases of kerosene and turpentine, brooms, Bristol's Sarsaparilla, Wheeler and Wilson sewing machines, Wheeler’s thresher machine, axe handles and tools, cases of silver plate, toys, pianos and organs, carriages and Yankee notions. The Eric the Red left New York under the command of Captain Zaccheus Allen (or some records say Captain Jacques Allen) and 24 other crew including the owner’s son third mate Ned Sewall. There were also 2 saloon passengers on board. The ship had been sailing for an uneventful 85 days and the voyage was almost at its end. As Eric the Red approached Cape Otway there was a moderate north-west wind and hazy and overcast atmosphere. On 4th September 1880 at about 1:30am Captain Allen sighted the Cape Otway light and was keeping the ship 5-6 miles offshore to stay clear of the hazardous Otway Reef. However he had badly misjudged his position. The ship hit the Otway Reef about 2 miles out to sea, south west of the Cape Otway light station. Captain Allen ordered the wheel to be put ‘hard up’ thinking that she might float off the reef. The sea knocked the helmsman away from the wheel, broke the wheel ropes and carried away the rudder. The lifeboats were swamped, the mizzenmast fell, with all of its rigging, then the mainmast also fell and the ship broke in two. Some said that the passenger Vaughan, who was travelling for his health and not very strong, was washed overboard and never seen again. The ship started breaking up. The forward house came adrift with three of the crew on it as well as a longboat, which the men succeeded in launching and keeping afloat by continually bailing with their sea boots. The captain, the third mate (the owner’s son) and others clung to the mizzenmast in the sea. Then the owner’s son was washed away off the mast. Within 10 minutes the rest of the ship was in pieces, completely wrecked, with cargo and wreckage floating in the sea. The captain encouraged the second mate to swim with him to the deckhouse where there were other crew but the second mate wouldn’t go with him. Eventually the Captain made it to the deckhouse and the men pulled him up. At about 4:30am the group of men on the deckhouse saw the lights of a steamer and called for help. At the same time they noticed the second mate and the other man had drifted nearby, still on the spur, and pulled them both onto the wreck. The coastal steamer SS Dawn was returning to Warrnambool from Melbourne, its sailing time different to its usual schedule. She was built in 1876 and bought by the Portland and Belfast Steam Navigation Co. in 1877. At the time of this journey she was commanded by Captain Jones, and was sailing between Melbourne and Portland via Warrnambool. The provedore of the Dawn, Benjamin Lear, heard cries of distress coming through the portholes of the saloon. He gave the alarm and the engines were stopped. Cries could be heard clearly, coming from the land. Captain Jones sent out crew in two boats, and fired off rockets and blue lights to illuminate the area. They picked up the three survivors who were in the long boat from Eric the Red. Two men were picked up out of the water, one being the owner’s son who was clinging to floating kerosene boxes. At daylight the Dawn then rescued the 18 men from the floating portion of the deckhouse, which had drifted about 4 miles from where they’d struck the reef. Shortly after the rescue the deckhouse drifted onto breakers and was thrown onto rocks at Point Franklin, about 2 miles east of Cape Otway. Captain Jones had signalled to Cape Otway lighthouse the number of the Eric the Red and later signalled that there was a wreck at Otway Reef but there was no response from the lighthouse. The captain and crew of the Dawn spent several more hours searching unsuccessfully for more survivors, even going back as far as Apollo Bay. On board the Dawn the exhausted men received care and attention to their needs and wants, including much needed clothing. Captain Allen was amongst the 23 battered and injured men who were rescued and later taken to Warrnambool for care. Warrnambool’s mayor and town clerk offered them all hospitality, the three badly injured men going to the hospital for care and others to the Olive Branch Hotel, then on to Melbourne. Captain Allen’s leg injury prevented him from going ashore so he and three other men travelled on the Dawn to Portland. They were met by the mayor who also treated them all with great kindness. Captain Allen took the train back to Melbourne then returned to America. Those saved were Captain Zaccheus Allen (or Jacques Allen), J. Darcy chief mate, James F. Lawrence second mate, Ned Sewall third mate and owner’s son, John French the cook, C. Nelson sail maker, Clarence W. New passenger, and the able seamen Dickenson, J. Black, Denis White, C. Herbert, C. Thompson, A. Brooks, D. Wilson, J. Ellis, Q. Thompson, C. Newman, W. Paul, J. Davis, M. Horenleng, J. Ogduff, T. W. Drew, R. Richardson. Four men had lost their lives; three of them were crew (Gus Dahlgreen ship’s carpenter, H. Ackman steward, who drowned in his cabin, and George Silver seaman) and one a passenger (J. B. Vaughan). The body of one of them had been found washed up at Cape Otway and was later buried in the lighthouse cemetery; another body was seen on an inaccessible ledge. Twelve months later the second mate James F. Lawrence, from Nova Scotia, passed away in the Warrnambool district; an obituary was displayed in the local paper. Neither the ship, nor its cargo, was insured. The ship was worth about £15,000 and the cargo was reportedly worth £40,000; only about £2,000 worth had been recovered. Cargo and wreckage washed up at Apollo Bay, Peterborough, Port Campbell, Western Port and according to some reports, even as far away as the beaches of New Zealand. The day after the wreck the government steam ship Pharos was sent from Queenscliff to clear the shipping lanes of debris that could be a danger to ships. The large midship deckhouse of the ship was found floating in a calm sea near Henty Reef. Items such as an American chair, a ladder and a nest of boxes were all on top of the deckhouse. As it was so large and could cause danger to passing ships, Captain Payne had the deckhouse towed towards the shore just beyond Apollo Bay. Between Apollo Bay and Blanket Bay the captain and crew of Pharos collected Wheeler and Wilson sewing machines, nests of boxes, bottles of Bristol’s sarsaparilla, pieces of common American chairs, axe handles, a Wheelers’ Patent thresher and a sailor’s trunk with the words “A. James” on the front. A ship’s flag-board bearing the words “Eric the Red” was found on the deckhouse; finally those on board the Pharos had the name of the wrecked vessel. During this operation Pharos came across the government steamer Victoria and also a steamer S.S. Otway, both of which were picking up flotsam and wreckage. A whole side of the hull and three large pieces of the other side of the hull, with some of the copper sheathing stripped off, had floated on to Point Franklin. Some of the vessels yards and portions of her masts were on shore. The pieces of canvas attached to the yards and masts confirmed that the vessel had been under sail. The beach there was piled with debris several feet high. There were many cases of Diamond Oil kerosene, labelled R. W. Cameron and Company, New York. There were also many large planks of red pine, portions of a small white boat and a large, well-used oar. Other items found ashore included sewing machines (some consigned to ‘Long and Co.”) and notions, axe and scythe handles, hay forks, wooden pegs, rolls of wire (some branded “T.S” and Co, Melbourne”), kegs of nails branded “A.T. and Co.” from the factory of A. Field and Son, Taunton, Massachusetts, croquet balls and mallets, buggy fittings, rat traps, perfumery, cutlery and Douay Bibles, clocks, bicycles, chairs, a fly wheel, a cooking stove, timber, boxes, pianos, organs and a ladder. (Wooden clothes pegs drifted in for many years). There seemed to be no personal luggage or clothing. The Pharos encountered a long line, about one and a half miles, of floating wreckage about 10 miles off land, south east of Cape Otway, and in some places about 40 feet wide. It seemed that more than half of it was from Eric the Red. The ship’s crew rescued 3 cases that were for the Melbourne Exhibition and other items from amongst the debris. There were also chairs, doors, musical instruments, washing boards, nests of trunks and fly catchers floating in the sea. Most of the goods were saturated and smelt of kerosene. A section of the hull lies buried in the sand at Parker River Beach. An anchor with chain is embedded in the rocks east of Point Franklin and a second anchor, thought to be from Eric the Red, is on display at the Cape Otway light station. (There is a photograph of a life belt on the verandah of Rivernook Guest House in Princetown with the words “ERIC THE RED / BOSTON”. This is rather a mystery as the ship was registered in Bath, Maine, USA.) Parts of the ship are on display at Bimbi Park Caravan Park and at Apollo Bay Museum. Flagstaff Hill Maritime Village also has part of the helm (steering wheel), a carved wooden sword (said to be the only remaining portion of the ship’s figurehead; further research is currently being carried out), a door, a metal rod, several samples of wood and a medal for bravery, awarded to Nelson Johnson, a crew member of the S.S. Dawn by the U.S. President, for the rescue of the crew. Much of the wreckage was recovered by the local residents before police and other authorities arrived at the scene. Looters went to great effort to salvage goods, being lowered down the high cliff faces to areas with little or no beach to collect items from the wreckage, their mates above watching out for dangerous waves. A Tasmanian newspaper reports on a court case in Stawell, Victoria, noting a man who was caught 2 months later selling tobacco from the wreckage of Eric the Red. Some of the silverware is still treasured by descendants of Mr Mackenzie who was given these items by officials for his help in securing the cargo. The gifts included silver coffee and tea pots, half a dozen silver serviette rings and two sewing machines. A Mr G.W. Black has in his possession a medal and a purse that were awarded to his father, another Dawn crew member who was part of the rescue team. The medal is inscribed and named “To John Black ….” (from “Shipwrecks” by Margaret E. Mackenzie, 3rd edition, published 1964). The wreck and cargo were sold to a Melbourne man who salvaged a quantity of high quality tobacco and dental and surgical instruments. Timbers from the ship were salvaged and used in the construction of houses and sheds around Apollo Bay, including a guest house, Milford House (since burnt down in bushfires), which had furniture, fittings and timber on the dining room floor from the ship. A 39.7 foot long trading ketch, the Apollo, was also built from its timbers by Mr Burgess in 1883 and subsequently used in Tasmanian waters. It was the first attempt at ship building in Apollo bay. In 1881 a red light was installed about 300 feet above sea level at the base of the Cape Otway lighthouse to warn ships when they were too close to shore; It would not be visible unless a ship came within 3 miles from it. This has proved to be an effective warning. Nelson Johnson, recipient of the medal for bravery, married Elizabeth Howard in 1881 and they had 10 children. They lived in South Melbourne, Victoria. Nelson died in 1922 in Fitzroy Victoria, age 66. In 1895 the owners of the S.S. Dawn, the Portland and Belfast Steam Navigation Co., wound up and sold out to the Belfast Company who took over the Dawn for one year before selling her to Howard Smith. She was condemned and sunk in Suva in 1928. The State Library of Victoria has a lithograph in its collection depicting the steamer Dawn and the shipwrecked men, titled. "Wreck of the ship Eric the Red, Cape Otway: rescue of the crew by the Dawn".The wood (timber) sample is listed on the Collections Australia Database, Heritage Victoria, number 239 00010 A “The Eric the Red is historically significant as one of Victoria's major 19th century shipwrecks. (Heritage Victoria Eric the Red; HV ID 239) The wreck led to the provision of an additional warning light placed below the Cape Otway lighthouse to alert mariners to the location of Otway Reef. The site is archaeologically significant for its remains of a large and varied cargo and ship's fittings being scattered over a wide area. The site is recreationally and aesthetically significant as it is one of the few sites along this coast where tourists can visit identifiable remains of a large wooden shipwreck, and for its location set against the background of Cape Otway, Bass Strait, and the Cape Otway lighthouse.“ (Victorian Heritage Database Registration Number S239, Official Number 8745 USA) Wood sample from the wreck of the ship Eric the Red. Triangular shaped, full of sea worm (Teredo worm) holes. The wood is dark in colour and is very light in weight.flagstaff hill, warrnambool, shipwrecked-coast, flagstaff-hill, flagstaff-hill-maritime-museum, maritime-museum, shipwreck-coast, flagstaff-hill-maritime-village, shipwreck-artefact, eric-the-red, zaccheus-allen, sewall, 1880, melbourne-exhibition, cape-otway, otway-reef, wood-sample, s.s.-dawn -
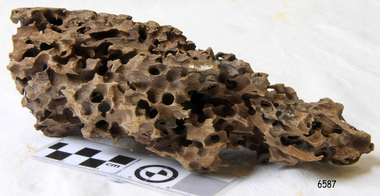 Flagstaff Hill Maritime Museum and Village
Wood Sample, About 1871
This piece of timber from the ship Eric the Red has been eaten through by the marine animals called Teredo Worms, sometimes called sea worms or ‘termites of the sea’. The worms bore holes into wood that is immersed in sea water and bacteria inside the worms digest the wood. Shipbuilders tried to prevent this problem by using coatings of tar, wax, lead or pitch. In the 18th and 19th centuries the outside of their ships were sheathed in copper or a combination of copper and zinc (called Muntz metal) and would be re-metalled periodically to ensure the sheathing would remain effective. In more recent times the ships are protected with a toxic coating. The American ship Eric the Red was a wooden, three masted clipper ship. She had 1,580 tons register and was the largest full-rigged ship built at Bath, Maine, USA in 1871. She was built and registered by Arthur Sewall, later to become the partnership E. & A. Sewall, the 51st ship built by this company. The annually-published List of Merchant Vessels of the U.S. shows Bath was still the home port of Eric the Red in 1880. The vessel was named after the Viking discoverer, Eric ‘the Red-haired’ Thorvaldsson , who was the first European to reach the shores of North America (in 980AD). The ship Eric the Red at first traded in coal between America and Britain, and later traded in guano nitrates from South America. In 1879 she was re-metalled and was in first class condition. On 10th June 1880 (some records say 12th June) Eric the Red departed New York for Melbourne and then Sydney. She had been commissioned by American trade representatives to carry a special cargo of 500 exhibits (1400 tons) – about a quarter to a third of America’s total exhibits - for the U.S.A. pavilion at Melbourne’s first International Exhibition. The exhibits included furniture, ironmongery, wines, chemicals, dental and surgical instruments, paper, cages, bronze lamp trimmings, axles, stamped ware, astronomical and time globes, samples of corn and the choicest of leaf tobacco. Other general cargo included merchandise such as cases of kerosene and turpentine, brooms, Bristol's Sarsaparilla, Wheeler and Wilson sewing machines, Wheeler’s thresher machine, axe handles and tools, cases of silver plate, toys, pianos and organs, carriages and Yankee notions. The Eric the Red left New York under the command of Captain Zaccheus Allen (or some records say Captain Jacques Allen) and 24 other crew including the owner’s son third mate Ned Sewall. There were also 2 saloon passengers on board. The ship had been sailing for an uneventful 85 days and the voyage was almost at its end. As Eric the Red approached Cape Otway there was a moderate north-west wind and hazy and overcast atmosphere. On 4th September 1880 at about 1:30am Captain Allen sighted the Cape Otway light and was keeping the ship 5-6 miles offshore to stay clear of the hazardous Otway Reef. However he had badly misjudged his position. The ship hit the Otway Reef about 2 miles out to sea, south west of the Cape Otway light station. Captain Allen ordered the wheel to be put ‘hard up’ thinking that she might float off the reef. The sea knocked the helmsman away from the wheel, broke the wheel ropes and carried away the rudder. The lifeboats were swamped, the mizzenmast fell, with all of its rigging, then the mainmast also fell and the ship broke in two. Some said that the passenger Vaughan, who was travelling for his health and not very strong, was washed overboard and never seen again. The ship started breaking up. The forward house came adrift with three of the crew on it as well as a longboat, which the men succeeded in launching and keeping afloat by continually bailing with their sea boots. The captain, the third mate (the owner’s son) and others clung to the mizzenmast in the sea. Then the owner’s son was washed away off the mast. Within 10 minutes the rest of the ship was in pieces, completely wrecked, with cargo and wreckage floating in the sea. The captain encouraged the second mate to swim with him to the deckhouse where there were other crew but the second mate wouldn’t go with him. Eventually the Captain made it to the deckhouse and the men pulled him up. At about 4:30am the group of men on the deckhouse saw the lights of a steamer and called for help. At the same time they noticed the second mate and the other man had drifted nearby, still on the spur, and pulled them both onto the wreck. The coastal steamer SS Dawn was returning to Warrnambool from Melbourne, its sailing time different to its usual schedule. She was built in 1876 and bought by the Portland and Belfast Steam Navigation Co. in 1877. At the time of this journey she was commanded by Captain Jones, and was sailing between Melbourne and Portland via Warrnambool. The provedore of the Dawn, Benjamin Lear, heard cries of distress coming through the portholes of the saloon. He gave the alarm and the engines were stopped. Cries could be heard clearly, coming from the land. Captain Jones sent out crew in two boats, and fired off rockets and blue lights to illuminate the area. They picked up the three survivors who were in the long boat from Eric the Red. Two men were picked up out of the water, one being the owner’s son who was clinging to floating kerosene boxes. At daylight the Dawn then rescued the 18 men from the floating portion of the deckhouse, which had drifted about 4 miles from where they’d struck the reef. Shortly after the rescue the deckhouse drifted onto breakers and was thrown onto rocks at Point Franklin, about 2 miles east of Cape Otway. Captain Jones had signalled to Cape Otway lighthouse the number of the Eric the Red and later signalled that there was a wreck at Otway Reef but there was no response from the lighthouse. The captain and crew of the Dawn spent several more hours searching unsuccessfully for more survivors, even going back as far as Apollo Bay. On board the Dawn the exhausted men received care and attention to their needs and wants, including much needed clothing. Captain Allen was amongst the 23 battered and injured men who were rescued and later taken to Warrnambool for care. Warrnambool’s mayor and town clerk offered them all hospitality, the three badly injured men going to the hospital for care and others to the Olive Branch Hotel, then on to Melbourne. Captain Allen’s leg injury prevented him from going ashore so he and three other men travelled on the Dawn to Portland. They were met by the mayor who also treated them all with great kindness. Captain Allen took the train back to Melbourne then returned to America. Those saved were Captain Zaccheus Allen (or Jacques Allen), J. Darcy chief mate, James F. Lawrence second mate, Ned Sewall third mate and owner’s son, John French the cook, C. Nelson sail maker, Clarence W. New passenger, and the able seamen Dickenson, J. Black, Denis White, C. Herbert, C. Thompson, A. Brooks, D. Wilson, J. Ellis, Q. Thompson, C. Newman, W. Paul, J. Davis, M. Horenleng, J. Ogduff, T. W. Drew, R. Richardson. Four men had lost their lives; three of them were crew (Gus Dahlgreen ship’s carpenter, H. Ackman steward, who drowned in his cabin, and George Silver seaman) and one a passenger (J. B. Vaughan). The body of one of them had been found washed up at Cape Otway and was later buried in the lighthouse cemetery; another body was seen on an inaccessible ledge. Twelve months later the second mate James F. Lawrence, from Nova Scotia, passed away in the Warrnambool district; an obituary was displayed in the local paper. Neither the ship, nor its cargo, was insured. The ship was worth about £15,000 and the cargo was reportedly worth £40,000; only about £2,000 worth had been recovered. Cargo and wreckage washed up at Apollo Bay, Peterborough, Port Campbell, Western Port and according to some reports, even as far away as the beaches of New Zealand. The day after the wreck the government steam ship Pharos was sent from Queenscliff to clear the shipping lanes of debris that could be a danger to ships. The large midship deckhouse of the ship was found floating in a calm sea near Henty Reef. Items such as an American chair, a ladder and a nest of boxes were all on top of the deckhouse. As it was so large and could cause danger to passing ships, Captain Payne had the deckhouse towed towards the shore just beyond Apollo Bay. Between Apollo Bay and Blanket Bay the captain and crew of Pharos collected Wheeler and Wilson sewing machines, nests of boxes, bottles of Bristol’s sarsaparilla, pieces of common American chairs, axe handles, a Wheelers’ Patent thresher and a sailor’s trunk with the words “A. James” on the front. A ship’s flag-board bearing the words “Eric the Red” was found on the deckhouse; finally those on board the Pharos had the name of the wrecked vessel. During this operation Pharos came across the government steamer Victoria and also a steamer S.S. Otway, both of which were picking up flotsam and wreckage. A whole side of the hull and three large pieces of the other side of the hull, with some of the copper sheathing stripped off, had floated on to Point Franklin. Some of the vessels yards and portions of her masts were on shore. The pieces of canvas attached to the yards and masts confirmed that the vessel had been under sail. The beach there was piled with debris several feet high. There were many cases of Diamond Oil kerosene, labelled R. W. Cameron and Company, New York. There were also many large planks of red pine, portions of a small white boat and a large, well-used oar. Other items found ashore included sewing machines (some consigned to ‘Long and Co.”) and notions, axe and scythe handles, hay forks, wooden pegs, rolls of wire (some branded “T.S” and Co, Melbourne”), kegs of nails branded “A.T. and Co.” from the factory of A. Field and Son, Taunton, Massachusetts, croquet balls and mallets, buggy fittings, rat traps, perfumery, cutlery and Douay Bibles, clocks, bicycles, chairs, a fly wheel, a cooking stove, timber, boxes, pianos, organs and a ladder. (Wooden clothes pegs drifted in for many years). There seemed to be no personal luggage or clothing. The Pharos encountered a long line, about one and a half miles, of floating wreckage about 10 miles off land, south east of Cape Otway, and in some places about 40 feet wide. It seemed that more than half of it was from Eric the Red. The ship’s crew rescued 3 cases that were for the Melbourne Exhibition and other items from amongst the debris. There were also chairs, doors, musical instruments, washing boards, nests of trunks and fly catchers floating in the sea. Most of the goods were saturated and smelt of kerosene. A section of the hull lies buried in the sand at Parker River Beach. An anchor with chain is embedded in the rocks east of Point Franklin and a second anchor, thought to be from Eric the Red, is on display at the Cape Otway light station. (There is a photograph of a life belt on the verandah of Rivernook Guest House in Princetown with the words “ERIC THE RED / BOSTON”. This is rather a mystery as the ship was registered in Bath, Maine, USA.) Parts of the ship are on display at Bimbi Park Caravan Park and at Apollo Bay Museum. Flagstaff Hill Maritime Village also has part of the helm (steering wheel), a carved wooden sword (said to be the only remaining portion of the ship’s figurehead; further research is currently being carried out), a door, a metal rod, several samples of wood and a medal for bravery, awarded to Nelson Johnson, a crew member of the S.S. Dawn by the U.S. President, for the rescue of the crew. Much of the wreckage was recovered by the local residents before police and other authorities arrived at the scene. Looters went to great effort to salvage goods, being lowered down the high cliff faces to areas with little or no beach to collect items from the wreckage, their mates above watching out for dangerous waves. A Tasmanian newspaper reports on a court case in Stawell, Victoria, noting a man who was caught 2 months later selling tobacco from the wreckage of Eric the Red. Some of the silverware is still treasured by descendants of Mr Mackenzie who was given these items by officials for his help in securing the cargo. The gifts included silver coffee and tea pots, half a dozen silver serviette rings and two sewing machines. A Mr G.W. Black has in his possession a medal and a purse that were awarded to his father, another Dawn crew member who was part of the rescue team. The medal is inscribed and named “To John Black ….” (from “Shipwrecks” by Margaret E. Mackenzie, 3rd edition, published 1964). The wreck and cargo were sold to a Melbourne man who salvaged a quantity of high quality tobacco and dental and surgical instruments. Timbers from the ship were salvaged and used in the construction of houses and sheds around Apollo Bay, including a guest house, Milford House (since burnt down in bushfires), which had furniture, fittings and timber on the dining room floor from the ship. A 39.7 foot long trading ketch, the Apollo, was also built from its timbers by Mr Burgess in 1883 and subsequently used in Tasmanian waters. It was the first attempt at ship building in Apollo bay. In 1881 a red light was installed about 300 feet above sea level at the base of the Cape Otway lighthouse to warn ships when they were too close to shore; It would not be visible unless a ship came within 3 miles from it. This has proved to be an effective warning. Nelson Johnson, recipient of the medal for bravery, married Elizabeth Howard in 1881 and they had 10 children. They lived in South Melbourne, Victoria. Nelson died in 1922 in Fitzroy Victoria, age 66. In 1895 the owners of the S.S. Dawn, the Portland and Belfast Steam Navigation Co., wound up and sold out to the Belfast Company who took over the Dawn for one year before selling her to Howard Smith. She was condemned and sunk in Suva in 1928. The State Library of Victoria has a lithograph in its collection depicting the steamer Dawn and the shipwrecked men, titled. "Wreck of the ship Eric the Red, Cape Otway: rescue of the crew by the Dawn".The wood (timber) sample is listed on the Collections Australia Database, Heritage Victoria, number 239 00010 A “The Eric the Red is historically significant as one of Victoria's major 19th century shipwrecks. (Heritage Victoria Eric the Red; HV ID 239) The wreck led to the provision of an additional warning light placed below the Cape Otway lighthouse to alert mariners to the location of Otway Reef. The site is archaeologically significant for its remains of a large and varied cargo and ship's fittings being scattered over a wide area. The site is recreationally and aesthetically significant as it is one of the few sites along this coast where tourists can visit identifiable remains of a large wooden shipwreck, and for its location set against the background of Cape Otway, Bass Strait, and the Cape Otway lighthouse.“ (Victorian Heritage Database Registration Number S239, Official Number 8745 USA) Wood sample from the wreck of the ship Eric the Red. Oblong shaped, full of sea worm (Teredo worm) holes. The wood is dark in colour and is very light in weight. flagstaff hill, warrnambool, shipwrecked-coast, flagstaff-hill, flagstaff-hill-maritime-museum, maritime-museum, shipwreck-coast, flagstaff-hill-maritime-village, shipwreck-artefact, eric-the-red, zaccheus-allen, sewall, 1880, melbourne-exhibition, cape-otway, otway-reef, wood-sample, s.s.-dawn -
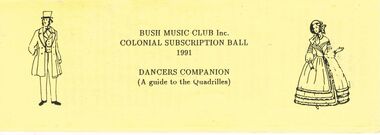 Bendigo Historical Society Inc.
Document - PETER ELLIS COLLECTION: BUSH MUSIC CLUB COLONIAL BALL, 1991
Small yellow booklet outline of a man on left of title and woman on right. Bush Music Club Inc. Colonial Subscription Ball 1991 Dancers Companion (A guide to the Quadrilles) The Quadrille Figure 1 (Le Pantelon) (2x32) 8 Top couples R and L through. (without giving hands). 8 Set & turn Partners 8 Top ladies chain. 4 Top couples promenade across set. 4 Half R and L to place. 32 Side couples repeat Figure 2 (Le 'Ete) (4x24) 4 Top couples advance & retire. 4 Cross over (without changing places with partner). 8 Repeat back to place. 8 Set & turn partners. 24 Sides repeat. 48 Top and Sides repeat. Figure 3 (La Poule) (4x32) 4 Lady 1, Man 2 adv, tough RH, retire to opposite place. 4 Lady 1, Man 2 adv, join LH give RH to partner 4 Line of 4 balance fwd & back twice. 4 Men lead partners to opp. Place. 4 Lady 1, Man 2 adv. & ret. 4 Lady 1, Man 2 adv, honour & ret. 4 Top couples, advance & retire. 4 Half R & L to place. 32 Repeat with Lady 2, Man !. 32 Repeat with Lady 3, Man 4. 32 Repeat with Lady 4, Man 3. The Quadrille Figure 4. (La Pastourelle) (4x32) 4 1st couple advance & retire. 4 1st couple adv, lady join 2nd couple. 4 Line of 3 adv. & ret, 1st man retire. 4 Line of 3 adv. Ladies cross to 1st man. 4 Line of 3 adv. & ret, 2nd man retire. 4 Re-advance, form circle with 2nd man. 4 Circle L half way round. 4 Half R & L to place. 32 Repeat with 2nd couple leading. 32 Repeat with 3rd couple leading. 32 Repeat with 4th couple leading. Figure 5 (La Finale) (4 x 32 + 8) 4 All advance & retire. 4 Turn partners. 4 Ladies adv, curtsey & retire. 4 Men advance, bow & retire. 8 All set & turn corners. 8 Promenade with corner. (men to original place with corner) 96 Repeat 3 times to return to partner. 4 All advance & retire. Turn Partners. Notes: 1 Couples numbered 1 4 2 3 2 Set & turn is a 'balance' set and open hand turn. The Lancers Quadrille Figure 1 (4x24) 4 1st lady, 2nd man advance & retire, 4 Adv, turn two hands, return to place. 4 1st couple lead through across set 4 2nd couple lead through back 8 all set & turn corners. 24 Repeat, 2nd lady, 1st man leading 24 Repeat 3rd lady, 4th man leading 24 Repeat, 4th lady, 3rd man leading Figure 2 (4x24) 4 1st couple advance & retire. 2 1st lady adv to centre, turn to face partner 2 1st couple honour each other. 8 1st couple set and turn then sides form top & bottom lines 4 Lines advance & retire, 4 Advance and turn partners to place. 24 Repeat with 2nd couple leading 24 Repeat with 3rd couple leading 24 Repeat with 4th couple leading Figure 3. (2x32) 4 Ladies advance, curtsey & retire. 4 Men adv, bow, turn by left, bow to partners, then join RH in centre, (ladies RH on partners left elbow). 8 Promenade round set to place. 4 Ladies adv, curtsey & retire again. 4 Men adv, bow, turn by right, bow to partners, join LH in centre, right arm behind partner. 8 Promenade round to set in place. 32 Repeat. The Lancers Quadrille. Figure 4. (4x24) 8 Top couples visit R then L 4 Right Hands around with LH couple 4 then left hands around. 8 Circle left with that couple. 24 Repeat with side couples leading. 24 repeat, top couples visit L then R. 24 Repeat, side couples visit L then R. Figure 5. (4x48 +24) 8 All grand chain 1/2 way round and honour partners. 8 Continue grand chain to place and honour partners. 8 1st couple visit, return to place, facing out with sides in behind. 2 Change places with partner, 2 All rock fwd and back 2 change places again 2 All rock fwd and back 8 Cast out reform in lines 4 Lines advance & retire 4 Advance & turn partners to place 48 Repeat with 2nd couple leading 48 Repeat with 3rd couple leading 48 Repeat with 4th couple leading. 8 Grand chain 1/2 way round and honour partners. 8 continue grand chain to place and honour partners 8 swing partners (R arm round partner, LH in air) Note: All figures walked. Set & Turn is a 'balance' set and open two hand turn. The Prince Imperial's Quadrille Figure 1. (4x24) 4 Top couples visit right, honour sides. 4 Top men retire with partner & side lady to opposite place, (ladies facing each other). 8 Ladies grand chain to places 8 All set and turn partners 24 Top couples repeat back to place. 48 Repeat with side couples. Figure 2 (4 x 24) 4 1st Lady, 2nd man adv & turn in centre finish facing 2nd lady. 2 2nd lady pass through to 1st man. 2 Both couples turn out to place. 4 top couples advance & retire. 4 Ladies chain back to place. (Nariel) 8 Chasse-croise. (4 steps past partner RH turn corner 4 steps back, LH turn with partner.) 24 Repeat with 2nd lady, 1st man leading 24 Repeat with 3rd lady, 4th man leading 24 Repeat wth 4th lady, 3rd man leading. Figure 3 (4x32) 4 1st lady to centre, curtsey to partner. (RH in RH, ACW turn in to centre) 4 2nd lady to centre, curtsey to partner. 4 3rd lady to centre, curtsey to partner.4 4th lady to centre, curtsey to partner. 8 ladies join hands, circle R, small steps after circle R, Men join circle, (giving RH to partner). 4 Balance for 4 (step lift x 4) 4 Turn partners to place, bow & curtsey. 32 Repeat, Lady 2, 1, 4 & 3 to centre 32 Repeat Lady 3, 4, 2 & 1 to centre 32 Repeat, Lady 4, 3, 1 & 2 to centre The Prince Imperial's Quadrille Figure 4 (4x32) 4 Top couples advance & retire. 4 Top couples adv, ladies move to R, as men retire to place. 8 Line of 3 adv & ret twice. 4 Single men adv, bow and retire. 4 Re-advance and turn to face partner. 4 Circle L half way round (with partner & side couple). 4 Half R & L to place. 32 Repeat with side couples leading. 32 Repeat with top couples leading (men moving to left as ladies retire) 32 Repeat with Side couple leading. (Men moving to left as ladies retire) Figure 5 (4x32 +32) 16 Ladies to the right, (RH turn with corner man then continue round to the right turning each man) 4 1st Lady, 2nd man advance & retire 4 re-advance & turn RH (finish facing partners) 8 set & turn partners (finishing in place) 32 Repeat with 2nd Lady, 1st man leading 32 repeat with 3rd lady, 4th man leading 32 Repeat with 4th Lady, 3rd man leading 16 Ladies to the right again. 4 Men turn partners to centre. 4 All bow and curtsey. 8 Promenade set ( hall) Note: Set & turn is a 'balance' set and open hand turn. The Parisienne Quadrille Figure 1 (1x32) 8 Couples R and L through. (without giving hands) 8 set & turn partners 8 Ladies chain. 4 Couples promenade across set. 4 Half R and L to place. Figure 2 (2x24) 4 Couples advance & retire. 4 Cross over (without changing places with partners) 8 Repeat back to place. 8 Set & turn partners. 24 Repeat. Figure 3 (2x32) 4 Lady 1, Man 2 adv, touch RH, retire to opposite place. 4 Lady 1, Man 2 adv, join LH, give RH to partner. 4 Line of 4 balance fwd & back twice 4 Men lead partners to opp. Place 4 Lady 1, Man 2 adv & retire 4 Lady 1, Man 2 adv, honour & ret. 4 Couples, advance & retire. 4 Half R & L to place. 32 Repeat with Lady 2, Man 1. The Parisienne Quadrille Figure 4. (2x32) 4 1st couple advance & retire. 4 1st couple adv, lady join 2nd couple. 4 Line of 3 adv. & ret, 1st man retire. 4 Line of 3 adv. Ladies cross to 1st man. 4 Line of 3 adv. & ret, 2nd man retire. 4 Re-advance, form circle with 2nd man. 4 Circle L half way round. 4 Half R & L to place. 32 Repeat with 2nd couple leading. Figure 5 (2x32) 4 Couples advance & retire 4 Cross over 8 Repeat back to place. 8 Ladies chain across & back.8 Set & turn partners. 32 Repeat Notes: 1 This 'quadrille' is similar to the first set (1st 4 figures) and is danced as two couple sets. 2 Set & turn is a 'balance' set and open hand turn. Wellington Waltz 8 Honour Partner, honour corner 8 Circle L 7 steps, then tap, tap 8 Circle R 7 steps, then tap, tap 4 Top couples, 2 side-steps to centre and back with lady turning under man's left arm. 4 Waltz across to opposite side 8 Side couples repeat. 8 Top ladies chain across. (pause in centre, turn twice with opp. Man) 8 Side ladies chain across. 8 Grand Chain half way round set. 8 Waltz to man's place. 64 Repeat with side couples leading. Waltz Cotillon 8 Honour Partner, honour corner 16 1st couple waltz the set. 8 Top ladies cross over.8 Side ladies cross over. 8 Top men cross over. 8 Side men cross over. 16 All waltz back to place. Form top & bottom lines, 8 Adv. & ret, cross over. 8 Adv. & ret, cross back. 16 Waltz chain to meet partner. 16 All waltz back to place. Form top & bottom lines, 8 Adv. & ret, cross over. 8 Adv. & ret, cross back. 16 Waltz chain to meet partner. 16 All waltz back to place. 112 Repeat with 2nd couple leading. 112 Repeat with 3rd couple leading. Side lines adv. & ret. 112 Repeat with 4th couple leading. Side lines adv. & ret. Galopade Quadrille 8 Honour Partner, honour corner 8 All galop round set. (Galop half way round set, on opp. Side change places with partner, continue galop to place.) 8 Top couples R & L through. 8 Side couples R & L through. 8 All set & swing partners. 8 All galop round set. 8 Top ladies chain. 8 Side ladies chain. 8 All set & swing partners. 8 All galop round set. 8 1st couple lead through, 2nd on return 8 3rd couple lead through, 4th on return 8 All set & swing partners. 8 All galop round set. 4 1st lady & 2nd man adv. & ret. 4 2nd lady & 1st man adv. & ret. 4 3rd lady & 4th man adv. & ret. 4 4th lady & 3rd man adv. & ret. 8 All set & swing partners. 8 All galop round set. 4 Ladies advance & retire. 4 Men advance & retire. 8 Double ladies chain. 8 All set & swing partners. 8 All galop round set. 8 Top couples waltz the set 8 Side couples waltz the set 8 All set & swing partners. 32 Waltz the hall. The Caledonians Quadrille Figure 1. (2x32) 4 Top couples R.H. across, move CW (Ladies hands joined over Mens). 4 then L.H. across, move ACW. 8 Set & swing Partners 8 Top ladies chain. 4 Top couples promenade across set. 4 Half R and L to place. 32 Side couples repeat. Figure 2. (4x24) 8 1st Man advance & retire twice. 8 Set & swing corners. 8 Promenade with corners (to men's position.) 24 2nd man repeat. 48 3rd and 4th man repeat. Figure 3. (4x32) 4 Lady 1, Man 2 advance & retire. 4 Re-advance, 2 hand turn to place. 8 1st & 2nd couples lead through and back. (1st lead through across, 2nd back) 8 Set & swing corners. 4 All advance & retire. 4 Swing partners. 32 Repeat wth Lady 2, Man 1. 32 Repeat with Lady 3, Man 4. 32 Repeat with Lady 4, Man 3. The Caledonians Quadrille Figure 4. (4x24) 2 Lady 1, Man 2 advance and stop. 2 Lady 2, Man 1 advance and stop. 4 Turn partners back to place. 2 All ladies to the right 4 steps. 2 All men to the left 4 steps. 2 All ladies to the right 4 steps. 2 All men to the left 4 steps. 4 Promenade to place. 4 Swing partners. 24 Repeat wth Lady 2, Man 1 leading. 24 Repeat wth Lady 3, Man 4 leading. 24 Repeat wth Lady 4, Man 3 leading. Figure 5. (4x48 + 16) 8 1st couple visit. 4 Ladies advance, curtsey & retire. 4 Men advance, bow & retire. 8 All set & swing partners. 8 Grand chain 1/2 way round and honour partners. 4 Promenade to place 4 and swing partners. 8 Chasse-croise, (4 steps past partner, RH to corner balance fwd & back, then 4 steps back, LH to partner balance fwd & back). 48 Repeat with 2nd couple leading. 48 Repeat wth 3rd couple leading. 48 Repeat wth 4th couple leading. 8 All promenade set. 8 Swing partners. Note: Set & swing is 'normal' set and cross hand swing. The Lancers Quadrille (BMC version) Figure 1. (4x32) 8 1st Lady, 2nd man advance & swing in centre (with ballroom hold). 4 Partners move 1/2 way across, Centres keep swinging. 4 Promenade partner to opp. Place. 8 1st couple lead through to place. 8 All swing corners. 32 Repeat with 2nd lady, 1st man. 32 Repeat with 3rd lady, 4th man. 32 Repeat with 4th lady, 3rd man. Figure 2. (4x32) 8 1st couple lead up (to 2nd) & retire. 8 1st couple swing in place Form top & bottom lines. 8 Lines adv & retire twice. 8 Swing partners. 32 Repeat with 2nd couple leading. 32 Repeat with 3rd couple leading. (Forming side lines instead) 32 Repeat with 4th couple leading. (Forming side lines instead) Figure 3. (2x32) 4 Introduction - Ladies to the centre and men form a circle around them. 8 Men circle left. 8 Men circle right. Men form a grand cross (LH) Right arm behind partners. 16 Promenade round set. Ladies return to the centre. 32 Repeat - Circle L & R, & Grand Cross. The Lancers Quadrille (BMC version) Figure 4. (2x48) 8 Top couples visit. 4 Tops RH star. 4 then LH star. 8 Tops basket Left. 8 Tops basket Right. 8 Tops circle Left. Tops circle Right. 48 Repeat with side couples leading. Figure 5. ((4x 16+32) + 24) 8 All grand chain 1/2 way round and honour partners. 8 Promenade with partners to place. 8 1st couple lead up, turn and lead out with side falling in behind. 8 Cast out, reform top & bottom lines. 4 Lines advance & retire. 4 Advance & swing partners to place. 8 Swing partners in place. 48 Repeat with 2nd couple leading. 48 Repeat with 3rd couple leading (forming side lines) 48 Repeat with 4th couple leading. (forming side lines) 8 All grand chain 1/2 way round and honour partners. 8 Promenade with partners to place. 8 Swing partners in place. Note: Normal swing here is with hands crossed. 1. The Quadrille 2.The Lancers Quadrille 3. The Prince Imperials 4. The Parisienne Quadrille 5. The Wellington Waltz 6. The Waltz Cotillon 7. The Galopade Quadrille 8. The Caledonians Quadrille 9. The Lancers Quadrille (BMC)person, individual, peter ellis oam -
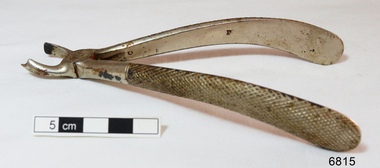 Flagstaff Hill Maritime Museum and Village
Equipment - Tooth Extractor, Late 19th - early 20th century
Toothaches have been with us since the evolution of teeth and extracting teeth. I wonder what poor Homo erectus did when suffering with a toothache. He probably just suffered and probably became very bad tempered. Ancient Dentistry Significant tooth decay did not appear until hunter-gatherer societies became agrarian. The change in diet included a large increase in carbohydrates which then led to tooth decay. Early man was primitive but he was also pretty smart. Some time around 8000 years ago someone in the area that is now Pakistan was using a drill to remove tooth decay. Examination of Neolithic skulls have revealed the handiwork of at least one very early dentist. A Sumerian text in about 5000 B.C. taught that the cause of tooth decay was tooth worms. Proposed cures for toothache were numerous. Early Egyptians wore amulets. An Egyptian named Hesy-Re, is known as the first dentist. Praise for his dentistry is inscribed on his tomb. Unfortunately it doesn’t delineate what he did to earn the praise. Pliny, the Elder, recommended finding a frog at midnight and asking it to take away the pain. The doctor to Emperor Claudius around 50 A.D. had his toothache patients inhale smoke produced by scattering certain seeds on burning charcoal and then rinsing the mouth with hot water. This was to expel the tooth worms. On the more practical side Aristotle and Hippocrates both wrote about the treatment of tooth decay. A primitive forceps was used for extracting teeth. Some dentists at that time were able to weave wire in the teeth to stabilize loose teeth. Medieval Torture From about 500 A.D. to 1100 A.D. monks were well educated and well trained and did some of the surgical procedures of the time. Barbers handled the rest of the operations, especially blood letting and tooth extractions. In 1163 the Pope put a stop to all surgeries by monks and the field was left open to the barbers. Barbers were, after all, very skilled with knives and razors. In fact, the barber pole, red and white spiraling stripes, is a symbol of the blood letting; red for blood. white for bandages. In the 1300s a Barbers’ Guild was established which divided the barbers into two groups: those with the skills and training to do procedures and those who were relegated to blood letting and tooth extractions. Pliers from a blacksmith’s foundry were the only device available. Barbers would often go to fairs and advertise painless tooth pulling. A shill in the audience would come on the stage, feigning severe toothache. The barber would pretend to extract tooth, pulling out a bloody molar he had palmed earlier. The supposed sufferer would jump for joy. The barbers set up near the bands at the fairs so that the music would drown out the screams of their patients. If the tooth was loose enough, the barber would tie a string around the tooth and yank hard to extract the tooth. This was a much less painful and dangerous procedure than the pliers. The pliers often fractured other teeth and sometimes the jaw. The procedure was far from sterile and infection was a common problem and some people bled to death. The Renaissance and the Rise of Tooth Decay In the 1400s refined sugar was introduced into Europe but only reached the tables of the wealthy. While their betters were munching on sweets, the poorer folk suffered fewer toothaches. Queen Elizabeth I was known for her blackened teeth. George Washington had a tooth extraction every year after age 22. He supposedly had a set of wooden false teeth but his dentures were actually ivory. The earliest instrument designed for tooth extraction was the dental pelican, which was shaped something like a pelican’s beak. The pelican was replaced in the 1700s by the dental key, which was fitted down over the affected tooth and was better able to grip the tooth. Both still often caused more damage than relief. The Development of Modern Dentistry Modern dental equipment began to be introduced in the 1800s about the time when dentistry became a profession and dental schools began to open. Ether was used starting in 1846 to anesthetize the pain and local anesthetics were introduced in the early 1900s. Modern dentists no longer have to seat their patients on the floor and have helpers to hold them down. Dentistry is as close to painless as possible now. There is no excuse to suffer the agony of a toothache these days. And extracting teeth is no longer dangerous. https://arizonadentalspecialists.com/the-surprising-history-of-extracting-teeth/ This tooth extractor was donated to Flagstaff Hill Maritime Village by the family of Doctor William Roy Angus, Surgeon and Oculist. It is part of the “W.R. Angus Collection” that includes historical medical equipment, surgical instruments and material once belonging to Dr Edward Ryan and Dr Thomas Francis Ryan, (both of Nhill, Victoria) as well as Dr Angus’ own belongings. The Collection’s history spans the medical practices of the two Doctors Ryan, from 1885-1926 plus that of Dr Angus, up until 1969. ABOUT THE “W.R.ANGUS COLLECTION” Doctor William Roy Angus M.B., B.S., Adel., 1923, F.R.C.S. Edin.,1928 (also known as Dr Roy Angus) was born in Murrumbeena, Victoria in 1901 and lived until 1970. He qualified as a doctor in 1923 at University of Adelaide, was Resident Medical Officer at the Royal Adelaide Hospital in 1924 and for a period was house surgeon to Sir (then Mr.) Henry Simpson Newland. Dr Angus was briefly an Assistant to Dr Riddell of Kapunda, then commenced private practice at Curramulka, Yorke Peninsula, SA, where he was physician, surgeon and chemist. In 1926, he was appointed as new Medical Assistant to Dr Thomas Francis Ryan (T.F. Ryan, or Tom), in Nhill, Victoria, where his experiences included radiology and pharmacy. In 1927 he was Acting House Surgeon in Dr Tom Ryan’s absence. Dr Angus had become engaged to Gladys Forsyth and they decided he would take time to further his studies overseas in the UK in 1927. He studied at London University College Hospital and at Edinburgh Royal Infirmary and in 1928, was awarded FRCS (Fellow from the Royal College of Surgeons), Edinburgh. He worked his passage back to Australia as a Ship’s Surgeon on the on the Australian Commonwealth Line’s T.S.S. Largs Bay. Dr Angus married Gladys in 1929, in Ballarat. (They went on to have one son (Graham 1932, born in SA) and two daughters (Helen (died 12/07/1996) and Berenice (Berry), both born at Mira, Nhill ) Dr Angus was a ‘flying doctor’ for the A.I.M. (Australian Inland Ministry) Aerial Medical Service in 1928 . The organisation began in South Australia through the Presbyterian Church in that year, with its first station being in the remote town of Oodnadatta, where Dr Angus was stationed. He was locum tenens there on North-South Railway at 21 Mile Camp. He took up this ‘flying doctor’ position in response to a call from Dr John Flynn; the organisation was later known as the Flying Doctor Service, then the Royal Flying Doctor Service. A lot of his work during this time involved dental surgery also. Between 1928-1932 he was surgeon at the Curramulka Hospital, Yorke Peninsula, South Australia. In 1933 Dr Angus returned to Nhill where he’d previously worked as Medical Assistant and purchased a share of the Nelson Street practice and Mira hospital from Dr Les Middleton one of the Middleton Brothers, the current owners of what was once Dr Tom Ryan’s practice. Dr L Middleton was House Surgeon to the Nhill Hospital 1926-1933, when he resigned. [Dr Tom Ryan’s practice had originally belonged to his older brother Dr Edward Ryan, who came to Nhill in 1885. Dr Edward saw patients at his rooms, firstly in Victoria Street and in 1886 in Nelson Street, until 1901. The Nelson Street practice also had a 2 bed ward, called Mira Private Hospital ). Dr Edward Ryan was House Surgeon at the Nhill Hospital 1884-1902 . He also had occasions where he successfully performed veterinary surgery for the local farmers too. Dr Tom Ryan then purchased the practice from his brother in 1901. Both Dr Edward and Dr Tom Ryan work as surgeons included eye surgery. Dr Tom Ryan performed many of his operations in the Mira private hospital on his premises. He too was House Surgeon at the Nhill Hospital 1902-1926. Dr Tom Ryan had one of the only two pieces of radiology equipment in Victoria during his practicing years – The Royal Melbourne Hospital had the other one. Over the years Dr Tom Ryan gradually set up what was effectively a training school for country general-practitioner-surgeons. Each patient was carefully examined, including using the X-ray machine, and any surgery was discussed and planned with Dr Ryan’s assistants several days in advance. Dr Angus gained experience in using the X-ray machine there during his time as assistant to Dr Ryan. Dr Tom Ryan moved from Nhill in 1926. He became a Fellow of the Royal Australasian College of Surgeons in 1927, soon after its formation, a rare accolade for a doctor outside any of the major cities. He remained a bachelor and died suddenly on 7th Dec 1955, aged 91, at his home in Ararat. Scholarships and prizes are still awarded to medical students in the honour of Dr T.F. Ryan and his father, Dr Michael Ryan, and brother, John Patrick Ryan. ] When Dr Angus bought into the Nelson Street premises in Nhill he was also appointed as the Nhill Hospital’s Honorary House Surgeon 1933-1938. His practitioner’s plate from his Nhill surgery states “HOURS Daily, except Tuesdays, Fridays and Saturday afternoons, 9-10am, 2-4pm, 7-8pm. Sundays by appointment”. This plate is now mounted on the doorway to the Port Medical Office at Flagstaff Hill Maritime Village, Warrnambool. Dr Edward Ryan and Dr Tom Ryan had an extensive collection of historical medical equipment and materials spanning 1884-1926 and when Dr Angus took up practice in their old premises he obtained this collection, a large part of which is now on display at the Port Medical Office at Flagstaff Hill Maritime Village in Warrnambool. During his time in Nhill Dr Angus was involved in the merging of the Mira Hospital and Nhill Public Hospital into one public hospital and the property titles passed on to Nhill Hospital in 1939. In 1939 Dr Angus and his family moved to Warrnambool where he purchased “Birchwood,” the 1852 home and medical practice of Dr John Hunter Henderson, at 214 Koroit Street. (This property was sold in1965 to the State Government and is now the site of the Warrnambool Police Station. ). The Angus family was able to afford gardeners, cooks and maids; their home was a popular place for visiting dignitaries to stay whilst visiting Warrnambool. Dr Angus had his own silk worm farm at home in a Mulberry tree. His young daughter used his centrifuge for spinning the silk. Dr Angus was appointed on a part-time basis as Port Medical Officer (Health Officer) in Warrnambool and held this position until the 1940’s when the government no longer required the service of a Port Medical Officer in Warrnambool; he was thus Warrnambool’s last serving Port Medical Officer. (The duties of a Port Medical Officer were outlined by the Colonial Secretary on 21st June, 1839 under the terms of the Quarantine Act. Masters of immigrant ships arriving in port reported incidents of diseases, illness and death and the Port Medical Officer made a decision on whether the ship required Quarantine and for how long, in this way preventing contagious illness from spreading from new immigrants to the residents already in the colony.) Dr Angus was a member of the Australian Medical Association, for 35 years and surgeon at the Warrnambool Base Hospital 1939-1942, He served as a Surgeon Captain during WWII1942-45, in Ballarat, Victoria, and in Bonegilla, N.S.W., completing his service just before the end of the war due to suffering from a heart attack. During his convalescence he carved an intricate and ‘most artistic’ chess set from the material that dentures were made from. He then studied ophthalmology at the Royal Melbourne Eye and Ear Hospital and created cosmetically superior artificial eyes by pioneering using the intrascleral cartilage. Angus received accolades from the Ophthalmological Society of Australasia for this work. He returned to Warrnambool to commence practice as an ophthalmologist, pioneering in artificial eye improvements. He was Honorary Consultant Ophthalmologist to Warrnambool Base Hospital for 31 years. He made monthly visits to Portland as a visiting surgeon, to perform eye surgery. He represented the Victorian South-West subdivision of the Australian Medical Association as its secretary between 1949 and 1956 and as chairman from 1956 to 1958. In 1968 Dr Angus was elected member of Spain’s Barraquer Institute of Barcelona after his research work in Intrasclearal cartilage grafting, becoming one of the few Australian ophthalmologists to receive this honour, and in the following year presented his final paper on Living Intrasclearal Cartilage Implants at the Inaugural Meeting of the Australian College of Ophthalmologists in Melbourne In his personal life Dr Angus was a Presbyterian and treated Sunday as a Sabbath, a day of rest. He would visit 3 or 4 country patients on a Sunday, taking his children along ‘for the ride’ and to visit with him. Sunday evenings he would play the pianola and sing Scottish songs to his family. One of Dr Angus’ patients was Margaret MacKenzie, author of a book on local shipwrecks that she’d seen as an eye witness from the late 1880’s in Peterborough, Victoria. In the early 1950’s Dr Angus, painted a picture of a shipwreck for the cover jacket of Margaret’s book, Shipwrecks and More Shipwrecks. She was blind in later life and her daughter wrote the actual book for her. Dr Angus and his wife Gladys were very involved in Warrnambool’s society with a strong interest in civic affairs. Their interests included organisations such as Red Cross, Rostrum, Warrnambool and District Historical Society (founding members), Wine and Food Society, Steering Committee for Tertiary Education in Warrnambool, Local National Trust, Good Neighbour Council, Housing Commission Advisory Board, United Services Institute, Legion of Ex-Servicemen, Olympic Pool Committee, Food for Britain Organisation, Warrnambool Hospital, Anti-Cancer Council, Boys’ Club, Charitable Council, National Fitness Council and Air Raid Precautions Group. He was also a member of the Steam Preservation Society and derived much pleasure from a steam traction engine on his farm. He had an interest in people and the community He and his wife Gladys were both involved in the creation of Flagstaff Hill, including the layout of the gardens. After his death (28th March 1970) his family requested his practitioner’s plate, medical instruments and some personal belongings be displayed in the Port Medical Office surgery at Flagstaff Hill Maritime Village, and be called the “W. R. Angus Collection”. The W.R. Angus Collection is significant for still being located at the site it is connected with, Doctor Angus being the last Port Medical Officer in Warrnambool. The collection of medical instruments and other equipment is culturally significant, being an historical example of medicine from late 19th to mid-20th century. Dr Angus assisted Dr Tom Ryan, a pioneer in the use of X-rays and in ocular surgery. Tooth extractor, dental surgical instrument. Metal with cross hatched pattern on handle. Stamped with maker's mark on hinge. Other stamps inside handles. Part of the W.R. Angus Collection.Stamped on hinge 'CASH & SONS ENGLAND'. Inside handles are 'C', 'P' and '27'.flagstaff hill, warrnambool, shipwrecked coast, flagstaff hill maritime museum, maritime museum, shipwreck coast, flagstaff hill maritime village, great ocean road, dr w r angus, dr ryan, surgical instrument, t.s.s. largs bay, warrnambool base hospital, nhill base hospital, mira hospital, flying doctor, dental surgical instrument, tooth extractor -
 Melbourne Tram Museum
Album - Photographs - Comeng Dandenong, 1980s - 1990s
In March 2024, Milissa Box (DTP) was at a trash and treasure market. She'd found a $5 photo album for sale with some photos that she thought might be of interest… From what I can gather it belonged to the gentleman pictured who was a worker at Dandenong in the Comeng and ABB eras. He appears to have worked on the Z3, A1/A2, B1/B2 class trams, Hong Kong LRVs, Comeng Melbourne suburban trains, and later the extra Victorian-purchased XP power cars and XAM sleepers to enable the Riverina XPT to be extended to Melbourne. It's clear he was very proud of the vehicles he'd helped to build. I have scanned a selection of the images, which appear to be a mix of official builder's portraits, team photos, and self-taken shots showing candid everyday scenes on the shop floor. There are also images of the launch of the XP power cars with then-Victorian Premier Joan Kirner; and some personal visits to see the Flying Scotsman, Victorian Goldfields Railway, Coal Creek, etc. Filename Description Date Comeng Scans 2024-03-05 0001 Three Comeng workers (including the photographer) stand in front of Comeng suburban train 697M (Chopper unit) c. June-July 1989 Comeng Scans 2024-03-05 0002 Three Comeng workers (including the photographer) stand in front of Comeng suburban train 697M (Chopper unit) c. June-July 1989 Comeng Scans 2024-03-05 0003 Hong Kong Light Rail Phase 1 LRV 1013 being lifted onto its transport loader c. 1987-88 Comeng Scans 2024-03-05 0004 Walter Wright transport truck (Mack) waits to draw a heavy transport platform out of a shed at Comeng Dandenong. Hong Kong Phase I LRV (1024) can be seen inside the shed c. 1988 Comeng Scans 2024-03-05 0005 Hong Kong Light Rail Phase 1 LRV 1013 on its transport loader in a shed at Comeng Dandenong ready for transport c. 1988 Comeng Scans 2024-03-05 0006 Hong Kong Light Rail Phase 1 LRV 1013 on its transport loader in a shed at Comeng Dandenong ready for transport c. 1988 Comeng Scans 2024-03-05 0007 The photographer is pictured fitting components to the cab of a Phase I Hong Kong LRV No 1026 c. 1988 Comeng Scans 2024-03-05 0008 Hong Kong Light Rail Phase 1 LRV 1013 on its transport loader at Comeng Dandenong ready for transport c. 1988 Comeng Scans 2024-03-05 0009 Hong Kong Light Rail Phase 1 LRV 1013 on its transport loader at Comeng Dandenong ready for transport c. 1988 Comeng Scans 2024-03-05 0010 Hong Kong Light Rail Phase 1 LRV 1013 on its transport loader at Comeng Dandenong ready for transport c. 1988 Comeng Scans 2024-03-05 0011 The photographer and a colleague are pictured in the car park posing for a photo at Comeng Dandenong c. 1988 Comeng Scans 2024-03-05 0012 The photographer and a colleague are pictured inside the cab of Comeng suburban train 697M, posing for a photo at Comeng Dandenong c. 1989 Comeng Scans 2024-03-05 0013 A stainless steel Hitachi train bodyshell is being transported on a truck-trailer. Possibly taken at Martin and King in Bayswater, under transport to the station for railing to Somerton for fitout. This is a later series M car with the rear-mounted pantograph (note the mounting lugs above the non-driving end) c. 1980 Comeng Scans 2024-03-05 0014 A shot at Comeng Dandenong of the onsite workforce standing in front of a Phase I Hong Kong LRV. c.1987-88 Comeng Scans 2024-03-05 0015 A shot at Comeng Dandenong of the onsite workforce standing in front of a Phase I Hong Kong LRV. c.1987-88 Comeng Scans 2024-03-05 0016 Hong Kong Light Rail Phase 1 LRV 1038 on its transport loader at Port of Melbourne ready for transport c. 1988 Comeng Scans 2024-03-05 0017 Three Comeng workers (including the photographer) stand in front of a workbench at Comeng Dandenong c. June-July 1989 Comeng Scans 2024-03-05 0018 A newly completed Comeng train (wearing VicRail teacup orange) on the factory access track at Comeng Dandenong c. 1981 Comeng Scans 2024-03-05 0019 A newly completed Z3 class tram on a transporter, with its bogie frames waiting transport to Preston Workshops for final fitout and commissioning c. 1981 Comeng Scans 2024-03-05 0020 A newly completed Comeng train (wearing VicRail teacup orange) on the factory access track at Comeng Dandenong c. 1981 Comeng Scans 2024-03-05 0021 A newly completed Z3 class tram on a transporter, with its bogie frames waiting transport to Preston Workshops for final fitout and commissioning c. 1981 Comeng Scans 2024-03-05 0022 A Comeng/ABB artist impression presumably part of their bid for the Double Decker demonstrator train for Melbourne. Note the similarity to similar Comeng sets constructed for Sydney. c. Nov 1989 – April 1990 Comeng Scans 2024-03-05 0023 Victorian Railways steam locomotive K 169 on static display at Coal Creek. c. 1980s Comeng Scans 2024-03-05 0024 Comeng suburban train carriage 1190T on a traverser in the yard at Comeng Dandenong. c. June-July 1989 Comeng Scans 2024-03-05 0025 Comeng suburban train carriages the yard at Comeng Dandenong. c. June-July 1989 Comeng Scans 2024-03-05 0026 Comeng suburban train carriages the yard at Comeng Dandenong. c. June-July 1989 Comeng Scans 2024-03-05 0027 Comeng suburban train carriages the yard at Comeng Dandenong. c. June-July 1989 Comeng Scans 2024-03-05 0028 Comeng suburban train carriages the yard at Comeng Dandenong. c. June-July 1989 Comeng Scans 2024-03-05 0029 Comeng suburban train in a shed at Comeng Dandenong. c. June-July 1989 Comeng Scans 2024-03-05 0030 Comeng suburban train carriage 1190T on a traverser in the yard at Comeng Dandenong – possible Factory Acceptance Inspection by the Met c. June-July 1989 Comeng Scans 2024-03-05 0031 Comeng suburban train carriage 1190T being tractor-shunted in the yard at Comeng Dandenong – possible Factory Acceptance Inspection by the Met c. June-July 1989 Comeng Scans 2024-03-05 0032 Two Comeng workers carry a train part (possibly a first aid kit) for fitting to a Comeng suburban train. c. June-July 1989 Comeng Scans 2024-03-05 0033 Comeng suburban train carriage 1190T on a traverser in the yard at Comeng Dandenong – possible Factory Acceptance Inspection by the Met. One of the Met staff appears to be giving one of the Comeng workers a kiss on the cheek. c. June-July 1989 Comeng Scans 2024-03-05 0034 A B2 Class tram is on a low-loader multiwheel transport trailer waiting transport to Preston Workshops; while what appears to be a classic AP6 Valiant Safari Wagon is in the foreground. c. June-July 1989 Comeng Scans 2024-03-05 0035 A B2 Class tram is on a low-loader multiwheel transport trailer waiting transport to Preston Workshops; while a worker poses for a photo with his hand on the rigging. c. June-July 1989 Comeng Scans 2024-03-05 0036 A B2 Class tram is on a low-loader multiwheel transport trailer waiting transport to Preston Workshops; An HT Holden Belmont sedan has been posed in front to appear as if it is towing the heavy vehicle. c. June-July 1989 Comeng Scans 2024-03-05 0037 A B2 Class tram is on a low-loader multiwheel transport trailer waiting transport to Preston Workshops; An HT Holden Belmont sedan has been posed in front to appear as if it is towing the heavy vehicle. c. June-July 1989 Comeng Scans 2024-03-05 0038 A1 Class tram 232 is pictured up on stands while various A/B class tram cab frames are in the foreground in various stages of assembly. Of note, 232 appears to have been returned to Dandenong for major repair or other work, and shows signs of having been in traffic for some time (weathering and wear) c. June-July 1989 Comeng Scans 2024-03-05 0039 various A/B class tram cab frames are in the foreground in various stages of assembly. c. June-July 1989 Comeng Scans 2024-03-05 0040 A group of Comeng Dandenong workers stopped on a tea break. c. June-July 1989 Comeng Scans 2024-03-05 0041 An A/B Class tram cab being fitted out with electronics and controls. c. June-July 1989 Comeng Scans 2024-03-05 0042 A new Comeng suburban train in Metropolitan Transit livery on the test track at Comeng Dandenong. c. mid 1980s Comeng Scans 2024-03-05 0043 A new Comeng suburban train in Metropolitan Transit livery on the test track at Comeng Dandenong. c. mid 1980s Comeng Scans 2024-03-05 0044 Interior shot of a new Comeng suburban train at Comeng Dandenong. c. mid 1980s Comeng Scans 2024-03-05 0045 Interior shot of a new Comeng suburban train at Comeng Dandenong. c. mid 1980s Comeng Scans 2024-03-05 0046 The exterior sign at Dandenong showing ABB brand. Early 1990s Comeng Scans 2024-03-05 0047 A B2 Class tram is on a low-loader multiwheel transport trailer waiting transport to Preston Workshops. Early 1990s Comeng Scans 2024-03-05 0048 The Brush generator and Paxman Valenta engine as fitted inside a new XP power car for NSW Countrylink (paid for by Victoria) c. 1992 Comeng Scans 2024-03-05 0049 An exterior shot of a new Countrylink XP power car for NSW under construction (paid for by Victoria) c. 1992 Comeng Scans 2024-03-05 0050 Two new XAM class XPT sleeper carriages under construction at Comeng Dandenong c. 1992 Comeng Scans 2024-03-05 0051 A B2 class tram under construction at Comeng Dandenong Early 1990s Comeng Scans 2024-03-05 0052 A B2 class tram under construction at Comeng Dandenong Early 1990s Comeng Scans 2024-03-05 0053 An exterior shot of a new Countrylink XP power car for NSW being moved out of the shed c. 1992 Comeng Scans 2024-03-05 0054 An exterior shot of a new Countrylink XP power car at Comeng Dandenong c. 1992 Comeng Scans 2024-03-05 0055 An exterior shot of a new Countrylink XP power car at Comeng Dandenong c. 1992 Comeng Scans 2024-03-05 0056 An exterior shot of a new Countrylink XP power car at Comeng Dandenong c. 1992 Comeng Scans 2024-03-05 0057 B2 class trams under construction at Comeng Dandenong Early 1990s Comeng Scans 2024-03-05 0058 An XP Powercar from NSW wearing the Intercity XPT Candy Livery at Comeng Dandenong. It is not known if this was originally painted in this livery (incorrectly) or if this was one of the first delivered series transported to Dandenong to aid the construction process of the four additional locomotives. Early 1990s Comeng Scans 2024-03-05 0059 Melbourne B2 Class tram B2.2100 (renumbered from 2102) painted in the distinctive Chocolate and Cream livery to mark the completion of 100 B2 class trams Early 1990s Comeng Scans 2024-03-05 0060 A factory forklift wearing a hand painted “We love Labo(u)r” cardboard sign, possibly in connection to a media event with the Victorian Premier onsite at Comeng Dandenong. c. 1992 Comeng Scans 2024-03-05 0061 An exterior shot of a new Countrylink XP power car at Comeng Dandenong c. 1992 Comeng Scans 2024-03-05 0062 Two new new Countrylink XP power cars under construction and final fitout at Comeng Dandenong c. 1992 Comeng Scans 2024-03-05 0063 An exterior shot of a new Countrylink XP power car on the traverser at Comeng Dandenong c. 1992 Comeng Scans 2024-03-05 0064 A B2 Class tram is on a low-loader multiwheel transport trailer waiting transport to Preston Workshops. A large banner is draped on the side explaining that this is the 106th vehicle delivered to the Public Transport Corporation (B2.2108). c. Oct 1992 (based on delivery date) Comeng Scans 2024-03-05 0065 Victorian Premier Joan Kirner addresses a group of dignitaries in front of an ABB banner inside the main administration building at Dandenong, on the occasion of the first XPT power car purchased by Victoria being unveiled at a media event c. 1992 Comeng Scans 2024-03-05 0066 An ABB executive addresses a group of dignitaries in front of an ABB banner inside the main administration building at Dandenong, on the occasion of the first XPT power car purchased by Victoria being unveiled at a media event c. 1992 Comeng Scans 2024-03-05 0067 Victorian Premier Joan Kirner addresses the media in front of a completed XP class XPT power car at Dandenong, on the occasion of the first XPT power car purchased by Victoria being unveiled at a media event c. 1992 Comeng Scans 2024-03-05 0068 An exterior shot of a new Countrylink XP power car at Comeng Dandenong c. 1992 Comeng Scans 2024-03-05 0069 A Melbourne B2 class tram undergoing testing on the test circuit at ABB Dandenong c. early 1990s Comeng Scans 2024-03-05 0070 An XPlorer type DMU emerges from a shed at ABB Dandenong c.1994 Comeng Scans 2024-03-05 0071 Voith final drive axle mounted units for XPlorer railcars waiting to be fitted at Dandenong. c.1994 Comeng Scans 2024-03-05 0072 A completed XAM class sleeper carriage at ABB Dandenong. c.1993 Comeng Scans 2024-03-05 0073 Completed XPlorer railcars wait transfer to South Dynon for bogie exchange and transfer to NSW at ABB Dandenong. c. 1994 Comeng Scans 2024-03-05 0074 A clipping from an ABB internal newsletter outlining the staff-led initiative to commemorate the 100th B2 class tram with a special livery c.1992 Has photographs of ABB, Steamrail tours, Castlemaine and Maldon Railway, Fying Scotsman 4472 visit and Puffing Billy.Yields information about the people and events at Commonwealth Engineering plant Dandenong and the activities of the unknown compiler.Album containing 40 leaves, photos in a heavy card 3 ring spring binder.comeng, commonwealth engineering co., tramcars, hong kong, nsw, sydney, melbourne, railways, the met, b class, cmr, steam engines, abb, asea brown boveri -
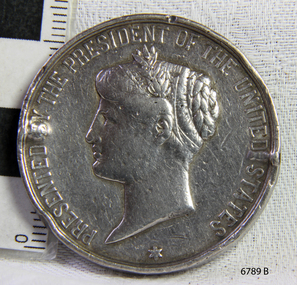 Flagstaff Hill Maritime Museum and Village
Award - Medal, Nelson Johnson, November 1880
This medal for bravery, for rescue of the crew from the shipwreck “Eric the Red” on 4th September 1880, was awarded to one of the crew of the steamer S.S. Dawn by the President of the United States in July 1881. The medal is engraved with the name “Nelson Johnson” (the anglicised version of his Swedish name Neils Frederick Yohnson). It was donated to Flagstaff Hill Maritime Village in 2013 by Nelson’s granddaughter. Nelson had migrated from Sweden to Sydney in 1879. The next year in 1880, aged 24, he was a seaman on the steamship Dawn and involved in the rescue of the survivors of the Eric the Red. Nelson Johnson was a crew member of the S.S. Dawn and was one of the rescue team in the dinghy in the early morning of September 4th 1880. Medals were awarded to the Captain and crew of the S.S. Dawn by the President of the United States, through the Consul-general (Mr Oliver M. Spencer), in July 1881 “ … in recognition of their humane efforts in rescuing the 23 survivors of the American built wooden sailing ship, the Eric the Red, on 4th September 1880.” The men were also presented with substantial monetary rewards and gifts. The city of Warrnambool’s care of the survivors was also mentioned by the President at the presentation, saying that “the city hosted and supported the crew ‘most graciously’. Previously, a week after the shipwreck, the Australian Government had also conveyed its thanks to the Captain and crew of the S.S. Dawn “Captain Griffith Jones, S.S. Dawn, The Hon. Mr Clark desires that the thanks of the Government should be conveyed to you for the prompt, persevering and seamanlike qualities displayed by you, your officers and crew in saving the number of lives you did on the occasion referred to. The hon. The Commissioner has also been pleased to award you a souvenir in commemoration of the occasion, and a sum of 65 pounds to be awarded to your officers and crew according to annexed scale. I am, &c, W Collins Rees, for and in the absence of the Chief Harbour Master.” The Awards are as follows: - Crew of DAWN'S lifeboat-Chief Officer, Mr G. Peat, 15 pounds; boat's crew-G. Sterge, A.B., 5 pounds; T. Hammond, A.B., 5 pounds; J. Black, A.B., 5 pounds; H. Edwards, A.B., 5 pounds. Dinghy's Crew-Second Officer, Mr Christie, 10 pounds; boat's crew -F. Lafer, A.B., 5 pounds; W. Johnstone, A.B., 5 pounds; Mr Lear, provedore, 5 pounds; Mr Dove, purser, 5 pounds. Captain Jones receives a piece of plate. (from “Wreck of the ship Eric the Red” by Jack Loney) The medal’s history, according to the Editor of ‘E-Sylum’ (the newsletter of The Numismatic Bibliomania Society “… appears to be an example of an 1880 State Department medal, catalogued as LS-3 (page 322 of R. W. Julian's book, Medals of the United States Mint: The First Century 1792-1892). The reverse is mostly blank for engraving, surrounded by a thin wreath. It was designed by George Morgan, chief engraver for the Philadelphia Mint, and struck in gold, silver and bronze. The one pictured here (in The Standard newspaper, 2nd July 2013) appears to be silver.” The following is an account of the events which led to the awarding of this medal. The American ship Eric the Red was a wooden, three-masted clipper ship. She had 1,580 tons register and was the largest full-rigged ship built at Bath, Maine, USA in 1871. She was built and registered by Arthur Sewall, later to become the partnership E. & A. Sewall, the 51st ship built by this company. The annually-published List of Merchant Vessels of the U.S. shows Bath was still the home port of Eric the Red in 1880. The vessel was named after the Viking discoverer, Eric ‘the Red-haired’ Thorvaldsson, who was the first European to reach the shores of North America (in 980AD). The ship Eric the Red at first traded in coal between America and Britain, and later traded in guano nitrates from South America. In 1879 she was re-metalled and was in first-class condition. On 10th June 1880 (some records say 12th June) Eric the Red departed New York for Melbourne and then Sydney. She had been commissioned by American trade representatives to carry a special cargo of 500 exhibits (1400 tons) – about a quarter to a third of America’s total exhibits - for the U.S.A. pavilion at Melbourne’s first International Exhibition. The exhibits included furniture, ironmongery, wines, chemicals, dental and surgical instruments, paper, cages, bronze lamp trimmings, axles, stamped ware, astronomical and time globes, samples of corn and the choicest of leaf tobacco. Other general cargo included merchandise such as cases of kerosene and turpentine, brooms, Bristol's Sarsaparilla, Wheeler and Wilson sewing machines, Wheeler’s thresher machine, axe handles and tools, cases of silver plate, toys, pianos and organs, carriages and Yankee notions. The Eric the Red left New York under the command of Captain Zaccheus Allen (or some records say Captain Jacques Allen) and 24 other crew including the owner’s son third mate Ned Sewall. There were also 2 saloon passengers on board. The ship had been sailing for an uneventful 85 days and the voyage was almost at its end. As Eric the Red approached Cape Otway there was a moderate north-west wind and a hazy and overcast atmosphere. On 4th September 1880 at about 1:30 am Captain Allen sighted the Cape Otway light and was keeping the ship 5-6 miles offshore to stay clear of the hazardous Otway Reef. However, he had badly misjudged his position. The ship hit the Otway Reef about 2 miles out to sea, southwest of the Cape Otway light station. Captain Allen ordered the wheel to be put ‘hard up’ thinking that she might float off the reef. The sea knocked the helmsman away from the wheel, broke the wheel ropes and carried away the rudder. The lifeboats were swamped, the mizzenmast fell, with all of its riggings, then the mainmast also fell and the ship broke in two. Some said that the passenger Vaughan, who was travelling for his health and not very strong, was washed overboard and never seen again. The ship started breaking up. The forward house came adrift with three of the crew on it as well as a longboat, which the men succeeded in launching and keeping afloat by continually bailing with their sea boots. The captain, the third mate (the owner’s son) and others clung to the mizzenmast in the sea. Then the owner’s son was washed away off the mast. Within 10 minutes the rest of the ship was in pieces, completely wrecked, with cargo and wreckage floating in the sea. The captain encouraged the second mate to swim with him to the deckhouse where there were other crew but the second mate wouldn’t go with him. Eventually, the Captain made it to the deckhouse and the men pulled him up. At about 4:30 am the group of men on the deckhouse saw the lights of a steamer and called for help. At the same time, they noticed the second mate and the other man had drifted nearby, still on the spur, and pulled them both onto the wreck. The coastal steamer SS Dawn was returning to Warrnambool from Melbourne, and its sailing time was different to its usual schedule. She was built in 1876 and bought by the Portland and Belfast Steam Navigation Co. in 1877. At the time of this journey, she was commanded by Captain Jones and was sailing between Melbourne and Portland via Warrnambool. The provedore the Dawn, Benjamin Lear, heard cries of distress coming through the portholes of the saloon. He gave the alarm and the engines were stopped. Cries could be heard clearly, coming from the land. Captain Jones sent out crew in two boats and fired off rockets and blue lights to illuminate the area. They picked up the three survivors who were in the long boat from Eric the Red. Two men were picked up out of the water, one being the owner’s son who was clinging to floating kerosene boxes. At daylight, the Dawn then rescued the 18 men from the floating portion of the deckhouse, which had drifted about 4 miles from where they’d struck the reef. Shortly after the rescue the deckhouse drifted onto breakers and was thrown onto rocks at Point Franklin, about 2 miles east of Cape Otway. Captain Jones had signalled to Cape Otway lighthouse the number of the Eric the Red and later signalled that there was a wreck at Otway Reef but there was no response from the lighthouse. The captain and crew of the Dawn spent several more hours searching unsuccessfully for more survivors, even going back as far as Apollo Bay. On board the Dawn the exhausted men received care and attention to their needs and wants, including much-needed clothing. Captain Allen was amongst the 23 battered and injured men who were rescued and later taken to Warrnambool for care. Warrnambool’s mayor and town clerk offered them all hospitality, the three badly injured men going to the hospital for care and others to the Olive Branch Hotel, then on to Melbourne. Captain Allen’s leg injury prevented him from going ashore so he and three other men travelled on the Dawn to Portland. They were met by the mayor who also treated them all with great kindness. Captain Allen took the train back to Melbourne then returned to America. Those saved were Captain Zaccheus Allen (or Jacques Allen), J. Darcy chief mate, James F. Lawrence second mate, Ned Sewall third mate and owner’s son, John French the cook, C. Nelson sail maker, Clarence W. New passenger, and able seamen Dickenson, J. Black, Denis White, C. Herbert, C. Thompson, A. Brooks, D. Wilson, J. Ellis, Q. Thompson, C. Newman, W. Paul, J. Davis, M. Horenleng, J. Ogduff, T. W. Drew, R. Richardson. Four men had lost their lives; three of them were crew (Gus Dahlgreen ship’s carpenter, H. Ackman steward, who drowned in his cabin, and George Silver seaman) and one a passenger (J. B. Vaughan). The body of one of them had been found washed up at Cape Otway and was later buried in the lighthouse cemetery; another body was seen on an inaccessible ledge. Twelve months later the second mate James F. Lawrence, from Nova Scotia passed away in the Warrnambool district; an obituary was displayed in the local paper. Neither the ship nor its cargo was insured. The ship was worth about £15,000 and the cargo was reportedly worth £40,000; only about £2,000 worth had been recovered. Cargo and wreckage washed up at Apollo Bay, Peterborough, Port Campbell, Western Port and according to some reports, even as far away as the beaches of New Zealand. The day after the wreck the government steamship Pharos was sent from Queenscliff to clear the shipping lanes of debris that could be a danger to ships. The large midship deckhouse of the ship was found floating in a calm sea near Henty Reef. Items such as an American chair, a ladder and a nest of boxes were all on top of the deckhouse. As it was so large and could cause danger to passing ships, Captain Payne had the deckhouse towed towards the shore just beyond Apollo Bay. Between Apollo Bay and Blanket Bay, the captain and crew of Pharos collected Wheeler and Wilson sewing machines, nests of boxes, bottles of Bristol’s sarsaparilla, pieces of common American chairs, axe handles, a Wheelers’ Patent thresher and a sailor’s trunk with the words “A. James” on the front. A ship’s flag-board bearing the words “Eric the Red” was found on the deckhouse; finally, those on board the Pharos had the name of the wrecked vessel. During this operation, Pharos came across the government steamer Victoria and also a steamer S.S. Otway, both of which were picking up flotsam and wreckage. A whole side of the hull and three large pieces of the other side of the hull, with some of the copper sheathing stripped off, had floated onto Point Franklin. Some of the vessels' yards and portions of her masts were on shore. The pieces of canvas attached to the yards and masts confirmed that the vessel had been under sail. The beach there was piled with debris several feet high. There were many cases of Diamond Oil kerosene, labelled R. W. Cameron and Company, New York. There were also many large planks of red pine, portions of a small white boat and a large, well-used oar. Other items found ashore included sewing machines (some consigned to ‘Long and Co.”) and notions, axe and scythe handles, hay forks, wooden pegs, rolls of wire (some branded “T.S” and Co, Melbourne”), kegs of nails branded “A.T. and Co.” from the factory of A. Field and Son, Taunton, Massachusetts, croquet balls and mallets, buggy fittings, rat traps, perfumery, cutlery and Douay Bibles, clocks, bicycles, chairs, a fly wheel, a cooking stove, timber, boxes, pianos, organs and a ladder. (Wooden clothes pegs drifted in for many years). There seemed to be no personal luggage or clothing. The Pharos encountered a long line, about one and a half miles, of f locating wreckage about 10 miles off land, southeast of Cape Otway, and in some places about 40 feet wide. It seemed that more than half of it was from Eric the Red. The ship’s crew rescued 3 cases that were for the Melbourne Exhibition and other items from amongst the debris. There were also chairs, doors, musical instruments, washing boards, nests of trunks and flycatchers floating in the sea. Most of the goods were saturated and smelt of kerosene. A section of the hull lies buried in the sand at Parker River Beach. An anchor with a chain is embedded in the rocks east of Point Franklin and a second anchor, thought to be from Eric the Red, is on display at the Cape Otway light station. (There is a photograph of a life belt on the verandah of Rivernook Guest House in Princetown with the words “ERIC THE RED / BOSTON”. This is rather a mystery as the ship was registered in Bath, Maine, USA.) Parts of the ship are on display at Bimbi Park Caravan Park and at Apollo Bay Museum. Flagstaff Hill Maritime Village also has part of the helm (steering wheel), a carved wooden sword (said to be the only remaining portion of the ship’s figurehead; further research is currently being carried out), a door, a metal rod, samples of wood and this medal awarded for the rescue of the crew. Much of the wreckage was recovered by the local residents before police and other authorities arrived at the scene. Looters went to great effort to salvage goods, being lowered down the high cliff faces to areas with little or no beach to collect items from the wreckage, their mates above watching out for dangerous waves. A Tasmanian newspaper reports on a court case in Stawell, Victoria, noting a man who was caught 2 months later selling tobacco from the wreckage of Eric the Red. Some of the silverware is still treasured by descendants of Mr Mackenzie who was given these items by officials for his help in securing the cargo. The gifts included silver coffee and teapots, half a dozen silver serviette rings and two sewing machines. A Mr G.W. Black has in his possession a medal and a purse that was awarded to his father, another Dawn crew member who was part of the rescue team. The medal is similarly inscribed and named “To John Black ….” (from “Shipwrecks” by Margaret E. Mackenzie, 3rd edition, published 1964). The wreck and cargo were sold to a Melbourne man who salvaged a quantity of high-quality tobacco and dental and surgical instruments. Timbers from the ship were salvaged and used in the construction of houses and shed around Apollo Bay, including a guest house, Milford House (since burnt down in bushfires), which had furniture, fittings and timber on the dining room floor from the ship. A 39.7-foot-long trading ketch, the Apollo, was also built from its timbers by Mr Burgess in 1883 and subsequently used in Tasmanian waters. It was the first attempt at shipbuilding in Apollo Bay. In 1881 a red light was installed about 300 feet above sea level at the base of the Cape Otway lighthouse to warn ships when they were too close to shore; It would not be visible unless a ship came within 3 miles from it. This has proved to be an effective warning. Nelson Johnson married Elizabeth Howard in 1881 and they had 10 children, the father of the medal’s donor being the youngest. They lived in 13 Tichbourne Place, South Melbourne, Victoria. Nelson died in 1922 in Fitzroy Victoria, age 66. In 1895 the owners of the S.S. Dawn, the Portland and Belfast Steam Navigation Co., wound up and sold out to the Belfast Company who took over the Dawn for one year before selling her to Howard Smith. She was condemned and sunk in Suva in 1928. The State Library of Victoria has a lithograph in its collection depicting the steamer Dawn and the shipwrecked men, titled. "Wreck of the ship Eric the Red, Cape Otway: rescue of the crew by the Dawn". The medal for bravery is associated with the ship the “The Eric the Red which is historically significant as one of Victoria's major 19th century shipwrecks. (Heritage Victoria Eric the Red; HV ID 239) The wreck led to the provision of an additional warning light placed below the Cape Otway lighthouse to alert mariners to the location of Otway Reef. The site is archaeologically significant for its remains of a large and varied cargo and ship's fittings being scattered over a wide area. The site is recreationally and aesthetically significant as it is one of the few sites along this coast where tourists can visit identifiable remains of a large wooden shipwreck, and for its location set against the background of Cape Otway, Bass Strait, and the Cape Otway lighthouse.“ (Victorian Heritage Database Registration Number S239, Official Number 8745 USA) This medal was awarded to Nelson Johnson by the U.S. President for bravery in the rescue of the Eric the Red crew. The obverse of the round, solid silver medal has an inscription around the rim. In the centre of the medal is the head of Liberty to the left, hair in a bun, with a sprig of leaves in the top left of a band around her head. There is a 6-pointed star below the portrait, between the start and end of the inscription. There are two raised areas on the rim, horizontally opposite each other, from the edge to just below the lettering and coinciding with the holes drilled in the edge. Slightly right of the top is a round indentation in the rim. The reverse has a wreath of leaves as a border, joined at the bottom by a ribbon bow. In the centre of the medal is an inscription, decorated with 3-pronged design and dots. The edge is plain with 2 small, rough and uneven holes horizontally opposite to each other, as though they had been used for mounting the medal at some stage. The medal has a matte finish on both sides and is slightly pitted and scratched.“PRESENTED BY THE PRESIDENT OF THE UNITED STATES” around the perimeter of the obverse of the medal. “TO / Nelson Johnson, / seaman of the British, / str “Dawn”, for bravery, / at risk of life, / in / rescuing the crew of / the American Ship / “Eric the Red.” “M” on obverse, truncation of the portraitwarrnambool, flagstaff hill, flagstaff hill maritime village, maritime museum, shipwreck coast, great ocean road, shipwreck artefact, eric the red, zaccheus allen, sewall, 1880, melbourne exhibition, cape otway, otway reef, victorian shipwreck, medal, nelson johnson, neils frederick yohnson, s.s. dawn, george morgan, hero