Showing 200 items
matching k. keith
-
 Melbourne Tram Museum
Slide, Keith Kings, 15/08/1959 12:00:00 AM
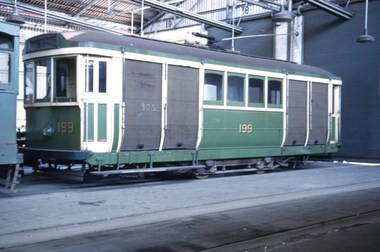
... for Myers Christmas tram. Slide Number K(c)(292) Slide Keith ...Colour slide, Kodak, fawn cardboard of MMTB former Q class 199 as altered for wheel transportation of spare wheel and axle sets to depots. Photographed on road 17 at Preston workshops 15/8/1959. See Reg Item 4276 as the tram decorated for Myers Christmas tram. Slide Number K(c)(292)Extensive handwriting on rear in ink and that it was photographed at ? f5.6. Slide has in pencil 'WJW" in the top right hand corner.trams, tramways, q class, wheels, work trams, preston workshops, tram 199 -
 Melbourne Tram Museum
Slide, Keith Kings, 12/09/1959 12:00:00 AM
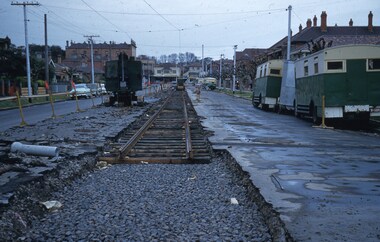
... undertaken. Slide Number K(c)(292) Slide Keith Kings ...Colour slide, Kodak, fawn cardboard of track laying for the new South Melbourne / St Kilda Beach terminus in Park St, for the closing of the section of track into Mary St and Beaconsfield Parade. Has an early tracked excavator, parked on the road that has been broken up. Shows new track laid on timber sleepers with former wartime Austerity buses along side the road. Photo taken at the corner of Mary St 12/9/1959. Preliminary overhead work has been undertaken. Slide Number K(c)(292)Extensive handwriting on rear in ink and that it was photographed at 1/60 at f4.5.trams, tramways, st kilda, mary st, beaconsfield parade, south melbourne, new track, park st st kilda -
 Melbourne Tram Museum
Slide - Set of 2, Keith Kings, 17/10/1959 12:00:00 AM
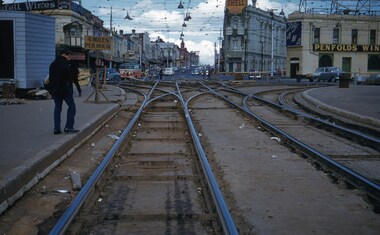
Set of two Colour slides, Kodak, white cardboard mount of track laying and reconstruction at St Kilda Junction during Oct. 1959. .1 - St Kilda Junction during reconstruction looking south with the junction arrangements shown. Has in the background, the Signal box, the junction hotel and the Corner Hotel, all with adverts for Penfold Wines, Fly ANA, Shell, Sepletts wins and Gilbeys Gin. Shows the vertical curves and the nature of the trackwork at this location. Photo 17/10/1959. .2 - ditto, but further back, with track welding, overhead work, tower wagon and a welding truck. In the background in addition to .1 are signs for Fosters Lager and Goodyear tyres. Dated 18/10/1959. Slide Number K(l)(293) and K(i)(293).Extensive handwriting on rear in ink and that it was photographed at 1/125 f4 and 1/125 f5.6trams, tramways, st kilda junction, overhead, tower wagon, welding truck, signal box, trackwork -
 Melbourne Tram Museum
Slide - Set of 5, Keith Kings, 15/11/1959 12:00:00 AM
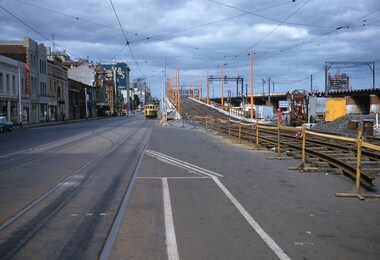
Set of five Colour slides, Kodak, white cardboard mount of track laying and the construction of the Flinders Street overpass during November 1959. .1 - Photo showing the tram line in the pre location position with the new track over the first stage of the overpass read to be cut in. 15/11/1959. Tram running a route 46. Keith notes - 317 to Spencer St terminus in Flinders St from Cnr of Spencer with temporary track ready for trams on the overpass. .2 - track being tested on 21/11/1959 - has the Flinders St station and signal gantry in the background. On the bridge is a sign for Coffey Ford. Keith notes - 903 stranded on temporary track as test car for Kings St bridge overpass Flinders St between William and Market Sts. .3 - tram 903 testing the track, has a number of workers in the view - 22/11/1959 Keith's notes - 903 first tram (on its second use) testing Flinders St overpass track and approach curves on east side. .4 - trams 939 (route 46) and 350 (route 27, Spencer St) at the east end of the new bridge with people watching. Note the "cars stop here" on the orange pole near the bottom of the ramp. 22/11/1959 Keith's notes - 939 - first passenger tram over Flinders St overpass on return journey and 350 second passenger tram. .5 - tram 939 first passenger car over the bridge at the western end of the new bridge with many workers in the background. Also Markillies Hotel. Also shows the reinforcing in the side of the bridge for the next section of the bridge to be built following this stage. 22/11/1959 Keith's notes - 939 first passenger tram over Flinders St overpass over King St. Slide Number K(l)(287), K(m)(275), K(m)(278), K(m)(287), K(m)(282) respectively.Extensive handwriting on rear in ink giving the photographic details of exposure.trams, tramways, flinders st, track equipment, track construction, trackwork, route 46, testing, king st, tram 371, tram 903, tram 939, tram 350 -
 Melbourne Tram Museum
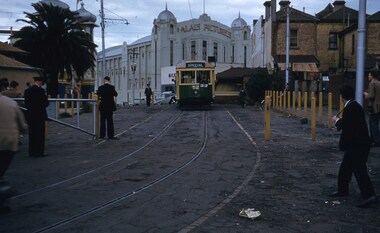
Slide, Keith Kings, 15/08/1959 12:00:00 AM
... the wheels etc. Slide Number K(i)(282) Slide Keith Kings ...Colour slide, Kodak, white cardboard of ex VR No. 52 using the Luna Park Loop, St Kilda during an AETA tour, 17/10/1959. Has the Palais Theatre in the background. Tram has an auxiliary board of "Luna Park", would appear that the AETA auxiliary board is in the cab. An Inspector is shutting the gate behind the tram, while other people are watching the wheels etc. Slide Number K(i)(282)Extensive handwriting on rear in ink.trams, tramways, vr class tramcars, luna park, loops, aeta, tours, tram 52 -
 Melbourne Tram Museum
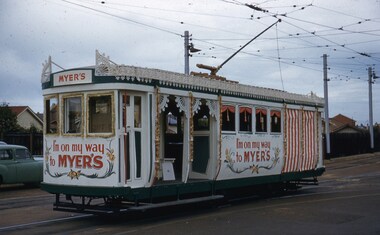
Slide, Keith Kings, 15/08/1959 12:00:00 AM
... Number K(l)(289) Slide Keith Kings ...Colour slide, Kodak, white cardboard of MMTB former Q class 199 decorated by Myers for Father Xmas special, East Preston Depot 21/11/1959. See Reg Item 4271 for the tram in Preston Workshops undecorated in August 1959. Slide Number K(l)(289)Extensive handwriting on rear in ink and that it was photographed at 1/60 f5.6. Slide has in pencil 'WJW" in the top right hand corner.trams, tramways, q class, east preston depot, myers, christmas trams, decorated trams, tram 199 -
 Melbourne Tram Museum
Slide, Keith Kings, 15/08/1959 12:00:00 AM
... controller". Slide Number K(l)(289) Slide Keith Kings ...Colour slide, Kodak, white cardboard of track reconstruction in Flemington Road, North Melbourne 19/12/1959, over Grattan St, with trams 935 and 927 in the far distance. Note the wood block construction, the austerity bus, the hotel in the far distance on the corner of Elizabeth St and Peel St, the trees are blocking the view of the former Haymarket, the temporary track relaying and the lone watchman or "traffic controller". Slide Number K(l)(289)Extensive handwriting on rear in ink and that it was photographed at 1/60 f5.6.trams, tramways, flemington rd, grattan st, trackwork, track construction, tram 935 -
 Melbourne Tram Museum
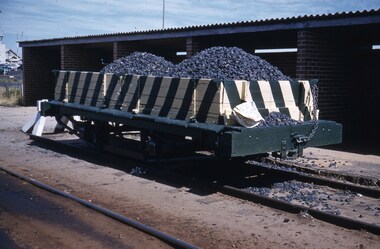
Slide, Keith Kings, 9/01/1960 12:00:00 AM
... ), Essendon Aerodrome terminus. Slide Number K(q)(283) Slide Keith ...Colour slide, Kodak, white cardboard of one of the MMTB Ballast Trailers at the Essendon Aerodrome airport terminus siding. Has the shelter in the background. 9/1/1960. Keith's notes - Ballast trailer (resurrected and reconditioned), Essendon Aerodrome terminus. Slide Number K(q)(283)Extensive handwriting on rear in ink and that it was photographed at 1/125 f5.6.trams, tramways, essendon aerodrome, essendon airport, ballast wagons, shelters -
 Melbourne Tram Museum
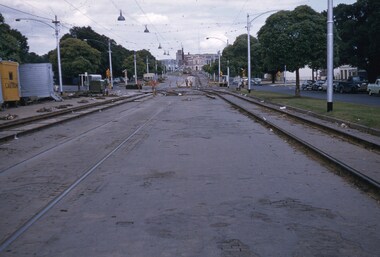
Slide, Keith Caldwell, Mar. 1968
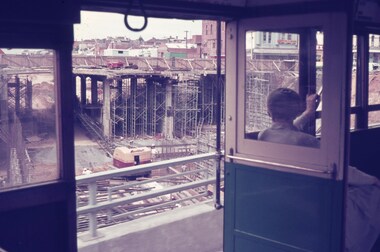
Agfa colour slide, blue / white plastic mount, photo by Keith Caldwell of a view from a tram southbound in St Kilda Road, looking down on the works to replace St Kilda Junction. Part of the work has been completed looking at the bridge structure alongside the tram. Shows the extent of the bridge construction work. 3/1968In ink "St K jct 3/68"trams, tramways, st kilda junction, trackwork, road works, st kilda rd -
 Melbourne Tram Museum
Slide, Keith Caldwell, Mar. 1968
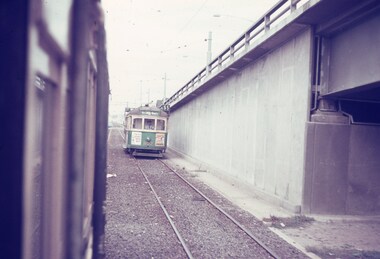
Agfa colour slide, blue / white plastic mount, photo by Keith Caldwell of a view from a tram southbound in Kingsway section where the road bridge starts to rise to cross over the tram track and then the Yarra river. Tram 802, West Coburg - via William St, route 55 is in the view. Tram has adverts for Tolley's Brandy and ? in Essendon. 3/1968In ink "St K jct 3/68"trams, tramways, kingsway, bridges, route 55, west coburg, tram 802 -
 Melbourne Tram Museum
Photograph - X 217 Hawthorn Depot, c1925
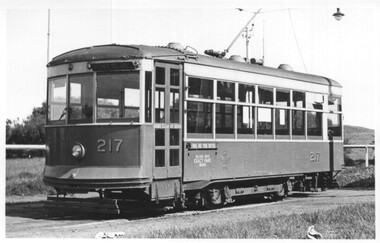
Shows X class tram No. 217 at Hawthorn Depot with a bow collector. Tram has the destination of "Bridge Rd" (Bridge Road). Yields information about X 217 when it was fitted with a bow collector and Hawthorn Depot.Black and white photograph notes on rearIn ink by Keith Kings: - X217 Hawthorn depot about 1925, courtesy of Mr Stephenson Preston Workshops", has Rev L Marshall Wood stamp and K S Kings stamp - with number S-A 111.tramways, tramcars, tram 217, hawthorn depot, bow collector, x class, mmtb -
 Melbourne Tram Museum
Photograph - Set of 2 Black & White Photograph/s, Keith Kings, 13/08/1949 12:00:00 AM
Black and White photographs of X class trams at the Point Ormond terminus by Keith Kings. Photos shows the lettering and signs for one man trams. .1 - X-217 - 13/8/1949 .2 - X-218 - 29/4/1950On the rear in ink details of each tram and photo along with Keith's photo numbers c(e)(4) and D(k)(7).trams, tramways, x class, point ormond, one man trams, tram 217, tram 218 -
 Melbourne Tram Museum
Photograph - Set of 11 Black and White photograph, Ken Flood, 18/04/1974 12:00:00 AM
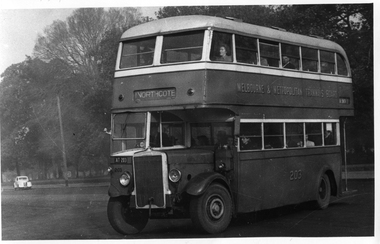
Set of 11 black and white photographs sent to Keith Kings received from Ken Flood 4/6/1975. .1 - Bus No 203 1940 Leyland TD5c - Turning from Nicholson Street into Gertrude Street. - bound for Northcote. .2 - Bus No 201 1940 Leyland TD5c - In Nicholson Street at Albert Street - Photo. bound for Northcote .3.- Bus No 492 1943 Ford Austerity - at Queens Pde Clifton Hill - Note the Pram and Passenger bus sign by the front doorway. Photo not dated. .4 - Bus No 365 1948 OPS1 - Nicholson Street at Victoria Pde. bound for East Brunswick. Photo not dated. .5 - Bus No 325 1950 OPS4 - Nicholson Street at Victoria Pde. bound for East Brunswick. Photo not dated. Bus did not enter service until 1950. .6 - Bus No 500 1943 Ford Austerity - Marine Pde. Point Ormond. Note the Pram bus sign by the front door. .7 - Bus No 19 1938 Leyland Cub (diesel) with Preston Workshops body. - Lonsdale Street at William Street. W2 No 305 passes behind the bus. Late 1940's photo. .8 - Bus No 143 1940 Leyland TS8c drop enter - in Russell Street at LaTrobe Street bound for North Kew. (Belford Road via Collingwood). Photo not dated. .9 - Bus No 9 1938 Leyland Cub (diesel) with Preston Workshops body. - in Russell Street at LaTrobe Street bound for North Carlton .10 - Bus No 4 1938 Leyland Cub (Diesel) with Preston Workshops body - in Lonsdale Street at William Street. note destination not reset for the return trip. .11 - Bus No 150 1940 Leyland TS11c Drop enter - Nicholson Street at Victoria Pde. Photo not dated. Most of the photos dated 9/6/1949 unless noted otherwise. Notes on photos provided by Rod Atkins - see htd5860doc.pdfOn rear of the photos in ink; .1 - MMTB 203 9/6/49 - K Flood .2 - MMTB 201 - 9/6/49 - K Flood .3 - MMTB Ford #492 - K Flood .4 - MMTB #365 - K Flood .5 - MMTB #325 - K Flood .6 - MMTB #500 Pt Ormond 6/6/49 - K Flood .7 - MMTB #19 9/6/49 - K Flood .8 - MMTB #143 - K Flood .9 - MMTB #4 9/6/49, K Flood .10 - MMTB #4 9/6/49, K Flood .11 - MMTB #150 - K Floodtrams, tramways, buses, double deck buses, prams, mmtb buses, austerity buses, w2 class, tram 305, bus 203, bus 201, bus 492, bus 365, bus 500, bus 19, bus 143, bus 9, bus 4, bus 150, leyland, ford motor company, td5c class, ops1 class, ops4 class, ts8c class, cub class, ts11c class -
 Melbourne Tram Museum
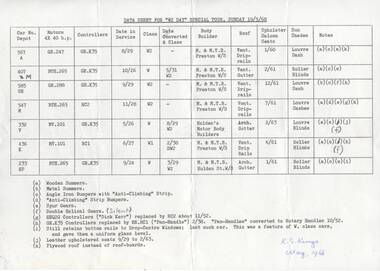
Document - Tramcar Data Sheet, Keith Kings, "Data sheet for "W2 Day", special tour, Sunday 19/5/68", May. 1968
Gestener print of a sheet titled "Data sheet for "W2 Day", TMSV special tour, Sunday 19/5/68", listing the tramcars used on the day; car number and depot, motors, controllers, date in service, class, date converted and class, body builder, roof, date of Upholstered seats in saloons, sun shades and notes on the tramcars them selves. Data for 567, 407, 585, 547, 332, 436 and 233. Made by Keith Kings May 1968. See Reg Item 605 for the ticket used on this tour and Reg item 3543 for a photograph of tram W2 332 at Wattlepark Loop."K. S Kings May 1968" in bottom right hand corner in light blue ink.trams, tramways, tramcars, mmtb, lists, tours, w2 class, tmsv -
 Bendigo Military Museum
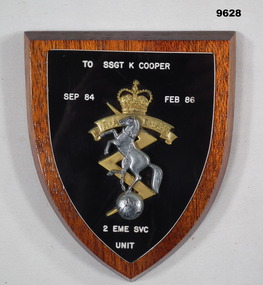
Plaque - RAEME PLAQUE, Feb 1986
Part of the Cooper Collection. See Catalogue No. 9586.2 for details of No. 379859, 'Keith Cooper's service'.Shield shaped brown coloured wooden plaque with RAEME insignia. Insignia on black plastic background. Recipient details in white lettering.Engraved in white lettering: 'To SGT. K. COOPER, Sep 84., Feb 86, 2 EME SVC UNIT'.cooper collection, keith cooper, raeme, plaque -
 Bendigo Military Museum
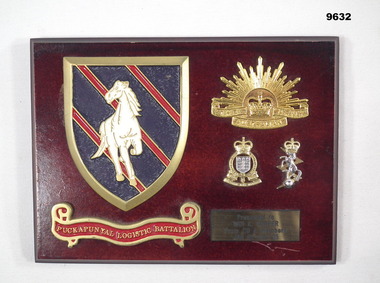
Plaque - PUCKAPUNYAL LOGISTIC BATTALION PLAQUE, Puckapunyal Logistics Battalion, Aug 1995
Part of the Cooper Collection. See Catalogue No. 9586.2 for details of No. 3798359, "Keith Cooper's" service.Rectangular brown wooden plaque featuring gold coloured Rising Sun Badge, RAEME insignia on Royal Australian Army Ordinance Corps insignia. On LH side is a metal shield with white horse over blue and red striped background. Below is a banner with 'PUCKAPUNYAL LOGISTIC BATTALION' printed in gold lettering over a red background. Rectangular gold coloured plate with black lettering located on bottom RH corner.Engraved on gold coloured plate: “Presented to WO1 K. COOPER From CO & Members Jan 92 - Aug 95”cooper collection, keith cooper, plaque, puckapunyal -
 Bendigo Military Museum
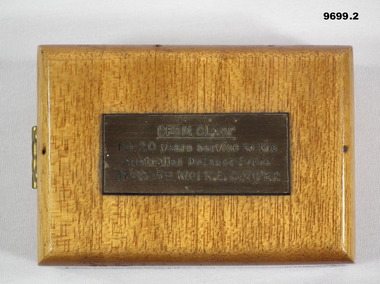
Award - MEDAL RIBBON
Part of the Cooper Collection. See Catalogue No. 9586.2 for details of service for "Keith Cooper" No. 3798359.1. DFSM ribbon with silver coloured rosette. Ribbon is mounted on green felt. 2. Hinged wooden box. Gold coloured plastic plate on lid of box. Plate has black text engraved.2. Engraved on plastic plate: "DFSM CLASP for 20 years service by the Australian Defence Force, 3798358 WO2 K. E. Cooper.cooper collection, keith cooper, defence force service medal, medal ribbon -
 Flagstaff Hill Maritime Museum and Village
Photograph - Vessel, Sail and Steam Ship, S.S. Warrnambool
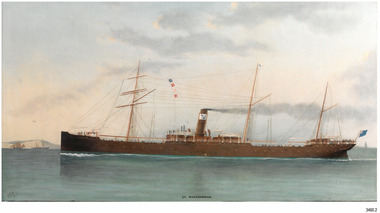
This photograph and a matching earlier photograph are the images of a painting of the British steamship SS Warrnambool at Dover Strait in the English Channel. The photographs were donated by the painting’s owner, who acquired the 30” x 56” (76 x 142.5 cm) oil on canvas painting in 1998. Both photographs were accompanied by a letter, one written in 2001, and the other in 2003. The letters confirm that the artist of the painting was Charles Keith Miller, signed with the initials “CKM” and dated “1893”. The painting shown in the photographs was a gift to the Town Council of Warrnambool, presented to Warrnambool folks in Melbourne on December 1, 1892, by the Captain of William Lund’s ship SS Warrnambool. The painting was given by Lund in appreciation of the Ladies of Warrnambool who had presented the ship with a ‘house’ flag bearing the Blue Anchor Line’s symbol of a diagonal blue anchor on a white background; the ladies had made the decision to present the flag only a month earlier. A few days later, December 6th, the SS Warrnambool was on its homeward journey to Britain, sailing via Adelaide. It anchored for a short time off the Port of Warrnambool. A boat was launched from Lady Bay to take a group of friends to the ship with a delivery of gifts. After cheers were roused for both the ship and the Captain, the ship continued on its way. The photograph shows the gifted white flag with a diagonal blue anchor flying from the masthead. The same symbol is painted on the ship’s black funnel. The signal flags on the foremast display ‘M’ ‘R’ ‘V’ ‘B’. These letters are most likely the ship’s call number ‘MRVB’. Although the painting was given as a gift in December 1892, it is post-dated “1893”. Perhaps the painting was given earlier than anticipated; or the date added later, but whatever the reason, the provenance of the painting was confirmed at auctions of this painting and other works by the same artist. CHARLES KEITH MILLER 1836-1907:- Captain Charles Miller left his home in Scotland at the age of 15 years for a life at sea. He earned his Master’s Certificate ten years later. After being the captain of sailing ships he moved over to the steamships because they were faster. In 1866 he married and settled in Glasgow. Over the following eleven years he and his wife had five children, then sadly his wife passed away. Captain Miller returned to the sea for a while but in 1888 he gave up his sea life to spend his time as a marine artist. His understanding of seafaring life and vessels, combined with his artistic skills, gave him the ability to produce fine art and several galleries and museums have collections of his sought-after works. S.S. WARRNAMBOOL 1892-1925:- The steamship SS Warrnambool was built in 1892 by the Sunderland Ship Building Company for the Lund Line of London, founded by William Lund in 1869. It efficiently carried both passengers and cargo across the world to Australia, under the command of her master Captain Joshua Edward Iibery, who had many years of experience with the Blue Anchor Line. The company, referred to as the Blue Anchor Line or BAL, owned a fleet of both sail and steamships. The funnels of all of the steamships were painted black, with a white band around the top bearing a diagonal blue anchor and chain. The company’s house flag was also white with a diagonal blue anchor. The SS Warrnambool carried passengers and cargo in a ‘no frills’ service to and from Europe around the Cape of Good Hope, stopping at some ports in between. The ship was involved in bringing home returned solders in 1895. At one time it carried a doctor from Victoria, Australia, to assist at the war front in South Africa. The ship had a very good reputation for its cargo arriving ‘almost always in excellent condition.’ Exported goods from Australia included iron safes, flour, wool, apples, frozen rabbits, butter, cheese, pork, cattle, poultry and sheep. One remarkable delivery contained Ostriches for Queen Victoria and they survived the journey well. The SS Warrnambool was sold in 1900 to the British and South American Steam Navigation Co. Ltd of Liverpool and was renamed ‘Harmodius’. The company was managed by R.P. Houston & Company of London and its Houston Line funnels were red with a black top. The Harmodius was sold in 1919 to K.S.S. Co. Ltd, managed by Kaye Son & Co. Ltd. of Liverpool, and was renamed ‘Kut’. The line had black funnels with a white ‘K’ in a diamond or between white stripes. In 1926 it was purchased by T.W. Ward Ltd. and broken up. NOTE- other vessels named “Warrnambool” Two other vessels carried the name “Warrnambool” (1)- HMAS Warrnambool J202 (1941-1947), a Bathurst Class corvette vessel owned by the Royal Australian Navy, destroyed by a mine. The photograph is significant for its association with the painting "SS Warrnambool" by well-known early 20th century marine artist Charles Keith Miller, whose paintings are well valued. The painting and the photograph of it are namesakes of Warrnambool and are connected through the gifts exchanged between the ship company owner, the City of Warrnambool and the Ladies of Warrnambool; the House Flag and the painting by C K Miller. The image is a good likeness to original photographs of the late-19th to early-20th century steam and sale vessel. Coloured photograph of a painting, the steamship S.S. Warrnambool. The three-masted ship has lowered sails. It is in calm water, land on one side, and other vessels in the water. The ship has four raised signal flags, a house flag and a blue ensign. The funnel also bears the house flags symbol. Smoke emits from the funnel. Figures are visible onboard. There is a signature and a title on the lower edge of the photograph. (Artist of the painting in the photograph was Charles Keith Miller)House flag symbol, [diagonal blue anchor on white background] Text "CKM" and "1893" Text "S. S. WARRNAMBOOL."flagstaff hill, warrnambool, photograph, steam ship warrnambool, flagstaff hill maritime village, shipwreck coast, ss warrnambool, captain, charles keith miller, ckm, 1893, william lund, warrnambool town council, blue anchor line, lund line, ladies of warrnambool, house flag, diagonal blue anchor, captain miller, sunderland ship building company, migrant ship, 1892 ship, home flag, bal, australian export, s.s.warrnambool, dover strait, english chanel, port of warrnambool, lady bay, mrvb, captain charles miller, captain joshua edward iibery, ostriches, queen victoria, british and south american steam navigation co., harmodius, r.p. houston & company, houston line, k.s.s. co. ltd, kaye son & co. ltd, kut, t.w. ward ltd -
 Bendigo Military Museum
Administrative record - CERTIFICATE OF DISCHARGE WW2, 5.3.1946
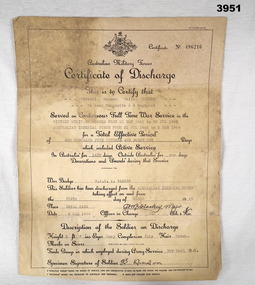
"Keith HINTON" enlisted 15.12.1914 in the CMF (Citizen Military Forces) No V102292 aged 34 years. He transferred to 2nd AIF No VX84222 on 31.7.1942 & discharged 5.3.1946. He had no overseas service but was awarded Returned from Active Service badge meaning that he served in Northern Australia.Certificate of Discharge, parchment paper, printed form with typed details. Certificate No 496216 re K HINTON. Document details name, rank, regiment no, enlistment & discharge, dates, service inside & outside Australia. “VX84222 Gunner Keith HINTON, 54 Aust Composite A.A. Regiment”certificate, discharge, keith hinton -
 Bendigo Military Museum
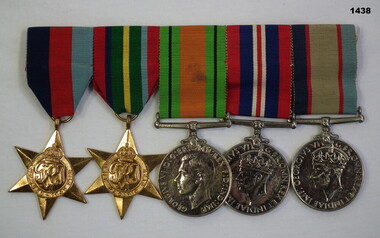
Award - MEDAL SET WW2, Post 1945
Keith Charles BUCKLEY initially enlisted in the CMF on 6.3.1939 age 27 years 4 months. He had an odd No 449179 in 6th Bn (RMR), this changed to V55220, made L/Cpl 1.8.1940, transfers to the 2nd AIF No VX112283 on 29.10.1942. At some point he obviously signs on at wars end and his No changes to 337514, discharged from the services on 1.11.1958 with the rank of Major in Signals Cipher. Refer also Cat No 1440.Medal set, brass plate mounted, set of (5) re K C Buckley. 1. 1939-45 Star. 2. Pacific Star. 3. Defence Medal. 4. War Medal 1939-45 5. Australian Service Medal 1939 - 45"VX112283 K.C.Buckley"decorations, medals, numismatics- medals - military