Showing 7406 items
matching jack-walker
-
 International House, The University of Melbourne
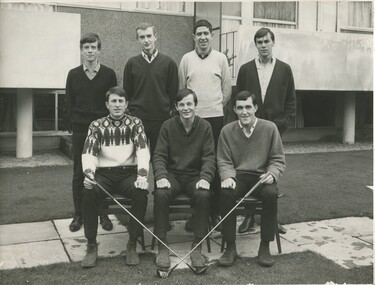
Photograph (Item), Golf team, International House
Inscribed in black ink on reverse: 'Back - L-R Geoff Moir, Julian Gardner, John Fenton, Bert Middleton. Front L-R Randall Bell, John McLaren, Ian Spottiswood.' -
 Ballarat Heritage Services
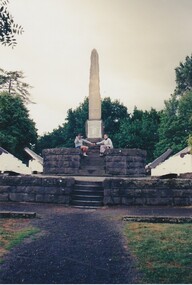
Photograph - Digital photograph, Brenda & Jack Ford, Eureka Stockade Monument, 14 December 1993
Digital coloured photograph of two people at the Eureka Stockade Monument in Ballarat East.eureka, diorama, 1993, jack ford, brenda ford, eureka monument, memorial -
 Ballarat Heritage Services
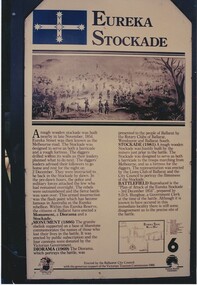
Digital photograph, Brenda & Jack Ford, Diorama Hut Exterior Signage, 14 December 1993
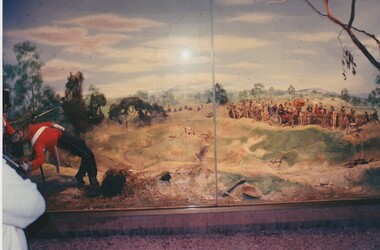
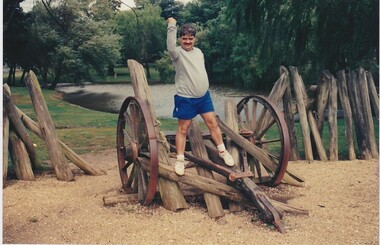
Please find 5 photographs taken by me & my wife Brenda, at Ballarat, on 14 December 1993. Unfortunately, I did not take photographs of the building that housed the exhibit, probably because I thought just how sad and pathetic the entire memorial display looked. It comprised a reconstructed slab hut and nearby a partly-rebuilt fence that represented the hastily-built Eureka Stockade. The signage that detailed the events surrounding the Eureka Stockade was affixed to the hut wall beside the entrance to the interior diorama. In the first photograph, you can see the dark, bare timber colour of the slab wood that held the signage plus (on the left side) one of the numerous holes in the slab walls. This made the display very cold and draughty in its interior. Once inside, you were confronted with an earthen, gravel and leafy floor, which became muddy, after rain, as it was on the day of our visit. The diorama was held in a glass and cement display case. with no lights on. It was dark inside the hut so the diorama was not easy to see unless you inserted a coin into a metal pay-box. Then lights would turn on and a recording of shouting and gunfire (representing the battle noise) would play. I remember the whole experience to be short and underwhelming. To get an idea of the scale of the diorama, you can see Brenda’s elbow & part torso to the left of the photograph labeled “diorama- hut exit”. Once outside the diorama’s slab hut, you could walk across to a partial representation of the stockade’s fortifications, complete with two wagon wheels. This space was also graveled to distinguish it from the rest of the green-lawn park. Finally, you walked up the hill, from the hut and outside display, to visit the old Eureka Stockade monument & cannons. This is still in existence today. Digital photographeureka stockade, sign, diorama, jack ford, brenda ford, memorial -
 Ballarat Heritage Services
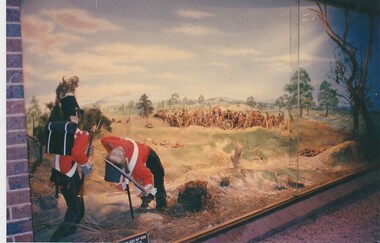
Photograph - Digital photograph, Brenda & Jack Ford, Eureka Diorama entrance, 14/12/1993
The signage that detailed the events surrounding the Eureka Stockade diaroma was affixed to the hut wall beside the entrance to the interior diorama. In the first photograph, you can see the dark, bare timber colour of the slab wood that held the signage plus (on the left side) one of the numerous holes in the slab walls. This made the display very cold and draughty in its interior. Once inside, you were confronted with an earthen, gravel and leafy floor, which became muddy, after rain, as it was on the day this photograph was taken. The diorama was held in a glass and cement display case. with no lights on. It was dark inside the hut so the diorama was not easy to see unless you inserted a coin into a metal pay-box. Then lights would turn on and a recording of shouting and gunfire (representing the battle noise) would play. The Photographer remembers the whole experience to be short and underwhelming. Once outside the diorama’s slab hut, you could walk across to a partial representation of the stockade’s fortifications, complete with two wagon wheels. This space was also graveled to distinguish it from the rest of the green-lawn park. digital photographeureka stockade, diorama, jack ford, brenda ford, eureka stockade memorial -
 Ballarat Heritage Services
Photograph - Digital photograph, Brenda & Jack Ford, Eureka Diorama exit, 14/12/1993
The signage that detailed the events surrounding the Eureka Stockade diaroma was affixed to the hut wall beside the entrance to the interior diorama. In the first photograph, you can see the dark, bare timber colour of the slab wood that held the signage plus (on the left side) one of the numerous holes in the slab walls. This made the display very cold and draughty in its interior. Once inside, you were confronted with an earthen, gravel and leafy floor, which became muddy, after rain, as it was on the day this photograph was taken. The diorama was held in a glass and cement display case. with no lights on. It was dark inside the hut so the diorama was not easy to see unless you inserted a coin into a metal pay-box. Then lights would turn on and a recording of shouting and gunfire (representing the battle noise) would play. The Photographer remembers the whole experience to be short and underwhelming. Once outside the diorama’s slab hut, you could walk across to a partial representation of the stockade’s fortifications, complete with two wagon wheels. This space was also graveled to distinguish it from the rest of the green-lawn park.digital photographeureka, diorama, 1993, jack ford, brenda ford, eureka monument, memorial -
 Ballarat Heritage Services
Photograph - Digital photograph, Eureka Stockade Replica, 14/12/1993
Please find 5 photographs taken by me & my wife Brenda, at Ballarat, on 14 December 1993. Unfortunately, I did not take photographs of the building that housed the exhibit, probably because I thought just how sad and pathetic the entire memorial display looked. It comprised a reconstructed slab hut and nearby a partly-rebuilt fence that represented the hastily-built Eureka Stockade. The signage that detailed the events surrounding the Eureka Stockade was affixed to the hut wall beside the entrance to the interior diorama. In the first photograph, you can see the dark, bare timber colour of the slab wood that held the signage plus (on the left side) one of the numerous holes in the slab walls. This made the display very cold and draughty in its interior. Once inside, you were confronted with an earthen, gravel and leafy floor, which became muddy, after rain, as it was on the day of our visit. The diorama was held in a glass and cement display case. with no lights on. It was dark inside the hut so the diorama was not easy to see unless you inserted a coin into a metal pay-box. Then lights would turn on and a recording of shouting and gunfire (representing the battle noise) would play. I remember the whole experience to be short and underwhelming. To get an idea of the scale of the diorama, you can see Brenda’s elbow & part torso to the left of the photograph labeled “diorama- hut exit”. Once outside the diorama’s slab hut, you could walk across to a partial representation of the stockade’s fortifications, complete with two wagon wheels. This space was also graveled to distinguish it from the rest of the green-lawn park. Finally, you walked up the hill, from the hut and outside display, to visit the old Eureka Stockade monument & cannons. This is still in existence today. digital photographeureka, diorama, 1993, jack ford, brenda ford, eureka monument, memorial, eureka stockade, eureka diorama -
 Lakes Entrance Regional Historical Society (operating as Lakes Entrance History Centre & Museum)
Photograph, Jack Palmer, 1950 c
Seven other black and white photographs taken at same event 6 x 8.5 cmBlack and white photograph showing twenty members of Tambo Shire Council and staff at a viewing point on their trip to the Snowy Mountains Hydro Electric Scheme Alpine Country Victoriabusinesses, politics -
Lakes Entrance Regional Historical Society (operating as Lakes Entrance History Centre & Museum)
Photograph, Jack Palmer, 1950 c
Also five other black and white photographs taken at Snowy Mountain project 6 x 8.5 cmBlack and white photograph taken at sign for Snowy Mountains Hydro Electric Scheme in Australian Alpspeople, government -
Lakes Entrance Regional Historical Society (operating as Lakes Entrance History Centre & Museum)
Photograph, Jack Palmer, 1950 c
Also five other black and white photographs taken at same time of housing at village 6 x 8.5 cmBlack and white photograph of view of village established for workers at Snowy Mountains Scheme Australian Alps Victoriacouncil, government -
Lakes Entrance Regional Historical Society (operating as Lakes Entrance History Centre & Museum)
Photograph, Jack Donnelly, 1975 c
Also a colour photograph of a platform in distance Bass Strait 04922.1 9 x 11 cmColour photograph of an Esso Supply boat towing a barge in Bass Straitoil and gas industry -
Lakes Entrance Regional Historical Society (operating as Lakes Entrance History Centre & Museum)
Photograph, Jack Donnelly, 1975 c
Colour photograph on board a drilling platform in Bass Straitoil and gas industry -
Lakes Entrance Regional Historical Society (operating as Lakes Entrance History Centre & Museum)
Photograph, Jack Donnelly, 1980 c
Colour photograph of Esso Supply boat Makaira at Lakes Entrance Victoriaoil and gas industry -
Lakes Entrance Regional Historical Society (operating as Lakes Entrance History Centre & Museum)
Photograph, Jack Donelly, 1998 c
Photograph taken from Jemmys PointColour photograph showing discoloured flood water backed up by the incoming tide with fishing boat Crianda shown approaching the Western Pier at the entrance Lakes Entrance Victoriafloods, accommodation -
Lakes Entrance Regional Historical Society (operating as Lakes Entrance History Centre & Museum)
Photograph, Jack Donnelly, 1988 c
Further information on attached sheetColour photograph of the replica sailing ship Bounty which joined the First Fleet Reenactment Voyage for the Australian Bicentenary celebrations then as a tourist attraction in Darling Harbour Sydney NSWfloods -
Southern Sherbrooke Historical Society Inc.
Book - History/Autobiography, Black Jack Press, Men In Hats And Other Tales, 2000
pp. xii, 175, paperback, 2 maps. Author's childhood memories of Belgrave where his father, Elef Jorgensen, was a local doctor.jorgensen family, belgrave -
 Ballarat Tramway Museum
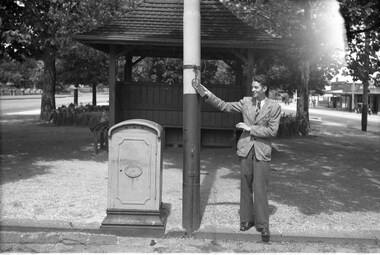
Photograph - Digital image, Wal Jack, 1/01/1970 12:00:00 AM
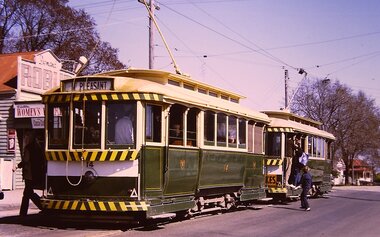
Yields information about the Mt Pleasant terminus and tram operations c1970.Digital images of two trams at the Mt Pleasant terminus. Tram 14 has just arrived with passengers leaving. In front is another single trucker with passengers - possibly a charter - this tram has a Twin Lakes sign. Photo by Chris Phillips. Image dated 1/1/1970 - to be confirmed. In the background is the Milk bar with a Robur Tea, Women's Weekly, a cigarette advert and Coca Cola advert. trams, tramways, mt pleasant, barkly st, tram 14 -
 Ballarat Tramway Museum
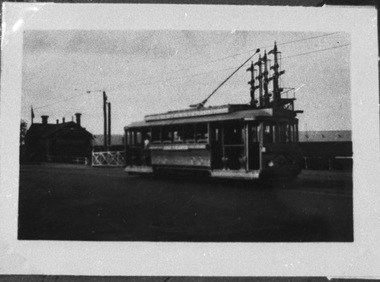
Photograph - ESCo cross bench tram No. 20 and ESCo 2, Wal Jack, c1910
Photo of ESCo cross bench tram No. 20 and ESCo 2 at the intersection of Sturt and Lydiard Streets, with the Post Office, along with the Summerscales offices, Robbie Burns statue, Vita Studio, and George Payne Jewellers in the background. The conductor on the rear of No. 2 is holding the trolley rope, while the driver of No. 20 is watching the road closely. The conductor of the tram is reboarding or about to alight. No. 20 has the destination of Gardens via Convent. Other trams are in the background. Wal has dated the photograph about 1909. Note the point frog or pan in the overhead above No. 20 and in particular notes the type of destination box and that the tram is going to the Gardens via the Convent. See item 5132 for a copy negative and digital image.Yields information about the use of ESCo trams c1910 and the overhead.Black and white print on Kodak paper with notes on rear.See rear image.trams, tramways, esco, cross bench tram, sturt st, post office, lydiard st, tram 20, tram 2 -
 Ballarat Tramway Museum
Negative, Wal Jack, Mar. 1938
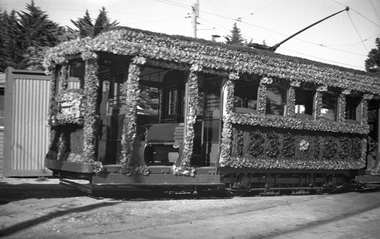
Yields information about Ballarat 's 23, ex Adelaide when decorated for the 1938 state celebrations.Black and white Negative of a photograph of SEC Tram 23 decorated to celebrate the centenary of settlement in the Ballarat district in 1938 at the Wendouree Parade depot. Photo shows the interior exterior of the tram along with the flowers including the track brakes and trolley pole base. See also Reg Item 1031 for a similar image. Image i2 - hi res scan version of the negative.trams, tramways, depot, centenary, decorated trams, floral tram, tram 23 -
 Ballarat Tramway Museum
Negative - Set of 3, Wal Jack, c1948
Yields information about staff or safeworking system in use at Ballarat up to the time of the introduction of the signal system. No information known at the time of cataloguing of the person in the photographs.Set of three Negative and Digital images of an unknown person: .1 - showing the hook and the section staff at the Ripon St - Sturt St corner. Alongside is an ESCo Electrical connection box or pillar. In the background is the shelter at this location. .2 - the same person handing the staff to a well loaded No. 22 (c1946) at Ripon St. Tram has a Regatta Auxiliary board. Has the Western Hotel in the background. .3 - the same person holding the Sturt St to Lake View Loop. .4 - close up of the staff. Note: The Ripon St - Lake View Loop - View Point section of track was not fitted with coloured light signals. Tram 22 (Reg Item 5533) entered service - 1945; post 1947, as side numbers (which can just be seen in image i2) were painted Oct. 1947 and was renumbered to 37, in Sept. 1952.trams, tramways, signals, staff, ripon st, view point, lake view, tram 22 -
 Ballarat Tramway Museum
Book, Jack Richardson, "Destination City", 1954
Reproduced from the Australian Tramway Album 2nd Edition, (revised). 2nd Edition, (revised). Two colour cover - green with black. Describes Melbourne's tram car fleet, including Victorian Railways tramcars, cable cars and the Doncaster and Box Hill tramway. Includes brief description of each type, photographs and a summary history. Has many photographs of the various tramcars associated with relevant text. On front cover, has PCC 980 with green banding and price. On back cover is a map of Melbourne tramways drawn in 1948. Book - "Destination City" - paper covers - 20 pages - with sub title "A Pictorial Review of Melbourne's Tramcars", priced at 2/-, published by Traction Publications of Brighton Beach in 1954. Copy 2 - on front cover has number "500/18" crossed out with "501/2" in blue ink underneath. Copy 3 - on inside of front cover, stamped in black ink "R.J.Meyer / 6 Moorefield Rd., / Johnsonville".trams, tramways, melbourne, tramcars, mmtb, vr -
 Ballarat Tramway Museum
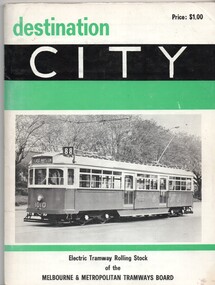
Book, Keith Kings, "Destination City", 1971
"Electric Tramway Rolling Stock of the Melbourne and Metropolitan Tramways Board", priced at $1, published by Traction Publications of P.O. Box 438, Canberra City in 1971, 3rd edition with a small corrigenda sheet. Describes Melbourne s tram car fleet. Includes brief description of each type, photographs and a summary history. Has many photographs of the various tramcars associated with relevant text. On front cover, has W7 1010 with green and black banding and price. On page 1 is a map of Melbourne tramways drawn in 1971, but showing abandoned lines as well. Page ii, inside cover, has a list of Traction Publications. Back cover has a end on photograph of SW6 940. Outside of covers is gloss paper. Corrigenda sheet - 85mm sq has been placed inside its own cover and numbered 1803a. Yields information about Melbourne's tram rolling stock or tramcars.Book - "Destination City" - card covers - 84 pagestrams, tramways, melbourne, tramcars, mmtb -
 Ballarat Tramway Museum
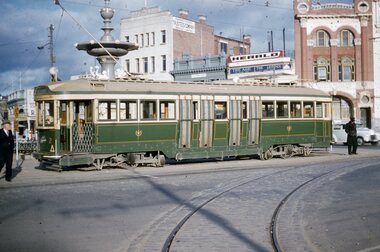
Slide - 35mm slide/s, Wal Jack, 3/09/1958 12:00:00 AM
Bendigo, bogie tram No. 2 standing alongside the fountain before proceeding to Eaglehawk. Tram fitted with small reflective triangles on front panels, all blinds drawn and gate closed. Has fountain in background and shops on the west side of Charing cross.'7 55 am Wed 3 Sept. 1958, Tram No. 2 at Fountain, Bendigo'tramways, trams, bendigo, tram 2 -
 Ballarat Tramway Museum
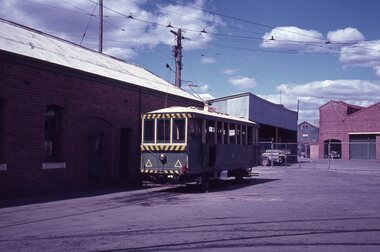
Slide - 35mm slide/s, Wal Jack, 6/01/1963 12:00:00 AM
Bendigo, Scrubber tramcar in depot yard on blocks after truck and motors have been removed, 6-1-1963, with SEC electricity depot yard in background. Tramway offices on side.'SEC Bendigo, scrubber without truck, at depot Sunday 6/1/63'tramways, trams, bendigo, scrubber tram, scrubber -
 Ballarat Tramway Museum
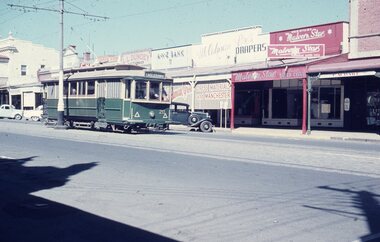
Slide - 35mm slide/s, Wal Jack, 12/04/1959 12:00:00 AM
Bendigo, SEC No. 20 with Eaglehawk destination, travelling west along Mitchell St, 12-4-1959. Tram has small white reflective triangles placed on front panels, , blinds drawn, centre of the road poles visible, and some parked cars. Has various shops in view, eg ANZ bank, Malvern Star bicycles, Holdmans? Bros. drapers'Bendigo, No. 20, Mitchell St, 12-4-59, W.Jack Photo'tramways, trams, bendigo, tram 20 -
 Ballarat Tramway Museum
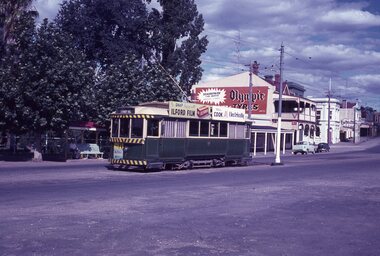
Slide - 35mm slide/s, Wal Jack, 6/01/1963 12:00:00 AM
Bendigo No. 7 at Eaglehawk tram terminus, 6-1-1963. Tram has been fitted with lights and warning stripes. On front panel is Hutton's hams, and roof ads for Ilford film and 'Cook with electricity'. In background is park, shops on the north side of the terminus, including a large 'Olympic' tyres advertisement. Tram has destination of 'Quarry Hill''Ex Ballarat 19, SEC Bendigo No. 7, at Eaglehawk terminus, 6-1-63'tramways, trams, bendigo, eaglehawk, tram 7 -
 Ballarat Tramway Museum
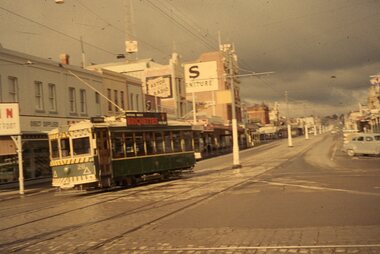
Slide - 35mm slide/s, Wal Jack, 17/06/1962 12:00:00 AM
Bendigo, Birney No. 28 turning into Mitchell St from Pall Mall, heading for Quarry Hill. Photo taken after tram has passed, looks along Mitchell Street towards railway station, with centre of the road poles. Not well in focus. Tram has Briquettes roof ad.'SEC Bendigo, Birney No. 28 in Mitchell St. 17-6-62'tramways, trams, bendigo, mitchell st, tram 28 -
 Ballarat Tramway Museum
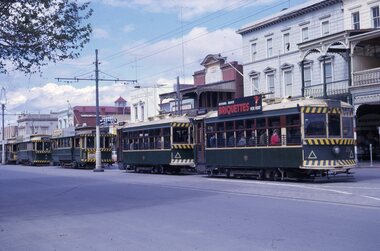
Slide - 35mm slide/s, Wal Jack, 20/10/1962 12:00:00 AM
Bendigo, trams 28, 30, 21, 7, and 19 in Pall Mall heading for Charing Cross, on 20-10-1962, as part of a ARHS tour.'Pall Mall, 28,30,21,7,19, 20-10-1962'tramways, trams, bendigo, pall mall, charing cross, tram 28, tram 30, tram 21, tram 7, tram 19 -
 Ballarat Tramway Museum
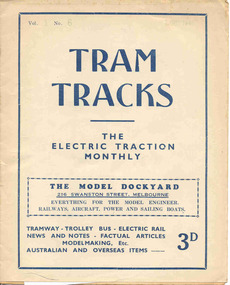
Magazine, Jack Richardson, "Tram Tracks - The Electric Traction Monthly", Oct to Dec. 1946
Three issues of "Tram Tracks - The Electric Traction Monthly" of the Australian Electric Traction Association. Each issue has a standard cover, of the magazine name etc, with a small advertisement for the Model Dockyard but are in different colours, all have been saddled stapled with two staples. The Volume and date details have been over stamped using a hand stamp. Back covers, inside back covers have the same advertisements. The three issues contain advertisements for Hartleys Sports store, Hearns Hobbies, Wattle Park, Johnson's Variety Store, Barnes Tennis Centre, The Model Dockyard, Meadmore Model Engineering and Austral Bronze Pty Ltd, Christie Scale Model Railway and Equipment, Herbert Small (Meccano) and Bassett-Lowke Models. 2464.1 - Vol. 1, No. 6 - 12 pages, Oct. 1946, with cover printed in blue. Has articles on staff and ticket working on VR tramways, Tramway rolling stock classification, rolling stock listing for SEC Bendigo, and the first 65 years of electric traction. News items on Sydney, Melbourne, Ballarat, Newcastle, Hobart and AETA. Inside front cover has a photo of Y1 611. 2464.2 - Vol. 1, No. 6 - 16 pages, Nov. 1946 with cover printed in brown. Has articles on bus profits, route symbols on Australian tramways, Hobarts double deckers, high current collection tests, rolling stock listing for SEC Geelong, VR Electric locos, and the first 65 years of electric traction continued. News items on Sydney, Melbourne, Ballarat, VR, Brisbane, Adelaide, Perth, Fremantle, Kalgoorlie, overseas and AETA. Inside front cover has photos of Sydney R and R1 class trams. 2464.3 - Vol. 1, No. 7 - 12 pages, Dec. 1946 with cover printed in green. Has articles on NSW tram and bus losses, proposed abandonment of the Sandringham - Block Rock line, Elwood Depot, rolling stock listing of NSW Service stock. Has news items on Brisbane, Sydney, Newcastle, Melbourne, Adelaide and AETA news. trams, tramways, electric traction, aeta, models, australian tramways -
 Ballarat Tramway Museum
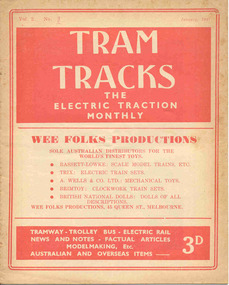
Magazine, Jack Richardson, "Tram Tracks - The Electric Traction Monthly", Jan to June 1947
Six issues of "Tram Tracks - The Electric Traction Monthly" of the Australian Electric Traction Association. Each issue has a standard cover, of the magazine name etc, featuring "Wee Folks Productions" models but are in different colours, all have been saddled stapled with two staples, except No. 6. The Volume and date details have been over printed. Back covers inside back covers have the same advertisements but the font varies vary. The six issues contain advertisements for the Wee Folks productions, Hartleys Sports store, Hearns Hobbies, Wattle Park, Johnson's Variety Store, Barnes Tennis Centre, The Model Dockyard, Robilt Models, Meadmore Model Engineering and Austral Bronze Pty Ltd, Hearns Hobbies, Christie Scale Model Railway and Equipment, Herbert Small (Meccano), the American Subscription Agency, Manufacturers' Mutual Insurance Ltd. 2465.1 - Vol. 2 No. 1 - 16 pages, Jan 1947, with cover printed in red. Has articles on the tram / car debate, Dunedin Tramways, Overlapping fare sections, type of trucks under Sydney tramcars, Brisbane Electric Railway (Power station), The Balmain Counterweight and Trolley buses in Australia. News items include Brisbane, Newcastle, Sydney, Melbourne, SEC, Hobart, VR, Adelaide, Kalgoorlie, Broome, electric trains in Melbourne and Sydney, and AETA notes. Photos include Sydney O, OP and P, VR PERM 63 and interior photo of a MMTB W4 class tram. 2465.2 - Vol. 2, No. 2 - 16 pages, Feb. 1947, with cover printed in dark blue. Has articles on Brisbane 400 class tramcar, Adelaide to Glenelg Brighton - Le Sands tramway, Melbourne Suburban railways, Diesel Electrics on the Southern Railway (US)and Birney Safety Car. News items include Brisbane, Sydney, Melbourne, VR, Fremantle and AETA notes. 2465.3 - Vol. 2, No. 3 - 12 pages, Mar. 1947, with cover printed in brown. Has articles on why NSW trams lose money, Duncan and Frazer, new trams in Johannesburg, Melbourne Suburban railways, and Sydney New Railway (Eastern Suburbs). News items Sydney, Melbourne, SEC, VR and Adelaide and AETA notes. 2465.4 - Vol. 2, No. 4 - 16 pages, Apr. 1947, with cover printed in green. Has articles on Duncan and Fraser (continued), In search of Ancient Warriors (old trams), Brisbane Electric Railway and some unusual fares arrangements. News items include Brisbane, Newcastle, Melbourne, Sydney, SEC, Launceston, Kalgoorlie, overseas, and AETA notes. Editorial looks at claims that the SW6 cars are the finest in the world, back numbers (notes that Tram Tracks started with a mimeographed club news sheet and now have circulation of nearly 200), costs of production etc. Has photographs of the interior of a SW6 850, a plan for Melbourne underground railway, the VR power operations room at Flinders St., Hobart trolley bus and a cartoon about Sydney traffic. 2465.5 - Vol. 2, No. 5 - 16 pages, May 1947, with cover printed in red. Has articles on Australian Light railways, Sydney's relief lines and the start of an article on NSWGT 600/1200V tramcars. Has news items on Brisbane, Sydney, MMTB, VR, Geelong, Ballarat, Launceston, Hobart and AETA notes. Editorial notes the first anniversary of the magazine and has a number of letters regarding this, content and the tram/car debate. 2465.6 - Vol. 2, No. 6 - 20 pages, June 1947, with cover printed in blue. Has articles on Cremorne bridge replacement (with photos), Neutral bay line and Tramcar transmission gears. News items include photos of MMTB track replacements, crowded trams, Brisbane, Sydney, Melbourne, and a photo of a Sydney tram passing under the new bridge work for Circular Quay station. 2465.7 - Vol. 2, No. 12 - pages 1-12, cover has an advert for Hartley Sporting Goods. Has cartoon on fares on Sydney trams by Peterson, not regarding retirement of Mr. H. Bell of MMTB, Melbourne Latrobe St and bus construction, Sydney tram cartoons from Emile Mercier, electric trains and other tramway news. (Item added 24-3-18 - from consolidation of Melbourne Tram Museum and BTM collections) trams, tramways, electric traction, aeta, models, australian tramways, duncan fraser, cartoons -
 Ballarat Tramway Museum
Negative - Copy, Wal Jack
Yields information about Ballarat 's tram that it decorated for the 1951 gold centenary celebrations in Lydiard St Nth.Copy negative of a black and white photograph from Ray Pearson Collection, taken by Dave Macartney in 1975c of Ballarat No. 23 decorated for the 1951 Gold centenary celebrations about to cross the railway level crossing in Lydiard St. Nth. Refer to image N869, Reg Item 7641 for a better image - updated 30/5/2020.trams, tramways, secv, gold centenary, gold tram, decorated trams, lydiard st nth, railway crossing