Showing 782 items matching "a c green"
-
 Eltham District Historical Society Inc
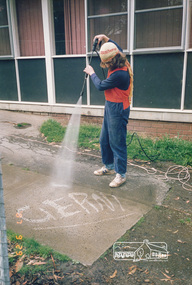
Photograph, Gerni High Pressure Water Cleaner - Engineering Design
One of a set of display images thought to be produced by the Shire of Eltham c.1979-1987Illustrative of services provided by former Shire of ElthamColour photograph 20 x 29 cm mounted on green-painted chipboard 28 x 35.5 cm (string on back for hanging)Title printed on label adhered to board below photograph (replaced June 2017)cleaning, maintenance -
 Eltham District Historical Society Inc
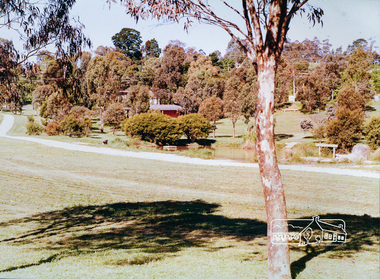
Photograph, Eltham Town Park (previous tip site)
One of a set of display images thought to be produced by the Shire of Eltham c.1979-1987. The Eltham Town Park was a reclaimed tip site. It was later named the Alistair Knox Park Illustrative of services provided by former Shire of ElthamColour photograph 20 x 29 cm mounted on green-painted cardboard 25.5 x 30.5 cmTitle printed on label adhered to board below photograph (replaced June 2017)eltham town park, alistair knox park -
 Eltham District Historical Society Inc
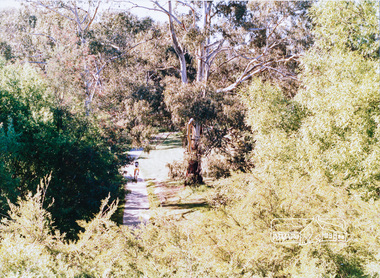
Photograph, Eltham Town Park (previous tip site)
One of a set of display images thought to be produced by the Shire of Eltham c.1979-1987. Eltham Town park is a reclaimed tip site and was later named the Alistair Knox Park. It is located in Main Road, ElthamIllustrative of services provided by former Shire of ElthamColour photograph 20 x 29 cm mounted on green-painted cardboard 25.5 x 30.5 cmTitle printed on label adhered to board below photograph (replaced June 2017)eltham town park, alistair knox park -
 Eltham District Historical Society Inc
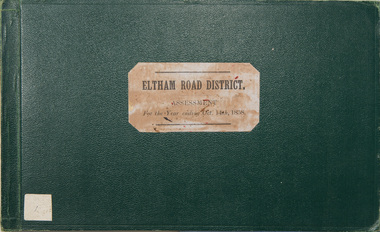
Ledger, Eltham Road District. Assessment for the Year ending Oct. 14th, 1858, 1857c
The Eltham Roads Board was established in 1856. This is a unique significant record of early settlers in the Shire of Eltham. One of 6 early rate books. This is among the oldest items in the EDHS collection. An article in the Eltham and Whittlesea Shires Advertiser Friday 21 Nov 1941 Page 5 titled: District's Early History states: "The first rate book which is still in existence at the Shire Office is for the year ending October 14, 1858 and is probably the best record possible to indicate the development of the district. At the time properties were rated as follows: Cultivated land. 6d. per acre; pasture land, 1d. per acre: estimated annual value of buildings, etc., 6d in the (pound). The total amount of rate recorded for the year was (pounds)153/14/8. Properties were described as being situated at Lower Plenty, Yarra Yarra, Eltham, Lower Eltham, Kangaroo Ground, Yarra Flats, Diamond Creek and the Yarra."Ledger with printed columns: Number, Name of Occupier, Description, Where situated, Cultivated land, Pasture land, Estimated annual value of buildings, Rate, Remarks. Ledger filled out by hand with 152 entries (not alphabetically arranged). A number of blank pages are included. Copy re-bound in green hard leather look card by Arnall & Jackson Pty Ltd Brunswick, 1968 Inside cover includes a compliments slip taped to the cover from Arnall & Jackson Pty Ltd. with handwritten inscription: "Ian, I hope the hysterical society doesn't get historical about this". Organised 1968 I. Maynard Inside cover includes pasted printed note: RATE OF ASSESSMENT AS FOLLOWS: Cultivated land 6d per acre Pasture land 1 per acre Estimated Annual Value of Buildings, &c., 6d. in the Pound eltham roads board, rate book, rate payers, transaction, pioneers, settlers, 1858, assessment ledger, eltham road district, public records office victoria (prov), rate books, shire of eltham archives -
 Warrnambool and District Historical Society Inc.
Cards, Post Cards Warrnambool, Early 20th century
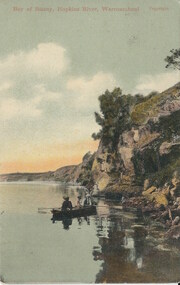
These cards have been sent to Christina Lawrance (1889-1970). She was born in Williamstown, Victoria and married James Robertson in 1912. They lived in the Gundagai area of N.S.W. on a property named ‘Nargoon’ (sheep and cattle) and they had five children. One of the daughters, Margaret, married Jeffrey (Bill) Whitehead of ‘Goodwood’ near Hawkesdale and the cards have been passed on to us from a Whitehead descendant. It is not known who sent the cards to Christina Lawrance who would have been 16 or 17 at the time. These cards are of interest because they are of Warrnambool scenes and demonstrate the practice at the time (1906) of sending cards that had photographs of local scenes. The photographs, although printed in great numbers, are of historical interest today. The cards are also of interest because of the recipient’s connection with the Warrnambool area – Christina Lawrance is an important person in the family tree of the Whitehead families today. These are four colour post cards in green, yellow and black tonings. They have photographs of the Hopkins River, Warrnambool and the Hopkins Falls on one side. They all have a penny red Victorian stamp and were posted from Warrnambool in 1906. The address is handwritten in black ink. Addressed to: ‘Miss C. Lawrance, C/O Kirkpatricks Hotel, Mornington, Victoria’whitehead family of ‘goodwood’, christina robertson nee lawrance, history of warrnambool and district -
 Warrnambool and District Historical Society Inc.
Document - Warrnambool. Woodford. Winslow. Purnim Race Books, Modern Print, W’Bool, Victoria, 1920's and 1930's
The Warrnambool Amateur Turf Club was first formed in September 1859, but didn't become a properly constituted club until April 1873, when a meeting was held at the Commercial Hotel, now the Whaler's Inn, and a committee was elected.Part of the present racecourse of 100 acres was set aside as a racing and recreation reserve in August 1855. It is one of the finest racecourses in Australia, ringed by the gentle slopes of a huge basin.The first race meeting was held on the course in August 1858. The Warrnambool Racing Club has managed racing at Warrnambool since it was formed on 5 April 1873.Apart from a number of smaller meetings held throughout the year, the feature of racing in the district is the Grand Annual Steeplechase. The first steeplechase over the now famous cross-country course was run on 13th June 1872 then known as the Grand Annual Steeplechase. The paddocks now know as Brierly and Granters were first used on that date. The course, over four miles, was made up of different kinds of jumps including a stone wall, a log fence, a ditch and parapet, a paling fence and numerous post and rails. The name Grand Annual was first used for this steeplechase in May 1895. It is the longest horse race in Australia, and the thirty three fences of the course, the most of any steeplechase in the world is raced over 5,500 metres. The three day May racing carnival is the major racing event on the horseracing and social calendar. Many of these race booklets relate to those May meetings. The Warrnambool Racecourse has been the home of district racing clubs such as Woodford, Purnim and Koroit over the latter part of the 20th century. The Woodford Racing club holds their annual meeting after Christmas each year. The Winslow races were held from approximately mid-19th century to around 1946. It began as a small picnic race club in Tobin’s paddock to a splendid race course on the property, “Green Hills” owned by Mr. John O’Keefe about one mile north of the Winslow township.. The annual meetings held on New Year’s Day drew crowds of seven to eight thousand people. All of these books contains family names which in some cases are still strongly linked to horse racing in the district.These booklets are a tangible link to a great sporting and social event in the Western District. A collection of programmes for race meetings. They relate to Warrnambool, Woodford, Purnim, Winslow and Victoria Racing Club meetings in the period 1922 to 1931. All are soft card covers with approximately 16 pages in each in white paper. They are numbered as follows: 001250.1 WRC Soft green cover with blue text 01/05/1923 001250.2 WRC Mauve cover with blue text 03/05/1923 001250.3 WRC fawn cover with red text 06/05/1924 001250.4 WRC Orange cover with blue text 08/05/1924 001250.5 WRC Soft green cover with light brown text 05/05/1925 001250.6 WRC Soft green cover with red text 07/05/1925 001250.7 WRC fawn cover with brown text 04/05/1926 001250.8 Woodford racing Club soft pink cover, Blue text 01/04/1922 001250.9 Woodford racing Club green cover, Blue text 07/04/1923 001250.9 Woodford racing Club grey cover, Blue text 05/04/1924 001250.10 Woodford racing Club grey cover, Blue text 05/04/1924 001250.11 Woodford Racing Club green cover, Blue text 22/11/1924 001250.12 Woodford Racing Club green cover, brown text 04/04/1925 001250.13 Woodford Racing Club orange cover, blue text 10/04/1926 001250.14 Woodford Racing Club pink cover, green text 10/04/1926 001250.15 Warrnambool Racing Club pink cover, blue text 18/11/1922 001250.16 Warrnambool Racing Club pink cover, red text 13/11/1926 001250.17 Warrnambool Racing Club cream cover, brown text 15/11/1924 001250.18 Warrnambool Racing Club cream cover, green text 18/01/1922 001250.19 Warrnambool Racing Club grey cover, blue text 15/01/1924 001250.20 Warrnambool Racing Club cream cover, blue text 13/01/1925 001250.21 Warrnambool Racing Club pink cover, blue text 15/01/1925 001250.22 Warrnambool Racing Club olive green cover, blue text 12/01/1926 001250.23 Warrnambool Racing Club blue cover, blue text 14/01/1926 001250.24 Warrnambool Racing Club soft green cover, blue text 13/01/1931 001250.24 Warrnambool Racing Club orange cover, black text 16/01/1930 001250.25 Warrnambool Racing Club orange cover, black text 16/01/1930 001250.26 Purnim Racing Club green cover, blue text 19/05/1924 001250.27 Winslow Racing Club pink cover,black text 21/04/1923 001250.28 Winslow Racing Club green cover,black text 06/12/1924 001250.29 Victoria Racing Club cream cover,green text 11/07//1923 001250.30 Victoria Racing Club cream cover, red text 14/07//1923 Most of the booklets have markings with place getters and jockeys marked in pencil. Warrnambool Racing club books have R U Forbes, C T Alexander A H Davies and William White as secretaries. Woodford club has Thomas Gleeson as secretary, Winslow 's secretary is W Latta and Purnim is P J Kelly. The local booklets are printed by The Modern Print Co Koroit St Warrnambool.warrnambool, warrnambool racing club, winslow racing club, woodford racing club, purnim racing club, victoria racing club -
 Warrnambool and District Historical Society Inc.
Document, Collett and Bain, Notice of meeting Warrnambool Shire, 1963
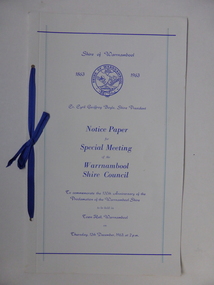
This booklet commemorates the 100th anniversary of the proclamation of the Shire of Warrnambool. The original proclamation was read from the Government gazette 13/12/1863 Pg 2958. This follows from being proclaimed a roads district in 1854 which was then partly portioned and proclaimed the Municipal district in 1855. Portion of the shire was again annexed to the city in 1955. The Warrnambool shire covers the area on north east and western sides of the city of Warrnambool covering approximately 600 square miles and has a rich history of farming and dairy products. A program which commemorates 100 years of the shire of Warrnambool. It contains a comprehensive list of councillors who served during that time.White light card cover with royal blue text and tied with royal blue ribbon.Pale blue vertical lines. Shire crest with dates either side at top centre of page.Back cover has list of councillors names who have served from 1863 up to 1963. Photographs in green tinge inside front and back covers. 8 pages. Cr Cyril Geoffery Boyle. Thursday 12th December 1963.Mr Robert Burke, Cr C S Brown, Cr C G Boyle, A F Ponting,The Honourable Murray Porter, Hon R W Mack, Cr J Pascoe, Mr J W Crawley, Mr L Crawley, J Wm Crawley, Jnr, R L Crawleywarrnambool,, warrnambool shire, cr c g boyle, warrnambool shire 1863, warrnambool shire 1963 -
 Warrnambool and District Historical Society Inc.
Booklet, Exercise Book, C 1946
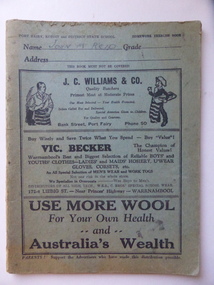
These books were provided free of charge to pupils thanks to the support of the advertisers. The front pages which possibly contained student's work have been torn from the book and the following pages contain lists of names, times and dates . The entries relate to work at places such as E A Wright, Infectious diseases hospital, Ray Barnes as well as many names of local people and areas. Most appear to be associated with electrical work.A link to the district containing names of local people and the cover provides an interesting snapshot of businesses around the district in the 1940's.Green card cover with exercise book inside.There are advertisements for businesses on the outside and inside front cover.Some are local businesses and others relate to businesses further afield. In the top RH corner "Homework Exercise Book" is printed.John M Reid is handwritten at top of front cover.Advertisements included are for the following businesses: J C Williams & Co Port Fairy, Vic Becker clothing Warrnambool, X-L Motor oils, A J Oakes Port Fairy, John Newton Port FairyAlex J King Port Fairy Mrs A V Smith Koroit, R S Corson Koroit , W F Brebner Warrnambool,W J Gee Koroit,Vacuum Oil Company, SPC canned fruits Shepparton.warrnambool, john m reid warrnambool, port fairy, koroit and district state schools, homework exercise book -
 Warrnambool RSL Sub Branch
Army Uniform trousers, 1968
This uniform belonged to Sapper Hughes 3795948 of the Royal Australian Engineers Corps. By the date on the uniform, it is assumed that he served C 1968.This uniform has significance as an example of a uniform worn by soldier ranks for daily work and dress parades.Khaki coloured long trousers with attached suspenders. They have a button up front (5 brown plastic buttons). There are two pockets on either side of the trousers and one button up pocket on the back right with a flap that is fastened with a single brown plastic button. There are three extra brown plastic buttons on the back exterior of the waistband and six belt loops on the whole length of the waist band. The interior pocket fabric is more light weight and a slightly more green in colour. The interior of the right back pocket includes a white patch of fabric with printed inscriptions and further inscriptions written in black ink just above. The suspenders are composed mostly of blue, grey, beige, black and cream striped thick fabric. There are also silver coloured metallic components (which include inscriptions) and leather sections, most of which have a reddish/brown coating on the exterior and a white coating on the interior. One leather component has inscriptions in black ink on the interior as opposed to a white coating. The suspenders are attached to the trousers by six brown plastic buttons on the interior of the waistband. Back pocket interior inscriptions on the green fabric: HUGHES / 3795948 Back pockket interior inscriptions on the white fabric: E.W. P/LTD. / SOUTH AUSTRALIA / 1968 / (a symbol of a broad arrow) / Class 8405-66-025-6405 / Batch 67 / Mill / Size and Waist 28C / Matching Jacket 35 /36C / DRY CLEAN ONLY / CREASES SET BY SIROSET / REPRESS ON ORIGINAL CREASES / MENDING PATCH ATTACHED / NAME HUGHES. J.W. / ARMY No. 3795948 8PL Bcoj Identical metallic clip inscriptions on two of the suspenders: POLICE / (embossed image of a police baton)royal australian engineers, warrnambool rsl, warrnambool, engineer, hughes, sapper hughes, 3795948, hughes 3795948, uniform, army uniform, trousers, army -
 Warrnambool RSL Sub Branch
Trousers, Australian Defence Apparel, 2015
These trousers are part of a Disruptive Pattern Combat Uniform issued by the Australian Airforce to Bernard Farley during service. This uniform type was used in base and field activities and was replaced in 2014 by the General Purpose Uniform as the uniform worn during general base duties and in non-warlike environments.This item has social significance, as an item of uniform worn by Warrnambool RSL community member and Secretary (2019), Bernard Farley during service with the Australian Airforce. The item is a representative example of previously standard issue Airforce uniform and is in excellent condition. As a set, the uniform has aesthetic significance in it’s design, incorporating the Disruptive Pattern style of camouflage which has its roots in the 1980s and continues to be adapted into uniform design by the Defence Force.Disruptive Pattern trousers in five colours of green and brown. Long pants with elasticised drawstring fastener at ankle and velcro adjustment fasteners at the waist. Pants take a straight leg style and bears several pockets: two thigh level pockets with zippered horizontal opening, two open hip pockets on the front, one open pocket on the reverse right hand side with blue plastic button fastener. Five large belt loops encircle the waist and there is a zippered fly, secured at the top with a blue plastic button.Label on interior front right of trousers reads: “A13/ADA/VICTORIA 2008/(broad arrow)/SPECIFICATION ARMY (AUST)6542/NSN: 8415 66 152 1059/SIZE: 95 S/NAME/SERVICE NO/75% COTTON 25% POLYESTER/WARM MACHINE WASH 40*C/RINSE WELL, WARM IRON/DO NOT IRON OVER HOOK AND PILE/DO NOT BLEACH/DO NOT STARCH/MAY BE TUMBLE DRY 40*C/MADE IN AUSTRALIA” The name “FARLEY” is also handwritten on the back interior waist band of the trousers. camouflage, general purpose uniform, airforce, uniform, australian defence force -
![Patch, SIMC [Southern Isles Motor Club], c. early 1990s, c. early 1990s](/media/collectors/4f729f7b97f83e0308601892/items/546188982162f10be8b1972c/item-media/5461c65c2162f10be8c6d9de/item-fit-380x285.jpg) Australian Queer Archives
Australian Queer ArchivesPatch, SIMC [Southern Isles Motor Club], c. early 1990s, c. early 1990s
Circular cloth patch featuring a map the shape of Tasmania in green, with text "SIMC" in red, on a blue background.Text: "SIMC" [Southern Isles Motor Club]. -
 Australian Queer Archives
Banner, Gay Solidarity Group : International Gay Solidarity, c.1978, 1978
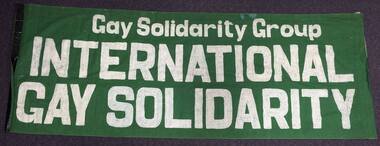
This banner was produced by the Gay Solidarity Group (GSG) for use in the first Mardi Gras, one of the events held as part of the Day of International Gay Solidarity, held on 24 June 1978. The banner was displayed on the side of the truck that was used in the Mardi Gras. It was subsequently used in numerous protests and demonstrations by GSG into the late 1980s.White text on green canvas backing, ends folded and stitched with red cotton, reinforced by black tape. -
 Australian Queer Archives
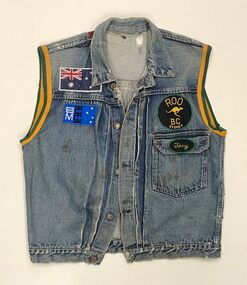
Uniform - Textiles, Tony Shaw's Roo BC overlay, c.1970s-1980s
This motorcycle club overlay belonged to former Roo BC [Roo Bike Club] President Tony Shaw, and dates from the mid 1970s.Sleeveless blue denim jacket with green and yellow trim to the sleeve holes, with various patches to the front, and a large club patch on the back.gay, motorcycle club -
 Warrnambool and District Historical Society Inc.
Functional object - Farming Equipment Branding Iron, Circa 1840
Armyne, George and Lemuel Bolden were original landholders of large parts of land in the Western district. Portions of it extended from Pirron Yallock in the East to almost as far as Portland. The head station was at Grasmere. They were noted breeders of shorthorn cattle in fact they were some of the first men to bring the breed to Victoria and thus helped to pioneer the Australian Shorthorn breeding Industry. This branding iron was found at Lyall Park, originally 640 acres selected by William Lyall at Cooramook. It is believed to be a branding iron dating from when the land was occupied by the Bolden Brothers. The Bolden Brothers were the first to erect considerable lengths of fencing in the Warrnambool area. If this item is an authentic Bolden piece of property then it is the oldest artefact from the time of white settlement that is held by the Warrnambool and district Historical society. The item itself while a common farming implement and which was found on a farm originally owned by the Bolden Brothers is a link with the earliest part of Warrnambool’s history.Short, round wooden handle with metal brand in the shape of the letter T with two thirds circle attached to vertical part of T. Daub of paint at end of handle . T 5Paper label attached with green tape with 931 in texta and hand written on back,” branding iron reputed to have been used by Bolden Bros Grasmere c 1840. warrnambool, bolden brothers, armyne bolden, george bolden, lemuel bolden, branding iron, shorthorn cattle -
 Warrnambool and District Historical Society Inc.
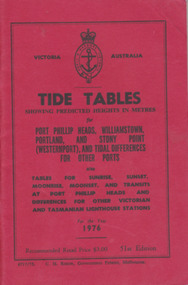
Booklet, Tide Tables, For the year 1976
Yearly publication showing predicted heights in metres for Port Phillip Heads, Williamstown, Portland and Stony Point (Westernport) and tidal differences for other Ports.This booklet provides tide and port information for the coastline of Victoria for the year 1976. It also has information on other aspects of weather such as wind, cloud and sea descriptions. These booklets were a useful reference for fishermen and those involved in boating along the coast of Victoria. They are published in digital form today.Sold at Stan McPhee Sports store Liebig St Warrnambool Vic showing local tides. Red card wrap around cover. 92 cream coloured pages held with 2 staples. Black print. Ports and harbour seal on the frontBooksellers stamp: ink. blue Stan McPhee Sports, green Liebig St Vic. red ...2953. 6717/75. C.H. Rixon, Government Printer, Melbourne. 51st Edition. Recommended price $3.00. Tables for Sunrise, Sunset/moonrise, moonset and transits at Port Phillip Heads & differences for other Victorian and Tasmanian Lighthouse stations.tide table, warrnambool tide table 1976, southern victorian tides -
 Emerald Museum & Nobelius Heritage Park
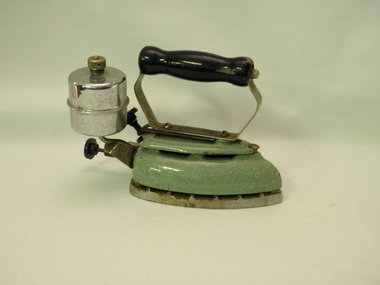
Iron, C. J. Thomas & Son Pty Ltd, circa 1948
Used by the donor Gwen Asling (nee A'Vard) when she lived on her parent's (George and May A'Vard) dairy farm in 1920.The A'Vard family were pioneers who came to selected land in The Dandenong Ranges in 1898 Green enamel body, iron bottom, 2 control knobs, black wooden handle and petrol can attached Peerman pumpless, serial number PL/46 domestic appliance, laundry -
 Ringwood and District Historical Society
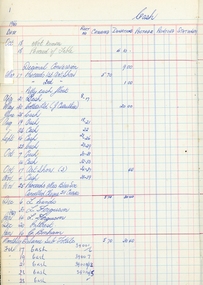
Book - Cash Book, Ringwood Art Group, Ringwood Arts Group Account book 1963-67, 1966-1967
... collection. This A/C book 1966-67 Green covered book with red spine ...Part of the Ringwood Art Group collection. This A/C book 1966-67Green covered book with red spine. Divided into receipts and payments -
 Orbost & District Historical Society
bottles, late 19th - 1930s ?
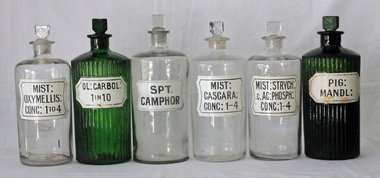
These bottles were used at the pharmacies in Orbost. Chemists who worked in Orbost included Henry Cottman; James Alfred Dubois Williams; Harry Arthur Murray; Miss P.E .Mason (Phyllis Estelle?); Miss Sybil Monica Buzza; Thomas James Frayer; Australia Shaw; James David Torley; John William Zimmer; Dalkeith William Steele; William Thomas Hollingsworth; E.E. Cohen; R.S. Anderson; Frances John Perry Faith Everard Pardew and Charles Anthony Wurf.Medicinal bottles are probably the largest and most diverse group of bottles. The practices of early pharmacists are revealed through these glass bottles. The items have a clear association with Orbost.Six large glass bottles - four clear and two green. All have narrow necks with glass stoppers and are clearly labelled with black print on a white background. Each of the the two coloured glass bottles have a fluted surface. These apothecary bottles were used to dispense medications and also for show or display purposes. The labels under glass bottles had a recessed section that the label was placed into. The label was then covered with a thin piece of glass to prevent the label from becoming damaged by the bottles contents. 3210.1 - "MIST ; OXYMELLIS : CONC : 1 TO 4" 3210.2 - " OL : CARBOL : 1 IN 10" 3210.3 - "SPT. CAMPHOR" 3210.4 - "MIST : CASCARA: CONC: 1 - 4" 3210.5 - "MIST : STRYCH: c. AC : PHOSPH CONC : 1 - 4" 3210.6 - "PIG : MANDL : ": bottles-pharmaceutical chemists-orbost medicine -
 Orbost & District Historical Society
household items, 1935-1960s
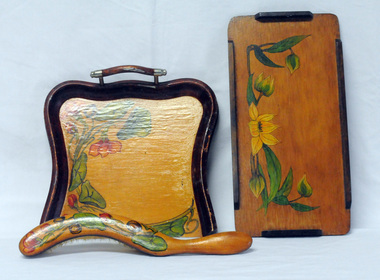
These items are from the estate of Norma Adelaide Scott (nee Johnston) ,January 2, 1925 - May 18, 2018 (93 years old) who died in Orbost. Norma was part of the Morris family who came to Newmerella in 1888, had land on Grandview Road and on the flats. Mr Morris had been a school teacher at Lake Tyers Mission before coming to Orbost. "Bobs y’r Uncle" was a nursery rhyme game designed by Frank H. Simpson for John Waddington Ltd. in 1935. The game was especially designed for children. The cards had scenes from nursery rhymes and six cards were needed to make up each rhyme in a set. Games turned out to become an important part in the progress of Waddingtons, who eventually acquired the rights to Monopoly in the UK, and then published Cluedo, opening the way for their supremacy in the toy industry These items are examples of common household items used in an Orbost family in the first - mid 20th century.3228.1 is a wooden tray with handles. The tray is lacquered and hand - painted with green leaves and orange flowers. 3228.2 is a brush with a curved wooden handle, lacquered and decorated in a similar pattern of green leaves and flowers. 3228.3 is a small wooden tray, lacquered and hand -painted with green leaves and yellow flowers. It is a rectangular shape with raised edging attached on the four sides. 3229.4 is a pack of cards in a red box with a cartoon type drawing of a man wearing a checked coat and hat holding two dogs on leashes.3228.5 is an orange / white cardboard box containing a pair of nylon stockings: box labelled " 'KOLOTEX/ Free-n-eezy" stockings.3228,5 - in orange and white print - "KOLOTEX/ Free-n-eezy/ Clings/ 40 denier/ SEAMLESS/ S-T-R-E-T-C-H" and in black - "NEW guaranteed never to ladder"scott-norma cards-playing hosiery-kolotex-stockings trays-wooden household -
 Ringwood and District Historical Society
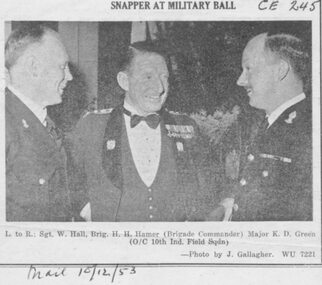
Photograph, Military Ball, Ringwood 1953
... . Hamer (Brigade Commander) Major K. D. Green (O/C 10th Ind. Field.... Green (O/C 10th Ind. Field Sqdn) - Photo by J. Gallagher'. 'Mail ...Typed below photograph, 'L. to R.: Sgt. W. Hall, Brig. H. H. Hamer (Brigade Commander) Major K. D. Green (O/C 10th Ind. Field Sqdn) - Photo by J. Gallagher'. 'Mail 18/12/53'. -
 Orbost & District Historical Society
book, The Little Birthday Queen, C. 1906
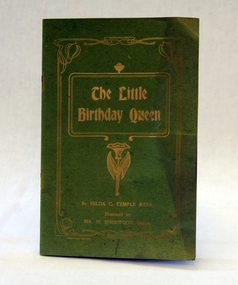
Daughter of George Temple and Mary McAuslane of Castlemaine, Hilda married James Kerr in 1893 and lived at Lincluden, Raymond Street, Orbost. Her husband was a Scot who had come to Australia as a ship's doctor and practised in NSW before visiting Orbost on a government vaccination programme. He liked Orbost and returned there, its first doctor, until his death in 1928. Hilda was sometimes referred to as 'Mrs Dr Kerr.' She and her sisters Mabel Stewart Temple and Margaret Ferrie Temple were all talented writers and musicians.This book is an example of the talent of Hilda Temple Kerr. Hilda Temple Kerr (1874-1956) grew up in Orbost. She was very talented and published several books. It is reflective of the style of poetry in the early 19th century. A small green covered book of children's poetry. The title is in gold print within a small frame above a stylised gold flower. Below in gold print - "Hilda C. Temple Kerr" and "Illustrated by Mr H. Sherwood, Orbost". There is an ornate border around this.temple-hilda kerr-hilda poetry book-the-little-birthday-queen literature -
 Orbost & District Historical Society
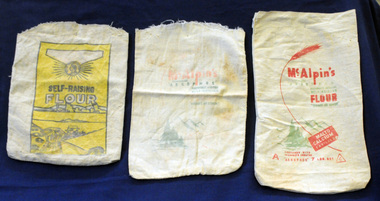
flour bags, mid 20th century
These three flour bags belonged to Helena Warren (nee McKeown) who was a self-taught photographer who became the local press correspondent and producer of postcard images. She was married to William John warren and lived in Newmerella. Flour bags were used for bulk purchases of flour in early to mid 20th century. They would have been laundered and re-used for storage. In earlier times empty flour bags were washed and boiled and then made into tea towels or children’s bloomers, or underwear. The flour bags are good examples of packaging and design for Australian produce which sold across Australia and overseas in the mid 20th century. Three rectangular, open calico flour bags. 2491.1 is faded and has red and green print sketch of a fir tree with mountains in the background- "McAlpin's, Containing "Aerophos", Self-Raising Flour; "There's No Other". 2491.2 has similar print with a red stalk of wheat and "7lbs Net" and a C inside a triangle. 2491.3 has yellow background inside a rectangular frame with black print - "Tested ; Self-Raising Flour"; a drawing of a wheat field; "Medallion Brand ; Groves McVitty & Co Pty Ltd' 8 Market Street Melbourne.flour-bags warren-helena mcalpin mcvitty food-storage -
 Orbost & District Historical Society
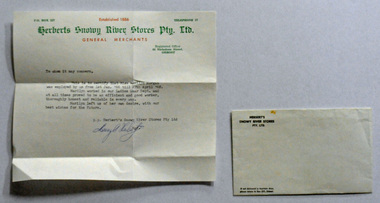
letter, 1968
Massey Herbert was a prominent Orbost citizen being the youngest candidate In Orbost's history to have been elected to the shire council. This letter was written by Massey Herbert for Marilyn Morgan as a job reference. Marilyn worked at Herbert's Snowy River Store in Nicholson Street, Orbost from 1.1.1966 until 27.4.1968.Associated with a well-known Orbost business which started in 1888 and finally closed in c.1970.A typed letter of reference from Massey Herbert for Marilyn Morgan. It is typed on a Herbert's Snowy River Pty Ltd letter head. The header is green and red print and the text black. The envelope is 2599.2.herbert-massey snowy-river-stores morgan-marilyn -
 Orbost & District Historical Society
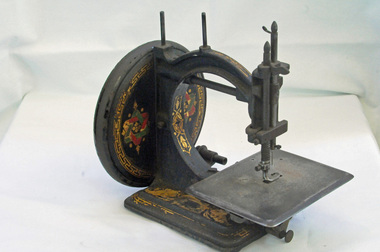
sewing machine, late 1860's - 1870's
The early settlers of Orbost had to be self sufficient making their own clothes, tableware, bed coverings, furnishings and equipment. Many women were skilled dressmakers and craft workers. This item reflects that time.A small black hand-cranked lockstitch sewing machine. It has a backwards C-shaped body. The wheel and base are decorated with a gold pattern. On the end above the needle assembly is a brass plate The balance wheel has a handle. The pattern on the wheel is a gold border with two gold, red and green stars formed by interwoven triangles. On the cloth plate is stamped "Patent March 1867 Heron Gresham" with some indecipherable marks.sewing-machine needlework -
 Orbost & District Historical Society
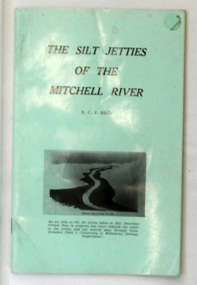
book, James Yeates & Sons (Printing) Pty Ltd, The Silk Jetties of the Mitchell river, 1972
This booklet was the first of a series of scientific and historical studies of Gippsland to be published by the Bairnsdale Advertiser. The author, Eric Charles Frederick Bird was Principal Fellow, Department of Geography, University of Melbourne, Australia. The Mitchell River silt jetties are an unusually long, thin landform located in the Gippsland Lakes region. They have been formed over millions of years by sediment deposition from the Mitchell River during periods of low water flow and subsequent wash-through during periods of high water flow. The long narrow banks of silt extend more than eight kilometres east into Lake King. This item is a useful reference for the silt jetties of the Mitchell River.A 32 pp book with alight green cover. The title is in black print, " The Silk Jetties of the Mitchell River" and underneath the title there is a b/w photograph of the Mitchell River and silt jetties taken from above in 1931. It was written by E. C. F. Bird.silt-jetties mitchell-river paynesville bird-e.c.f. -
 Flagstaff Hill Maritime Museum and Village
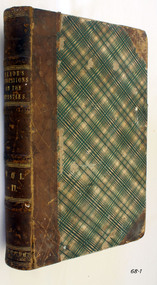
Literary work - Religious Book, C. & J. Revington, Annotations on the Epistles, Volume 2, 1824 (Second Edition)
An epistle from the Greek (epistolē, meaning "letter") is a writing directed or sent to a person or group of people, usually an elegant and formal didactic letter. The epistle genre of letter-writing was common in ancient Egypt as part of the scribal schools writing curriculum. The letters in the New Testament from Apostles to Christians are usually referred to as epistles. Those traditionally attributed to Paul are known as Pauline epistles and the others as catholic or "general" epistles. The subject volume is titled "Annotations on the Apocalypse" and was intended as a sequel to those originally written by Mr. Elsley on the Gospels and of Mr. Prebendary Slade on the Epistles, and thus aimed to complete a series of comments on the whole of the New Testament, for the use of students in prophetical scrip this book, "Annotations on the Apocalypse was intended as a sequel to those of Mr. Elsley on the Gospels and of Mr. Prebendary Slade on the Epistles", by John Chappel Woodhouse, is a second edition of the book originally published before 1824. These pair of books were part of Tom Wicking's collection and represent the type of literature published and read in the early 1800s and up to the present day for the religious instruction of priests. Spine has “Slades Annotations on the Epistles, Vol II”. Covers have green and cream diagonal tartan with brown binding decorated with gold. Annotations on the Epistles, being a continuation of Mr. Elsley’s Annotations and Principally Designed for the use of Candidates for the Holy Orders, by the Rev. James Slade, M.A., vicar of Bolton, and Prebendary of Chester; late Fellow and Tutor of Emmanuel College, Cambridge; and Examining Chaplain to the Lord Bishop of Chester. In two volumes, Vol. II, second edition. Printed in 1824 for C. & J. Rivington, St Paul’s church-yard, and Waterloo-place, Pall Mall, London . The pair of books is part of the Tom Wicking Collection.Marked inside cover "J. Lewis Glenview to Mrs MacLean S. Broadwater" Marked (illegible) "Maclean "Roger" Poet Diary (misspelt dairy)"flagstaff hill, warrnambool, shipwrecked coast, flagstaff hill maritime museum, maritime museum, shipwreck coast, flagstaff hill maritime village, great ocean road, book, annotations on the epistles vol 2, rev. james slade, c. & j. revington, religious book, mrs maclean, j lewis of glenview, tom wicking collection -
 Flagstaff Hill Maritime Museum and Village
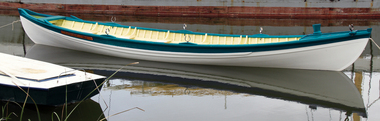
Vessel, "Sir Fletcher Jones", c. 1989
This whaleboat "Sir Fletcher Jones" is one of a set of three timber whaleboats in the whaleboat collection at Flagstaff Hill Maritime Village. The boats are designed for use in a contemporary environment. Whaleboat "Sir Fletcher Jones" painted white with dark green trim and ellow interior, one of a set of three. Built by Garry Stewart c. 1989.flagstaff hill, warrnambool, shipwrecked-coast, flagstaff-hill, flagstaff-hill-maritime-museum, maritime-museum, shipwreck-coast, flagstaff-hill-maritime-village, vessel, whaleboat -
 Flagstaff Hill Maritime Museum and Village
Domestic object - Bowl, Late 19th or early 20th Century
The Process of Making Pottery Decorating, Firing, Glazing, Making, Technical There is a rhythm and flow to clay. It can’t be done all at once! Even the making process! It can take weeks to get everything done, especially if you can only work on your pottery once a week! Even though we have three hour classes, it’s often just not enough time! Here is an overview of some of the processes so you have a bit more grasp on some of the technical stuff! Step One – Design There are SO many ideas out there for making stuff in clay! From delicate porcelain jewellery, through to heavy sculptural work and everything in between. Deciding your direction is sometimes not that easy – when you first start, try everything, you will naturally gravitate to the style that you enjoy! The options and variations are endless and can get a wee bit overwhelming too! Check in with me before you start to ensure your ideas will work, what order you might do things, how you could achieve the look you are seeking and any other technical data required! Step Two – Making Clay is thixotropic. This means that as you work with it, the clay first gets sloppier and wetter, before is begins to dry in the atmosphere. For most things, you simply can’t do all parts of the project at once. An example of work order might look like: Get last weeks work out from the shelves Prepare clay for today’s work – roll your clay, prepare balls for throwing, make the first stage of a pinch pot) Clean up last week’s work and put it on the shelf for bisque firing Check that you have any glazing to do – and do enough of it that you will have time to finish your main project Do the next step of your next project – there might be a further step that can’t be complete immediately, in that case, wrap your work well and put onto the shelves. Letting your work rest for a while can really help keep your work clean and professional looking. Many things require bagging under plastic to keep it ready for work the next week – put your name on the outside of the bag so you can find your work easily. We have stickers and markers. Consider how you want to decorate your work – coloured slip can be applied at a fairly wet stage (remembering that it will make your work even wetter!). Trying to apply slip to dry clay won’t work! If you want to do sgraffito – you will need to keep the work leather hard (a state of dryness where you can still work the clay with a little effort and a little water and care). Step Three – Drying Most of the time your work can go into the rack uncovered to let it dry out for the following week. If you want to continue forming or shaping you will need to double bag your work – put your work on a suitable sized bat and put the bat in a bag so the base of the bag is under the bat, then put another bag over the top of the work and tuck the top of the bag under the bat. If you want to trim (or turn) your thrown work the following week, it should also be double bagged. If your work is large, delicate, or of uneven thicknesses, you should lightly cover your work for drying. When considering the drying process, bare in mind the weather, humidity and wind! The hotter and dryer, the faster things dry and work can dry unevenly in the shelves – this can lead to cracking – another time to lightly cover your work for drying. Step Four – Trimming and Cleaning Up Your work is dry! It is called greenware now and it is at it’s most fragile! Handle everything with two hands. I often refer to soft hands – keep everything gentle and with your fingers spread as much as possible. Try to not pick up things like plates too much, and always with both hands! Before your work can be bisque fired it should be “cleaned up”. You work won’t go into the kiln if it has sharp edges – when glazed, sharp edges turn into razor blades! Use a piece of fly wire to rub the work all over – this will scratch a little so be light handed. Use a knife or metal kidney to scrape any areas that require a bit more dynamic treatment than the fly wire offers! Finally, a very light wipe over with a slightly damp sponge can help soften and soothe all of your edges and dags! Trimming thrown work: If you are planning to trim (or turn) your thrown work (and you should be), make sure you bag it well – your work should be leather hard to almost dry for easiest trimming. Use this step to finish the work completely – use a metal kidney to polish the surface, or a slightly damp sponge to give a freshly thrown look. Wipe the sponge around the rim after trimming, and check the inside of the pot for dags! Trimming slip cast work: Usually I will trim the rims of your work on the wheel the following day to make that stage easier, however you will still need to check your work for lumps and bumps. Last but not least – check that your name is still clearly on the bottom of your work. Step Five – Bisque Firing When the work is completely dry it can go into the bisque kiln. The bisque kiln is fired to 1000°C. This process burns off the water in the clay as well as some of the chemically bound water. The structure of the clay is not altered that much at this temperature. Inside the bisque kiln, the work is stacked a little, small bowl inside a larger bowl and onto a heavy plate. Smaller items like decorations or drink coasters might get stacked several high. Consideration is paid to the weight of the stack and shape of the work. A bisque kiln can fire about one and a half times the amount of work that the glaze kiln can fire. The firing takes about 10 hours to complete the cycle and about two days to cool down. Once it has been emptied the work is placed in the glaze room ready for you to decorate! Step Six – Glazing Decorating your work with colour can be a lot of fun – and time consuming! There are three main options for surface treatment at this stage: Oxide Washes Underglazes Glazes Washes and underglazes do not “glaze” the work – It will still need a layer of glaze to fully seal the clay (washes don’t need glaze on surfaces not designed for food or liquid as they can gloss up a little on their own). Underglazes are stable colourants that turn out pretty much how they look in the jar. They can be mixed with each other to form other colours and can be used like water colours to paint onto your work. Mostly they should have a clear glaze on top to seal them. Oxides are a different species – the pink oxide (cobalt) wash turns out bright blue for instance. They don’t always need a glaze on top, and some glazes can change the colour of the wash! The glazes need no other “glaze” on top! Be careful of unknown glaze interactions – you can put any combination of glaze in a bowl or on a plate, but only a single glaze on the outside of any vertical surface! Glazes are a chemical reaction under heat. We don’t know the exact chemicals in the Mayco glazes we use. I can guess by the way they interact with each other, however, on the whole, you need to test every idea you have, and not run the test on a vertical surface! Simply put, glaze is a layer of glass like substance that bonds with the clay underneath. Clay is made of silica, alumina and water. Glaze is made of mostly silica. Silica has a melting point of 1700°C and we fire to 1240°C. The silica requires a “flux” to help it melt at the lower temperature. Fluxes can be all sorts of chemicals – a common one is calcium – calcium has a melting point of 2500°C, however, together they both melt at a much lower temperature! Colourants are metal oxides like cobalt (blue), chrome (green through black), copper (green, blue, even red!), manganese (black, purple and pink) iron (red brown), etc. Different chemicals in the glaze can have dramatic effects. for example, barium carbonate (which we don’t use) turns manganese bright pink! Other elements can turn manganese dioxide brown, blue, purple and reddish brown. Manganese dioxide is a flux in and of itself as well. So, glazes that get their black and purple colours, often interact with other glazes and RUN! Our mirror black is a good example – it mixes really well with many glazes because it fluxes them – causes them to melt faster. It will also bring out many beautiful colours in the glazes because it’s black colouring most definitely comes from manganese dioxide! Glaze chemistry is a whole subject on it’s own! We use commercial Mayco glazes on purpose – for their huge range of colour possibilities, stability, cool interactions, artistic freedom with the ability to easily brush the glazes on and ease of use. We currently have almost 50 glazes on hand! A major project is to test the interactions of all glazes with each other. That is 2,500 test tiles!!!! I’m going to make the wall behind the wheels the feature wall of pretty colours! Step Seven – Glaze (Gloss or sometimes called “Glost”) Firing Most of the time this is the final stage of making your creation (but not always!) The glaze kiln goes to 1240°C. This is called cone 6, or midrange. It is the low end of stoneware temperatures. Stoneware clays and glazes are typically fired at cone 8 – 10, that is 1260 – 1290°C. The energy requirement to go from 1240°C to 1280°C is almost a 30% more! Our clay is formulated to vitrify (mature, turn “glass-like”) at 1240°, as are our glazes. A glaze kiln take around 12 hours to reach temperature and two to three days to cool down. Sometimes a third firing process is required – this is for decoration that is added to work after the glaze firing. For example – adding precious metals and lustres. this firing temperature is usually around 600 – 800°C depending upon the techniques being used. There are many students interested in gold and silver trims – we will be doing this third type of firing soon! After firing your work will be in the student finished work shelves. Remember to pay for it before you head out the door! There is a small extra charge for using porcelain clay (it’s more than twice the price of regular clay), and for any third firing process! Once your work has been fired it can not turn back into clay for millennia – so don’t fire it if you don’t like it! Put it in the bucket for recycling. https://firebirdstudios.com.au/the-process-of-making-pottery/ The bowl is an example of kitchenware used in the 19th century and still in use today.Bowl white ceramic. Crack on side. Badly stained.Backstamp very faint and unable to be read.flagstaff hill, warrnambool, shipwrecked-coast, flagstaff-hill, flagstaff-hill-maritime-museum, maritime-museum, shipwreck-coast, flagstaff-hill-maritime-village, mixing bowl, food preparation, kitchen equipment, ceramic -
 Flagstaff Hill Maritime Museum and Village
Domestic object - Bowl
The Process of Making Pottery Decorating, Firing, Glazing, Making, Technical There is a rhythm and flow to clay. It can’t be done all at once! Even the making process! It can take weeks to get everything done, especially if you can only work on your pottery once a week! Even though we have three hour classes, it’s often just not enough time! Here is an overview of some of the processes so you have a bit more grasp on some of the technical stuff! Step One – Design There are SO many ideas out there for making stuff in clay! From delicate porcelain jewellery, through to heavy sculptural work and everything in between. Deciding your direction is sometimes not that easy – when you first start, try everything, you will naturally gravitate to the style that you enjoy! The options and variations are endless and can get a wee bit overwhelming too! Check in with me before you start to ensure your ideas will work, what order you might do things, how you could achieve the look you are seeking and any other technical data required! Step Two – Making Clay is thixotropic. This means that as you work with it, the clay first gets sloppier and wetter, before is begins to dry in the atmosphere. For most things, you simply can’t do all parts of the project at once. An example of work order might look like: Get last weeks work out from the shelves Prepare clay for today’s work – roll your clay, prepare balls for throwing, make the first stage of a pinch pot) Clean up last week’s work and put it on the shelf for bisque firing Check that you have any glazing to do – and do enough of it that you will have time to finish your main project Do the next step of your next project – there might be a further step that can’t be complete immediately, in that case, wrap your work well and put onto the shelves. Letting your work rest for a while can really help keep your work clean and professional looking. Many things require bagging under plastic to keep it ready for work the next week – put your name on the outside of the bag so you can find your work easily. We have stickers and markers. Consider how you want to decorate your work – coloured slip can be applied at a fairly wet stage (remembering that it will make your work even wetter!). Trying to apply slip to dry clay won’t work! If you want to do sgraffito – you will need to keep the work leather hard (a state of dryness where you can still work the clay with a little effort and a little water and care). Step Three – Drying Most of the time your work can go into the rack uncovered to let it dry out for the following week. If you want to continue forming or shaping you will need to double bag your work – put your work on a suitable sized bat and put the bat in a bag so the base of the bag is under the bat, then put another bag over the top of the work and tuck the top of the bag under the bat. If you want to trim (or turn) your thrown work the following week, it should also be double bagged. If your work is large, delicate, or of uneven thicknesses, you should lightly cover your work for drying. When considering the drying process, bare in mind the weather, humidity and wind! The hotter and dryer, the faster things dry and work can dry unevenly in the shelves – this can lead to cracking – another time to lightly cover your work for drying. Step Four – Trimming and Cleaning Up Your work is dry! It is called greenware now and it is at it’s most fragile! Handle everything with two hands. I often refer to soft hands – keep everything gentle and with your fingers spread as much as possible. Try to not pick up things like plates too much, and always with both hands! Before your work can be bisque fired it should be “cleaned up”. You work won’t go into the kiln if it has sharp edges – when glazed, sharp edges turn into razor blades! Use a piece of fly wire to rub the work all over – this will scratch a little so be light handed. Use a knife or metal kidney to scrape any areas that require a bit more dynamic treatment than the fly wire offers! Finally, a very light wipe over with a slightly damp sponge can help soften and soothe all of your edges and dags! Trimming thrown work: If you are planning to trim (or turn) your thrown work (and you should be), make sure you bag it well – your work should be leather hard to almost dry for easiest trimming. Use this step to finish the work completely – use a metal kidney to polish the surface, or a slightly damp sponge to give a freshly thrown look. Wipe the sponge around the rim after trimming, and check the inside of the pot for dags! Trimming slip cast work: Usually I will trim the rims of your work on the wheel the following day to make that stage easier, however you will still need to check your work for lumps and bumps. Last but not least – check that your name is still clearly on the bottom of your work. Step Five – Bisque Firing When the work is completely dry it can go into the bisque kiln. The bisque kiln is fired to 1000°C. This process burns off the water in the clay as well as some of the chemically bound water. The structure of the clay is not altered that much at this temperature. Inside the bisque kiln, the work is stacked a little, small bowl inside a larger bowl and onto a heavy plate. Smaller items like decorations or drink coasters might get stacked several high. Consideration is paid to the weight of the stack and shape of the work. A bisque kiln can fire about one and a half times the amount of work that the glaze kiln can fire. The firing takes about 10 hours to complete the cycle and about two days to cool down. Once it has been emptied the work is placed in the glaze room ready for you to decorate! Step Six – Glazing Decorating your work with colour can be a lot of fun – and time consuming! There are three main options for surface treatment at this stage: Oxide Washes Underglazes Glazes Washes and underglazes do not “glaze” the work – It will still need a layer of glaze to fully seal the clay (washes don’t need glaze on surfaces not designed for food or liquid as they can gloss up a little on their own). Underglazes are stable colourants that turn out pretty much how they look in the jar. They can be mixed with each other to form other colours and can be used like water colours to paint onto your work. Mostly they should have a clear glaze on top to seal them. Oxides are a different species – the pink oxide (cobalt) wash turns out bright blue for instance. They don’t always need a glaze on top, and some glazes can change the colour of the wash! The glazes need no other “glaze” on top! Be careful of unknown glaze interactions – you can put any combination of glaze in a bowl or on a plate, but only a single glaze on the outside of any vertical surface! Glazes are a chemical reaction under heat. We don’t know the exact chemicals in the Mayco glazes we use. I can guess by the way they interact with each other, however, on the whole, you need to test every idea you have, and not run the test on a vertical surface! Simply put, glaze is a layer of glass like substance that bonds with the clay underneath. Clay is made of silica, alumina and water. Glaze is made of mostly silica. Silica has a melting point of 1700°C and we fire to 1240°C. The silica requires a “flux” to help it melt at the lower temperature. Fluxes can be all sorts of chemicals – a common one is calcium – calcium has a melting point of 2500°C, however, together they both melt at a much lower temperature! Colourants are metal oxides like cobalt (blue), chrome (green through black), copper (green, blue, even red!), manganese (black, purple and pink) iron (red brown), etc. Different chemicals in the glaze can have dramatic effects. for example, barium carbonate (which we don’t use) turns manganese bright pink! Other elements can turn manganese dioxide brown, blue, purple and reddish brown. Manganese dioxide is a flux in and of itself as well. So, glazes that get their black and purple colours, often interact with other glazes and RUN! Our mirror black is a good example – it mixes really well with many glazes because it fluxes them – causes them to melt faster. It will also bring out many beautiful colours in the glazes because it’s black colouring most definitely comes from manganese dioxide! Glaze chemistry is a whole subject on it’s own! We use commercial Mayco glazes on purpose – for their huge range of colour possibilities, stability, cool interactions, artistic freedom with the ability to easily brush the glazes on and ease of use. We currently have almost 50 glazes on hand! A major project is to test the interactions of all glazes with each other. That is 2,500 test tiles!!!! I’m going to make the wall behind the wheels the feature wall of pretty colours! Step Seven – Glaze (Gloss or sometimes called “Glost”) Firing Most of the time this is the final stage of making your creation (but not always!) The glaze kiln goes to 1240°C. This is called cone 6, or midrange. It is the low end of stoneware temperatures. Stoneware clays and glazes are typically fired at cone 8 – 10, that is 1260 – 1290°C. The energy requirement to go from 1240°C to 1280°C is almost a 30% more! Our clay is formulated to vitrify (mature, turn “glass-like”) at 1240°, as are our glazes. A glaze kiln take around 12 hours to reach temperature and two to three days to cool down. Sometimes a third firing process is required – this is for decoration that is added to work after the glaze firing. For example – adding precious metals and lustres. this firing temperature is usually around 600 – 800°C depending upon the techniques being used. There are many students interested in gold and silver trims – we will be doing this third type of firing soon! After firing your work will be in the student finished work shelves. Remember to pay for it before you head out the door! There is a small extra charge for using porcelain clay (it’s more than twice the price of regular clay), and for any third firing process! Once your work has been fired it can not turn back into clay for millennia – so don’t fire it if you don’t like it! Put it in the bucket for recycling. https://firebirdstudios.com.au/the-process-of-making-pottery/ This bowl is an example of kitchenware used in the 19th century and still in use today.Bowl white ceramic plain that has two sets of edging around lip. Inside bowl has plaster designed to look like cooking mixture.flagstaff hill, warrnambool, shipwrecked-coast, flagstaff-hill, flagstaff-hill-maritime-museum, maritime-museum, shipwreck-coast, flagstaff-hill-maritime-village, kitchen equipment, ceramic -
 Flagstaff Hill Maritime Museum and Village
Domestic object - Bowl, J & G Meakin, Late 19th or early 20th Century
The Process of Making Pottery Decorating, Firing, Glazing, Making, Technical There is a rhythm and flow to clay. It can’t be done all at once! Even the making process! It can take weeks to get everything done, especially if you can only work on your pottery once a week! Even though we have three hour classes, it’s often just not enough time! Here is an overview of some of the processes so you have a bit more grasp on some of the technical stuff! Step One – Design There are SO many ideas out there for making stuff in clay! From delicate porcelain jewellery, through to heavy sculptural work and everything in between. Deciding your direction is sometimes not that easy – when you first start, try everything, you will naturally gravitate to the style that you enjoy! The options and variations are endless and can get a wee bit overwhelming too! Check in with me before you start to ensure your ideas will work, what order you might do things, how you could achieve the look you are seeking and any other technical data required! Step Two – Making Clay is thixotropic. This means that as you work with it, the clay first gets sloppier and wetter, before is begins to dry in the atmosphere. For most things, you simply can’t do all parts of the project at once. An example of work order might look like: Get last weeks work out from the shelves Prepare clay for today’s work – roll your clay, prepare balls for throwing, make the first stage of a pinch pot) Clean up last week’s work and put it on the shelf for bisque firing Check that you have any glazing to do – and do enough of it that you will have time to finish your main project Do the next step of your next project – there might be a further step that can’t be complete immediately, in that case, wrap your work well and put onto the shelves. Letting your work rest for a while can really help keep your work clean and professional looking. Many things require bagging under plastic to keep it ready for work the next week – put your name on the outside of the bag so you can find your work easily. We have stickers and markers. Consider how you want to decorate your work – coloured slip can be applied at a fairly wet stage (remembering that it will make your work even wetter!). Trying to apply slip to dry clay won’t work! If you want to do sgraffito – you will need to keep the work leather hard (a state of dryness where you can still work the clay with a little effort and a little water and care). Step Three – Drying Most of the time your work can go into the rack uncovered to let it dry out for the following week. If you want to continue forming or shaping you will need to double bag your work – put your work on a suitable sized bat and put the bat in a bag so the base of the bag is under the bat, then put another bag over the top of the work and tuck the top of the bag under the bat. If you want to trim (or turn) your thrown work the following week, it should also be double bagged. If your work is large, delicate, or of uneven thicknesses, you should lightly cover your work for drying. When considering the drying process, bare in mind the weather, humidity and wind! The hotter and dryer, the faster things dry and work can dry unevenly in the shelves – this can lead to cracking – another time to lightly cover your work for drying. Step Four – Trimming and Cleaning Up Your work is dry! It is called greenware now and it is at it’s most fragile! Handle everything with two hands. I often refer to soft hands – keep everything gentle and with your fingers spread as much as possible. Try to not pick up things like plates too much, and always with both hands! Before your work can be bisque fired it should be “cleaned up”. You work won’t go into the kiln if it has sharp edges – when glazed, sharp edges turn into razor blades! Use a piece of fly wire to rub the work all over – this will scratch a little so be light handed. Use a knife or metal kidney to scrape any areas that require a bit more dynamic treatment than the fly wire offers! Finally, a very light wipe over with a slightly damp sponge can help soften and soothe all of your edges and dags! Trimming thrown work: If you are planning to trim (or turn) your thrown work (and you should be), make sure you bag it well – your work should be leather hard to almost dry for easiest trimming. Use this step to finish the work completely – use a metal kidney to polish the surface, or a slightly damp sponge to give a freshly thrown look. Wipe the sponge around the rim after trimming, and check the inside of the pot for dags! Trimming slip cast work: Usually I will trim the rims of your work on the wheel the following day to make that stage easier, however you will still need to check your work for lumps and bumps. Last but not least – check that your name is still clearly on the bottom of your work. Step Five – Bisque Firing When the work is completely dry it can go into the bisque kiln. The bisque kiln is fired to 1000°C. This process burns off the water in the clay as well as some of the chemically bound water. The structure of the clay is not altered that much at this temperature. Inside the bisque kiln, the work is stacked a little, small bowl inside a larger bowl and onto a heavy plate. Smaller items like decorations or drink coasters might get stacked several high. Consideration is paid to the weight of the stack and shape of the work. A bisque kiln can fire about one and a half times the amount of work that the glaze kiln can fire. The firing takes about 10 hours to complete the cycle and about two days to cool down. Once it has been emptied the work is placed in the glaze room ready for you to decorate! Step Six – Glazing Decorating your work with colour can be a lot of fun – and time consuming! There are three main options for surface treatment at this stage: Oxide Washes Underglazes Glazes Washes and underglazes do not “glaze” the work – It will still need a layer of glaze to fully seal the clay (washes don’t need glaze on surfaces not designed for food or liquid as they can gloss up a little on their own). Underglazes are stable colourants that turn out pretty much how they look in the jar. They can be mixed with each other to form other colours and can be used like water colours to paint onto your work. Mostly they should have a clear glaze on top to seal them. Oxides are a different species – the pink oxide (cobalt) wash turns out bright blue for instance. They don’t always need a glaze on top, and some glazes can change the colour of the wash! The glazes need no other “glaze” on top! Be careful of unknown glaze interactions – you can put any combination of glaze in a bowl or on a plate, but only a single glaze on the outside of any vertical surface! Glazes are a chemical reaction under heat. We don’t know the exact chemicals in the Mayco glazes we use. I can guess by the way they interact with each other, however, on the whole, you need to test every idea you have, and not run the test on a vertical surface! Simply put, glaze is a layer of glass like substance that bonds with the clay underneath. Clay is made of silica, alumina and water. Glaze is made of mostly silica. Silica has a melting point of 1700°C and we fire to 1240°C. The silica requires a “flux” to help it melt at the lower temperature. Fluxes can be all sorts of chemicals – a common one is calcium – calcium has a melting point of 2500°C, however, together they both melt at a much lower temperature! Colourants are metal oxides like cobalt (blue), chrome (green through black), copper (green, blue, even red!), manganese (black, purple and pink) iron (red brown), etc. Different chemicals in the glaze can have dramatic effects. for example, barium carbonate (which we don’t use) turns manganese bright pink! Other elements can turn manganese dioxide brown, blue, purple and reddish brown. Manganese dioxide is a flux in and of itself as well. So, glazes that get their black and purple colours, often interact with other glazes and RUN! Our mirror black is a good example – it mixes really well with many glazes because it fluxes them – causes them to melt faster. It will also bring out many beautiful colours in the glazes because it’s black colouring most definitely comes from manganese dioxide! Glaze chemistry is a whole subject on it’s own! We use commercial Mayco glazes on purpose – for their huge range of colour possibilities, stability, cool interactions, artistic freedom with the ability to easily brush the glazes on and ease of use. We currently have almost 50 glazes on hand! A major project is to test the interactions of all glazes with each other. That is 2,500 test tiles!!!! I’m going to make the wall behind the wheels the feature wall of pretty colours! Step Seven – Glaze (Gloss or sometimes called “Glost”) Firing Most of the time this is the final stage of making your creation (but not always!) The glaze kiln goes to 1240°C. This is called cone 6, or midrange. It is the low end of stoneware temperatures. Stoneware clays and glazes are typically fired at cone 8 – 10, that is 1260 – 1290°C. The energy requirement to go from 1240°C to 1280°C is almost a 30% more! Our clay is formulated to vitrify (mature, turn “glass-like”) at 1240°, as are our glazes. A glaze kiln take around 12 hours to reach temperature and two to three days to cool down. Sometimes a third firing process is required – this is for decoration that is added to work after the glaze firing. For example – adding precious metals and lustres. this firing temperature is usually around 600 – 800°C depending upon the techniques being used. There are many students interested in gold and silver trims – we will be doing this third type of firing soon! After firing your work will be in the student finished work shelves. Remember to pay for it before you head out the door! There is a small extra charge for using porcelain clay (it’s more than twice the price of regular clay), and for any third firing process! Once your work has been fired it can not turn back into clay for millennia – so don’t fire it if you don’t like it! Put it in the bucket for recycling. https://firebirdstudios.com.au/the-process-of-making-pottery/This bowl was made by renowned pottery company J & G Meakin of England. The firm was established in the mid-1800's. The bowl is an example of kitchenware used in the 19th century and still in use today.Bowl; white ceramic, round and tapering inwards towards base. Made by J and G Meakin England.On base, 'Ironstone China Reg SOL 391413' with symbolflagstaff hill, flagstaff hill maritime museum and village, warrnambool, maritime museum, maritime village, great ocean road, shipwreck coast, mixing bowl, food preparation, j & g meakin, pottery, stoke-on-trent, kitchen equipment, ceramic