Showing 345 items
matching danger
-
 Federation University Historical Collection
Photograph - Photograph - Colour, Jarrod Watt, Street Protests in Hong Kong against proposed extradition laws, 2019, 17/06/2019
Carrie Lam, Hong Kong’s chief executive, had plenty of political support in the territory’s pro-Beijing legislature to pass a bill that would allow extraditions to mainland China. The legislators were set to begin discussing the bill in early June, and intended to vote on it just weeks later. A series of protests took place, and after a June 16 protest saw the largest turnout yet, Ms. Lam made a major concession: She postponed the bill, at least temporarily. It was an undeniable victory for the protesters — but it did little to quell the unrest. Since the bill could later be reintroduced, protesters felt they remained in danger. The police tactics to break up the demonstrations on June 12, including the use of more than 150 tear gas canisters to push protesters far away from the government office, created a new set of demands from the protesters. Now, instead of just calling for the withdrawal of the bill and Ms. Lam’s resignation, they said they wouldn’t be content unless there was an independent investigation of officers’ conduct. They also wanted the release of protesters arrested on June 12, and for the government to rescind its description of the demonstrations as a “riot,” a designation that carries legal significance. None of that has happened. Many analysts say Ms. Lam is unlikely to step down, nor would Beijing accept her resignation if she offered it. She has more wiggle room on the other demands, but has not indicated any willingness to budge. The Hong Kong Protests are a leaderless, digital movement.There is no single leader or group deciding on or steering the strategy, tactics and goals of the movement. Instead, protesters have used forums and messaging apps to decide next steps. Anyone can suggest a course of action, and others then vote on whether they support it. The most popular ideas rise to the top, and then people rally to make them happen. At its best, this structure has empowered many people to participate and have their voices heard. Protesters say it keeps them all safe by not allowing the government to target specific leaders. Their success in halting the extradition bill, which was shelved by the territory’s chief executive, speaks to the movement’s power. Despite the lack of a clear leader, protesters have shown extensive coordination at the demonstrations, having planned the specifics online beforehand. Supply stations are set up to distribute water, snacks, gloves, umbrellas and shields made of cardboard. Volunteer first aid workers wear brightly colored vests. People form assembly lines to pass supplies across long distances, with protesters communicating what they need through a series of predetermined hand signals. Anyone walking in dangerous areas without a helmet or a mask is quickly offered one. No individual can speak on behalf of the protesters, which makes negotiations difficult, if not impossible. (https://www.nytimes.com/2019/07/02/world/asia/hong-kong-protest-explained.html, accessed 07/07/2019) Hong Kong’s amended extradition law would allow the extradition of suspects to mainland China for the first time. Supporters say the amendments are key to ensuring the city does not become a criminal refuge, but critics worry Beijing will use the law to extradite political opponents and others to China where their legal protections cannot be guaranteed. The government claims the push to change the law, which would also apply to Taiwan and Macau, stems from the killing last year of a Hong Kong woman while she was in Taiwan with her boyfriend. Authorities in Taiwan suspect the woman’s boyfriend, who remains in Hong Kong, but cannot try him because no extradition agreement is in place. Under the amended law, those accused of offences punishable by seven years or more in prison could be extradited. The new legislation would give Hong Kong’s leader, known as the chief executive, authority to approve extradition requests, after review by the courts. Hong Kong’s legislature, the legislative council, would not have any oversight over the extradition process. Many Hong Kongers fear the proposed extradition law will be used by authorities to target political enemies. They worry the new legislation spells the end of the “one country, two systems” policy, eroding the civil rights enjoyed by Hong Kong residents since the handover of sovereignty from the UK to China in 1997. Many attending the protests on Sunday said they could not trust China as it had often used non-political crimes to target government critics, and said they also feared Hong Kong officials would not be able to reject Beijing’s requests. Legal professionals have also expressed concern over the rights of those sent across the border to be tried. The conviction rate in Chinese courts is as high as 99%. Arbitrary detentions, torture and denial of legal representation of one’s choosing are also common. Many in the protests on Sunday 09 June 2019 said they felt overwhelmed by a sense of helplessness in the face of mainland China’s increasing political, economic and cultural influence in Hong Kong. Hong Kong’s top political leader is not elected by ordinary voters but by a 1,200-strong election committee accountable to Beijing. Half of its legislature are chosen through indirect electoral systems that favour pro-Beijing figures. Many Hong Kongers also cited the jailing of leaders and activists from the 2014 Occupy Central movement– a 79-day mass civil disobedience movement – as well as the disqualification of young localist lawmakers as signs of the erosion of civil freedoms. Resentment towards China has been intensified by soaring property prices – with increasing numbers of mainland Chinese buying properties in the city – as well as the government’s “patriotic education” drive, and the large numbers of mainland tourists who flock to Hong Kong. Many Hong Kongers are also concerned about China’s growing control over the city’s news media, as they increasingly self-censor and follow Beijing’s tacit orders. https://www.theguardian.com/world/2019/jun/10/what-are-the-hong-kong-protests-about-explainerPhotograph of a crowd or protestors against proposed extradition laws gathering on the streets of Causeway Bay, Hong Kong, leading down to the gathering area. carrie lam, hong kong protests, extraditions, protest, protestors -
 Federation University Historical Collection
Photograph - Colour, Jarrod Watt, Street Protests in Hong Kong against proposed extradition laws, 2019, 17/06/2019
Carrie Lam, Hong Kong’s chief executive, had plenty of political support in the territory’s pro-Beijing legislature to pass a bill that would allow extraditions to mainland China. The legislators were set to begin discussing the bill in early June, and intended to vote on it just weeks later. A series of protests took place, and after a June 16 protest saw the largest turnout yet, Ms. Lam made a major concession: She postponed the bill, at least temporarily. It was an undeniable victory for the protesters — but it did little to quell the unrest. Since the bill could later be reintroduced, protesters felt they remained in danger. The police tactics to break up the demonstrations on June 12, including the use of more than 150 tear gas canisters to push protesters far away from the government office, created a new set of demands from the protesters. Now, instead of just calling for the withdrawal of the bill and Ms. Lam’s resignation, they said they wouldn’t be content unless there was an independent investigation of officers’ conduct. They also wanted the release of protesters arrested on June 12, and for the government to rescind its description of the demonstrations as a “riot,” a designation that carries legal significance. None of that has happened. Many analysts say Ms. Lam is unlikely to step down, nor would Beijing accept her resignation if she offered it. She has more wiggle room on the other demands, but has not indicated any willingness to budge. The Hong Kong Protests are a leaderless, digital movement.There is no single leader or group deciding on or steering the strategy, tactics and goals of the movement. Instead, protesters have used forums and messaging apps to decide next steps. Anyone can suggest a course of action, and others then vote on whether they support it. The most popular ideas rise to the top, and then people rally to make them happen. At its best, this structure has empowered many people to participate and have their voices heard. Protesters say it keeps them all safe by not allowing the government to target specific leaders. Their success in halting the extradition bill, which was shelved by the territory’s chief executive, speaks to the movement’s power. Despite the lack of a clear leader, protesters have shown extensive coordination at the demonstrations, having planned the specifics online beforehand. Supply stations are set up to distribute water, snacks, gloves, umbrellas and shields made of cardboard. Volunteer first aid workers wear brightly colored vests. People form assembly lines to pass supplies across long distances, with protesters communicating what they need through a series of predetermined hand signals. Anyone walking in dangerous areas without a helmet or a mask is quickly offered one. No individual can speak on behalf of the protesters, which makes negotiations difficult, if not impossible. (https://www.nytimes.com/2019/07/02/world/asia/hong-kong-protest-explained.html, accessed 07/07/2019) Hong Kong’s amended extradition law would allow the extradition of suspects to mainland China for the first time. Supporters say the amendments are key to ensuring the city does not become a criminal refuge, but critics worry Beijing will use the law to extradite political opponents and others to China where their legal protections cannot be guaranteed. The government claims the push to change the law, which would also apply to Taiwan and Macau, stems from the killing last year of a Hong Kong woman while she was in Taiwan with her boyfriend. Authorities in Taiwan suspect the woman’s boyfriend, who remains in Hong Kong, but cannot try him because no extradition agreement is in place. Under the amended law, those accused of offences punishable by seven years or more in prison could be extradited. The new legislation would give Hong Kong’s leader, known as the chief executive, authority to approve extradition requests, after review by the courts. Hong Kong’s legislature, the legislative council, would not have any oversight over the extradition process. Many Hong Kongers fear the proposed extradition law will be used by authorities to target political enemies. They worry the new legislation spells the end of the “one country, two systems” policy, eroding the civil rights enjoyed by Hong Kong residents since the handover of sovereignty from the UK to China in 1997. Many attending the protests on Sunday said they could not trust China as it had often used non-political crimes to target government critics, and said they also feared Hong Kong officials would not be able to reject Beijing’s requests. Legal professionals have also expressed concern over the rights of those sent across the border to be tried. The conviction rate in Chinese courts is as high as 99%. Arbitrary detentions, torture and denial of legal representation of one’s choosing are also common. Many in the protests on Sunday 09 June 2019 said they felt overwhelmed by a sense of helplessness in the face of mainland China’s increasing political, economic and cultural influence in Hong Kong. Hong Kong’s top political leader is not elected by ordinary voters but by a 1,200-strong election committee accountable to Beijing. Half of its legislature are chosen through indirect electoral systems that favour pro-Beijing figures. Many Hong Kongers also cited the jailing of leaders and activists from the 2014 Occupy Central movement– a 79-day mass civil disobedience movement – as well as the disqualification of young localist lawmakers as signs of the erosion of civil freedoms. Resentment towards China has been intensified by soaring property prices – with increasing numbers of mainland Chinese buying properties in the city – as well as the government’s “patriotic education” drive, and the large numbers of mainland tourists who flock to Hong Kong. Many Hong Kongers are also concerned about China’s growing control over the city’s news media, as they increasingly self-censor and follow Beijing’s tacit orders. https://www.theguardian.com/world/2019/jun/10/what-are-the-hong-kong-protests-about-explainerPhotograph of a crowd on the streets of Hong Kong to protest against proposed extradition laws, heading towards Admiralty. carrie lam, hong kong protests, extraditions, protest, protestors, admiralty -
 Federation University Historical Collection
Photograph - Colour Photograph, Street Protests in Hong Kong against proposed extradition laws, 2019, 17/06/2019
Carrie Lam, Hong Kong’s chief executive, had plenty of political support in the territory’s pro-Beijing legislature to pass a bill that would allow extraditions to mainland China. The legislators were set to begin discussing the bill in early June, and intended to vote on it just weeks later. A series of protests took place, and after a June 16 protest saw the largest turnout yet, Ms. Lam made a major concession: She postponed the bill, at least temporarily. It was an undeniable victory for the protesters — but it did little to quell the unrest. Since the bill could later be reintroduced, protesters felt they remained in danger. The police tactics to break up the demonstrations on June 12, including the use of more than 150 tear gas canisters to push protesters far away from the government office, created a new set of demands from the protesters. Now, instead of just calling for the withdrawal of the bill and Ms. Lam’s resignation, they said they wouldn’t be content unless there was an independent investigation of officers’ conduct. They also wanted the release of protesters arrested on June 12, and for the government to rescind its description of the demonstrations as a “riot,” a designation that carries legal significance. None of that has happened. Many analysts say Ms. Lam is unlikely to step down, nor would Beijing accept her resignation if she offered it. She has more wiggle room on the other demands, but has not indicated any willingness to budge. The Hong Kong Protests are a leaderless, digital movement.There is no single leader or group deciding on or steering the strategy, tactics and goals of the movement. Instead, protesters have used forums and messaging apps to decide next steps. Anyone can suggest a course of action, and others then vote on whether they support it. The most popular ideas rise to the top, and then people rally to make them happen. At its best, this structure has empowered many people to participate and have their voices heard. Protesters say it keeps them all safe by not allowing the government to target specific leaders. Their success in halting the extradition bill, which was shelved by the territory’s chief executive, speaks to the movement’s power. Despite the lack of a clear leader, protesters have shown extensive coordination at the demonstrations, having planned the specifics online beforehand. Supply stations are set up to distribute water, snacks, gloves, umbrellas and shields made of cardboard. Volunteer first aid workers wear brightly colored vests. People form assembly lines to pass supplies across long distances, with protesters communicating what they need through a series of predetermined hand signals. Anyone walking in dangerous areas without a helmet or a mask is quickly offered one. No individual can speak on behalf of the protesters, which makes negotiations difficult, if not impossible. (https://www.nytimes.com/2019/07/02/world/asia/hong-kong-protest-explained.html, accessed 07/07/2019) Hong Kong’s amended extradition law would allow the extradition of suspects to mainland China for the first time. Supporters say the amendments are key to ensuring the city does not become a criminal refuge, but critics worry Beijing will use the law to extradite political opponents and others to China where their legal protections cannot be guaranteed. The government claims the push to change the law, which would also apply to Taiwan and Macau, stems from the killing last year of a Hong Kong woman while she was in Taiwan with her boyfriend. Authorities in Taiwan suspect the woman’s boyfriend, who remains in Hong Kong, but cannot try him because no extradition agreement is in place. Under the amended law, those accused of offences punishable by seven years or more in prison could be extradited. The new legislation would give Hong Kong’s leader, known as the chief executive, authority to approve extradition requests, after review by the courts. Hong Kong’s legislature, the legislative council, would not have any oversight over the extradition process. Many Hong Kongers fear the proposed extradition law will be used by authorities to target political enemies. They worry the new legislation spells the end of the “one country, two systems” policy, eroding the civil rights enjoyed by Hong Kong residents since the handover of sovereignty from the UK to China in 1997. Many attending the protests on Sunday said they could not trust China as it had often used non-political crimes to target government critics, and said they also feared Hong Kong officials would not be able to reject Beijing’s requests. Legal professionals have also expressed concern over the rights of those sent across the border to be tried. The conviction rate in Chinese courts is as high as 99%. Arbitrary detentions, torture and denial of legal representation of one’s choosing are also common. Many in the protests on Sunday 09 June 2019 said they felt overwhelmed by a sense of helplessness in the face of mainland China’s increasing political, economic and cultural influence in Hong Kong. Hong Kong’s top political leader is not elected by ordinary voters but by a 1,200-strong election committee accountable to Beijing. Half of its legislature are chosen through indirect electoral systems that favour pro-Beijing figures. Many Hong Kongers also cited the jailing of leaders and activists from the 2014 Occupy Central movement– a 79-day mass civil disobedience movement – as well as the disqualification of young localist lawmakers as signs of the erosion of civil freedoms. Resentment towards China has been intensified by soaring property prices – with increasing numbers of mainland Chinese buying properties in the city – as well as the government’s “patriotic education” drive, and the large numbers of mainland tourists who flock to Hong Kong. Many Hong Kongers are also concerned about China’s growing control over the city’s news media, as they increasingly self-censor and follow Beijing’s tacit orders. https://www.theguardian.com/world/2019/jun/10/what-are-the-hong-kong-protests-about-explainerCrowds mass on Queens Way in Hong Kong as an estimated 2 million people march in protest at the government's refusal to withdraw a controverisal law allowing people to be extradited to mainland China. Chants demanded the chief executive apologise and the legislation be withdrawn, while many held signs protesting police violence. Nearly 2 million protesters flooded the streets of Hong Kong on Sunday, organisers claimed, delivering a stunning repudiation of Chief Executive Carrie Lam Cheng Yuet-ngor’s governance and forcing a public apology out of the city’s leader over her campaign to bulldoze a controversial extradition bill through the legislature. A day after Lam suspended her push for the bill, expecting it to defuse a crisis that has seen violent clashes between mostly young protesters and police, the centre of Hong Kong was brought to a complete standstill as the masses marched to chastise her for refusing to withdraw the bill or apologise when first asked to, and declaring that nothing short of her resignation would satisfy them now. (https://www.scmp.com/news/hong-kong/politics/article/3014737/nearly-2-million-people-take-streets-forcing-public-apology ) carrie lam, hong kong protests, extraditions, protest, protestors, admiralty -
 Bendigo Military Museum
Photograph - Army Survey Regiment – CO’s Parade and Defence Force Service Medal Presentations, c1987
These 34 photographs were taken at a CO’s parade at the Army Survey Regiment, Bendigo in c1987. The Colonel Commandant (honorary appointment) of the Survey Corps - COL Clem Sargent (Retd), presented the Defence Force Service Medal to four personnel in recognition of 15 years of efficient remunerated service, or the Clasp for 5 years of additional service. Recipients were WO1 Neville Stone and three unidentified support staff from the Australian Army Catering Corps, Royal Australian Electrical and Mechanical Engineers and the Royal Australian Corps of Transport. This is a set of 34 photographs of a CO’s parade and the presentation of the Defence Force Service Medal, at the Army Survey Regiment, Bendigo in c1987. The colour photographs are on 35mm negative film and are part of the Army Survey Regiment’s Collection. The photographs were scanned at 96 dpi. .1) to 2) - Photo, colour, c1987. Squadrons marching on parade ground. .3) to .4) - Photo, colour, c1987. Squadrons formed up on parade ground. RSM WO1 Jeff Lynch delivering orders. .5) - Photo, colour, c1987. Officers at ease in readiness to take posts. .6) - Photo, colour, c1987. Squadrons formed up on parade ground. RSM WO1 Jeff Lynch delivering orders. .7) - Photo, colour, c1987. RSM WO1 Jeff Lynch handing over to 2IC MAJ Terry Edwards. .8) - Photo, colour, c1987. Officers marching on to take posts. .9) - Photo, colour, c1987. L to R: CPL Paul Richards, SPR Todd Reynolds, SPR Eric Nicholson, MAJ Roger Rix, CPL Steve Hill, unidentified, CPL Russ Mollenhauer, remainder. .10) - Photo, colour, c1987. Guest of Honour - COL COMDT COL Clem Sargent arrives on parade ground, remainder unidentified. .11) - Photo, colour, c1987. Army Survey Regiment ready to salute Guest of Honour - COL COMDT COL Clem Sargent. .12) - Photo, colour, c1987, Guest of Honour - COL COMDT COL Clem Sargent returns salute. .13) - Photo, colour, c1987, L to R: 2IC MAJ Terry Edwards, SPR Eric Nicholson, COL COMDT COL Clem Sargent, SGT John ‘Stormy’ Tempest, unidentified (x2), SGT Mal Paterson, SGT Kevin Boehm, SSGT Peter Mustart, CPL Trevor Poll, SGT Terry Danger. .14) - Photo, colour, c1987, In left foreground MAJ Bob McHenry, unidentified personnel, unidentified officer, 2IC MAJ Terry Edwards, COL COMDT COL Clem Sargent, 3rd from right CAPT Graeme Wastell, CPL John Martin, SGT Martin Evans. .15) - Photo, colour, c1987, L to R: unidentified personnel, unidentified officer, 2IC MAJ Terry Edwards, COL COMDT COL Clem Sargent, SSGT Rick Van der Bom, CPL Paul Hunter, unidentified personnel, CAPT Graeme Wastell, SGT Paul Leskovec CSM, CPL John Martin, SGT Paul Cheater, SGT Martin Evans. .16) - Photo, colour, c1987, L to R: SGT Martin Evans. 2IC MAJ Terry Edwards, unidentified officer, COL COMDT COL Clem Sargent, unidentified personnel, SGT Paul Leskovec CSM, SGT Paul Cheater, SSGT Brian Collings, SSGT Ian ‘Rock’ Thistleton, WO1 Stevo Hinic. .17) - Photo, colour, c1987, L to R: unidentified personnel, 2IC MAJ Terry Edwards, COL COMDT COL Clem Sargent, SGT Roger Rees, unidentified female officer, SGT Phil Smalley, CPL Steve Coulsen, SPR Toni Wright, SGT Steve Gloster, SSGT Ken Talbot-Smith, CPL Darren Wilkinson, unidentified, SGT Paul Hopes. .18) - Photo, colour, c1987, L to R: unidentified female officer, COL COMDT COL Clem Sargent, unidentified, SGT Phil Smalley, CPL Steve Coulsen, SPR Toni Wright, CPL Steve Gloster, SSGT Ken Talbot-Smith, CPL Darren Wilkinson, SGT Paul Hopes. .19) - Photo, colour, c1987, L to R: unidentified personnel, CPL Peter ‘Jack’ Elverd, 2IC MAJ Terry Edwards, COL COMDT COL Clem Sargent, unidentified, SGT Stuart Hibbert, unidentified, Ted Burgess. .20) - Photo, colour, c1987, L to R: unidentified officer, COL COMDT COL Clem Sargent, 2IC MAJ Terry Edwards. .21) - Photo, colour, c1987, L to R: unidentified (x3), WO1 Neville Stone, COL COMDT COL Clem Sargent, SSGT Greg Anderson, unidentified officer, CAPT Graeme Wastell. .22) to .24) - Photo, colour, c1987, L to R: unidentified (x3), WO1 Neville Stone, COL COMDT COL Clem Sargent, SSGT Greg Anderson, unidentified officer. .25) to .26) - Photo, colour, c1987, L to R: unidentified, WO1 Neville Stone, unidentified, COL COMDT COL Clem Sargent, SSGT Greg Anderson, unidentified officer. .26) to 30) - Photo, colour, c1987, L to R: unidentified (x2), WO1 Neville Stone, COL COMDT COL Clem Sargent, SSGT Greg Anderson, unidentified officer. .31) to .34) - Photo, colour, c1987, L to R: unidentified, WO1 Neville Stone, COL COMDT COL Clem Sargent, unidentified officer..1P to .34P – There are no personnel identified.royal australian survey corps, rasvy, army survey regiment, army svy regt, fortuna, asr -
 Bendigo Military Museum
Photograph - Annual Sport Competition: Flag Day - Army Survey Regiment Verses School of Military Survey, Bendigo, 1977
This set of 33 photographs of sports action was taken on Flag Day, an annual sports competition between the Army Survey Regiment (ASR) and the School of Military Survey (SMS), at Bendigo on the 13th of May 1977. Softball was held at Beischer Park Strathdale, sailing was most likely held at Lake Eppalock, rifle shooting at Wellsford Rifle Range and tug-of-war at Fortuna. The venues for basketball, golf, squash and volleyball are unknown. The two RA Svy units took turns each year to host the event. Personnel from the ASR’s Detachment located at Bonegilla were part of the SMS’s teams. The day competition usually comprised basketball, cross country, golf, sailing, squash softball, tennis, rifle shooting, touch football, tug-of-war and volleyball. The evening competition often included darts, carpet bowls, hookey, quoits and snooker. See items 6025.15P for photo proofs of sports action and 6326.25P for softball action and taken on the day. There are numerous duplicates previously published from these photo proofs; however they are inferior in quality.This is a set of 33 photographs of sports action was taken on Flag Day, Army Survey Regiment (ASR) versus the School of Military Survey (SMS), at Bendigo on the 13th of May 1977. The photographs were printed on photographic paper and are part of the Army Survey Regiment’s Collection. The black and white photographs were scanned at 300 dpi. .1) - Photo, black & white, 1977, Basketball. ASR Team Back row L to R: unidentified, Stuart Symonds, Bruce Gordon. Front row L to R: unidentified (x2), Bill Jones, unidentified. Sitting: unidentified. .2) - Photo, black & white, 1977, Basketball. SMS Team Back row L to R: Duncan Burns, Stuart Thaxter, unidentified (x2). Front row L to R: Owen Moss, unidentified, Steve Hansen. Sitting: unidentified. .3) to .5) - Photo, black & white, 1977. Basketball action. .6) - Photo, black & white, 1977, Golf - L to R: Kevin ‘Chuck’ Berry, George Austen, unidentified, Roy Morgan. .7) - Photo, black & white, 1977, Golf - L to R: Stan Vote, Gordon Lowery, Peter Warwick, John ‘JB’ Barrie. .8) & .9) - Photo, black & white, 1977, ASR Golf Team – Back row L to R: Peter Warwick, unidentified, Graeme Jeffers, John Sinclair. Front row L to R: Stan Vote, Roy Morgan, George Austen, Len Thirlwell. .10) & .11) - Photo, black & white, 1977, SMS Golf Team - Back row L to R: Kevin ‘Chuck’ Berry, unidentified, Gordon Lowery. Front row L to R: unidentified, Peter Hardy, unidentified, John ‘JB’ Barrie. .12) & .13) - Photo, black & white, 1977, Golf. Teeing off – unidentified. .14) - Photo, black & white, 1977, Golf. Teeing off – John Sinclair. .15) - Photo, black & white, 1977, Golf. Putting – Stan Vote. .16) - Photo, black & white, 1977, Golf. Putting - Peter Warwick. .17) - Photo, black & white, 1977, Golf. Putting – Roy Morgan. .18) - Photo, black & white, 1977, ASR Rifle Shooting Team - Back row L to R: Paul Davis, unidentified (x2), Max Neil, Rhys De Laine. Front row L to R: Tony Lawler, Rene van den Tol, unidentified, Warren ‘Waldo’ Shirley. .19) - Photo, black & white, 1977, ASR Rifle Shooting Team – L to R: unidentified (x4), 2nd back right: Tony Lawler, unidentified. .20) - Photo, black & white, 1977, SMS Rifle Shooting Team - Back row L to R: John Ashby, unidentified (x3). Front row L to R: Dave Murphy, Wolfgang Thun, John ‘Stormy’ Tempest, unidentified. .21) - Photo, black & white, 1977, Softball – L to R: Jenny Haddow, Debbie Brown, unidentified umpire. .22) - Photo, black & white, 1977, ASR & SMS Sailing Teams – Back row L to R: Chris Osborne, Josh De Groot, unidentified (x2), Greg Francis-Wright, Peter Breukel. 3rd row L to R: Marrianne (Van De Zee) De Groot, unidentified, Kim Reynolds, Alex Cairney, unidentified, Sam Chambers. 2nd row L to R: Les Dixon, Jim Macdonald, unidentified, George Graham, Ted ‘FOT’ Burgess. Front row L to R: Doug Carswell, Alan Adsett, Peter Mustart, Tony Waldon, Dave Miles. .23) - Photo, black & white, 1977, Sailing on Lake Eppalock, Victoria. .24) - Photo, black & white, 1977, SMS Squash Team – Back row L to R: Graham Squire, Peter Constantine AM, Peter Colwell, Bill Boyd OAM, Front row L to R: unidentified, Dick Barwald, Colin Darch, unidentified. .25) - Photo, black & white, 1977, ASR Squash Team – Back row L to R: Andy Wilson, Terry Danger, Errol Fletcher, Dennis Puniard. Front row L to R: Lynn Johnson, Kerry Browne. .26) - Photo, black & white, 1977, ASR Tug-of-War Team: Back row L to R: Russ Mollenhauer, Neville Stone, Jim Cook, Jeff Willey, unidentified (x3). Front row L to R: unidentified, John ‘Flash’ Anderson, Mick ‘Buddha’ Ellis, Ken ‘Sluggo’ Slater, Rob ‘Boges’ Bogumil, Frank Lenane, unidentified. .27) - Photo, black & white, 1977, SMS Tug-of-War Team: Back row L to R: unidentified, Stuart Thaxter, Steve Hansen, unidentified (x2). Front row L to R: Kim Lenson, unidentified (x4), Jamie ‘Fish’ McRae. .28) & .29) - Photo, black & white, 1977, ASR Tug-of-War Team in action. .30) - Photo, black & white, 1977, Volleyball action. .31) - Photo, black & white, 1977, Volleyball action. Chris Edwards blocking. .32) & .33) - Photo, black & white, 1977, Volleyball action..1P to .33P –No personnel are identified. ‘Regiment v School 13 May 1977’ annotated on cover sleeve.royal australian survey corps, rasvy, army survey regiment, army svy regt, fortuna, asr, school of military survey, flag day -
 Flagstaff Hill Maritime Museum and Village
Functional object - Ship's Wheel, 1871 or earlier
The ship building company E. & A. Sewall, from Bath, Maine, USA, built many ships that had wheels with the same decorative, starburst pattern on them as this particular wheel segment, including the Eric the Red. The wheel was manufactured by their local Bath foundry, Geo. Moulton & Co. and sold to the Sewall yard for $100, according to the construction accounts of the vessel. Eric the Red was a wooden, three masted clipper ship. She had 1,580 tons register and was the largest full-rigged ship built at Bath, Maine, USA in 1871. She was built and registered by Arthur Sewall, later to become the partnership E. & A. Sewall, and was the 51st ship built by this company. The annually-published List of Merchant Vessels of the U.S. shows that Bath was still the home port of Eric the Red in 1880. The vessel was named after the Viking discoverer, Eric the Red, who was the first European to reach the shores of North America (in 980AD). The ship Eric the Red at first traded in coal between America and Britain, and later traded in guano nitrates from South America. In 1879 she was re-metalled and was in first class condition. On 10th June 1880 (some records say 12th June) Eric the Red departed New York for Melbourne and then Sydney. She had been commissioned by American trade representatives to carry a special cargo of 500 exhibits (1400 tons) - about a quarter to a third of America’s total exhibits - from America for the U.S.A. pavilion at Melbourne’s first International Exhibition. The exhibits included furniture, ironmongery, wines, chemicals, dental and surgical instruments, paper, cages, bronze lamp trimmings, axles, stamped ware, astronomical and time globes, samples of corn and the choicest of leaf tobacco. Other general cargo included merchandise such as cases of kerosene and turpentine, brooms, Bristol's Sarsaparilla, Wheeler and Wilson sewing machines, Wheeler’s thresher machine, axe handles and tools, cases of silver plate, toys, pianos and organs, carriages and Yankee notions. The Eric the Red left New York under the command of Captain Z. Allen (or some records say Captain Jacques Allen) and 24 other crew including the owner’s son third mate Ned Sewall. There were 2 saloon passengers also. On 4th September 1880 the ship had been sailing for an uneventful 85 days and the voyage was almost at its end. Eric the Red approached Cape Otway in a moderate north-west wind and hazy and overcast atmosphere. Around 1:30am Captain Allen sighted the Cape Otway light and was keeping the ship 5-6 miles offshore to stay clear of the hazardous Otway Reef. However he had badly misjudged his position. The ship hit the Otway Reef about 2 miles out to sea, south west of the Cape Otway light station. Captain Allen ordered the wheel to be put ‘hard up’ thinking that she might float off the reef. A heavy sea knocked the man away from the wheel, broke the wheel ropes and carried away the rudder. The sea swamped the lifeboats, the mizzenmast fell, with all of its rigging, then the mainmast fell and the ship broke in two. Some said that the passenger Vaughan, who was travelling for his health and not very strong, was washed overboard and never seen again. The ship started breaking up. The forward house came adrift with three of the crew on it as well as a longboat, which the men succeeded in launching and keeping afloat by continually bailing with their sea boots. The captain, the third mate (the owner’s son) and others clung to the mizzenmast in the sea. Then the owner’s son was washed away off the mast. Within 10 minutes the rest of the ship was in pieces, completely wrecked, with cargo and wreckage floating in the sea. The captain encouraged the second mate to swim with him to the deckhouse where there were other crew but the second mate wouldn’t go with him. Eventually the Captain made it to the deckhouse and the men pulled him up. At about 4:30am the group of men on the deckhouse saw the lights of a steamer and called for help. At the same time they noticed the second mate and the other man had drifted nearby, still on the spur, and pulled them both onto the wreck. The coastal steamer Dawn was returning to Warrnambool from Melbourne, its sailing time different to its usual schedule. Cries were heard coming from out of the darkness. Captain Jones sent out two life boats, and fired off rockets and blue lights to illuminate the area. They picked up the three survivors who were in the long boat from Eric the Red. Two men were picked up out of the water, one being the owner’s son who was clinging to floating kerosene boxes. At daylight the Dawn then rescued the 18 men from the floating portion of the deckhouse, which had drifted about 4 miles from where they’d struck the reef. Shortly after the rescue the deckhouse drifted onto breakers and was thrown onto rocks at Point Franklin, about 2 miles east of Cape Otway. Captain Jones had signalled to Cape Otway lighthouse the number of the Eric the Red and later signalled that there was a wreck at Otway Reef but there was no response from the lighthouse. The captain and crew of the Dawn spent several more hours searching unsuccessfully for more survivors, even going back as far as Apollo Bay. On board the Dawn the exhausted men received care and attention to their needs and wants, including much needed clothing. Captain Allen was amongst the 23 battered and injured men who were rescued and later taken to Warrnambool for care. Warrnambool’s mayor and town clerk offered them all hospitality, the three badly injured men going to the hospital and others to the Olive Branch Hotel, then on to Melbourne. Captain Allen’s leg injury prevented him from going ashore so he and three other men travelled on the Dawn to Portland. They were met by the mayor who also treated them all with great kindness. Captain Allen took the train back to Melbourne then returned to America. Those saved were Captain Z. Allen (or Jacques Allen), J. Darcy chief mate, James F. Lawrence second mate, Ned Sewall third mate and owner’s son, John French the cook, C. Nelson sail maker, Clarence W. New passenger, and the able seamen Dickenson, J. Black, Denis White, C. Herbert, C. Thompson, A. Brooks, D. Wilson, J. Ellis, Q. Thompson, C. Newman, W. Paul, J. Davis, M. Horenleng, J. Ogduff, T. W. Drew, R. Richardson. Four men had lost their lives; three of them were crew (Gus Dahlgreen ship’s carpenter, H. Ackman steward, who drowned in his cabin, and George Silver seaman) and one a passenger (J. B. Vaughan). The body of one of them had been found washed up at Cape Otway and was later buried in the lighthouse cemetery; another body was seen on an inaccessible ledge. Twelve months later the second mate James F. Lawrence, from Nova Scotia, passed away in the Warrnambool district; an obituary was displayed in the local paper. The captain and crew of the Dawn were recognised by the United States Government in July 1881 for their humane efforts and bravery, being thanked and presented with substantial monetary rewards, medals and gifts. Neither the ship, nor its cargo, was insured. The ship was worth about £15,000 and the cargo was reportedly worth £40,000; only about £2,000 worth had been recovered. Cargo and wreckage washed up at Apollo Bay, Peterborough, Port Campbell, Western Port and according to some reports, even as far away as the beaches of New Zealand. The day after the wreck the government steam ship Pharos was sent from Queenscliff to clear the shipping lanes of debris that could be a danger to ships. The large midship deckhouse of the ship was found floating in a calm sea near Henty Reef. Items such as an American chair, a ladder and a nest of boxes were all on top of the deckhouse. As it was so large and could cause danger to passing ships, Captain Payne had the deckhouse towed towards the shore just beyond Apollo Bay. Between Apollo Bay and Blanket Bay the captain and crew of Pharos collected Wheeler and Wilson sewing machines, nests of boxes, bottles of Bristol’s sarsaparilla, pieces of common American chairs, axe handles, a Wheelers’ Patent thresher and a sailor’s trunk with the words “A. James” on the front. A ship’s flag-board bearing the words “Eric the Red” was found on the deckhouse; finally those on board the Pharos had the name of the wrecked vessel. During this operation Pharos came across the government steamer Victoria and also a steamer S.S. Otway, both of which were picking up flotsam and wreckage. A whole side of the hull and three large pieces of the other side of the hull, with some of the copper sheathing stripped off, had floated on to Point Franklin. Some of the vessels yards and portions of her masts were on shore. The pieces of canvas attached to the yards and masts confirmed that the vessel had been under sail. The beach there was piled with debris several feet high. There were many cases of Diamond Oil kerosene, labelled R. W. Cameron and Company, New York. There were also many large planks of red pine, portions of a small white boat and a large, well-used oar. Other items found ashore included sewing machines (some consigned to ‘Long and Co.”) and notions, axe and scythe handles, hay forks, wooden pegs, rolls of wire (some branded “T.S” and Co, Melbourne”), kegs of nails branded “A.T. and Co.” from the factory of A. Field and Son, Taunton, Massachusetts, croquet balls and mallets, buggy fittings, rat traps, perfumery, cutlery and Douay Bibles, clocks, bicycles, chairs, a fly wheel, a cooking stove, timber, boxes, pianos, organs and a ladder. (Wooden clothes pegs drifted in for many years). There seemed to be no personal luggage or clothing. The Pharos encountered a long line, about one and a half miles, of floating wreckage about 10 miles off land, south east of Cape Otway, and in some places about 40 feet wide. It seemed that more than half of it was from Eric the Red. The ship’s crew rescued 3 cases that were for the Melbourne Exhibition and other items from amongst the debris. There were also chairs, doors, musical instruments, washing boards, nests of trunks and fly catchers floating in the sea. Most of the goods were saturated and smelt of kerosene. A section of the hull lies buried in the sand at Parker River Beach. An anchor with chain is embedded in the rocks east of Point Franklin and a second anchor, thought to be from Eric the Red, is on display at the Cape Otway light station. (There is a photograph of a life belt on the verandah of Rivernook Guest House in Princetown with the words “ERIC THE RED / BOSTON”. This is rather a mystery as the ship was registered in Bath, Maine, USA.) Parts of the ship are on display at Bimbi Park Caravan Park and at Apollo Bay Museum. Flagstaff Hill Maritime Village also has part of the helm (steering wheel), a carved wooden sword (said to be the only remaining portion of the ship’s figurehead; further research is currently being carried out), a door, a metal rod, samples of wood and a medal for bravery. Much of the wreckage was recovered by the local residents before police and other authorities arrived at the scene. Looters went to great effort to salvage goods, being lowered down the high cliff faces to areas with little or no beach to collect items from the wreckage, their mates above watching out for dangerous waves. A Tasmanian newspaper reports on a court case in Stawell, Victoria, noting a man who was caught 2 months later selling tobacco from the wreckage of Eric the Red. Some of the silverware is still treasured by descendants of Mr Mackenzie who was given these items by officials for his help in securing the cargo. The gifts included silver coffee and tea pots, half a dozen silver serviette rings and two sewing machines. The wreck and cargo were sold to a Melbourne man who salvaged a quantity of high quality tobacco and dental and surgical instruments. Timbers from the ship were salvaged and used in the construction of houses and sheds around Apollo Bay, including a guest house, Milford House (since burnt down in bushfires), which had furniture, fittings and timber on the dining room floor from the ship. A 39.7 foot long trading ketch, the Apollo, was also built from its timbers by Mr Burgess in 1883 and subsequently used in Tasmanian waters. It was the first attempt at ship building in Apollo bay. In 1881 a red light was installed about 300 feet above sea level at the base of the Cape Otway lighthouse to warn ships when they were too close to shore; It would not be visible unless a ship came within 3 miles from it. This has proved to be an effective warning. The State Library of Victoria has a lithograph in its collection depicting the steamer Dawn and the shipwrecked men, titled. "Wreck of the ship Eric the Red, Cape Otway: rescue of the crew by the Dawn". “The Eric the Red is historically significant as one of Victoria's major 19th century shipwrecks. (Heritage Victoria Eric the Red; HV ID 239) The wreck led to the provision of an additional warning light placed below the Cape Otway lighthouse to alert mariners to the location of Otway Reef. The site is archaeologically significant for its remains of a large and varied cargo and ship's fittings being scattered over a wide area. The site is recreationally and aesthetically significant as it is one of the few sites along this coast where tourists can visit identifiable remains of a large wooden shipwreck, and for its location set against the background of Cape Otway, Bass Strait, and the Cape Otway lighthouse.“ (Victorian Heritage Database Registration Number S239, Official Number 8745 USA) Segment of a ship's wheel, or helm, from the wreck of the sailing ship Eric the Red. The wheel part is an arc shape from the outer rim of the wheel and is made up of three layers of timber. The centre layer is a dark, dense timber and is wider than the two outer layers, which are less dense and lighter in colour. The wheel segment has a vertically symmetrical, decorative copper plate inlaid on the front. The plate has a starburst pattern; six stars decorate it, each at a point where there is a metal fitting going through the three layers of timber to the rear side of the wheel. On the rear each of the six fittings has an individual copper star around it. The edges of the helm are rounded and bevelled, polished to a shine in a dark stain. Around each of the stars, front and back, the wood is a lighter colour, as though the metal in that area being polished frequently. The length of the segment suggests that it has probably come from a wheel or helm that had ten spokes. (Ref: F.H.M.M. 16th March 1994, 239.6.610.3.7. Artefact Reg No ER/1.)flagstaff hill, warrnambool, shipwrecked-coast, flagstaff-hill, flagstaff-hill-maritime-museum, maritime-museum, shipwreck-coast, flagstaff-hill-maritime-village, ship's-wheel, eric-the-red, helm, shei's wheel, ship's steering wheel -
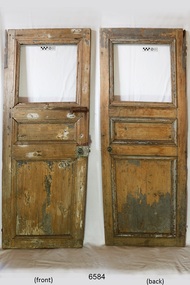 Flagstaff Hill Maritime Museum and Village
Furniture - Door, 1871 or earlier
The wooden door was salvaged from the wreck of the sailing ship Eric the Red, which was a wooden, three masted clipper ship. Eric the Red was the largest full-rigged ship built at Bath, Maine, USA in 1871, having had a 1,580 tons register. She was built and registered by Arthur Sewall, later to become the partnership E. & A. Sewall, the 51st ship built by this company. The annually-published List of Merchant Vessels of the U.S. shows Bath was still the home port of Eric the Red in 1880. The vessel was named after the Viking discoverer, Eric the Red, who was the first European to reach the shores of North America (in 980AD). The ship Eric the Red at first traded in coal between America and Britain, and later traded in guano nitrates from South America. In 1879 she was re-metalled and was in first class condition. On 10th June 1880 (some records say 12th June) Eric the Red departed New York for Melbourne and then Sydney. She had been commissioned by American trade representatives to carry a special cargo of 500 exhibits (1400 tons) – about a quarter to a third of America’s total exhibits - from America for the U.S.A. pavilion at Melbourne’s first International Exhibition. The exhibits included furniture, ironmongery, wines, chemicals, dental and surgical instruments, paper, cages, bronze lamp trimmings, axles, stamped ware, astronomical and time globes, samples of corn and the choicest of leaf tobacco. Other general cargo included merchandise such as cases of kerosene and turpentine, brooms, Bristol's Sarsaparilla, Wheeler and Wilson sewing machines, Wheeler’s thresher machine, axe handles and tools, cases of silver plate, toys, pianos and organs, carriages and Yankee notions. The Eric the Red left New York under the command of Captain Z. Allen (or some records say Captain Jacques Allen) and 24 other crew including the owner’s son third mate Ned Sewall. There were 2 saloon passengers also. The ship had been sailing for an uneventful 85 days and the voyage was almost at its end. On 4th September 1880 the Eric the Red approached Cape Otway with a moderate north-west wind and hazy and overcast atmosphere. Around 1:30am Captain Allen sighted the Cape Otway light and was keeping the ship 5-6 miles offshore to stay clear of the hazardous Otway Reef. However he had badly misjudged his position. The ship hit the Otway Reef about 2 miles out to sea, south west of the Cape Otway light station. He ordered the wheel to be put ‘hard up’ thinking that she might float off the reef. A heavy sea knocked the man away from the wheel, broke the wheel ropes and carried away the rudder. The sea swamped the lifeboats. The mizzenmast fell, with all of its rigging, then the mainmast also fell and the ship broke in two. Some said that the passenger Vaughan, who was travelling for his health and not very strong, was washed overboard and never seen again. The ship started breaking up. The forward house came adrift with three of the crew on it as well as a longboat, which the men succeeded in launching and keeping afloat by continually bailing with their sea boots. The captain, the third mate (the owner’s son) and others clung to the mizzenmast in the sea. Then the owner’s son was washed away off the mast. Within 10 minutes the rest of the ship was in pieces, completely wrecked, with cargo and wreckage floating in the sea. The captain encouraged the second mate to swim with him to the deckhouse where there were other crew but the second mate wouldn’t go with him. Eventually the Captain made it to the deckhouse and the men pulled him up. At about 4:30am the group of men on the deckhouse saw the lights of a steamer and called for help. At the same time they noticed the second mate and the other man had drifted nearby, still on the spur, and pulled them both onto the wreck. The coastal steamer Dawn was returning to Warrnambool from Melbourne, its sailing time different to its usual schedule. Captain Jones sent out two life boats, and fired off rockets and blue lights to illuminate the area. They picked up the three survivors who were in the long boat from Eric the Red. Two men were picked up out of the water, one being the owner’s son who was clinging to floating kerosene boxes. At daylight the Dawn then rescued the 18 men from the floating portion of the deckhouse, which had drifted about 4 miles from where they’d struck the reef. Shortly after the rescue the deckhouse drifted onto breakers and was thrown onto rocks at Point Franklin, about 2 miles east of Cape Otway. Captain Jones had signalled to Cape Otway lighthouse the number of the Eric the Red and later signalled that there was a wreck at Otway Reef but there was no response from the lighthouse. The captain and crew of the Dawn spent several more hours searching unsuccessfully for more survivors, even going back as far as Apollo Bay. On board the Dawn the exhausted men received care and attention to their needs and wants, including much needed clothing. Captain Allen was amongst the 23 battered and injured men who were rescued and later taken to Warrnambool for care. Warrnambool’s mayor and town clerk offered them all hospitality, the three badly injured men going to the hospital for care and others to the Olive Branch Hotel, then on to Melbourne. Captain Allen’s leg injury prevented him from going ashore so he and three other men travelled on the Dawn to Portland. They were met by the mayor who also treated them all with great kindness. Captain Allen took the train back to Melbourne then returned to America. Those saved were Captain Z. Allen (or Jacques Allen), J. Darcy chief mate, James F. Lawrence second mate, Ned Sewall third mate and owner’s son, John French the cook, C. Nelson sail maker, Clarence W. New passenger, and the able seamen Dickenson, J. Black, Denis White, C. Herbert, C. Thompson, A. Brooks, D. Wilson, J. Ellis, Q. Thompson, C. Newman, W. Paul, J. Davis, M. Horenleng, J. Ogduff, T. W. Drew, R. Richardson. Four men had lost their lives; three of them were crew (Gus Dahlgreen ship’s carpenter, H. Ackman steward, who drowned in his cabin, and George Silver seaman) and one a passenger (J. B. Vaughan). The body of one of them had been found washed up at Cape Otway and was later buried in the lighthouse cemetery; another body was seen on an inaccessible ledge. Twelve months later the second mate James F. Lawrence, from Nova Scotia, passed away in the Warrnambool district; an obituary was displayed in the local paper. The captain and crew of the Dawn were recognised by the United States Government in July 1881 for their humane efforts, being thanked and presented with substantial monetary rewards, medals and gifts. Neither the ship, nor its cargo, was insured. The ship was worth about £15,000 and the cargo was reportedly worth £40,000; only about £2,000 worth had been recovered. Cargo and wreckage washed up at Apollo Bay, Peterborough, Port Campbell, Western Port and according to some reports, even as far away as the beaches of New Zealand. The day after the wreck the government steam ship Pharos was sent from Queenscliff to clear the shipping lanes of debris that could be a danger to ships. The large midship deckhouse of the ship was found floating in a calm sea near Henty Reef. Items such as an American chair, a ladder and a nest of boxes were all on top of the deckhouse. As it was so large and could cause danger to passing ships, Captain Payne had the deckhouse towed towards the shore just beyond Apollo Bay. Between Apollo Bay and Blanket Bay the captain and crew of Pharos collected Wheeler and Wilson sewing machines, nests of boxes, bottles of Bristol’s sarsaparilla, pieces of common American chairs, axe handles, a Wheelers’ Patent thresher and a sailor’s trunk with the words “A. James” on the front. A ship’s flag-board bearing the words “Eric the Red” was found on the deckhouse; finally those on board the Pharos had the name of the wrecked vessel. During this operation Pharos came across the government steamer Victoria and also a steamer S.S. Otway, both of which were picking up flotsam and wreckage. A whole side of the hull and three large pieces of the other side of the hull, with some of the copper sheathing stripped off, had floated on to Point Franklin. Some of the vessels yards and portions of her masts were on shore. The pieces of canvas attached to the yards and masts confirmed that the vessel had been under sail. The beach there was piled with debris several feet high. There were many cases of Diamond Oil kerosene, labelled R. W. Cameron and Company, New York. There were also many large planks of red pine, portions of a small white boat and a large, well-used oar. Other items found ashore included sewing machines (some consigned to ‘Long and Co.”) and notions, axe and scythe handles, hay forks, wooden pegs, rolls of wire (some branded “T.S” and Co, Melbourne”), kegs of nails branded “A.T. and Co.” from the factory of A. Field and Son, Taunton, Massachusetts, croquet balls and mallets, buggy fittings, rat traps, perfumery, cutlery and Douay Bibles, clocks, bicycles, chairs, a fly wheel, a cooking stove, timber, boxes, pianos, organs and a ladder. (Wooden clothes pegs drifted in for many years). There seemed to be no personal luggage or clothing. The Pharos encountered a long line, about one and a half miles, of floating wreckage about 10 miles off land, south east of Cape Otway, and in some places about 40 feet wide. It seemed that more than half of it was from Eric the Red. The ship’s crew rescued 3 cases that were for the Melbourne Exhibition and other items from amongst the debris. There were also chairs, doors, musical instruments, washing boards, nests of trunks and fly catchers floating in the sea. Most of the goods were saturated and smelt of kerosene. A section of the hull lies buried in the sand at Parker River Beach. An anchor with chain is embedded in the rocks east of Point Franklin and a second anchor, thought to be from Eric the Red, is on display at the Cape Otway light station. (There is a photograph of a life belt on the verandah of Rivernook Guest House in Princetown with the words “ERIC THE RED / BOSTON”. This is rather a mystery as the ship was registered in Bath, Maine, USA.) Parts of the ship are on display at Bimbi Park Caravan Park and at Apollo Bay Museum. Flagstaff Hill Maritime Village also has part of the helm (steering wheel), a carved wooden sword (said to be the only remaining portion of the ship’s figurehead; further research is currently being carried out), a door, a metal rod and samples of wood. Much of the wreckage was recovered by the local residents before police and other authorities arrived at the scene. Looters went to great effort to salvage goods, being lowered down the high cliff faces to areas with little or no beach to collect items from the wreckage, their mates above watching out for dangerous waves. A Tasmanian newspaper reports on a court case in Stawell, Victoria, noting a man who was caught 2 months later selling tobacco from the wreckage of Eric the Red. Some of the silverware is still treasured by descendants of Mr Mackenzie who was given these items by officials for his help in securing the cargo. The gifts included silver coffee and tea pots, half a dozen silver serviette rings and two sewing machines. The wreck and cargo were sold to a Melbourne man who salvaged a quantity of high quality tobacco and dental and surgical instruments. Timbers from the ship were salvaged and used in the construction of houses and sheds around Apollo Bay, including a guest house, Milford House (since burnt down in bushfires), which had furniture, fittings and timber on the dining room floor from the ship. A 39.7 foot long trading ketch, the Apollo, was also built from its timbers by Mr Burgess in 1883 and subsequently used in Tasmanian waters. It was the first attempt at ship building in Apollo bay. In 1881 a red light was installed about 300 feet above sea level at the base of the Cape Otway lighthouse to warn ships when they were too close to shore; It would not be visible unless a ship came within 3 miles from it. This has proved to be an effective warning. The State Library of Victoria has a lithograph in its collection depicting the steamer Dawn and the shipwrecked men, titled. "Wreck of the ship Eric the Red, Cape Otway: rescue of the crew by the Dawn". “The Eric the Red is historically significant as one of Victoria's major 19th century shipwrecks. (Heritage Victoria Eric the Red; HV ID 239) The wreck led to the provision of an additional warning light placed below the Cape Otway lighthouse to alert mariners to the location of Otway Reef. The site is archaeologically significant for its remains of a large and varied cargo and ship's fittings being scattered over a wide area. The site is recreationally and aesthetically significant as it is one of the few sites along this coast where tourists can visit identifiable remains of a large wooden shipwreck, and for its location set against the background of Cape Otway, Bass Strait, and the Cape Otway lighthouse.“ (Victorian Heritage Database Registration Number S239, Official Number 8745 USA) Door from the wreck of the ship Eric the Red. The wooden singular rectangular door includes three insert panel sections. The top section is square shaped and is missing its panel or glass. The centre timber panel is about a third of the height of the top panel and the bottom timber panel is approximately equal in height to the total height of the two upper panels. The door fastenings include both a metal door latch and traditional door bolt. They are both attached to the front right hand side of the door. The bolt is just below the top panel, and the door latch is in approximately the centre of that side. The door latch has a round mark where a handle could have been attached. The wood of the door has scraping marks in a semi-circle around the door latch where the latch has swung around on its one remaining fastening and grazed the surface. There is a metal hinge at the top section of the door on the opposite side to the latch. The painted surface has been scraped back to expose the wood. The door is shorter than the average height of a person. On the reverse of the door there are lines on the panels, just inside their edges, is what appears to be pencil. The door is not aligned straight but is skew to centre.warrnambool, flagstaff hill, flagstaff hill maritime village, maritime museum, shipwreck coast, great ocean road, shipwreck artefact, eric the red, jaques allen, sewall, 1880, melbourne exhibition 1880, cape otway, otway reef, victorian shipwreck, bass strait, eric-the-red, door -
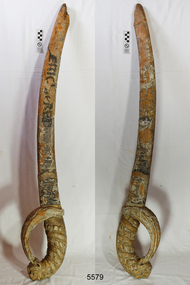 Flagstaff Hill Maritime Museum and Village
Decorative object - Sword, 1871 or earlier
This wooden sword is said to “possibly be the only remaining part of the figurehead from the sailing ship Eric the Red.” It was previously part of the collection of the old Warrnambool Museum and the entry in its inventory says “Wooden sword, portion of the figurehead, held by “Eric the Red” at the bow.” A large part of the ship’s hull was found on the rocks and a figurehead may have been attached or washed up on the shore. The shipping records for E. & A. Sewall, the builders, owners and managers of Eric the Red, are now preserved in the Maine Maritime Museum. There is no photograph on record of Eric the Red but photographs of other ships built around that time by the same company show that these did not have figureheads, and there is no record found of a figurehead for Eric the Red being ordered or paid for. Further research is being carried out. The ship building company E. & A. Sewall, from Bath, Maine, USA, built Eric the Red, a wooden, three masted clipper ship. She had 1,580 tons register and was the largest full-rigged ship built at Bath, Maine, USA in 1871. She was built and registered by Arthur Sewall, later to become the partnership E. & A. Sewall, and was the 51st ship built by this company. The annually-published List of Merchant Vessels of the U.S. shows that Bath was still the home port of Eric the Red in 1880. The vessel was named after the Viking discoverer, Eric the Red, who was the first European to reach the shores of North America (in 980AD). The ship Eric the Red at first traded in coal between America and Britain, and later traded in guano nitrates from South America. In 1879 she was re-metalled and was in first class condition. On 10th June 1880 (some records say 12th June) Eric the Red departed New York for Melbourne and then Sydney. She had been commissioned by American trade representatives to carry a special cargo of 500 exhibits (1400 tons) - about a quarter to a third of America’s total exhibits - from America for the U.S.A. pavilion at Melbourne’s first International Exhibition. The exhibits included furniture, ironmongery, wines, chemicals, dental and surgical instruments, paper, cages, bronze lamp trimmings, axles, stamped ware, astronomical and time globes, samples of corn and the choicest of leaf tobacco. Other general cargo included merchandise such as cases of kerosene and turpentine, brooms, Bristol's Sarsaparilla, Wheeler and Wilson sewing machines, Wheeler’s thresher machine, axe handles and tools, cases of silver plate, toys, pianos and organs, carriages and Yankee notions. The Eric the Red left New York under the command of Captain Z. Allen (or some records say Captain Jacques Allen) and 24 other crew including the owner’s son third mate Ned Sewall. There were 2 saloon passengers also. On 4th September 1880 the ship had been sailing for an uneventful 85 days and the voyage was almost at its end. Eric the Red approached Cape Otway in a moderate north-west wind and hazy and overcast atmosphere. Around 1:30am Captain Allen sighted the Cape Otway light and was keeping the ship 5-6 miles offshore to stay clear of the hazardous Otway Reef. However he had badly misjudged his position. The ship hit the Otway Reef about 2 miles out to sea, south west of the Cape Otway light station. Captain Allen ordered the wheel to be put ‘hard up’ thinking that she might float off the reef. A heavy sea knocked the man away from the wheel, broke the wheel ropes and carried away the rudder. The sea swamped the lifeboats, the mizzenmast fell, with all of its rigging, then the mainmast fell and the ship broke in two. Some said that the passenger Vaughan, who was travelling for his health and not very strong, was washed overboard and never seen again. The ship started breaking up. The forward house came adrift with three of the crew on it as well as a longboat, which the men succeeded in launching and keeping afloat by continually bailing with their sea boots. The captain, the third mate (the owner’s son) and others clung to the mizzenmast in the sea. Then the owner’s son was washed away off the mast. Within 10 minutes the rest of the ship was in pieces, completely wrecked, with cargo and wreckage floating in the sea. The captain encouraged the second mate to swim with him to the deckhouse where there were other crew but the second mate wouldn’t go with him. Eventually the Captain made it to the deckhouse and the men pulled him up. At about 4:30am the group of men on the deckhouse saw the lights of a steamer and called for help. At the same time they noticed the second mate and the other man had drifted nearby, still on the spur, and pulled them both onto the wreck. The coastal steamer Dawn was returning to Warrnambool from Melbourne, its sailing time different to its usual schedule. Cries were heard coming from out of the darkness. Captain Jones sent out two life boats, and fired off rockets and blue lights to illuminate the area. They picked up the three survivors who were in the long boat from Eric the Red. Two men were picked up out of the water, one being the owner’s son who was clinging to floating kerosene boxes. At daylight the Dawn then rescued the 18 men from the floating portion of the deckhouse, which had drifted about 4 miles from where they’d struck the reef. Shortly after the rescue the deckhouse drifted onto breakers and was thrown onto rocks at Point Franklin, about 2 miles east of Cape Otway. Captain Jones had signalled to Cape Otway lighthouse the number of the Eric the Red and later signalled that there was a wreck at Otway Reef but there was no response from the lighthouse. The captain and crew of the Dawn spent several more hours searching unsuccessfully for more survivors, even going back as far as Apollo Bay. On board the Dawn the exhausted men received care and attention to their needs and wants, including much needed clothing. Captain Allen was amongst the 23 battered and injured men who were rescued and later taken to Warrnambool for care. Warrnambool’s mayor and town clerk offered them all hospitality, the three badly injured men going to the hospital and others to the Olive Branch Hotel, then on to Melbourne. Captain Allen’s leg injury prevented him from going ashore so he and three other men travelled on the Dawn to Portland. They were met by the mayor who also treated them all with great kindness. Captain Allen took the train back to Melbourne then returned to America. Those saved were Captain Z. Allen (or Jacques Allen), J. Darcy chief mate, James F. Lawrence second mate, Ned Sewall third mate and owner’s son, John French the cook, C. Nelson sail maker, Clarence W. New passenger, and the able seamen Dickenson, J. Black, Denis White, C. Herbert, C. Thompson, A. Brooks, D. Wilson, J. Ellis, Q. Thompson, C. Newman, W. Paul, J. Davis, M. Horenleng, J. Ogduff, T. W. Drew, R. Richardson. Four men had lost their lives; three of them were crew (Gus Dahlgreen ship’s carpenter, H. Ackman steward, who drowned in his cabin, and George Silver seaman) and one a passenger (J. B. Vaughan). The body of one of them had been found washed up at Cape Otway and was later buried in the lighthouse cemetery; another body was seen on an inaccessible ledge. Twelve months later the second mate James F. Lawrence, from Nova Scotia, passed away in the Warrnambool district; an obituary was displayed in the local paper. The captain and crew of the Dawn were recognised by the United States Government in July 1881 for their humane efforts and bravery, being thanked and presented with substantial monetary rewards, medals and gifts. Neither the ship, nor its cargo, was insured. The ship was worth about £15,000 and the cargo was reportedly worth £40,000; only about £2,000 worth had been recovered. Cargo and wreckage washed up at Apollo Bay, Peterborough, Port Campbell, Western Port and according to some reports, even as far away as the beaches of New Zealand. The day after the wreck the government steam ship Pharos was sent from Queenscliff to clear the shipping lanes of debris that could be a danger to ships. The large midship deckhouse of the ship was found floating in a calm sea near Henty Reef. Items such as an American chair, a ladder and a nest of boxes were all on top of the deckhouse. As it was so large and could cause danger to passing ships, Captain Payne had the deckhouse towed towards the shore just beyond Apollo Bay. Between Apollo Bay and Blanket Bay the captain and crew of Pharos collected Wheeler and Wilson sewing machines, nests of boxes, bottles of Bristol’s sarsaparilla, pieces of common American chairs, axe handles, a Wheelers’ Patent thresher and a sailor’s trunk with the words “A. James” on the front. A ship’s flag-board bearing the words “Eric the Red” was found on the deckhouse; finally those on board the Pharos had the name of the wrecked vessel. During this operation Pharos came across the government steamer Victoria and also a steamer S.S. Otway, both of which were picking up flotsam and wreckage. A whole side of the hull and three large pieces of the other side of the hull, with some of the copper sheathing stripped off, had floated on to Point Franklin. Some of the vessels yards and portions of her masts were on shore. The pieces of canvas attached to the yards and masts confirmed that the vessel had been under sail. The beach there was piled with debris several feet high. There were many cases of Diamond Oil kerosene, labelled R. W. Cameron and Company, New York. There were also many large planks of red pine, portions of a small white boat and a large, well-used oar. Other items found ashore included sewing machines (some consigned to ‘Long and Co.”) and notions, axe and scythe handles, hay forks, wooden pegs, rolls of wire (some branded “T.S” and Co, Melbourne”), kegs of nails branded “A.T. and Co.” from the factory of A. Field and Son, Taunton, Massachusetts, croquet balls and mallets, buggy fittings, rat traps, perfumery, cutlery and Douay Bibles, clocks, bicycles, chairs, a fly wheel, a cooking stove, timber, boxes, pianos, organs and a ladder. (Wooden clothes pegs drifted in for many years). There seemed to be no personal luggage or clothing. The Pharos encountered a long line, about one and a half miles, of floating wreckage about 10 miles off land, south east of Cape Otway, and in some places about 40 feet wide. It seemed that more than half of it was from Eric the Red. The ship’s crew rescued 3 cases that were for the Melbourne Exhibition and other items from amongst the debris. There were also chairs, doors, musical instruments, washing boards, nests of trunks and fly catchers floating in the sea. Most of the goods were saturated and smelt of kerosene. A section of the hull lies buried in the sand at Parker River Beach. An anchor with chain is embedded in the rocks east of Point Franklin and a second anchor, thought to be from Eric the Red, is on display at the Cape Otway light station. (There is a photograph of a life belt on the verandah of Rivernook Guest House in Princetown with the words “ERIC THE RED / BOSTON”. This is rather a mystery as the ship was registered in Bath, Maine, USA.) Parts of the ship are on display at Bimbi Park Caravan Park and at Apollo Bay Museum. Flagstaff Hill Maritime Village also has part of the helm (steering wheel), a carved wooden sword (said to be the only remaining portion of the ship’s figurehead; further research is currently being carried out), a door, a metal rod, samples of wood and a medal for bravery. Much of the wreckage was recovered by the local residents before police and other authorities arrived at the scene. Looters went to great effort to salvage goods, being lowered down the high cliff faces to areas with little or no beach to collect items from the wreckage, their mates above watching out for dangerous waves. A Tasmanian newspaper reports on a court case in Stawell, Victoria, noting a man who was caught 2 months later selling tobacco from the wreckage of Eric the Red. Some of the silverware is still treasured by descendants of Mr Mackenzie who was given these items by officials for his help in securing the cargo. The gifts included silver coffee and tea pots, half a dozen silver serviette rings and two sewing machines. The wreck and cargo were sold to a Melbourne man who salvaged a quantity of high quality tobacco and dental and surgical instruments. Timbers from the ship were salvaged and used in the construction of houses and sheds around Apollo Bay, including a guest house, Milford House (since burnt down in bushfires), which had furniture, fittings and timber on the dining room floor from the ship. A 39.7 foot long trading ketch, the Apollo, was also built from its timbers by Mr Burgess in 1883 and subsequently used in Tasmanian waters. It was the first attempt at ship building in Apollo bay. In 1881 a red light was installed about 300 feet above sea level at the base of the Cape Otway lighthouse to warn ships when they were too close to shore; It would not be visible unless a ship came within 3 miles from it. This has proved to be an effective warning. The State Library of Victoria has a lithograph in its collection depicting the steamer Dawn and the shipwrecked men, titled. "Wreck of the ship Eric the Red, Cape Otway: rescue of the crew by the Dawn".The Eric the Red is historically significant as one of Victoria's major 19th century shipwrecks. (Heritage Victoria Eric the Red; HV ID 239) The wreck led to the provision of an additional warning light placed below the Cape Otway lighthouse to alert mariners to the location of Otway Reef. The site is archaeologically significant for its remains of a large and varied cargo and ship's fittings being scattered over a wide area. The site is recreationally and aesthetically significant as it is one of the few sites along this coast where tourists can visit identifiable remains of a large wooden shipwreck, and for its location set against the background of Cape Otway, Bass Strait, and the Cape Otway lighthouse. (Victorian Heritage Database Registration Number S239, Official Number 8745 USA)This carved wooden sword, recovered from the Eric the Red, is possibly the only portion of the figurehead recovered after the wreck. There are spirals carved from the base of the handle to the top of the sword. The hilt of the sword is a lion’s head holding its tail in its mouth, the tail forming the handle. The blade of the sword has engraved patterns on it. Tiny particles of gold leaf and dark blue paint fragments can be seen between the carving marks. There are remnants of yellowish-orange and crimson paint on the handle. At some time after the sword was salvaged the name of the ship was hand painted on the blade in black paint. The tip of the sword has broken or split and the remaining part is charcoal in appearance. On both the tip and the base of the handle are parts made where the sword could have been joined onto the figurehead There is a white coating over some areas of the sword, similar to white lead putty used in traditional shipbuilding. The words “ERIC the RED” have been hand painted on the blade of the sword in black paint sometime after it was salvaged.flagstaff hill, flagstaff hill maritime museum and village, warrnambool, maritime museum, maritime village, great ocean road, shipwreck coast, sword, wooden sword, eric the red, carved sword, figurehead, snake head on sword -
 Flagstaff Hill Maritime Museum and Village
Wood Sample, about 1871
This piece of timber from the ship Eric the Red has been eaten through by the marine animals called Teredo Worms, sometimes called sea worms or ‘termites of the sea’. The worms bore holes into wood that is immersed in sea water and bacteria inside the worms digest the wood. Shipbuilders tried to prevent this problem by using coatings of tar, wax, lead or pitch. In the 18th and 19th centuries the outside of their ships were sheathed in copper or a combination of copper and zinc (called Muntz metal) and would be re-metalled periodically to ensure the sheathing would remain effective. In more recent times the ships are protected with a toxic coating. The American ship Eric the Red was a wooden, three masted clipper ship. She had 1,580 tons register and was the largest full-rigged ship built at Bath, Maine, USA in 1871. She was built and registered by Arthur Sewall, later to become the partnership E. & A. Sewall, the 51st ship built by this company. The annually-published List of Merchant Vessels of the U.S. shows Bath was still the home port of Eric the Red in 1880. The vessel was named after the Viking discoverer, Eric ‘the Red-haired’ Thorvaldsson , who was the first European to reach the shores of North America (in 980AD). The ship Eric the Red at first traded in coal between America and Britain, and later traded in guano nitrates from South America. In 1879 she was re-metalled and was in first class condition. On 10th June 1880 (some records say 12th June) Eric the Red departed New York for Melbourne and then Sydney. She had been commissioned by American trade representatives to carry a special cargo of 500 exhibits (1400 tons) – about a quarter to a third of America’s total exhibits - for the U.S.A. pavilion at Melbourne’s first International Exhibition. The exhibits included furniture, ironmongery, wines, chemicals, dental and surgical instruments, paper, cages, bronze lamp trimmings, axles, stamped ware, astronomical and time globes, samples of corn and the choicest of leaf tobacco. Other general cargo included merchandise such as cases of kerosene and turpentine, brooms, Bristol's Sarsaparilla, Wheeler and Wilson sewing machines, Wheeler’s thresher machine, axe handles and tools, cases of silver plate, toys, pianos and organs, carriages and Yankee notions. The Eric the Red left New York under the command of Captain Zaccheus Allen (or some records say Captain Jacques Allen) and 24 other crew including the owner’s son third mate Ned Sewall. There were also 2 saloon passengers on board. The ship had been sailing for an uneventful 85 days and the voyage was almost at its end. As Eric the Red approached Cape Otway there was a moderate north-west wind and hazy and overcast atmosphere. On 4th September 1880 at about 1:30am Captain Allen sighted the Cape Otway light and was keeping the ship 5-6 miles offshore to stay clear of the hazardous Otway Reef. However he had badly misjudged his position. The ship hit the Otway Reef about 2 miles out to sea, south west of the Cape Otway light station. Captain Allen ordered the wheel to be put ‘hard up’ thinking that she might float off the reef. The sea knocked the helmsman away from the wheel, broke the wheel ropes and carried away the rudder. The lifeboats were swamped, the mizzenmast fell, with all of its rigging, then the mainmast also fell and the ship broke in two. Some said that the passenger Vaughan, who was travelling for his health and not very strong, was washed overboard and never seen again. The ship started breaking up. The forward house came adrift with three of the crew on it as well as a longboat, which the men succeeded in launching and keeping afloat by continually bailing with their sea boots. The captain, the third mate (the owner’s son) and others clung to the mizzenmast in the sea. Then the owner’s son was washed away off the mast. Within 10 minutes the rest of the ship was in pieces, completely wrecked, with cargo and wreckage floating in the sea. The captain encouraged the second mate to swim with him to the deckhouse where there were other crew but the second mate wouldn’t go with him. Eventually the Captain made it to the deckhouse and the men pulled him up. At about 4:30am the group of men on the deckhouse saw the lights of a steamer and called for help. At the same time they noticed the second mate and the other man had drifted nearby, still on the spur, and pulled them both onto the wreck. The coastal steamer SS Dawn was returning to Warrnambool from Melbourne, its sailing time different to its usual schedule. She was built in 1876 and bought by the Portland and Belfast Steam Navigation Co. in 1877. At the time of this journey she was commanded by Captain Jones, and was sailing between Melbourne and Portland via Warrnambool. The provedore of the Dawn, Benjamin Lear, heard cries of distress coming through the portholes of the saloon. He gave the alarm and the engines were stopped. Cries could be heard clearly, coming from the land. Captain Jones sent out crew in two boats, and fired off rockets and blue lights to illuminate the area. They picked up the three survivors who were in the long boat from Eric the Red. Two men were picked up out of the water, one being the owner’s son who was clinging to floating kerosene boxes. At daylight the Dawn then rescued the 18 men from the floating portion of the deckhouse, which had drifted about 4 miles from where they’d struck the reef. Shortly after the rescue the deckhouse drifted onto breakers and was thrown onto rocks at Point Franklin, about 2 miles east of Cape Otway. Captain Jones had signalled to Cape Otway lighthouse the number of the Eric the Red and later signalled that there was a wreck at Otway Reef but there was no response from the lighthouse. The captain and crew of the Dawn spent several more hours searching unsuccessfully for more survivors, even going back as far as Apollo Bay. On board the Dawn the exhausted men received care and attention to their needs and wants, including much needed clothing. Captain Allen was amongst the 23 battered and injured men who were rescued and later taken to Warrnambool for care. Warrnambool’s mayor and town clerk offered them all hospitality, the three badly injured men going to the hospital for care and others to the Olive Branch Hotel, then on to Melbourne. Captain Allen’s leg injury prevented him from going ashore so he and three other men travelled on the Dawn to Portland. They were met by the mayor who also treated them all with great kindness. Captain Allen took the train back to Melbourne then returned to America. Those saved were Captain Zaccheus Allen (or Jacques Allen), J. Darcy chief mate, James F. Lawrence second mate, Ned Sewall third mate and owner’s son, John French the cook, C. Nelson sail maker, Clarence W. New passenger, and the able seamen Dickenson, J. Black, Denis White, C. Herbert, C. Thompson, A. Brooks, D. Wilson, J. Ellis, Q. Thompson, C. Newman, W. Paul, J. Davis, M. Horenleng, J. Ogduff, T. W. Drew, R. Richardson. Four men had lost their lives; three of them were crew (Gus Dahlgreen ship’s carpenter, H. Ackman steward, who drowned in his cabin, and George Silver seaman) and one a passenger (J. B. Vaughan). The body of one of them had been found washed up at Cape Otway and was later buried in the lighthouse cemetery; another body was seen on an inaccessible ledge. Twelve months later the second mate James F. Lawrence, from Nova Scotia, passed away in the Warrnambool district; an obituary was displayed in the local paper. Neither the ship, nor its cargo, was insured. The ship was worth about £15,000 and the cargo was reportedly worth £40,000; only about £2,000 worth had been recovered. Cargo and wreckage washed up at Apollo Bay, Peterborough, Port Campbell, Western Port and according to some reports, even as far away as the beaches of New Zealand. The day after the wreck the government steam ship Pharos was sent from Queenscliff to clear the shipping lanes of debris that could be a danger to ships. The large midship deckhouse of the ship was found floating in a calm sea near Henty Reef. Items such as an American chair, a ladder and a nest of boxes were all on top of the deckhouse. As it was so large and could cause danger to passing ships, Captain Payne had the deckhouse towed towards the shore just beyond Apollo Bay. Between Apollo Bay and Blanket Bay the captain and crew of Pharos collected Wheeler and Wilson sewing machines, nests of boxes, bottles of Bristol’s sarsaparilla, pieces of common American chairs, axe handles, a Wheelers’ Patent thresher and a sailor’s trunk with the words “A. James” on the front. A ship’s flag-board bearing the words “Eric the Red” was found on the deckhouse; finally those on board the Pharos had the name of the wrecked vessel. During this operation Pharos came across the government steamer Victoria and also a steamer S.S. Otway, both of which were picking up flotsam and wreckage. A whole side of the hull and three large pieces of the other side of the hull, with some of the copper sheathing stripped off, had floated on to Point Franklin. Some of the vessels yards and portions of her masts were on shore. The pieces of canvas attached to the yards and masts confirmed that the vessel had been under sail. The beach there was piled with debris several feet high. There were many cases of Diamond Oil kerosene, labelled R. W. Cameron and Company, New York. There were also many large planks of red pine, portions of a small white boat and a large, well-used oar. Other items found ashore included sewing machines (some consigned to ‘Long and Co.”) and notions, axe and scythe handles, hay forks, wooden pegs, rolls of wire (some branded “T.S” and Co, Melbourne”), kegs of nails branded “A.T. and Co.” from the factory of A. Field and Son, Taunton, Massachusetts, croquet balls and mallets, buggy fittings, rat traps, perfumery, cutlery and Douay Bibles, clocks, bicycles, chairs, a fly wheel, a cooking stove, timber, boxes, pianos, organs and a ladder. (Wooden clothes pegs drifted in for many years). There seemed to be no personal luggage or clothing. The Pharos encountered a long line, about one and a half miles, of floating wreckage about 10 miles off land, south east of Cape Otway, and in some places about 40 feet wide. It seemed that more than half of it was from Eric the Red. The ship’s crew rescued 3 cases that were for the Melbourne Exhibition and other items from amongst the debris. There were also chairs, doors, musical instruments, washing boards, nests of trunks and fly catchers floating in the sea. Most of the goods were saturated and smelt of kerosene. A section of the hull lies buried in the sand at Parker River Beach. An anchor with chain is embedded in the rocks east of Point Franklin and a second anchor, thought to be from Eric the Red, is on display at the Cape Otway light station. (There is a photograph of a life belt on the verandah of Rivernook Guest House in Princetown with the words “ERIC THE RED / BOSTON”. This is rather a mystery as the ship was registered in Bath, Maine, USA.) Parts of the ship are on display at Bimbi Park Caravan Park and at Apollo Bay Museum. Flagstaff Hill Maritime Village also has part of the helm (steering wheel), a carved wooden sword (said to be the only remaining portion of the ship’s figurehead; further research is currently being carried out), a door, a metal rod, several samples of wood and a medal for bravery, awarded to Nelson Johnson, a crew member of the S.S. Dawn by the U.S. President, for the rescue of the crew. Much of the wreckage was recovered by the local residents before police and other authorities arrived at the scene. Looters went to great effort to salvage goods, being lowered down the high cliff faces to areas with little or no beach to collect items from the wreckage, their mates above watching out for dangerous waves. A Tasmanian newspaper reports on a court case in Stawell, Victoria, noting a man who was caught 2 months later selling tobacco from the wreckage of Eric the Red. Some of the silverware is still treasured by descendants of Mr Mackenzie who was given these items by officials for his help in securing the cargo. The gifts included silver coffee and tea pots, half a dozen silver serviette rings and two sewing machines. A Mr G.W. Black has in his possession a medal and a purse that were awarded to his father, another Dawn crew member who was part of the rescue team. The medal is inscribed and named “To John Black ….” (from “Shipwrecks” by Margaret E. Mackenzie, 3rd edition, published 1964). The wreck and cargo were sold to a Melbourne man who salvaged a quantity of high quality tobacco and dental and surgical instruments. Timbers from the ship were salvaged and used in the construction of houses and sheds around Apollo Bay, including a guest house, Milford House (since burnt down in bushfires), which had furniture, fittings and timber on the dining room floor from the ship. A 39.7 foot long trading ketch, the Apollo, was also built from its timbers by Mr Burgess in 1883 and subsequently used in Tasmanian waters. It was the first attempt at ship building in Apollo bay. In 1881 a red light was installed about 300 feet above sea level at the base of the Cape Otway lighthouse to warn ships when they were too close to shore; It would not be visible unless a ship came within 3 miles from it. This has proved to be an effective warning. Nelson Johnson, recipient of the medal for bravery, married Elizabeth Howard in 1881 and they had 10 children. They lived in South Melbourne, Victoria. Nelson died in 1922 in Fitzroy Victoria, age 66. In 1895 the owners of the S.S. Dawn, the Portland and Belfast Steam Navigation Co., wound up and sold out to the Belfast Company who took over the Dawn for one year before selling her to Howard Smith. She was condemned and sunk in Suva in 1928. The State Library of Victoria has a lithograph in its collection depicting the steamer Dawn and the shipwrecked men, titled. "Wreck of the ship Eric the Red, Cape Otway: rescue of the crew by the Dawn".The wood (timber) sample is listed on the Collections Australia Database, Heritage Victoria, number 239 00010 A “The Eric the Red is historically significant as one of Victoria's major 19th century shipwrecks. (Heritage Victoria Eric the Red; HV ID 239) The wreck led to the provision of an additional warning light placed below the Cape Otway lighthouse to alert mariners to the location of Otway Reef. The site is archaeologically significant for its remains of a large and varied cargo and ship's fittings being scattered over a wide area. The site is recreationally and aesthetically significant as it is one of the few sites along this coast where tourists can visit identifiable remains of a large wooden shipwreck, and for its location set against the background of Cape Otway, Bass Strait, and the Cape Otway lighthouse.“ (Victorian Heritage Database Registration Number S239, Official Number 8745 USA) Wood sample from the wreck of the ship Eric the Red. Triangular shaped, full of sea worm (Teredo worm) holes. The wood is dark in colour and is very light in weight.flagstaff hill, warrnambool, shipwrecked-coast, flagstaff-hill, flagstaff-hill-maritime-museum, maritime-museum, shipwreck-coast, flagstaff-hill-maritime-village, shipwreck-artefact, eric-the-red, zaccheus-allen, sewall, 1880, melbourne-exhibition, cape-otway, otway-reef, wood-sample, s.s.-dawn -
 Flagstaff Hill Maritime Museum and Village
Wood Sample, About 1871
This piece of timber from the ship Eric the Red has been eaten through by the marine animals called Teredo Worms, sometimes called sea worms or ‘termites of the sea’. The worms bore holes into wood that is immersed in sea water and bacteria inside the worms digest the wood. Shipbuilders tried to prevent this problem by using coatings of tar, wax, lead or pitch. In the 18th and 19th centuries the outside of their ships were sheathed in copper or a combination of copper and zinc (called Muntz metal) and would be re-metalled periodically to ensure the sheathing would remain effective. In more recent times the ships are protected with a toxic coating. The American ship Eric the Red was a wooden, three masted clipper ship. She had 1,580 tons register and was the largest full-rigged ship built at Bath, Maine, USA in 1871. She was built and registered by Arthur Sewall, later to become the partnership E. & A. Sewall, the 51st ship built by this company. The annually-published List of Merchant Vessels of the U.S. shows Bath was still the home port of Eric the Red in 1880. The vessel was named after the Viking discoverer, Eric ‘the Red-haired’ Thorvaldsson , who was the first European to reach the shores of North America (in 980AD). The ship Eric the Red at first traded in coal between America and Britain, and later traded in guano nitrates from South America. In 1879 she was re-metalled and was in first class condition. On 10th June 1880 (some records say 12th June) Eric the Red departed New York for Melbourne and then Sydney. She had been commissioned by American trade representatives to carry a special cargo of 500 exhibits (1400 tons) – about a quarter to a third of America’s total exhibits - for the U.S.A. pavilion at Melbourne’s first International Exhibition. The exhibits included furniture, ironmongery, wines, chemicals, dental and surgical instruments, paper, cages, bronze lamp trimmings, axles, stamped ware, astronomical and time globes, samples of corn and the choicest of leaf tobacco. Other general cargo included merchandise such as cases of kerosene and turpentine, brooms, Bristol's Sarsaparilla, Wheeler and Wilson sewing machines, Wheeler’s thresher machine, axe handles and tools, cases of silver plate, toys, pianos and organs, carriages and Yankee notions. The Eric the Red left New York under the command of Captain Zaccheus Allen (or some records say Captain Jacques Allen) and 24 other crew including the owner’s son third mate Ned Sewall. There were also 2 saloon passengers on board. The ship had been sailing for an uneventful 85 days and the voyage was almost at its end. As Eric the Red approached Cape Otway there was a moderate north-west wind and hazy and overcast atmosphere. On 4th September 1880 at about 1:30am Captain Allen sighted the Cape Otway light and was keeping the ship 5-6 miles offshore to stay clear of the hazardous Otway Reef. However he had badly misjudged his position. The ship hit the Otway Reef about 2 miles out to sea, south west of the Cape Otway light station. Captain Allen ordered the wheel to be put ‘hard up’ thinking that she might float off the reef. The sea knocked the helmsman away from the wheel, broke the wheel ropes and carried away the rudder. The lifeboats were swamped, the mizzenmast fell, with all of its rigging, then the mainmast also fell and the ship broke in two. Some said that the passenger Vaughan, who was travelling for his health and not very strong, was washed overboard and never seen again. The ship started breaking up. The forward house came adrift with three of the crew on it as well as a longboat, which the men succeeded in launching and keeping afloat by continually bailing with their sea boots. The captain, the third mate (the owner’s son) and others clung to the mizzenmast in the sea. Then the owner’s son was washed away off the mast. Within 10 minutes the rest of the ship was in pieces, completely wrecked, with cargo and wreckage floating in the sea. The captain encouraged the second mate to swim with him to the deckhouse where there were other crew but the second mate wouldn’t go with him. Eventually the Captain made it to the deckhouse and the men pulled him up. At about 4:30am the group of men on the deckhouse saw the lights of a steamer and called for help. At the same time they noticed the second mate and the other man had drifted nearby, still on the spur, and pulled them both onto the wreck. The coastal steamer SS Dawn was returning to Warrnambool from Melbourne, its sailing time different to its usual schedule. She was built in 1876 and bought by the Portland and Belfast Steam Navigation Co. in 1877. At the time of this journey she was commanded by Captain Jones, and was sailing between Melbourne and Portland via Warrnambool. The provedore of the Dawn, Benjamin Lear, heard cries of distress coming through the portholes of the saloon. He gave the alarm and the engines were stopped. Cries could be heard clearly, coming from the land. Captain Jones sent out crew in two boats, and fired off rockets and blue lights to illuminate the area. They picked up the three survivors who were in the long boat from Eric the Red. Two men were picked up out of the water, one being the owner’s son who was clinging to floating kerosene boxes. At daylight the Dawn then rescued the 18 men from the floating portion of the deckhouse, which had drifted about 4 miles from where they’d struck the reef. Shortly after the rescue the deckhouse drifted onto breakers and was thrown onto rocks at Point Franklin, about 2 miles east of Cape Otway. Captain Jones had signalled to Cape Otway lighthouse the number of the Eric the Red and later signalled that there was a wreck at Otway Reef but there was no response from the lighthouse. The captain and crew of the Dawn spent several more hours searching unsuccessfully for more survivors, even going back as far as Apollo Bay. On board the Dawn the exhausted men received care and attention to their needs and wants, including much needed clothing. Captain Allen was amongst the 23 battered and injured men who were rescued and later taken to Warrnambool for care. Warrnambool’s mayor and town clerk offered them all hospitality, the three badly injured men going to the hospital for care and others to the Olive Branch Hotel, then on to Melbourne. Captain Allen’s leg injury prevented him from going ashore so he and three other men travelled on the Dawn to Portland. They were met by the mayor who also treated them all with great kindness. Captain Allen took the train back to Melbourne then returned to America. Those saved were Captain Zaccheus Allen (or Jacques Allen), J. Darcy chief mate, James F. Lawrence second mate, Ned Sewall third mate and owner’s son, John French the cook, C. Nelson sail maker, Clarence W. New passenger, and the able seamen Dickenson, J. Black, Denis White, C. Herbert, C. Thompson, A. Brooks, D. Wilson, J. Ellis, Q. Thompson, C. Newman, W. Paul, J. Davis, M. Horenleng, J. Ogduff, T. W. Drew, R. Richardson. Four men had lost their lives; three of them were crew (Gus Dahlgreen ship’s carpenter, H. Ackman steward, who drowned in his cabin, and George Silver seaman) and one a passenger (J. B. Vaughan). The body of one of them had been found washed up at Cape Otway and was later buried in the lighthouse cemetery; another body was seen on an inaccessible ledge. Twelve months later the second mate James F. Lawrence, from Nova Scotia, passed away in the Warrnambool district; an obituary was displayed in the local paper. Neither the ship, nor its cargo, was insured. The ship was worth about £15,000 and the cargo was reportedly worth £40,000; only about £2,000 worth had been recovered. Cargo and wreckage washed up at Apollo Bay, Peterborough, Port Campbell, Western Port and according to some reports, even as far away as the beaches of New Zealand. The day after the wreck the government steam ship Pharos was sent from Queenscliff to clear the shipping lanes of debris that could be a danger to ships. The large midship deckhouse of the ship was found floating in a calm sea near Henty Reef. Items such as an American chair, a ladder and a nest of boxes were all on top of the deckhouse. As it was so large and could cause danger to passing ships, Captain Payne had the deckhouse towed towards the shore just beyond Apollo Bay. Between Apollo Bay and Blanket Bay the captain and crew of Pharos collected Wheeler and Wilson sewing machines, nests of boxes, bottles of Bristol’s sarsaparilla, pieces of common American chairs, axe handles, a Wheelers’ Patent thresher and a sailor’s trunk with the words “A. James” on the front. A ship’s flag-board bearing the words “Eric the Red” was found on the deckhouse; finally those on board the Pharos had the name of the wrecked vessel. During this operation Pharos came across the government steamer Victoria and also a steamer S.S. Otway, both of which were picking up flotsam and wreckage. A whole side of the hull and three large pieces of the other side of the hull, with some of the copper sheathing stripped off, had floated on to Point Franklin. Some of the vessels yards and portions of her masts were on shore. The pieces of canvas attached to the yards and masts confirmed that the vessel had been under sail. The beach there was piled with debris several feet high. There were many cases of Diamond Oil kerosene, labelled R. W. Cameron and Company, New York. There were also many large planks of red pine, portions of a small white boat and a large, well-used oar. Other items found ashore included sewing machines (some consigned to ‘Long and Co.”) and notions, axe and scythe handles, hay forks, wooden pegs, rolls of wire (some branded “T.S” and Co, Melbourne”), kegs of nails branded “A.T. and Co.” from the factory of A. Field and Son, Taunton, Massachusetts, croquet balls and mallets, buggy fittings, rat traps, perfumery, cutlery and Douay Bibles, clocks, bicycles, chairs, a fly wheel, a cooking stove, timber, boxes, pianos, organs and a ladder. (Wooden clothes pegs drifted in for many years). There seemed to be no personal luggage or clothing. The Pharos encountered a long line, about one and a half miles, of floating wreckage about 10 miles off land, south east of Cape Otway, and in some places about 40 feet wide. It seemed that more than half of it was from Eric the Red. The ship’s crew rescued 3 cases that were for the Melbourne Exhibition and other items from amongst the debris. There were also chairs, doors, musical instruments, washing boards, nests of trunks and fly catchers floating in the sea. Most of the goods were saturated and smelt of kerosene. A section of the hull lies buried in the sand at Parker River Beach. An anchor with chain is embedded in the rocks east of Point Franklin and a second anchor, thought to be from Eric the Red, is on display at the Cape Otway light station. (There is a photograph of a life belt on the verandah of Rivernook Guest House in Princetown with the words “ERIC THE RED / BOSTON”. This is rather a mystery as the ship was registered in Bath, Maine, USA.) Parts of the ship are on display at Bimbi Park Caravan Park and at Apollo Bay Museum. Flagstaff Hill Maritime Village also has part of the helm (steering wheel), a carved wooden sword (said to be the only remaining portion of the ship’s figurehead; further research is currently being carried out), a door, a metal rod, several samples of wood and a medal for bravery, awarded to Nelson Johnson, a crew member of the S.S. Dawn by the U.S. President, for the rescue of the crew. Much of the wreckage was recovered by the local residents before police and other authorities arrived at the scene. Looters went to great effort to salvage goods, being lowered down the high cliff faces to areas with little or no beach to collect items from the wreckage, their mates above watching out for dangerous waves. A Tasmanian newspaper reports on a court case in Stawell, Victoria, noting a man who was caught 2 months later selling tobacco from the wreckage of Eric the Red. Some of the silverware is still treasured by descendants of Mr Mackenzie who was given these items by officials for his help in securing the cargo. The gifts included silver coffee and tea pots, half a dozen silver serviette rings and two sewing machines. A Mr G.W. Black has in his possession a medal and a purse that were awarded to his father, another Dawn crew member who was part of the rescue team. The medal is inscribed and named “To John Black ….” (from “Shipwrecks” by Margaret E. Mackenzie, 3rd edition, published 1964). The wreck and cargo were sold to a Melbourne man who salvaged a quantity of high quality tobacco and dental and surgical instruments. Timbers from the ship were salvaged and used in the construction of houses and sheds around Apollo Bay, including a guest house, Milford House (since burnt down in bushfires), which had furniture, fittings and timber on the dining room floor from the ship. A 39.7 foot long trading ketch, the Apollo, was also built from its timbers by Mr Burgess in 1883 and subsequently used in Tasmanian waters. It was the first attempt at ship building in Apollo bay. In 1881 a red light was installed about 300 feet above sea level at the base of the Cape Otway lighthouse to warn ships when they were too close to shore; It would not be visible unless a ship came within 3 miles from it. This has proved to be an effective warning. Nelson Johnson, recipient of the medal for bravery, married Elizabeth Howard in 1881 and they had 10 children. They lived in South Melbourne, Victoria. Nelson died in 1922 in Fitzroy Victoria, age 66. In 1895 the owners of the S.S. Dawn, the Portland and Belfast Steam Navigation Co., wound up and sold out to the Belfast Company who took over the Dawn for one year before selling her to Howard Smith. She was condemned and sunk in Suva in 1928. The State Library of Victoria has a lithograph in its collection depicting the steamer Dawn and the shipwrecked men, titled. "Wreck of the ship Eric the Red, Cape Otway: rescue of the crew by the Dawn".The wood (timber) sample is listed on the Collections Australia Database, Heritage Victoria, number 239 00010 A “The Eric the Red is historically significant as one of Victoria's major 19th century shipwrecks. (Heritage Victoria Eric the Red; HV ID 239) The wreck led to the provision of an additional warning light placed below the Cape Otway lighthouse to alert mariners to the location of Otway Reef. The site is archaeologically significant for its remains of a large and varied cargo and ship's fittings being scattered over a wide area. The site is recreationally and aesthetically significant as it is one of the few sites along this coast where tourists can visit identifiable remains of a large wooden shipwreck, and for its location set against the background of Cape Otway, Bass Strait, and the Cape Otway lighthouse.“ (Victorian Heritage Database Registration Number S239, Official Number 8745 USA) Wood sample from the wreck of the ship Eric the Red. Oblong shaped, full of sea worm (Teredo worm) holes. The wood is dark in colour and is very light in weight. flagstaff hill, warrnambool, shipwrecked-coast, flagstaff-hill, flagstaff-hill-maritime-museum, maritime-museum, shipwreck-coast, flagstaff-hill-maritime-village, shipwreck-artefact, eric-the-red, zaccheus-allen, sewall, 1880, melbourne-exhibition, cape-otway, otway-reef, wood-sample, s.s.-dawn -
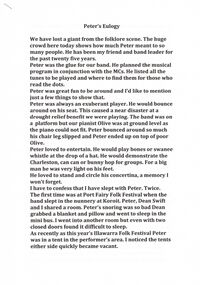 Bendigo Historical Society Inc.
Document - PETER ELLIS COLLECTION: PETER ELLIS OBITUARY
3 A4 pages stapled together. Peter's Eulogy. We have lost a giant from the folklore scene. The huge crowd here today shows how much Peter meant to so many people. He has been my friend and band leader for the past twenty five years. Peter was the glue for our band. He planned the musical program in conjunction with the MCs. He listed all the tunes to be played and where to find them for those who read the dots. Peter was great fun to be around and I'd like to mention just a few things to show that. Peter was always an exuberant player. He would bounce around on his seat. This caused a near disaster at a drought relief benefit we were playing. The band was on a platform but our pianist Olive was at ground level as the piano could not fit. Peter bounced around so much his chair leg slipped and Peter ended up on top of poor Olive. Peter loved to entertain. He would play bones or swanee whistle at the drop of a hat. He would demonstrate the Charleston, can can or bunny hop for groups. For a big man he was very light on his feet. He loved to stand and circle his concertina, a memory I won't forget. I have to confess I have slept with Peter. Twice. The first time was at Port Fairy Folk Festival when the band slept in the nunnery at Koroit. Peter, Dean Swift and I shared a room. Peter's snoring was so bad Dean grabbed a blanket and a pillow and went to sleep in the mini bus. I went into another room but even with two closed doors found it difficult to sleep. As recently as this year's Illawarra Folk Festival Peter was in a tent in the performer's area. I noticed the tents either side quickly became vacant. The next time was in Canberra when Peter and I were at one end of a caravan and Mary Smith was at the other. I don't think poor Mary got much sleep that night. On another occasion in Canberra Peter was Half asleep in his van when another well known female performer (not from the band) came in and stripped off. She realised she was in the wrong van and grabbed her stuff and took off. She returned very red faced the next morning to collect her shoes. Peter maintained he saw nothing. One freezing cold night in Canberra Peter ad I had been at a terrific session in the bar. We had to support each other across the oval towards our caravan. Peter tried to straddle the fence and got stuck. There was a real Canberra frost on the fence and a sensitive part of Peter's anatomy was in grave danger of frost bite. Peter took an eternity to extricate himself. I couldn’t help him as I was laughing so much. We'll never forget making Harry McQueen's bull boar sausages at Nariel. Peter had already organised the meat and intestine casings from the butcher in Corryong. He was such an organiser and the sausages were brilliant. Peter was quirky. He always made a morning cuppa complete with tea cosy. It even left Martin Pearson speechless in the breakfast tent at Illawarra this year. Another example was when he sold his beloved FJ which is parked out the front today. As the new buyer drove off down the road Peter stood there playing 'Now is the hour' and 'wish me luck as you wave me goodbye' on his concertina. Peter loved a joke. He knew Shirley Andrews loathed the tune Danny boy so he played it in her hearing any chance he go. He even gave her a cd with a dozen different performers doing their versions of the song. We once played at the Rifle Brigade Oktoberfest and Peter was just a bit under the weather after being there for two days (the band got free drinks). The late night crowd was getting restless so Peter tried to shut them up by holding his finger up. They got more restless. Peter couldn’t understand it. 'it worked for Grummy Ross,' he wailed. It was the only time we ever over rode him and started playing without him. He wasn’t happy but disaster was averted. The dance club once had a reverse deb ball. Peter shave his beard, got his sister Robyn to make up his face and came to the ball in a lovely gown. It took ages for people to realise who it was.Margaret Hogan said the other night 'Peter let me see and do things I never would have done otherwise.' I think that is true of all of us in the band. We performed in major festivals regularly, travelled widely and had experiences such as playing at the opening of Melbourne Museum or State Parliament. Experience we'd never have had without Peter. I'm glad Peter didn’t suffer. He told me last Monday morning on my last visit he was in no pain. For that I am grateful. He passed away that night. He was taken far too young and has left a huge hole in all our lives. Personally I have lost a great mate, but then we can all say that. We'll miss you Dirty Pierre. John Williams.person, individual, peter ellis oam -
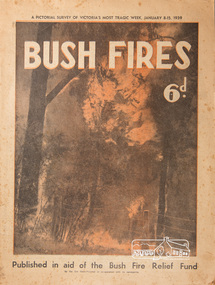 Eltham District Historical Society Inc
Magazine, Sun News-Pictorial, Bush Fires: A pictorial survey of Victoria's most tragic week, January 8-15, 1939, 1939
THE WEEK REVIEWED (Article; Bush Fires: A pictorial survey of Victoria's most tragic week, January 8-15, 1939. Published in aid of the Bush Fire Relief Fund by the Sun News-Pictorial in co-operation with its newsagents, pp2-3) THE fiercest bush fires Australia has known since its discovery are quiescent at the moment, and Victoria, in the comparative coolness of the change which came with rain on Sunday night, has begun·to count its losses. In the fiery eight days, from Sunday to Sunday, at least sixty-six men, women and children have lost their lives in forest fires, or have succumbed to burns and shock; many others have died from heat; and several serious cases of burns are being treated in hospitals. Two babies in Narrandera district have died, and ten others are in hospital, because of milk soured by the record temperatures of those eight days. Forest damage totals at least a million pounds, and incalculable damage has been done to the seedlings which were to have been the forests of the future. Water conservation will be seriously affected by the silting-up of reservoirs and streams from which protective timber has been taken by the all-engulfing flames. More than a thousand houses have been destroyed, and these, with 40 mills, and schools, post-offices, churches, and other buildings, represent a loss of at least half a million. At least 1500 are homeless. For their aid, money raised in appeals has now passed the £50,000 mark, and the biggest relief organisation ever set up in peace time has swung into operation. The First Hint Victoria's first hint of what was to come appeared on Sunday, January 8, when most parts of the State awoke to find a blistering day awaiting. At 12.20 p.m., when the thermometer reached its highest for the day, 109.6 degrees, the first fire victims were at that moment going to their death on a bush track five feet wide off the main road to Narbethong. They were the forestry officers Charles Isaac Demby and John Hartley Barling, who went to warn Demby of his danger when he parted from his companions, and was himself surrounded by the treacherous fire. It was not until 8 o'clock next morning that the tragic news was flashed throughout the State. Searchers found the two charred bodies close together, one seeking protection in the nook of two logs. Barling's watch had stopped at 1.20. In the meantime, tragedy was spreading its cloak. By Monday, big fires were raging at Toolangi, Erica, Yallourn, Monbulk, Frankston, Dromana, Drouin South, Glenburn, and Blackwood, with smaller outbreaks at many other centres. In the ensuing week, while women and children were evacuated as fast as the flames would permit, Erica-scene of the 1926 fire disaster-thrice escaped doom by a change of wind. Indeed, those who have been in the fire country these past days say that the numbers of times a change of wind has saved towns from destruction is amazing. In the towns they speak of miracles. Monday's Miracles The escapes from Monett's Mill at Erica and from the Hardwood Company's Mill at Murrindindi, near where Demby and Barling went to their death, were Monday's miracles. Twenty came out alive from each mill. At the first a 60ft. dugout provided an oven-like refuge; at the second, 12 women and children survived in the smoke-filled gloom of a three-roomed cottage while their eight men, their clothes sometimes afire, poured water on the wooden walls. Three houses out of ten remained when the fire had passed. Record Temperatures Sunday had been the hottest Melbourne day for 33 years; Monday dropped to a 76.1 degree maximum; but Tuesday dawned hotter than ever, the mercury reaching 112.5. By now rumor was racing ahead of fact; whole towns were being reported lost; the alarm was raised for scores of missing persons. But fact soon overtook rumor, and within a few days the staggering toll began to mount to a figure beyond the wildest imaginings of the panic-stricken. Six died from heat on this torrid Tuesday, and the fires spread in a wide swathe from south-west to north-east across the State. Fish died in shallow streams. A curtain of smoke hid the sky from all Victoria, and hung far out to sea. It alarmed passengers on ships. On the Ormonde, on the voyage to Sydney from Burnie, women ran on deck, believing fire had broken out in the hold. Days later the smoke reached New Zealand. In Melbourne thousands of fire-volunteers were leaving in cars: vans, motor-buses-anything reliable on wheels-to aid the country in its grim fight. In the fires at Rubicon and. Narbethong, seventeen were facing death this day. But not till Wednesday, when Melbourne breathed again in a cool change, while the country still sweltered in temperatures up to 117 degrees, did the news come through the tree blocked roads. A woman and her little daughter, trapped on the road, were among those who died. Their bodies, and those of menfolk with them, were found strewn out at intervals along the road, where the furnace of the surrounding fire had dropped them in their tracks as they ran. Twelve died at a Rubicon mill, five on the road at Narbethong. At Alexandra, not far distant, a baby was born while the fires raged, and stretcher-bearers brought in the injured. On Thursday the State Government voted £5000 for the relief of fire victims. The Governor (Lord Huntingfield) and the Lord Mayor (Cr. Coles) visited some of the stricken areas, and dipped into their pockets personally. Later, the City Council, too, voted £5000. Friday, The 13th Friday, the Thirteenth, justified its evil name. A blistering northerly came early in the morning, presaging destruction, and forcing the mercury to a new record of 114 degrees. Racing fires killed at least ten in those terrible 12 hours. Four children were engulfed in the furnace at Colac. Panic drove them, uncontrollable, into the smoke-filled road when the fire raced down behind their home. They choked to death. In other parts fires were joining to make fronts of scores of miles. Kinglake was being menaced on two fronts, £60,000 worth of timber was going up in smoke in Ballarat district. Warburton was surrounded. Residents at Lorne, favoured resort, were being driven to the sea-front by a fire which destroyed at least 20 homes. Healewille. with flames visible from the town at one stage, was in a trough between two fires which burned four guest-houses, seven homes and left its surrounding beauty-spots wastes of bowed-over, blackened tree-fern fronds; with its famous Sanctuary, however, intact. Most of Omeo was destroyed this black day: Noojee. while 200 residents crouched in the river, was being reduced to a waste of buckled iron and smoking timber; Erica was once again saved by a change of wind. Beneath a pall of smoke, the Rubicon victims were buried at Alexandra. Friday night and the early hours of Saturday saw the streets of beleagured towns strewn with exhausted fire-fighters. Their flails beside them, ready for the next call, they lay where exhaustion overtook them-on footpaths, beside lamp-posts, in gutters, in cars, under trucks. Saturday's dawn brought clear skies and lower temperatures in many parts, and from the burnt-out areas came a great rush of tragic reports. The death-roll rushed past the fifty mark with incredible speed. Some had been trapped on roads, others at mills; some, after burying their treasures, had clung too long to the places they had made their homes for many years. Four men lost their lives because one went back for his dog. By Sunday, when the first of the saving rain came, nearly another score of names had been added to the list.Newspaper magazine, 48 pages (incl. covers). Fully digitised and searchable PDFPublished in aid of the Bush Fire Relief Fund by the Sun News-Pictorial in co-operation with its newsagents.bushfires, 1939 bushfires, black friday, warrandyte -
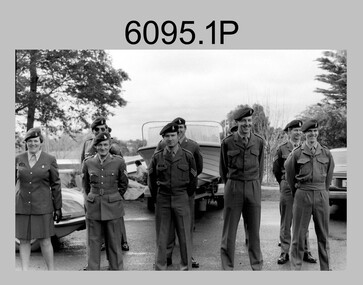 Bendigo Military Museum
Photograph - Army Survey Regiment – Corps Day Parade, 1983
These photographs were taken at the Corps Day parade at the Army Survey Regiment, Bendigo in July 1983. This was the Director of the Survey Corps – COL John Hillier’s last parade at Fortuna before his retirement. COL Hillier, often referred to as ‘NRJ’ (his initials) was Director for five years. COL Alex W. Laing attended the parade as his successor, seen in the foreground of photos .5P and .6P. COL Hillier was appointed a couple of years later to the honorary position of Colonel Commandant of the Royal Australian Survey Corps from 1989 to 1993. COL Laing was Director of RASvy from July 1983 to November 1988. Corps Day Parades were held to commemorate the formation of the Royal Australian Survey Corps in July 1915.This is a set of 19 photographs of a Corps Day parade at the Army Survey Regiment, Bendigo in July 1983. The negatives of the photographs were scanned at 96 dpi. .1) - Photo, black & white, 1983, L to R: CPL Di Chalmers, CPL Dave Cook, unidentified, SGT Bob Bright, unidentified, SPR Dave Wright, SGT Josh Degroot, SPR Chad Hardwick. .2) - Photo, black & white, 1983, L to R: LT Karen (Adams) Byrne, CAPT Roger Rix, RSM WO1 Bob Mason, MAJ Bob Roche, CO LTCOL Jorge Gruszka, CAPT Mick Byrne, Director COL John Hillier, CPL Terry Danger, CPL Paul Richards, CPL Greg Sulman, CPL George Holland, CPL Roger Pearson, LT Terry Lord, CPL Warren ‘Wah’ Hall. .3) - Photo, black & white, 1983, L to R: unidentified personnel, Director COL John Hillier, SPR Ben Tarasenko, CAPT John Bloor, unidentified, RSM WO1 Bob Mason, CPL John Bettridge, SPR Tom Bloxham. .4) - Photo, black & white, 1983, L to R: unidentified, MAJ Bob Roche, CO LTCOL Jorge Gruszka, Director COL John Hillier, MAJ Stan Vote. .5) - Photo, black & white, 1983, L to R: Colonel Alex W. Laing – foreground, CO LTCOL Jorge Gruszka, MAJ Bob Roche. .6) - Photo, black & white, 1983, L to R: Director COL John Hillier, MAJ Jim Mitchell – background, Colonel Alex W. Laing - foreground, CO LTCOL Jorge Gruszka, unidentified, SGT Kevin Boehm, SGT Jim Beard, unidentified, CAPT Dave Sankey .7) - Photo, black & white, 1983, L to R: CAPT John Bloor, CAPT Andy McLeod, SGT Kevin Boehm, MAJ Bob Roche, SGT Jim Beard, CO LTCOL Jorge Gruszka, Director COL John Hillier, SSGT Bill Kemp, CPL Peter (Jack) Elvard, SGT Bob Croxton, CAPT Dave Sankey, CPL Mick Minchin, SGT Bruce Wetzig, CPL Ken Talbot-Smith. .8) - Photo, black & white, 1983, L to R: CAPT John Bloor, RSM WO1 Bob Mason, Director COL John Hillier, CO LTCOL Jorge Gruszka, MAJ Graham Baker. .9) - Photo, black & white, 1983, L to R: CAPT John Bloor, RSM WO1 Bob Mason, Director COL John Hillier, MAJ Bob Roche, CO LTCOL Jorge Gruszka, MAJ Graham Baker. .10) - Photo, black & white, 1983, L to R: CAPT Chris Mazur, CAPT John Bloor, CO LTCOL Jorge Gruszka, MAJ Graham Baker, SPR Steve Coulson, SGT Harald Mai, Director COL John Hillier, SPR Viv (Hawkins) Doherty, unidentified, SPR Tony Grivell, SPR Ross Collishaw, SGT Phil Meagher, SSGT Brett ‘Dutchy’ Van Leeuwen. .11) - Photo, black & white, 1983, L to R: CO LTCOL Jorge Gruszka, MAJ Graham Baker, SPR Tony Grivell, SPR Ross Collishaw, Director COL John Hillier, SGT Phil Meagher, SPR Peter Peterson, SSGT Brett ‘Dutchy’ Van Leeuwen, SGT Bruce Bowers, SGT Mick Davy, SPR Gerry Gates. .12) - Photo, black & white, 1983, L to R: SSGT Bruce ‘Stretch’ Gordon, SGT George Timmins, CO LTCOL Jorge Gruszka, Director COL John Hillier, MAJ Graham Baker, CAPT John Bloor, MAJ Bob Roche, WO2 Ted Burgess, RSM WO1 Bob Mason, WO2 Peter Biorac, WO1 Graeme Birrell. .13) - Photo, black & white, 1983, L to R: CO LTCOL Jorge Gruszka, CAPT John Bloor, Director COL John Hillier, inspecting rank R to L: SSGT Peter Barrett, CPL Gary Drummond, SPR Peter Breukel, CPL Ian Nichols, unidentified personnel. .14) - Photo, black & white, 1983, L to R: CO LTCOL Jorge Gruszka, Director COL John Hillier, MAJ Stan Vote, SSGT Peter Barrett, RSM WO1 Bob Mason, CPL Gary Drummond, SPR Peter Breukel, CPL Ian Nichols, unidentified. .15) - Photo, black & white, 1983, L to R: SGT John Cain, SSGT Jim Cook, CAPT John Bloor, CO LTCOL Jorge Gruszka, MAJ Stan Vote, Director COL John Hillier, CPL Keith Quinton, CPL Mick Gillham, CPL Kim Reynolds, SPR Paul Baker, WO1 Ken Slater, SPR Brian Fauth, SPR Jim Ash, WO2 George Graham, SGT Gavin Neilson. .16) - Photo, black & white, 1983, L to R: MAJ Bob Roche, MAJ Stan Vote, CPL Kim Reynolds, CO LTCOL Jorge Gruszka, Director COL John Hillier, WO2 George Graham, CPL John ‘Flash’ Anderson, SPR Gary Tremain, WO1 Ken Slater. .17) - Photo, black & white, 1983, L to R: MAJ Stan Vote, CO LTCOL Jorge Gruszka, Director COL John Hillier, WO1 Noel ‘Nesty’ Coulthard. .18) - Photo, black & white, 1983, L to R: LTCOL Jorge Gruszka, Director COL John Hillier, unidentified civilians. .19) - Photo, black & white, 1983, L to R: Director COL John Hillier, LTCOL Jorge Gruszka, RSM WO1 Bob Mason..1P to .19P – There are no personnel identifiedroyal australian survey corps, rasvy, army survey regiment, army svy regt, fortuna, asr -
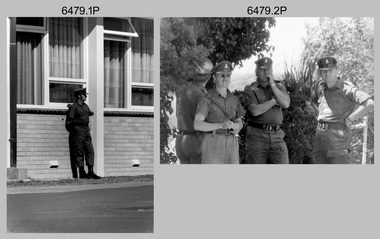 Bendigo Military Museum
Photograph - Army Survey Regiment Freedom of Entry Parade Rehearsal, Fortuna. Bendigo, 1980
This set of 38 black and white photographs were taken at the Army Survey Regiment’s parade rehearsal held at Fortuna, Bendigo in 1980. The rehearsal was for the Freedom of Entry parade held 1-2 weeks later in 1980. The exact date for the Freedom of Entry parade is not known. The Freedom of Entry to the City of Bendigo was an honour first conferred by the Bendigo City Council to the Army Survey Regiment in 1970. The Freedom of Entry parade in 1980 was the fourth time the unit exercised its right of freedom of entry. The Regiment also exercised its Freedom of Entry with anniversary parades in 1977, 1980 and 1995. Refer to items 6020.8P, 6021.25P, 6248P, 6266, 6409.2, 6430.39P, 6490.53P and 6491.21P for more Army Survey Regiment Freedom of Entry photographs, documents and certificates. See item 6471.2P for photos of Lithographic Squadron taken on the same day of this parade rehearsal. This set of 38 black and white photographs of the Army Survey Regiment (Army Svy Regt) were taken in a rehearsal for the Freedom of Entry parade to the City of Bendigo, held 1-2 weeks later in 1980. The photographs are on 35mm negative film and were scanned at 96 dpi. They are part of the Army Survey Regiment’s Collection. .1) - Photo, black & white, 1980. WO1 John McCulloch observes the rehearsal. .2) - Photo, black & white, 1980. RSM WO1 Aub Harvey, WO1 Dave Thomson and WO1 Roger Rix observe the rehearsal. .3) - Photo, black & white, 1980. Under command of SSM WO1 Bob Mason, Air Survey Squadron marches onto the parade ground - Front rank L to R: SPR Peter Jones, SPR Barry Miller, CPL Alan Hawkins. .4) - Photo, black & white, 1980. Air Survey Squadron marches on the parade ground - L to R: SPR Peter Jones, CPL Lyall Camp, SPR Barry Miller, SPR Geoff Havelberg, unidentified, CPL Alan Hawkins, CPL Peter Treble, unidentified (x2), SGT Mick Hogan, SGT Bruce Hammond, unidentified, SPR Steve Linane, SPR Jamie McRae, unidentified (x2). .5) - Photo, black & white, 1980. Air Survey Squadron formed up – CAPT Peter Ralston on far left. .6) - Photo, black & white, 1980. Air Survey Squadron inspection – L to R: CAPT Peter Ralston, CPL Alan Hawkins, CO LTCOL Bob Skitch, SGT Mick Hogan, SGT Bruce Hammond, SPR Jamie McRae. .7) - Photo, black & white, 1980. Air Survey Squadron inspection – L to R: SPR Peter Jones, unidentified, CPL Paul Hopes, unidentified, SGT Rick van der Bom, LTCOL Bob Skitch, SPR Steve Linane, CPL Mick Minchin, unidentified, SPR Gae (Robinson) Amato, unidentified, SPR Chris ‘CPL Peter Treble, Charlie’ Brown, SPR Ginny (Turner) Rowe. .8) - Photo, black & white, 1980. Lithographic Squadron marches onto the parade ground - Front rank L to R: SPR Brian Fauth, SPR Roy Hicks, SPR Per Andersen, commanded by LT Steve Cooper. .9) - Photo, black & white, 1980. Lithographic Squadron marches onto the parade ground - L to R: SSM WO1 Ken Slater, Front rank SPR Brian Fauth, SPR Roy Hicks, SPR Per Andersen, LT Steve Cooper. .10) - Photo, black & white, 1980. Lithographic Squadron inspection - L to R: CAPT Stan Vote, LT Steve Cooper, CO LTCOL Bob Skitch, SPR Neville Carr, SPR Laurie Justin, SPR Keith Quinton. .11) - Photo, black & white, 1980. Lithographic Squadron inspection - L to R: unidentified, LT Steve Cooper, CPL Frank Lenane, CPL Mick ‘Buddha’ Ellis, SPR Martin van de Maele, CO LTCOL Bob Skitch, unidentified (x2), SPR Garry Hudson, remainder unidentified. .12) - Photo, black & white, 1980. Lithographic Squadron inspection - L to R: LT Steve Cooper, CPL Rob Bogumil, unidentified, CO LTCOL Bob Skitch, CPL Bill Jones, CPL John ‘Flash’ Anderson, CPL Warren ‘Waldo’ Shirley, unidentified. .13) - Photo, black & white, 1980. Lithographic Squadron inspection - L to R: unidentified (x4), CO LTCOL Bob Skitch, unidentified, CPL Bill Jones, LT Steve Cooper, CPL Warren ‘Waldo’ Shirley. .14) - Photo, black & white, 1980. Lithographic Squadron performs form - right file L to R: SPR Brian Fauth, SPR Roy Hicks, SPR Per Andersen. .15) - Photo, black & white, 1980. Lithographic Squadron completes form at the halt. .16) - Photo, black & white, 1980. Lithographic Squadron marches in column of route – right file L to R: SPR Keith Quinton, SPR John Whaling, SPR Martin van de Maele, SPR John Whaling, SPR Garry Hudson, unidentified. Centre marker: CPL Warren ‘Waldo’ Shirley, remainder unidentified. .17) - Photo, black & white, 1980. Lithographic Squadron marches in column of route – right file L to R: SPR John Whaling, SPR Martin van de Maele, SPR John Whaling, SPR Garry Hudson, unidentified. Centre marker CPL Warren ‘Waldo’ Shirley, remainder unidentified. .18) - Photo, black & white, 1980. Lithographic Squadron marches in column of route – L to R: SPR Per Andersen, CPL Josh Degroot, SPR Neville Carr, SPR Laurie Justin, SPR Keith Quinton, SPR John Whaling, SPR Martin van de Maele, SPR John Whaling, SPR Garry Hudson, unidentified. .19) - Photo, black & white, 1980. Lithographic Squadron marches in column of route – L to R: SPR Per Andersen, CPL Josh Degroot, SPR Neville Carr, SPR Laurie Justin, SPR Keith Quinton, SPR Martin van de Maele, SPR John Whaling, SPR Garry Hudson, unidentified (x2), CPL Warren ‘Waldo’ Shirley, unidentified. .20) - Photo, black & white, 1980. Lithographic Squadron rehearses ‘rest on arms reverse.’ .21) - Photo, black & white, 1980. Cartographic Squadron marches onto the parade ground in column of route - L to R: SPR Cheryl Lofthouse, unidentified, SSM WO1 Gordon Lowery, unidentified, SPR Megan (McBurney) Reynolds, unidentified (x6), SPR Peter Main, CPL Stu Symonds, SPR Greg Else, SPR Rod Skidmore. .22) - Photo, black & white, 1980. Cartographic Squadron marches onto the parade ground in column of route - L to R: SPR Rod Skidmore, SPR Greg Else, CPL Phil McGuire, CPL Dennis Learmonth, CPL Brad Peppler, CPL Trevor Bottomley, SPR Gina (Coore) Neilson, SPR Carla Dell, CPL Lynn Johnson, commanded by CAPT Bob Williams. .23) - Photo, black & white, 1980. Cartographic Squadron inspection - L to R: unidentified officer, CAPT Bob Williams, SPR Greg Else, CO LTCOL Bob Skitch, CPL Phil McGuire, CPL Dennis Learmonth, CPL Brad Peppler, CPL Trevor Bottomley. .24) - Photo, black & white, 1980. Cartographic Squadron inspection - L to R: RSM WO1 Aub Harvey, unidentified officer, CAPT Bob Williams, CO LTCOL Bob Skitch. Front rank L to R: SPR Rod Skidmore, CPL Phil McGuire, CPL Dennis Learmonth, CPL Brad Peppler, CPL Trevor Bottomley, SPR Gina (Coore) Neilson, SPR Carla Dell, CPL Lynn Johnson. Centre rank L to R: CPL Terry Danger, SPR John Martin, SPR Bob Sheppard. SPR Megan (McBurney) Reynolds. .25) - Photo, black & white, 1980. Cartographic Squadron inspection - Front rank L to R: CPL Phil McGuire, CAPT Bob Williams, CPL Brad Peppler, CO LTCOL Bob Skitch, CPL Trevor Bottomley, SPR Gina (Coore) Neilson, SPR Carla Dell, CPL Lynn Johnson. .26) - Photo, black & white, 1980. Cartographic Squadron inspection - L to R: WO1 Roger Rix, RSM WO1 Aub Harvey, unidentified officer. Front rank L to R: SPR Rod Skidmore, SPR Greg Else, CPL Phil McGuire, CPL Brad Peppler, CPL Trevor Bottomley, SPR Gina (Coore) Neilson, SPR Carla Dell, CPL Lynn Johnson. Centre rank L to R: CPL Terry Danger, SPR John Martin, SPR Bob Sheppard. SPR Megan (McBurney) Reynolds. .27) - Photo, black & white, 1980. Cartographic Squadron inspection - L to R: CPL Dennis Learmonth, CPL Brad Peppler, CO LTCOL Bob Skitch, CPL Trevor Bottomley, SPR Gina (Coore) Neilson, SPR Carla Dell, CPL Lynn Johnson. .28) - Photo, black & white, 1980. Cartographic Squadron inspection - L to R: CAPT Bob Williams, unidentified, CO LTCOL Bob Skitch, SPR John Martin, SPR Bob Sheppard, SPR Megan (McBurney) Reynolds, rear rank L to R: SPR Peter Main, unidentified (x3). .29) - Photo, black & white, 1980. Cartographic Squadron rehearses ‘reverse arms’ - L to R: SPR Peter Main, CPL Stu Symonds, SPR Rod Skidmore, SPR Greg Else, remainder unidentified. .30) - Photo, black & white, 1980. Cartographic Squadron rehearses ‘rest on arms reverse.’ - Front rank L to R: SPR Rod Skidmore, SPR Greg Else, CPL Phil McGuire, CPL Dennis Learmonth, CPL Brad Peppler, CPL Trevor Bottomley. remainder unidentified. Centre rank L to R: unidentified (x2), SPR John Martin, SPR Bob Sheppard, SPR Megan (McBurney) Reynolds. Rear rank L to R: unidentified (x3), SPR Carla Dell on far right. .31) - Photo, black & white, 1980. Cartographic Squadron marches in column of route. .32) - Photo, black & white, 1980. Cartographic Squadron marches in column of route. Left file L to R: SPR Rod Skidmore, SPR Greg Else, CPL Phil McGuire, CPL Dennis Learmonth, CPL Brad Peppler, CPL Trevor Bottomley, SPR Gina (Coore) Neilson, SPR Carla Dell, CPL Lynn Johnson. Centre file L to R: unidentified (x2), SPR Dan Cirsky, SPR Bob Sheppard. Commanded by CAPT Bob Williams (foreground). .33) - Photo, black & white, 1980. Cartographic Squadron rehearses ‘order arms.’ Front rank L to R: SPR Rod Skidmore, SPR Greg Else, CPL Phil McGuire, CPL Dennis Learmonth, CPL Brad Peppler, CPL Trevor Bottomley, SPR Gina (Coore) Neilson, SPR Carla Dell, CPL Lynn Johnson. Centre rank L to R: unidentified (x2), SPR Dan Cirsky, SPR Megan (McBurney) Reynolds, SPR Ilen Isaac. Rear rank L to R: SPR Cathy Regan, unidentified, SPR Cheryl Lofthouse. .34) - Photo, black & white, 1980. Cartographic Squadron rehearses ‘right dress.’ Front rank L to R: SPR Rod Skidmore, SPR Greg Else, CPL Phil McGuire, CPL Dennis Learmonth, CPL Brad Peppler, CPL Trevor Bottomley, SPR Gina (Coore) Neilson, SPR Carla Dell, CPL Lynn Johnson. Centre rank L to R: SPR John Martin, SPR Bob Sheppard. SPR Megan (McBurney) Reynolds, SPR Ilen Isaac. Rear rank L to R: unidentified (x2), SPR Cathy Regan, unidentified, SPR Cheryl Lofthouse. Commanded by CAPT Bob Williams (far left). 35) - Photo, black & white, 1980. Air Survey Squadron section rehearses marching with reverse arms. L to R: SPR Bob Hopper, CPL Rick Downie, CPL Paul Hopes, unidentified (x2, SGT Rick van der Bom, SPR Steve Hilton, CPL Peter Treble, unidentified, SPR John Lane, remainder unidentified. .36) - Photo, black & white, 1980. Air Survey Squadron section rehearses marching with reverse arms. L to R: CPL Alan Hawkins, CPL John Smith, SPR Dave Jobe, unidentified (x2), SGT Mick Hogan, SPR Barry Miller, WO1 Dave Thomson. .37) - Photo, black & white, 1980. Cartographic Squadron sections practice drill. .38) - Photo, black & white, 1980. Air Survey Squadron rest break from drill practice. L to R: unidentified (x2), CPL Noel McNamara, SSGT Peter Warwick, SSGT Greg Buckingham (facing away), SGT Jim Beard, unidentified, SPR Sharon (Jones) Treble (foreground), unidentified, SGT Bruce Gordon, SPR Kristin (Isaac) Skidmore.There are no personnel identified. royal australian survey corps, rasvy, army survey regiment, army svy regt, fortuna, asr -
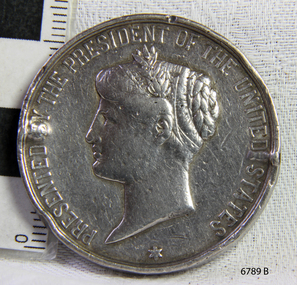 Flagstaff Hill Maritime Museum and Village
Award - Medal, Nelson Johnson, November 1880
This medal for bravery, for rescue of the crew from the shipwreck “Eric the Red” on 4th September 1880, was awarded to one of the crew of the steamer S.S. Dawn by the President of the United States in July 1881. The medal is engraved with the name “Nelson Johnson” (the anglicised version of his Swedish name Neils Frederick Yohnson). It was donated to Flagstaff Hill Maritime Village in 2013 by Nelson’s granddaughter. Nelson had migrated from Sweden to Sydney in 1879. The next year in 1880, aged 24, he was a seaman on the steamship Dawn and involved in the rescue of the survivors of the Eric the Red. Nelson Johnson was a crew member of the S.S. Dawn and was one of the rescue team in the dinghy in the early morning of September 4th 1880. Medals were awarded to the Captain and crew of the S.S. Dawn by the President of the United States, through the Consul-general (Mr Oliver M. Spencer), in July 1881 “ … in recognition of their humane efforts in rescuing the 23 survivors of the American built wooden sailing ship, the Eric the Red, on 4th September 1880.” The men were also presented with substantial monetary rewards and gifts. The city of Warrnambool’s care of the survivors was also mentioned by the President at the presentation, saying that “the city hosted and supported the crew ‘most graciously’. Previously, a week after the shipwreck, the Australian Government had also conveyed its thanks to the Captain and crew of the S.S. Dawn “Captain Griffith Jones, S.S. Dawn, The Hon. Mr Clark desires that the thanks of the Government should be conveyed to you for the prompt, persevering and seamanlike qualities displayed by you, your officers and crew in saving the number of lives you did on the occasion referred to. The hon. The Commissioner has also been pleased to award you a souvenir in commemoration of the occasion, and a sum of 65 pounds to be awarded to your officers and crew according to annexed scale. I am, &c, W Collins Rees, for and in the absence of the Chief Harbour Master.” The Awards are as follows: - Crew of DAWN'S lifeboat-Chief Officer, Mr G. Peat, 15 pounds; boat's crew-G. Sterge, A.B., 5 pounds; T. Hammond, A.B., 5 pounds; J. Black, A.B., 5 pounds; H. Edwards, A.B., 5 pounds. Dinghy's Crew-Second Officer, Mr Christie, 10 pounds; boat's crew -F. Lafer, A.B., 5 pounds; W. Johnstone, A.B., 5 pounds; Mr Lear, provedore, 5 pounds; Mr Dove, purser, 5 pounds. Captain Jones receives a piece of plate. (from “Wreck of the ship Eric the Red” by Jack Loney) The medal’s history, according to the Editor of ‘E-Sylum’ (the newsletter of The Numismatic Bibliomania Society “… appears to be an example of an 1880 State Department medal, catalogued as LS-3 (page 322 of R. W. Julian's book, Medals of the United States Mint: The First Century 1792-1892). The reverse is mostly blank for engraving, surrounded by a thin wreath. It was designed by George Morgan, chief engraver for the Philadelphia Mint, and struck in gold, silver and bronze. The one pictured here (in The Standard newspaper, 2nd July 2013) appears to be silver.” The following is an account of the events which led to the awarding of this medal. The American ship Eric the Red was a wooden, three-masted clipper ship. She had 1,580 tons register and was the largest full-rigged ship built at Bath, Maine, USA in 1871. She was built and registered by Arthur Sewall, later to become the partnership E. & A. Sewall, the 51st ship built by this company. The annually-published List of Merchant Vessels of the U.S. shows Bath was still the home port of Eric the Red in 1880. The vessel was named after the Viking discoverer, Eric ‘the Red-haired’ Thorvaldsson, who was the first European to reach the shores of North America (in 980AD). The ship Eric the Red at first traded in coal between America and Britain, and later traded in guano nitrates from South America. In 1879 she was re-metalled and was in first-class condition. On 10th June 1880 (some records say 12th June) Eric the Red departed New York for Melbourne and then Sydney. She had been commissioned by American trade representatives to carry a special cargo of 500 exhibits (1400 tons) – about a quarter to a third of America’s total exhibits - for the U.S.A. pavilion at Melbourne’s first International Exhibition. The exhibits included furniture, ironmongery, wines, chemicals, dental and surgical instruments, paper, cages, bronze lamp trimmings, axles, stamped ware, astronomical and time globes, samples of corn and the choicest of leaf tobacco. Other general cargo included merchandise such as cases of kerosene and turpentine, brooms, Bristol's Sarsaparilla, Wheeler and Wilson sewing machines, Wheeler’s thresher machine, axe handles and tools, cases of silver plate, toys, pianos and organs, carriages and Yankee notions. The Eric the Red left New York under the command of Captain Zaccheus Allen (or some records say Captain Jacques Allen) and 24 other crew including the owner’s son third mate Ned Sewall. There were also 2 saloon passengers on board. The ship had been sailing for an uneventful 85 days and the voyage was almost at its end. As Eric the Red approached Cape Otway there was a moderate north-west wind and a hazy and overcast atmosphere. On 4th September 1880 at about 1:30 am Captain Allen sighted the Cape Otway light and was keeping the ship 5-6 miles offshore to stay clear of the hazardous Otway Reef. However, he had badly misjudged his position. The ship hit the Otway Reef about 2 miles out to sea, southwest of the Cape Otway light station. Captain Allen ordered the wheel to be put ‘hard up’ thinking that she might float off the reef. The sea knocked the helmsman away from the wheel, broke the wheel ropes and carried away the rudder. The lifeboats were swamped, the mizzenmast fell, with all of its riggings, then the mainmast also fell and the ship broke in two. Some said that the passenger Vaughan, who was travelling for his health and not very strong, was washed overboard and never seen again. The ship started breaking up. The forward house came adrift with three of the crew on it as well as a longboat, which the men succeeded in launching and keeping afloat by continually bailing with their sea boots. The captain, the third mate (the owner’s son) and others clung to the mizzenmast in the sea. Then the owner’s son was washed away off the mast. Within 10 minutes the rest of the ship was in pieces, completely wrecked, with cargo and wreckage floating in the sea. The captain encouraged the second mate to swim with him to the deckhouse where there were other crew but the second mate wouldn’t go with him. Eventually, the Captain made it to the deckhouse and the men pulled him up. At about 4:30 am the group of men on the deckhouse saw the lights of a steamer and called for help. At the same time, they noticed the second mate and the other man had drifted nearby, still on the spur, and pulled them both onto the wreck. The coastal steamer SS Dawn was returning to Warrnambool from Melbourne, and its sailing time was different to its usual schedule. She was built in 1876 and bought by the Portland and Belfast Steam Navigation Co. in 1877. At the time of this journey, she was commanded by Captain Jones and was sailing between Melbourne and Portland via Warrnambool. The provedore the Dawn, Benjamin Lear, heard cries of distress coming through the portholes of the saloon. He gave the alarm and the engines were stopped. Cries could be heard clearly, coming from the land. Captain Jones sent out crew in two boats and fired off rockets and blue lights to illuminate the area. They picked up the three survivors who were in the long boat from Eric the Red. Two men were picked up out of the water, one being the owner’s son who was clinging to floating kerosene boxes. At daylight, the Dawn then rescued the 18 men from the floating portion of the deckhouse, which had drifted about 4 miles from where they’d struck the reef. Shortly after the rescue the deckhouse drifted onto breakers and was thrown onto rocks at Point Franklin, about 2 miles east of Cape Otway. Captain Jones had signalled to Cape Otway lighthouse the number of the Eric the Red and later signalled that there was a wreck at Otway Reef but there was no response from the lighthouse. The captain and crew of the Dawn spent several more hours searching unsuccessfully for more survivors, even going back as far as Apollo Bay. On board the Dawn the exhausted men received care and attention to their needs and wants, including much-needed clothing. Captain Allen was amongst the 23 battered and injured men who were rescued and later taken to Warrnambool for care. Warrnambool’s mayor and town clerk offered them all hospitality, the three badly injured men going to the hospital for care and others to the Olive Branch Hotel, then on to Melbourne. Captain Allen’s leg injury prevented him from going ashore so he and three other men travelled on the Dawn to Portland. They were met by the mayor who also treated them all with great kindness. Captain Allen took the train back to Melbourne then returned to America. Those saved were Captain Zaccheus Allen (or Jacques Allen), J. Darcy chief mate, James F. Lawrence second mate, Ned Sewall third mate and owner’s son, John French the cook, C. Nelson sail maker, Clarence W. New passenger, and able seamen Dickenson, J. Black, Denis White, C. Herbert, C. Thompson, A. Brooks, D. Wilson, J. Ellis, Q. Thompson, C. Newman, W. Paul, J. Davis, M. Horenleng, J. Ogduff, T. W. Drew, R. Richardson. Four men had lost their lives; three of them were crew (Gus Dahlgreen ship’s carpenter, H. Ackman steward, who drowned in his cabin, and George Silver seaman) and one a passenger (J. B. Vaughan). The body of one of them had been found washed up at Cape Otway and was later buried in the lighthouse cemetery; another body was seen on an inaccessible ledge. Twelve months later the second mate James F. Lawrence, from Nova Scotia passed away in the Warrnambool district; an obituary was displayed in the local paper. Neither the ship nor its cargo was insured. The ship was worth about £15,000 and the cargo was reportedly worth £40,000; only about £2,000 worth had been recovered. Cargo and wreckage washed up at Apollo Bay, Peterborough, Port Campbell, Western Port and according to some reports, even as far away as the beaches of New Zealand. The day after the wreck the government steamship Pharos was sent from Queenscliff to clear the shipping lanes of debris that could be a danger to ships. The large midship deckhouse of the ship was found floating in a calm sea near Henty Reef. Items such as an American chair, a ladder and a nest of boxes were all on top of the deckhouse. As it was so large and could cause danger to passing ships, Captain Payne had the deckhouse towed towards the shore just beyond Apollo Bay. Between Apollo Bay and Blanket Bay, the captain and crew of Pharos collected Wheeler and Wilson sewing machines, nests of boxes, bottles of Bristol’s sarsaparilla, pieces of common American chairs, axe handles, a Wheelers’ Patent thresher and a sailor’s trunk with the words “A. James” on the front. A ship’s flag-board bearing the words “Eric the Red” was found on the deckhouse; finally, those on board the Pharos had the name of the wrecked vessel. During this operation, Pharos came across the government steamer Victoria and also a steamer S.S. Otway, both of which were picking up flotsam and wreckage. A whole side of the hull and three large pieces of the other side of the hull, with some of the copper sheathing stripped off, had floated onto Point Franklin. Some of the vessels' yards and portions of her masts were on shore. The pieces of canvas attached to the yards and masts confirmed that the vessel had been under sail. The beach there was piled with debris several feet high. There were many cases of Diamond Oil kerosene, labelled R. W. Cameron and Company, New York. There were also many large planks of red pine, portions of a small white boat and a large, well-used oar. Other items found ashore included sewing machines (some consigned to ‘Long and Co.”) and notions, axe and scythe handles, hay forks, wooden pegs, rolls of wire (some branded “T.S” and Co, Melbourne”), kegs of nails branded “A.T. and Co.” from the factory of A. Field and Son, Taunton, Massachusetts, croquet balls and mallets, buggy fittings, rat traps, perfumery, cutlery and Douay Bibles, clocks, bicycles, chairs, a fly wheel, a cooking stove, timber, boxes, pianos, organs and a ladder. (Wooden clothes pegs drifted in for many years). There seemed to be no personal luggage or clothing. The Pharos encountered a long line, about one and a half miles, of f locating wreckage about 10 miles off land, southeast of Cape Otway, and in some places about 40 feet wide. It seemed that more than half of it was from Eric the Red. The ship’s crew rescued 3 cases that were for the Melbourne Exhibition and other items from amongst the debris. There were also chairs, doors, musical instruments, washing boards, nests of trunks and flycatchers floating in the sea. Most of the goods were saturated and smelt of kerosene. A section of the hull lies buried in the sand at Parker River Beach. An anchor with a chain is embedded in the rocks east of Point Franklin and a second anchor, thought to be from Eric the Red, is on display at the Cape Otway light station. (There is a photograph of a life belt on the verandah of Rivernook Guest House in Princetown with the words “ERIC THE RED / BOSTON”. This is rather a mystery as the ship was registered in Bath, Maine, USA.) Parts of the ship are on display at Bimbi Park Caravan Park and at Apollo Bay Museum. Flagstaff Hill Maritime Village also has part of the helm (steering wheel), a carved wooden sword (said to be the only remaining portion of the ship’s figurehead; further research is currently being carried out), a door, a metal rod, samples of wood and this medal awarded for the rescue of the crew. Much of the wreckage was recovered by the local residents before police and other authorities arrived at the scene. Looters went to great effort to salvage goods, being lowered down the high cliff faces to areas with little or no beach to collect items from the wreckage, their mates above watching out for dangerous waves. A Tasmanian newspaper reports on a court case in Stawell, Victoria, noting a man who was caught 2 months later selling tobacco from the wreckage of Eric the Red. Some of the silverware is still treasured by descendants of Mr Mackenzie who was given these items by officials for his help in securing the cargo. The gifts included silver coffee and teapots, half a dozen silver serviette rings and two sewing machines. A Mr G.W. Black has in his possession a medal and a purse that was awarded to his father, another Dawn crew member who was part of the rescue team. The medal is similarly inscribed and named “To John Black ….” (from “Shipwrecks” by Margaret E. Mackenzie, 3rd edition, published 1964). The wreck and cargo were sold to a Melbourne man who salvaged a quantity of high-quality tobacco and dental and surgical instruments. Timbers from the ship were salvaged and used in the construction of houses and shed around Apollo Bay, including a guest house, Milford House (since burnt down in bushfires), which had furniture, fittings and timber on the dining room floor from the ship. A 39.7-foot-long trading ketch, the Apollo, was also built from its timbers by Mr Burgess in 1883 and subsequently used in Tasmanian waters. It was the first attempt at shipbuilding in Apollo Bay. In 1881 a red light was installed about 300 feet above sea level at the base of the Cape Otway lighthouse to warn ships when they were too close to shore; It would not be visible unless a ship came within 3 miles from it. This has proved to be an effective warning. Nelson Johnson married Elizabeth Howard in 1881 and they had 10 children, the father of the medal’s donor being the youngest. They lived in 13 Tichbourne Place, South Melbourne, Victoria. Nelson died in 1922 in Fitzroy Victoria, age 66. In 1895 the owners of the S.S. Dawn, the Portland and Belfast Steam Navigation Co., wound up and sold out to the Belfast Company who took over the Dawn for one year before selling her to Howard Smith. She was condemned and sunk in Suva in 1928. The State Library of Victoria has a lithograph in its collection depicting the steamer Dawn and the shipwrecked men, titled. "Wreck of the ship Eric the Red, Cape Otway: rescue of the crew by the Dawn". The medal for bravery is associated with the ship the “The Eric the Red which is historically significant as one of Victoria's major 19th century shipwrecks. (Heritage Victoria Eric the Red; HV ID 239) The wreck led to the provision of an additional warning light placed below the Cape Otway lighthouse to alert mariners to the location of Otway Reef. The site is archaeologically significant for its remains of a large and varied cargo and ship's fittings being scattered over a wide area. The site is recreationally and aesthetically significant as it is one of the few sites along this coast where tourists can visit identifiable remains of a large wooden shipwreck, and for its location set against the background of Cape Otway, Bass Strait, and the Cape Otway lighthouse.“ (Victorian Heritage Database Registration Number S239, Official Number 8745 USA) This medal was awarded to Nelson Johnson by the U.S. President for bravery in the rescue of the Eric the Red crew. The obverse of the round, solid silver medal has an inscription around the rim. In the centre of the medal is the head of Liberty to the left, hair in a bun, with a sprig of leaves in the top left of a band around her head. There is a 6-pointed star below the portrait, between the start and end of the inscription. There are two raised areas on the rim, horizontally opposite each other, from the edge to just below the lettering and coinciding with the holes drilled in the edge. Slightly right of the top is a round indentation in the rim. The reverse has a wreath of leaves as a border, joined at the bottom by a ribbon bow. In the centre of the medal is an inscription, decorated with 3-pronged design and dots. The edge is plain with 2 small, rough and uneven holes horizontally opposite to each other, as though they had been used for mounting the medal at some stage. The medal has a matte finish on both sides and is slightly pitted and scratched.“PRESENTED BY THE PRESIDENT OF THE UNITED STATES” around the perimeter of the obverse of the medal. “TO / Nelson Johnson, / seaman of the British, / str “Dawn”, for bravery, / at risk of life, / in / rescuing the crew of / the American Ship / “Eric the Red.” “M” on obverse, truncation of the portraitwarrnambool, flagstaff hill, flagstaff hill maritime village, maritime museum, shipwreck coast, great ocean road, shipwreck artefact, eric the red, zaccheus allen, sewall, 1880, melbourne exhibition, cape otway, otway reef, victorian shipwreck, medal, nelson johnson, neils frederick yohnson, s.s. dawn, george morgan, hero -
 Carlton Football Club
Dinner Program & Menu, Carlton Football Club November 21st 1957 to Mr H R Clover, 1957
Dinner to Mr H R Clover player Career : 1920-24, 1926-31 Debut : Round 2, 1920 vs. Richmond, aged 25 years, 46 days Carlton Player No. 346 Games : 147 Goals : 396 Guernsey No. 1 Last Game : Semi Final, 1931 vs. Collingwood, aged 36 years, 180 days Height : 185 cm (6 ft. 1 in.) Weight : 86.5 kg (13 stone, 9 lbs.) DOB : 20 March, 1895 League Leading Goalkicker: 1922 Leading Goalkicker: 1920, 1921, 1922, 1923, 1926, 1928 Best and Fairest: 1929 Captain Coach: 1922-1924, 1927 Champion of the Colony: 1921 VFL AFL Hall of Fame Carlton Hall of Fame Team of the Century President: 1956-57 Vice President: 1932, 1935-54 Club Secretary: 1925-26 Horace “Horrie” Clover was Carlton’s star centre half-forward of the 1920’s; a high flying, long-kicking champion who enjoyed a stellar career with the Old Dark Navy Blues, then went on to be one of our longest-serving administrators. But even before he took the field for Carlton, Clover had to conquer the odds on the battlefields of France in World War 1. From Maryborough in central Victoria, Horrie enlisted in the 1st AIF in September 1915. After basic training, he embarked for France with reinforcements for the 7th Battalion in January of 1916. Soon pitched into the horrors of trench warfare, he fought and survived until September of that year, when he was transferred to a machine gun company and promoted to the rank of Corporal. On Christmas day, 1916, Horrie was struck down with acute appendicitis. He was evacuated to a field hospital for emergency surgery, where the doctors discovered that his appendix was gangrenous and that his life was in danger. He was immediately transferred to London for specialist treatment, and months of recuperation. Pronounced unfit for further front-line service, he was repatriated back to Australia in August 1917, and honourably discharged in May of the following year – six months before the Armistice. Having recovered, and keen to have a crack at senior football, Clover trained with Richmond and Melbourne before Carlton gave him an opportunity at VFL level. And how he delivered! In his first match in 1920 – ironically, against Richmond - he kicked four goals from centre half-forward, and hit the post three times! By the end of his first season at Princes Park, Clover was one of Carlton’s drawcards. Former Australian Prime Minister Sir Robert Menzies was just one of the many Carlton fans who were captivated; “he was the most artistic of high marks, unforgettable at half-forward,” said Menzies. Horrie could kick a football, too. A balanced, deceptively quick mover, he was a glorious running drop-kick for goal. Playing against Richmond again at Princes Park in July, 1921, he let fly with a monster kick that was later measured at 86.26 metres – that’s 94 yards, 2 feet in imperial terms! And there are numerous other instances where he roosted the ball more than 70 metres. In round 12 of 1921, he slotted 13 goals in a game against St Kilda; a club record which still stands today. The Blues made the finals in third place in 1921 and battled through to meet Richmond for the Premiership. Then the heavens above the MCG opened up on the day before the decider, turning the ground into a quagmire. In what was to be Clover’s only Grand Final appearance, Richmond won a slogging, mauling contest by four points. While Premiership glory eluded him, Horrie was Carlton’s top goalkicker in three of his first four seasons, including 1922, where his total of 58 was the competition’s best. He was appointed captain of the Blues that same year, and in 1923 took on the dual role of captain-coach. Over 1924 / 1925, he suffered more debilitating illness that prevented him from playing all season. Unable to pull on his football boots, he took on the job of Club Secretary, and continued in that position even after returning to the field in 1926. When he did eventually resume, he formed a new, powerful Carlton forward set-up with a young Harry “Soapy” Vallence at full-forward. Twice more – in 1926 and 1928, Clover’s brilliance and accuracy in front of goal saw him at the top of Carlton’s goal-kicking, and in 1929 – aged 34, he was honoured with the captaincy of Victoria against WA in his ninth and final game in the Big Vee. show_image.php?id=205 Horrie Clover retired as a player in 1931 after 147 games. His total of 396 goals is still ranked fifth best in Carlton’s proud history (only displaced for fourth when Brendan Fevola broke through in 2007/2008) – and it should be remembered that all but a handful of his games were played at centre half-forward, not in the goal square. In 1932 he was elected Vice-President of the Carlton Football Club, but retired after one year. In February 1935 on learning of Terry Ogden's the serious illness, Clover and Newton Chandler offered their services for a blood transfusion for the club's wing man. After a blood test Chandler's blood was accepted. However, Ogden passed away the next month. Clover stood again in 1935, was elected – and spent twenty unbroken years serving his beloved Blues. He even took on the Presidency in 1956, aged 60, and was as vigorous and determined as ever in his two years in the job. Carlton Football Club mourned deeply when Horrie Clover passed away on the first day of January, 1984. Three years later, he was among the first to be inducted into the Carlton Hall of Fame. Testament to his stature in the game as a whole, he was elected to the AFL Hall of Fame in 1996; and May 2000 saw him named as one of four emergencies in Carlton’s Team of the Century. A champion in every sense of the word, he spent 37 years of his remarkable life at Princes Park. Footnote The Argus published an article on Maryborough, April 12 1930, it said; "Clover has been the leading half-forward in League ranks for some time. It takes a specialist to fill the position capably, and the Carisbrook man does this admirably. Like good wine he has improved with age, and besides being one of the greatest half forwards that has ever appeared on a football field, he is about the best all round kicker that has ever played the game. He excells in punting, drop, and place kicking. He is a great marksman and a splendid exponent, one of the greatest the district has produced, besides being a fair cricketer also." When Clover returned to football in 1926, The Argus mentioned that they thought it was the first time a member of the Permit and Umpire Committee had played in a League game. 13 GOAL AWARD Round 12, 1921 At the Carlton AGM held on Monday 27 February 1922, Horrie Clover "was presented with ball used on the occasion, the St.Kilda club having generously donated it to the Carlton officials, who had it mounted for the purpose." (Age February 22 1922) 1922 The Art Of Forward Play Horrie wrote an article for the Sporting Globe August 30 p7 To read click here> http://nla.gov.au/nla.news-article184798404 1928 Idol of Carlton Crowds - Australia's Best Centre Half Forward The Sporting Globe's football writer W. S. "Jumbo" Sharland writes about Horrie Clover To read click here> http://nla.gov.au/nla.news-article183958222 Footballer Who Gambles With Death. Daily Pictorial (Sydney) article about Horrie. http://nla.gov.au/nla.news-article246129350 1932 Jack Worrall on Clover Writing for the Australasian September 03 p7; "Take Horrie Clover as an example, a real specialist, one of the best forwards the game has seen, and the best all-round kick that has ever come under my purview. For that reason he deserves a line to himself. He played the game like a sportsman, was a glorious high mark, and could cover a great distance by either drop, punt, or place kick - a remarkable accomplishment. Many players have been notable kicks in two aspects of the game, yet none have equalled Clover in the three branches. His nearest rival as an all-round kick, though not quite as certain in his efforts, was Frank Caine, of Carlton, who, like Clover, also hailed from the country." 1933 Coming Football Champion Melbourne, Saturday A special warning was issued to the Victorian Football League delegates last night by Mr. D. H. Crone, a Carlton delegate, not to angle for a certain "coming" champion that the Carlton Club had signed up that day. At first delegates were a little puzzled at the statement, but when it was explained that Horrie Clover, former champion half-forward, had that day become the father of of a son they burst into sustained laughter. It was only by persistent ringing of the bell by the chairman that order was restored. (News (Adelaide) May 20 1933 p3) 1933 - The Place Kick A letter to The Argus via the Huon Times about the lack of place kicking expertise in the VFL. The writer mentions that he got Horrie to play football in Maryborough after he saw the then 15 y.o. place kick a ball 63 yards, and later with Carlton, Clover place kicked 8 goals in one match. To read click here> http://nla.gov.au/nla.news-article137253000 Milestones 50 Games: Round 1, 1923 vs Fitzroy 100 Games: Round 18, 1927 vs St Kilda 100 Goals: Round 18, 1921 vs Collingwood 200 Goals: Round 3, 1924 vs St Kilda 300 Goals: Round 11, 1928 vs Geelong Links Articles: The Magical 'Three Goal Average' | A Letter From Horrie | Our Flagless Greats Blueseum: Stat Shot for Horrie Clover | Career Breakdown | Clover's big goals hauls | Clover's Blueseum Image Gallery A dinner to celebrate career Horrie Clover in 1957Four Page Program & Menu 1927 -
 Melton City Libraries
Photograph, Wendy Barrie, Unknown
Eldest daughter of Edna and Bon Barrie, born on 03 November 1943 in Melbourne, Victoria, Memoirs of Wendy Barrie, recalling the early formative years of life in Melton: In 1949 I started school at Melton State School no 430 and was driven the 2½ miles to there by my parents at first. Later we walked home in the afternoons or were picked up by car as we made our way home along the Western Highway. In 1956 I went to Bacchus Marsh High School. There were 4 students in grade 6 and 3 of us went to the High School. The students from Melton, Melton South and Toolern Vale State Schools went by bus to Bacchus Marsh High School as far a fifth form. My parents drove me to the pick up point and during the five years of travel to High School. The bus travelled via Toolern Vale and later went through Exford and through Parwan. On the return journey in the afternoon the bus went in the reverse direction. The bridge at Exford was an old narrow wooden one, and the students had to get off the bus and walk across, with the driver crossing in the empty bus for safety reasons. There was a travelling allowance paid to parents and it was estimated from the distance the crow flies, a straight line. We lived a Ferris Lane, just where the Harness Racing entrance is now situated about 2 ½ miles by road to school too close to qualify for the subsidy. While at State School Melton we would walk home in a group with the Nixon and Gillespie children, along the main road over the bridge near the Shire Offices and down a hill. I was being dinked on Joyce Gillespie’s bike while holding onto the seat, toppled off the bike striking my chin and teeth on the bitumen and cracking my jaw. I was about 9 years old and stayed a couple of days in the Quamby Hospital in Bacchus Marsh, it seemed like and eternity at the time and quite traumatic being separated from my family. I can remember contemplating how I could get out of the window and run away but realised it was too far to walk home. Often we would cut across the Common on our way home from school picking up stray golf balls and collecting them from the creek when it dried out. We were warned about not accepting lifts from strangers passing along the Melbourne/ Ballarat Road. The only danger we faced was being swooped by the magpies particularly on the open ground on the Common. We were also fairly cautious when the Gypsies camped on the Common in the area just about opposite the small reservoir. “Mum” grandma Myers loved to have us call in on our way home, and usually would cut a slice of Jongebloed’s bread and spread it with home made butter. Sometimes we waited there until we were collected by car, usually driven by our mother. Margaret Nixon and Joyce Gillespie were a few grades ahead of me and Barbara Nixon was born just two months earlier than me. Our mothers were great friends for over 6o years, born in the same month three years apart. They lived within a few days of the same age as each other at the time their deaths. Dad and George Nixon attended Melton school at the same time. Sarah nee Hornbuckle Nixon and my grandfather Frederick Myers Snr were at school together at the same in the 1880s. The Nixon family lived in Keilor Road just past the Toolern Creek near the turnoff. Tom and Ann Collins lived on the southern side of the Western highway and Keilor road intersection. Jim and Ruby Gillespie’s house was further long Keilor road on the right. They backed onto the Myers who lived on the north side of Western Highway east of Myers Gully (Ryans Creek). The Bridge over the Toolern Creek as very narrow and as truck traffic increased there were accidents. One truck took out the side railing and plunged upside down into the bank and into the shallow water. Another fatal accident happened between a car and a truck right in front of the Myers house. Grandfather Fred had been a bike rider all his life, as far as the Riverina in his younger years, wryly made the comment about the drivers the speeding along the Ballarat Road were setting out to kill themselves. The road was busy particularly after the Races at Ballarat when the crowds were hurrying home to Melbourne. Train travel had changed very little from the time my mothers generation to mine. The timetable meant the usual rush to Melton South by bike in her case and if she was running late the train pulled up on the crossing. I was driven to the Station from home past Keith and Mary Gillespie’s house near the Ferris Road rail crossing to Bridge road to Melton South for the 7.32 train. While attending Sunshine High School in 1961 I would meet up with three other students, two of whom I knew from Bacchus Marsh High School days. We usually got into the same compartment on the train, it was a typical country train with a corridor along the side and compartments with a door, roof racks and sometimes heated metal containers for the feet in the winter. Some of the trains came through from Horsham and Ballarat, and the Overland from Adelaide passed through in the evening, we could hear it in the distance from the Ferris Lane home. The carriages had 1st and economy class compartments showing photographs of county scenes and holiday destinations. The engine was the large A class diesel. They are still running to Bacchus Marsh 50 years later, due to the need for the greatly increased number of commuters travelling to work in the city. Sometimes the carriages were pull by a Steam engine, these were a problem in the summer time because the sparks caused fires along the train lines and then quickly spread into the dry grass, crops and stubble. The Motor Train left Spencer Street at 4.23 pm and was the best train for me to catch. Ferris Road was a designated stop and train pulled up on the road crossing. It had steps at the door and rungs to hold while alighting to the ground. The ballast along the tracks was rough and uneven and awkward to land on. The train was painted blue and yellow with the letters VR pained on the front. This saved may parents the afternoon trip to collect me from the Station. On the walk home on the gravel road I would pass Uncle Tom and Aunty May’s house before reaching home. Melva Gillespie was studying at Sunshine Technical School and we sometimes both got off the train at the same time. On other occasions the Motor Train was replaced with a diesel engine with carriages, it was also required to stop and the driver had to be notified in advance. This meant getting into the guards van a Rockbank. It was more difficult alighting from the carriage as the gap was greater and more precarious to swing out and land on the ground. A few times in my last year of study at Melbourne Teachers College in Grattan Street Carlton. I managed to catch the 2.30 pm train to Serviceton, it was express to Melton and was very quick trip. The last train, was the 5.25 pm diesel to Ballarat and I usually caught this train to Melton South Station. On one occasion after being held up on the tram in Bourke street I had to make a mad dash to the platform chasing the train as it was just moving off and yelling to the guard, fortunately I was noticed and the train ground to halt. I scrambled into the end door and took most of the journey home to recover. After the last year at High School I continued to travel on the train, 2 years to Prahran Technical School changing at North Melbourne. There were a lot school children travelling to private schools and some at the primary level and mainly from Bacchus Marsh. Rockbank children also travelled by train from the beginning of their high school years, quite a few went to Sunshine High School. During my third year of teacher training I travelled to Flinders Street to RMIT for ceramics classes and Grattan St Teachers College located in the grounds of Melbourne University. There were many teachers being trained at the Secondary Teachers College due to the baby bulge creating a great shortage of teachers. Sunshine High School was very well represented amongst the different courses in Primary, Secondary and Art and Crafts. I attended Melbourne University lectures, studying a Fine Art subject. Bernard Smith was the most notable of the lecturers. he replaced Professor Joseph Bourke who had taken leave for the years. In 1962 he published the art book “Australian Painting”. The secondary art and craft student teachers from the College were in the majority, taking this subject and were well regarded due to their practical art and craft methods and their teaching round experience. In December 1964 I graduated as a Trained Secondary Teacher – Art and Crafts. The graduating ceremony was held at Wilson Hall. I received my appointment to work at Maryborough High School. Uncle Max and Aunty Rosemary Myers arranged my accommodation. Uncle Max was a teacher at the Maryborough Technical School fat the time. The appointment was suddenly changed when just before the school year was about to start when I received notification that I was now required to move to Warracknabeal High School. I was subject to a bond for the three years of training and three years of teaching and was under an obligation to comply with the directive of the Education Department. My father stood as guarantor when I was accepted as student at the Melbourne Teachers’ College, thus enabling me to receive my teacher training, and a 5 pounds a week allowance for expenses. After teaching for two years at Warracknabeal High School I was fortunate enough the gain a transfer to Sunshine West High School, returning to live at home in Melton and travelling by car to work with a fellow colleague, Jock Smith who lived at Station road Melton. I completed bond obligation and resigned at the end of the year. The employment regulations at that time did not allow the option of leave of absence for, indefinite overseas travel. I returned to Australia in October 1969. Visiting Arthur Hart the Principal of Sunshine High School he arranged with the Education Department for my re-employment at Sunshine High School until the end of the year. In 1970 I was transferred, and returned to Sunshine West High School where I worked for the next three years. In January 1968 I sailed on the “Oriana” to South Hampton with two teaching friends from Warracknabeal High School on a travelling and working holiday. Doreen Kiely, a former Bacchus Marsh High student and fellow train traveller from Bacchus Marsh, was already working in London, had arranged our accommodation at the London Travellers Club Hotel, Braham Gardens, Earls Court SW5. We based our stay at this address in London and travelled around Scotland, Ireland and England. In the summer we took a four month trip around the Continent and the Mediterranean. I registered with The Royal Borough Of Kingston Upon Thames as a Supply teacher, and worked at Chessington School form autumn to spring the following year and living with Mrs Rose Gillies at Kinross Avenue, Worcester Park, Surrey. In the spring of 1969 visiting Norway, Sweden and Finland joining an organised camping group to the Artic Circle, entered Russia at Leningrad (St Petersburg) Moscow, Minsk, to Poland and Czechoslovakia. In August returning to Worcester Park for the flight to Montreal to stay with cousin Lynette and husband Jurgen. A side trip was taken to Toronto, Niagara Falls and New York. The flight home from Montreal to Melbourne took 52 hours. A ½ day break in Vancouver before boarding the Qantas boeing 707 via San Francisco, Honolulu, Fiji, Sydney to Melbourne. Around the world in 21 months. Photographs of Wendy local identities -
 Flagstaff Hill Maritime Museum and Village
Photograph - Vessels Speculant and S. S. Flinders, Between 1902 and 1907
This photograph was one of ten photographs donated to Flagstaff Hill Maritime Museum and Village by Fred Trewartha. Frederick John Fox Trewartha (Fred) was a well-known Warrnambool businessman. He was born in Beeac near Geelong in 1920 and came to Warrnambool with his family as a very young child. He was apprenticed to his father John, as a saddler and later opened his own shop on Raglan Parade. He then moved into working with tarpaulins and canvases for the trucking industry. Fred was keenly interested in photography (and was a member of the Warrnambool Cine Club), yachting and boat building. He kept his yacht moored at Port Fairy for many years and participated in sailing events locally and interstate. He also built boats with his sons. He had the opportunity to meet many older sailors and it's thought this photo (and others in the set) may have been given to him by one of these men. Fred Trewartha died in 2016 in Warrnambool. The two identifiable ships in this picture are the "Speculant" and the "S. S. Flinders" - both coastal trading vessels that regularly came and went from Warrnambool. The third steamer on the left hasn't been identified The barquentine SPECULANT was a steel, three-masted sailing ship built in 1895 in Inverkeithing, Scotland, registered in Warrnambool, Victoria and wrecked at Cape Paton, Victoria, 10th February 1911. The SPECULANT had been involved in the timber trade between the United Kingdom and Russia, until sold to its Warrnambool owners and timber merchants Messrs. P.J. McGennan & Co. (Peter John McGennan) in 1902 for 3000 pounds and had her sailed to Warrnambool as her new port. Peter John McGennan was born in 1844 and worked as a builder and cooper in Holyhead, Anglesea, Wales. He immigrated to Australia in 1869 as a free settler and arrived in Warrnambool in 1871 and undertook management of a property in Grassmere for Mr. Palmer. Peter met his wife Emily in South Melbourne and they married in 1873. They had ten children including Harry who lived to 1965, and Andrew who lived until 1958. (The other children were their four brothers - John who was killed in the Dardenalles aged 35, Frederick who died aged 8, Peter who died aged 28, Frank who died aged 5 weeks - and four sisters - Beatrice who died age 89, Edith who died aged 49, Blanche who died aged 89 and Eveline who died aged 48.) In 1874 Peter starting a boating establishment on the Hopkins River. In 1875 he opened up a Coopers business in Kepler Street next to what was Bateman, Smith and Co., moving to Liebig Street, next to the Victoria Hotel, in 1877. In 1882 he then moved to Lava Street (which in later years was the site of Chandlers Hardware Store). He was associated with the establishment of the Butter Factory at Allansford. He started making Butter Boxes to his own design and cheese batts for the Butter Factory. In 1896 established a Box Factory in Davis Street Merrivale, employing 24 people at its peak, (it was burnt down in 1923); and in Pertobe Road from 1912 (now the Army Barracks building). Peter was a Borough Councillor for Albert Ward from 1885 to 1891, he commenced the Foreshore Trust (including the camping grounds along Pertobe Road), and he was an inaugural Director of the Woollen Mill in Harris Street, buying an extensive share-holding in 1908 from the share trader Edward Vidler. They lobbied the Town Hall to have a formal ‘Cutting’ for the waters of the Merri River to be redirected from its natural opening south of Dennington, to its existing opening near Viaduct Road, in order to have the scourings from the wool at the Woollen Mill discharged into the sea. He sold Butter Boxes around the state, and had to ship them to Melbourne by rail. Peter’s purchase of the SPECULANT in 1902 enabled him to back-load white pine from Kaipara, New Zealand to Warrnambool to make his butter boxes then, to gain profitability, buy and ship potatoes and other primary produce bound to Melbourne. (McGennan & Co. had also owned the LA BELLA, which had traded in timber as well, until she was tragically wrecked with the loss of seven lives, after missing the entrance channel to Warrnambool harbour in 1905. It appears that the SPECULANT was bought to replace the LA BELLA.) In 1911 the SPECULANT had been attempting to depart Warrnambool for almost the entire month of January to undergo docking and overhaul in Melbourne. A month of east and south-easterly winds had forced her to remain sheltered in Lady Bay, Warrnambool apart from one morning of northerlies, when an attempt was made to round Cape Otway; she had to return to shelter in Portland after failing to make any headway. With only 140 tons of sand ballast aboard, the ship would not have been easy to handle. Captain Jacobsen and his crew of nine, mainly Swedes, decided to make for Melbourne, leaving Portland Harbour on 5th February 1911. By the 9th they had reached Cape Otway, where they encountered a moonless night, constant heavy rain, and a heavy sea with a south-easterly wind blowing. After safely rounding Cape Otway the course was changed to east, then north-east to take the vessel to a point six miles off Cape Patton, following the orders of Captain Jacobsen, who told the crew to be very careful with the steering, as the wind and sea was running to leeward. The patent log (used to measure speed) had been out of order for the last four months as no-one in Warrnambool was able to fix it: it was intended to have it repaired in Melbourne. In the meantime the crew measured the vessel's speed by looking over the side and estimating wind strength. This compounded the difficulties of imprecise positioning, as the strong cross wind and sea were acting on the lightly laden vessel to steadily drive it towards the shore. At 3.30am on Friday 10 February 1911 Captain Jacobsen and the first mate were looking over the side of the vessel when they heard the sound of breakers and suddenly struck the rocks. The crew immediately knew they had no chance of getting the SPECULANT off, and attempted to rescue themselves by launching the lifeboat, which was instantly smashed to pieces. One of the crew then volunteered to take a line ashore, and the rest of the crew were all able to drag themselves to shore, some suffering hand lacerations from the rocks. Once ashore they began to walk along the coast towards Lorne, believing it was the nearest settlement. Realising their mistake as dawn broke they returned westwards to Cape Patton, and found a farm belonging to Mr C. Ramsden, who took them in and gave them a change of clothes and food. After resting for a day and returning to the wreck to salvage some of their personal possessions, at 10am on Saturday they set out for Apollo Bay, a voyage that took six hours, sometimes wading through flooded creeks up to their necks. The Age described the wreck as "listed to starboard. All the cabin is gutted and the ballast gone. There is a big rock right through the bottom of her, and there is not the slightest hope of getting her off". A Board of Marine inquiry found that Captain Jacobson was guilty of careless navigation by not taking steps to accurately verify the position of the vessel with respect to Cape Otway when the light was visible and by not setting a safe and proper course with respect to the wind and sea. It suspended his certificate for 6 months and ordered him to pay costs. The location of the wreck site was marked for a long time by two anchors on the shoreline, until in 1970 the larger of the two anchors was recovered by the Underwater Explorers' Club and mounted on the foreshore at Apollo Bay. The bell from the wreck was also donated to the Apollo Bay Surf Lifesaving Club but is recorded to have been stolen. Rusting remains of the wreck can still be found on the shoreline on the southern side of, and directly below Cape Patton. Parts of the SPECULANT site have been buried by rubble from construction and maintenance works to the Great Ocean Road, as well as by naturally occurring landslides. Peter J McGennan passed away in 1920. The Gates in the western wall of the Anglican Church in Henna Street/Koroit St are dedicated to him for his time of community work, which is matched with other prominent Warrnambool citizens; Fletcher Jones, John Younger, J.D.E (Tag) Walter, and Edward Vidler. After Peter J McGennan's death Harry, Andrew and Edith continued to operate the family business until July 11th 1923 when the company was wound up. (Andrew lived in Ryot Street Warrnambool, near Lava Street.) Harry McGennan (Peter and Emily’s son) owned the Criterion Hotel in Kepler Street Warrnambool (now demolished). His son Sid and wife Dot lived in 28 Howard Street (corner of Nelson Street) and Sid managed the Criterion until it was decided by the family to sell, and for he remained Manager for the new owners until he retired. Harry commenced the Foreshore Trust in Warrnambool around 1950. The McGennan Carpark in Pertobe Road is named after Harry and there are Memorial-Stone Gates in his memory. (The Gates were once the original entrance to the carpark but are now the exit.). The Patent Log (also called a Taffrail log) from the SPECULANT, mentioned above, and a number of photographs, are now part of the Collection at Flagstaff Hill Maritime Village.. The S. S. Flinders was built by A. J. Inglis, Ltd, Pointhouse, Glasgow in 1878 for the "Tasmanian Steam Navigation Company', Hobart which merged with the "Union Steamship Company" of New Zealand and it was later sold to the firm "McIlwraith, McEacham and Company". It was built of iron and was 1000 tons and 227 feet, 1 inch long. It was described as "splendidly fitted up for the carriage of passengers and her cargo space was also very large". In the saloon about 130 passengers could be accommodated while the second class had sufficient room for one hundred passengers. In 1890, the S. S. Flinders would leave Melbourne on Mondays and Thursdays at 5 pm and reach Warrnambool the following morning at 8 am. On the return it would leave Warrnambool on Wednesdays and Saturdays at 5 pm and reach Melbourne the following morning. In 1896, the Weekly Times described the "steamer Flinders (otherwise known as "the Warrnambool mailboat") as "as good a sample of a seagoing steamer as there is trading on the Victorian Coast at the present time". In April 1896 newspaper reports noted the S. S. Flinders took 2915 bags of potatoes from Warrnambool to Melbourne (the largest shipment of that season) as well as 50 tons of tinned rabbits from the Hamilton Preserving Factory. It was also noted that particularly during the Christmas period, there were excessive demands for berths from holiday makers wanting to enjoy a holiday in Warrnambool. In May 1903, the S. S. Flinders narrowly escaped destruction when an explosion and subsequent fire occurred during the passage from Melbourne to Warrnambool. A drum (which apparently contained carbide of calcium) exploded and blew off a hatch cover. As the steamer got to within a mile or two of Warrnambool, smoke was seen coming out of the hold and (unknown to the passengers) flames had taken hold. The crew quickly got to work - closing down all the hatches and pumping water into the hold through a hole in the saloon floor. There were 30 or 40 cases of kerosene on board. The Flinders continued on to Warrnambool and berthed at the Breakwater. The passengers all went ashore - many unaware of the danger they had been in. A telephone message was sent to the local Fire Brigade Station however the fire was extinguished before the firemen and their equipment arrived. After the hold was checked, the Flinders was certified as seaworthy and left for Portland. The Flinders continued to transport Western District produce as well as passengers from Warrnambool to Melbourne until 1906 when (due to a decrease in shipping trade during the Winter and the availability of train services) the Flinders was replaced by the smaller steamer "Dawn" and in 1907 when it was sold to the "Adelaide Steamship Company" for use in the Western Australia coastal trade, it was replaced by the "S. S. Barrabool".This photograph is a significant record of two of the well known coastal traders (the "Speculant" and the "Flinders") that sailed along the south west coast of Victoria for many years - transporting goods and passengers between Melbourne and Warrnambool.Black and white photograph of the Breakwater in Warrnambool with two ships docked and another in the bay. On the front boat (the Speculant), men can be seen at the wheel, on the deck and on the bottom two booms where they appear to be furling the sails. The sails of the top booms are already furled. A small boy can be seen on the deck and a young girl, two women and a dog are on the Breakwater. There is a steam ship (the S. S. Flinders) tied up behind the "Speculant" and an unidentified steam ship (with smoke coming from its smokestack) in the bay. There is a blue and black handwritten label on the back of the photo - naming the ships and the owner of the photo.Speculant and Flinders / Passenger ship in / Lady Bay / name of donor and phone numberflagstaff hill maritime museum and village, warrnambool, great ocean road, shipwreck coast, speculant, barque speculant, flinders, s. s. finders, steamship flinders, coastal trader, passenger ship, goods, steamer, breakwater, lady bay, warrnambool mailboat, p. j. mcgennan, peter john mcgennan, butter boxes, captain jacobsen, cape patton, tasmanian steam navigation company -
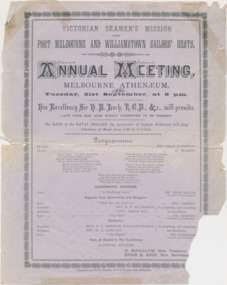 Mission to Seafarers Victoria
Flyer, Annual Meeting, 1886
The Annual Meeting presenting the Annual Report was held on the 21st of September 1886 at the Melbourne Athenaeum. In the Standard (Port Melbourne, Vic. : 1884 - 1914), Saturday 25 September 1886, page 2 VICTORIAN SEAMEN'S MISSION. This institution held its annual meeting in the Melbourne Athenæum on Tuesday evening under the most favourable auspices. The hall was filled in every part, a very large pro portion of the audience being seamen. The half hour previous to the com mencement of the meeting was very pleasantly occupied bv listening to the capital playing of the band of the Naval Brigade, and precisely at eight o'clock the musicians heralded the entrance of the vice-regal party by playing ' The National Anthem.' Sir Henry and Lady Loch were received by the Mayor of Melbourne (Mr. Stewart), the Hon. F. T. Derham, Captain Pasco, Mr. H. R. Reid (hon. secretary), and Lieutenant - Colonel Templeton, and His Excellency imme diately took the chair. The venerable ex-chaplain, the Rev. Kerr Johnson, was present, but as he did not feel equal to taking part in the proceedings, the Rev. E. T. Miles opened the meeting with prayer. Nothing could have been more cal culated to give a distinctive character to the meeting than the singing of the Sailors' Hymn by the 300 odd seamen present. The rugged yet tuneful voices of the men blending with those of the ladies present, who heartily joined in, gave a most spirit-stirring effect to the beautiful words of the refrain : — Rocks and streams I'll fear no more, When on that eternal shore; Drop the anchor ! furl the sail ! I am safe within the vail. Next followed His Excellency's address as chairman. The Governor threw himself heartily into the pro ceedings, and his remarks, expressive of the utmost sympathy with the sea men of the empire, were applauded to the echo. In fact from the start all the speakers struck the right key-note. The institution was not held up as a charity on which Jack was more or less dependent. According to the gentlemen who one and all welcomed him as a friend, and a right useful friend too, the thing was all the other way. To the sailor it was, they de clared, that they owed all that the colony possessed, and more — the great ness and prosperity of the Empire, He was the sort of man who never turned his back on a fellow creature, or refused to give a hand to a comrade in distress. Therefore it was deter mined that Jack should not come to these shores and think there were none to care for the comfort of his body or the welfare of his soul, and with the object of greeting the sailor on his arrival, of grasping his hand as a friend, beguiling his hours on shore, and saving him from the scores of dangers and temptations which beset a sea-faring man's stay in port, the institution had in '57 been started. Its claims on the Victorian public, not as a charity, but as a means of show ing some recognition of the services of the brave men who man our mercan tile marine, were ably put before the meeting. The Rev. G. D. Buchanan de clared that if the Melbourne merchants contributed to the mission a tithe of the amount they spent in insurance, they would find their goods better looked after by the seamen than by the insurance companies. Captain McCallum, the treasurer, read the following report of the com mittees of the Port Melbourne and Williamstown Rests : — In no part of the Queen's dominions have there been more changes during the last thirty years than in the colony bearing her gracious name ; and it is therefore all the more pleasant to report that the Victorian Mission to seamen, which started so long ago as 1857, still pursues an active career of usefulness, holding out a helping hand to mariners of all nations, without distinction of colour, race or creed. Eight years ago, some of the supporters of the Mission, feeling the want of a Temperance Club, where the crews of the various ships might recreate themselves and enjoy the three ' C's' — Coffee — Comfort — Company, appealed to the public for assistance, resulting in sufficient funds being obtained to justify the establishment of Sailors' Rests at Sandridge and Williamstown. Both these institutions were opened by a distinguished gentleman who has always taken a practical interest in sea men, and who, but for illness, would have been present at this meeting — Sir W. F. Stawell — and the result jof several years' experience fully justifies the statement that these institutions have supplied a felt want — the attendance of visitors reaching now about 30,000 per annum ; whilst so economically are they managed, that the annual cost to the public is less than L150 The thanks of the committee are specially due to those ladies and gentlemen who so kindly made a special and successful effort to supply both of the Bests with new piano fortes, to the great enjoyment of ' Jack ashore.' The instrument which was pre sented to the Port Melbourne institution by Mr. J. M. Bruce, on behalf of the sub scribers, the funds having been collected by his daughter yet in her teens, being espec ially one of great value. Concerts free to all seamen, given by amateur singers, are held weekly on both sides of the bay, and are largely attended and much appreciated. The building at Port Melbourne, which, being of wood, is merely of a temporary character, is free from debt ; but there is a mortgage of L500 on the Williamstown institution, which cripples its usefulness. The committee have regretfully to report that during the year under review they have lost, through the weakness of increas ing years, tbe loving services of the Rev. Kerr Johnston, their venerable friend and chaplain, whose life is, indeed, the history of the Mission, for he has been connected with it from the commencement of the work. Mr. Johnston has proved himself a true disciple of his Divine Master, and the com mittee trust that in the evening of his days he may enjoy that peace and rest which he lias so well earned. The com mittee presented Mr. Johnston, on retiring, with an honorarium of L100. Mr. E. James has been appointed iu Mr. JohuBton'u room, and the committee believe that their choice lias been a fortunate one. The Mission aud Sailors' Bests have been kept afloat by the unwearied and self -deny-ing exertions of the Ladies1 Committee, who have personally collected nearly the whole of the income ; but it may fairly be asked whether, in this great seaport, where last year there entered in at Her Majesty's Customs 1711 ships, manned by 61,256 men, the mercantile community of Melbourne should net take a more active interest in the welfare of the thousands of brave men who, for a few weeks, temporary sojourners on our shores, away from friends and relatives, have a special claim on our sympathy and help. We are of the old land, ' that gem sunk in the silver sea and we can re-echo Mr. Gladstone's recent words to the crew of the yacht Sunbeam, ' The calling which you follow is a noble one, and is calculated to bring forth the highest qualities of our common nature ; ana if it is possible for any occupation to make a man, in the highest and wideBt sense of the word, it is ' the occupation to which your lives are given. How closely it is connected with the the prosperity and fame of tbi» great nation ; how closely, indeed, it is connected with advancement of civilisation, and tiie general welfare of the world, it needs no words of mine to tell yon, for in your work and life you know it well, and feel it truly.' Look ing at what we Victorians owe to the British sailor, the committee earnestly trust that, with the blessings of the Almighty God, increased success will attend the work of the Mission and Rests. Mr. James read the chaplain's re port: — Since my appointment as chaplain to tbe Seamens' Mission, I have met with greater success than I anticipated. I have visited all the ships that have come into port, also many of the vessels on the Yarra, and am pleased with the civil and courteous manner in which I have been received by captains, officers and men, and in most cases my invitations to them to attend our meetings have been most heartily responded to. . The attendance at the services in the Bethel has much improved — on some occasions scarcely sitting room is to be found. The services have proved a great blessing to many Christian seamen ; whilst several who have come into port caring for nothing of a religious nature, have left praying. God fearing men, with the request that those left behind would remember them in their supplications, that they should be kept through all the trials and temptations to which seamen are exposed. The weekly Tuesday evening concerts got up bj the ladies of the committee and others, have proved a great benefit to the Mission, and a source of great enjoyment to the seamen in port. The programmes are excellent; and are spoken of by the sailors as the best they have heard in any port. The Sailors* Rest is provided with a library, the daily papers, and illustrated literature, with games of chess, draughts, dominoes, quoits, and other amusements, which are much taken advantage of during the evenings. Seamen ' are alio provided with writing materials, free, bo that everyone may have any opportunity of writing to their friends; for many an anxious parent is counting the days and hoping for .the time to come when they shall get a line from their sons in the far distant land, and many a son is reminded of his obligation by the opportunity thus afforded. I am much pleased at this time to acknowledge the kindness of the committee, and the great help I have received from them, also from Mr. Douglas, the manager of the Best. I do not think I could have been blest with a better co-worker. I have no hesitation in recommending the seamen to go to the Best, and telling them that they will receive a most hearty welcome, to which they can all testify ; my thanks are due to the voluntary workers, who have given every assistance ft their power, especially to Miss Lloyd, who is an invaluable help, attending in all weathers, and playing the organ at every service. The Sunday School is progressing, and we aie now about to make another addition to the library, of good readable books. The work at Williamstown is also pro gressing well, the Wednesday night concerts being well attended, and the singing and reciting supplied by local talent really good; the sailors contributing largely to the programmes. Captain McCallum is the backbone of the work at Williamstown, well supported by many warm friends of the sailors. The services held every Sunday night are productive of mnch good. The work here, too, is very encouraging, having much improved of late. I am thank ful to God that He has so blessed the efforts of His people, and hope they may be long spared to carry on the work. The Rev. G. D. Buchanan in an eloquent speech proposed the first re solution : — ' That the Reports now read be adopted, and that the following ladies and gentlemen be the Committee for the ensuing year : — SEAMEN'S MISSION. Ladies Committee. — Mesdames Templeton, Campbell, Chamberlin, Elworthy, Lormer, Gourlay, Gowan, B. Johnston, Webb, Young, Plummer, Misses Elwortny, Webb, Gowan, and M. Hastie. Gentlemen's Committee. — Captains Pasco, R. N., Adams, McCallum, J.P., Dalgarno, Garside, Messrs. Courtis, A. J. Smith, Macpherson, H. R. Reid, J.P., Henry Berry, J.P., Revs. Kerr Johnston, and A. R. Edgar.' Captain Pasco seconded, and in formed the audience that Baron Von Mueller had written regretting his inability to attend, but had sent a substantial cheque. (Applause.) A collection was then taken up and liberally responded to, the band mean-time playing airs suitable to the occa sion, such as ' The Death of Nelson' and ' Rocked in the Cradle of the Deep.' The hon. F. T. Derham next pro posed the second resolution : — ' That the success which has attended the working of the Port Melbourne Sailors' Rest justifies this meeting in taking imme diate steps to raise the funds necessary to erect a Seamen's Institute worthy of the in creasing trade and commerce of Victoria.' This was seconded by the Rev. A. R. Edgar, and both were carried by ac clamation. The Mayor of Melbourne moved a vote of thanks to His Excellency, and Sir Henry in the course of his reply said his sympathies were not only with sailors because he had been much brought into contact with them, but because he had been a sailor himself and had had the honour and privilege of serving in Her Majesty's navy. At this the men sprang to their feet and gave three deafening cheers for the Governor and another for Lady Loch, who bowed her acknowledgment and appeared very pleased at the hearty reception accorded to her. During the evening Mrs. Pearce, and Messrs. Walsh, Woods, and Robinson, members of the Liedertafel, contributed songs. The lady, who has sung at the Tuesday evening concerts, sang ' When the Tide comes in' so charmingly that an encore, although against the rule of the evening, was insisted upon, which was responded to by a beautiful rendering of the old ballad ' Robin Adair,' Altogether the meeting was a com plete success, and will doubtless afford the committee fresh encouragement in their well-directed efforts. Printed programme for the 1886 annual meeting taking place in the Melbourne AthenaeumWritten in black ink at the back by WHC Darvall: annual meeting, melbourne athenaeum, 1886, baron ferdinand von mueller, sailors' rest, hugh ronald reid, captain fullarton, captain mccallum, henry loch, captain pasco, reverend kerr johnston -
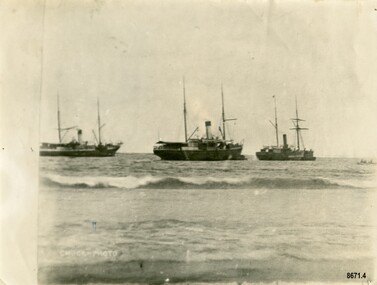 Flagstaff Hill Maritime Museum and Village
Photograph - Steamers - Julia Percy, Dawn and Coorong, Chuck Photo Ballarat, Circa 1885
This photograph was one of ten photographs donated to Flagstaff Hill Maritime Museum and Village by Fred Trewartha. Frederick John Fox Trewartha (Fred) was a well-known Warrnambool businessman. He was born in Beeac near Geelong in 1920 and came to Warrnambool with his family as a very young child. He was apprenticed to his father John, as a saddler and later opened his own shop on Raglan Parade. He then moved into working with tarpaulins and canvases for the trucking industry. Fred was keenly interested in photography (and was a member of the Warrnambool Cine Club), yachting and boat building. He kept his yacht moored at Port Fairy for many years and participated in sailing events locally and interstate. He also built boats with his sons. He had the opportunity to meet many older sailors and it's thought this photo (and others in the set) may have been given to him by one of these men. Fred Trewartha died in 2016 in Warrnambool. Shipping was the cheapest and most practical means of carrying produce and goods during the period 1840-1890. Regular domestic steamer services commenced in the Warrnambool district in the late 1850’s and by 1870 the passenger trade was booming. Four coastal traders made regular stops at Warrnambool in the 1880's - S. S. Julia Percy, S. S. Dawn, S. S. Nelson and S. S. Casino. The S.S. Julia Percy (later named Leeuwin) was an iron passenger-cargo steam ship built in 1876. At one point in time the Julia Percy would sail from Warrnambool to Melbourne every Friday and return from Melbourne to Warrnambool every Tuesday. The cost of a return ticket for a Saloon Fare was £1.0.0. The Julia Percy was built in Glasgow by Thomas Wingate & Company, Whiteinch, in 1876 for the Warrnambool Steam Packet Company, which commissioned it for trade in Victoria’s western district. It was first registered in Warrnambool, Victoria in 1876. Two steamships, the Julia Percy and the Nelson, collided on 25th December 1881. The Julia Percy was at that time owned by its first owners, the Warrnambool Steam Packet Company, and she sailed under the command of Captain Chapman. It had left Melbourne the evening of 24th December, with about 150 passengers, sailing in fine weather through Port Phillip Heads around 9pm. It was headed for Warrnambool, Belfast (now named Port Fairy) and Portland. The Julia Percy was off Apollo Bay when Captain Chapman was woken by the ship’s whistle after midnight, the steamer Nelson being on a collision course with the Julia Percy. The Nelson struck Julia Percy midship. Boats were lowered from the ship (apart from a damaged lifeboat) and about 30-40 of the passengers boarded the Nelson. The engine room and the forehold were checked and found clear of water. The company manager, Mr. Evans, had been on the Nelson, so he boarded and inspected the Julia Percy and the decision was made to continue on to Warrnambool with the passengers as there appeared to be no immediate danger. However, Captain Thomas Smith said the Nelson was taking on water, so Julia Percy followed it for about an hour towards Melbourne on standby in case of need. Then Julia Percy turned around towards Warrnambool again. Shortly afterwards the Nelson turned to follow her, the ships stopped and passengers were returned to Julia Percy, and three from Julia Percy boarded the Nelson. Both ships proceeded on their way. Julia Percy passed Cape Otway light afterwards, signaling that there had been a collision. It was discovered later that one of the passengers was missing, then thought to have boarded the Nelson but later thought to have fallen into the sea and drowned while trying to jump from Julia Percy to Nelson. There had been 3 tickets purchased under the same name of that passenger “Cutler”; a father, son and friend named Wordsworth, which had caused quite some confusion. No further mishap occurred to either ship and both the Julia Percy and the Nelson reached their destinations safely. An enquiry was instigated by the Victoria Steam Navigation Board regarding the cause of the accident between the two steamships, in connection with the death of Cutler who was supposed to have lost his life by the collision. The enquiry resulted in Captain Thomas Smith having his master's certificate suspended for six months. The Julia Percy changed hands several times. Its next owner was the Western Steam Navigation Co (1887), managed by Mr. T.H. Osborne (the company’s office was on the corner of Timor and Liebig Streets - its north-western wall is now part of the current Warrnambool Regional Art Gallery.) The Melbourne Steamship Co became the next owners (1890), followed by William Howard Smith and Sons (1901) for use in Queensland coastal trades and then it was bought by George Turnbull in 1903 and used for local mail contract in Western Australia. The Julia Percy was sold to the Melbourne Steamship Company Ltd. (1906) and re-named the “Leeuwin” but continued in her Western Australian coastal run. It was converted into a coal hulk in Melbourne in 1910 as a result of damaged caused when it was driven against the jetty at Dongara during a gale. The ship was eventually dismantled and scuttled off Port Phillip Heads on 28 December 1934. The steamship "Dawn" was a 522-ton coastal trader built in 1876 and the vessel operated around the Victorian west coast from 1877 until 1898 for the Portland & Belfast Steam Navigation Co. sailing between Melbourne and Portland, via Warrnambool. The vessel was then owned in October 1885 by the renamed company, Belfast & Koroit Steam Navigation Co., until March 1896 when its ownership moved to W Howard Smith & Sons Ltd. This Melbourne company used the ship to service most ports around Australia. Captain F. Chapman took over from Captain Jones and served on the SS Dawn from 1898 until 1900 when he took command of the SS Casino. On September 4th 1880, the three masted clipper ship, "Eric the Red" struck Otway Reef, near Cape Otway. The S. S. Dawn, under the command of Captain Jones, was returning to Warrnambool from Melbourne, its sailing time different to its usual schedule. The provedore of the Dawn, Benjamin Lear, heard cries of distress coming through the portholes of the saloon. He gave the alarm and the engines were stopped. Cries could be heard clearly, coming from the land. Captain Jones sent out crew in two boats, and fired off rockets and blue lights to illuminate the area. They picked up the three survivors who were in the long boat from "Eric the Red". Two men were picked up out of the water, one being the owner’s son who was clinging to floating kerosene boxes. At daylight the Dawn then rescued the 18 men from the floating portion of the deckhouse, which had drifted about 4 miles from where they’d struck the reef. Shortly after the rescue the deckhouse drifted onto breakers and was thrown onto rocks at Point Franklin, about 2 miles east of Cape Otway. Captain Jones had signalled to Cape Otway lighthouse the number of the Eric the Red and later signalled that there was a wreck at Otway Reef but there was no response from the lighthouse. The captain and crew of the Dawn spent several more hours searching unsuccessfully for more survivors, even going back as far as Apollo Bay. On board the Dawn the exhausted men received care and attention to their needs and wants, including much needed clothing. Four men (three crew and one passenger) died. A week after the shipwreck, the Australian Government had also conveyed its thanks to the Captain and crew of the S.S. Dawn - “Captain Griffith Jones, S.S. Dawn, The Hon. Mr Clark desires that the thanks of the Government should be conveyed to you for the prompt, persevering and seamanlike qualities displayed by you, your officers and crew in saving the number of lives you did on the occasion referred to. The Hon. The Commissioner has also been pleased to award you a souvenir in commemoration of the occasion, and a sum of 65 pounds to be awarded to your officers and crew according to annexed scale. I am, &c, W Collins Rees, for and in the absence of the Chief Harbour Master.” The Awards are as follows: - Crew of DAWN'S lifeboat-Chief Officer, Mr G. Peat, 15 pounds; boat's crew-G. Sterge, A.B., 5 pounds; T. Hammond, A.B., 5 pounds; J. Black, A.B., 5 pounds; H. Edwards, A.B., 5 pounds. Dinghy's Crew-Second Officer, Mr Christie, 10 pounds; boat's crew -F. Lafer, A.B., 5 pounds; W. Johnstone, A.B., 5 pounds; Mr Lear, provedore, 5 pounds; Mr Dove, purser, 5 pounds. Captain Jones receives a piece of plate. (from “Wreck of the ship Eric the Red” by Jack Loney). Medals of Bravery were awarded to the Captain and crew of the S.S. Dawn by the President of the United States, through the Consul-general (Mr Oliver M. Spencer), in July 1881 “ … in recognition of their humane efforts in rescuing the 23 survivors of the American built wooden sailing ship, the Eric the Red, on 4th September 1880.” The men were also presented with substantial monetary rewards and gifts. The city of Warrnambool’s care of the survivors was also mentioned by the President at the presentation, saying that “the city hosted and supported the crew ‘most graciously’. The Medal of Bravery awarded to Nelson Johnson is in the collection at Flagstaff Hill Maritime Museum and Village in Warrnambool. Prior to 1882, and the arrival of the S. S. Casino, the "Dawn" was the only steamer to be able to navigate up the Moyne River at Port Fairy and unload at the wharf. The other regular steamers had to anchor in the bay instead. In February 1891 (as reported in The Age newspaper) the "Dawn" became the first vessel to berth alongside the newly completed Warrnambool Breakwater. The occasion was celebrated with a number of prominent townspeople assembling on board to "participate of a glass of wine". In 1895 the owners of the S.S. Dawn, the Portland and Belfast Steam Navigation Co., wound up and sold out to the Belfast Company who took over the Dawn for one year before selling it to Howard Smith. It took over the Melbourne to Warrnambool run in 1906 when the S. S. Flinders was sold. The S. S. Dawn was condemned and sunk in Suva in 1928. The State Library of Victoria has a lithograph in its collection depicting the steamer Dawn and the shipwrecked men, titled. "Wreck of the ship Eric the Red, Cape Otway: rescue of the crew by the Dawn". The third ship depicted in the photograph was thought to be the S. S. Coorong but there was a question mark next to its name. The photograph was thought to have been taken in 1885 and it's possible the S.S. Coorong was working in Clarence River, N. S. W. by this time. The steamer "Coorong" was built in 1862 by J. G. Lawrie of Glasgow. It was an "iron screw" steamer of 304 tons. It had many owners including Joseph Darwent of Adelaide (1863 - 1871), McMeckan Blackwood and Company, Melbourne (1871 - 1877), Mount Gambier Steamship Company Ltd. (1877 - 1881). William Whineham, Port Adelaide (1882), John See and Company, Sydney (1884 - 1892) and the North Coast Steam Navigation Company Ltd, Sydney (1892 - 1910). In 1911 it was hulked in Sydney Harbour and in 1921 it was being used as a coal hulk at Sydney. It had been originally imported into South Australia for the Port Augusta trade (primarily transporting goods needed by the early settlers) however the owners recognized that it had too much space for that purpose, so it was moved to work on the Adelaide to Melbourne line. Its passenger accommodation was enlarged and it enjoyed a "first class reputation" and by 1874 had made 313 voyages between Melbourne and Adelaide. Its captains included Captain McLean, Captain Ashton and Captain Dowell. In 1867, when 25 miles west of Cape Otway, while travelling from Adelaide to Melbourne, it came across the crew of the schooner "Black Watch" who had abandoned ship after it began quickly taking on water. The crew (six men) were able to get away in a small boat with a compass, chart and few candles. They were "excessively cold from exposure to the weather" when the S. S. Coorong picked them up. In 1877 the Coorong ran aground when entering the Outer Harbour at Adelaide (but was not damaged) and in 1882 it was stranded (for a short time) near Curdies Inlet (Victoria) with some slight damage to its bottom plates. Note - A ship with the same name "Coorong" (a coal carrying barque) was often on the Newcastle / Wollongong to Adelaide route also stopped several times in Warrnambool in the mid 1880's. The photograph has the label "Chuck Photos" printed on the front. Thomas Foster Chuck (born 1826 in London) was a photographer and entrepreneur who arrived in Victoria in 1861. The following year he produced and toured a "Grand Moving Diarama" of dramatic painted scenes from the Burke and Wills expedition. By 1866 he had established a photography studio in Daylesford and later he returned to Melbourne where he opened a studio in the Royal Arcade. In 1874 a collection of Chuck's photographs won a gold medal at the Annual International Exhibition in London. Throughout the 1870's he took over 700 individual photographs of prominent citizens for his historical photographic montage titled "Historical Pictures of the Explorers and Early Colonists of Victoria" which is now in the collection of the National Library of Australia. By 1888 he had sold his Melbourne studio and had established a studio in Ballarat (with his son Thomas Henry Chuck). In 1886 they produced an album titled "Warrnambool and District 1886, Western Hotel - J. Fox proprietor" containing over sixty large photographs of local coastal scenes and seascapes, for the use of patrons of the Western Hotel. This photo (of the three steamers in Lady Bay) was taken at this time and is in the album. Thomas Chuck died on December 7th, 1898, in Albert Park, Melbourne and his son Thomas Henry continued to operate the photography studio in Ballarat into the 1920's.This photograph is a significant record of several of the well-known coastal traders (S. S. Julia Percy, S. S. Dawn and possibly S. S. Coorong) that sailed along the southwest coast of Victoria for many years - transporting goods and passengers between Melbourne and Warrnambool in the 1880's. They are also significant in the role they played in the history of Warrnambool and the other coastal ports they visited as well as being examples of the dangers and hazards associated with navigating the waters along the southern coast of Australia. It is also a good example of a photograph taken by a well-known and significant photographer of that era.Black and white photograph of three steam ships anchored in Lady Bay, Warrnambool. They each have a funnel and two masts and are side on to the beach. A small rowboat with a crew can be seen on the far right. The words "CHUCK-PHOTO" are on the bottom left of the photograph. On the back of the photograph is the name and telephone number of the donor (handwritten in black ball point pen) and the names of the three steamships and date written in uppercase letters in dark blue ink. There is a four-figure number stamped in the centre of the back.Front - "CHUCK-PHOTO" Back - Name of donor and telephone number "6944" "JULIA PERCY, DAWN & KOORONG(?) IN LADY BAY 1885"flagstaff hill maritime museum and village, warrnambool, great ocean road, fred trewartha, s. s. julia percy, s. s. dawn, s. s. nelson, s. s. casino, leeuwin, steamer, steamship, coastal trader, warrnambool steam packet company, captain chapman, victorian steam navigation board, western steam navigation company, melbourne steamship company, william howard smith and sons, portland and belfast steam navigation company, w howard smith and sons ltd, eric the red, captain jones, medal of bravery, rescue, moyne river, warrnambool breakwater, lady bay, s. s. coorong, mount gambier steamship company, black watch, thomas foster chuck, chuck photos, chuck photography -
 Geelong Football Club
Geelong Cats Print 1990s players Sholl, Brad: Snell, Jason: Kilpatrick, Glenn: Hocking, Garry: Pickering, Liam: Riccardi, Peter: Colbert, Leigh: McGrath, Tim: Stoneham, Barry: Mansfield, Michae
Brad ‘Nails’ Sholl Born: 10/11/1972 From: Geelong College via North Melb Height: 184cm Weight: 84kg Natural kicking foot: Right Guernsey number: 12 First senior match for Geelong: Round 1, 1995 v Melbourne at Kardinia Park The attacking small defender delighted fans with his adventurous attacks on the ball and dashes out of the danger area. He was an excellent mark for his size and lacked nothing in courage and determination. His ability to rush to space to create a viable target for a team-mate was another of his trademarks. Occasionally, he was moved forward with success, where he took great delight in booting important goals. Total Brownlow Medal votes for Geelong: 54 Runner-up in club B&F count: 1996 Fourth in club B&F count: 1997, 1998, 2000 Fifth in club B&F count: 1995 Seventh in club B&F count: 1999 GFC Hall of Fame inductee (2002) GFC Life Membership (2001) Career span for Geelong: 1995-2002 Total matches for Geelong: Premiership 169, Night/Pre-Season Series 12, Interstate 1 Total goals for Geelong: Premiership 46, Night/Pre-Season Series 5, Interstate 0 Finals matches for Geelong: 7 Finals goals for Geelong: 0 Last senior match for Geelong: Round 19, 2002 v St Kilda at Docklands Stadium Jason Snell Born: 27/07/1977 From: Upwey-Tecoma/Eastern U18 Height: 181cm Weight: 81kg Natural kicking foot: Right Guernsey numbers: 25 (1996-97) & 4 (1998-2001) First senior match: Round 1, 1996 v Melbourne at the MCG The courageous mid-fielder/small forward possessed sound skills and an excellent football brain. Opposition coaches experienced difficulty in finding suitable match-up opponents to counter him. In a match at Kardinia Park against Port Adelaide in 1997 he scored a match-winning five goals after spending the first half on the bench. He won the club most improved player award in 1999. Tragically, a shocking leg injury sustained at the MCG prematurely terminated his highly promising career. Total Brownlow Medal votes: 5 Career span: 1996-2001 Total matches: Premiership 68, Night/Pre-Season Series 8 Total goals: Premiership 62, Night/Pre-Season Series 3 Finals matches: 3 Finals goals: 1 Last senior match: Round 3, 2001 v Melbourne at the MCG Glenn ‘Killer’ Kilpatrick Born: 29/08/1972 From: Studfield via North Melb Reserves, West Adelaide (SA) & Essendon Height: 184cm Weight: 85kg Natural kicking foot: Right Guernsey number: 13 First senior match for Geelong: Round 5, 1996 v Richmond at Kardinia Park No-one could accuse the dogged half-back flanker and mid-fielder of not giving his all in every match that he played. He used courage and determination to win the ball, negate an opponent or block for a team-mate. Often, his repeated efforts would inspire his fellow Cats. Although effective disposal by foot did not come easy for him, he worked hard on the training track to improve. Total Brownlow Medal votes for Geelong: 27 Runner-up in club B&F count: 1997 Seventh in club B&F count: 2000 Eighth in club B&F count: 1999 (equal) Career span for Geelong: 1996-2002 Total matches for Geelong: Premiership 120, Night/Pre-Season Series 12 Total goals for Geelong: Premiership 31, Night/Pre-Season Series 1 Finals matches for Geelong: 3 Finals goals for Geelong: 0 Last senior match for Geelong: Round 20, 2002 v Fremantle at Subiaco Garry ‘Buddha’ Hocking Born: 08/10/1968 From: Cobram Height: 182cm Weight: 84kg Natural kicking foot: Right Guernsey numbers: 51 (1987) & 32 (1988-2001) First senior match: Round 3, 1987 v Melbourne at Kardinia Park As one of football’s genuine tough and skilful performers, he gave the Cats magnificent service. Undoubtedly, he became one of the code’s all-time greats. His ability to make perfect position, fix eyes on the ball at all costs, seize the ball in packs, mark with vice-like fingers and dispose by hand and foot on either side of his body to bring team-mates into the play made him a nightmare opponent. He delighted in applying gorilla-like tackles and bone-shattering bumps to open up opportunities for his allies. During the last few seasons of his career a severely damaged knee saw him ignore agonizing pain to continue to contribute. He just loved footy! Total Brownlow Medal votes: 133 Captain: 21 matches (1994-95; 1999) Third in Brownlow Medal count: 1991, 1994 Club Best & Fairest: 1991, 1993, 1994, 1996 Runner-up in club B&F count: 1990, 1998 Sixth in club B&F count: 1989, 2000 Seventh in club B&F count: 1997 Ninth in club B&F count: 1995 Tenth in club B&F count: 1992 All Australian selection: 1991, 1993, 1994, 1996 GFC Team of the Century selection (ruck-rover) GFC Hall of Fame inductee (2002) GFC Hall of Fame Legend GFC Life Membership (1995) Career span: 1987-2001 Total matches: Premiership 274, Night/Pre-Season Series 19, Interstate 8 Total goals: Premiership 243, Night/Pre-Season Series 6, Interstate 10 Finals matches: 21 Finals goals: 21 Last senior match: Round 22, 2001 v Carlton at Princes Park Liam Pickering Born: 09/09/1968 From: Stawell via North Melb Height: 184cm Weight: 85kg Natural kicking foot: Right Guernsey number: 23 First senior match for Geelong: Round 3, 1993 v North Melb at Kardinia Park After being unable to command regular senior selection with the Kangaroos, the dogged mid-fielder quickly gained the respect of Geelong coaching staff and team-mates with his faultless reading of the play and ability to bring others into the game. Although not fleet of foot, he was capable of instant decision-making and quick, accurate disposal. He knew how to restrict talented opponents with disciplined manning-up, while having a positive influence on play himself. A series of injuries terminated his career prematurely. Total Brownlow Medal votes for Geelong: 12 Captain: 3 matches (1996-97) Club Best & Fairest: 1997 Third in club B&F count: 1995 Eighth in club B&F count: 1994 Career span for Geelong: 1993-99 Total matches for Geelong: Premiership 102, Night/Pre-Season Series 3, Interstate 1 Total goals for Geelong: Premiership 46, Night/Pre-Season Series 1, Interstate 0 Finals matches for Geelong: 9 Finals goals for Geelong: 8 Last senior match for Geelong: Round 20, 1999 v Carlton at the MCG Peter Riccardi Born: 17/12/1972 From: West St Peters Height: 183cm Weight: 89kg Natural kicking foot: Left Guernsey number: 15 First senior match: Round 4, 1992 v West Coast at Subiaco Few players with more natural pace have represented the club. He is a crisp ball-handler, a safe mark and a long raking left-foot kick. Many of his goals have been registered in spectacular fashion from a long way out, on the run. His versatility as a mid-fielder/forward has been a valuable asset. In recent season he has improved his team-play by improving his tackling and chasing techniques. Total Brownlow Medal votes: 60 Club Best & Fairest: 1998 Runner-up in club B&F count: 1999 Third in club B&F count: 2002 Fifth in club B&F count: 1996 Sixth in club B&F count: 1995 Ninth in club B&F count: 2000 GFC Hall of Fame inductee (2002) GFC Life Membership (1999) Career span: 1992-2006 Total matches: Premiership 288, Night/Pre-Season Series 26, Interstate 2 Total goals: Premiership 286, Night/Pre-Season Series 24, Interstate 1 Finals matches: 19 Finals goals: 13 Last senior match: Round 19, 2006 v St Kilda at Docklands Stadium Leigh ‘Spider’ Colbert Born: 07/06/1975 From: Golden Square Height: 192cm Weight: 92kg Natural kicking foot: Right Guernsey numbers: 35 (1993) & 2 (1994-98) First senior match for Geelong: Round 7, 1993 v West Coast at Kardinia Park Although not strongly built, he was a fearless competitor who performed well at centre half-back. His versatility allowed him to be effective anywhere on the field. Reliable marking, sure ball handling and accurate disposals were features of his play. In 1999 he was appointed captain but a serious knee injury sustained in a pre-season practice match caused him to miss that season. He left the club in controversial circumstances. Total Brownlow Medal votes for Geelong: 10 Captain: 3 matches (1998) Third in club B&F count: 1996 Fifth in club B&F count: 1997 Sixth in club B&F count: 1998 Career span for Geelong: 1993-98 Total matches for Geelong: Premiership 105, Night/Pre-Season Series 7, Interstate 3 Total goals for Geelong: Premiership 50, Night/Pre-Season Series 3, Interstate 1 Finals matches for Geelong: 10 Finals goals for Geelong: 4 Last senior match for Geelong: Round 22, 1998 v Essendon at the MCG Transferred to North Melb in 2000 Tim ‘Bluey’ McGrath Born: 07/10/1970 From: North Dandenong via North Melb Height: 190cm Weight: 94kg Natural kicking foot: Right Guernsey number: 17 First senior match for Geelong: Round 1, 1992 v Hawthorn at Waverley Park He has been one of several players recruited from the Kangaroos to give the club excellent service. His first match for the Cats was a hectic one at full-back opposed to a rampant Jason Dunstall. The selectors showed faith in the strong red-headed defender and he rewarded them with a long string of highly serviceable performances. His determination, safe marking, sound defensive skills and leadership qualities were great assets. Often, he was able to outpoint champion opponents. Around the club he was a valuable role-model with his general attitude. Total Brownlow Medal votes for Geelong: 26 Captain: 8 matches (1999) Runner-up in club B&F count: 1998 Third in club B&F count: 1993, 1999 Seventh in club B&F count: 1998 Eighth in club B&F count: 1995, 1997 Ninth in club B&F count: 2001 Tenth in club B&F count: 1996 GFC Hall of Fame inductee (2002) GFC Life Membership (1998) Career span for Geelong: 1992-2002 Total matches for Geelong: Premiership 219, Night/Pre-Season Series 15, Interstate 1 Total goals for Geelong: Premiership 18, Night/Pre-Season Series 3, Interstate 0 Finals matches for Geelong: 14 Finals goals for Geelong: 1 Last senior match for Geelong: Round 2, 2002 v Adelaide at Football Park Barry Stoneham Born: 09/02/1968 From: St Josephs (VCFL) Height: 194cm Weight: 98kg Natural kicking foot: Right Guernsey numbers: 53 (R 6, 1986) & 26 (R 7, 1986-2000) First senior match: Round 6, 1986 v Footscray at Kardinia Park A fanatical Geelong supporter all his life, the determined big man was in his element at centre half-forward. Excellent positioning, agility, magnificent marking, a mean streak and endless determination were his trademarks. He was able to bring crumbing team-mates into the play and score goals regularly. He was sufficiently versatile to play successfully in any key position or as a relief ruckman. Tragically, in 1994 a badly broken leg severely restricted his mobility and kicking power. Despite such restrictions, he retained his effectiveness by developing additional team skills. Total Brownlow Medal votes: 21 Captain: 59 matches (1991-93; 1996-98) Club Best & Fairest: 1990 Runner-up in club B&F count: 1989 Third in club B&F count: 1992 Fourth in club B&F count: 1991, 1993 Tenth in club B&F count: 1997, 1999 All Australian selection: 1989, 1992 GFC Hall of Fame inductee (2002) GFC Life Membership (1994) Career span: 1986-94; 1996-2000 Total matches: Premiership 241, Night/Pre-Season Series 21, Interstate 7 Total goals: Premiership 223, Night/Pre-Season Series 14, Interstate 2 Finals matches: 15 Finals goals: 14 Last senior match: First Elimination Final, 2000 v Hawthorn at Docklands Stadium Michael Mansfield Born: 08/08/1971 From: St Josephs (VCFL) Height: 183cm Weight: 85kg Natural kicking foot: Left Guernsey numbers: 49 (1990) & 21 (1991-99) First senior match for Geelong: Round 18, 1990 v Essendon at Kardinia Park The well-balanced performer played mostly as an attacking half-back flanker but was capable of being used effectively on the forward line. His exceptional strength, reliable marking and considerable mobility made him a difficult opponent who did not lack courage. His performances in finals matches were outstanding. Total Brownlow Medal votes for Geelong: 28 Captain: 9 matches (1997-99) Third in club B&F count: 1994, 1997 Fourth in club B&F count: 1995 Sixth in club B&F count: 1996 Eighth in club B&F count: 1998 GFC Hall of Fame inductee (2002) GFC Life Membership (1998) Career span for Geelong: 1990-99 Total matches for Geelong: Premiership 181, Night/Pre-Season Series 10, Interstate 4 Total goals for Geelong: Premiership 100, Night/Pre-Season Series 0, Interstate 1 Finals matches for Geelong: 15 Finals goals for Geelong: 9 Last senior match for Geelong: Round 22, 1999 v Fremantle at Kardinia Park Transferred to Carlton in 2000 Historical information provided by GFC Historian Col Hutchinson The print consists of ten player photographs and a Geelong Cat Mascot in the top centre of the print with the words - GEELONG/CATS - below the picture. In the top left are action photographs of Sholl and Snell. In the top right corner are action photographs of Kilpatrick and Hocking. Along the bottom of the print from left to right are action photographs of Pickering, Riccardi, Colbert, McGrath, Stoneham and Mansfield. Each photograph has the player's surname in white text in the bottom left hand corner. Has a wire along the back for hanging. 1990s players Sholl, Brad: Snell, Jason: Kilpatrick, Glenn: Hocking, Garry: Pickering, Liam: Riccardi, Peter: Colbert, Leigh: McGrath, Tim: Stoneham, Barry: Mansfield, Michael. -
 Melbourne Legacy
Document - Speech, Commemorative Address - Sir Stanley Savige K.B.E. Federal Conference of Legacy Clubs, Canberra, 10/1954
After the death of Stan Savige this address was given at the Canberra Conference in October 1954. It is tribute to his life. Sir Stanley Savige KBE : Commemorative Address Federal Conference of Legacy Clubs, Canberra : October 1954. On the 15th of May this year Legacy learned to its enduring sorrow of the death of its Founder, Lieut. General Stanley George Savige KBE, CB, CBE, DSO, MC, ED, for more than 30 years affectionately known to us all as Legatee Stan Savige. He was the embodiment of all those things for which Legacy stands, and each one of us who knew him and worked with him feels a great and abiding sense of personal loss. It is proper, therefore, that those of us at this Conference, the first after his passing, representative of Legacy throughout the Commonwealth, and comprising so many who were his friends, so many who knew the depth of his love for Legacy, should acknowledge our debt to our Founder and ensure, so far as we may, that the inspiration of his life and work in this Cause shall not be lost to those who follow after. It was not ordained that Stanley George Savige - should enjoy a long life, but it was to prove a life of outstanding service. Born at Morwell in Victoria some 63 years ago, he received with his brothers and sisters such education as was then available to a lad in a mining district. He had no particular opportunities of advancement, but from his early days he cherished a strong ambition to make a success of his life, and with this in view he lost no opportunity of adding to his knowledge. Always a lover of the open country, a good bushman and a fine shot, he became as a young man, a Scoutmaster with a keen following of boys. Even in those early days he attracted youth and showed undoubted promise of the quality of leadership which later was to make him famous. Opportunity came with the first World War, and he took his place as a private soldier in the original 24th Battalion AIF. Followed Gallipoli and Anzac where his marksmanship and bush craft stood him in good stead. Conscious that his early training was not sufficient to secure the promotion he desired, he set himself to enlarge it. Only a man of fine fibre and rare determination could apply himself to study on that war torn Peninsula, where our men, hitherto untested, suffered every known hardship and no man knew, from hour to hour, whether he would survive. But Savige achieved it. Himself then a Corporal he found another Corporal who was a former Schoolmaster and learned from him all that he had to teach. Savige was on his way. He was commissioned on the Field and allotted the heroic task of leading the last party off that desperate coast during the famous evacuation. In France he became the Adjutant of his Battalion and one of the best known officers in the 6th Brigade. He won the Military Cross and was mentioned in despatches. Early in 1918 he received a signal distinction, He was included in a small but distinguished band of Officers and Non-Commissioned Officers from the British and Dominion Forces most carefully selected for individual courage and proved qualities of leadership, and was sent to Persia, under the command of Major-General Dunsterville, Kipling’s famous Stalky, to assist and mobilise the friendly tribes with a view to protecting the road to India, left wide open by the withdrawal of Russia. The story of the Dunsterforce, its suffering and achievements in the face of incredible hardships and difficulties, was later to be told by Savige in his book “Stalky’s Forlorn Hope”. He emerged, finally, unscathed, despite his active participation in several of the bloodiest battles of all time, with the rank of Captain and a DSO and MC to his credit, to say nothing of three mentions in despatches. In later years, further decorations were to be conferred upon him, but I believe he valued none of these so highly as his awards for outstanding personal bravery won in the Field when he was an Officer of comparatively junior rank. Such was the man who in August 1923, at the instance of his former Commander, Major-General Sir John Gellibrand, gathered around him a handful of men who had fought and laughed with him over four well remembered years. This small band adopted the name of “Legacy”, but its purpose then was, in the main, to assist in safeguarding the interests of ex-servicemen in this country. Worthy although the case undoubtedly was, the conception and ideal which was to distinguish Legacy from all kindred post-war movements did not emerge until two years later. The torch had not been lit. Legacy had not yet found its soul. What has been achieved since then is known to you all. The Legacy ideal, unique in its conception, with no known counterpart elsewhere, is now accepted, welcomed and honoured throughout the Commonwealth and abroad. But in those early days the achievements of our Founder in the face of all manner of difficulties and frustrations are worthy of our lasting memory and thankfulness. As the source of every river lies in the hills, so must the inspiration from which stems a great conceptions of service to one’s fellow men be lofty and above reproach. Savige was the embodiment of this new expression of comradeship, as he was the central figure and driving force of the little group that sponsored it. But for his zeal, his faith and determination, it is likely that the flame, newly kindled, might have flickered and died. The idea of men returned from active service pledging for the sake of their former comradeship, their personal assistance to the widows, and above all, to the children of those who had fought beside them and paid the full price of War, was so completely new and unexpected that it was by no means readily accepted. There were no funds, no precedents to guide the new adventurers, only the clear bright flame of an ideal just envisaged, and the conviction that the Cause was unassailable. Nor were there lacking many who said that the community held no place for Legacy, that it was born of sentiment only, and would quickly pass. The scoffers are gone and one since forgotten, but the torch remains and burns brighter than ever. Down the years of Legacy there are many names deserving of honour, men from all States and all stations of life, but no name stands out in such clear and bold relief as does the name of our Founder. By his works you shall know him. He was, in truth, the Soul of Legacy. He sought no office and preferred to work as one of the team. Six years went by before he accepted the Presidency of Melbourne Club, and then only because his fellows would book no further delay. “The Spirit of Legacy is Service” - so runs the Charter, and that was Savige’s Creed. By virtue of his attainments he was called upon to take a leading part in the administration of Legacy, first within his own club and later, as Chairman of the Co-ordinating Council of Legacy in Australia. But always it was the essentially human character of the work which enthralled and upheld him, and the tasks which gave him most joy were those which brought him into close personal contact with the youngsters and their home life. Like their elders they recognised his goodwill and his leadership and responded to it. It was Savige who made possible the first camps held for the boys and girls by Melbourne Club. These were erected on his own seaside property, and were originally conducted under his personal direction and largely with the aid of funds he had collected. There was hardly an important post in his own Club that Savige did not at some time occupy and adorn. He was happiest in the company of those men with whom he had served in the field, and cherished always the comradeship born of active service which is of the essence of Legacy. He was a man of strong convictions but attentive always to another’s point of view. As a Legatee he played a leading part in bringing hope and encouragement to many a mother on whom the whole responsibility of a young family had been suddenly and tragically laid; in the attainment of the ambitions of many an orphan child, which not so long since had seemed to him or her to be mere dreams, impossible of realisation. Comfort for the bereaved, new hope for the children’s physical and educational welfare, assistance with the home, aid for the sick, money for the needy and a new courage to face a future that hitherto had held no promise, all these facets of Legacy endeavour combine to present a living and enduring memorial to the man we honour as our Founder today. Between the two World Wars in addition to establishing himself successfully in civilian life and answering the constant calls of Legacy on his energy and time, Savige maintained an active association with the Army. He was convinced that a Second AIF would one day be urgently called upon, and as a Battalion Commander he spared no effort to train the Officers under his charge during the uneasy years of peace for the trial that he felt must come. These men have all subsequently had distinguished military careers, their names are well known and many of the serve in Legacy today. When the second crisis came, Savige himself was one of the first to offer, and although his youth was spent, he proudly carried the number VX13 throughout the terrible years that followed. This time he was to command, first the 17th Australian Infantry Brigade in the first action of the Second AIF against the enemy at Barida, and subsequently at Tobruk and Derna - all famous names now. It was his patrols which gave the warning - unheeded at the time - that Rommel’s reinforcements were reaching North Africa far earlier than was expected. Then followed the grim days of Greece and Crete when the fine qualities of his leadership were put to the utmost test. I have been told by those who were closest to him it was typical of Savige that when his convoys were on the move back and were being blasted from the air by the unopposed Luftwaffe, he should sit by the side of the open road, wearing his red banded cap, to steady the morale of men who had then no chance of hitting back at the enemy. Unorthodox no doubt, but here was a man indeed. Throughout the whole campaign and later when he commended the 3rd division in New Guinea and later still when with the rank of Lieutenant-General he became a Corps Commander in New Guinea and Bouganville, it was at all times characteristic of him that he should see for himself the situation in the forward areas. He dealt personally with his subordinate commanders whenever it was possible to do so. No one says his G.S.O. 1. understood better than he did the importance of front line troops seeing their G.O.C. frequently, and knowing that he was aware of and prepared to share their hardships and dangers. He took many risks that he should not have taken, exhausted himself physically and mentally times without number, and considered himself not at all in order to secure the success of his operations. Finally, in Bouganville, he brought his campaign to a victorious conclusion and accepted the personal surrender of the Japanese Commander. Savige is known as one of Australia’s most human military leaders, but let no one believe that he did not ask and receive the utmost of his men. He trained them in a hard school but he was ever conscious of their needs and observant and thoughtful of their welfare. Fearless and untiring under conditions which brought younger men down, he asked nothing that he was not himself prepared to give and do. The close of the Second World War left him with the same brave heart; but a vitality greatly impaired. He was called up again and again to perform important national tasks, notably that of Co-ordinator of Demobilisation and Dispersal. But his interest in Legacy never flagged it was in fact more personal than ever, for under his command many junior legatees, sons of former comrades had proved themselves worthy of their Fathers in war and in peace. In the bearing and achievements of the young men of the Second A.I.F. he took a particular and justifiable pride. He applied himself to the Extension of Legacy to areas where it had not previously been practicable to operate. His record of service and close personal contact with the men of both wars made him a most welcome pioneer and many new Clubs and Groups resulted from his efforts. He founded, and I doubt whether any one else could have done so, the Club in the great Capital of our Empire. His reputation and obvious sincerity surmounted obstacles that might well have daunted lesser man. Legacy’s debt to him visibly increased. But he was ever a simple man, with a great love and understanding of his fellow men and a true Legatee at heart. Much that he did will never be known or recognised, save by those who benefitted. His service in Legacy ranged from the humble kitchen of cottage and farm to our representation in Westminster Abbey itself. A knighthood set the seal upon an outstanding career. None the less when upon the death of Field Marshall Sir Thomas Blamey, Lieut. General Sir Stanley Savige became the Patron of the Melbourne Club, he retained at his own express desire, the title of Legatee Savige, and when on that final day we bade him farewell, when the Flags he had served so well were lowered and the guns which had formed a grim final salute, it was apparent to all who had eyes to see that this great and simple man had won such a place in the hearts and affection of his fellow country men as is given to few men indeed. From the packed Cathedral, escorted by his fellow Generals, followed by men of his own Units, by Legatees and a great company of others who had cause to honour and esteem him, he made his last journey. But that is not the end. His voice and presence are lost to us but his memory and inspiration must ever remain. As he has bequeathed to the National War Memorial yonder his diaries, records and battle plans, so he has bequeathed to us his fellow Legatees his greatest achievement and his trust, Legacy itself. Never was the Torch passed by worthier hands. Now it is ours to hold it high. Whatever material memorial the future many hold for him, Legacy owes its Founder a livelier recompense. It is within our power to implement what I believe to be his greatest wish, that Legacy and its ideal of comradeship and service shall flourish and endure. Let each one of us then resolve that we shall, within our Clubs, in all tasks to which we are assigned, both great and small, keep in our minds the life and spirit of Stanley George Savige, so that we may be proud at all times to say of Legacy to those who follow after - “If you would see his memorial - Look around you”.The tribute to Stanley Savige shows how greatly he was regarded by the Legatees.Off white quarto paper with black type, address given about Stan Savige to the Canberra Conference, x 12 pages.savige, speech, obituary -
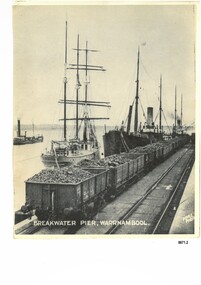 Flagstaff Hill Maritime Museum and Village
Photograph - Vessels at Breakwater Pier, Warrnambool, Foyle Photographic Studio, circa 1906
This photograph was one of ten photographs donated to Flagstaff Hill Maritime Museum and Village by Fred Trewartha. Frederick John Fox Trewartha (Fred) was a well-known Warrnambool businessman. He was born in Beeac near Geelong in 1920 and came to Warrnambool with his family as a very young child. He was apprenticed to his father John, as a saddler and later opened his own shop on Raglan Parade. He then moved into working with tarpaulins and canvases for the trucking industry. Fred was keenly interested in photography (and was a member of the Warrnambool Cine Club), yachting and boat building. He kept his yacht moored at Port Fairy for many years and participated in sailing events locally and interstate. He also built boats with his sons. He had the opportunity to meet many older sailors and it's thought this photo (and others in the set) may have been given to him by one of these men. Fred Trewartha died in 2016 in Warrnambool. The three identifiable ships in this picture are the "Speculant", the "S. S. Barrabool" and the "S. S. Flinders" - coastal trading vessels that regularly came and went from Warrnambool. The steamer on the left hasn't been identified. The barquentine SPECULANT was a steel, three-masted sailing ship built in 1895 in Inverkeithing, Scotland, registered in Warrnambool, Victoria and wrecked at Cape Paton, Victoria, 10th February 1911. The SPECULANT had been involved in the timber trade between the United Kingdom and Russia, until sold to its Warrnambool owners and timber merchants Messrs. P.J. McGennan & Co. (Peter John McGennan) in 1902 for 3000 pounds and had her sailed to Warrnambool as her new port. Peter John McGennan was born in 1844 and worked as a builder and cooper in Holyhead, Anglesea, Wales. He immigrated to Australia in 1869 as a free settler and arrived in Warrnambool in 1871 and undertook management of a property in Grassmere for Mr. Palmer. Peter met his wife Emily in South Melbourne and they married in 1873. They had ten children including Harry who lived to 1965, and Andrew who lived until 1958. (The other children were their four brothers - John who was killed in the Dardenalles aged 35, Frederick who died aged 8, Peter who died aged 28, Frank who died aged 5 weeks - and four sisters - Beatrice who died age 89, Edith who died aged 49, Blanche who died aged 89 and Eveline who died aged 48.) In 1874 Peter starting a boating establishment on the Hopkins River. In 1875 he opened up a Coopers business in Kepler Street next to what was Bateman, Smith and Co., moving to Liebig Street, next to the Victoria Hotel, in 1877. In 1882 he then moved to Lava Street (which in later years was the site of Chandlers Hardware Store). He was associated with the establishment of the Butter Factory at Allansford. He started making Butter Boxes to his own design and cheese batts for the Butter Factory. In 1896 established a Box Factory in Davis Street Merrivale, employing 24 people at its peak, (it was burnt down in 1923); and in Pertobe Road from 1912 (now the Army Barracks building). Peter was a Borough Councillor for Albert Ward from 1885 to 1891, he commenced the Foreshore Trust (including the camping grounds along Pertobe Road), and he was an inaugural Director of the Woollen Mill in Harris Street, buying an extensive share-holding in 1908 from the share trader Edward Vidler. They lobbied the Town Hall to have a formal ‘Cutting’ for the waters of the Merri River to be redirected from its natural opening south of Dennington, to its existing opening near Viaduct Road, in order to have the scourings from the wool at the Woollen Mill discharged into the sea. He sold Butter Boxes around the state, and had to ship them to Melbourne by rail. Peter’s purchase of the SPECULANT in 1902 enabled him to back-load white pine from Kaipara, New Zealand to Warrnambool to make his butter boxes then, to gain profitability, buy and ship potatoes and other primary produce bound to Melbourne. (McGennan & Co. had also owned the LA BELLA, which had traded in timber as well, until she was tragically wrecked with the loss of seven lives, after missing the entrance channel to Warrnambool harbour in 1905. It appears that the SPECULANT was bought to replace the LA BELLA.) In 1911 the SPECULANT had been attempting to depart Warrnambool for almost the entire month of January to undergo docking and overhaul in Melbourne. A month of east and south-easterly winds had forced her to remain sheltered in Lady Bay, Warrnambool apart from one morning of northerlies, when an attempt was made to round Cape Otway; she had to return to shelter in Portland after failing to make any headway. With only 140 tons of sand ballast aboard, the ship would not have been easy to handle. Captain Jacobsen and his crew of nine, mainly Swedes, decided to make for Melbourne, leaving Portland Harbour on 5th February 1911. By the 9th they had reached Cape Otway, where they encountered a moonless night, constant heavy rain, and a heavy sea with a south-easterly wind blowing. After safely rounding Cape Otway the course was changed to east, then north-east to take the vessel to a point six miles off Cape Patton, following the orders of Captain Jacobsen, who told the crew to be very careful with the steering, as the wind and sea was running to leeward. The patent log (used to measure speed) had been out of order for the last four months as no-one in Warrnambool was able to fix it: it was intended to have it repaired in Melbourne. In the meantime the crew measured the vessel's speed by looking over the side and estimating wind strength. This compounded the difficulties of imprecise positioning, as the strong cross wind and sea were acting on the lightly laden vessel to steadily drive it towards the shore. At 3.30am on Friday 10 February 1911 Captain Jacobsen and the first mate were looking over the side of the vessel when they heard the sound of breakers and suddenly struck the rocks. The crew immediately knew they had no chance of getting the SPECULANT off, and attempted to rescue themselves by launching the lifeboat, which was instantly smashed to pieces. One of the crew then volunteered to take a line ashore, and the rest of the crew were all able to drag themselves to shore, some suffering hand lacerations from the rocks. Once ashore they began to walk along the coast towards Lorne, believing it was the nearest settlement. Realising their mistake as dawn broke they returned westwards to Cape Patton, and found a farm belonging to Mr C. Ramsden, who took them in and gave them a change of clothes and food. After resting for a day and returning to the wreck to salvage some of their personal possessions, at 10am on Saturday they set out for Apollo Bay, a voyage that took six hours, sometimes wading through flooded creeks up to their necks. The Age described the wreck as "listed to starboard. All the cabin is gutted and the ballast gone. There is a big rock right through the bottom of her, and there is not the slightest hope of getting her off". A Board of Marine inquiry found that Captain Jacobson was guilty of careless navigation by not taking steps to accurately verify the position of the vessel with respect to Cape Otway when the light was visible and by not setting a safe and proper course with respect to the wind and sea. It suspended his certificate for 6 months and ordered him to pay costs. The location of the wreck site was marked for a long time by two anchors on the shoreline, until in 1970 the larger of the two anchors was recovered by the Underwater Explorers' Club and mounted on the foreshore at Apollo Bay. The bell from the wreck was also donated to the Apollo Bay Surf Lifesaving Club but is recorded to have been stolen. Rusting remains of the wreck can still be found on the shoreline on the southern side of, and directly below Cape Patton. Parts of the SPECULANT site have been buried by rubble from construction and maintenance works to the Great Ocean Road, as well as by naturally occurring landslides. Peter J McGennan passed away in 1920. The Gates in the western wall of the Anglican Church in Henna Street/Koroit St are dedicated to him for his time of community work, which is matched with other prominent Warrnambool citizens; Fletcher Jones, John Younger, J.D.E (Tag) Walter, and Edward Vidler. After Peter J McGennan's death Harry, Andrew and Edith continued to operate the family business until July 11th 1923 when the company was wound up. (Andrew lived in Ryot Street Warrnambool, near Lava Street.) Harry McGennan (Peter and Emily’s son) owned the Criterion Hotel in Kepler Street Warrnambool (now demolished). His son Sid and wife Dot lived in 28 Howard Street (corner of Nelson Street) and Sid managed the Criterion until it was decided by the family to sell, and for he remained Manager for the new owners until he retired. Harry commenced the Foreshore Trust in Warrnambool around 1950. The McGennan Carpark in Pertobe Road is named after Harry and there are Memorial-Stone Gates in his memory. (The Gates were once the original entrance to the carpark but are now the exit.). The Patent Log (also called a Taffrail log) from the SPECULANT, mentioned above, and a number of photographs, are now part of the Collection at Flagstaff Hill Maritime Village.. The S. S. Flinders was built by A. J. Inglis, Ltd, Pointhouse, Glasgow in 1878 for the "Tasmanian Steam Navigation Company', Hobart which merged with the "Union Steamship Company" of New Zealand and it was later sold to the firm "McIlwraith, McEacham and Company". It was built of iron and was 1000 tons and 227 feet, 1 inch long. It was described as "splendidly fitted up for the carriage of passengers and her cargo space was also very large". In the saloon about 130 passengers could be accommodated while the second class had sufficient room for one hundred passengers. In 1890, the S. S. Flinders would leave Melbourne on Mondays and Thursdays at 5 pm and reach Warrnambool the following morning at 8 am. On the return it would leave Warrnambool on Wednesdays and Saturdays at 5 pm and reach Melbourne the following morning. In 1896, the Weekly Times described the "steamer Flinders (otherwise known as "the Warrnambool mailboat") as "as good a sample of a seagoing steamer as there is trading on the Victorian Coast at the present time". In April 1896 newspaper reports noted the S. S. Flinders took 2915 bags of potatoes from Warrnambool to Melbourne (the largest shipment of that season) as well as 50 tons of tinned rabbits from the Hamilton Preserving Factory. It was also noted that particularly during the Christmas period, there were excessive demands for berths from holiday makers wanting to enjoy a holiday in Warrnambool. In May 1903, the S. S. Flinders narrowly escaped destruction when an explosion and subsequent fire occurred during the passage from Melbourne to Warrnambool. A drum (which apparently contained carbide of calcium) exploded and blew off a hatch cover. As the steamer got to within a mile or two of Warrnambool, smoke was seen coming out of the hold and (unknown to the passengers) flames had taken hold. The crew quickly got to work - closing down all the hatches and pumping water into the hold through a hole in the saloon floor. There were 30 or 40 cases of kerosene on board. The Flinders continued on to Warrnambool and berthed at the Breakwater. The passengers all went ashore - many unaware of the danger they had been in. A telephone message was sent to the local Fire Brigade Station however the fire was extinguished before the firemen and their equipment arrived. After the hold was checked, the Flinders was certified as seaworthy and left for Portland. The Flinders continued to transport Western District produce as well as passengers from Warrnambool to Melbourne until 1906 when (due to a decrease in shipping trade during the Winter and the availability of train services) the Flinders was replaced by the smaller steamer "Dawn" and in 1907 when it was sold to the "Adelaide Steamship Company" for use in the Western Australia coastal trade, it was replaced by the "S. S. Barrabool". The S. S. Barrabool was a coastal steamer built by "Palmer Shipbuilding and Iron Company Limited" in Jarrow, Durham in 1874. It was bought by "Howard Smith Ltd" who was a pioneer in the coal trade between Melbourne and Newcastle. Howards Smith's early fleet contained ships named after local hills and mountains -"You Yangs", "Macedon", "Dandenongs" and "Barrabool". Later they extended their fleet to include ships that were well known in Warrnambool including the "Dawn" and the "Edina". The S. S. Barrabool had a chequered start and was nicknamed the "Great Australian Ram" because of the numerous accidents it was involved in. Between 1875 and 1883 it collided with three other vessels - sinking the "Queensland" on August 3rd, 1876, near Wilson's Promontory and sinking the "Bonnie Dundee" on 10th March 1879 off Lake Macquarie, New South Wales (with the loss of five lives). In August 1884 the Barrabool collided with the steamer "Birksgate" in Port Jackson causing considerable damage to "Birksgate". However in a newspaper article published in the "Truth" in March 1899 the S. S. Barrabool was described as "one of the fine old type of vessels" and "still a stout a craft as ever". The article was describing the practice of a "two-mate" system on board many ships (the Barrabool being one) whereby the company only employs two men (a first and second mate who must alternate watches of four hours each) rather than three mates who work four hours on and eight hours off. It was suggested that ships employing the "two-mate" system may find their insurance policies "null and void" should an accident occur. However the writer did note that the Barrabool was "officered by a captain and first and second mates .. whom it would be impossible to find more capable officers amongst the maritime fleet of the colonies". Between 1900 and 1909 the Barrabool was making regular trips along the east coast of Australia, carrying coal to Hobsons Bay (Melbourne) from Newcastle, Bellambi and Sydney. In 1907 it was brought in as a temporary replacement on the Melbourne to Warrnambool route for the S.S. Flinders. In 1912 the S. S. Barrabool ran aground off the Fitzroy River in Queensland and was found to be uneconomic to repair. It was brought back to Sydney and converted into a hulk. In August 1952 it was towed 17 miles off Sydney and scuttled. “Foyle” written on the photograph is the name of Foyle’s Photographic studio - originally owned by James Charles Foyle. He owned “Foyle’s Photo Card Studios” in Liebig St, Warrnambool, which operated between 1889 – 1919 At the time of the photograph the studio was owned by both Charles and Lilian Foyle (sometimes known as Lillian or Lily), either of whom could have taken this photograph. They also worked together at a later date on the photographs, sketches and paintings of the famous and historical Pioneers’ Honour Board.This photograph is a significant record of three of the well-known coastal traders (the "Speculant", the "S. S. Barrabool" and the "S. S. Flinders") that sailed along the southwest coast of Victoria for many years - transporting goods and passengers between Melbourne and Warrnambool.A black and white photograph titled "Breakwater Pier, Warrnambool". A line of coal trucks on rails are on the Breakwater. There are three ships (one sailing ship and two steamers) moored at the pier. In the left side of the picture is another ship. The name of the photographer is printed in the lower right corner. On the back of the photograph are the handwritten names of the moored ships written in blue pen. It also has the handwritten name, town and telephone number of the donor. In the bottom right hand corner is an upside down stamped number in black ink.Front of photograph - "BREAKWATER PIER, WARRNAMBOOL." "FOYLE PHOTO" Back of photograph - "Sailing Ship" "Speculant sail ship" "Barrabool coal ship" "Flinders Passenger ship" Name of donor W'Bool (and telephone number) "K-7148 M" (stamped upside down)flagstaff hill maritime museum and village, warrnambool, great ocean road, shipwreck coast, speculant, barque speculant, p. j. mcgennan, peter john mcgennan, speculant wreck, captain jacobsen, s. s. flinders, steamer flinders, a. j. inglis ltd, tasmanian steam navigation company, mcilwraith mceacham and company, warrnambool mailboat, coastal steamer, s. s. barrabool, howard smith ltd, two-mate system, coal ship, dawn, edina, lady bay, breakwater, warrnambool breakwater, foyle, foyle photographic studio warrnambool -
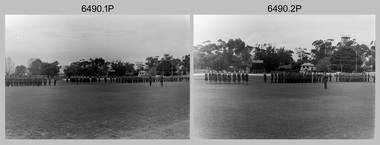 Bendigo Military Museum
Photograph - Army Survey Regiment Freedom of Entry Parade, Queen Elizabeth Oval, Bendigo, 1980
The Freedom of Entry to the City was an honour conferred by the Bendigo City Council to the Army Survey Regiment in 1970. 1980 was the third time the unit exercised its freedom of marching into the city with swords drawn, bayonets fixed and drums beating. The honour is usually bestowed upon local regiments, in recognition of their dedicated service, and it is common for military units to periodically exercise their freedom by arranging a parade through the city. Led by the Regiment’s CO – LTCOL Bob Skitch, the unit marched down View St in the CBD, along Pall Mall and up Gaol Rd to the Queen Elizabeth II Oval. The ceremonial parade followed with a march past the guests of honour, Mayor of Bendigo Councillor Paul Tomkinson and military dignitaries. The parade concluded after formal inspections of the troops. The Regiment also exercised its Freedom of Entry with anniversary parades in 1977, 1980, 1985, 1990 and 1995. Some photos in this set were also printed on photo paper and catalogued under item 6021.25P. Photos of the march are catalogued under item 6491.21P. Photos of the Freedom of Entry parade rehearsal are catalogued under item 6479.38P.These black and white photographs of the Army Survey Regiment were taken on the occasion of the Freedom of Entry parade to the City of Bendigo in 1980. The photographs are on 35mm negative film and scanned at 96 dpi. They are part of the Army Survey Regiment’s Collection. .1) to .7) - Photo, black & white, 1980. Squadrons formed up at beginning of parade. .8) & .9) - Photo, black & white, 1980. 3rd Military District Band marches to their parade position. .10) to .11) - Photo, black & white, 1980. Squadrons formed up parade with 3rd Military District Band playing music. .12) to .14) - Photo, black & white, 1980. Officers formed up before taking posts. L to R: MAJ Peter Eddy, LT Brendon Jaego-Banks, CAPT Peter Searle - UK Exchange, unidentified, ADJT CAPT John Harrison, MAJ Sam Schwartz US Exchange, unidentified, MAJ Robin Blackburn, remainder unidentified. .15) - Photo, black & white, 1980. Officers march to their posts. L to R: MAJ Peter Eddy, LT Brendon Jaego-Banks, CAPT Peter Searle - UK Exchange, unidentified, ADJT CAPT John Harrison, MAJ Sam Schwartz US Exchange, unidentified, MAJ Robin Blackburn, remainder unidentified. .16 - Photo, black & white, 1980. Officers march to their posts. .17 - Photo, black & white, 1980. Army Svy Regt awaits the arrival of the Mayor – Councillor Paul Tomkinson. .18 - Photo, black & white, 1980. CO LTCOL Bob Skitch escorts the Mayor – Councillor Paul Tomkinson and unidentified guest to the dais. .19) to .25) – Army Svy Regt salutes the Mayor – Councillor Paul Tomkinson. .26) - Photo, black & white, 1980. CO LTCOL Bob Skitch escorts the Mayor – Councillor Paul Tomkinson to Headquarters Squadron to inspect its personnel. .27) - Photo, black & white, 1980. Headquarters Squadron inspection. L to R: OC MAJ Paddy Strunks, RSM WO1 Aub Harvey, Mayor – Councillor Paul Tomkinson, SPR Chris ‘Charlie’ Brown, unidentified, SGT John Grove (orderly room), unidentified, SPR Jeff Ruiz, WO2 Max Neil, unidentified, SGT Alan Brown, SGT Tim Allanson. .28) - Photo, black & white, 1980. Headquarters Squadron inspection. L to R: OC MAJ Paddy Strunks, Mayor – Councillor Paul Tomkinson, unidentified, SGT Rick Warren, unidentified, CPL Andy Wilson, WO2 Ted Burgess. .29) - Photo, black & white, 1980. Headquarters Squadron inspection. L to R: OC MAJ Paddy Strunks, RSM WO1 Aub Harvey, unidentified civilian, Mayor – Councillor Paul Tomkinson, unidentified, SGT Rick Warren, unidentified, CPL Andy Wilson, WO2 Ted Burgess. .30) - Photo, black & white, 1980. Cartographic Squadron’s OC CAPT Bob Roche salutes the Mayor – Councillor Paul Tomkinson. L to R: unidentified civilian, CO LTCOL Bob Skitch. In background L to R: SSGT Bob Scaddan, unidentified, CPL John Tempest, CAPT Simon Lemon, SSGT Colin Cuskelly, CPL Trevor Bottomley, SPR Bob Sheppard, WO2 Bob ‘Stretch’ Hayden, unidentified, CPL Ian McKenzie, FLTLT Ron Aitken, SPR Ian Fitzgerald, SPR Greg Else. .31) - Photo, black & white, 1980. Cartographic Squadron’s OC CAPT Bob Roche salutes the Mayor – Councillor Paul Tomkinson. L to R: unidentified civilian, CO LTCOL Bob Skitch. In background L to R: CPL Terry Danger, SPR Rod Skidmore, SSGT Bob Scaddan, unidentified, CPL John Tempest, CAPT Simon Lemon, SSGT Colin Cuskelly, CPL Trevor Bottomley, SPR Bob Sheppard, WO2 Bob ‘Stretch’ Hayden, unidentified, CPL Ian McKenzie, FLTLT Ron Aitken, SPR Ian Fitzgerald, SPR Greg Else. .32) - Photo, black & white, 1980. Cartographic Squadron inspection. L to R: OC CAPT Bob Roche, Mayor – Councillor Paul Tomkinson. In background L to R: SGT Stu Thaxter, unidentified, SSGT John Barrie, CPL Roger Pearson, SGT Doug Carswell, SPR Peter Main, WO2 Bob ‘Stretch’ Hayden. .33) - Photo, black & white, 1980. Cartographic Squadron inspection. L to R: CO LTCOL Bob Skitch, OC CAPT Bob Roche, unidentified civilian, SGT Doug Carswell, Mayor – Councillor Paul Tomkinson, WO2 Bob ‘Stretch’ Hayden. .34) - Photo, black & white, 1980. Female Contigent inspection L to R: unidentified, SPR Gae (Amato) Robinson, SPR Scheryl Delforce, unidentified officer, unidentified civilian, Mayor – Councillor Paul Tomkinson, CPL Marrianne (Van De Zee) De Groot, SPR Cathy Regan, SPR Ginny (Turner) Rowe, SPR Ilen Isaac, SPR Penny Knott, SPR Santina (Argetto) Straube, SPR Gina (Coore) Neilson, WO2 Pat Lumsden. .35) - Photo, black & white, 1980. Female Contigent inspection L to R: SPR Scheryl Delforce, unidentified officer, CO LTCOL Bob Skitch, unidentified civilian, Mayor – Councillor Paul Tomkinson, SPR Ginny Turner, SPR Ilen Isaac, SPR Penny Knott, SPR Santina (Argetto) Straube, SPR Gina (Coore) Neilson, WO2 Pat Lumsden. .36) - Photo, black & white, 1980. Female Contigent inspection L to R: SPR Scheryl Delforce, unidentified officer, CO LTCOL Bob Skitch, unidentified civilian, Mayor – Councillor Paul Tomkinson, SPR Cathy Regan, SPR Ginny Turner, SPR Ilen Isaac, SPR Penny Knott, SPR Santina (Argetto) Straube, SPR Gina (Coore) Neilson, WO2 Pat Lumsden. .37) - Photo, black & white, 1980. Female Contigent inspection L to R: SPR Scheryl Delforce, unidentified officer, CO LTCOL Bob Skitch, CPL Marrianne (Van De Zee) De Groot, unidentified civilian, Mayor – Councillor Paul Tomkinson, SPR Ilen Isaac, SPR Penny Knott, SPR Santina (Argetto) Straube, SPR Gina (Coore) Neilson, WO2 Pat Lumsden. .38) - Photo, black & white, 1980. Air Survey Squadron’s OC MAJ Peter Eddy salutes the Mayor – Councillor Paul Tomkinson. L to R: unidentified civilian, CO LTCOL Bob Skitch. In background L to R: WO1 Jim ‘Triple J’ Jefferies, SPR Allan Choat, SPR Geoff Havelberg, CPL Alan Hawkins, CPL Dave Cook, LT Brendon Jaego-Banks, SGT Jim Beard, SSGT Russell ‘Rusty’ Williams, SGT Cam Chapman, SSGT Alan Derby, SSGT Greg Buckingham. .39) - Photo, black & white, 1980. Air Survey Squadron inspection. L to R: back of CAPT Kym Weston, OC MAJ Peter Eddy, Mayor – Councillor Paul Tomkinson, unidentified civilian. .40) - Photo, black & white, 1980. Air Survey Squadron inspection. L to R: CAPT Peter Searle - UK Exchange, unidentified officer, unidentified civilian, Mayor – Councillor Paul Tomkinson, unidentified, SSGT Alan Derby, LCPL Paul Hopes, SPR Peter Jones, SPR John Lane, WO2 Brian Meade, CPL Mick Hogan, CPL Greg Byers, SGT Cliff Webb. .41) - Photo, black & white, 1980. Air Survey Squadron inspection. Centre rank L to R: SGT Bruce ‘Stretch’ Gordon, WO2 Chris Parkinson. Rear rank L to R: SPR Allan Choat, unidentified, SPR Jamie McRae, SSGT Russell ‘Rusty’ Williams, SSGT Greg Buckingham, CPL Greg Byers, CPL Roger Rees, SPR Gary Ames, SGT Greg Gilbert, SSGT Peter Warwick, WO2 Mick Dempster. .42) - Photo, black & white, 1980. Air Survey Squadron inspection. Rear rank: SSGT Russell ‘Rusty’ Williams. Centre rank L to R: SPR Geoff Havelberg, CPL Peter Treble, SGT Jim Beard, SPR Peter Hardy, SPR Steve Hilton, SPR John Lane, CPL Mick Hogan, Mayor – Councillor Paul Tomkinson, OC MAJ Peter Eddy. .43) - Photo, black & white, 1980. Air Survey Squadron inspection. Centre rank L to R: SGT Bruce ‘Stretch’ Gordon, WO2 Chris Parkinson. Mayor – Councillor Paul Tomkinson, OC MAJ Peter Eddy. Rear rank L to R: SPR Allan Choat, unidentified, SPR Jamie McRae, SSGT Russell ‘Rusty’ Williams, SSGT Greg Buckingham, CPL Greg Byers, CPL Roger Rees, SPR Gary Ames, SGT Greg Gilbert, SSGT Peter Warwick, WO2 Mick Dempster. .44) - Photo, black & white, 1980. Lithographic Squadron’s OC MAJ Robin Blackburn salutes the Mayor – Councillor Paul Tomkinson. L to R: unidentified civilian, CO LTCOL Bob Skitch. In background L to R: WO1 Manfred Panknin, SSGT Peter Coombes, CPL Frank Lenane, SPR Per Andersen, CPL John ‘Flash’ Anderson, unidentified, MAJ Sam Schwartz US Exchange, CPL Warren ‘Waldo’ Shirley, SPR Warren ‘Wah’ Hall, unidentified, SPR Neville Carr, SPR Paul Davis, SPR Paul Baker, CPL Mick ‘Buddha’ Ellis, SPR Martin Van De Maele, CPL Bill Jones, SPR Greg Rowe. .45) - Photo, black & white, 1980. Lithographic Squadron inspection. L to R: RSM WO1 Aub Harvey, SPR Warren ‘Wah’ Hall, CO LTCOL Bob Skitch, SPR Paul Davis, unidentified civilian, unidentified, OC MAJ Robin Blackburn, CPL Lance Strudwick, Mayor – Councillor Paul Tomkinson, SPR Neville Carr, SPR Roy Hicks, SSGT Trevor Osborne, SPR Paul Baker, CAPT Stan Vote, CPL Bill Jones, SGT Greg Francis-Wright, SGT Ralph Chant, CPL Garry Drummond, WO2 Noel ‘Nesty’ Coulthard. .46) - Photo, black & white, 1980. Lithographic Squadron inspection. Front rank L to R: SGT Greig Kidman, SPR Garry Hudson, SPR Gary Tremain, CPL Steve Egan, SPR Greg Rowe, CPL Mick ‘Buddha’ Ellis, remainder unidentified. Centre rank: SSGT Kevin Macquire. Inspection party L to R: CO LTCOL Bob Skitch, OC MAJ Robin Blackburn, unidentified civilian, Mayor – Councillor Paul Tomkinson. Rear rank L to R: unidentified (x5), CPL Warren ‘Waldo’ Shirley, SPR Neville Carr, SPR Paul Baker, CPL Bill Jones, CPL Garry Drummond, SGT Graeme Jeffers, WO2 Tom Pattison. .47) - Photo, black & white, 1980. Lithographic Squadron inspection. Front rank L to R: SSGT Trevor Osborne, SGT Greig Kidman, SPR Garry Hudson, SPR Gary Tremain, CPL Steve Egan, SPR Greg Rowe, CPL Mick ‘Buddha’ Ellis, remainder unidentified. Centre rank: SSGT Kevin Macquire, SGT Ralph Chant. Inspection party L to R: OC MAJ Robin Blackburn, RSM WO1 Aub Harvey, unidentified civilian, Mayor – Councillor Paul Tomkinson. Rear rank L to R: SPR Paul Baker, CPL Bill Jones, CPL Garry Drummond, SGT Graeme Jeffers, WO2 Tom Pattison. 48) - Photo, black & white, 1980. Lithographic Squadron inspection. Inspection party L to R: OC MAJ Robin Blackburn, Mayor – Councillor Paul Tomkinson, CO LTCOL Bob Skitch, unidentified civilian. Rear rank L to R: WO2 Tom Pattison, SGT Graeme Jeffers, CPL Garry Drummond, CPL Bill Jones, CPL SPR Neville Carr, Warren ‘Waldo’ Shirley, unidentified. Rear supernumery: WO1 John McCulloch. 49) - Photo, black & white, 1980. Lithographic Squadron inspection. Inspection party L to R: OC MAJ Robin Blackburn, CO LTCOL Bob Skitch, Mayor – Councillor Paul Tomkinson, unidentified civilian, RSM WO1 Aub Harvey. Rear rank L to R: WO2 Tom Pattison, SGT Graeme Jeffers, remainer unidentified. 50) - Photo, black & white, 1980. 3rd Military District Band inspection. L to R: unidentified band master, CO LTCOL Bob Skitch, Mayor – Councillor Paul Tomkinson. 51) - Photo, black & white, 1980. CO LTCOL Bob Skitch delivers his speech. 52) & .53) - Photo, black & white, 1980. Army Svy Regt squadrons stand at ease during CO LTCOL Bob Skitch’s speech.There are no personnel identified. royal australian survey corps, rasvy, army survey regiment, army svy regt, fortuna, asr -
 Eltham District Historical Society Inc
Document - Property Binder, 895 Main Road, Eltham
Folder: 895 Main Road, Eltham Contents Listing 1. Certificate of Title; Vol. 8424, Fol. 334, 5 February 1963 2. Certificate of Title; Lot 2, Plan of Subdivision No. 63242, Parish of Nillumbik, Vol. 8479, Fol. 283, 18 May 1964 (Eltham War Memorial Trust) 3. Newspaper article: Extensions to shire offices will benefit all, by Fab Calafuri, Diamond Valley News, Tuesday, July 8, 1986, p6 [Reverse side, p5, Residents rally to save dam by Helen Gillman about Peck’s Dam in Napier Street, Montmorency] 4. Office memo: Temporary Shutdown of Water Supply Shire Offices – Tuesday 9 March 1993; Anthony Guzzo, 5 March 1993 – Melbourne Water advice due to works on new library 5. Plan of Old Municipal Offices, date and creator unknown 6. Newspaper clipping: Move to convert shire office for police use, by Jodie Haythorne, Diamond Valley News, May 1995 7. Newspaper clipping: Sale of Eltham office / Removal of Question time; Nillumbik Happenings, Mountain Views, 15 May 1995 8. Newspaper clipping: Bid for TAFE campus, Mountain Views, 25 September 1995, p8 9. Newspaper clipping: Will the former Shire of Eltham offices become a TAFE college?, The Advertiser, circa September 1995 [Reverse side; Jezza! Photo of football legend Alex Jesaulenko at Watsonia RSL also Advertisement: Maternal and Child Health Centre Timetable] 10. Newspaper clipping: Eltham may get TAFE campus in shire offices, by Fiona Kaegi and Natalie Town, and Nillumbik set for rate cuts, Diamond Valley News, circa September 1995 [Reverse side; Art for hope – article about artist Damien Curtain at Hurstbridge Primary School] 11. Newspaper clipping: More talks on TAFE, The Advertiser, Tuesday, October 17, 1995, p3 – includes photos of Nillumbik Chief Commissioner Don Cordell, Box Hill College of TAFE Executive Director Andrew Jackson and Niillumbik CEO Barry Rochford; Eltham MP Wayne Phillips with Eltham Chamber of Commerce President Norm Williams and Rotary Club of Eltham President Peter Bishop; Eltham College principal John Brennan with St Helena Secondary College head Ken Cunningham and Eltham High School principal Ron Edwards. [On reverse, p4, Sorry sag of botched relations, Jock Kyme] 12. Newspaper clipping: Eltham hails TAFE take-over, by Fiona Kaegi and Council to hold regular briefings, Diamond Valley News, 18 October 1995 13. Newspaper clipping (photocopy): Why no council office at Eltham?, Mark Burns, Letters, Diamond Valley News, 18 October 1995 14. Newspaper clipping: Future of Eltham office?, Mountain Views, Monday, October 23, 1995, p8 15. Newspaper clipping: Council seeks opinions on former shire offices, by Fiona Kaegi, Diamond Valley News, 25 October 1995 16. Newspaper clipping: Shire office move, The Advertiser, December 1995 17. Newspaper clipping: Former shire offices up for sale; possibly Diamond Valley News, December 1995 18. Newspaper clipping: Agents to sell shire office, Mountain Views, Monday, December 18, 1995, p8 19. Newspaper clipping: Advertisement; Nillumbik Shire Council Proposed Sale or Lease of Eltham Municipal Offices, Diamond Valley News, 10 January 1996 20. Newspaper clipping: No Submissions on Eltham Shire Offices, Diamond Valley-Whittlesea Advertiser, 30 January 1996, p1 21. Photocopy: Minutes of Ordinary Council Meeting, 31 January 1996, 7.4 Sale or Lease of Former Eltham Municipal Offices 22. Photocopy: Letter HTW Valuers to Nillumbik Shire Council, Valuation of former Eltham Municipal Offices at $1.45 million, 31 January 1996 23. Newspaper clipping: New G’boro, Eltham places, Diamond Valley-Whittlesea Advertiser, Tuesday, March 26, 1996, p4 [on reverse, p3, ALP Faithful at Montsalvat] 24. Newspaper clipping: Legal costs a hurdle for action group, by Laeta Antonysen, Diamond Valley News, 16 April 1996 25. Photocopy (91 pages): Tender Documents for purchase of Former Eltham Shire Offices 895 Main Road, Eltham, Prepared for Nillumbik Shire Council, Maddock Lonie & Chisholm, Melbourne. Tenders close at 3.00pm on 24 April 1996 26. Newspaper clipping (Photocopy): Building’s asbestos riddle. By Fiona Kaegi, Diamond Valley News, 26 June 1996 27. Photocopy: Minutes of Ordinary Council Meeting, 26 June 1996, 11.43/96 Sale of Eltham Offices, Main Road, Eltham 28. Media Release (Photocopy of facsimile from Barry Rochford, CEO): Community Facilities in New Gateway to Eltham, 28 June 1996 29. Photocopy (A3): TPA1 – Site Plan 1:200 Proposed Convenience Centre At Main Road Eltham, Baldasso Cortese Pty Ltd Architects, Collingwood, July 1996 30. Newspaper clipping: ‘Whopper’ For Eltham?, Letters, Sigmund Jorgensen, The Advertiser, Tuesday, July 2, 1996, p3 31. Newspaper clipping: Ex-shire offices to go, by Fiona Kaegi, Diamond Valley News, 3 July 1996, p1 32. Photocopy Newspaper clipping: Unsuccessful bidders criticise sale of offices, by Fiona Kaegi, Diamond Valley News, 10 July 1996 33. Newspaper clipping: Insensitive proposal, Sue Dyet, Letters, Diamond Valley Newsm 17 July 1996 34. Photocopy: Minutes of Ordinary Council Meeting, 17 July 1996, 7.116/96 Sale of Eltham Offices, Main Road, Eltham 35. Newspaper clipping: Former shire office sale angers residents, Diamond Valley News, 30 July 1996, p3 36. Newspaper clipping: Eltham Offices Demolition, ‘You can’t demolish city hall’, The Advertiser, Tuesday, July 30, 1996, pp14-15 features photos of Eltham protestors, Thelma Barkway, Harry Gilham, Jenni Mitchell, Jock Kyme and David Essex 37. Photocopy (A3): TPA1 – Site Plan Proposed Convenience Centre, Main Road, Eltham, Graeme Bentley Landscape Architects, August 1996 38. Newspaper clipping (Photocopy): Letters; Disbelief at plans, Margaret Jennings; Lack of respect, Mike Jansz; Community opinion, Sigmund Jorgensen, Diamond Valley News, circa August 1996 39. Newspaper clipping (Photocopy): ‘There was no conflict of interest’, The Advertiser, Tuesday, August 4, 1996 40. Newspaper clipping: Chamber supports plans, by Jodie Guest, Diamond Valley News, 7 August 1996 41. Newspaper clipping (Photocopy): Letters; Adding to the price, Kelly Fitzpatrick; Area being torn apart, Jenni Bundy, Diamond Valley News, 7 August 1996 42. Newspaper clipping: Labor joins battle to save offices, by Fiona Kaegi, Diamond Valley News, (7?) August 1996 43. Newspaper clipping: Letters to the Editor; ‘Atrocious assault of commercialism’, Lois Loftus-Hills, The Advertiser, Tuesday, August 13, 1996, p9 44. Newspaper clipping: Letters; Roll up for the show, Kahn Franke; Thanks for turn-out, Margaret Jennings; Way past time, Jenni Bundy; Angry at the vandalism (continued p13 missing), Diamond Valley News, August 14, 1996, p12 45. Newspaper clipping: ‘Enough is enough’ states John Cohen; Letters to the Editor, Diamond Valley-Whittlesea Advertisers, Tuesday, August 20, 1996, p2 [Reverse, p1, Trade boost at Diamond Creek] 46. Newspaper clipping: Public viewing, Diamond Valley News, 4 September 1996, p 47. Newspaper clipping: Letters; Chiefs must resign, Gayle Blackwood; Time to have your say, Margaret Jennings; Sensible balance, Gwen Jakins; Recycling: a fine example, Grace Mitchell; Limits on site use, Stephen Clendinnen; Diamond Valley News, 4 September 1996, p4 48. Newspaper clipping: Letters; A lasting memorial, Ken and Laurel Eckersell; Stripping assets, Jack Lawson; Diamond Valley News, 4 September 1996, p29 49. Newspaper clipping: Letters; Nillumbik: in the eye of the beholder, Sigmund Jorgensen; ‘Crying inside’ over Eltham Shire office, Grace Mitchell; The Advertiser, Tuesday, September 10, 1996, 2 50. Newspaper clipping: Public Notice; Notice of an Application for Planning Permit, Dallas price Homes Pty Ltd, Diamond Valley News, 11 September 1996 51. Newspaper clipping (Photocopy): Timing was the problem: chief, by Laeta Antonysen, Diamond Valley News, 11 September 1996 52. Newspaper clipping: Letters; Architectural monstrosity, Jenni Bundy; Bargain price, Gavin Gray; Paying for road works, Sue Dyet; Diamond Valley News, 11 September 1996 [ on reverse, articles on Queen’s Guide Nicola Blay (photo) and Plenty River and Diamond Creek waterways] 53. Newspaper clipping: Eltham Hub Plans on Show, The Advertiser, Tuesday, September 17, 1996, p1 54. Newspaper clipping: Bleeding halted: Commish and Letters; Sigmund’s credibility gap, David Nolte; ‘Double standards’, Ros Harris, The Advertiser, Tuesday, September 17, 1996, p3 55. Newspaper clipping: Gateway to the future; Plans on display, public comments sought, by Laeta Antonysen, Diamond Valley News, September 18, 1996, p8 [Reverse, p7, Policy limits event signs, and, Council ‘arrogant’ on ward option: MP] 56. Newspaper clipping (Photocopy): 19 on council inquiry list, by Jodie Guest, Diamond Valley News, 18 September 1996 – about council listing 19 people who are only to be dealt with directly by CEO, Barry Rochford 57. Newspaper clipping (Photocopy): Eltham is wonderful, Sigmund Jorgensen, Letters, The Advertiser, Tuesday, September 24, 1996, p4 58. Objection to Grant of Planning Permit (Photocopy): Russell Yeoman per Eltham District Historical Society Inc. re application 960376 for petrol station, convenience shop, retail shop, etc to be issued to Dallas price Homes Pty Ltd, 25 September 1996 59. Newspaper clipping (Photocopy): Public meeting, Eltham Gateway Action Group – to discuss latest plans to develop former shire office site on Sunday 4 September 1996; publication unknown, possibly Diamond Valley News 60. Newspaper clipping: Minister orders sale probe, by Jodie Guest, Diamond Valley News, Wednesday, October 12, 1996, p1 61. Newspaper clipping: Letters; Headline could mislead, Wayne Phillips, Member for Eltham, The Advertiser, Tuesday, October 8, 1996, p3 62. Newspaper clipping: Letters; Few jobs for young, Margaret Jennings; The whole truth, Alan Ramsay, Diamond Valley News, October 9, 1996, p12 63. Newspaper clipping: Public outcry at Abbott veto with ‘reserve power’; 200 residents yell abuse as commissioners give ok to Eltham service station, The Advertiser, Tuesday, October 15, 1996, p1 64. Newspaper clipping: Letters; Eltham Hub briochure has ‘trees that are a fiction’, Lois Lofus-Hills, The Advertiser, Tuesday, October 15, 1996, p2 65. Newspaper clipping: Shrewd tactics row, by Jodie Guest, Diamond Valley News, Wednesday, October 16, 1996, p1 66. Newspaper clipping: Residents have their say on former shire offices, by Jodie Guest, and, Anger over reserve power, by Laeta Antonysen, Diamond Valley News, Wednesday, October 16, 1996, p9 67. Newspaper clipping: Office sale report will not be made public, Diamond Valley News, October 23, 1996 [Reverse, article featuring Youth development officer, Ian Patching] 68. Newspaper clipping: Letters; Happening in a hurry, Peter Dodds; Development unsuitable, Mark Burns; Vale those dreamers, Sigmund Jorgensen, Diamond Valley News, October 23, 1996, two pages unidentified 69. Newspaper clipping: Group to fight council decision on office site, by Laeta Antonysen, Diamond Valley News, October 26, 1996 – re Eltham Gateway Action Group taking Council to the Administrative Appeal Tribunal over approval of controversial development [Reverse, article on Bend of Islands place name] 70. Newspaper clipping: Three days allowed to hear objection, by John Dubois, Diamond Valley New, December 4, 1996 71. Newspaper clipping: Letters; Site traffic dangers, Frank Burgoyne; Thanks for support, Margaret Jennings, Diamond Valley News, noted in pen as 8 December 1996 though probably 11 December 1996 [Reverse, What about that link, asks council, by Natalie Town – about ring road between Greensborough and Ringwood] 72. Newspaper clipping: Minister to rule on proposal, by Fiona Kaegi, Diamond Valley News, December 18, 1996 73. Report (Photocopy, 31 pages): Convenience Centre Development Proposal: Italian Cypress at Former Eltham Shire Offices Site, Main Rd. Eltham, Graeme Butler & Associates, 1997 74. Newspaper clipping: People unite to battle project, by Fiona Kaegi, Diamond Valley News, February 19, 1997 75. Letter (Photocopy): Ms B Martin to Fiona Kaegi to be submitted for Letters to the Editor, Diamond Valley News 26 March 1996 edition 76. Letter (Photocopy): Thelma Barkway to Fiona Kaegi to be submitted for Letters to the Editor, Diamond Valley News 26 March 1996 edition 77. Newspaper clipping: Legal Battle, by Fiona Kaegi, Diamond Valley News, Wednesday, April 2, 1997 78. Newspaper clipping: Site Row Saga, by Laeta Antonysen, Diamond Valley News, Wednesday, April 9, 1997 79. Newspaper clipping: Community fears loss of heritage, by Laeta Antonysen, Diamond Valley News, April 9, 1997 80. Newspaper clipping: Debate erupts over service station plan, by Laeta Antonysen, Diamond Valley News, April 9, 1997 [Reverse, ‘No’ to rates hike proposal] 81. Newspaper clipping: Letter to the Editor; “Your front-page last week is considerable inaccurate … a surplus of $14,000 is expected at 30 June 1977.”, Robert Marshall, The Advertiser, April 28, 1997, p1 82. Newspaper clipping: $1.1m Debt Plan, by Fiona Keagi, Diamond Valley News, Wednesday, April 23, 1997, p1 and continued on p24, Shire to defer works programs 83. Newspaper clipping: Blast for Council, by Laeta Antonysen, Diamond Valley News, Wednesday, April 30, 1997, p1 and continued on p7, ‘Experts’ oppose plans for shire site. 84. Newspaper clipping: Photo – Uncertainty: the future of the former Eltham Shire office site is still to be decided by Planning Minister Rob Maclellan., Diamond Valley News, April 30, 1997 [ Reverse; Not your average convenience store, by Laeta Antonysen] 85. Newspaper clipping: Shire site decision soon, Diamond Valley News, May 28, 1997 86. Newspaper clipping: Letters to the Editor; Features to protect, Ken Eckersell, Diamond Valley News, June 4, 1997 87. Newspaper clipping: Costly bun fight over shire offices, by Laeta Antonysen, Diamond Valley News, July 2, 1997 [reverse, Montsalvat plans season of festivals, by Fiona Kaegi] 88. Newspaper clipping: Shire office shemozzle, Diamond Valley News, July 2, 1997 – provides a brief timeline of events June 1996 to April 22, 1997 89. Newspaper clipping: Law Suit Threat, by Fiona Kaegi and Laeta Antonysen, Diamond Valley News, Wednesday, July 9, 1997, p1 90. Newspaper clipping: Report rejects store plan, and, Residents with panel, Diamond Valley News, Wednesday, July 9, 1997 91. Newspaper clipping: Councillors meet Shell developer, by Laeta Antonysen, Diamond Valley News, July 30, 1997 92. Newspaper clipping: Deadline extended to allow more talks, by Fiona Kaegi, Diamond Valley News, August 8, 1997. Also Curves to stay in link road about Nillumbik’s realignment plans for Diamond Creek’s ‘windy mile’ [Reverse, Shire tightens grants scheme] 93. Newspaper clipping: $10m option for shire office site, by Laeta Antonysen, Diamond Valley News, September 10, 1997 94. Newspaper clipping: New plan for shire office site, by Laeta Antonysen, and , Council refuses to do trade with developer, Diamond Valley News, September 17, 1997, p12 [ Reverse, p11, Mixed reaction to kangaroo culling] 95. Newspaper clipping: Gateway plan review, by Laeta Antonysen, Diamond Valley News, October 22, 1997, p3 96. Newspaper clipping: Top planner calls for rethink on office site, by Jodie Guest, Diamond Valley News (includes photo of John Pizzey) 97. Newspaper clipping: Opposition offers help on planning, by Jamie Duncan, Diamond Valley News, November 5, 1997, p3 (includes photo of Opposition Leader John Brumby and Nillumbik Shire President Robert Marshall at the Eltham Gateway site) 98. Letter (Photocopy): Russell Yeoman, Secretary, Eltham District Historical SAociety to Mr B. Rochford, CEO, Nillumbik Shire Council, 15 November 1997 with specific reference to the health of the three “Shillinglaw” trees 99. Newspaper clipping: Puzzlement over delay on office site, by Laeta Antonysen, Diamond Valley News, November 19, 1997 100. Newspaper clipping: Developer pulls out, by Laeta Antonysen, Diamond Valley News, December 10, 1997, p3, and, Council uproar over officers [Reverse, p4, Final victory – announcing resignation of Jenni Mitchell as president of Etham Gateway Action Group] 101. Newspaper clipping: Letters; Asset of pride, Sigmund Jorgensen, Diamond Valley News, January 14, 1998 102. Newspaper clipping: Minister ‘no’ to plan, by Laeta Antonysen, Diamond Valley News, February 11, 1998, p3 103. Newspaper clipping: Shell shocked as Eltham planning protest is upheld, by Gabrielle Costa, date and publication unknown; possibly The Age, February 1998 104. Newspaper clipping: Land review, by Laeta Antonysen, Diamond Valley News, April 1, 1998 105. Newspaper clipping: Bid to move shire offices to new site, by Laeta Antonysen, Diamond Valley News not specifically about 895 Main Road but former Diamond Valley Shire Offices at Civic Drive, Greensborough, circa June 1998 106. Newspaper clipping: Letters; What about us?, Gayle Blackwood, Diamond Valley News, circa June 10, 1998 107. Letter (Photocopy): Sigmund Jorgensen to Kahn Franke, 1 July 1998 re advertisement and list of contributors 108. Advertisement (Photocopy): Show that democracy is not dead in Nillumbik !!!, Saturday 17 Oct. 1998 109. Newspaper clipping: Arts dream shattered, by Natalie Birch, Diamond Valley Leader, July 17, 2002, p3 – Council about to dump plans for an arts centre on former office site 110. Newspaper clipping: Letters; This site belongs to the people, John Cohen; Pro-development, Jenni Bundy, Diamond Valley Leader, May 21, 2003 111. Discussion Paper: Community Use of Site, 895 Main Road Eltham, 8 pages, Gayle Blackwood, Sue Dyet, Ken Eckersell, 25 August 2003 with supporting drafts dated August 5 and 6. 112. Newspaper clipping: Shire plan ‘sacrilegious’; Residents fight war memorial sale, by Dave Cropssthwaite, Diamond Valley Leader, Nillumbik Edition, Wednesday, August 18, 2004, p1 – about council plans to sell Eltham War memorial and former Shire Office sites 113. Newspaper clipping: Land sales to come under more debate, by Dave Crossthwaite, Diamond Valley Leader, September 15, 2004, p5 114. Newspaper clipping: Council saves ex-office site, axes club plan, Diamond Valley Leader, March 30, 2005 115. Newspaper clipping: Letters; Ask the people, John Cohen, Diamond Valley Leader, April 6, 2005, p20 116. Newspaper clipping: Shire moving for public use zoning on Eltham landmark sites, Diamond Valley Leader, October 25, 2006 117. Newspaper clipping: Letters; Consultation a sham, Carol Doherty; Civic centre excellent, Marguerite Marshall; Only Eltham counts, Carmel Jacobsen, Diamond Valley Leader, May 22, 2007 [Reverse, Disability a test for councillor (Bo Bendtsen)] 118. Newspaper clipping: Advertisement; Nillumbik Planning Scheme, Approval of Amendment C49 – rezoning of 895 and 903-907 Main Road, Diamond Valley Leader, September 5, 2007, p7 119. Newspaper clipping: Illustration; An artist’s impression of the proposed Nillumbik civic centre in Main Rd., Diamond Valley Leader, June 25, 2008 [Reverse, City link with learning – about Eltham College setting up a city campus for Year 9 students, with photo featuring principal Dr David Warner and students] 120. Newspaper clipping: Civic centre forecast withdrawn, Diamond Valley Leader, July 2, 2008 121. Letter: Nillumbik Shire Council, 5 September 2008, re Civic Future Project 122. Letter: Nillumbik Shire Council to EDHS, 5 October 2008, re Civic Future Project 123. Letter (Copy): Mrs D. Bassett-Smith to Mayor and Councillors, 17 April 2009 re former shire office site and future community use 124. Letter (Copy): Eltham District Historical Society to Bill Forrest, CEO, Nillumbik Shire Council, 1 August 2009, in support of D. Bassett-Smith letter of 17 April 2009 and response from Council, 12 August 2009 125. Newspaper clipping: Hotel mooted for site, by Brittany Shanahan, Diamond Valley Leader, July 5, 2017 126. Newspaper clipping: Letters; Fury, surprise and support for Eltham development; Re: Grand plan for Eltham’s jewel (February 7), Cath McLardy, Diamond Valley Leader, February 14, 2008, p14 [Reverse, p13, Learning from the fateful day; the devastation on that day in 2009 will always stay in Steve Warrington’s mind. He recalls the tragedy] 127. Newspaper clipping: Letters; Plan to fight council on land sell-off, Jennifer Ambrudge and others, Diamond Valley Leader, February 14, 2018, p15 – about council plan to sell off reserves and shire office site and Eltham War Memorial 128. Newspaper clipping: Plans for site urged, by Brittany Shanahan, Diamond Valley Leader, September 5, 2018 129. Newspaper clipping: Approach under fire; Council plans for historic shire site raises eyebrows, by Brittany Shanahan, Diamond Valley Leader, September 19, 2018 130. Newspaper clipping: Advertisement; Our plan for a revitalised Eltham, Nillumbik Shire Council, Diamond Valley Leader, Wednesday, October 3, 2018, p7 131. Notice: Eltham Community Town Meeting, Saturday 134th October 2018 – about council plans to sell off community reserves and assets – along with flyer for Eltham Community Action Group 132. Essay A4 18 pages: An essay addressed to the Councillors of Nillumbik Shire, October 2018 (with addendum 7 November), Andrew Lemon 133. Photocopy Marked Up Flyer: The story behind 895 and 903-907 Main Road, Eltham – the heart of Eltham’s Town Centre, with marked up comments by Eltham Community Action Group, collected 9 December 2018 134. Newspaper clipping: Calls to fix ‘outdated’ site; negotiations cease with developers amid renewed push to improve civic space at Main St. Eltham, by Anthony Plovesan, Diamond Valley Leader, May 29, 2019, p5 135. Newspaper clipping: Ex-council site flagged for hospital; Councillor suggests former Eltham headquarters would be ideal spot, by Anthony Plovesan, Diamond Valley Leader, October 30, 2019, p3 136. Concept plan: Proposal; Nillumbik Cultural Gallery with Art Cinema, Restaurant, Tourism, Preliminary Sketch Design G, Barry Pearce Architect and Designer, 8 April 2022, 8 pagesmain road, eltham, property, houses, shops, businesses, shillinglaw trees, eltham shire offices site -
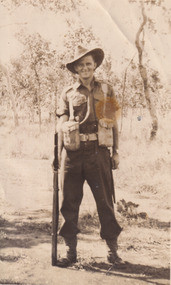 The Beechworth Burke Museum
Photograph, c.1914
This photograph depicts a soldier, credited on the reverse as Fred Foster. The young man is dressed in military attire and is standing tall with a gun beside him. He is located in the Australian bush and the date of the photograph is unknown. Frederick “Fred” Arthur Foster was nephew to famous Bushranger Edward “Ned” Kelly. He was born on the 15th of March 1889 in Forbes, New South Wales. He was the eldest son of Catherine “Kate” Kelly and William Henry “Bricky” Foster. After the death of his mother in October of 1898 from apparent drowning, Foster (then aged 9) was raised by his grandmother Ellen Kelly (née Quinn) at Eleven Mile Creek in Victoria. On the 29th of June 1915, 26 year old Foster travelled to Melbourne, Victoria and enlisted in the Australian Army. He was a Private in the 17th Infantry Battalion (originally C.Company, 47th battalion). He previously was attached to the 55th Battalion but transferred in 1916. Prior to enlisting in the army, Foster worked as a Bee Keeper and served in the 16th Light Horse regiment at Benalla. Foster had blue eyes, brown hair and was of Presbyterian faith. On the 28th of February 1917, Foster travelled to France aboard SS “Golden Eagle”. He was killed in action in Lagnicourt, France on the 15th of April 1917 at 28 years old. The Battle in Lagnicourt France, on the Western Front, occurred from the 1st of March to the 30th of April of 1917 and was the location of fierce fighting between Germany and the British Empire. Germany became aware of a weakness they had along the Hindenburg Line, one of these weaknesses was located in Lagnicourt which is a small village in Northern France. Therefore, the Germans decided to launch a counter-attack in this area on the 15th of April at dawn. During this fight, German forces captured several batteries of the 1st Australian Division’s artillery but the Australians led a strong counter-attack by four of their battalions and recaptured the village and most of the guns from the German forces. German forces were forced into a premature withdrawal. This battle was not undertaken in typical WW1 “trench” style warfare. Instead, the battle was up on the ground in what was described as “old open style warfare”. In this battle, slightly more than 1000 casualties were Australian, with 300 of these prisoners of war. German forces suffered a loss of over 2300 casualties with 360 taken captive. Foster was one of 43 in his regiment who died, 87 were wounded and 51 reported missing. Foster was buried at location in Lagnicourt and whilst the grave was initially marked, it is now unknown. Foster’s service, alongside those who fell at Lagnicourt, is commemorated at the Australian National Memorial in Villers-Bretonneux, France along with other national Australian memorial sites.Photography played an important part in World War 1. Photographs of men in their military uniforms served as propaganda during the Great War to reassure civilians back at home of the military prowess of their nation and the bravery of their men. It did this while hiding the true horrors which faced the men in battle. These photographs, which includes those taken at home prior to embarking overseas like Fred Foster’s, act as censored memory for those who have lost a loved one at war. It enables families to remember their relatives in their youth and standing proudly rather than having to face the actual danger and horror which faced these men at the front line. The battle of Lagnicourt France was a victory for the European Empire and therefore, men who lost their lives protecting their countries became heroes and were awarded posthumous medals for their service. Photos of soldiers in their uniforms, were undertaken by men like Foster, so their families would be able to retain their memories and likeness before they embarked for war. Many men were killed or horribly wounded so these images were important for reminding families about their sons/ husbands/ brothers/ cousins and friends. This photo is a part of the Burke Museum Kelly album which includes numerous photographs relating to the Kelly Gang. As the son of Kate Kelly and William “Bricky” Foster, Fred Foster is an important part of the Kelly story after the execution of Edward “Ned” Kelly which has information it can impart relating to the history of the family after 1880. Whilst an important element of the Kelly Album, Foster’s photograph is also historically important in its own right for its connection to the Great War and the experiences of a soldier at the Western Front.Original sepia rectangular photograph developed on matte photographic paper, unmounted.Reverse: (Top right corner of reverse:) FRED FOSTER/ (Top centre of reverse:) Kate Kelly's son.kelly album, fred foster, kate kelly, photograph, australian soldier, the kelly gang, australian bush, burke museum, sepia photo, gum trees, family of the kelly gang, world war i, langnicourt, france, great war, 1917, ned kelly, frederick foster, william "bricky" foster, ellen kelly, military history, australian military -
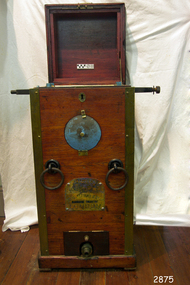 Flagstaff Hill Maritime Museum and Village
Machine - Diving Compressor, Siebe Gorman & Co. Ltd, 1880-1890
This compressor was part of the E.G. Ward Collection. It is connected to the diving suit and boots also in our collection. Siebe Gorman & Company Ltd was a British company that developed diving equipment and breathing equipment and worked on commercial diving and marine salvage projects. The company advertised itself as 'Submarine Engineers'. It was founded by Augustus Siebe, a German-born British engineer chiefly known for his contributions to diving equipment. Siebe Gorman traded as an engineering firm for over 180 years from 1819 to 1999. The early success of the business was due to its founder, the Prussian immigrant Christian 'Augustus' Siebe (1788-1872). For business reasons, he applied for and was granted British citizenship in 1856. He was a gifted engineer who was able to translate theoretical problems into practical, working products. During the industrial Victorian period, the business traded as 'A. Siebe' at 145 High Street Holborn London, but in 1828 new premises were acquired at 5 Denmark Street, Soho. The family firm produced a wide range of manufactured goods including paper-making machinery, measuring machinery, water-pumps, refrigeration equipment and diving apparatus. Augustus Siebe specialised in submarine engineering early on and the company gained a reputation for the manufacture of safe, reliable diving apparatus. Augustus Siebe is best remembered for the development and manufacture of the ‘closed’ Diving Dress based on the ideas of Charles and John Deane, George Edwards and Charles Pasley. Apart from some small modifications to valves and diver communications, the basic 12 bolt ‘closed’ diving dress remained relatively unchanged after the 1870s. Later company successes were also based on innovation, with new products that could be successfully developed and manufactured to high standards. This was largely attributed to the inventive nature, foresight, engineering and entrepreneurial skills of Robert Henry Davis (1870-1965). In 1882, RH Davis joined the company of 'Siebe & Gorman' as a young 11-year-old office boy and he was to remain with the company until he died in 1965. Augustus Siebe retired in 1869 and handed over the company to a new partnership of Henry H. Siebe (1830-1885) and William A. O'Gorman (1834-1904). The new firm traded as 'Siebe & Gorman' (1870-1879) from premises in and around Mason Street, Westminster Bridge Road, Lambeth, London. The two partners soon recognised the potential of R.H. Davis and in 1894, aged 24, he became General Manager of Siebe & Gorman. Davis increasingly ran the company until the surviving partner (W.A. Gorman) died in 1904. The firm was disposed of to the Vickers (armaments) family and a new company 'Siebe Gorman & Co. Ltd.' (1905-1998) was formed. Under the chairmanship of Albert Vickers, R.H. Davis was kept on as Managing Director, and the company forged ahead. However, after WW1, the Great Depression caused manufacturing output and share prices to slump. In 1924 Robert Davis made a deal with the Vickers Board and acquired control of the company through majority shares. Under his leadership, the Siebe Gorman Company flourished and within time, four of his sons also joined the firm. The company gained a worldwide reputation for the manufacture of diving apparatus, decompression and observation chambers, and safety breathing apparatus of all types for use on the land, in the air and under the sea (including mine rescue, tunneling, aircraft, diving, submarine escape and in other hazardous environments). Close research and development links with the MOD (especially the Admiralty), also provided a lucrative outlet for the company products. In 1932, Robert Davis was knighted by King George V, principally for his invention of the ‘Davis Submerged Escape Apparatus’ (D.S.E.A.). Siebe Gorman essentially remained a family firm from the beginning (under A Siebe) until it became a public company for the first time in 1952. However, following WW2, British manufacturing stagnated through stifled investment and post-war austerity, and there was little innovation. Siebe Gorman fortunes began to decline as an ageing Sir Robert Davis failed to invest, or change the company business and management practices. In 1959, Siebe Gorman was acquired by the “Fairy Group” and the ailing Sir Robert was made Life President. Consequently, nothing changed and the slow decline continued until Sir Robert's death in March 1965. Around 1960, Siebe Gorman acquired the diving apparatus manufacturer C E Heinke, and for a brief period, it manufactured some diving equipment under the combined name of Siebe Heinke. Around 1964, Mr. E. 'Barry' Stephens was appointed as the new Managing Director to modernise Siebe Gorman. Changes were made, including a move to a new factory in Wales in 1975. The new company concentrated on fire fighting breathing apparatus and escape equipment, and the move coincided with the loss of many of the older, traditional craft skills. Between 1985 and 1998, Siebe expanded through acquisitions, and several other companies were acquired. The Siebe Gorman (diving apparatus) company has therefore traded as A. Siebe (1819-1870); Siebe & Gorman (1870-1879); Siebe Gorman & Co (1880-1904); Siebe Gorman & Co. Ltd (1905-1998).The compressor is a very significant item as it gives a snapshot into marine history and the development of diving equipment generally especially that used for salvage operations before and during WW2. Siebe & Gorman the company that made the equipment was a leading inventor, developer and innovator of marine equipment with its early helmets and other items eagerly sought after today for collections around the world. The items in the Flagstaff Hill collection give us an insight as to how divers operated and the dangers they faced doing a very necessary and dangerous job during the early days of marine exploration.A single cylinder divers' pump by Siebe Gorman & Co Ltd, London, eccentric hand cranked in brass mounted mahogany case with instructions to the underside of the lid, brass covered pressure gauge and air outlet, brass makers plaque to the front, water inlet and outlet to the rear, green painted lifting rings. Machinery has some blue painted areas on the metal.Plate on the back 'WATER SUPPLY" "WATER OVERFLOW" "WATER DRAIN-IN" Pressure gauge dial "BOURDON'S PRESSURE GAUGE" STEBE GORMAN & CO. LONDON", "LBS PRESSURE" "FEET OF SALT WATER" Plate on the front " PATENT, Siebe Gorman & Co Ltd Submarine Engineers" below emblem (Lion, Crown, Horse)flagstaff hill, warrnambool, flagstaff-hill, maritime-museum, diving compressor, london, siebe gorman & co ltd, marine technology, life saving, deep sea diving, maritime museum, maritime village, manine history -
 Flagstaff Hill Maritime Museum and Village
Functional object - Diving Suit, boots and weight, 1900
This diving suit with helmet, boots and weight is part of the E.G.Ward collection, along with the diving compressor and a photograph of a diver in this equipment. Siebe Gorman & Company Ltd was a British company that developed diving equipment and breathing equipment and worked on commercial diving and marine salvage projects. The company advertised itself as 'Submarine Engineers'. It was founded by Augustus Siebe, a German-born British engineer chiefly known for his contributions to diving equipment. Siebe Gorman traded as an engineering firm for over 180 years from 1819 to 1999. The early success of the business was due to its founder, the Prussian immigrant Christian 'Augustus' Siebe (1788-1872). For business reasons, he applied for and was granted British citizenship in 1856. He was a gifted engineer who was able to translate theoretical problems into practical, working products. During the industrial Victorian period, the business traded as 'A. Siebe' at 145 High Street Holborn London, but in 1828 new premises were acquired at 5 Denmark Street, Soho. The family firm produced a wide range of manufactured goods including paper-making machinery, measuring machinery, water pumps, refrigeration equipment and diving apparatus. Augustus Siebe specialised in submarine engineering early on and the company gained a reputation for the manufacture of safe, reliable diving apparatus. Augustus Siebe is best remembered for the development and manufacture of the ‘closed’ Diving Dress based on the ideas of Charles and John Deane, George Edwards and Charles Pasley. Apart from some small modifications to valves and diver communications, the basic 12-bolt ‘closed’ diving dress remained relatively unchanged after the 1870s. Later company successes were also based on innovation, with new products that could be successfully developed and manufactured to high standards. This was largely attributed to the inventive nature, foresight, engineering and entrepreneurial skills of Robert Henry Davis (1870-1965). In 1882, RH Davis joined the company of 'Siebe & Gorman' as a young 11-year-old office boy and he was to remain with the company until he died in 1965. Augustus Siebe retired in 1869 and handed over the company to a new partnership of Henry H. Siebe (1830-1885) and William A. O'Gorman (1834-1904). The new firm traded as 'Siebe & Gorman' (1870-1879) from premises in and around Mason Street, Westminster Bridge Road, Lambeth, London. The two partners soon recognised the potential of R.H. Davis and in 1894, aged 24, he became General Manager of Siebe & Gorman. Davis increasingly ran the company until the surviving partner (W.A. Gorman) died in 1904. The firm was disposed of to the Vickers (armaments) family and a new company 'Siebe Gorman & Co. Ltd.' (1905-1998) was formed. Under the chairmanship of Albert Vickers, R.H. Davis was kept on as Managing Director, and the company forged ahead. However, after WW1, the Great Depression caused manufacturing output and share prices to slump. In 1924 Robert Davis made a deal with the Vickers Board and acquired control of the company through majority shares. Under his leadership, the Siebe Gorman Company flourished and within time, four of his sons also joined the firm. The company gained a worldwide reputation for the manufacture of diving apparatus, decompression and observation chambers, and safety breathing apparatus of all types for use on the land, in the air and under the sea (including mine rescue, tunnelling, aircraft, diving, submarine escape and in other hazardous environments). Close research and development links with the MOD (especially the Admiralty), also provided a lucrative outlet for the company products. In 1932, Robert Davis was knighted by King George V, principally for his invention of the ‘Davis Submerged Escape Apparatus’ (D.S.E.A.). Siebe Gorman essentially remained a family firm from the beginning (under A.Siebe) until it became a public company for the first time in 1952. However, following WW2, British manufacturing stagnated through stifled investment and post-war austerity, and there was little innovation. Siebe Gorman fortunes began to decline as an ageing Sir Robert Davis failed to invest, or change the company business and management practices. In 1959, Siebe Gorman was acquired by the “Fairy Group” and the ailing Sir Robert was made Life President. Consequently, nothing changed and the slow decline continued until Sir Robert's death in March 1965. Around 1960, Siebe Gorman acquired the diving apparatus manufacturer C E Heinke, and for a brief period, it manufactured some diving equipment under the combined name of Siebe Heinke. Around 1964, Mr E. 'Barry' Stephens was appointed as the new Managing Director to modernise Siebe Gorman. Changes were made, including a move to a new factory in Wales in 1975. The new company concentrated on fire-fighting breathing apparatus and escape equipment, and the move coincided with the loss of many of the older, traditional craft skills. Between 1985 and 1998, Siebe expanded through acquisitions, and several other companies were acquired. The Siebe Gorman (diving apparatus) company has therefore traded as A. Siebe (1819-1870); Siebe & Gorman (1870-1879); Siebe Gorman & Co (1880-1904); Siebe Gorman & Co. Ltd (1905-1998).The items are very significant as a snapshot into marine history and the development of diving equipment generally especially that used for salvage operations before and during WW2. The company that made the equipment was a leading inventor,developer and innovator of marine equipment with its early helmets and other items eagerly sought after today for collections around the world. The items in the Flagstaff Hill collection give us an insight as to how divers operated and the dangers they faced doing a very necessary and dangerous job.Diving suit including helmet, boots and a weight. Diving suit is made of canvas with knitted cuffs. The helmet is metal. The boots have a thick sole and thick leather upper that is held on with leather straps and buckles. The toe of the boot is heavy metal. The weight is worn next to the trunk of the diver and it has an inscription to mark the front. It is worn with straps and buckles holding it in place. Royal Navy Admiralty Pattern 6 bolt No 3 light Siebe Gorman light diving helmet circa 1960 used by the Royal Navy before and after World War 2"Siebe Gorman & Co Ltd Marine Engineers London. Patent" with "E G Ward" on front and back plate. On weight "FRONT"flagstaff hill, warrnambool, diving suit, siebe gorman and co ltd., siebe gorman and co ltd marine engineers london, marine engineers, diving helmet, diving boots, diving weight, marine diving, maritimemuseum, maritime village, maritime history, marine technology, life saving, deep sea diving -
 Federation University Historical Collection
Book - Book - Scrapbook, Ballarat Institute of Advanced Education: Scrapbook of newspaper cutting, Book 6; December 1971 to May 1972
Newspaper cuttings relating to Ballarat Institute of Advanced Education. These are from various newspapers and include The Age, Ballarat Courier, The Australian, The Herald. The cuttings cover the period from 12 December 1971 to 1 May 1972. Book with orange cover, front. Spiral bound.ballarat institute of advanced education, biae, employment advertisements, application for enrolment, outline of courses, victorian institute of colleges staff association, jack barker sees danger, fourth university use up funds, technical teachers at annual conference, professor at seminar, middle courses needed in engineering field, 1973 for biae library, student poster to sovereign hill, john crebbin, graeme trevena, gary murphy, group leadership is important, mr kevin murray, pollution threat to biae at mt helen, $300000 for biae student housing, academic registrar for institute, decision on mt helen clay pit, a l mckenzie president, japanese exchange group in ballarat, study grant for metallurgist, planners agree on fourth uni, pmg training at institute, melbourne site recommended, fourth uni should reach out, leaders slate report, pressure from country - fourth uni, gates to be removed - former gaol, 60 year old fleece found, john sharrock, youth is his thing, industry shows lack of interest, great blow to decentralisation, develop flexibility advise to chemical society, australian science education project, fourth uni not wanted - councillor, biae library taking shape, $500 scholarship to anne mills, bush their classroom, smb cabaret ball, greg govan - pottery student, prize commemorates early industrialists, e j tippett apprenticeship prize, daryl eason athletics champion, goon's giftthrough ballarat, technical teachers at protest meeting, stock exchange award to anne mills, chamber of manufactures scholarship to david ward, arblaster award for smb, new course - bachelor of applied science in metallurgy -
 Lara RSL Sub Branch
Book, Australia in Palestine, 1919
A soldier's book produced almost entirely by soldiers in the field under active service conditions to send to their friends in Australia and abroad. Australian Lighthorse men is a type peculiar his own and has no counterpart in h is NZ brother. His fearlessness, initiative and endurance, and his adaptability to almost any task, are due to the adventurous life he leads in his own country where he has been accustomed to long hours in the saddle, day and night, and to facing danger of all sorts from his earliest youth.Brown front and back hardcover with dark brown text 'Australia in Palestine' with a light horseman framed in centre of front cover. The spine is green with text Australia in Palestine, Angus and Robertson bottom of spine. Evidence of water on front cover. Silverfish have eaten top right hand corner of first two pages. Farm scene in four boxes with AR in the lower corner of each square. Inside front and back covers are illustrations of a camel train and came corps in the desert with the rising sun in the background with a mountain. There is a grave and white cross in their foreground right lower corner Illustrations, photographs, poems, short stories, Centre foldout of the Battle for Richon Le Zion and Battle of Beersheba and after the Battle of Bir El Abed To the memory of fallen comrades. Pen mark inside W. Mathews Larabattle of beersheba, battle of richon ze zion, battle of bir er abd, camel corps, lighthorse, slush light, sir h.g. chauvel, mounted division at kantara, medical services, signal engineers, katia oasis, new zealand mounted troops, sir edmund h allenby, walers story, 5th lighthorse, romani, ww1, world war 1, australian army