Showing 2616 items
matching king street
-
 Moorabbin Air Museum
Manual (Item) - King Nav/ILS Receiver System Installation Manual, KNR 630/KNR 631/KNR 632/KNR 633 Nav/ILS Receiver Installation Manual
-
Moorabbin Air Museum
Manual (Item) - King DME Code Converter Manual, KA 47 DME Code Converter Manual
-
Moorabbin Air Museum
Manual (Item) - King DIstance Measuring Equipment Maintenance/Overhaul Manual, Maintenance/Overhaul Manual KDM 705A Distance Measuring Equipment
-
Moorabbin Air Museum
Manual (Item) - King Marker Beacon Receiver and Isolation Amplifier Installation Manual, KMA 20/KR 21 Marker Beacon Receiver Isolation Amplifier Installation Manual
-
Moorabbin Air Museum
Manual (Item) - King Audio Panel/Marker Beacon Receiver Installation Manual, KMA 24 Audio Panel/Marker Beacon Receiver Installation Manual
-
Moorabbin Air Museum
Manual (Item) - King Audio Selector Panel and Interphone System Installation Manual, KMA 24H-70/71 Audio Selector Panel and Interphone System Installation Manual
-
Moorabbin Air Museum
Manual (Item) - King Navigation System Installation Manual, KNS 81 Digital Area Navigation System Installation Manual
-
Moorabbin Air Museum
Manual (Item) - King ADF System Installation Manual, KDF 806/KFS 586/A ADF System Installation Manual
-
Moorabbin Air Museum
Manual (Item) - King ADF System Installation Manual, KDF 806/KFS 586 ADF System Installation Manual
-
Moorabbin Air Museum
Manual (Item) - King Transceiver Installation Manual, KHF 950 HF Transceiver Installation Manual
-
Moorabbin Air Museum
Manual (Item) - King Audio Selector and Amplifier Installation Manual, KMA 24H Audio Selector Panel and Amplifier Installation Manual
-
Moorabbin Air Museum
Manual (Item) - King Cessna 404 Flight Control System Installation Manual, KFC 200 Flight Control System for Cessna 404 Installation Manual
-
Moorabbin Air Museum
Manual (Item) - King Transponder and Control Unit Installation Manual, KXP 756 Transponder and KFS 576/A Control Unit Installation Manual
-
Moorabbin Air Museum
Manual (Item) - King VOR/LOC/GS Indicators Installation Manual, KI 202/203/204/206/207 Installation Manual
-
Moorabbin Air Museum
Manual (Item) - King Distance Measuring Equipment Installation Manual, KN 62/62A/64 Distance Measuring Equipment Installation Manual
-
Moorabbin Air Museum
Manual (Item) - King ATC Transponder System Installation Manual, ATC Transponder System KXP 750/750A Installation Manual
-
Moorabbin Air Museum
Manual (Item) - King Navigation/Communications Unit Instruction Manual, Instruction Manual KX-160 Nav/Comm Unit
-
Moorabbin Air Museum
Manual (Item) - King Navigation Receiver/Communications Transceiver Installation Manual, KX 170A/KX 175 Navigation Receiver/Communcations Transceiver Installation Manual
-
Moorabbin Air Museum
Manual (Item) - King Communications Transceiver Installation Manual, KY 195B Communications Transceiver Installation Manual
-
Moorabbin Air Museum
Manual (Item) - King Navigation Receiver and Control Units Installation Manual, KNR 634/KNR 634A Nav Receiver KFS 564/KFS 564A Installation Manual
-
Moorabbin Air Museum
Manual (Item) - King HF SSB Trainsceiver Installation Manual, KTR 993 HF SSB Transceiver Installation Manual
-
Moorabbin Air Museum
Manual (Item) - King Radio Magnetic Indicator Installation Manual, KNI 582 Radio Magnetic Indicator Installation Manual
-
Moorabbin Air Museum
Manual (Item) - King Radio Magnetic Indicator Installation Manual, KNI 581 Radio Magnetic Indicator Installation Manual
-
Moorabbin Air Museum
Manual (Item) - Bendix/King Distance Measuring Equipment Installation Manual, Installation Manual KDM 706/706A Distance Measuring Equipment
-
Moorabbin Air Museum
Magazine (Item) - Beech King Air 350 magazine articles w/photos
... Moorabbin Air Museum Moorabbin Airport 12 First Street ... -
 Ballarat Tramway Museum
Film - Movie Film & Box, Kodak, 1960
Yields information in movie film format of Ballarat trams in 1960, how the system operated and was used by people., Yields information in movie film format of Ballarat trams in 1960, how the system operated and was used by people.Movie film - 8mm, approx. 30mins, with leader strip on a plastic reel, within a black and white plastic box, titled "Ballarat No. 1. 1960". Has been transferred to DVD - see Reg item 4100 as Segment No. 2. Made by Ben Parle. Also transferred to DVD by Rod Cook Oct. 2015, via Roger Greenwood for use in his DVD, "The City of Ballarat Trams, Gardens & Gold" of 2016. See Reg Item 6883. Synopsis: based on time. 0:00 View of typed introduction, noting that this is a pictorial record of Ballarat. 0:10 Title “The Tramways of Ballarat 1960, Part 1” 0:16 13, showing “View Point” at Stones Corner, Bridge St, east end, with trolley pole being turned, while another single trucker heads out towards Mt Pleasant. 0:25 13 leaving Stones Corner, short approach and then longer trailing shot of the tram going towards the City in Bridge St. 0:44 View out of front of tram in Bridge St heading towards the City, with cars in the photo, then passing through city Loop, no trams in the loop and running up to Lydiard St Nth and crossing the road. 1:22 Running up Sturt St from Armstrong St, passes over Dawson St X-over and up to the next intersection, Lyons St. 1:54 Title “The View Point Line” 1:59 19 inbound, in Ripon St, from crossing Mair St, towards camera and then passing away and turning into Sturt St. 2:49 View of a “Warning Oncoming Trams” sign 2:52 19 in Ripon St, going to View Point, crossing Webster St towards camera, then going away through the disconnected Victoria Ave loop, pass the “Warning Oncoming Trams” sign. Note very windy scene with people running across roads. 3:17 19 in Wendouree Parade, in bound, though showing destination View Point, going away from the camera, past the View Point Hotel. 3:39 19 coming towards camera near Excerpt or Devon St and then going away towards the terminus. 4:04 19 at the terminus, stationary, with a single trucker 3?, passing from Macarthur St into Wendouree Parade, behind 19. 4:20 33 coming towards camera in Wendouree Parade from St Aidans Drive, stopping to pick up passenger at Forest St and then going away towards the City, photographed from near the depot, on a wet and windy day. 4:54 35 in Wendouree Parade, coming towards the Camera from St Aidans Drive and then going away with the Gardens Loop area in the background. Tram stops at stop to let a passenger off. 5:28 21 leaving Gardens Loop for the City via the Depot, green light in signal can be seen. 5:43 28?, closely followed by 26 turn from Drummond St South into Sturt St. 6:18 Scene opens with shot of “Sebastopol” destination on a bogie tram. 6:21 Title “The Sebastopol Line” 6:24 21 turning from Sturt St into Drummond St Sth with destination of Bell St and then going away from the camera. 6:55 38 in Drummond St Sth, coming towards the camera and then passing the camera with Sturt St just in the view. 7:10 21, showing Gregory St, in Drummond St Sth, approaching and then going away, entering the Urquhart St Loop, 7:39 34 in Drummond St Sth (location check required (Latrobe?)), approaches camera, picks up passengers and the goes away. 8:09 39 at ? Street, turns from Drummond St Sth into Skipton St, after picking up and setting down passengers, bound for Sebastopol 8:55 35 inbound in Skipton St passes through the Bell Street Loop, and then goes away from the camera. 9:33 42 outbound in Skipton St, approaches the camera, passes and then crosses over the half the road into Albert St. 10:00 39 inbound in Albert St – location? 10:31 34 outbound for Sebastopol, approaches camera and just starts to pass by. 10:36 34 in Grey St crossing loop, crosses 42 inbound. 10:59 39 outbound in Albert St, with shopping centre in bound, approaches camera, passes and then crosses over Albert St. Mid morning scene. 11:39 39 inbound, Albert St south, approaches camera and then passes and the crosses over Albert St. 12:16 41 outbound in Albert St passes the camera, and pulls into the terminus with the conductor getting out on the back bumper to pull the pole down as the tram stops and a passenger walks into the Royal Hotel. 12:39 Title “The Lydiard Street North Line” 12:44 Filmed from the Hotel balcony, 21 inbound in Lydiard St Nth passes over Mair St, stops while 33 passes in the other direction. 13:18 With the red light showing on the Seymour St loop signal, 33 inbound for Sebastopol stops and picks up many passengers, passes the camera and runs past the VRI building in the background and through the loop. Possibly filmed on a Sunday given the ladies dresses and quieter streets. 14:01 30 outbound, passes the camera and stops at Macarthur St. Filmed alongside the brick wall of the cutting. 14:28 30 inbound arrives, passes through the Gregory St loop and then proceeds past the camera, making a stop to pick up passengers. 15:14 28 in Lydiard St Nth – location?, approaches and goes away from the camera, north of Gregory St. 15:34 28 ditto location? 15:53 21 arrives at the terminus with passengers getting on and off. 16:11 View of the a vertical positioned “End of Section” sign on a pole at the terminus and then lifting the camera to see the timetable board and the stop sign. 16:33 31 in Bridge St passing Morseheads and then turning into Sturt St, stops at the Grenville St stop, while another single trucker comes down to the stop from the City. 16:58 31 outbound in Bridge St, with destination of Victoria St. 17:14 Title “The Victoria Street Line” 17:18 31 outbound to Victoria St from Stones Corner. Starts with an overhead shot, shows clock at the Caltex service station,. 17:37 31 inbound approaching Bakery Hill and then descending to the junction after it passes camera. 18:09 25 climbing outbound in Victoria St, passing the camera, to then pass through the King St loop. 18:47 25 inbound in Victoria St, passing the camera, then pass through the King St loop, with St Alypius Church in the background. 19:36 14 approaching the rail bridge in Victoria St and stopping at the 2nd last stop to left of passengers. 20:01 14 leaving the terminus and approaching the camera and the a short sequence going away, to the next stop to pick up quite a few passengers. 20:14 “Trams Stop Here” sign, metal wrap around on a steel pole. 20:16 Title “The Mount Pleasant Line” 20:21 11 inbound in Main St, with a passenger leaping off the tramcar and another getting off just before the junction. 20:45 11 passes the junction and then proceeds away from the camera in Bridge St. 21:04 30 outbound in Main St, then turns into Barkly St, a bus (Eclipse Motors) passes in Main St just before the sequence ends. 21:31 30 inbound near Steinfield St. (exact location?) 21:49 25 approaches the camera, then proceeds away and passes through the Grant St. loop. 22:29 25 inbound, windy day, between Grant and Cobden, (exact location?), with a horse drawn bread van in the view and the breadman walking behind the tram as it passes. 23:02 11 outbound in Barkly St, (exact location?) 23:37 11 inbound in Barkly St (exact location?) 23:44 Mt Pleasant terminus signage 23:50 30 approaches the terminus and then stops with the conductor alighting turning the pole, passengers getting on and off and the driver appearing at the other end. 24:32 Title “The Gardens Via Sturt St. West Line” 24:35 21 outbound in Sturt St near Raglan St, approaches and passes the Camera. 25:09 12, showing City Oval, approaches and passes the camera, outbound near Windermere St. 25:33 13 showing View Point, goes away from the camera – location? 25:44 12 comes from St. West, inbound passes the camera and then stop as the next stop next Talbot St? 26:21 Short sequence of a “Warning Oncoming Trams” sign 26:28 42 inbound in Sturt St West, just before Ripon St, view coming towards camera and then going away to cross Ripon St. 27:10 34 passes through the Parker St loop 27:25 35 or 39 inbound past the college in Sturt St West 28:04 41 outbound at the Russell St curve, passes away from the camera. 28:11 35? inbound passes away from the camera through the Victoria Park or Morrison St loop, swinging out into the roadway. 28:29 View of timetable sign at Hamilton Ave. 28:37 35 turning from Sturt St West into Hamilton Ave, can see the conductor changing over the barrier rails. 29:11 42 inbound, crosses another bogie tram (35?) at Carlton St loop then passes the camera and goes past the Olympic rings monument. 29:42 12 approaches the Carlton St gates. 30:07 12 outbound, crosses a bogie tram in the loop with both trams then leaving the loop. 30:20 Title “End of Part One” Written labels giving title information on outside of box.trams, tramways, ballarat, sebastopol, lydiard st north, victoria st, mt pleasant, sturt st west -
 Ballarat Tramway Museum
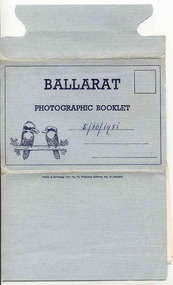
Postcard - Folder set, Valentine & Sons Publishing Co, "Ballarat Photographic Booklet", 1940's
Shows views of the Ballarat CBD and nearby features in the 1930's and 1940's of views of Ballarat, including some trams in the photographs. Demonstrates production of souvenirs of the era - folded postcards. The photos could also be used for individual postcards.Set of 9 black and white views of Ballarat printed on a folded strip, glued within a blue colour light weight cardboard folder, titled "Ballarat Photographic Booklet". Booklet printed with an address area with title and kookaburras. Produced by The Valentine Publishing Co. Pty Ltd Melbourne & Sydney The rear has a slit on the rear cover that allowed the folder to be secured. Pictures are: 1. Panorama from Sturt Street, looking up Bridge St 2. City Hall 3. The Avenue of Honour (14 Miles Long) 4. Lake Wendouree 5. King George V. Memorial 6. The Pergola, Botanical Gardens 7. Eureka Stockade 8. Lydiard Street, showing Craig's Hotel 9. Sturt Street, Ballarat. Made during 1940, with photographs of the 1930's as well given motor cars in the photo. Has a date of "5/10/1951" on the front cover in ink. Has a date of "5/10/1951" on the front cover in ink.trams, tramways, sturt st, town hall, lake wendouree, memorial arch avenue of honour, memorial, gardens, lydiard st, eureka -
Moorabbin Air Museum
Photograph (Item) - Various Photos - See Description, CAC Keith Meggs photos
-
Moorabbin Air Museum
Manual (Item) - King KFS 564/KNR 634 NAV/ILS/Marker Beacon Receiver System
Installation Manual 006-0188-01 -
Moorabbin Air Museum
Magazine (Item) - Includes Point Cook, History, Museum, Roulettes, Hercules, Globemaster, Boeing 737, Hawk 127, AP-3C Orion, PC-9a, F111, Hornet, King Air DHC-4, Caribou, Challenger, CL-604O, RAAF Airforce articles