Showing 331 items
matching energy
-
 Melton City Libraries
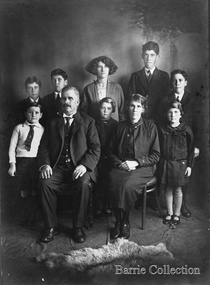
Photograph, Charles Ernest and Jessie Barrie with family, Unknown
This document is has been compiled by Wendy Barrie daughter of Ernest (Bon) and Edna Barrie and granddaughter of Charles E and Jessie M Barrie. I was born in during WW 11 and the first child of my generation to live on the ‘ Darlingsford’ property at Melton. My grandfather was well known in the district and was mostly referred to as Ernie. He shared the same initials as his second son Edgar. His three eldest sons lived and farmed in Melton for their entire lives. His descendants are still associated with farming, engineering and earthmoving in Melton. Ernie Barrie operated a travelling Chaff Cutter in the St Arnaud area where his parents William and Mary Ann had taken up land at Coonooer West in 1873. Ernie commenced his working life with a team of bullocks and a chaff cutter. The earliest connection he had with Melton was in 1887. By the beginning of the 20th century Ernie and his father William and brothers, William, Samuel, James Edwin,[Ted] Robert, Arthur and Albert have been associated with farming and milling in the Melton district. In the early 1900’s Ernie and his brother Ted were in partnership in a Chaff cutting and Hay processing Mill on the corner of Station and Brooklyn road Melton South. The mill was managed by William for a time. By 1906 Charles Ernest and James Edwin were in partnership in the Station Road mill when a connecting rail line across Brooklyn Road for a siding was constructed to the Melton Railway Station. In 1911 the Mill’s letterhead shows C.E. BARRIE Hay Pressing and Chaff Cutting Mills. Melton Railway Station. Telephone No 1 Melton. This Mill as sold to H S K Ward in 1916 and stood until 1977 when it burnt down in a spectacular fire. Ernie built a house at Melton South beside the Chaff Mill at Station Road in 1906 and married Jessie May Lang in August at the Methodist Church. Jessie’s father was Thomas Lang. He came to Melton in 1896 and was the Head Teacher at Melton State School No 430 until he retired in 1917. They had 9 children with 8 surviving to adulthood. Jessie and Ernie had 6 sons and 3 daughters. All the children lived at Darlingsford. In April 1910 the family left Melton for a brief period and moved to a farm in Trundle in NSW. They returned to Melton and purchased Darlingsford in May 1911. For a time during WW1 they lived at Moonee Ponds near the Lang grandparents at Ascot Vale. Mary and Bon attended Bank St State School. The children developed diphtheria in 1916 and their youngest boy, Cecil died of complications. Mary and Bon were taken to Fairfield Hospital and both recovered. At the end of the war influenza broke out the family returned to Darlingsford and shared the home for a short while with the Pearcey family who had been working the farm. By 1922 the family had and grown and Edgar, Tom, Horace, Jessie, Joyce and Jim were living a Darlingsford. Ernie continued during the 1920’s working the farm and attend his many civic and community commitments. Two 8 clydesdale horse teams were used to work the land which meant early rising for the horses to be fed and harnessed to commence the days work. In 1916 Ernie also became involved in a Chaff Mill on the corner of Sunshine and Geelong Road West Footscray, which at the time was being run by John Ralph Schutt. It was known an Schutt Barrie. A flour mill was added at a later stage. Other Schutt and Barrie mills were situated at Parwan and Diggers Rest. Another mill was situated beside the railway line at Rockbank. The Footscray mill ceased operation in 1968 Ernie spent a lot of time and energy at the Parwan Mill and travelling around Parwan and Balliang farms, where he came to know many of the families in the district. Ernies commitment to the civic development to the Melton and district was extensive, he was involved with a number of large events during the 1920’s such as the Melton Exhibitions and the 1929 Back to Melton Celebrations. He was a member of the Australian Natives Association at the turn of the century. He was Chairman of the School Committee at Melton State School 430 and the Melton South State School in thw1920s. He donated the land for a Hall for Melton South in 1909, known as Exford Hall and later in 1919 renamed Victoria Hall. The Hall was demolished in 1992. He was a Councillor, JP, and Vice President and President of the Melton Mechanics Institute Hall Committee in 1915- 1916. He was a member of the Methodist Church and later the Scots Presbyterian Church. He was Superintendent of the Sunday School of the Methodist Church to 1910 and later Scots Presbyterian Church until 1931. This is reflected in the theme of children in the stained glass window which was dedicated in his memory by his wife Jessie as a gift to the Scots Church. Charles Ernest Barrie made many generous donations to many charities who supported young people and children. In 1918 Jessie and Ernie made the first donation to a very prominent Victorian charity whose work still continues. Yooralla. In July 1931 Ernie’s untimely death was a major blow to the family and the Melton community. To this day people still vividly recall the day they lined the streets for his funeral. The day of the funeral is recalled as the day Melton stood as two of their prominent citizens who tragically died on the same day. Their eldest daughter Mary had married Keith Robinson in 1930 and had just moved to Heatherdale Toolern Vale with their year old baby son. Bon the eldest son was 22, Edgar 18, Tom 16, Horace 15, Jessie and Joyce 10 and Jim 8 years old. A heavy burden of responsibility fell on the shoulders of the two eldest children, Mary particularly for her mother and Bon stepped in assuming head of the family for his mother, brothers and sisters living at the Darlingsford homestead. In the early 1930’s the three eldest sons took on many of the Civic and Church commitments which their father had held. This community involvement extended well into the 1980s. In 1941 Bon married Edna Myers and they moved into a house shifted from Harkness Lane to Harkness Lane on the eastern section of the Darlingford property. Edgar married Margaret Hodgkinson a Primary school teacher at Melton in 1949 and they lived in the Darlingsford house. Earlier Tom married May Ferris and lived on the eastern side of Ferris Lane in the Ferris home. Bon , Edgar and Tom often operated as a team effort, in particular at harvest time when a larger team of workers was needed. The three farms cultivated wheat, barley and oats and supplied the Mill with sheafed hay. They continued using horse teams until mechanisation in the 1940’s made the horses redundant. By the 1960s their five sons continued with farming. Many loads of hay were transported to the Mill in Footscray. Well into the 1960s hired harvest hands along with agricultural university students were involved in bringing in he harvest. Stacking was an art form in itself and Tom held the expertise for building and shaping the sides and roof. The stacks built in the district each had their own unique shape and could be recognized by their builders. The Barrie brothers developed a mechanical fork lift for picking up complete stooks and moving them to be loaded to the elevator to build the haystack. The prototype built by Bill Gillespie was attached to a Bedford truck. Later refinements in a collaborative effort with the Gillespie brothers a multi pronged fork was attached to the front of tractor which was hydraulically operated to raise each stook onto trucks to be transported to the site of the haystacks. This method of handling sheaves significantly reduced laborious pitchforking individual sheaves. This invention was soon taken up by farmers far and wide and was a common sight in the district at harvest time in the stacking season. I recall visiting farmers calling in at the house at Ferris Road farm to inspect this break through invention. The Clydesdale horse teams were used into the 1940s but by the 1950s the Barries’ farms were fully mechanised. When the demand for sheafed hay declined other crops were introduced these included barley, lucerne, wheat and peas. Sheep were added to the mix in the 1950s in an attempt to keep the farms more viable. In the 1970s part of the Barrie’s farms were facing a major disruption with the impending compulsorily acquisition of a strip of land for the construction the freeway bypass, which divided access between the Darlingsford homestead with those on Ferris Lane. Charles Ernest Barrie and Jessie May Lang's children: 1. Mary Ena BARRIE was born on 07 October 1907. She died on 29 April 1999. 2. Ernest Wesley BARRIE was born on 29 April 1909 in Ascot Vale, Victoria, Australia.He died on 25 December 1985 in Melton, Victoria, Australia. 3. Cecil William BARRIE was born on 23 February 1911.He died on 25 May 1916. 4. Charles Edgar BARRIE was born on 01 June 1913.He died on 06 October 1975. 5. Thomas Lindsay BARRIE was born on 25 November 1914.He died on 14 September 1990 in Melton, Victoria, Australia. 6. William Horace BARRIE was born on 11 October 1915.He died on 19 December 1950. 7. Jessie Maud BARRIE was born on 06 November 1920 in Bacchus Marsh, Victoria, Australia.She died on 26 February 1994. 8. Dorothy Joyce BARRIE was born on 06 November 1920 in Bacchus Marsh, Victoria, Australia.She died on 18 March 2003.. 9. James Edward BARRIE was born on 17 January 1922 in Bacchus Marsh, Victoria, Australia.He died on 23 August 2004Family Photo with Edgar, Tom, Mary, Ernest (Bon), Horace, Jim, Charles Ernest, Jessie and Joycelocal identities -
 Bendigo Historical Society Inc.
Letter - MERLE HALL COLLECTION: ROSALIND PARK CREATIVE VILLAGE BENDIGO PROJECT LETTERS, 1994
Merle Hall Collection: Rosalind Park Creative Village Bendigo Project Letters 31 March 1994 To: Victorian Arts Council Members From Grant Finck Project Coordinator Content: Introduces himself as the coordinator for 12 months; to members looking for expression of interest, includes Information Sheet 1994 on what the Creative Village is. 27 October 1995 To: Mrs. Mearle Hall From: City of Greater Bendigo, Bernard Smith (Director Environmental Services) Content: Granting access to the Victoria Hill site for small quantities of geological material. 10 January 1996 To: Mrs. Mearle Hall From: City of Greater Bendigo, Bernard Smith (Director Environmental Services) Content: Endorsement of the project by the Council and confirmation that the Council will provide preliminary site work to allow the project to be enabled. Also advised the Arts Bendigo Mosaic Project makes contact with the Salvation Army (New Work Opportunity Project) 27 February 1996 To: Mrs. Mearle Hall From: Ken Beasley Manager Project Development The Smith Read Training Group. Content: LEAP Project Proposal - Mining Heritage Mosaic outlining the benefits of using LEAP Trainees to undertake the project. Proposed Scope of work outlining responsibilities of each participant. Bendigo Mining NL Environmental Trust Fund (Perseverance Exploration and Department of Energy and Minerals Victoria representatives) 27 June 1996 To: Mrs. Mearle Hall From: City of Greater Bendigo, Bernard Smith (Director Environmental Services) Content: Advising that the Council will match dollar for dollar funding for the engagement of an artist to supervise the construction of the Mosaic in Upper Rosalind Park up to $3,500. 22 July 1996 To: Anne Buzza From Geof Brown Camp Hill Primary School Content: Thanks for using and managing the school students to help create tiles. 9 October 1996 To: Mrs. Mearle Hall From: City of Greater Bendigo, Bernard Smith (Director Environmental Services) Content: Enclosed cheque for matching grant of $3500 15 October 1996 To: Mrs. Mearle Hall From: City of Greater Bendigo, Bernard Smith (Director Environmental Services) Content: Agreement to relocate the project facilities to the car park and to maintain a close liaison between the Council and Arts Bendigo. 13 November 1996 To: Mrs. Mearle Hall From: The Sidney Myer Fund Helen Morris Research Officer Content: Remittance advice for $1000 22 April 1997 To: Mrs. Mearle Hall From: John Little Administrator Victorian Arts Council Content: Remittance advice for $500 towards the project and enclosing 12 VAC Annual reports. 20 October 1998 To: Mrs. Mearle Hall From: City of Greater Bendigo, Andrew Hall (Director Community Development) Content: Advising that the Council will make a grant of $1090 for the purpose of printing of Brochures for Bendigo Heritage Mosaic. A service agreement to be signed before the issue of the grant, 21 March 2001 To: Mrs. Mearle Hall From: City of Greater Bendigo, Justin Hanney (Director Community Services) Content: A reference from Council supporting the project application to Vic Health for the development of a series of small mosaic pieces along the linear pathway asjacent to the Bendigo Creek. 12 November 1996 To: Mrs. Mearle Hall From: Arts Bendigo Inc. Content: Cheque for $2000 being first payment as under contract two for mosaic project. 4 December 1996 To: Mrs. Mearle Hall From: Arts Bendigo Inc. Content: Cheque for $2000 being second payment as under contract two for mosaic project. 27 July 1997 To: Maery Gabriel Mosaic Artist From: Arts Bendigo Inc. Content: Cheque for $2000 being final payment as under contract two for mosaic project. 12 June 1997 - Two copies To: Maery Gabriel Mosaic Artist From: Arts Bendigo Inc. Content: Agreement between Maery Gabriel (The artist) and Arts Bendigo Inc. to complete the final two sections of the Bendigo Heritage Mosaic at the base of the Rosalin Park Poppet Head, Bendigo with a design of approximately two square meters within each section. The work to be completed by the endo of July 1997, unless severe weather conditions make the laying impossible. Agreement for two lots of $2000. 14 June 1996 From: Maery Gabriel Mosaic Artist To: Arts Bendigo Inc. Content: receipt for 50% payment for two weeks and $60 Travelling expenses. 21 May 1996 Agreement between Arts Bendigo of P.O Box 563, Bendigo in the State of Victoria (hereinafter referred to as the ‘AB’ of the first part AND Meary Hall of Morningswood, Petersons Road, Ellinbank, 3821 in the State of Victoria (hereinafter referred to as ‘the artist’) of the second part. ENGAGEMENT: (a) AB engages the Artist to provide her services as Mosaic Artist for the design and creation of a Mosaic pavement surround to the poppet head lookout in Rosalind Park, Bendigo and matters incidental thereto at such schools, halls and any other places as required from time to time by AB and the Artist accepts the engagement upon the term and conditions hereinafter appearing. (b) Services to be provided by the artist include community consultation and design work in association with AB Co-Ordinator and Arts Bendigo, a minimum of six weeks of the artist’s time within the six months of the project. Completion of section one of the whole design with further work on the other sections to depend on available funding. The agreed fee was $5400 and $60 per visit to Bendigo with living away to be provided by Arts Bendigo 1 November 1996 Agreement between Arts Bendigo of P.O Box 563, Bendigo in the State of Victoria (hereinafter referred to as the ‘AB’ of the first part AND Meary Hall of Morningswood, Petersons Road, Ellinbank, 3821 in the State of Victoria (hereinafter referred to as ‘the artist’) of the second part. ENGAGEMENT: (a) AB engages the Artist to provide her services as Mosaic Artist for the design and creation of a Mosaic pavement surround to the poppet head lookout in Rosalind Park, Bendigo and matters incidental thereto at such schools, halls and any other places as required from time to time by AB and the Artist accepts the engagement upon the term and conditions hereinafter appearing. (b) Services to be provided by the artist include community consultation and design work in association with AB Co-Ordinator and Arts Bendigo, a minimum of six weeks of the artist’s time within the six months of the project. Completion of section one of the whole design with further work on the other sections to depend on available funding. The agreed fee was $5000 and $60 per visit to Bendigo with living away to be provided by Arts Bendigo, plus transfer of the diamond saw purchased by AB 28 August 1996 Memorial to Bendigo’s Mining Heritage and Traditions financial and other support as at August 128th Arts Bendigo Financial contribution: $7000 Local Busine Sponsors: $2800 City of Greater Bendigo Matching Above: $2800 City of Greater Bendigo Site works: Equiv, $12000 Local Businesses and institutions supplying goods and services to total value of: Equiv: $7600 Expenditure: Purchase of equipment, including diamond saw: $2000 Purchase of materials: $800 Artists design fees: $3000 Artists on site work, travel and accommodation: $12000 insurance, administration etc.: $700 31 May 1996 List of possible donors' checklist Undated Budget Sheet 21 September 1995 From: The Victorian Arts Council To: City of Greater Bendigo Content: Invoice for $5000 10 December 1995 From: Maery Gabriel artist To: Arts Bendigo Content: Invoice $1575 for design of Rosalind Park Lookout. 45 hours @ $35/hour 1 October 1996 Historic mining Mosaic Pavement, Rosalind Park Poppet Head Financial Statement as a October 1st, 1996 28 October 1996 From: Maery Gabriel To: Ann Buzza (representing Arts Bendigo) Report on project of Rosalind Park Mosaic as at October 1996. The report lists the difficulties faced with the weather, unsuitable facilities on site and problems with the LEAP team labour.victorian arts council, city of greater bendigo -
 Flagstaff Hill Maritime Museum and Village
Domestic object - Bowl, Late 19th or early 20th Century
The Process of Making Pottery Decorating, Firing, Glazing, Making, Technical There is a rhythm and flow to clay. It can’t be done all at once! Even the making process! It can take weeks to get everything done, especially if you can only work on your pottery once a week! Even though we have three hour classes, it’s often just not enough time! Here is an overview of some of the processes so you have a bit more grasp on some of the technical stuff! Step One – Design There are SO many ideas out there for making stuff in clay! From delicate porcelain jewellery, through to heavy sculptural work and everything in between. Deciding your direction is sometimes not that easy – when you first start, try everything, you will naturally gravitate to the style that you enjoy! The options and variations are endless and can get a wee bit overwhelming too! Check in with me before you start to ensure your ideas will work, what order you might do things, how you could achieve the look you are seeking and any other technical data required! Step Two – Making Clay is thixotropic. This means that as you work with it, the clay first gets sloppier and wetter, before is begins to dry in the atmosphere. For most things, you simply can’t do all parts of the project at once. An example of work order might look like: Get last weeks work out from the shelves Prepare clay for today’s work – roll your clay, prepare balls for throwing, make the first stage of a pinch pot) Clean up last week’s work and put it on the shelf for bisque firing Check that you have any glazing to do – and do enough of it that you will have time to finish your main project Do the next step of your next project – there might be a further step that can’t be complete immediately, in that case, wrap your work well and put onto the shelves. Letting your work rest for a while can really help keep your work clean and professional looking. Many things require bagging under plastic to keep it ready for work the next week – put your name on the outside of the bag so you can find your work easily. We have stickers and markers. Consider how you want to decorate your work – coloured slip can be applied at a fairly wet stage (remembering that it will make your work even wetter!). Trying to apply slip to dry clay won’t work! If you want to do sgraffito – you will need to keep the work leather hard (a state of dryness where you can still work the clay with a little effort and a little water and care). Step Three – Drying Most of the time your work can go into the rack uncovered to let it dry out for the following week. If you want to continue forming or shaping you will need to double bag your work – put your work on a suitable sized bat and put the bat in a bag so the base of the bag is under the bat, then put another bag over the top of the work and tuck the top of the bag under the bat. If you want to trim (or turn) your thrown work the following week, it should also be double bagged. If your work is large, delicate, or of uneven thicknesses, you should lightly cover your work for drying. When considering the drying process, bare in mind the weather, humidity and wind! The hotter and dryer, the faster things dry and work can dry unevenly in the shelves – this can lead to cracking – another time to lightly cover your work for drying. Step Four – Trimming and Cleaning Up Your work is dry! It is called greenware now and it is at it’s most fragile! Handle everything with two hands. I often refer to soft hands – keep everything gentle and with your fingers spread as much as possible. Try to not pick up things like plates too much, and always with both hands! Before your work can be bisque fired it should be “cleaned up”. You work won’t go into the kiln if it has sharp edges – when glazed, sharp edges turn into razor blades! Use a piece of fly wire to rub the work all over – this will scratch a little so be light handed. Use a knife or metal kidney to scrape any areas that require a bit more dynamic treatment than the fly wire offers! Finally, a very light wipe over with a slightly damp sponge can help soften and soothe all of your edges and dags! Trimming thrown work: If you are planning to trim (or turn) your thrown work (and you should be), make sure you bag it well – your work should be leather hard to almost dry for easiest trimming. Use this step to finish the work completely – use a metal kidney to polish the surface, or a slightly damp sponge to give a freshly thrown look. Wipe the sponge around the rim after trimming, and check the inside of the pot for dags! Trimming slip cast work: Usually I will trim the rims of your work on the wheel the following day to make that stage easier, however you will still need to check your work for lumps and bumps. Last but not least – check that your name is still clearly on the bottom of your work. Step Five – Bisque Firing When the work is completely dry it can go into the bisque kiln. The bisque kiln is fired to 1000°C. This process burns off the water in the clay as well as some of the chemically bound water. The structure of the clay is not altered that much at this temperature. Inside the bisque kiln, the work is stacked a little, small bowl inside a larger bowl and onto a heavy plate. Smaller items like decorations or drink coasters might get stacked several high. Consideration is paid to the weight of the stack and shape of the work. A bisque kiln can fire about one and a half times the amount of work that the glaze kiln can fire. The firing takes about 10 hours to complete the cycle and about two days to cool down. Once it has been emptied the work is placed in the glaze room ready for you to decorate! Step Six – Glazing Decorating your work with colour can be a lot of fun – and time consuming! There are three main options for surface treatment at this stage: Oxide Washes Underglazes Glazes Washes and underglazes do not “glaze” the work – It will still need a layer of glaze to fully seal the clay (washes don’t need glaze on surfaces not designed for food or liquid as they can gloss up a little on their own). Underglazes are stable colourants that turn out pretty much how they look in the jar. They can be mixed with each other to form other colours and can be used like water colours to paint onto your work. Mostly they should have a clear glaze on top to seal them. Oxides are a different species – the pink oxide (cobalt) wash turns out bright blue for instance. They don’t always need a glaze on top, and some glazes can change the colour of the wash! The glazes need no other “glaze” on top! Be careful of unknown glaze interactions – you can put any combination of glaze in a bowl or on a plate, but only a single glaze on the outside of any vertical surface! Glazes are a chemical reaction under heat. We don’t know the exact chemicals in the Mayco glazes we use. I can guess by the way they interact with each other, however, on the whole, you need to test every idea you have, and not run the test on a vertical surface! Simply put, glaze is a layer of glass like substance that bonds with the clay underneath. Clay is made of silica, alumina and water. Glaze is made of mostly silica. Silica has a melting point of 1700°C and we fire to 1240°C. The silica requires a “flux” to help it melt at the lower temperature. Fluxes can be all sorts of chemicals – a common one is calcium – calcium has a melting point of 2500°C, however, together they both melt at a much lower temperature! Colourants are metal oxides like cobalt (blue), chrome (green through black), copper (green, blue, even red!), manganese (black, purple and pink) iron (red brown), etc. Different chemicals in the glaze can have dramatic effects. for example, barium carbonate (which we don’t use) turns manganese bright pink! Other elements can turn manganese dioxide brown, blue, purple and reddish brown. Manganese dioxide is a flux in and of itself as well. So, glazes that get their black and purple colours, often interact with other glazes and RUN! Our mirror black is a good example – it mixes really well with many glazes because it fluxes them – causes them to melt faster. It will also bring out many beautiful colours in the glazes because it’s black colouring most definitely comes from manganese dioxide! Glaze chemistry is a whole subject on it’s own! We use commercial Mayco glazes on purpose – for their huge range of colour possibilities, stability, cool interactions, artistic freedom with the ability to easily brush the glazes on and ease of use. We currently have almost 50 glazes on hand! A major project is to test the interactions of all glazes with each other. That is 2,500 test tiles!!!! I’m going to make the wall behind the wheels the feature wall of pretty colours! Step Seven – Glaze (Gloss or sometimes called “Glost”) Firing Most of the time this is the final stage of making your creation (but not always!) The glaze kiln goes to 1240°C. This is called cone 6, or midrange. It is the low end of stoneware temperatures. Stoneware clays and glazes are typically fired at cone 8 – 10, that is 1260 – 1290°C. The energy requirement to go from 1240°C to 1280°C is almost a 30% more! Our clay is formulated to vitrify (mature, turn “glass-like”) at 1240°, as are our glazes. A glaze kiln take around 12 hours to reach temperature and two to three days to cool down. Sometimes a third firing process is required – this is for decoration that is added to work after the glaze firing. For example – adding precious metals and lustres. this firing temperature is usually around 600 – 800°C depending upon the techniques being used. There are many students interested in gold and silver trims – we will be doing this third type of firing soon! After firing your work will be in the student finished work shelves. Remember to pay for it before you head out the door! There is a small extra charge for using porcelain clay (it’s more than twice the price of regular clay), and for any third firing process! Once your work has been fired it can not turn back into clay for millennia – so don’t fire it if you don’t like it! Put it in the bucket for recycling. https://firebirdstudios.com.au/the-process-of-making-pottery/ The bowl is an example of kitchenware used in the 19th century and still in use today.Bowl white ceramic. Crack on side. Badly stained.Backstamp very faint and unable to be read.flagstaff hill, warrnambool, shipwrecked-coast, flagstaff-hill, flagstaff-hill-maritime-museum, maritime-museum, shipwreck-coast, flagstaff-hill-maritime-village, mixing bowl, food preparation, kitchen equipment, ceramic -
 Flagstaff Hill Maritime Museum and Village
Domestic object - Bowl
The Process of Making Pottery Decorating, Firing, Glazing, Making, Technical There is a rhythm and flow to clay. It can’t be done all at once! Even the making process! It can take weeks to get everything done, especially if you can only work on your pottery once a week! Even though we have three hour classes, it’s often just not enough time! Here is an overview of some of the processes so you have a bit more grasp on some of the technical stuff! Step One – Design There are SO many ideas out there for making stuff in clay! From delicate porcelain jewellery, through to heavy sculptural work and everything in between. Deciding your direction is sometimes not that easy – when you first start, try everything, you will naturally gravitate to the style that you enjoy! The options and variations are endless and can get a wee bit overwhelming too! Check in with me before you start to ensure your ideas will work, what order you might do things, how you could achieve the look you are seeking and any other technical data required! Step Two – Making Clay is thixotropic. This means that as you work with it, the clay first gets sloppier and wetter, before is begins to dry in the atmosphere. For most things, you simply can’t do all parts of the project at once. An example of work order might look like: Get last weeks work out from the shelves Prepare clay for today’s work – roll your clay, prepare balls for throwing, make the first stage of a pinch pot) Clean up last week’s work and put it on the shelf for bisque firing Check that you have any glazing to do – and do enough of it that you will have time to finish your main project Do the next step of your next project – there might be a further step that can’t be complete immediately, in that case, wrap your work well and put onto the shelves. Letting your work rest for a while can really help keep your work clean and professional looking. Many things require bagging under plastic to keep it ready for work the next week – put your name on the outside of the bag so you can find your work easily. We have stickers and markers. Consider how you want to decorate your work – coloured slip can be applied at a fairly wet stage (remembering that it will make your work even wetter!). Trying to apply slip to dry clay won’t work! If you want to do sgraffito – you will need to keep the work leather hard (a state of dryness where you can still work the clay with a little effort and a little water and care). Step Three – Drying Most of the time your work can go into the rack uncovered to let it dry out for the following week. If you want to continue forming or shaping you will need to double bag your work – put your work on a suitable sized bat and put the bat in a bag so the base of the bag is under the bat, then put another bag over the top of the work and tuck the top of the bag under the bat. If you want to trim (or turn) your thrown work the following week, it should also be double bagged. If your work is large, delicate, or of uneven thicknesses, you should lightly cover your work for drying. When considering the drying process, bare in mind the weather, humidity and wind! The hotter and dryer, the faster things dry and work can dry unevenly in the shelves – this can lead to cracking – another time to lightly cover your work for drying. Step Four – Trimming and Cleaning Up Your work is dry! It is called greenware now and it is at it’s most fragile! Handle everything with two hands. I often refer to soft hands – keep everything gentle and with your fingers spread as much as possible. Try to not pick up things like plates too much, and always with both hands! Before your work can be bisque fired it should be “cleaned up”. You work won’t go into the kiln if it has sharp edges – when glazed, sharp edges turn into razor blades! Use a piece of fly wire to rub the work all over – this will scratch a little so be light handed. Use a knife or metal kidney to scrape any areas that require a bit more dynamic treatment than the fly wire offers! Finally, a very light wipe over with a slightly damp sponge can help soften and soothe all of your edges and dags! Trimming thrown work: If you are planning to trim (or turn) your thrown work (and you should be), make sure you bag it well – your work should be leather hard to almost dry for easiest trimming. Use this step to finish the work completely – use a metal kidney to polish the surface, or a slightly damp sponge to give a freshly thrown look. Wipe the sponge around the rim after trimming, and check the inside of the pot for dags! Trimming slip cast work: Usually I will trim the rims of your work on the wheel the following day to make that stage easier, however you will still need to check your work for lumps and bumps. Last but not least – check that your name is still clearly on the bottom of your work. Step Five – Bisque Firing When the work is completely dry it can go into the bisque kiln. The bisque kiln is fired to 1000°C. This process burns off the water in the clay as well as some of the chemically bound water. The structure of the clay is not altered that much at this temperature. Inside the bisque kiln, the work is stacked a little, small bowl inside a larger bowl and onto a heavy plate. Smaller items like decorations or drink coasters might get stacked several high. Consideration is paid to the weight of the stack and shape of the work. A bisque kiln can fire about one and a half times the amount of work that the glaze kiln can fire. The firing takes about 10 hours to complete the cycle and about two days to cool down. Once it has been emptied the work is placed in the glaze room ready for you to decorate! Step Six – Glazing Decorating your work with colour can be a lot of fun – and time consuming! There are three main options for surface treatment at this stage: Oxide Washes Underglazes Glazes Washes and underglazes do not “glaze” the work – It will still need a layer of glaze to fully seal the clay (washes don’t need glaze on surfaces not designed for food or liquid as they can gloss up a little on their own). Underglazes are stable colourants that turn out pretty much how they look in the jar. They can be mixed with each other to form other colours and can be used like water colours to paint onto your work. Mostly they should have a clear glaze on top to seal them. Oxides are a different species – the pink oxide (cobalt) wash turns out bright blue for instance. They don’t always need a glaze on top, and some glazes can change the colour of the wash! The glazes need no other “glaze” on top! Be careful of unknown glaze interactions – you can put any combination of glaze in a bowl or on a plate, but only a single glaze on the outside of any vertical surface! Glazes are a chemical reaction under heat. We don’t know the exact chemicals in the Mayco glazes we use. I can guess by the way they interact with each other, however, on the whole, you need to test every idea you have, and not run the test on a vertical surface! Simply put, glaze is a layer of glass like substance that bonds with the clay underneath. Clay is made of silica, alumina and water. Glaze is made of mostly silica. Silica has a melting point of 1700°C and we fire to 1240°C. The silica requires a “flux” to help it melt at the lower temperature. Fluxes can be all sorts of chemicals – a common one is calcium – calcium has a melting point of 2500°C, however, together they both melt at a much lower temperature! Colourants are metal oxides like cobalt (blue), chrome (green through black), copper (green, blue, even red!), manganese (black, purple and pink) iron (red brown), etc. Different chemicals in the glaze can have dramatic effects. for example, barium carbonate (which we don’t use) turns manganese bright pink! Other elements can turn manganese dioxide brown, blue, purple and reddish brown. Manganese dioxide is a flux in and of itself as well. So, glazes that get their black and purple colours, often interact with other glazes and RUN! Our mirror black is a good example – it mixes really well with many glazes because it fluxes them – causes them to melt faster. It will also bring out many beautiful colours in the glazes because it’s black colouring most definitely comes from manganese dioxide! Glaze chemistry is a whole subject on it’s own! We use commercial Mayco glazes on purpose – for their huge range of colour possibilities, stability, cool interactions, artistic freedom with the ability to easily brush the glazes on and ease of use. We currently have almost 50 glazes on hand! A major project is to test the interactions of all glazes with each other. That is 2,500 test tiles!!!! I’m going to make the wall behind the wheels the feature wall of pretty colours! Step Seven – Glaze (Gloss or sometimes called “Glost”) Firing Most of the time this is the final stage of making your creation (but not always!) The glaze kiln goes to 1240°C. This is called cone 6, or midrange. It is the low end of stoneware temperatures. Stoneware clays and glazes are typically fired at cone 8 – 10, that is 1260 – 1290°C. The energy requirement to go from 1240°C to 1280°C is almost a 30% more! Our clay is formulated to vitrify (mature, turn “glass-like”) at 1240°, as are our glazes. A glaze kiln take around 12 hours to reach temperature and two to three days to cool down. Sometimes a third firing process is required – this is for decoration that is added to work after the glaze firing. For example – adding precious metals and lustres. this firing temperature is usually around 600 – 800°C depending upon the techniques being used. There are many students interested in gold and silver trims – we will be doing this third type of firing soon! After firing your work will be in the student finished work shelves. Remember to pay for it before you head out the door! There is a small extra charge for using porcelain clay (it’s more than twice the price of regular clay), and for any third firing process! Once your work has been fired it can not turn back into clay for millennia – so don’t fire it if you don’t like it! Put it in the bucket for recycling. https://firebirdstudios.com.au/the-process-of-making-pottery/ This bowl is an example of kitchenware used in the 19th century and still in use today.Bowl white ceramic plain that has two sets of edging around lip. Inside bowl has plaster designed to look like cooking mixture.flagstaff hill, warrnambool, shipwrecked-coast, flagstaff-hill, flagstaff-hill-maritime-museum, maritime-museum, shipwreck-coast, flagstaff-hill-maritime-village, kitchen equipment, ceramic -
 Flagstaff Hill Maritime Museum and Village
Domestic object - Bowl, J & G Meakin, Late 19th or early 20th Century
The Process of Making Pottery Decorating, Firing, Glazing, Making, Technical There is a rhythm and flow to clay. It can’t be done all at once! Even the making process! It can take weeks to get everything done, especially if you can only work on your pottery once a week! Even though we have three hour classes, it’s often just not enough time! Here is an overview of some of the processes so you have a bit more grasp on some of the technical stuff! Step One – Design There are SO many ideas out there for making stuff in clay! From delicate porcelain jewellery, through to heavy sculptural work and everything in between. Deciding your direction is sometimes not that easy – when you first start, try everything, you will naturally gravitate to the style that you enjoy! The options and variations are endless and can get a wee bit overwhelming too! Check in with me before you start to ensure your ideas will work, what order you might do things, how you could achieve the look you are seeking and any other technical data required! Step Two – Making Clay is thixotropic. This means that as you work with it, the clay first gets sloppier and wetter, before is begins to dry in the atmosphere. For most things, you simply can’t do all parts of the project at once. An example of work order might look like: Get last weeks work out from the shelves Prepare clay for today’s work – roll your clay, prepare balls for throwing, make the first stage of a pinch pot) Clean up last week’s work and put it on the shelf for bisque firing Check that you have any glazing to do – and do enough of it that you will have time to finish your main project Do the next step of your next project – there might be a further step that can’t be complete immediately, in that case, wrap your work well and put onto the shelves. Letting your work rest for a while can really help keep your work clean and professional looking. Many things require bagging under plastic to keep it ready for work the next week – put your name on the outside of the bag so you can find your work easily. We have stickers and markers. Consider how you want to decorate your work – coloured slip can be applied at a fairly wet stage (remembering that it will make your work even wetter!). Trying to apply slip to dry clay won’t work! If you want to do sgraffito – you will need to keep the work leather hard (a state of dryness where you can still work the clay with a little effort and a little water and care). Step Three – Drying Most of the time your work can go into the rack uncovered to let it dry out for the following week. If you want to continue forming or shaping you will need to double bag your work – put your work on a suitable sized bat and put the bat in a bag so the base of the bag is under the bat, then put another bag over the top of the work and tuck the top of the bag under the bat. If you want to trim (or turn) your thrown work the following week, it should also be double bagged. If your work is large, delicate, or of uneven thicknesses, you should lightly cover your work for drying. When considering the drying process, bare in mind the weather, humidity and wind! The hotter and dryer, the faster things dry and work can dry unevenly in the shelves – this can lead to cracking – another time to lightly cover your work for drying. Step Four – Trimming and Cleaning Up Your work is dry! It is called greenware now and it is at it’s most fragile! Handle everything with two hands. I often refer to soft hands – keep everything gentle and with your fingers spread as much as possible. Try to not pick up things like plates too much, and always with both hands! Before your work can be bisque fired it should be “cleaned up”. You work won’t go into the kiln if it has sharp edges – when glazed, sharp edges turn into razor blades! Use a piece of fly wire to rub the work all over – this will scratch a little so be light handed. Use a knife or metal kidney to scrape any areas that require a bit more dynamic treatment than the fly wire offers! Finally, a very light wipe over with a slightly damp sponge can help soften and soothe all of your edges and dags! Trimming thrown work: If you are planning to trim (or turn) your thrown work (and you should be), make sure you bag it well – your work should be leather hard to almost dry for easiest trimming. Use this step to finish the work completely – use a metal kidney to polish the surface, or a slightly damp sponge to give a freshly thrown look. Wipe the sponge around the rim after trimming, and check the inside of the pot for dags! Trimming slip cast work: Usually I will trim the rims of your work on the wheel the following day to make that stage easier, however you will still need to check your work for lumps and bumps. Last but not least – check that your name is still clearly on the bottom of your work. Step Five – Bisque Firing When the work is completely dry it can go into the bisque kiln. The bisque kiln is fired to 1000°C. This process burns off the water in the clay as well as some of the chemically bound water. The structure of the clay is not altered that much at this temperature. Inside the bisque kiln, the work is stacked a little, small bowl inside a larger bowl and onto a heavy plate. Smaller items like decorations or drink coasters might get stacked several high. Consideration is paid to the weight of the stack and shape of the work. A bisque kiln can fire about one and a half times the amount of work that the glaze kiln can fire. The firing takes about 10 hours to complete the cycle and about two days to cool down. Once it has been emptied the work is placed in the glaze room ready for you to decorate! Step Six – Glazing Decorating your work with colour can be a lot of fun – and time consuming! There are three main options for surface treatment at this stage: Oxide Washes Underglazes Glazes Washes and underglazes do not “glaze” the work – It will still need a layer of glaze to fully seal the clay (washes don’t need glaze on surfaces not designed for food or liquid as they can gloss up a little on their own). Underglazes are stable colourants that turn out pretty much how they look in the jar. They can be mixed with each other to form other colours and can be used like water colours to paint onto your work. Mostly they should have a clear glaze on top to seal them. Oxides are a different species – the pink oxide (cobalt) wash turns out bright blue for instance. They don’t always need a glaze on top, and some glazes can change the colour of the wash! The glazes need no other “glaze” on top! Be careful of unknown glaze interactions – you can put any combination of glaze in a bowl or on a plate, but only a single glaze on the outside of any vertical surface! Glazes are a chemical reaction under heat. We don’t know the exact chemicals in the Mayco glazes we use. I can guess by the way they interact with each other, however, on the whole, you need to test every idea you have, and not run the test on a vertical surface! Simply put, glaze is a layer of glass like substance that bonds with the clay underneath. Clay is made of silica, alumina and water. Glaze is made of mostly silica. Silica has a melting point of 1700°C and we fire to 1240°C. The silica requires a “flux” to help it melt at the lower temperature. Fluxes can be all sorts of chemicals – a common one is calcium – calcium has a melting point of 2500°C, however, together they both melt at a much lower temperature! Colourants are metal oxides like cobalt (blue), chrome (green through black), copper (green, blue, even red!), manganese (black, purple and pink) iron (red brown), etc. Different chemicals in the glaze can have dramatic effects. for example, barium carbonate (which we don’t use) turns manganese bright pink! Other elements can turn manganese dioxide brown, blue, purple and reddish brown. Manganese dioxide is a flux in and of itself as well. So, glazes that get their black and purple colours, often interact with other glazes and RUN! Our mirror black is a good example – it mixes really well with many glazes because it fluxes them – causes them to melt faster. It will also bring out many beautiful colours in the glazes because it’s black colouring most definitely comes from manganese dioxide! Glaze chemistry is a whole subject on it’s own! We use commercial Mayco glazes on purpose – for their huge range of colour possibilities, stability, cool interactions, artistic freedom with the ability to easily brush the glazes on and ease of use. We currently have almost 50 glazes on hand! A major project is to test the interactions of all glazes with each other. That is 2,500 test tiles!!!! I’m going to make the wall behind the wheels the feature wall of pretty colours! Step Seven – Glaze (Gloss or sometimes called “Glost”) Firing Most of the time this is the final stage of making your creation (but not always!) The glaze kiln goes to 1240°C. This is called cone 6, or midrange. It is the low end of stoneware temperatures. Stoneware clays and glazes are typically fired at cone 8 – 10, that is 1260 – 1290°C. The energy requirement to go from 1240°C to 1280°C is almost a 30% more! Our clay is formulated to vitrify (mature, turn “glass-like”) at 1240°, as are our glazes. A glaze kiln take around 12 hours to reach temperature and two to three days to cool down. Sometimes a third firing process is required – this is for decoration that is added to work after the glaze firing. For example – adding precious metals and lustres. this firing temperature is usually around 600 – 800°C depending upon the techniques being used. There are many students interested in gold and silver trims – we will be doing this third type of firing soon! After firing your work will be in the student finished work shelves. Remember to pay for it before you head out the door! There is a small extra charge for using porcelain clay (it’s more than twice the price of regular clay), and for any third firing process! Once your work has been fired it can not turn back into clay for millennia – so don’t fire it if you don’t like it! Put it in the bucket for recycling. https://firebirdstudios.com.au/the-process-of-making-pottery/This bowl was made by renowned pottery company J & G Meakin of England. The firm was established in the mid-1800's. The bowl is an example of kitchenware used in the 19th century and still in use today.Bowl; white ceramic, round and tapering inwards towards base. Made by J and G Meakin England.On base, 'Ironstone China Reg SOL 391413' with symbolflagstaff hill, flagstaff hill maritime museum and village, warrnambool, maritime museum, maritime village, great ocean road, shipwreck coast, mixing bowl, food preparation, j & g meakin, pottery, stoke-on-trent, kitchen equipment, ceramic -
 Flagstaff Hill Maritime Museum and Village
Domestic object - Plate
The Process of Making Pottery Decorating, Firing, Glazing, Making, Technical There is a rhythm and flow to clay. It can’t be done all at once! Even the making process! It can take weeks to get everything done, especially if you can only work on your pottery once a week! Even though we have three hour classes, it’s often just not enough time! Here is an overview of some of the processes so you have a bit more grasp on some of the technical stuff! Step One – Design There are SO many ideas out there for making stuff in clay! From delicate porcelain jewellery, through to heavy sculptural work and everything in between. Deciding your direction is sometimes not that easy – when you first start, try everything, you will naturally gravitate to the style that you enjoy! The options and variations are endless and can get a wee bit overwhelming too! Check in with me before you start to ensure your ideas will work, what order you might do things, how you could achieve the look you are seeking and any other technical data required! Step Two – Making Clay is thixotropic. This means that as you work with it, the clay first gets sloppier and wetter, before is begins to dry in the atmosphere. For most things, you simply can’t do all parts of the project at once. An example of work order might look like: Get last weeks work out from the shelves Prepare clay for today’s work – roll your clay, prepare balls for throwing, make the first stage of a pinch pot) Clean up last week’s work and put it on the shelf for bisque firing Check that you have any glazing to do – and do enough of it that you will have time to finish your main project Do the next step of your next project – there might be a further step that can’t be complete immediately, in that case, wrap your work well and put onto the shelves. Letting your work rest for a while can really help keep your work clean and professional looking. Many things require bagging under plastic to keep it ready for work the next week – put your name on the outside of the bag so you can find your work easily. We have stickers and markers. Consider how you want to decorate your work – coloured slip can be applied at a fairly wet stage (remembering that it will make your work even wetter!). Trying to apply slip to dry clay won’t work! If you want to do sgraffito – you will need to keep the work leather hard (a state of dryness where you can still work the clay with a little effort and a little water and care). Step Three – Drying Most of the time your work can go into the rack uncovered to let it dry out for the following week. If you want to continue forming or shaping you will need to double bag your work – put your work on a suitable sized bat and put the bat in a bag so the base of the bag is under the bat, then put another bag over the top of the work and tuck the top of the bag under the bat. If you want to trim (or turn) your thrown work the following week, it should also be double bagged. If your work is large, delicate, or of uneven thicknesses, you should lightly cover your work for drying. When considering the drying process, bare in mind the weather, humidity and wind! The hotter and dryer, the faster things dry and work can dry unevenly in the shelves – this can lead to cracking – another time to lightly cover your work for drying. Step Four – Trimming and Cleaning Up Your work is dry! It is called greenware now and it is at it’s most fragile! Handle everything with two hands. I often refer to soft hands – keep everything gentle and with your fingers spread as much as possible. Try to not pick up things like plates too much, and always with both hands! Before your work can be bisque fired it should be “cleaned up”. You work won’t go into the kiln if it has sharp edges – when glazed, sharp edges turn into razor blades! Use a piece of fly wire to rub the work all over – this will scratch a little so be light handed. Use a knife or metal kidney to scrape any areas that require a bit more dynamic treatment than the fly wire offers! Finally, a very light wipe over with a slightly damp sponge can help soften and soothe all of your edges and dags! Trimming thrown work: If you are planning to trim (or turn) your thrown work (and you should be), make sure you bag it well – your work should be leather hard to almost dry for easiest trimming. Use this step to finish the work completely – use a metal kidney to polish the surface, or a slightly damp sponge to give a freshly thrown look. Wipe the sponge around the rim after trimming, and check the inside of the pot for dags! Trimming slip cast work: Usually I will trim the rims of your work on the wheel the following day to make that stage easier, however you will still need to check your work for lumps and bumps. Last but not least – check that your name is still clearly on the bottom of your work. Step Five – Bisque Firing When the work is completely dry it can go into the bisque kiln. The bisque kiln is fired to 1000°C. This process burns off the water in the clay as well as some of the chemically bound water. The structure of the clay is not altered that much at this temperature. Inside the bisque kiln, the work is stacked a little, small bowl inside a larger bowl and onto a heavy plate. Smaller items like decorations or drink coasters might get stacked several high. Consideration is paid to the weight of the stack and shape of the work. A bisque kiln can fire about one and a half times the amount of work that the glaze kiln can fire. The firing takes about 10 hours to complete the cycle and about two days to cool down. Once it has been emptied the work is placed in the glaze room ready for you to decorate! Step Six – Glazing Decorating your work with colour can be a lot of fun – and time consuming! There are three main options for surface treatment at this stage: Oxide Washes Underglazes Glazes Washes and underglazes do not “glaze” the work – It will still need a layer of glaze to fully seal the clay (washes don’t need glaze on surfaces not designed for food or liquid as they can gloss up a little on their own). Underglazes are stable colourants that turn out pretty much how they look in the jar. They can be mixed with each other to form other colours and can be used like water colours to paint onto your work. Mostly they should have a clear glaze on top to seal them. Oxides are a different species – the pink oxide (cobalt) wash turns out bright blue for instance. They don’t always need a glaze on top, and some glazes can change the colour of the wash! The glazes need no other “glaze” on top! Be careful of unknown glaze interactions – you can put any combination of glaze in a bowl or on a plate, but only a single glaze on the outside of any vertical surface! Glazes are a chemical reaction under heat. We don’t know the exact chemicals in the Mayco glazes we use. I can guess by the way they interact with each other, however, on the whole, you need to test every idea you have, and not run the test on a vertical surface! Simply put, glaze is a layer of glass like substance that bonds with the clay underneath. Clay is made of silica, alumina and water. Glaze is made of mostly silica. Silica has a melting point of 1700°C and we fire to 1240°C. The silica requires a “flux” to help it melt at the lower temperature. Fluxes can be all sorts of chemicals – a common one is calcium – calcium has a melting point of 2500°C, however, together they both melt at a much lower temperature! Colourants are metal oxides like cobalt (blue), chrome (green through black), copper (green, blue, even red!), manganese (black, purple and pink) iron (red brown), etc. Different chemicals in the glaze can have dramatic effects. for example, barium carbonate (which we don’t use) turns manganese bright pink! Other elements can turn manganese dioxide brown, blue, purple and reddish brown. Manganese dioxide is a flux in and of itself as well. So, glazes that get their black and purple colours, often interact with other glazes and RUN! Our mirror black is a good example – it mixes really well with many glazes because it fluxes them – causes them to melt faster. It will also bring out many beautiful colours in the glazes because it’s black colouring most definitely comes from manganese dioxide! Glaze chemistry is a whole subject on it’s own! We use commercial Mayco glazes on purpose – for their huge range of colour possibilities, stability, cool interactions, artistic freedom with the ability to easily brush the glazes on and ease of use. We currently have almost 50 glazes on hand! A major project is to test the interactions of all glazes with each other. That is 2,500 test tiles!!!! I’m going to make the wall behind the wheels the feature wall of pretty colours! Step Seven – Glaze (Gloss or sometimes called “Glost”) Firing Most of the time this is the final stage of making your creation (but not always!) The glaze kiln goes to 1240°C. This is called cone 6, or midrange. It is the low end of stoneware temperatures. Stoneware clays and glazes are typically fired at cone 8 – 10, that is 1260 – 1290°C. The energy requirement to go from 1240°C to 1280°C is almost a 30% more! Our clay is formulated to vitrify (mature, turn “glass-like”) at 1240°, as are our glazes. A glaze kiln take around 12 hours to reach temperature and two to three days to cool down. Sometimes a third firing process is required – this is for decoration that is added to work after the glaze firing. For example – adding precious metals and lustres. this firing temperature is usually around 600 – 800°C depending upon the techniques being used. There are many students interested in gold and silver trims – we will be doing this third type of firing soon! After firing your work will be in the student finished work shelves. Remember to pay for it before you head out the door! There is a small extra charge for using porcelain clay (it’s more than twice the price of regular clay), and for any third firing process! Once your work has been fired it can not turn back into clay for millennia – so don’t fire it if you don’t like it! Put it in the bucket for recycling. https://firebirdstudios.com.au/the-process-of-making-pottery/Ceramics have evolved over thousands of years.White earthenware dinner plate. Crazing evident all over.Backstamped ‘Made in England S LTD’flagstaff hill, warrnambool, shipwrecked-coast, flagstaff-hill, flagstaff-hill-maritime-museum, maritime-museum, shipwreck-coast, flagstaff-hill-maritime-village, ceramics, tableware -
 Flagstaff Hill Maritime Museum and Village
Domestic object - Plate, Johnson Bros
The Process of Making Pottery Decorating, Firing, Glazing, Making, Technical There is a rhythm and flow to clay. It can’t be done all at once! Even the making process! It can take weeks to get everything done, especially if you can only work on your pottery once a week! Even though we have three hour classes, it’s often just not enough time! Here is an overview of some of the processes so you have a bit more grasp on some of the technical stuff! Step One – Design There are SO many ideas out there for making stuff in clay! From delicate porcelain jewellery, through to heavy sculptural work and everything in between. Deciding your direction is sometimes not that easy – when you first start, try everything, you will naturally gravitate to the style that you enjoy! The options and variations are endless and can get a wee bit overwhelming too! Check in with me before you start to ensure your ideas will work, what order you might do things, how you could achieve the look you are seeking and any other technical data required! Step Two – Making Clay is thixotropic. This means that as you work with it, the clay first gets sloppier and wetter, before is begins to dry in the atmosphere. For most things, you simply can’t do all parts of the project at once. An example of work order might look like: Get last weeks work out from the shelves Prepare clay for today’s work – roll your clay, prepare balls for throwing, make the first stage of a pinch pot) Clean up last week’s work and put it on the shelf for bisque firing Check that you have any glazing to do – and do enough of it that you will have time to finish your main project Do the next step of your next project – there might be a further step that can’t be complete immediately, in that case, wrap your work well and put onto the shelves. Letting your work rest for a while can really help keep your work clean and professional looking. Many things require bagging under plastic to keep it ready for work the next week – put your name on the outside of the bag so you can find your work easily. We have stickers and markers. Consider how you want to decorate your work – coloured slip can be applied at a fairly wet stage (remembering that it will make your work even wetter!). Trying to apply slip to dry clay won’t work! If you want to do sgraffito – you will need to keep the work leather hard (a state of dryness where you can still work the clay with a little effort and a little water and care). Step Three – Drying Most of the time your work can go into the rack uncovered to let it dry out for the following week. If you want to continue forming or shaping you will need to double bag your work – put your work on a suitable sized bat and put the bat in a bag so the base of the bag is under the bat, then put another bag over the top of the work and tuck the top of the bag under the bat. If you want to trim (or turn) your thrown work the following week, it should also be double bagged. If your work is large, delicate, or of uneven thicknesses, you should lightly cover your work for drying. When considering the drying process, bare in mind the weather, humidity and wind! The hotter and dryer, the faster things dry and work can dry unevenly in the shelves – this can lead to cracking – another time to lightly cover your work for drying. Step Four – Trimming and Cleaning Up Your work is dry! It is called greenware now and it is at it’s most fragile! Handle everything with two hands. I often refer to soft hands – keep everything gentle and with your fingers spread as much as possible. Try to not pick up things like plates too much, and always with both hands! Before your work can be bisque fired it should be “cleaned up”. You work won’t go into the kiln if it has sharp edges – when glazed, sharp edges turn into razor blades! Use a piece of fly wire to rub the work all over – this will scratch a little so be light handed. Use a knife or metal kidney to scrape any areas that require a bit more dynamic treatment than the fly wire offers! Finally, a very light wipe over with a slightly damp sponge can help soften and soothe all of your edges and dags! Trimming thrown work: If you are planning to trim (or turn) your thrown work (and you should be), make sure you bag it well – your work should be leather hard to almost dry for easiest trimming. Use this step to finish the work completely – use a metal kidney to polish the surface, or a slightly damp sponge to give a freshly thrown look. Wipe the sponge around the rim after trimming, and check the inside of the pot for dags! Trimming slip cast work: Usually I will trim the rims of your work on the wheel the following day to make that stage easier, however you will still need to check your work for lumps and bumps. Last but not least – check that your name is still clearly on the bottom of your work. Step Five – Bisque Firing When the work is completely dry it can go into the bisque kiln. The bisque kiln is fired to 1000°C. This process burns off the water in the clay as well as some of the chemically bound water. The structure of the clay is not altered that much at this temperature. Inside the bisque kiln, the work is stacked a little, small bowl inside a larger bowl and onto a heavy plate. Smaller items like decorations or drink coasters might get stacked several high. Consideration is paid to the weight of the stack and shape of the work. A bisque kiln can fire about one and a half times the amount of work that the glaze kiln can fire. The firing takes about 10 hours to complete the cycle and about two days to cool down. Once it has been emptied the work is placed in the glaze room ready for you to decorate! Step Six – Glazing Decorating your work with colour can be a lot of fun – and time consuming! There are three main options for surface treatment at this stage: Oxide Washes Underglazes Glazes Washes and underglazes do not “glaze” the work – It will still need a layer of glaze to fully seal the clay (washes don’t need glaze on surfaces not designed for food or liquid as they can gloss up a little on their own). Underglazes are stable colourants that turn out pretty much how they look in the jar. They can be mixed with each other to form other colours and can be used like water colours to paint onto your work. Mostly they should have a clear glaze on top to seal them. Oxides are a different species – the pink oxide (cobalt) wash turns out bright blue for instance. They don’t always need a glaze on top, and some glazes can change the colour of the wash! The glazes need no other “glaze” on top! Be careful of unknown glaze interactions – you can put any combination of glaze in a bowl or on a plate, but only a single glaze on the outside of any vertical surface! Glazes are a chemical reaction under heat. We don’t know the exact chemicals in the Mayco glazes we use. I can guess by the way they interact with each other, however, on the whole, you need to test every idea you have, and not run the test on a vertical surface! Simply put, glaze is a layer of glass like substance that bonds with the clay underneath. Clay is made of silica, alumina and water. Glaze is made of mostly silica. Silica has a melting point of 1700°C and we fire to 1240°C. The silica requires a “flux” to help it melt at the lower temperature. Fluxes can be all sorts of chemicals – a common one is calcium – calcium has a melting point of 2500°C, however, together they both melt at a much lower temperature! Colourants are metal oxides like cobalt (blue), chrome (green through black), copper (green, blue, even red!), manganese (black, purple and pink) iron (red brown), etc. Different chemicals in the glaze can have dramatic effects. for example, barium carbonate (which we don’t use) turns manganese bright pink! Other elements can turn manganese dioxide brown, blue, purple and reddish brown. Manganese dioxide is a flux in and of itself as well. So, glazes that get their black and purple colours, often interact with other glazes and RUN! Our mirror black is a good example – it mixes really well with many glazes because it fluxes them – causes them to melt faster. It will also bring out many beautiful colours in the glazes because it’s black colouring most definitely comes from manganese dioxide! Glaze chemistry is a whole subject on it’s own! We use commercial Mayco glazes on purpose – for their huge range of colour possibilities, stability, cool interactions, artistic freedom with the ability to easily brush the glazes on and ease of use. We currently have almost 50 glazes on hand! A major project is to test the interactions of all glazes with each other. That is 2,500 test tiles!!!! I’m going to make the wall behind the wheels the feature wall of pretty colours! Step Seven – Glaze (Gloss or sometimes called “Glost”) Firing Most of the time this is the final stage of making your creation (but not always!) The glaze kiln goes to 1240°C. This is called cone 6, or midrange. It is the low end of stoneware temperatures. Stoneware clays and glazes are typically fired at cone 8 – 10, that is 1260 – 1290°C. The energy requirement to go from 1240°C to 1280°C is almost a 30% more! Our clay is formulated to vitrify (mature, turn “glass-like”) at 1240°, as are our glazes. A glaze kiln take around 12 hours to reach temperature and two to three days to cool down. Sometimes a third firing process is required – this is for decoration that is added to work after the glaze firing. For example – adding precious metals and lustres. this firing temperature is usually around 600 – 800°C depending upon the techniques being used. There are many students interested in gold and silver trims – we will be doing this third type of firing soon! After firing your work will be in the student finished work shelves. Remember to pay for it before you head out the door! There is a small extra charge for using porcelain clay (it’s more than twice the price of regular clay), and for any third firing process! Once your work has been fired it can not turn back into clay for millennia – so don’t fire it if you don’t like it! Put it in the bucket for recycling. https://firebirdstudios.com.au/the-process-of-making-pottery/Ceramics have evolved over thousands of years.A white earthenware side plate with a gadroon edge. Has water marks and chips on front.‘Johnson Bros England Reg No 15587’flagstaff hill, warrnambool, shipwrecked-coast, flagstaff-hill, flagstaff-hill-maritime-museum, maritime-museum, shipwreck-coast, flagstaff-hill-maritime-village, johnson bros, ceramics, tableware -
 Flagstaff Hill Maritime Museum and Village
Domestic object - Plate, Alfred Meakin
The Process of Making Pottery Decorating, Firing, Glazing, Making, Technical There is a rhythm and flow to clay. It can’t be done all at once! Even the making process! It can take weeks to get everything done, especially if you can only work on your pottery once a week! Even though we have three hour classes, it’s often just not enough time! Here is an overview of some of the processes so you have a bit more grasp on some of the technical stuff! Step One – Design There are SO many ideas out there for making stuff in clay! From delicate porcelain jewellery, through to heavy sculptural work and everything in between. Deciding your direction is sometimes not that easy – when you first start, try everything, you will naturally gravitate to the style that you enjoy! The options and variations are endless and can get a wee bit overwhelming too! Check in with me before you start to ensure your ideas will work, what order you might do things, how you could achieve the look you are seeking and any other technical data required! Step Two – Making Clay is thixotropic. This means that as you work with it, the clay first gets sloppier and wetter, before is begins to dry in the atmosphere. For most things, you simply can’t do all parts of the project at once. An example of work order might look like: Get last weeks work out from the shelves Prepare clay for today’s work – roll your clay, prepare balls for throwing, make the first stage of a pinch pot) Clean up last week’s work and put it on the shelf for bisque firing Check that you have any glazing to do – and do enough of it that you will have time to finish your main project Do the next step of your next project – there might be a further step that can’t be complete immediately, in that case, wrap your work well and put onto the shelves. Letting your work rest for a while can really help keep your work clean and professional looking. Many things require bagging under plastic to keep it ready for work the next week – put your name on the outside of the bag so you can find your work easily. We have stickers and markers. Consider how you want to decorate your work – coloured slip can be applied at a fairly wet stage (remembering that it will make your work even wetter!). Trying to apply slip to dry clay won’t work! If you want to do sgraffito – you will need to keep the work leather hard (a state of dryness where you can still work the clay with a little effort and a little water and care). Step Three – Drying Most of the time your work can go into the rack uncovered to let it dry out for the following week. If you want to continue forming or shaping you will need to double bag your work – put your work on a suitable sized bat and put the bat in a bag so the base of the bag is under the bat, then put another bag over the top of the work and tuck the top of the bag under the bat. If you want to trim (or turn) your thrown work the following week, it should also be double bagged. If your work is large, delicate, or of uneven thicknesses, you should lightly cover your work for drying. When considering the drying process, bare in mind the weather, humidity and wind! The hotter and dryer, the faster things dry and work can dry unevenly in the shelves – this can lead to cracking – another time to lightly cover your work for drying. Step Four – Trimming and Cleaning Up Your work is dry! It is called greenware now and it is at it’s most fragile! Handle everything with two hands. I often refer to soft hands – keep everything gentle and with your fingers spread as much as possible. Try to not pick up things like plates too much, and always with both hands! Before your work can be bisque fired it should be “cleaned up”. You work won’t go into the kiln if it has sharp edges – when glazed, sharp edges turn into razor blades! Use a piece of fly wire to rub the work all over – this will scratch a little so be light handed. Use a knife or metal kidney to scrape any areas that require a bit more dynamic treatment than the fly wire offers! Finally, a very light wipe over with a slightly damp sponge can help soften and soothe all of your edges and dags! Trimming thrown work: If you are planning to trim (or turn) your thrown work (and you should be), make sure you bag it well – your work should be leather hard to almost dry for easiest trimming. Use this step to finish the work completely – use a metal kidney to polish the surface, or a slightly damp sponge to give a freshly thrown look. Wipe the sponge around the rim after trimming, and check the inside of the pot for dags! Trimming slip cast work: Usually I will trim the rims of your work on the wheel the following day to make that stage easier, however you will still need to check your work for lumps and bumps. Last but not least – check that your name is still clearly on the bottom of your work. Step Five – Bisque Firing When the work is completely dry it can go into the bisque kiln. The bisque kiln is fired to 1000°C. This process burns off the water in the clay as well as some of the chemically bound water. The structure of the clay is not altered that much at this temperature. Inside the bisque kiln, the work is stacked a little, small bowl inside a larger bowl and onto a heavy plate. Smaller items like decorations or drink coasters might get stacked several high. Consideration is paid to the weight of the stack and shape of the work. A bisque kiln can fire about one and a half times the amount of work that the glaze kiln can fire. The firing takes about 10 hours to complete the cycle and about two days to cool down. Once it has been emptied the work is placed in the glaze room ready for you to decorate! Step Six – Glazing Decorating your work with colour can be a lot of fun – and time consuming! There are three main options for surface treatment at this stage: Oxide Washes Underglazes Glazes Washes and underglazes do not “glaze” the work – It will still need a layer of glaze to fully seal the clay (washes don’t need glaze on surfaces not designed for food or liquid as they can gloss up a little on their own). Underglazes are stable colourants that turn out pretty much how they look in the jar. They can be mixed with each other to form other colours and can be used like water colours to paint onto your work. Mostly they should have a clear glaze on top to seal them. Oxides are a different species – the pink oxide (cobalt) wash turns out bright blue for instance. They don’t always need a glaze on top, and some glazes can change the colour of the wash! The glazes need no other “glaze” on top! Be careful of unknown glaze interactions – you can put any combination of glaze in a bowl or on a plate, but only a single glaze on the outside of any vertical surface! Glazes are a chemical reaction under heat. We don’t know the exact chemicals in the Mayco glazes we use. I can guess by the way they interact with each other, however, on the whole, you need to test every idea you have, and not run the test on a vertical surface! Simply put, glaze is a layer of glass like substance that bonds with the clay underneath. Clay is made of silica, alumina and water. Glaze is made of mostly silica. Silica has a melting point of 1700°C and we fire to 1240°C. The silica requires a “flux” to help it melt at the lower temperature. Fluxes can be all sorts of chemicals – a common one is calcium – calcium has a melting point of 2500°C, however, together they both melt at a much lower temperature! Colourants are metal oxides like cobalt (blue), chrome (green through black), copper (green, blue, even red!), manganese (black, purple and pink) iron (red brown), etc. Different chemicals in the glaze can have dramatic effects. for example, barium carbonate (which we don’t use) turns manganese bright pink! Other elements can turn manganese dioxide brown, blue, purple and reddish brown. Manganese dioxide is a flux in and of itself as well. So, glazes that get their black and purple colours, often interact with other glazes and RUN! Our mirror black is a good example – it mixes really well with many glazes because it fluxes them – causes them to melt faster. It will also bring out many beautiful colours in the glazes because it’s black colouring most definitely comes from manganese dioxide! Glaze chemistry is a whole subject on it’s own! We use commercial Mayco glazes on purpose – for their huge range of colour possibilities, stability, cool interactions, artistic freedom with the ability to easily brush the glazes on and ease of use. We currently have almost 50 glazes on hand! A major project is to test the interactions of all glazes with each other. That is 2,500 test tiles!!!! I’m going to make the wall behind the wheels the feature wall of pretty colours! Step Seven – Glaze (Gloss or sometimes called “Glost”) Firing Most of the time this is the final stage of making your creation (but not always!) The glaze kiln goes to 1240°C. This is called cone 6, or midrange. It is the low end of stoneware temperatures. Stoneware clays and glazes are typically fired at cone 8 – 10, that is 1260 – 1290°C. The energy requirement to go from 1240°C to 1280°C is almost a 30% more! Our clay is formulated to vitrify (mature, turn “glass-like”) at 1240°, as are our glazes. A glaze kiln take around 12 hours to reach temperature and two to three days to cool down. Sometimes a third firing process is required – this is for decoration that is added to work after the glaze firing. For example – adding precious metals and lustres. this firing temperature is usually around 600 – 800°C depending upon the techniques being used. There are many students interested in gold and silver trims – we will be doing this third type of firing soon! After firing your work will be in the student finished work shelves. Remember to pay for it before you head out the door! There is a small extra charge for using porcelain clay (it’s more than twice the price of regular clay), and for any third firing process! Once your work has been fired it can not turn back into clay for millennia – so don’t fire it if you don’t like it! Put it in the bucket for recycling. https://firebirdstudios.com.au/the-process-of-making-pottery/Ceramics have evolved over thousands of years.Earthenware dessert plate, cream colour. Made by Alfred Meakin, England. Backstamped ‘Alfred Meakin England’. flagstaff hill, warrnambool, shipwrecked-coast, flagstaff-hill, flagstaff-hill-maritime-museum, maritime-museum, shipwreck-coast, flagstaff-hill-maritime-village, alfred meakin, ceramics, earthenware, kitchenware -
 Flagstaff Hill Maritime Museum and Village
Domestic object - Jug
The Process of Making Pottery Decorating, Firing, Glazing, Making, Technical There is a rhythm and flow to clay. It can’t be done all at once! Even the making process! It can take weeks to get everything done, especially if you can only work on your pottery once a week! Even though we have three hour classes, it’s often just not enough time! Here is an overview of some of the processes so you have a bit more grasp on some of the technical stuff! Step One – Design There are SO many ideas out there for making stuff in clay! From delicate porcelain jewellery, through to heavy sculptural work and everything in between. Deciding your direction is sometimes not that easy – when you first start, try everything, you will naturally gravitate to the style that you enjoy! The options and variations are endless and can get a wee bit overwhelming too! Check in with me before you start to ensure your ideas will work, what order you might do things, how you could achieve the look you are seeking and any other technical data required! Step Two – Making Clay is thixotropic. This means that as you work with it, the clay first gets sloppier and wetter, before is begins to dry in the atmosphere. For most things, you simply can’t do all parts of the project at once. An example of work order might look like: Get last weeks work out from the shelves Prepare clay for today’s work – roll your clay, prepare balls for throwing, make the first stage of a pinch pot) Clean up last week’s work and put it on the shelf for bisque firing Check that you have any glazing to do – and do enough of it that you will have time to finish your main project Do the next step of your next project – there might be a further step that can’t be complete immediately, in that case, wrap your work well and put onto the shelves. Letting your work rest for a while can really help keep your work clean and professional looking. Many things require bagging under plastic to keep it ready for work the next week – put your name on the outside of the bag so you can find your work easily. We have stickers and markers. Consider how you want to decorate your work – coloured slip can be applied at a fairly wet stage (remembering that it will make your work even wetter!). Trying to apply slip to dry clay won’t work! If you want to do sgraffito – you will need to keep the work leather hard (a state of dryness where you can still work the clay with a little effort and a little water and care). Step Three – Drying Most of the time your work can go into the rack uncovered to let it dry out for the following week. If you want to continue forming or shaping you will need to double bag your work – put your work on a suitable sized bat and put the bat in a bag so the base of the bag is under the bat, then put another bag over the top of the work and tuck the top of the bag under the bat. If you want to trim (or turn) your thrown work the following week, it should also be double bagged. If your work is large, delicate, or of uneven thicknesses, you should lightly cover your work for drying. When considering the drying process, bare in mind the weather, humidity and wind! The hotter and dryer, the faster things dry and work can dry unevenly in the shelves – this can lead to cracking – another time to lightly cover your work for drying. Step Four – Trimming and Cleaning Up Your work is dry! It is called greenware now and it is at it’s most fragile! Handle everything with two hands. I often refer to soft hands – keep everything gentle and with your fingers spread as much as possible. Try to not pick up things like plates too much, and always with both hands! Before your work can be bisque fired it should be “cleaned up”. You work won’t go into the kiln if it has sharp edges – when glazed, sharp edges turn into razor blades! Use a piece of fly wire to rub the work all over – this will scratch a little so be light handed. Use a knife or metal kidney to scrape any areas that require a bit more dynamic treatment than the fly wire offers! Finally, a very light wipe over with a slightly damp sponge can help soften and soothe all of your edges and dags! Trimming thrown work: If you are planning to trim (or turn) your thrown work (and you should be), make sure you bag it well – your work should be leather hard to almost dry for easiest trimming. Use this step to finish the work completely – use a metal kidney to polish the surface, or a slightly damp sponge to give a freshly thrown look. Wipe the sponge around the rim after trimming, and check the inside of the pot for dags! Trimming slip cast work: Usually I will trim the rims of your work on the wheel the following day to make that stage easier, however you will still need to check your work for lumps and bumps. Last but not least – check that your name is still clearly on the bottom of your work. Step Five – Bisque Firing When the work is completely dry it can go into the bisque kiln. The bisque kiln is fired to 1000°C. This process burns off the water in the clay as well as some of the chemically bound water. The structure of the clay is not altered that much at this temperature. Inside the bisque kiln, the work is stacked a little, small bowl inside a larger bowl and onto a heavy plate. Smaller items like decorations or drink coasters might get stacked several high. Consideration is paid to the weight of the stack and shape of the work. A bisque kiln can fire about one and a half times the amount of work that the glaze kiln can fire. The firing takes about 10 hours to complete the cycle and about two days to cool down. Once it has been emptied the work is placed in the glaze room ready for you to decorate! Step Six – Glazing Decorating your work with colour can be a lot of fun – and time consuming! There are three main options for surface treatment at this stage: Oxide Washes Underglazes Glazes Washes and underglazes do not “glaze” the work – It will still need a layer of glaze to fully seal the clay (washes don’t need glaze on surfaces not designed for food or liquid as they can gloss up a little on their own). Underglazes are stable colourants that turn out pretty much how they look in the jar. They can be mixed with each other to form other colours and can be used like water colours to paint onto your work. Mostly they should have a clear glaze on top to seal them. Oxides are a different species – the pink oxide (cobalt) wash turns out bright blue for instance. They don’t always need a glaze on top, and some glazes can change the colour of the wash! The glazes need no other “glaze” on top! Be careful of unknown glaze interactions – you can put any combination of glaze in a bowl or on a plate, but only a single glaze on the outside of any vertical surface! Glazes are a chemical reaction under heat. We don’t know the exact chemicals in the Mayco glazes we use. I can guess by the way they interact with each other, however, on the whole, you need to test every idea you have, and not run the test on a vertical surface! Simply put, glaze is a layer of glass like substance that bonds with the clay underneath. Clay is made of silica, alumina and water. Glaze is made of mostly silica. Silica has a melting point of 1700°C and we fire to 1240°C. The silica requires a “flux” to help it melt at the lower temperature. Fluxes can be all sorts of chemicals – a common one is calcium – calcium has a melting point of 2500°C, however, together they both melt at a much lower temperature! Colourants are metal oxides like cobalt (blue), chrome (green through black), copper (green, blue, even red!), manganese (black, purple and pink) iron (red brown), etc. Different chemicals in the glaze can have dramatic effects. for example, barium carbonate (which we don’t use) turns manganese bright pink! Other elements can turn manganese dioxide brown, blue, purple and reddish brown. Manganese dioxide is a flux in and of itself as well. So, glazes that get their black and purple colours, often interact with other glazes and RUN! Our mirror black is a good example – it mixes really well with many glazes because it fluxes them – causes them to melt faster. It will also bring out many beautiful colours in the glazes because it’s black colouring most definitely comes from manganese dioxide! Glaze chemistry is a whole subject on it’s own! We use commercial Mayco glazes on purpose – for their huge range of colour possibilities, stability, cool interactions, artistic freedom with the ability to easily brush the glazes on and ease of use. We currently have almost 50 glazes on hand! A major project is to test the interactions of all glazes with each other. That is 2,500 test tiles!!!! I’m going to make the wall behind the wheels the feature wall of pretty colours! Step Seven – Glaze (Gloss or sometimes called “Glost”) Firing Most of the time this is the final stage of making your creation (but not always!) The glaze kiln goes to 1240°C. This is called cone 6, or midrange. It is the low end of stoneware temperatures. Stoneware clays and glazes are typically fired at cone 8 – 10, that is 1260 – 1290°C. The energy requirement to go from 1240°C to 1280°C is almost a 30% more! Our clay is formulated to vitrify (mature, turn “glass-like”) at 1240°, as are our glazes. A glaze kiln take around 12 hours to reach temperature and two to three days to cool down. Sometimes a third firing process is required – this is for decoration that is added to work after the glaze firing. For example – adding precious metals and lustres. this firing temperature is usually around 600 – 800°C depending upon the techniques being used. There are many students interested in gold and silver trims – we will be doing this third type of firing soon! After firing your work will be in the student finished work shelves. Remember to pay for it before you head out the door! There is a small extra charge for using porcelain clay (it’s more than twice the price of regular clay), and for any third firing process! Once your work has been fired it can not turn back into clay for millennia – so don’t fire it if you don’t like it! Put it in the bucket for recycling. https://firebirdstudios.com.au/the-process-of-making-pottery/The form of the jug has been in use for many centuries.Stoneware jug. Two tone brown glaze with pierced lip behind spout. Spout chipped.None.flagstaff hill, warrnambool, shipwrecked-coast, flagstaff-hill, flagstaff-hill-maritime-museum, maritime-museum, shipwreck-coast, flagstaff-hill-maritime-village, jug, ceramic jug -
 Federation University Historical Collection
Booklet, The Ballarat School of Mines and Industries 1870-1920 Jubilee Booklet, 1920 (estimated)
The first school of Mines in Australia was established at Ballarat in 1870. At the time of its jubilee (1930) the following people were members of the School Council: W.H. Middleton (President), W.T. Humphreys (VP), J.S. Vickery (VP), F. Barrow, Col. W.K. Bolton, William Baragwanath, A.E. Cutter, J.N. Dunn, G. Fitches, W.H. Fleay, F. Herman. W.D. Hill, T. Hurley, K. Kean. J. Kelly, L. Lederman, Mayor of Ballarat, Mayour of Ballarat East, D. Maxwell, M. Martin, R. Maddern, D. Ronaldson, F. Saunders, R. Stephenson, A.O. Stubbs, R.E. Tunbridge. The School Staff in 1920 comprised: Herbert H. Smith, Walter Rowbotham, Reginald L. Cutter, M.C. Young, Hilda Wardle, M. Wiliamson, P.S. Richards, L.H. Archibald, J. Woods, Ken Moss, W. Kenneth, Mrs McIlvena. B. Robinson, S. Rowe, E. Hope-Jones, Miss Abrams, L.St.G.P. Austin, Alfred Mica Smith, J.R. Pound, Herbert R. Murphy, N.H. Junner, Maurice Copland, L.H. Archibald, E.J.A. McConnon, Newton King, D.m. Hull, T.R. Gordon, John M. Sutherland, T.K. Jebb, Dick Richards, C. Tonkin, A.W. Steane, J. Paterson, H.W. Malin, R.V. Maddison, S.M. Mayo, F.A. King, W.H. Steane, T.R. Gordon, T.A. Williams, H. Waldron, G. Black, E.J. McConnon, R.V. Duncan. R. Cutter, E.G. Vawdrey, Hilda WardleWhite stapled booklet - landscape format - 20pp + soft covers with blue writing. Includes an historical sketch of the Ballarat School of Mines. Contains images of the school from around 1920. The history outlined in the booklet follows: 'Ballarat has helped to influence the life and destinies of Australia in many ways, the recital of which would perhaps prove tedious to the citizens of less favoured localities! However, it can be said, without much fear of contradiction, that only less known thought Australia than its fame as a gold field is the reputation won for it by its school of Mines, ... Ballarat was still quite a new place when the School was founded, but a very propserous and popular place all the same, with a go-ahead lot of citizens brim full of the spirit of enterprise which seemsto animate mining populations generally. Money was plentiful, and they launched out into ventures, which later, were to develop and take the place of the gold mines, while what is more to the point, they understood the value of education. the old digging days were passing away. So far as Ballarat itself was concerned the day of the cradle and tin dish had already passed into an antiquity "as dead and distant as the age of the Tubal Caon," said dir redmond Barry on declaring the School open. Mining had become a serious business, and the mining engineer, the metallurgist, and the geologist had become a power in the land. In these circumstances the suggestions to found a School of Mines met with ready acceptance. The late Mr James M. Bickett had the honor of bringing forward the proposition at a meeting of the Ballarat Mining Board in October, 1869. it was agreed to, and the Government, having been approached for assistance, granted a lease of the old Supreme Court buildings at a nominal reantal. A modest sum, including 100 pounds from the Borough Council of Ballarat West, was subscribed by a number of sympathisers, and on the 26th October, 1870, the inaugural address was delivered by Sir Redmond Barry, the first President of the School. Classes were commenced on the 23rd January, 1871. The students at first were mostly adults. They were chiefly men emloyed at the mines, who had the wisdom and energy to devote their spare time to study, and, though their attendance was somewhat irregular, they made very good progress. Old prints which have been preserved show them at work at furnaces, big bearded men of the old-fashioned type of miner. It is interesting to note that among those who gave evidence and encouragement was Sir Roderick Murchison, who many years before had advised Cornish miners to emigrate to Australia to search for gold, and who in 1848 was in possession of gold ore sent from this country. Sir Roderick sent a parcel of books for the library, and gave useful advice as to the curriculum which should be adopted. The Museum, which now contains a most valuable collection of minerals, was one of the first things attended to, and the reports presented to the Council from time to time speak of additions being made from all parts of the world. New equipment was constantly being added to the School, a good deal of assay work was done, and some specimens were sent from the East Indies for examination as far back as 1873. By this time there was a difficulty in providing accomodation for the students who wished to enrol, and the number of instructors had grown from two to four. In 1882 the first building was being erected on what was then part of the gaol reserve. A little more than ten years afterwards a buildnig formerly serving as a Methodist Church was absorbed, while later on, the demand for accomodation increasing, the attack upon the gaol was renewed. The School continued to grow in reputation and size, and became the science centre of the district, and in 1889 a learge new building was opened by Sir Alexander Peacock. Students came from over seas as well as from all the States of Australia, and after going through their courses they took with them the name and fame of the old School to all parts of the globe. School of Mines boys have played a great part in developing the mining fields of Western Australia, South Australia, and africa, while old students who have made a name in their profession are constantly dropping in to see how the old place is getting along. It was not to be expected, however, that the Ballarat School would be left without rivals, its very success inspiring competition. Mining Schools were started in other parts of Australia, and, at the same time, Victoria ceased to hold first place as a mining state. On the other hand there was a great advance in manufacturing, and the demand for technicaly trained men became a great and as insistent as ever it had been for trained mining men. The Council was quick to adapt the school to the new conditions, and the result is seen in the institution, which is one of Ballarat's proudest possession. Instruction is given in all branches of technical work, and the classes are filled with students who are building up for Ballarat a reputation as an industrial centre, which promises to equal that which it formerly held as a mining town. Owing to its bracing climate, its abundant opportunities for recreations, and its accessibilty, Ballarat as a city is an ideal place for educational purposed, and is yearly becoming more and more appreciated throughout the State. The chairman of one of Ballarat's biggests industries claims that the workman can do twice the day's work here that he can do in Melbourne. he was a little enthusiastic over it, perhaps, but it is a well-known fact that the healthy and invigourating Ballarat climate is conducive to both physical and mental activity, and the records of the School provide ample proof of it. One of the most interesting and successful branches of the School of Mines and Industries - if the name be enlarged with the enlargement of its scope - is the Technical Art School. "The City of Statues" has from its earliest days been a stronghold of art. Art schools have flourised here, and in 1905 the Education Department came to the conclusion that the best thing to do with them was to place them under the management of the School of Mines Council. A magnificent new Technical Art School was built at a cost of some 12,000 pounds on the site of the old Supreme Court building, and was formally opened on the 23rd July, 1915. The results have not only been justified but surpassed all anticipations. The most comprehensive list of subjects is taught, and this list is constantly added to. Students have flocked to the art School, which may be said to occupy a unique position in Australia, and its record of success is really astonishing. Its students supply art teachers for the newer schools that are being built, and many occupy leading positinos in important business houses. So well is its reputation known that orders are constantly being received, not only from Victoria, but from other States, for honor boards and challenge shields to be designed and made. The most recent addition to the School of Mines and Industries is the Junior Technical School, for which a new building is now being erected on a portion of the gaol site, transferred to the School of Mines Counci by the Government. At the present moment temporary quarters are being occupied. Some students after passing through the Junior School go straight to employment, continuing perhaps to attend the evening trade classes, while others move on to the senior School. In a review of the work of the School of Mines mention must be made of a series of industrial research carried out under supervision of the Principal. One in particular, regarding the suitability of the local ores for the manufacture of pigments attracted much attention, while the experiemtns on the manufacture of white potery from Victorian clayes were considered of sufficient importance by the Federal Advisory Council of Science and Industry to warrant the appointment of a special investigator. The results of these have been most encouraging, and may have far-reaching consequences. The vocational training of returned soldiers also should not be overlooked. The work was taken in hand from the first, before the Repatriation Department gave assistance, and now with the help of the department of the School has become one of the largest vocational training centres in Victoria outside of Melbourne. The soldiers, trained in a variety of occupations, have made remarkable progress, and already considerable numbers have found employment in local workshops and factories. To sum up, the School is divided into the following departments, each well staffed and equipped: - The School of Mines, science, and Engineering; the Techncial Art School, the Boys' Junior Technical School, the Girl's Preparatory Technical Classes, Trade Classes, and the Commercial School. The school of Mines, science and Engineering, comprises the following branches: - Mining, Metallurgy, Geology, Electrical Engineering, Civil Engineering, Mechanical Engineering, Applied Chemistry, and Pharmacy. Battery treatments, Cyanide Testing, Smelting, Assays, and Clay Testing from a regular part of the School's work. Students gaining qualifications obtain concession in their courses at the university, should they proceed there to continue their studies. The technical Art school curriculum includes training in all branches of pictorial and applied art, an Architectural Diploma Course, a Draughtman's Course, technical Art teachers' Course, Photography,Ticket Writing, Art Metal Work, Woodcarving, Needlework, and Leather work. The Trade Classes give instruction in Telephone Mechanics, telegraphy, Carpentry, Cabinet Making, Plumbing, Blacksmithing, Fitting, Electric Wiring, and Printing. Numerous Scholarships are offered every year, and altogether students will find few places to equal the Ballarat School of Mines and Industries as a training place for their life's work. One of the first in the continent to be established, its Jubilee finds it still in the front rank, keeping pace with the times, and offering to the youths of this country the means of taking advantage of Australia's teeming opportunities. william, battery, smith, herbert, drawing from the antique, ballarat school of mines botanical gardens, ballarat school of mines, redmond barry, alfred mica smith, james bickett, museum, dick richards, ballarat junior technical school, s m b, ballarat school of mines and industries, ballarat technical art school, model mine, james m bickett, j m bickett, roderick murchison, vocational training rooms, wesley church, methodist church, alexander peacock, lathes, repatriation, repatriatin department, war service, school council, baragwanath, gold mining, mining laboratory, plaster cast, r.w. richards, anniversary, jubilee -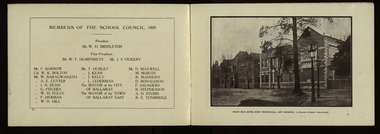
 Bendigo Historical Society Inc.
Document - PETER ELLIS COLLECTION: ORDER OF AUSTRALIA
4 page A4 printed document. Achievements of Peter Ellis (for consideration for the Order of Australia) Peter is regarded as one of the leading collectors and presenters of traditional dance tunes, dances and musical instruments in Australia. At the 2005 National Folk Festival it was announced by Robyn Holmes that he has the largest selection of dance related material collected in the National Library Archives in Canberra. Peter has been collecting for many years and has collected with the late John Meredith (AM), Shirley Andrews (AM), Rob Willis and Dave Di Santi amongst others. Peter has literally travelled Australia collecting over the past thirty years. He has extensive field recordings from Western Australia and Tasmania in addition to his Victorian collection, for example. Most of his recording has been in North Western and Central Victoria. Peter collected a lot of his material from Harry McQueen ( Castlemaine), which led to a double CD of Harry's music. Harry had played in dance bands for over sixty years in Central Victoria. Harry had a number of tunes from Bill McGlashan who had taken Harry under his wing as a young man. Through Peter's efforts much valuable material and knowledge from almost a century ago was saved for posterity. Founder, Charter member and life member of the Bush Dance and Music Club of Bendigo. Life Member of the Victorian Folk Music Club. Recipient of the Graham Squance award (for the person who has done the most to promote folk dance and music in Victoria)) from the Folk Song and Dance Society of Victoria. Member of the famous Wedderburn Old Timers Band for over twenty-eight years (two platinum and several gold recordings in that time). Founder and leader of the Emu Creek Bush Band (twenty-nine years old in 2010) Emu Creek has made many CDs of dance music as listed. Friday Night at the Spring Gully Hop, Three double CDs called 'Quadrille Mania' which contain many rare dances and tunes which have been learnt and recorded, under Peter's guidance, so they would not be lost to posterity. A triple CD called 'Take Me Back To Bendigo' with heritage songs and music from the Gold Rush to Federation (solely organised and financed by Peter) These CDs show the multicultural heritage in Bendigo and include music and groups from the Koorie, Chinese, Cornish, German, Irish, Italian, Scots, English and Welsh communities of Bendigo and district. Upon his recovery of costs Peter has handed over copyright to the Bendigo Community so future profits go back into the community. Three double CDs called 'The Merry Country Dance' with dances and tunes going back to the time of Governor Lachlan Macquarie's Ball in 1804. Most of the tracks are performed by Emu Creek Following much practice under Peter's tutelage. For further authenticity Peter liaised with other musicians to record some tracks which were revived from almost two hundred years ago and have now been recorded using the instruments of the time. A three volume set of Bush Concert recordings (Vol 1 Goornong (launched Australia Day 2006 with any profits going to the Soldier's Memorial Hall Committee), Vol 2 Heywood and Vol 3 Maldon/Sutton Grange, already recorded and to be released as money from other projects becomes available. NOTE: None of these CDs have led to any profit. All money raised is put back into the community and further heritage recordings, books and videos through the Bush Dance and Music Club of Bendigo Inc. In 2009 a full collection of all Peter's book and CDs was donated to the John Gorton Library as part of the recognition of the fifty year career of the Gay Charmers Dance Band from Lake Charm. 'Music of the Diggings' (4 tracks by Peter or Emu Creek). In addition the Emu Creek Band, under Peter's leadership, has appeared on a CD backing Bruce Watson on his song, 'The Old Bush Dance'. Emu Creek has performed at National Folk Festivals in four states and several times at the National Folk Festival in Canberra. They have also been mainstays of the Maldon Folk Festival for over twenty years as well as doing dance programs for the Port Fairy Folk Festival on two occasions. Peter has written and published many books related to traditional music and dance. These include Three volumes of 'Collectors Choice' which is musical notation for bush dances coupled with much dance history which would have been lost without Peter's efforts. 'Two Hundred Dancing Years - How to run a Colonial Ball: (co-authored with Shirley Andrews (A.M.), 'Music Makes Me Smile - The Music of the Nariel Valley' (co-authored with Harry Gardner). The Merry Country Dance' (292 pages) a companion to the three double CDs. He has also been a contributor to Verandah Music' authors Rob Willis and Graham Seal and 'The Oxford Companion to Australia Folklore' Ed Graham Seal. Peter is also a regular contributor to 'Trad and Now' Magazine. His latest completed book is titled 'The Merry Country Dance' and is over three hundred pages of social history, recipes and dance instructions. It was completed with the assistance of a Victorian Government Heritage Grant. The first edition sold out in only a few weeks. Peter has taught many children about old time musicianship through the junior bands which have functioned over the years with many children joining Emu Creek and then going on to follow their own musical inclinations. He has trained several young concertina and button accordion players over the years. Peter has been a regular tutor with Continuing Education in tin whistle, harmonica and old time dancing for many years. Peter has conducted workshops in music dance at National Folk Festivals in Perth, Alice Springs, Maleny, Melbourne, Adelaide, Kuranda and more recently at several Canberra National folk Festivals. He has also done this at Maldon for many years, Port Fairy, Glen Innes, Jamberoo and Kiama Festivals. For over thirty years Peter has been a guest player and MC for the dances at the Nariel Folk Festival (Australia's oldest continuing Folk Festival) Peter is very well known in the Corryong area as a collector and the co-author of the book, Music Makes Me Smile, about the Klippel/Simpson dynasty in the Nariel Creek Band. This book is currently being revised for re-issue as more material has come to light since the original publication. For many years Peter trained Debutante Sets in the Bendigo District. Peter was an instigator of the annual Dinki Di Ball held each September in Eaglehawk for the past thirteen years. At this ball three bands play for a quarter of the night and then join together for the final part of the evening. The bands are Emu Creek, The Wedderburn Old Timers and the Gay Charmers. Up to four hundred dancers, many in heritage costumes have attended this dance. The ball also pays tribute to, and involves, the old MC's. Through this example their skills have been passed down to a younger generation of MC's. All profits are returned to the Dance Club to foster our musical heritage. Each Ball includes presentations designed to promote social dancing in Australia. Over the years several young musicians have been presented with musical instruments at the Ball, libraries have been given copies of Peter's books and CDs and one year a keen young dancer was presented a pair of dancing shoes. Peter is a trained ballroom dancer and has gained gold medal status in this field. Peter is an accomplished musician and is one of Australia's foremost button accordion players. He is also highly accomplished on the tin whistle, bones and harmonica. He is the only exponent of the Swanee whistle that I have seen. Peter also plays the piano and ukulele. Thirty six years membership of the Bendigo Field Naturalists Club, Secretary in the 1970s and actively involved in campaigns to save Lake Pedder and establish the Whipstick and Kamarooka State Parks (now part of the Bendigo National Park). Peter was also extremely active in the establishment of the Salomon's Gully and Jackass Flat Flora Reserves in Bendigo which have now been saved for posterity. Peter has also been involved in efforts to save One Tree Hill and this area has now been included in the Greater Bendigo National Park. He has discovered and named new plant species in the Whipstick Forest and propagates Australian plants. Peter takes regular guided tours of interested people through the Whipstick each Spring on wild flower educational tours. He is a keen and gifted photographer of local plant species. Life member of the Bendigo Field Naturalists. Peter contributed text and photographs to their publication 'Wildflowers of Bendigo'. When the Victorian State Parliament had its first historical sitting outside Melbourne Emu Creek played during lunch for the guests and public. They have also played at functions such as the Centenaries of Federation, the Bendigo Post Office, the Shamrock Hotel and the opening of the new Melbourne Museum and the Federation Museum in Bendigo. The band regularly plays for Seniors week and at homes for the aged such as Bethlehem, Mirridong, Bignold Park, Bendigo Village and others. Peter has been instrumental in getting the band to play for fundraisers such as schools, scouts and environmental groups. The band plays many charitable 'gigs'. The band supports the Bendigo Easter Fair and the Eaglehawk Fair when able and has appeared in several parades over the years. The above list shows the invaluable contribution that Peter Ellis has made towards the collecting and distributing of Australia's musical and dance heritage. No one has done more than Peter in this area. He has also been active locally and nationally in his endeavours towads saving the natural environment. He has put many years of time and energy into both area's and has many on going projects in mind for the years ahead. The awarding of an honour from Australia would be just reward for a man who has preserved so much of our musical and dance heritage for future generations. Knowing Peter I have no doubt he would treasure such an honour as he has given so much to preserve Australia's music and dance heritage over most of his sixty plus years. Compiled by John Williams. Handwritten notes at bottom of last page reads: Referees Jacinta Allan MLA Steve Gibbons MHR Willie Carney ex Mayor of Bendigo Supporting letter Mary Smith Sec. Bush Dance + Music Club.person, individual, peter ellis oam -
 Melbourne Legacy
Document - Speech, Commemorative Address - Sir Stanley Savige K.B.E. Federal Conference of Legacy Clubs, Canberra, 10/1954
After the death of Stan Savige this address was given at the Canberra Conference in October 1954. It is tribute to his life. Sir Stanley Savige KBE : Commemorative Address Federal Conference of Legacy Clubs, Canberra : October 1954. On the 15th of May this year Legacy learned to its enduring sorrow of the death of its Founder, Lieut. General Stanley George Savige KBE, CB, CBE, DSO, MC, ED, for more than 30 years affectionately known to us all as Legatee Stan Savige. He was the embodiment of all those things for which Legacy stands, and each one of us who knew him and worked with him feels a great and abiding sense of personal loss. It is proper, therefore, that those of us at this Conference, the first after his passing, representative of Legacy throughout the Commonwealth, and comprising so many who were his friends, so many who knew the depth of his love for Legacy, should acknowledge our debt to our Founder and ensure, so far as we may, that the inspiration of his life and work in this Cause shall not be lost to those who follow after. It was not ordained that Stanley George Savige - should enjoy a long life, but it was to prove a life of outstanding service. Born at Morwell in Victoria some 63 years ago, he received with his brothers and sisters such education as was then available to a lad in a mining district. He had no particular opportunities of advancement, but from his early days he cherished a strong ambition to make a success of his life, and with this in view he lost no opportunity of adding to his knowledge. Always a lover of the open country, a good bushman and a fine shot, he became as a young man, a Scoutmaster with a keen following of boys. Even in those early days he attracted youth and showed undoubted promise of the quality of leadership which later was to make him famous. Opportunity came with the first World War, and he took his place as a private soldier in the original 24th Battalion AIF. Followed Gallipoli and Anzac where his marksmanship and bush craft stood him in good stead. Conscious that his early training was not sufficient to secure the promotion he desired, he set himself to enlarge it. Only a man of fine fibre and rare determination could apply himself to study on that war torn Peninsula, where our men, hitherto untested, suffered every known hardship and no man knew, from hour to hour, whether he would survive. But Savige achieved it. Himself then a Corporal he found another Corporal who was a former Schoolmaster and learned from him all that he had to teach. Savige was on his way. He was commissioned on the Field and allotted the heroic task of leading the last party off that desperate coast during the famous evacuation. In France he became the Adjutant of his Battalion and one of the best known officers in the 6th Brigade. He won the Military Cross and was mentioned in despatches. Early in 1918 he received a signal distinction, He was included in a small but distinguished band of Officers and Non-Commissioned Officers from the British and Dominion Forces most carefully selected for individual courage and proved qualities of leadership, and was sent to Persia, under the command of Major-General Dunsterville, Kipling’s famous Stalky, to assist and mobilise the friendly tribes with a view to protecting the road to India, left wide open by the withdrawal of Russia. The story of the Dunsterforce, its suffering and achievements in the face of incredible hardships and difficulties, was later to be told by Savige in his book “Stalky’s Forlorn Hope”. He emerged, finally, unscathed, despite his active participation in several of the bloodiest battles of all time, with the rank of Captain and a DSO and MC to his credit, to say nothing of three mentions in despatches. In later years, further decorations were to be conferred upon him, but I believe he valued none of these so highly as his awards for outstanding personal bravery won in the Field when he was an Officer of comparatively junior rank. Such was the man who in August 1923, at the instance of his former Commander, Major-General Sir John Gellibrand, gathered around him a handful of men who had fought and laughed with him over four well remembered years. This small band adopted the name of “Legacy”, but its purpose then was, in the main, to assist in safeguarding the interests of ex-servicemen in this country. Worthy although the case undoubtedly was, the conception and ideal which was to distinguish Legacy from all kindred post-war movements did not emerge until two years later. The torch had not been lit. Legacy had not yet found its soul. What has been achieved since then is known to you all. The Legacy ideal, unique in its conception, with no known counterpart elsewhere, is now accepted, welcomed and honoured throughout the Commonwealth and abroad. But in those early days the achievements of our Founder in the face of all manner of difficulties and frustrations are worthy of our lasting memory and thankfulness. As the source of every river lies in the hills, so must the inspiration from which stems a great conceptions of service to one’s fellow men be lofty and above reproach. Savige was the embodiment of this new expression of comradeship, as he was the central figure and driving force of the little group that sponsored it. But for his zeal, his faith and determination, it is likely that the flame, newly kindled, might have flickered and died. The idea of men returned from active service pledging for the sake of their former comradeship, their personal assistance to the widows, and above all, to the children of those who had fought beside them and paid the full price of War, was so completely new and unexpected that it was by no means readily accepted. There were no funds, no precedents to guide the new adventurers, only the clear bright flame of an ideal just envisaged, and the conviction that the Cause was unassailable. Nor were there lacking many who said that the community held no place for Legacy, that it was born of sentiment only, and would quickly pass. The scoffers are gone and one since forgotten, but the torch remains and burns brighter than ever. Down the years of Legacy there are many names deserving of honour, men from all States and all stations of life, but no name stands out in such clear and bold relief as does the name of our Founder. By his works you shall know him. He was, in truth, the Soul of Legacy. He sought no office and preferred to work as one of the team. Six years went by before he accepted the Presidency of Melbourne Club, and then only because his fellows would book no further delay. “The Spirit of Legacy is Service” - so runs the Charter, and that was Savige’s Creed. By virtue of his attainments he was called upon to take a leading part in the administration of Legacy, first within his own club and later, as Chairman of the Co-ordinating Council of Legacy in Australia. But always it was the essentially human character of the work which enthralled and upheld him, and the tasks which gave him most joy were those which brought him into close personal contact with the youngsters and their home life. Like their elders they recognised his goodwill and his leadership and responded to it. It was Savige who made possible the first camps held for the boys and girls by Melbourne Club. These were erected on his own seaside property, and were originally conducted under his personal direction and largely with the aid of funds he had collected. There was hardly an important post in his own Club that Savige did not at some time occupy and adorn. He was happiest in the company of those men with whom he had served in the field, and cherished always the comradeship born of active service which is of the essence of Legacy. He was a man of strong convictions but attentive always to another’s point of view. As a Legatee he played a leading part in bringing hope and encouragement to many a mother on whom the whole responsibility of a young family had been suddenly and tragically laid; in the attainment of the ambitions of many an orphan child, which not so long since had seemed to him or her to be mere dreams, impossible of realisation. Comfort for the bereaved, new hope for the children’s physical and educational welfare, assistance with the home, aid for the sick, money for the needy and a new courage to face a future that hitherto had held no promise, all these facets of Legacy endeavour combine to present a living and enduring memorial to the man we honour as our Founder today. Between the two World Wars in addition to establishing himself successfully in civilian life and answering the constant calls of Legacy on his energy and time, Savige maintained an active association with the Army. He was convinced that a Second AIF would one day be urgently called upon, and as a Battalion Commander he spared no effort to train the Officers under his charge during the uneasy years of peace for the trial that he felt must come. These men have all subsequently had distinguished military careers, their names are well known and many of the serve in Legacy today. When the second crisis came, Savige himself was one of the first to offer, and although his youth was spent, he proudly carried the number VX13 throughout the terrible years that followed. This time he was to command, first the 17th Australian Infantry Brigade in the first action of the Second AIF against the enemy at Barida, and subsequently at Tobruk and Derna - all famous names now. It was his patrols which gave the warning - unheeded at the time - that Rommel’s reinforcements were reaching North Africa far earlier than was expected. Then followed the grim days of Greece and Crete when the fine qualities of his leadership were put to the utmost test. I have been told by those who were closest to him it was typical of Savige that when his convoys were on the move back and were being blasted from the air by the unopposed Luftwaffe, he should sit by the side of the open road, wearing his red banded cap, to steady the morale of men who had then no chance of hitting back at the enemy. Unorthodox no doubt, but here was a man indeed. Throughout the whole campaign and later when he commended the 3rd division in New Guinea and later still when with the rank of Lieutenant-General he became a Corps Commander in New Guinea and Bouganville, it was at all times characteristic of him that he should see for himself the situation in the forward areas. He dealt personally with his subordinate commanders whenever it was possible to do so. No one says his G.S.O. 1. understood better than he did the importance of front line troops seeing their G.O.C. frequently, and knowing that he was aware of and prepared to share their hardships and dangers. He took many risks that he should not have taken, exhausted himself physically and mentally times without number, and considered himself not at all in order to secure the success of his operations. Finally, in Bouganville, he brought his campaign to a victorious conclusion and accepted the personal surrender of the Japanese Commander. Savige is known as one of Australia’s most human military leaders, but let no one believe that he did not ask and receive the utmost of his men. He trained them in a hard school but he was ever conscious of their needs and observant and thoughtful of their welfare. Fearless and untiring under conditions which brought younger men down, he asked nothing that he was not himself prepared to give and do. The close of the Second World War left him with the same brave heart; but a vitality greatly impaired. He was called up again and again to perform important national tasks, notably that of Co-ordinator of Demobilisation and Dispersal. But his interest in Legacy never flagged it was in fact more personal than ever, for under his command many junior legatees, sons of former comrades had proved themselves worthy of their Fathers in war and in peace. In the bearing and achievements of the young men of the Second A.I.F. he took a particular and justifiable pride. He applied himself to the Extension of Legacy to areas where it had not previously been practicable to operate. His record of service and close personal contact with the men of both wars made him a most welcome pioneer and many new Clubs and Groups resulted from his efforts. He founded, and I doubt whether any one else could have done so, the Club in the great Capital of our Empire. His reputation and obvious sincerity surmounted obstacles that might well have daunted lesser man. Legacy’s debt to him visibly increased. But he was ever a simple man, with a great love and understanding of his fellow men and a true Legatee at heart. Much that he did will never be known or recognised, save by those who benefitted. His service in Legacy ranged from the humble kitchen of cottage and farm to our representation in Westminster Abbey itself. A knighthood set the seal upon an outstanding career. None the less when upon the death of Field Marshall Sir Thomas Blamey, Lieut. General Sir Stanley Savige became the Patron of the Melbourne Club, he retained at his own express desire, the title of Legatee Savige, and when on that final day we bade him farewell, when the Flags he had served so well were lowered and the guns which had formed a grim final salute, it was apparent to all who had eyes to see that this great and simple man had won such a place in the hearts and affection of his fellow country men as is given to few men indeed. From the packed Cathedral, escorted by his fellow Generals, followed by men of his own Units, by Legatees and a great company of others who had cause to honour and esteem him, he made his last journey. But that is not the end. His voice and presence are lost to us but his memory and inspiration must ever remain. As he has bequeathed to the National War Memorial yonder his diaries, records and battle plans, so he has bequeathed to us his fellow Legatees his greatest achievement and his trust, Legacy itself. Never was the Torch passed by worthier hands. Now it is ours to hold it high. Whatever material memorial the future many hold for him, Legacy owes its Founder a livelier recompense. It is within our power to implement what I believe to be his greatest wish, that Legacy and its ideal of comradeship and service shall flourish and endure. Let each one of us then resolve that we shall, within our Clubs, in all tasks to which we are assigned, both great and small, keep in our minds the life and spirit of Stanley George Savige, so that we may be proud at all times to say of Legacy to those who follow after - “If you would see his memorial - Look around you”.The tribute to Stanley Savige shows how greatly he was regarded by the Legatees.Off white quarto paper with black type, address given about Stan Savige to the Canberra Conference, x 12 pages.savige, speech, obituary -
Mission to Seafarers Victoria
Article, A Woman's Melbourne Letter
A detailed description of the Mission and its activities written by a woman: Western Mail (Perth, WA : 1885 - 1954), Friday 13 December 1918, page 34 A WOMAN'S MELBOURNE LETTER. Melbourne, Dec. 4. There is an idea abroad, which as regards Melbourne, at any rate, is quite erroneous, that our sailors are not as well looked after as our soldiers, and that the noble men of the Mercantile Marine are much neglected ! For once, perhaps, my readers will pardon a letter dealing with only one subject, but the steady, unostentatious work done by the Ladies' Harbour Light Guild, in connection with the mission to seamen in Melbourne could not be adequately explained if dismissed in the usual short paragraph. Some of the most prominent names in Melbourne are associated with this guild and with the Mission Chaplain, and Mrs. Gurney Goldsmith, the members have made the Seamen's Institute a real home for those sailors of the Mercantile Marine, who touch our port. What we as a community owe to those men by their heroism in recent hostilities is certainly more understood by this band of enthusiastic workers than by the community generally. By using their unflagging energies, and influence on the sailor's behalf they endeavour to discharge a debt to which in some way or other we could and should all contribute. Even the most casual person can, if he thinks at all, sum up a few of the things our sailors - other than those belonging to our glorious navy - have done for us. On the spur of the moment we remember that those of the Mercantile Marine, are the men who manned our transports, who carried our wheat and wool, to oversea markets; who kept us in touch with our loved ones abroad; who kept the fires going in the furnaces of the great leviathans, bringing our wounded soldiers home again; who never flinched when self-sacrifice was demanded; who cared, with that tenderness, innate in all sailors, for the women and children, when the passenger ships were struck a dastardly blow by the wicked enemy; who, mocking death, gave up life with a heroism all the more heroic because it was always taken as a matter of course! Is it any wonder, then, that the members of the Ladies' Harbour Light Guild make it their business to provide a bright, homelike, spot in Melbourne, where the sailors are always certain of a cherry welcome ashore? The members of the guild are admirably drafted! The 360 non-workers each pay £1 1s. per annum. The workers, of whom there are between 700 and 800, donate 2s. 6d. and school members - it is confidently hoped that gradually all the schools will take an active interest in the mission - 1s. a year. The knights of the guild - as the men members are designated - are responsible for any sum they wish to name, from 5s. a year upwards. Everything is paid for out of these revenues, with the exception of a small grant from the Home Mission Fund - and such is the organisation, and management, that the entire concern is quite free from debt. The Seamen's Church and Institute, where the "Harbour Lights" gleam so brightly, is situated right in the midst of all the bustle and turmoil of the wharves, at the end of Flinders-street. The building, comprising chapel, and institute under the one red tiled roof, is grey stuccoed, with a small tower, from which flaunts the flag of 'The Flying Angel" - the badge of the guild. A visit to the institute makes one fully appreciate the boon the place must be to the voyage worn, weary, sailor. The atmosphere is eminently social in its best sense. While the architecture imparts an elegance, and quiet dignity which soothes by the very subtlety of its charm. With its comfortable furniture, its wealth of flowers, and the happy, wholesome, feminine influence which prevails everywhere, the quality which stands for the magic word "home" abounds. The Chaplain in the course of conversation said: -"We try to make this really a free club for sailors." But the habitues would probably tell you it was far more than that to them. The Institute is excellently appointed, and every little corner seems to have its particular history. It was built after the model of one of the old mission churches in California, and retains something of the old world attraction, while yet it combines all the advantages of modern, practical, conveniences. On entering the door the first thing, one notices is a huge compass, inlaid upon the floor, evidently to indicate one's proper bearings for it points due north - to the chapel! Only one other seamen's mission in the world boasts such a compass. As the sailor swings through the entrance he finds the office on his right, and there is, here, always a smiling face to welcome the shy, or timid, new comer. Quite a real post office is staffed by members of the guild, and all the letters received are listed alphabetically. Therefore, the expectant sailor has just to run his eye down the list, and he can immediately see whether there is a letter for him or not. If he is fortunate, he comes up to the member in charge, who unlocks the box, and produces the longed for missive. The boys are always encouraged to answer letters - and to write them. Often a few words about their mother, and their own home, will provoke a sleeping memory into activity. The writing room is well stocked with paper, envelopes, pens, and ink. The tables are so divided to ensure the utmost privacy, and through a calculated chain of circumstances, many an anxious mother receives a letter from her sailor lad, who, perhaps, might not have written but for these kindly inducements. The central hall - where social evenings are held every other night besides two special concerts a week - is inviting in the extreme. A handsome piano affords opportunity for those musically inclined. The tables are strewn with papers. The walls are bright with pictures, and here, and there, is a carved model, of a ship. One, of especial interest, is a model of "The Roon" carved, and presented by a French sailor. This German vessel will always be remembered in Australia. For it was across her bows that the first hostile shot was ever fired in Australian waters. In the corner is the canteen. It was fitted up entirely from the proceeds of a quotation calendar compiled by one of the members. The sailors may at any time, get a teapot of tea, or a tray of eatables, at a nominal cost. Before the canteen was in existence they had to go out for refreshments! - and sometimes they did not come back! Groups of sailors sit chatting at the tables. Half a dozen Swedes laugh and talk among themselves, for the simple reason they know no other language than their own. Several British sailors cluster about a dark-eyed Welsh lad - a perfect Celtic type - who, although only about twenty years of age, has been the victim of the Hun five times. Mines and torpedoes sank the ships he was in, either in the Channel or off the English coast, four times; and it is to his fifth experience, when the Inverness was wrecked, that everyone is eagerly listening. "We were in the boats eight days," he was saying, "I was pretty well mangled when they picked me up. The sufferings we endured were awful. At last we managed to reach Rapa, a Hawaiian island. The natives thought we were Germans, and came at us with spears. When they found we were British, they were awfully good to us. They even cried when we left, and the day before the rescue boat arrived they begged us to go into the hills and hide." At another table a Canadian lad - once a sailor - then a soldier, who trained at the Broadmeadows camp - was telling his experiences : - "The voyage which will always stick in my memory," he said, "was to a place which must be nameless. We left the United States not knowing whether we were bound, or what we were going to do. After some weeks we sighted a group of wonderfully beautiful islands, and we headed for the most remote and most lovely of them all. Then, and only then, we learned our mission from the skipper. We were taking their year's supply to a leprosy station! Oh no! I don't blame the skipper for not telling us ! Someone has to do these things, you know. A naval guard saw they didn't come near - and we all got sixty dollars extra. When the job was over we were quarantined on another island for two months, and one little chap - the baby of the crew, not eighteen - developed leprosy, and died before we left. Yes! I'll never forget that voyage, mates! Sometimes, I seem to see Leper's Island yet, with its lavish tropical vegetation and the gorgeous sunsets which stained all the water with blood. Then, too" - here the voice deepened - "there was an English girl - a leper - there. We heard she used to be an actress, and she contracted the disease somehow or other. She was always alone, and always watching us. In the distance we could see her come to the water's edge, and from there she would watch. Just watch . .. . watch . . .watch. ..." "Here come a couple of North Sea chaps," broke in an elderly man after pause. "One of them wounded, too, poor lad." It is not strange that all the sailors flock to the Institute. It is so comfortable, and essentially inviting, besides being full of human interest. The men's quarters comprise reading, writing and dressing rooms - hot and cold baths are always available - billiard room, and a special baggage room, where any sailor may leave his kit for as long as he likes. The payment of 3d. covers its complete insurance. Upstairs are the officers' quarters. These also have their own billiard room, writing and reading rooms, bath and dressing rooms. Just close are the apprentices' quarters - "The Half Deck," as popular parlance has it! The lads also have a billiard room of their own, and indulge in an easy armchair - amongst others - which was a donation from the Milverton School branch of the Guild. It is hoped by the committee to some day utilise the huge empty rooms, which run the length of the whole building. Their ultimate intention is to fit them up as cubicles, or "cabins," as they are to be called. They trust these "cabins" will be donated, either in memory, or in honour, of someone dear to the donor. Another forward movement soon to be put in hand, now that materials are available, is the establishment of "Norla Gymnasium." In a sailors' club such facility for exercise is absolutely essential. The men both need, and miss, exertion. As one boy, who had been backsliding, once said pathetically : -"If only there was something to do to get me into a good sweat, I would be all right." Soon such an one will be helped to swing from the trapese of the Norla Gymnasium into the right track! Sunday is always a fete day at the Institute, for 40 or 50 sailors generally come into tea. The up-to-date kitchen, which is fitted with every labour-saving appliance - all paid for out of working members' half crowns - is then a hive of animation, and methodical order. A formidable row of teapots await filling. Mrs. Goldsmith -, the chaplain's wife - rightly thinks it is far more homely to pour out the tea from a pot, than to serve it straight from the urns. So tea is poured out by a member, who sits at the head of a table gay with flowers, and chats to the guests. These latter are of all nationalities. But the French, the Spanish, Scandinavian, Norwegian - or any other sailor is equally welcome with the British. Two enthusiasts belonging to the Guild actually learnt Norwegian, so that men of this nation would have someone to talk to, and so be less lonely when they reached this, to them, foreign port ! The members of the Guild have their own private suite where they arrange the flow-err and do other necessary odds and ends undisturbed. No one appreciates flowers like a sailor, and the earliest and most beautiful may always be seen adorning the tables and rooms. Teas are served and lectures are held in the "Celia Little Hall," one of the most beautiful portions of the institute. It was erected by the chaplain in memory of his aunt from whom the hall takes its name. The Gothic windows open upon the cloisters, where, in the hot weather, the sailors enjoy their meals out of doors. The cloisters, indeed, form an exquisite spot. They are between a series of sweeping arches which lead to the chapel, and are sheltered by the open balcony of the chaplain's quarters. Grace of contour marks the architecture on every turn. Just around the corner is the chaplain's garden - a patch of green and colour, transformed from a desert waste, by a well-known woman horticulturist. The book room is a department especially valued by the sailors. There are two secretaries, one for home and the other for foreign literature. Books in French, English, Spanish, Scandinavian, Norwegian, and German may be found on the shelves. Each week about 36 convenient parcels of reading stuff are made up. These contain illustrated papers, books in various languages, and magazines. These parcels are eagerly accepted by the sailor with a long monotonous voyage before him. But complete as is every corner of the institute, no part is so well equipped as the memorial chapel erected by the Ladies' Harbour Light Guild, in memory of the officers and men, who have lost their lives during the war. St Peter's - for it is called after the sailor's patron saint - with its hallowed gentle dignity is a veritable sanctuary of peace, perhaps all the more so because it sprang out of war. The fittings are entirely of Australian wood. The pews, given in memory of some loved one by one of the members, are of Tasmanian hardwood. The reredos and altar chairs of carved blackwood. The rich carpet was provided by the members' magical half-crowns. Already this chapel holds memorials of peculiar historical interest. The altar lectern was given in memory of Commander Elwell, who, it will be remembered, was killed at Rabaul, in the early part of the war. The font commemorates two heroes - Nigel Hockley and Fred Hyde, who lost their lives at the hands of the Germans, although they survived the actual torpedoing of their ships, the Galgorn Castle off the coast of Ireland. The mother of one of them wrote out that her son had died as an Englishman should - fighting for the right. This noble sentiment is suitably paraphrased upon the inscription engraved upon the font. Practically every-hing enshrined in the chapel has its own sentimental value. The alms salver of beaten copper, studded with agate, is fragrant with the memory of a saintly woman.The eye of the sailor is caught and held by the pulpit, which is fashioned like a ship's hull and only a twist of rope guides the chaplain up the steps. For the last 13 years the Rev. A. Gurney Goldsmith, M.A., has acted as chaplain to the Seamen's Mission in Melbourne. Before that he and his wife worked in China. Mr Goldsmith visits all the boats and gets in touch personally with the sailor, over whom he has great influence. He is not only their chaplain and friend, but, amongst a wide range of other things, their banker besides. An exchange system exists between the various Missions, and the sailor who has "banked" his money with the chaplain, upon going away, receives a cheque which is cashed - minus exchange - by the chaplain of the next port. Mr. Goldsmith will tell you he has a soft spot in his heart for on old sailor he calls "Paddy." This ancient mariner has been wrecked ten times. It was a long time before the chaplain prevailed upon "Paddy" to partake of the spiritual and secular advantages afforded by the institute. He would not come, he said, until he could do so "with a good heart." Finally he frankly admitted that he had no "friends like those of 'the Flying Angel,' " and that he eventually proved his own "good heart" will be shown in this story. One day he came in to the chaplain and said bluffly, "Well, sir, I've been payin' off some old scores up Carlton way, an' I tells yer, plain, sir, not one of 'em would have seen a penny of their money but for the Mission." The Ladies' Harbour Light Guild has over thirty working suburban branches, and the excellent results achieved at the Institute now will no doubt be considerably augmented in the future. The practical actions of the members do more than anything else to convey the subtle meaning of the name of the Guild. To the visiting sailors the word "ladies" signifies the bread givers; "harbour" safety ; "lights" welcome; "guild" the welding of fraternity, and they one and all tell you the ideals thus embodied are unselfishly carried out by all the ladies who have banded together to care for the sailors' welfare.The article describes the Mission and the use of several spaces a year after its opening and gives details about the daily activities.Digital copy of an article published in the Western Mail on the 13th of December 1918. 717 flinders street, seamen's mission, norla dome, lhlg, reverend alfred gurney goldsmith, celia little room, garden, frederica godfrey -
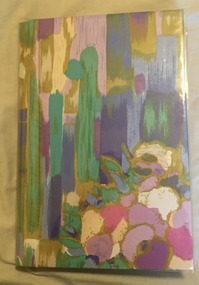 Melbourne Tram Museum
Album - Photo Album, John Etkins, Ray Marsh, 1990's
Photo Album - 48 sheets bound with a white circular metal/plastic spiral bound within a heavy duty cardboard cover, with glued cover pages, plastic covered with an index sheet. Allows for three photographs per page. Not known whether the plastic envelope for each photograph is of archival quality. No Manufacture detail, though has a bar code on the bottom left hand corner of the rear cover. Cover is a reproduction from a painted art piece. Listing of photographs given on htd1800-RayMarshalbum.pdf Dates given when written on the rear of the photograph. Compiled by John Etkins from photographs given to him by Ray Marsh. 1990's to 1993 generally. Page Tram/s Notes – dates given when on rear of photograph. 1 226 Loading passengers – ex MMTB Annual Report? 1 957 City Circle 1 “hands off our trams” protest march 2 2100, 231 South Melbourne Depot – 10-4-1993 2 676 And many others – Hawthorn Depot 2 217 Princes Bridges 3 380, 104 St Kilda Road 3 106, 104 Essendon Depot 3 431 As a W1 4 1011 Fresh fruit tram, Preston Depot 6-12-1992, 4 824 Day in Day out, Brunswick and Victoria Parade 29-4-1993 4 722 Art tram 5 ? Advert tram – Imperial China 5 237 Stubbsy tram – TrippleM? 6 856 City Circle – with gas and fuel building – 31-7-1994 6 925 City Circle - with gas and fuel building – 31-7-1994 6 728 City Circle – 10-8-1994 7 246 Navy tram x three pics – July 1992 8 ? Gold tram advertising Georges 8 990 Advertising Telstra– 29-4-1993 8 749 Art tram? 9 990 NRMA - 1-3-1994 9 727, 215 Public Transport 9 920 Advert tram with a picket fence 10 Bendigo 21 Preston Workshops 11-3-1993 10 774? W5 being rebuilt at Preston – 21-10-1991 11 ? Bogie cable trailer at Preston – 29-4-1993 11 922 Interior view of a tram – being modernised – 11-3-1993 11 922 Preston Workshops 29-4-1993 12 1018 Workcare tram at Preston 1994 – 11-8-1994 12 774 Preston Workshops – 20-12-1993 12 8 Preston Workshops – 1-10-1992 13 380 Preston Workshops 13 8 Preston Workshops 13 20, 8 Preston Workshops 14 721 Preston Workshops 20-12-1993 14 ? Tramways painted artist tram featuring a driver and workshop 14 Traverser Preston Workshops 15 2110, 2106 Preston Workshops 15 ? Preston Workshops 15 2130 Interior Preston Workshops 20-12-1993 16 Set of three pics Elizabeth St floods – 17-2-1972 17 Set of three pics Elizabeth St floods – 17-2-1972 18 676 Turning into Swanston St from Batman Ave 18 676 Kew Depot – 10-11-1991 18 237, 676, 611 Kew Depot – 10-11-1991 19 214, 676 South Melbourne Depot – Kingsway 19 217 Spencer St 19 214 Advertising Kew Depot Open Day -8-12-1991 20 231, 676 Advertising Kew Depot Open Day -8-12-1991 20 Zoo tram, 256 Outside Kew Depot 20 214 Hawthorn Open Day with band 21 Zoo tram x 3 pics And horses, Kew Open day 22 231, 431 Kew Depot 22 892, 214 Kew Depot 75 years, Postcard – 1991 22 282 Kew Depot – with the name Monique on the tram and a lady standing alongside 23 238, 233 Kew Depot 23 236, 892, 282 Kew Depot – 25-4-1992 23 232, 236, 282 Kew Depot 24 2112 Port Melbourne line – with long grass – 11-4-1993 24 469, 2037, ? 2015 South Melbourne Depot 24 1018 or 976? Advertising a PTC Open Day – 20-10-1991 – In Swanston St - see Reg Item 1845 25 250 Bourke St 25 2100 Running into Preston Workshops 25 282, 1003 Collins St in the rain 26 Logo PMTT 26 Point cover With P&MTT cast into the cover 26 Foundation Stone Person reblocking in gold, a PMTT Foundation Stone 27 Logo Tramway Board 27 Logo MMTB logo 27 Logo Footscray Tramways Trust 28 217 And 2’gauge W2 – South Melbourne Depot – 20-10-1991 28 164 Somewhere? 28 1018 Advert tram – “Moro”, Preston flyover 29 V214 x 3 pics Kew Depot 30 611 Whitehorse Road, Balwyn 5-10-1991 30 976 x 2 pics Advert tram – have a red instead 31 610 Malvern Depot 31 138 (max tract) Flinders St 31 138 (max tract) Bourke into Spencer 32 844 Victoria Parade with R10 behind 32 264 With a TV interview being undertaken 32 2066 Elizabeth St – 29-4-1993 33 255 x 2 pics Derailed at Kew Depot 33 253 Derailed outside the Beehive Hotel 34 214, 892, 611 Re-enactment of Victoria Bridge to Esplanade service – 10-11-91 34 726 Art tram? – Swanston St with overhead trucks in background 34 10W Reblocking scrubber car at Brunswick Depot 1999 35 2085 At Preston workshops over an inspection track section 35 731 St Georges Road, road being rebuilt – Nov. 1991 35 Preston Jtn Junction at Workshops being relaid 36 1003 St Georges Road, Nov. 1991 trackworks 36 St Georges Rd Track being rebuilt – Nov. 1991 has temp track cross over 36 Victoria St Victoria St being reconstructed 6-9-1992 37 East Burwood Extension works – 18-2-1993 37 East Burwood Re-building crossover – 18-2-1993 37 Victoria St Victoria St being reconstructed 6-9-1992 38 19W, 16W Bylands – 5-12-1993 38 R10 Kew Depot 38 Workers Kew Depot pushing on a post 39 R10 R10 towing a B class tram- Royal Parade? 39 11W, 10W? South Melbourne Depot 39 Overhead Overhead truck at Kew Depot 40 Kew Depot Demolition works opposite depot 40 613? Malvern Depot on special tram 40 256 zoo tram Royal Park tram at Kew Depot 41 B class Bundoora line 1993 41 231, 611 Kew depot 75th anniversary tram 41 469, 287 Kew depot 42 510 Spring St into Bourke St – 28-4-1993. “42nd street promotion. 42 153 High St Northcote, Bundoora 42 611 Kew Depot, Nov. 1991 43 195? Simpson St siding – 25-4-1993 – 7 trams in all 43 646 Route 12, with fire station in background – Gisborne and Victoria 43 961 Burke Road, Camberwell, 10-8-1994 44 760 Art tram 44 938 Sam the tram, Flinders St 44 1014 Gilbert Road, West Preston, June 1994, advert for AGC 45 965 Daimaru advert tram, Swanston St 45 1018 Express post advert tram, Swanston St. 45 1024 Advert – lego exhibition – Swanston St 46 104 Camberwell depot 46 611 Looking towards driver’s controls from interior. 46 W1 Interior photo showing tip over seats 47 Cable car Interior photo – could be zoo tram 47 510 Interior, 28-4-1993 47 214 Kew Depot, night shot, Oct. 1991 48 246, 237 Kew depot, 13-9-1993 – Stubbsy and Energy Victoria advert 48 246, 231, 237 Kew depot, Navy, 75th anniversary of Kew and Fox Fm advert 48 2014, 2072 South Melbourne – tt line? Advert tram 49 59 And six other trams in front of Preston Workshops 49 1024 MMTB Christmas Tram, 1970 49 2001 Camberwell Depot 50 725 Preston depot area – tram has a red upper half 50 725 South Melbourne depot – now has Xmas decorations 50 1026 Bourke St, Christmas 6-12-1993 51 933 Victoria Parade shunt and other A class tram – Autumn 51 829 Art tram 51 39 Advert tram – Crime prevention 52 Connie Connie at night = has jeans on 52 1?? Has a MET inspector standing in front of number – Latrobe uni tram 52 611 Kew Depot 53 237 Fox FM Black Thunder tram at Kew Depot, August 1992 53 237, 611, 892 Victoria Bridge re-enactment – 10-11-1991 53 237 At Kew depot with 4 people, including Hugh Waldron 53 442, 10W South Melbourne Restaurant tram and works car 53 W2 At Wattle Park 53 School art Photo of students holding artwork on the zoo tram 256 at Kew 54 138 And many others 54 469 Launch of the Melbourne Tram by the PTC 54 School art Photo of students holding artwork on the zoo tram 256 at Kew 55 B2 Elizabeth St terminus, Christmas 1994 55 8 Z8 Swanston St, April 1993 55 504 Clifton Pugh – Preston Workshops 56 138, 180, 214 Hawthorn Depot display 56 650, 510 Hawthorn Depot 56 469 Camberwell 57 568 Bridge Road Richmond by cable tram depot 57 ? Advert tram – Falls Creek 57 995 Malvern Road, 18-5-1992 58 457, 217 etc Swanston St display 58 231, 611 Kew 75th Anniversary 58 682 Artist tram at Malvern Depot – 18-5-1992 59 1018 Country Road advert tram 59 8 Z class – decorated tram – Essendon Depot 59 947 Metland Safety Express – safety tram – Kew depot 60 101 x 2pics Decorated for RAAF 70th Anniversary 60 2082 Near East Preston Depot, with destination “Next Stop Mill Park” 61 475 After sale and disposal 61 585 After sale and disposal 61 651 After sale and disposal – Diamond Creek – 9-8-1994 62 386 After sale and disposal – Sunbury 62 590 After sale and disposal – Hall ACT 62 476 After sale and disposal – Kinglake 63 11W Bundoora Extension – track being opened 63 947 Metland Safety Express – safety tram – Kew depot 63 Model 2,3 2’ gauge model trams 64 Model 2 Ditto 64 250 After sale and disposal 64 293 After sale and disposal – Diamond Ck – 9-8-1994 65 246, 231, 237 Kew depot, Navy, 75th anniversary of Kew and Fox Fm advert 65 1002 Advert tram – Salvation Army 65 231, 29 Kew Depot 66 246, 231, 237 Kew depot, Navy, 75th anniversary of Kew and Fox Fm advert 66 646, 935, 1002 Kew depot 66 220, 60 Preston Workshops? 67 851, 814 Malvern Depot 3-9-1992 67 726 Malvern Rd at Glenferrie Road – 18-5-1992 67 237, 133 Victoria Parade 1996 68 814 and others Interior Malvern Depot – 18-5-1992 68 231 75th Kew depot anniversary at depot 68 231 75th Kew depot anniversary at depot 69 1024 Malvern Depot 10-11-1991 69 1011 Advert tram Melbourne City Toyota 69 106, 180 Swanston St 70 190, 568 Camberwell Depot 70 431 Flinders St – tram event 70 20, 138 Camberwell Depot 71 431 Flinders St – tram event 71 237 Fox FM Thunder Tram 71 2057, 2014 Elizabeth St, Vic Market 29-4-1993 72 676, 611, 892 Victoria Bridge re-enactment – 10-11-1991 72 Ceremony Victoria Bridge – mayor and others event 72 214 214 on the bridge 73 164 Lygon St – former outer circle line level crossing in view 73 841 Swanston Walk 29-4-1993 74 821 St Georges Road, April 1993 74 431, 231 Victoria Parade 74 217, 676 Passing Camberwell Depot 75 Oporto 018 Clarendon St 6-3-2003 75 3007 Albert Park – 7-3-2003 75 3001, 018, 3502 Docklands – 10-3-2003 76 Oporto 018 Docklands – 16-1-2003 76 Oporto 018 Flinders St 7-3-2003 76 3502 Swanston St at Flinders St -8-3-2003 77 16 Kew Depot, Jan 1991 77 112, 110 Bundoora 4-9-1992 77 738 Camberwell Feb 1991 78 1011 Thornbury Jan 1991 advert for City Toyota 78 101 Bundoora – RAAF tram 4-9-1992 78 814 Art tram – Swanston St August 1992 79 1024, 469, Z3 Preston Workshops – 469 as the Melbourne Tram – 9-9-1992 79 961 Malvern Depot 3-9-1992 79 242 Single line working in Victoria St 6-9-1992 80 781 Thornbury, the hump, Preston Workshops Jan 1991 80 2104 Preston Workshops 9-9-1992 80 2100 Launch, Preston Workshops 9-9-1992 81 5W + 1A 5 x W at Kew Depot 3-2-1991 81 676 Kew Depot 21-2-1991 81 873, 2016 Brunswick depot 2-3-1991 82 231 Kew Depot Yard – 21-1-1991 82 157, 158 Brunswick Depot – 2-3-1991 82 2057, 873, 158 Brunswick Depot – 2-3-1991 83 802 Art Tram - Franklin St from the signal box 2-3-1991 83 990 990 Evian advert tram, Franklin St signal box 2-3-1991 83 920 GIO Advert Tram with Bushels tea and Yellow Pages? Adverts 84 721 Art Tram, Franklin St signal box 84 976 St Georges Road, Jan 1991 – advert tram Capital society 84 731 St Georges Road, Jan. 1991 Art tram 85 10W Victoria Parade, Brunswick St, 1/3/1991 85 10W, 9 or 11W South Melbourne depot 85 10W Bundoora Terminus 4-2-1991 86 11W City Baths 86 10, 16 Camberwell Depot 6-12-1990 86 944 Glenhuntly Depot 18-2-1991 87 2011 Spring St – Princess Theatre, March 1990 87 294, 239, 277, 243, 259, 280 Kew Depot 87 296 Kew Depot 88 1015, 16 Batman Ave 19-1-1991 88 963, 948, 935, 996, 892 Kew Depot 3-2-1991 88 Victoria St Victoria St Richmond Reconstruction 6-2-1992 89 1014, 990 Batman Ave 19-1-1991 (Image added i5 and rear view added 23-12-2018, scanned for Dale Budd. 89 920 920 – GIO advert tram, 760 art Tram Collins at Spencer 17-10-1990 89 610, 611 Kooyong Station level crossing 30-12-1990 90 95 Royal Park, 15-2-1991 90 2057, 873, 158 Brunswick Depot – 2-3-1991 90 10 Camberwell Depot 6-12-1990 91 Bendigo 44 In Prahran and Malvern Tramways Trust Colours 1986 –Black and white photo. Listed 5-11-2016See note page 1 and on image 3trams, tramways, album, photo album, tramcars, the met, yarra trams, kew depot, brunswick depot, advertising trams, transporting art, preston depot, hawthorn, bundoora, st georges rd, victoria st, camberwell depot, tram r10, 8, 10w, 10, 11w, 16, 16w, oporto 018, 19w, 20, bendigo 21, 29, 39, bendigo 44, 59, 60, 95, 101, 104, 106, 110, 112, 133, 138, 153, 157, 158, 164, 180, 190, 195?, 214, 215, 217, 220, 226, 231, 232, 233, 236, 237, 238, 239, 242, 243, 246, 250, 253, 255, 256, 259, 264, 277, 280, 282, 287, 293, 294, 296, 380, 386, 431, 442, 457, 469, 475, 476, 504, 510, 568, 585, 590, 610, 611, 613?, 646, 651, 676, 682, 721, 722, 725, 726, 727, 728, 731, 738, 749, 760, 774, 781, 802, 814, 821, 824, 829, 841, 844, 851, 856, 873, 892, 920, 922, 925, 933, 935, 938, 944, 947, 948, 957, 961, 963, 965, 976, 990, 995, 996, 1002, 1003, 1011, 1014, 1015, 1018, 1024, 1026, 2001, 2011, 2014, 2015, 2016, 2037, 2057, 2057, 2066, 2072, 2082, 2085, 2100, 2104, 2106, 2112, 2130, 3001, 3007, 3502 -
 The Beechworth Burke Museum
Geological specimen - Black Coal
This specimen was recovered from Wonthaggi in Victoria. Coal is a sedimentary rock which is composed of peat after it has been exposed over millions of years. This is an example of Australian black coal which is used as either thermal or coking coal for electricity generation or manufacturing processes. It is predominantly composed of Carbon which is 'C' on the periodic table of elements. This early example of a coal sample, shows the important role that coal played/plays in Australia's energy generation and manufacturing processes. This specimen is part of a larger collection of geological and mineral specimens collected from around Australia (and some parts of the world) and donated to the Burke Museum between 1868-1880. A large percentage of these specimens were collected in Victoria as part of the Geological Survey of Victoria that begun in 1852 (in response to the Gold Rush) to study and map the geology of Victoria. Collecting geological specimens was an important part of mapping and understanding the scientific makeup of the earth. Many of these specimens were sent to research and collecting organisations across Australia, including the Burke Museum, to educate and encourage further study.Small piece of black coal with museum original labelGeological survey / R..... S...../ Locality Cape Patterson coal specimen, burke museum, geological survey of victoria, geological specimen, geology -
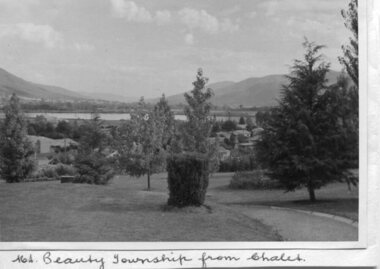 Kiewa Valley Historical Society
Photos - Mt Beauty and Surrounds, March 1960
Photos of the Kiewa Hydro Scheme and townships as they were in March 1960Pictorial record of the Hydro Electric Scheme in the 1960's when it was operated by the State Electricity Commission of Victoria (SECV). With the privatisation of the SECV in the 1990's the scheme passed to Southern Hydro and was then acquired by ALG Energy in 2005.4 black and white photographs of the Kiewa Valley area taken on a tour of the Kiewa Hydro Electric Scheme in March 1960 1. Mt Beauty township taken from the Mt Beauty Chalet 2. Mt Bogong, taken from Tawonga Gap 3. McKay portal pipeline 4. Bogong townshipmt beauty, kiewa hydro electric scheme, bogong, secv -
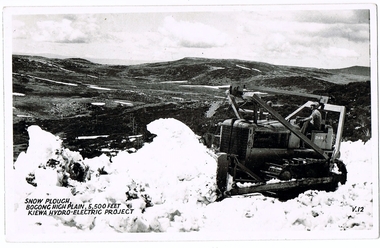 Kiewa Valley Historical Society
Postcard Circa 1950, Snow Plough, Bogong High Plain,5,500 Feet Kiewa Hydro-Electric Project, Circa 1950
This postcard was produced in the 1950's for the tourist trade in the Kiewa Valley and Alpine region. It encompasses the period when the State of Victoria was pressured by the ever increasing demand by industry and its population for electricity supplies. Hydro electricity was seen as an untapped natural resource to quench this demand. The Victorian Alps and the rivers flowing into its valleys was ideal for the construction of the Kiewa Hydro Electricity Scheme. The late 1940's saw the development of this scheme and the changing of sections of alpine landscape is covered by this and other postcards/pictures (tourists, construction workers, and established rural populations). This period in time was before the established wildlife and forest/nature groups became political activist who changed legislative acts to protect the environment. This rural region (Kiewa Valley/alpine plains) was at most only significant to a smaller group of winter sports, summer hikers/horse riders and rural farmers/graziers. The numbers of tourists and the increase in the local resident population was boosted by the construction of the Hydro Electricity Scheme. This influx to the regional population resulted in a corresponding diversity in services and brought about an environment that responded to a growing level of tourists and thereby permitting this industry to grow more rapidly than it would have naturally. This postcard details an attraction to the "cleaner" method of providing electricity. This postcard was purchased in 1950 by a surveyor at Landford's Gap. This item is a black and white photograph(professional) of a panoramic view of a snow plough clearing the unsealed road in 1950.This postcard is on quality paper and the reproduction of the picture is of a high standard.For other "tourist" postcards see 0480 (A) -(F) for other photos of similar postcards. kiewa valley tourism, victorian alps, alternate energy supplies, alpine population growth, secv, snow plough -
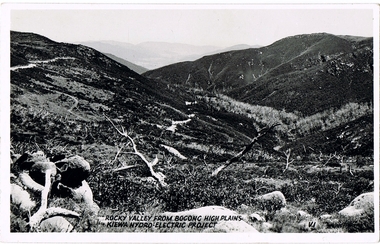 Kiewa Valley Historical Society
Postcard - Rocky Valley - Circa 1950, 1950
This postcard was produced in the 1950's for the tourist trade in the Kiewa Valley and Alpine region. It encompasses the period when the State of Victoria was pressured by the ever increasing demand by industry and its population for electricity supplies. Hydro electricity was seen as an untapped natural resource to quench this demand. The Victorian Alps and the rivers flowing into its valleys was ideal for the construction of the Kiewa Hydro Electricity Scheme. The late 1940's saw the development of this scheme and the changing of sections of alpine landscape is covered by this and other postcards/pictures (tourists, construction workers, and established rural populations). This period in time was before the established wildlife and forest/nature groups became political activist who changed legislative acts to protect the environment.This rural region (Kiewa Valley/alpine plains) was at most only significant to a smaller group of winter sports, summer hikers/horse riders and rural farmers/graziers. The numbers of tourists and the increase in the local resident population was boosted by the construction of the Hydro Electricity Scheme. This influx to the regional population resulted in a corresponding diversity in services and brought about an environment that responded to a growing level of tourists and thereby permitting this industry to grow more rapidly than it would have naturally. This postcard details an attraction to the "cleaner" method of providing electricity. This postcard was purchased in 1950 by a surveyor at Landford's Gap.This black and white photograph is from a Valentine's V2 Argus postcard. It is on a 200g/m paper density one side gloss. See also KVHS 0480 (A) to (L) for similar postcards. "ROCKY VALLEY FROM BOGONG HIGH PLAINS KIEWA HYDRO-ELECTRIC PROJECT" "V1"kiewa valley tourism, victorian alps, alternate energy supplies, alpine population growth, rocky valley, secv -
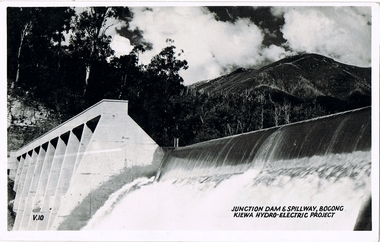 Kiewa Valley Historical Society
Postcard - Junction Dam - Circa 1950, Circa 1950's
This postcard was produced in the 1950's for the tourist trade in the Kiewa Valley and Alpine region. It encompasses the period when the State of Victoria was pressured by the ever increasing demand by industry and its population for electricity supplies. Hydro electricity was seen as an untapped natural resource to quench this demand. The Victorian Alps and the rivers flowing into its valleys was ideal for the construction of the Kiewa Hydro Electricity Scheme. The late 1940's saw the development of this scheme and the changing of sections of alpine landscape is covered by this and other postcards/pictures (tourists, construction workers, and established rural populations). This period in time was before the established wildlife and forest/nature groups became political activist who changed legislative acts to protect the environment.This rural region (Kiewa Valley/alpine plains) was at most only significant to a smaller group of winter sports, summer hikers/horse riders and rural farmers/graziers. The numbers of tourists and the increase in the local resident population was boosted by the construction of the Hydro Electricity Scheme. This influx to the regional population resulted in a corresponding diversity in services and brought about an environment that responded to a growing level of tourists and thereby permitting this industry to grow more rapidly than it would have naturally. This postcard details an attraction to the "cleaner" method of providing electricity. This postcard was purchased in 1950 by a surveyor at Landford's Gap.This black and white photograph is a Valentine's postcard, from a V2 Argus photograph. It is on a 200g/m paper density with only the photo side gloss.Front "JUNCTION DAM & SPILLWAY, BOGONG KIEWA HYDRO-ELECTRIC PROJECT" on the flip side "VALENTINE'S POST CARD " "A GENUINE PHOTOGRAPH"kiewa valley tourism, victorian alps, alternate energy supplies, alpine population growth, junction dam, secv -
 Kiewa Valley Historical Society
Postcard - Junction Dam - Circa 1950, Circa 1950
This postcard was produced in the 1950's for the tourist trade in the Kiewa Valley and Alpine region. It encompasses the period when the State of Victoria was pressured by the ever increasing demand by industry and its population for electricity supplies. Hydro electricity was seen as an untapped natural resource to quench this demand. The Victorian Alps and the rivers flowing into its valleys was ideal for the construction of the Kiewa Hydro Electricity Scheme. The late 1940's saw the development of this scheme and the changing of sections of alpine landscape is covered by this and other postcards/pictures (tourists, construction workers, and established rural populations). This period in time was before the established wildlife and forest/nature groups became political activist who changed legislative acts to protect the environment.This rural region (Kiewa Valley/alpine plains) was at most only significant to a smaller group of winter sports, summer hikers/horse riders and rural farmers/graziers. The numbers of tourists and the increase in the local resident population was boosted by the construction of the Hydro Electricity Scheme. This influx to the regional population resulted in a corresponding diversity in services and brought about an environment that responded to a growing level of tourists and thereby permitting this industry to grow more rapidly than it would have naturally. This postcard details an attraction to the "cleaner" method of providing electricity. This postcard was purchased in 1950 by a surveyor at Landford's Gap.This black and white photograph on a Valentine's postcard is from a V2 Argus photograph. It is on a 200g/m paper density one side gloss only/. See 0480 (A) -(L) for other photos of similar postcards."JUNCTION DAM & SPILLWAY, LAKE GUY, BOGONG, KIEWA HYDRO-ELECTRIC PROJECT" "V5" on the flip side" VALENTINE'S POST CARD " "A GENUINE PHOTOGRAPH"kiewa valley tourism, victorian alps, alternate energy supplies, alpine population growth, junction dam, secv -
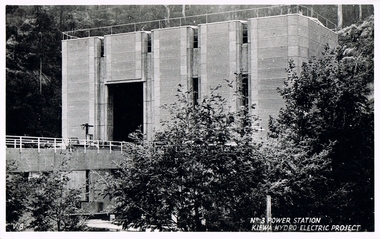 Kiewa Valley Historical Society
Postcard Circa 1950, No.3 Power Station Kiewa Hydro-electric Project "V.8", Circa 1950
This postcard was produced in the 1950's for the tourist trade in the Kiewa Valley and Alpine region. It encompasses the period when the State of Victoria was pressured by the ever increasing demand by industry and its population for electricity supplies. Hydro electricity was seen as an untapped natural resource to quench this demand. The Victorian Alps and the rivers flowing into its valleys was ideal for the construction of the Kiewa Hydro Electricity Scheme. The late 1940's saw the development of this scheme and the changing of sections of alpine landscape is covered by this and other postcards/pictures (tourists, construction workers, and established rural populations). This period in time was before the established wildlife and forest/nature groups became political activist who changed legislative acts to protect the environment.This rural region (Kiewa Valley/alpine plains) was at most only significant to a smaller group of winter sports, summer hikers/horse riders and rural farmers/graziers. The numbers of tourists and the increase in the local resident population was boosted by the construction of the Hydro Electricity Scheme. This influx to the regional population resulted in a corresponding diversity in services and brought about an environment that responded to a growing level of tourists and thereby permitting this industry to grow more rapidly than it would have naturally. This postcard details an attraction to the "cleaner" method of providing electricity. This postcard was purchased in 1950 by a surveyor at Landford's Gap.This black and white photograph from a Valentine's postcard is from a V2 Argus photograph postcard. It is on a 200g/m paper density photo side gloss. See 0480 (A) - (K) for other photos of similar postcards."No.3 POWER STATION KIEWA HYDRO ELECTRIC PROJECT" "V8"kiewa valley tourism, victorian alps, alternate energy supplies, alpine population growth, secv -
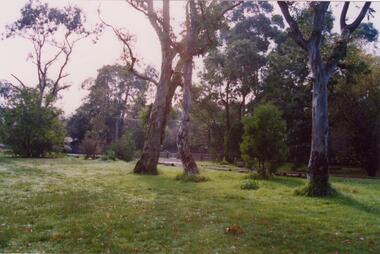 Glen Eira Historical Society
Article - Boyd Park
This file contains two items. Two original photographs of Boyd Park, date unknown. An article from the CAULFIELD/ PORT PHILLIP LEADER on a massive swamp gum tree that was felled by heavy winds in Boyd Park, Murrumbeena, dated 03/08/2012.glen eira, glen eira environment group, smith colin, caine paul, boyd park, murrumbeena, parks, conservation of natural land and energy economics, reserves, bushland, gardens, resources, trees, plants -
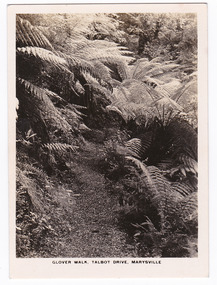 Marysville & District Historical Society
Photograph (item) - Black and white photograph, Rose Stereograph Company, Glover Walk, Talbot Drive, Marysville, 1913-1967
An early black and white photograph of Glover Walk which was off Lady Talbot Drive in Marysville, Victoria.An early black and white photograph of Glover Walk which was off Lady Talbot Drive in Marysville, Victoria. Glover Walk was named after Hannah Elizabeth Glover, a nurse who in 1908 established the Kerami guest house in Marysville. She became an active member of the local tourist association and was acclaimed for her 'energy and enterprise' (Riverine Herald, 31 December 1915). In this capacity she successfully lobbied government to fund walking tracks in the district, one of which was given her name. The photograph was also used to produce the Rose Series postcard P. 2312.marysville, victoria, photograph, glover walk, hannah elizabeth glover, lady talbot drive, talbot drive, p. 2312, rose stereograph company, souvenir, rose series postcard, marysville tourist association, kerami guest house -
Federation University Historical Collection
Book - Book - Scrapbook, Ballarat College of Advanced Education: Scrapbook of newspaper cutting, Book 5; March 1979 to August 1979
Newspaper cuttings relating to Ballarat College of Advanced Education. These are from various newspapers and include The Age, Ballarat Courier, The Australian, The Herald. The cuttings cover the period from 21 March 1979 to 4 August 1979. . Book with grey cover, front. Spiral bound.employment advertisements, application for enrolment, outline of courses, scholarships for bcae students, western mining corporation, gunther jahnks, stephen fernee, jim stringer, robert withers former student, earthquakes, new men at bcae, geoff westcott, garry kinnane, jeffrey leeuwenberg, study of muscle power, dr alan roberts, mark heuston, new at bcae, cao duc thac - school of business, bruce cossins - civil engineering, val lloyd - librarianship department, prof hilda elkins - librarianship department for 6 months, community support vital to colleges, inquiry committee in ballarat, growing concern for sports injuries, shortage of qualified metallurgists, 400 graduate, graeme jeffries engineering, accountancy prize to belinda tantau, john wach appointed to mt stromlo observatory, energy seminar, minister for minerals and energy, teacher union may put ban on bcae, bcae director replies, bcae indoor sports facilities popular, chemical institute branch formed, great hall takes shape, educationalists in ballarat, another degree for frank hurley, dr mosley on barrier reef, posters depict conservation, bcae gets gift of logo, bcae's first annual council meeting, pilot fatigue significant factor, management training - business survey, better decision makers, industrial safety, engineering heritage display, why people take risks, vtu boycott suspended, prof david klein u.s.a., prof praises bcae course, swimming instructors 2-day course, david jelbart retires, gunther jahnke wins arblaster award, bcae library expands, regional colleges -
Federation University Historical Collection
Book - Book - Scrapbook, Ballarat College of Advanced Education: Scrapbook of newspaper cutting, Book 6; August 1979 to January 1980
Newspaper cuttings relating to Ballarat College of Advanced Education. These are from various newspapers and include The Age, Ballarat Courier, The Australian, The Herald. The cuttings cover the period from 10 August 1979 to 30 January 1980. . Book with grey cover, front. Spiral bound.employment advertisements, application for enrolment, outline of courses, bcae open day on sunday, energy hysteria by lobby groups, farmer and his fuel supply, prof helen lyman, outreach subjuects, adult literacy, migrant education, a bush walk, moorabool river, energy and the farm, miners have learned from past mistakes, working holiday in america, more mining activity ahead, secondary students 'copping out' for 'soft options', national parks satisfy a need, dr myron sutton, dr ann sutton, bcae guidance for secondary students, peter blizzard sculptor, $1200 award, helping novice orienteers, bishop hazlewood apologises to bcae, 'verbal vandalism' says jack barker, soil conservation - in designs, stephen roberts, judy ellis, ballarat books on campus, education - buildings luxury image, what's in a name, sergeant family recital, reading skills depend on parental support, computer link a success, paddle your stone canoe, projects in tune with needs, voice training for the deaf turned into a game, career centre at work, rail link forum, bcar librarianship courses accredited, health and human relations education, concrete canoe club wins trophy, laa looking out for librarians, future plans for bcae, new policy on college entrance, final year arts students, forestry course, health education course, german safety expert visit, expert in safety engineering, physical education impotant in schools, lack of reading and numeracy skills, remedial neglect: who's to blame, teachers not doing job? not true, zig plavina retires, discussion on students reports, keith mcelroy asu's first coaching co-ordinator, great hall near completion -
Federation University Historical Collection
Book - Book - Scrapbook, Ballarat College of Advanced Education: Scrapbook of newspaper cutting, Book 10; September 1981 to May 1982
Newspaper cuttings relating to Ballarat College of Advanced Education. These are from various newspapers and include The Age, Ballarat Courier, The Australian, The Herald. The cuttings cover the period from 2 September 1981 to 6 May 1982. . Book with grey cover, front. Image of image of two trotters. Spiral bound.employment advertisements, application for enrolment, outline of courses, more students less money, bcae staff cuts, fewer graduates in engineering, half marathon, need for more maths and science students, energy resources control warning, bcae spring festival, companies woo bcae engineering graduates, engineering students and 'the iron horse', recreation survey, p e degree course, energy saving project, student winemakers, tom nestor wins award, nigerian students studies ground movement, sir arthur nicholson, golden taste of success, ivan durrant on art students, critical time for ballarat's economy, first group to complete arts degree, francis brown, john mcmahon, award in metallurgy, award in mechanical engineering, pottery group's first show, rich clays of ballarat, colleges to retrench staff, retirement of frank ryan, growing computer industry, new job in northern territory, break-in brumbies, ballarat's young jobless, librarians enter computer age, tertiary chief sacked, dr jim watson, hsc seminar at bcae, students eat too much fast food, chemistry graduate to work in canberra, stephen wilson, dianne budge to work in alice springs, physical fitness director of ymca, revamp for key tertiary commission, lake weed problem, businessmen wooed, move to promote health fitness, scholarships for students, robert allan artist, move to save bendigo course, hobby course for gold prospectors, john crump ceramics, day of firsts at bcae, track and field titles win, tamara beckier artist, abstract art, talks on future of regional colleges, government funding -
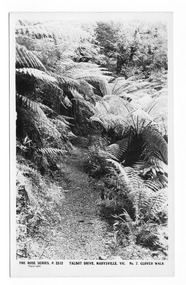 Marysville & District Historical Society
Postcard (item) - Black and white postcard, Rose Stereograph Company, Talbot Drive, Marysville, Vic. No. 7, Glover Walk, 1913-1967
A postcard in a series produced by the Rose Stereograph Company in Victoria, Australia as a souvenir of Marysville.An early black and white photograph of Glover Walk which was off Lady Talbot Drive in Marysville, Victoria. Glover Walk was named after Hannah Elizabeth Glover, a nurse who in 1908 established the Kerami guest house in Marysville. She became an active member of the local tourist association and was acclaimed for her 'energy and enterprise' (Riverine Herald, 31 December 1915). In this capacity she successfully lobbied government to fund walking tracks in the district, one of which was given her name. This postcard was produced by the Rose Stereograph Company as a souvenir of Marysville.POST CARD The "Rose" Series/ De Luxe A Real Photograph/ Produced in Australia Published by the Rose Stereograph Co.,/ Armadale, Victoria.marysville, victoria, photograph, glover walk, hannah elizabeth glover, lady talbot drive, talbot drive, p. 2312, rose stereograph company, souvenir, rose series postcard, marysville tourist association, kerami guest house -
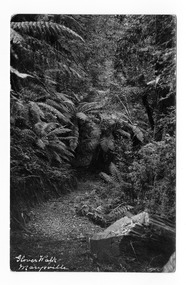 Marysville & District Historical Society
Postcard (item) - Black and white postcard, Glover Walk Marysville, Unknown
An early black and white photograph of Glover Walk which was off Lady Talbot Drive in Marysville, Victoria.An early black and white photograph of Glover Walk which was off Lady Talbot Drive in Marysville, Victoria. Glover Walk was named after Hannah Elizabeth Glover, a nurse who in 1908 established the Kerami guest house in Marysville. She became an active member of the local tourist association and was acclaimed for her 'energy and enterprise' (Riverine Herald, 31 December 1915). In this capacity she successfully lobbied government to fund walking tracks in the district, one of which was given her name.POST CARD PLACE/ POSTAGE/ STAMP/ HERE Marysville/ Dear Kath/ We managed to get here safely/ after a lovely trip, but it/ has done nothing but rain/ since we arrived. It looks/ as if it is going to clear up/ a bit & perhaps we will/ be able to get a few fish. Being over in this spot I/ am unable to send you/ the weekly suply of ??????/ so please sweetheart let me/ off this time. I hope to/ see you all again soon./ Love + kisses from your Valmarysville, victoria, glover walk, hannah elizabeth glover, lady talbot drive, talbot drive, souvenir, marysville tourist association, kerami guest house, postcard -
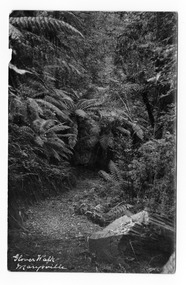 Marysville & District Historical Society
Postcard (item) - Black and white postcard, Glover Walk Marysville, Unknown
An early black and white photograph of Glover Walk which was off Lady Talbot Drive in Marysville, Victoria.An early black and white photograph of Glover Walk which was off Lady Talbot Drive in Marysville, Victoria. Glover Walk was named after Hannah Elizabeth Glover, a nurse who in 1908 established the Kerami guest house in Marysville. She became an active member of the local tourist association and was acclaimed for her 'energy and enterprise' (Riverine Herald, 31 December 1915). In this capacity she successfully lobbied government to fund walking tracks in the district, one of which was given her name.POST CARD PLACE/ POSTAGE/ STAMP/ HERE Marysville/ Jan 29th/18 Dear Lillie/ We arrived here safely on Sat after a very hot/ drive, we rested at several places on the way. The/ road is very heavy, the scenery is extremely/ beautiful, it repay one to see the beauty./ I have never seen such scenery. Weather/ today is very oppressive, it has rained all/ this morning. We leave for home tomorrow Wed./ I hope you are having a very enjoyable time/ Love from ??? Jerome ???? Sonya + Mothermarysville, victoria, glover walk, hannah elizabeth glover, lady talbot drive, talbot drive, souvenir, marysville tourist association, kerami guest house, postcard