Showing 283 items matching "beach boxes"
-
 Melbourne Tram Museum
Ephemera - Tram Route Guides, Public Transport Victoria (PTV), "Tram Route Guide", Feb. 2016
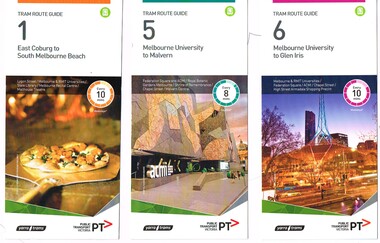
Set of 18 Tram Route Guides, published during 2016. Each comprises a vertical DL folded sheet, full colour for the nominated routes, with Yarra Trams and PTV logos, listing the stops, interchanges with bus and other tram services, ticketing zones, estimated frequencies with adverts for Night tram services, TramTracker and Myki tickets. .1 - Route 1 - East Coburg to South Melbourne Beach .2 - Route 5 - Melbourne University to Malvern .3 - Route 6 - Melbourne University to Glen Iris .4 - Route 8 - Moreland to Toorak .5 -Route 57 - West Maribyrnong to Flinders St Station (2 copies) .6 - Route 70 - Wattle Park to Waterfront City Docklands .7 - Route 72 - Melbourne University to Camberwell .8 - Route 75 - Vermont South to Etihad Stadium / Bourke St Docklands .9 - Route 82 - Footscray to Moonee Ponds .10 - Route 19 - North Coburg to Flinders St Station .11 - Route 55 - West Coburg to Domain Interchange (two copies held) .12 - Route 59 - Airport West to Flinders St Station .13 - Route 30 - St Vincent's Plaza to Ethida Stadium Docklands .14 - Route 12 - Victoria Gardens to St Kilda / Fitzroy St .15 - Route 64 - Melbourne University to East Brighton .16 - Route 78 - North Richmond to Balaclava (via Prahran) .17 - Route 86 - Bundoora (RMIT) to Waterfront City Docklands .18 - Route 96 - East Brunswick to St Kilda Beach .19 - Route 11 - West Preston to Victoria Harbour Docklands ,20 - Route 16 - Melbourne University to Kew via St Kilda .21 - Route 48 - North Balwyn to Victoria Harbour Docklands .22 - Route 67 - Melbourne University to Carnegie .23 - Route 109 - Box Hill to Port Melbourne See Reg Item 2396 for 2012, 2939 for 2015 and 2940 for 2014 versions Items .13 to .18 added 2/9/18Item 11 has the "5" changed to "8" in Texta - see history of object.trams, tramways, timetables, maps, route 1, route 5, route 6, route 8, route 11, route 16, route 132, route 19, route 30, route 48, route 55, route 57, route 59, route 64, route 67, route 70, route 72, route 75, route 78, route 82, route 86, route 96, route 109, east coburg, west coburg, airport west, north coburg, south melbourne, malvern, glen iris, moreland, toorak, west maribyrnong, wattle park, docklands, camberwell, vermont south, footscray, moonee ponds, st vincent's plaza, victoria gardens, east brighton, north richmond, balaclava, bundoora, east brunswick, west preston, kew, north balwyn, carnegie, box hill -
 Melbourne Tram Museum
Ephemera - Tram Route Guides, Public Transport Victoria (PTV), "Tram Route Guide", Oct. 2011 to Oct 2012
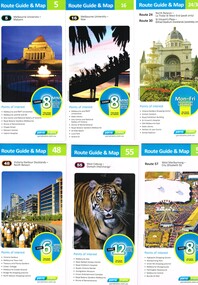
Set of 23 Tram Route Guides, published during 2011 or 2012. Each comprises a vertical DL folded sheet, full colour for the nominated routes, with Yarra Trams, Myki and TramTracker logos, listing the stops, interchanges with bus and other tram services, ticketing zones, estimated frequencies with adverts for Night tram services, TramTracker and Myki tickets. .1 - Route 5 - Melbourne University to Malvern .2 - Route 16 - Melbourne University to Kew .3 - Route 24 and 30 - North Balwyn - Latrobe St and St Vincent's Plaza - Etihad Stadium .4 - Route 48 - North Balwyn - Victoria Harbour Docklands .5 - Route 55 - West Coburg - Domain Interchange .6 - Route 57 - West Maribyrnong to Flinders St Station .7 - Route 59 - Airport West - City .8 - Route 75 - City - Vermont South .9 - Route 78 and 79 - North Richmond - Prahran or St Kilda Beach .10 - Route 82 - Footscray to Moonee Ponds .11 - Route 96 - East Brunswick - St Kilda Beach .12 - ditto .13 - Route 112/11 - West Preston - St Kilda, West Preston - Victoria Harbour Docklands .14 - Route 70 - Wattle Park - Waterfront City Docklands .15 - Route 86/95 - Bundoora - Waterfront City Docklands and Melbourne Museum - City .16 - Route 1 - East Coburg - South Melbourne Beach .17 - Route 3/3a - Melbourne University to East Malvern .18 - Route 6 - Melbourne University to - Glen Iris .19 - Route 8 - Moreland to Toorak .20 - Route 64 - Melbourne University to East Brighton .21 - Route 67 - Melbourne University to Carnegie .22 - Route 72 - Melbourne University to Camberwell .23 - Route 109 - Box Hill - Port Melbourne and Route 31 - Hoddle St - Victoria Harbour - Docklands .24 - Route 75 - Vermont South - dated 10/2011 See Reg Item 2278 for 2016 versionstrams, tramways, timetables, maps, route 1, route 3/3a, route 5, route 6, route 8, route 11, route 16, route 24, route 30, route 31, route 48, route 55, route 57, route 59, route 64, route 67, route 70, route 72, route 75, route 78, route 79, route 82, route 86, route 95, route 96, route 109, route 112, east coburg, south melbourne, malvern, west maribyrnong, airport west, docklands, north balwyn, west coburg, domain interchange, north richmond, prahran, east brunswick, st kilda, vermont south, footscray, moonee ponds, kew, st vincent's plaza, preston, wattle park, bundoora, museum, south melbourne beach, east coburg, east malvern, glen iris, toorak, moreland, east brighton, carnegie, camberwell, box hill, port melbourne -
 Melbourne Tram Museum
Document - Research Notes, H. S. McComb, Domain Road, Park St, Toorak Road and Chapel St lines, c1930
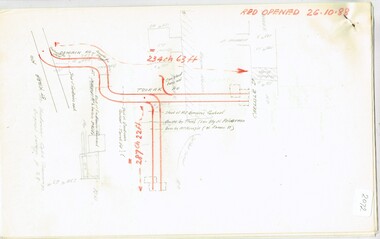
Notes 6 pages, pinned together, giving details, opening dates, terminals, depot entries, sheave pits, curves, for the Domain Road, Park St, Toorak Road and Chapel St lines. Second set of notes 4 pages for the Port Melbourne and South Melbourne beach lines via City Road and Victoria St respectively. Single page sketches for both the Flemington Road via North Melbourne and Spencer St to North Melbourne lines - no dimensions or survey notes. Items 2064 to 2075 within box 72.3 in a brown folder marked "MT&O Co." red pencil on the front cover.trams, tramways, mto co, cable trams, drawings, reports, surveys, toorak rd, chapel st, south melbourne beach, port melbourne, city rd, victoria st, north melbourne, flemington rd -
 Melbourne Tram Museum
Photograph - Block Mounted Photograph, c1934 original photo, print - c1980
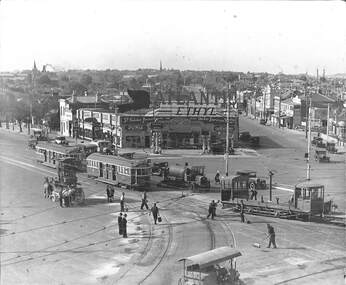
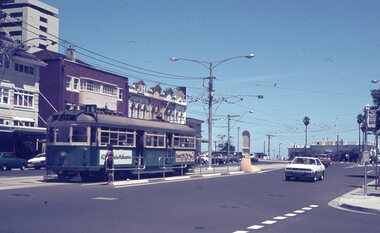
Block mounted photograph of a scene c1934 at St Kilda Junction, featuring re-surfacing of the junction tram track - used on page 3 of the December issue of Bellcord. "St Kilda Junction looking northward as tramway roadworks near completion. Workmen are dispersing gravel to cover recently applied bitumen, perhaps from the tanker (centre). Ballast Motor 11 pushes a ballast trailer ahead of W2 571 to St Kilda Beach and a second car to East Malvern. A horse drawn tower wagon (left), heavy roller (foreground) and private motor vehicles stand by. On the Punt Road corner is a petrol station advertising a then popular brand, Atlantic Ethyl, advertising Ford cars. Segments of the intricate junction overhead and trackwork are visible." 2nd copy added from the Donation by David Webb of the Keith Kings collection - in box 89.trams, tramways, st kilda junction, tower wagon, trackwork, freight tram, ballast motor, trailers, tram 11, tram 571 -
 Melbourne Tram Museum
Negative - Copy - L 101 Balaclava Junction Hawthorn Road Caufield, early 1940s
Copy negative of a photograph of L 101 Balaclava Junction Hawthorn Road Caufield, with a destination of Glenhuntly Depot. The tram was fitted with a route number boxes in June 1939, which provides a date era for the tram, but is yet to have its drop centre floor raised. Behind the tram is the shelter at this location along with a sign stating the trams could be taken to Balaclava, St Kilda Beach and Caulfield, along with a tram stop sign and an End Section sign.Yields information about the use of L class trams.Copy negative of a black and white photographtramways, caulfield, l class, tram 101, hawthorn road, shelters, signs, trams -
 Melbourne Tram Museum
Photograph - set of 9 Black & White Photograph/s, Melbourne & Metropolitan Tramways Board (MMTB), 1966
Series of 9 black and white photographs of the traffic congestion in the CBD during 1951. .1 - view looking south along Spencer St from Collins St showing the VR Head office, and the railway viaduct with a Berger Paint advertisement, Has one wide body tram with dash canopy lighting and three W2's. Also one small bus. Has "G3" in pencil on rear. .2 - similar view but with a different vehicle mix - W2 317 (Richmond Route 28), an SW6 route 27 and another W2 (route 41). Includes one large truck carrying Land Rover boxes. Typed on rear "Enlargement of No. 72 - Sheet No. 26 (Report P25/1/8) and in ink initials and "For Testing Engs 1/11/51". .3 - View looking north along Swanston St Princes Bridge with a route 6 tram and Princes Bridge Station and St Pauls Cathedral. On rear in pencil "11/2" .4 - Spencer St - trams crossing Spencer St bridge - W5 781 (Route 10) and a W2 649, route 9, South Melbourne Beach. .5 - Queensbridge under bridge - showing many cars jammed and the railway viaduct. .6 - ?? - Collins St - National Mutual and Shaw Savill Line offices - has a Safety Zone stand. .7 - Collins St looking east from Market St - with many trams in the view and many cars. .8 - Collins at Market St with a SW6 with dash canopy lighting - route 45, followed by a route 9A .9 - same location - total chaos. See also Reg 4520 for another 7 photos of the same series.trams, tramways, traffic control, congestion, spencer st, route 27, route 28, route 41, route 6, princes bridge, swanston st, w2 class, sw6 class, route 10, route 9, spencer st bridge, market st, collins st, route 45, route 9a, tram 317, tram 781, tram 649 -
 Melbourne Tram Museum
Ephemera - Timetable, Yarra Trams, Set of 22 Yarra Trams timetables, 2003 and 2004
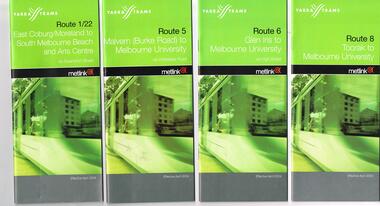
Set of 22 Yarra Trams timetables, green grey cover with route number on cover, giving details of popular destination, check points, use of Metcards and contact details, tram hire, frequency, a Welcome to Swanston Trams, description of route and route map. .1 - Route 1/22 - East Coburg / Moreland - South Melbourne Beach and Arts Centre - April 2004 - 36 pages. .2 - Route 5 - Malvern (Burke Rd) - University - April 2004 - 32 pages. .3 - Route 6 - Glen Iris - City - April 2004 - 20 pages. .4 - Route 8 - Toorak - April 2004 - 20 pages. .5 - Route 16 - St Kilda Beach - University - April 2004 - 24 pages. .6 - Route 48 - North Balwyn to Docklands - May 2003 - 28 pages .7 - Route 57 - West Maribyrnong - City - April 2004 - 28 pages. .8 - Route 59 - Airport West - City - April 2004 - 32 pages. .9 - Route 64 - East Brighton - University - April 2004 - 28 pages. .10 - Route 67 - Carnegie - City - April 2004 - 20 pages. .11 - Route 70 - Wattle Park - City - May 2003 - 24 pages .12 - Route 72 - Camberwell - University - April 2004 - 28 pages. .13 - Route 78/79 - North Richmond - Prahran or St Kilda Beach - April 2004 - 20 pages .14 - Route 82 - Moonee Pond - Footscray - April 2004 - 20 pages. .15 - Route 109 - Port Melbourne to Box Hill - May 2003 - 28 pages. .16 - Route 112 - Sth Melbourne/St Kilda Beach to West Preston - May 2003 - 44 pages. .17 - Route 3 - East Malvern to Melbourne University - April 2004 - 20 pages .18 - Route 16 - Melbourne University to Kew - Oct. 2004 - 40 pages with fold out map .19 - Route 24 - North Balwyn to LaTrobe St and Route 30 - St Vincent's Plaza to Flinders St via Docklands - 8 pages. .20 - Route 69 - Kew (Cotham Road) to St Kilda Beach - April 2004 .21 - Route 86 - Bundoora to Central Pier - May 2003 .22 - Route 96 - St Kilda Beach to East Brunswick - Sept 2002Some have number notes and notes written inside about changes or errors in ink. See History.trams, tramways, yarra trams, tram services, timetables, route 1, route 3, route 22, route 5, route 6, route 8, route 16, route 24, route 30, route 48, route 57, route 59, route 64, route 67, route 69, route 70, route 72, route 78, route 79, route 86, route 96, route 109, route 112 -
 Melbourne Tram Museum
Functional object - Tramcar component, Boselli Italy, Luminator Texas, Set of six destination indicator equipment that was fitted to Z, Z3 and B class trams, c1975 - 1990's?
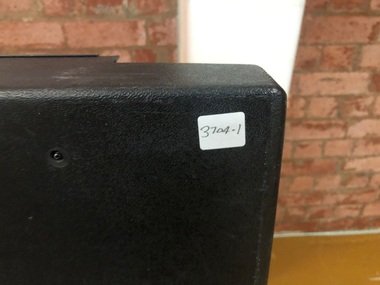
Set of six destination indicator equipment that was fitted to Z, Z3 and B class trams. .1 - dot matrix type destination sign fitted to the side of a B class tram - set at Preston Depot - serial number 232636 - Luminator type, back cover loose, 180H x 1300W x 100D. See images 3704i1a to e. .2 - dot matrix type route number fitted to the front of a tram, type fitted to B2 class tram, set at 86D, serial number 273644 - Luminator type, marked "163 No", 240H x 350W x 135D. See images 3704i2a to d. .3 - flipper type, side destination type, marked "ex 53" (Z class tram), made in Italy by Boselli has yellow label 37/702S, serial number 40A1603, set to St Kilda Beach and stamped 136 on one flange. 120H x 330W x 165D. See images 3704i3a to c .4 - flipper type, destination box, with markings "B'Wick Flaps", with labels "New" "Universal A flaps" made in Italy by Boselli, serial number 40A6623, set to St Kilda Junc". 210H x 1000W x 1900. See images 3704i4a to d. .5 - flap from an above type box, half of "Richmond" and "South Melb Depot", 970W x 80H. See images 3704i5a to b .6 - controller box, marked "No. 105" on rear, serial number 202311 Luminator, numeric pad, illuminated display and five control buttons made by gulton Luminator division fitted to a B2 tram. See images 3704i6a to b .7 - dot matrix destination sign fitted to the front of a B2 class tram, set to "Not in Service", Serial number 502626 Luminator, 220H x 1300W x 165D, See images 3704i7a to e. Source of items 3 and 4 name based on drawings held by the Museum for the destination signs fitted to Z class trams. Refer to drawing R11-982 as an example. Luminator made by Luminator Technology Group Texas - see https://www.ltgglobal.com/ access 12/7/2019. Imagetrams, tramways, destination indicators, z3 class, transport equipment, z class, b class -
 Melbourne Tram Museum
Album - Robert Thomson Slide Collection, "Melbourne 1968"
4182 - Box 2 - Melbourne 1968 (RT033-054) RT033 Dandenong Rd - tram 870 - "St Kilda Bch - Balaclava Rd" - route 69 RT034 St Kilda Rd - tram 262 - "South Melb Beach" - route 2A RT035 Sth Melb Beach Ter - tram 262 - "City" - route 2A RT036 Wallen Rd - tram 923 - "City" - route 70 RT037 Dandenong Rd - tram 438 - "Malvern - Burke Rd" - route 5 RT038 Batman Ave Ter - tram 851 - "Wattle Park Warrigal Rd" - route 70 RT039 Batman Ave - tram 864 - "City" - route 70 RT040 Princes Bridge - tram 874 - "Moreland" - route 15 RT041 E Brunswick Ter - tram 1038 - "City - Spencer St" - route 96 RT042 Victoria Pde - tram 673 - "South Melb & St Kilda Beach" - route 12 RT043 Dandenong Rd at St Kilda Junction? RT044 Dandenong Rd at St Kilda Junction? RT045 St Kilda Jct? RT046 Wellington St - tram 811 - "City" - route 64 RT047 St Kilda Jct RT048 St Kilda Jct? - trams 968 & 902 - "Carnegie" & "City" route 4 RT049 St Kilda Jct? - trams 968 & 902 - "Carnegie" & "City" route 4 RT050 Carnegie Single Line - tram 774 - "City" - route 4 RT051 Nth Fitzroy Depot - buses RT052 Wattle Park Single Line - tram 823 - "Wattle Park Elgar Rd" - route 70 RT053 Wattle Park Single Line - tram 371 - "Wattle Park Elgar Rd" - route 70 RT054 Essendon Reserved Track - tram 449 - "City" - route 59Demonstrates the work of Robert Thomson in photography, collection and/or production of slidesAssembled album in a black presentation folder of 22 colour slides, collected or produced by Robert Thomson. All photographs have been scanned and placed on the Museum's G drive. A list of all photographs with details has been compiled. melbourne, tramways, trams, track construction -
 Melbourne Tram Museum
Album - Robert Thomson Slide Collection, "January 1980 Box 2 - COTMA 1982"
Photo - see pdf file for further information. Number Brief Description RT315 Fitzroy St St Kilda 27-1-80 - tram 900 - "City" - route 16 RT316 Mont Albert Terminus 27-1-80 - tram 937 - "City" - route 42 RT317 Footscray Terminus 26-1-80 - tram 700 - route 82? RT318 Hawthorn Depot 27-1-80 - tram V214 & tram 56 - "Wattle Park - Elgar Rd" - route 70 RT319 Hawthorn Depot 27-1-80 - tram V214 RT320 Swan St Burnley 27-1-80 - tram V214 RT321 Batman Avenue 27-1-80 - tram V214 RT322 Sth Melbourne Beach Terminus 27-1-80 - tram 757 - "East Coburg Moreland" - route 1 RT323 Mitcham Station 24-1-80 - bus 794 -"Doncaster Jun" - route 281 RT324 COTMA 1982 Sth Melb Depot RT325 COTMA 1982 Sth Melb Depot - tram 8W - "Special" RT326 COTMA 1982 Sth Melb Depot - tram 587 RT327 COTMA 1982 Sth Melb Depot - tram 587 RT328 COTMA 1982 Sth Melb Depot - Tramways Emergency Truck RT329 COTMA 1982 Sth Melb Depot - track stockpile RT330 COTMA 1982 Sth Melb Depot - emergency trucks and lifts RT331 1982 West Coburg Dawson St Relay - tram 764 - "Domain Rd" - route 56 RT332 1982 Hawthorn Depot - tram 610 - "Special" & tram 469 - "Special" RT333 1982 Preston Workshops - tram 201 RT334 1982 Preston Workshops - tram 202 and tram 46 - note this car repainted into the Z3 Deep Yellow livery. RT335 1982 Victoria Pde - tram 729 -"Mont Albert" - route 42 Demonstrates the work of Robert Thomson in photography, collection and/or production of slidesAssembled album in a black presentation folder of 21 colour slides, collected or produced by Robert Thomson. A list of all photographs with details has been compiled. melbourne, tramways, trams, z3 class, z1 class, v class, w5 class, w2 class, y1 class, y class, south melbourne depot, vr class, tram 700, tram 214, tram 900, route 16, sw6 class, fitzroy st, mont albert, route 42, tram 937, footscray, hawthorn depot, z1, tram 46, route 70, swan st, batman avenue, south melbourne beach, tram 757, mitcham station, aec, mkv1 class, bus 794, route 281, tram 8w, tram 587, tram 56, international, route 56, tram 764, dawson st, tram 610, tram 469, preston workshops, tram 201, tram 202, tram 729, victoria parade -
 Melbourne Tram Museum
Ephemera - Timetable, Yarra Trams, Set of seven Yarra Trams timetables, 5/2003 to 9/2006
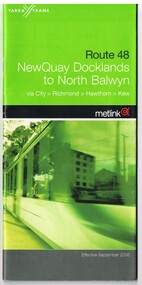
Set of seven Yarra Trams timetables, green cover, centre stapled with contact details on rear. All provide details about Yarra Trams, Metlink, Metcards and Frequency of Service. .1 - Printed 34 page book stapled timetable for "Route 48 - North Quay Docklands to North Balwyn" tram service, dated September 2006 with fold out covers. .2 - Printed 30 page book stapled timetable for "Route 59 - Airport West to City" tram service, dated Effective April 2004, gives details of route, check point and description of other Essendon Depot routes. .3 - Printed 40 page book stapled timetable for "Route 109 - Box Hill to Port Melbourne" tram service, dated September 2006 with fold out covers. .4 - Printed 44 page book stapled timetable for "Route 112 - South Melb./St. Kilda Beach to West Preston" tram service, date May 2003. .5 - Printed 36 page book stapled timetable for "Route 19 - North Coburg to City" tram service, dated April 2004. .6 - Printed 24 pages book stapled timetable for "Route 70 - Wattle Park to City" tram service, dated May 2003 .7 - Printed 40 page book stapled timetable for "Route 75 Vermont South to City" tram service, dated July 2004 with fold out covers. Full Image of .5 added 9/4/17 following a query about route 19 timetables - see image i2trams, tramways, tickets, yarra trams, tram services, timetables, route 48, route 59, route 109, route 112, route 19, route 70, route 75 -
 Melbourne Tram Museum
Ephemera - Timetable - bus - The Met - set of 24, The Met, 1992 & 1993
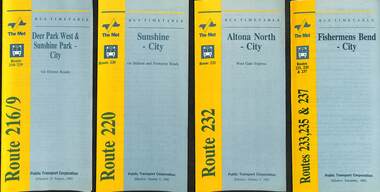
SSet of 24 The Met bus timetables, with diagrammatic map, major stops and contact details. All dated during1993 unless noted otherwise. 1 - Route 216/9 - Deer Park West & Sunshine Park - City 2 - Route 220 - Sunshine - City - 1992 3 - Route 232 - Altona North - City - 1992 4 - Route 233 - Fishermens Bend - City - 1992 5 - Route 254 - Northland Shopping Centre - City - 1992 6 - Route 256 - La Trobe Uni - City - 1992 7 - Routes 258 & 259 - Northland Shopping Centre, and La Trobe Uni - City via Eastern Freeway - 1992 8 - Route 260 etc - Deep Creek Templestow - Donvale - City 9 - Route 264 - Mitcham, Donvale City 10 - Route 265 - Deep Creek - City 11 - Route 602 - Brighton - city 12 - Route 269, 291 and 296 - Greensborough, Heidelberg & Newmans Road to Box Hill 13 - Route 272 - Warrandyte - City 14 - Route 276 & 278 - Warrandyte - City 15 - Route 284 & 270 - East Kew - City or Box Hill 16 - Route 285 - The Pines - Box Hill 17 - Route 286 & 288 - The Pines and Templestowe - Box Hill 18 - Route 290 - North Nunawading - Box Hill 19 - Route 292 etc - Box Hill, Deep Creek, Ringwood, Warrandyte 20 - Route 301, 281 315 - Ringwood, Park Orchards and Donvale - City 21 - Route 305 - Box Hill - Ringwood 22 - Route 366 & 367 - Ringwood - Croydon 23 - Route 600 - St Kilda - Brighton Beach - 1992 24 - Route 601 - Gardenvale - City - 1992Yields information about some of The Met bus services 1993Set of 24 The Met timetables, DL size, printed in two colours.timetables, the met, route 216, route 220, route 232, route 233, route 254, route 258, route 259, route 260, route 264, route 265, route 256, route 602, route 269, route 272, route 276, route 284, route 270, route 285, route 286, route 288, route 290, route 292, route 301, route 305, route 366, route 367, route 600, route 601 -
 Melbourne Tram Museum
Map, Melbourne & Metropolitan Tramways Board (MMTB), MMTB Route Maps, 1979
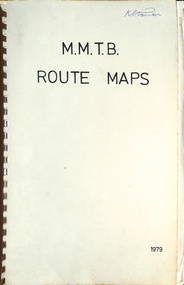
Series of colour maps for various tram and bus routes, dated 1979. Also contained, not scanned are letters, reports, and specifications for printing these maps for use in shelters etc. Some have the Transport Information Centre telephone printed on them. Some are finished with a plastic laminate finish on either one or both sides. Show the major cross streets, parks, schools, other tram routes, major stop numbers, and railway lines. See also item 3909 for another example of these. Trams 1 - City route guide - R9/77 - showing all route numbers and destinations that passed through the CBD. 2 - Bourke St tram routes - R4/77 - East Brunswick Blyth St and East Preston Tyler St and intermediate routes, routes 95, 96, 97, 90, 89 and 88. 3 - Malvern, East Malvern, Carnegie, and East Brighton Tram Routes (from St Kilda Junction) - R1/79 - shows routes 5, 3, 67, 66, 61, 62, and 64. 4 - Elizabeth St tram routes - R12/77 - Essendon Airport, West Maribyrnong, North Coburg lines, routes 50, 58, 60, 54, 57, 52. 49, 59, 18, 20 and 19 5 - Flinders St tram routes - R5/78 - North Balwyn, East Burwood, routes 48, 40, 41, Hartwell, 28, 74 and 75 6 - Kew - St Kilda Beach - R1/79 - Route 69. 7 - Mont - Albert City - R11/77, shows routes 43. 47. 45. 44 8 - St Kilda Rd Tram Routes R12/77 - details South Melbourne Beach, route 1 and route 2 and St Kilda Beach routes 15, 16, and 55 otherwise shows where the various routes branch off St Kilda Road 9 - Batman Ave tram routes - R9/77 - Wattle Park, North Richmond and Prahran - routes 70, 71, 78 and 79. 10 - Footscray - Moonee Ponds - R3/81 - Route 82 11 - Swanston St tram guide - R1/79 - lists all routes and route numbers that branch or cross Swanston St between Grattan St and St Kilda Junction. 12 - Toorak Camberwell and Glen Iris tram route with Camberwell Junction and Malvern Town Hall, R1/79, routes 8, 7, 6, 72, and 73 shown. 13 - West Preston - Beach tram routes - R12/77 - routes 10, 11, 9 and 12, 14 - William St tram routes - R12/77 - Route 55, 56, and 63 - South Melbourne Depot and Domain. Buses 1 - Footscray, Sunshine, Deer Park, Nth Altona & Fishermans Bend - R2/79 2 - Box Hill bus routes to Templestowe, Heidelberg & East Kew - R6/78 - notes superseded by R3/82 3 - Plan of Russell St Melbourne bus departure bays. 4 - Box Hill, Mitcham & Ringwood bus routes to East Doncaster & Warrandyte - R3/82 5 - City - Warrandyte & East Doncaster bus routes - R3/82 & R6/78 6 - Bulleen - City - Port Melbourne - Garden City Bus route - R6/78 7 - North Altona - City bus route - 11/78 8 - Clifton Hill - Elsternwick - R2/79 9 - La Trobe - Northland - West Heidelberg - City Bus Service via East Freeway - 11/79 and R3/81 10 - Box Hill, Mitcham & Ringwood Bus Routes to East Doncaster & Warrandyte - R10/84 - with the Metropolitan Transit logo.Yields information about tram and bus routes in late 1970s early 1980s.Book - brown comb binding, card and clear plastic covers containing both bound and unbound maps and documents.K C Painter on front cover in ink.tramways, mmtb, tram routes, maps, bus routes, route numbers, routes, route guide -
 Melbourne Tram Museum
Document - Notices to Traffic Staff, Melbourne & Metropolitan Tramways Board (MMTB), "Satchel boxes", 1953
Set of 6 notices glued to one backing sheet: 1 - "Satchel boxes" - C7567. dated 4/9/53 regarding location of Satchel boxes in the City area. 2 - ditto - to Depot Masters - dated 4/9/53 3 - ditto to Superintendents - dated 8/9/53 4 - Notice to Conductors "Transfers to St Kilda Beach from Hawthorn Road trams D7566, 4/9/1953 5 - "Method of turning buses" - City to Elgin & Lygon St - 22/12/1948 6 - Buses running into service from Central Bus Depot, to pick up passengers in Nicholson St - 10/9/1953 All signed by F G Wraith.Yields information about misc. matters of 1953 and 1948.Set of 6 notices printed, and glued to a sheet of paper on both sides.tramways, satchel boxes, correspondence, buses, nicholson st -
Bialik College
Document (series) - Drama and musical production programs and promotional material, 1980s-2010s
1990s, 2000s, 2010s1990s, 2000s, 2010s -
 Ringwood and District Historical Society
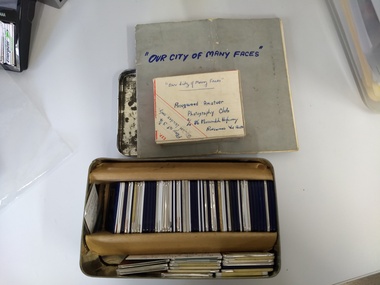
Mixed media, Ringwood Amateur Photography Club 1965 Slide Show "Our City of Many Faces" - Audio, Slides and Video
This group of items is retained as a record of a typical project of the Ringwood Amateur Photography using multi-media facilities available in 1965 - ie slides and slide projector and an audio tape reocrding to accompany the slideshow. Project by the RIngwood Amateur Photography Club in 1965 - a slideshow entitled "Our City of Many Faces" cvoering Melbourne, the Dandenongs, Bayside beach etc. Originally donated as a tin box of Slides, and audio narration on reel of tape, and a handwritten booklet with the text and notation of slide number for each text comment. The slides were then scanned at RDHS Archives (2024), the audio tape was converted to a digital file by Aidem Media, and the slides and audio file combined into a digital movie by Ken Briscoe and Rob Carter (RDHS) which was subsequently shown to a meeting of RDHS. The speaker on the audio tape is not identified After conversion and cataloguing, the physical slides, audio tape and tin were disposed of. Only the handwritten script booklet is retained (along with the digital files). The final movie is not loaded to Victorian Collections (256Mb) but is available from the RDHS Archives. Attached is a pdf copy of the script booklet, the audio tape digital copy, a pdf table index to images, and images of the tin and each of the slides. Annotation to the Handwritten Booklet: "A record of Time and Tide in Ringwood, Melbourne, Australia". -
 Melbourne Tram Museum
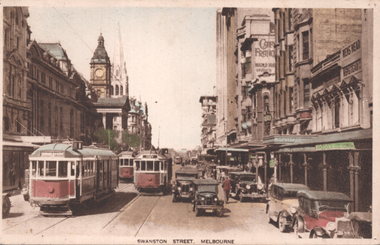
Postcard, "Swanston Street Melbourne", c1929
Photo looking south in Swanston St from near Bourke St with three W2 class trams in the view, all fitted with route number boxes. Tram 486 (St Kilda Beach route 1), tram 585 (City Route 4), and another route 4 southbound. All the trams have been given a red colour. in the background are the Town Hall, Hepstead Men's wear. The Shrine of Remembrance can just be seen.Yields information about Swanston St during the mid 1930s.Postcard - printed, unused, part colour with Ken Magor stamp on the rear.In pencil "All W2" and given Ken Magor No. 2397.trams, tramways, w2 class, swanston st, tram 585, tram 486, route 1, route 4 -
 Whitehorse Historical Society Inc.
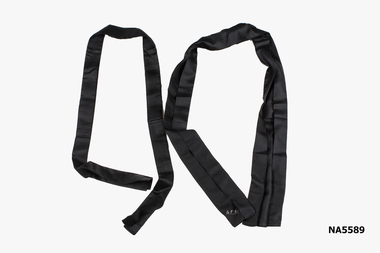
Uniform - Sailors' uniform ribbons, C 1940s
Part of the uniform of Leading Wireman Allan Edward Beach. Part of the uniform worn by Beach, Allan Edward, Service no. 25718. Date of birth 6 Nov. 1913 - Box Hill Place of enlist - Melbourne -leading wireman Died 29 January 1981 Buried: Springvale Botanical Cemetery Copy of research - National Archives of Australia Two pleated silk ribbons, which form part of the uniform of Leading Wireman, Allan Edward Beach. See also NA5582 Tunic, NA5585 Trousers, NA5581 Dicky front, NA5578 Collar, NA5586 Lanyard, NA5589 Two Ribbons, NA5591 Hat band (HMAS), NA5583 Hat band (HMAS Cerberus), NA5593 Ribbon (HMS Repulse), NA5590 Ribbonroyal australian navy, world war ii, uniform, allan edward beach, sailor -
 Whitehorse Historical Society Inc.
Headwear - Hat band
Part of the uniform of Allan Edward Beach Part of the uniform worn by Beach, Allan Edward, Service no. 25718. Date of birth 6 Nov. 1913 - Box Hill Place of enlist - Melbourne -leading wireman Died 29 January 1981 Buried: Springvale Botanical Cemetery Copy of research - National Archives of Australia Black hat band with bow on one side and "H.M.A.S. CERBERUS" in gold lettering worn by Allan Edward Beach. See also NA5582 Tunic, NA5585 Trousers, NA5581 Dicky front, NA5578 Collar, NA5586 Lanyard, NA5589 Two Ribbons, NA5591 Hat band (HMAS), NA5583, NA5593 Ribbon (HMS Repulse) and NA5590 Ribbon H.M.A.S. CERBERUSh.m.a.s cerberus, allan edward beach, sailor -
 Whitehorse Historical Society Inc.
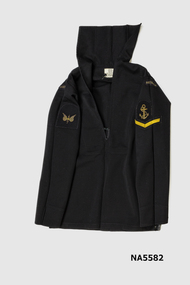
Uniform - Royal Australian Navy uniform (tunic), C 1979
Part of the uniform worn by Beach, Allan Edward, Service no. 25718. Date of birth 6 Nov. 1913 - Box Hill Place of enlist - Melbourne- leading wireman Died 29 January 1981 Buried: Springvale Botanical Cemetery Copy of research - National Archives of Australia Worsted wool black tunic with sailor collar and open ended zipper left hand side seam The Rank insignia (Wireman) & Australia are on the right hand shoulder The left hand shoulder Insignias are Australia and RAN, Corporal See also NA5582 Tunic, NA5585 Trousers, NA5581 Dicky front, NA5578 Collar, NA5586 Lanyard, NA5589 Two Ribbons, NA5591 Hat band (HMAS), NA5583 Hat band (HMAS Cerberus), NA5593 Ribbon (HMS Repulse), NA5590 RibbonA. G.C.F. Vic 1979 size 86L CH86 H33.173 8405.66.094 7753 R.A.N. Made in Australiauniform, royal australian navy, allan edward beach, allan beach -
 Whitehorse Historical Society Inc.
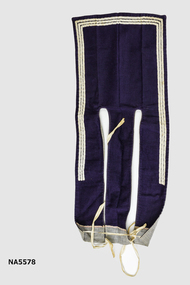
Uniform - Royal Australian Navy, Sailor Collar, C 1942
Part of the uniform worn by Beach, Allan Edward, Service no. 25718. Date of birth 6 Nov. 1913 - Box Hill Place of enlist - Melbourne- leading wireman Died 29 January 1981 Buried: Springvale Botanical Cemetery Copy of research - National Archives of Australia- Service uniform collar - Hand detailing, 3 white stripes - Gabardine fabric, plain dark navy face - Gabardine fabric, plain dark navy/white back - Cotton tape ties front & rear See also NA5582 Tunic, NA5585 Trousers, NA5581 Dicky front, NA5578 Collar, NA5586 Lanyard, NA5589 Two Ribbons, NA5591 Hat band (HMAS), NA5583 Hat band (HMAS Cerberus), NA5593 Ribbon (HMS Repulse), NA5590 RibbonNilww2, royal australian navy, uniform, allan edward beach, allan beach -
 Whitehorse Historical Society Inc.
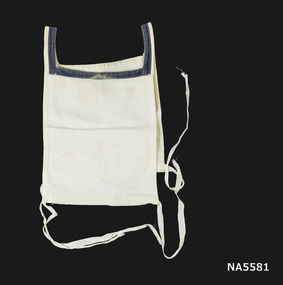
Uniform - Sailor's Dicky front, C 1942
Part of the uniform worn by Beach, Allan Edward, Service no. 25718. Date of birth 6 Nov. 1913 - Box Hill Place of enlist - Melbourne -leading wireman Died 29 January 1981 Buried: Springvale Botanical Cemetery Copy of research - National Archives of AustraliaWhite dicky front/panel/bib with square neckline edged with dark blue and with white ties. Part of WW2 uniform. See also NA5582 Tunic, NA5585 Trousers, NA5581 Dicky front, NA5578 Collar, NA5586 Lanyard, NA5589 Two Ribbons, NA5591 Hat band (HMAS), NA5583 Hat band (HMAS Cerberus), NA5593 Ribbon (HMS Repulse), NA5590 Ribbon royal australian navy-wwii, allan edward beach, allan beach -
 Whitehorse Historical Society Inc.
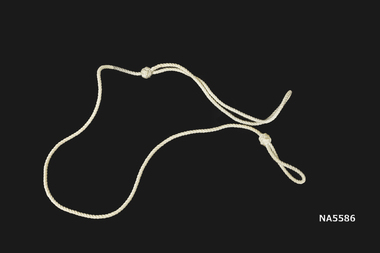
Uniform - Cotton cord lanyard, C 1940
Part of the uniform worn by Beach, Allan Edward, Service no. 25718. Date of birth 6 Nov. 1913 - Box Hill Place of enlist - Melbourne- leading wireman Died 29 January 1981 Buried: Springvale Botanical Cemetery Copy of research - National Archives of Australia- Cotton cord lanyard (white) - With two knife lanyard knots See also NA5582 Tunic, NA5585 Trousers, NA5581 Dicky front, NA5578 Collar, NA5586 Lanyard, NA5589 Two Ribbons, NA5591 Hat band (HMAS), NA5583 Hat band (HMAS Cerberus), NA5593 Ribbon (HMS Repulse), NA5590 RibbonNilroyal australian navy, ww2 uniform, allan edward beach, allan beach, sailor -
 Whitehorse Historical Society Inc.
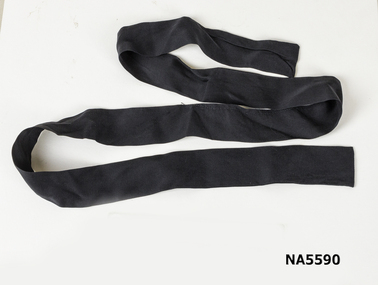
Uniform - Ribbon, C 1940
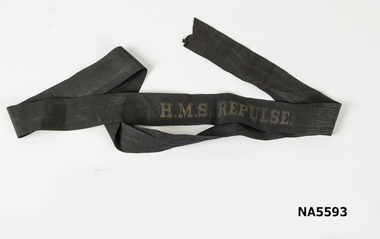
Part of the uniform worn by Leading Wireman Beach, Allan Edward, Service no. 25718. Date of birth 6 Nov. 1913 - Box Hill Place of enlist - Melbourne -leading wireman Died 29 January 1981 Buried: Springvale Botanical Cemetery Copy of research - National Archives of Australia Black silk ribbon which is folded & stitched. Part of the uniform of Allan Edward Beach. See also NA5582 Tunic, NA5585 Trousers, NA5581 Dicky front, NA5578 Collar, NA5586 Lanyard, NA5589 Two Ribbons, NA5591 Hat band (HMAS), NA5583 Hat band (HMAS Cerberus), NA5593 Ribbon (HMS Repulse), NA5590 RibbonNilroyal australian navy, ww2 uniform -
 Whitehorse Historical Society Inc.
Headwear - Navy hat band, Not known
World War 2 Naval uniform Part of the uniform worn by Beach, Allan Edward, Service no. 25718. Date of birth 6 Nov. 1913 - Box Hill Place of enlist - Melbourne -leading wireman Died 29 January 1981 Buried: Springvale Botanical Cemetery Copy of research - National Archives of Australia Black hat band with "HMS Repulse" printed in gold ink. Part of the uniform of Allan Edward Beach. See also NA5582 Tunic, NA5585 Trousers, NA5581 Dicky front, NA5578 Collar, NA5586 Lanyard, NA5589 Two Ribbons, NA5591 Hat band (HMAS), NA5583 Hat band (HMAS Cerberus), NA5593 Ribbon (HMS Repulse), NA5590 RibbonHMS REPULSEnavy, headwear, allan edward beach, sailor -
 Whitehorse Historical Society Inc.
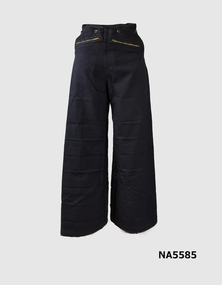
Uniform - Trousers, Phipp"s Tailors, C 1940
Part of the uniform worn by Beach, Allan Edward, Service no. 25718. Date of birth 6 Nov. 1913 - Box Hill Place of enlist - Melbourne- leading wireman Died 29 January 1981 Buried: Springvale Botanical Cemetery Copy of research - National Archives of AustraliaBlack Royal Australian Navy uniform worsted wool bell bottom trousers with two metal zippered pockets and buttons on waistband which has a flap front. The Bell-bottom sailor's trousers have creases for the 7 oceans of the world. See also NA5582 Tunic, NA5585 Trousers, NA5581 Dicky front, NA5578 Collar, NA5586 Lanyard, NA5589 Two Ribbons, NA5591 Hat band (HMAS), NA5583 Hat band (HMAS Cerberus), NA5593 Ribbon (HMS Repulse), NA5590 RibbonPhipp's Tailoring 225 George St Brisbaneroyal australian navy, uniform, allan edward beach, allan beach, sailor -
 Whitehorse Historical Society Inc.
Headwear - Naval hat band
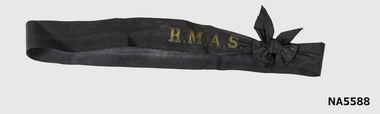
World War 2 uniform of Allan Edward Beach. Part of the uniform worn by Beach, Allan Edward, Service no. 25718. Date of birth 6 Nov. 1913 - Box Hill Place of enlist - Melbourne -leading wireman Died 29 January 1981 Buried: Springvale Botanical Cemetery Copy of research - National Archives of Australia Black hat band with a bow on one side and H.M.A.S. printed next to it. See also NA5582 Tunic, NA5585 Trousers, NA5581 Dicky front, NA5578 Collar, NA5586 Lanyard, NA5589 Two Ribbons, NA5591 Hat band (HMAS), NA5583 Hat band (HMAS Cerberus), NA5593 Ribbon (HMS Repulse), NA5590 RibbonH.M.A.S.naval, h.m.a.s. -
 Flagstaff Hill Maritime Museum and Village
Furniture - Door, 1871 or earlier
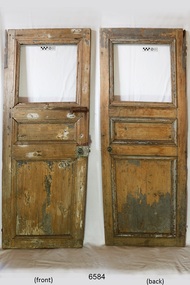
The wooden door was salvaged from the wreck of the sailing ship Eric the Red, which was a wooden, three masted clipper ship. Eric the Red was the largest full-rigged ship built at Bath, Maine, USA in 1871, having had a 1,580 tons register. She was built and registered by Arthur Sewall, later to become the partnership E. & A. Sewall, the 51st ship built by this company. The annually-published List of Merchant Vessels of the U.S. shows Bath was still the home port of Eric the Red in 1880. The vessel was named after the Viking discoverer, Eric the Red, who was the first European to reach the shores of North America (in 980AD). The ship Eric the Red at first traded in coal between America and Britain, and later traded in guano nitrates from South America. In 1879 she was re-metalled and was in first class condition. On 10th June 1880 (some records say 12th June) Eric the Red departed New York for Melbourne and then Sydney. She had been commissioned by American trade representatives to carry a special cargo of 500 exhibits (1400 tons) – about a quarter to a third of America’s total exhibits - from America for the U.S.A. pavilion at Melbourne’s first International Exhibition. The exhibits included furniture, ironmongery, wines, chemicals, dental and surgical instruments, paper, cages, bronze lamp trimmings, axles, stamped ware, astronomical and time globes, samples of corn and the choicest of leaf tobacco. Other general cargo included merchandise such as cases of kerosene and turpentine, brooms, Bristol's Sarsaparilla, Wheeler and Wilson sewing machines, Wheeler’s thresher machine, axe handles and tools, cases of silver plate, toys, pianos and organs, carriages and Yankee notions. The Eric the Red left New York under the command of Captain Z. Allen (or some records say Captain Jacques Allen) and 24 other crew including the owner’s son third mate Ned Sewall. There were 2 saloon passengers also. The ship had been sailing for an uneventful 85 days and the voyage was almost at its end. On 4th September 1880 the Eric the Red approached Cape Otway with a moderate north-west wind and hazy and overcast atmosphere. Around 1:30am Captain Allen sighted the Cape Otway light and was keeping the ship 5-6 miles offshore to stay clear of the hazardous Otway Reef. However he had badly misjudged his position. The ship hit the Otway Reef about 2 miles out to sea, south west of the Cape Otway light station. He ordered the wheel to be put ‘hard up’ thinking that she might float off the reef. A heavy sea knocked the man away from the wheel, broke the wheel ropes and carried away the rudder. The sea swamped the lifeboats. The mizzenmast fell, with all of its rigging, then the mainmast also fell and the ship broke in two. Some said that the passenger Vaughan, who was travelling for his health and not very strong, was washed overboard and never seen again. The ship started breaking up. The forward house came adrift with three of the crew on it as well as a longboat, which the men succeeded in launching and keeping afloat by continually bailing with their sea boots. The captain, the third mate (the owner’s son) and others clung to the mizzenmast in the sea. Then the owner’s son was washed away off the mast. Within 10 minutes the rest of the ship was in pieces, completely wrecked, with cargo and wreckage floating in the sea. The captain encouraged the second mate to swim with him to the deckhouse where there were other crew but the second mate wouldn’t go with him. Eventually the Captain made it to the deckhouse and the men pulled him up. At about 4:30am the group of men on the deckhouse saw the lights of a steamer and called for help. At the same time they noticed the second mate and the other man had drifted nearby, still on the spur, and pulled them both onto the wreck. The coastal steamer Dawn was returning to Warrnambool from Melbourne, its sailing time different to its usual schedule. Captain Jones sent out two life boats, and fired off rockets and blue lights to illuminate the area. They picked up the three survivors who were in the long boat from Eric the Red. Two men were picked up out of the water, one being the owner’s son who was clinging to floating kerosene boxes. At daylight the Dawn then rescued the 18 men from the floating portion of the deckhouse, which had drifted about 4 miles from where they’d struck the reef. Shortly after the rescue the deckhouse drifted onto breakers and was thrown onto rocks at Point Franklin, about 2 miles east of Cape Otway. Captain Jones had signalled to Cape Otway lighthouse the number of the Eric the Red and later signalled that there was a wreck at Otway Reef but there was no response from the lighthouse. The captain and crew of the Dawn spent several more hours searching unsuccessfully for more survivors, even going back as far as Apollo Bay. On board the Dawn the exhausted men received care and attention to their needs and wants, including much needed clothing. Captain Allen was amongst the 23 battered and injured men who were rescued and later taken to Warrnambool for care. Warrnambool’s mayor and town clerk offered them all hospitality, the three badly injured men going to the hospital for care and others to the Olive Branch Hotel, then on to Melbourne. Captain Allen’s leg injury prevented him from going ashore so he and three other men travelled on the Dawn to Portland. They were met by the mayor who also treated them all with great kindness. Captain Allen took the train back to Melbourne then returned to America. Those saved were Captain Z. Allen (or Jacques Allen), J. Darcy chief mate, James F. Lawrence second mate, Ned Sewall third mate and owner’s son, John French the cook, C. Nelson sail maker, Clarence W. New passenger, and the able seamen Dickenson, J. Black, Denis White, C. Herbert, C. Thompson, A. Brooks, D. Wilson, J. Ellis, Q. Thompson, C. Newman, W. Paul, J. Davis, M. Horenleng, J. Ogduff, T. W. Drew, R. Richardson. Four men had lost their lives; three of them were crew (Gus Dahlgreen ship’s carpenter, H. Ackman steward, who drowned in his cabin, and George Silver seaman) and one a passenger (J. B. Vaughan). The body of one of them had been found washed up at Cape Otway and was later buried in the lighthouse cemetery; another body was seen on an inaccessible ledge. Twelve months later the second mate James F. Lawrence, from Nova Scotia, passed away in the Warrnambool district; an obituary was displayed in the local paper. The captain and crew of the Dawn were recognised by the United States Government in July 1881 for their humane efforts, being thanked and presented with substantial monetary rewards, medals and gifts. Neither the ship, nor its cargo, was insured. The ship was worth about £15,000 and the cargo was reportedly worth £40,000; only about £2,000 worth had been recovered. Cargo and wreckage washed up at Apollo Bay, Peterborough, Port Campbell, Western Port and according to some reports, even as far away as the beaches of New Zealand. The day after the wreck the government steam ship Pharos was sent from Queenscliff to clear the shipping lanes of debris that could be a danger to ships. The large midship deckhouse of the ship was found floating in a calm sea near Henty Reef. Items such as an American chair, a ladder and a nest of boxes were all on top of the deckhouse. As it was so large and could cause danger to passing ships, Captain Payne had the deckhouse towed towards the shore just beyond Apollo Bay. Between Apollo Bay and Blanket Bay the captain and crew of Pharos collected Wheeler and Wilson sewing machines, nests of boxes, bottles of Bristol’s sarsaparilla, pieces of common American chairs, axe handles, a Wheelers’ Patent thresher and a sailor’s trunk with the words “A. James” on the front. A ship’s flag-board bearing the words “Eric the Red” was found on the deckhouse; finally those on board the Pharos had the name of the wrecked vessel. During this operation Pharos came across the government steamer Victoria and also a steamer S.S. Otway, both of which were picking up flotsam and wreckage. A whole side of the hull and three large pieces of the other side of the hull, with some of the copper sheathing stripped off, had floated on to Point Franklin. Some of the vessels yards and portions of her masts were on shore. The pieces of canvas attached to the yards and masts confirmed that the vessel had been under sail. The beach there was piled with debris several feet high. There were many cases of Diamond Oil kerosene, labelled R. W. Cameron and Company, New York. There were also many large planks of red pine, portions of a small white boat and a large, well-used oar. Other items found ashore included sewing machines (some consigned to ‘Long and Co.”) and notions, axe and scythe handles, hay forks, wooden pegs, rolls of wire (some branded “T.S” and Co, Melbourne”), kegs of nails branded “A.T. and Co.” from the factory of A. Field and Son, Taunton, Massachusetts, croquet balls and mallets, buggy fittings, rat traps, perfumery, cutlery and Douay Bibles, clocks, bicycles, chairs, a fly wheel, a cooking stove, timber, boxes, pianos, organs and a ladder. (Wooden clothes pegs drifted in for many years). There seemed to be no personal luggage or clothing. The Pharos encountered a long line, about one and a half miles, of floating wreckage about 10 miles off land, south east of Cape Otway, and in some places about 40 feet wide. It seemed that more than half of it was from Eric the Red. The ship’s crew rescued 3 cases that were for the Melbourne Exhibition and other items from amongst the debris. There were also chairs, doors, musical instruments, washing boards, nests of trunks and fly catchers floating in the sea. Most of the goods were saturated and smelt of kerosene. A section of the hull lies buried in the sand at Parker River Beach. An anchor with chain is embedded in the rocks east of Point Franklin and a second anchor, thought to be from Eric the Red, is on display at the Cape Otway light station. (There is a photograph of a life belt on the verandah of Rivernook Guest House in Princetown with the words “ERIC THE RED / BOSTON”. This is rather a mystery as the ship was registered in Bath, Maine, USA.) Parts of the ship are on display at Bimbi Park Caravan Park and at Apollo Bay Museum. Flagstaff Hill Maritime Village also has part of the helm (steering wheel), a carved wooden sword (said to be the only remaining portion of the ship’s figurehead; further research is currently being carried out), a door, a metal rod and samples of wood. Much of the wreckage was recovered by the local residents before police and other authorities arrived at the scene. Looters went to great effort to salvage goods, being lowered down the high cliff faces to areas with little or no beach to collect items from the wreckage, their mates above watching out for dangerous waves. A Tasmanian newspaper reports on a court case in Stawell, Victoria, noting a man who was caught 2 months later selling tobacco from the wreckage of Eric the Red. Some of the silverware is still treasured by descendants of Mr Mackenzie who was given these items by officials for his help in securing the cargo. The gifts included silver coffee and tea pots, half a dozen silver serviette rings and two sewing machines. The wreck and cargo were sold to a Melbourne man who salvaged a quantity of high quality tobacco and dental and surgical instruments. Timbers from the ship were salvaged and used in the construction of houses and sheds around Apollo Bay, including a guest house, Milford House (since burnt down in bushfires), which had furniture, fittings and timber on the dining room floor from the ship. A 39.7 foot long trading ketch, the Apollo, was also built from its timbers by Mr Burgess in 1883 and subsequently used in Tasmanian waters. It was the first attempt at ship building in Apollo bay. In 1881 a red light was installed about 300 feet above sea level at the base of the Cape Otway lighthouse to warn ships when they were too close to shore; It would not be visible unless a ship came within 3 miles from it. This has proved to be an effective warning. The State Library of Victoria has a lithograph in its collection depicting the steamer Dawn and the shipwrecked men, titled. "Wreck of the ship Eric the Red, Cape Otway: rescue of the crew by the Dawn". “The Eric the Red is historically significant as one of Victoria's major 19th century shipwrecks. (Heritage Victoria Eric the Red; HV ID 239) The wreck led to the provision of an additional warning light placed below the Cape Otway lighthouse to alert mariners to the location of Otway Reef. The site is archaeologically significant for its remains of a large and varied cargo and ship's fittings being scattered over a wide area. The site is recreationally and aesthetically significant as it is one of the few sites along this coast where tourists can visit identifiable remains of a large wooden shipwreck, and for its location set against the background of Cape Otway, Bass Strait, and the Cape Otway lighthouse.“ (Victorian Heritage Database Registration Number S239, Official Number 8745 USA) Door from the wreck of the ship Eric the Red. The wooden singular rectangular door includes three insert panel sections. The top section is square shaped and is missing its panel or glass. The centre timber panel is about a third of the height of the top panel and the bottom timber panel is approximately equal in height to the total height of the two upper panels. The door fastenings include both a metal door latch and traditional door bolt. They are both attached to the front right hand side of the door. The bolt is just below the top panel, and the door latch is in approximately the centre of that side. The door latch has a round mark where a handle could have been attached. The wood of the door has scraping marks in a semi-circle around the door latch where the latch has swung around on its one remaining fastening and grazed the surface. There is a metal hinge at the top section of the door on the opposite side to the latch. The painted surface has been scraped back to expose the wood. The door is shorter than the average height of a person. On the reverse of the door there are lines on the panels, just inside their edges, is what appears to be pencil. The door is not aligned straight but is skew to centre.warrnambool, flagstaff hill, flagstaff hill maritime village, maritime museum, shipwreck coast, great ocean road, shipwreck artefact, eric the red, jaques allen, sewall, 1880, melbourne exhibition 1880, cape otway, otway reef, victorian shipwreck, bass strait, eric-the-red, door -
 Flagstaff Hill Maritime Museum and Village
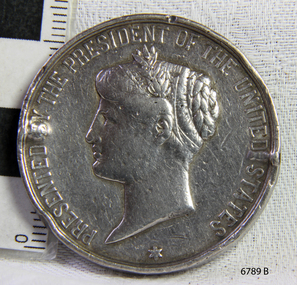
Award - Medal, Nelson Johnson, November 1880
This medal for bravery, for rescue of the crew from the shipwreck “Eric the Red” on 4th September 1880, was awarded to one of the crew of the steamer S.S. Dawn by the President of the United States in July 1881. The medal is engraved with the name “Nelson Johnson” (the anglicised version of his Swedish name Neils Frederick Yohnson). It was donated to Flagstaff Hill Maritime Village in 2013 by Nelson’s granddaughter. Nelson had migrated from Sweden to Sydney in 1879. The next year in 1880, aged 24, he was a seaman on the steamship Dawn and involved in the rescue of the survivors of the Eric the Red. Nelson Johnson was a crew member of the S.S. Dawn and was one of the rescue team in the dinghy in the early morning of September 4th 1880. Medals were awarded to the Captain and crew of the S.S. Dawn by the President of the United States, through the Consul-general (Mr Oliver M. Spencer), in July 1881 “ … in recognition of their humane efforts in rescuing the 23 survivors of the American built wooden sailing ship, the Eric the Red, on 4th September 1880.” The men were also presented with substantial monetary rewards and gifts. The city of Warrnambool’s care of the survivors was also mentioned by the President at the presentation, saying that “the city hosted and supported the crew ‘most graciously’. Previously, a week after the shipwreck, the Australian Government had also conveyed its thanks to the Captain and crew of the S.S. Dawn “Captain Griffith Jones, S.S. Dawn, The Hon. Mr Clark desires that the thanks of the Government should be conveyed to you for the prompt, persevering and seamanlike qualities displayed by you, your officers and crew in saving the number of lives you did on the occasion referred to. The hon. The Commissioner has also been pleased to award you a souvenir in commemoration of the occasion, and a sum of 65 pounds to be awarded to your officers and crew according to annexed scale. I am, &c, W Collins Rees, for and in the absence of the Chief Harbour Master.” The Awards are as follows: - Crew of DAWN'S lifeboat-Chief Officer, Mr G. Peat, 15 pounds; boat's crew-G. Sterge, A.B., 5 pounds; T. Hammond, A.B., 5 pounds; J. Black, A.B., 5 pounds; H. Edwards, A.B., 5 pounds. Dinghy's Crew-Second Officer, Mr Christie, 10 pounds; boat's crew -F. Lafer, A.B., 5 pounds; W. Johnstone, A.B., 5 pounds; Mr Lear, provedore, 5 pounds; Mr Dove, purser, 5 pounds. Captain Jones receives a piece of plate. (from “Wreck of the ship Eric the Red” by Jack Loney) The medal’s history, according to the Editor of ‘E-Sylum’ (the newsletter of The Numismatic Bibliomania Society “… appears to be an example of an 1880 State Department medal, catalogued as LS-3 (page 322 of R. W. Julian's book, Medals of the United States Mint: The First Century 1792-1892). The reverse is mostly blank for engraving, surrounded by a thin wreath. It was designed by George Morgan, chief engraver for the Philadelphia Mint, and struck in gold, silver and bronze. The one pictured here (in The Standard newspaper, 2nd July 2013) appears to be silver.” The following is an account of the events which led to the awarding of this medal. The American ship Eric the Red was a wooden, three-masted clipper ship. She had 1,580 tons register and was the largest full-rigged ship built at Bath, Maine, USA in 1871. She was built and registered by Arthur Sewall, later to become the partnership E. & A. Sewall, the 51st ship built by this company. The annually-published List of Merchant Vessels of the U.S. shows Bath was still the home port of Eric the Red in 1880. The vessel was named after the Viking discoverer, Eric ‘the Red-haired’ Thorvaldsson, who was the first European to reach the shores of North America (in 980AD). The ship Eric the Red at first traded in coal between America and Britain, and later traded in guano nitrates from South America. In 1879 she was re-metalled and was in first-class condition. On 10th June 1880 (some records say 12th June) Eric the Red departed New York for Melbourne and then Sydney. She had been commissioned by American trade representatives to carry a special cargo of 500 exhibits (1400 tons) – about a quarter to a third of America’s total exhibits - for the U.S.A. pavilion at Melbourne’s first International Exhibition. The exhibits included furniture, ironmongery, wines, chemicals, dental and surgical instruments, paper, cages, bronze lamp trimmings, axles, stamped ware, astronomical and time globes, samples of corn and the choicest of leaf tobacco. Other general cargo included merchandise such as cases of kerosene and turpentine, brooms, Bristol's Sarsaparilla, Wheeler and Wilson sewing machines, Wheeler’s thresher machine, axe handles and tools, cases of silver plate, toys, pianos and organs, carriages and Yankee notions. The Eric the Red left New York under the command of Captain Zaccheus Allen (or some records say Captain Jacques Allen) and 24 other crew including the owner’s son third mate Ned Sewall. There were also 2 saloon passengers on board. The ship had been sailing for an uneventful 85 days and the voyage was almost at its end. As Eric the Red approached Cape Otway there was a moderate north-west wind and a hazy and overcast atmosphere. On 4th September 1880 at about 1:30 am Captain Allen sighted the Cape Otway light and was keeping the ship 5-6 miles offshore to stay clear of the hazardous Otway Reef. However, he had badly misjudged his position. The ship hit the Otway Reef about 2 miles out to sea, southwest of the Cape Otway light station. Captain Allen ordered the wheel to be put ‘hard up’ thinking that she might float off the reef. The sea knocked the helmsman away from the wheel, broke the wheel ropes and carried away the rudder. The lifeboats were swamped, the mizzenmast fell, with all of its riggings, then the mainmast also fell and the ship broke in two. Some said that the passenger Vaughan, who was travelling for his health and not very strong, was washed overboard and never seen again. The ship started breaking up. The forward house came adrift with three of the crew on it as well as a longboat, which the men succeeded in launching and keeping afloat by continually bailing with their sea boots. The captain, the third mate (the owner’s son) and others clung to the mizzenmast in the sea. Then the owner’s son was washed away off the mast. Within 10 minutes the rest of the ship was in pieces, completely wrecked, with cargo and wreckage floating in the sea. The captain encouraged the second mate to swim with him to the deckhouse where there were other crew but the second mate wouldn’t go with him. Eventually, the Captain made it to the deckhouse and the men pulled him up. At about 4:30 am the group of men on the deckhouse saw the lights of a steamer and called for help. At the same time, they noticed the second mate and the other man had drifted nearby, still on the spur, and pulled them both onto the wreck. The coastal steamer SS Dawn was returning to Warrnambool from Melbourne, and its sailing time was different to its usual schedule. She was built in 1876 and bought by the Portland and Belfast Steam Navigation Co. in 1877. At the time of this journey, she was commanded by Captain Jones and was sailing between Melbourne and Portland via Warrnambool. The provedore the Dawn, Benjamin Lear, heard cries of distress coming through the portholes of the saloon. He gave the alarm and the engines were stopped. Cries could be heard clearly, coming from the land. Captain Jones sent out crew in two boats and fired off rockets and blue lights to illuminate the area. They picked up the three survivors who were in the long boat from Eric the Red. Two men were picked up out of the water, one being the owner’s son who was clinging to floating kerosene boxes. At daylight, the Dawn then rescued the 18 men from the floating portion of the deckhouse, which had drifted about 4 miles from where they’d struck the reef. Shortly after the rescue the deckhouse drifted onto breakers and was thrown onto rocks at Point Franklin, about 2 miles east of Cape Otway. Captain Jones had signalled to Cape Otway lighthouse the number of the Eric the Red and later signalled that there was a wreck at Otway Reef but there was no response from the lighthouse. The captain and crew of the Dawn spent several more hours searching unsuccessfully for more survivors, even going back as far as Apollo Bay. On board the Dawn the exhausted men received care and attention to their needs and wants, including much-needed clothing. Captain Allen was amongst the 23 battered and injured men who were rescued and later taken to Warrnambool for care. Warrnambool’s mayor and town clerk offered them all hospitality, the three badly injured men going to the hospital for care and others to the Olive Branch Hotel, then on to Melbourne. Captain Allen’s leg injury prevented him from going ashore so he and three other men travelled on the Dawn to Portland. They were met by the mayor who also treated them all with great kindness. Captain Allen took the train back to Melbourne then returned to America. Those saved were Captain Zaccheus Allen (or Jacques Allen), J. Darcy chief mate, James F. Lawrence second mate, Ned Sewall third mate and owner’s son, John French the cook, C. Nelson sail maker, Clarence W. New passenger, and able seamen Dickenson, J. Black, Denis White, C. Herbert, C. Thompson, A. Brooks, D. Wilson, J. Ellis, Q. Thompson, C. Newman, W. Paul, J. Davis, M. Horenleng, J. Ogduff, T. W. Drew, R. Richardson. Four men had lost their lives; three of them were crew (Gus Dahlgreen ship’s carpenter, H. Ackman steward, who drowned in his cabin, and George Silver seaman) and one a passenger (J. B. Vaughan). The body of one of them had been found washed up at Cape Otway and was later buried in the lighthouse cemetery; another body was seen on an inaccessible ledge. Twelve months later the second mate James F. Lawrence, from Nova Scotia passed away in the Warrnambool district; an obituary was displayed in the local paper. Neither the ship nor its cargo was insured. The ship was worth about £15,000 and the cargo was reportedly worth £40,000; only about £2,000 worth had been recovered. Cargo and wreckage washed up at Apollo Bay, Peterborough, Port Campbell, Western Port and according to some reports, even as far away as the beaches of New Zealand. The day after the wreck the government steamship Pharos was sent from Queenscliff to clear the shipping lanes of debris that could be a danger to ships. The large midship deckhouse of the ship was found floating in a calm sea near Henty Reef. Items such as an American chair, a ladder and a nest of boxes were all on top of the deckhouse. As it was so large and could cause danger to passing ships, Captain Payne had the deckhouse towed towards the shore just beyond Apollo Bay. Between Apollo Bay and Blanket Bay, the captain and crew of Pharos collected Wheeler and Wilson sewing machines, nests of boxes, bottles of Bristol’s sarsaparilla, pieces of common American chairs, axe handles, a Wheelers’ Patent thresher and a sailor’s trunk with the words “A. James” on the front. A ship’s flag-board bearing the words “Eric the Red” was found on the deckhouse; finally, those on board the Pharos had the name of the wrecked vessel. During this operation, Pharos came across the government steamer Victoria and also a steamer S.S. Otway, both of which were picking up flotsam and wreckage. A whole side of the hull and three large pieces of the other side of the hull, with some of the copper sheathing stripped off, had floated onto Point Franklin. Some of the vessels' yards and portions of her masts were on shore. The pieces of canvas attached to the yards and masts confirmed that the vessel had been under sail. The beach there was piled with debris several feet high. There were many cases of Diamond Oil kerosene, labelled R. W. Cameron and Company, New York. There were also many large planks of red pine, portions of a small white boat and a large, well-used oar. Other items found ashore included sewing machines (some consigned to ‘Long and Co.”) and notions, axe and scythe handles, hay forks, wooden pegs, rolls of wire (some branded “T.S” and Co, Melbourne”), kegs of nails branded “A.T. and Co.” from the factory of A. Field and Son, Taunton, Massachusetts, croquet balls and mallets, buggy fittings, rat traps, perfumery, cutlery and Douay Bibles, clocks, bicycles, chairs, a fly wheel, a cooking stove, timber, boxes, pianos, organs and a ladder. (Wooden clothes pegs drifted in for many years). There seemed to be no personal luggage or clothing. The Pharos encountered a long line, about one and a half miles, of f locating wreckage about 10 miles off land, southeast of Cape Otway, and in some places about 40 feet wide. It seemed that more than half of it was from Eric the Red. The ship’s crew rescued 3 cases that were for the Melbourne Exhibition and other items from amongst the debris. There were also chairs, doors, musical instruments, washing boards, nests of trunks and flycatchers floating in the sea. Most of the goods were saturated and smelt of kerosene. A section of the hull lies buried in the sand at Parker River Beach. An anchor with a chain is embedded in the rocks east of Point Franklin and a second anchor, thought to be from Eric the Red, is on display at the Cape Otway light station. (There is a photograph of a life belt on the verandah of Rivernook Guest House in Princetown with the words “ERIC THE RED / BOSTON”. This is rather a mystery as the ship was registered in Bath, Maine, USA.) Parts of the ship are on display at Bimbi Park Caravan Park and at Apollo Bay Museum. Flagstaff Hill Maritime Village also has part of the helm (steering wheel), a carved wooden sword (said to be the only remaining portion of the ship’s figurehead; further research is currently being carried out), a door, a metal rod, samples of wood and this medal awarded for the rescue of the crew. Much of the wreckage was recovered by the local residents before police and other authorities arrived at the scene. Looters went to great effort to salvage goods, being lowered down the high cliff faces to areas with little or no beach to collect items from the wreckage, their mates above watching out for dangerous waves. A Tasmanian newspaper reports on a court case in Stawell, Victoria, noting a man who was caught 2 months later selling tobacco from the wreckage of Eric the Red. Some of the silverware is still treasured by descendants of Mr Mackenzie who was given these items by officials for his help in securing the cargo. The gifts included silver coffee and teapots, half a dozen silver serviette rings and two sewing machines. A Mr G.W. Black has in his possession a medal and a purse that was awarded to his father, another Dawn crew member who was part of the rescue team. The medal is similarly inscribed and named “To John Black ….” (from “Shipwrecks” by Margaret E. Mackenzie, 3rd edition, published 1964). The wreck and cargo were sold to a Melbourne man who salvaged a quantity of high-quality tobacco and dental and surgical instruments. Timbers from the ship were salvaged and used in the construction of houses and shed around Apollo Bay, including a guest house, Milford House (since burnt down in bushfires), which had furniture, fittings and timber on the dining room floor from the ship. A 39.7-foot-long trading ketch, the Apollo, was also built from its timbers by Mr Burgess in 1883 and subsequently used in Tasmanian waters. It was the first attempt at shipbuilding in Apollo Bay. In 1881 a red light was installed about 300 feet above sea level at the base of the Cape Otway lighthouse to warn ships when they were too close to shore; It would not be visible unless a ship came within 3 miles from it. This has proved to be an effective warning. Nelson Johnson married Elizabeth Howard in 1881 and they had 10 children, the father of the medal’s donor being the youngest. They lived in 13 Tichbourne Place, South Melbourne, Victoria. Nelson died in 1922 in Fitzroy Victoria, age 66. In 1895 the owners of the S.S. Dawn, the Portland and Belfast Steam Navigation Co., wound up and sold out to the Belfast Company who took over the Dawn for one year before selling her to Howard Smith. She was condemned and sunk in Suva in 1928. The State Library of Victoria has a lithograph in its collection depicting the steamer Dawn and the shipwrecked men, titled. "Wreck of the ship Eric the Red, Cape Otway: rescue of the crew by the Dawn". The medal for bravery is associated with the ship the “The Eric the Red which is historically significant as one of Victoria's major 19th century shipwrecks. (Heritage Victoria Eric the Red; HV ID 239) The wreck led to the provision of an additional warning light placed below the Cape Otway lighthouse to alert mariners to the location of Otway Reef. The site is archaeologically significant for its remains of a large and varied cargo and ship's fittings being scattered over a wide area. The site is recreationally and aesthetically significant as it is one of the few sites along this coast where tourists can visit identifiable remains of a large wooden shipwreck, and for its location set against the background of Cape Otway, Bass Strait, and the Cape Otway lighthouse.“ (Victorian Heritage Database Registration Number S239, Official Number 8745 USA) This medal was awarded to Nelson Johnson by the U.S. President for bravery in the rescue of the Eric the Red crew. The obverse of the round, solid silver medal has an inscription around the rim. In the centre of the medal is the head of Liberty to the left, hair in a bun, with a sprig of leaves in the top left of a band around her head. There is a 6-pointed star below the portrait, between the start and end of the inscription. There are two raised areas on the rim, horizontally opposite each other, from the edge to just below the lettering and coinciding with the holes drilled in the edge. Slightly right of the top is a round indentation in the rim. The reverse has a wreath of leaves as a border, joined at the bottom by a ribbon bow. In the centre of the medal is an inscription, decorated with 3-pronged design and dots. The edge is plain with 2 small, rough and uneven holes horizontally opposite to each other, as though they had been used for mounting the medal at some stage. The medal has a matte finish on both sides and is slightly pitted and scratched.“PRESENTED BY THE PRESIDENT OF THE UNITED STATES” around the perimeter of the obverse of the medal. “TO / Nelson Johnson, / seaman of the British, / str “Dawn”, for bravery, / at risk of life, / in / rescuing the crew of / the American Ship / “Eric the Red.” “M” on obverse, truncation of the portraitwarrnambool, flagstaff hill, flagstaff hill maritime village, maritime museum, shipwreck coast, great ocean road, shipwreck artefact, eric the red, zaccheus allen, sewall, 1880, melbourne exhibition, cape otway, otway reef, victorian shipwreck, medal, nelson johnson, neils frederick yohnson, s.s. dawn, george morgan, hero -
 Port Melbourne Historical & Preservation Society
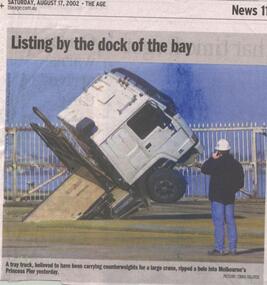
Photograph - Truck Stranded on Princes Pier, 18 Nov 2003
On Friday 16 August 2002, a truck carrying the tower crane counterweights from the 4th residential tower in Beach Street, entered Princes Pier to turn around and fell through the decking. The area was fenced off and a year later on 18 November 2003 the truck was extricated by a crane on a barge. The hole was covered by a steel box like structure until the Pier was renovated at a later date.piers and wharves - princes pier