Showing 436 items
matching tanks - history
-
 Glenelg Shire Council Cultural Collection
Photograph, n.d
Port of Portland Authority Archivesport of portland archives, model breakwater -
Glenelg Shire Council Cultural Collection
Photograph, n.d
Port of Portland Authority Archivesport of portland archives -
Glenelg Shire Council Cultural Collection
Photograph - Photograph - Model Breakwater;, n.d
Port of Portland Authority Archivesport of portland archives, model breakwater -
Glenelg Shire Council Cultural Collection
Photograph, n.d
Port of Portland Authority Archivesport of portland archives, breakwater -
Glenelg Shire Council Cultural Collection
Photograph, n.d
Port of Portland Authority Archivesport of portland archives, model breakwater -
Glenelg Shire Council Cultural Collection
Photograph, n.d
Port of Portland Authority Archivesport of portland archives -
Glenelg Shire Council Cultural Collection
Photograph - Photograph - Model Parapet Wall, n.d
Port of Portland Authority Archivesport of portland archives -
 Australian Commando Association - Victoria
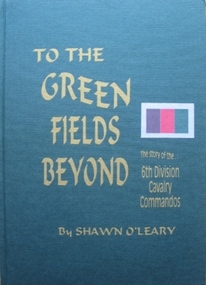
Book - 6th Div, Shawn OLeary, To The Green Fields Beyond:The story of the 6th Division Cavalry Commandos
The comprehensive history of the 6th Australian Division Cavalry Commandos – a (now out of print) reprint of one of the rarer Armoured unit history books. This is the story of one of Australia’s most famous fighting regiments during World War II. As an armoured cavalry unit it fought the Italians and Germans in the sands of the African desert and the Vichy French in the mountains of Syria. Later as a dismounted commando unit it fought the Japanese in the terrifying jungles of New Guinea. The heroism of the men in its ranks and the actions in which they engaged are portrayed in a way which makes battle deeds leap realistically from the pages. “To The Green Fields Beyond” is a documented and detailed book which is of value to everyone who is interested in Australia’s story. Seldom before has such a contribution been made to record of our national history. The book has been approved and sponsored by the Australian War Memorial. The 6th Division Cavalry Regiment was formed in November 1939 and, just two months later, was sent overseas to the Middle East in January 1940. Arriving in Egypt, the regiment immediately went to Palestine, where it joined the rest of the 6th Division and trained using machine-gun carriers and, from October, six old Vickers light tanks. At the end of the year the regiment moved into the Western Desert, where it joined British forces ready for the major offensive to commence on 9 December. Two days later the regiment became the first unit of the 2nd Australian Imperial Force (AIF) to go into action when one of its squadron fought a sharp action against the Italians holding Garn el Grein and Fort Maddalina on 11 and 12 December. By 21 December British forces had captured Sidi Barrrani and the desert was now open for the 6th Division’s advance along the Libyan coast. On 3 January 1941 the division attacked and captured the Italian fort of Bardia. The regiment’s A Squadron, under the command of Major Denzil Macarthur-Onslow, who went on to command the 4th Armoured Brigade, supported the attack. Tobruk was the next Italian fort to be captured, with the regiment again in support and covering the 19th Brigade’s advance. The regiment, though, was under-equipped and without its full compliment of vehicles, using only machine gun carriers. To compensate for this, A Squadron was parity re-equipped with captured Italian light tanks, which had large kangaroos painted on the hulls and turrets to distinguish them from enemy vehicles. After Tobruk, the regiment was used as part of the advance guard in the capture of Derna and then Benghazi. In April the unit moved to Helwan, where it was equipped with Vickers light tanks and machine-gun carriers, and operated with British troops in capturing Sollum. Towards the end of May the regiment moved to Palestine, where it came under the command of the 7th Division for the imminent invasion of Syria. The regiment experienced its heaviest fighting during the Syrian campaign, which began on 7 June. A Squadron was attached to the 21st Brigade and advanced along the coast, where the rugged hills made it difficult to manoeuvre the tanks and carriers. The squadron was relieved by one of the 9th Division Cavalry Regiment’s squadrons on 13 and 14 June. C Squadron, meanwhile, was with the 25th Brigade, and advanced along the Rosh Pinna road, engaging strong enemy defences at Fort Khirbe. C Squadron was relieved by B Squadron, which was later attacked by Vichy French tanks that were supported by heavy artillery and machine-gun fire, which forced the Australians to withdrawal. Always willing or needing to improvise during the campaign, A and B Squadrons both operated three captured French R35 Renault light tanks, while C Squadron provided personnel for a horse troop, quickly nicknamed the “Kelly Gang”, to patrol the high, rugged hills near the Mardjayoun–Banis Road. The regiment remained in Syria as part of the occupation force and returned to Australia in March 1942. It was sent to the Adelaide River, in the Northern Territory, and then later to Murgon, in Queensland. In 1943 and 1944 divisional cavalry regiments were reorganised into cavalry (commando) regiments. In January 1944 the 6th Division Cavalry Regiment became the 2/6th Cavalry (Commando) Regiment. The regiment lost its vehicles and became the administrative headquarters for the 2/7th, 2/9th, and 2/10th Commando Squadrons. The regiment remained with the 6th Division and participated in the Aitpae–Wewak campaign, in New Guinea, during 1945. Includes Nominal Rollnon-fictionThe comprehensive history of the 6th Australian Division Cavalry Commandos – a (now out of print) reprint of one of the rarer Armoured unit history books. This is the story of one of Australia’s most famous fighting regiments during World War II. As an armoured cavalry unit it fought the Italians and Germans in the sands of the African desert and the Vichy French in the mountains of Syria. Later as a dismounted commando unit it fought the Japanese in the terrifying jungles of New Guinea. The heroism of the men in its ranks and the actions in which they engaged are portrayed in a way which makes battle deeds leap realistically from the pages. “To The Green Fields Beyond” is a documented and detailed book which is of value to everyone who is interested in Australia’s story. Seldom before has such a contribution been made to record of our national history. The book has been approved and sponsored by the Australian War Memorial. The 6th Division Cavalry Regiment was formed in November 1939 and, just two months later, was sent overseas to the Middle East in January 1940. Arriving in Egypt, the regiment immediately went to Palestine, where it joined the rest of the 6th Division and trained using machine-gun carriers and, from October, six old Vickers light tanks. At the end of the year the regiment moved into the Western Desert, where it joined British forces ready for the major offensive to commence on 9 December. Two days later the regiment became the first unit of the 2nd Australian Imperial Force (AIF) to go into action when one of its squadron fought a sharp action against the Italians holding Garn el Grein and Fort Maddalina on 11 and 12 December. By 21 December British forces had captured Sidi Barrrani and the desert was now open for the 6th Division’s advance along the Libyan coast. On 3 January 1941 the division attacked and captured the Italian fort of Bardia. The regiment’s A Squadron, under the command of Major Denzil Macarthur-Onslow, who went on to command the 4th Armoured Brigade, supported the attack. Tobruk was the next Italian fort to be captured, with the regiment again in support and covering the 19th Brigade’s advance. The regiment, though, was under-equipped and without its full compliment of vehicles, using only machine gun carriers. To compensate for this, A Squadron was parity re-equipped with captured Italian light tanks, which had large kangaroos painted on the hulls and turrets to distinguish them from enemy vehicles. After Tobruk, the regiment was used as part of the advance guard in the capture of Derna and then Benghazi. In April the unit moved to Helwan, where it was equipped with Vickers light tanks and machine-gun carriers, and operated with British troops in capturing Sollum. Towards the end of May the regiment moved to Palestine, where it came under the command of the 7th Division for the imminent invasion of Syria. The regiment experienced its heaviest fighting during the Syrian campaign, which began on 7 June. A Squadron was attached to the 21st Brigade and advanced along the coast, where the rugged hills made it difficult to manoeuvre the tanks and carriers. The squadron was relieved by one of the 9th Division Cavalry Regiment’s squadrons on 13 and 14 June. C Squadron, meanwhile, was with the 25th Brigade, and advanced along the Rosh Pinna road, engaging strong enemy defences at Fort Khirbe. C Squadron was relieved by B Squadron, which was later attacked by Vichy French tanks that were supported by heavy artillery and machine-gun fire, which forced the Australians to withdrawal. Always willing or needing to improvise during the campaign, A and B Squadrons both operated three captured French R35 Renault light tanks, while C Squadron provided personnel for a horse troop, quickly nicknamed the “Kelly Gang”, to patrol the high, rugged hills near the Mardjayoun–Banis Road. The regiment remained in Syria as part of the occupation force and returned to Australia in March 1942. It was sent to the Adelaide River, in the Northern Territory, and then later to Murgon, in Queensland. In 1943 and 1944 divisional cavalry regiments were reorganised into cavalry (commando) regiments. In January 1944 the 6th Division Cavalry Regiment became the 2/6th Cavalry (Commando) Regiment. The regiment lost its vehicles and became the administrative headquarters for the 2/7th, 2/9th, and 2/10th Commando Squadrons. The regiment remained with the 6th Division and participated in the Aitpae–Wewak campaign, in New Guinea, during 1945. Includes Nominal Rollww2, australian commandos, australian special forces, world war 2 -
 Bendigo Historical Society Inc.
Slide - MOUAT CRAWFORD COLLECTION: FARMING IN THE WIMMERA, c1960s
Mouat Collection - Farming in the Wimmera. 2 large silos & 2 smaller silo, the smaller one have W T Thomas & Son PLI LTD Wheat Silo. 1 shed on road side and 2 larger sheds out the back, one with a square chimney. And what looks like a square water tank on a high stand. Markings; Flour Mill Warracknabeal. Used as a teaching aid.kodakfarming -
 Bendigo Historical Society Inc.
Document - H.A. & S.R. WILKINSON COLLECTION: CONTRACT OF SALE
Conditions of sale by private contract dated 30th March, 1932 between A. McKinnon (seller) and P. Thompson (buyer) for land situate in Murphy Street, Bendigo being the balance of the subdivision unsold of Crown allotment 151,270A, 271A, 271C, 271R, 195, 196, 270C, 271B and 271D described in certificate of title volume 2666 folio 533101, and being the land at present occupied by the vendor, not including the allotments or read showed on plan of subdivision. Together with weatherboard dwelling and all sundry including galvanized iron tank and stand, water trough and loose timber in paddock but does not include any window or verandah blinds. Price 800 pounds.organization, business, h.a. & s.r wilkinson real estate -
 Bendigo Historical Society Inc.
Newspaper - JENNY FOLEY COLLECTION: HARD WORK
Bendigo Advertiser '' The way we were'' from Thursday, March 25, 2004. Hard work: underground water proved to be a bonanza to rural holdings, as this windmill, galvanised tank and trough demonstrate. However, dry feed was still handled manually. This workman was pictured grappling with a three-bushel bag of oats in 1938. the clip is in a folder.newspaper, bendigo advertiser, the way we were -
 Bendigo Historical Society Inc.
Document - H.A. & S.R. WILKINSON COLLECTION: CONDITION OF SALE
Conditions of sale by private sale dated 27th April 1944 between Mrs M.M. Williams (seller) and H.V. Ramage (buyer) for land situate Cohn Street near Holdsworth Road, Bendigo, being allotment 16 section K1, containing 2 acres, 1rood and 20 perches more or less in the City of Bendigo, described in Crown grant volume 6207 folio 1241225, together with 4-roomed weatherboard building, iron tank and all sundry. Price 33 pounds.organization, business, h.a. & s.r wilkinson real estate -
 Bendigo Historical Society Inc.
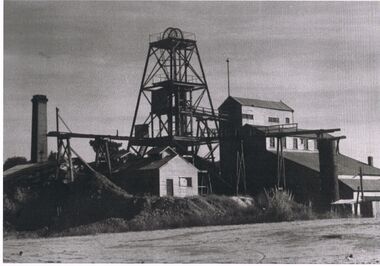
Photograph - BLACK AND WHITE PHOTOGRAPH OF THE BIG DEBORAH MINE
black and white photograph of the Big Deborah mine, showing infrastructure, chimney, large steel tank. Note the absence of cables from top of the poppet to the engine room.mining, surface equipment, big deborah mine. -
 Bendigo Historical Society Inc.
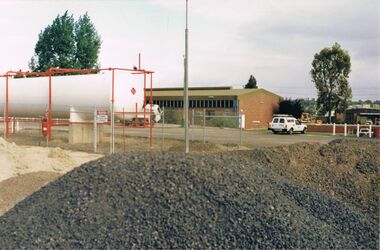
Photograph - CASTLEMAINE GAS COMPANY COLLECTION: PHOTO GAS AND FUEL DEPOT
Gas and Fuel depot with big gas tank. Centre background shows a large brick building with a row of windows just below roof line. White panel van is parked on righthand has red sign writing. Four white posts. Foreground is a large heap of gravel road base materialbusiness, retail, gas and fuel -
 Bendigo Historical Society Inc.
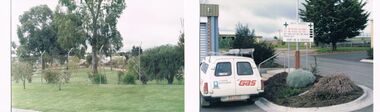
Photograph - CASTLEMAINE GAS COMPANY COLLECTION: PHOTO ABEL STREET DEPOT
2 photos of the Abel street depot Bendigo. One photo gives view from the street of the security fence surrounding the property, and the grounds within, Semi trailer with large gas tank is partially visible in the background. Second photo shows a white panel van with identification of advertising on rear doors, and ladder on roof, to the right an access road can be seen.bendigo, industry, gas and fuel depot -
 Bendigo Historical Society Inc.
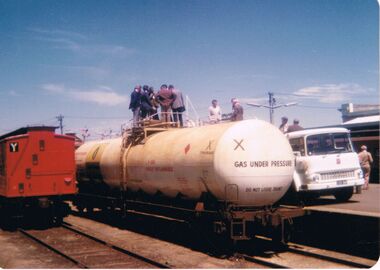
Photograph - CASTLEMAINE GAS COMPANY COLLECTION: PHOTO TRAIN
Photo of gas tank on train carriage, several people are standing on top of the tank. A truck can be seen on the right with 2 people standing on the back, another person on the platform. At the left another goods train carriage. Date and location unknown.Kodakphotograph, train, goods -
 Bendigo Historical Society Inc.
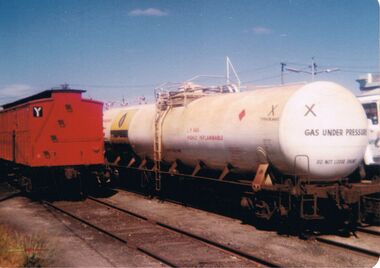
Photograph - CASTLEMAINE GAS COMPANY COLLECTION: PHOTO TRAIN
Photo of a gas tank on train carriage and another goods train carriage. Date and location unknownKodakphotograph, train, goods -
 Bendigo Historical Society Inc.
Photograph - CASTLEMAINE GAS COMPANY COLLECTION: PHOTO TRUCK
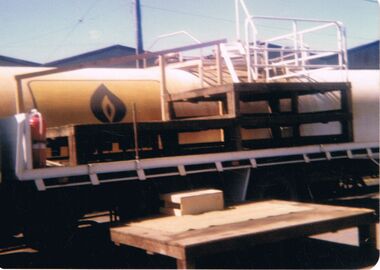
Photo of the tray of a truck with 3 pallets on, a gas tank on a train and a pallet on the ground. Date and location unknownKodakphotograph, tank, gas under pressure -
 Bendigo Historical Society Inc.
Photograph - CASTLEMAINE GAS COMPANY COLLECTION: PHOTO TRUCK
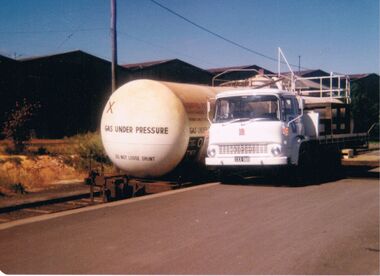
Photo of a gas tank on a train carriage and a white Bedford truck. A row of warehouses in background. Date and location unknownKodakphotograph, tank, gas under pressure -
 Bendigo Historical Society Inc.
Photograph - CASTLEMAINE GAS COMPANY COLLECTION: PHOTO GAS PLANT, 06/1986
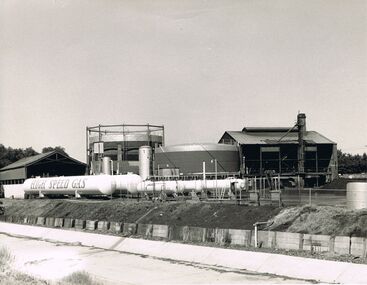
Photo of a gas plant with several gas tanks, two sheds and two large silos. Pic 19. June 1986 Gas Arrival.organisation, industry, gas and fuel -
 Bendigo Historical Society Inc.
Photograph - CASTLEMAINE GAS COMPANY COLLECTION: PHOTO WORK AREA
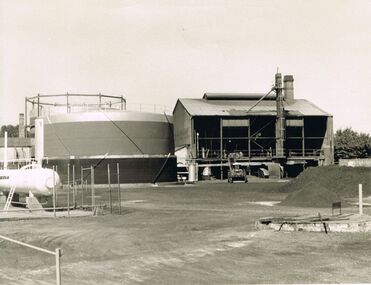
Photo of a plant date and location unknown - Left side a gas tank in the centre a round silos and a large open shed with chimney and tractor or excavator at front. At left of photo a Pile of dirty.organisation, industry, gas and fuel -
 Bendigo Historical Society Inc.
Photograph - CASTLEMAINE GAS COMPANY COLLECTION: PHOTO GAS DEPOT
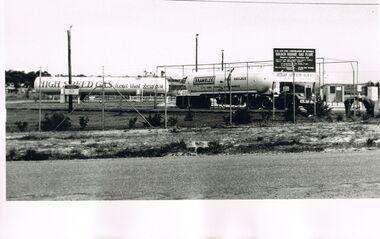
13(in a circle) T.L.P.G Plan - centre left High speed Gas Tank. Right Another gas Tank and a Brambles Bulk Haulage Truck. Date Unknown.organisation, industry, gas and fuel -
 Bendigo Historical Society Inc.
Photograph - CASTLEMAINE GAS COMPANY COLLECTION: PHOTO GAS DEPOT
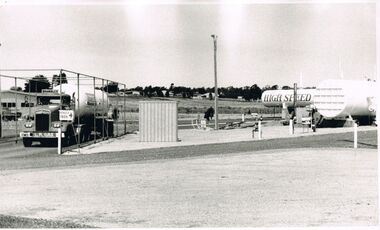
T.L.P.G. Plan. On Left hand side Brambles gas Truck. A small shed and on the left hand side to gas tanks. Several houses can be seen in background. Date Unknown.organisation, industry, gas and fuel -
 Bendigo Historical Society Inc.
Photograph - CASTLEMAINE GAS COMPANY COLLECTION: PHOTO GOLDEN SQUARE DEPOT
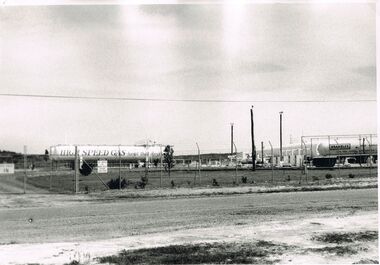
L.P.G. Plan Gas and fuel Corporation of Victoria '' Golden Square Gas Plant'' Tank of ''High Speed Gas heat that obeys you '' at centre left side and a brambles baulk haulage truck at centre right.. Date Unknownorganisation, industry, gas and fuel -
 Bendigo Historical Society Inc.
Photograph - CASTLEMAINE GAS COMPANY COLLECTION: PHOTO LAWN
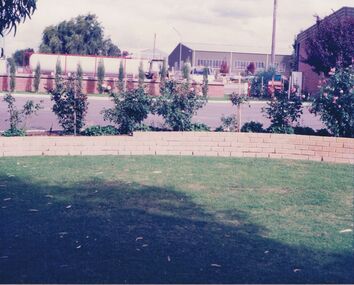
Green lawn, roses, road 3 buildings in the background and a large gas tank. Date and location unknownbusiness, retail, gas and fuel -
Bendigo Historical Society Inc.
Photograph - UNKNOWN MINING PHOTOS - POPPET LEGS & BUILDINGS
Black & white photocopy of a photo of the poppet legs, a corrugated iron building, a wood stack, and a frame structure. A man is on the walkway going toward the landing brace. (b) Picture of woden poppet legs, corrugated iron building, tramway and a large mullock heap. (c) Photocopy of wooden poppet legs with stairway going up to the landing, corrugated building, a tank beside the building, ore bins with a man and horse and dray beside them. In the background are houses.photo, unknown mining photos, poppet legs & buildings -
Bendigo Historical Society Inc.
Document - Digital, KEN BICE COLLECTION: NEW ARGUS MINE
Copy of photo (also copy of photo): New Argus Mine, image shows poppet head right of centre, men lined up underneath. Sheds on LH side, written on boiler feeder tank 'New Argus …. Co' Railway line in foreground. This is a digital only photograph.bendigo, mining, new argus mine, bendigo, eaglehawk, new argus mine, mining -
 Bendigo Historical Society Inc.
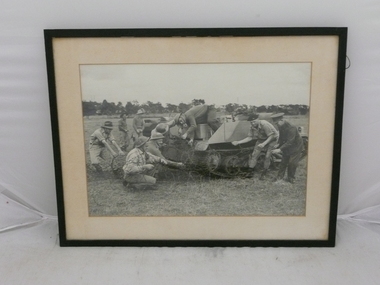
Photograph - ABBOTT COLLECTION: BARBED WIRE
Abbott collection, black and white photograph showing a group of men in military uniform trying to dis-entangle a tank from barbed wire, in a thin black wooden frame, under glass with buff coloured mount, brown paper backing with framers label.photograph, tank, abbott -
 Bendigo Historical Society Inc.
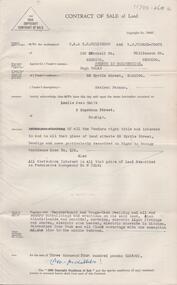
Document - H. A. & S. R. WILKINSON COLLECTION: CONTRACT OF SALE
Contract of sale of land dated 14th may, 1956 between Mr. H Nolan (vendor) and Mrs. L. J. Smith (purchaser). Property: land situate 55 Myrtle Street, Bendigo land described in Right to Occupy residence area no. 125 - Also land described in Permissive Occupancy No. W70141, together with weatherboard and rough cast dwelling and all sundry outbuildings, also blinds, curtains, electric light fittings and shades, electric sink heater, electric stovette in kitchen, galvanised iron tank and all floor coverings with the exception of the lino in the middle bedroom. Price: 3,400 pounds.organization, business, h.a. & s.r wilkinson real estate -
 Bendigo Historical Society Inc.
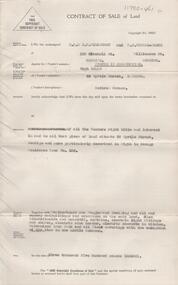
Document - H. A. & S. R. WILKINSON COLLECTION: CONTRACT OF SALE
Contract of sale of land dated 14th may, 1956 between Mr. H Nolan (vendor) and ? Property: land situate 55 Myrtle Street, Bendigo land described in Right to Occupy residence area no. 125, together with weatherboard and rough cast dwelling and all sundry outbuildings, also blinds, curtains, electric light fittings and shades, electric sink heater, electric stovette in kitchen, galvanised iron tank and all floor coverings with the exception of the lino in the middle bedroom. Price: 3,500 pounds.organization, business, h.a. & s.r wilkinson real estate