Showing 9770 items
matching east street
-
 Flagstaff Hill Maritime Museum and Village
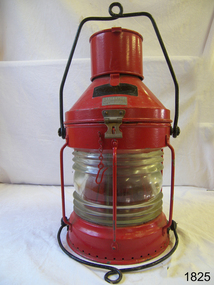
Functional object - Ships Navigation Lamp, William Harvie & Co, First half of the 20th century
William Harvie was granted a patent in 1868 for improvements in the manufacture of lamps, lanterns and lenses for ships navigation and signal lamps 1868. Production began at 222 Broomielaw street Glasgow Scotland. Another patent was issued in 1873 for additional improvements to the companies lamps. Records show that in1873 William Harvie was in partnership with Malcolm Graham & Co, grease manufacturers and rosin distillers at 50 Anderson Street Gallowgate Glasgow. It appears around this time the business was transferred to George Moffat of 128 Garthland Drive Dennistoun Glasgow to continue under the same name (William Harvie & Co at premises situated at 100 East John St Gallowgate Glasgow. It is unclear but at some point W T George & Co were one in the same with William Harvie & Co. W T George made lamps with the trade name “Meteorite” and after gaining a patent for improvements to his lamps in 1941 the patent numbers were affixed to his lamps. In the Scottish Post Office annual Glasgow Directory 1900-1902 William Haveie & Co. Ltd is listed with two addresses; 222 Broomielaw and 24 McAlpine Streets, Glasgow. In the early 20th century the business moved to Birmingham until 1983 when the company went into voluntary liquidation after a meeting was held at Newhall Street Birmingham on the 10th January 1983 for WT George and William Harvie. This meeting was for the purposes regarding the insolvency of a company as set out in Sec 294 & 295 of the companies Act 1948 as a result Harvie & Co cease production of their products.An item made by a company that was an innovator of significant improvements in the manufacture of marine signal and navigation lamps during the late 19th and 20th centuries. Lamps made by this manufacturer are now sought after collector's items that are of significant value. Navigation lamp, round ship's lamp with clear glass and a red filter, handle at top, fitted with hinged and catch section at top to service lamp. Bracket at back for hanging lamp item painted red with black handles.Black nameplate is unreadable. Front reference plate reads " Meteorite" then "Meteorite No. 92276" warrnambool, flagstaff-hill, flagstaff-hill-maritime-museum, maritime-museum, shipwreck-coast, flagstaff-hill-maritime-village, lamp, meteorite, william harvie, navigation lamp, kerosene lamp, signal lamp, marine equipment, marine navigation, w t george & co, george bocock & co, william harvie & co. ltd. -
 Flagstaff Hill Maritime Museum and Village
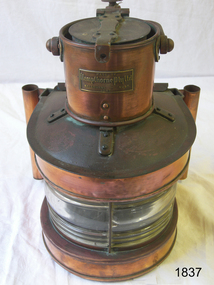
Functional object - Marine Lamp, Kempthorne Pty Ltd, 1941
Kempthorne Lighting Pty. was established as Coffey Lanterns in East Malvern, Melbourne Victoria in 1931 by brothers Selwyn and Owen Coffey. They manufactured lighting fixtures and fittings including oil lamps for marine use as well as for the domestic market. In early 1936 two other brothers, Erle and Terence had joined the company which was renamed Kempthorne Lantern Works Pty., Ltd. In 1946 Kempthorne joined with a small design team who had developed a domestic fan to form the subsidiary, Mistral fans. The company previously known as Kempthorne Holding Ltd was listed on the stock exchange in 1968. In 1977-1979 Kempthorne Mistral Ltd. Was a holding company comprising of Kempthorne Lighting Pty., Ltd. & Mistral Fans Pty., Ltd. An early Australian made marine lamp by a significant manufacturer that is still in business today making electrical equipment. The item is an important artefact that was made by an early Australian business that started in the 1930s. Over the years this company has demonstrated many innovations to the manufacturer of electrical items. Marine copper Lamp, round with brass makers lozenge and rounded hollow lugs set on either side of the lamp. Heavy metal handle with brass locking pin. Lid with catch on top. Made by Kempthorne Pty Ltd Melb. 1941flagstaff hill, warrnambool, shipwrecked-coast, flagstaff-hill, flagstaff-hill-maritime-museum, maritime-museum, shipwreck-coast, flagstaff-hill-maritime-village, lamp, copper ship lamp, ship lamp, kempthorne pty ltd -
 Flagstaff Hill Maritime Museum and Village
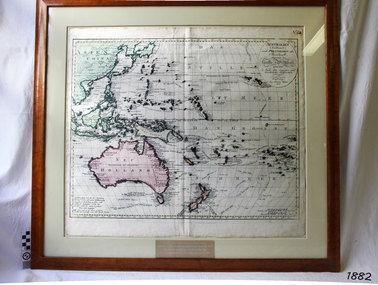
Map, Australien (Sudland) auch Polynesien oder Inselwelt, insgemein der funfte Welltheil, c.1990
This map is a reprint of Johann (Johannes) Walch’s “Australien (Sudland) auch Polynesien oder Inselwelt, insgemein der funfte Welltheil”, published in 1802. It shows Australia, New Zealand, South East Asia and the Pacific Islands shows a large number of places names, many of which have changed since the map was drawn. The map includes the routes and dates of the voyages of Tasman, Cook, Bougainville, Carteret, Byron, and others up to 1802. The shapes of the lands on this early map show that some of the areas had not yet been charted. The map was donated to Flagstaff Hill Maritime Village in April 1990 by the Group Study Exchange Team from Rotary District 233, Sweden. It was framed and presented by Rotary District 978 and presented by Barry Lange, the Governor of District 978 in 1989-90. (District 978, Geelong East, is now District 9780.) Johann (Johannes) Walch Johann Walch, painter and engraver, was born in 1757. He was well known for creating miniature portraits. He gained his training in Geneva, Venice and Rome. His publications include atlases and sheet maps, many of which were reprinted after his death in 1816. This reprint of an 1802 is significant for its historical and geographical contant, showing the voyages of many early explorers to the southern regions of the world including Australia. It also shows the early names used for countries and towns and is a valuable reference to historical interpretation. The map itself is a fine example of hand drawn and hand coloured maps of the early 19th century, the method of production, detail included, layout, symbols and so forth.Map, reprint of Johann (Johannes) Walch’s “Australien (Sudland) auch Polynesien oder Inselwelt, insgemein der funfte Welltheil “, first published by in Ausburg in 1802. The image on this Map No 5B, shows Australia and the south Pacific. The timber framed, glass covered, printed and coloured map was created in two sections and joined. Brass plaque at base of map states that the map was presented to Flagstaff Hill by Rotary International in April 1990. Feint lines used for aligning lettering can be seen on the map and there are large erased letters such as a “D” and “S” that are almost obscured.Plague “ROTARY INTERNATIONAL / THE MAP WAS DONATED BY THE GROUP STUDY EXCHANGE TEAM / FROM ROTARY DISTRICT 233 SWEDEN IN APRIL 1990 / AND WAS FRAMED AND PRESENTED BY ROTARY DISTRICT 978 / BARRY LANGE – GOVERNOR DISTRICT 978 1989/90” Stamped on back “ELLIMINOOK FRAMES / MRS. JILL FALKINER / ELLIMINOOK / BIRREGURRA, VIC. 3242 / PHONE: (052) 36 2080” flagstaff hill, warrnambool, shipwrecked coast, flagstaff hill maritime museum, maritime museum, shipwreck coast, flagstaff hill maritime village, great ocean road, australien (sudland) auch polynesien oder inselwelt, insgemein der funfte welltheil, johann (johannes) walch, cartographer johann (johannes) walch, ausburg publisher johann (johannes) walch, johann (johannes) walch map number 5b, 1802 map of australia and south pacific, rotary international group study exchange team, rotary district 233 sweden, elliminook frames, voyages of tasman, voyages of cook, voyages of bougainville, voyages of carteret, voyages of byron, barry lange, painter of miniature portraits johann (johannes) walch -
 Flagstaff Hill Maritime Museum and Village
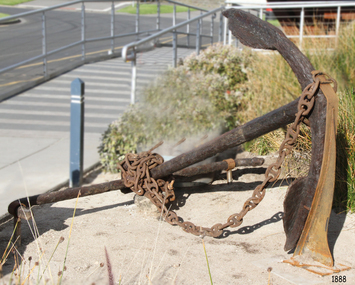
Anchor, Before 1831
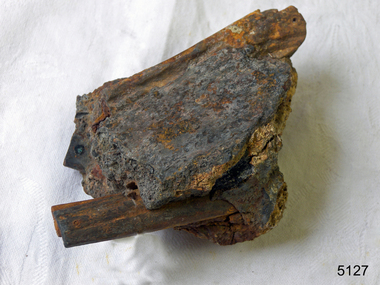
Historical Information: The anchor is from the wooden sailing ship CHILDREN, which was wrecked at Childers Cove east of Warrnambool on the 15th of January 1839 with the loss of 16 lives. The Children anchor was raised from the wreck site by Flagstaff Hill Divers; Peter Ronald, Garry Hayden (Terang, still), Tim Goodall (now Warrnambool), and Colin Goodall (now Warrnambool), on Sunday 3rd January 1974. A week or so later it was dragged up the cliffs and taken to Warrnambool. It is now on display near the entrance to the Maritime Village and Museum. It appears to be a Pering’s Improved Anchor, developed at Portsmouth after 1813. The addition of broad curvature to the anchor arms provided a stronger purchase than the pre-existing Admiralty Old Pattern Long Shanked Anchor with straight arms. However, the evidence of hammer-welding the separate pieces of the arms and palms to the central shank (peaked crown and flat palms) suggests the manufacture is before the 1831 Rodger’s Anchor design, (which cast both arms and their flukes as one piece that was then attached to the shank by a bolt through the crown). This identification seems consistent with the date of the CHILDREN’s construction in 1824. The CHILDREN was a three masted barque with a wooden hull built at Liverpool in England. She was bought by the Henty family of Portland (Australia Felix) in 1837 for regular coastal trading between Van Diemens Land, the Port Phillip District of New South Wales and South Australia. Only 255 tons burden (92 feet in length, with a beam of 25 feet and depth of 17 feet), she sailed from Launceston bound for Adelaide in late December1838, on her first Australian voyage and under the English master who had brought her out – Captain H. Browne. On board the CHILDREN were 24 passengers, including 9 children; the captain and 14 crew; livestock of 1500 sheep, 8 bullocks and 7 horses; general cargo of beef, pork, tobacco, tripe, butter, limejuice, horse hair, currants, lead shot, beer and spirits; 5,000 house bricks from London; and six whaling boats with associated whaling gear. The vessel was battered by gale force north-westerly winds shortly after setting out from Launceston on 11 January 1839 and adverse sailing conditions persisted for the next four days. At 11 pm on the 15th of January 1839, and many miles north and east of the captain’s navigated position, the CHILDREN struck the Pinnacle, a limestone stack off Childers Cove. Within half an hour the ship was completely destroyed. As well as the loss of livestock and cargo, 16 passengers and crew perished, including the captain, six men, one woman and eight children. In 1931 shifting sands at Childers Cove uncovered the skeleton of an adult male. In 1951 another two skeletons were exposed by storms, an adult male and a child. In 1963 some district scuba divers retrieved a small signal-cannon from the site. And in 1974 Flagstaff Hill recovered the anchor and some house bricks. The shipwreck of the CHILDREN is of state significance – Victorian Heritage Register No. S116.A large forged-wrought iron anchor from the wreck of the CHILDREN. Flat hammer-welded flukes on opposing curved arms and a peaked crown. It has a metal (elbowed) stock or cross-bar and a heavy duty pinned shackle (not ring) for the anchor chain. It is in fair condition but extensively corroded after 135 years on seabed (supported on display) .warrnambool, shipwreck coast, flagstaff hill, shipwrecked coast, flagstaff hill maritime village, flagstaff hill maritime museum, shipwreck artefact, maritime museum, the children, childers cove, anchor, pering’s improved anchor, 1839 shipwreck. -
 Flagstaff Hill Maritime Museum and Village
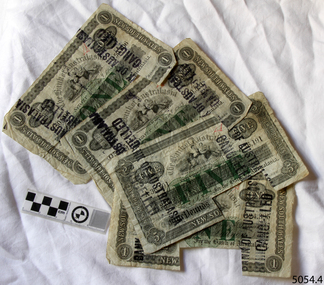
Currency - Banknote set, Bank of Australasia, 1899-1903
This set of banknotes was issued by the Bank of Australasia's Head Office in Sydney, New South Wales. Two banknotes are dated before the Federation of Australia on 1st January 1901 and two are dated just two years after Federation. Each of the banknotes in this set has a rectangular piece cut from it. This indicates that the banknote was cancelled when the note was exchanged for Australian dollars after Decimal Currency was introduced on 14th February 1966. The Bank of Australasia was established under the Royal Charter of England. It first came to Australia in 1835, opening in Sydney. The Bank of Australasia was the first bank in Warrnambool. It was established in 1854 and operated from leased buildings in Merri Street then Timor Street. The bank opened its own building on May 21, 1860, on the north-east corner of Timor and Kepler Streets. In that year, the Acting Superintendent of the Bank of Australasia in Sydney was David Charters McArthur. He went on to become the Superintendent 1867-1876. In 1951 the Bank of Australasia amalgamated with the Union Bank to form the Australia and New Zealand Bank, now known as the ANZ. Then in 1970 the ANZ merged with both the ES&A and the London Bank of Australia to form the ANZ Banking Group Limited. The ANZ Banking Group Ltd kindly donated a variety of historic items from the Bank of Australasia. This set of banknotes has historical significance as it was issued by the Bank of Australasia. The Bank of Australasia was the first bank in Warrnambool, established in 1854. The bank continued to operate until its merger in 1951 when it became the ANZ Bank, which is still in operation today. The Bank was an integral part of the establishment and growth of commerce in Colonial Warrnambool and throughout Australia. The banknotes also have a significant place in Australia’s history as two notes are just prior to the Federation of Australia and two notes just after.This banknote set of four notes comprises three (3) £1 one-pound notes and one (1) £5 five-pound note. The notes were published by The Bank of Australasia, Sydney, New South Wales between 1899 and 1903. The denominations of the notes and their round pound-coin symbols are printed in green ink, and the remainder of the printing is in black ink. All notes have a black ink stamp impressed twice on each side. The stamp states that the notes are cancelled. There are handwritten initials in red ink on each note's obverse and text in pencil on their reverse. The reverse of the one-pound notes is unprinted but the five-pound note has a printed decorative border and images with an inscription and shield. The notes have a rectangular cut-out on the lower edge.Serial Numbers, Denominations and Dates: 5054.1 "ONE POUND" "Q50,806" "NEW SOUTH WALES" "1st July 1903" 5054.2 "ONE POUND" "O50 551" "NEW SOUTH WALES" "1st July 1903" 5054.3 "ONE POUND" "O24,385" "NEW SOUTH WALES" "1st July 1899" 5054.4 "FIVE POUND" "A36,191" "NEW SOUTH WALES" "5th February 1900" Stamp "BANK OF AUSTRALASIA / CANCELLED" Handwritten in red [initials] Image on five pound note"(around border) "BANK OF AUSTRALASIA INCORPORATED BY ROYAL CHARTER" and (image on shield) [suspended sheep] in diagonal corners, and [sailing ships] in other diagonal corners, and four stars (or open flowers)" Text in pencil "L24"flagstaff hill, warrnambool, one pound note, bank of australasia, legal tender, £1, banknote, banknotes, flagstaff hill maritime museum & village, shipwreck coast, five poind note, australian currency, shipwrecked coast, flagstaff hill maritime museum, maritime museum, flagstaff hill maritime village, great ocean road, union bank, australia & new zealand bank, anz bank, david charters mcarthur, d c mcarthur, one-pound note, five-pound note, £5, sydney, new south wales, pre-federation, post-federation, currency, set of banknotes -
 Flagstaff Hill Maritime Museum and Village
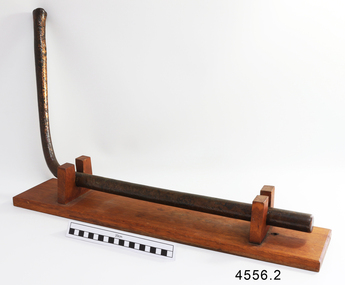
Nail, circa 1810
This copper nail, sometimes known as a ‘Dumpy Bolt’ or spike, was salvaged from the hull of the wreck of the “George III”. It dates back to at least 1810. It was found by an abalone diver on the south east coast of Tasmania. The nail would have been used to hold the layers of the ship’s keel frame and the planking together. The nail has been passed from the abalone diver to an interested business man on a trip to the south of Hobart, on again to the business man’s close friend who then donated it to Flagstaff Hill Maritime Village. The metal of nails such as this one, after being in the sea for a long time, become affected by the natural reaction of the sea water, causing it to degenerate and thin, and the stress from the force of the sea over the years alters its shape. Iron nails had been used on ships previously, but they quickly corroded in the salt; ships needed regular, costly and time-consuming maintenance to replace the iron nails. Towards the end of the 18th century the British Navy trialled the use of copper nails, finding them to be very successful. Merchant ships began to adopt this process in the early 19th century, although it made ship building very expensive and was more often used for ships such as the “George III” that sailed on long voyages. The three masted sailing ship “George III” was a convict transport ship built in Deptford, England, in 1810. On 14th December 1834 she left Woolwich, England, bound for Hobart Town, Van Diemen’s Land (Tasmania), under Captain William Hall Moxey. She was carrying 220 male convicts plus crew, guards and their families, totalling 294 persons (another 2 were during the voyage). Amongst the cargo were military stores including several copper drums of gun powder. On 27th January 1835 the “George III” was near the Equator, about half way into her journey. A fire broke out and the gun powder was in danger of explosion, threatening the whole ship. Two convicts braved the heat and smoke, entered the store and seized the gun powder drums, suffering burns for their efforts but saving a probable disaster. The fire destroyed some of the provisions and food was scarce. Many became ill with scurvy and some died during the journey. Nearing the end of their journey on 10th April 1835 the “George III” was headed through the D'Entrecasteaux Channel, south east Tasmania, between the mainland and Bruny Island. She was sailing in the moonlit night to hasten her arrival in port due to the great number of sick on board. She struck uncharted rocks, known only to the local whalers, between Actaeon Reef and Southport Lagoon and within hours began to break up. The ship’s boats were used to first rescue the women and children. Firearms were used to help quell the panic of the convicts below decks and some were killed by the shots. Many convicts, including the sick, were drowned. In all, 133 lives were lost including 5 of the crew, guards and their families. It was the third worst shipping disaster in Tasmanian waters. A monument in honour of the prisoners who perished in the “George III” has been erected, noting the date of the wreck as “Friday 10th April 1835.” (NOTE: there are a few differences between sources regarding dates of the shipwreck, some saying March and others April 1835. There are also differences in the figures of those on board and the number of lives lost.) The copper nail is significant as an example of sailing ship construction; fasteners used in the early 19th century on ships carrying convicts to Australia. The nail is also significant for its association with the ship “George III”. The “George III” is registered on the Australian National Shipwreck Database, ID 7195 as an Historic Shipwreck. She is the third worst shipwreck in Tasmanian waters. She is also associated with Early Australian History and the transportation of convicts to Australia. The incident of the fire on board and the bravery of the convicts in making the gun powder safe is an example of the social character of the people in early Tasmanian colonisation. Copper nail (also called a Dumpy bolt or spike) from the convict ship George III, wrecked in 1835. Nail is long, bent in an ‘L’ shape about 3/5ths along, tapering from both ends to the bend. Both ends are flat and do not taper to a point, nor have a thread. The shorter end has been polished, showing bright copper. There is pitting along the nail and virdigris is evident on the longer, unpolished end. The nail is displayed with the longer section resting on a wooden board between two ‘U’ shaped uprights, the shorter section upright. flagstaff hill, warrnambool, shipwrecked coast, flagstaff hill maritime museum, maritime museum, shipwreck coast, flagstaff hill maritime village, great ocean road, george iii, ship construction, ship nail, 1835 shipwreck, 19th century shipwreck, william moxey, d'entrecasteaux channel, convict transportation, copper nail, dumpy bolt, spike, keel nail -
 Flagstaff Hill Maritime Museum and Village
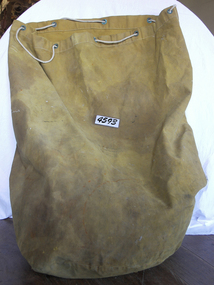
Bag
Bag canvas for sails mustard colour with 8 eyelets around top. Printed in black E F Prior Sailmaker 7 McHenry Sy East St Kilda. Has canvas patch on base.flagstaff hill, warrnambool, shipwrecked-coast, flagstaff-hill, flagstaff-hill-maritime-museum, maritime-museum, shipwreck-coast, flagstaff-hill-maritime-village -
 Flagstaff Hill Maritime Museum and Village
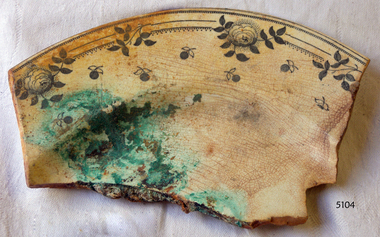
Ceramic - Plate Shard, Before 1878
History of the Loch Ard: The Loch Ard got it’s name from ”Loch Ard” a loch which lies to the west of Aberfoyle, and to the east of Loch Lomond. It means "high lake" in Scottish Gaelic.The vessel belonged to the famous Loch Line which sailed many vessels from England to Australia. The Loch Ard was built in Glasgow by Barclay, Curdle and Co. in 1873, the vessel was a three-masted square-rigged iron sailing ship that measured 79.87 meters in length, 11.58 m in width, and 7 m in depth with a gross tonnage of 1693 tons with a mainmast that measured a massive 45.7 m in height. Loch Ard made three trips to Australia and one trip to Calcutta before its fateful voyage. Loch Ard left England on March 2, 1878, under the command of 29-year-old Captain Gibbs, who was newly married. The ship was bound for Melbourne with a crew of 37, plus 17 passengers. The general cargo reflected the affluence of Melbourne at the time. Onboard were straw hats, umbrella, perfumes, clay pipes, pianos, clocks, confectionery, linen and candles, as well as a heavier load of railway irons, cement, lead and copper. There were other items included that were intended for display in the Melbourne International Exhibition of 1880. The voyage to Port Phillip was long but uneventful. Then at 3 am on June 1, 1878, Captain Gibbs was expecting to see land. But the Loch Ard was running into a fog which greatly reduced visibility. Captain Gibbs was becoming anxious as there was no sign of land or the Cape Otway lighthouse. At 4 am the fog lifted and a lookout aloft announced that he could see breakers. The sheer cliffs of Victoria's west coast came into view, and Captain Gibbs realised that the ship was much closer to them than expected. He ordered as much sail to be set as time would permit and then attempted to steer the vessel out to sea. On coming head-on into the wind, the ship lost momentum, the sails fell limp and Loch Ard's bow swung back towards land. Gibbs then ordered the anchors to be released in an attempt to hold its position. The anchors sank some 50 fathoms - but did not hold. By this time the ship was among the breakers and the tall cliffs of Mutton Bird Island rose behind. Just half a mile from the coast, the ship's bow was suddenly pulled around by the anchor. The captain tried to tack out to sea, but the ship struck a reef at the base of Mutton Bird Island, near Port Campbell. Waves subsequently broke over the ship and the top deck became loosened from the hull. The masts and rigging came crashing down knocking passengers and crew overboard. When a lifeboat was finally launched, it crashed into the side of Loch Ard and capsized. Tom Pearce, who had launched the boat, managed to cling to its overturned hull and shelter beneath it. He drifted out to sea and then on the flood tide came into what is now known as Loch Ard Gorge. He swam to shore, bruised and dazed, and found a cave in which to shelter. Some of the crew stayed below deck to shelter from the falling rigging but drowned when the ship slipped off the reef into deeper water. Eva Carmichael a passenger had raced onto the deck to find out what was happening only to be confronted by towering cliffs looming above the stricken ship. In all the chaos, Captain Gibbs grabbed Eva and said, "If you are saved Eva, let my dear wife know that I died like a sailor". That was the last Eva Carmichael saw of the captain. She was swept off the ship by a huge wave. Eva saw Tom Pearce on a small rocky beach and yelled to attract his attention. He dived in and swam to the exhausted woman and dragged her to shore. He took her to the cave and broke the open case of brandy which had washed up on the beach. He opened a bottle to revive the unconscious woman. A few hours later Tom scaled a cliff in search of help. He followed hoof prints and came by chance upon two men from nearby Glenample Station three and a half miles away. In a complete state of exhaustion, he told the men of the tragedy. Tom then returned to the gorge while the two men rode back to the station to get help. By the time they reached Loch Ard Gorge, it was cold and dark. The two shipwreck survivors were taken to Glenample Station to recover. Eva stayed at the station for six weeks before returning to Ireland by steamship. In Melbourne, Tom Pearce received a hero's welcome. He was presented with the first gold medal of the Royal Humane Society of Victoria and a £1000 cheque from the Victorian Government. Concerts were performed to honour the young man's bravery and to raise money for those who lost family in the disaster. Of the 54 crew members and passengers on board, only two survived: the apprentice, Tom Pearce and the young woman passenger, Eva Carmichael, who lost her family in the tragedy. Ten days after the Loch Ard tragedy, salvage rights to the wreck were sold at auction for £2,120. Cargo valued at £3,000 was salvaged and placed on the beach, but most washed back into the sea when another storm developed. The wreck of Loch Ard still lies at the base of Mutton Bird Island. Much of the cargo has now been salvaged and some items were washed up into Loch Ard Gorge. Cargo and artefacts have also been illegally salvaged over many years before protective legislation was introduced in March 1982. One of the most unlikely pieces of cargo to have survived the shipwreck was a Minton majolica peacock- one of only nine in the world. The peacock was destined for the Melbourne 1880 International Exhibition in. It had been well packed, which gave it adequate protection during the violent storm. Today the Minton peacock can be seen at the Flagstaff Hill Maritime Museum in Warrnambool. From Australia's most dramatic shipwreck it has now become Australia's most valuable shipwreck artifact and is one of very few 'objects' on the Victorian State Heritage Register.The shipwreck of the Loch Ard is of significance for Victoria and is registered on the Victorian Heritage Register ( S 417). Flagstaff Hill has a varied collection of artefacts from Loch Ard and its collection is significant for being one of the largest accumulation of artefacts from this notable Victorian shipwreck. The collections object is to also give us a snapshot into history so we are able to interpret the story of this tragic event. The collection is also archaeologically significant as it represents aspects of Victoria's shipping history that allows us to interpret Victoria's social and historical themes of the time. The collections historically significance is that it is associated unfortunately with the worst and best-known shipwreck in Victoria's history. Fragment of ceramic plate. White plate with black flower design and border around edge. Verdigris stain on plate. Little encrustation on broken edge. Recovered from the wreck of the Loch Ard.flagstaff hill, warrnambool, shipwrecked coast, flagstaff hill maritime museum, maritime museum, shipwreck coast, flagstaff hill maritime village, great ocean road, loch line, loch ard, captain gibbs, eva carmichael, tom pearce, glenample station, mutton bird island, loch ard gorge, ceramic plate, plate, shard, cream with black roses -
 Flagstaff Hill Maritime Museum and Village
Domestic object - Knife, Before 1878
Cutlery was part of the large cargo of the Loch Ard sailing ship. This concreted block of knives was recovered from the wreck of that ship. History of the Loch Ard: - The Loch Ard got its name from ”Loch Ard” a loch which lies to the west of Aberfoyle, and to the east of Loch Lomond. It means "high lake" in Scottish Gaelic. The vessel belonged to the famous Loch Line which sailed many vessels from England to Australia. The Loch Ard was built in Glasgow by Barclay, Curdle and Co. in 1873, the vessel was a three-masted square-rigged iron sailing ship that measured 79.87 meters in length, 11.58 m in width, and 7 m in depth with a gross tonnage of 1693 tons with a mainmast that measured a massive 45.7 m in height. Loch Ard made three trips to Australia and one trip to Calcutta before its fateful voyage. Loch Ard left England on March 2, 1878, under the command of 29-year-old Captain Gibbs, who was newly married. The ship was bound for Melbourne with a crew of 37, plus 17 passengers. The general cargo reflected the affluence of Melbourne at the time. Onboard were straw hats, umbrellas, perfumes, clay pipes, pianos, clocks, confectionery, linen and candles, as well as a heavier load of railway irons, cement, lead and copper. There were other items included that were intended for display in the Melbourne International Exhibition of 1880. The voyage to Port Phillip was long but uneventful. Then at 3 am on June 1, 1878, Captain Gibbs was expecting to see land. But the Loch Ard was running into a fog which greatly reduced visibility. Captain Gibbs was becoming anxious as there was no sign of land or the Cape Otway lighthouse. At 4 am the fog lifted and a lookout aloft announced that he could see breakers. The sheer cliffs of Victoria's west coast came into view, and Captain Gibbs realised that the ship was much closer to them than expected. He ordered as much sail to be set as time would permit and then attempted to steer the vessel out to sea. On coming head-on into the wind, the ship lost momentum, the sails fell limp and Loch Ard's bow swung back towards land. Gibbs then ordered the anchors to be released in an attempt to hold their position. The anchors sank some 50 fathoms - but did not hold. By this time the ship was among the breakers and the tall cliffs of Mutton Bird Island rose behind. Just half a mile from the coast, the ship's bow was suddenly pulled around by the anchor. The captain tried to tack out to sea, but the ship struck a reef at the base of Mutton Bird Island, near Port Campbell. Waves subsequently broke over the ship and the top deck became loosened from the hull. The masts and rigging came crashing down knocking passengers and crew overboard. When a lifeboat was finally launched, it crashed into the side of Loch Ard and capsized. Tom Pearce, who had launched the boat, managed to cling to its overturned hull and shelter beneath it. He drifted out to sea and then on the flood tide came into what is now known as Loch Ard Gorge. He swam to shore, bruised and dazed, and found a cave in which to shelter. Some of the crew stayed below deck to shelter from the falling rigging but drowned when the ship slipped off the reef into deeper water. Eva Carmichael a passenger had raced onto the deck to find out what was happening only to be confronted by towering cliffs looming above the stricken ship. In all the chaos, Captain Gibbs grabbed Eva and said, "If you are saved Eva, let my dear wife know that I died like a sailor". That was the last Eva Carmichael saw of the captain. She was swept off the ship by a huge wave. Eva saw Tom Pearce on a small rocky beach and yelled to attract his attention. He dived in and swam to the exhausted woman and dragged her to shore. He took her to the cave and broke the open case of brandy which had washed up on the beach. He opened a bottle to revive the unconscious woman. A few hours later Tom scaled a cliff in search of help. He followed hoof prints and came by chance upon two men from nearby Glenample Station three and a half miles away. In a complete state of exhaustion, he told the men of the tragedy. Tom then returned to the gorge while the two men rode back to the station to get help. By the time they reached Loch Ard Gorge, it was cold and dark. The two shipwreck survivors were taken to Glenample Station to recover. Eva stayed at the station for six weeks before returning to Ireland by steamship. In Melbourne, Tom Pearce received a hero's welcome. He was presented with the first gold medal of the Royal Humane Society of Victoria and a £1000 cheque from the Victorian Government. Concerts were performed to honour the young man's bravery and to raise money for those who lost family in the disaster. Of the 54 crew members and passengers on board, only two survived: the apprentice, Tom Pearce and the young woman passenger, Eva Carmichael, who lost her family in the tragedy. Ten days after the Loch Ard tragedy, salvage rights to the wreck were sold at auction for £2,120. Cargo valued at £3,000 was salvaged and placed on the beach, but most washed back into the sea when another storm developed. The wreck of Loch Ard still lies at the base of Mutton Bird Island. Much of the cargo has now been salvaged and some items were washed up into Loch Ard Gorge. Cargo and artefacts have also been illegally salvaged over many years before protective legislation was introduced in March 1982. One of the most unlikely pieces of cargo to have survived the shipwreck was a Minton majolica peacock- one of only nine in the world. The peacock was destined for the Melbourne 1880 International Exhibition. It had been well packed, which gave it adequate protection during the violent storm. Today the Minton peacock can be seen at the Flagstaff Hill Maritime Museum in Warrnambool. From Australia's most dramatic shipwreck, it has now become Australia's most valuable shipwreck artifact and is one of very few 'objects' on the Victorian State Heritage Register.The shipwreck of the Loch Ard is of significance for Victoria and is registered on the Victorian Heritage Register ( S 417). Flagstaff Hill has a varied collection of artefacts from Loch Ard and its collection is significant for being one of the largest accumulation of artefacts from this notable Victorian shipwreck. The collections object is to also give us a snapshot into history so we are able to interpret the story of this tragic event. The collection is also archaeologically significant as it represents aspects of Victoria's shipping history that allows us to interpret Victoria's social and historical themes of the time. The collections historically significance is that it is associated unfortunately with the worst and best-known shipwreck in Victoria's history. Knife handles extend from and are embedded in concretion. Recovered from the wreck of the Loch Ard..Noneflagstaff hill, warrnambool, shipwrecked coast, flagstaff hill maritime museum, maritime museum, shipwreck coast, flagstaff hill maritime village, great ocean road, loch line, loch ard, captain gibbs, eva carmichael, tom pearce, glenample station, mutton bird island, loch ard gorge, knife handles, knife, cutlery, cargo -
 Flagstaff Hill Maritime Museum and Village
Functional object - Pipe, Before 1878
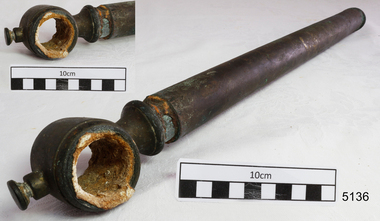
HISTORY OF THE LOCH ARD: - The Loch Ard got its name from ”Loch Ard” a loch that lies to the west of Aberfoyle, and to the east of Loch Lomond. It means "high lake" in Scottish Gaelic. The vessel belonged to the famous Loch Line which sailed many vessels from England to Australia. The Loch Ard was built in Glasgow by Barclay, Curdle and Co. in 1873, the vessel was a three-masted square-rigged iron sailing ship that measured 79.87 meters in length, 11.58 m in width, and 7 m in depth with a gross tonnage of 1693 tons with a mainmast that measured a massive 45.7 m in height. Loch Ard made three trips to Australia and one trip to Calcutta before its fateful voyage. Loch Ard left England on March 2, 1878, under the command of 29-year-old Captain Gibbs, who was newly married. The ship was bound for Melbourne with a crew of 37, plus 17 passengers. The general cargo reflected the affluence of Melbourne at the time. Onboard were straw hats, umbrellas, perfumes, clay pipes, pianos, clocks, confectionery, linen and candles, as well as a heavier load of railway irons, cement, lead and copper. There were other items included that were intended for display in the Melbourne International Exhibition of 1880. The voyage to Port Phillip was long but uneventful. Then at 3 am on June 1, 1878, Captain Gibbs was expecting to see land. But the Loch Ard was running into a fog which greatly reduced visibility. Captain Gibbs was becoming anxious as there was no sign of land or the Cape Otway lighthouse. At 4 am the fog lifted and a lookout aloft announced that he could see breakers. The sheer cliffs of Victoria's west coast came into view, and Captain Gibbs realised that the ship was much closer to them than expected. He ordered as much sail to be set as time would permit and then attempted to steer the vessel out to sea. On coming head-on into the wind, the ship lost momentum, the sails fell limp and Loch Ard's bow swung back towards land. Gibbs then ordered the anchors to be released in an attempt to hold their position. The anchors sank some 50 fathoms - but did not hold. By this time the ship was among the breakers and the tall cliffs of Mutton Bird Island rose behind. Just half a mile from the coast, the ship's bow was suddenly pulled around by the anchor. The captain tried to tack out to sea, but the ship struck a reef at the base of Mutton Bird Island, near Port Campbell. Waves subsequently broke over the ship and the top deck became loosened from the hull. The masts and rigging came crashing down knocking passengers and crew overboard. When a lifeboat was finally launched, it crashed into the side of Loch Ard and capsized. Tom Pearce, who had launched the boat, managed to cling to its overturned hull and shelter beneath it. He drifted out to sea and then on the flood tide came into what is now known as Loch Ard Gorge. He swam to shore, bruised and dazed, and found a cave in which to shelter. Some of the crew stayed below deck to shelter from the falling rigging but drowned when the ship slipped off the reef into deeper water. Eva Carmichael a passenger had raced onto the deck to find out what was happening only to be confronted by towering cliffs looming above the stricken ship. In all the chaos, Captain Gibbs grabbed Eva and said, "If you are saved Eva, let my dear wife know that I died like a sailor". That was the last Eva Carmichael saw of the captain. She was swept off the ship by a huge wave. Eva saw Tom Pearce on a small rocky beach and yelled to attract his attention. He dived in and swam to the exhausted woman and dragged her to shore. He took her to the cave and broke the open case of brandy which had washed up on the beach. He opened a bottle to revive the unconscious woman. A few hours later Tom scaled a cliff in search of help. He followed hoof prints and came by chance upon two men from nearby Glenample Station three and a half miles away. In a complete state of exhaustion, he told the men of the tragedy. Tom then returned to the gorge while the two men rode back to the station to get help. By the time they reached Loch Ard Gorge, it was cold and dark. The two shipwreck survivors were taken to Glenample Station to recover. Eva stayed at the station for six weeks before returning to Ireland by steamship. In Melbourne, Tom Pearce received a hero's welcome. He was presented with the first gold medal of the Royal Humane Society of Victoria and a £1000 cheque from the Victorian Government. Concerts were performed to honour the young man's bravery and to raise money for those who lost family in the disaster. Of the 54 crew members and passengers on board, only two survived: the apprentice, Tom Pearce and the young woman passenger, Eva Carmichael, who lost her family in the tragedy. Ten days after the Loch Ard tragedy, salvage rights to the wreck were sold at auction for £2,120. Cargo valued at £3,000 was salvaged and placed on the beach, but most washed back into the sea when another storm developed. The wreck of Loch Ard still lies at the base of Mutton Bird Island. Much of the cargo has now been salvaged and some items were washed up into Loch Ard Gorge. Cargo and artefacts have also been illegally salvaged over many years before protective legislation was introduced in March 1982. One of the most unlikely pieces of cargo to have survived the shipwreck was a Minton majolica peacock- one of only nine in the world. The peacock was destined for the Melbourne 1880 International Exhibition. It had been well packed, which gave it adequate protection during the violent storm. Today the Minton peacock can be seen at the Flagstaff Hill Maritime Museum in Warrnambool. From Australia's most dramatic shipwreck, it has now become Australia's most valuable shipwreck artifact and is one of very few 'objects' on the Victorian State Heritage Register.The shipwreck of the Loch Ard is of significance for Victoria and is registered on the Victorian Heritage Register ( S 417). Flagstaff Hill has a varied collection of artefacts from Loch Ard and its collection is significant for being one of the largest accumulation of artefacts from this notable Victorian shipwreck. The collections object is to also give us a snapshot into history so we are able to interpret the story of this tragic event. The collection is also archaeologically significant as it represents aspects of Victoria's shipping history that allows us to interpret Victoria's social and historical themes of the time. The collections historically significance is that it is associated unfortunately with the worst and best-known shipwreck in Victoria's history. Heavy duty brass sleeve retrieved from the wreck of the LOCH ARD. It is pinched and broken off at one end, enclosing an extendable inner sleeve, which is connected to a brass bracket fixed at right angles. The circular enclosing bracket would hold (and fix by an adjustable brass screw) a through or cross pipe of similar diameter to the outer sleeve. The artefact is a structural piece delivering vertical support to a horizontal rail (missing) and not for transporting gas. It is constructed of thick gauge metal suitable for weight/load bearing and its sliding sleeve design is similar to a modern shock absorber, or a telescopic leg supporting a surveying instrument. There is concreting sediment immobilising the sleeves and lining the inner surface of the bracket. flagstaff hill, warrnambool, shipwrecked coast, flagstaff hill maritime museum, maritime museum, shipwreck coast, flagstaff hill maritime village, great ocean road, loch line, loch ard, captain gibbs, eva carmichael, tom pearce, glenample station, mutton bird island, loch ard gorge, brass fitting, brass pipe, 1878 shipwreck -
 Flagstaff Hill Maritime Museum and Village
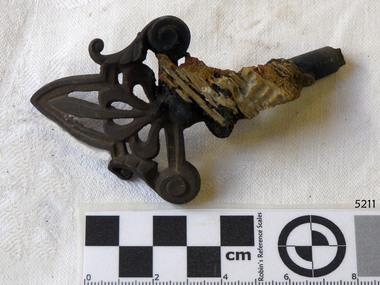
Functional object - Gas Tap, ca 1878
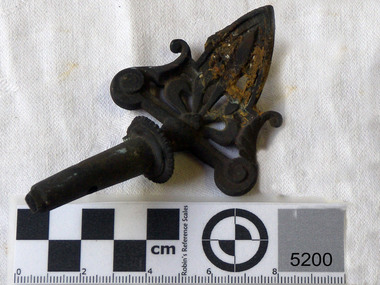
History of the Loch Ard: The Loch Ard got it’s name from ”Loch Ard” a loch which lies to the west of Aberfoyle, and to the east of Loch Lomond. It means "high lake" in Scottish Gaelic.The vessel belonged to the famous Loch Line which sailed many vessels from England to Australia. The Loch Ard was built in Glasgow by Barclay, Curdle and Co. in 1873, the vessel was a three-masted square-rigged iron sailing ship that measured 79.87 meters in length, 11.58 m in width, and 7 m in depth with a gross tonnage of 1693 tons with a mainmast that measured a massive 45.7 m in height. Loch Ard made three trips to Australia and one trip to Calcutta before its fateful voyage. Loch Ard left England on March 2, 1878, under the command of 29-year-old Captain Gibbs, who was newly married. The ship was bound for Melbourne with a crew of 37, plus 17 passengers. The general cargo reflected the affluence of Melbourne at the time. Onboard were straw hats, umbrella, perfumes, clay pipes, pianos, clocks, confectionery, linen and candles, as well as a heavier load of railway irons, cement, lead and copper. There were other items included that were intended for display in the Melbourne International Exhibition of 1880. The voyage to Port Phillip was long but uneventful. Then at 3 am on June 1, 1878, Captain Gibbs was expecting to see land. But the Loch Ard was running into a fog which greatly reduced visibility. Captain Gibbs was becoming anxious as there was no sign of land or the Cape Otway lighthouse. At 4 am the fog lifted and a lookout aloft announced that he could see breakers. The sheer cliffs of Victoria's west coast came into view, and Captain Gibbs realised that the ship was much closer to them than expected. He ordered as much sail to be set as time would permit and then attempted to steer the vessel out to sea. On coming head-on into the wind, the ship lost momentum, the sails fell limp and Loch Ard's bow swung back towards land. Gibbs then ordered the anchors to be released in an attempt to hold its position. The anchors sank some 50 fathoms - but did not hold. By this time the ship was among the breakers and the tall cliffs of Mutton Bird Island rose behind. Just half a mile from the coast, the ship's bow was suddenly pulled around by the anchor. The captain tried to tack out to sea, but the ship struck a reef at the base of Mutton Bird Island, near Port Campbell. Waves subsequently broke over the ship and the top deck became loosened from the hull. The masts and rigging came crashing down knocking passengers and crew overboard. When a lifeboat was finally launched, it crashed into the side of Loch Ard and capsized. Tom Pearce, who had launched the boat, managed to cling to its overturned hull and shelter beneath it. He drifted out to sea and then on the flood tide came into what is now known as Loch Ard Gorge. He swam to shore, bruised and dazed, and found a cave in which to shelter. Some of the crew stayed below deck to shelter from the falling rigging but drowned when the ship slipped off the reef into deeper water. Eva Carmichael a passenger had raced onto the deck to find out what was happening only to be confronted by towering cliffs looming above the stricken ship. In all the chaos, Captain Gibbs grabbed Eva and said, "If you are saved Eva, let my dear wife know that I died like a sailor". That was the last Eva Carmichael saw of the captain. She was swept off the ship by a huge wave. Eva saw Tom Pearce on a small rocky beach and yelled to attract his attention. He dived in and swam to the exhausted woman and dragged her to shore. He took her to the cave and broke the open case of brandy which had washed up on the beach. He opened a bottle to revive the unconscious woman. A few hours later Tom scaled a cliff in search of help. He followed hoof prints and came by chance upon two men from nearby Glenample Station three and a half miles away. In a complete state of exhaustion, he told the men of the tragedy. Tom then returned to the gorge while the two men rode back to the station to get help. By the time they reached Loch Ard Gorge, it was cold and dark. The two shipwreck survivors were taken to Glenample Station to recover. Eva stayed at the station for six weeks before returning to Ireland by steamship. In Melbourne, Tom Pearce received a hero's welcome. He was presented with the first gold medal of the Royal Humane Society of Victoria and a £1000 cheque from the Victorian Government. Concerts were performed to honour the young man's bravery and to raise money for those who lost family in the disaster. Of the 54 crew members and passengers on board, only two survived: the apprentice, Tom Pearce and the young woman passenger, Eva Carmichael, who lost her family in the tragedy. Ten days after the Loch Ard tragedy, salvage rights to the wreck were sold at auction for £2,120. Cargo valued at £3,000 was salvaged and placed on the beach, but most washed back into the sea when another storm developed. The wreck of Loch Ard still lies at the base of Mutton Bird Island. Much of the cargo has now been salvaged and some items were washed up into Loch Ard Gorge. Cargo and artefacts have also been illegally salvaged over many years before protective legislation was introduced in March 1982. One of the most unlikely pieces of cargo to have survived the shipwreck was a Minton majolica peacock- one of only nine in the world. The peacock was destined for the Melbourne 1880 International Exhibition in. It had been well packed, which gave it adequate protection during the violent storm. Today the Minton peacock can be seen at the Flagstaff Hill Maritime Museum in Warrnambool. From Australia's most dramatic shipwreck it has now become Australia's most valuable shipwreck artifact and is one of very few 'objects' on the Victorian State Heritage Register.The shipwreck of the Loch Ard is of significance for Victoria and is registered on the Victorian Heritage Register ( S 417). Flagstaff Hill has a varied collection of artefacts from Loch Ard and its collection is significant for being one of the largest accumulation of artefacts from this notable Victorian shipwreck. The collections object is to also give us a snapshot into history so we are able to interpret the story of this tragic event. The collection is also archaeologically significant as it represents aspects of Victoria's shipping history that allows us to interpret Victoria's social and historical themes of the time. The collections historically significance is that it is associated unfortunately with the worst and best-known shipwreck in Victoria's history. Brass gas light tap fitting has fancy metal work at the end. Recovered from the Loch Ard wreck. Noneflagstaff hill, warrnambool, shipwrecked coast, flagstaff hill maritime museum, maritime museum, shipwreck coast, flagstaff hill maritime village, great ocean road, loch line, loch ard, captain gibbs, eva carmichael, tom pearce, glenample station, mutton bird island, loch ard gorge, gas tap, brass gas tap -
 Flagstaff Hill Maritime Museum and Village
Domestic object - Drink Stirrers, Before 1878
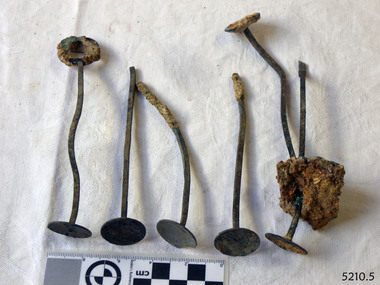
History of the Loch Ard: The Loch Ard got it’s name from ”Loch Ard” a loch which lies to the west of Aberfoyle, and to the east of Loch Lomond. It means "high lake" in Scottish Gaelic.The vessel belonged to the famous Loch Line which sailed many vessels from England to Australia. The Loch Ard was built in Glasgow by Barclay, Curdle and Co. in 1873, the vessel was a three-masted square-rigged iron sailing ship that measured 79.87 meters in length, 11.58 m in width, and 7 m in depth with a gross tonnage of 1693 tons with a mainmast that measured a massive 45.7 m in height. Loch Ard made three trips to Australia and one trip to Calcutta before its fateful voyage. Loch Ard left England on March 2, 1878, under the command of 29-year-old Captain Gibbs, who was newly married. The ship was bound for Melbourne with a crew of 37, plus 17 passengers. The general cargo reflected the affluence of Melbourne at the time. Onboard were straw hats, umbrella, perfumes, clay pipes, pianos, clocks, confectionery, linen and candles, as well as a heavier load of railway irons, cement, lead and copper. There were other items included that were intended for display in the Melbourne International Exhibition of 1880. The voyage to Port Phillip was long but uneventful. Then at 3 am on June 1, 1878, Captain Gibbs was expecting to see land. But the Loch Ard was running into a fog which greatly reduced visibility. Captain Gibbs was becoming anxious as there was no sign of land or the Cape Otway lighthouse. At 4 am the fog lifted and a lookout aloft announced that he could see breakers. The sheer cliffs of Victoria's west coast came into view, and Captain Gibbs realised that the ship was much closer to them than expected. He ordered as much sail to be set as time would permit and then attempted to steer the vessel out to sea. On coming head-on into the wind, the ship lost momentum, the sails fell limp and Loch Ard's bow swung back towards land. Gibbs then ordered the anchors to be released in an attempt to hold its position. The anchors sank some 50 fathoms - but did not hold. By this time the ship was among the breakers and the tall cliffs of Mutton Bird Island rose behind. Just half a mile from the coast, the ship's bow was suddenly pulled around by the anchor. The captain tried to tack out to sea, but the ship struck a reef at the base of Mutton Bird Island, near Port Campbell. Waves subsequently broke over the ship and the top deck became loosened from the hull. The masts and rigging came crashing down knocking passengers and crew overboard. When a lifeboat was finally launched, it crashed into the side of Loch Ard and capsized. Tom Pearce, who had launched the boat, managed to cling to its overturned hull and shelter beneath it. He drifted out to sea and then on the flood tide came into what is now known as Loch Ard Gorge. He swam to shore, bruised and dazed, and found a cave in which to shelter. Some of the crew stayed below deck to shelter from the falling rigging but drowned when the ship slipped off the reef into deeper water. Eva Carmichael a passenger had raced onto the deck to find out what was happening only to be confronted by towering cliffs looming above the stricken ship. In all the chaos, Captain Gibbs grabbed Eva and said, "If you are saved Eva, let my dear wife know that I died like a sailor". That was the last Eva Carmichael saw of the captain. She was swept off the ship by a huge wave. Eva saw Tom Pearce on a small rocky beach and yelled to attract his attention. He dived in and swam to the exhausted woman and dragged her to shore. He took her to the cave and broke the open case of brandy which had washed up on the beach. He opened a bottle to revive the unconscious woman. A few hours later Tom scaled a cliff in search of help. He followed hoof prints and came by chance upon two men from nearby Glenample Station three and a half miles away. In a complete state of exhaustion, he told the men of the tragedy. Tom then returned to the gorge while the two men rode back to the station to get help. By the time they reached Loch Ard Gorge, it was cold and dark. The two shipwreck survivors were taken to Glenample Station to recover. Eva stayed at the station for six weeks before returning to Ireland by steamship. In Melbourne, Tom Pearce received a hero's welcome. He was presented with the first gold medal of the Royal Humane Society of Victoria and a £1000 cheque from the Victorian Government. Concerts were performed to honour the young man's bravery and to raise money for those who lost family in the disaster. Of the 54 crew members and passengers on board, only two survived: the apprentice, Tom Pearce and the young woman passenger, Eva Carmichael, who lost her family in the tragedy. Ten days after the Loch Ard tragedy, salvage rights to the wreck were sold at auction for £2,120. Cargo valued at £3,000 was salvaged and placed on the beach, but most washed back into the sea when another storm developed. The wreck of Loch Ard still lies at the base of Mutton Bird Island. Much of the cargo has now been salvaged and some items were washed up into Loch Ard Gorge. Cargo and artefacts have also been illegally salvaged over many years before protective legislation was introduced in March 1982. One of the most unlikely pieces of cargo to have survived the shipwreck was a Minton majolica peacock- one of only nine in the world. The peacock was destined for the Melbourne 1880 International Exhibition in. It had been well packed, which gave it adequate protection during the violent storm. Today the Minton peacock can be seen at the Flagstaff Hill Maritime Museum in Warrnambool. From Australia's most dramatic shipwreck it has now become Australia's most valuable shipwreck artifact and is one of very few 'objects' on the Victorian State Heritage Register.The shipwreck of the Loch Ard is of significance for Victoria and is registered on the Victorian Heritage Register ( S 417). Flagstaff Hill has a varied collection of artefacts from Loch Ard and its collection is significant for being one of the largest accumulation of artefacts from this notable Victorian shipwreck. The collections object is to also give us a snapshot into history so we are able to interpret the story of this tragic event. The collection is also archaeologically significant as it represents aspects of Victoria's shipping history that allows us to interpret Victoria's social and historical themes of the time. The collections historically significance is that it is associated unfortunately with the worst and best-known shipwreck in Victoria's history. Brass drink stirrers or swizzle sticks, set of six. One is complete with a narrow shank, loop handle on top, and disc on base. Others have the handle missing, and a block of concretion joins two. Surfaces have encrustatio. Recovered from the Loch Ard.flagstaff hill, warrnambool, shipwrecked coast, flagstaff hill maritime museum, maritime museum, shipwreck coast, flagstaff hill maritime village, great ocean road, loch line, loch ard, captain gibbs, eva carmichael, tom pearce, glenample station, mutton bird island, loch ard gorge, brass drink stirrers, swizzle-sticks, beverage accessory -
 Flagstaff Hill Maritime Museum and Village
Functional object - Gas Tap, Before 1878
History of the Loch Ard: The Loch Ard got it’s name from ”Loch Ard” a loch which lies to the west of Aberfoyle, and to the east of Loch Lomond. It means "high lake" in Scottish Gaelic.The vessel belonged to the famous Loch Line which sailed many vessels from England to Australia. The Loch Ard was built in Glasgow by Barclay, Curdle and Co. in 1873, the vessel was a three-masted square-rigged iron sailing ship that measured 79.87 meters in length, 11.58 m in width, and 7 m in depth with a gross tonnage of 1693 tons with a mainmast that measured a massive 45.7 m in height. Loch Ard made three trips to Australia and one trip to Calcutta before its fateful voyage. Loch Ard left England on March 2, 1878, under the command of 29-year-old Captain Gibbs, who was newly married. The ship was bound for Melbourne with a crew of 37, plus 17 passengers. The general cargo reflected the affluence of Melbourne at the time. Onboard were straw hats, umbrella, perfumes, clay pipes, pianos, clocks, confectionery, linen and candles, as well as a heavier load of railway irons, cement, lead and copper. There were other items included that were intended for display in the Melbourne International Exhibition of 1880. The voyage to Port Phillip was long but uneventful. Then at 3 am on June 1, 1878, Captain Gibbs was expecting to see land. But the Loch Ard was running into a fog which greatly reduced visibility. Captain Gibbs was becoming anxious as there was no sign of land or the Cape Otway lighthouse. At 4 am the fog lifted and a lookout aloft announced that he could see breakers. The sheer cliffs of Victoria's west coast came into view, and Captain Gibbs realised that the ship was much closer to them than expected. He ordered as much sail to be set as time would permit and then attempted to steer the vessel out to sea. On coming head-on into the wind, the ship lost momentum, the sails fell limp and Loch Ard's bow swung back towards land. Gibbs then ordered the anchors to be released in an attempt to hold its position. The anchors sank some 50 fathoms - but did not hold. By this time the ship was among the breakers and the tall cliffs of Mutton Bird Island rose behind. Just half a mile from the coast, the ship's bow was suddenly pulled around by the anchor. The captain tried to tack out to sea, but the ship struck a reef at the base of Mutton Bird Island, near Port Campbell. Waves subsequently broke over the ship and the top deck became loosened from the hull. The masts and rigging came crashing down knocking passengers and crew overboard. When a lifeboat was finally launched, it crashed into the side of Loch Ard and capsized. Tom Pearce, who had launched the boat, managed to cling to its overturned hull and shelter beneath it. He drifted out to sea and then on the flood tide came into what is now known as Loch Ard Gorge. He swam to shore, bruised and dazed, and found a cave in which to shelter. Some of the crew stayed below deck to shelter from the falling rigging but drowned when the ship slipped off the reef into deeper water. Eva Carmichael a passenger had raced onto the deck to find out what was happening only to be confronted by towering cliffs looming above the stricken ship. In all the chaos, Captain Gibbs grabbed Eva and said, "If you are saved Eva, let my dear wife know that I died like a sailor". That was the last Eva Carmichael saw of the captain. She was swept off the ship by a huge wave. Eva saw Tom Pearce on a small rocky beach and yelled to attract his attention. He dived in and swam to the exhausted woman and dragged her to shore. He took her to the cave and broke the open case of brandy which had washed up on the beach. He opened a bottle to revive the unconscious woman. A few hours later Tom scaled a cliff in search of help. He followed hoof prints and came by chance upon two men from nearby Glenample Station three and a half miles away. In a complete state of exhaustion, he told the men of the tragedy. Tom then returned to the gorge while the two men rode back to the station to get help. By the time they reached Loch Ard Gorge, it was cold and dark. The two shipwreck survivors were taken to Glenample Station to recover. Eva stayed at the station for six weeks before returning to Ireland by steamship. In Melbourne, Tom Pearce received a hero's welcome. He was presented with the first gold medal of the Royal Humane Society of Victoria and a £1000 cheque from the Victorian Government. Concerts were performed to honour the young man's bravery and to raise money for those who lost family in the disaster. Of the 54 crew members and passengers on board, only two survived: the apprentice, Tom Pearce and the young woman passenger, Eva Carmichael, who lost her family in the tragedy. Ten days after the Loch Ard tragedy, salvage rights to the wreck were sold at auction for £2,120. Cargo valued at £3,000 was salvaged and placed on the beach, but most washed back into the sea when another storm developed. The wreck of Loch Ard still lies at the base of Mutton Bird Island. Much of the cargo has now been salvaged and some items were washed up into Loch Ard Gorge. Cargo and artefacts have also been illegally salvaged over many years before protective legislation was introduced in March 1982. One of the most unlikely pieces of cargo to have survived the shipwreck was a Minton majolica peacock- one of only nine in the world. The peacock was destined for the Melbourne 1880 International Exhibition in. It had been well packed, which gave it adequate protection during the violent storm. Today the Minton peacock can be seen at the Flagstaff Hill Maritime Museum in Warrnambool. From Australia's most dramatic shipwreck it has now become Australia's most valuable shipwreck artifact and is one of very few 'objects' on the Victorian State Heritage Register.The shipwreck of the Loch Ard is of significance for Victoria and is registered on the Victorian Heritage Register ( S 417). Flagstaff Hill has a varied collection of artefacts from Loch Ard and its collection is significant for being one of the largest accumulation of artefacts from this notable Victorian shipwreck. The collections object is to also give us a snapshot into history so we are able to interpret the story of this tragic event. The collection is also archaeologically significant as it represents aspects of Victoria's shipping history that allows us to interpret Victoria's social and historical themes of the time. The collections historically significance is that it is associated unfortunately with the worst and best-known shipwreck in Victoria's history. Brass gas light tap with fancy metalwork end, recovered from the wreck of the Loch Ard. flagstaff hill, warrnambool, shipwrecked coast, flagstaff hill maritime museum, maritime museum, shipwreck coast, flagstaff hill maritime village, great ocean road, loch line, loch ard, captain gibbs, eva carmichael, tom pearce, glenample station, mutton bird island, loch ard gorge, brass gas tap, brass light fitting, gas fitting -
 Flagstaff Hill Maritime Museum and Village
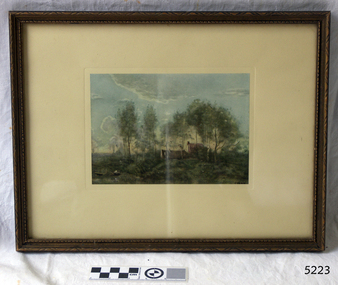
Print - Landscape, Jean Baptiste Camille Corot, Souvenir of a Journey to Coubron, 1908-mid-20th century
Famous French artist Jean Baptiste Camille Corot, 1796-1875, was trained in the classical landscape style. His inspiration came from his travels around France and Italy. He developed a soft poetic or romantic style of work which became very popular. He had the skills to bring'light' into his paintings. The original oil on canvas painting by Corot is held at The National Gallery in the United Kingdom. It is titled 'Souvenir of a Journey to Coubron' and is one of twenty-seven of his works at the Gallery. Corot visited Coubon, east of Paris, many times. In 1873 during his stay there he sketched the scene that became the basis of this painting. This reproduction print was made by The Medici Society Ltd., founded in England 1908. The Society's aim was to make artwork affordable and available to the general public. The name Medici was chosen to honour the support and encouragement given to artists in the 15th century by Lorenzo de' Medici (1449 - 1492), known as Lorenzo the Magnificent, and his family. His profile is on the company's trademark. The Medici Society still produces Fine Art reproduction prints as well as selling original works. The print was framed by Westminster Art Gallery in Camperdown, London. The handwritten text on the back of the artwork adds some background to the artist: Corot was apprenticed to a Draper but changed to his profession at the age of 22 years. When he went from a poor artist to achieving wealth and fame he generously supported his less fortunate fellow artists. Corot found that the light and shade in a natural scene meant more to a landscape painter that what could be learned by following the principles of the academies. Corot was 51 years old before he sold his first picture. He though that he was the only artist that could really paint 'light'. The National Gallery, Victoria, has an original oil on canvas by Corot "the bent tree", created 1856-1860. It is in a similar style to this print "Souvenir of a Journey to Coubron", which was likely to have been painted around the same time.This high quality reproduction print was produced in the early-to-mid 1900;'s. This advancement in technology allowed everyday people to own and enjoy the fine art that was previously only accessible to the wealthy. The print is significant for its association with the famous 19th century artist Jean Baptiste Camille Corot.Print of a painting by Jean Baptiste Camille Corot, depicting a landscape with two buildings amongst trees and a boatman in the marshy foreground. The print is famed in carved timber with a cream matt, behind glass. there is an inscription on bottom right of print and further stamped and handwritten inscriptions of the reverse paper. The is a genuine Medici Society Fine Art reproduction print and was framed by Westminster Art Gallery.Original artwork painted and signed by artist "COROT" White sticker with"32" Reproduction print by the Medici Society, London Stamp "Westminster Art Gallery / 91 CAMBERWELL RD. / CAMBERWELL E.6." Text on Corot's history Underlined statement "GENUINE MEDICI PRINT "flagstaff hill, flagstaff hill maritime museum and village, warrnambool, maritime museum, maritime village, great ocean road, shipwreck coast, jean-baptiste-camille corot, french artist, jean corot, camille corot, print, souvenir of a journey to coubron, coubron, 19th century artist, medici society, reproduction print, westminster art gallery, fine art -
 Flagstaff Hill Maritime Museum and Village
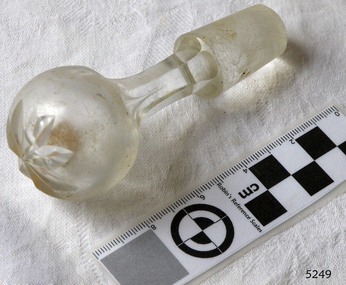
Domestic object - Glass Decanter Stopper, 1850+
History of the Loch Ard: The Loch Ard got it’s name from ”Loch Ard” a loch which lies to the west of Aberfoyle, and to the east of Loch Lomond. It means "high lake" in Scottish Gaelic.The vessel belonged to the famous Loch Line which sailed many vessels from England to Australia. The Loch Ard was built in Glasgow by Barclay, Curdle and Co. in 1873, the vessel was a three-masted square-rigged iron sailing ship that measured 79.87 meters in length, 11.58 m in width, and 7 m in depth with a gross tonnage of 1693 tons with a mainmast that measured a massive 45.7 m in height. Loch Ard made three trips to Australia and one trip to Calcutta before its fateful voyage. Loch Ard left England on March 2, 1878, under the command of 29-year-old Captain Gibbs, who was newly married. The ship was bound for Melbourne with a crew of 37, plus 17 passengers. The general cargo reflected the affluence of Melbourne at the time. Onboard were straw hats, umbrella, perfumes, clay pipes, pianos, clocks, confectionery, linen and candles, as well as a heavier load of railway irons, cement, lead and copper. There were other items included that were intended for display in the Melbourne International Exhibition of 1880. The voyage to Port Phillip was long but uneventful. Then at 3 am on June 1, 1878, Captain Gibbs was expecting to see land. But the Loch Ard was running into a fog which greatly reduced visibility. Captain Gibbs was becoming anxious as there was no sign of land or the Cape Otway lighthouse. At 4 am the fog lifted and a lookout aloft announced that he could see breakers. The sheer cliffs of Victoria's west coast came into view, and Captain Gibbs realised that the ship was much closer to them than expected. He ordered as much sail to be set as time would permit and then attempted to steer the vessel out to sea. On coming head-on into the wind, the ship lost momentum, the sails fell limp and Loch Ard's bow swung back towards land. Gibbs then ordered the anchors to be released in an attempt to hold its position. The anchors sank some 50 fathoms - but did not hold. By this time the ship was among the breakers and the tall cliffs of Mutton Bird Island rose behind. Just half a mile from the coast, the ship's bow was suddenly pulled around by the anchor. The captain tried to tack out to sea, but the ship struck a reef at the base of Mutton Bird Island, near Port Campbell. Waves subsequently broke over the ship and the top deck became loosened from the hull. The masts and rigging came crashing down knocking passengers and crew overboard. When a lifeboat was finally launched, it crashed into the side of Loch Ard and capsized. Tom Pearce, who had launched the boat, managed to cling to its overturned hull and shelter beneath it. He drifted out to sea and then on the flood tide came into what is now known as Loch Ard Gorge. He swam to shore, bruised and dazed, and found a cave in which to shelter. Some of the crew stayed below deck to shelter from the falling rigging but drowned when the ship slipped off the reef into deeper water. Eva Carmichael a passenger had raced onto the deck to find out what was happening only to be confronted by towering cliffs looming above the stricken ship. In all the chaos, Captain Gibbs grabbed Eva and said, "If you are saved Eva, let my dear wife know that I died like a sailor". That was the last Eva Carmichael saw of the captain. She was swept off the ship by a huge wave. Eva saw Tom Pearce on a small rocky beach and yelled to attract his attention. He dived in and swam to the exhausted woman and dragged her to shore. He took her to the cave and broke the open case of brandy which had washed up on the beach. He opened a bottle to revive the unconscious woman. A few hours later Tom scaled a cliff in search of help. He followed hoof prints and came by chance upon two men from nearby Glenample Station three and a half miles away. In a complete state of exhaustion, he told the men of the tragedy. Tom then returned to the gorge while the two men rode back to the station to get help. By the time they reached Loch Ard Gorge, it was cold and dark. The two shipwreck survivors were taken to Glenample Station to recover. Eva stayed at the station for six weeks before returning to Ireland by steamship. In Melbourne, Tom Pearce received a hero's welcome. He was presented with the first gold medal of the Royal Humane Society of Victoria and a £1000 cheque from the Victorian Government. Concerts were performed to honour the young man's bravery and to raise money for those who lost family in the disaster. Of the 54 crew members and passengers on board, only two survived: the apprentice, Tom Pearce and the young woman passenger, Eva Carmichael, who lost her family in the tragedy. Ten days after the Loch Ard tragedy, salvage rights to the wreck were sold at auction for £2,120. Cargo valued at £3,000 was salvaged and placed on the beach, but most washed back into the sea when another storm developed. The wreck of Loch Ard still lies at the base of Mutton Bird Island. Much of the cargo has now been salvaged and some items were washed up into Loch Ard Gorge. Cargo and artefacts have also been illegally salvaged over many years before protective legislation was introduced in March 1982. One of the most unlikely pieces of cargo to have survived the shipwreck was a Minton majolica peacock- one of only nine in the world. The peacock was destined for the Melbourne 1880 International Exhibition in. It had been well packed, which gave it adequate protection during the violent storm. Today the Minton peacock can be seen at the Flagstaff Hill Maritime Museum in Warrnambool. From Australia's most dramatic shipwreck it has now become Australia's most valuable shipwreck artifact and is one of very few 'objects' on the Victorian State Heritage Register. The shipwreck of the Loch Ard is of significance for Victoria and is registered on the Victorian Heritage Register ( S 417). Flagstaff Hill has a varied collection of artefacts from Loch Ard and its collection is significant for being one of the largest accumulation of artefacts from this notable Victorian shipwreck. The collections object is to also give us a snapshot into history so we are able to interpret the story of this tragic event. The collection is also archaeologically significant as it represents aspects of Victoria's shipping history that allows us to interpret Victoria's social and historical themes of the time. The collections historically significance is that it is associated unfortunately with the worst and best-known shipwreck in Victoria's history. Glass decanter stopper; hand blown. The bulbous glass head has floral motif, neck is six-sided, base has textured surface. The stopper was, recovered from the wreck of the Loch Ard. flagstaff hill, warrnambool, shipwrecked coast, flagstaff hill maritime museum, maritime museum, shipwreck coast, flagstaff hill maritime village, great ocean road, loch line, loch ard, captain gibbs, eva carmichael, tom pearce, glenample station, mutton bird island, loch ard gorge, decanter stopper, stopper, hand blown, bottle stopper -
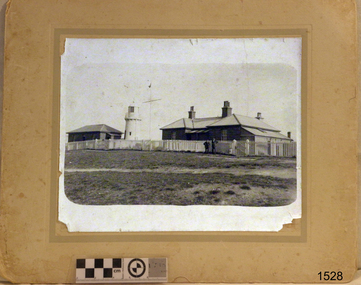 Flagstaff Hill Maritime Museum and Village
Photograph - Historical, building, Late 19th to early 20th century
The black and white photograph depicts the Lady Bay Lighthouse Complex at Flagstaff Hill, Warrnambool. It was opened on this site in 1871. From left to right, the Chartroom (previously named the Store), Upper Lighthouse, Flagstaff, Lighthouse Keeper's Quarters. The bluestone buildings are facing North on Merri Street. The Harbour Pilot's Lodgings were on the east of the Complex. There are two unknown male figures standing in front of the light-coloured picket fence that encompasses the Complex. The photograph is mounted on card. WARRNAMBOOL'S LADY BAY LIGHTHOUSES In the 1800s ships sailing from England to Australia began to use Bass Strait as a faster route to Melbourne. Small navigation errors led to many tragic shipwrecks. From 1848 lighthouses were operating along Victoria’s southern coast as a guide for sailors. Coastal towns such as Warrnambool grew and the exchange of trade and passengers was of great benefit. However, the uncertain weather changes, relatively shallow waters and treacherous, hidden rocky reefs were not really suitable for a Harbour and in the 1840s and 1850s, there were many shipwrecks in the area, with some even stranded in its Lady Bay harbour. A jetty was built in 1850 and a flagstaff to guide seafarers was placed up high on what became known now as Flagstaff Hill. In November 1857 the Victorian Government recommended that Warrnambool Harbour had beacons and two lighthouses to guide vessels into and out of the Harbour safely. The white light of the Middle Island lighthouse was to be used for the first time on September 1, 1859. The red light of the Beach Lighthouse, a wooden obelisk structure, was first operated on March 25, 1860, but in 1868 this light was ‘discontinued’ due to it being too low. Melbourne’s Department of Public Works decided to relocate the Middle Island Lighthouse Complex - Lighthouse, Keeper’s Quarters, Privy, Store Room and even water tanks - to Flagstaff Hill. The lower obelisk was shortened, and a protruding gallery, railing, and external ladder were added, and the light from the Beach Lighthouse. A green guiding light was erected on the end of the jetty. The transfer of the Complex began in March 1871. Each shaped stone of the lighthouse was carefully numbered, removed then reassembled on Flagstaff Hill. In 1872 the well was sunk behind the Lighthouse Keeper’s Cottage. The Keepers and families had left Middle Island in April and moved to Flagstaff Hill in October 1871. Vessels entering Lady Bay align the Upper and Lower Lighthouse towers during the day and the lights at night. The Upper Lighthouse is a round tower, and the Lower Light is square. The Lighthouses were categorised as harbour lights rather than coastal lights, so they remain under the control of the Victorian Government’s Ports and Harbours section. The lights were originally powered by oil, then acetylene gas, later by electricity, and then converted to solar power in 1988. In 1993 the solar panel was replaced by a battery charger. A decision was made in 1936 to replace the lighthouses’ lights with unattended lights that no longer required Keepers and Assistants. At least 29 Keepers had attended to the lighthouse from its opening in 1859 to when the last official Lightkeepers left In April 1916. The Warrnambool Harbour Board rented out the Quarters from 1916 to 1936. The Board closed down but the rentals continued with other unknown landlords. In the 1970s the Flagstaff Hill Planning Board was set up under the chairmanship of John Lindsay. The Board was to make recommendations to the Warrnambool City Council regarding using the buildings and the rest of the Crown Land on the site. The Flagstaff Hill Maritime Village opened in 1975 and began renovating the Cottage in stages, during which time evidence of a 1920s fire was found in the eastern section of the cottage. Additions of a porch on the west and a washroom on the east were made in the 1980s. The western part of the building is now a Shipwreck Museum and the east has returned to a late 19th-century Lighthouse Keeper’s cottage and includes the screen made by Assistant Lighthouse Keeper Thomas Hope in the late 19th century. He served as Assistant Keeper in Warrnambool for two periods.The Warrnambool Lighthouse Complex is now listed on the Victorian Heritage Register, H1520, for being of historical, scientific (technological) and architectural significance to the State of Victoria. The Complex is significant as an example of early colonial development. The buildings are significant for their connection with the important navigational function of the Lighthouses, a function still being performed to this day. The buildings are also significant as an example of structures designed and works carried out by the Public Works Department in Victoria in the mid-to-late 19th century. The structures still stand strong. Photograph; Warrnambool Lighthouse Keeper's cottage, lighthouse, flagstaff and chartroom at Flagstaff Hill, and a light-coloured picket fence with gate. Two male figures are in front of the fence. Black and white print glued to a yellow card. The inscription is indecipherable. The right side of the cottage has a built-in, enclosed addition.Ink stamped in lower right hand corner, too faded to be legible.flagstaff hill, flagstaff hill maritime museum, flagstaff hill maritime village, warrnambool, maritime museum, shipwreck coast, lighthouse keeper's cottage, lighthouse residence, lighthouse, chart room, quarters, privy, middle island, beach lighthouse, obelisk, lighthouse complex, lady bay complex, warrnambool port, warrnambool harbour, lady bay, keepers, lighthouse keeper, upper lighthouse, lower lighthouse, assistant keeper, ports and harbours, cottage -
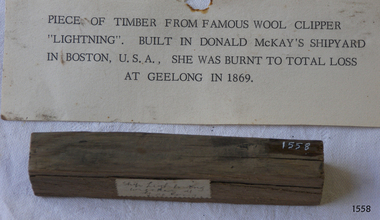 Flagstaff Hill Maritime Museum and Village
Wood Sample, c. 1854
This piece of wood is from the American clipper ship LIGHTNING was a 3 masted, fully rigged extreme clipper ship. She was commissioned by James Baines, of the Black Ball Line in Liverpool, England, during the time of the Australian Gold Rush for the trade of passengers and cargo between England and Australia. Her cargo listed early consignments of livestock and animals, including rabbits sent to Thomas Austin of Barwon Park, Winchelsea, Victoria. The LIGHTNING was built in 1854 by shipbuilder Donald McKay, of East Boston, USA. She was described as spacious and comfortable, and one of the smartest ships known. The LIGHTNING set many speed records for her sea crossings, and became one of the most famous of the racing clippers and one of the fastest ever launched. In 1854, with Captain ‘Bully’ Forbes and Mate ‘Bully’ Bragg, LIGHTNING made the return trip from Melbourne to Liverpool in only 64 days, 3 hours and 10 minutes; a record for all time. Captain Enright became the new Master of LIGHTNING soon afterwards. He has been described as one of the finest mariners in the Australian trade. One of Captain Enright’s innovations was to publish a ship’s paper called The Lightning Gazette. (Captain Forbes had left to captain the SCHOMBERG.) In January 1855 Capt. Enright sailed the LIGHTNING from Liverpool with over 700 passengers and returned home carrying gold as her cargo. In 1857, for a very brief time under Capt. Byrne the LIGHTNING was used as a troop ship, taking British officers and soldiers, stores and ammunition, to fight in India. In 1859 she then returned to her run between Liverpool and Melbourne, apart from 1867 when she made a special trip between Melbourne and Port Chalmers in New Zealand. In 1869 the LIGHTNING was sold to Thomas Harrison of Liverpool, and she continued to sail for the Black Ball Line. Master of LIGHTNING, Captain Henry Jones, sailed her to Geelong in October 1869, and whilst docked, he had her loaded with a cargo of wool, copper, wire, tallow and other goods. At about 1am on 31st October 1869, whilst still docked and fully laden, a fire was noticed on the LIGHTNING. Efforts to extinguished the fire were unsuccessful, so she was towed to the shoals in Corio Bay, where she eventually sank, losing all cargo but no lives. The area is now known as Lightning Shoals. The LIGHTNING is listed on the Victorian Heritage Register VHR S415. She is historically significant for being one of the fastest wooden ships ever built, the first clipper built in the USA for British owners and being the worst shipping disaster in Geelong's history. It spent its whole career carrying cargo and immigrants from England to Australia.Sample of wood from the wool clipper LIGHTNING, 1854-1869, The sample has a label and a card with information about the ship and a person. Card, typewritten, "PIECE OF TIMBER FROM FAMOUS WOOL CLIPPER / "LIGHTNING". BUILD IN DONALD McKAY'S SHIPYARD / IN BOSTON, U.S.A.. SHE WAS BURNT TO TOTAL LOSS / IN GEELONG IN 1869"flagstaff hill, warrnambool, shipwrecked-coast, flagstaff-hill, flagstaff-hill-maritime-museum, maritime-museum, shipwreck-coast, flagstaff-hill-maritime-village, sailing ship lightning, extreme clipper ship, american clipper ship, record breaking clipper ship, james baines, black ball line, donald mckay shipbuilder, captain ‘bully’ forbes, australian immigration, liverpool to melbourne migration, captain enright, captain byrne, captain henry jones, lightning shoals geelong, rabbits introduced to australia, wood sample from lightning -
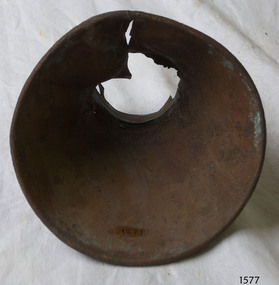 Flagstaff Hill Maritime Museum and Village
Equipment - Speaking Tube, Morts Dock & Engineering Co. Ltd, circa 1941
This brass speaking tube or voice pipe was used by the crew to communicate within the ship. It was recovered from the wreck of the Royal Australian Navy vessel, HMAS Warrnambool in 1948. The HMAS Warrnambool J202 was commissioned by the Royal Australian Navy for use as a minesweeper during World War II. The Bathurst Class Corvette, fitted out with a range of armaments, was launched in Sydney 1941 and was. The ship began service in Bass Strait in 1941. At the end of the year it called into its namesake city, Warrnambool, where the crew paraded for the public marching eastwards along Timor Street. A gift of books for the ship’s personnel and a plaque bearing the City of Warrnambool’s Coat of Arms were presented to the ship. The ship was involved in evacuating a family of nine from the Dutch East Indies that was later successful in its challenge of Australia’s Immigration Restriction Act (White Australia Polity). The ship had many other appointments around Australia. On 13th September 1947 HMAS Warrnambool was leading a flotilla of minesweepers in northern Queensland’s coastal waters, clearing mines previously laid to defend Australia. The ship hit a mine, which exploded and very quickly sunk the ship. Boats from the nearby ships rescued most of the seamen although one was killed at the time. The survivors were taken by the HMAS Swan II to Darwin, and they went from there to hospitals in Brisbane and Sydney. Three of these men later died from their injuries. A number of items were recovered by Navy divers in 1948 including the ship’s bell and a plaque with Warrnambool’s Coat of Arms. In 1972-75 the wreck was sold and other items were salvaged. In 1995 a memorial plaque was erected in Warrnambool near the RSL. NOTE: The RAN built a second HMAS Warrnambool FCPB204, launched in 1981 and decommissioned in 2005. There was also a steam ship SS Warrnambool built in London 1892 and broken up in 1926. [A more detailed history can be found in our Collection Record 3477.] This speaking tube is an example of communication used in the mid-1900s on board a vessel. It is significant is significant for its association with Royal Australian Navy and its vessel, HMAS Warrnambool (J202). The HMAS Warrnambool played a nationally significant role in overturning Australia’s Immigration Restriction Act 1901 (colloquially known as the White Australia policy). The ship rescued, and brought to Australia, Samuel and Annie Jacob and their family after they evacuated Dutch East India. The family was threatened with deportation and made the first successful appeal to High Court regarding that Act. The HMAS Warrnambool has - Local significance for being the namesake of the City of Warrnambool - Local significance, having docked in Warrnambool Harbour - Local significance, the crew having paraded in Timor Street, Warrnambool - State significance for its first patrol being in Bass Strait. - National significance, being present in Timor at the Japanese surrender - National significance, shown by the significance of the ship’s bell being curated as Military Heritage and Technology at the Australian War Memorial. - National significance as part of Australia’s defence force history, being one of only four Bathurst class corvettes lost while in Australian service, the only Bathurst class corvette lost after World War II, the only RAN vessel to be sunk by a mine, and associated with the last four Navy deaths of WWIISpeaking tube or voice pipe, brass, conical shape, broken off at base. Wide end has a rolled edge. Recovered from HMAS Warrnambool, sunk on 13-09-1947.flagstaff hill, maritime village, maritime museum, warrnambool, shipwreck coast, mort's dock & engineering co ltd, h.m.a.s. warrnambool, hmas warrnambool, hmas warrnambool i, hmas warrnambool j202, hmas swan ii, j202, world war ii, bathurst class corvette, royal australian navy, ran, sydney built ship, bass strait patrol, sea mine patrol, mine sweeper, mine clearance, navy divers, great barrier reef, cockburn reef, southern cross diving and salvage, warrnambool city council, cr j r astbury, mayor j r astbury, warrnambool patriotic fund, seal, coat of arms, ship’s bell, hmas warrnambool 1941, shipwreck by sea mine 1947, sinking ship, sunk ship, sea rescue, life saving, lifesaving, speaking tube, voice pipe, communication on ship, marine technology, marine equipment, minesweeper -
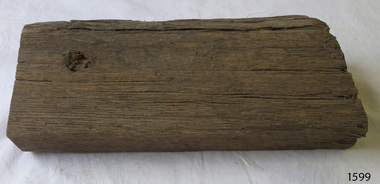 Flagstaff Hill Maritime Museum and Village
Wood Sample, c. 1854
This sample of wood is from the American clipper ship LIGHTNING was a 3 masted, fully rigged extreme clipper ship. She was commissioned by James Baines, of the Black Ball Line in Liverpool, England, during the time of the Australian Gold Rush for the trade of passengers and cargo between England and Australia. Her cargo listed early consignments of livestock and animals, including rabbits sent to Thomas Austin of Barwon Park, Winchelsea, Victoria. The LIGHTNING was built in 1854 by shipbuilder Donald McKay, of East Boston, USA. She was described as spacious and comfortable, and one of the smartest ships known. The LIGHTNING set many speed records for her sea crossings, and became one of the most famous of the racing clippers and one of the fastest ever launched. In 1854, with Captain ‘Bully’ Forbes and Mate ‘Bully’ Bragg, LIGHTNING made the return trip from Melbourne to Liverpool in only 64 days, 3 hours and 10 minutes; a record for all time. Captain Enright became the new Master of LIGHTNING soon afterwards. He has been described as one of the finest mariners in the Australian trade. One of Captain Enright’s innovations was to publish a ship’s paper called The Lightning Gazette. (Captain Forbes had left to captain the SCHOMBERG.) In January 1855 Capt. Enright sailed the LIGHTNING from Liverpool with over 700 passengers and returned home carrying gold as her cargo. In 1857, for a very brief time under Capt. Byrne the LIGHTNING was used as a troop ship, taking British officers and soldiers, stores and ammunition, to fight in India. In 1859 she then returned to her run between Liverpool and Melbourne, apart from 1867 when she made a special trip between Melbourne and Port Chalmers in New Zealand. In 1869 the LIGHTNING was sold to Thomas Harrison of Liverpool, and she continued to sail for the Black Ball Line. Master of LIGHTNING, Captain Henry Jones, sailed her to Geelong in October 1869, and whilst docked, he had her loaded with a cargo of wool, copper, wire, tallow and other goods. At about 1am on 31st October 1869, whilst still docked and fully laden, a fire was noticed on the LIGHTNING. Efforts to extinguished the fire were unsuccessful, so she was towed to the shoals in Corio Bay, where she eventually sank, losing all cargo but no lives. The area is now known as Lightning Shoals. The LIGHTNING is listed on the Victorian Heritage Register VHR S415. She is historically significant for being one of the fastest wooden ships ever built, the first clipper built in the USA for British owners and being the worst shipping disaster in Geelong's history. It spent its whole career carrying cargo and immigrants from England to Australia.Sample wooden rectangular from the clipper Lightning, which burned out at Geelong 31 Oct 1869.flagstaff hill, warrnambool, shipwrecked-coast, flagstaff-hill, flagstaff-hill-maritime-museum, maritime-museum, sailing ship lightning, extreme clipper ship, american clipper ship, record breaking clipper ship, james baines, black ball line, donald mckay shipbuilder, captain ‘bully’ forbes, australian immigration, liverpool to melbourne migration, captain enright, captain byrne, captain henry jones, lightning shoals geelong, rabbits introduced to australia, wood from sailing ship, shipwreck-coast, flagstaff-hill-maritime-village, lightning -
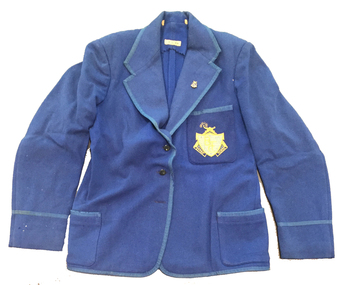 Federation University Historical Collection
Costume, Ballarat Teachers' College Blazer, 1940s
This blazer was worn by Elaine Cooke when she attended the Ballarat Teachers College. The Ballarat Teachers' College was established after the Victorian State Government and the State Education Department decided to establish two provincial teachers' colleges, at Ballarat and Bendigo. On 04 May 1926 W.H. Ellwood (Principal), Miss A. Bouchier, and Mr A.B. Jones, welcomed the first enrolment of 61 students to undertake the one year course. In 1927 the College moved to the former Ballarat East Town Hall in Barkly Street, which was remodelled for their use. It closed in December 1931 due to the Great Depression. In 1946 Ballarat Teachers' College reopened and relocated to the Dana Street State School. It was originally planned to open as a women's college, for whom the residence at 130 Victoria Street was purchased, but the decision was made to admit resident men from Ballarat. Mr T.W. Turner was appointed as Principal in 1951 and directed the introduction of a two year course for the Trained Primary Teachers' Certificate. The former one year course was terminated at the end of 1951. In 1958 the College was relocated to a custom built facility at Gillies Street, in close proximity to the Ballarat Botanical Gardens. Numbers increased with the introduction of the Trained Infant Teachers' Certificate course under the guidance of Mary Egan. With the introduction of a three year Diploma Course in 1968 accommodation became cramped. The introduction of the Diploma of Teaching (Primary) led to the Trained Infant Teachers' Certificate being discontinued in 1969, and the end of the Trained Primary Teachers' Certificate in 1969. Secondary Art and Craft students began studies at Ballarat Teachers' College in 1969 under Mr Ted Doney. In 1971 Mr D. Watson was appointed Principal. The State College of Victoria was proclaimed by Order in Council on 24 July 1973, and Ballarat Teachers' College became a constituent college of the State College of Victoria, and was known as State College of Victoria, Ballarat. By 1975 the College moved to Mount Helen as part of the Ballarat College of Advanced Education. Pre service teachers currently undertake their studies on the Mount Helen Campus of Federation University. ("Ruffians Attempted to Carry of the School Tent: A History of State Education in Ballarat", 1974, p73-4.)Blue woollen blazer with Ballarat Teachers College lapel pin and embroidered pocket. The edges are bound, including the two side pockets and the breast pocket and the sleeve cuffs have the binding 10.5 cm from the edge. The blazer has three front buttons. The body is unlined but the sleeves are lined with a cotton fabric. The hem edge is bound and hand stitched in place, whilst the back neck facing is cut with pinking shears.Hand written with pen on white tape - E. Cookballarat teachers' college, blazer, elaine cook, costume, textiles, uniform, embroidery -
 Federation University Historical Collection
Costume, Ballarat Teachers' College Blazer, c1947
This blazer was worn by Tom Hill in 1947. He was educated at Digby Primary School and Hammilton High and was appointed principle of Paschendale P.S. and Kannagulk P.S. at the age of 17 before he entered the College at Dana Street. He graduated in 1948 and was appointed to the Myrtle Creek school. At the time of his retirement in 1986 he was principle of Bacchus Marsh P.S. The Ballarat Teachers' College was established after the Victorian State Government and the State Education Department decided to establish two provincial teachers' colleges, at Ballarat and Bendigo. On 04 May 1926 W.H. Ellwood (Principal), Miss A. Bouchier, and Mr A.B. Jones, welcomed the first enrolment of 61 students to undertake the one year course. In 1927 the College moved to the former Ballarat East Town Hall in Barkly Street, which was remodelled for their use. It closed in December 1931 due to the Great Depression. In 1946 Ballarat Teachers' College reopened and relocated to the Dana Street State School. It was originally planned to open as a women's college, for whom the residence at 130 Victoria Street was purchased, but the decision was made to admit resident men from Ballarat. Mr T.W. Turner was appointed as Principal in 1951 and directed the introduction of a two year course for the Trained Primary Teachers' Certificate. The former one year course was terminated at the end of 1951. In 1958 the College was relocated to a custom built facility at Gillies Street, in close proximity to the Ballarat Botanical Gardens. Numbers increased with the introduction of the Trained Infant Teachers' Certificate course under the guidance of Mary Egan. With the introduction of a three year Diploma Course in 1968 accommodation became cramped. The introduction of the Diploma of Teaching (Primary) led to the Trained Infant Teachers' Certificate being discontinued in 1969, and the end of the Trained Primary Teachers' Certificate in 1969. Secondary Art and Craft students began studies at Ballarat Teachers' College in 1969 under Mr Ted Doney. In 1971 Mr D. Watson was appointed Principal. The State College of Victoria was proclaimed by Order in Council on 24 July 1973, and Ballarat Teachers' College became a constituent college of the State College of Victoria, and was known as State College of Victoria, Ballarat. By 1975 the College moved to Mount Helen as part of the Ballarat College of Advanced Education. Pre service teachers currently undertake their studies on the Mount Helen Campus of Federation University. ("Ruffians Attempted to Carry of the School Tent: A History of State Education in Ballarat", 1974, p73-4.)Blue satin lined, wool gabardine Ballarat Teachers' College blazer with embroidered pocket. The jacket has two plain silver coloured buttons at the frontEmbroidered emblem of the Ballarat Teachers College.ballarat teachers' college, blazer, tom hill, thomas hill, costume, uniform, embroidery, textiles -
 Federation University Historical Collection
Costume, Paterson Powell Pty Ltd, Ballarat Teachers' College Blazer, 1948
This blazer was worn by John Freckleton at the Ballarat Teachers College in 1949. The Ballarat Teachers' College was established after the Victorian State Government and the State Education Department decided to establish two provincial teachers' colleges, at Ballarat and Bendigo. On 04 May 1926 W.H. Ellwood (Principal), Miss A. Bouchier, and Mr A.B. Jones, welcomed the first enrolment of 61 students to undertake the one year course. In 1927 the College moved to the former Ballarat East Town Hall in Barkly Street, which was remodelled for their use. It closed in December 1931 due to the Great Depression. In 1946 Ballarat Teachers' College reopened and relocated to the Dana Street State School. It was originally planned to open as a women's college, for whom the residence at 130 Victoria Street was purchased, but the decision was made to admit resident men from Ballarat. Mr T.W. Turner was appointed as Principal in 1951 and directed the introduction of a two year course for the Trained Primary Teachers' Certificate. The former one year course was terminated at the end of 1951. In 1958 the College was relocated to a custom built facility at Gillies Street, in close proximity to the Ballarat Botanical Gardens. Numbers increased with the introduction of the Trained Infant Teachers' Certificate course under the guidance of Mary Egan. With the introduction of a three year Diploma Course in 1968 accommodation became cramped. The introduction of the Diploma of Teaching (Primary) led to the Trained Infant Teachers' Certificate being discontinued in 1969, and the end of the Trained Primary Teachers' Certificate in 1969. Secondary Art and Craft students began studies at Ballarat Teachers' College in 1969 under Mr Ted Doney. In 1971 Mr D. Watson was appointed Principal. The State College of Victoria was proclaimed by Order in Council on 24 July 1973, and Ballarat Teachers' College became a constituent college of the State College of Victoria, and was known as State College of Victoria, Ballarat. By 1975 the College moved to Mount Helen as part of the Ballarat College of Advanced Education. Pre service teachers currently undertake their studies on the Mount Helen Campus of Federation University. ("Ruffians Attempted to Carry of the School Tent: A History of State Education in Ballarat", 1974, p73-4.)This unlined, 3 buttoned, royal blue woolen blazer is bound with twill tape in a matching colour. It has a patch pocket on either side near the bottom hem line and a breast patch pocket with an embroidered emblem of the Ballarat Teachers College. Under this emblem is embroidered in stem stitch 'B B' in brown and yellow. The pockets are all bound at the top and the sleeves have a trim binding about 8.5 cm from the cuff. The inside seams are all bound.The fabric label says - Paterson, Powell Pty Ltd Ballarat Attached to the shoulder seam is a tape with a handwritten - Georgeballarat teachers' college, blazer, costume, textiles, uniform, embroidery -
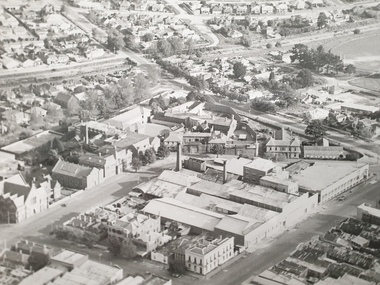 Federation University Historical Collection
Photograph - Photograph - Black and White, Aerial Photograph of the Ballarat School of Mines and Ballarat East, Pre 1967
Black and white aerial photograph of the Ballarat School of Mines, White Flat Oval, Ballarat Gaol, Ballarat Brewery, Ballarat Club, Uniting Church, John Valves (Lydiard Street), Ballarat Girls' Technical School and Ballarat ballarat gaol, white flat, ballarat uniting church, ballarat girls' technical school, armstrong street south, lydiard street south, yarrowee channel, humffray street south, m.b. john, john valves, former ballarat gaol, ballarat brewery, dana street, grant street, lydiards street south, white flat oval, aerial photograph -
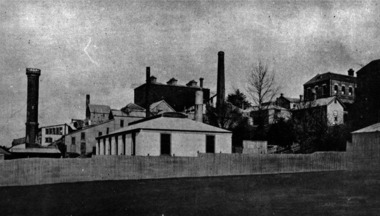 Federation University Historical Collection
Photograph - Black and White, Ballarat School of Mines from the north-east corner, c1917
.1) Ballarat School of Mines buildings from Dana Street, near Albert Street, Ballarat showing Caselli's Gauge Tower, Administration Building, and Model Mine. .2) similar view to .1) but showing more foreground and additional buildings, c1917henry richards caselli, gauge tower, ballarat school of mines, dana street, albert street, model mine, mining laboratory -
 Federation University Historical Collection
Newspaper - Ballarat News Special Publication, The Way We Were. The Making of a Mighty City, 1991, 12/09/1991
A Ballarat News Special Publication.36 page Special Ballarat News Publicationsupplement, mighty, ballarat, fiskin, aborigines, eureka stockade, james esmond, bank of australasia, ballarat fire brigade, penyweight hotel, academy of music, urquhart street primary school, star of the east mine, ballarat observatory, ballarat district hospital nurse training school, bank of victoria, shearers union, john valves, ballarat school of mines, ambulance, f.w. barnes, phoenix foundry, neil grant, naval cadets, australian timken, robert baird, ufs dispensaries, arch of victory, coliseum, messer and opie, wrld war two, wags school, eureka valves, olympic games at ballarat, bendix, eureka concrete, btv channel 6, sovereign hill, mars confectionary, ballarat bypass, south street, south street competitions, wireless air gunners school, sturt street -
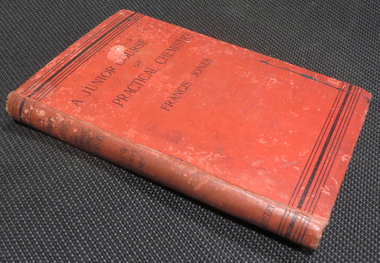 Federation University Historical Collection
Book, Francis Jones, A Junior Course of Practical Chemistry, 1898, 1898
Red hard covered book.Signed on inside front cover "Thomas A. Davis Eureka St, Ballarat East"thomas a. davis, chemistry, francis jones, eureka street -
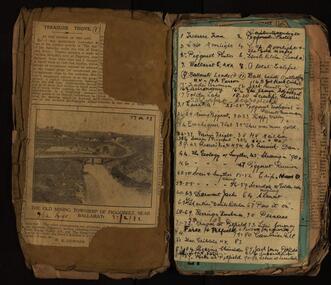 Federation University Historical Collection
Book - Scrapbooks, William RObertson, Newsclips written by William Robertson, c1930-c1948, c1930-c1948
... On cover: "Wm Robertson 10 Young Street Ballarat East"...10 Young Street, Ballarat East, Victoria, Australia... of smythesdale On cover: "Wm Robertson 10 Young Street Ballarat East ...Small brown covered scrapbook with newsclipping written by William Robertson, and his handwritten corrections to the articles. Newsclips include poetry and articles on: Piggoreet, Captain Moonlight, Devil's Kitchen, Ballarat East Australian Natives' Association, A Total Eclipse, Ballarat Leads, Joe Mack Cricket, Trade Unionism, Jack Hewitt of Piggoreet, Astronomy, Golden Lake, Scientific Shearers, Eureka, Piggoreet Geological, Piggoreet Mining, Happy Valley, Exchequer Flat, Fairy's Fright, H.V. Mailboy, Shearers, Creswick, Geology of Smythesdale, Shearing in the 1890s, Piggoreet reunion, Scarsdale and Smythesdale, Scarsdale to Golden Lake, Derwent Jacks, Shanties Devil's Kitchen, Berringa Bushmen, Perseus, Kruger at Pitfield, Fires and Pitfield, Football Memories, Cambrian Hill, Theo Gribble, Jack Jones Pitfield, Risks at Pitfield, Superstition, Scarsdale, death notice for William Robertson's mother.On cover: "Wm Robertson 10 Young Street Ballarat East"andrew christie, mrs nimon, william christie, alec christie, grand trunk, cape clear, donald mclean's, alchemist co, john lynch, golden belt lead, paddy webb, annie rooney, kruger hanging, pitfield, boer war, napoleons, cambran hill, hiscocks, john winter, john jenkins, bonshaw, john bird, nintingbool, moppianum station, w.h. bird, david clarke, william hamilton, john clarke, benjamin j. scott, julius kleberger, m.a. weatherston, j.h. vaughan, a. reid, alfred william crow, p. young, george clarkson, a.w. crowe, william henderson, claud pender, a. garside, mount erip, alec crothers, communism, basalt, italian gully, john roberts, john browne, john crossthwaite, patrick mcgrath, newtown, john boyd, john bruce, william irwin, george hatfield, d. croswaite, grand trunk mine, golden horn, jubilee lode, woady yallock, springdallah, fairy glen lead, linton lead, south berry, banshee, wil-o-the wisps, forest creek, chewton, mount alexander, jim crow ranges, trawalla, j.g. roberts, carngham, german lead, scarsdale railway, great western, beaumont mine, north grenville, shearing, piggoreet reunion, scarsdale and smythesdale, scarsdale to golden lake, derwent jacks, shanties, devil's kitchen, berringa bushmen, perseus, kruger at pitfield, fires and pitfield, football memories, cambrian hill, theo gribble, jack jones pitfield, risks at pitfield, superstition, scarsdale, golden point lead outlet, frenchman's lead, trooper o'brogue, peroni, morelli, lucky woman's gully, william robertson, piggoreet, captain moonlight, devil's kitchen, ballarat east australian natives' association, total eclipse, ballarat leads, joe mack cricket, trade unionism, jack hewitt of piggoreet, astronomy, golden lake, scientific shearers, eureka, piggoreet geological, piggoreet mining, happy valley, exchequer flat, fairy's fright, h.v. mailboy, shearers, creswick, geology of smythesdale -
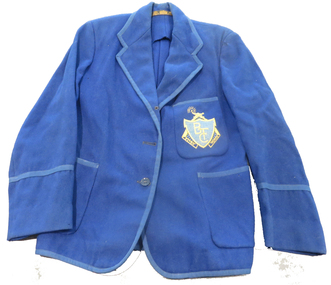 Federation University Historical Collection
Costume - Blazer, Ballarat Teachers' College Blazer, c1954
Wilma Hall (later Hobbs) wore this blazer while studying at the Ballarat Teachers' College in 1954-55. The college was established after the Victorian State Government and the State Education Department decided to establish two provincial teachers' colleges, at Ballarat and Bendigo. On 04 May 1926 W.H. Ellwood (Principal), Miss A. Bouchier, and Mr A.B. Jones, welcomed the first enrolment of 61 students to undertake the one year course. In 1927 the College moved to the former Ballarat East Town Hall in Barkly Street, which was remodelled for their use. It closed in December 1931 due to the Great Depression. In 1946 Ballarat Teachers' College reopened and relocated to the Dana Street State School. It was originally planned to open as a women's college, for whom the residence at 130 Victoria Street was purchased, but the decision was made to admit resident men from Ballarat. Mr T.W. Turner was appointed as Principal in 1951 and directed the introduction of a two year course for the Trained Primary Teachers' Certificate. The former one year course was terminated at the end of 1951. In 1958 the College was relocated to a custom built facility at Gillies Street, in close proximity to the Ballarat Botanical Gardens. Numbers increased with the introduction of the Trained Infant Teachers' Certificate course under the guidance of Mary Egan. With the introduction of a three year Diploma Course in 1968 accommodation became cramped. The introduction of the Diploma of Teaching (Primary) led to the Trained Infant Teachers' Certificate being discontinued in 1969, and the end of the Trained Primary Teachers' Certificate in 1969. Secondary Art and Craft students began studies at Ballarat Teachers' College in 1969 under Mr Ted Doney. In 1971 Mr D. Watson was appointed Principal. The State College of Victoria was proclaimed by Order in Council on 24 July 1973, and Ballarat Teachers' College became a constituent college of the State College of Victoria, and was known as State College of Victoria, Ballarat. By 1975 the College moved to Mount Helen as part of the Ballarat College of Advanced Education. Pre service teachers currently undertake their studies on the Mount Helen Campus of Federation University. ("Ruffians Attempted to Carry off the School Tent: A History of State Education in Ballarat", 1974, p73-4.)Blue unlined, woollen Ballarat Teachers' College blazer with embroidered pocket. The jacket had three buttons at the front although two are missing. The edges are all bound with tape including the pocket and the sleeve binding is 12cm from the cuff edge. The seam edges are either turned back and stitched or cut with pinking shears. There is a small panel on either side of the inside between the side seam and the facing which reinforces the pockets.Embroidered emblem of the Ballarat Teachers College and woven makers patch - The Myer Store for Menballarat teachers' college, blazer, wilma hall, wilma hobbs, textiles, costume, embroidery, uniform -
 Federation University Historical Collection
Stick Pin, Swann, Ballarat Teachers' College Stick Pins, c1948/50
Both this students stick pin and Ex Students' Association stick pin were owned and worn by Helen Veitch who was a student at the Ballarat Teachers' College in 1948. The Ballarat Teachers' College was established after the Victorian State Government and the State Education Department decided to establish two provincial teachers' colleges, at Ballarat and Bendigo. On 04 May 1926 W.H. Ellwood (Principal), Miss A. Bouchier, and Mr A.B. Jones, welcomed the first enrolment of 61 students to undertake the one year course. In 1927 the College moved to the former Ballarat East Town Hall in Barkly Street, which was remodelled for their use. It closed in December 1931 due to the Great Depression. In 1946 Ballarat Teachers' College reopened and relocated to the Dana Street State School. It was originally planned to open as a women's college, for whom the residence at 130 Victoria Street was purchased, but the decision was made to admit resident men from Ballarat. Mr T.W. Turner was appointed as Principal in 1951 and directed the introduction of a two year course for the Trained Primary Teachers' Certificate. The former one year course was terminated at the end of 1951. In 1958 the College was relocated to a custom built facility at Gillies Street, in close proximity to the Ballarat Botanical Gardens. Numbers increased with the introduction of the Trained Infant Teachers' Certificate course under the guidance of Mary Egan. With the introduction of a three year Diploma Course in 1968 accommodation became cramped. The introduction of the Diploma of Teaching (Primary) led to the Trained Infant Teachers' Certificate being discontinued in 1969, and the end of the Trained Primary Teachers' Certificate in 1969. Secondary Art and Craft students began studies at Ballarat Teachers' College in 1969 under Mr Ted Doney. In 1971 Mr D. Watson was appointed Principal. The State College of Victoria was proclaimed by Order in Council on 24 July 1973, and Ballarat Teachers' College became a constituent college of the State College of Victoria, and was known as State College of Victoria, Ballarat. By 1975 the College moved to Mount Helen as part of the Ballarat College of Advanced Education. Pre service teachers currently undertake their studies on the Mount Helen Campus of Federation University. ("Ruffians Attempted to Carry of the School Tent: A History of State Education in Ballarat", 1974, p73-4.)Two gold coloured stick pins with the Ballarat Teachers' College Shield, featuring a blue enamelled background with the letters in gold. 1). has Ex Students Assoc'n in gold with blue enamelled background at the bottom of the shield. 2). has Extra Muros in gold coloured relief at the bottom of the shield and a safety chain and pin attached.BTC shield ballarat teachers' college, stick pin, student stick pin, ex student association stick pin, helen veitch -
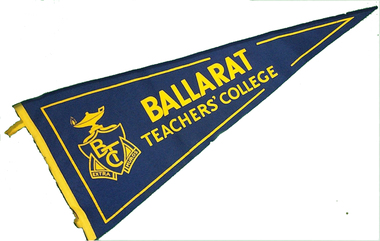 Federation University Historical Collection
Pennant, Ballarat Teachers' College, c1948
The pennant was part of the collection owned by Helen Veitch when she was a student at the Ballarat Teachers' College in 1948. The Ballarat Teachers' College was established after the Victorian State Government and the State Education Department decided to establish two provincial teachers' colleges, at Ballarat and Bendigo. On 04 May 1926 W.H. Ellwood (Principal), Miss A. Bouchier, and Mr A.B. Jones, welcomed the first enrolment of 61 students to undertake the one year course. In 1927 the College moved to the former Ballarat East Town Hall in Barkly Street, which was remodelled for their use. It closed in December 1931 due to the Great Depression. In 1946 Ballarat Teachers' College reopened and relocated to the Dana Street State School. It was originally planned to open as a women's college, for whom the residence at 130 Victoria Street was purchased, but the decision was made to admit resident men from Ballarat. Mr T.W. Turner was appointed as Principal in 1951 and directed the introduction of a two year course for the Trained Primary Teachers' Certificate. The former one year course was terminated at the end of 1951. In 1958 the College was relocated to a custom built facility at Gillies Street, in close proximity to the Ballarat Botanical Gardens. Numbers increased with the introduction of the Trained Infant Teachers' Certificate course under the guidance of Mary Egan. With the introduction of a three year Diploma Course in 1968 accommodation became cramped. The introduction of the Diploma of Teaching (Primary) led to the Trained Infant Teachers' Certificate being discontinued in 1969, and the end of the Trained Primary Teachers' Certificate in 1969. Secondary Art and Craft students began studies at Ballarat Teachers' College in 1969 under Mr Ted Doney. In 1971 Mr D. Watson was appointed Principal. The State College of Victoria was proclaimed by Order in Council on 24 July 1973, and Ballarat Teachers' College became a constituent college of the State College of Victoria, and was known as State College of Victoria, Ballarat. By 1975 the College moved to Mount Helen as part of the Ballarat College of Advanced Education. Pre service teachers currently undertake their studies on the Mount Helen Campus of Federation University. ("Ruffians Attempted to Carry of the School Tent: A History of State Education in Ballarat", 1974, p73-4.)lBlue wool felt pennant with a yellow felt edge with 2 loops stitched to the side edge. The pennant is printed in yellow with the words 'Ballarat Teachers' College' and Coat of Arms.Printed - Ballarat Teachers' College & Coat of Armsballarat teachers' college, pennant, helen veitch