Showing 8656 items matching "g-howard"
-
 Kiewa Valley Historical Society
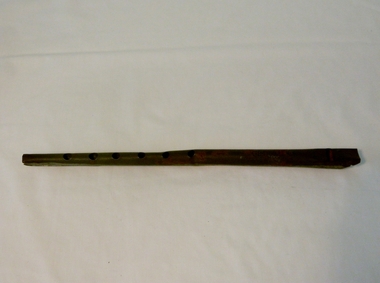
Whistle Penny, circa 1950s
This item is a cheap Penny Whistle made in Thailand Circa 1955. The item was one of the first wave of imports from the growing Asian steel producers. This was an era where cheaper Asia based steel companies did not compete against the stronger, and well established Australian ones. This Penny Whistle was "roughly" made and possibly purchased by the Victorian Education Department for use in school bands and music classes. Schools within the Kiewa Valley would have used them to integrate students the fundamentals of reading music and playing basic musical scores. Later conversion from steel to plastics would have been more conducive to multiple users in a classroom environment (more hygienic and rust proof.This item shows how the "cheaper" invasion of all types of manufactured goods from the Asian regions have altered the purchasing patterns of rural Australians(the more traditional consumer). The cost imbalance of purchasing from "The Mother Country (England)" or European supply versus the Asian manufacturers was due to not only the financial pressures post World War II but also in the elimination of Tariff restrictions placed on non favoured suppliers.This tin Penny Whistle is made from rolled tin(steel), cylindrical in shape, with a wooden Fipple plug at the mouth end and six note holes starting half way down the front side evenly spaced and ending 35mm from the bottom. This whistle is in the key of D"G steel & Co. D"music, wind instruments, whistle, celtic music -
 Lilydale RSL Sub Branch
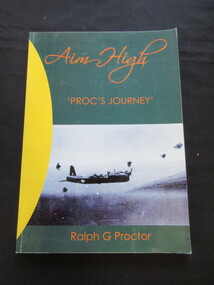
Book, Ralph G Proctor, Aim High -' PROC'S JOURNEY', 2005
Life Stories and Events by Ralph G ProctorBooknon-fictionLife Stories and Events by Ralph G Proctor -
 Mission to Seafarers Victoria
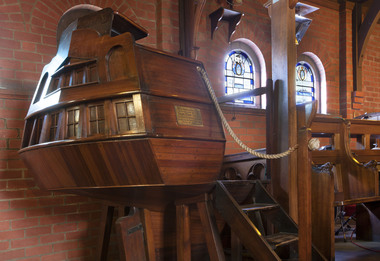
Furniture - Pulpit, Rodney Howard Alsop, 1909
In 1909, assistant Chaplain Rev. Haire presented the Mission with an 'uncommonly artistic pulpit' in memory of his mother. A plaque in memory of Jane King Haire can be found on the side next to the steps. The dedication was performed by the Archbishop of Melbourne on the 26th January (date engraves on the plaque) This pulpit was designed by Melbourne architect Rodney Howard Alsop (1881-1932) and manufactured by William John Dalziel (furniture manufacturer). It was initially used in the first Mission in Central Melbourne, Siddeley St. It is located in the Chapel of Saint Peter of the Mission to Seafarers 717 Flinders St. complex since 1917 (State Heritage listed (H1496). This complex was designed by Walter Richmond Butler in 1916, and officially opened on 11 September 1917, a day '...of unusually kind weather', by the Governor of Victoria, the Honourable Sir Arthur Stanley. According to a later article published in 1950: The pulpit is a model, built to scale, of the stern of an old ship of the line in Lord Nelson's day. This pulpit is significant as it is housed in The Memorial Chapel of Saint Peter forming part of the State Heritage listed Mission to Seafarers Victoria complex. It was built in Melbourne of Australian timbers, and is one of only two known maritime inspired pulpits, both associated with Missions to Seamen of the early 20th C. the other is held in the ANMM Collection see link. Their statement of significance is worth quoting in part as it applies equally to this pulpit "...an extremely rare and unique example of such pulpits. It is highly significant as a wonderfully preserved example of a time when religion was preached to sailors for their spiritual guidance and temperance..." Rodney Howard Alsop was an important Melbourne architect of the Arts and Crafts movement. John William Dalziel had sailed from Liverpool to Melbourne in 1862. Seventeen years later Penman and Dalziel founded the business in Lonsdale Street West, and won recognition at the Indian and Colonial Exhibition in London in 1886. Penman and Dalziel were identified in 1937 as one of Melbourne’s early ‘skilled craftsmen’ and ‘leading names’ in the manufacture of fine furniture. He died in February 1918 in a railway accident.Timber pulpit built in the form of a ship's stern including a timber step ladder for access, a timber keel and rudder, a rope fixed from the pulpit to a post mounted to the floor, and a dedication plaque on the side of the pulpit. The pulpit sits on timber legs. It's likely to be the original rope: traditionally made coir rope with twisted fibres, covered with canvas supported by a thread. At lower end the rope is secured by a monkey fist know and at the top by a turk head knot.Inside the pulpit (right) is the cardboard label with the maker details: " On an attached plaque see 0678 To the greater glory of God and in ever loving memory of Jane King Haire. This pulpit is erected by her son. Blessed are the pure in heart. For they shall see God. St. Matt. V.8. 26.1.09mission, seafarers, melbourne, victoria, chapel, saint peter, pulpit, australian timber, stern, walter richmond butler, australian maritime history, reverend w.f. haire, rodney howard alsop (1881-1932), wright's lane, william john dalziel, gifts-1917, heritage listed -
 Surrey Hills Historical Society Collection
Folder of real estate advertisements, Folders of real estate advertisements (Streets beginning with G), Various
A4 folders with individual pockets for each property in streets beginning with G located in Surrey Hills and Mont Albert. Folders are ordered by street name and then chronologically by property number. Each property has its own pocket. This may include multiple real estate advertisements collected from sales over time. It may also include copies of any research undertaken by Alan Holt and / or members of the SHNCHC team. These are augmented by cards in the Alan Holt index file and by his property registers of Surrey Hills and Mont Albert.gawler court, george street, gilbert street, gladstone street, glendale street, godfrey court, goodwood street, gordon street, grace court, graham street, grange street, griffin close, grovedale road, guildford road -
 Ringwood and District Historical Society
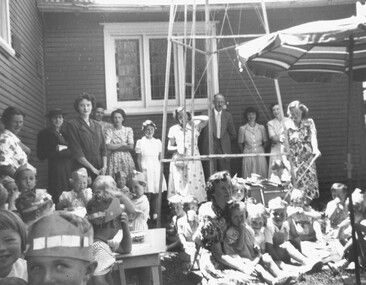
Photograph, 1950 - Parish Hall Xmas Party, Church of England, Ringwood Street, Ringwood. Mrs. Caughey, Mrs. McCrae Senr. Mr. and Mrs. G. Williams, Mr. John McCrae, Mrs. M. McCall, Mrs. McWilliam, Mrs. Dedman, Mrs. Win Leslie, Director
Typed below photograph, "1950 - Parish Hall Xmas Party. Mrs. Caughey, Mrs. McCrae Senr. Mr. and Mrs. G. Williams, Mr. John McCrae, Mrs. M. McCall, Mrs. McWilliam, Mrs. Dedman, Mrs. Win Leslie, Director". -
Glenelg Shire Council Cultural Collection
Domestic object - Printed Metal Match Box Cover, G & G (A/ASIA) LTD>, c. 1931
Promotional metal matchbox cover for the Club Hotel Portland. Green Border, cream panels centre front, back and side, with gold fancy border. Text & graphics in black.Front: G & G (A/Asia) Ltd. Picture of a face - smiling underneath "This man drinks Richmond Beer" Turn up other way Face is frowning, underneath "This man wishes he had" Back: 1931 Calendar Side Strike the Club Hotel for a good spot ( J.R. Sullivan Prop) Portland -
 Eltham District Historical Society Inc
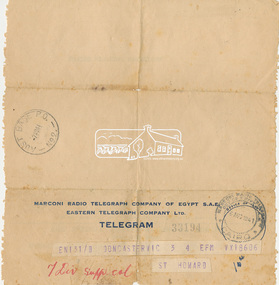
Telegram, Birthday greetings to Sefton Howard (VX18606); Telegram received from D. Thomson in Cairo, Egypt, 6 August 1941, 1941
Digital file only - scanned by EDHS from item on loan 2nd aif, cairo, dave thomson, egypt, letters, lew howard collection, second world war, sefton thomas cranton howard, ww2 -
 Eltham District Historical Society Inc
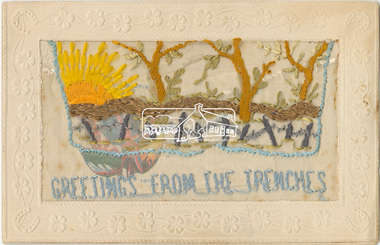
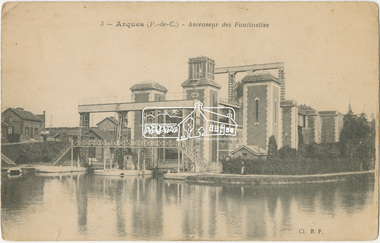
Postcard, Postcard to Lily Howard from Eric, Cape Town, c.1915, 1915
Digital file only - scanned by EDHS from item on loan aif, cape town, eric, first world war, letters, lew howard collection, south africa, ww1 -
 Eltham District Historical Society Inc
Postcard, Postcard to Lily Howard from Charlie Harris (front left) in camp, c.1916, 1916
Digital file only - scanned by EDHS from item on loan aif, charlie harris, first world war, letters, lew howard collection, ww1 -
 Eltham District Historical Society Inc
Postcard, Postcard to Lily Howard from Charlie Harris, Melbourne, 16 January 1916, 1916
Digital file only - scanned by EDHS from item on loan aif, charlie harris, first world war, letters, lew howard collection, ww1 -
 Eltham District Historical Society Inc
Postcard, Postcard to Lily Howard from Charlie Harris, Egypt, 20 February 1916, 1916
Digital file only - scanned by EDHS from item on loan aif, charlie harris, egypt, first world war, letters, lew howard collection, ww1 -
 Eltham District Historical Society Inc
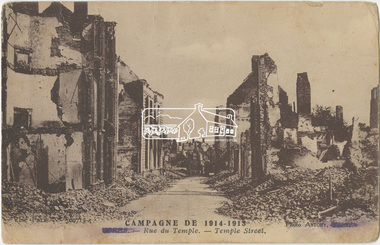
Postcard, Postcard to Lily Howard from Charlie Harris, France, 11 June 1916, 1916
Digital file only - scanned by EDHS from item on loan aif, charlie harris, france, first world war, letters, lew howard collection, ww1 -
 Eltham District Historical Society Inc
Postcard, Postcard to Lily Howard from Charlie Harris, France, 21 June 1916, 1916
Digital file only - scanned by EDHS from item on loan aif, charlie harris, france, first world war, letters, lew howard collection, ww1 -
 Eltham District Historical Society Inc
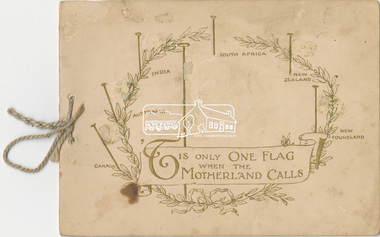
Postcard, Postcard to Lily Howard from W.W.W., France, 21 January 1917, 1917
Digital file only - scanned by EDHS from item on loan aif, first world war, france, letters, lew howard collection, ww1 -
 Eltham District Historical Society Inc
Postcard, Postcard to Sadie Howard from W.W.W., France, 22 January 1917, 1917
Digital file only - scanned by EDHS from item on loan aif, first world war, france, letters, lew howard collection, ww1 -
 Eltham District Historical Society Inc
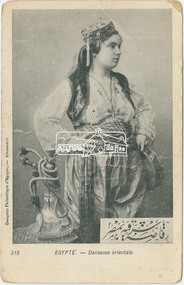
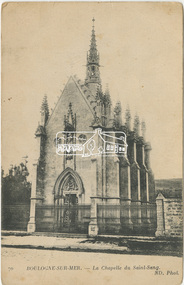
Postcard, Postcard to Lily Howard from Robert Harris from No. 3 Aust. Aux. Hospital, Heliopolis, Egypt, 7 February (1916), 1916
Digital file only - scanned by EDHS from item on loan aif, egypt, first world war, heliopolis, letters, lew howard collection, lily howard, robert harris, ww1 -
 Eltham District Historical Society Inc
Postcard, Postcard to Lily Howard from Robert Harris, Gizeh, Egypt, 24 February (1916), 1916
Digital file only - scanned by EDHS from item on loan aif, egypt, first world war, gizeh, letters, lew howard collection, lily howard, robert harris, ww1 -
 Eltham District Historical Society Inc
Postcard, Postcard to Lily Howard from Charlie Harris, Wareham, England, 30 March 1917, 1917
Digital file only - scanned by EDHS from item on loan aif, charlie harris, england, first world war, letters, lew howard collection, wareham, ww1 -
 Eltham District Historical Society Inc
Postcard, Postcard to Lily Howard from Pte Patrick Francis Plunkett, France, 5 August 1917, 1917
Digital file only - scanned by EDHS from item on loan aif, first world war, france, letters, lew howard collection, lily howard, patrick francis plunkett, ww1 -
 Eltham District Historical Society Inc
Postcard, Postcard to Lily Howard from Pte Patrick Francis Plunkett, France, 5 August 1917, 1917
Digital file only - scanned by EDHS from item on loan aif, first world war, france, letters, lew howard collection, lily howard, patrick francis plunkett, ww1 -
 Eltham District Historical Society Inc
Postcard, Postcard to Lily Howard from Pte Patrick Francis Plunkett, France, 7 August 1917, 1917
Digital file only - scanned by EDHS from item on loan aif, first world war, france, letters, lew howard collection, lily howard, patrick francis plunkett, ww1 -
 Eltham District Historical Society Inc
Postcard, Postcard to Lily Howard from Charlie Harris, France, 4 September 1917, 1917
Digital file only - scanned by EDHS from item on loan aif, charlie harris, first world war, france, letters, lew howard collection, lily howard, ww1 -
 Eltham District Historical Society Inc
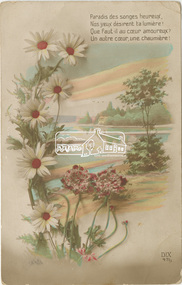
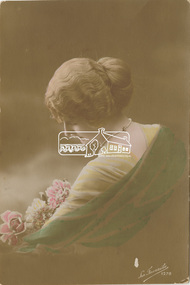
Greeting Card, Christmas greetings to Lily Howard from Dev(?), Palestine, 1917, 1917
Digital file only - scanned by EDHS from item on loan aif, first world war, letters, lew howard collection, lily howard, palestine, ww1 -
 Eltham District Historical Society Inc
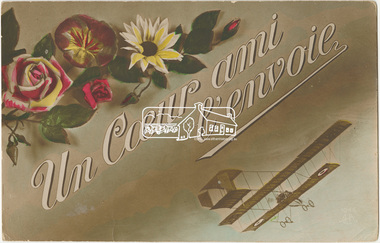
Greeting Card, Christmas greetings to Lily Howard from Charlie Harris, 1917, 1917
Digital file only - scanned by EDHS from item on loan aif, charlie harris, first world war, letters, lew howard collection, lily howard, ww1 -
 Eltham District Historical Society Inc
Postcard, Postcard to Lily Howard from Harold (?), France, 9 February 1918, 1918
Digital file only - scanned by EDHS from item on loan aif, first world war, france, letters, lew howard collection, lily howard, ww1 -
 Eltham District Historical Society Inc
Postcard, Postcard to Lily Howard from Eric (?), France, 28 April 1918, 1918
Digital file only - scanned by EDHS from item on loan aif, first world war, france, letters, lew howard collection, lily howard, ww1 -
 Eltham District Historical Society Inc
Postcard, Postcard to Lily Howard from Charlie Harris, France, 9 June 1918, 1918
Digital file only - scanned by EDHS from item on loan aif, charlie harris, first world war, france, letters, lew howard collection, lily howard, ww1 -
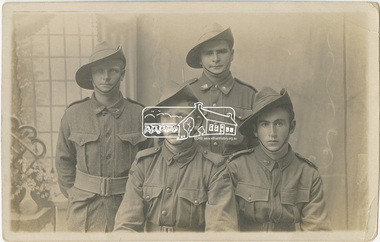 Eltham District Historical Society Inc
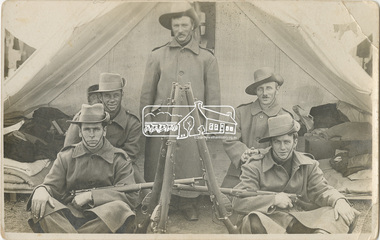
Postcard, Group of four AIF servicemen most likely connected to Howard or Harris families, 1918c
Digital file only - scanned by EDHS from item on loan aif, first world war, letters, lew howard collection, ww1 -
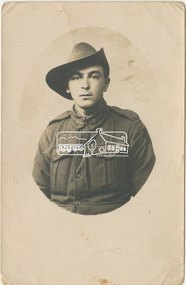
 Eltham District Historical Society Inc
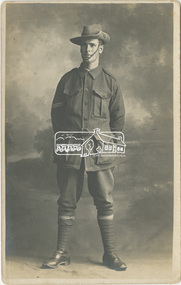
Postcard, Possibly a Howard family member on the right, 1918c
Digital file only - scanned by EDHS from item on loan aif, first world war, letters, lew howard collection, ww1 -
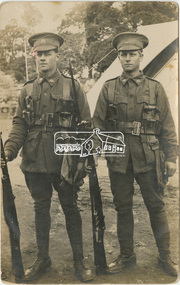
 Eltham District Historical Society Inc
Postcard, Postcard given to Lily Howard, possibly one of the soldiers she wrote to, 1918c
Digital file only - scanned by EDHS from item on loan aif, first world war, letters, lew howard collection, ww1